
HOLIDAY DONATION DRIVE - SUPPORT MSW - DO YOUR PART TO KEEP THIS GREAT FORUM GOING! (Only 72 donations so far out of 49,000 members - Can we at least get 100? C'mon guys!)
×


popeye the sailor
-
Posts
16,007 -
Joined
-
Last visited
Content Type
Profiles
Forums
Gallery
Events
Everything posted by popeye the sailor
-
 nice work with the death star! gonna look super when assembled....glad to see your back too. hope you two are well and a happy new year to you both!
 -
Cutty Sark by NenadM
popeye the sailor replied to NenadM's topic in - Build logs for subjects built 1851 - 1900
looking good Nenad.........good to see your finding time at the table hope you had a great holiday- 4,152 replies
-
- 3
-

-
- cutty sark
- tehnodidakta
- (and 1 more)
-
boiler looks great! agreed on the rivet detail........it adds quite a bit glad your feeling better.
- 599 replies
-
- 5
-
-
- sidewheeler
- arabia
- (and 4 more)
-
she's look'in better and better totally agree with Russ....flat is the only way to go. it add realism and in some cases, age. I totally missed the deck........very nice work there as well
-
your at a level all your own.........from the cannons, to the frieze decorations.......to the furniture........truly an artist! your self portrait figure looks like you! I'd be honored to be one of your crew members! I'll PM you as soon as I can get a picture love seeing your work.......your weapons are jaw droppingly gorgeous!
- 1,035 replies
-
- 5
-
-
- royal katherine
- ship of the line
- (and 1 more)
-
I've gotten a couple of orders from Cornwall.....ordered a pair from Billings to see if I'd get lucky, but that was a lost cause I looked in Ages, but I didn't see anything.........I'll peak in again, maybe I missed something. thanks!
-
at least you have clinker hulled life boats.........some folks with that thought in mind can't find them, let alone easily make them. look at how many there are!....... you said the magic word.......paint. a flat paint will cover over plastic nicely and give realistic results. try doing that with metal......especially that Britannia metal. the boats can be stained too, with the use of washes and clear coat.....flat. how larger are they? so far, I'm on my third order to find clinker boats for my 1:124 Thermopylae......none have suited my fancy so far. if I keep this up, I won't need life boats for quite a long time very nice work BTW!
-
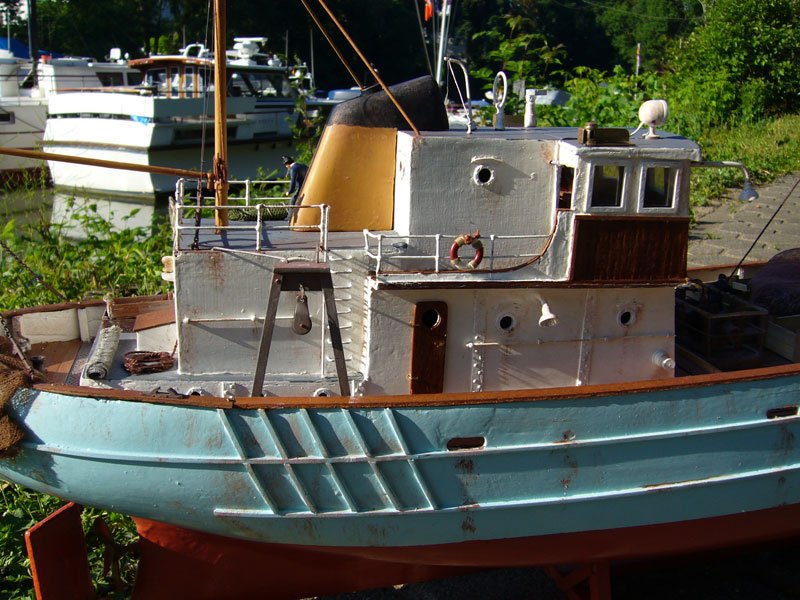
thanks Tollyman........you'll find that there are quite a few fishing boats outfitted in this manner.........all geared towards their particular needs. sailing vessels too. the biggest draw for me with this model, was that winch......how does it work?!?! images on line and you tube videos were a big help with it. the best find I had was the hair net....I found it in a trailer where I work........all beaten up with dirt and stuff ground into it. haven't been able to find that same type of mesh........still on the hunt always here to help.......
- 378 replies
-
- 3
-
-
- t78 norden
- billing boats
- (and 1 more)
-
interesting rigging for the poles.........look'in really nice
- 131 replies
-
- 1
-
-
- finished
- artesania latina
- (and 1 more)
-
the examples shown are really cool.....especially that one you showed earlier Rick. in the other example, the bit for the bow spirit could be incorporated into the windlass assembly {and still add the fife rails}. depending which side the anchor ropes lead out, the ratchets in the center must face opposite, so the tension from the anchor ropes will pull back and lock in place. add a lever to release the ratchets, would give it a bit of detail. I go to craft stores.....I found an assortment of {fake} clock gears, small enough to be used as the cogs. there are a number of things you can do. I would also suggest looking around on the site......lots of folks don't buy them......they just get more of the same. so, they create their own......some from thin air, and others from info they found in books.
- 714 replies
-
- 2
-
-
- lady nelson
- victory models
- (and 1 more)
-
the hull is look'in great Greg.........there's gotta be something more.... I go and try something like that, and the next day, I can't stand it and have to fix it. even seeing all this amazing work......still can't get it in my head that it's OK. crazy!?! really enjoy seeing your work
-
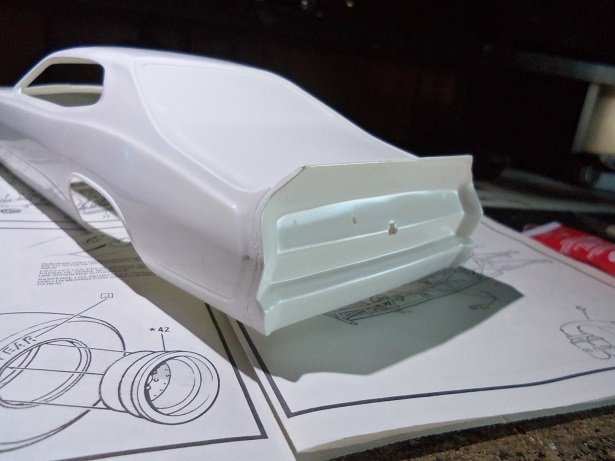
thanks Mark........I hope so. so far, it's look'in OK..........it's not fitting together too badly. I'm concerned about the corners.....but on most older cars, they have a natural seam in these areas, so as long as I can get rid of any tiny gaps, they'll look OK. more progress soon. thanks for the likes
-
yup most supplied windlasses aren't adequate for the model..........most folks either purchase one, or make it the way they want to.
- 714 replies
-
- 2
-
-
- lady nelson
- victory models
- (and 1 more)
-
good that your getting to the table........it can be therapeutic, you know. ......keeps the head clear hope you had a great holiday and that a better 2019 comes your way
-
hope your holidays were good.........nice bit of progress
- 77 replies
-
- 4
-
-
- icm models
- Markgraf
- (and 1 more)
-
hey Tasmanian.........are we not in Kansas any more? whoops.......wrong shoes enjoy
-
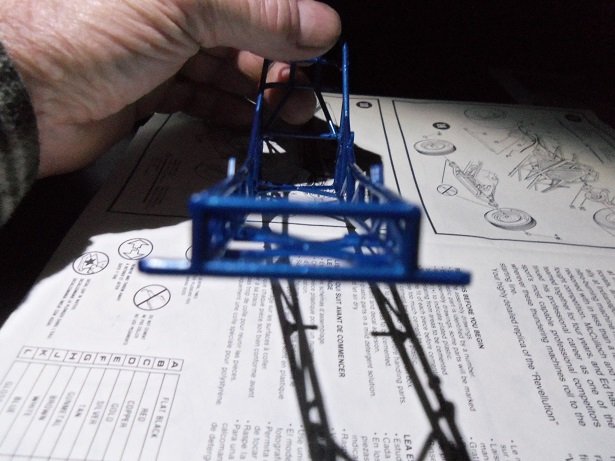
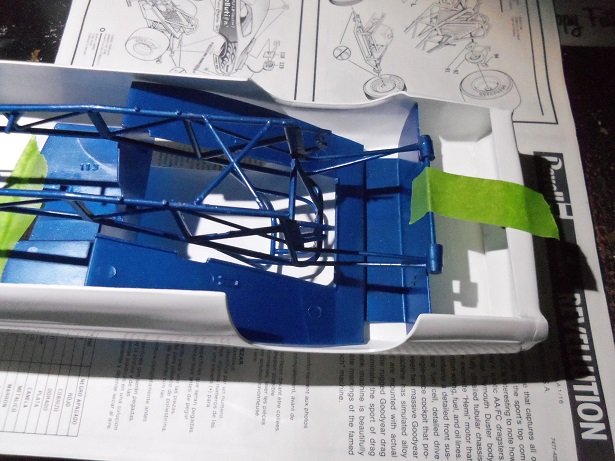
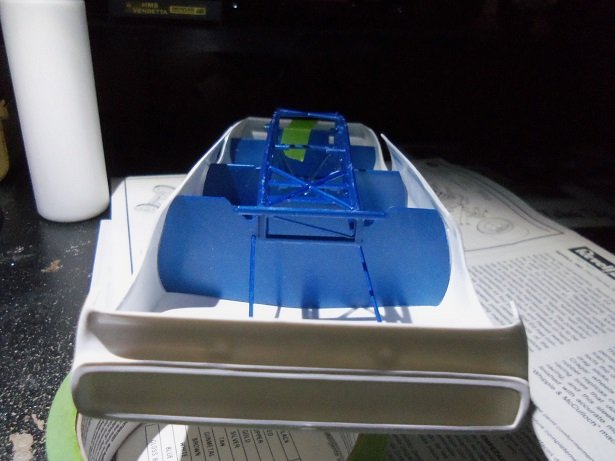
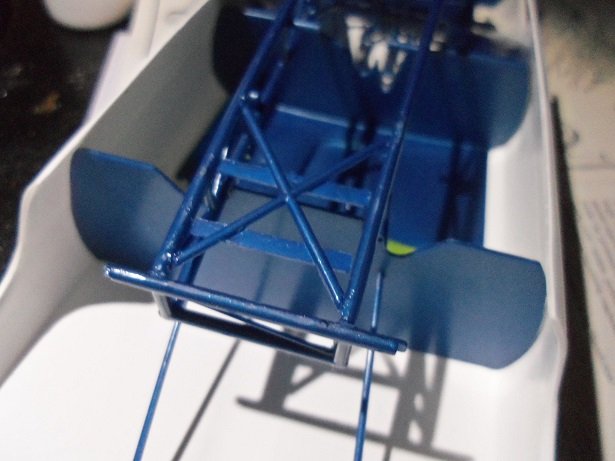
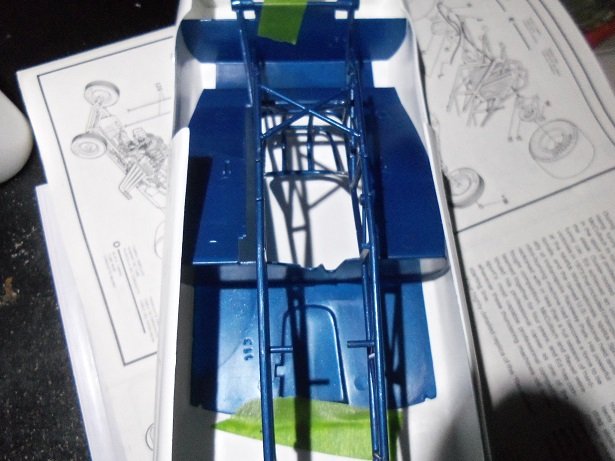
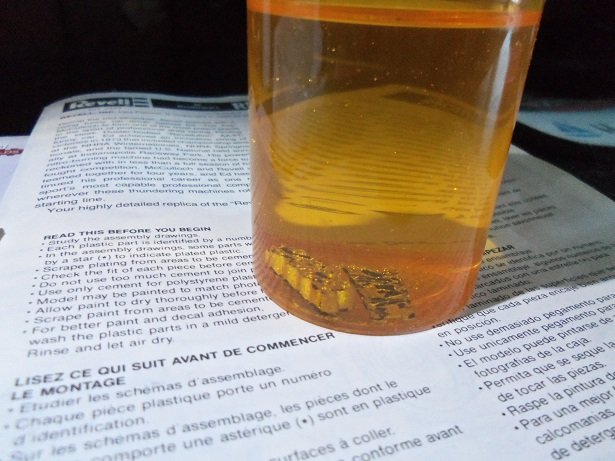
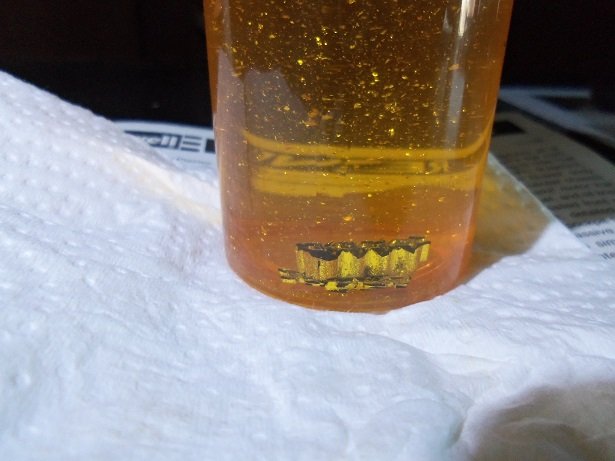
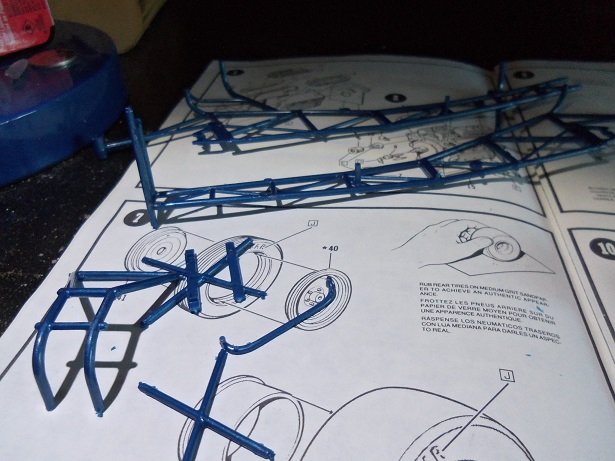
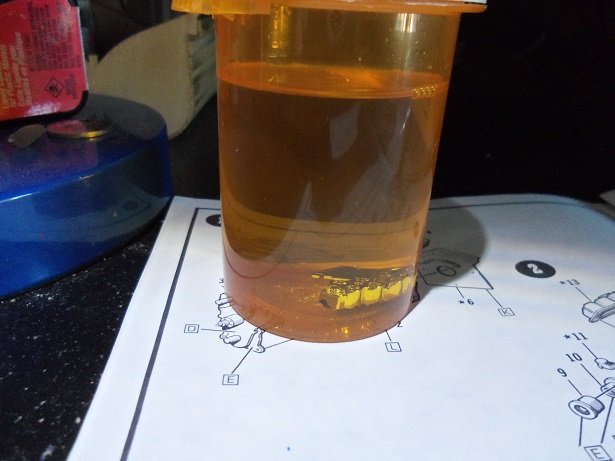
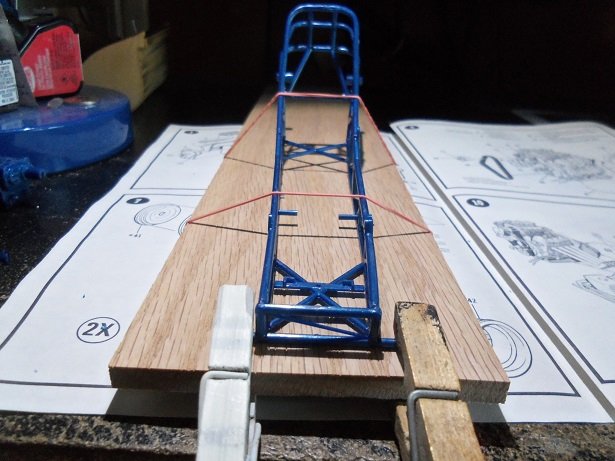
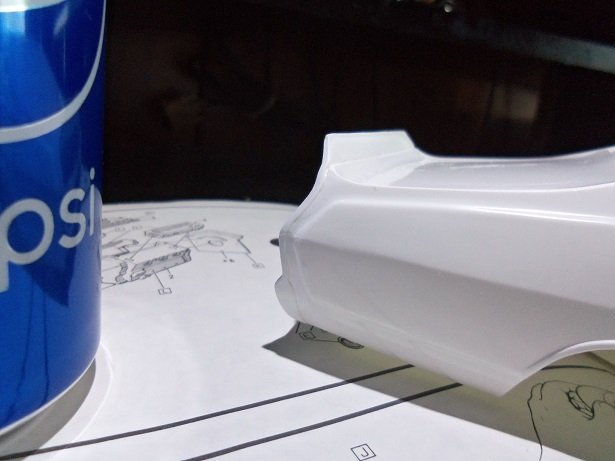
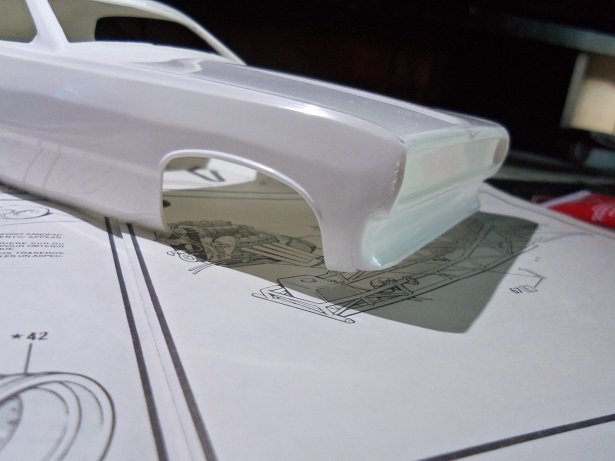
I'd say that the home made alignment rack was a big success! the frame dried as straight as I'm going to get it! I think once the weight of the engine and later the body gets added, all four wheels will be on mother Earth! yesterday,,,,,,I seemed to have forgotten the dilemma........there are tabs on the inside of the body. these panels must sit on the correct side of the tabs, or the body won't sit on the frame correctly. the rear tabs are already decided........with the cockpit panel in place, the large tab on the rear panel must connect to it. it needs to sit on the forward side of the tabs, closest to the rear wheels. as I found with this dry fit, the front inner body panel must sit forward of the tabs, closest to the front wheels. taping the panels in place, the frame was added to the dry fit. I'll confirm this once the fuel cell is in place on the frame. though the frame looks a tiny bit off here, both sides of the body panel are sitting on the frame. those two rods are braces for the front part of the body, to keep it from flexing. if you've ever seen one......you'll never forget it. they are loud.......... and if your there watching them heat up the tires.........the smell of the chloride rubber smoke will burn your nostrils and eyes, and make it really hard to breathe. they had a jet engine funny cay at New England drag way.........such an awesome sight! well......gotta go see about obtaining some brass strip speaking of strip.........how are my two little strip teasers doing? they don't look quite done yet.........I'll shake 'em around a bit and try for a better view...... hey! this bottle isn't sealed very good ! it's OK...just a little bled out through the cap! glad I had a double thick paper towel handy! oh well.....can't seem to get a better look than this I have stiff brushes to clean them.....I'll do it when I get back. here's one more shot of the body........thanks for look'in and hope ya like what ya see


-
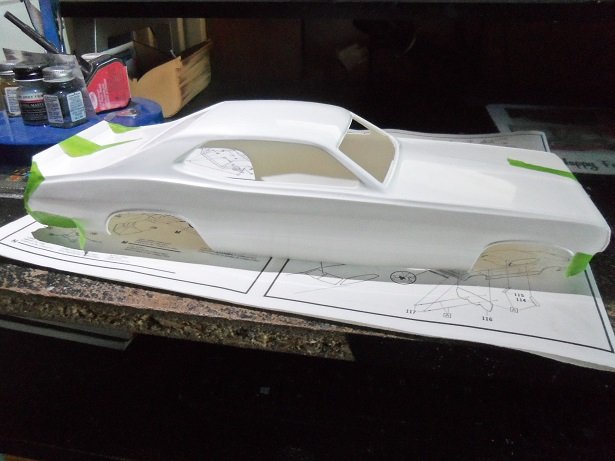
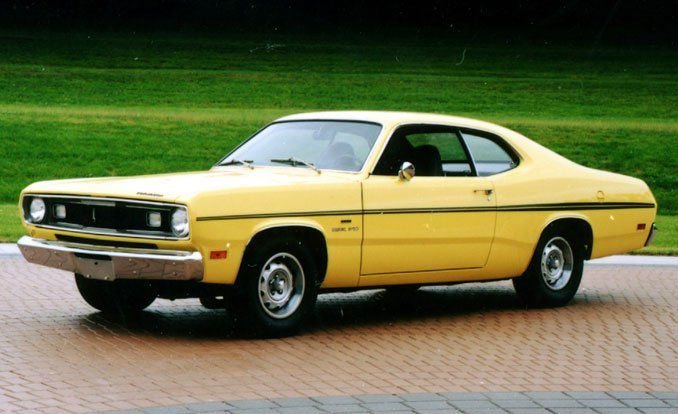
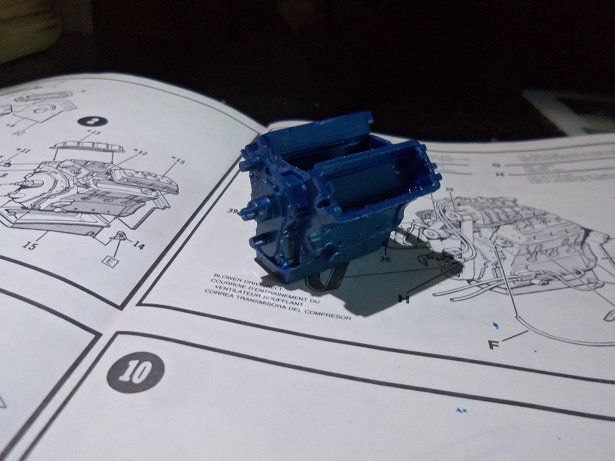
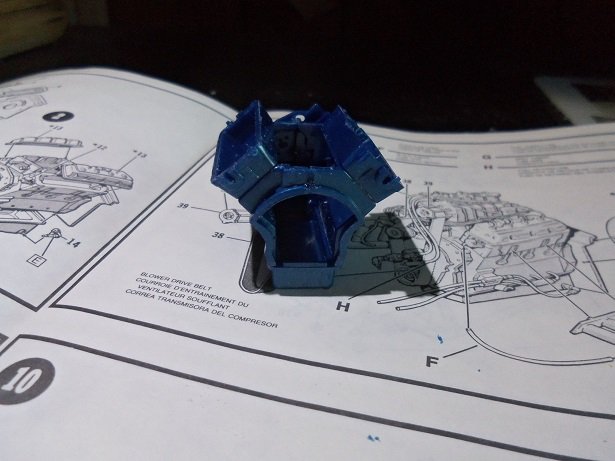
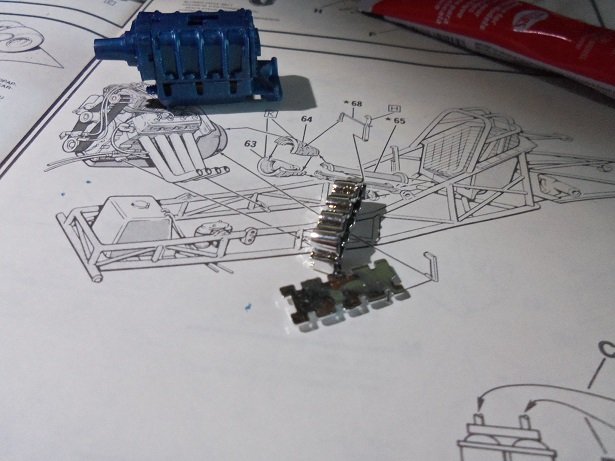
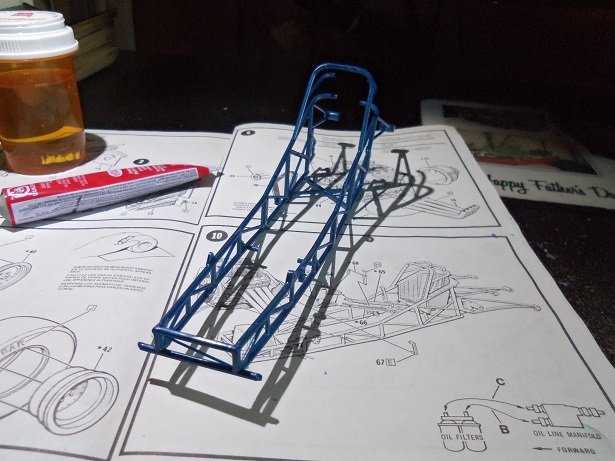
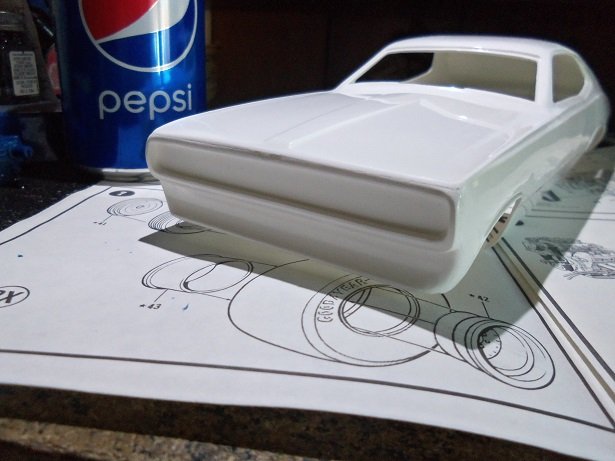
so yea.........I started to tinker with it at first light.........start the year off with a bang! the kit is in really good shape.......a little concerned about the decals, but I'll try one of the smaller decals first {one I can copy}, to see if they will be OK. the kit was produced in 1988.......mold stamped on the lower body pan. kinda ticks me off though, that they would stamp the part numbers on most of the parts themselves......and the sprues too. now I have to scrape them off the areas that can be seen and sand them 'gone'. at this time, I will assemble all the components that can be painted as a whole, and then detail from there. starting with the body, the grille and rear deck was cemented in place. both of these models sport the Plymouth Duster body. it's based on the 1970 Plymouth Duster 340 coupe {two door} model. setting the body aside, the basic parts for the engine block were pulled out. the block halves, the oil pan, the heads, and the timing cover, were assembled and sanded, readied for paint. the intake manifold and supercharger are to be different colors.....with the intake being one color, the supercharger was assembled separately. here it is shown on the intake. the chassis / roll cage was next to be assembled....just the frame for now. there was a bit of disappointment in seeing the two main frame parts being warped. gotta come up with a plan to straighten it. while thoughts were forming, I was looking for two other parts for the supercharger.......I had my suspicions yup! there they were.........on the chrome sprue......bother! I don't know 'bout chu.......but there are some parts that ya wish they wouldn't include to be chromed! I was never a huge fan concerning chrome anyway........in a lot of instances, it kind of takes away from the model. in these more modern times, paints have been developed that look better than being chromed. it looks terrible after the sprue connections are cleaned, along with any flash and mold lines, and looks even worse touched up with silver {before they came out with chrome silver}. this is a plate that sits on top of the supercharger and the induction plate {w/ no butterfly detail}. a molded fuel rail will envelope the induction plate once assembled on the supercharger. there is no color designation for the plate, but there is for the induction plate......and it's a different color. so the chrome must be removed from the parts.......I refuse to paint over it. I use brake fluid to remove the chrome.......depending on the age of the model, will decide on how fast it will work.........takes longer for the newer models. so let's see..........8:30 AM..........and counting. the frame was assembled to reveal just how warped it was. adding the rest of the roll cage and the fuel cell shelf, it cured it a little, but it was still badly warped. while it was still susceptible {the glue still setting}, an alignment rack was devised to arrest the frame to correct the warpage. simple really......... using the base for the Arizona project {it's still alive, BTW}......the frame, as can be seen, is held down with rubber bands, while the front suspension bar is held down with clothes pins. this will sit for the night.......I'll check it in the AM. setting this aside, the tape was removed from the body, and was sanded to remove mold lines and other malformations. attention was given to the front grille and rear deck as well. you might be able to see a gap.....more like a slot, towards the center of the hood........don't know what that's all about....it was molded that way. I filled it with glue and will let it dry......I'll fix it later. I also added glue to the four corners.......dab on a thin line of glue and wipe, to fill in the cracks. I tried to sand here, at this corner..........not quite to the safe point yet. as I was doing this, I got a sense that I was doing more than I did for the English Leather.........maybe I learned something.......who knows >shrug< it was at this point, when I began noticing all the part numbers on the parts....why in the blue blazes did they do that!?!?! as with the English Leather, the inner body panels was a huge question mark. there is a front panel and a rear panel, where the chassis hooks to {frame / roll cage}. in the close position, the frame nestles in slots carved out on the front inner panel. there is another huge panel that encloses the cockpit and roll cage. these need to line up, so the body will sit properly on the chassis. these parts were cleaned up and dry fitted in place. I can't find out any more until tomorrow, so I guess this would be a good place to stop. I have other car models I built over this past year......those are 1:25 scale. if interested, you can see the logs at: http://wenzelsautobody.wordpress.com/ you'll find the Batmobiles there too.........as a matter of fact, I gotta get moving and finish the Adam West Batmobile!
_(cropped).jpg.ad1f3cce186f755065630586c448d6b7.jpg)


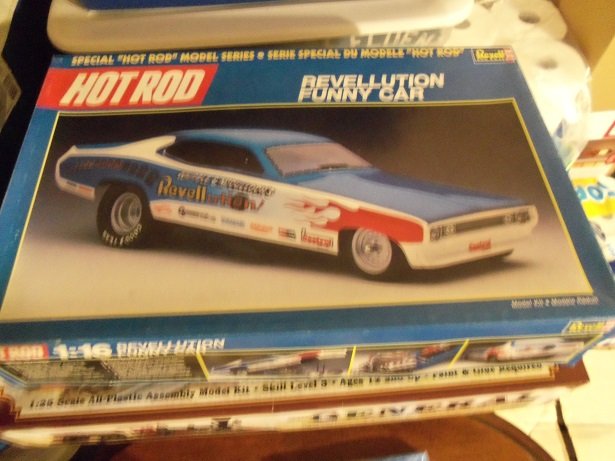
-
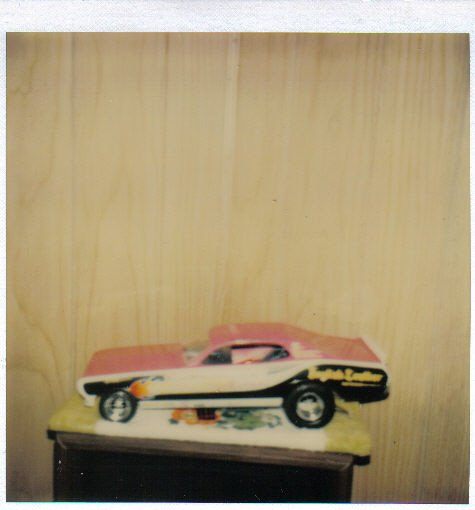
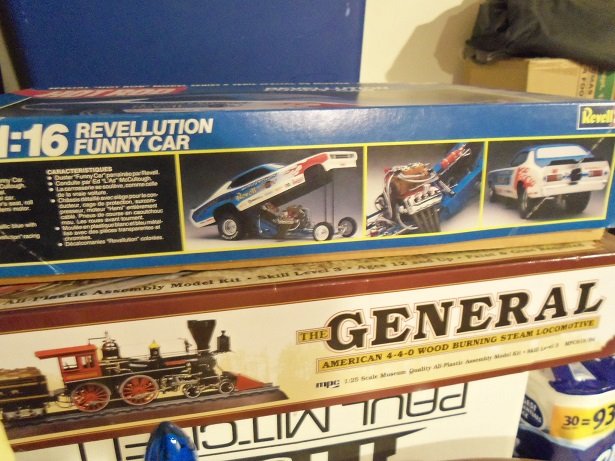
I woke up yesterday with an insatiable urge to dig into this kit of the 'Ed McCulloch' Revellution funny car. my longing to build another one of these beauties has come to fruition back in the 70's I lived in Florida. at the time, I was into balsa flying aircraft and car models. I can't tell you how many car models I had...all I know is that they filled a two sided base partition cabinet, that the company I worked for built {if only I had a picture}........{I used to have a few}. I had built one that I call the 'English Leather' funny car.........can't make out the actual name of it. I've not been able to find another one...........I was likely in my late twenties when I built it. I happened onto the website old model kits . com one day, and have been a steady follower ever since. I've bought a few models from them so far, and have been satisfied with the quality. they are old kits and they are up front on their condition and quality control. I saw this one model that peaked my interest......but it was not the same, so I held off pull'in the trigger. Christmas was around the corner, me and the admiral were throwing ideas at one another.......we do for each other throughout the year, so it's hard to come up with that "Christmas wish list". I jotted this model and two 1:24 scale British Spads on a piece of paper, and left it on her desk. Christmas morning........I opened my presents to find this! the Revellution funny car is 1:16 scale..........the finished model is 12 inches long. it has a real rubber accessory drive belt, real rubber tires, hoses and wiring for the ignition system. according to the preface on the instructions, Revell teamed up with Ed McCulloch to produce as replica a model as possible. the AA/FC nitro burning monster was one of the top machines back in 1973. though their looks really haven't changed much, technology and safety features have, in an effort to make the sport safer, as they strive to go faster. the beginning of the log is kinda disheveled....I don't have an open box for ya to see all the goodies that are packed inside. I'll have to show you as I go along. I was hesitant to post it, but that what this forum is all about........that, and I figured you gear heads would get a kick out of it so.........I'll go git the tool box an' meet cha out in the driveway ohhhhhh...........the General!?!?!?! that's another beauty.............if you enjoy this log, I'll post it too........no......I mean next. gotta watch me grammer.........don't want cha ta think I'm totally looney!!!
-
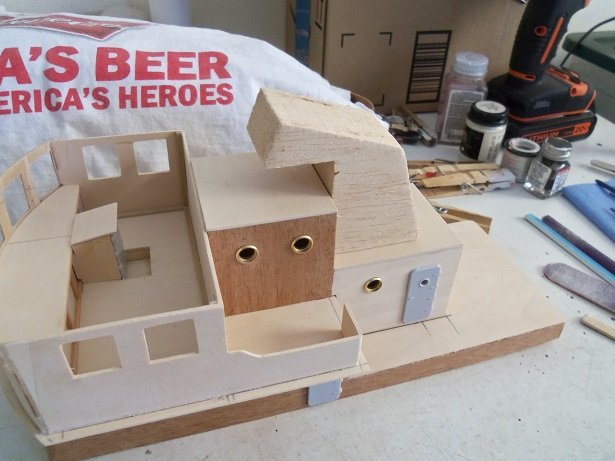
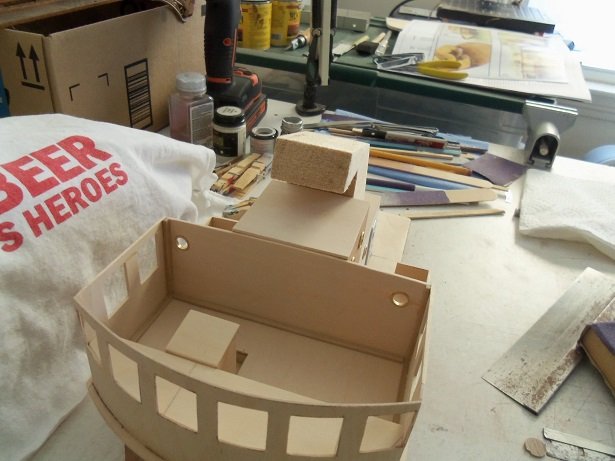
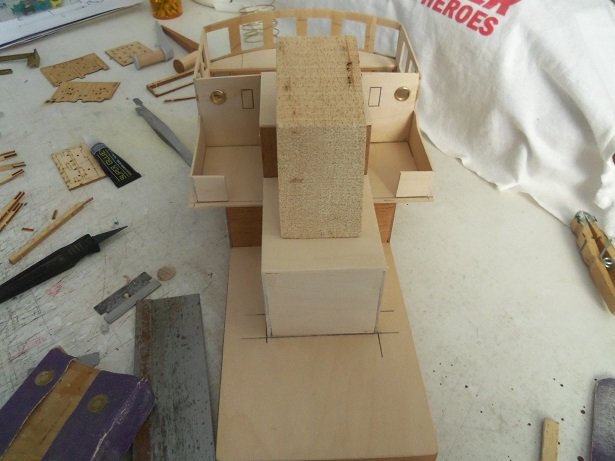
thank you Kevin and Sampson......and Happy 2019 to you! as with the Nordkap, the funnel for the Progress with be in the same location. it will sit attached to the aft cabin, and rest on the lower cabin. I'm going to position it a bit more forward to give the lower cabin more deck space. not that it really matters, since I gave the lower cabin more length.........either I didn't go back far enough with the forward deck cabin, or there was some difference in the original Progress kit. this model was built from an original kit. the give away to the age of this model {kit} is the portholes......they are plastic, as they are also in the Nordkap kit around the same production period. I'd be surprised if this model was built the same way as I am, using a Nordkap kit.........but the obvious conclusion I've come to, lies with the measurements of the cabin structure, as a whole.........even the helm room is different {side walls are shorter}. also shown here is one of the gallows.........earlier, I showed you one of them {or what's left of it}, that I need to recreate. I've almost resided myself to the fact, that I'm not going to find this style of gallows. I'm still looking, but I have an idea to make them rounded at the top, bending the metal, rather than cut and shape the parts to make the others. dunno.........I may try anyways. if I do, I will post how they come out. I won't need to adapt the funnel.......once shaped, it simply sits on top. the only thing I need to be concerned with, will be the separation lines along the bottom, where it will mate to the decks. shaping was fun when I did the Nordkap. I took my belt sander and laid it in a milk crate with the trigger locked on. after marking the shape on the block of Balsa, supplied in the kit, it was sanded and sculpted to the oval shape. that's the block I have to work with....should be fun when I finally get to it. welcome to the log.....enjoy Hello Sampson welcome to the log, glad you enjoyed what there is so far. should get more interesting when the paint starts flowing........she'll be prettier, as any rate I like trawlers.........my knowledge of them may be still shady though.....I'm constantly learning. reminds me when I was building the Mary Ann.........I outfitted her to be a self sufficient boat, able to repair her own nets, even during a days work, fishing. I posted the log here and on my Word Press site. after I had finished the model and posted the gallery on both sites, I received a comment on the Word press site, by a person from Norway {I think that's where he was from}. he told me I did a great job on the model, but just for future reference, those types of boats aren't outfitted like that I knew he was being funny and sincere, so I didn't take offense........later on down the road, he sent me pictures of his three boats........very nice looking bevy be welcome........follow along.......I'll try and make it as interesting as I can. if you have an idea or suggestion.....feel free to let me know. that's what we're all about here. I didn't get to do much on her yesterday...........my extra spoonful of insanity will be apparent in the shore leave forum
-
awesome video channell......the work you've done so far is phenomenal! the slight clouding around the portholes might not be so bad, if you think about it.........a hull isn't a consistent color....various hues come into play, as she's been out to sea as long as she has. so your suggestion that it could be called a form of weathering, isn't too far off she's a big beautiful girl...........I hope I can achieve a fraction of what you've accomplished, with the U.S.S. New Jersey, I recently acquired. very nice work!
-
it looks like you cut more than what the metal piece was sitting in..........the addition makes it look better. nicely done! I've seen keel parts like this sold individually........the Billing's Dragen is one of the vessels that has these accessory parts listed for. I would imagine that they would be for R/C....... ballast and for center of gravity is their main purpose.
- 39 replies
-
- 1
-
-
- kdy 15 juniorbad
- yacht
- (and 2 more)