


popeye the sailor
-
Posts
16,007 -
Joined
-
Last visited
Content Type
Profiles
Forums
Gallery
Events
Everything posted by popeye the sailor
-
 the life boats look great! you also gave me an idea about the guy wires to the funnels. I have the Academy kit......the wire pass through the holes in the deck and come back up to run the next one. what is happening, is when I start to fit the deck in place {all this is done off the model}, the wires either go limp or a few of them are pulling out of the holes....the glue isn't holding them. it will mean that I may have some reconstruction to do, but I will use eye bolts instead.........don't know why I didn't think of that before I like the way you think! do the sprues have part numbers? thanks for the tips here......it may just bring her back to the table
 -
New member from Maastricht, The Netherlands!
popeye the sailor replied to Anna's topic in New member Introductions
welcome! -
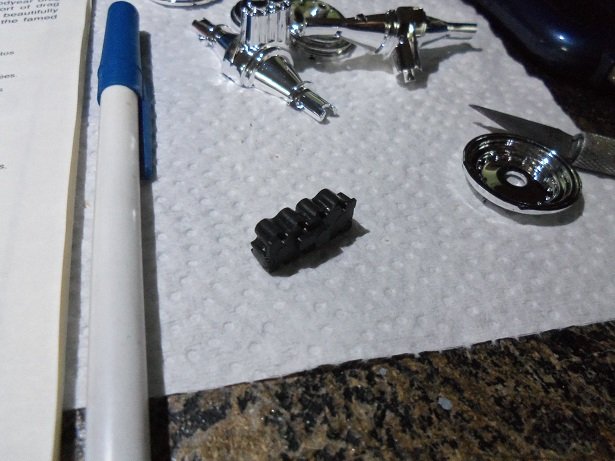
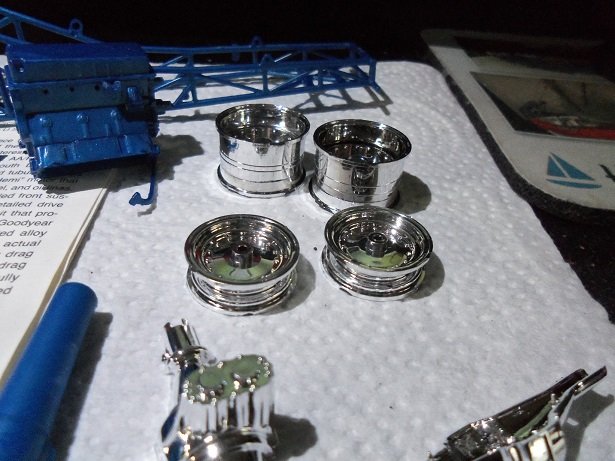
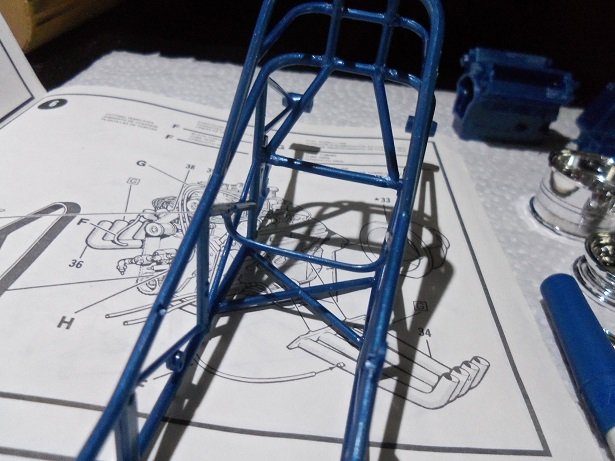
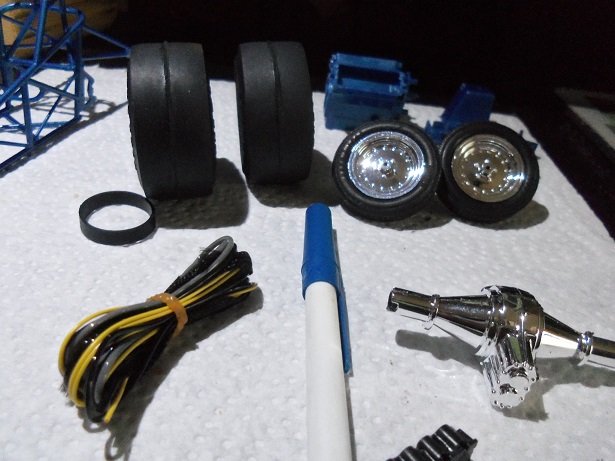
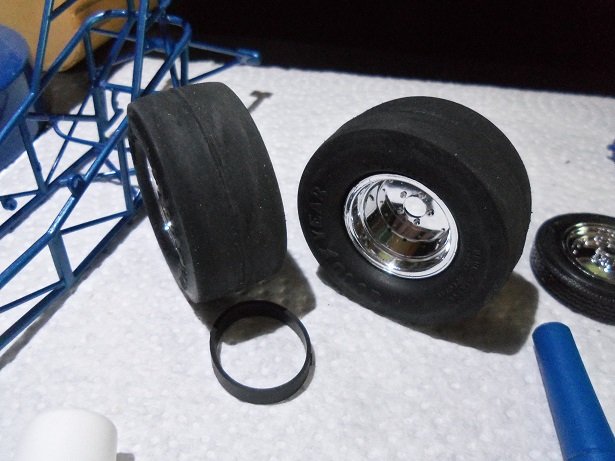
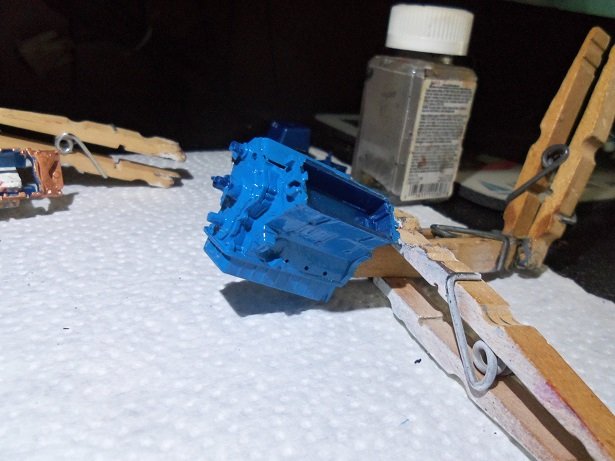
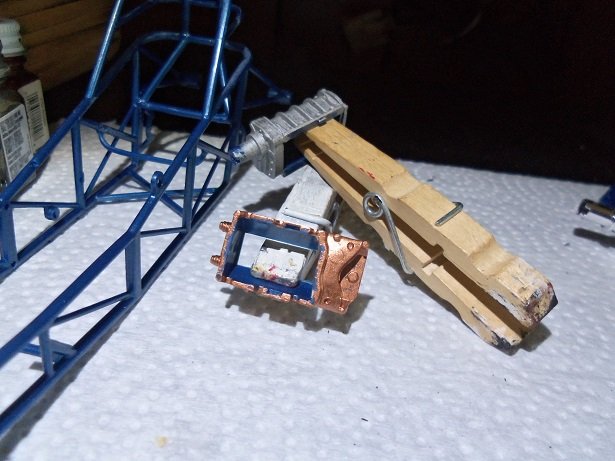
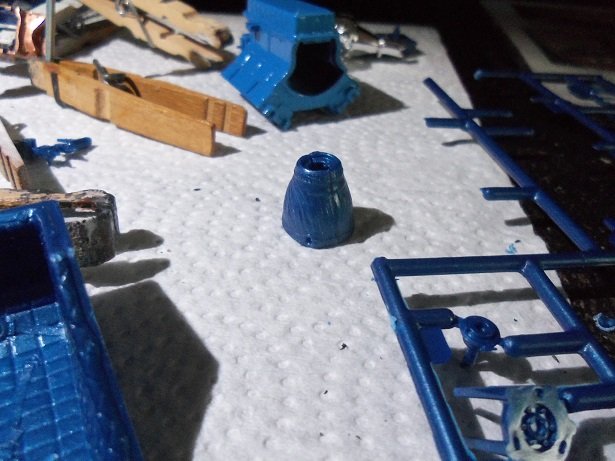
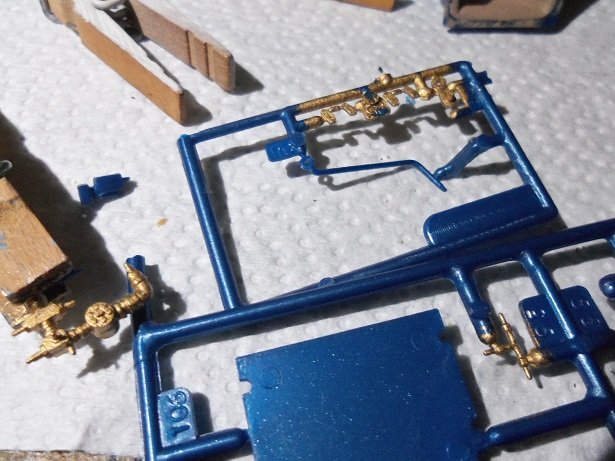
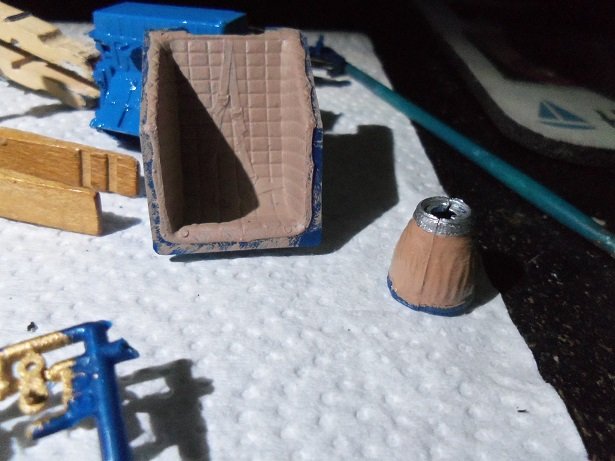
I took today off...........I hear by call this a 'paint' day to start this session off.......a few decisions. a few more parts are to be de chromed. the firewall is to be Blue....I don't like to paint over chrome. since they don't suggest a color for the frame, I'll be painting it either gloss or flat black. so......into the jar it goes. the bell housing was next to go in....that I will paint blue instead. the last thing to go in at this time will be the drive tube, that connects the clutch linkage {gearbox} to the differential. so...while these are stewing, I get to some painting and more assembly. those two parts.....the air induction and the induction plate, were sitting on the platform of my crane light. they were cemented together, since they will be painted in one color......and so I won't lose them the rims were assembled next. the cockpit brace was also cemented in place. the frame, was undergoing some straightening at the time, so I couldn't install it. the cock pit was fitted a while after this part had time to dry......it will be painted soon. here is the contents of the bag, included in the kit. hoses, wires {don't know what the length of braided rope is for}, and of course, the tires. the tires are really thin rubber.......I noticed the heavy mold line that runs the circumference of the slicks.......gonna be a real pain to get rid of it. the drive belt is there too.........I already mounted the front tires. I wanted to see if they would spread out enough to bead properly. in the event that they don't, I may have to stuff them with tissue, to make the sidewalls fill out more. the differential has been cemented together at this time as well, being a halved assembly. I left it to be chrome, in spite of the sprue marks that were left after trimming. I'll see if I have some chrome silver handy. on the box, it showed red ignition wires.......mine are going to be yellow, I guess. I looked on the decal sheet, but I don't see a decal for Accel wires........perhaps I'll make one of the logo and add it. Accel 8.8 spiral core wires........$90.00 over at the Speedway Motor Auto Parts store I set to work on the slicks......as I feared, I'm not going to get it all out. I don't want to get too aggressive......the rubber is really thin. the fronts still need to be done, but I got the road surface of the slicks all roughed up. the line can still be seen, but not as much of a eyesore as they were....there's no line on the front tires. they suggest the engine to be gloss black, but I mixed up a nice Plymouth Blue for it. I will compare it, but it {almost, if not exact} will match the Grabber Blue that I intend to paint the body with. the bell housing will be the same color. the intake is painted copper, and the supercharger is painted flat steel {I didn't know it, but I have aluminum}. the fuel cell was to be silver.......but it will be painted in the same blue......it will even out the chassis. here are also the other parts that goes to it. the pulleys were added to the painted pile........I also noted that the pulley for the supercharger will be painted the same color, so I added it and then painted it. I mentioned that the transmission gear box is in a protective wrap. MAN!!!!.....if this ever blows, I hope it's strong enough to stop the pieces from flying! it's located right between the driver's legs! suggested to be black, I thought I'd do something a bit different.....it will be gloss tan with silver bands on both ends. OK....so we have copper, flat steel, silver.........now for bit of gold to accent the plumbing for the fuel, brake, and oil systems. last, but not least, I started to detail the cock pit....the seat will be painted flat tan. the gear box shroud is beside it, already painted gloss tan and one of the bands is on it. at one point near the end of this session, I realized that the fire extinguisher is to be painted red.........that too was chromed so........in the hopper it went.....both halves! more on the project soon thanks for looking in and thanks for the likes👍


-
sweet!
-
the interior ribbing seems to have been built rather well love the beer box........and you wrote on it too........nice touch! if you took a 1" brush and went in there, you might get more of the dust out of the cracks and corners. some polish will bring the wood luster back too. this will help blend in with the work your putting into her looking really nice.....were there any with a raised cabin, one that might be high enough for some windows? I see there is a coaming there............your doing a super job!
- 39 replies
-
- 1
-

-
- kdy 15 juniorbad
- yacht
- (and 2 more)
-
looking good OC are you going to put that theory to work? those cannons look so lonely it would be hard to come up with blocks in this scale....let alone rig them {oh, I'm sure they are out there somewhere}. good that you can avoid the hassle.
-
very nice EJ scratch building is good to have under your belt........for the reasons you mention, as well for the kits that don't seem to fit together very good. also good for kits where your having to make a lot of the fittings....I have one of those kits I learned this with my first model......not that I didn't know better, I just felt that there should be more to it. it will be very useful to you
-
my word.........you've made some really great progress Greg she's looks splendid with her new deck.......structure looks really good too! really nice work!
-
Yamaha MT-01 by Dan Vadas - CARD - FINISHED
popeye the sailor replied to Dan Vadas's topic in Non-ship/categorised builds
missed the finish..........awesome looking bike! very well done. -
must have been grueling adding all those lugs on the tracks. is the drive gear movable? is there a way to compensate the slack from the top, as your adding the tension boggies? they look really good
-
catching up with your project Danny........you've certainly created one sweet looking model. the open concept would be interesting to do, but like with car models {early ones at that}, they gave them opening doors hoods and trunks for that very reason. you have the movable hatches, so that would suffice very well the boggies are awesome.......you did a great job with them....right down to the drive gears. I wish you well with the track. did you look into the link that maaaslo posted......looked like a decant replacement. almost done........fantastic job!
-
I've been know to build anything to pass my table
-
be glad to know that this hobby doesn't race along.........it suits one just fine, at their own pace. the only thing that tugs at you, is given the model, you can't wait to see it finished just take your time and enjoy !
-
thanks Marc....your here.....and I'm glad you came your still fairly early though........no paint yet and plenty of deck work to do. I'm went to Hobby Lobby the other day to see if they had any brass strip stock........only 1/8 x 1/8 so I bought a couple of 1/4 x 1/4 basswood strips thinking that I'd make them in wood. then I thought dowel.........that might b interesting........I just picked up a bunch of different sizes {I've become a hoarder of wood}. looking at the original one, I find that the uprights could be 3/16......I didn't measure them.....I went on blind assumption. so I will be experimenting with that along with every thing else. on top of that........I've been staring at the wood parts for the winch. I can get an all metal one from Cornwall for like $27.00........but I will assemble it to see how bad it will look. as I said.......your still early........glad to have you aboard
-
amazing to think that a tiny bit of plastic is the starting point........next thing you know, you'll be doing calligraphy on rice! really looks good!
-
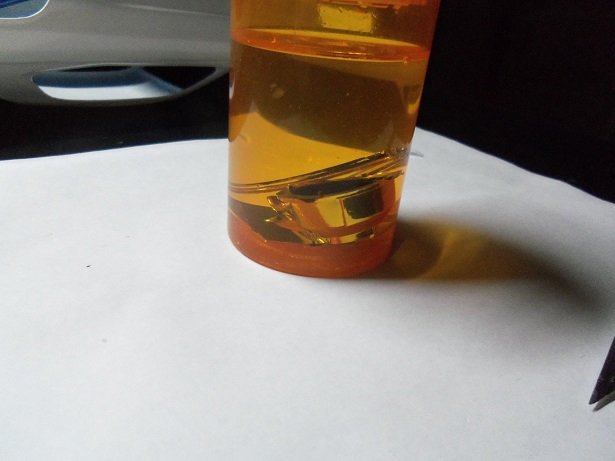
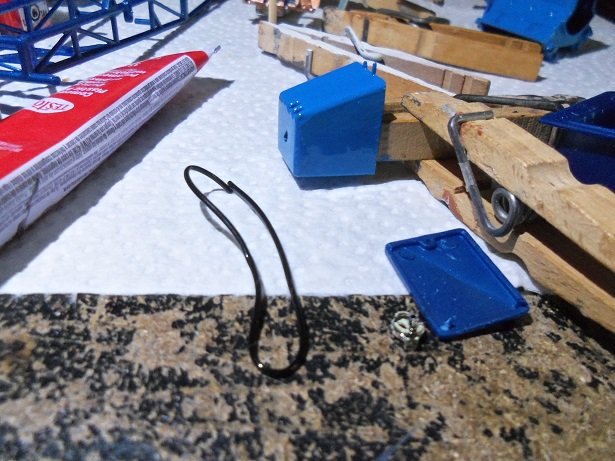
wow!......I can't believe I've forgotten about them......the parts in the brake fluid! they have been sitting on my desk all this time. I'd say they had a good couple day soak. time to get'em out of there! oh my........they are like prunes! a small bowl bath of hot water and Dawn dish soap was drawn. they got a good scrubbing with a small metal bristled brush......the kind you'd get at a part store. once rinsed off and dried, they look none the worse for wear. the Chrome is gone to reveal black plastic. these two parts will later be cemented together and painted the same color........combined, they make up the air induction port of the supercharger. I'm sure there are other parts that will need to be de-chromed. I've used this method for years........best of all, it won't damage the part. one worry to keep in mind............parts can go down the drain {don't ask me how I know this}.

-
thanks J........I can cut the scuppers next another step I need to do. I still need to sand the hull some more.....then I can do the rub rails. never a dull moment........hoping I can get some paint on her soon. thanks for the good word
-
these are neat cars to build Carl........the only problem with these kits, is you build one, you've built them all. same with the rail dragsters......they are basically the same. there are some variants though.....different classes of cars. if I were solely building these models, I'd have to mix it up to keep sane thanks for the good word! the base plastic is a metal flake blue.......sad that I'm going to paint over it. the body however, is white plastic. the English Leather model had a purplish colored plastic. I remember the Jungle Jim.......I believe there's a model produced of it......Don Prudomme's Snake was another. I use Testor's decal bonder for decals......I learned way back when, when I built the second Cutty Sark. I got it from E-Bay.......the decals were bad, as well as the sail sheets. I did a missing parts request to Revell.......got a new decal sheet and two of the three sail sheets. thinking my troubles were over, I went to use the decals, and found that they were just as old and had developed micro cracks......they too were no good. I searched around trying to find some place that could recreate the decals.......no from here........no from there..........then I hit onto this one guy, by the name of Parkes {I think his first name was Jim, but don't quote me}. he said he could do it......send him a picture of the decals. a while later, and a lot of excuses, he said he couldn't do it, because he couldn't print gold. DUH>>>>>>>>>>>no one can print gold.....ink jets can't even do white! by this time, I had stumbled onto the Testor's decal maker, and the rest is history. I first bought the basic program.......problem is, that you can't import images. so I bought the standard edition......I can now import images, but the program is flawed.....it does seem to have a transparency issue. the max DPI on an ink jet printer is 600 DPI, I think it needs to be higher. but I've been living with it, and so far, it's been working out. I went through some hassle to make the decals for the Cutty, they are on her none the less the decal bonder comes with the basic kit, or it can be purchased separately. so anyway.......I haven't laid any paint yet.........it's just the color plastic they used. these larger model kit are done in multi color plastics.......odd they do that, if only to make it easier for someone to build the model without much painting. usually when they add a color to plastic, it makes the plastic weaker and softer,.....not the case with this model though........this plastic is tough as nails! makes it harder to trim too.....not that there's a lot of flash. I've heard about the microsol stuff.....I've been a Testor's man for too long, me thinks. I'll have a look see.........thanks for the tip and thanks for look'in in!
-
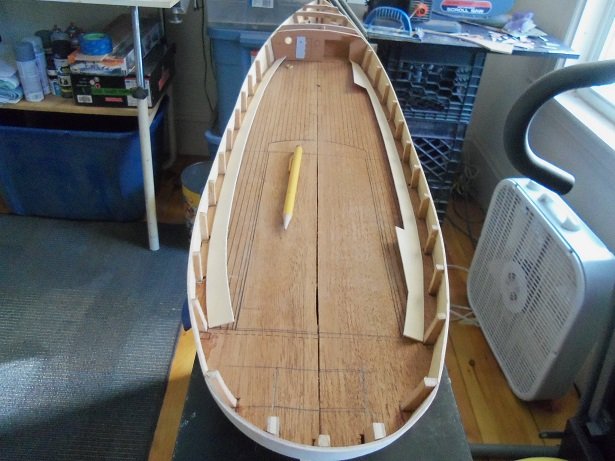
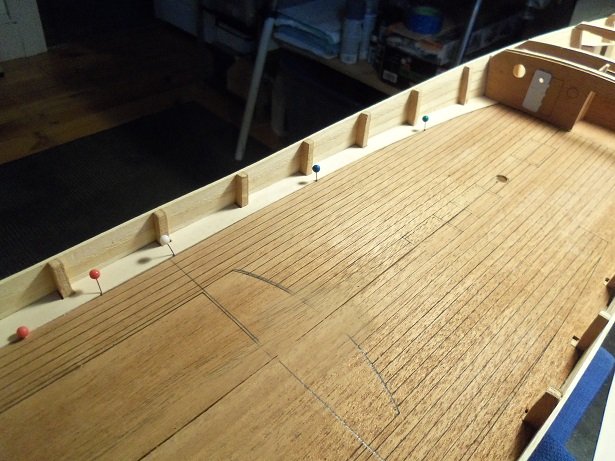
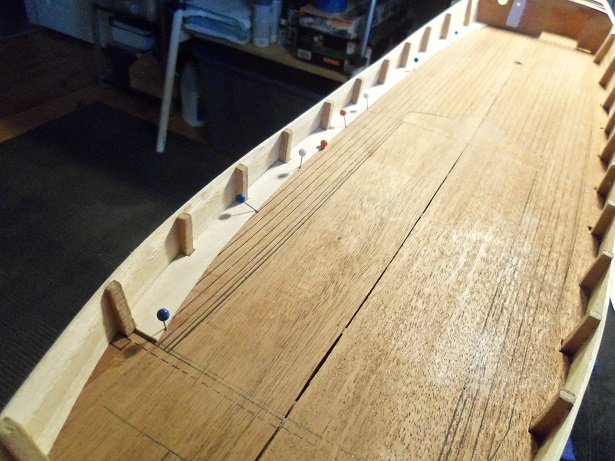
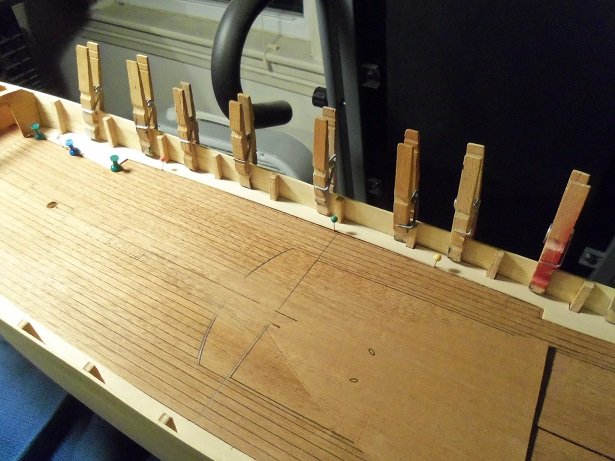
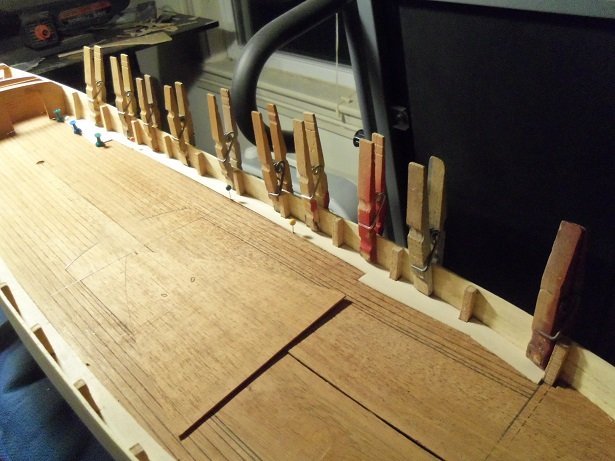
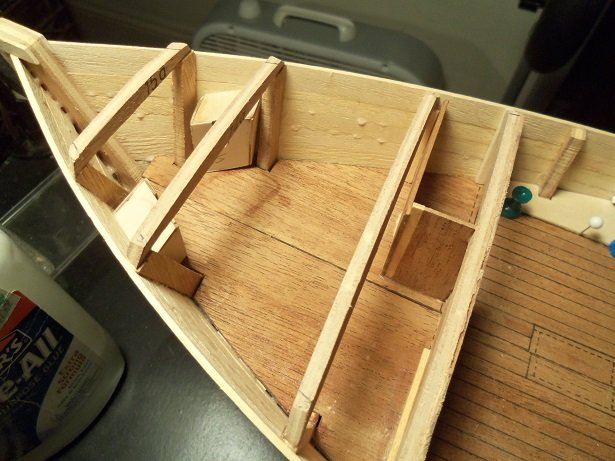
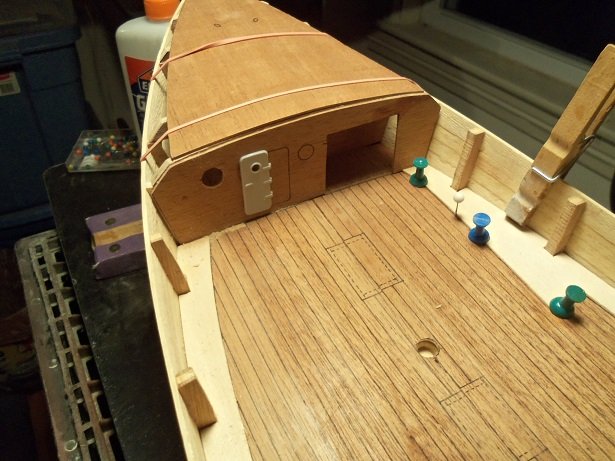
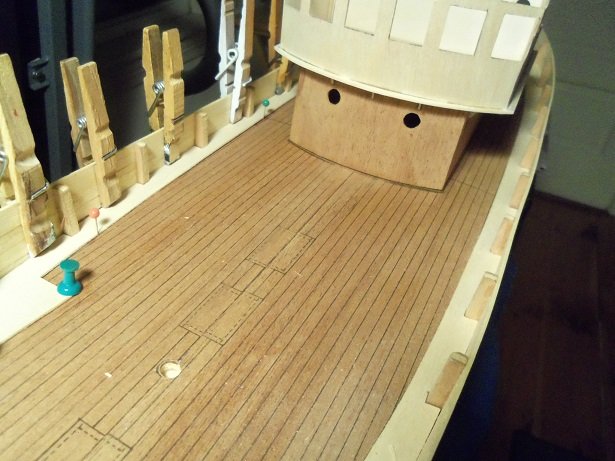
decided to install the margins today on the Progress. fitting them took a while.......a vast amount of adjustments. measure and cut all the notches, sand and trim until they are butted up to the bulwarks. the fun started with the port side. trimming was in a number of places....even a couple posts. the margins aren't that wide......I didn't want them to take the brunt of the trimming. any gaps left over will be filled with filler. when it was satisfactory enough, it was cemented in place. it laid down rather well.......it didn't try to lift usually, when wet from the white glue, the wood will try to curl. the starboard side was then fitted and cemented down. this one has the odd shape and did attempt to lift, mainly at the ends where the thicker areas are. top hat push pins helped to hold them down. there was also some lifting along the bulwarks, which was easy to remedy. the top of the bow cabin.....the roof or bow sheer { for lack of better terminology}, is seen lying on the deck. it was cut out from what was left of the sheet that it was printed on and dry fitted on the bow. sanding had to be done to the bow beams, for it to sit correctly. I also saw that the angles for the side parts need to be addressed too.......not enough of an angle. you might be able to see the marks I made. the real problem lies at the bow stem.......those top rabbit pieces will need to be notched. I first thought that by sanding the beam closest to the stem, it might alleviate the problem. it lessened it.......but not entirely cured it. you can see what I mean here by angle adjustment. I can make up for the stem problem with the sides........it's all in the fit I removed the portholes from the cabin assembly.......I was going to give it a primer coat. but them I remembered that there are a couple other thing I need to do before that can happen. with an errand to run, I left the cabin in place on deck.......I had also tried to sand in the deck camber at the bottom.........got most of it once the margins are painted, and the hold boxes are in place, I can then plank the deck.
-
I see you got her back in shape........I knew you could looks none the worse for wear my friend! hope you had a great holiday!
- 122 replies
-
- 3
-
-
- tamiya
- King George V
- (and 2 more)
-
looks 100% better the anchor looks great too.......pretty neat that it folds up.
- 39 replies
-
- 2
-
-
- kdy 15 juniorbad
- yacht
- (and 2 more)
-
looks great Marc! I saw the detail and though how nice it would look....and then I read further really nice job! hope you had a great holiday
- 525 replies
-
- 2
-
-
- cutty sark
- mantua
- (and 2 more)