
DONATION DRIVE - SUPPORT MSW - DO YOUR PART TO KEEP THIS GREAT FORUM GOING! (91 donations so far out of 49,000 members - C'mon guys!)
×


popeye the sailor
-
Posts
16,007 -
Joined
-
Last visited
Content Type
Profiles
Forums
Gallery
Events
Everything posted by popeye the sailor
-
 this is turning out to be a very decorative model.....your imagination is working overtime! the ball is a really neat addition superb in every way!
- 692 replies
-
- 3
-

-
- eagle of algier
- chebec
- (and 2 more)
-
hello Hakan...glad to see your back at the table glad to see you made a shaft for that drum........when I heard pressure......and the 1400 RPM's, I didn't think it sounded too safe to stand in front of. looks like a very nice project.......a boat one rarely sees as a kit on a shelf I recall your Regina build......I see you still have the box. you did such a wonderful job with that project, no doubt that this one will turn out equally as superb. I look forward in seeing more fine progress.
-
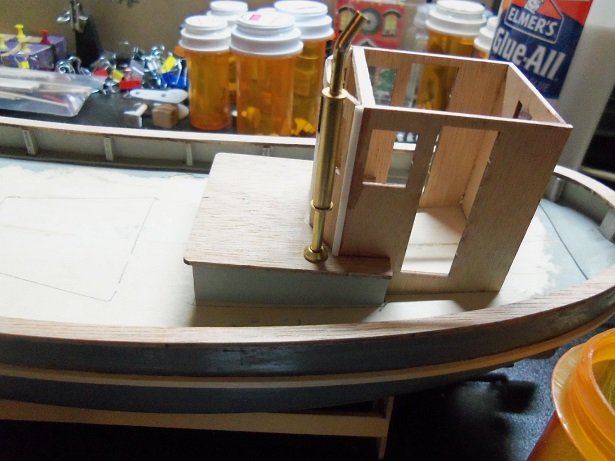
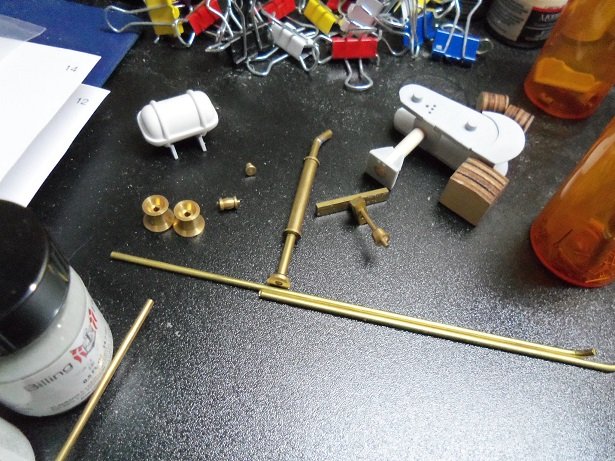
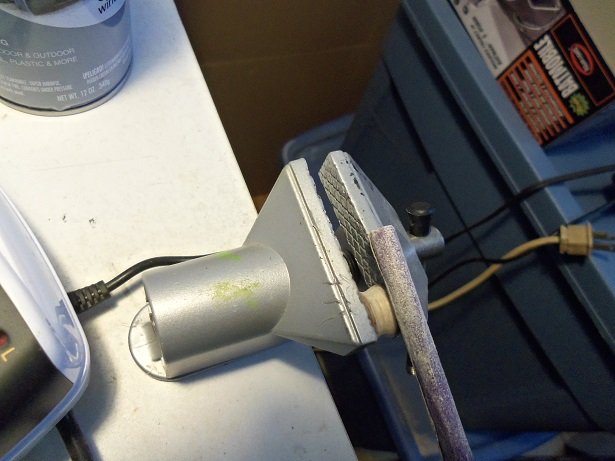
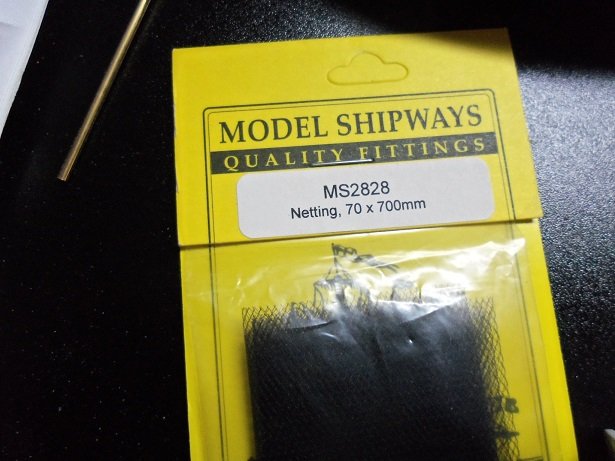
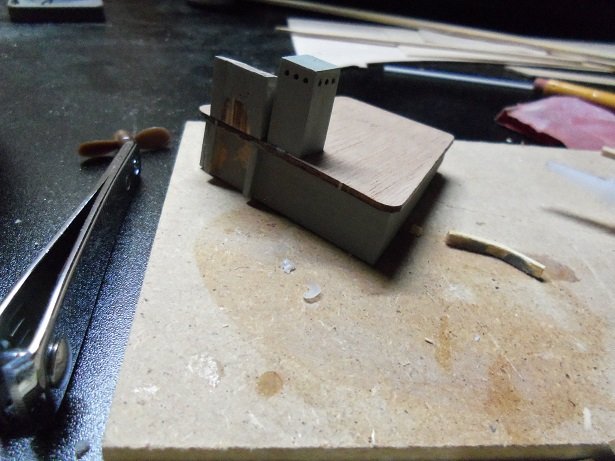
some of this was done last night before I hit the bunk. after the revelation John gave me, I assembled the funnel AKA the exhaust stack. the muffler part was assembled on the smaller brass tube. putting the base on led to a small snag......the hole in the base would not accept the brass tube....too small. in my inventory, I have some 2 mm brass rod.....perfect to link these two parts together. the tube went over the rod without any fuss at all. once assembled, I thought a bend would be a nice touch. so I filed in a cut near the top of the tube. a pair of pliers was used to make the bend, and the cut was soldered shut. once painted, it will never be seen again. the tops of the two structures were painted next with Billing's satin brown......with the exception of the hull paint, I've used Billing's paint so far. one of these days I hope to use it all up. it's not a bad paint......but it's been a few years since I got it all, and it seems to be going bad. back when Tom closed up shop, he must have sent me what inventory he had left. I've opened some bottles, only to find that the paint had either thickened to a gel, or dried completely....for this I blame poor packaging {bad cap seals}. it smells the high heavens, but for shine and durability, it's excellent stuff. it's getting harder to spray from an airbrush, and using a paint brush, it's like mopping tar, unless you thin it like crazy. I plan on doing the cap rails with it....I may wait till I get the hull painted {the house is still debating that}. I also assembled a couple of other fittings.......the life raft locker got it's supports cemented on, and the radar mast was assembled. the warping drums, extra lengths of 2 mm rod, are also present. the next focus was on the starboard winch. the front plate was added to the bottom, on the large reel end of the winch. those circles are supposed to be rollers......reels....drums......whatever you want to call them. me......I'm kinda curious about them......what are they supposed to look like? the two for the top of the winch are likely used as tensioners......I'm thinking that the large one in the front would be a drum for a net, and the back one {the smaller one}, is for line. the sad part is that I've no reference of one in operation....that would answer a lot of questions. so I'm gonna go with this assumption...if I'm wrong, I can always make new parts from dowel. these round thing are made from disc that are cemented together.....two for each one. the large one is missing here.......I'm working on that one first......I started it and finished it this morning. at first, I tried to use a file, keeping it to the center of the circumference. after coming to the conclusion that it wasn't working well, I took a length of 1/4" plastruct hollow tubing, and CA'd some medium grit sandpaper around it. working much better, I worked my way around the part, till my fingers cramped. at this point, I stuck it in the vise and continued the process. I can't mount the vise on the new table I was able to go completely around the part, trying to stay as even as possible. when I arrived at the depth desired, the smaller one was done the same way....I'm unsure if I should do the other two, so I'll leave them as they are for the time being. what I ended up with was this: it gets even better........when I got the Nordkap for Christmas, of course I had to look inside the box. there was the wood, a bag of thread, dowels, and stuff, but there was also a couple of items the previous owner bought for the kit. there was a bag of four, 3 X 3 mm beech strips, and this package of netting. the mesh looks like it would be perfect for a seine net. even if all of it doesn't fit into the winch, I can have it strewn onto the deck........or possibly, I can incorporate a boom. I dunno.......I'll need to look at the boats a bit further to see what my limits are. it's been snowing since late last night......I suppose I'll need to snow blow soon. I'll push on to get further along

- 378 replies
-
- 13
-
-
- t78 norden
- billing boats
- (and 1 more)
-
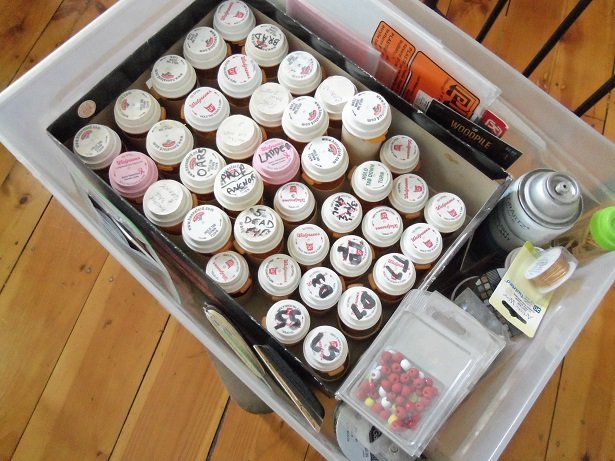
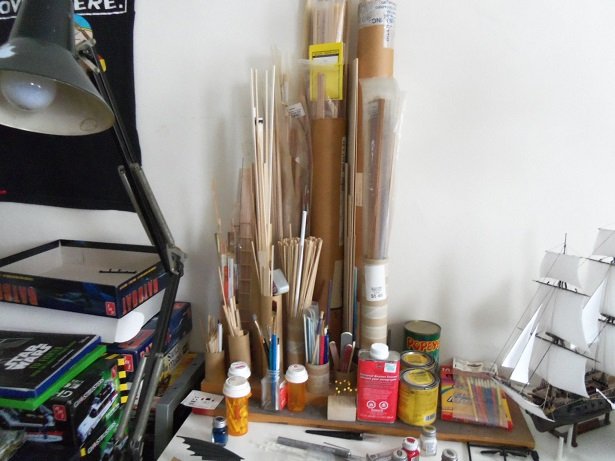
oh god Tom...you haven't seen everything yet you see, the admiral has been disabled since the mid 90's.......back problems, shoulder problems, and lately, she has been having trouble with her right knee. she sees a pain management doctor and takes meds on a regular basis. these bottles add up over a period of time....leave it to me to find a use for them. kit boxes can be quite large, so I save all of my boot boxes to store the smaller part in. as for the fittings, they are separated and put in bottles......figure that I have several boot boxes...each one can have as many as several bottles. if I order extra parts...they go in my inventory bin. I've got everything in here.........from super fine sawdust, to parts from builds gone by. some of this stuff I should toss {probably never use them again}, but I'm a confirmed pack rat....so I save everything the wood strips are tagged and put in a special tube, which is part of my wood organizer At the moment, I have it in the plastic room, but soon I hope to get it set up near the wood table so I don't have to walk a mile to get anything. I try to keep things organized, but occasionally, I fumble around looking for stuff. yea......I kinda rambled on this one, but I think it's neat to see how folks set up their work stations. if it were me, and I heard a comment like that....I'd just tell them "nawww....I don't take drugs.......I go 'green'! " {I don't now......but my younger days was groovy} now a days, I jes' relies on me spinach....AK_K-k-k-k-k!
- 378 replies
-
- 7
-
-
- t78 norden
- billing boats
- (and 1 more)
-
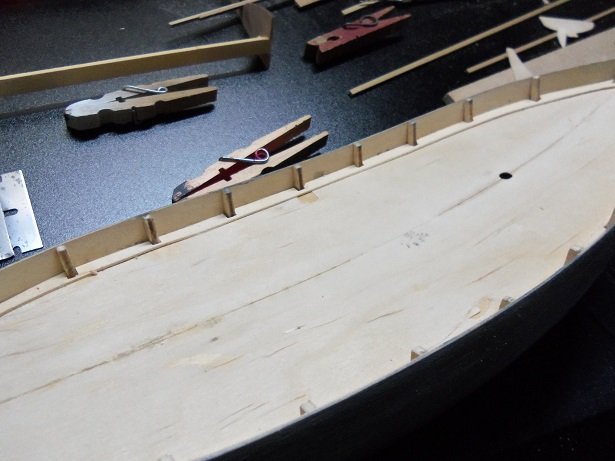
I found that out John........saw the mistake when I went to look at the box. I hope that's the last "DUH" move I make with this one.....don't know how I'm making all these silly mistakes. I'm usually pretty good with Billing instructions....having built so many of their models, I've come to an understanding of them. the companionway structure has been duly moved what I plan to do with the planking, is mark out all of the bulkheads and stagger my butt joints over them. on larger models, like the Nordkap {for instance}, I will go further and divide the areas between the bulkheads and draw lines there too. it gives me more butt stagger lines and I can do the three and four butt stagger spacings. to do it with just the bulkheads, spreads them out too far......although on some models, it's not a bad thing. I won't plank where the structures are to locate, so they will fit into the designated areas, and not show those {sometimes annoying} separation lines. I glue the cap rails on one at a time....it would be harder to install it as a complete unit. With the Cux, as well as the Mary Ann, the stern is the tricky part....I've had to do small fixes here and there with the cap rail not conforming to the circumstance. some of the problem lies with the thin plywood bulwark strips they supply with the kit......they just don't bent like that {I even tried soaking them}. I like to save the parts panels and clone hulls from them. so far, with this method, I built the M&M Fun Ship, and the Trawler Syborn. I did this as well, with the Boulogne Etaples kit and cloned three other hulls from it......from that bunch, only one has made it to becoming the Holiday Harbor fleet.......the others went on to become the Andrea Gale {which is in the gallery}, and another {no name} fishing boat. the reason I mention this, is that even the ones I cloned didn't have the problem so bad......I planked the bulwarks in stead of making the panels. I assembled the funnel last night after I left here......gave it a couple of small changes. I did a few other things to before I called it quits......I should have an update soon. I'm also modifying the starboard winch......got an idea in store for it. I hope it's not too hair brained and makes sense thanks Patrick......I think that's the first time I ever had to do that. I usually tend to plank over everything. these vessels have that characteristic high 'rump'. the other Billing kits do as well......I added the 'bump' rail at the stern to mimic the other models. my babies got 'booty'
- 378 replies
-
- 6
-
-
- t78 norden
- billing boats
- (and 1 more)
-
got to the party a bit late she's a very nice looking river boat Ron! I have the King of the Mississippi waiting in the stash.....can't wait to start it. nice clean build and paint work very well done!
-
John......they do include the larger brass rod {2 mm}.......silly me though, I used some from my inventory to make the funnel. I'm about to play with the winch on the base.....I look in the bag o' stuff and found it. hi Bob.......I probably could get more done, if I'd only lose this fogginess! man......I gotta be comm'in down with something thanks for look'in in and the good word! thanks OC.......there are some kits out there that you have to cut them out. I hardly do mainly because it makes the bulwarks weak. I did it for the Thermopylae and I cracked them more times than I care to know...every time.....stop and fix them. no need to do that to this model and I'm glad of it thanks for look'in in and the good word ....and thanks to those who hit the like button!
- 378 replies
-
- 4
-
-
- t78 norden
- billing boats
- (and 1 more)
-
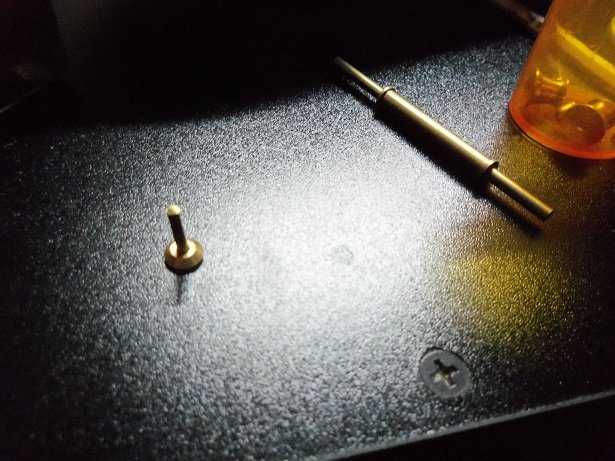
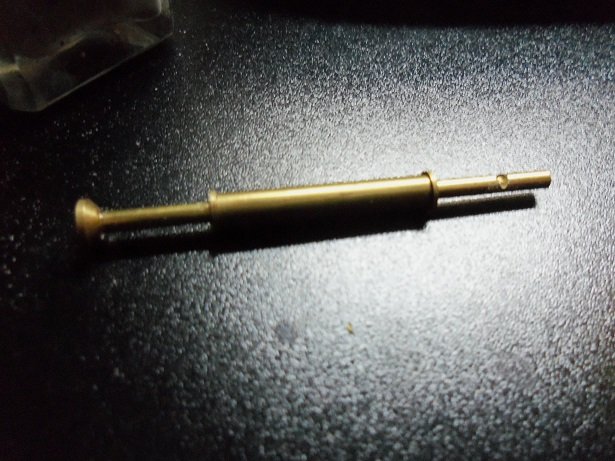
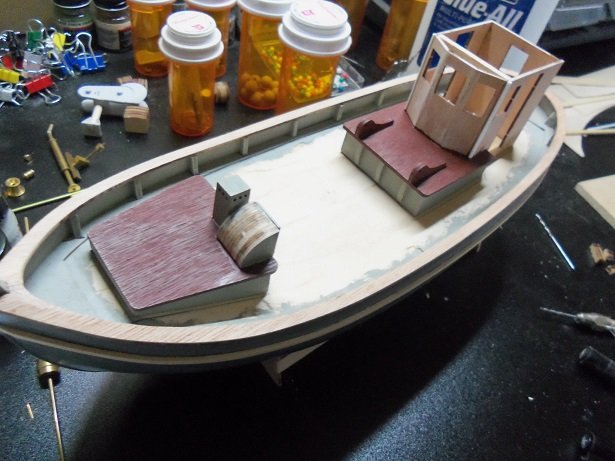
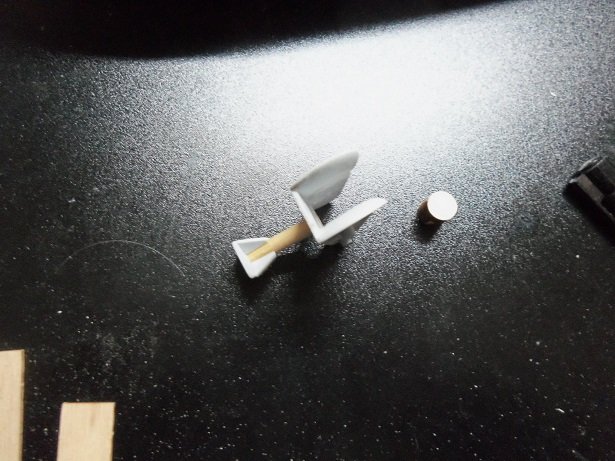
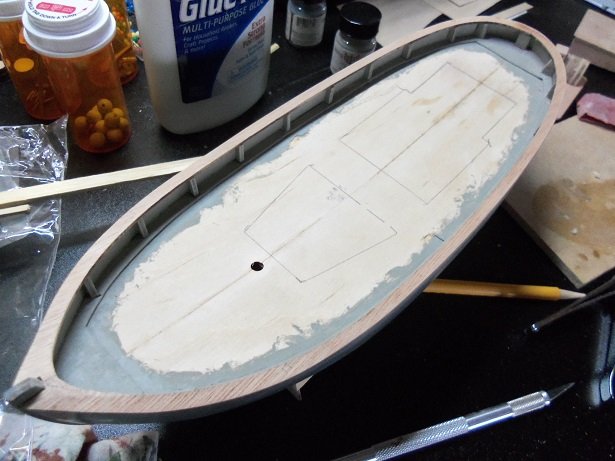
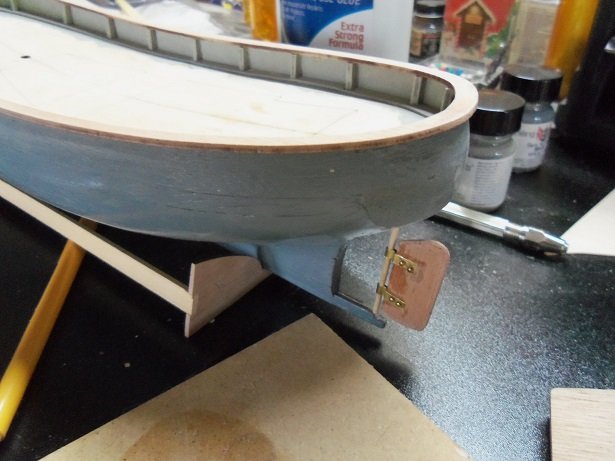
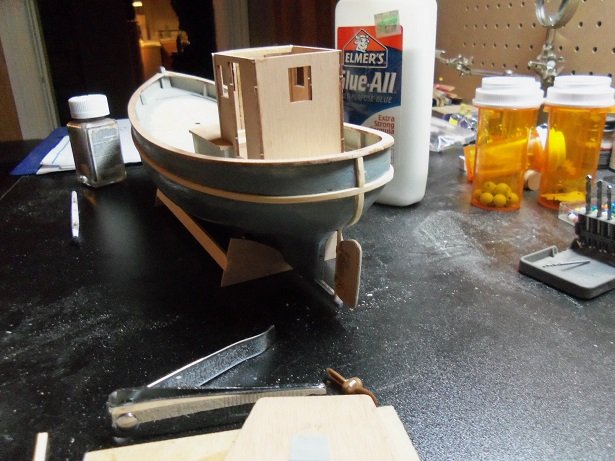
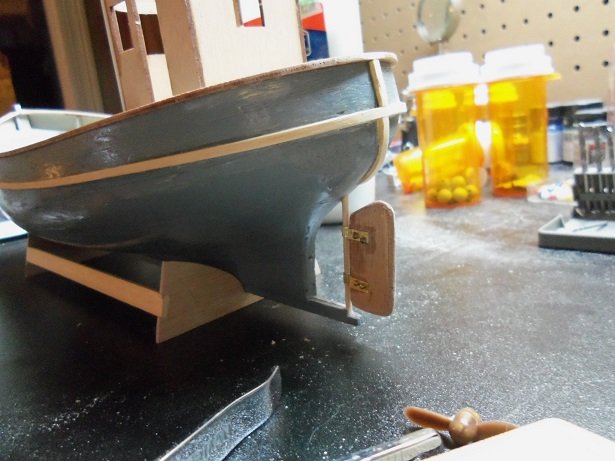
I got somewhat of a late start today at the table.........and then got side tracked on another foolish thing. but I did get something done.....I tried to make the best of it fumbling around, the first thing I pulled from the box, were the cap rails.......and so I cemented them on. did the finish sanding around the edges..inside and out.......I also redrew the back line for the pilot house, straightening it out. the stern area didn't look too bad either......the fit was rather good. then the rub rails were added to the hull.......I soaked them a short time before they were put on, so they wouldn't crack or break. I even added a stern bump rail, characteristic of the Cux and Mary Ann kit, which I also built.......this hull is similar in many ways. cupped underneath and tapered near the rudder. there is the prop.......getting in some camera time, before it's added to the model if you can see, I've already started the hole for it.....gotta make it a little larger. I did some painting to the structures.......the base on this one {though it's hard to see}. adding some braces in the front of the pilot house base, it too was painted. more to go yet.......I'll work on them some more tomorrow. perhaps I can paint the hull.......still deciding on the color.......the admiral wants Blue........I was thinking a nice Orange.......I still have a lot of that international Orange.......the Cux color {we'll see who wins} icky mae
- 378 replies
-
- 12
-
-
- t78 norden
- billing boats
- (and 1 more)
-
I had to look at your model again........you put the funnel / exhaust pipe on her they show how to put it together, but they don't show it in the pilot house assembly diagram. just goes to show......even though your new to the hobby, doesn't mean you have nothing to offer. your going to have a lot of fun with the HMS Fly......it's not the complexity, it's the challenge thanks again for waking me up hello John..........another walkabout? hope it was for fun {my apologies if it weren't}. glad to have you look'in in.......another John, has been keep'in me in line while you were away gotta pay more attention to my instructions another update awaits..........
- 378 replies
-
- 6
-
-
- t78 norden
- billing boats
- (and 1 more)
-
you know what John.......I just found out that I'm an idiot! I didn't recall seeing a prop when I separated all of the fittings. I have a never ending supply of medicine bottles....you ought to see what my inventory bin looks like. I didn't think there was a fitting photo in my instructions.......one look proved me wrong lo and behold, there's the prop...right up there at the top of the picture! I will have to get that bad boy on there, so I don't forget it. by funnel, I mean a smokestack beside the pilot house, or jutting out of the base. the Mary Ann looks similar to this boat.....I added a cap on the top {like you see on tractor, and construction equipment}. you see them on diesel exhaust, if they are vertical pipes...thought it would look neat. I'm glad you helped to clear that up........might have been more of a pain to add further along in the build thanks again!

- 378 replies
-
- 8
-
-
- t78 norden
- billing boats
- (and 1 more)
-
coming along nicely Vossy
-
the stern looks like it going to be a beast to plank......three bands for the transom. now you'll have to taper for the counter. if the frame is fared well enough, you'll have no problems. dry fit the planking to see how it will lay looks good so far
- 79 replies
-
- 1
-
-
- marisstella
- barque
- (and 1 more)
-
I would imagine the standing rigging is drawn darker than the running rigging, on the plans.......it is on most rigging diagrams I've seen. I'm sure that as you begin to decipher it, you'll have little trouble. shrouds, fore stays and back stays, are usually first. she's looking great so far....your having fun
-
the decorations look awesome........very nice added 'bling'!
- 192 replies
-
- 5
-
-
- sovereign of the seas
- sergal
- (and 1 more)
-
when the yards are fixed to the mast, will the studding boom be in their proper location? they should jut forward from the yard with a slight tilt downward. they look very nice......the fittings look great!
-
the base looks nice....is it red cedar? wonderful progress on the Vasa...the rigging is awesome!
-
not sure if it will fit the scale of your vessel, but Chuck has a kit for the stern lantern. check out his site to see http://www.syrenshipmodelcompany.com/
-
hello John! yepper....had a look at your fine model....she looks great! when I was working with Tom {when he owned the Billing USA site}, I did some research into Billing Boats.....it led me to the Amerang site. it also led me to Billing Boats direct. I came very close to actually meeting Kent Billing, but the meeting never happened. I had a feeling that the outfitting of this boat was a little strange.....I question the use of the two winches on the same boat. I see you added a prop......did you add a funnel? I was going to add a prop, but I don't have one that will fit the scale and don't feel like waiting on an order. you need to build another one now.......your little gem will get lonely. if your admiral like the look of this one, she'll love the next one {sell 'er on that premise}. don't waste your talent on just one model......you need to spread it out thanks Patrick......glad to see you found me we all get distracted every once in a while......nice to have a safe haven to regain our sanity. glad to have you looking in......hope to have an update soon
- 378 replies
-
- 6
-
-
- t78 norden
- billing boats
- (and 1 more)
-
thanks for the kind comments folks...and thanks to all who hit the like button considering the condition of the hull planking, the hull shaped up rather nicely. I probably should have soaked the whole lot of planking beforehand.......it might have lessened the splintering that it did as I was lay'in it down. it worked out. I plan on leaving the posts.......they'll give the bulwarks some character. I know that's not what you mean OC......your asking about butt staggering. normally, I'll draw lines across the deck for that, at every bulkhead. being a small model, I won't be doing it, but on larger decks, I'll even draw lines half way between the bulkheads. this way, I can go for the three or four butt spacing. the kit supplies 4 mm deck strips.....I will look to see if I have anything narrower...it might look better {glad they didn't supply 5 mm.......Yikes!} but that is yet to come I hope so Pat......if I can get this done in a jiffy...then maybe I can apply the same speed to a few other builds thanks for the good word! hello Downeaster..thanks for the good word as well. hope you continue to peek in
- 378 replies
-
- 7
-
-
- t78 norden
- billing boats
- (and 1 more)
-
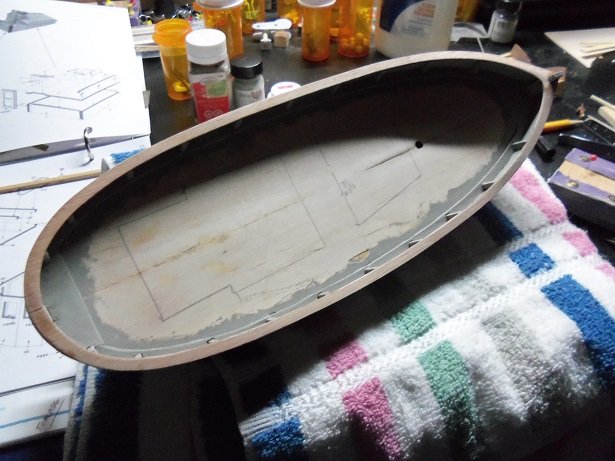
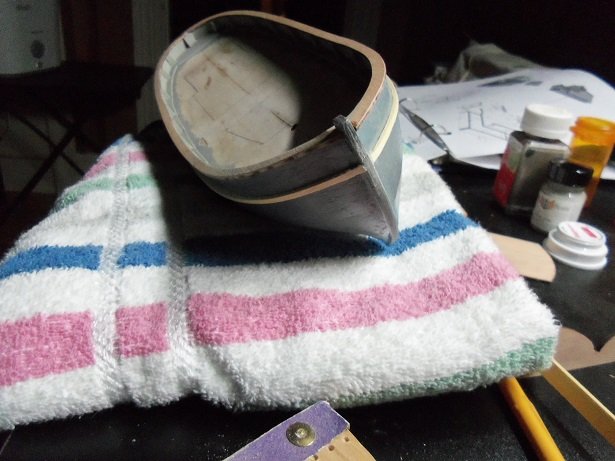
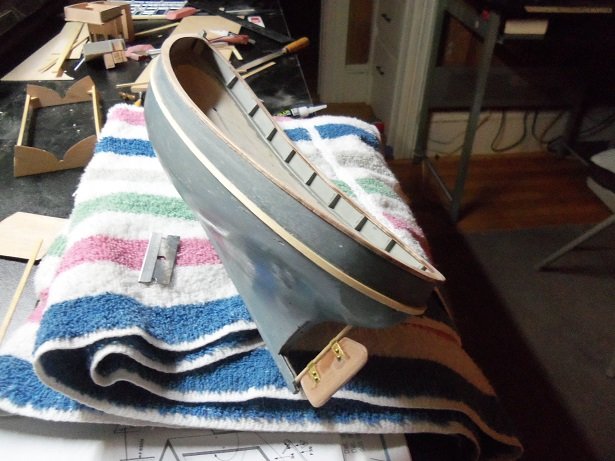
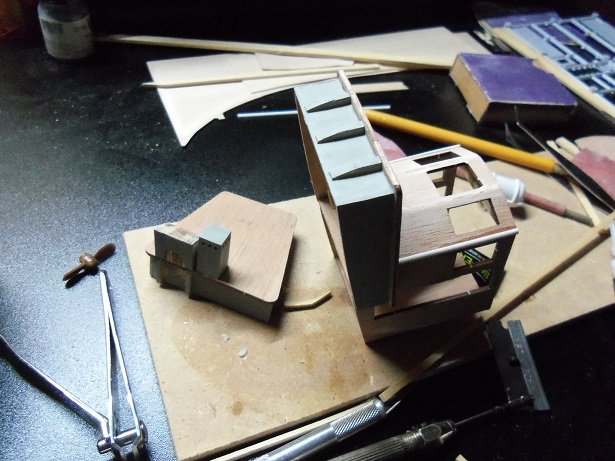
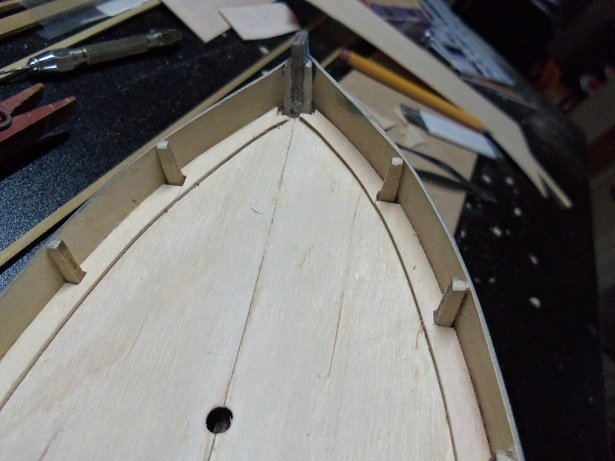
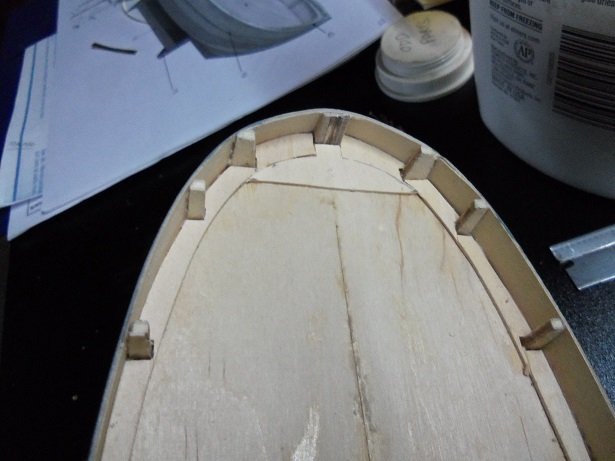
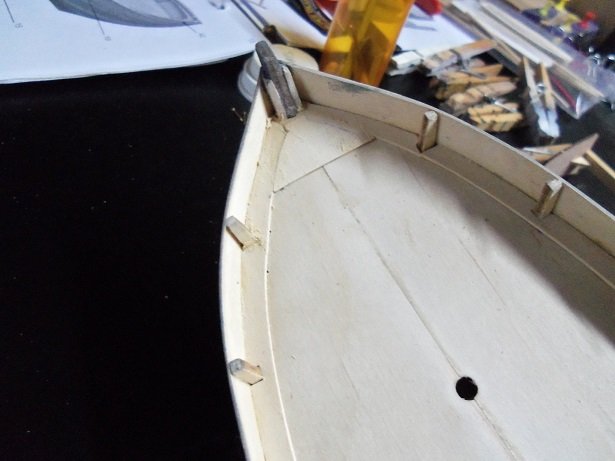
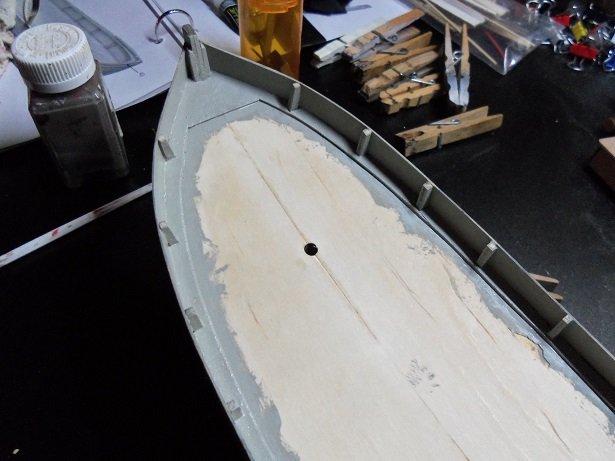
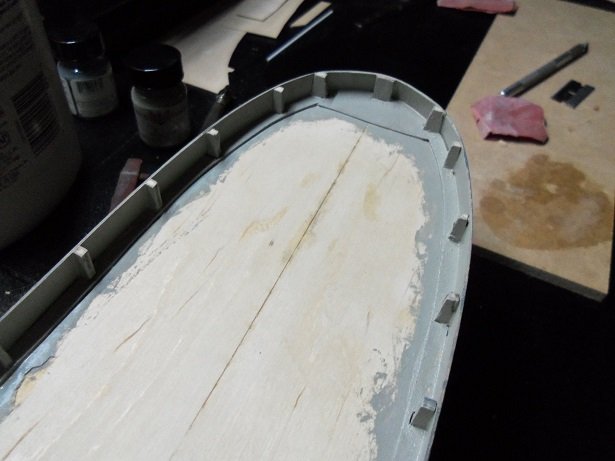
Great Caesar's Ghost! usually when that happens to me, I forgot to hit submit. but with the last update, if you forgot to do that, it would be there the next time you went to log a post I like it......saves some headaches. no matter......thanks for the good word OC! I thought I felt your presence, but wasn't sure anyway......to carry on the margins a bit further, I got them done. they did break in places, but I was able to piece them back together. next was the bow and stern plates......these just cap them off and takes away some of the planking trim work. I did the stern first......it looks off, but I think it's the camera angle. I'll be doing some final tweaking once everything is in place. then the bow....... filler took care of the tiny gaps at the bow and stern, and along the bulwarks. any wavy areas along the bulwarks were evened out with a razor blade. when all was said and done, it was painted with pale gray. it's still wet here and there....it should flatten out when fully dry. the last thing tonight, was to trace out the two structures, prepping up for planking. looking at the pilot house aft wall, you'll see a bump in the tracing......I needed to fix an anti-flush issue with the back wall. I fixed it and I'll retrace that line when it is dry. I should be planking come Tuesday.......hull paint won't be until I add the rub rails....hoping I can fit that in too thanks for look'in in.....much more to come

- 378 replies
-
- 19
-
-
- t78 norden
- billing boats
- (and 1 more)