


popeye the sailor
-
Posts
16,007 -
Joined
-
Last visited
Content Type
Profiles
Forums
Gallery
Events
Everything posted by popeye the sailor
-
 amazing Nils...........I like the gratings.........nice added detail
- 2,625 replies
-
- 5
-

-
- kaiser wilhelm der grosse
- passenger steamer
- (and 1 more)
-
the hull frame looks really nice........the contour is well defined. she's gonna plank up nicely!
- 420 replies
-
- 3
-
-
- captain roy
- lugger
- (and 2 more)
-
nice progress Dave
-
well blow me down.............Ben! welcome back..........!
-
thanks Pat........I did we're not going to lose this snow any time soon now. beads and trawl rigs are getting painted at the moment, so I'll have to play with something else........ I did check......I only have three. I will have to go, but I think tomorrow will be a better day. I did thread up the two lines I have set up for the trawl nets.......they are going to do just fine thanks for the good work.....lov'in the fact that I took today off.....it would have been a sh__show at work!
-
all I gotta say, is this has got to be a well thought out build. your envisioning skills must be in high gear. keep it up and keep going.....your doing an awesome job!
-
I'd be proud to walk that deck at night simply awesome!
- 434 replies
-
- 8
-
-
- pelikaan
- beamtrawler
- (and 2 more)
-
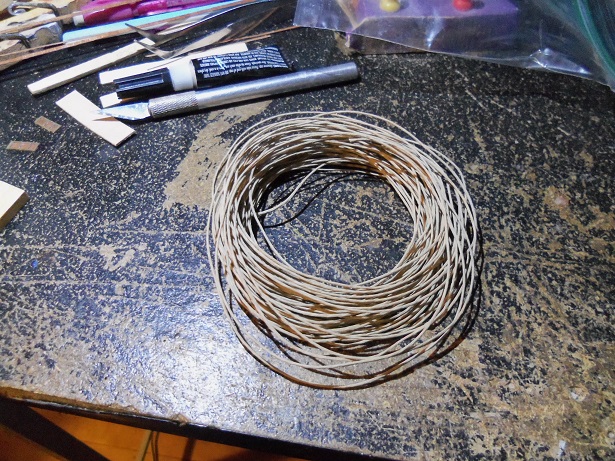
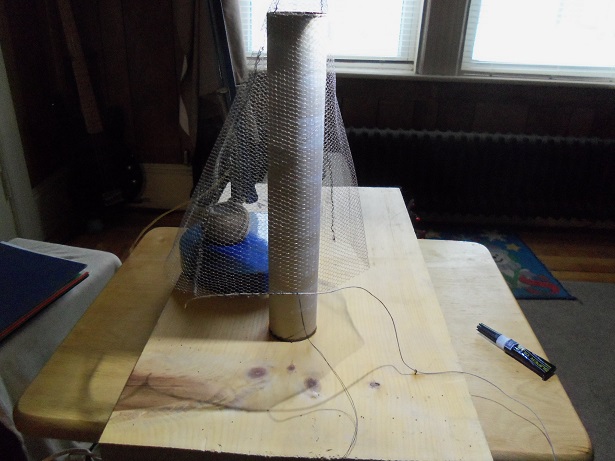
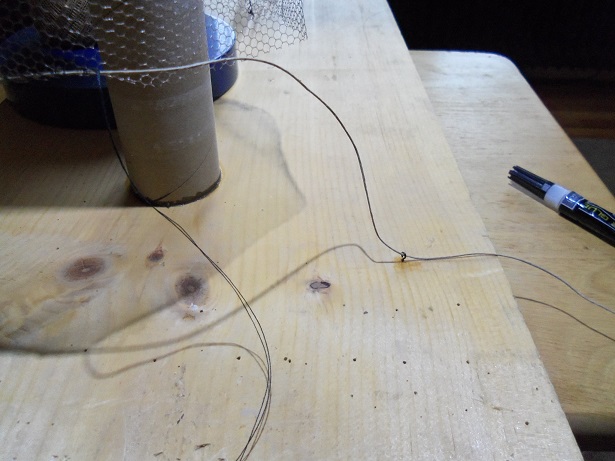
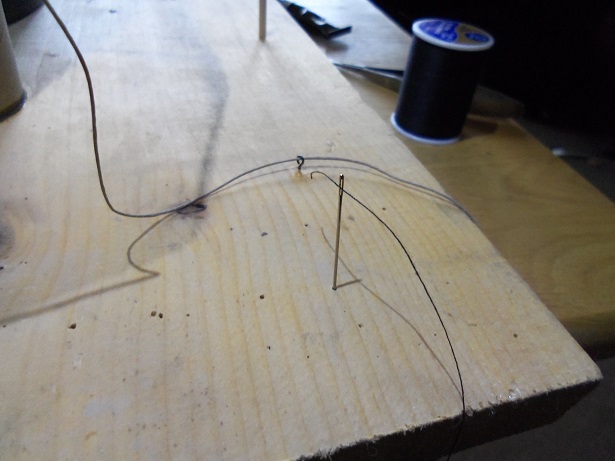
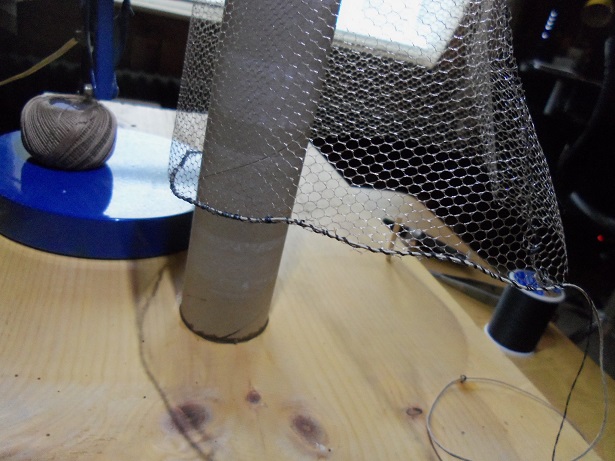
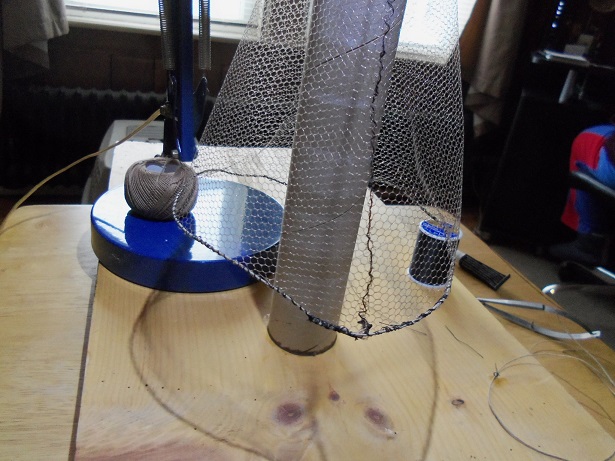
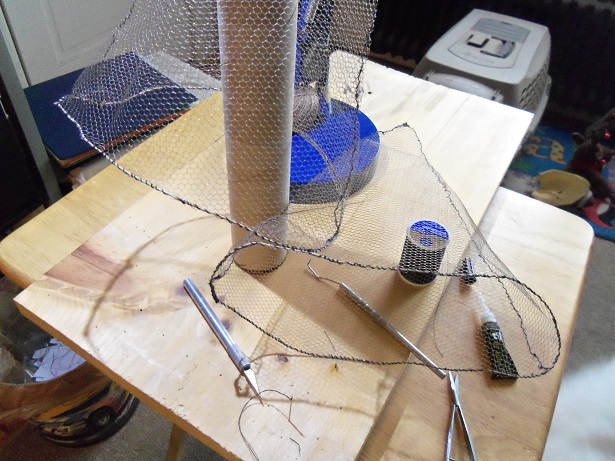
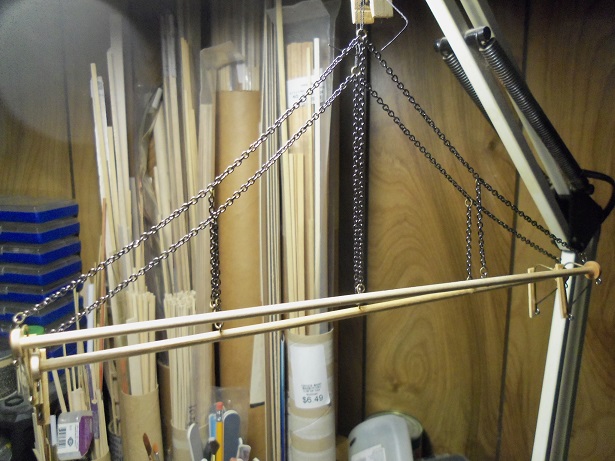
what to do on a snowy day........can't spend all day antagonizing the admiral.......so perhaps I should bury my face at the table {from the looks of the table, that's essentially what I'd be doing}. I got my first cup of coffee...........oh! excuse me, I should give the reason why I was home on Sunday........and today, for that matter. I took these days off.........Walking Dead resumed last night....and it did not disappoint! don't know how many here follow it.......but it's one of a few shows I really like! >cuddle time for me an' Gibbs anyway.....crazy dog!< so anyway.........my coffee.......settle at my desk and switch on the computer. I got this crazy idea to string the beads for painting. I started to paint them individually, but I think that would be like water torture........and I saw that I had done the beads for the Cux in this manner as well. I also reverted to the rope that started it all.........hemp. I still have plenty of it. I rigged the Nordkap with it.........and the Cux too, if I recall. I still like how it looks so much like actual rope, when coiled up. I'm going to give them a coat of primer first, since they are different colors and clear coated. I separated the colors, for no particular reason. if you look close to the last few on each strand, you'll see the original beads I started with. I'm also going to use the hemp to line the mouths of the nets. one redundant property of hemp thread, is that it is a little stiff.......it will work in my favor, in keeping the nets open. the thread needs to be sewn on........there laid the problem. if I wasn't sticking myself with the needle, I was fumbling with the needle, juggling between the net, the hemp thread, and the needle itself. I need a third hand here....and so I made one. cementing a paper towel roll on a piece of pine board, I had what I needed........I even set up another table to work on. it was still a little clumsy though.......the hemp thread wanted to be a fly in my ointment. I cemented an eye bolt in one of the thumb tack holes, and made a do it yourself guide for the thread. ....and for you swing'in bachelors out there, who can't thread a needle, one of the many thumb tack holes, easily becomes a holder for the needle, to make the task much easier. I'm not a bachelor.........I play one in my dreams I'm not the best seamster either.........> note to self: put seamster in the dictionary....because, like.......I'm a guy first one done! the second one went quicker, without all that >#@%**#! smooth as silk {just some minor pricking} both of the net rigs are suspended off of the crane light..........I'm in the process of setting up some sort of spray booth in Kevin's old room. .......what else can I do that's good 'n hostile................oh yea......I can paint those brackets for the extra lights, I was spouting about earlier. in my dreams last night, I think I solved how I'm going to hang the nets. I put brass rings on the cone end of 'em, and was thinking about the rope that will be seized on there. I recalled those half round clips I used on the Andrea Gail....the ones I used as shackles. I have to look and see if I have four of them. if not........then I guess I'll have to snow blow the eight or so inches {I'm guessing at the moment}, that fell between yesterday and last night. February is here.......28 days of hell for this neck 'o the woods. hope to have another update soon


- 747 replies
-
- 13
-
-
wonderful build Jim! I thumbed through the entire log, and the care that you've put into her is just super! I'm not an expert on these types of ships either, and to see what you've created, makes me thing there's hope for me yet I watch with interest us characters gotta stick together....even thoughs yas tries ta beat tha crap out'o me! AKK-k-k-k-k-kk---k-k!

-
video or not.........it's an awesome looking structure! very well done!
- 434 replies
-
- 4
-
-
- pelikaan
- beamtrawler
- (and 2 more)
-
then comes the burning question........if this is to be the first planking, why was that so important? you could have made up for it with the next pair of planks. did you correct the side that seems to be sticking out? it's good that your putting some thought into it........but it will be even more critical when the second planking starts. as Pat mentioned......it might not be a good idea to have the plank run seams in line with one another, due to cracking issues down the road.
- 714 replies
-
- 4
-
-
- lady nelson
- victory models
- (and 1 more)
-
thanks Rob..........no, the chain is as I bought it. it kinda stinks because there is a shininess to it. this will all be painted flat gray.......I'm hoping that I bought the same gray, that I painted the inner bulwarks. I made a boo boo with a slightly darker gray, and I need to fix it. thanks for the kind comment .........and thanks to all who hit the like button
-
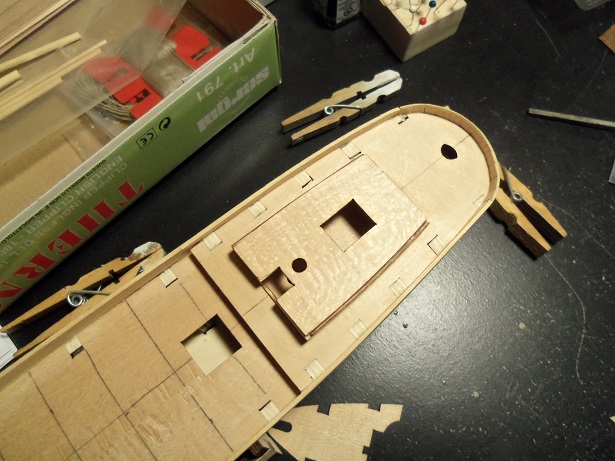
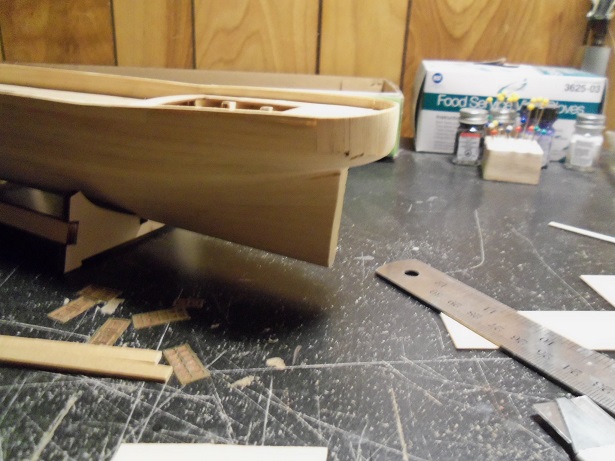
thank you gentlemen........I only sanded the char off the bulkheads. I didn't want to lose the camber. the structures are interesting to assemble, but I would like to get something done on the hull. I need to mark out the areas for the structures though, so I can do the deck planking. I want to do the waterways and around the structures with the mahogany, before I plank. I'm thinking that the deck is laid with yellow pine, with teak outlining the structures. also, the inner bulwarks is planked with a darker wood.......I may go with annegre {used in the majority of the Billing kits} I notice that I have a supply of this wood in the kit......0.5 x 2 mm. pin rails will also line the inner bulwarks. Thanks Rob........I will check them out thanks to all who hit the like button!
- 453 replies
-
- 9
-
-
- thermopylae
- sergal
- (and 1 more)
-
I'm just as bad.........taking pictures on such a cluttered table. the zoom on my 'el cheapo' is terrible....but I still try. you did well Carl.......you've made some decent progress. keep going........you doing a great job are you going to paint, or leave the etch as it is?
-
a little brass here and there will make a big difference...should accent them quite well you'll do all that when you rig them to the deck. do a search on this vessel {and others like it}.......it will give you so many ideas it's those little extras, that will make it your own
- 258 replies
-
- 2
-
-
- harriet lane
- model shipways
- (and 1 more)
-
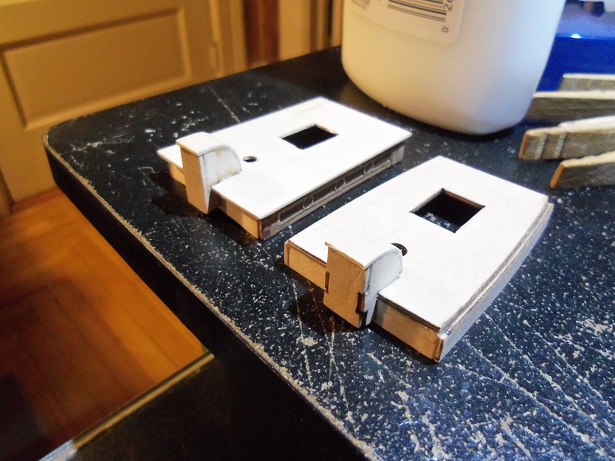
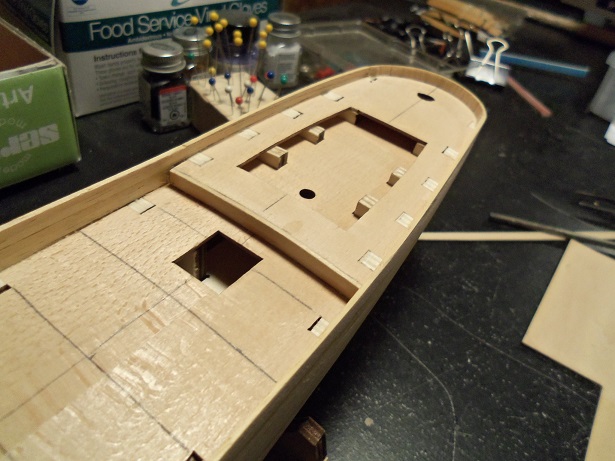
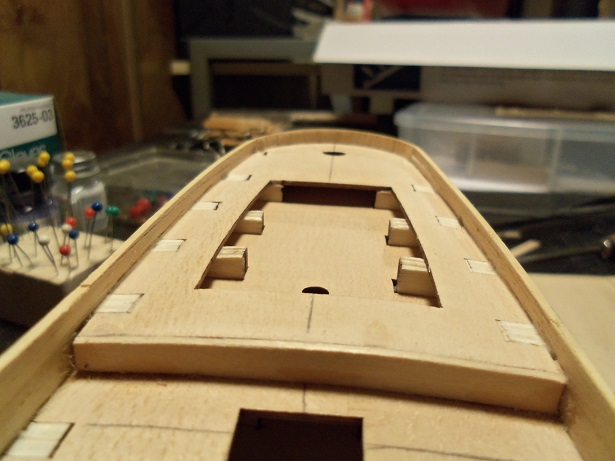
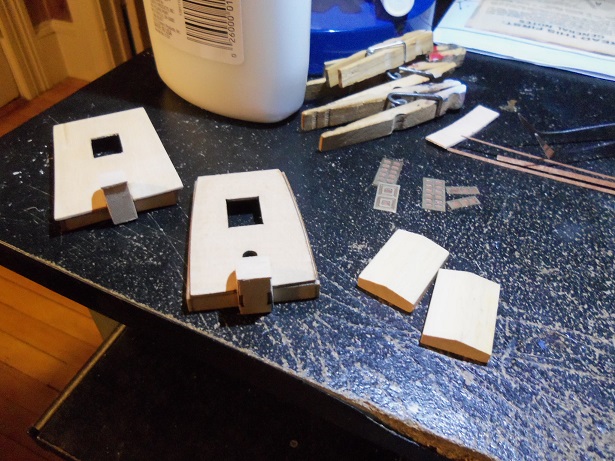
I spent some time on her today.......working on the galleys. as mentioned, the one that will get the metal plating is taking most of the time, having to border them off in mahogany. I have the two sides and the aft done so far. I've started to assemble the companionway and the front of the structure. as mentioned, I wanted this one to be more rectangular, than the other one. it does eat up a bit more deck......but I like it. I wasn't warm and fuzzy about how the roof is shaped on the companionways, so I gave them a more rounded appearance. I have put away some of the 1/32 flat stock in my scrap bin. this stuff is very flexible and will make these rounded bends without breaking. helps too if it is damp, so I soaked it for a couple of mins.......it's all it takes. the one with the metal will get finished off.........the other one will be done with the wood panels. another thing I finally did, was cap off that aft bulkhead for the poop deck. that bugged me to no end! I also did more sanding to the poop bulwarks.......may need a tiny bit more tweaking, but the bulwarks are level with the deck. I cut out the rest of the metal plates......panels?, I needed to finish off the galley. I have these two skylight blanks that I will try and cut down to fit the roof parts........have to see how they work out. I only have to work tomorrow..........I took the rest of the week end off. thank the good lord! small squall tonight....but another larger storm for Sunday into Monday. I'd rather be home! brace up Tom......February is shaping up to be the snow month!
- 453 replies
-
- 19
-
-
- thermopylae
- sergal
- (and 1 more)
-
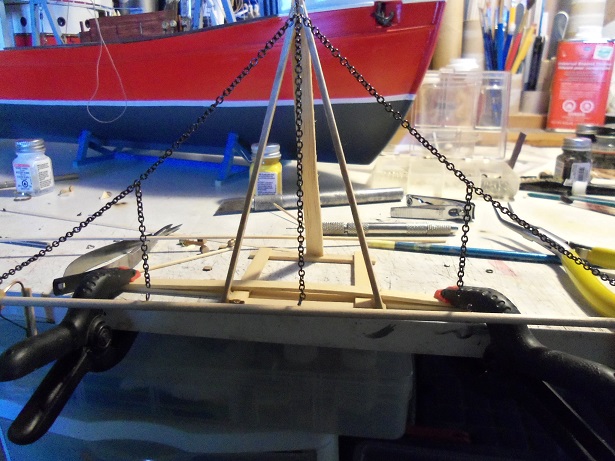
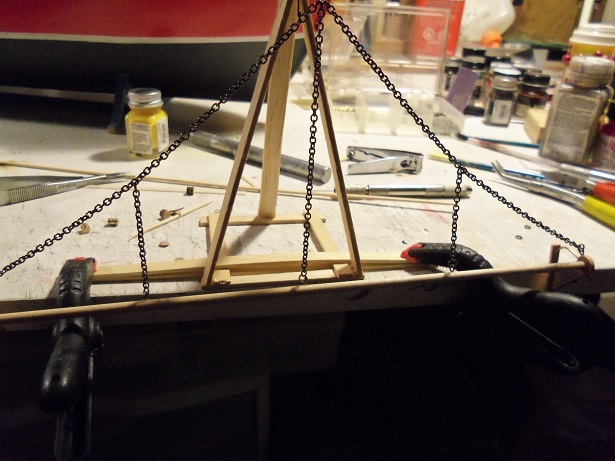
the other net rig is done........once the center lift was attached, the two other support chains were fastened in place. ....and then they were attached. for some reason, I had a little trouble lining them up. when I did the first one, I drilled the holes at that point and fitted the eye bolts. but I had already measured this one out, so I did 'em beforehand. I couldn't get the beads out of my mind........I knew we were going to Wal-Mart. they had a package of assorted beads, so now I have what I need. painting to follow.........and hopefully the nets thanks for look'in in.
- 747 replies
-
- 13
-
-
very well done on the mast tops and trees Tom
- 1,354 replies
-
- 1
-
-
- constitution
- model shipways
- (and 1 more)
-
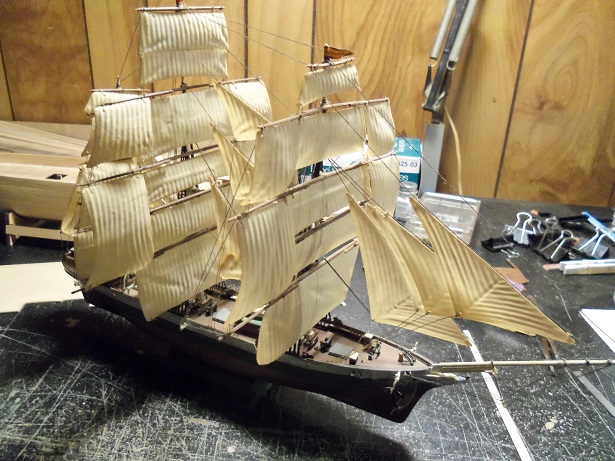
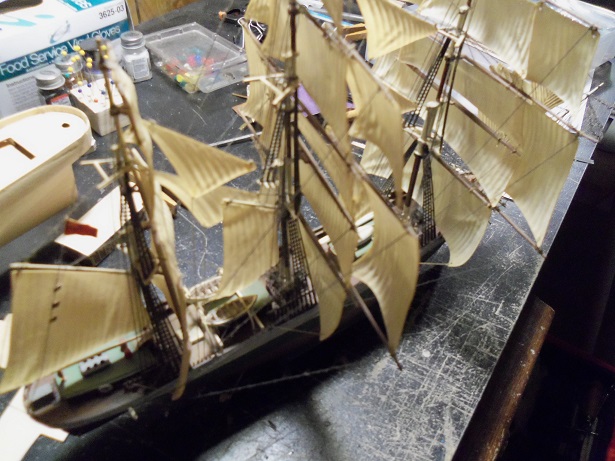
I plan on the green, since it's the color I'm used to seeing. as it's shaping up........I may not be able to correct all the little nuances with it, but I'm gonna do my best. I'm working on the galleys at the moment........I should have an update soon. that's what I'm having to do Hof........just as Revell used the Cutty to clone their kit of the Thermopylae, so have these guys. I'm sure most model manufacturers are no different. Billing does it too I have the site that John linked me too.........that's about as good a replica as I'm going to see. I can't say too much bad about the kit......it would make a decent model.......it would just have a few inaccuracies hello there Gary! no parts list here........I only got two large sheets. first sheet is the hull......flip over to many diagrams and the rigging. the second sheet is a full view of the mast and sails......you have to use this to cut out all the sails. the back side to that one is a few more diagrams and instructions in multi languages. your correct......this kit would be better suited to build a Cutty. the scale is another Achilles heel......trying to find additional parts is hard.....the biggest curiosity, is the absence of life boats. I have a few ideas of my own, and coupled with what I have, I'm sure it will turn out look'in alright. thanks for the info.....I hope you follow along thanks Carl..........when you see the next update, you'll know I'm on the up & up
- 453 replies
-
- 9
-
-
- thermopylae
- sergal
- (and 1 more)
-
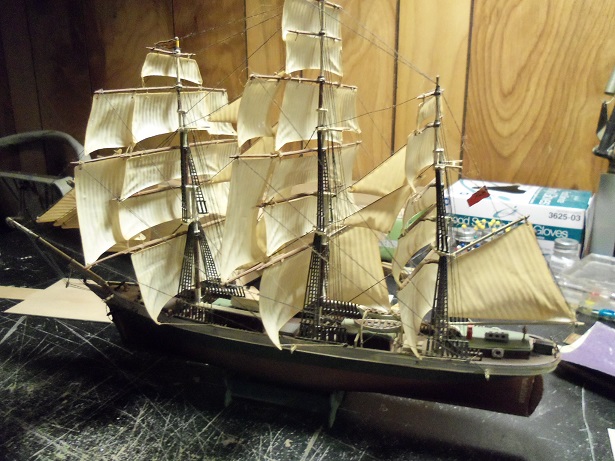
is that the 1:150 kit? I built one a long time ago........still have it in the living room. she's a bit dusty.......she has survived a few moves. it's a Revell kit.......I forget the scale. haven't seen her in white either......interesting I like the bark look......but I think square rig will be on the menu for this one. if I should do a Cutty, they'll match thanks for posting the pictures
- 453 replies
-
- 9
-
-
- thermopylae
- sergal
- (and 1 more)