


popeye the sailor
-
Posts
16,007 -
Joined
-
Last visited
Content Type
Profiles
Forums
Gallery
Events
Everything posted by popeye the sailor
-
 you mentioned this before. yea....the rigging diagram is on the wall. I tried to take a picture of it to post here, but I think the lighting is bad. the fore mast braces {pulley assemblies} are rigged to the bow spirit........the main mast braces {pulley assemblies} are rigged to the main stays, just aft of the fore mast. the mizzen braces are rigged pretty much in the same fashion as the main mast braces.....rigged just aft of the main mast, on the mizzen stays. I still have the rigging diagram for the Revell Cutty Sark.........they are opposite fore mast braces {pulley assembly} are rigged to the fore bumkins and terminated to pinrail. the main mast braces {pulley assembly} are rigged to the aft bumkins and terminated at pin rail. mizzen braces {rigged single block} are rigged to blocks tied to the back of the main mast and terminated at a fife rail at the base of the main mast. I wonder if I can feel safe to use these rigging diagrams. that's what I always liked about Revell........they break up the different groups of lines and are very easy to understand. I can post pictures of the rigging diagrams, if you like me to. thanks again John...let me know what you think
- 453 replies
-
- 7
-

-
- thermopylae
- sergal
- (and 1 more)
-
thanks for the head's up John. the fore castle deck is not cemented in place just yet. I still need to plank the main deck and close off the poop deck....to think of it, I still haven't seen where and when to do that even. I have the rigging sheet nearby......that's where I found the parts that have no name, are used for. the two parts under the top......what are they called? top brace........brackets? there may even be holes of sheaves for the tack lines. I still need to do the hawse holes for the anchors too. thanks for the good word! there's no rush spyglass........no rush at all. I was merely curious. when I hear that a kit hits the circular file {trash can......fireplace......bin of no return}, I imagine the whole thing going bye bye. folks who have 'hoard ah-la pack rat'.....well, it sounds like you got it too I guess I can't rightly say that it's from by gone kits........I haven't filed any kits, and I have quite an inventory {I buy a lot of stuff}. if you do though, let me know what you find this could get interesting folks thanks for the likes
- 453 replies
-
- 7
-
-
- thermopylae
- sergal
- (and 1 more)
-
so good to see her again the hull planking will take care of some of the small gaps, won't it? the transom and windows.....that's another story. I wish you well in catching up to the hull and continuing
-
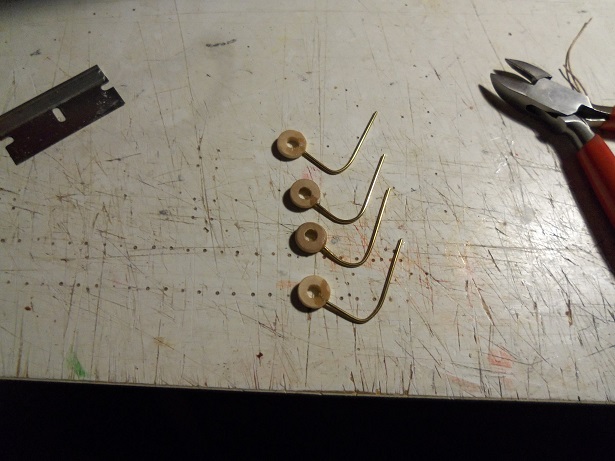
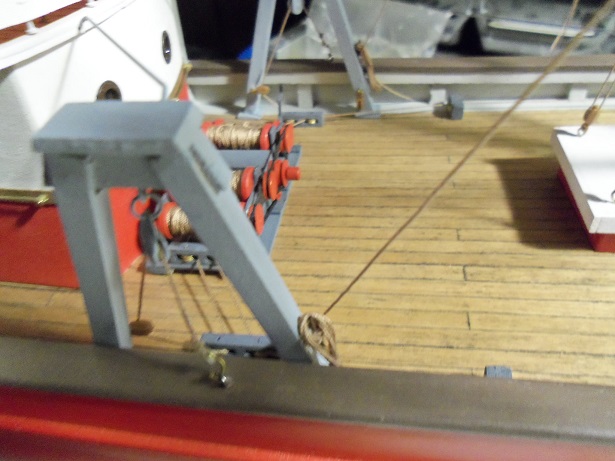
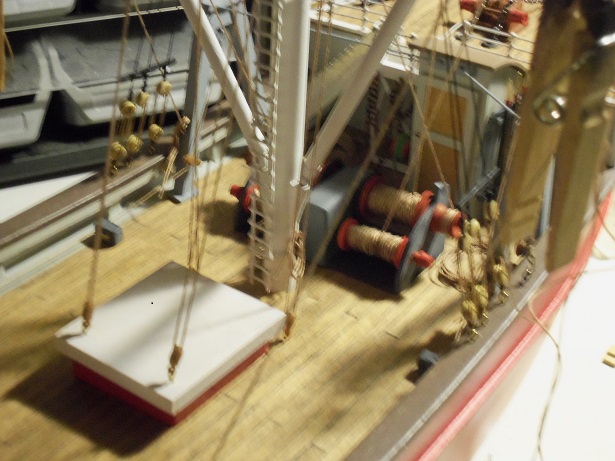
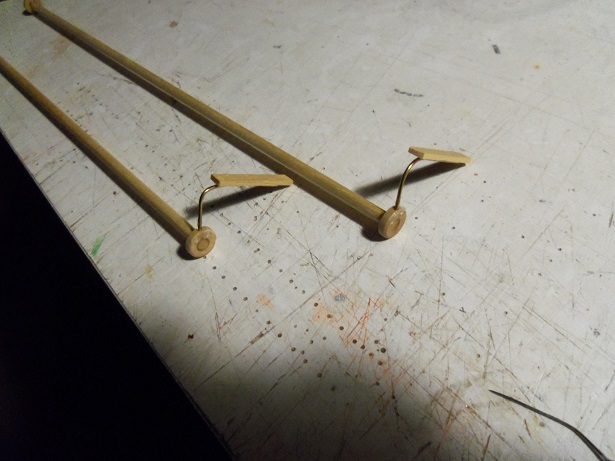
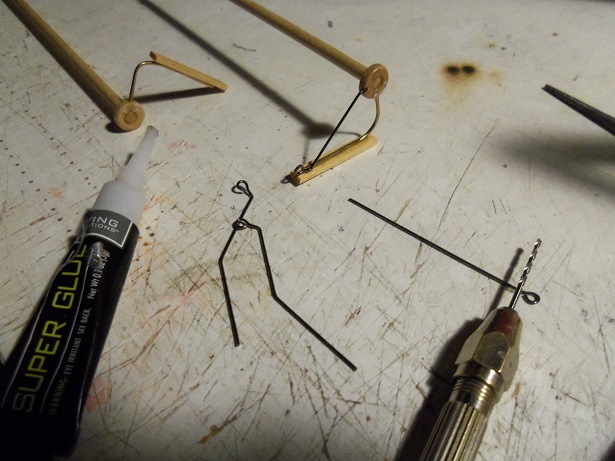
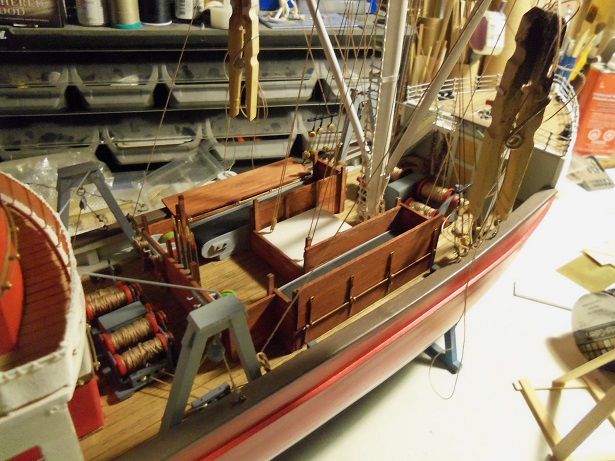
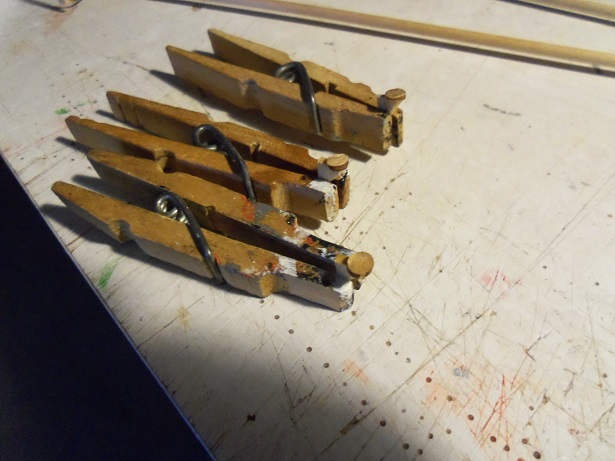
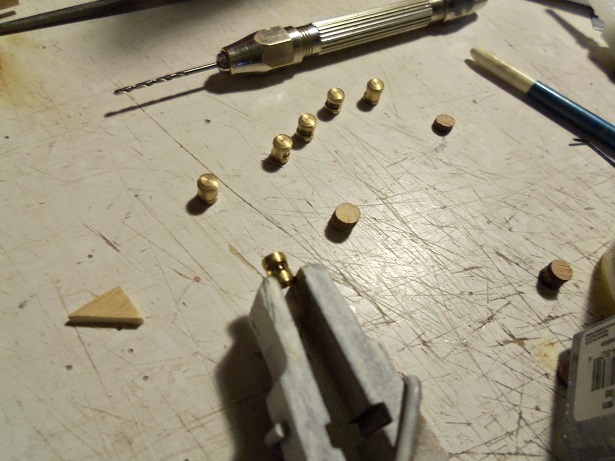
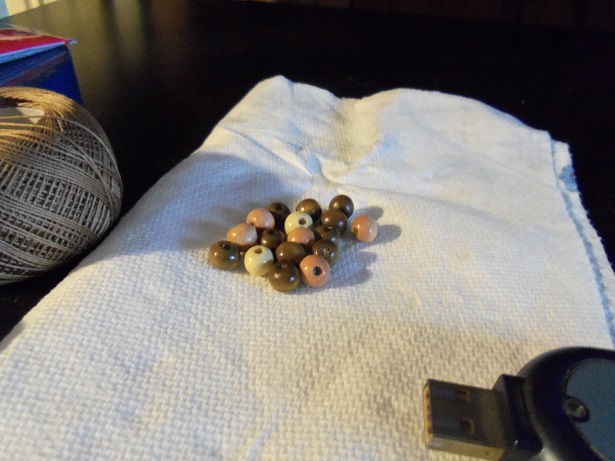
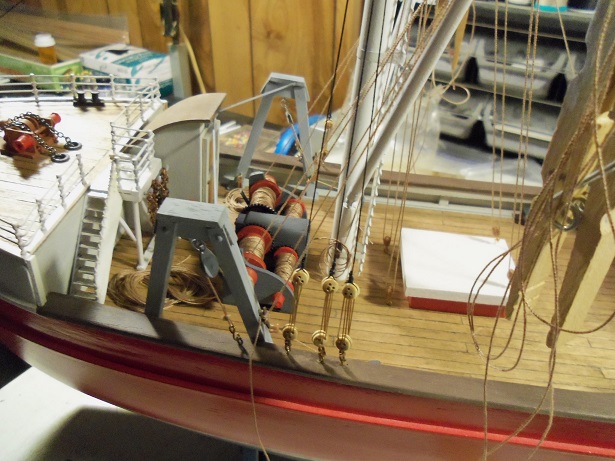
thanks for the likes..........and thanks for the kind comment Pat. gee.....if that were the case, all the muffled shouting from within my closet, would have the door vibrating! Horton heard who?!?!?! well then........I think I should answer her calls for affection, eh? yesterday was her lucky day! the outcome of this session had one small problem......but I doesn't pose too much of a bother, and won't impact the model. it's time to make the net rigs....I need two of them. that means that I need to make four end brackets. the cross bars were cut down by 10 mm, in relation to the nets. I have the four end caps, that will be the basis for the brackets. holes were drilled and brass rod was fitted and bent. while these were drying, the rope coils were added to the haul line terminations along with their installation, the spreader bars were added to the shrouds. this can be considered my first attempt in making the brackets......it might have been better to do these in plastic......... metal I think would have issues with heat sink, making them tougher to make. if these don't work out.....there are other options. anyway.......rub boards were added to the assembly. they offer protection from the rig, should it make contact with the hull sides {I think that's the purpose for them}. they will be trimmed to length, when they are complete. I mentioned the tool that I used to make the rigs for the Cux 87 build. how many folks remember it? to have the rig lying on the table during the assembly, is not fun. when the chain is added to the rig, it can be hung up, making it a lot easier to rig the rest of the chain lengths. you'll get a better view later on. at this point, I thought it better to assemble the brackets on the bars........should the holes I need to drill get too deep, the hole will be filled with the bar {dowel}, and drill into it as well. splitting might not be an issue either {fingers crossed}. each end will need about three eye bolts. the first of them will double as a brace. these will connect the outer lip of the net.......another pair will connect the inner lip of the net, and the third pair will be used to connect the chain. it's also reached the point where the fish box and the conveyors can be cemented in place. due to the position of the companionway, the starboard gallows were set back a bit further.......this also affected the position of the shrouds. the port side was not affected by this at all. this had consequences for the starboard dump ramp....too far forward, and the ramp will hit the shrouds. I forgot about that. I can still have the port side in the down position. it's not too big a deal. I just don't want to risk damaging anything........and I want to complete the build......and I still feel good about what I've done with the model. I had another thought.....I had it earlier as well. I need some light brackets......so some were roughed out. I found another light that I didn't fill the lense with window maker....I did that too. the latest aspects added to the build, are these beads.....later to be painted and used as flotation buoys on the nets. this build is like the energizer bunny.........it just keeps going .......and going...........and going.................


- 747 replies
-
- 16
-
-
he....he....hee! I just posted in that thread! .......I dunno......I couldn't help it!
-
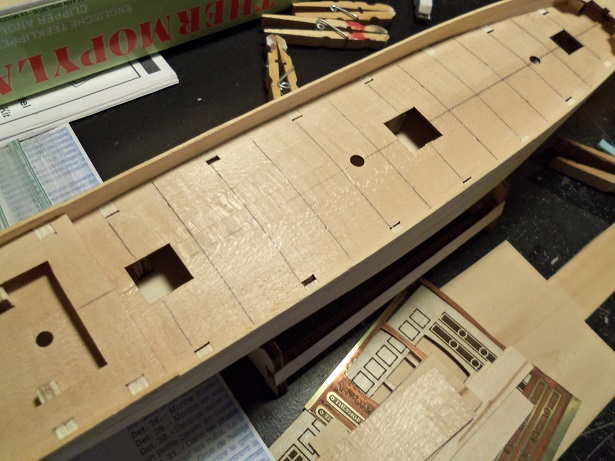
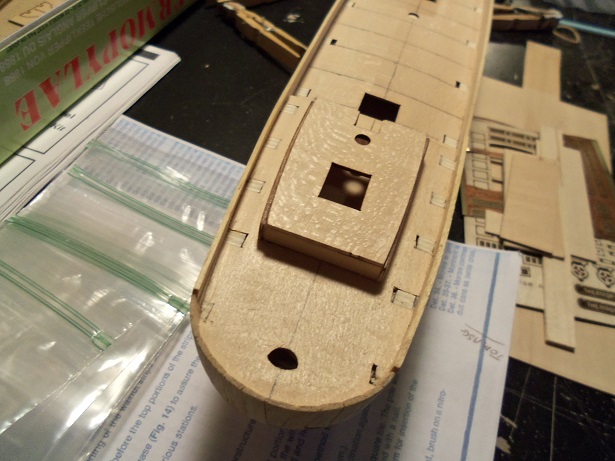
thanks for the kind comments and the likes. I got good news .......the life boats are in transit to me as we speak! I paid a whopping $6.26 for four of them {shipping included}. fingers crossed that they are the correct scale.....or very close to it. next will be the railings and stuff thanks Bob.......believe me....I wished the same. I was looking on E-bay and old model kits .com for a larger scale Cutty kit that I could bash, but in the back of my mind, I knew the admiral wouldn't go for it I also got an eye opener........I saw what looked like a Billing's Cux 87.....and the Mary Ann.....put out there by a manufacturer from China! I'd scratch build one, before I'd buy those pieces of crap! but......yea, I would have liked a larger kit, but the admiral got it for me, so I will build it............or face the 'woman's scorn' thanks spyglass.......I'm not used to this scale either..........and no......these fingers 'o mine are gett'in chubby as I get older. that's why I practice the bass.......I could never master the guitar but you are correct.......these metal parts are quite tiny. most gents use a coin to show scale........I might do well with a grain of rice! do you still have the kit? just covering my bases, in case I lose a piece or two another gentleman on the site built one....after seeing all I've seen so far with this kit, I'm amazed that his came out as well as it did. he did a very nice job. I hope you follow along...the more the merrier thanks John and Dr. Per no problems with pictures on my end either.......I'm even getting extras popping in every once in a while I'll try and stay on the yellow brick road John, but as long as your seeing some of them and able to stop me from making a mistake, then I'm good with that thinking back.........you know John........we've known each other since day 1 of my joining. .........and man!.........was I a greenie, or what?!?!? I'd about bump into a wall.......and you'd be there to steer me away and on the right track. I'd be lonely if you weren't look'in in I've admired your work Dr. Per........I'm quite confident, that should you see something amiss........please, feel free to point it out or suggest. I don't mind if anyone says that they don't think they can scratch build.........buy this kit. you will get all the 'scratch build 101' you will ever need. as mentioned, the box, besides the square and round stock, is almost empty of parts. I did find out what those six parts were for.....they are for the masts tops. every- thing else has to be scratch made. I mentioned that I did find a larger scale Cutty kit in my search........old model kits .com has wooden kits too......as well as model train and balsa flying models for sale. some of them are quite old....i've never heard of some of the companies. it would be very easy to modify a Cutty into the Thermopylae..........the hull and {most of the rigging} is done to the traditional clipper ship.......the deck layout is what sets the different ships apart. I will save this for something in the future not wanting to get too long winded with this update............yes, there's more the six posts that were left have been cut out. if the deck was planked, it would look loads better. I even did the ones on the fore deck. after I though to do it........it sounded good to me. cutting them from the poop deck, creates more room for the galley. it does make me wonder why they made the cutout for the galley........it doesn't fit into it, nor are there any provisions for it. the skylight is not hollow, so there is no way to look in {at the moment anyway}. I need to look into the ship's wheel box too.....as mentioned, everything else is scratch built. the box is no exception. I haven't done much more than cut out the posts and make more observations. I'll probably make some of the deck furnishings and dry fits, to see when I'll be able to plank the deck. the structures will be lined with the light mahogany, to simulate the teak, and planked with a lighter shade of deck planking.......should be a nice contrast. more on her soon
- 453 replies
-
- 13
-
-
- thermopylae
- sergal
- (and 1 more)
-
then the extra Wow was for resourcefulness I never throw stuff away either......you never know when it might be useful. look'in good Bob
-
I bought the basic kit at Hobby Lobby........it comes with a can of bonder. I sent away for the standard edition. you can also look in on the Testor's site to find it as well.
- 165 replies
-
- 5
-
-
- cape cod catboat
- Finished
- (and 1 more)
-
your in my thoughts jesse.....hope you get better soon
- 1,306 replies
-
- 10
-
-
- syren
- model shipways
- (and 1 more)
-
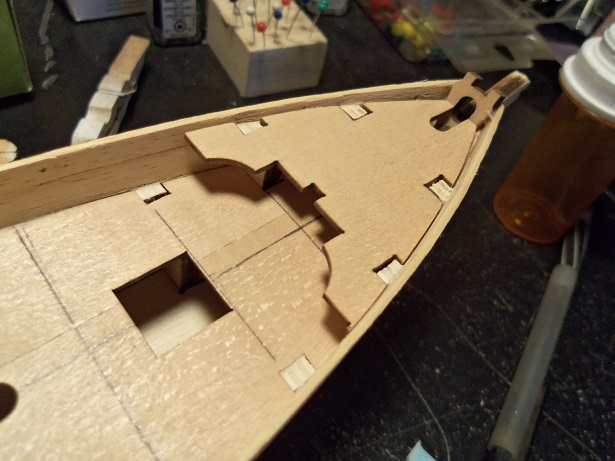
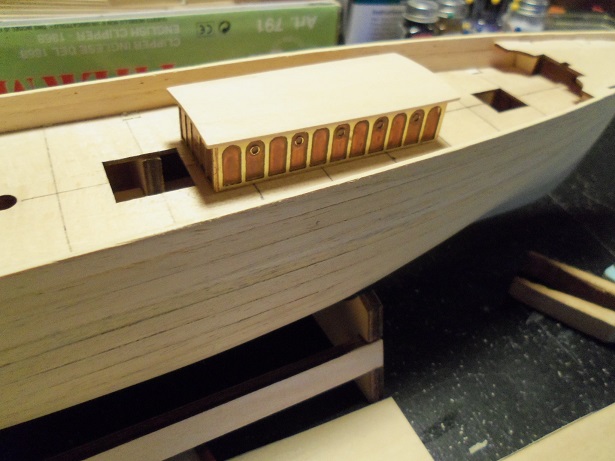
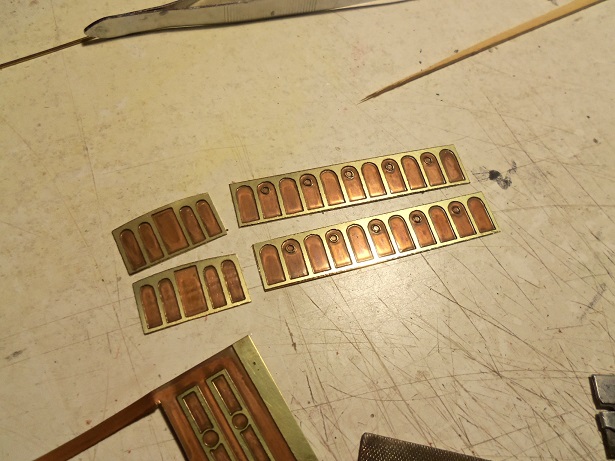
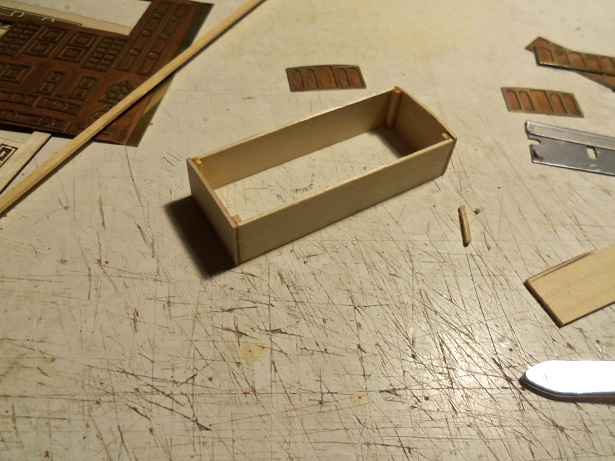
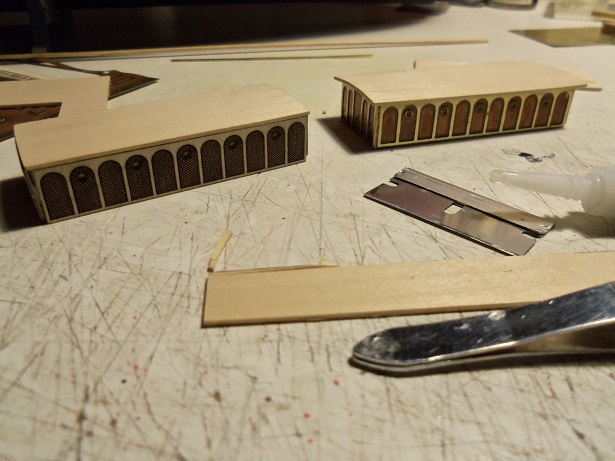
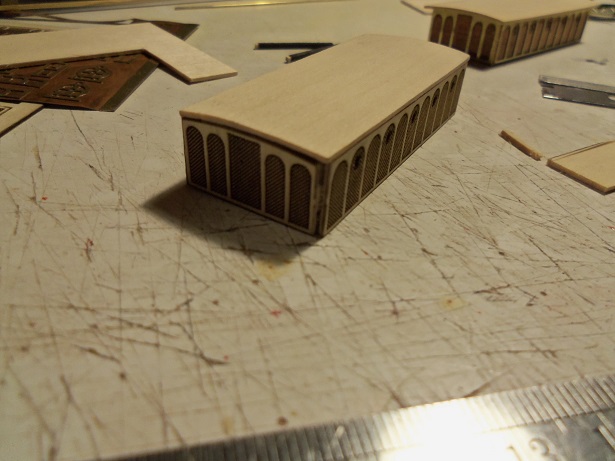
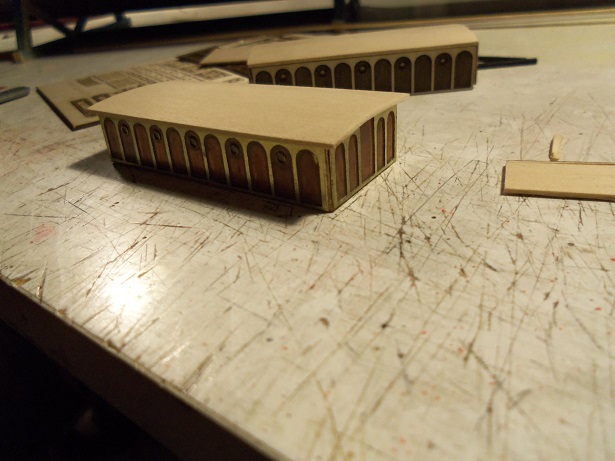
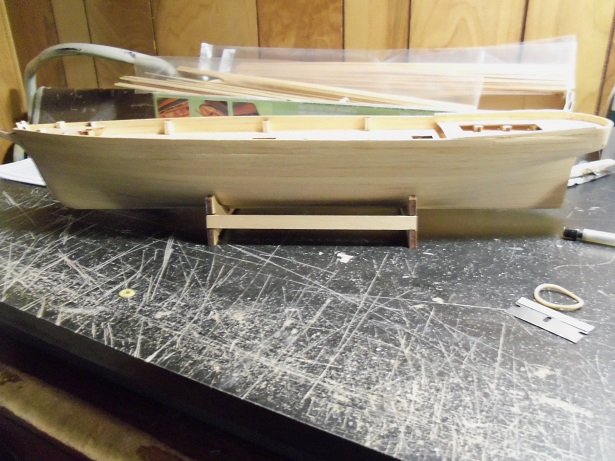
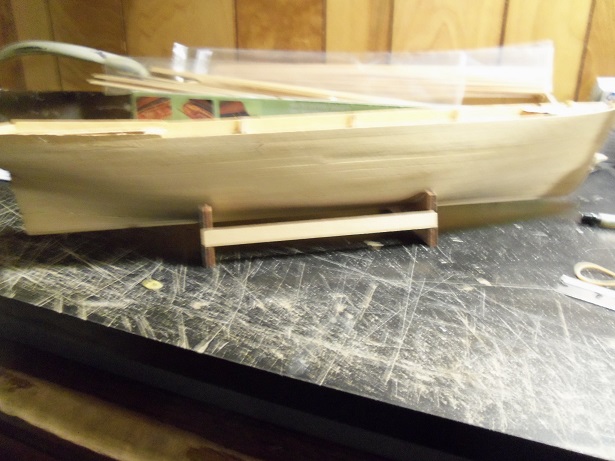
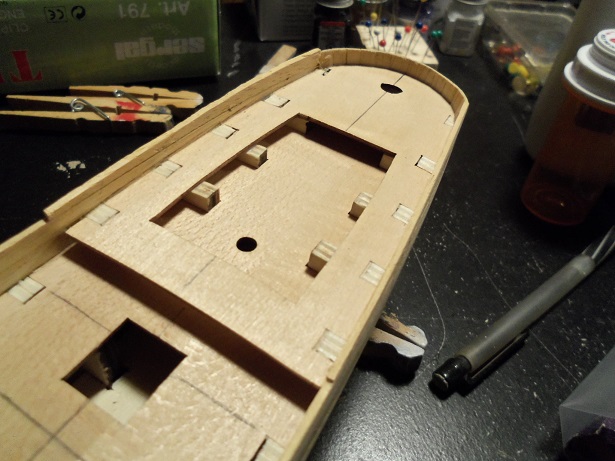
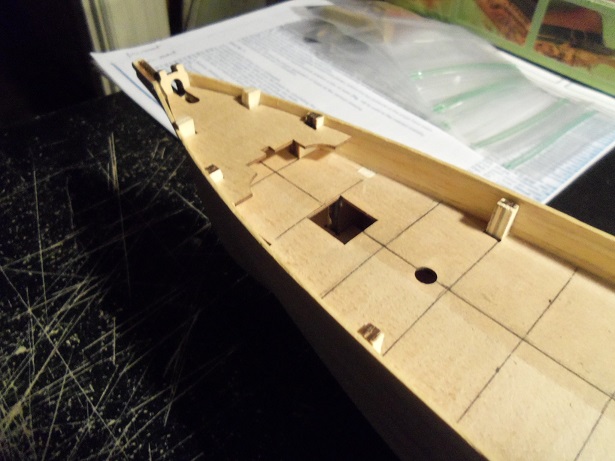
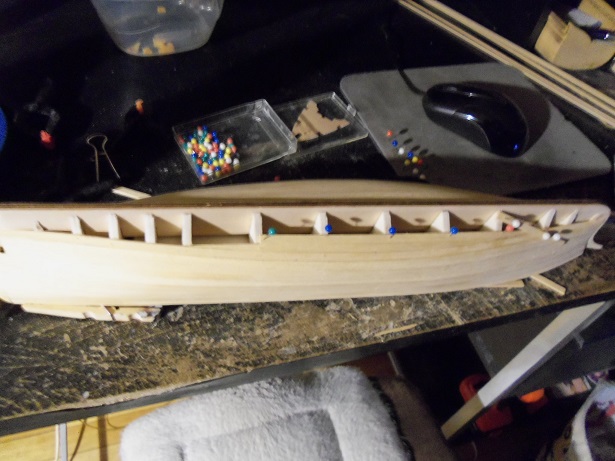
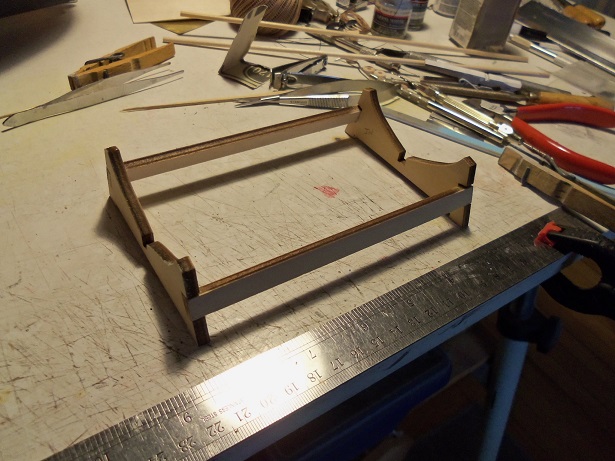
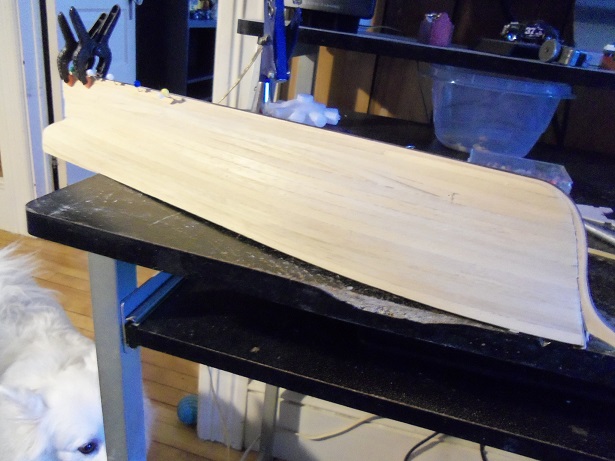
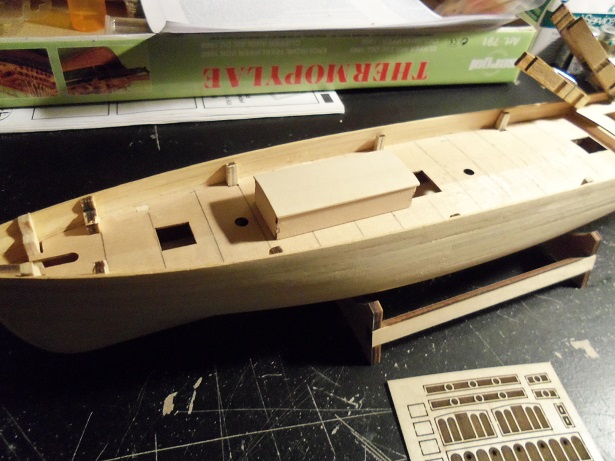
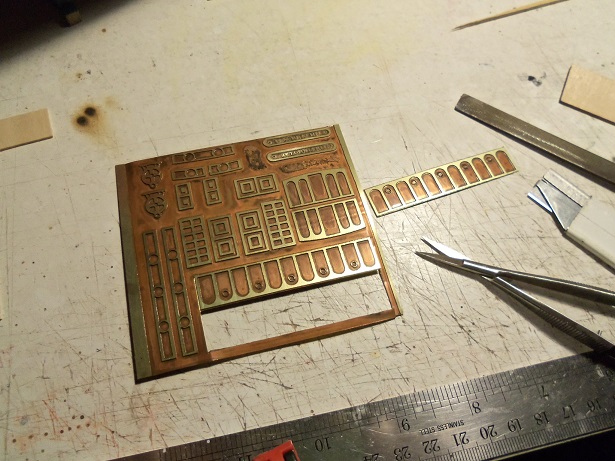
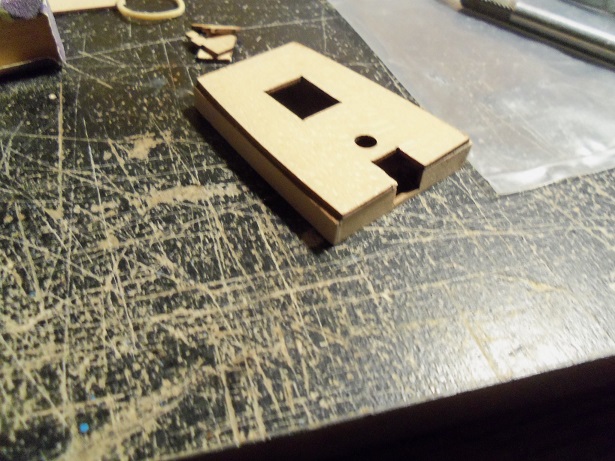
how in the heck did that happen..........the second photo of the stand!!?!?!?!?! the world may never know I have a feeling that this kit is going to be one giant experiment.......you know.......like a trip through Alice in wonderland....so many questions. I kinda hoped it would be like the Wizard of OZ, where all I had to do, was follow the yellow brick road hey......I'm laughing........it won't be the first time, I've walked away fro a set of instructions. it took a while to remove all the structure parts from the metal etch.......then to insure that they lay flat. then I made a second fore structure from 1/32 flat stock. 1/16 square strip was put in the four corners to strengthen it. the roof was made larger than the first one.......I will try and salvage the other one later, depending on........... the outer plates were added to both structures........each with their own less than desirable results. the wood structure is obvious........the roof is too small. the plates ate up the outcropping I gave it. now if I had done this with some mahogany {similar to Nenad's superb work}, it might not have been so drastic or thick. I even gave it some though.....perhaps with the use of a paper punch I wasn't thrilled with the corners........but in this case, it's an easy fix with some 1/32 square stock. the windows can be drilled out, and window maker can be used to fill in the glass......or some sort of cello. it's too bad that this is a small model.......I could have used some of those eyelets that I have. not all of the parts are added to it at this time. the one clad in the metal plates is a little jazzier...........again the windows can be drilled out and given the same treatment. I made the roof larger than the first one, so I didn't loose the outcroppings. I even tried to make up for the botched corners, but I didn't do well enough....it still occurred. they were touched up with gold paint to hide the wood.....I'm thinking that I might be able to make up some brass angles....or perhaps some round stock, to fill them in. I tried again to get some pictures of the finished hull. there are few spots that need some love, but I'm not done sanding and prepping the hull for paint yet. the rails need to be added as well. as for the aft deck bulwarks.........the other side filler plank was added. it will be sanded down to an even height all around the stern. I saw the way they want me to make the cap rail around the stern bulwarks........no thanks, I think I can come up with a better way...one that doesn't involve piecing together ten or so pieces of flat stock. dummy me again...........forgetting to draw a center line down the deck! bad enough that I forgot to do the plank stagger lines. harder to do with the deck platform in place. the fore deck in place {dry fit}. the bulwarks were hard to protect.........I had to repair them here and there, throughout the planking process. even though I had left some of them, they were still prone to cracking. the bulkheads were beveled inward slightly......even if I had left them all, it likely wouldn't have stopped it from happening. I can remove the rest of them now, and sand them flush to the deck. I may even remove the ones on the fore deck. looking in the box, there are only a few wood parts left. just about everything on the deck needs to be scratch built from strip stock contained in the kit. I do have six parts though, that I have no idea what they are for. I have not seen them in the instructions so far........and I have flipped over the sheet on the wall. I will have to review the first side, to make sure I've done everything on that side of the sheet..........what there is of it, is pretty much textbook to me
- 453 replies
-
- 15
-
-
- thermopylae
- sergal
- (and 1 more)
-
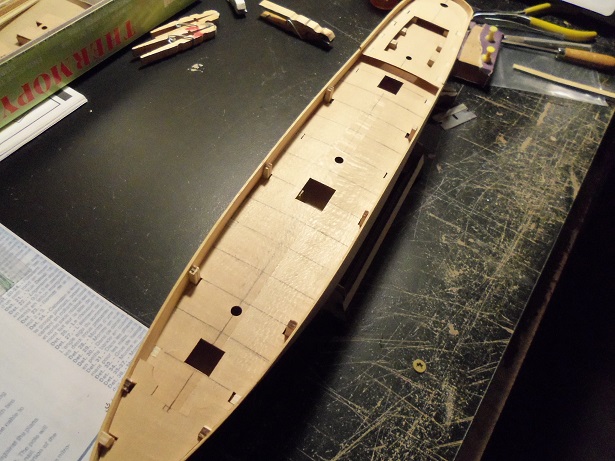
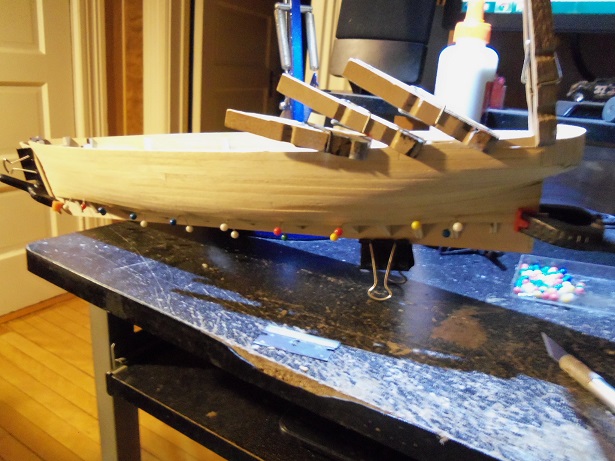
the timeline that I left on the Syborn log is true...........I spent my days planking the hull. some of the pictures didn't come out as well as I would have liked........but it's OK, I guess. all the less of my shoddy planking, that you'll need to endure. the port side looks scary, but it sanded out reasonably well. I opted to concentrate most of the tapering within the belly of the beast. this benefited the bow more than the stern, which still needed a stealer or two. this side finished off reasonably well.......and then it was on to the starboard side. while I was planking the starboard side, I added the filler plank I wanted to do to fill in the aft bulwarks. once set up.....there were periodical checks to insure that there were no gaps {like the one shown here}........I kept pressing the piece back down, since there wasn't much to clamp to. I will need to add a little filler here later on to smooth it out, before painting. at this time though, I'll fill the gaps with cement, in the hopes that it will make the bond stronger. I did the same here, with regards to the tapering, only changing it up a little, to use up the short pieces of planking that were beginning to multiply. to break up the manotany, I made the stand. I will need it soon the end came.........the last plank. this side didn't work out as well as the other side.......the garboard plank was done in three sections. the line was still a bit uneven at this point. sanding will hide it best.......good that it's down under, and not in a visible area. I did some sanding as well.........the thicker planking worked well for this........I was able to sand out most of the non-conformaties. the next couple of pictures didn't come out as well, so I deleted them. I'll show the hull results later.......there are some repairs to do, but the sanding isn't done either. I did it at my desk...........sand a bit........tap the keel on my garbage can to release the dust........and then blow and wipe. I spent time looking for life boats........I've pulled the trigger on four that Amati offers....I hope they are right. I signed on with Eduwards........they have the railings that I will need. yes......I am going to do a bit of bashing..........and from the looks of what I've done since the hull, there will be a lot of it. the fore structure was assembled.........not too keen on the process. I found the parts out of sync with each other.......sides too big and roof too small. I wasn't going to have any of that.....so, I made a roof for the structure, with outcroppings all around. the photo etch stuck in my mind.........this isn't like ordinary photo etch. the plate is thick at the parts, but thin all around them. they are not cleanly cut either.......I used a razor blade to score around them, so I could remove them from the plate. the edges needed to be filed, to remove the jagged feel. the galley structure was even worse........the parts didn't even follow the roof outline, which {it too} was too small for the structure. I wondered about the other gentleman who built this model........I wondered if he made allowances for these problems, or if he settled for how it went together, thinking that the instructions must be right. it's enough to make a person want to go rogue


- 453 replies
-
- 14
-
-
- thermopylae
- sergal
- (and 1 more)
-
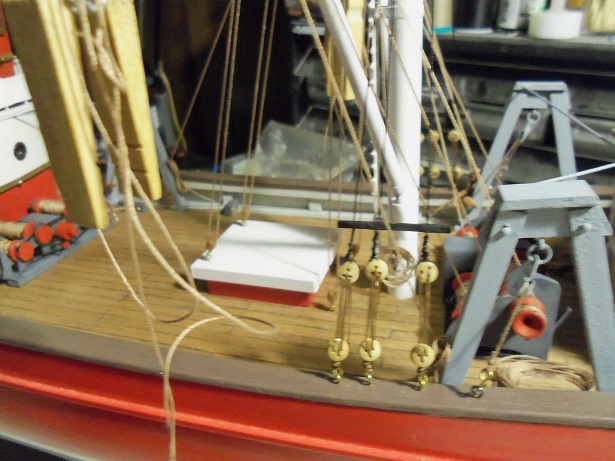
first day of my four day week end.............I got up........snow. I had my coffee, and I planked. the Syborn sat on the main table untouched this day. second day of my four day week end........I got up.....unsettled and snow. I had my coffee, and I planked. it was good to see the light at the end of the tunnel. the syborn sat on the main table, but there was a brief shuffle of the clutter that lay on the table. a pair of parts were painted, and lines got ties off. the dead eyes are now all tied off, and the forward haul lines are tied off as well.......I just need to cut the excess thread. the spreader bars are painted.....they need to be added to the shrouds. there are only two lines that need to be added {one added, one terminated}, to finish off the mid ship. I laid out the stuff I need to make the rope coils for the haul lines on my desk, but there was a lot of sanding dust about, so I cleaned my desk. it turned out to be enough of a distraction, to set me off on another tangent {the previous one I was on before}. back to planking. this third day of my four day week end.......I got up.....supposed to get some freezing rain today, but my big toe says no I have my coffee......my camera and adapter lay before me, after I've shuffled through all the pictures I took during the days before.......appalled that bad lighting had ruined some of the key pictures. hopefully, I can fill in the gaps somehow. I found that I did take one picture of the syborn.......the lines tied off and such. I hope to do more today. I brought out a tool that I had made during my Cux build........it will be interesting to see how many folks remember it the day is young........even I don't have a clue, as to what I'll find myself doing this day
- 747 replies
-
- 14
-
-
sounds good Marc......glad I could contribute in some way or another. sure thing 'decal it' is a basic program for the computer to create decals. I bought it a while ago, but found that images couldn't be imported into the program. that's when I bought the standard edition of the decal it program. stencils have been a gold mine......I just scan the images into a folder, and I can import them whenever I need them. I've also been able to scan other decal sheets and use those images as well. the decal bonder is the most important thing to get, besides the paper. it's like a lacquer.......dries quickly, but smells terrible. after the decals are printed, wait for about 20 mins or so.......then spray then lightly with the bonder. takes about two coats to do the job. glad I could help
- 165 replies
-
- 4
-
-
- cape cod catboat
- Finished
- (and 1 more)
-
down........but not out you have two options.........replace the section of mast, or repair. it looks like the break area is quite large......to cement it back together, would be a strong enough bond. keep the star shinning my friend
-
you could use photo shop to create the name plates........set them up for size. but instead of paper, use white decal paper. you will also need to purchase a can of decal bonder to seal the decals. the stars though could be done in a cool idea. on one of my scavenges through Hobby Lobby, I found these stars, used for leather studding and / or decorating. I found them in copper, gold, and silver.........but I also bought a pack of red, white, and blue. it might give it a cool touch for the flag, it involves making a mirrored opposite to the left of the image. here's the kicker........set up a piece of sail cloth and run it through your printer. I've done it for embossing sails, and for flags too. if the cloth your using is rigid enough, it should go through with no problem.......guide and assist if needed. seal with decal bonder.........do not use a water based product. PM me if you have questions, or this appeals to you.......gotta take m' dog out
- 165 replies
-
- 6
-
-
- cape cod catboat
- Finished
- (and 1 more)
-
thanks for your confidence Dupree. I though about doing it, but my lack of knowledge kept me from following through. I may try it out on a future project, but not at the moment {no way to install it anymore}. anyway......I appreciate the thought.
-
nice work with the hole saw Nils
- 2,625 replies
-
- 6
-
-
- kaiser wilhelm der grosse
- passenger steamer
- (and 1 more)
-
super job on the armament Greg.......all that repetition would be enough to drive anyone ga-ga. they came out look'in great, so it was worth it
-
interesting thought about sails.......do you think it would be susceptible to cracking over time?
-
look'in sweet Andy