HOLIDAY DONATION DRIVE - SUPPORT MSW - DO YOUR PART TO KEEP THIS GREAT FORUM GOING! (Only 20 donations so far - C'mon guys!)
×


popeye the sailor
-
Posts
16,007 -
Joined
-
Last visited
Content Type
Profiles
Forums
Gallery
Events
Everything posted by popeye the sailor
-
 hello Sjors. the pilot house is not in place yet........the only planking I plan on doing will be inside the pilot house.......I'm not going to make the same mistake like I did with the lobster boat. it's about time I took this one out of mothballs.
 -
'atta girl Robbyn..........most folks who get bit.......never go back. I think it's something they put in the glue for the plywood there....I don't feel like such a walflower this time.......you've just begun. I've never done a boat like this before, so this will be a treat.
-
might be a different toll for ships on the interstate........check ahead of time, so you'll have the correct change! LOL!!!
- 1,668 replies
-
- 5
-

-
- syren
- model shipways
- (and 1 more)
-
thanks Adam......really appreciated your looking in
-
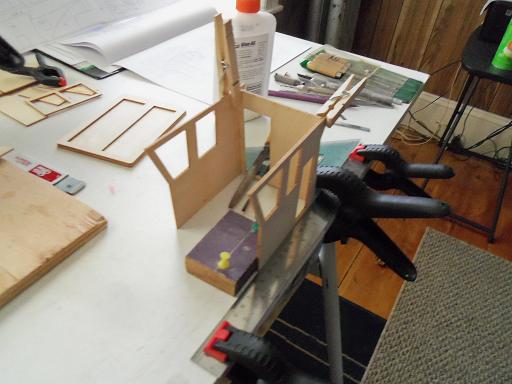
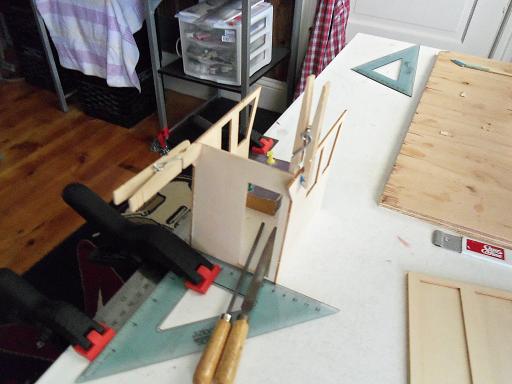
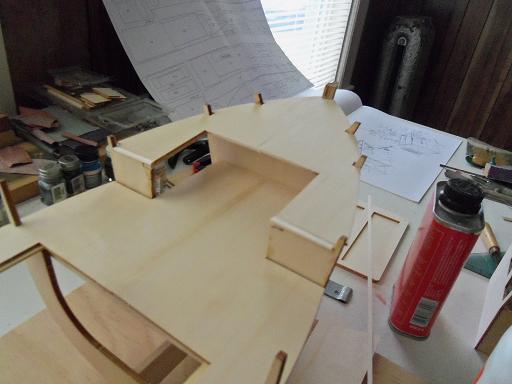
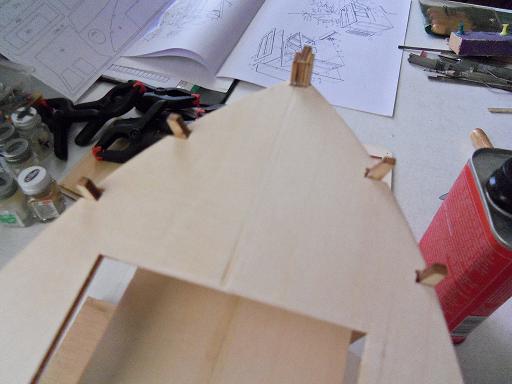
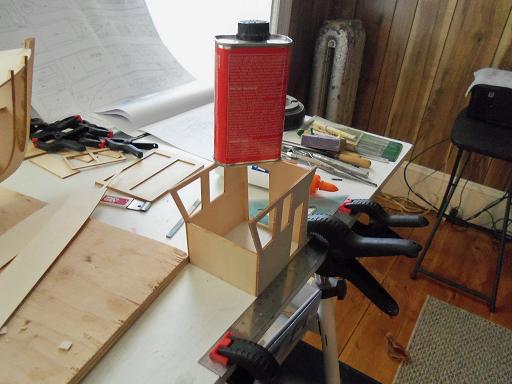
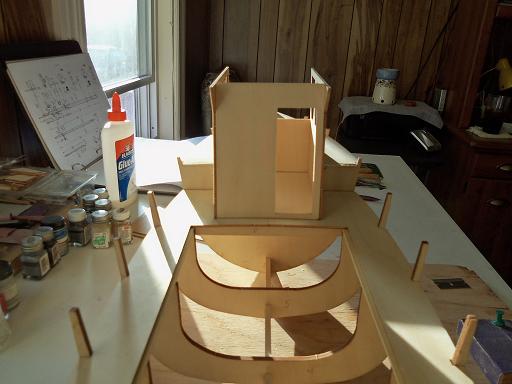
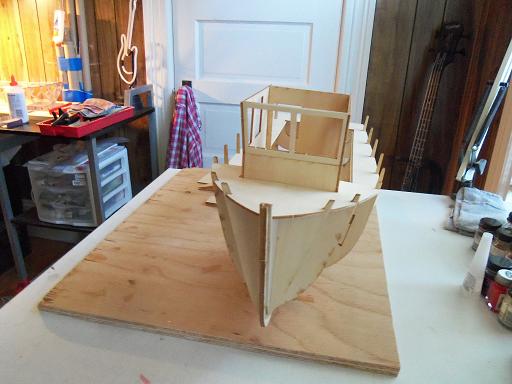
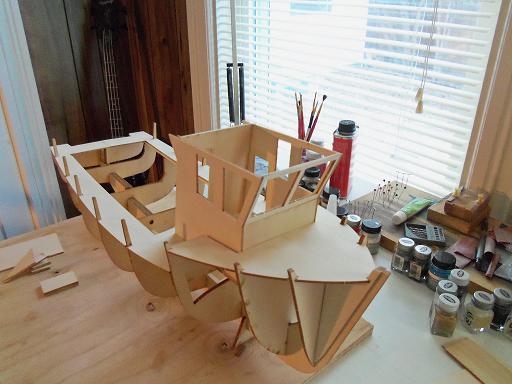
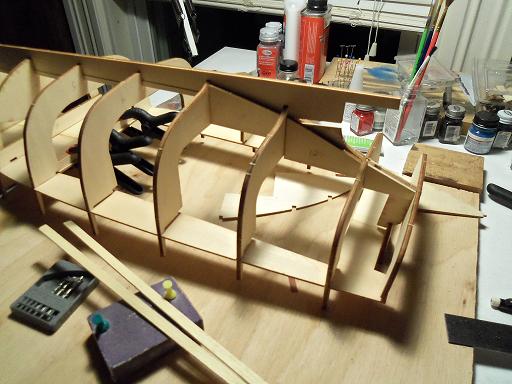
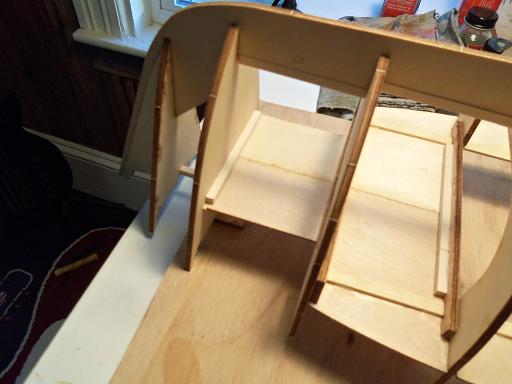
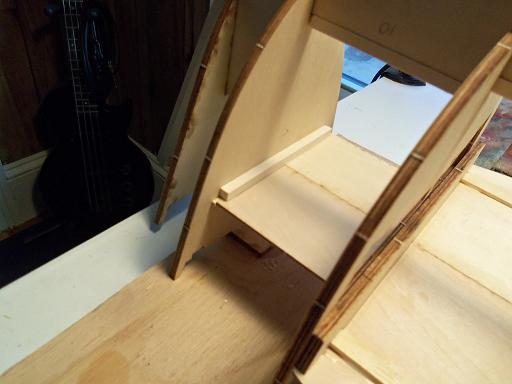
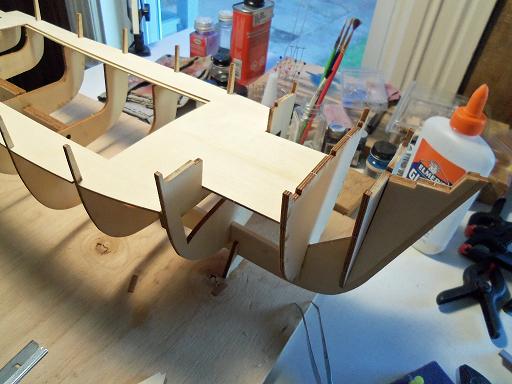
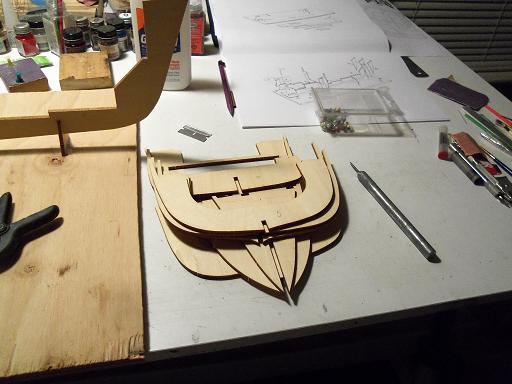
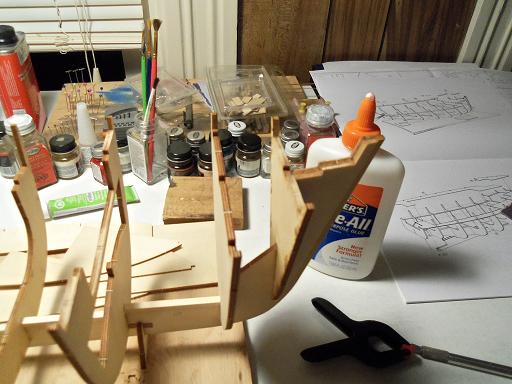
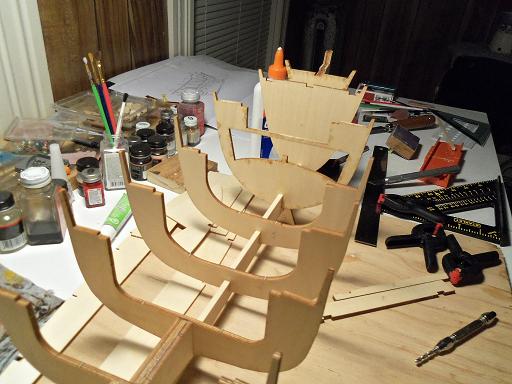
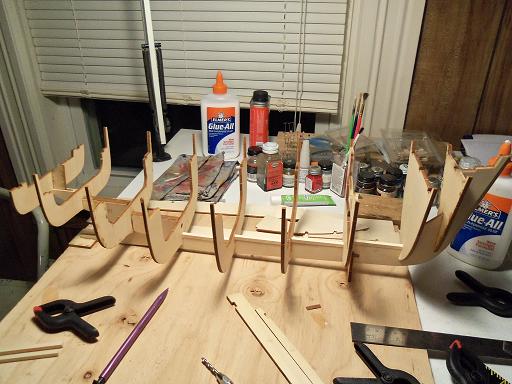
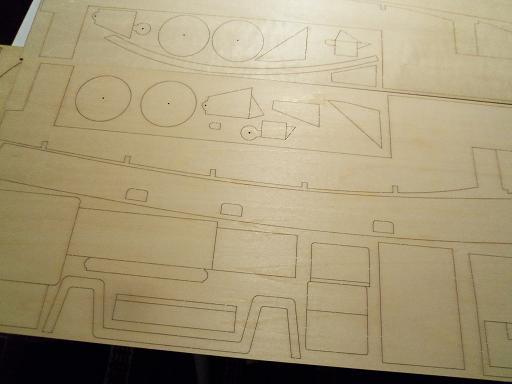
the bow deck was next to be installed. the frame for it was laid out. sanding was also done here to make the surface flat.......faring it, if you will. I found that the two panel halves did not completely meet the bulwark posts. I put the gap in the middle and shunted it with a piece of square stock. leaving this to dry, the pilot house was assembled........this is going to be quite big......just the way I like it. the bow deck did not meet flush to the edge, so two pieces of square stock was cemented in place. where it met the bow stem....had to be slightly modified the pilot house did not sit flush to the table.......I later found that I was a micro off at one corner. it was broken free and fixed.......I used ingenious ways to keep it flush. this is very important.....it needs to sit flat in it's box. ....and so, here she sat......the deck and bulwarks fitting tightly together........the bow deck as well....all flush to the edges of the frame. every corner that will be seen is matted, flush as well. the last thing I did was cement in the windshield frame the Regina has arrived........I finished up this part of the build and bagged her for storage. I hated to, but I had too many builds in the works as it was. here, on the 21st of November, 2011......she was to spend her time in the closet, until the day comes when I could continue her. the Regina was the second build I did for Tom......it was more important.


-
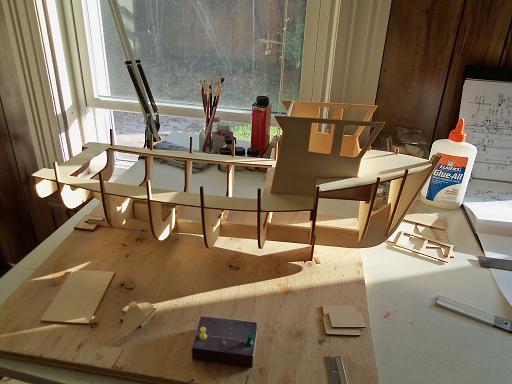
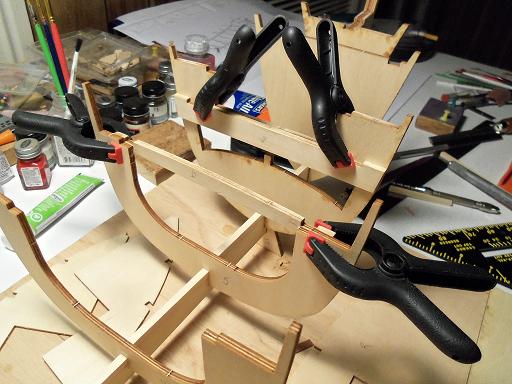
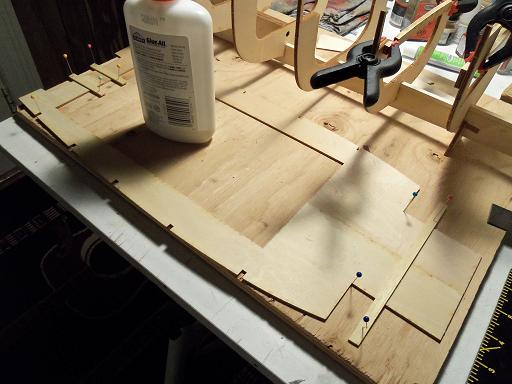
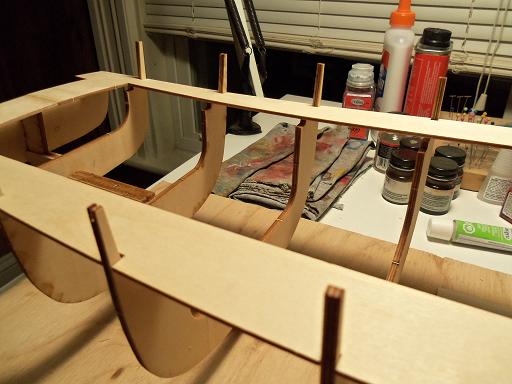
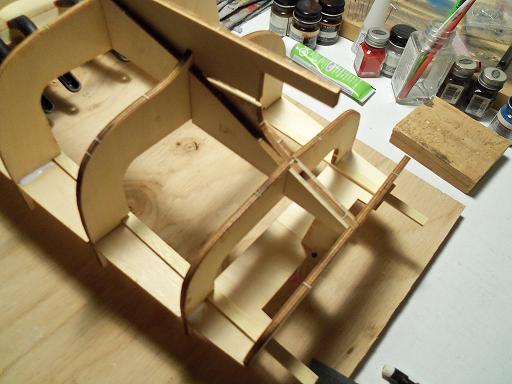
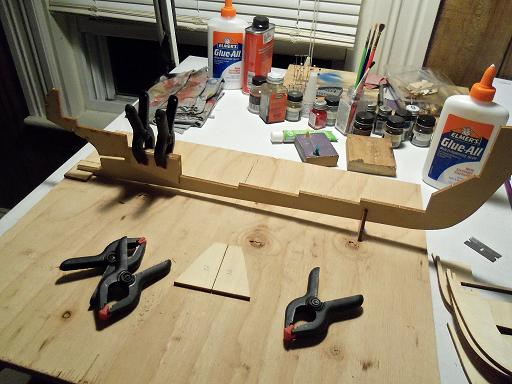
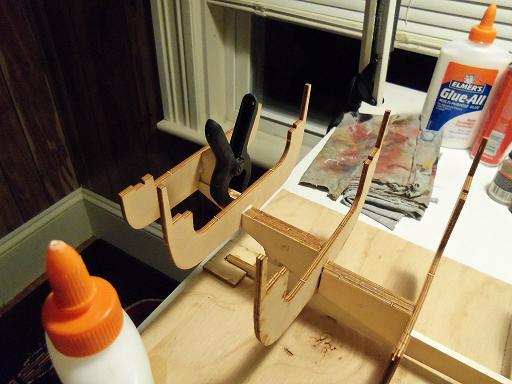
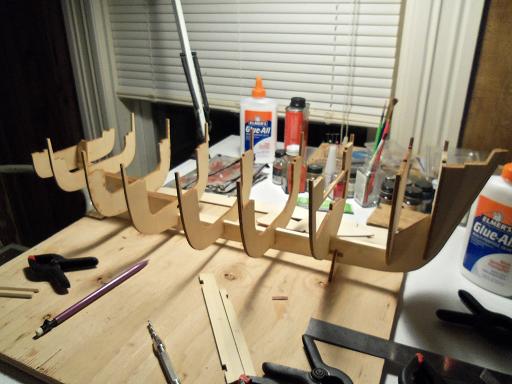
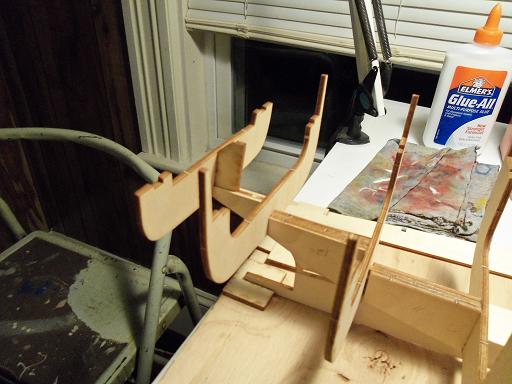
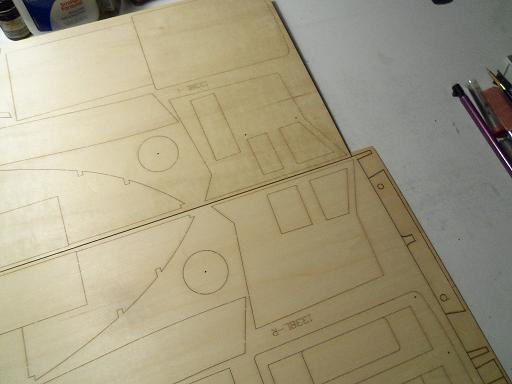
here's where I get the term "loose fitting". the frame was ready for the next step....installing the support beams the deck parts were cemented together to insure that they fit correct to one another after it was dry enough to handle, it was fitted in place. the frame was flipped upside down and the deck was cemented in place. the deck joices were slid into place and cemented as well extra support strips were also added. this was also done at the nose of this deck.....there was a bit of a gap, and lacked support for it the excess strips were cut off flush and this was allowed to dry.

-
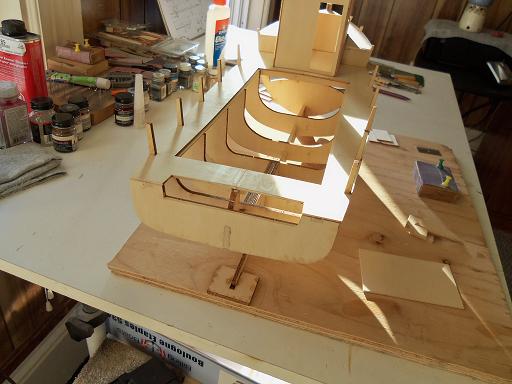
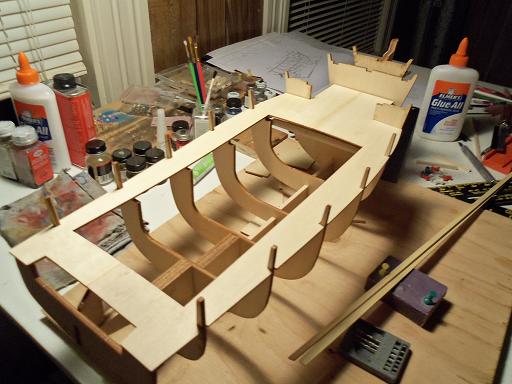
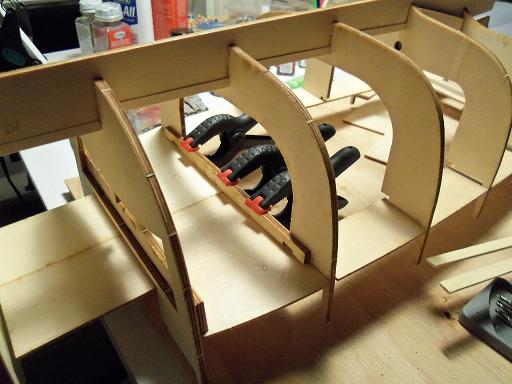
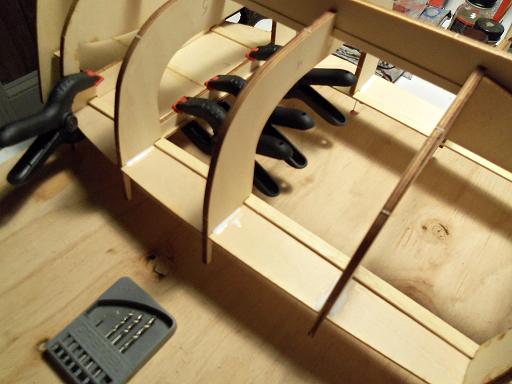
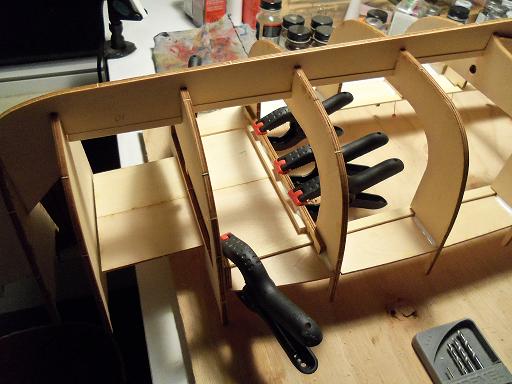
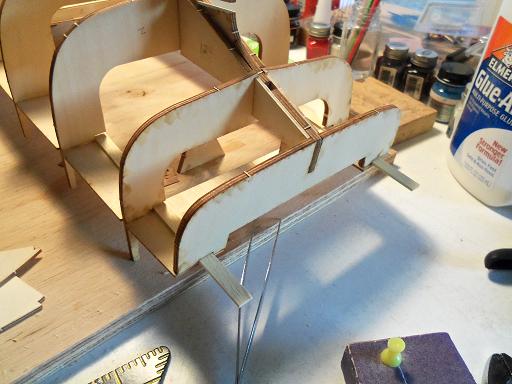
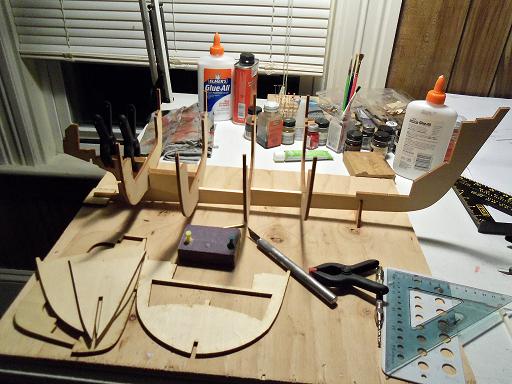
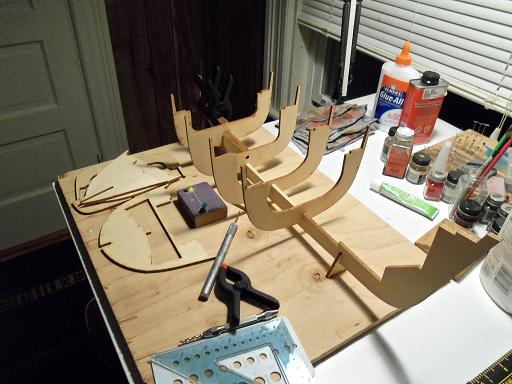
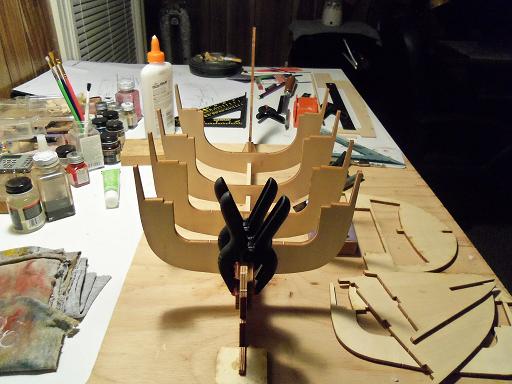
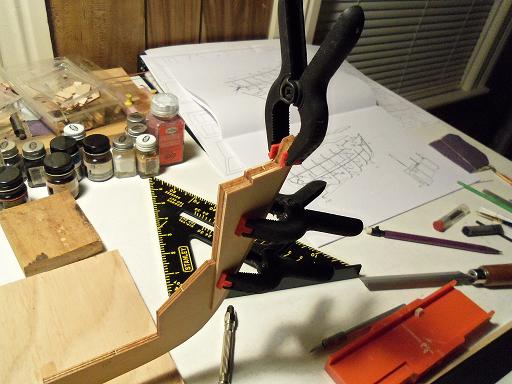
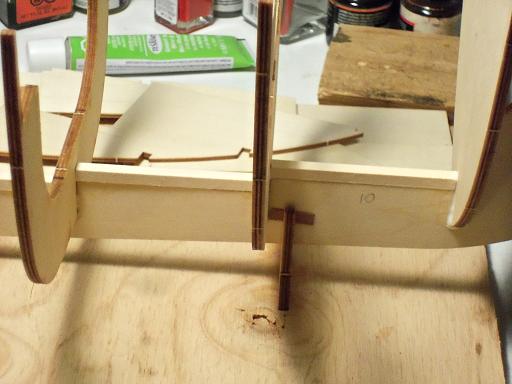
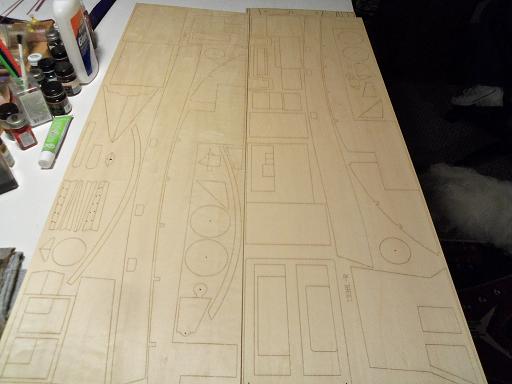
it starts with the frame........I still didn't have a build slip, so I made one. parts for this are included in the kit. After the keel was assembled and set up on the board, the support parts were cemented in place. this boat can be set up for R/C.....there are plans and diagrams included for this. I chose to make it a static build....not ready yet for this....perhaps in the future sometime, there are also diagrams that show the parts and their respective numbering, makes life very easy, the prop tube was cut down and the channel for it was planned out. it will be installed at a later time. the ribs fit snug......adjustments could be made without too much fanfare. as I've done with most of my builds, like-sized square stock was cemented in between the ribs, to aide in locking them in, for added strength. the bow rabbits were cemented in place at this time the rest of the frame was laid out this was left to dry.
-
talk about being late for a party or what! hard to believe how fast the site has grown........so many new folks and their builds! came across your build and took a looky.........looks all neat and tidy.......really nice job! too bad about the rigging thread.....I'm not too big a fan of kit supplied thread either. I have a whole bag full of Billing rigging thread.....just figured out what to do about staining it for the standing rigging. I tend to go walkabout for mine....found quite a bit in my travels. the ratlines you've done already look really good.....I hope the thread you get is simular to it. nice job Robbyn
- 773 replies
-
- 2
-
-
- san francisco ii
- artesania latina
- (and 1 more)
-
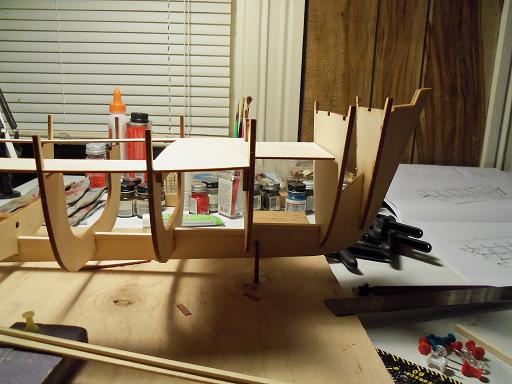
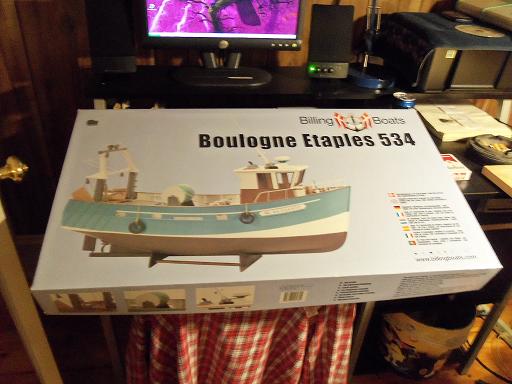
it was November of 2011 when I started this kit. I was waiting for the Regina to come.......figured I'd go as far as I could until then. this kit was slated to be discontinued.....I wanted to get one before they disappeared. Believe it or not......the Admiral picked this one out, she liked the way it looked. when we learned that it was out of stock...as well as out of production, she settled on the Mary Ann as a close second, and it was ordered. a bit down the road, I got an e-mail asking me if I still wanted one.......I said sure, and the rest is history. the wood parts are done very nice I built the hull frame and the shell of the pilot house. the Mary Ann was in the works and the Regina was also started as soon as I got her. the Boulogne was bagged up and put in the closet. John and his admiral {Pam} came to the states and stopped by to meet and visit with me and mine....so little time and so much to talk about.......{he just wanted to see the M&M ship in the flesh} hee....hee but I showed this one to him....one day I'd get back to her........... now ....I think it's time to do little things to her. the Mary Ann......the Regina {turned Susan A}.....the AmericA......heck, the Lobsie twins snuck their way in there somewhere.......these are all finished. I don't have any builds left that I have already started. I have two kits in the closet that I haven't started yet......and I am in nagotiations towards getting another Revell Cutty Sark kit {my third at 1:96} yes, I know it sounds crazy.........but I'm still young enough to enjoy it.......and by golly I will! to the fullest! I wasn't going to put in all the frame work and stuff, seeing as I've already done it, but I found this to be a rather "loose fitting kit".......I figure that it would be good to show some of the things I did to "tighten" her up. more on it soon.....thanks.
-
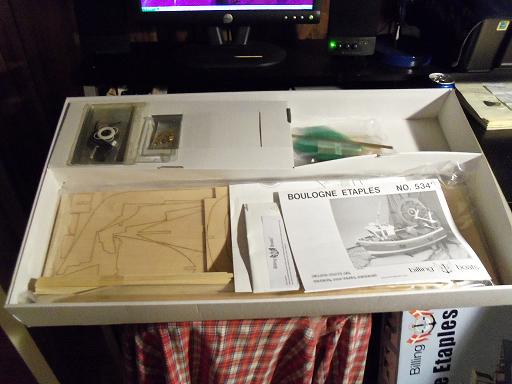
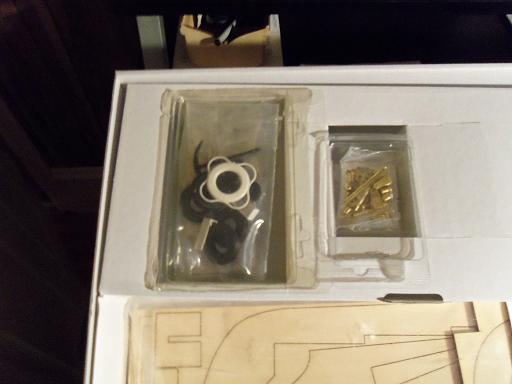
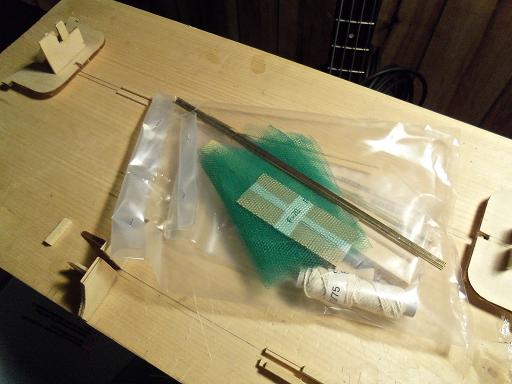
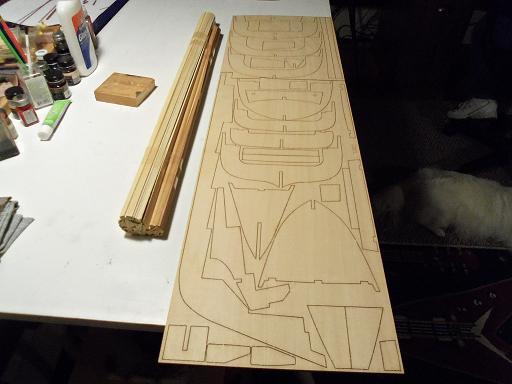
you got it Frank!.......I would have started back on her sooner, but I'm doing the hull planking on the Boulogne, and it's taking a bit longer than I would like (I really need to start the log on this one......I've only had it since 2011)
-
I hate the messy cleanup afterwards........sorry to hear your lament. be happy with your work.
-
thanks Michael........certainly.......on to the next one that's a good question Walter........this is the way thay have it in the kit. I suppose it would have to be untied from the jib boom, leaving a corner sheet line........then rolled up to the desired level. I'm still a bit new to all the different lines and ties.
-
that's a common color for them......there were also the olive drab....some even went camo, depending on the theatre or crew. paint looks really good. the main structures will look really nice with added detail.....good work!
-
do you feel better now.......smelling sawdust is like salts..........it brings back the senses. the sound of the cutting tools have a calming effect. Anja must be happy now that you now have altered your care you whittle away the while-a-way hour and get ye not in her hair
- 1,873 replies
-
- 4
-
-
- occre
- san ildefonso
- (and 1 more)
-
just the mere fact that you've chosen to build such a large scratch build as this, is awe inspiringring enough. there are many ship kits out there that may not be historicaly correct......but we build them any way. some choose to change them.....some don't. what you've done so far is wonderful.......the deck looks superb. the hull looks so sleek.......hard to believe that you've pulled it off using balsa {just writing the name makes me shiver} I'm going to be picking back up on my first full rigged ship.....I'll admit it, I am rather daunted...I've never done one in wood before. I'm finding that plastic was much easier....these I've done many. I'll think of what your going to face as I do it.....the thought alone will be a great motivator
-
looking great John........ratlines look sweet! you'll be finished before you know it!
-
well on your way to some great pilot house detail........sweet job Tom!
-
me 2 a t John good your looking in Bob........you haven't missed a thing
-
good to see you've made some progress phil. I believe the anchor ropes would go through fairleads in the deck, but don't quote me on it. the bow is really shaping up! very nice
-
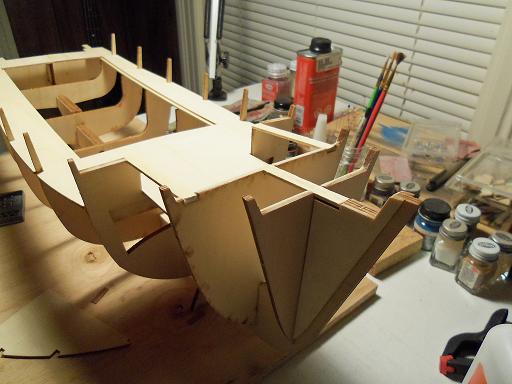
a very nice view of the ship's construction. very well made
-
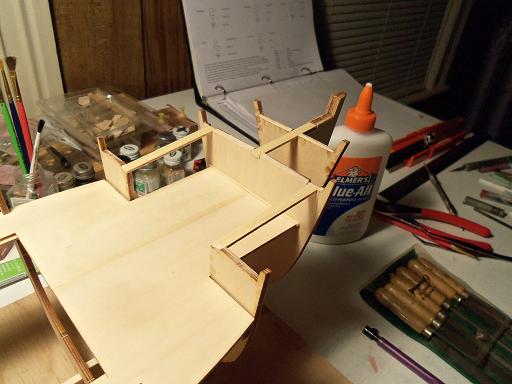
of course, that's not to say that the table doesn't get cluttered as well. at times, I barely have room to move. I'm a certified pack rat...I never throw anything away. you never know when even an oops part can be used
-
you gotta love 'em Bob........now take her out and buy some nice picture frames. can't wait to see the start of this build
-
surely! there are other places that carry accessories......those are just a few
-
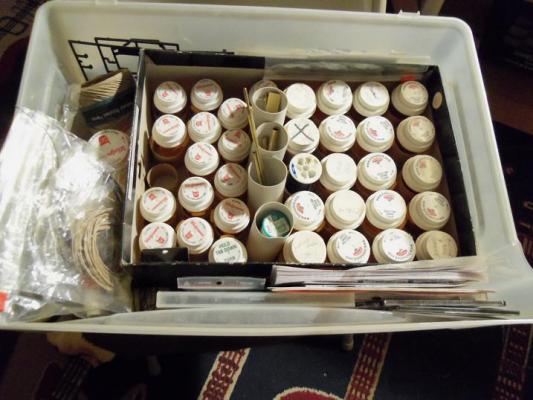
I'll have to post a picture of what my part storage system looks like. it starts with a large box, in which i lined with toilet paper tubes that are cut in half. the bottles are tall, so they sit in there without too much room to move around. the tubes are spaced out so the bottles are not crowded. I haven't labeled them....I started to, but the contents change with the supply I have of any given thing.....it would be a bother to relabel them. they are organized......I have a mental idea where everything is. thanks Eric.......I hope you have one as well no signs of me slowing down any time soon