popeye the sailor
-
Posts
16,007 -
Joined
-
Last visited
Content Type
Profiles
Forums
Gallery
Events
Everything posted by popeye the sailor
-
 take some time for your self.....you've been couped up on that ship........only to come home to find peg dripping at the bow for your touch. Yepper! get in some 'you' time!
 -
thanks Runner63 - I need to post the progress I made..up soon thanks Carl.......I found your log.....hope you are well thanks Borge...hope you are well.....as well
- 377 replies
-
- 1
-

-
- america
- billing boats
- (and 1 more)
-
you must have taken that quote from the Mary Ann build......yes, I wasn't happy with the fact that I hadn't fared the post correctly. what I would like you to do, is fare the posts and put the bullwarks on. you will then get an idea asto how much off the stern, your going to have to sand. fare it down to the deck line, making sure that the posts and the deck are flush. I will explain my reason later......for now, I go to work. hope you've gotten your things in the right rooms....HEE....HEE!
-
OK.........I'll bite........what do the snakes do?
-
looking very nice.......glad to see your back on your build again. take it slow........don't want the admiral to put you in shackles
- 525 replies
-
- 1
-
-
- cutty sark
- mantua
- (and 2 more)
-
looks like I would think 'taper'..........looks like it narrows toward the bow stem
-
watch out for the black dot in the vortex!
-
don't be too hard on yourself.....get into the habit of doing a couple of test passes on a piece of plywood, before committing paint to model.......I do it all the time. I use a siphon feed..very little cleanup, since the paint feed is outside of the airbrush. it works like blow'in on a pop bottle. you'll get it straightened out.........I'm sure
-
I think Sarah will do a splendid job on this kit........perhaps a little darkside too: "imagine, if you will........a door that leads to a world where imagination and x-actor capibilities apply. a place where ideas and creative talent, flows like a river, to an endless sea........to the great expance of the unknown or untried. where specks of sawdust come together to form massive hulks of hull and mast........only to end up battered by crashing waves of thought. with visions of mind, looking through the window of eyes........to materialize from the use of hand..........you know you've just stepped through.......to the darkside
-
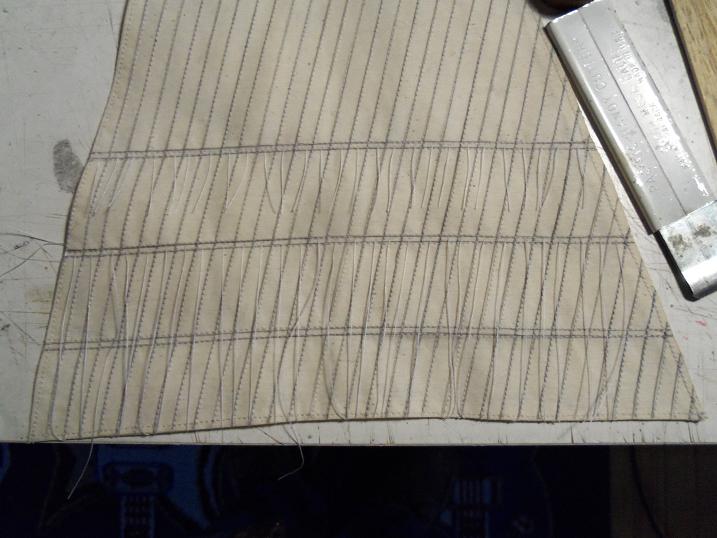
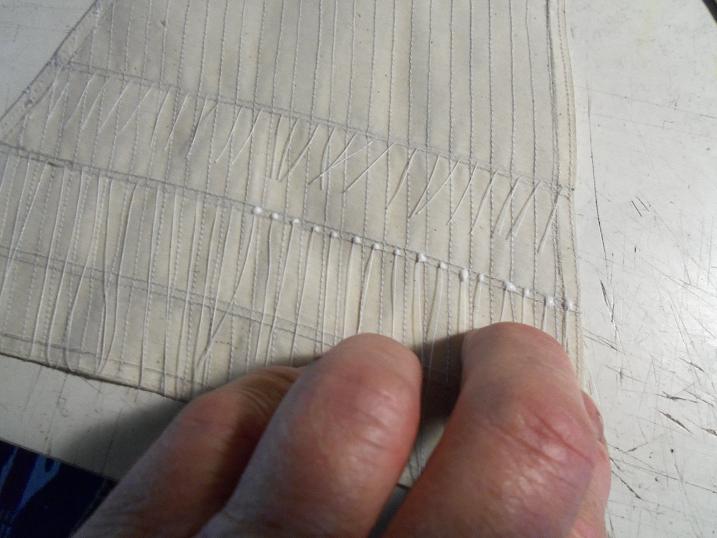
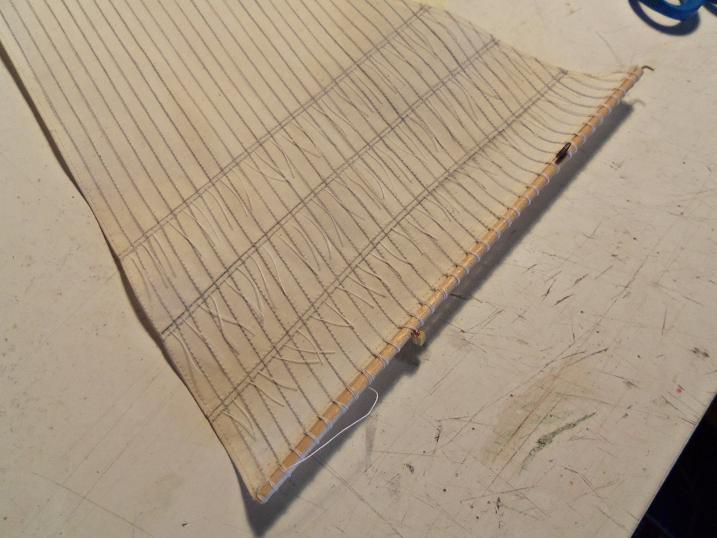
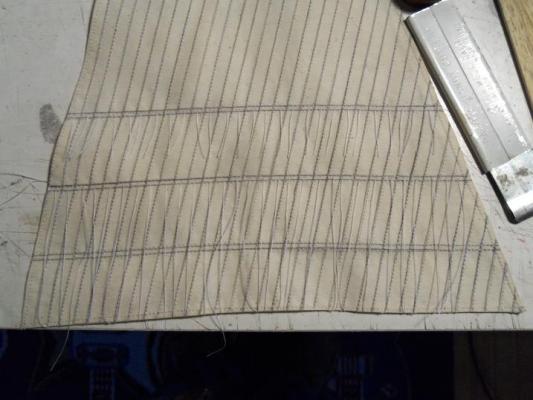
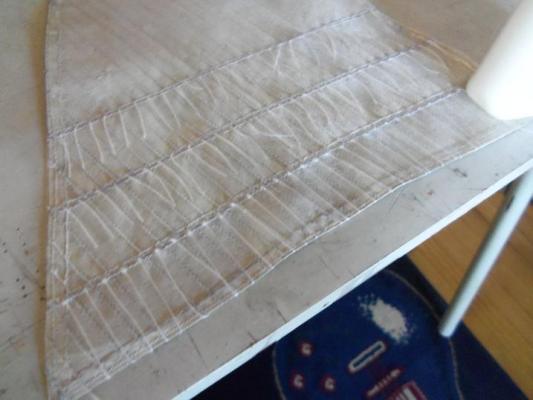
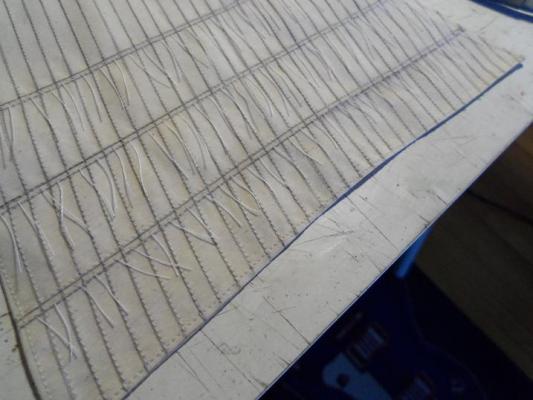
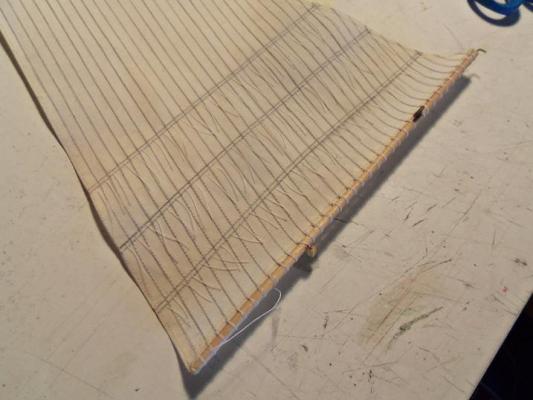
thanks Sarah.......saw you build log on the Cux......nice start! appreciate the good word on another site, I got the seamstress comment as well..........maybe I'm in the wrong business I already got an order for sails on a bluenose.....LOL! expecting the package soon. gotcha Augie..........how many pleats? hope you like ruffles and tails!
- 377 replies
-
- 1
-
-
- america
- billing boats
- (and 1 more)
-
good luck with your move, Sarah I forgot to say I hope that the move all works out...OK put that box over there she said in a fog allright, whose the joker that packed up the dog! a nice sunny place with a foyer and lobby and a big huge room to set up your hobby I hope it's set aside from the homey and formal 'cuz the sawdust you'll be making will be far from normal! have a good move........don't get too mad at the movers!
-
I resemble that remark! nyuk.....nyuk...nyuk........a wise-guy....ehhhh .......oh, m'lady.....you should have PM'd me that you started the build.......I'm impressed! I will say one thing though, those blocks put in the stern is going to make for a lot of sanding. you'll need to contour the stern to the deck.........it's just going to make it harder, that's all. The Cux has such a cute little 'rump' to her, but {pun intended}, make sure you don't lose the countersink for the bulwark wall. the part for that is about 1/16 thick, and quite stiff......I think I showed how I bent it in my blog. I used these wall componnets.......but I didn't on the mary Ann....basically the same hull http://maryanndrydock.wordpress.com/2011/08/16/the-mary-ann-part-3/ you can even follow this log for the hull construction. look near the bottom......it shows how I cemented in blocks for the mast placement. this is one of the problems you will encounter with this kit....especially with the mizzen. you will also see what will happen if the bulwark post are not fared properly....my mistake for bringing the dog outside with me when I did it {I think i mentioned it in the log}. I tried to fix it, but ended up ripping it all off and planked it.......got a big "why did you do that?" from Tom @ Billing's USA. anyway......back to the Cux.......it doesn't really matter in what order you do this kit, as far as the hull construction. whether you plank the deck before the hull planking, or after. it just means that you'll need to freshen up the decking after all the sanding. not sure if you do it as a rule, but your going to love leaving the structure areas blank......you won't see all those separation lines, and will give a better look to the deck layout. when I built the Cux, I didn't have a build slip, so I made my own. to be sure that the ribs were lined properly, I cemented the deck platforms in right after the frame was made. to do this, I left the two stern parts #13 out of the frame, so I could slide in the two deck joices that run underneath. at this point, these two strips of wood are not really needed, but I put them in anyway. the parts #13 were cemented in afterwards. now that I found your build m'lady, I can follow along. The Cux, The Mary Ann......the M&M ship......and even the trawler Syborn are the same hull design {the trawler having a few more ribs to 'er}. it's a nice hull......universal actually.......make a hull, and you can do pretty much what you want to do to them......perfect for a twisted builder like myself build her the way you want to.......put your dinty moore into it {you already have......that radio looks cool} I'm sure you'll have a fine time of it!
-
you did a fantastic job J.P. ! as far as the chipping goes.......I use the same technique........but I apply it with a very narrow piece of wood....no need to do a larger area and risk losing the nice plank lines you've got going. you did what you set out to do, and it worked! superb job! I agree with the color....basswood is kinda blotchy with a dark stain
-
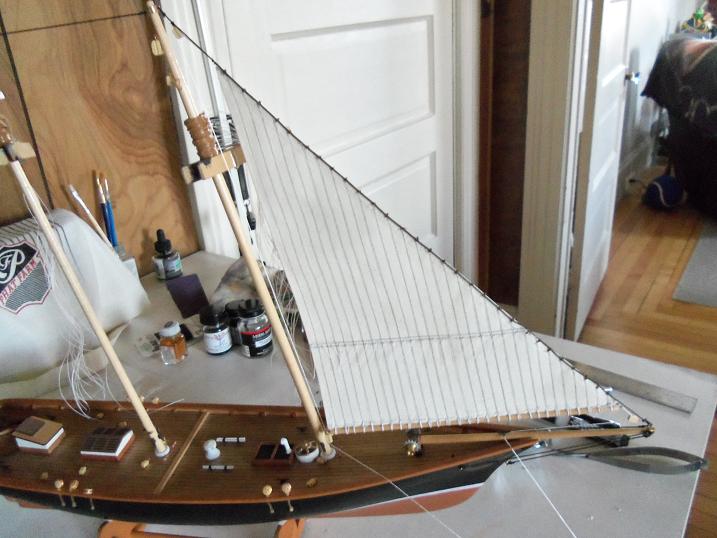
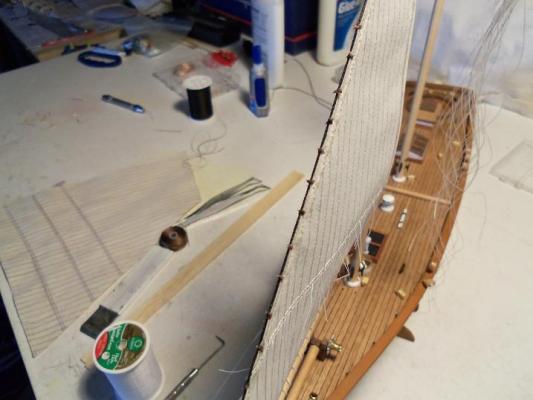
thanks Michael, Sjors, and Mark for the good word there are only shrouds Sjors......no ratlines.....I won't be doing those until the fore and main sheets are in place. according to the plans, there are no ratlines.........if anyone knows otherwise, please let me know. at this moment, the main sheet is in place and I'm doing the hoops. I've set the running rigging......they are not tied down yet, so I can make adjustments later.......and when the shrouds are in place. I will have an update soon....thanks for looking in
-
unique set of plans there........should prove to be an interesting build
-
thank you Augie Keith and John......got the upper gaff set up and sewn to the main sheet......should be tying it on tonight . that's about twenty mast hoops and rigging. wish me luck
-
think it over while your on vacation........you'll come up with the solution! have fun though!
-
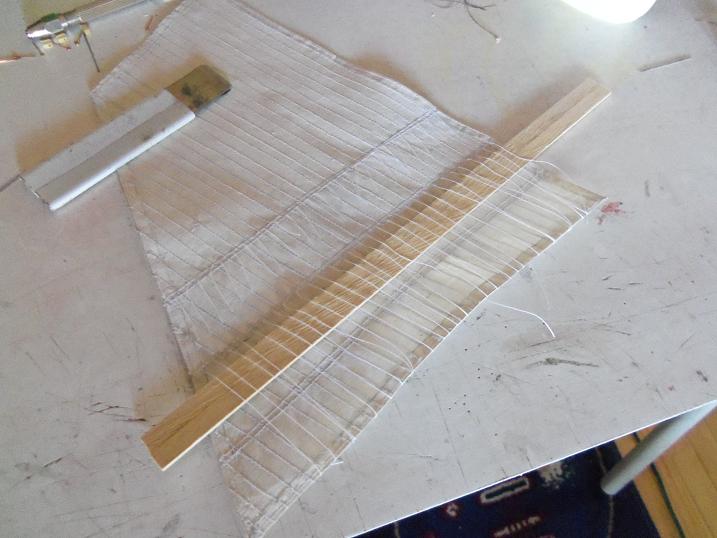
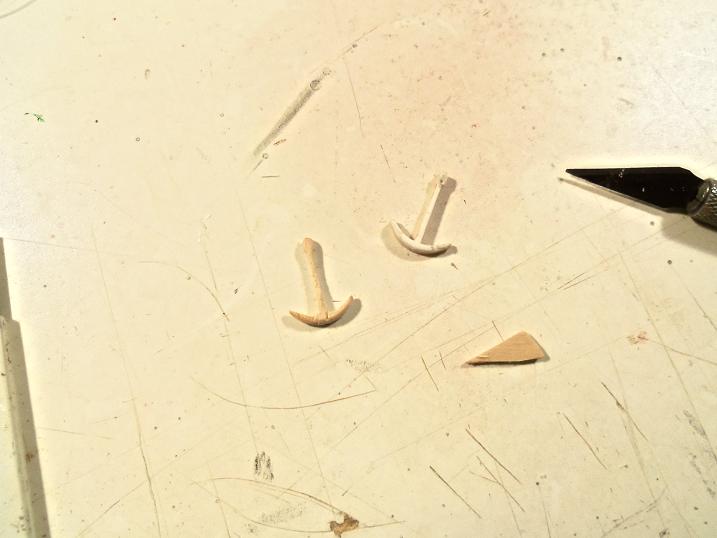
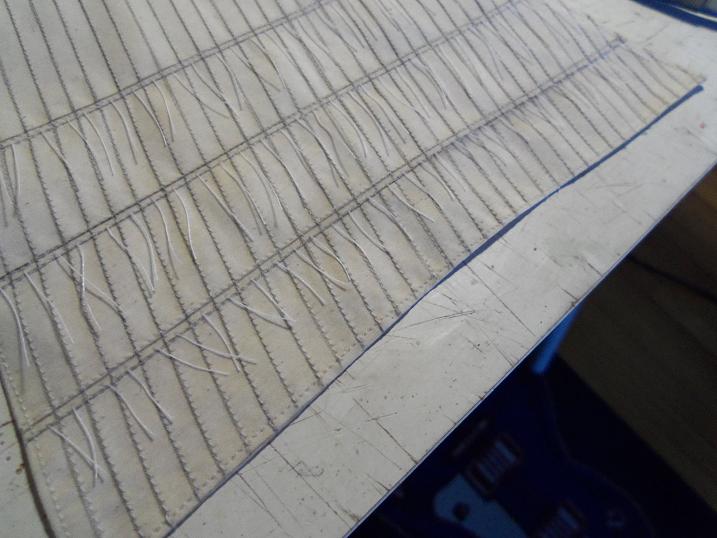
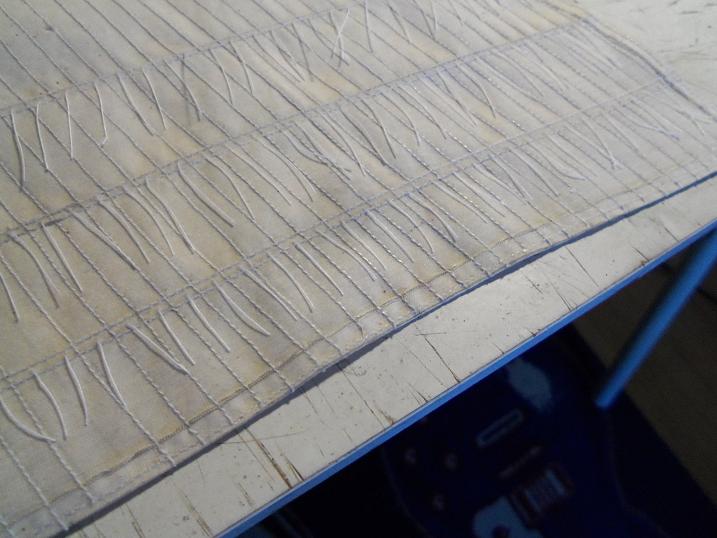
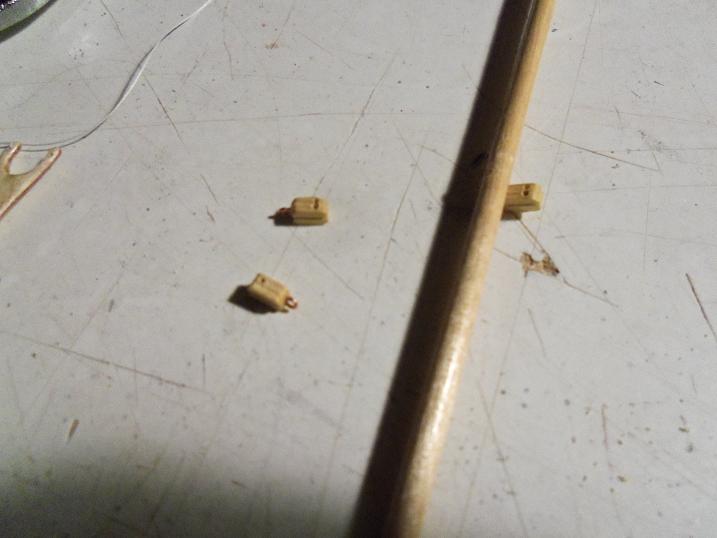
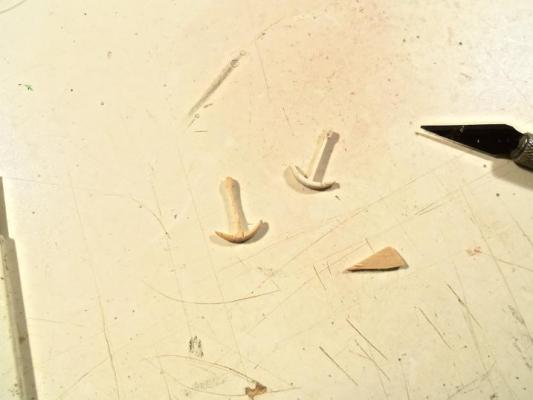
currently........I am finished with the reef lines......YEA!!!!!! to get where I am, the jib sheet need to be finished off the second row on the main sheet was being done the other anchor was cut out of the wood......now they need to be sanded and shaped. then they can be finished off and assembled onto the build. on to the third row.... when I got back to her, they were treated and trimmed. the kit only came with a couple of 5mm double blocks......I added a couple more and then the boom was sewn onto the bottom of the main sheet


- 377 replies
-
- 1
-
-
- america
- billing boats
- (and 1 more)
-
nice progress Sjors.........looks great now that she's masted!
-
looking good Andy..........I knew you'd show that wood whose boss!
-
where's Elmer Fudd when you need 'em
-
wonderful rigging John..........she's looking sweet!
-
I've never tried to do anything like that either.........I just use hardwood dowel. it's a lot easier to square off.......but it can be just as much work
-
don't you dare change it........I think it looks great! if you didn't say anything at all none would know the better. thanks for the extra photo.....the way you did those ports really adds to the beauty of the ship. she's a real looker!