


glbarlow
-
Posts
4,017 -
Joined
-
Last visited
Content Type
Profiles
Forums
Gallery
Events
Posts posted by glbarlow
-
-
We’ll done, very nice looking work!
- FrankWouts and westwood
-
 2
2
-
Great looking work on the guns. Those hooks were a nice find.
- mtaylor and CaptnBirdseye
-
2
-
I had the same reaction to my cabin walls…wow, they fit…cool…
Nice work!
- FriedClams, AJohnson, Edwardkenway and 2 others
-
4
-
 1
1
-
As Chris notes, these posts already exist in the form of James' build logs for each model.
- thibaultron, Canute and mtaylor
-
3
-
Enjoy the Antarctic. I’ll be close by in Patagonia in a couple of weeks on my paid for in 2020 photo trip.
The rigging and the model look fantastic. I’d venture to say you are a master of rigging. I had to get out my nautical dictionary to understand what you said🤣😂
- DelF, chris watton, Knocklouder and 1 other
-
3
-
1
-
Such nice looking work as always. So much detail, I’m sure it is enjoyable to be at this point of the project.
-
-
There is another moulding at the bottom of the counter where the frieze meets the planking you could add.
- cdrusn89 and FrankWouts
-
2
-
So much fine detail, those curves…. Well done.
-
Too late now but cutouts of profile drawings of the stern and quarter gallery framing on the plans were helpful for many of us to get the proper alignment and structures in place. Something not in the instructions is likely made clear on the plans. My biggest struggle was making an acceptable transition of planking from the counter to the sternpost. The filler piece Chuck mentioned is essential to make that curve.
I’m sure many will appreciate the level of detail you’ve provided, thanks for taking the time to share it.
Chuck is great in answering questions and all of us in the project learn from each other. Be sure to take advantage of those that have gone before. I think as I described the quarter gallery framing would have been helpful for example. I studied other logs in addition to Chuck’s monograph regarding the stern fillers as another.
-
I may make some more cannon to avoid the tabbed plank on the center deck planking belt for a while 🤣
-
Welcome to the project, I’m only on chapter 4, you may be late but there is still a party. I agree with others the plywood may be a challenge. The design includes plenty of bulkheads for strength whatever the material on one hand and on the other careful and thorough fairing is crucial to your success later in the build.
At any rate I look forward to following your progress, as noted and as I frequently do myself there are excellent build logs to help you along in addition to the monograph.
- Chuck, Saburo, scrubbyj427 and 2 others
-
5
-
-
The gratings look nice, do your coatings account for the height of the deck planks? They are well made for sure.
- Edwardkenway, AJohnson, FriedClams and 2 others
-
4
-
1
-
3 hours ago, westwood said:
The center belt and the binding planks are challenging
Thanks. It’s all fun, one way or another 😊
- Dave_E and FrankWouts
-
2
-
1 hour ago, Thistle17 said:
they didn't start over
But they did correct it 😊
- Dave_E and FrankWouts
-
2
-
22 hours ago, Edwardkenway said:
I really do like the care and attention you are putting into Winnie!
Thank you. I drive myself crazy sometimes, obsessing over 1mm variances. 🤪
-
22 hours ago, scrubbyj427 said:
The center planking definitely requires a lot of patience,
Thanks, I have them all glued in place now. I feel like l’m back in the doldrums of planking though I’m sure the deck won’t take as long as the hull. So many angles…
-
-
Main Deck
I had a great holiday season with my family, I hope all of you did as well. So after a lot of “time off” from the workshop I guess its back to work - at least until I head off to Patagonia next month for the 2020 photography trip that, paid for then, can finally happen.
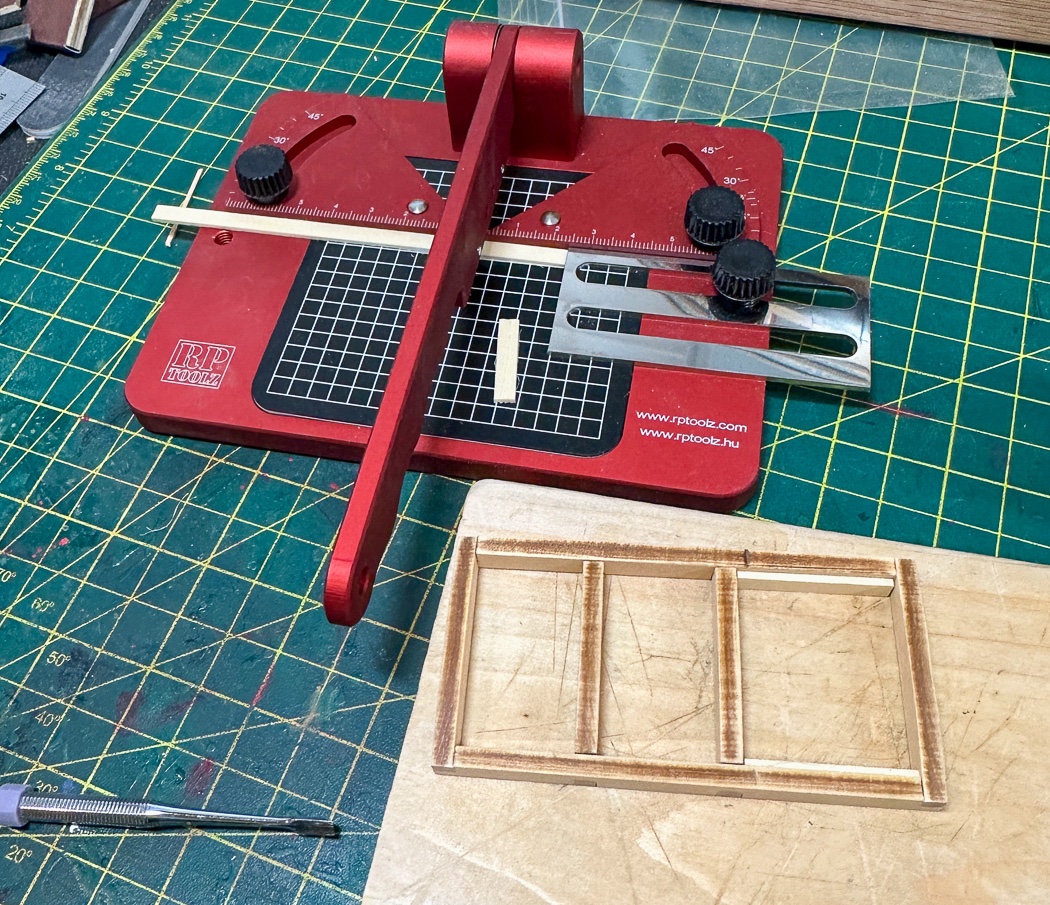
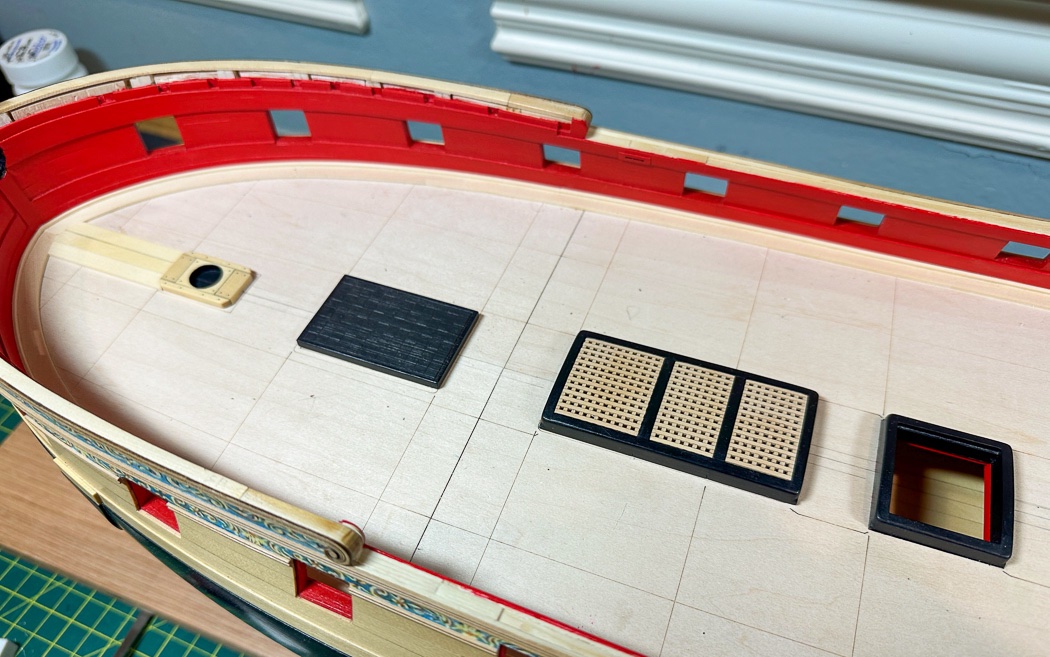
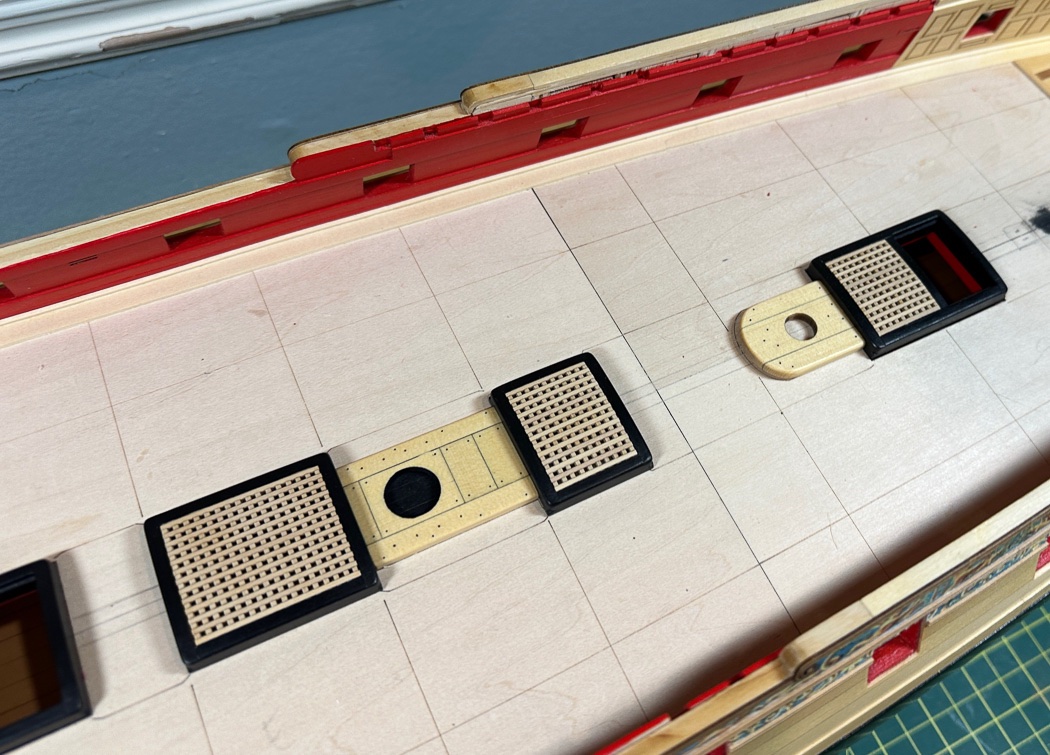
Time to make the coamings and gratings. The coamings are laser cut and a lot quicker and easier than making them scratch as I did on Cheerful. I got this RPToolz cutter after seeing it on James’ Indy build page. I’ve had my Chopper for years, this cutter though makes much more precise cuts, they don’t require a post cut visit to the sander. They’ll both have a home in my workshop, can’t ever have too many ways to cut stuff.
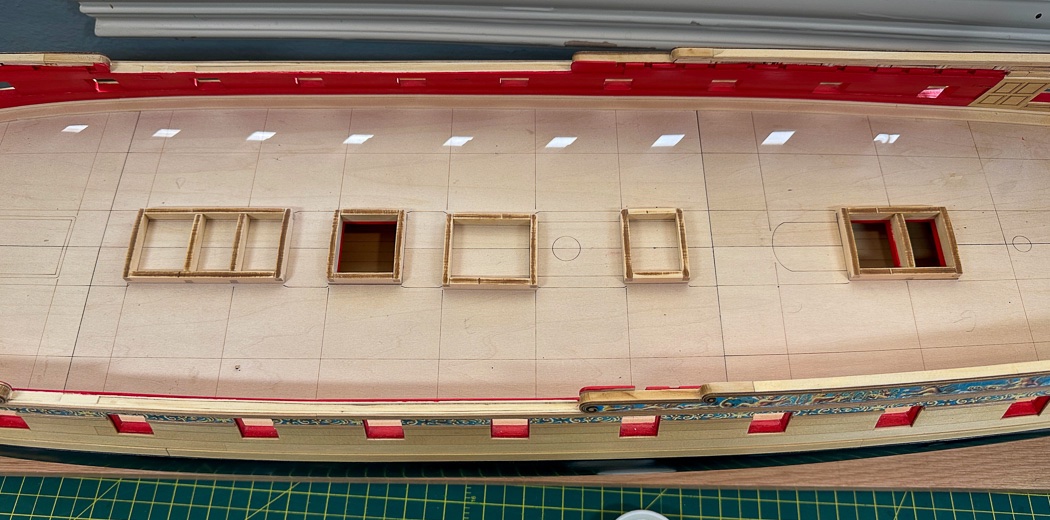
Here they are assembled and loosely positioned. The char removal wasn’t as essential beyond shaping and removing the crust since I’m painting the black. I’m using my favorite Admiralty Paints Ironworks Black, which as I’ve noted in earlier posts works nicely in providing a matte look to wood. I only used three coats with 600 grit sanding between coats as it covers well.
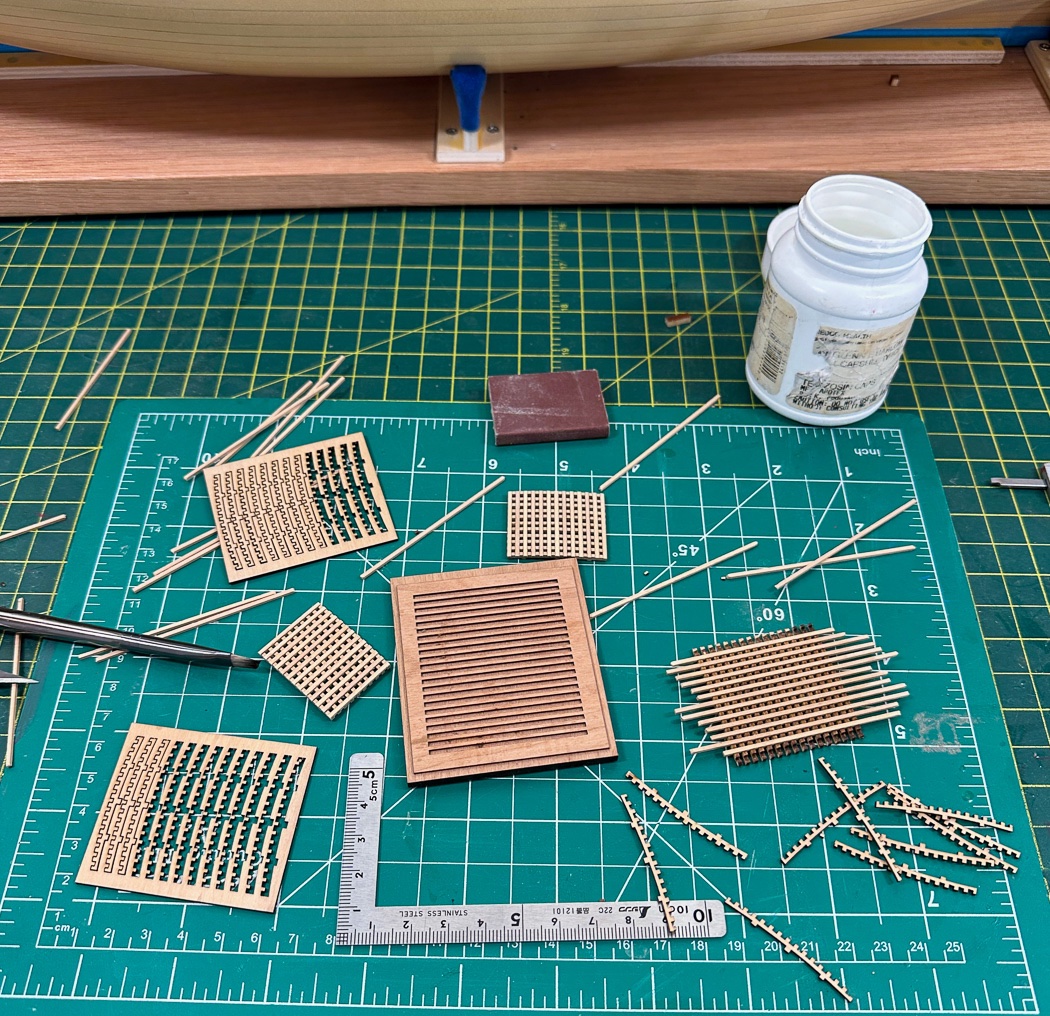
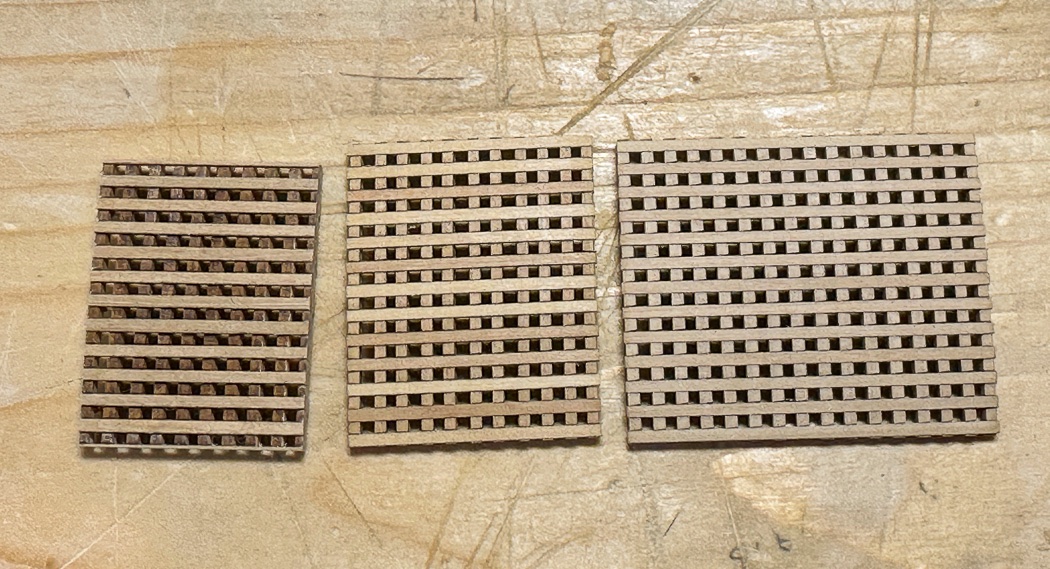
The gratings are easy to initially assemble using Chuck’s kit and jig but that’s just the beginning - I did a good deal of sanding to get the two crossed layers much thinner. The left is as assembled, the middle is sanded and coated with WOP, I then lightly sanded it once more for the finished look shown on the right.
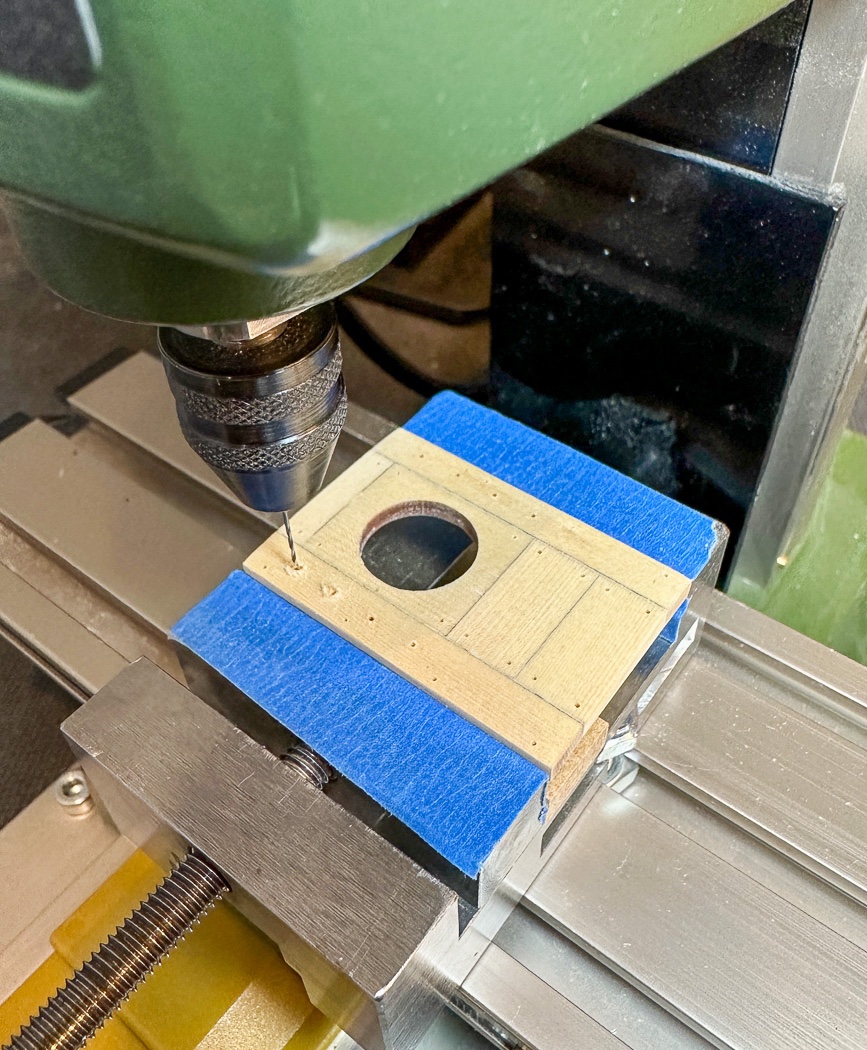
Next up was the partners. Once assembled including #2 pencil to simulate caulking off to the mill to drill bolt holes. Not a fast process but an accurate one, as long as I didn’t loose track of the turns of the axis wheels, 1mm, 2mm, 3mm……… While I had the main mast partner on the mill I included the holes for eight eyelets that will come later. It pays to look ahead in the monolog (and at all the wonderful build logs so much further along than I am).
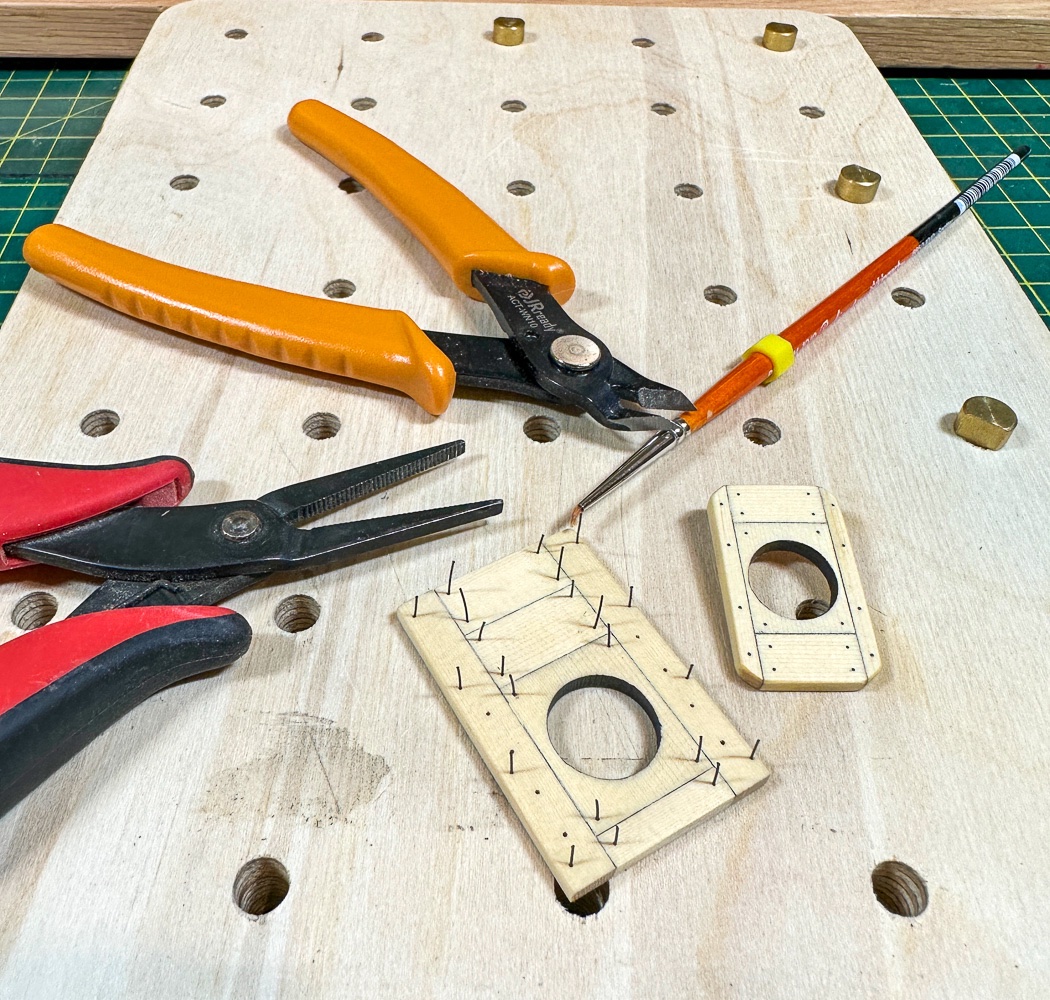
After I’m done building models I really need to consider deep sea fishing. Per Chuck’s recommendation I have black monofilament fishing line in multiple weights, it’s something you can’t buy just a little of. Here I used 20 weight for the capstan partners and 15 for the fore and main partners. It really does work perfectly, easy to install with PVA and a nice crisp look once flush cut (no shiny silver or crushed look that might happen with wire).
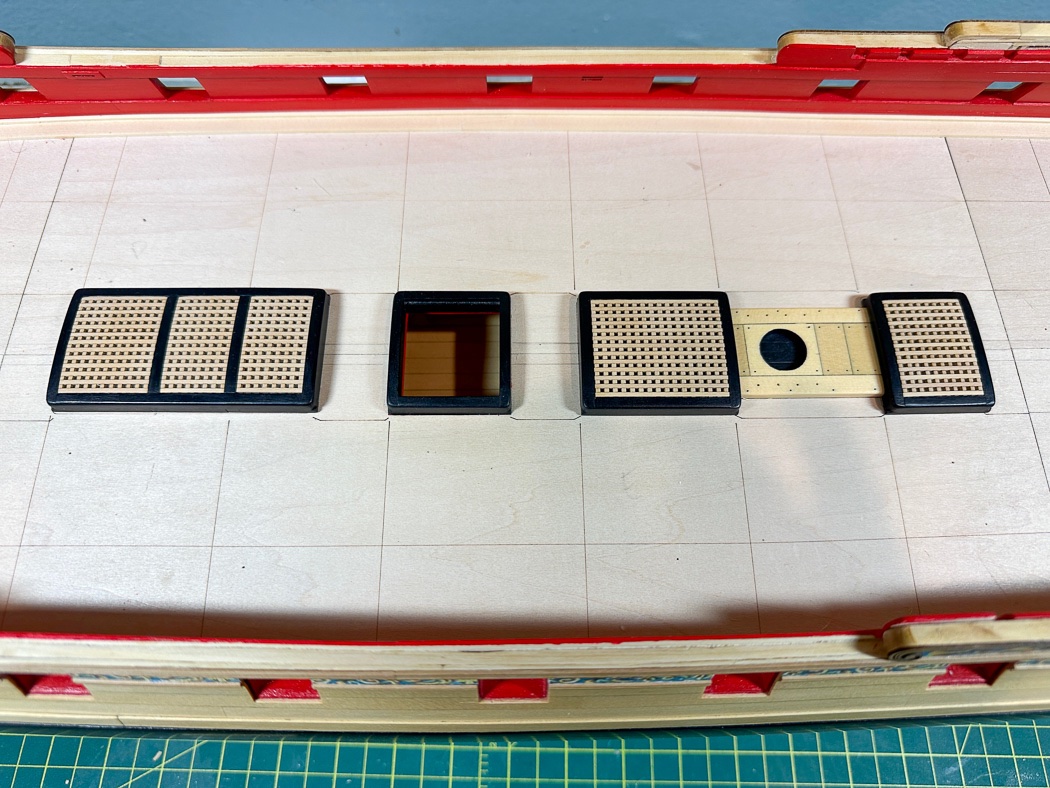
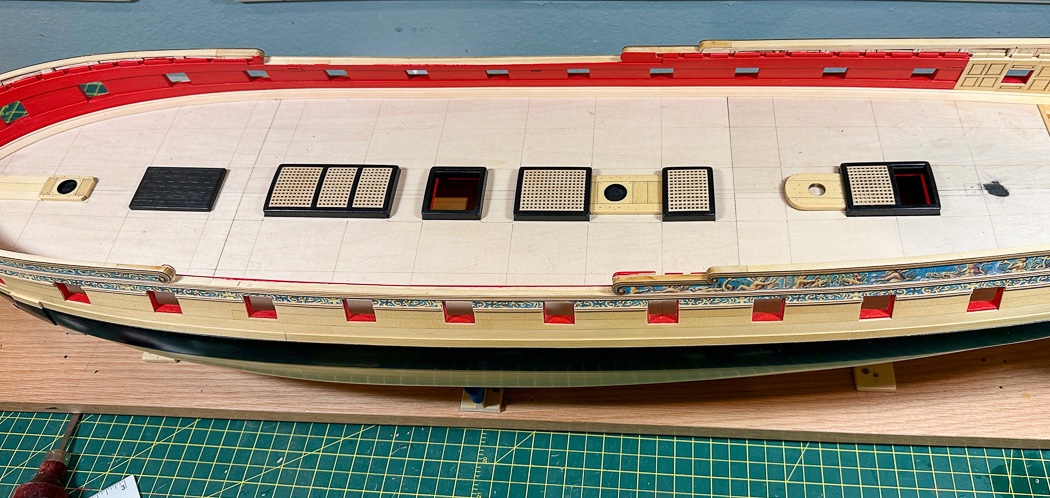
So with the first phase of the main deck complete and loosely dry-fitted here I’m ready to plank the deck beginning with the center pieces. It won’t take as long as the hull, but it will take a long while.
Thanks for looking in, your likes and comments are always appreciated. So many good Winchelsea builds to see and enjoy.
-
Glad i was helpful. The trial fit of the friezes really helps visualize it all.
Nice work, you’re on your way.
-
Excellent work, well done!
-
7 hours ago, Thistle17 said:
I encountered a bit of interference with the stern post.
Likely not a big deal but carefully check the start point for the top of plank 1. The transition from upper and lower counter is important and not as obvious as you’d think. Try a little. dry-fitting there. We all know our models won’t be fit like Chuck’s. I made lots of little adjustments here and there. The planking transition from sternpost to counter took me multiple tries and a couple of weeks to sort out. But it does sort out…
-
On 1/6/2023 at 7:40 AM, Thistle17 said:
has to be a white knuckle drive now
Not at all, that’s because you’d never get above about 30mph the whole way😂


Medway Longboat 1742 by Blue Ensign - FINISHED - Syren Ship Model Company - ½” scale
in Medway Long Boat - 1742 - Public group project.
Posted
Nice to see you back in action. I’ve always admired this kit, I’ll enjoy watching your build. I’m sure there are no others in your home matching the designed color scheme and subsequently no reason to change it for our entertainment.