


glbarlow
-
Posts
3,852 -
Joined
-
Last visited
Content Type
Profiles
Forums
Gallery
Events
Posts posted by glbarlow
-
-
5 hours ago, Dave_E said:
Really nice
Thank you Dave.
- Dave_E and FrankWouts
-
 2
2
-
2 hours ago, bdgiantman2 said:
Nice information about constructing your cannons and carriages,
Thank you. No coat hangers used though. This wire is much thinner and easier to bend. 😊
- Dave_E and FrankWouts
-
2
-
57 minutes ago, Thistle17 said:
I am sending mine onto you
I keep thinking about how long it is taking me to do 8, knowing there are 24 more to go. I’d have to return to sender😁😂
- FrankWouts, bdgiantman2, Dave_E and 1 other
-
2
-
 2
2
-
4 hours ago, Gregory said:
rather lacking in detail
There’s a lot of detail in the gun overall in my opinion. I can’t speak for other builders, just not something I felt was needed.
- Dave_E, hollowneck and FrankWouts
-
3
-
Cannon - It’s a Process
I managed to break a couple of parts preventing me from completing Chapter 3, of course Chuck has since kindly provided replacements. In the interim I elected to start production on the 32 cannon I’ll ultimately need for my war ship by building the first eight.
This many of anything for me requires a repeatable process, doing these eight helped work out that process. Upfront I acknowledge some of what I describe below comes from Chuck’s excellent instruction, some of it is my own, some from other builders like @Rustyj, @DelF, @James H, and @Stuntflyer, some of that I modified, some I probably absorbed from others and think its my own. That’s the wonder of this forum, many of us have built many cannon in many different ways, we all learn from each other and in doing so make it our own. I’m just out to efficiently make the many cannon needed for Winchelsea - So with that disclaimer and for your reading entertainment, here’s how I'm doing them.
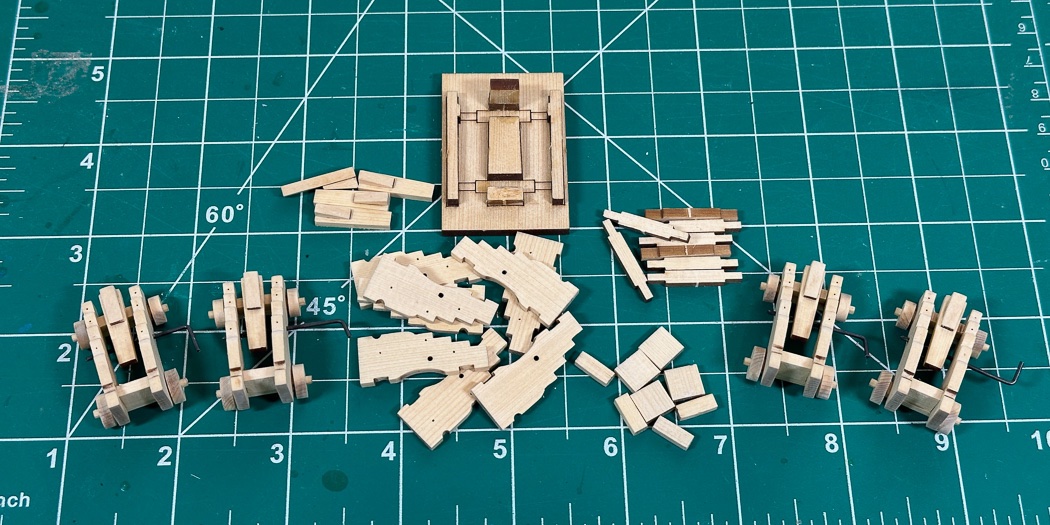
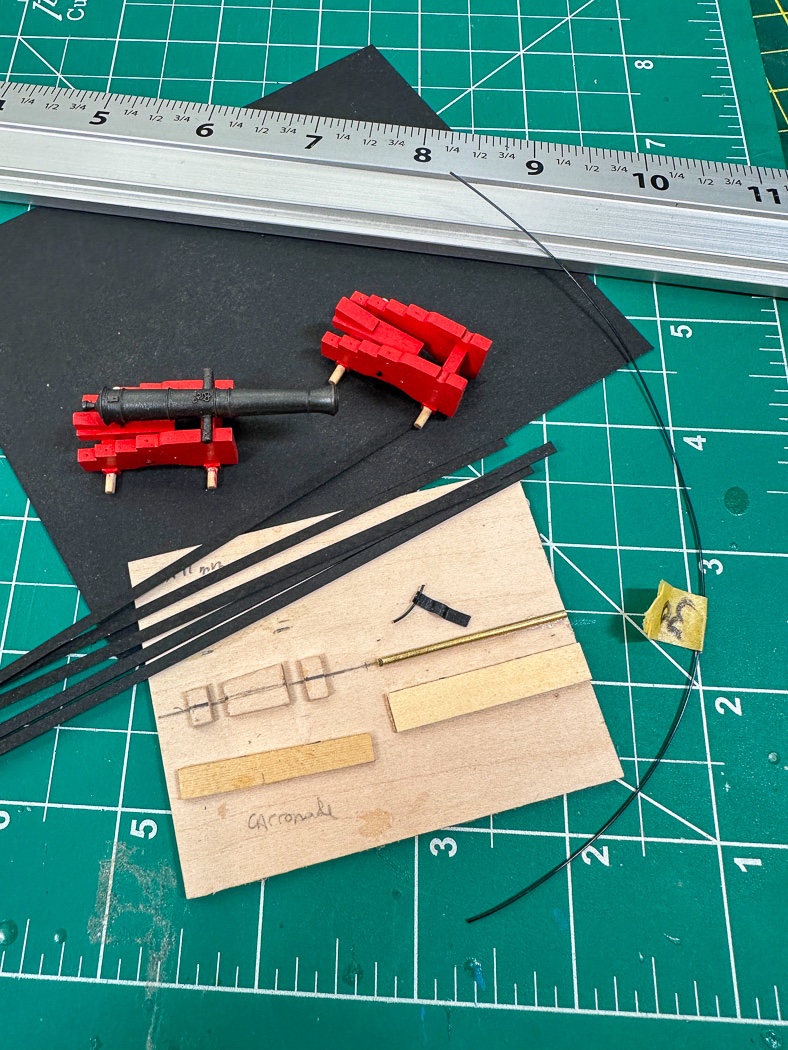
Like others I’ve opted for red carriages with natural wheels and axels. All edges and backside of all parts have a lot of char to remove. It’s a slow tedious process that can only be done one part at a time. There are no shortcuts. The red paint I’m using, Winsor & Newton Crimson, won’t cover char so it all has to come off. This photo is at the end of a lot of sanding with 320 and 400 grit paper (with 8 axels still to go).
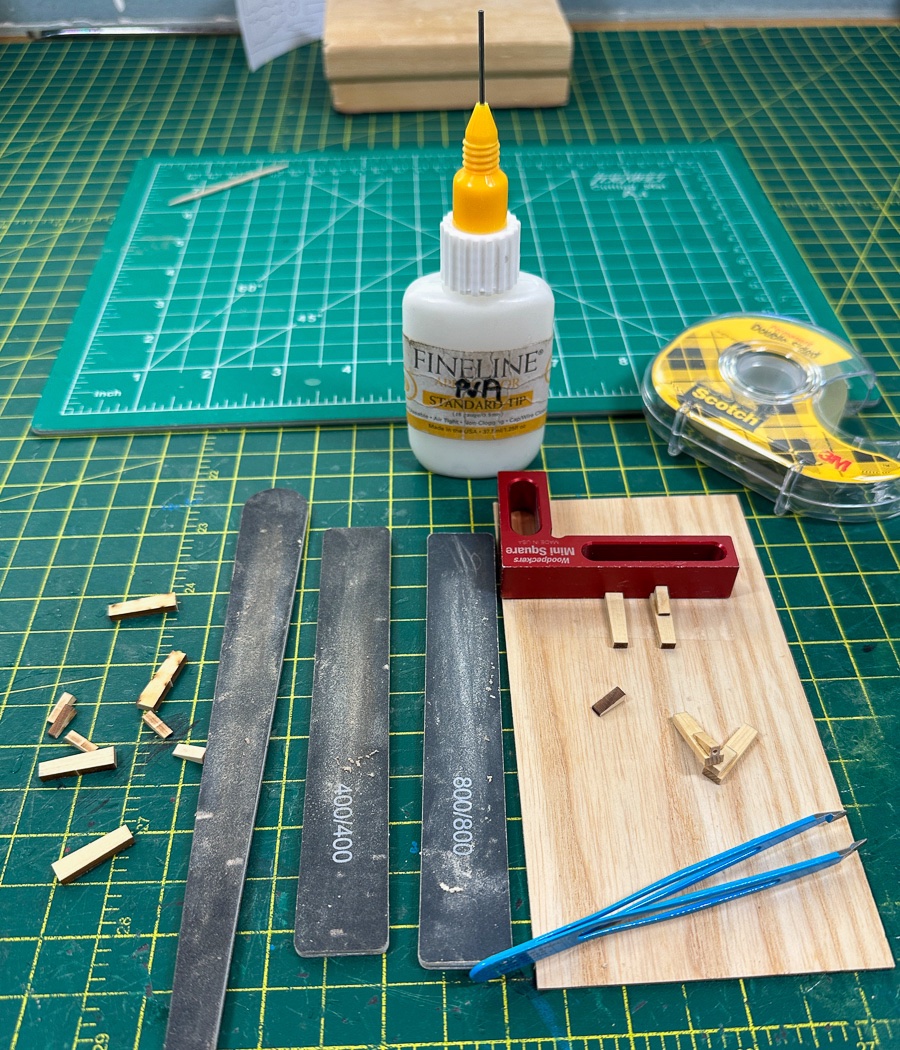
With all the char removed, first up was the combination of the carriage bed and quoin. I drilled a hole for the handle, I’m using 8mm belaying pins from Crafty Sailor, they look great and for me are the right scale. On a side note, this little bottle, learned from @DelF or more specifically his wife I recall, is a great applicator for PVA. I have a large bottle of quality white wood glue I transfer to this little bottle found on Amazon under Fine Line Applicator, standard tip.
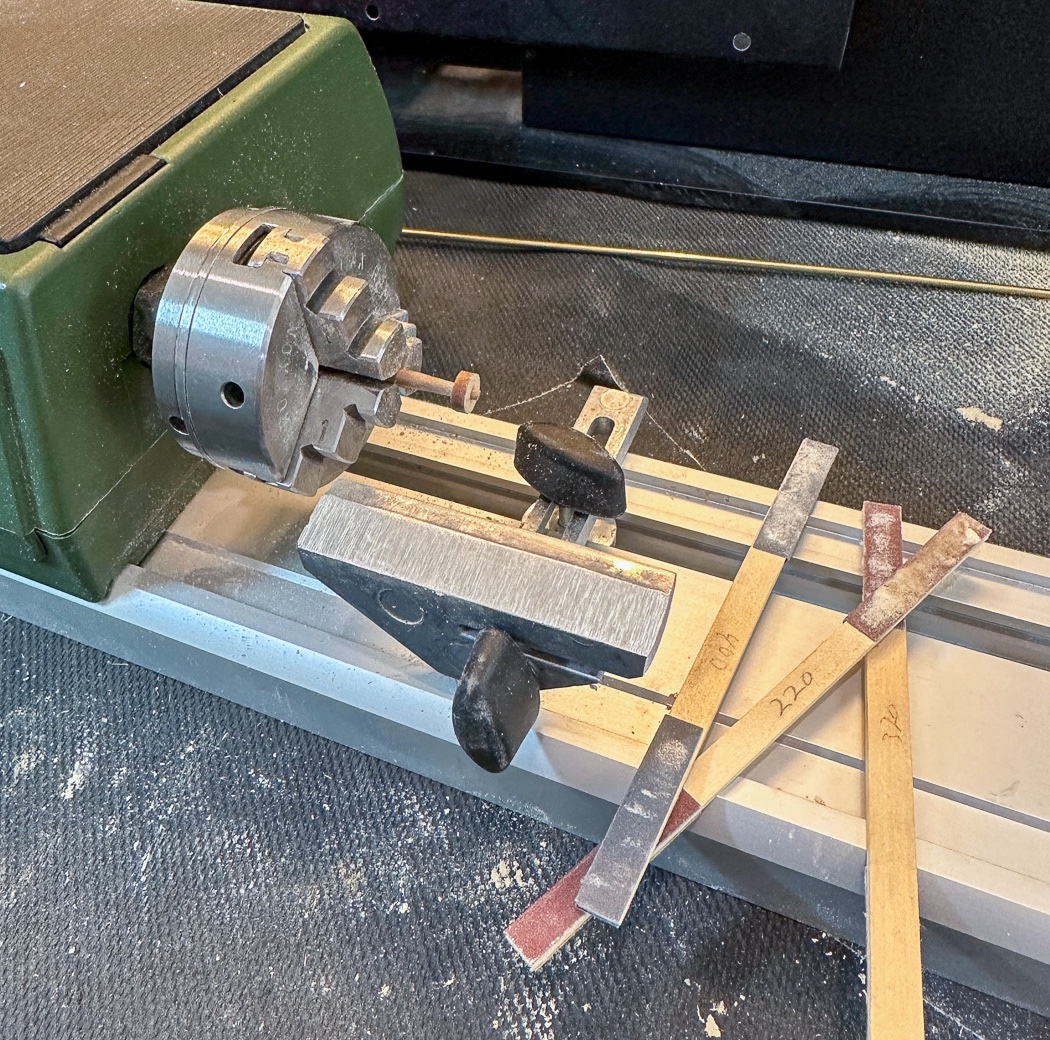
I put my Proxxon DB250 lathe and these home-made sanding sticks to work, turning the trucks to remove the char. 32 trucks later …
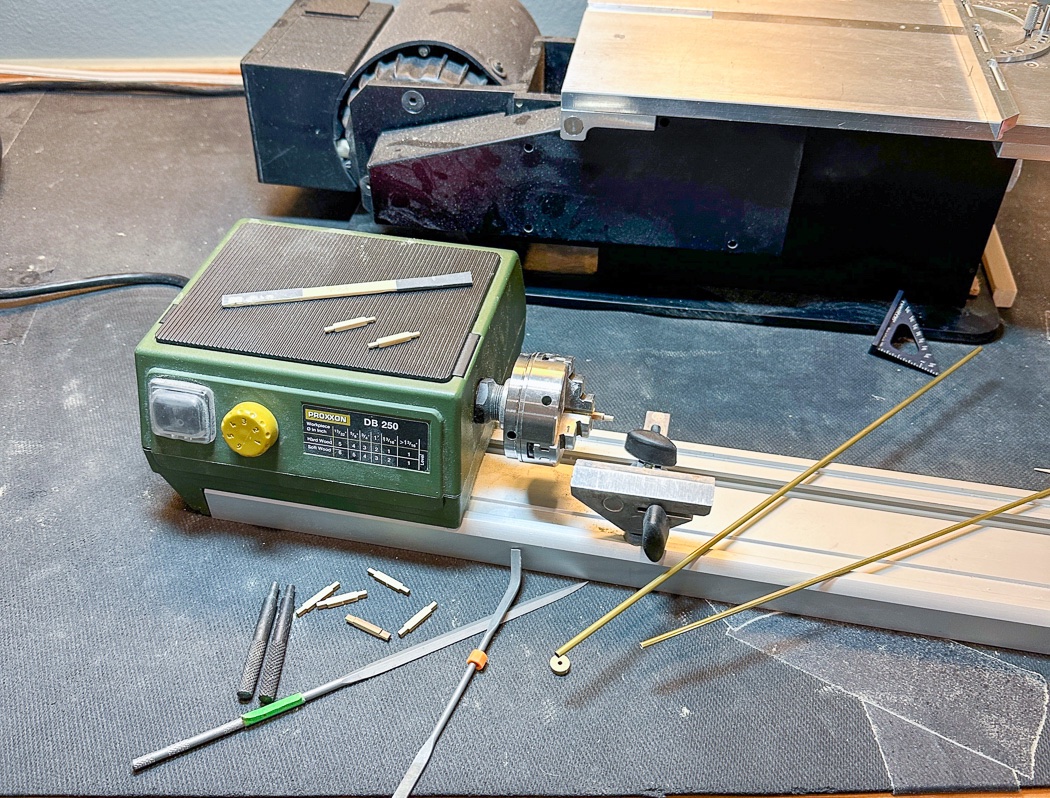
I put the lathe to work again rounding the axels, a brass tube (which I later cut to a shorter length) helped with the rounding and confirming a consistent size to match the wheels. 16 axels later…

I had this little jig from Cheerful (I keep all my old jigs) I put it to work on the mill drilling the required holes in the carriage sides. I set the right location for one then rotated all the carriages through drilling the one, set it for the next hole and did all again. There are 4 holes on each carriage side. 64 holes later …
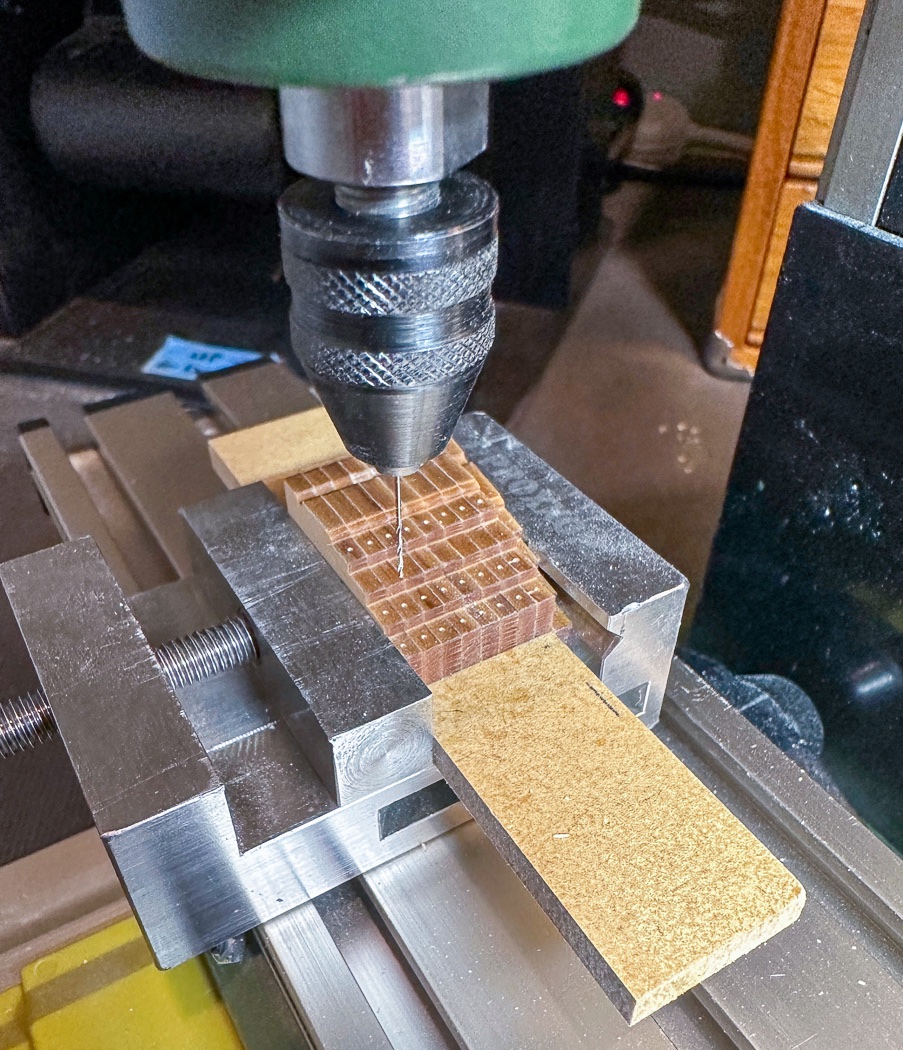
I made a new jig to hold eight carriage sides, again marking first location on a row, moving the mill back to front to drill the same hole 8 times, marked the next row, then the next. Once all three rows done, loaded the other 8 and did it again. 48 holes later …
On to the barrels. The resin barrels are excellent for the detail they show. So much better than applying the tiny King’s crest to a brass barrel as I did for Cheerful, but he sprue has to be gently removed without breaking off the cascabel, ask me how I know this. I chose the same method I’ve done in the past by next painting the barrels with Admiralty Ironworks Black. Its nice matte finish is fine on it’s own.
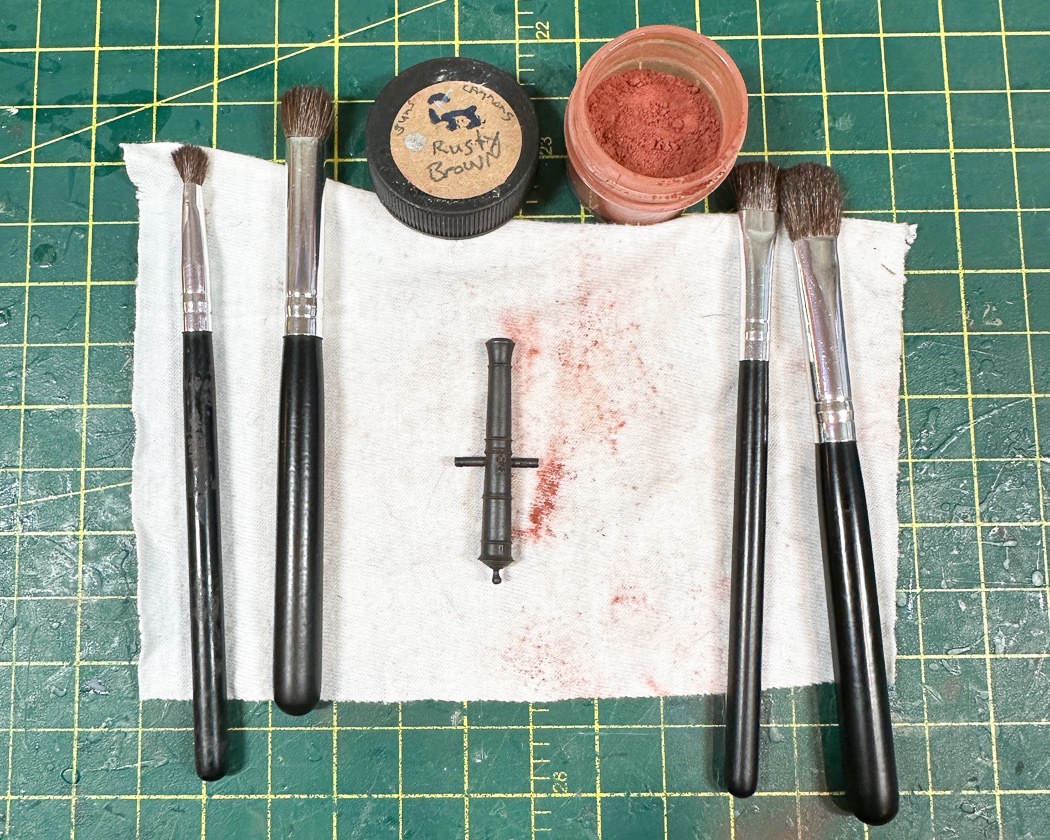
Instead I added Doc O’Brien’s Rusty Brown by cycling through this brush set left to right, each to its purpose from application to buff out. I don’t know why Rusty Brown produces such a nice gun metal gray on top of the Ironworks Black, but it does.
It doesn’t show up very well in this photo but here are the three stages, starting resin, painted black, weathering powder applied. 8 barrels later …
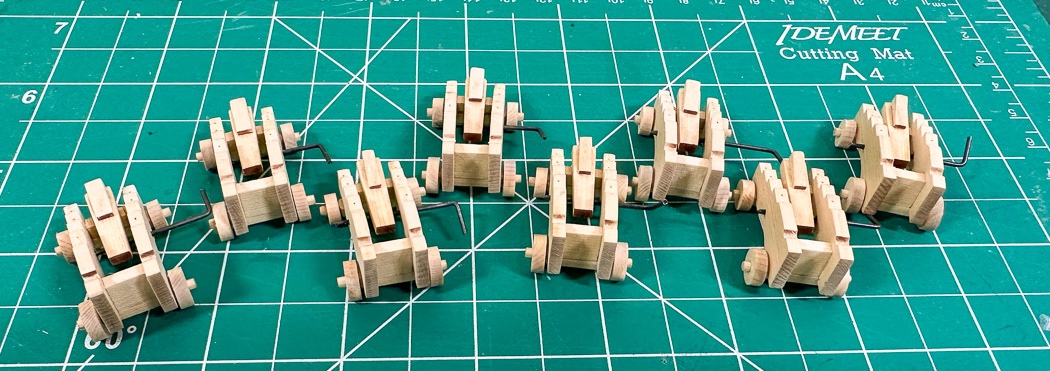
After assembly of the char-free parts, using the perfect jig provided by Chuck shown in the first photo, it’s off to the paint shop for the carriages.
I’m not super confident with an airbrush, specifically getting the paint from the tube to the right consistency. I seemed to have gotten it right this time using Liquitex Airbrush Medium and remembering the mantra ‘milk not milkshake.” Good that I remembered to tape the axels since I want them natural. 8 painted carriages later …
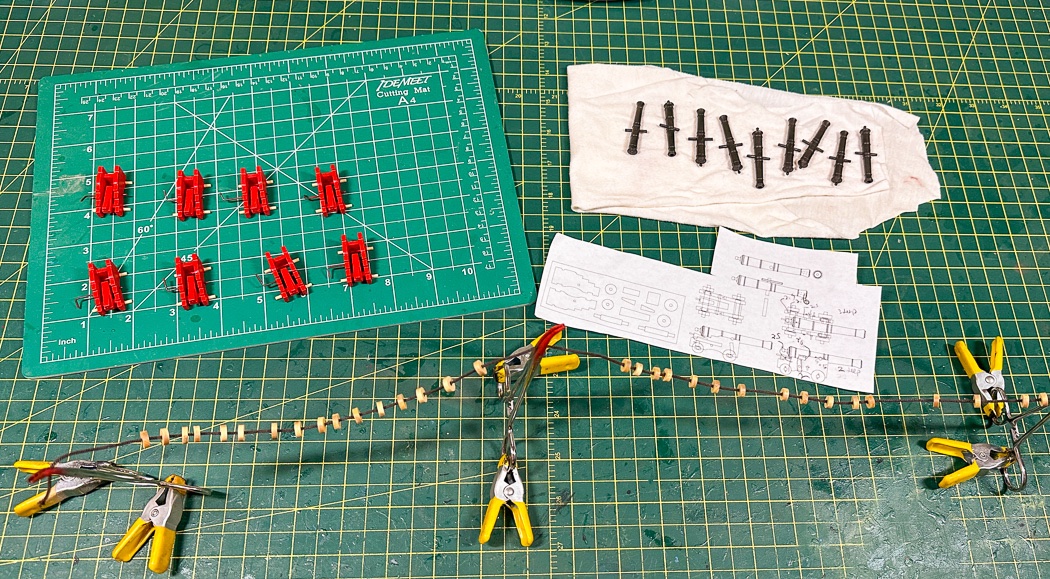
Next up, a coat of WOP to the axels and the trucks, threaded through a line and left overnight to dry. 32 wheels and 16 axels later …
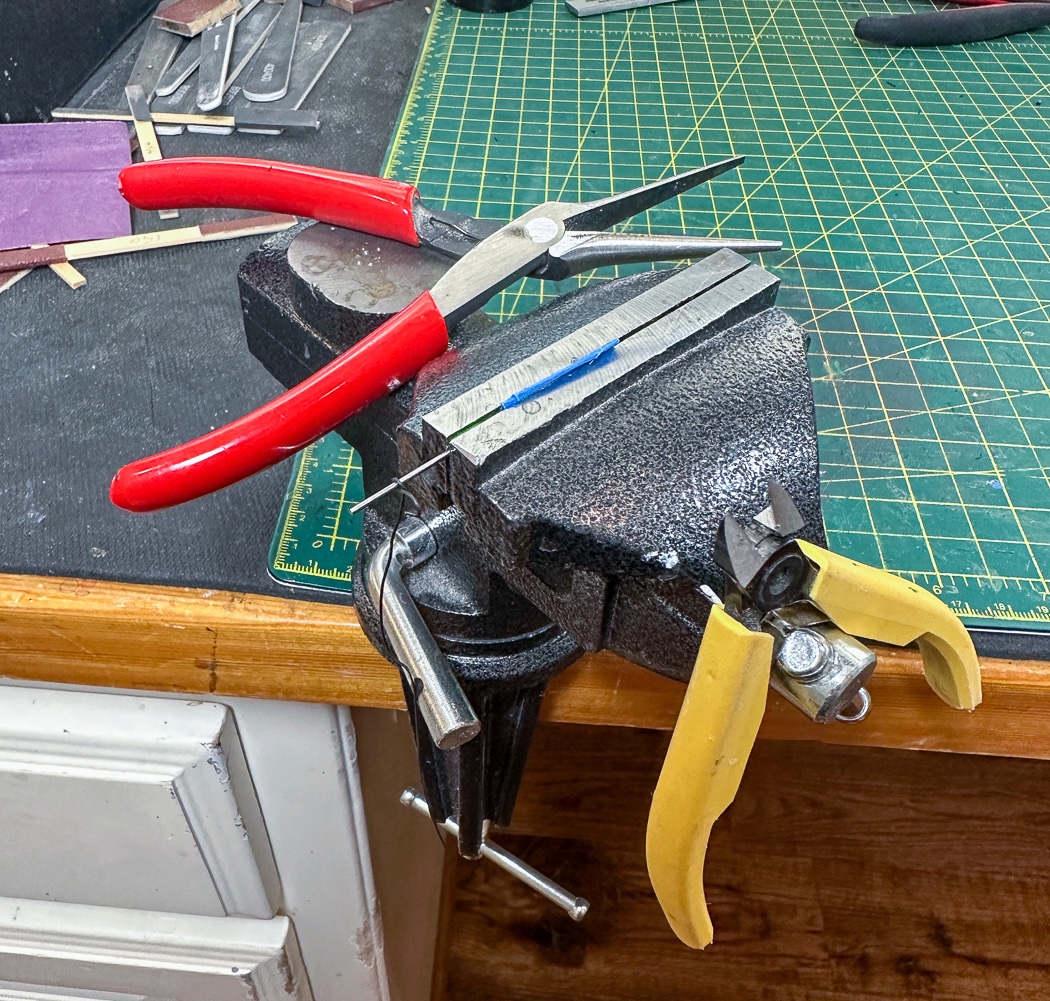
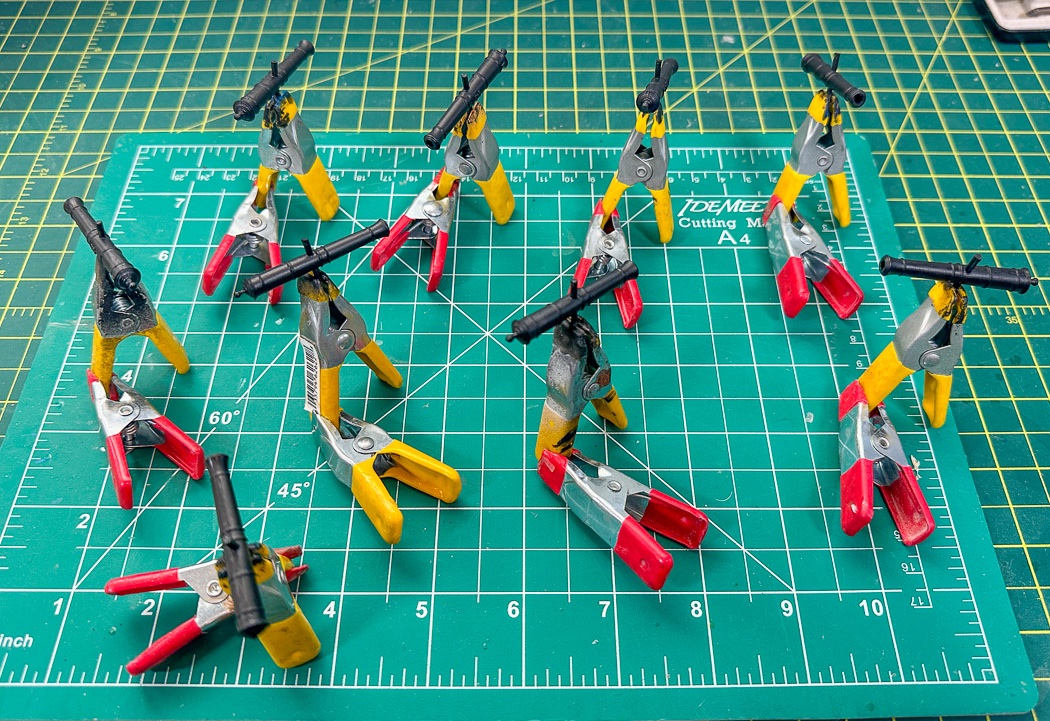
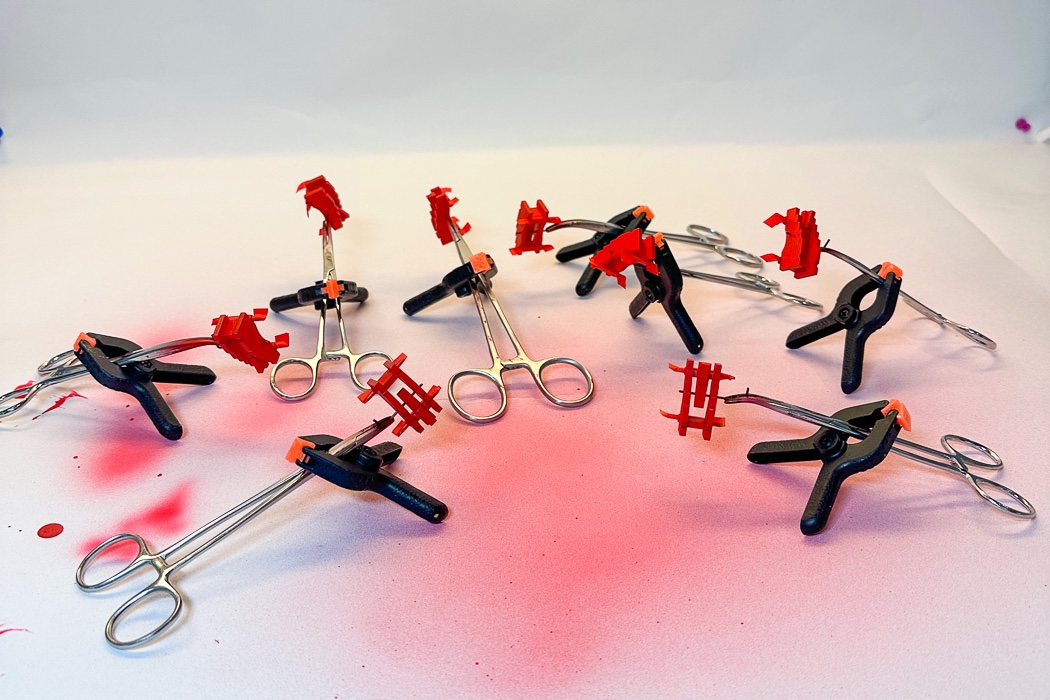
Not done yet, time to do the metal work - lots of eyebolts and split rings to make from 24 gauge wire. I’m using a #41 bit to form the split rings and a # 61 bit for the eyebolts. It took me a few times to remember how I did them for Cheerful, I got the hang of it again and methodically wrapped, twisted, cut repeat. For me the smooth surface (so not to scratch the wire) needle nose pliers and quality flush cutters are essential. I’ve found jewelry makers supply stores have the best tools for this type of metal work. 56 eyebolts and 16 split rings later …. (I was on a roll and made more, I'll need lots more later)
The eyebolts take up seven holes on the carriage, the remaining eight are bolts simulated with 25lb black monofilament fishing line. Just glue, insert and snip a little proud of the carriage. 64 cut lines later …
I’m using black card cut in 2mm strips for the cap squares and following Chuck’s look with a “hinge” and the front and hook bolt on the backside. Simulated with 25lb black fishing line (so I don’t have to paint cut wire) and 24 gauge wire for the hook. I re-imaged a jig I used for Cheerful to pre-shape the card so it will lay easily and consistently on the carriage for gluing. I found it easier to add the front hinge on the jig. 16 cap squares and 32 hinge sets later …

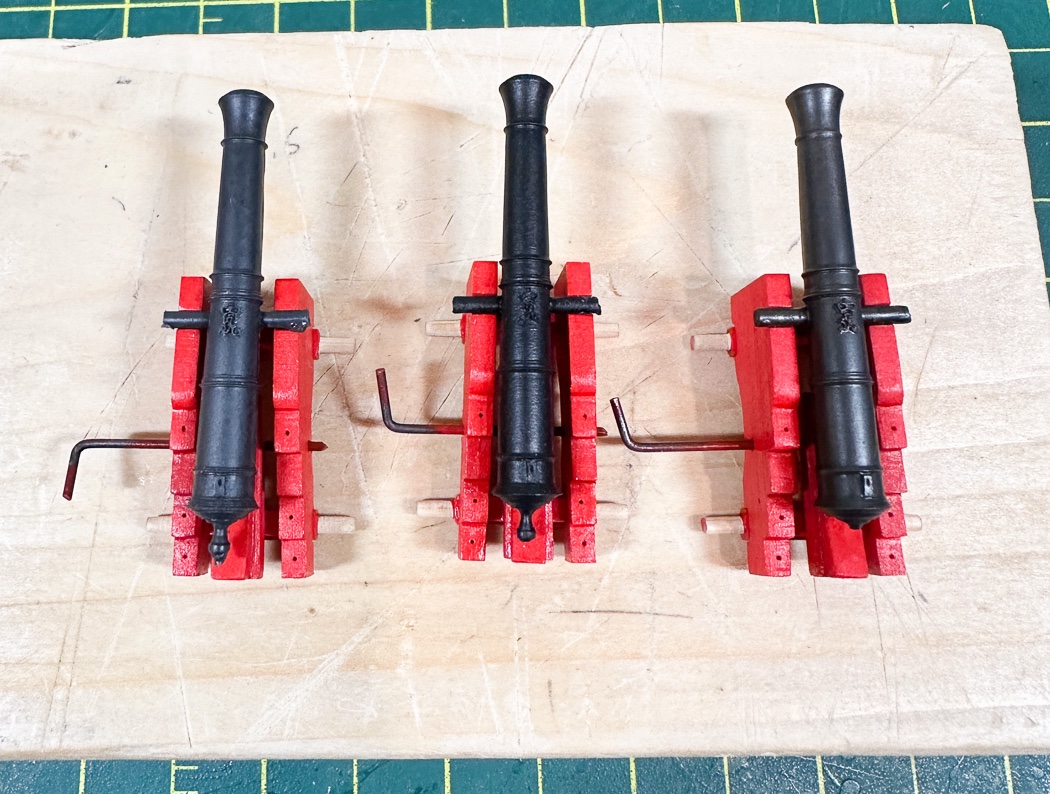
I finally have one completed cannon, here being inspected by mini-me, I still have seven more to mount barrels and add the cap square and hinges. Once the eight are complete I’m going back to finish Chapter 3 - knowing I still have 24 more to do, part of my reason for this post is a reference for me to look back to when I start the next set. They do look pretty cool once complete.
It is though, a process.
Thank you for stopping by, hope this was helpful or at least mildly entertaining. As always thank you for the likes and the comments.
- FrankWouts, DelF, westwood and 17 others
-
20
-
-
3 hours ago, DelF said:
a Navy Board-style model,
Or you could bring Winchelsea out of on hold status😁
- mtaylor and hollowneck
-
1
-
1
-
You’re on your way! I just settled in for the long haul when planking Winnie, mine took five months.
One plank at a time, every plank a project, I kept telling myself🙂
-
Just found your log. Very nice work. I enjoyed building Flirt, Speedy’s sister ship. Paused at completing hull to build Winchelsea, but will get back to the rigging at some point. Too late now but as I’ve done with Winchelsea, I think the one side pencil caulking is a great look, the separation really makes the planking pop. However I didn’t do it on Cheerful and it looks great too.
Derek is a great mentor and valuable resource, follow his work and you can’t go wrong.
-
Amazing cabinet work on the panel, well done!
-
-
2 hours ago, DelF said:
tying alternate clove hitches
Very clever, I’d never have thought of that. Something else to add to my Derek acquired knowledge database.
- Thukydides and DelF
-
1
-
 1
1
-
-
-
34 minutes ago, Roger Pellett said:
WOP, shellac, lacquer- all work. It’s a matter of personal choice.
Exactly!
- Canute, Bob Cleek, Roger Pellett and 2 others
-
5
-
We’ve done this before, I supplied pricing that clearly demonstrated that the $16 can of Wipe On Poly is cheaper than buying two products, especially given the extra chore of determining the mix ratio. I’m quite comfortable that WOP is not sold in Europe due to their being more sophisticated, that is also just silly. The silly you reference is the commentary on why WOP is so inferior when in fact it isn’t.
It’s ok to use shellac, if that is your choice. Just because it is your choice is no reason to denigrate any product other than that.
i also don’t accept the equally silly comment that WOP is used by the unskilled. In fact just slathering it on with a rag is not how it’s properly done. Let’s compare my WOP models against your shellacked ones.
- Canute, mtaylor and hollowneck
-
3
-
I’m quite comfortable with wipe-on Poly and get a chuckle from those that oppose it for what consider the silliest of reasons. I have 20 year old models that look the same as the day after I applied it. straight up Polyurethane I’m sure is a whole different thing I’d imagine.
Never tried shellac.
- Bob Cleek, mtaylor, scrubbyj427 and 1 other
-
4
-
The attachment above is an interesting read, it answers a lot of questions and dispels a lot of conjecture.
- Canute, mtaylor and thibaultron
-
3
-
Fun to watch your build of the Syren stove, you always add such clever mods. Mine for Winchelsea is still far in the future.
- mtaylor, Blue Ensign and CiscoH
-
3
-
Best wishes on a successful surgery and good health!
-
I never use what the glue comes in, too unwieldy. Bob Smith Industries also has these Applicators I’m sure they are available from other sources.
“There are significant differences in adhesive performance among the various cyanoacrylate products.“ From simple web search.
Both Smith Industries and Gorilla manufacturer their CA products. Bob Smith Industries has 8-9 different variations including an odorless version. As mentioned other companies, generally hobby stores, put their name, with permission, on BSI’s products.
So many glue threads, so many opinions….🤣 I know what works for me. -
-
Nice looking work!
- Edwardkenway and mtaylor
-
2
-
Maybe for a kit at this level engraved decks aren’t necessary. I’d plank the deck myself and would rather see quality wood strips rather than an engraved deck I wouldn’t use.
- chris watton, DelF, hollowneck and 6 others
-
9
Building my own budget lathe for wood model ship building - looking for tips and advice on my ideas
in Modeling tools and Workshop Equipment
Posted
Proxxon DB250. $225 All you need