glbarlow
-
Posts
4,134 -
Joined
-
Last visited
Content Type
Profiles
Forums
Gallery
Events
Everything posted by glbarlow
-
 It’s all good Joe, I am an expert at deconstructing having done it so many times. No time-outs, just a bit of reorientation. I’ve found the second or third third time I do something it sometimes turns out better 😊
 -
You have a lot of very nice work, we want to be able to find it easily.
- 542 replies
-
- 2
-

-
- Sphinx
- Vanguard Models
- (and 3 more)
-
Thanks Rusty, though I am looking forward to being done with planking for a while.
- 840 replies
-
- 2
-
-
- winchelsea
- Syren Ship Model Company
- (and 1 more)
-
From the manufacturer, www.rptoolz.com. They are clever enough to print their website right on the cutter. It’s pricey but worth it.
- 840 replies
-
- 2
-
-
- winchelsea
- Syren Ship Model Company
- (and 1 more)
-
Thank you! I got them from Shapeways.com under the category ‘humans’ at 1:48 scale. I selected one and hand painted them to kinda look like me. I borrowed the idea from Chuck as a fun way to have an appreciation for the scale of the ship.
- 840 replies
-
- 3
-
-
- winchelsea
- Syren Ship Model Company
- (and 1 more)
-
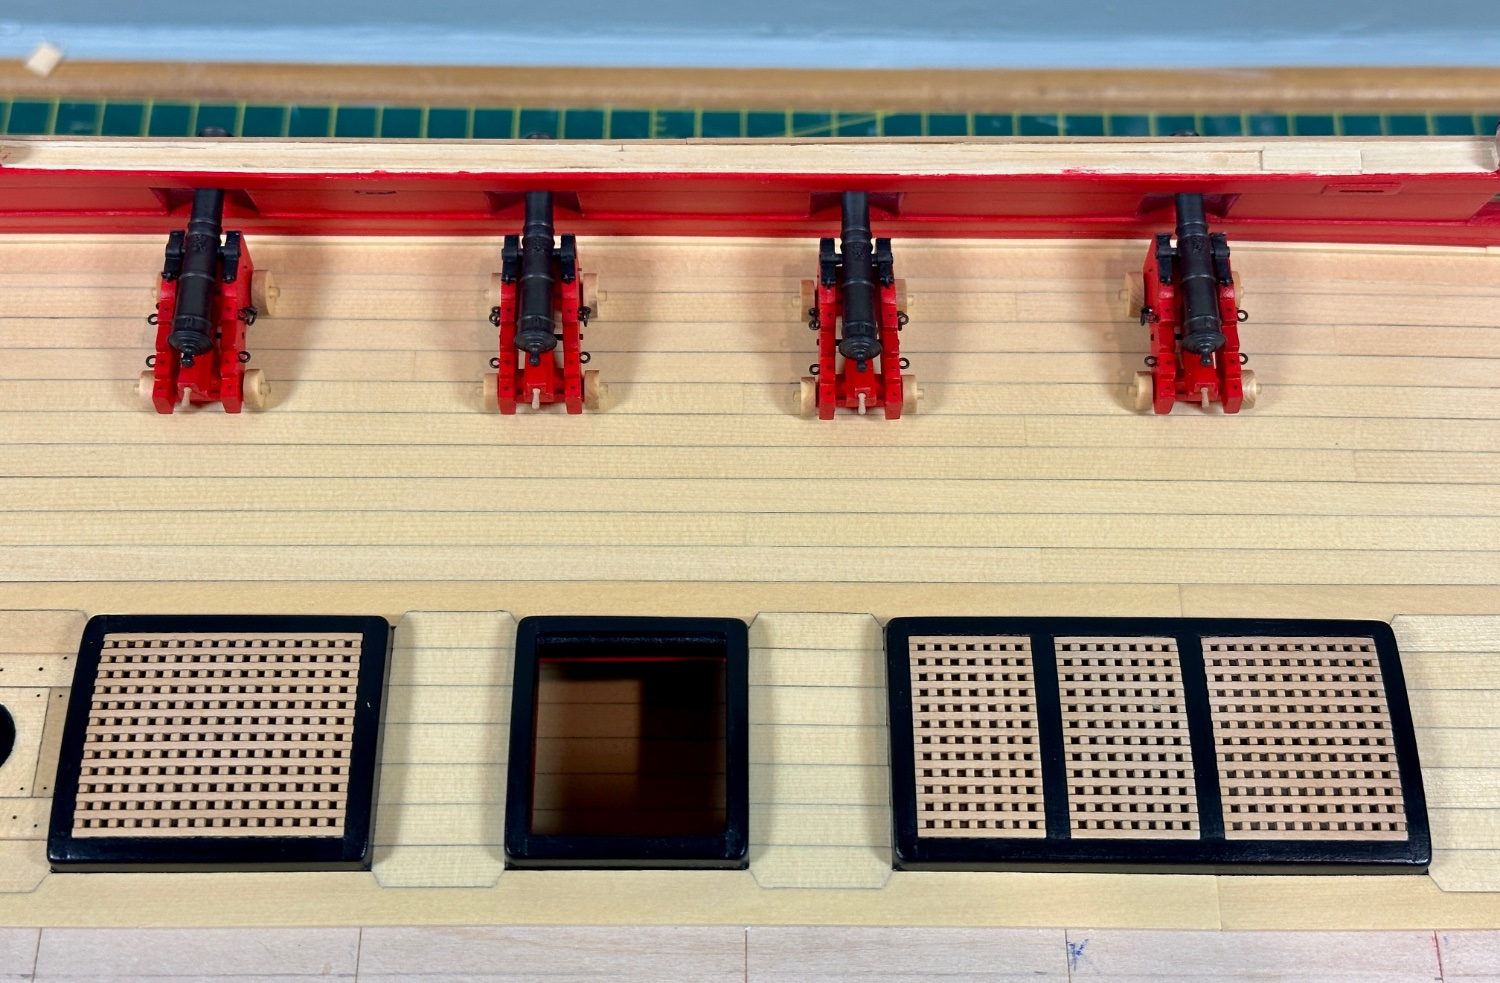
Deck Update About 2/3rds of a planked deck. The port waist battery in for a trial fit. Light coat of WOP but final sanding and scraping to come. Don’t think I’ll complete the deck and chapter 4 before my upcoming photography trip to Patagonia (originally scheduled March 2020 but then this thing happened.) I can only hope Winnie will wait for my safe return with a couple of hundred images to process. If interested you can check out my first Patagonia trip at GlennBarlow|Photography

- 840 replies
-
- 10
-
-
- winchelsea
- Syren Ship Model Company
- (and 1 more)
-
It needs to go in much much more, more than your line. A batten should notch into the rabbet and smoothly run through the first three bulkheads and continue on from there. As you can see from the plank you're holding it would never notch into the rabbet as it is. This is the toughest and along with the stern the most critical part of the build at this stage. Look at all the build logs and I think you'll see what I mean.
-
You'll catch up to me soon, it's looking great.
-
Log to PDF Tool
glbarlow replied to VTHokiEE's topic in Using the MSW forum - **NO MODELING CONTENT IN THIS SUB-FORUM**
This looks great, but I’m all Apple. I know they don’t make it easy for developers but I’ll wait and hope you get an iOS version you’re comfortable with, don’t trust myself at the terminal level. -
Your signature links don’t appear to be hyperlinks to your builds and gallery?
- 542 replies
-
- 1
-
-
- Sphinx
- Vanguard Models
- (and 3 more)
-
As many have noted, very well done! Your log just sort of stopped though the model is marked as finished. Did you post a gallery?
- 542 replies
-
- 1
-
-
- Sphinx
- Vanguard Models
- (and 3 more)
-
Very neat work, time well spent. Let the planking begin.
-
The process has begun, nice work!
-
Yay Surprise, and not the HMS Rose impersonating her in the movie...
-
I think the black strake isn't black? As Chuck, notes the handy thing about putting in on after the above the wales planking and after the second layer of wales is you get a nice clean paint line on the top of the wales with the not painted black strake above it. Maybe it's nomenclature and what your showing is actually the top plank of the wales?
-
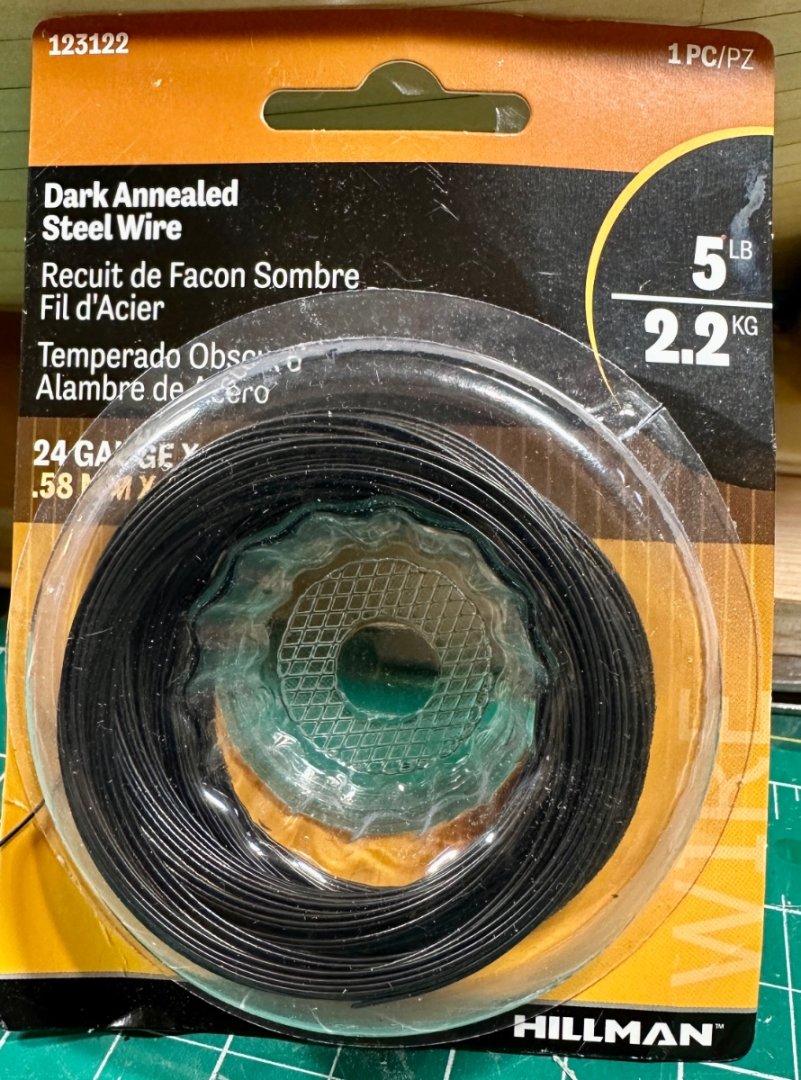
Straight up dark annealed steel wire, no paint or blackening. I may hit a shiny spot with Admiralty Iron Works black (my favorite black paint) for the most part I don’t touch them just for the reason you stated. Wire is wire, but I like this Hillman brand bought on Amazon.
-
Did you add sanding sealer to the boxwood decorations? That helps even out the color.
- 389 replies
-
- 2
-
-
- winchelsea
- Syren Ship Model Company
- (and 1 more)
-
Your new cannon is light years better than the one the right. The natural wheels look great, that’s how I’m doing mine. I like that you made your own eyebolts, but would offer the breaching rings are way out of scale too large. Check the Syren Ship Models build monograph for Cheerful or my build log, which followed it) for a best way of making and installing breech lines. .45 - .5 mm rope is a good size for the breech rope in my opinion.
-
Enjoy seeing a Flirt at this stage. Very nice work.
- 102 replies
-
- 1
-

-
- Flirt
- Vanguard Models
- (and 1 more)
-
Maybe for our German friend, in this context “ridiculous’ is American vernacular for “incredible.” Not sure how our younger generation gave this word two meanings that can only be sorted by context but they did. Those with English as a second language probably just shake their heads. Your work with ivory is incredible, your Winnie is really special.
-
Although I’m kind of a RED guy, that’s a nice color shade you have for the bulwarks. It feels good completing that step and with the multiple layers and clamps no small feat. Well done!
-
The stern frames, the port sills, transition from stern post to counter, and the gallery framing are the ones I was most referring to, those are still ahead of you. Sounds like you're on great track, glad you're enjoying the project from the start. Lots of fun awaits.
-
I built this model and wrote my first build log here for it. Unfortunately it was lost in the 2013 system crash, though i do have a photo gallery for it now posted. I write logs offline and keep backupsthese days. This is a great model, you’ll enjoy building it. Though you’re a long way from it, researching and installing the rigging was my favorite part.
-
Nice start. I can’t overemphasize enough how important getting the skeleton infrastructure exact to the plans. So much later from port location, quarter galleries and stern depend on it being solid and accurate. You’ll see on many build logs, including mine cutting out elements from the plans and using them as guides.