


Charter33
-
Posts
418 -
Joined
-
Last visited
Content Type
Profiles
Forums
Gallery
Events
Posts posted by Charter33
-
-
Well done, Ron, it's all coming together nicely!
- kiwiron and The Gimps Chimp
-
 2
2
-
Thanks for the likes and comments. Bit of a hick-up with the 1:1 workshop build at the moment. The main cause of my absence from the shipyard last year was the Admiral's garden project. It went a bit over budget so funds for the shed were diverted. Soon be back on track though, and I'll update both related threads in Shore Leave for anyone interested later.....
-
Oh yes, it's definitely a big project Ron, challenging but so satisfying once completed. Passing on a great piece of advice I was given by a much respected member of this site, Shipyard Sid, take your time and enjoy it. I shall be watching your progress with much interest.
Cheers,
Graham.
-
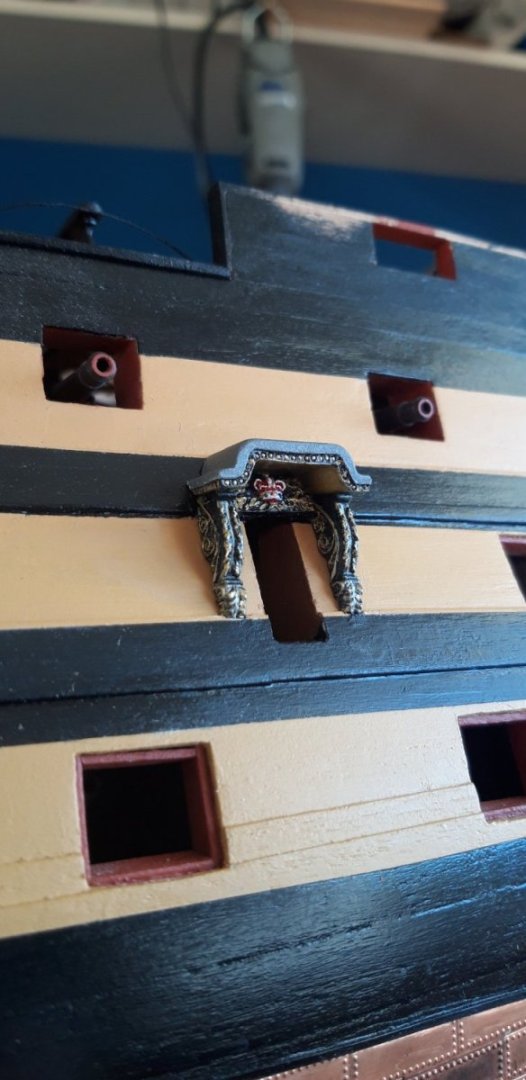
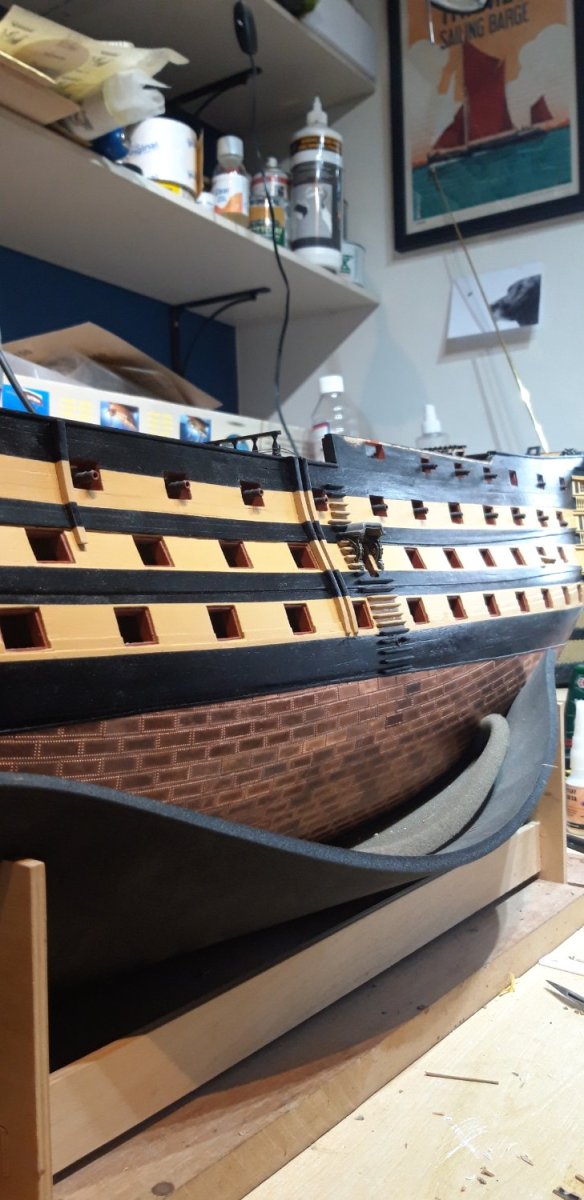
Back in the shipyard, and picking up from where I had got to on the Victory build.
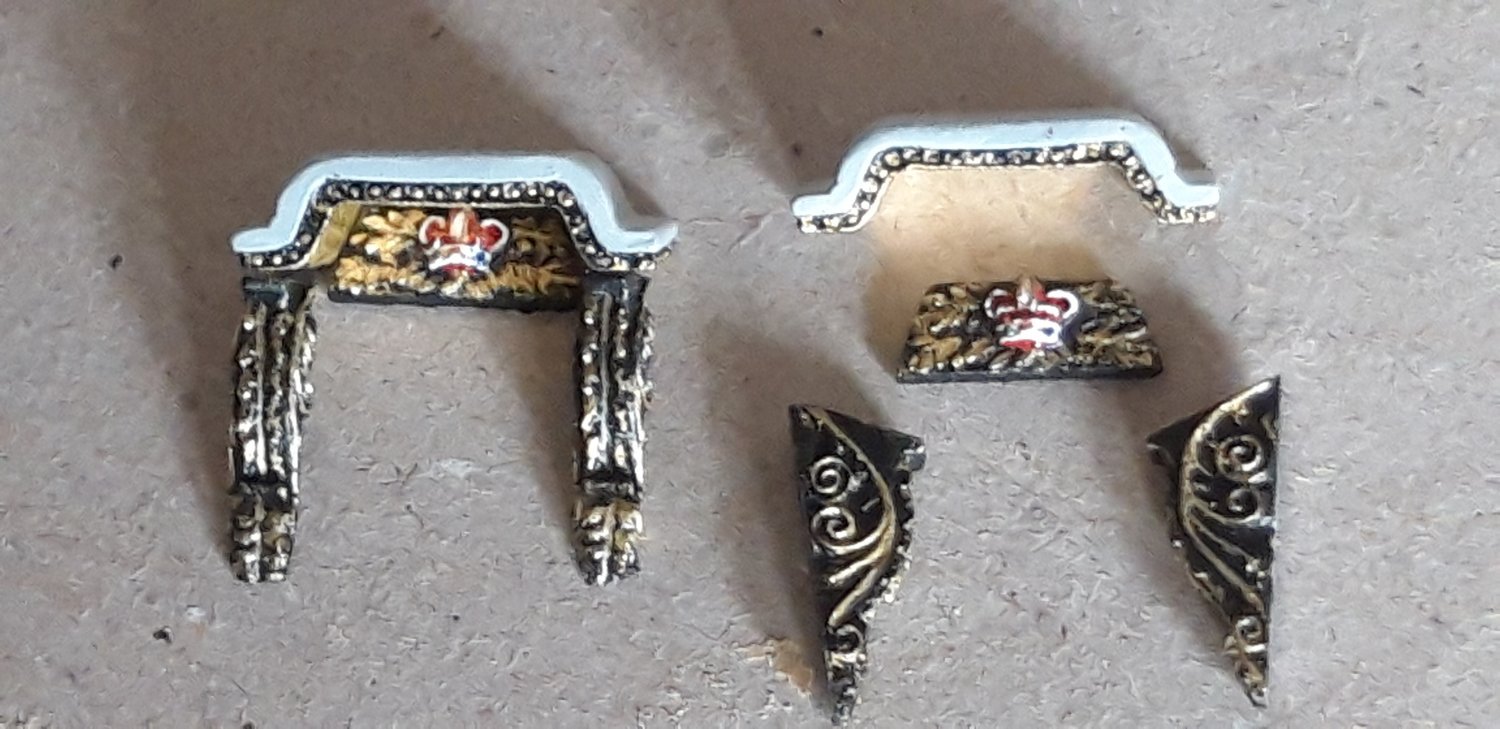
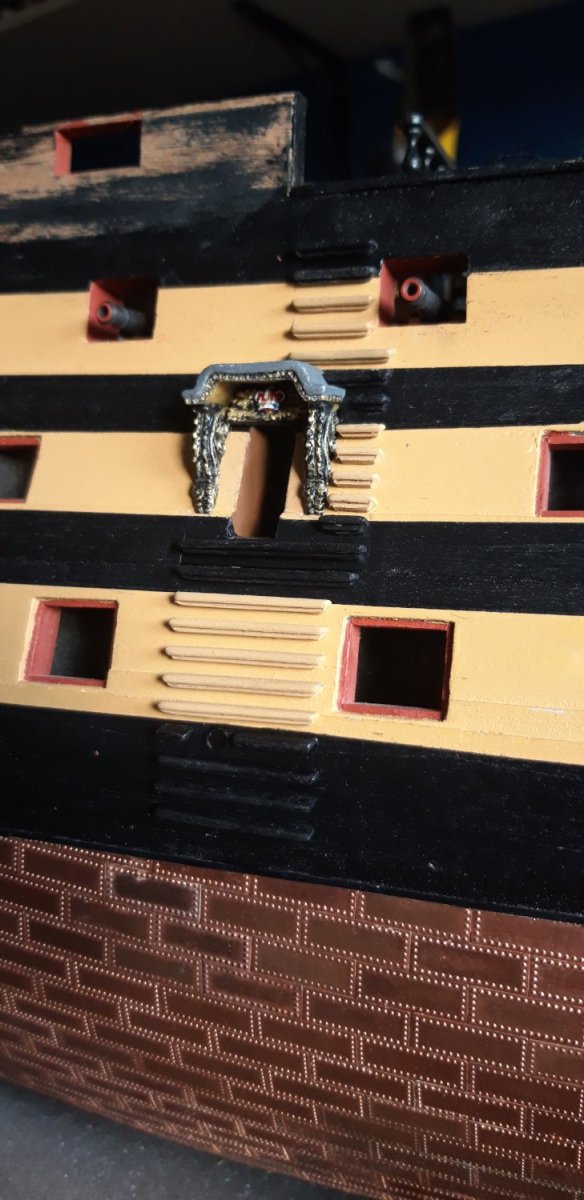
The first step was to get the white metal components for the two entry ports painted. These later additions to the vessel didn't exist when the ship was launched, neither were they fitted at the battle of Trafalgar. The models castings appear a little different to those shown in my 'go to' reference sources so I relied heavily on internet images.

Tricky to achieve the result I had in mind, especially the line of rivets/studs under the front and side edges if the canopy. The colour of the sheathing on this first attempt was way out, so I had a go at mixing my own version of what I guess is lead from my small stock of enamels. These decorations were fixed in place with epoxy glue.
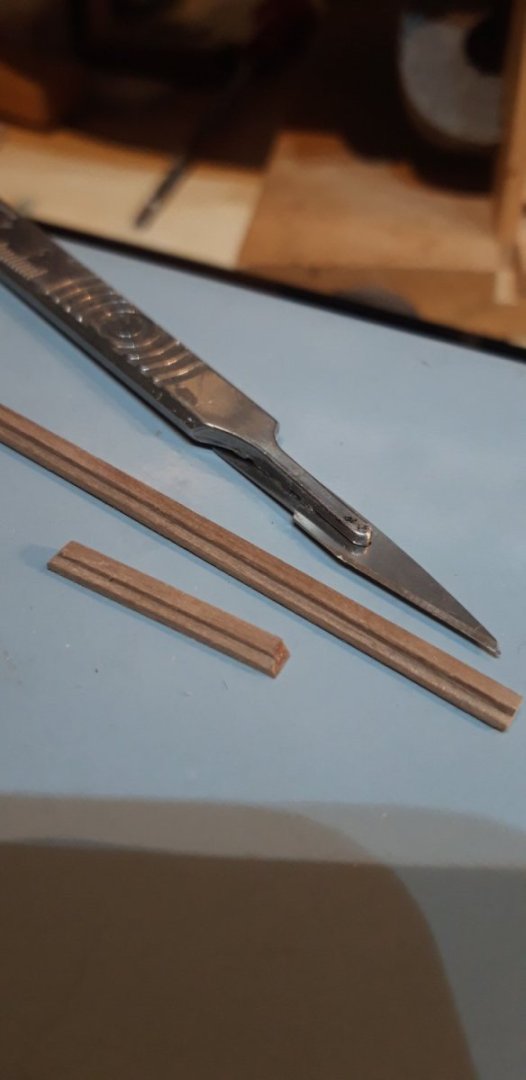
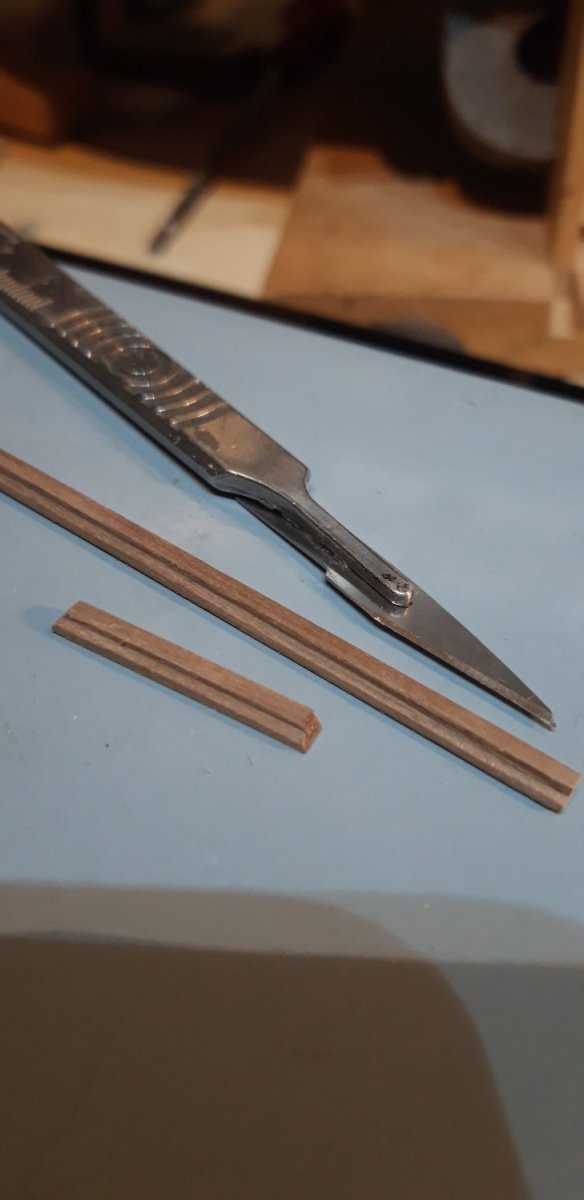
An unexpected task next, and totally self inflicted. Sorting out the various parts that form the steps up to, around and above the port I found that the two steps immediately below the ports had gone AWOL. I think they had become detached from their walnut sheet back when I was tackling the belfry. Classic mistake - I put them somewhere 'safe'..... and they disappeared into another dimension. Eventually solved by converting a scrap piece of stock to the required profile and then deducing their length from the remnants of the hole where they once resided when originally machined.
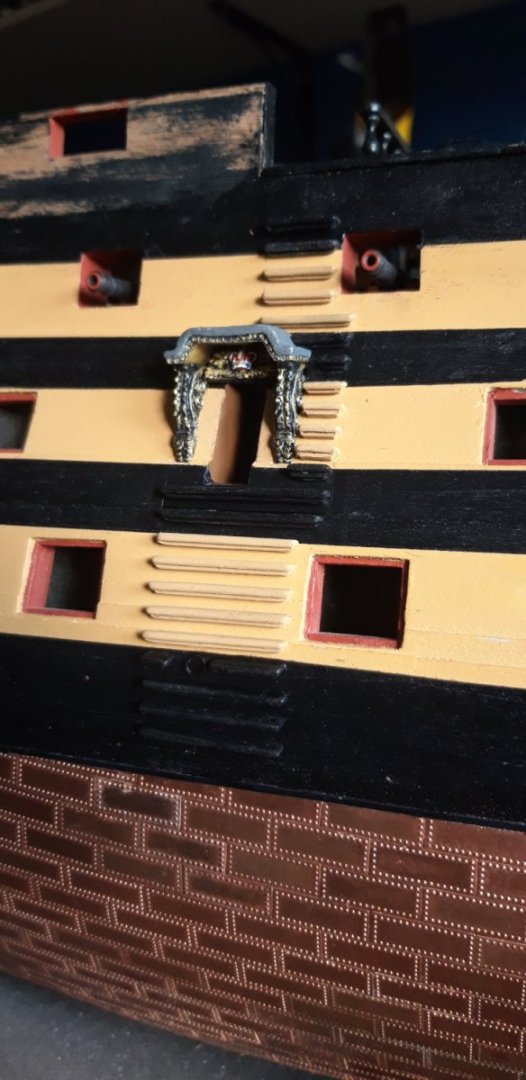
Masking tape helped align the steps and a couple of scaps of redundant planking made a simple 2 mm spacer for the gaps between them.
Finally the fenders and chesstrees were painted and added.

The three 'Victory' copper plates I mentioned back in posts #12 and #42 can be seen under each entry port.
Good to be back at the work bench.
Cheers.
Graham
- Mr Whippy, RossR, mort stoll and 2 others
-
5
-
-
Just like you and Andrew, I too suffer from 'safe place' syndrome, but with one unmentioned addition.... once the work is done and lost item has been replaced, the missing part turns up! 🤣
- AJohnson, Keith Black and mtaylor
-
 3
3
-
Allen is correct, Caldercraft is inaccurate. I couldn't find any definitive information in John McKay's 'Anatomy of the ship' book, Longbridge's 'The Anatomy of Nelson's ships' or any of the other published works I have in my library, so the following is based on personal observation so can only be regarded as a guide for consideration.....
It also assumes that your HMS Vanguard's rudder and that of another vessel of the same scale are reasonably comparable.
Longridge, plate 35, is a good photo of Victory's rudder and the chain in question. Using the thickness of the rudder as an appropriate datum it appears that this is equal to 10 chain links.
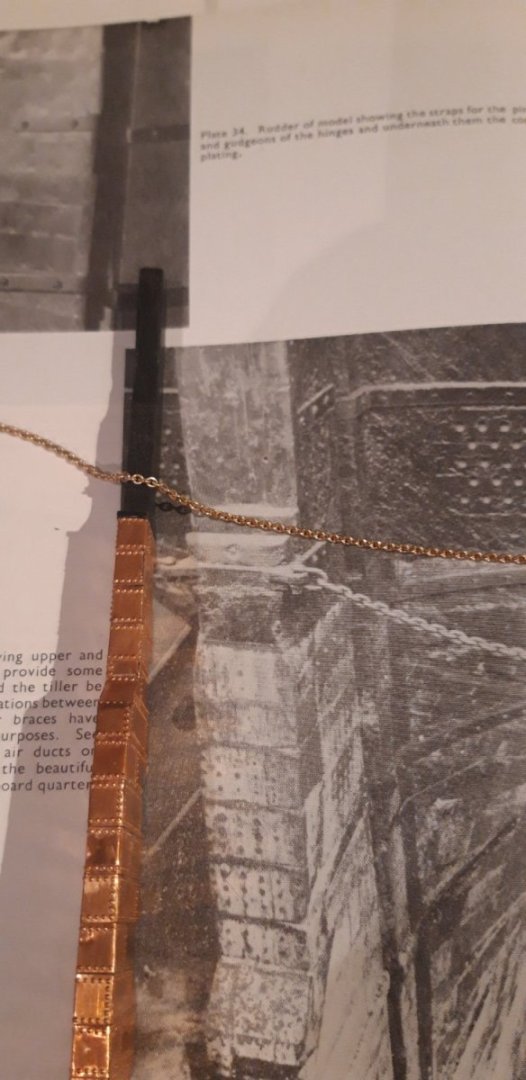
Comparing my Victory's rudder to the chain the kit provides shows the model's rudder is equal to 5 links. To be closer to scale accuracy a chain of around 40 links per inch is possibly closer to what it should be.
Graham.
- Ian B, Keith Black, allanyed and 3 others
-
6
-
Hi Ian,
The chain provided by Caldercraft for my HMS Victory, which is also 1/72nd scale, has 19 links per inch/25 mm, with each link 2mm long (as close as my old eyes can tell!)
Hope this helps.
Graham.
- mtaylor, AJohnson and Keith Black
-
3
-
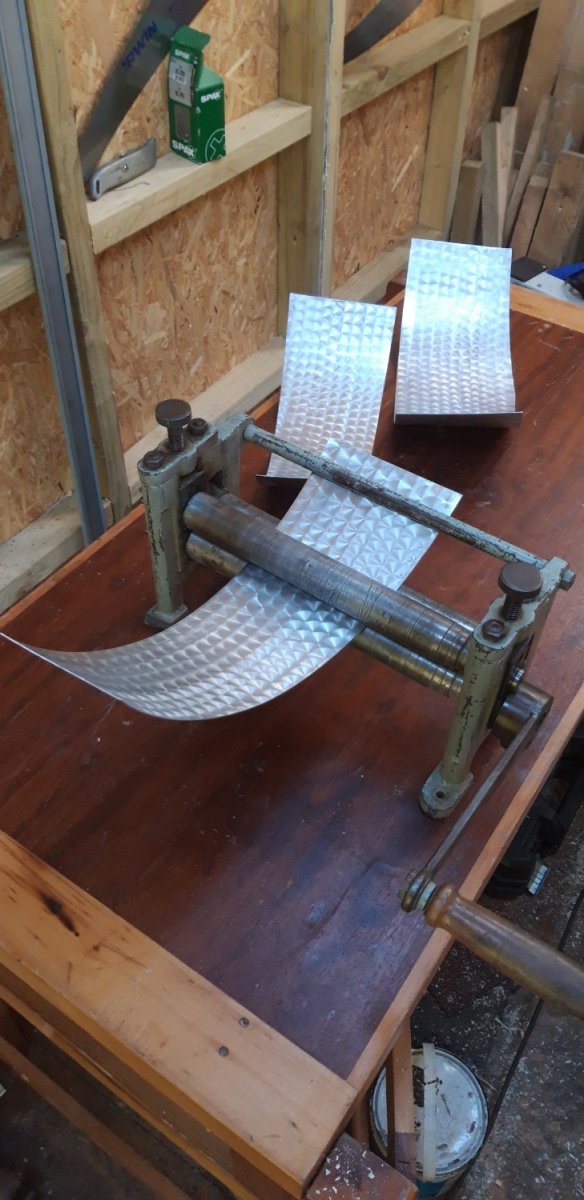
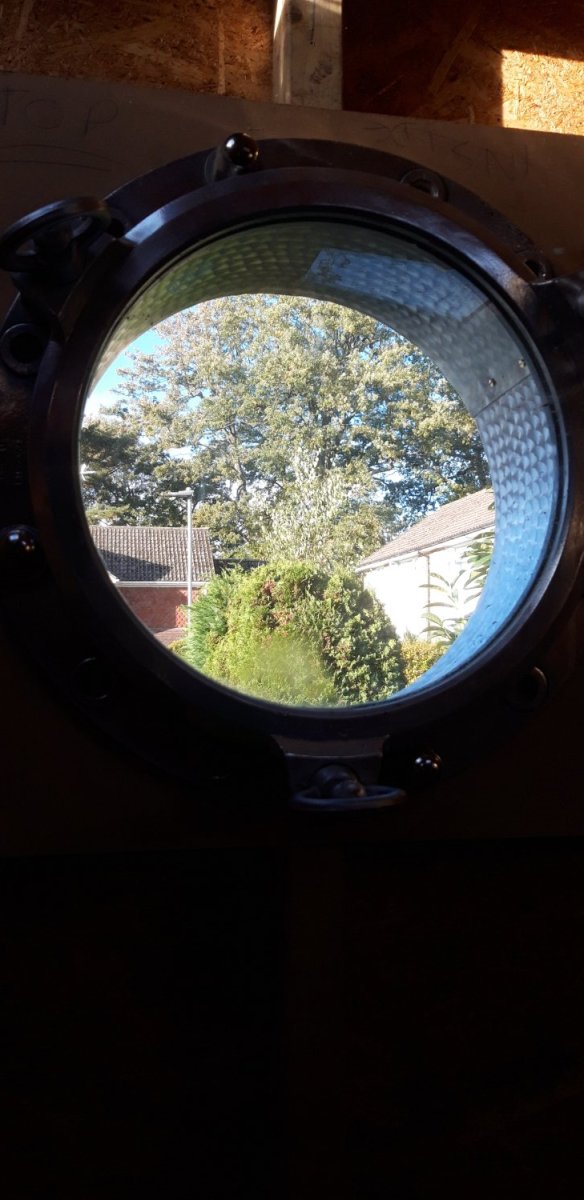
Thanks Canute. The ali sheet has been stored for a few years and needed something to hide all the dings and scratches. I used to use valve grinding paste and a piece of wooden dowel for this, but this time lashed up a tool using a dremel mandril, a 22 mm dia. disc of 4 mm thick softwood with the central hole recessed for the screw head, double sided tape and circles of abrasive Scotch Bright pad. The porthole faces north west and this finish catches the setting sun nicely on a good day.
Cheers,
Graham
- thibaultron, Egilman, Old Collingwood and 5 others
-
7
-
 1
1
-
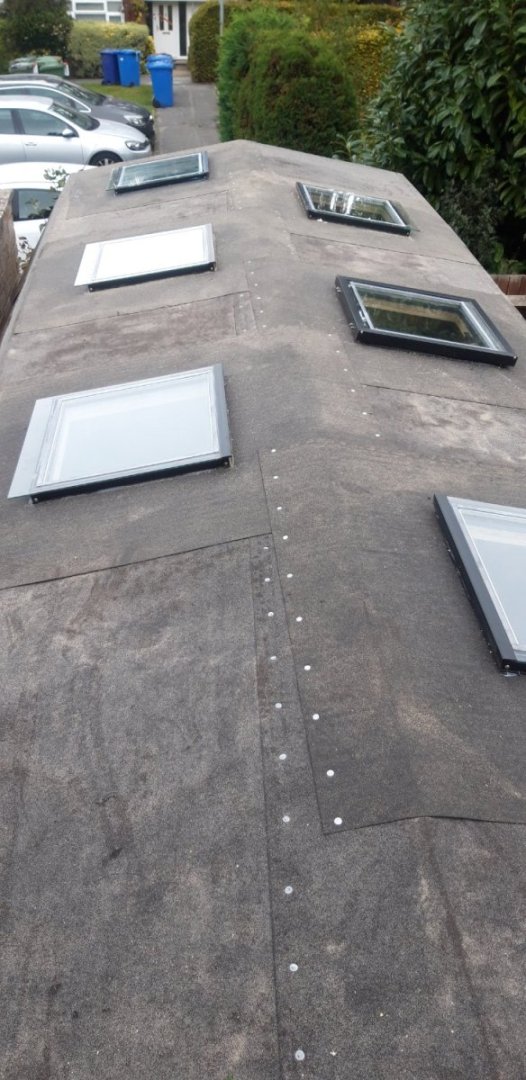
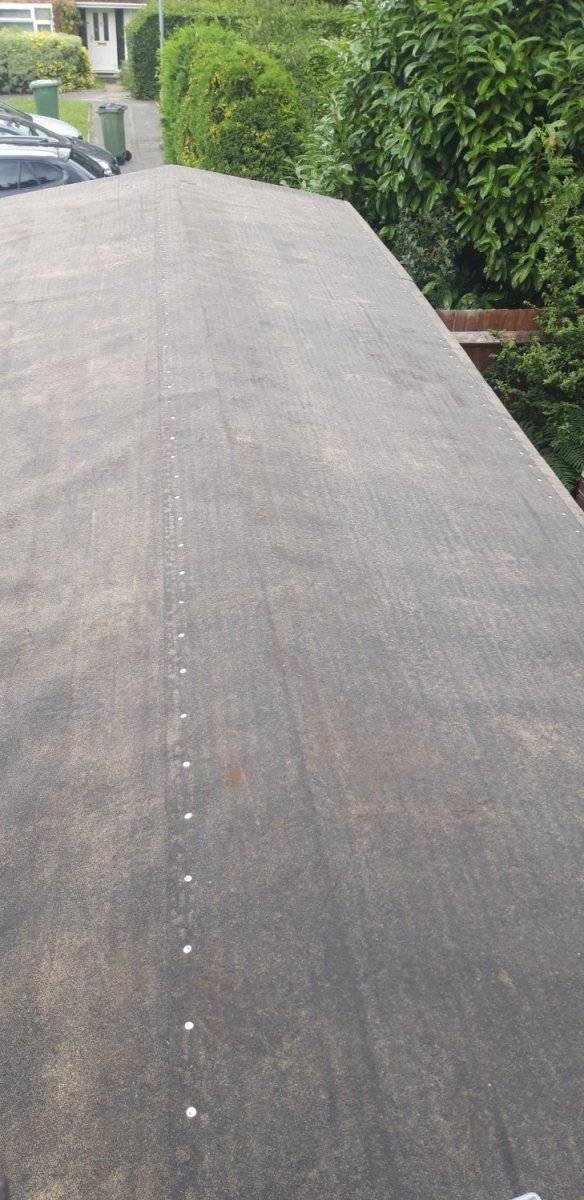
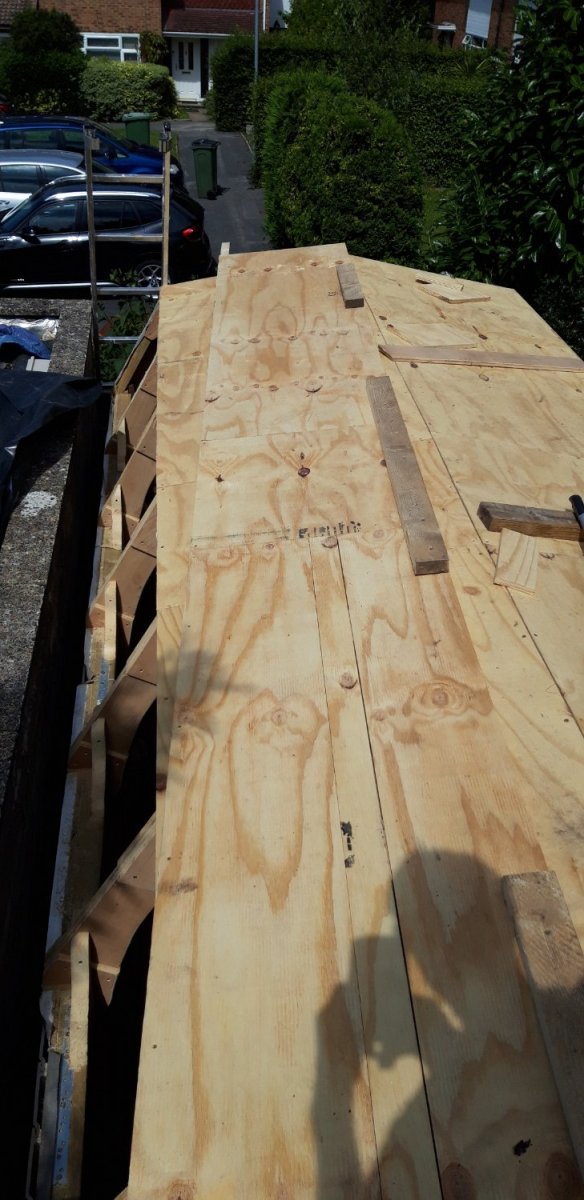
The roof shingles are now all sealed.
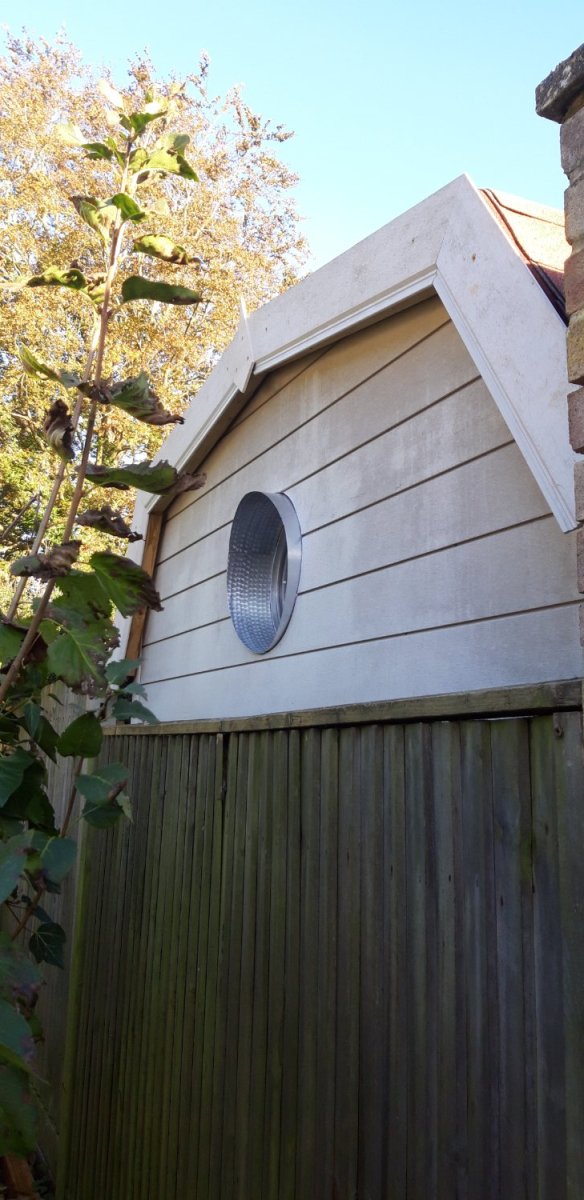
This is my neighbour's view of the build, a better one then I have!
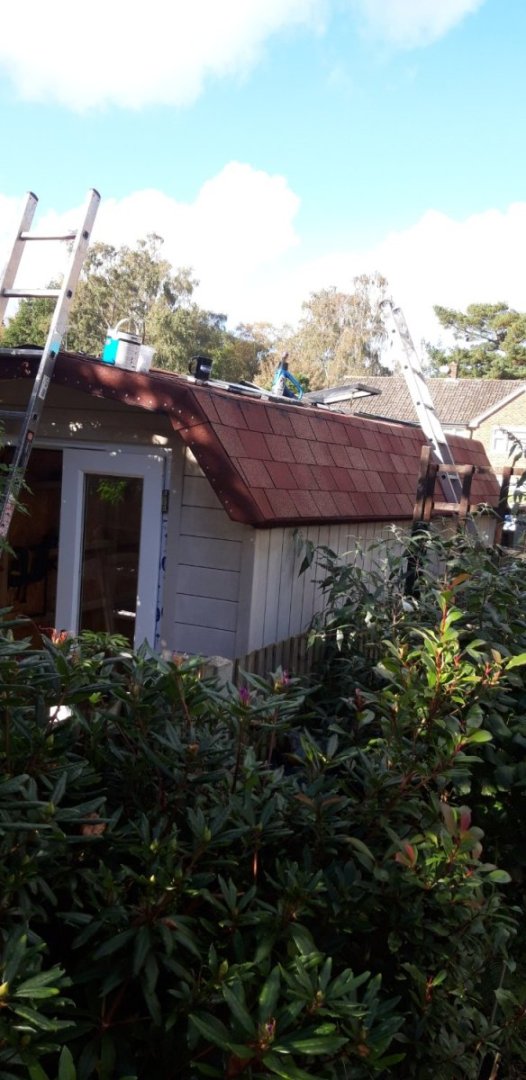
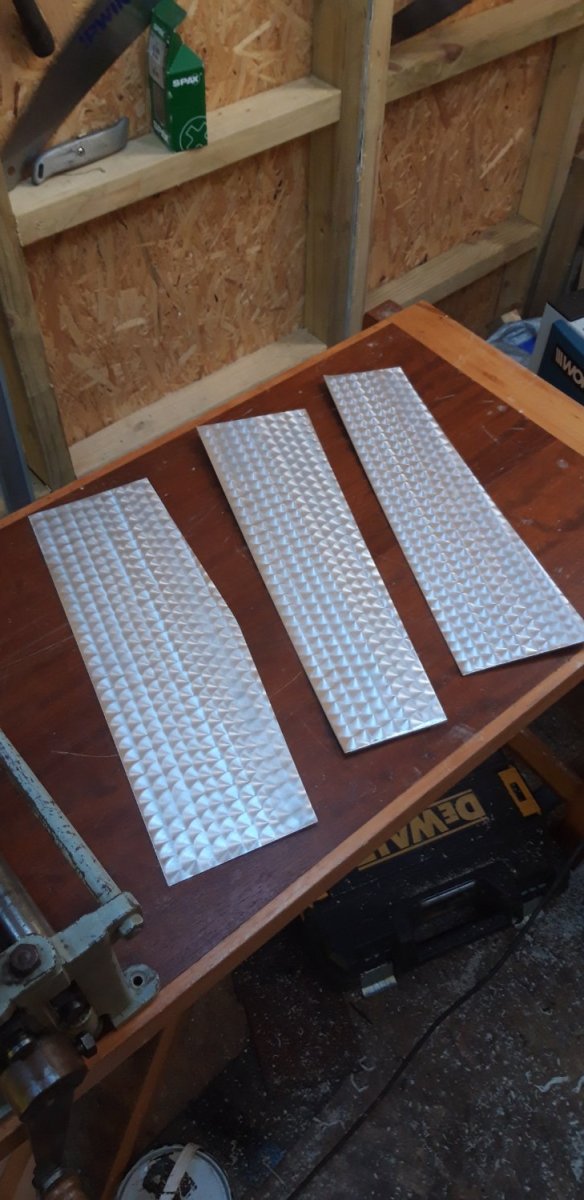
The aluminium porthole lining panels have been cut to size, 'engine turned'

and rolled to profile.

These panels have had a preliminary fixing and my next job is to remove them and then re-fit with additional sealant.

The barge board/ fascia board has also been completed on this gable end using the spare length of wall cladding I had left over.

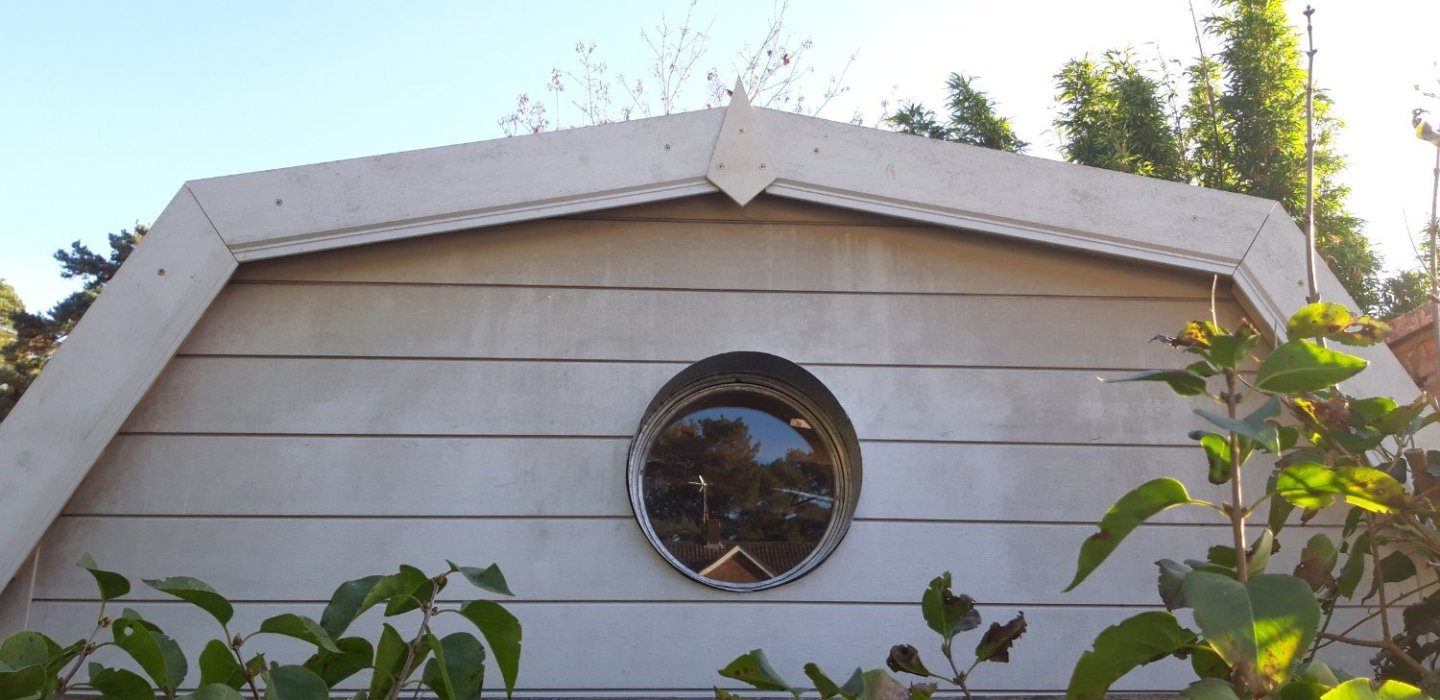
Once the front gable end has been finished I can start working on the interior beginning with the floor.
Progress!
Cheers,
Graham.
-
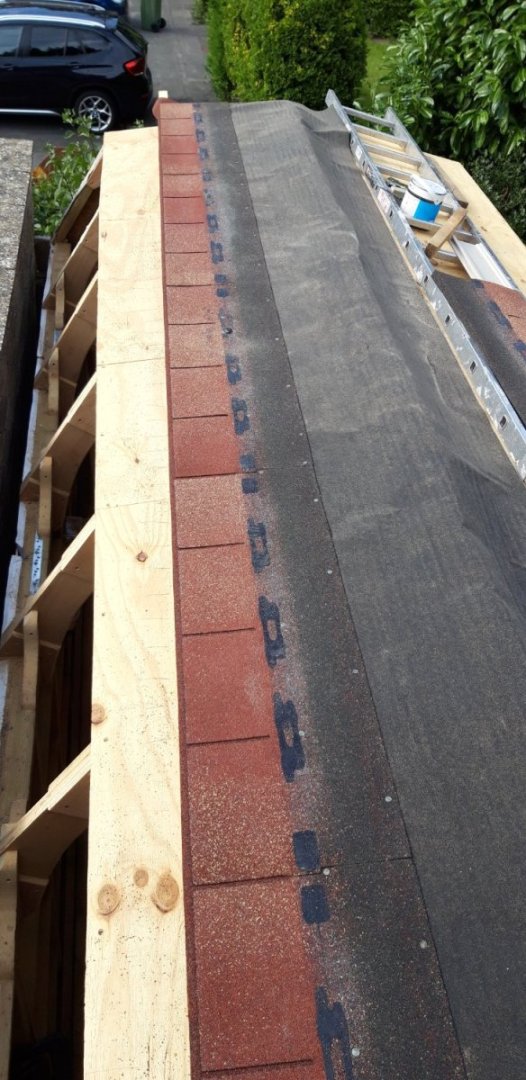
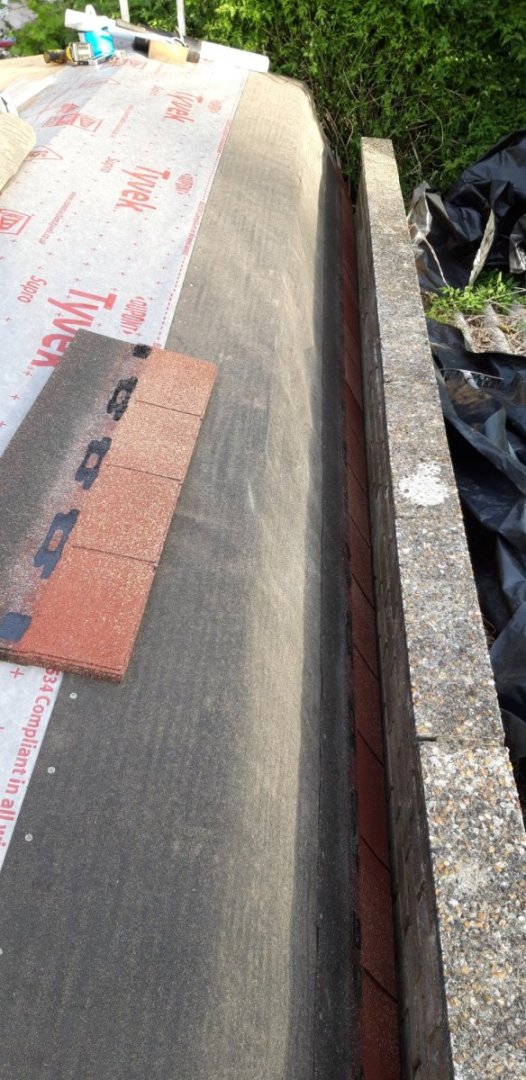
Bitumen shingles in place. The sun was setting as the top ridge was fitted so sealing with a heat gun and finishing edges with felt adhesive will have to wait until tomorrow...

Top ridge was completed using offcuts of shingles and 'detail strip' minimizing waste. The roof has stood up to some exceptionally wet weather this week without any leaks which is encouraging. I'm going to neaten up the gable ends with facia boards, and apart from adding some guttering, and the porthole lining, the outside is pretty much finished.
Cheers,
Graham.
-
That's the plan! 😄
Storm 'Babet' has halted work on the roof shingles for a few days but I'm aiming to complete the last couple of rows and the top ridge tomorrow.
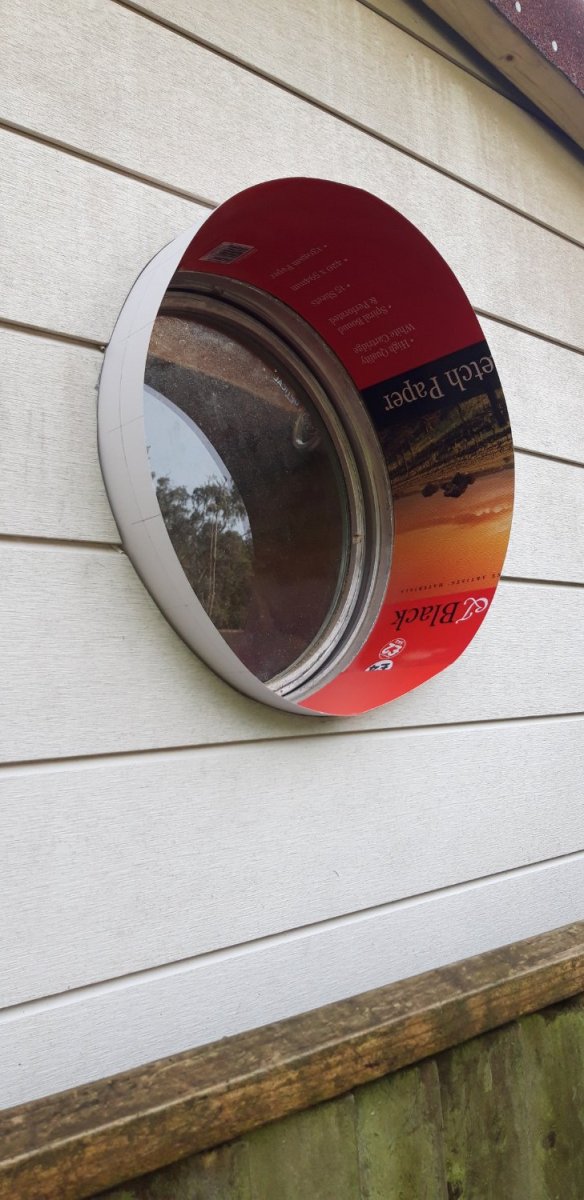
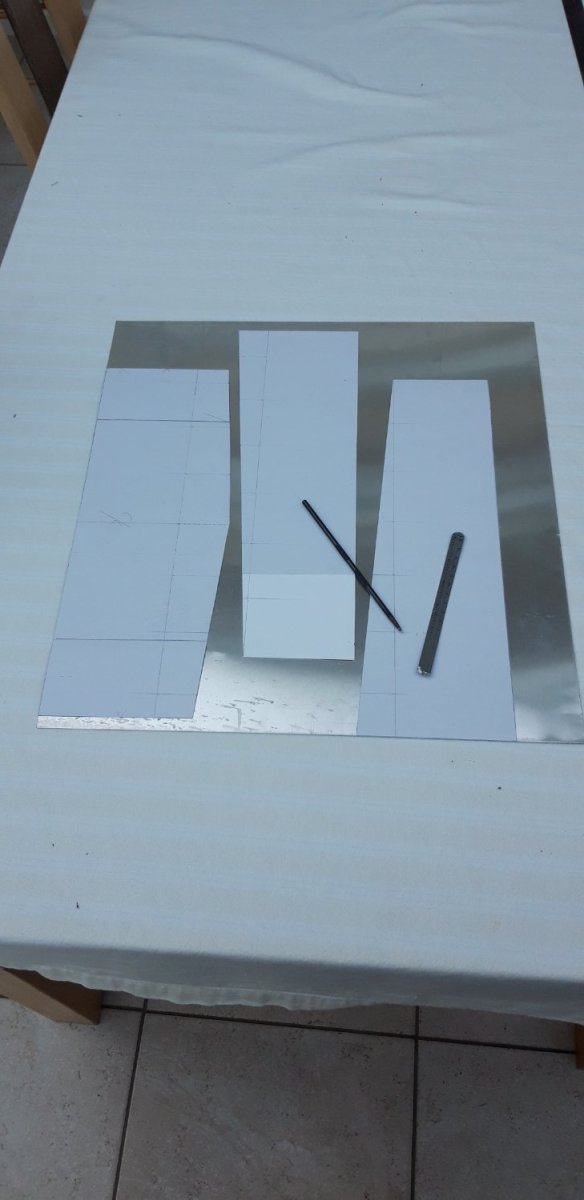
In the meantime I'm working on the recess surrounding the porthole.
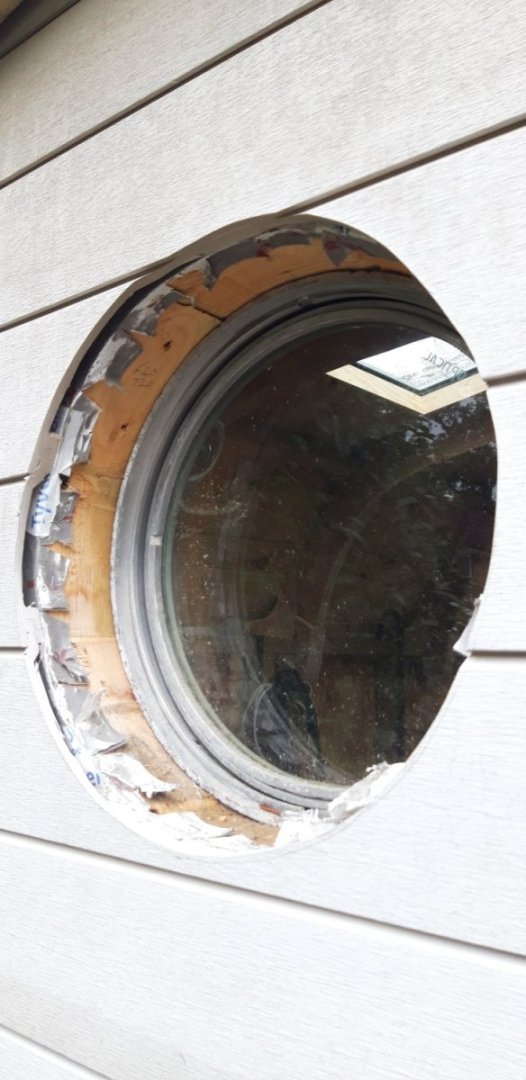
Card template made,

After adjusting the amount it projects out of the wall the template was cut to suit the available material, an offcut of aluminium sheet.

I'll add more pictures once these have been cut out and shaped....
Cheers,
Graham
-
Hi Robert, and welcome to MSW from another Thames Valley based member.
You've come to the right place for advice and plenty of others will chip in with their thoughts. You can use the search function on here to research this model too. You'll find an excellent kit review by esteemed member James H.
Good luck with your project. Starting a build log is a great way to get advice, feedback and support!
Cheers,
Graham
- Keith Black, mtaylor, AJohnson and 1 other
-
4
-
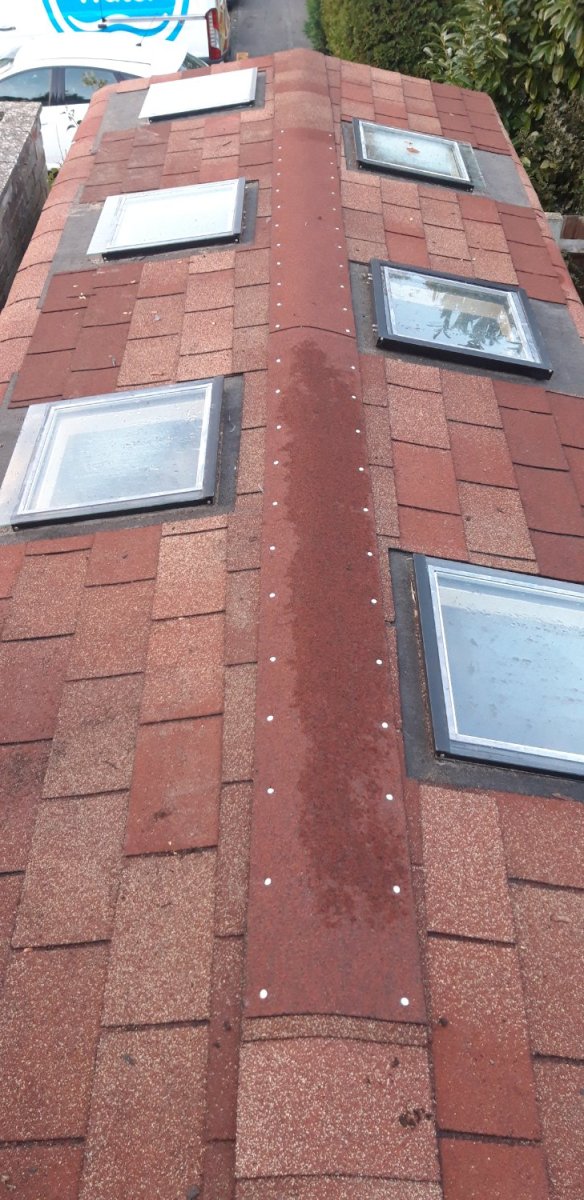
Having achieved a water-tight roof covering
it's time to start cutting holes through it!
Took the best part of the day, but the six roof lights are now in place....
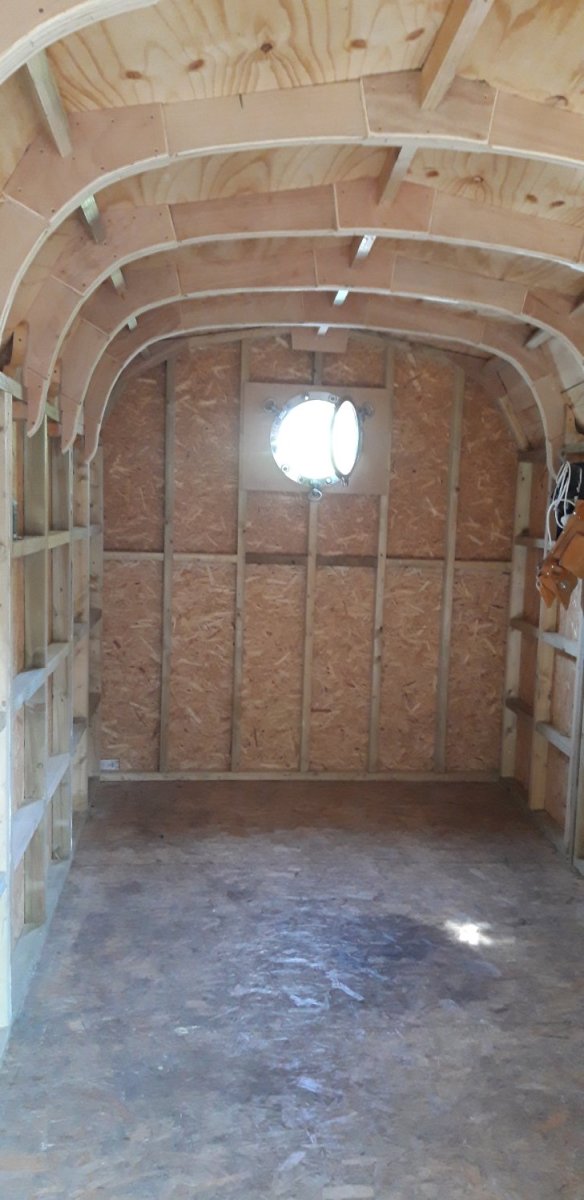
Here are a couple of 'before' pictures.....

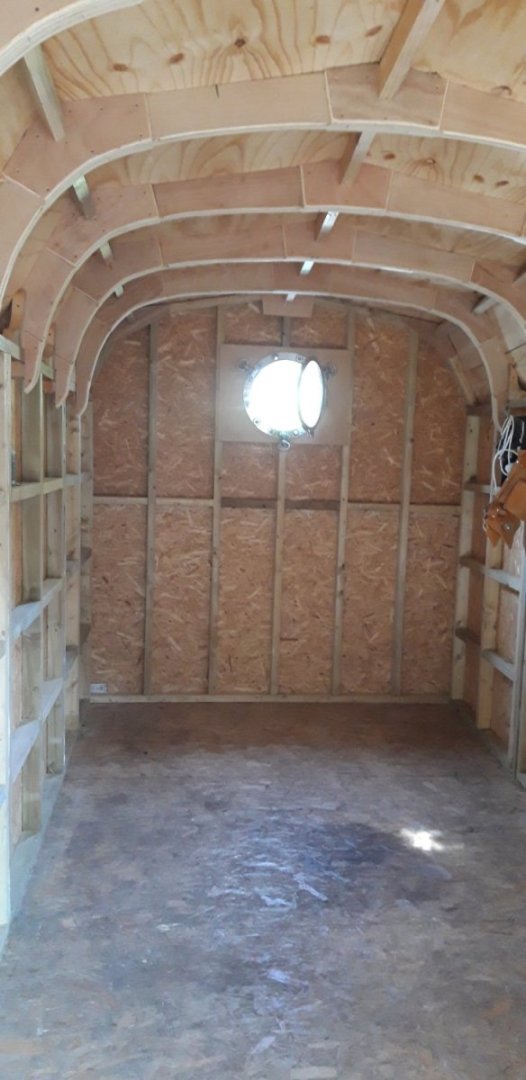
The camera has compensated in the second image and lightened it. In reality it was as dark as the previous picture.
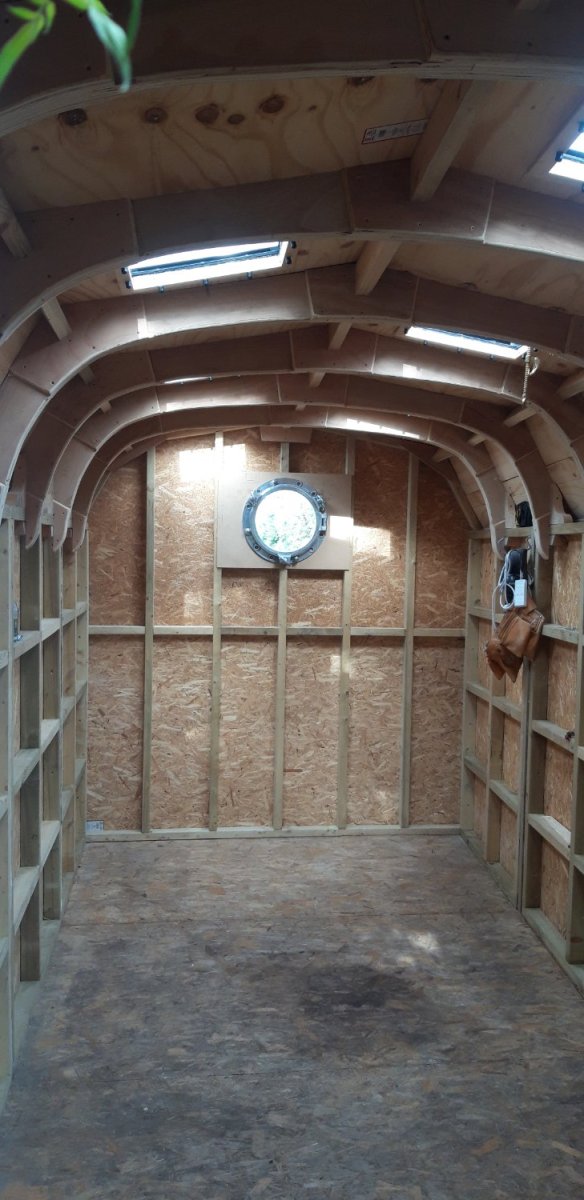
And 'after'.....

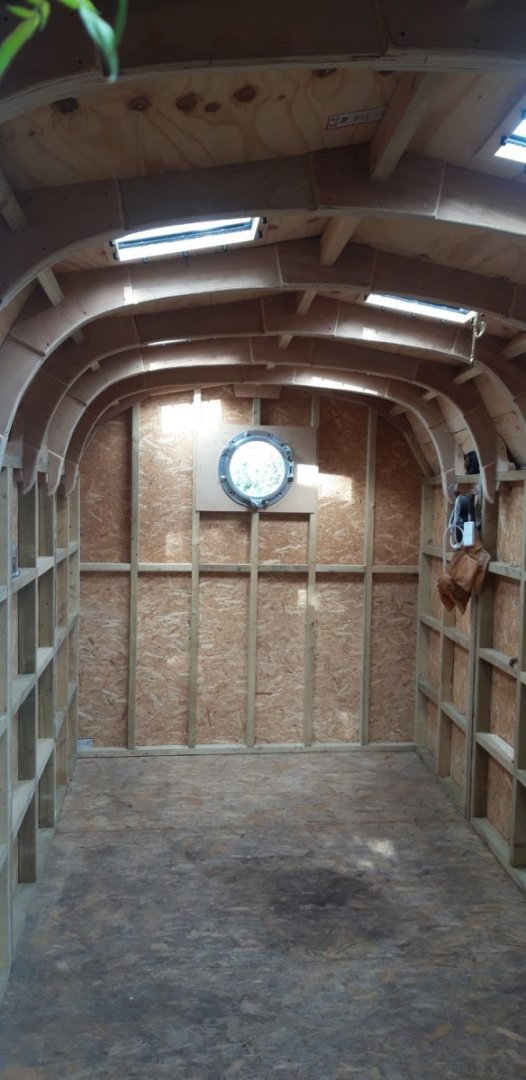
All units are double glazed with the right-hand middle one opening for additional ventilation.
Time now to complete the roof by adding the bitumen shingles.
Progress 🙂
-
-
-
An absolute masterclass Robert......
Congratulations on completing your truly inspirational model.
- AJohnson, wernerweiss and mort stoll
-
2
-
 1
1
-
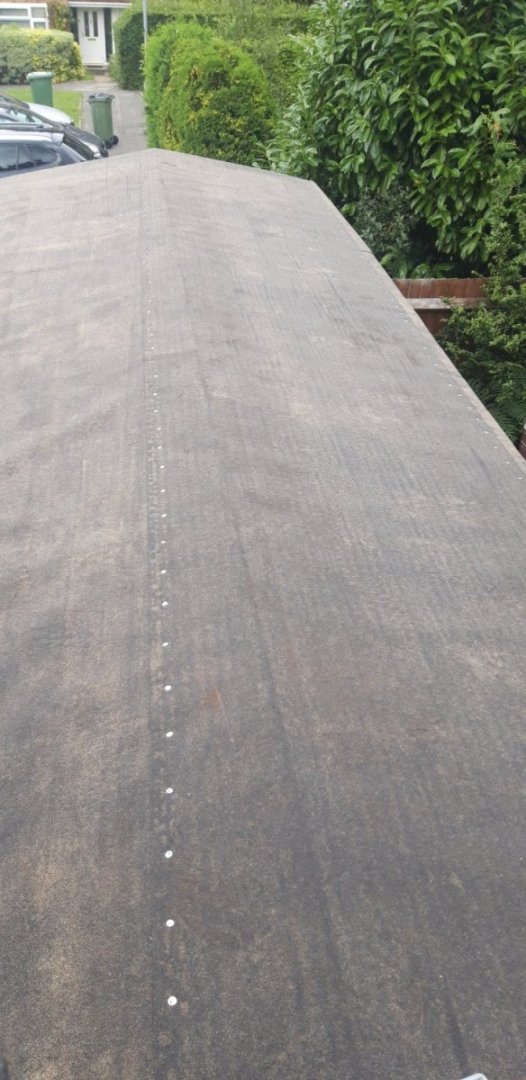
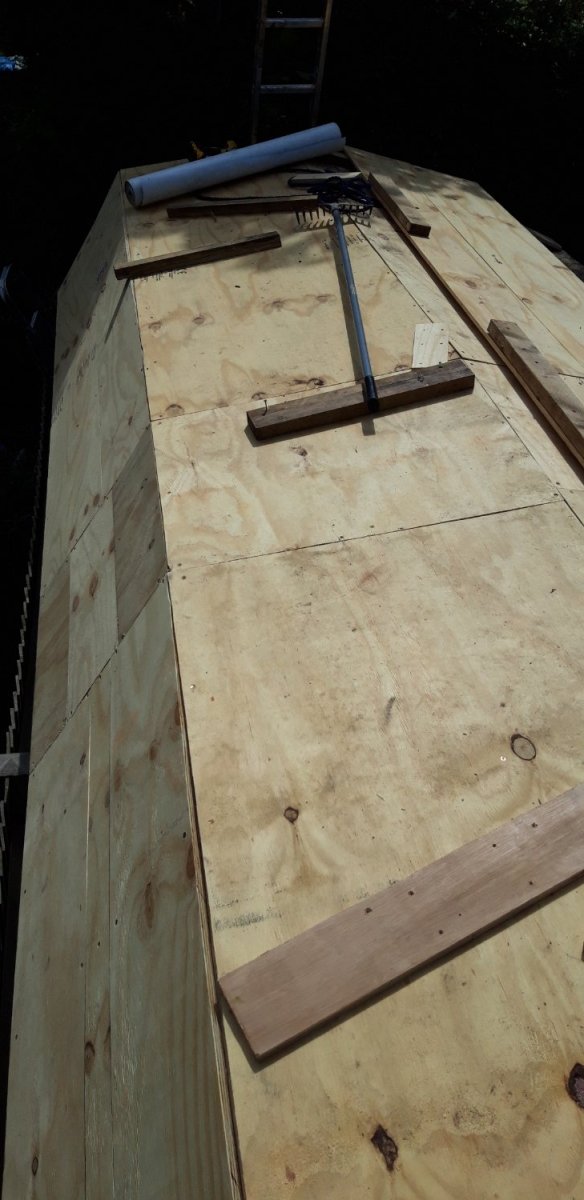
At last the weather has changed and the forcast is for a several consecutive dry days. I can finally remove the tarpaulin and polythene sheets, which have often appeared more like sagging water balloons recently, and work on making the roof waterproof.
I reversed my original plan and worked on the more straightforward sections first before attempting the more challenging one adjacent to the garage wall.
A bit of advanced planning to find the optimum way to cut the six 8' x 4' 18mm to minimize waste resulted in less than half a square metre of ofcuts.

Not pretty but it does the job. Now for the fun part....
Relying heavily on the three 'Ls', leverage, lateral thinking and luck, the the final panel was constructed on the roof and dropped into place. I took steps to ensure the whole assembly couldn't fall down the narrow gap between garage and workshop wall. At about 16' long and a couple of feet wide it was quite weighty! After marking the end profiles it was pulled back out and trimmed ready for covering.

First a layer of breathable membrane, then one of bitumen felt underlay. Next the detail trim was tacked into place followed by one course of bitumen shingles. I could have added a second but found that they would be accessible for nailing when the section was in place so dropped the idea as the already weighty panel was even heavier now.
With much care and trepidation the section was eased across to its balance point and then nudged over while being supported by a loop of rope. The plan worked! Next I had the Admiral maning a 4' length of 2" x 4" on the inside to lever the panel up to fine tune the fit while I screwed it to the top of the roof frames. Membrane and underlay sheets that had been left unattached were now fixed down.
Job done. The plan for tomorrow is to complete these two layers across the whole roof making it watertight. The shingles won't be added until the six roof lights are in place. These will be the next challenge 😉
Cheers,
Graham.
-
Well done on this epic build Mort. The 'cut ways' and the addition of crew make for a model I'm sure you must be rightly proud of. Your attention to the extra level of detail is inspiring!
Cheers,
Graham
-
Congratulations on a fine build David. I've enjoyed following your work. Impressive result for sure!
- Mr Whippy and drobinson02199
-
2
-
Hi John,
Not sure if this will meet your needs as it's not card, but Sarikhobbies in the UK produce 00 scale sailing barge kit. It's the only model of this type of craft that I have found that's not 1:48 or 1:67 scale. They also have several plan sets for sailing barges that you might be able to use. The Thames Sailing Barge Trust is another source for scale drawings.
Here is a link (hopefully!) to Sariks ....
https://www.sarikhobbies.com/product/thames-sailing-barge-oo-gauge/
They do sell through their ebay shop I believe, but I've always gone through their .com site. I too have spent some time researching this topic, sailing barges being a favourite of mine. I was hoping to find something scaled at 1.64 but have had to resort to draughting my own.
Cheers,
Graham
- thibaultron and mtaylor
-
2
-
2 hours ago, kiwiron said:
It's a good day when you find a missing part.
Know that feeling!🤣
She's coming along nicely Ron...
- mort stoll, Bill Morrison and kiwiron
-
3
-
Three phrases that bring stress onto your life:
'When you've got a minute...'
'While you're out there...'
'Could you just...'
🤣🤣🤣
-
Slightly less, Javlin, the internal floor area is around 136 sq/ft, close to the size of your room. This is significantly bigger than my current modelling space.🙂
As for the eternal battle for exclusive ownership with the Admiral I know where you're coming from and share the pain. Work on my Victory build has been severely affected by the current shipyard in the smallest bedroom in the house having been seconded since last October as the storage area for decorating supplies for the Boss's interior design aspirations. This includes the redecorating of the whole of the top floor of the house including the bathroom. Victory has been stored safely under dust sheets while surrounded by paint tins, shower unit, screen and base etc. ceramic floor and wall tiles, adhesives, grout, new window blinds..... the list is endless.....
All these projects, that had apparently been saved up for my retirement, are now happily completed and the only items causing loss of space are the six roof lights for the new workshop roof.
When I move into the new model making area, she will take over the vacated space for her hobbies.
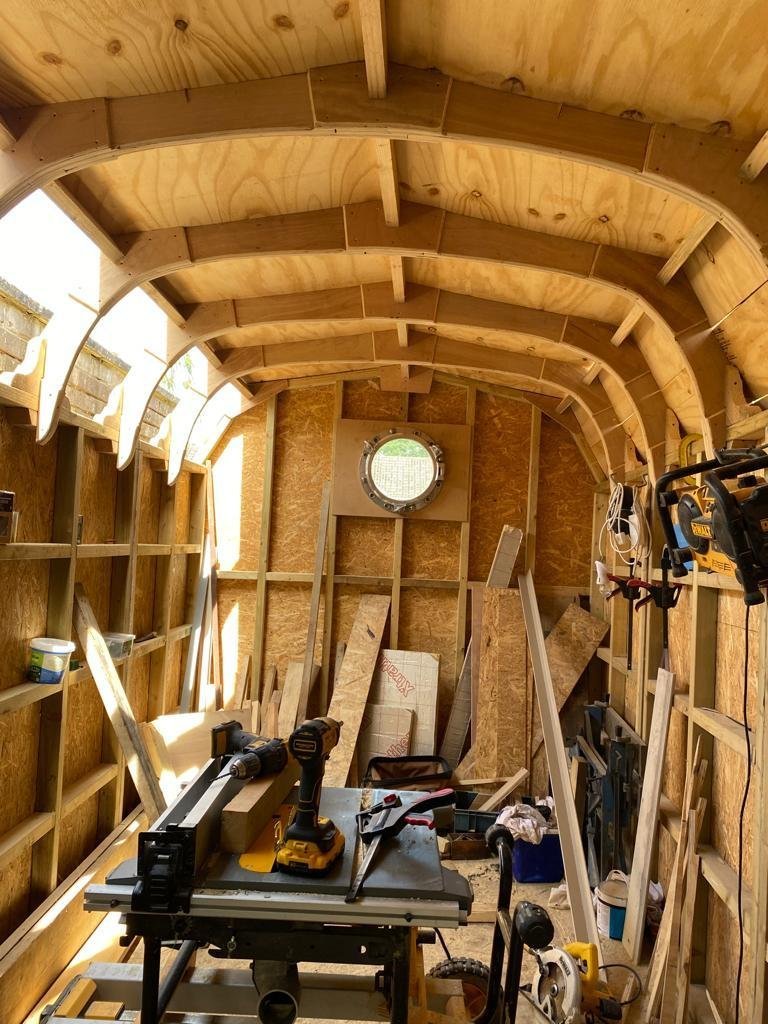
She is also a very keen gardener so I've built her a store in the garden for horticultural tools and consumables to keep these out of 'my' space. I've been polite but firm, the ground rules have been set and agreed..... there is no negotiation..... which is why the unfinished workshop is currently home to this...

...a life size deer, woven from willow by the Admiral on a recent weekend course. The soaked sticks need to dry out thoroughly before the scuplture can be weatherproofed. But then.... it's off to adorn the garden, never to return....honest!


HMS Victory 1805 by kiwiron - Caldercraft - 1:72
in - Kit build logs for subjects built from 1751 - 1800
Posted
Your comment is much appreciated Ron. With reference to decoration on the figurehead, I based it on photographs found on the internet of the current design, a research source I also used for the stern decoration and the entry ports. Unfortunately there is often confusion and disparity when comparing contemporary images to earlier historic pictures. So much has changed over the years, and this includes styles of carving etc. as much as application of colour! The point I'm trying to make here is that it may not be an accurate rendition of what was there in the past, but hopefully it's close enough 😉