


druxey
-
Posts
13,403 -
Joined
-
Last visited
Content Type
Profiles
Forums
Gallery
Events
Everything posted by druxey
-
 Thanks again, all. Mark: I wish I had more insight as to the rudder and yoke arrangement, but unfortunately I don't. If anyone out there can shed further light on the mystery, I'd be grateful.
- 433 replies
-
- 7
-

-
- open boat
- small boat
- (and 1 more)
-
Thank you, everyone. So, we come to the end of this particular journey. I appreciate all who have followed along. Happy model-making to you all. BTW, I've no idea what might be next - yet.
- 433 replies
-
- 37
-
-

-

-

-
- open boat
- small boat
- (and 1 more)
-
First, no book is entirely error free! It's not, alas, an ideal world we live in. The further we get historically from what we are trying to study, the harder it becomes. There is also a great difference between primary and secondary sources. Primary evidence comes from the time and place of the subject we are studying. Whoever wrote, produced an artifact or model is likely more reliable a witness to how things actually were. In the case of a model, things might be stylized or simplified, so one needs to be careful. Secondary evidence is from a later time and place. The creator may draw lightly or heavily on primary sources, but transcription and interpretational errors can creep in. As a history research professional friend observed; "Read elsewhere and read critically, always." He is so right!
-
Good progress there, Toni. It's difficult not to knock a chip or two of paint off during construction, but I'm sure it will clean up nicely in the end!
-
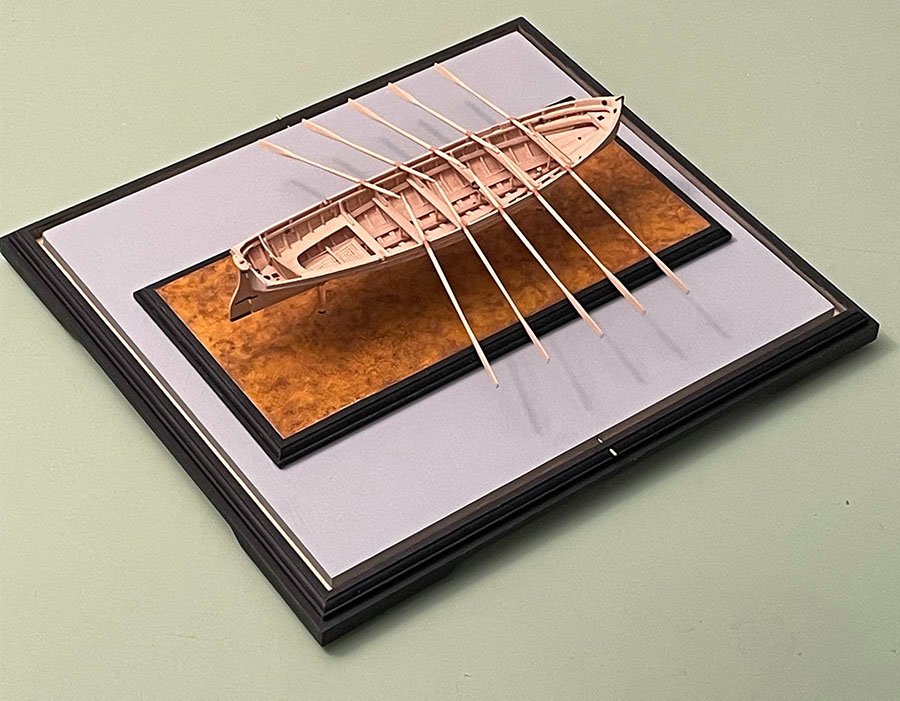
Yes, Eberhard, there are 'tin' bands on the oar blades, but it's hard to see them in the photos. Alan: There is no tiller, just a yoke with two lines attached. As I don't know the run of those lines, I'm omitting them. Steve: The oars are attached using both a dab of epoxy backed up with PVA. Belt and braces!
- 433 replies
-
- 5
-
-
- open boat
- small boat
- (and 1 more)
-
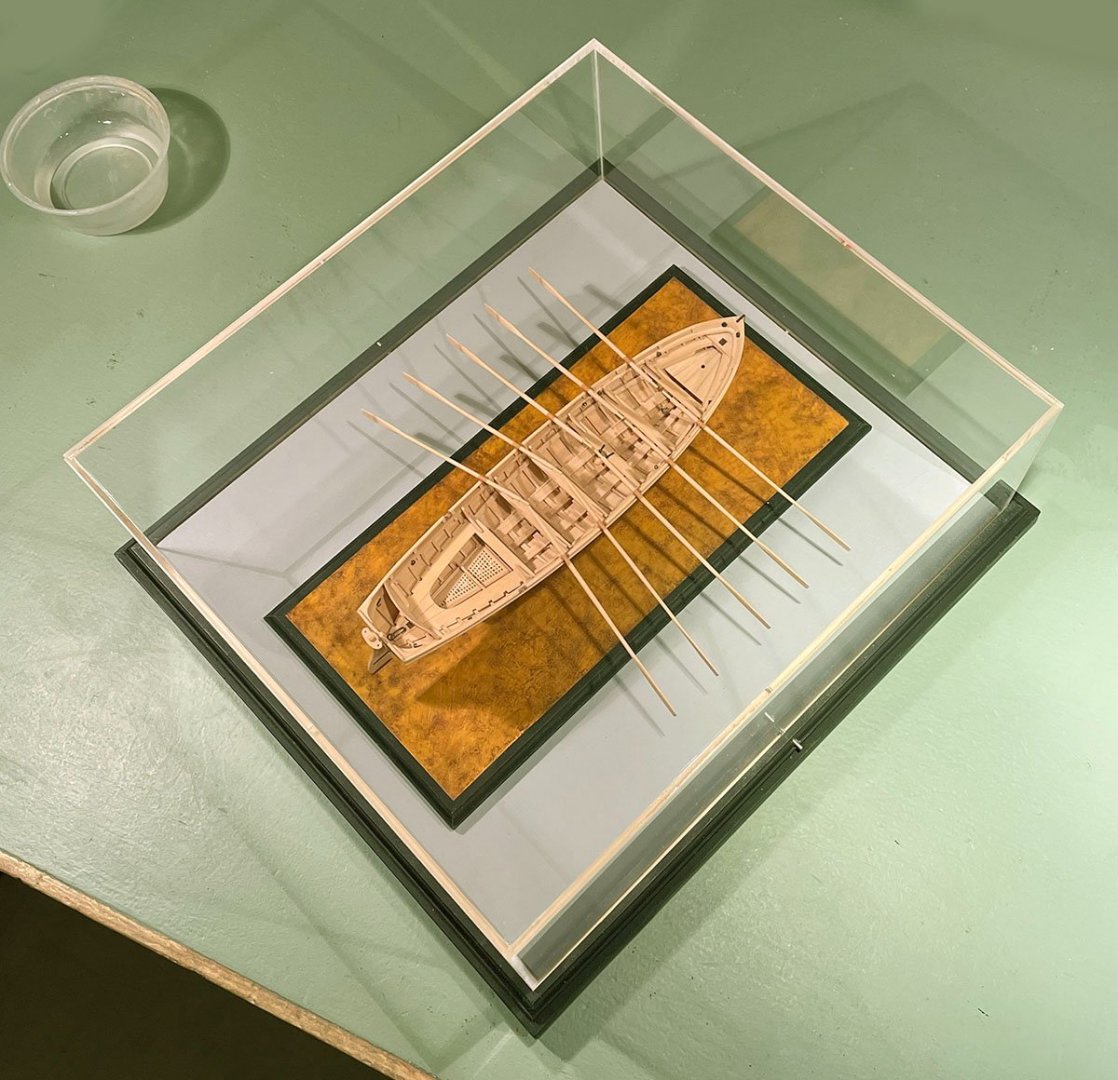
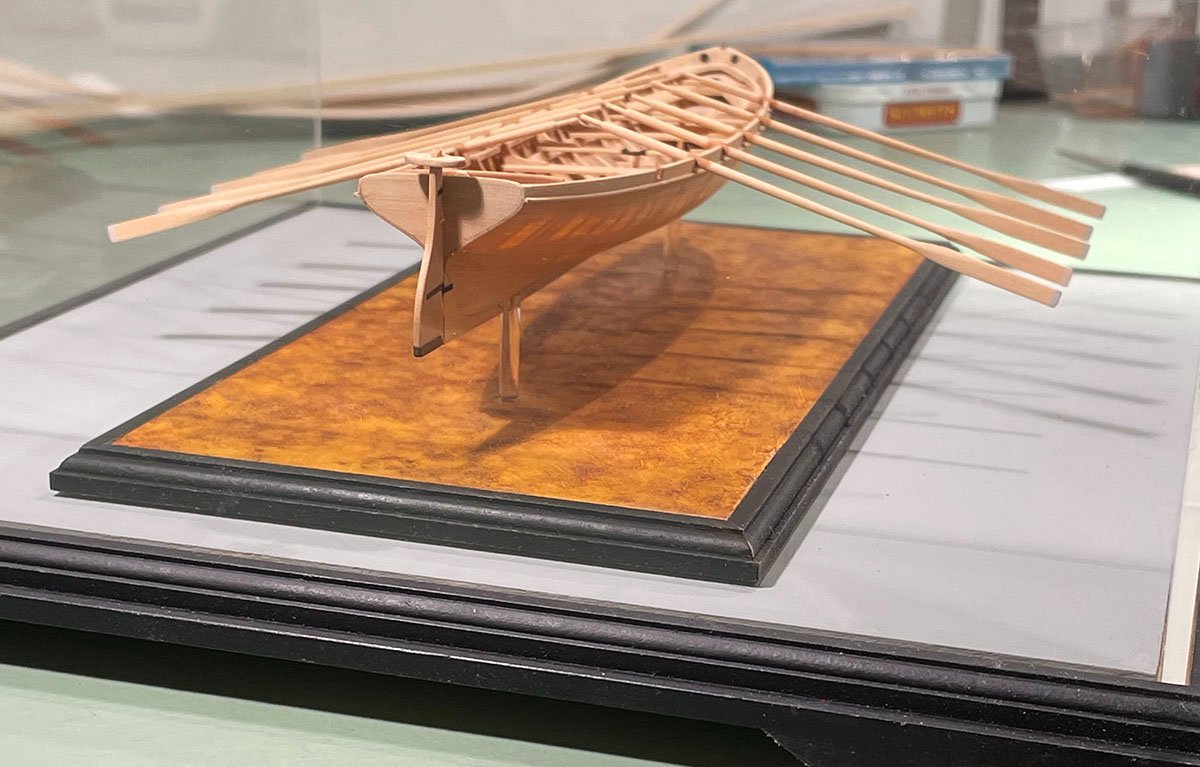
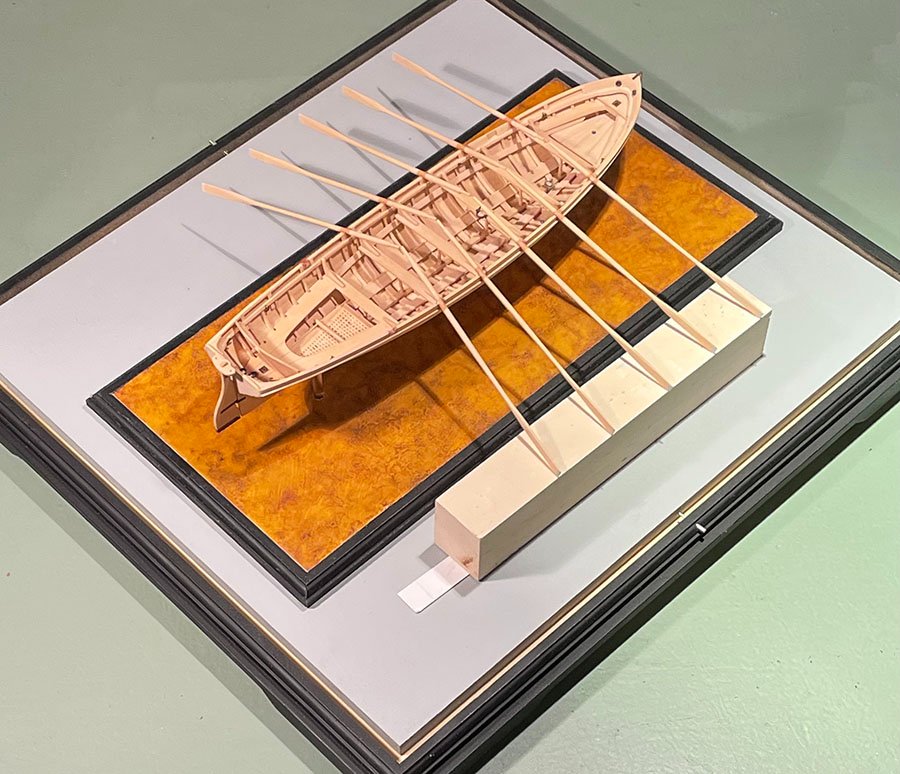
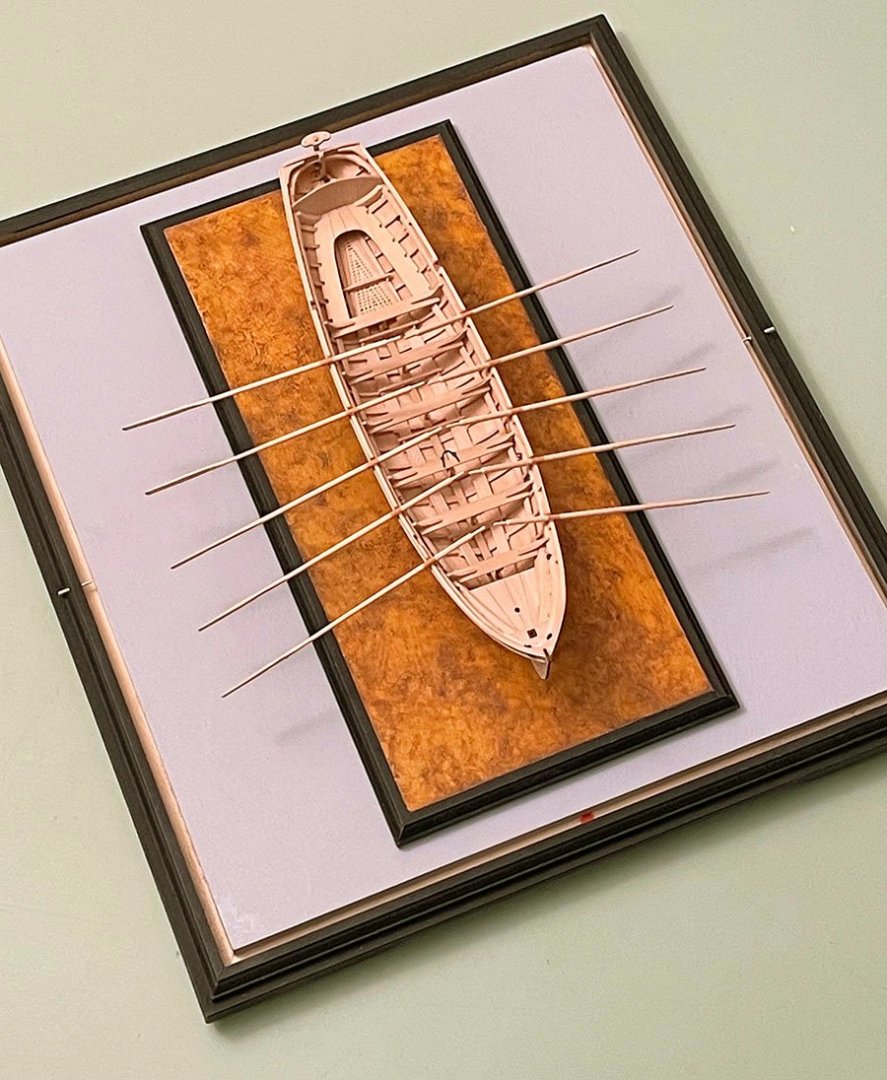
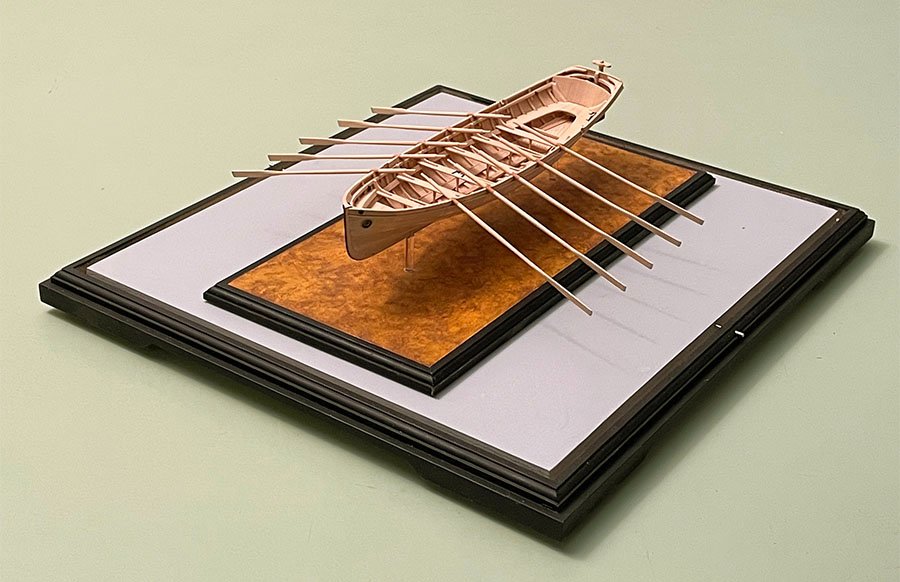
Thank you, one and all. Almost complete now! The oars have been installed and all that remains are final touch-ups, dusting and adding the case over the model. In the first photo you can see the second bank of oars going in, resting on a block of suitable height and shimmed with card. The retaining pins for the acrylic case are also done and temporarily inserted.
- 433 replies
-
- 26
-
-
-
-
- open boat
- small boat
- (and 1 more)
-
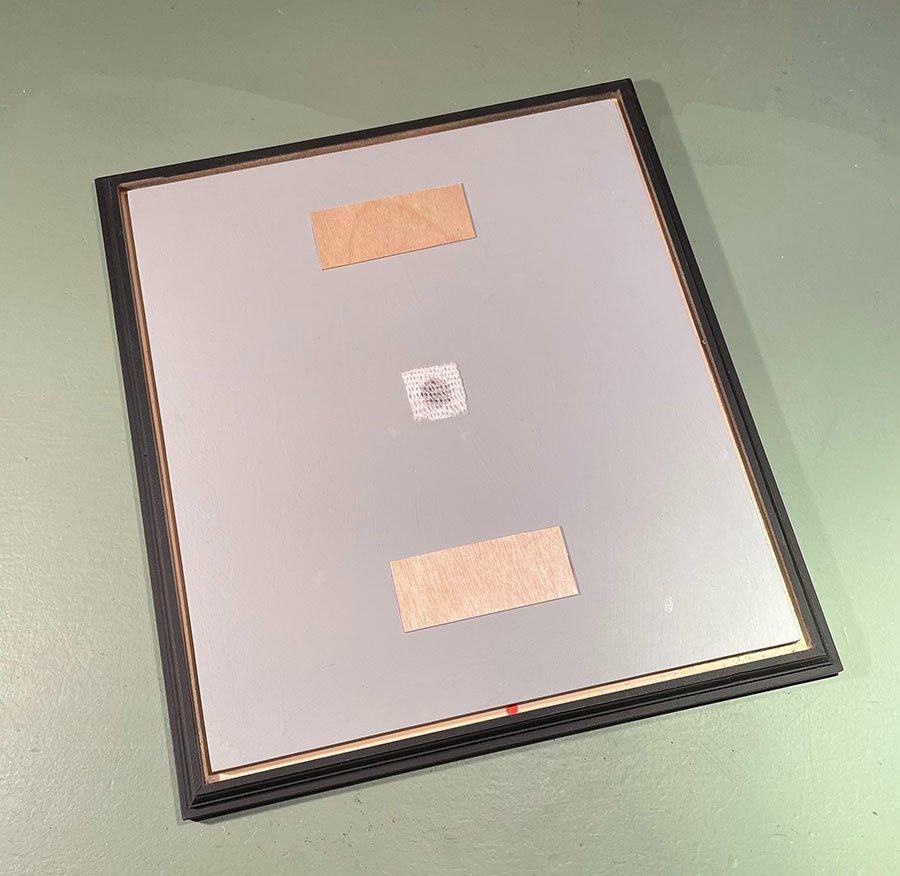
Thank to all for the discussion and comments. Finally some progress to report! The sub-base is complete to fit the acrylic case. For those curious, there is a central hole for air circulation with gauze meh to discourage insect infiltration. The two pieces of 1/64" ply act as an air gap between the sub-base and base of the model. Oars will be added tomorrow.
- 433 replies
-
- 27
-
-
-
-
- open boat
- small boat
- (and 1 more)
-
Ouch! See post #21. Next time, scrape the paint away where you will glue and that won't happen again. Good recovery, though.
- 70 replies
-
- 3
-
-
- Lowell Grand Banks Dory
- Finished
- (and 1 more)
-
Interesting how techniques from one craft translate to another! Looking good.
-
Rigging taken a whole is very daunting. But, as you say, line by line it ins't so awful. looking good so far!
- 740 replies
-
- 6
-
-
- Tudor
- restoration
- (and 4 more)
-
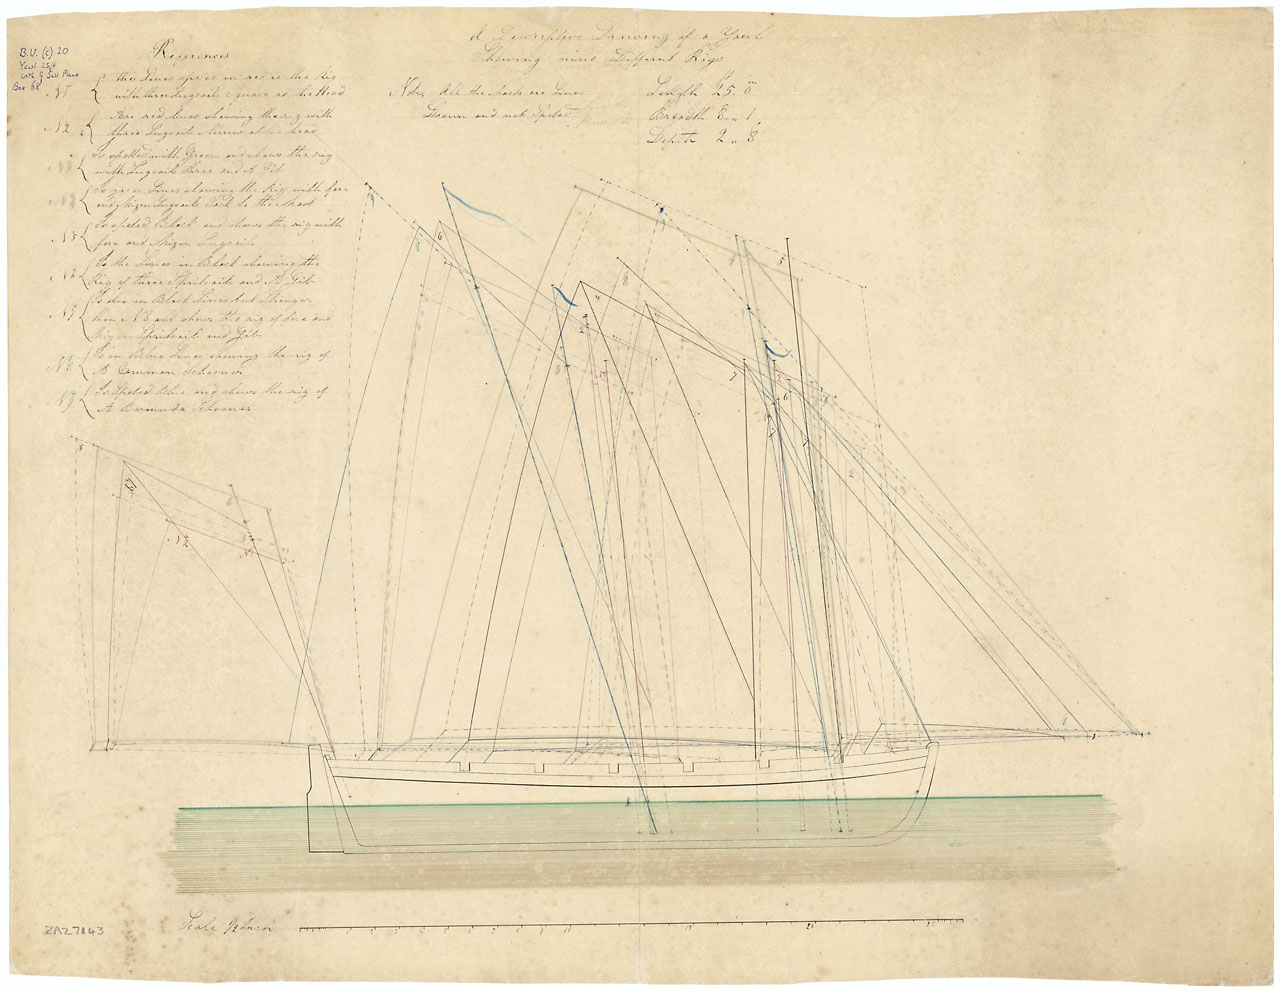
Well, Shipman, there are ringbolts attached to the inwales as well as hooked cleats near the stern. These all must be for attaching rigging. There are two ringbolts a side forward and one on each side aft. In addition, there is an eyebolt on each side just forward of the mast step. An example of cutter rig from the period is: This is ZAZ 7143, a 25 foot cutter in the RMG (NMM) collection. However, I'm unsure how a bowsprit (if present) was rigged on the 28 foot American cutter. This is one reason I'm not rigging the model.
- 433 replies
-
- 12
-
-
- open boat
- small boat
- (and 1 more)
-
HMS Euryalus 1803 by rlb - 1:48 scale
druxey replied to rlb's topic in - Build logs for subjects built 1801 - 1850
Problem fixed! Or you could simply have cropped the image yourself!
- 122 replies
-
- 13
-
-

-
- Euryalus
- Plank-on-frame
- (and 4 more)
-
Some smaller vessels that had headwork did not have space for a head, The heads were located inside the bulwarks on the forecastle. An example of this is Speedwell of 1752. (From the Royal Museums Greenwich, Collections.)
-
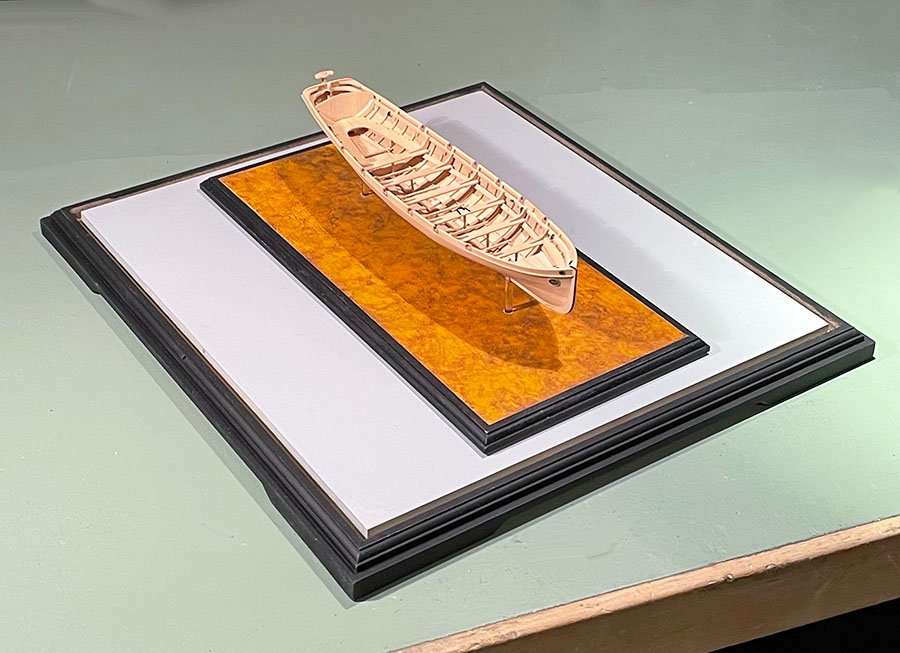
The acrylic case has arrived and the sub-base is boing constructed to fit. As soon as the casework is complete, I shall mount the base on the sub-base and set about deploying the oars. Stay tuned!
- 433 replies
-
- 12
-
-
- open boat
- small boat
- (and 1 more)
-
That is a tough challenge! My usual way is to cut the slot to size before shaping the figure. The issue here is, even if you mount the figure as illustrated, is to test fit it to your model before removing the mounting block.
-
When building a model like this, I always marvel at how the old-time builders managed to do this at full size.
-
Glad all is well! Nicely bevelled and fitted thwarts there.
- 70 replies
-
- 1
-
-
- Lowell Grand Banks Dory
- Finished
- (and 1 more)
-
Well, that saved you quite a bit of work!
-
Neatly done, although I might suggest that you scrape paint off where any glued joint is. Even if the glue holds, there is a possibility of the paint shearing if the riser were bumped.
- 70 replies
-
- 3
-
-
- Lowell Grand Banks Dory
- Finished
- (and 1 more)
-
I echo everyone else's concern and remarks, Michael.
-
Nice demo of this particular finish technique. As I only had a small area to do, I used artists' oil paint and thinners instead of stains. Otherwise I just used smaller brushes.
-
YOUNG AMERICA 1853 by Bitao - FINISHED - 1:72
druxey replied to Bitao's topic in - Build logs for subjects built 1851 - 1900
Congratulations on completing a superb model, bitao! I hope she will be protected in a suitable case.- 257 replies
-
- 3
-
-
-
- young america
- Finished
- (and 1 more)
-
Just discovered this lovely build and excellent figures. (This is a problem on MSW - too many fantastic models being built to be able to keep up with them all!) Very impressive work. Congratulations on a fine model, Silverman.
-
Just catching up on this lovely model. Well done, bolin!
- 179 replies
-
- 3
-
-
- longship
- Helga Holm
- (and 1 more)

