


druxey
-
Posts
13,406 -
Joined
-
Last visited
Content Type
Profiles
Forums
Gallery
Events
Everything posted by druxey
-
I suspect the beeswax thing is another of those passed down tales. I believe that heavy thread was waxed years ago to make sewing by hand easier. Some ship model maker saw this and thought "Hey, it makes my coarse thread less hairy," and used it. Word spread and every ship modeler started waxing their thread, whether it needed it or not. Somehow the idea of preservation got into the mix, in spite of the fact that beeswax is slightly acidic. That's my theory, anyway!
-
 Maury: There are floors that will go in that butt against the futtocks. The keelson runs above the floors in this case. You'll see all this - eventually! The jig just give a me basic bend. After that, each frame has to be free-hand bent to fit. That is why this takes so much time. In previous models all I had to do was wet the holly stock and bend it in place, quick and easy. Progress to this point:
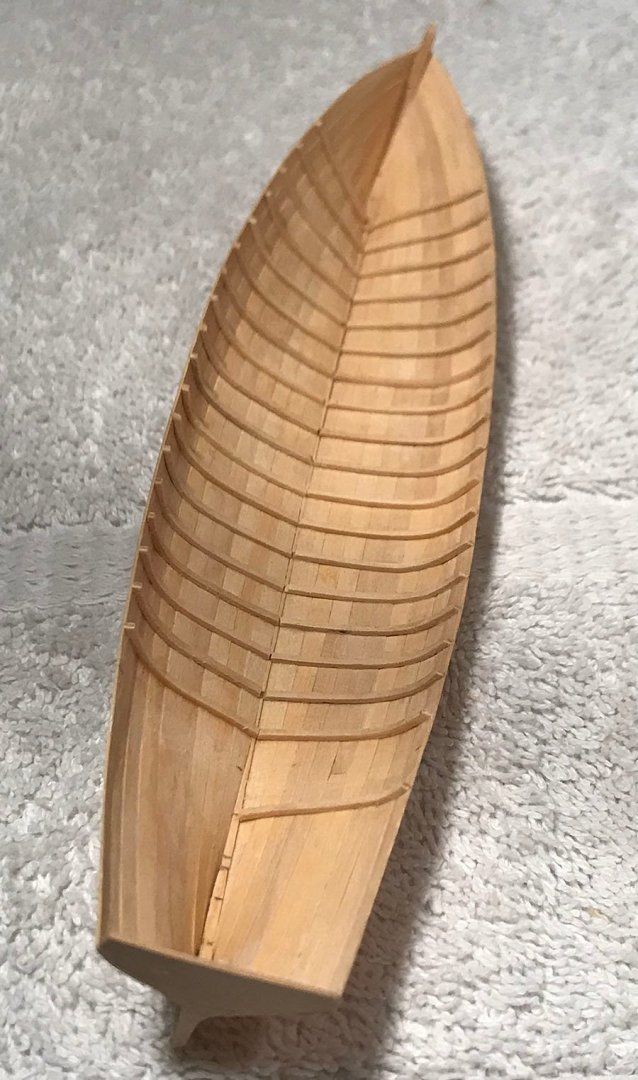
- 433 replies
-
- 21
-

-
- open boat
- small boat
- (and 1 more)
-
Very neatly done. Those radiating gratings are difficult to do so evenly, and you've succeeded nicely.
-
Carriage looks great, but he trunnions should end flush to the outside of the cheeks. Picky, aren't I? But it will look so much better, Kevin.
-
Nice work, Steven. Is a spirit pen something used in seances for automatic writing?
- 740 replies
-
- 4
-

-
-
- Tudor
- restoration
- (and 4 more)
-
Thank you, Toni! Forming and bending in of frames is now under way. I made a small jig to heat and moisture bend the stock on. I still need to fine-tune the spacing of a couple of installed frames. Another 18 of 27 frames to go, then the floors need to be added after that. So the next update will be a while. Thanks for dropping by.
- 433 replies
-
- 26
-
-
- open boat
- small boat
- (and 1 more)
-
Turning cannon is tricky, but you have done it well. I might comment, though, that the flare at the end of the muzzle is little exaggerated.
-
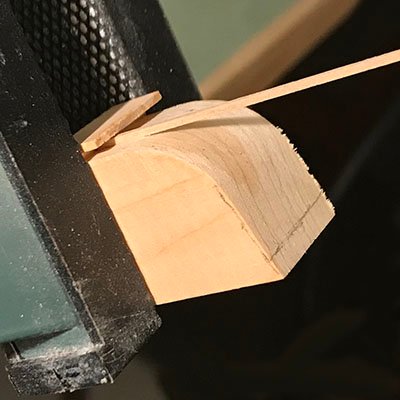
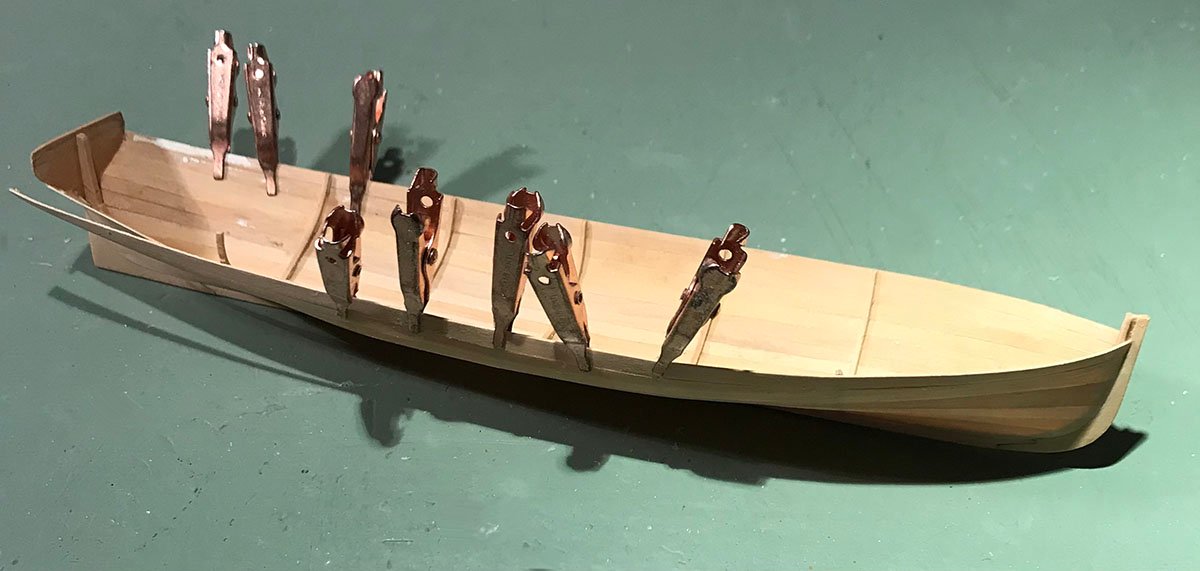
Bending in frames has now begun. Again, bending Castello is a very different experience to bending in holly. With the latter, all I had to do was wet it and in it went. Castello has to be soaked and heat bent off-model. This is going to be a long and drawn out procedure. I'm beginning to regret my decision to build an open boat in this specie of wood! The model has spread a little and will be cinched in when the risers and thwarts are added.
- 433 replies
-
- 21
-
-
- open boat
- small boat
- (and 1 more)
-
Looking very sweet, Maury!
-
Keith: The planks are 1/64" thick or a scale 3/4". I haven't yet measured an eggshell! Not much gluing surface, so I was not surprised by things giving way, other than the 'welded' areas. Maury: In hindsight holly would have been a better choice, but I wanted to try for an unpainted single-color model. I had not tried using Castello for planking on a boat this size before. Live and learn! If I were to repeat the exercise, I would not gesso the plug but go with plain waxed wood instead. Yes, after some fine-tuning the shell, the frames will be the next step. There are still some doubtful seams needing attention first. Thank you for looking in and commenting, ladies and gentlemen all.
- 433 replies
-
- 12
-
-
- open boat
- small boat
- (and 1 more)
-
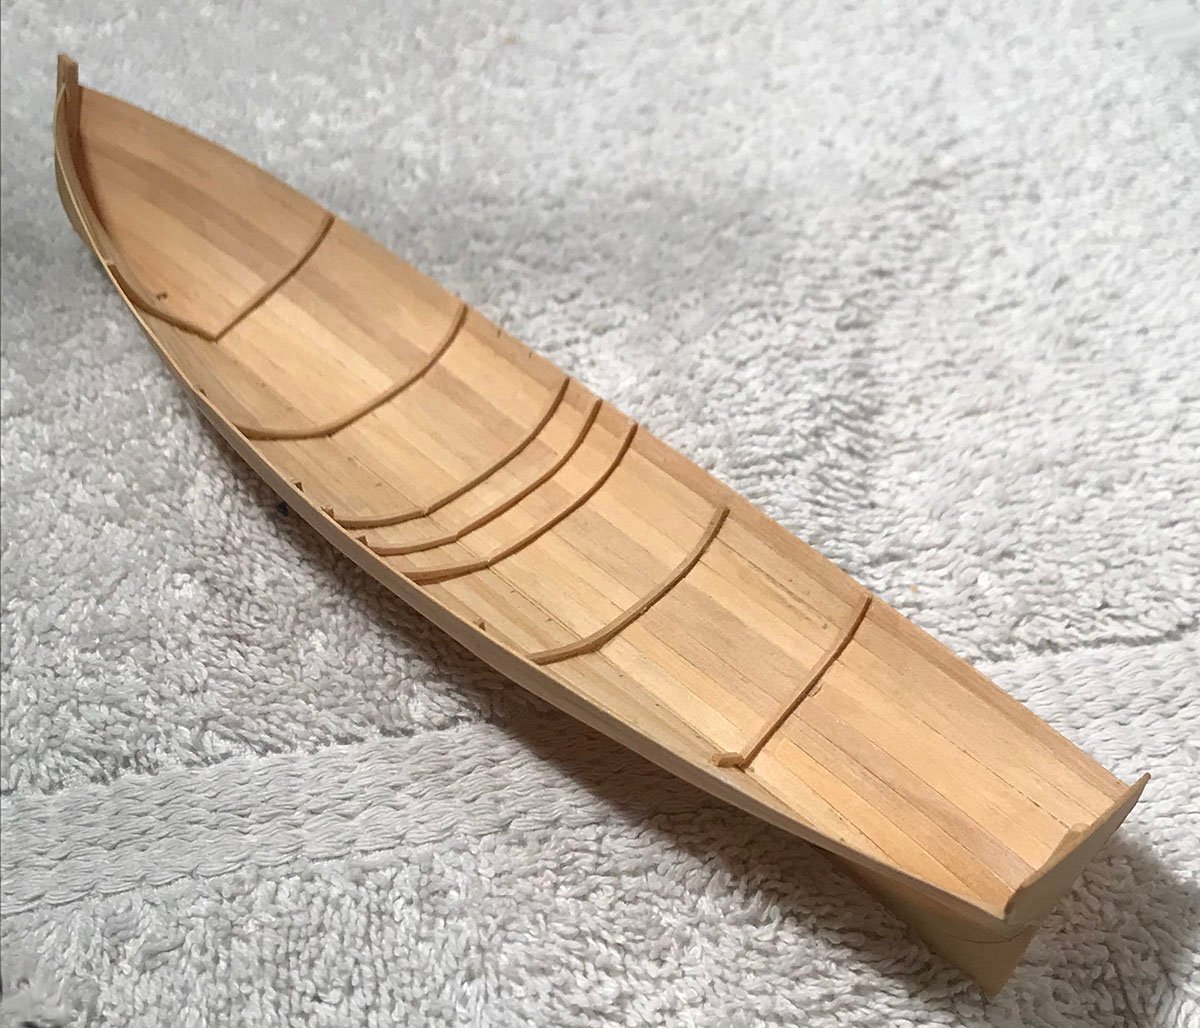
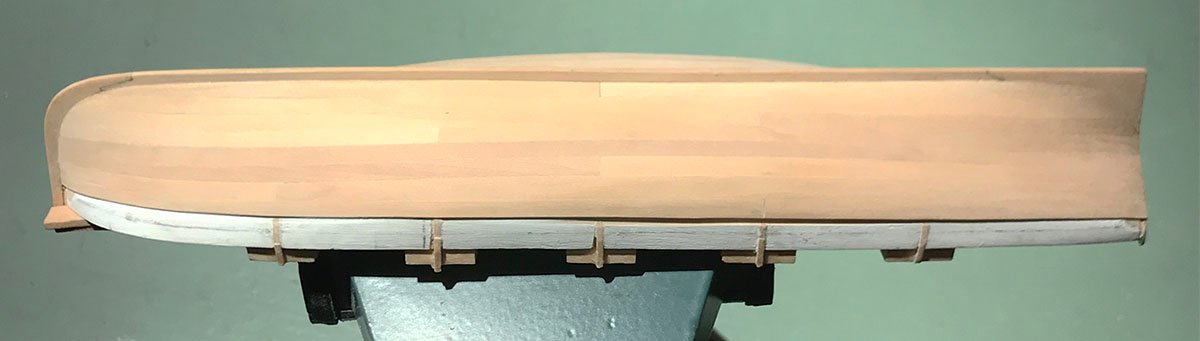
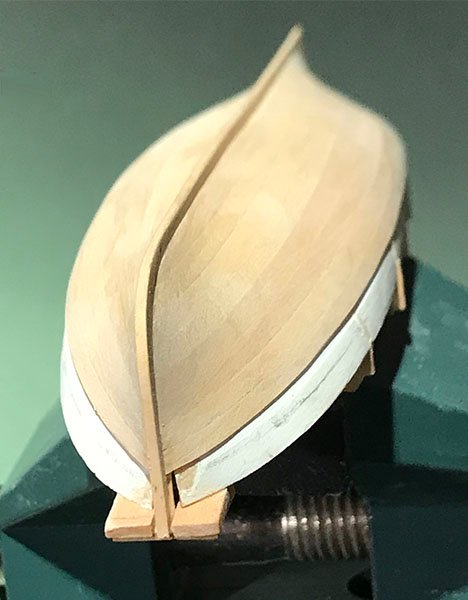
And for those who doubted that this was salvageable, after a few hours work: It still needs finessing before I can begin to install the rest of the framing.
- 433 replies
-
- 37
-
-

-
- open boat
- small boat
- (and 1 more)
-
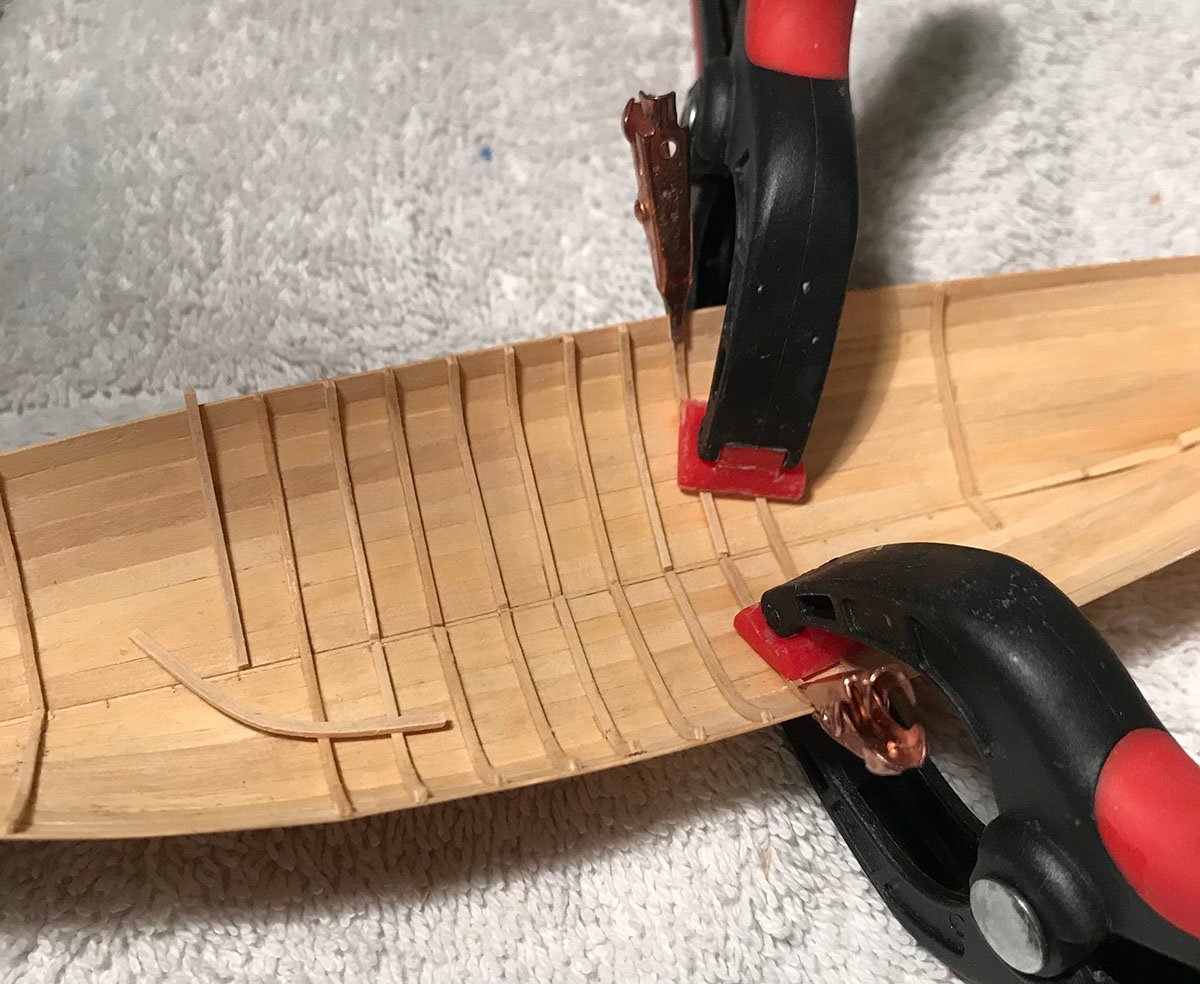
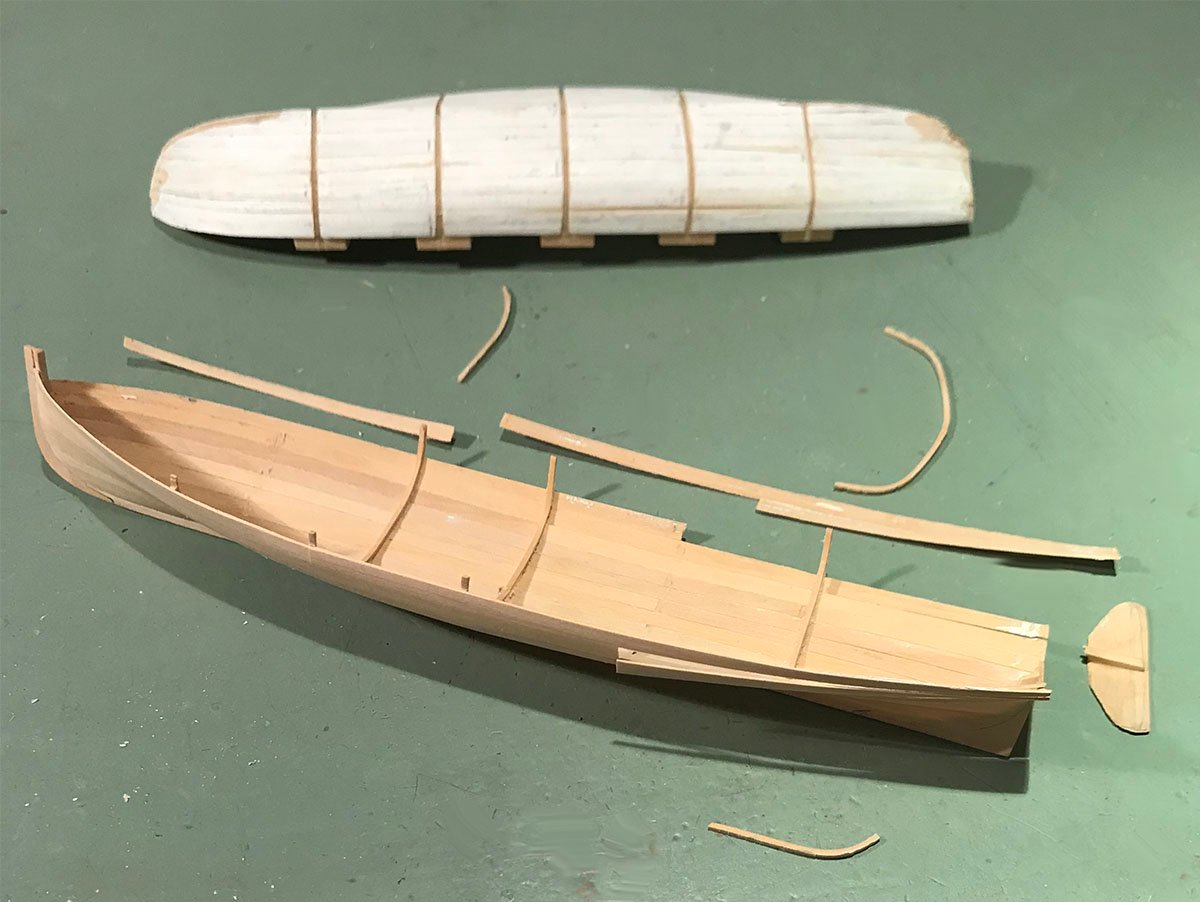
This post should be labelled 'Snatching victory from the jaws of disaster'. The removal of the model from the plug was more difficult than usual. I now realize why. In the past I've used holly for planking open boats. It bends easily and almost no moisture or heat was required. Castello is a different story. It needed a lot moisture and heat to form. In the process the planks welded in spots to the gesso layer on the plug. The photo tells the story. Repairs are under way, as you can also see. This will take a little time.
- 433 replies
-
- 29
-
-

-

-
- open boat
- small boat
- (and 1 more)
-
Good! All part of the learning process - how to fix 'oopsies'.
- 85 replies
-
- 2
-
-
- Lowell Grand Banks Dory
- First Build
- (and 2 more)
-
Not really, Eberhard, as the stem and frame tops are secured to the plug. Certainly I do this with clinker style hulls where no internal frames are needed when constructing the shell.
- 433 replies
-
- 5
-
-
- open boat
- small boat
- (and 1 more)
-
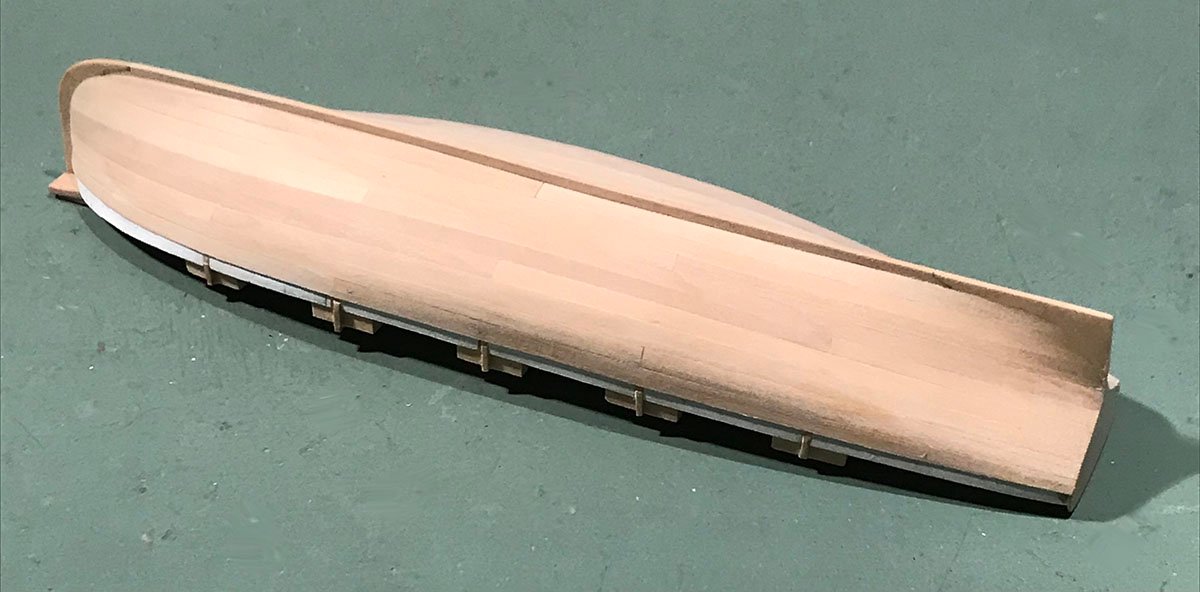
Thank you, Keith, and all who have dropped by. The last strake is on now and ready for the heart-stopper; getting the shell off the plug! No matter how careful, there is always some battle damage One simply hopes that it will be minimal, but one never knows. Once I've screwed up my courage, the frame extensions will be cut, the stem freed from its constraints and then.... Stay tuned!
- 433 replies
-
- 23
-
-
- open boat
- small boat
- (and 1 more)
-
Rigging Confusions - Lifts, Halyards and More, Oh My!
druxey replied to rraisley's topic in Masting, rigging and sails
While Petersson's book is very helpful, there are some details that are post 1780. He faithfully took a specific contemporary model as his example, but I believe that some of the rigging was replaced or augmented at some point. Martingales are definitely from after 1794 (Lees) and double ones from the post 1815 era. -
You are probably accurate to the way the actual cog was!
- 130 replies
-
- 4
-
-
- wütender hund
- hanseatic
- (and 2 more)
-
Well, Allan, I've painted both directly on and off models. The latter is much easier, particularly in places like lower counters. I've also used bond paper. It should not deteriorate, as it is sealed on both sides once glued to the model. I don't know of any really thin, smooth-surfaced 100% rag paper. Perhaps someone else does. For wales, etc, I've used black leather dye. It's hard to get a perfectly even surface if the planks are pre-dyed then added to the model. I've used the strategy of applying and smoothing the wales before any other planking, so if a little dye should go over the edge it doesn't ruin adjacent planking. Dye is very good at seeping or wicking under any masking tape!
-
If you insist! Well, there are at least two solutions. The easiest would be to carefully remove the broken end and reglue it to the rest of the plank. If there is enough wood left on the sheet you could mark out and cut a new plank, using the web as the pattern.
- 85 replies
-
- 2
-
-
-
- Lowell Grand Banks Dory
- First Build
- (and 2 more)
-
Isopropyl alcohol works on both white and yellow glue. The trick is patience. It takes time (sometimes up to a day) and multiple applications of solvent to soften the glue. Never force a joint apart - but you know that already.
- 85 replies
-
- 2
-
-
- Lowell Grand Banks Dory
- First Build
- (and 2 more)
-
The Last Frame
druxey replied to Don Case's topic in Building, Framing, Planking and plating a ships hull and deck
As your own master shipwright, you are on your own for this one. You will need to make your own decision. What you have learned is that you must check frequently for cumulative error as you go along, so you don't make this discovery at the end of framing. -
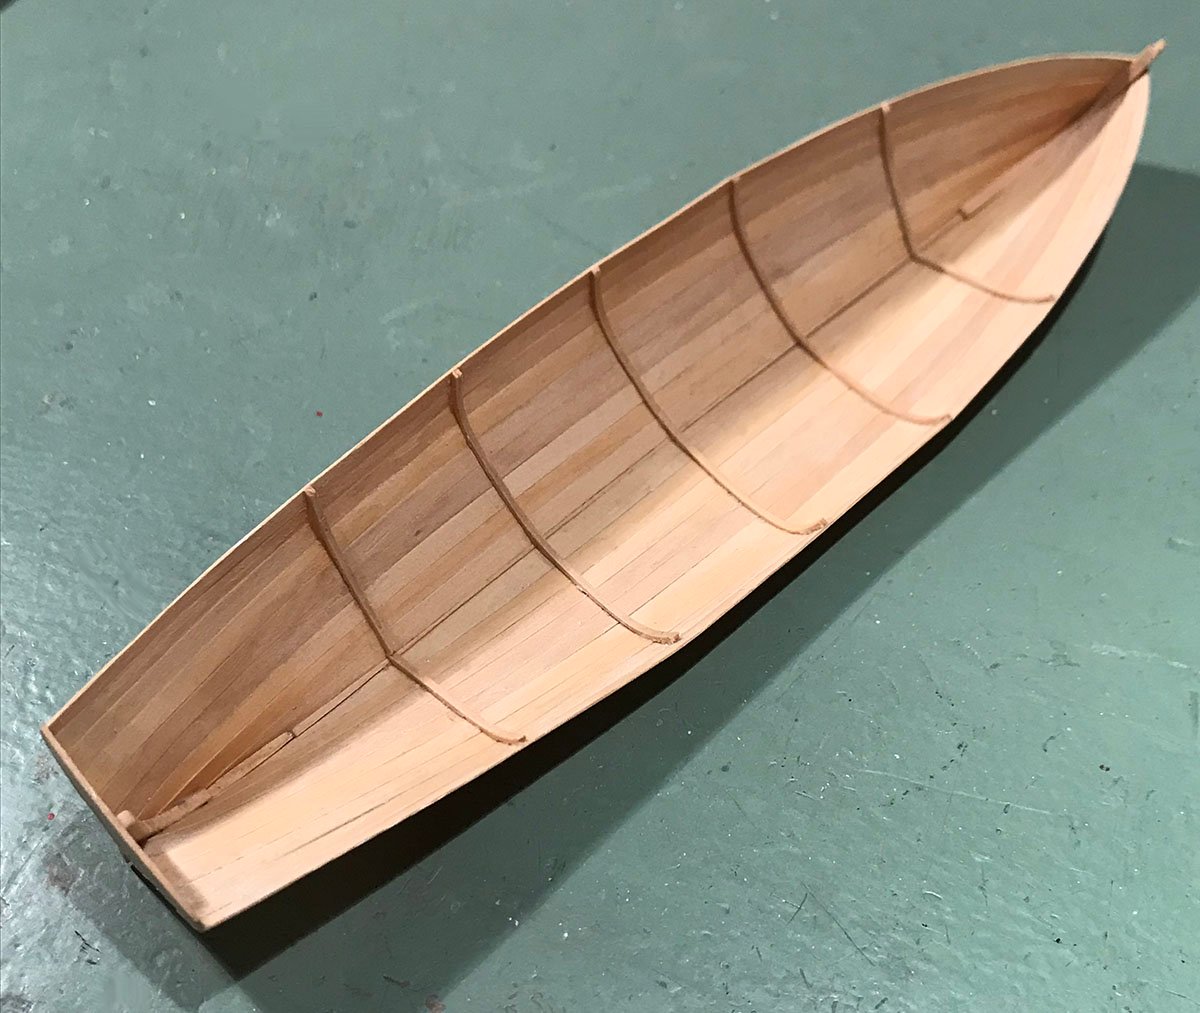
Another two strakes completed. The next strake will be the sheer strake. A smooth sheer line will make or break the model. Speaking of breaking, the moment of truth nears; that of removing the shell from the plug. From past experience there will be loud cracking nosies - heart-stopping! - and usually a few planks 'spring' a little, but it is all repairable. We shall see....
- 433 replies
-
- 30
-
-
- open boat
- small boat
- (and 1 more)
