druxey
-
Posts
13,357 -
Joined
-
Last visited
Content Type
Profiles
Forums
Gallery
Events
Everything posted by druxey
-
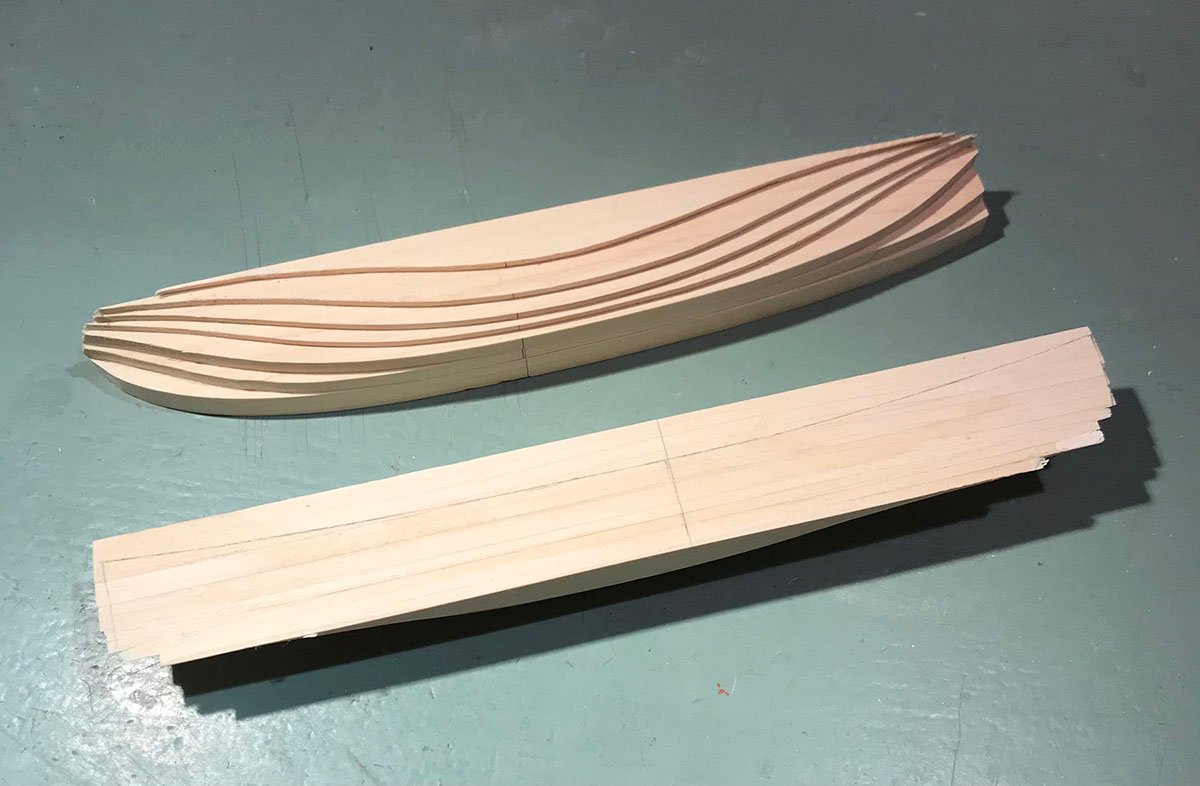
 Thanks for dropping in and having an interest in this project! The next step was to fit the backbone and plug so the slots at bow and stern were widened to accommodate them. The run of the planking was next sketched on. Looking at the photos from Venice, it appears that there are ten strakes below the sheer rail. As you can see, the run aft looks quite good already, but the fore body needs correction. The planking will be delineated far more accurately as corrections are made. This comes next. The deliberate gap at the forefoot is that the hull form is so fine here that, if the plug were in the way, the planks will not run smoothly into the stem rabbet.
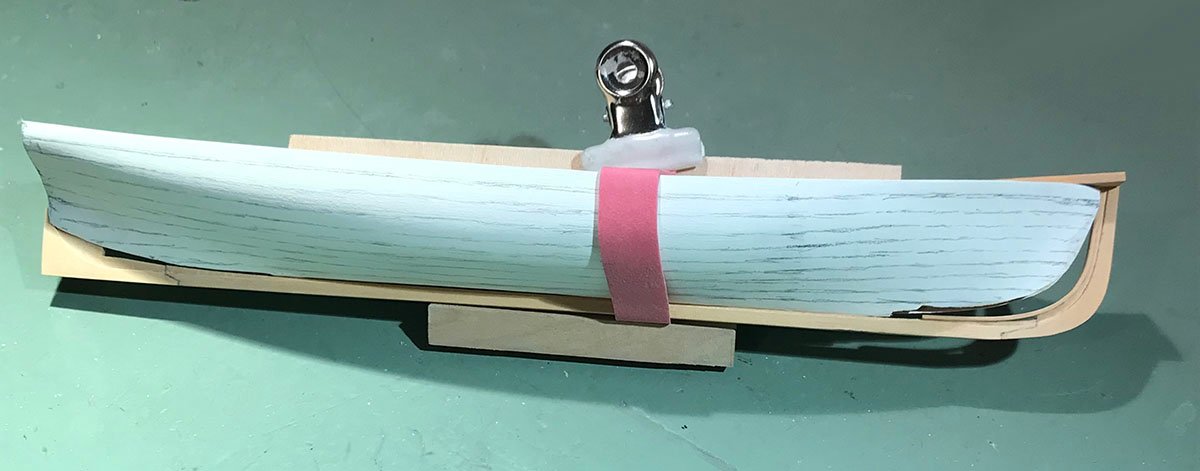
- 433 replies
-
- 25
-

-
- open boat
- small boat
- (and 1 more)
-
If you are trying to sand a straight edge, instead of rubbing sandpaper against the wood, rub the wood against the sandpaper. However, first rubber cement the sandpaper to a level flat surface; then you will get a perfectly straight edge.
- 85 replies
-
- 3
-
-
- Lowell Grand Banks Dory
- First Build
- (and 2 more)
-
Resaw into thinner slabs and sticker them as soon as possible. That will minimize splitting. Leave wood in log form, it will always split radially.
-
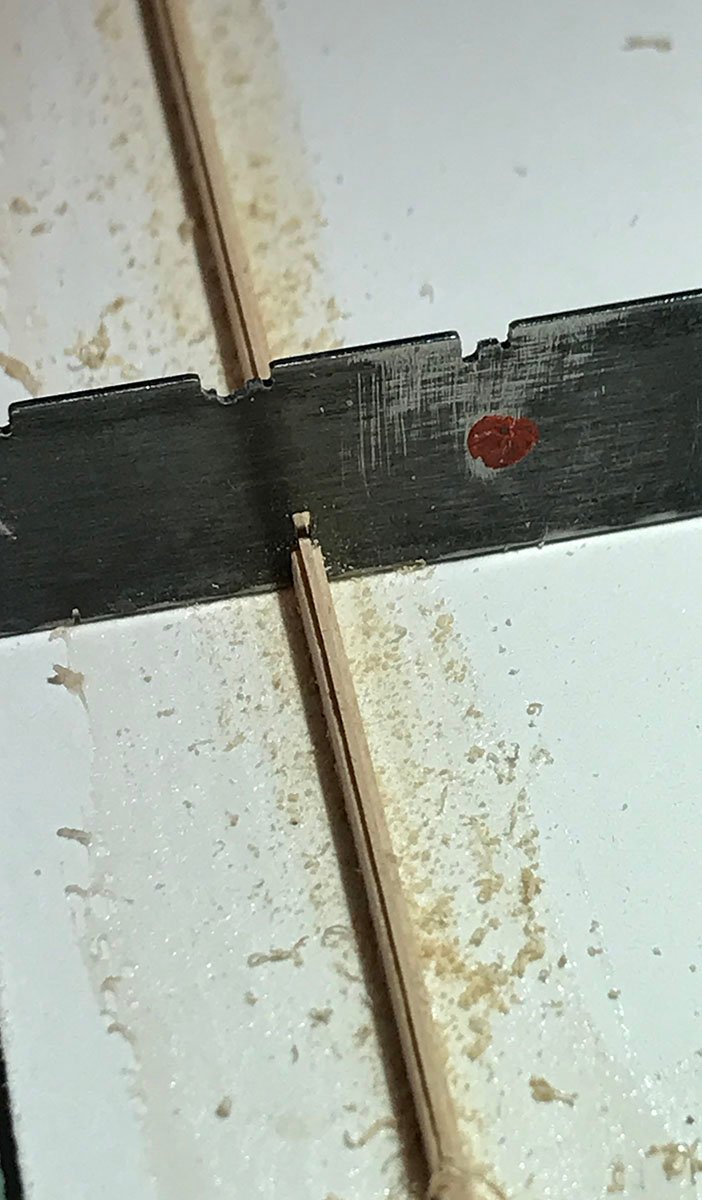
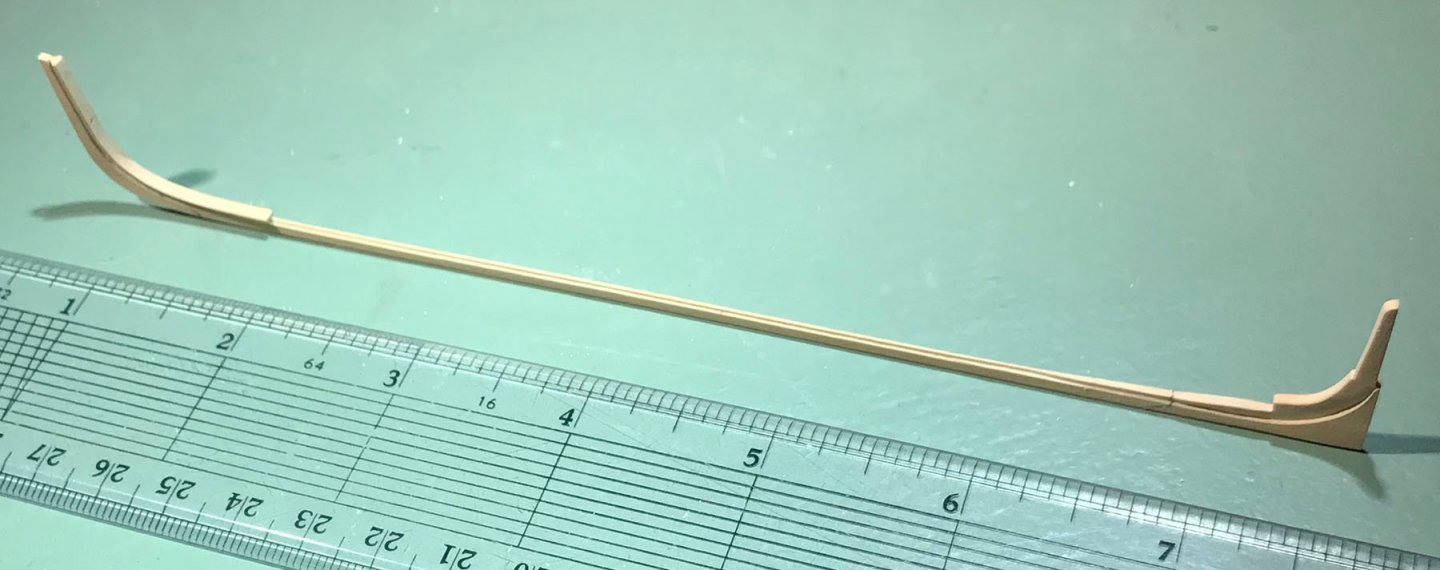
Next was to complete the spine of the cutter. Cutting the rabbet along the top of the keel was easiest for most of its length by attaching the keel (rubber cement again!) to a board and using a shaped scraper as shown. The stem and stern posts were scarphed on, the joints being accentuated with a little pencil. The aft scarph was unusually short, as shown on the surveyed plans.

- 433 replies
-
- 25
-
-
- open boat
- small boat
- (and 1 more)
-
Neatly done, Maury!
-
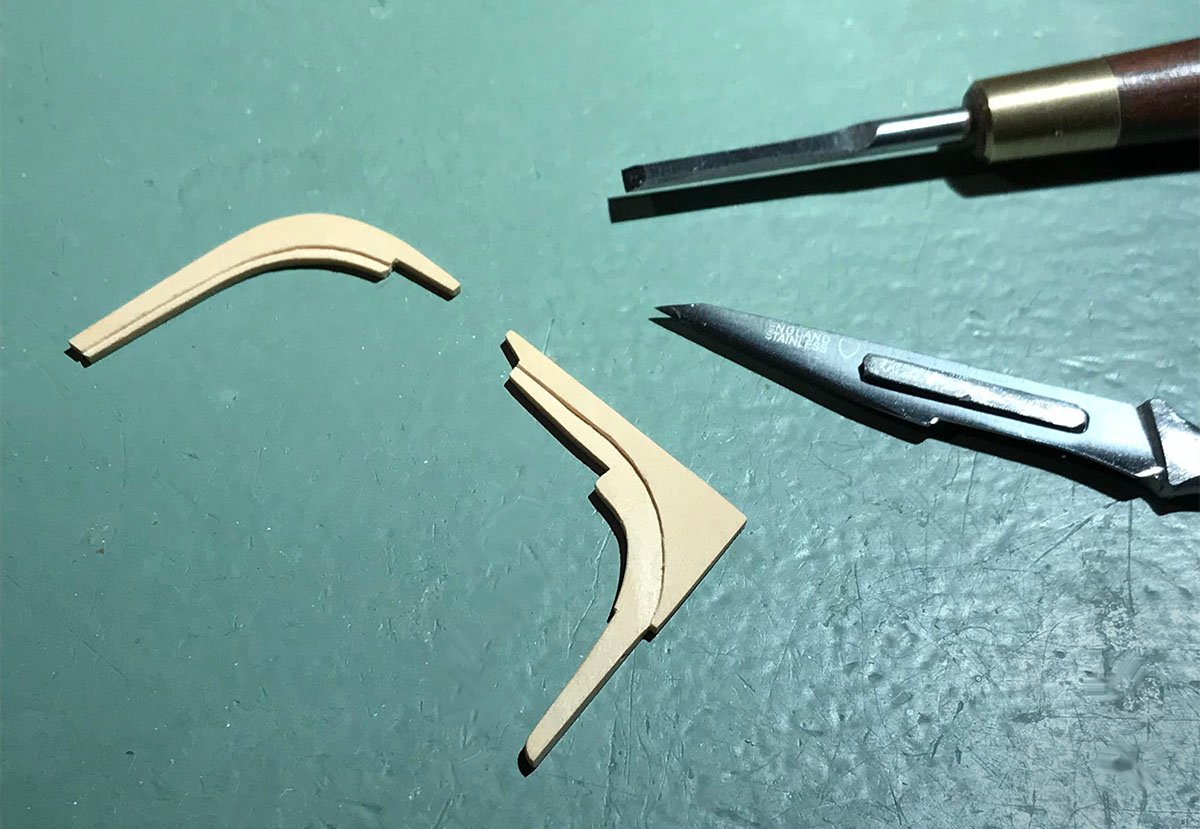
So, after many layers of gesso and sanding a good surface was achieved on the plug. While gesso coats were drying, I began construction of the backbone of the cutter. The stem and stern posts were cut out of wood a scale 2" and 3" respectively. The stern post was tapered to 2" at the heel. The rabbets were marked out carefully and cut. The drawings of this cutter showed both inner and outer rabbet lines. This established the changing bevels. The outer line was cut with a new scalpel blade and the bevel cut using a miniature chisel. Thinking ahead, the holes for the ringbolts were drilled using a #72 bit held in a pin chuck. Next will be the keel.
- 433 replies
-
- 21
-
-
- open boat
- small boat
- (and 1 more)
-
Over the planking for sure, Mark. The batten idea will certainly help align the pieces nice and smoothly. I found that my best molding strategy was to start with blanks that did not account for bevel on the back. The lengths were rubber cemented on a wood backing board. The molding scraper was then run along repeatedly and lightly until it bottomed out on the backing. That ensured a consistent depth of cut. After removing the molding from the board and cleaned of rubber cement, the bevel was put in. This was done with a very sharp chisel to establish the angle, then rubbed on a sanding board to refine the bevel.
-
Hope this is a quick fix for you, Mark.
-
Retired and ready to build my first model!
druxey replied to lraymo's topic in New member Introductions
Welcome! And I'll add; read and understand the instructions first! -
New to ship modelling? But what do you build first?
druxey replied to MSW's topic in Wood ship model kits
Smart move to begin with something simple. As you'll find out, even that has challenges! -
The gesso provides a white surface which you can use pencil on. The lines show up clearly and you can easily erase if you need to. Stay tuned to see this.
- 433 replies
-
- 7
-
-
- open boat
- small boat
- (and 1 more)
-
Very nice and neatly done, Clare. The sail material looks very convincing.
- 175 replies
-
- 3
-
-
- hanse kogge
- shipyard
- (and 1 more)
-
Thanks, but not yet, Chuck! It's gesso and sand and repeat time now.
- 433 replies
-
- 2
-
-
- open boat
- small boat
- (and 1 more)
-
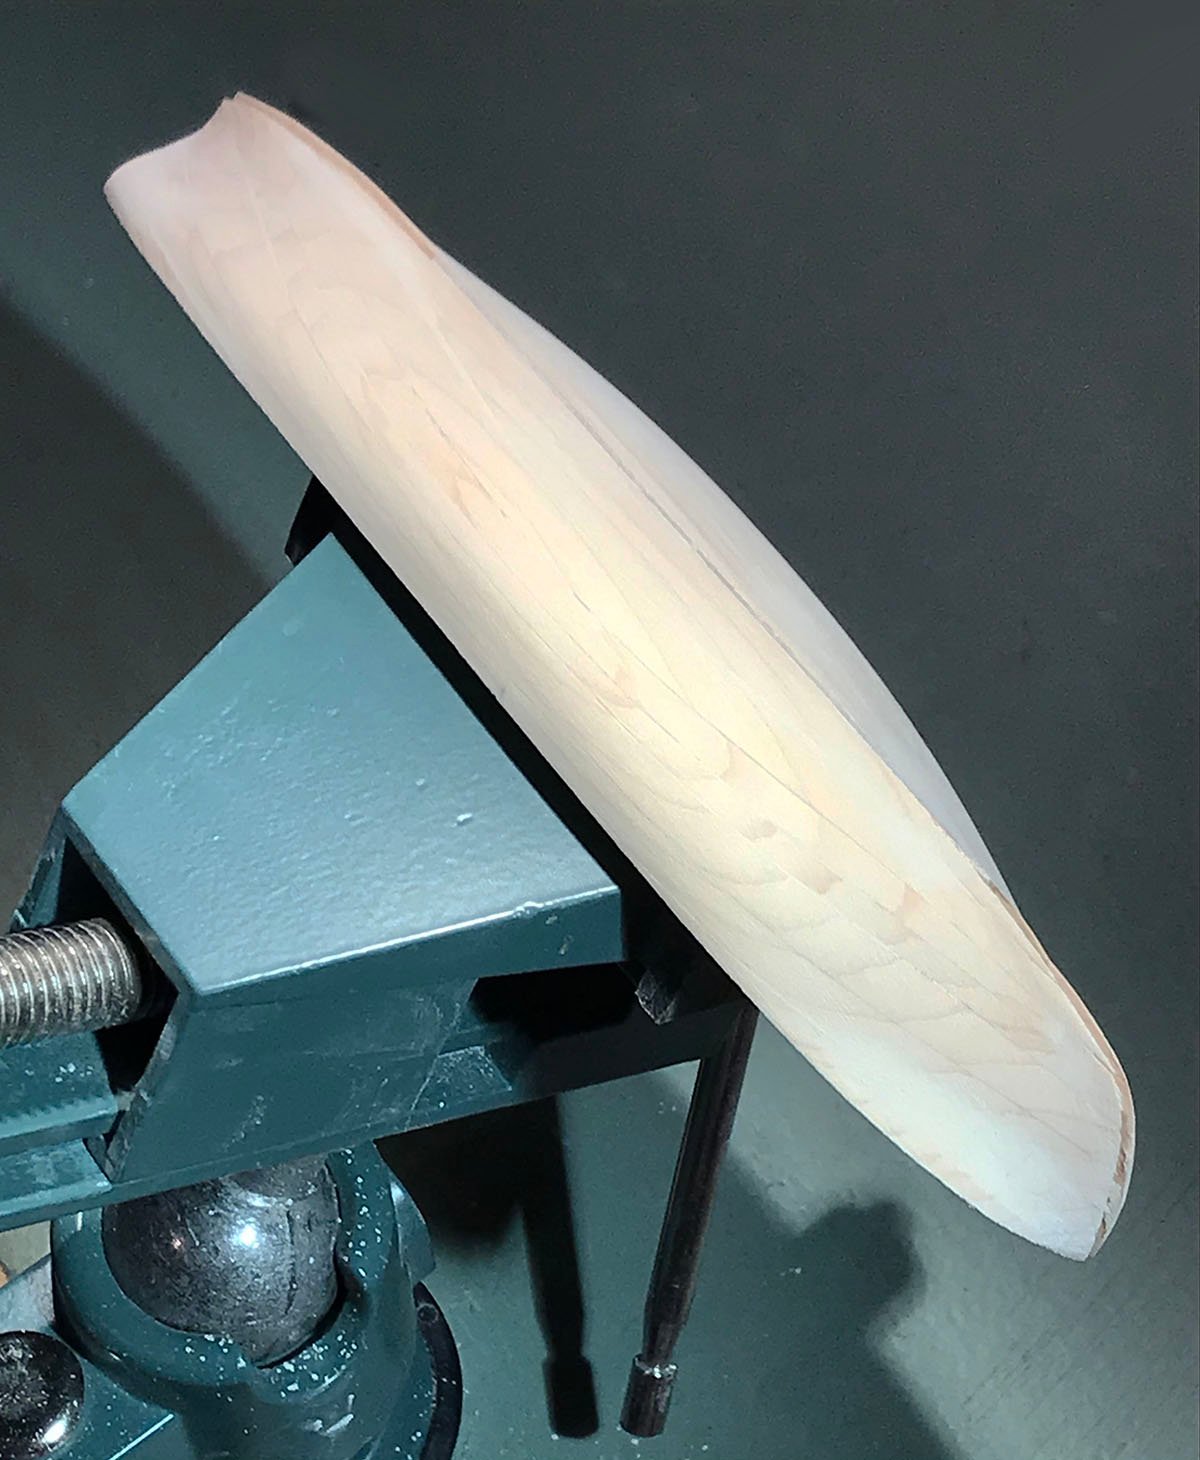
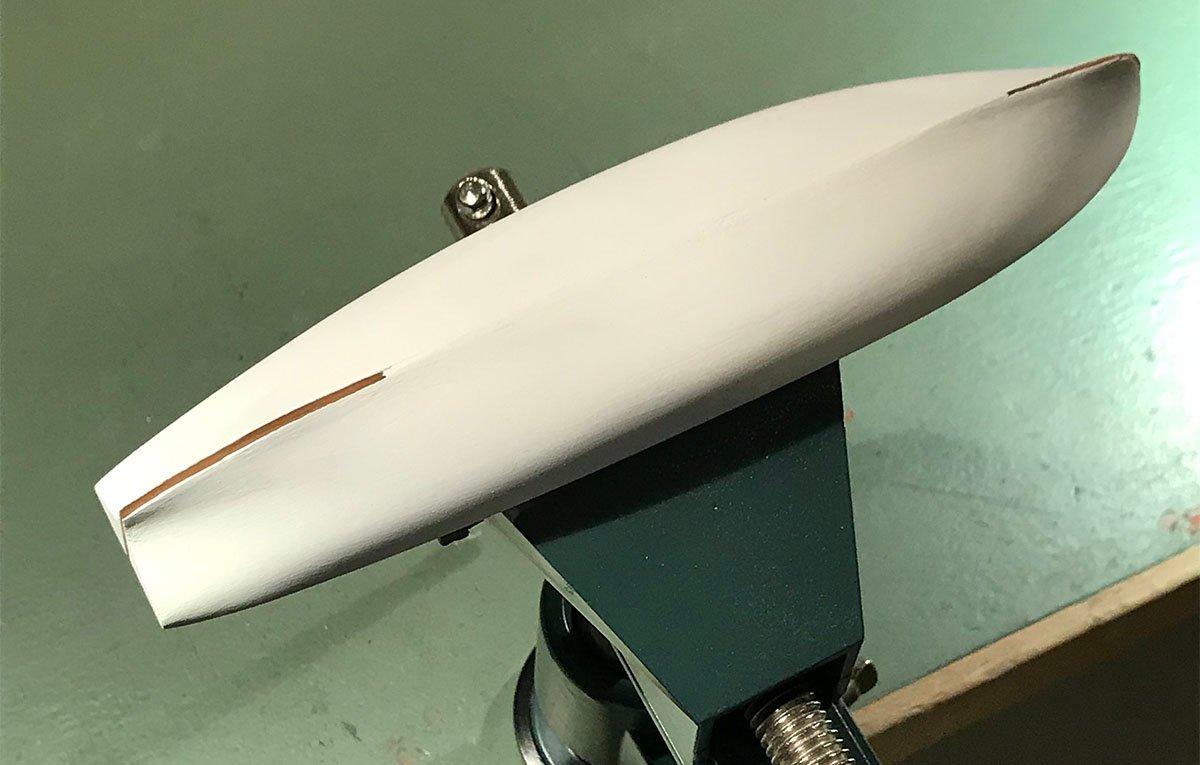
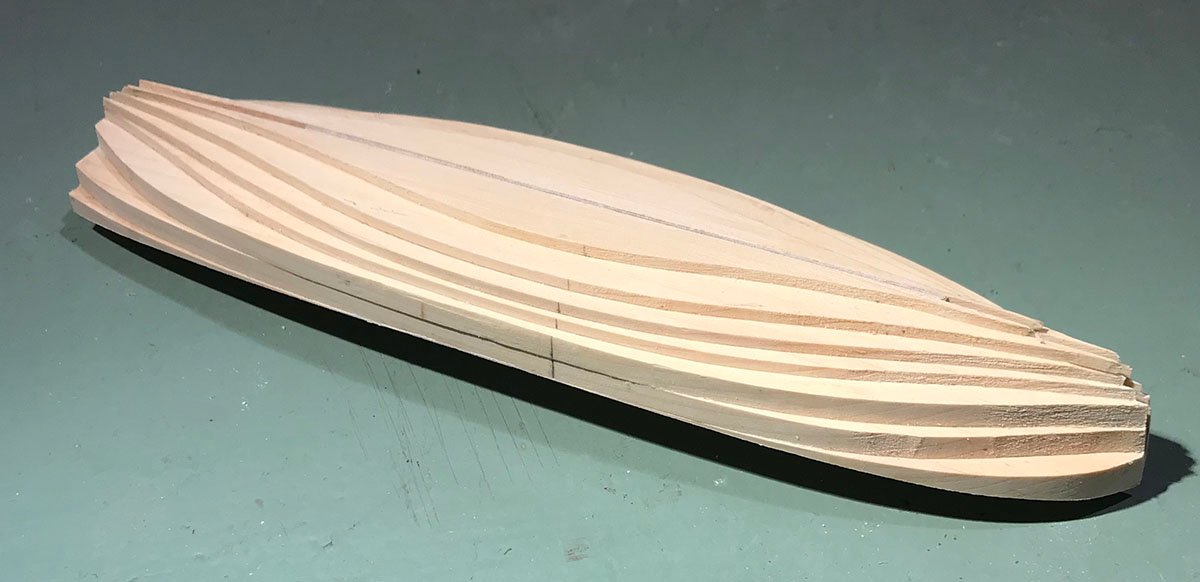
Just about completed the smoothing of the plug. It is worth taking time to refine this even though it isn't part of the model itself. A little filler was required in spots in order to create a smooth fair surface. Next will be several coats of gesso and sanding. The planking runs can then be marked out.

- 433 replies
-
- 23
-
-
- open boat
- small boat
- (and 1 more)
-
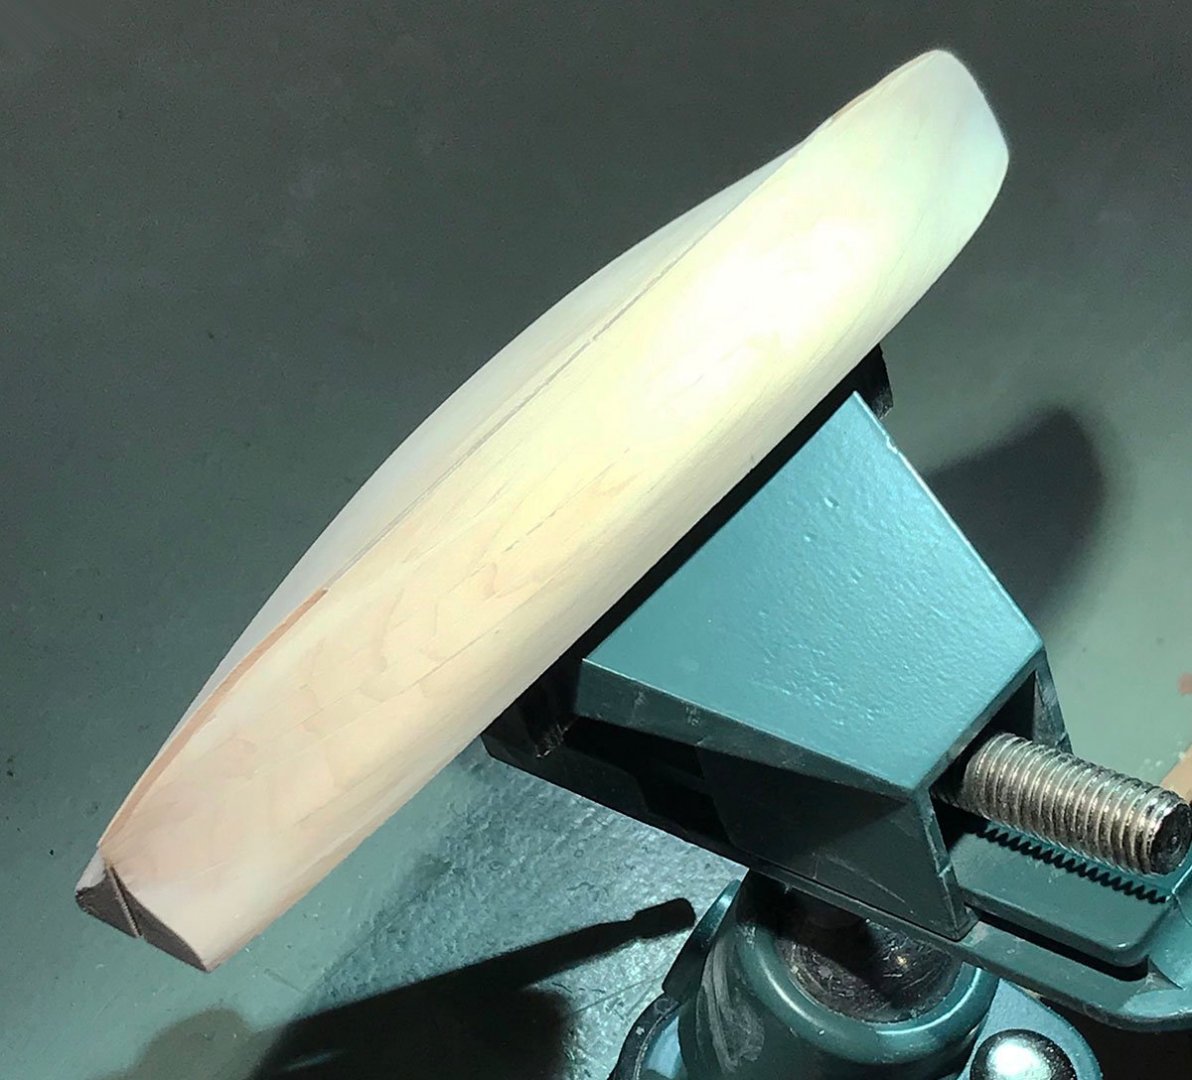
The sheer was sawn out and smoothed using shaped sanding sticks. The half-hulls were then joined with a central 'spine' to allow for the keel/stem/stern post assembly. The projection allows me to clamp the plug in my vise. Shaping then began using a sharp chisel and gouges.

- 433 replies
-
- 24
-
-
- open boat
- small boat
- (and 1 more)
-
Coming in late to this party, that is a lovely job that you are doing on this, Håkan. Visually the colors work very well.
-
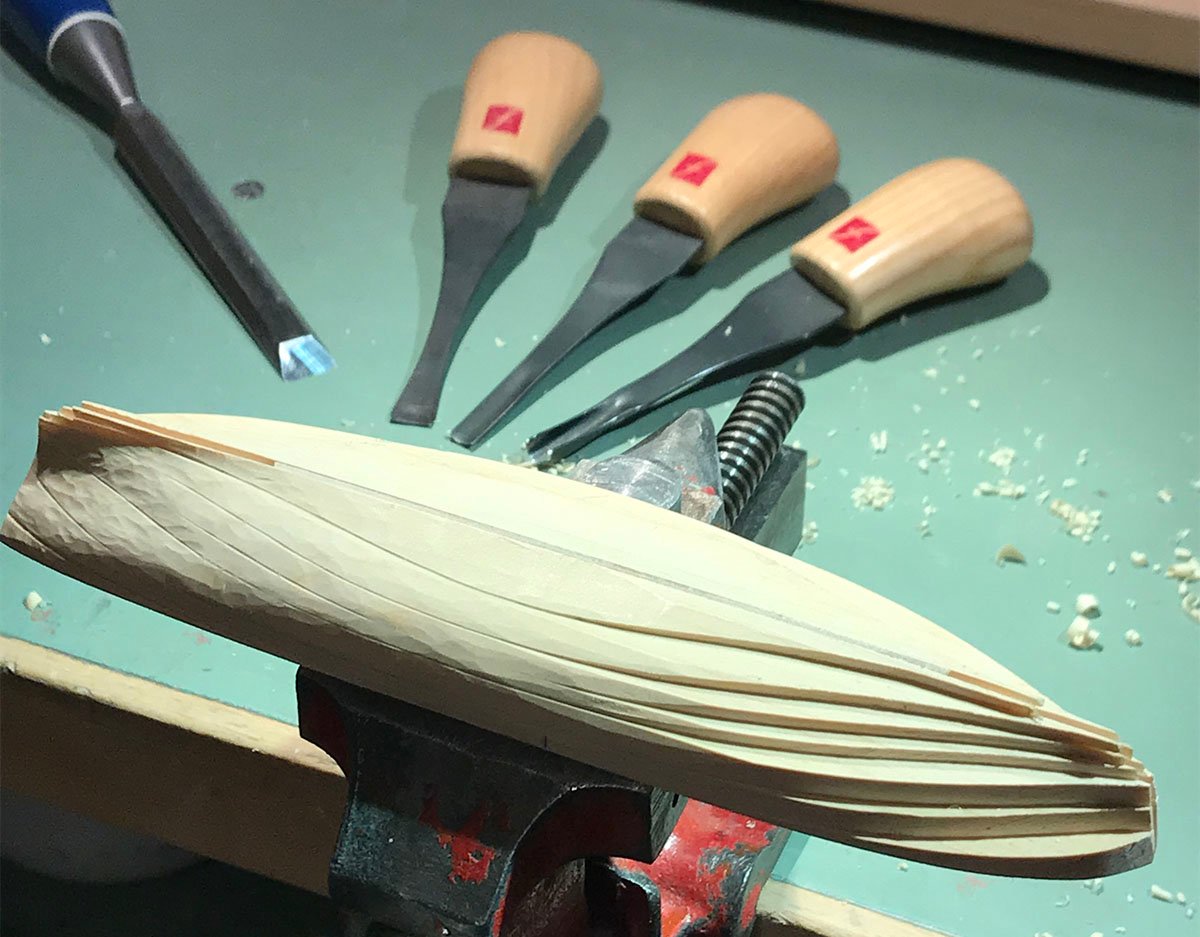
The lifts for the plug have been cut out and glued up. Next, the profile of the boat was marked out on the inner surfaces of the halves. I remembered to keep the off-cuts of the lifts to temporarily glue on again in order to scroll-saw the profiles!
- 433 replies
-
- 18
-
-
- open boat
- small boat
- (and 1 more)
-
Lovely clean work. Usually the first head beam is in one piece and scored on to the front of the stem head. I've not seen this arrangement before.
-
Strain? It thought it was Strine!
-
Thank you kindly, Bruce. That would be much appreciated! If there will be blame to be laid.... It's not often one has the luxury of a specific period small boat photo to refer to. Yes, Håkan, she is definitely carvel planked.
- 433 replies
-
- 3
-
-
- open boat
- small boat
- (and 1 more)
-
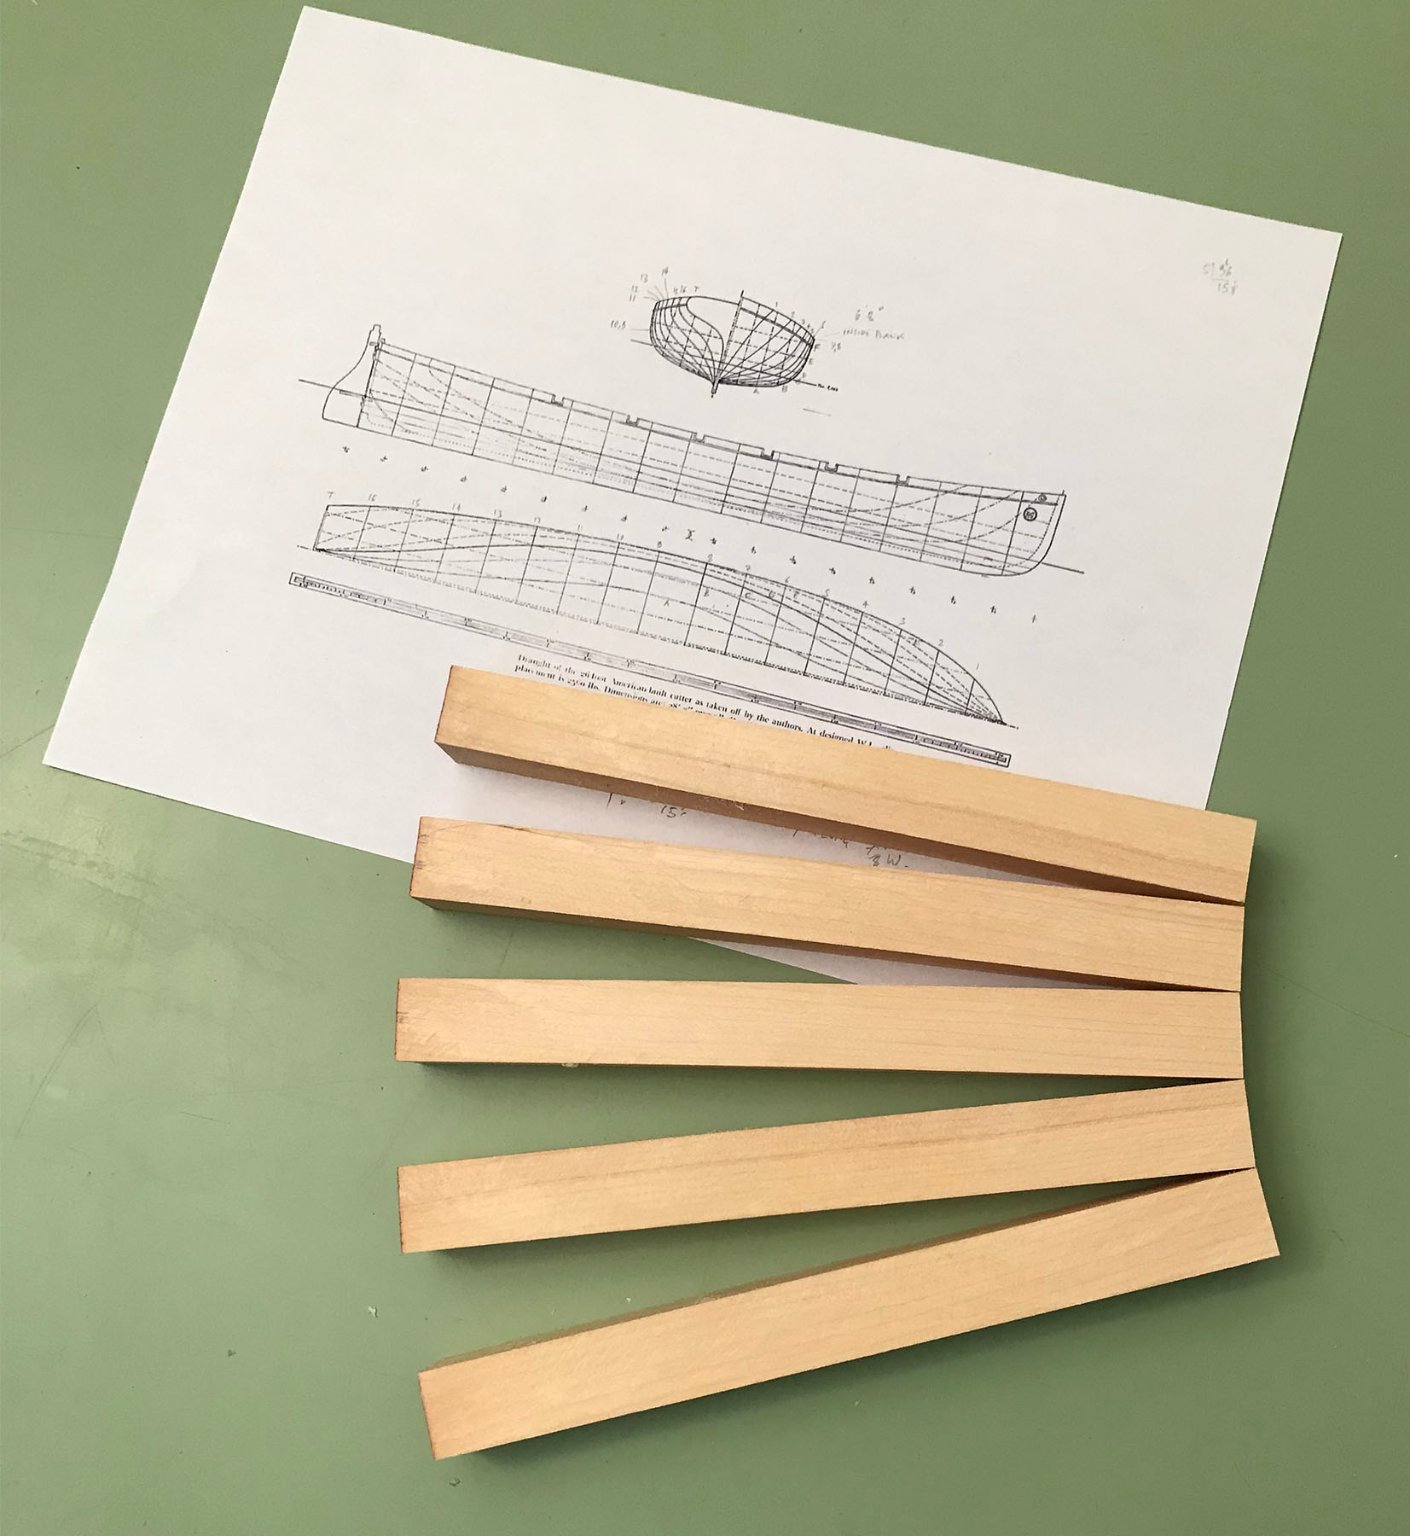
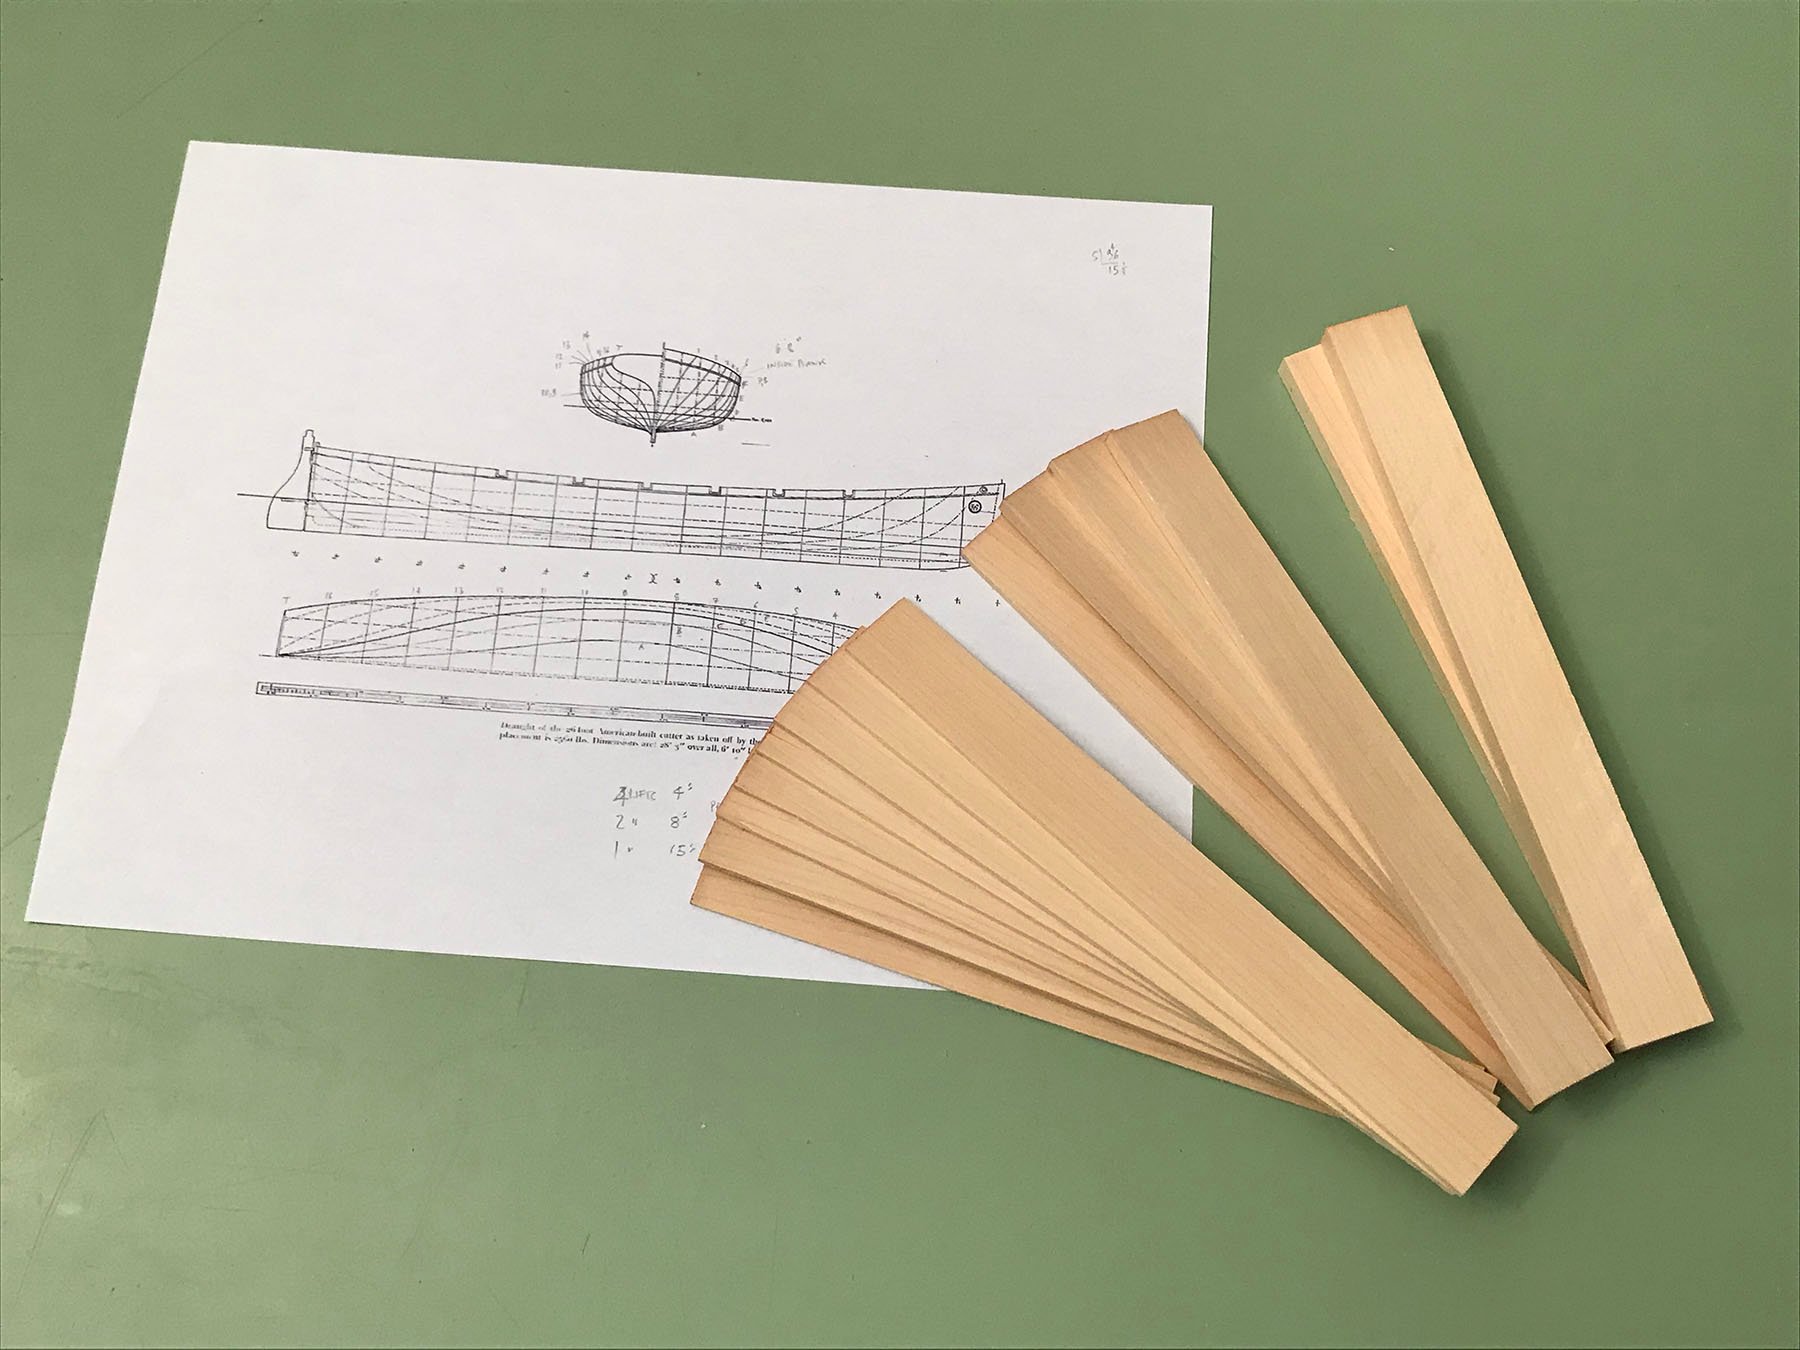
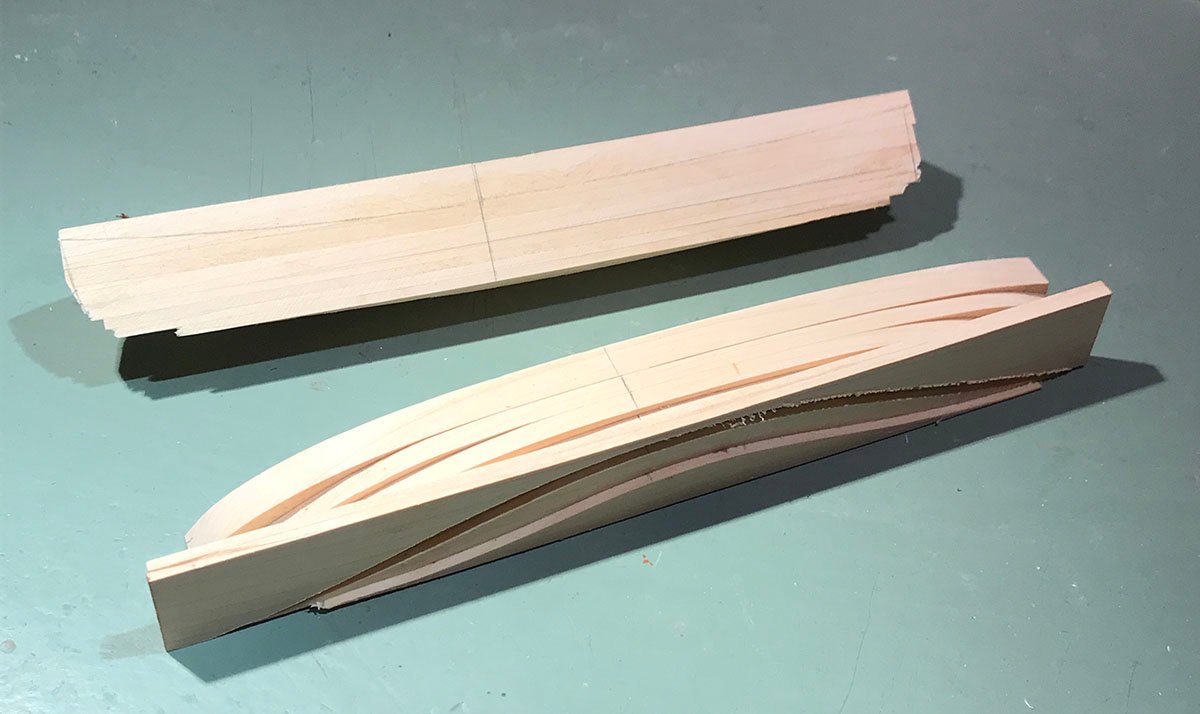
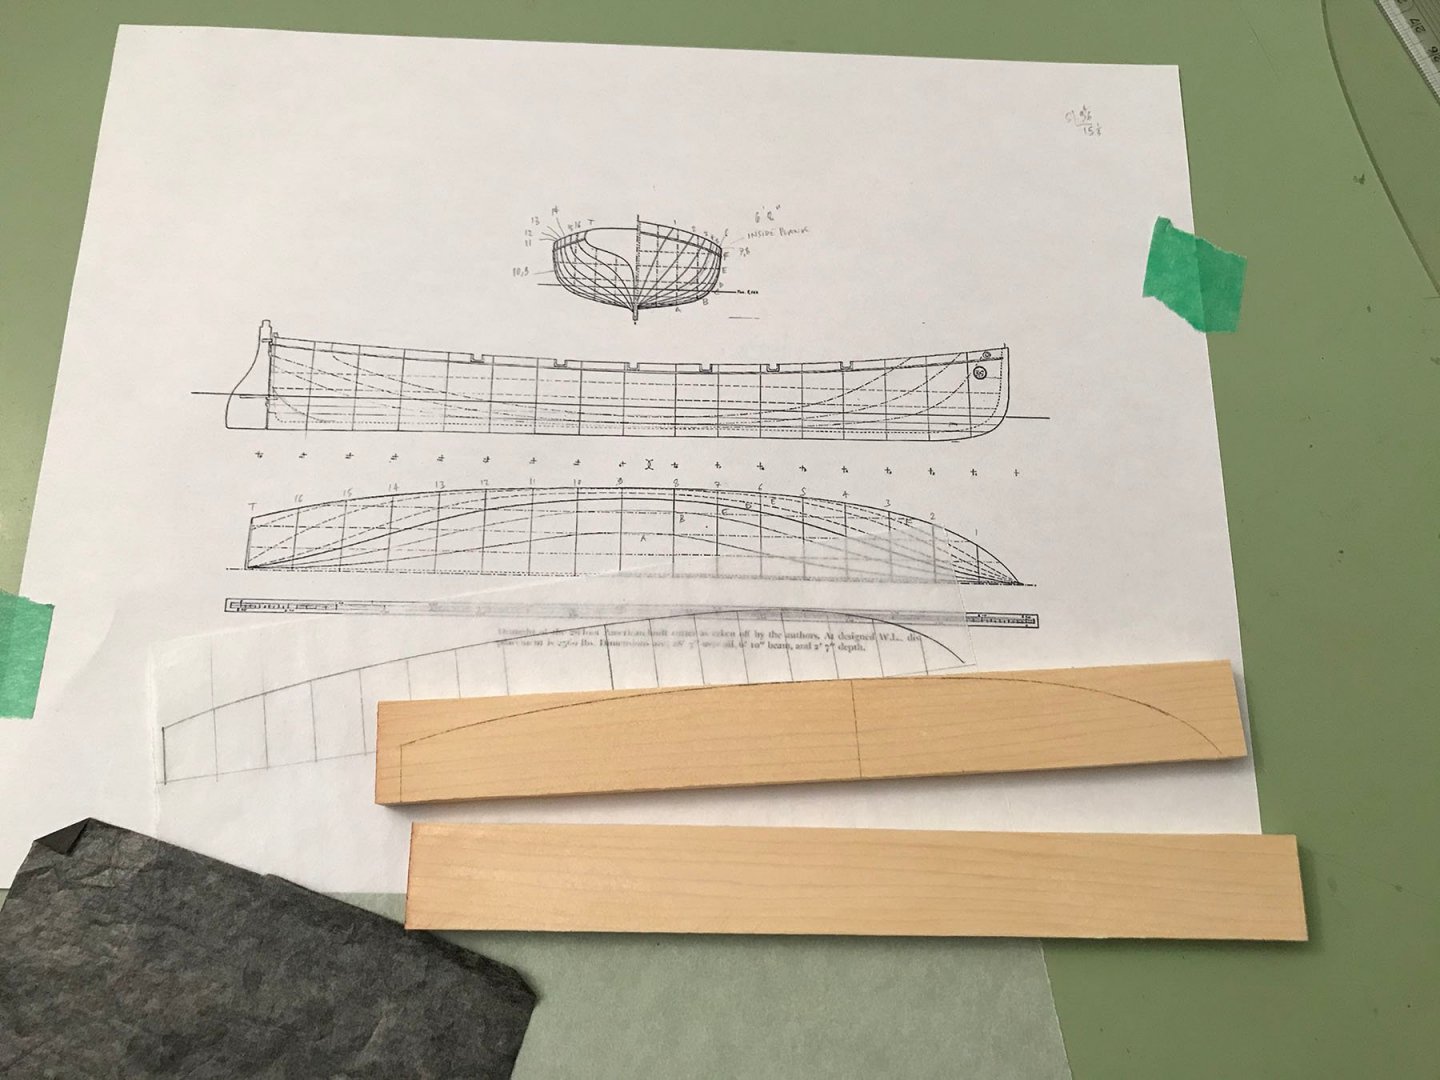
Well, having read the thread on an article seen the drawings and photos about a cutter preserved in Venice, the beautiful form has inspired me to attempt to build a model in 1:48 scale. The first step was to download the photos of the pages in the article that showed the surveyed drawings. These had to be stitched together and distortion removed, which was done in PhotoShop. Then the drawings had to be re-sized to 1:48. Having the overall length, width and depth helped define the reduction required. Once the drawings were to scale, I could begin. The first step was to begin preparing a plug on which to build the hull. Leaves of yellow cedar were cut from blocks (1) and sanded. Four layers a scale 4" thick, two layers 8" and one layer of 15" were needed for each half of the plug. These thicknesses matched the waterlines on the plan (2). Tracing paper was used to transfer the waterlines to the leaves of cedar and laid down using graphite paper (3). The opposite pairs of wood leaves were rubber cemented together before cutting them out on the scroll saw. To be continued!


- 433 replies
-
- 26
-
-
- open boat
- small boat
- (and 1 more)
-
If I may comment; I'm glad that you are having a good time, but reading and understanding the instructions first will prevent frustration!
-
Terrific demo and explanation!
-
Swan-Class Sloop by Stuglo - FINISHED - 1:48
druxey replied to stuglo's topic in - Build logs for subjects built 1751 - 1800
I have a whole box full of different flexible and rigid sanding sticks and blocks. The blocks have convex and concave surfaces in different radii. Great for sanding things like stem pieces or deck beams.