HOLIDAY DONATION DRIVE - SUPPORT MSW - DO YOUR PART TO KEEP THIS GREAT FORUM GOING! (Only 20 donations so far - C'mon guys!)
×


druxey
-
Posts
13,300 -
Joined
-
Last visited
Content Type
Profiles
Forums
Gallery
Events
Everything posted by druxey
-
Indeed: cotton buds, water or saliva and a ton of patience! Roll, don't scrub the tip. Have fun, Griptite (Thynne?)
-

new to me scalpel handle
druxey replied to Kurt Johnson's topic in Modeling tools and Workshop Equipment
Chuck: you've correctly guessed who gifted me with that handle! Thanks again, Toni! -
Remember to run proof diagonals when you've done, to prove that your lines are all fair. Any wobbles in the lines will quickly act as tell-tales.
-
Would it not be depend on the size of the links and their ability to be turned over the wheel without too much mechanical disadvantage? An 18th century wheel was 24" in diameter, the links 7" between pivot points and the crank throw was about 15". However, several men at a time turned the cranks.
- 12 replies
-
- 2
-

-
- chain pumps
- dromons
- (and 2 more)
-
Welcome aboard!
-
new to me scalpel handle
druxey replied to Kurt Johnson's topic in Modeling tools and Workshop Equipment
I was gifted a Bard Parker style handle some years ago that has a lovely balance. Google: Bard Parker 371070 Scalpel Handle Size 7 -
It depends on the definition of 'length'. It could be length on the upper deck, length on the keel, length overall, etc. One needs to know the definition of the length quoted.
-
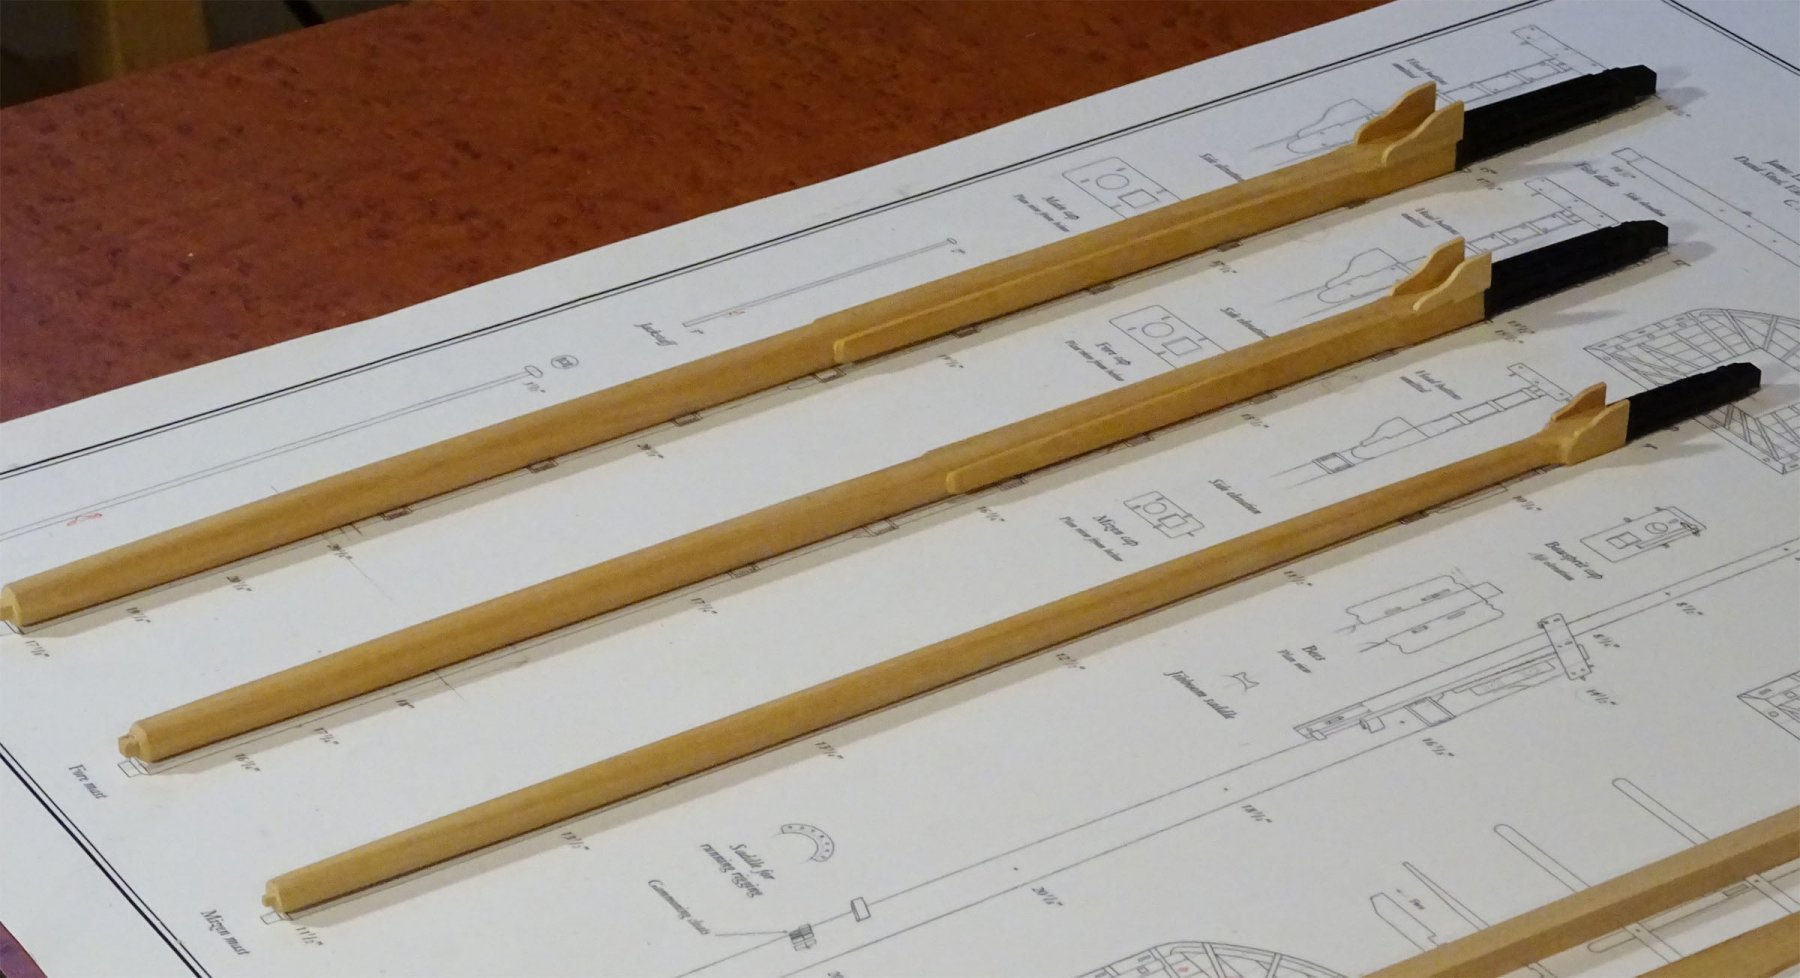
So much depends on personal taste. Many model-makers (myself included) use Castello boxwood, aka lemonwood or lancewood. It is creamy yellow ochre in color, has very tight grain and, if well seasoned, does not warp. Also, if you are modeling a 1770's era ship, sections of the masts and spars are square or octagonal. It is much easier to cut and shape them than to turn them. That was the was it was done in the old days as there weren't lathes that long!

-
Looking positively delicious, Chuck! Also, best wishes with all your family changes this week.
- 421 replies
-
- 8
-
-
- medway longboat
- Syren Ship Model Company
- (and 1 more)
-
Hints on carving: 1) I like to make a Plasticene model of the carving first (at a larger size). That way I can figure out the problems before actually trying to carve. 2) Keep the carving on the end of a long stick to hold or put in the vise until it is done. For a figure I cut the slot and glue in a 'handle'. If you use white glue, you can free the finished figure using rubbing alcohol. Saves accidentally carving your fingers! 3) Study photos of figureheads and sculptures. One learns a lot by looking at what others have done.
-
YA-1 Yamaha Motorcycle by Dan Vadas - FINISHED - CARD
druxey replied to Dan Vadas's topic in Non-ship/categorised builds
Some time ago I looked at the downloads Yamaha put out. Unlike you, I only looked! I look forward to seeing this go together, Dan. -
Oh, no, Michael! Another rabbit hole to go down again....
-
One needs a HSS slitting blade and zero-clearance table insert to successfully cut such narrow strips.
-
All encompassing compass considerations
druxey replied to JerseyCity Frankie's topic in Modeling tools and Workshop Equipment
There is also pleasure in handling and using a well designed and beautifully crafted instrument or tool. You will never experience this if you only use 'handyman specials'. And you will get better results. It's worth waiting while you save up for a really good quality tool. -
If you need to hold pieces in place while silver soldering, use soft iron wire. A jeweller taught me that trick. Another trick to protect a joint already soldered close to another is to coat the joint you wish to protect with a paste of yellow ochre powder and water. Anyway, nicely done!
-
It would make sense to place them at the lowest point in the ship that water would flow to.
- 12 replies
-
- 3
-
-
- chain pumps
- dromons
- (and 2 more)
-
Welcome, Mark. I smiled when I saw where you live. Recently I had a book published on Hayling, a harbour hoy from the 1750's, named after the Island you live on. You'll find all the help you need on this forum. Have fun!