


druxey
-
Posts
13,128 -
Joined
-
Last visited
Content Type
Profiles
Forums
Gallery
Events
Posts posted by druxey
-
-
Elegantly done, Ed! Those look perfect.
-
Thanks for dropping by, everyone.
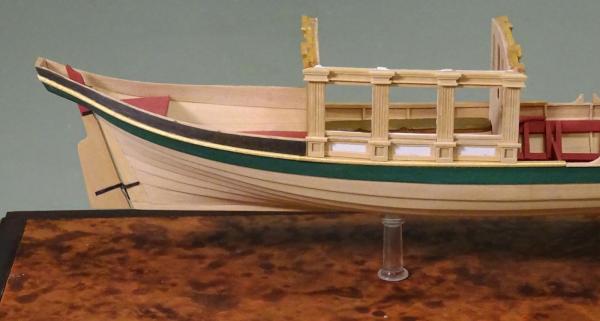
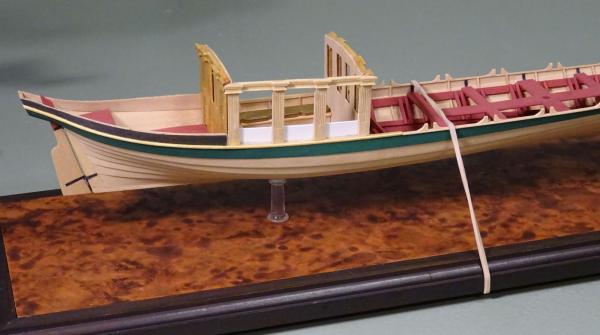
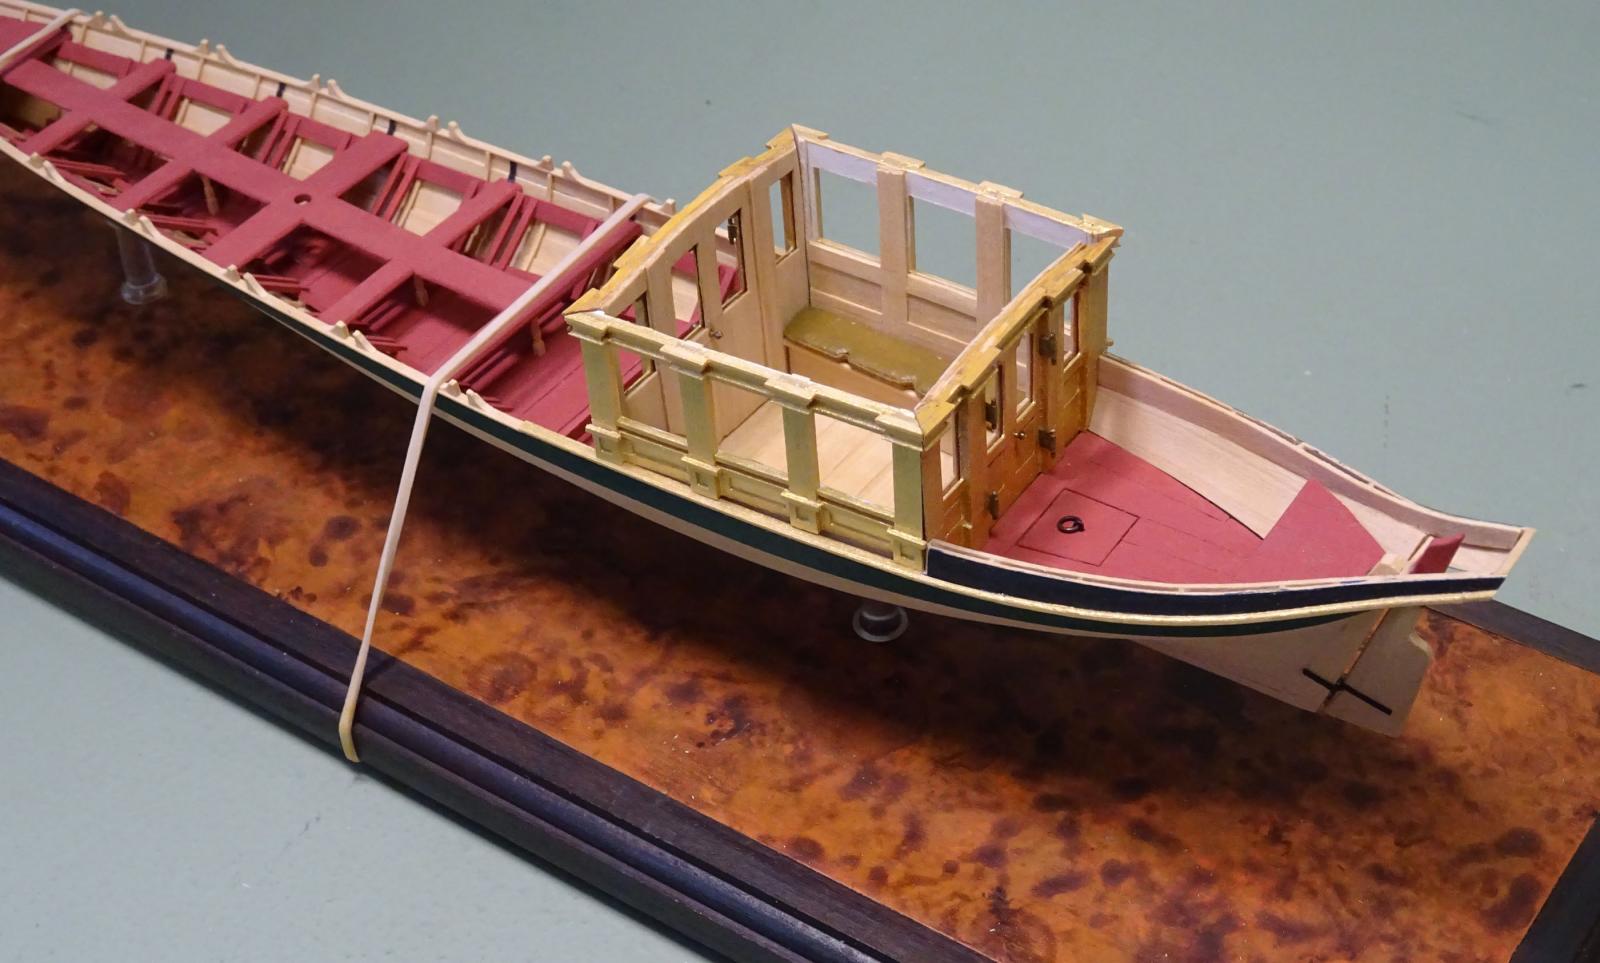
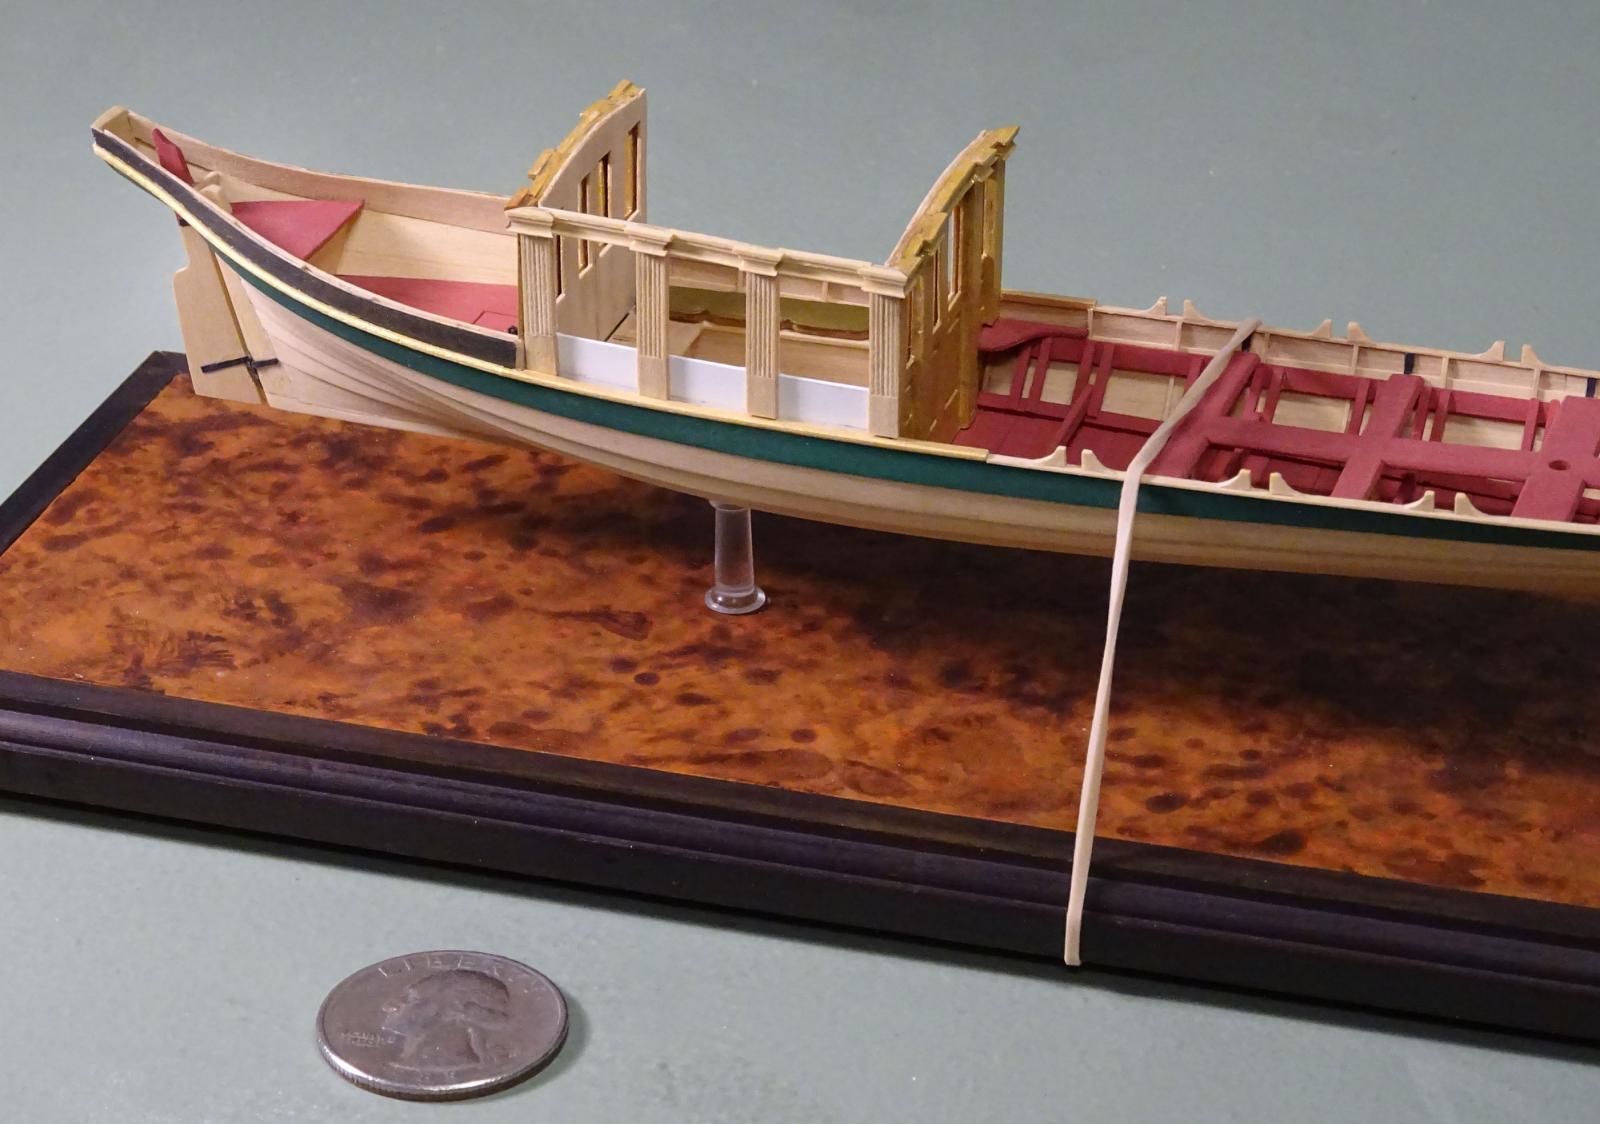
The outer sides of the coach have been completed and gilded. The coach is only test-fitted together at present. I'm now in the process of panelling the inner sides and refining the fit of the corners of the coach. The latter needs particular care: take too much material off a corner and....
The door hardware has been added. The door knobs are of brass wire whose ends have been melted. If done correctly, the ends of the wire will form a small spherical ball. The 'bronze' hinges are pieces of bamboo treenail and paper, acrylic painted.

-
-
-
-
Thanks once more for the likes and comments, everyone.
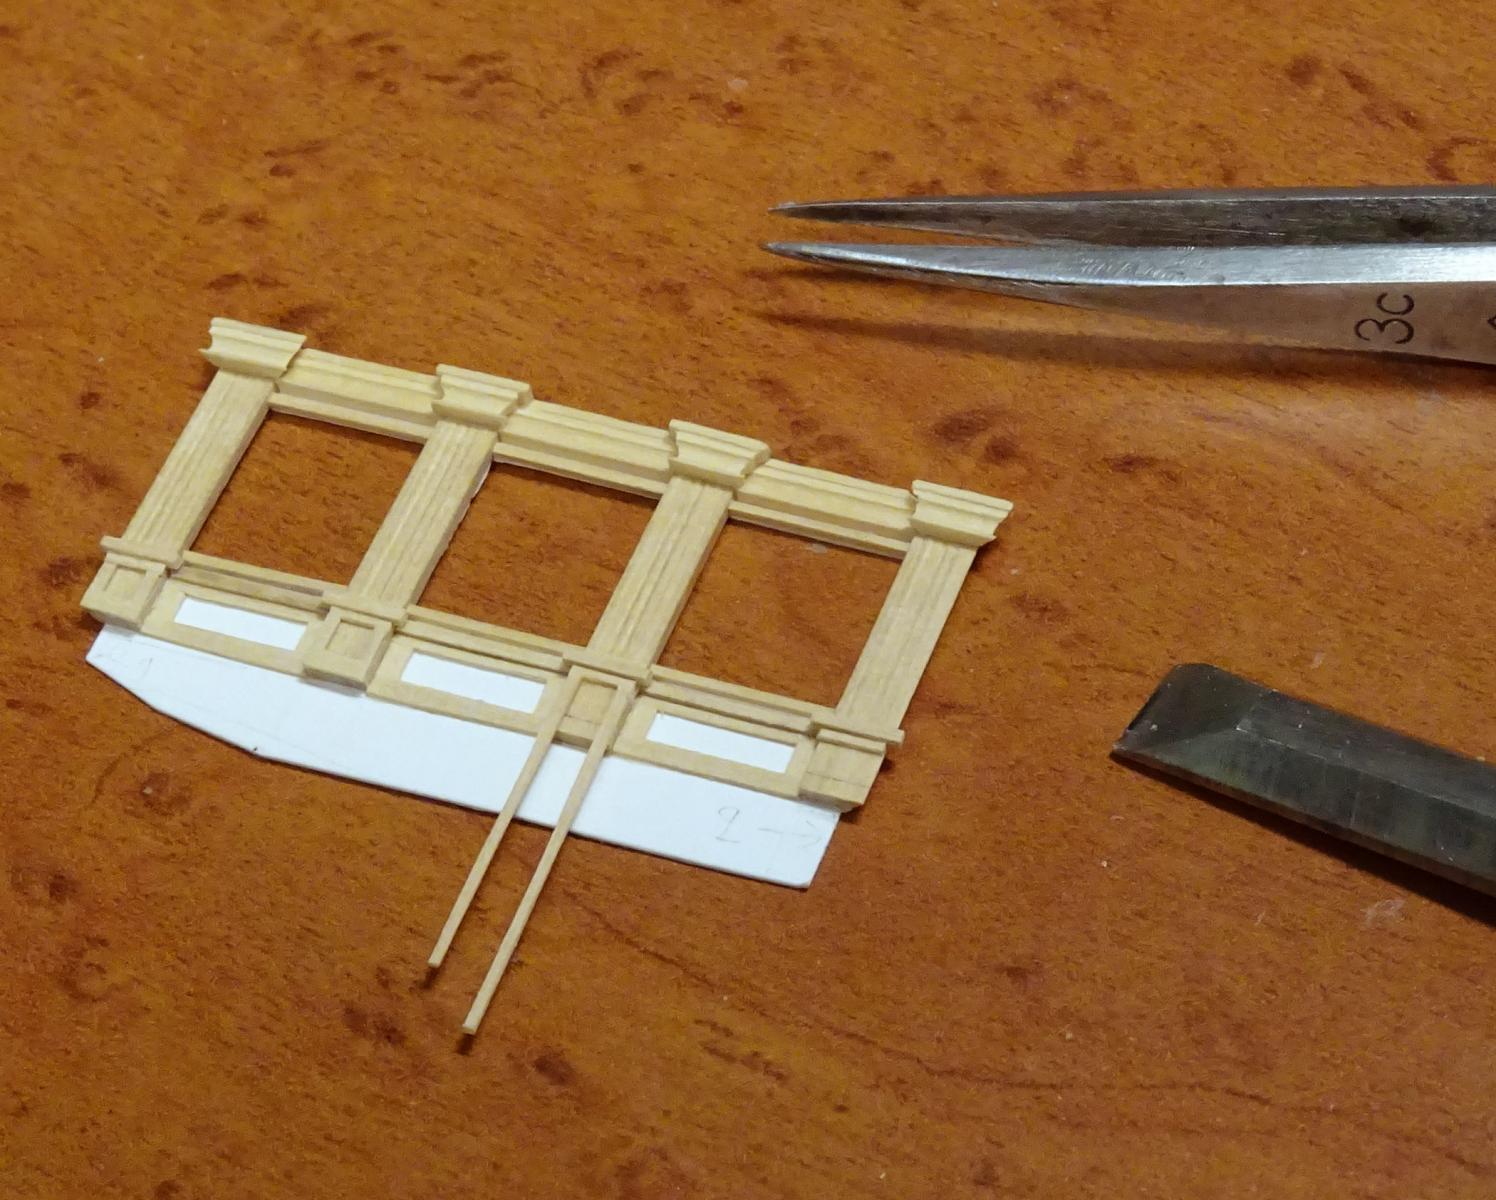
I had to re-do the side of the coach. I found that I had cut the lights to the wrong depth. In addition, the lights were uneven in width. So, a second round.
When dealing with tiny pieces, I've found it easiest to leave them over-length to glue them on (top photo). I then use a chisel to cut the pieces to exact length. The top and bottom pieces of the panel frame were cut a little overlength, then sanded using a sanding stick to trim them to exact dimension (second photo).
The inner side of the piece has had card strips glued on to leave channels for the glazing (third photo). In this case I shall be using mica. This is a naturally occurring mineral that is fairly transparent. It can be peeled into very thin layers and cuts easily. The pieces will be slid into place from above before the roof is installed. The cutaway at the bottom of the side is because the hull curves inward here and this allows for the changing interior contour.
The last photo shows the work to this point. Next will be the inside panelling and the other side piece.


- Erebus and Terror, janos, tlevine and 40 others
-
 43
43
-
-
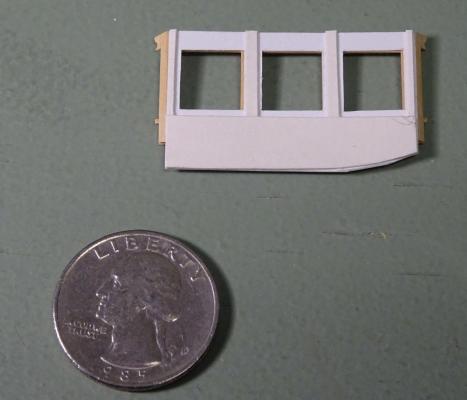
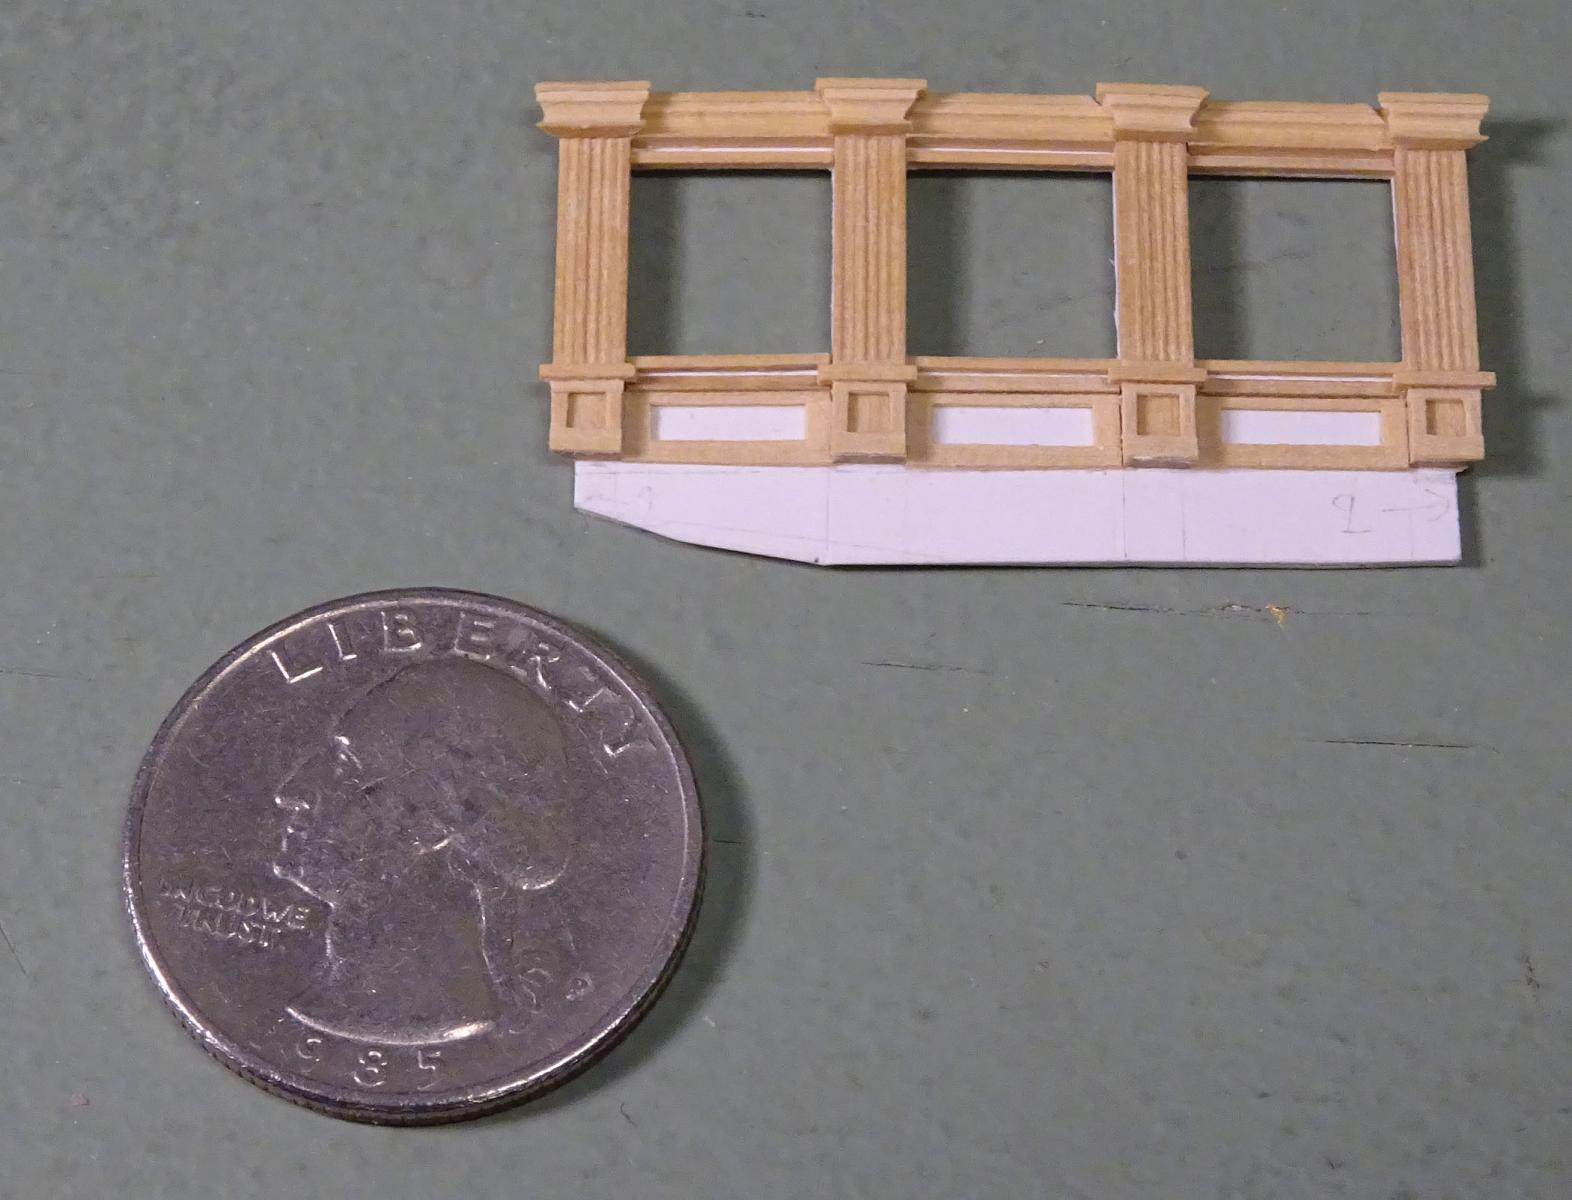
The first of the two coach sides is now in the process of being constructed. These are built up in the same way as the fore and aft ends of the coach. As there is a slight curve to the sides, allowance is made for some flex between each of the three lights.
Toni: to answer your question, I'm delaying a final judgement on the degree of reflectivity of the gold until the model nears completion. Also, the photographs don't really give the effect of the actual appearance to the eye.

- ccoyle, Ryland Craze, FatFingers and 37 others
-
40
-
-
Thanks for explaining your method of getting these floors out, Gerald.
-
-
-
-
-
-
Alan G: The original timber used was probably larch. A Royal barge draught of 1823 (ZAZ7154) has the notation "To be built of Larch, or other light and durable wood."
And yes, I've used trompe l'oeil techniques before, both on baseboards as well as theatrical and film furniture and sets.
-
-
-
-
-
-
-
It's not so much the brand of chisel, but how well it's sharpened that matters. I use a Lee Valley (Veritas) sharpening system with their jig and stone pond. I have water stones of 1000 and 4000 grit and add a micro-bevel on the edge. The back of the chisel is also polished to a mirror finish. Cutting with a well-sharpened edge produces the sound of a fresh apple being cut and beautiful shavings.
- WackoWolf, Canute, michael mott and 14 others
-
17
-


Dunbrody by Mahuna - FINISHED - 1:48 - Cross-Section - Irish Famine Ship
in - Build logs for subjects built 1801 - 1850
Posted · Edited by druxey
Are you sure you don't want to build the whole hull? Looking very neatly done, Frank.
One way to ensure the frames are plumb is to glue a temporary cross-spall across the top of the frames and mark the centreline. This will ensure symmetry across the hull. Two set squares will ensure plumb as well as at right angles to the keel.