


druxey
-
Posts
13,128 -
Joined
-
Last visited
Content Type
Profiles
Forums
Gallery
Events
Posts posted by druxey
-
-
-
-
-
-
Nice bit of filing, Chuck. Looks like it was turned!
- Canute, GLakie, Seventynet and 4 others
-
 7
7
-
-
-
-
-
Your first attempt at carving will probably go in the scrap box, as will your second or third. But don't be discouraged; your skills will rapidly improve with experience. I've found that making a maquette of modelling clay first helps sort out problems in 3D much better than 2D sketches. If really desperate and you've the budget for it, commission a carving!
- robin b, CharlieZardoz and mtaylor
-
3
-
There are also doors forward, Dan. You'll see them from another angle. The VIP's came aboard via the aftermost thwart and stepped down. I assume that the aft pair of doors were for a servant to hand things through. They are quite narrow: 20" at most.
- mtaylor, cog, Mirabell61 and 2 others
-
5
-
I believe that 'braces' here refer to the gudgeon straps.
Steel, Naval Architecture, page 11:
BRACES. Straps of iron, copper, or mixt metal, secured with bolts and screws to the stern post and bottom planks. In their after ends are holes to receive the pintles by which the rudder is hung.
-
Thank you, everyone. Still a way to go, though. There's those twelve sweeps (oars) to make as well....
Gerhard: the elegance you see is that of the barge's designer, not mine.
Jack: if you Google 'Prince Frederick's barge', you'll see that faux copper roofing color.
-
The baking paper trick is a new one to me - that is a brilliant solution!
- Gerhardvienna, Canute, mtaylor and 1 other
-
4
-
-
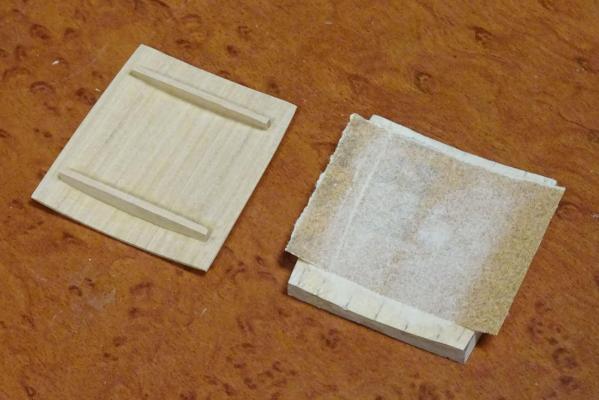
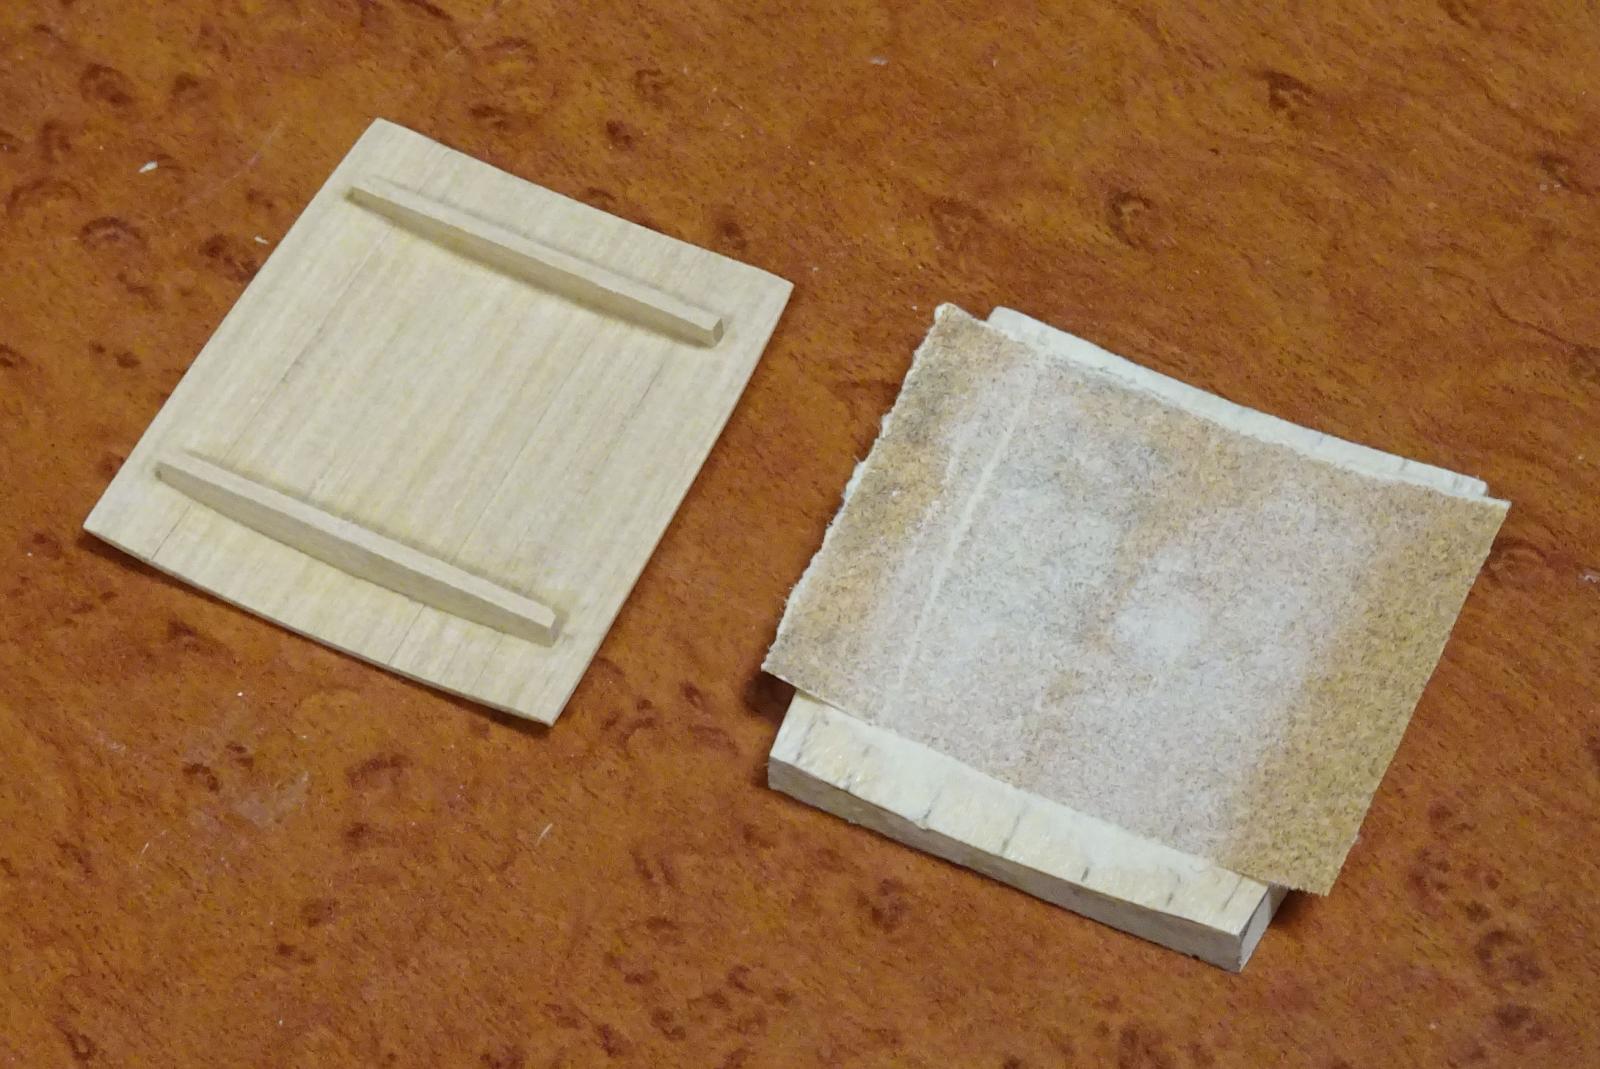
The roof of the coach has been completed and installed. As this is curved, a suitable strategy for building it is needed. I considered carving it from solid, but this would be difficult to keep a consistent thickness. I decided to cooper it, that is to say, build it up as one would a barrel.
The first step was to carve a form to build it on. I hollowed a piece of basswood to the appropriate radius, which in this case was 3½" full size (first photo). It was then shaped to the shape of the roof and marked out for the six planks that are nominally 1' 0" (scale) wide. These were cut and shaped with a slight bevel on each edge. They were then glued up on the form.
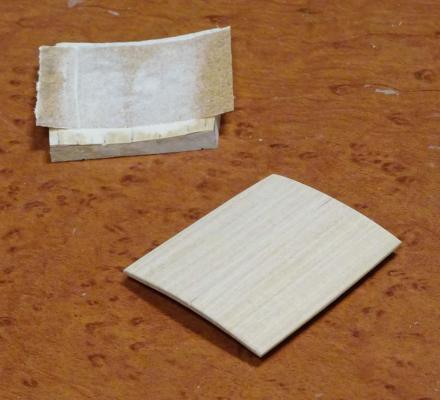
Once complete, two 'rafters' were glued on the underside to maintain shape and integrity. A piece of fine sandpaper was rubber cemented to the form and the upper side of the roof sanded (second and third photos). The outer side edges of the roof were sanded flat, to fit the coach top edges.
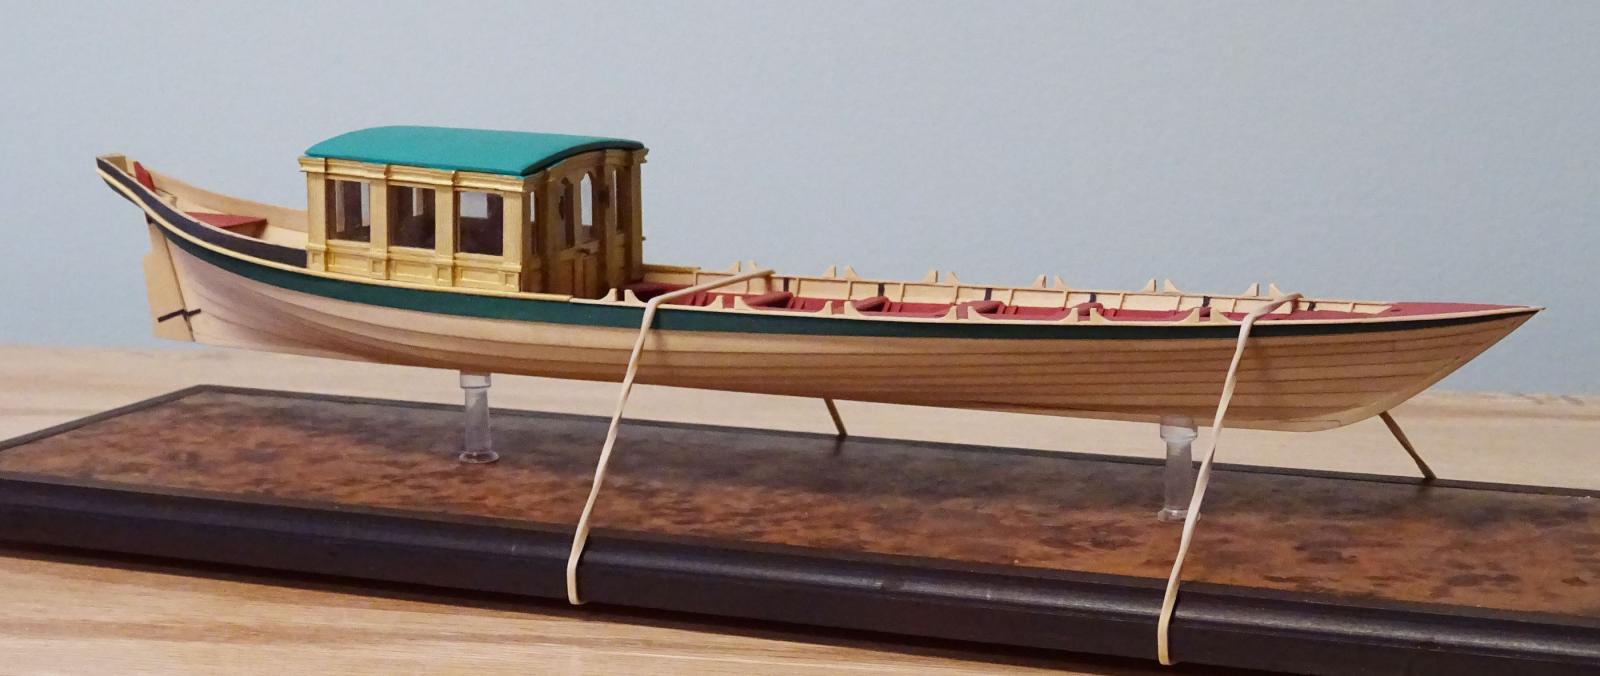
Following the color used on Prince Frederick's barge, I painted the roof a blueish green to imitate a verdigris copper roof. On the actual barge, the roof appears to be covered with painted canvas. I used a mix of viridian green, some white and then toned down with the addition of a touch of black. The top of the capitals on the coach were also painted this color and the roof glued in place.
Next is the decorative work at the stern.

- RGL, AnobiumPunctatum, Fam and 50 others
-
53
-
-
-
-
-
Paul: A 'rockhound' shop that sells mineral specimens will have samples of mica.
- mtaylor, Canute and paulsutcliffe
-
3
-
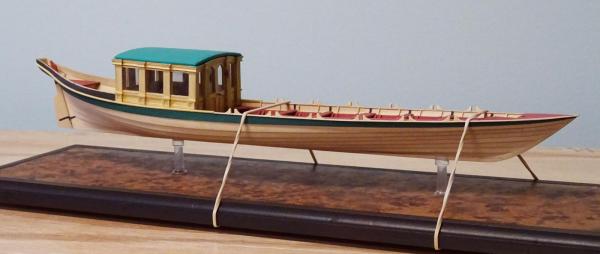
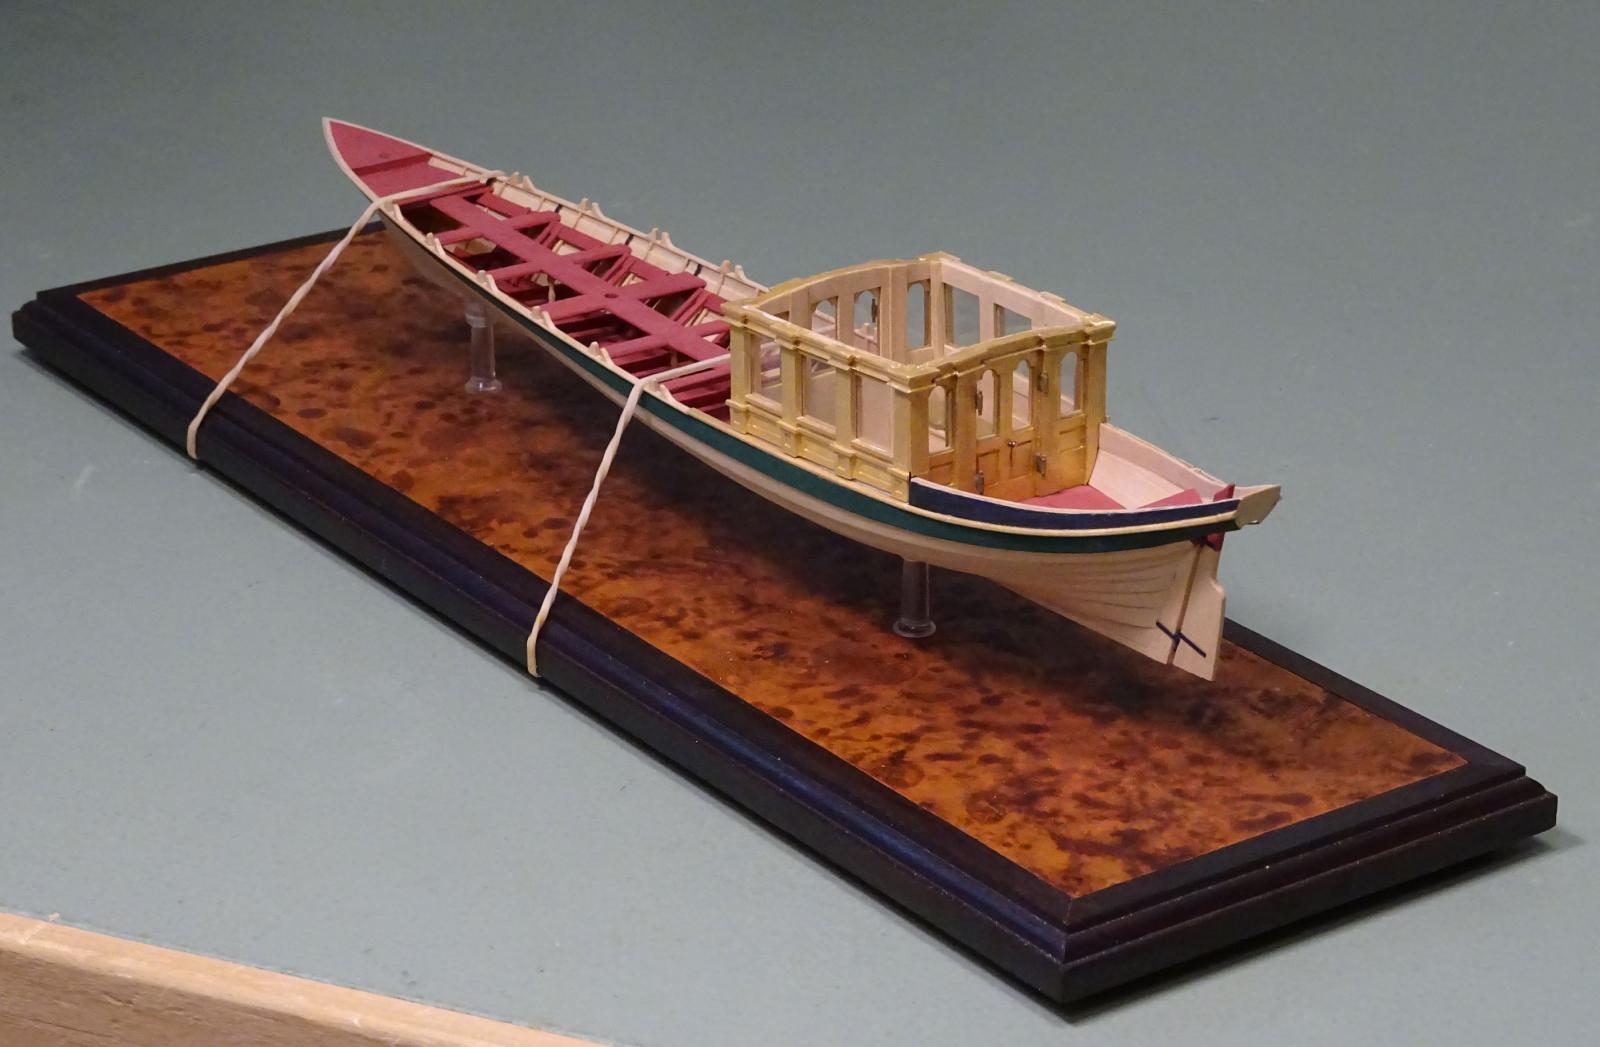
And... the coach sides and ends have been completed, the 'glass' installed and the four sides permanently assembled. After some fien adjustment, the corners came together quite nicely. For the statisticians among us, there were 53 separate parts required just for the outer surfaces of one coach side alone! Next, the coach roof.

-
-
Thanks, gentlemen.
Joel: The access scuttle was, I believe, for bailing. There were lockers beneath the coach seating.
Glenn: Mica was traditionally used on many contemporary models so, nothing new under the sun!
Paul: The hinges are simple to make. Cut a strip of paper whose width is the height of the hinge leaf. Lay it down on a flat surface and place a length of 'pin' of suitable diameter across it at right angles. Glue the strip for a little way on one side of the 'pin' and fold over. Press the paper strip snugly against the pin. Let this dry. Paint the assembly a suitable color. Trim the pin and leaves to length and install.
- Gerhardvienna, Jack12477, robin b and 6 others
-
9
 it will save you a ton of work!
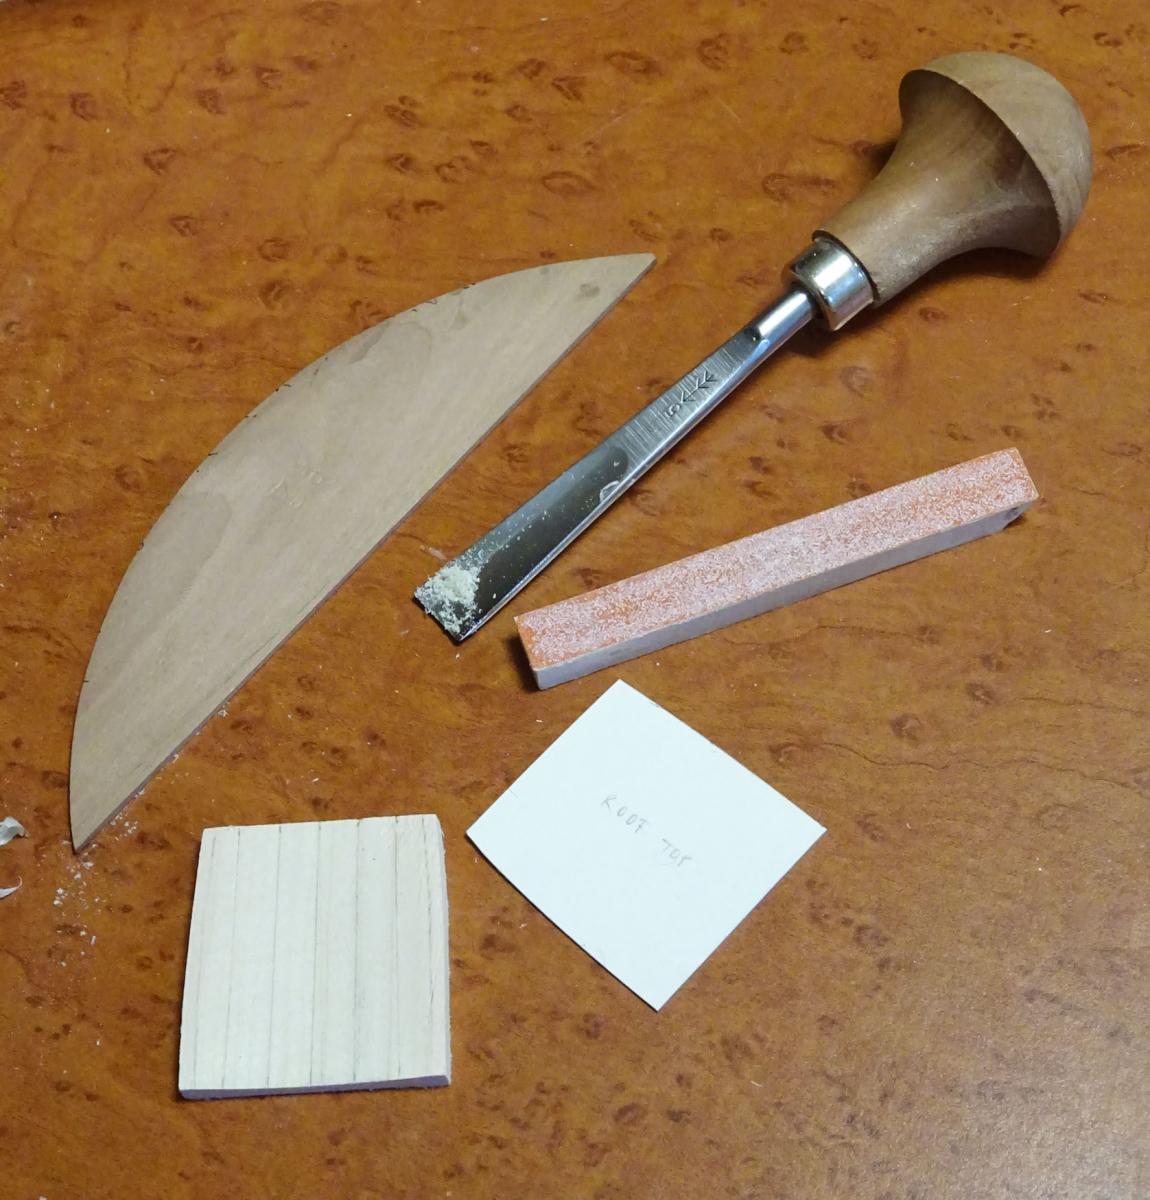

Greenwich Hospital barge of 1832 by druxey - FINISHED - 1:48 scale
in - Build logs for subjects built 1801 - 1850
Posted
One step forward... and two back! I decided to make the decorative barge-boards as friezes; that is to say, on paper. These will be glued on the model. I stretched the paper on a board and painted the dark background. Once dry, the design was traced down using white transfer paper. The design was then applied using a 000 sable brush and gold acrylic paint. I tried to build the paint up three-dimensionally, as the deign was too fine to carve.
When complete, I cut the pieces out carefully, only to find that I'd taken the pattern off to the wrong mark and the pieces were 3/16" too long. So... time for Take Two. I have to do these over again. Onward and upward!