md1400cs
-
Posts
2,875 -
Joined
-
Last visited
Content Type
Profiles
Forums
Gallery
Events
Everything posted by md1400cs
-
 B.E., Very nice - you are so eclectic in your project choices, and all result in great looking, excellently researched builds. PS: Love the fishnet in this one 😀 & steering is brilliant work indeed.
- 195 replies
-
- 2
-

-
- lady eleanor
- vanguard models
- (and 1 more)
-
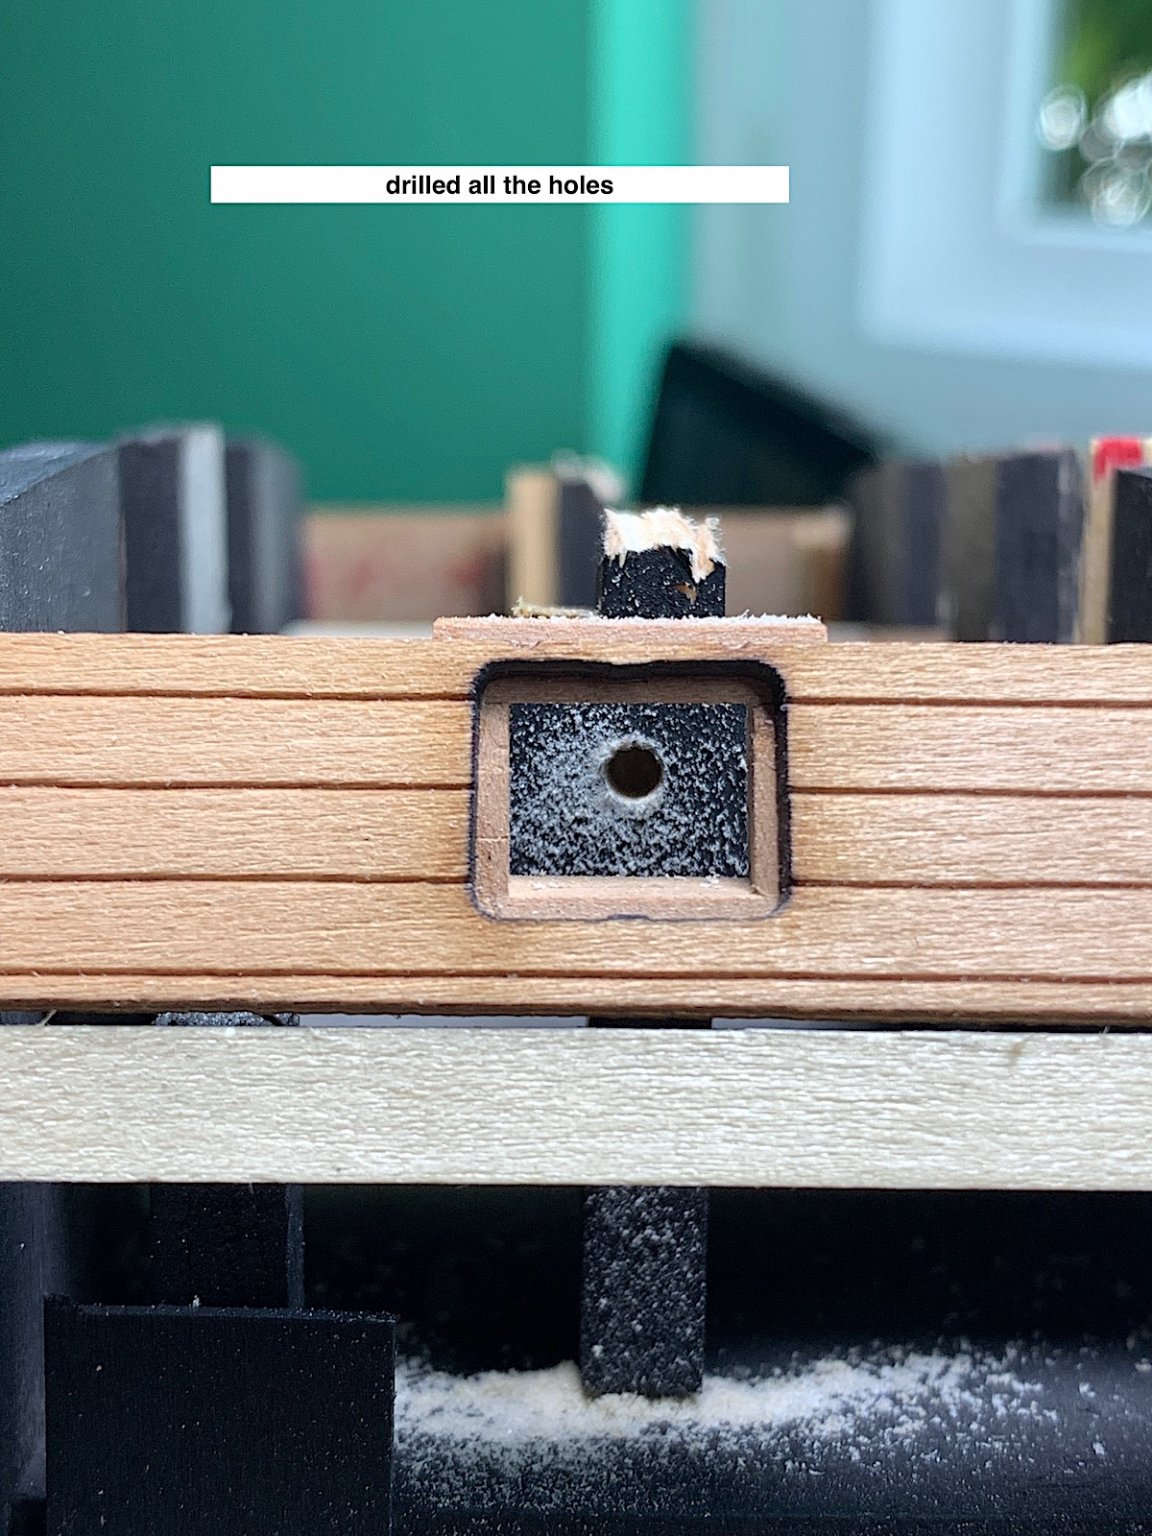
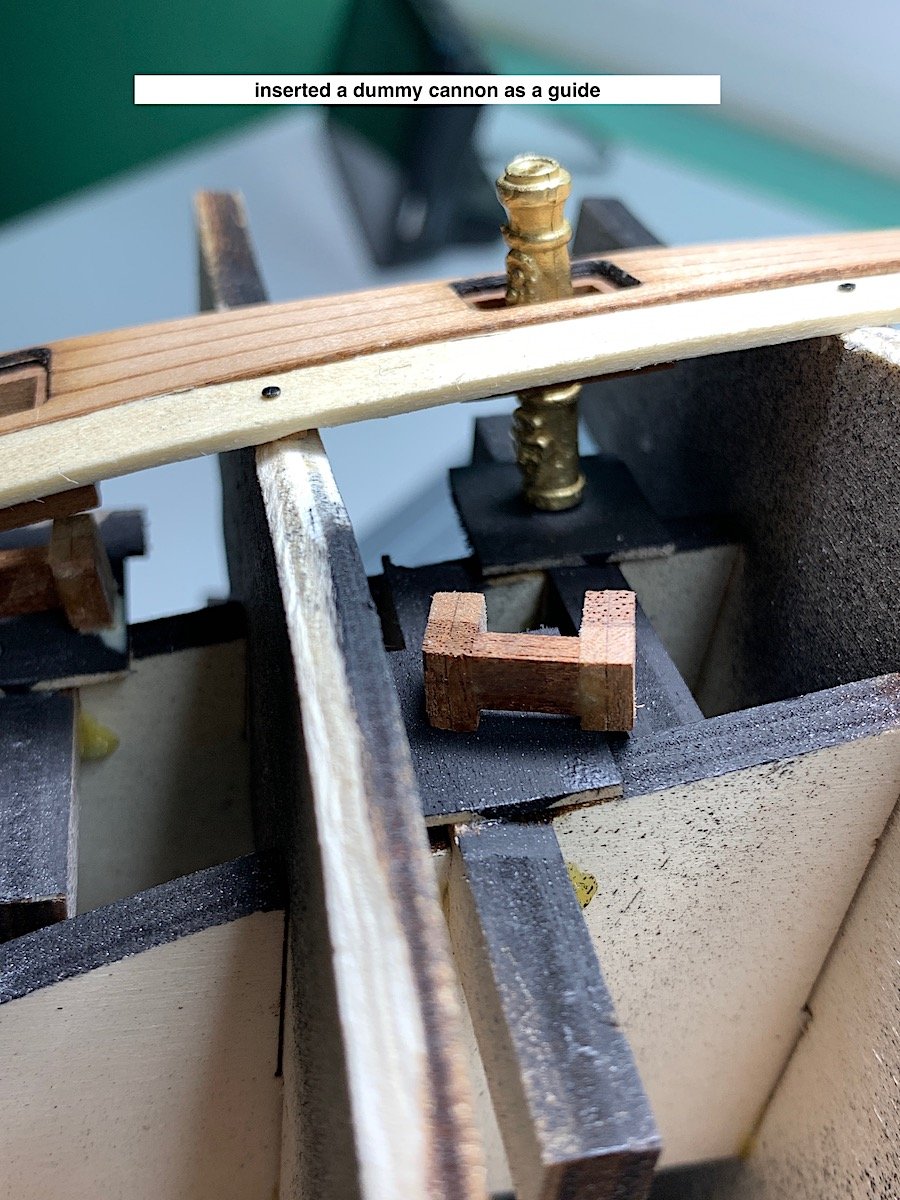
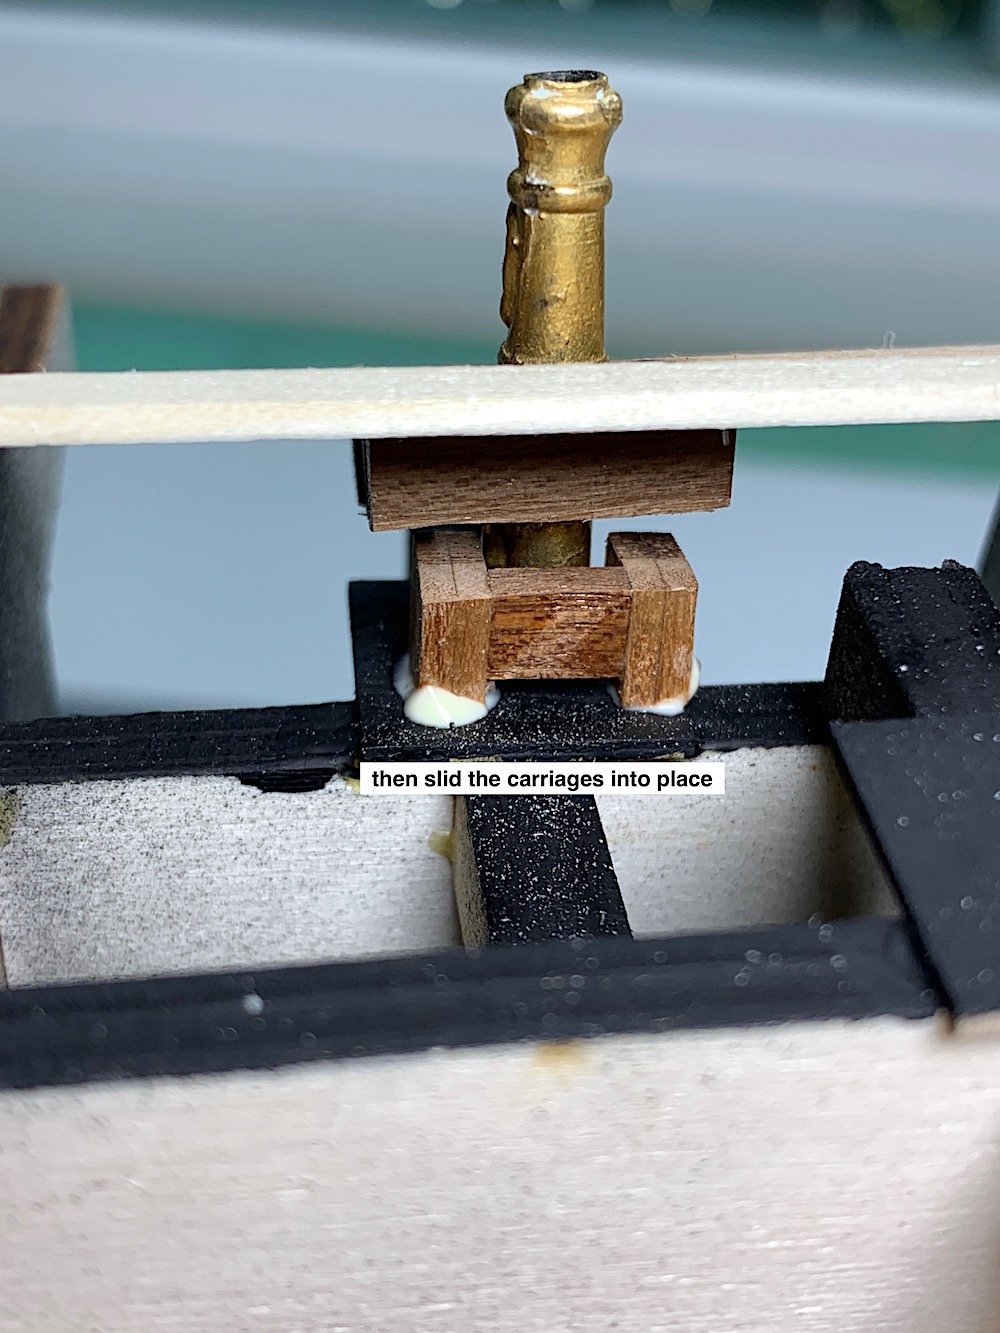
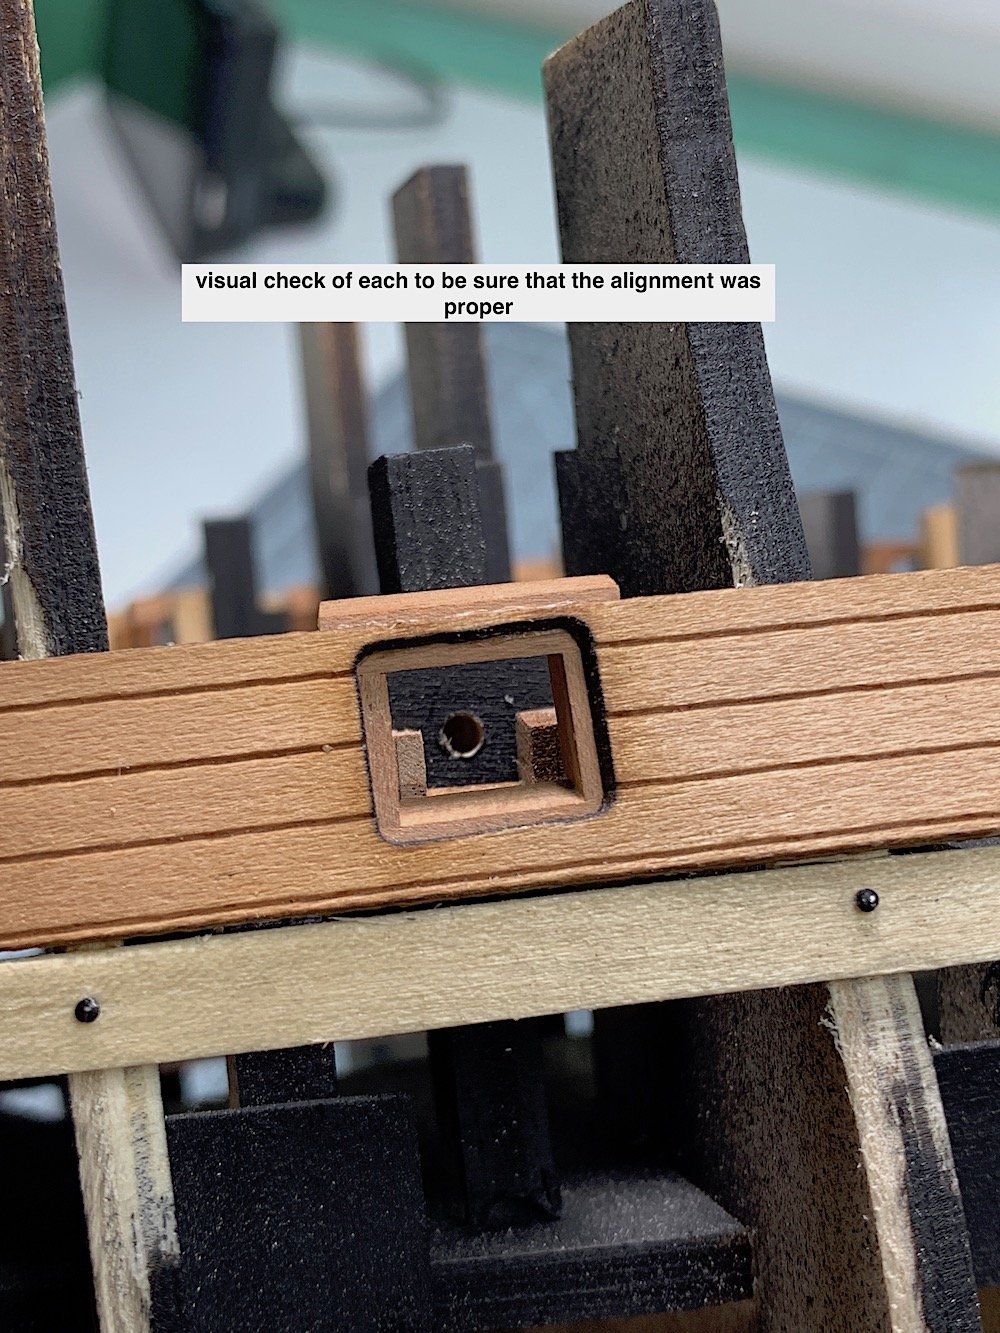
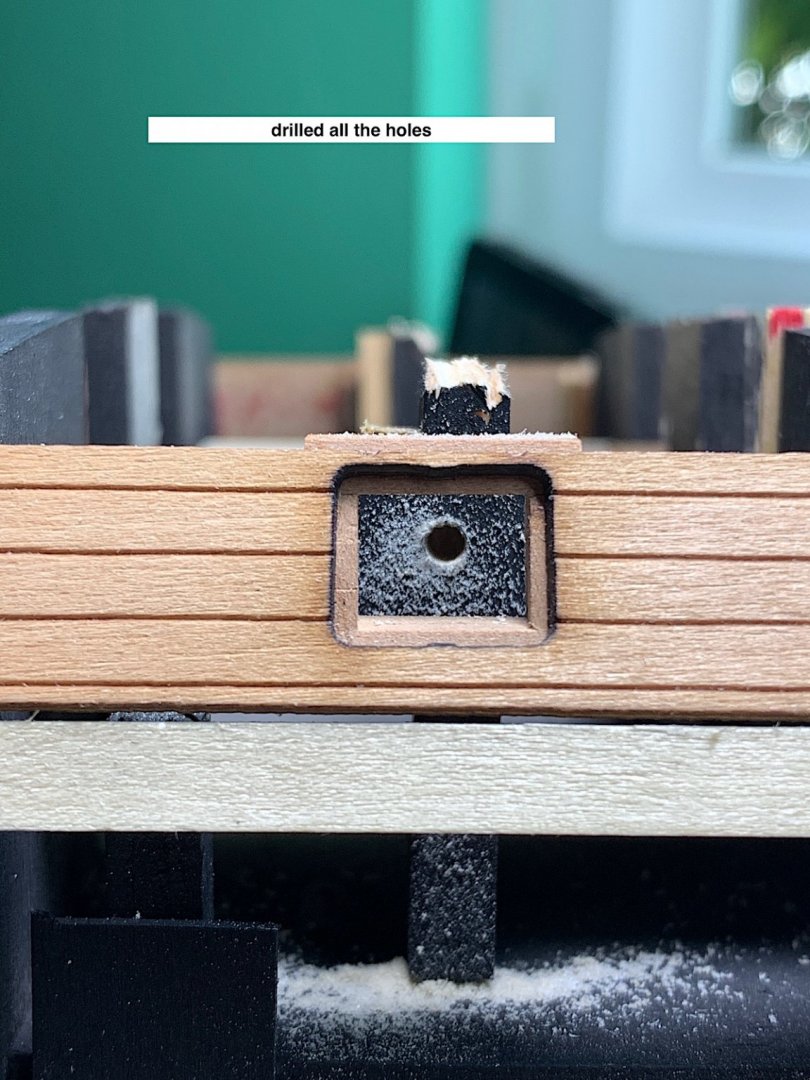
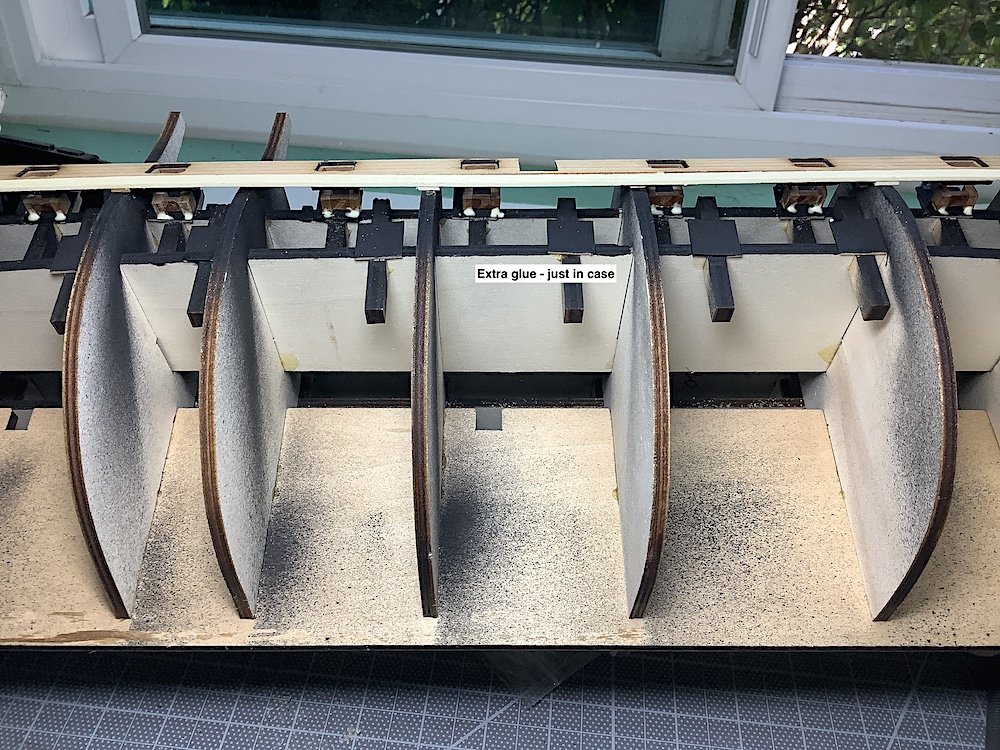
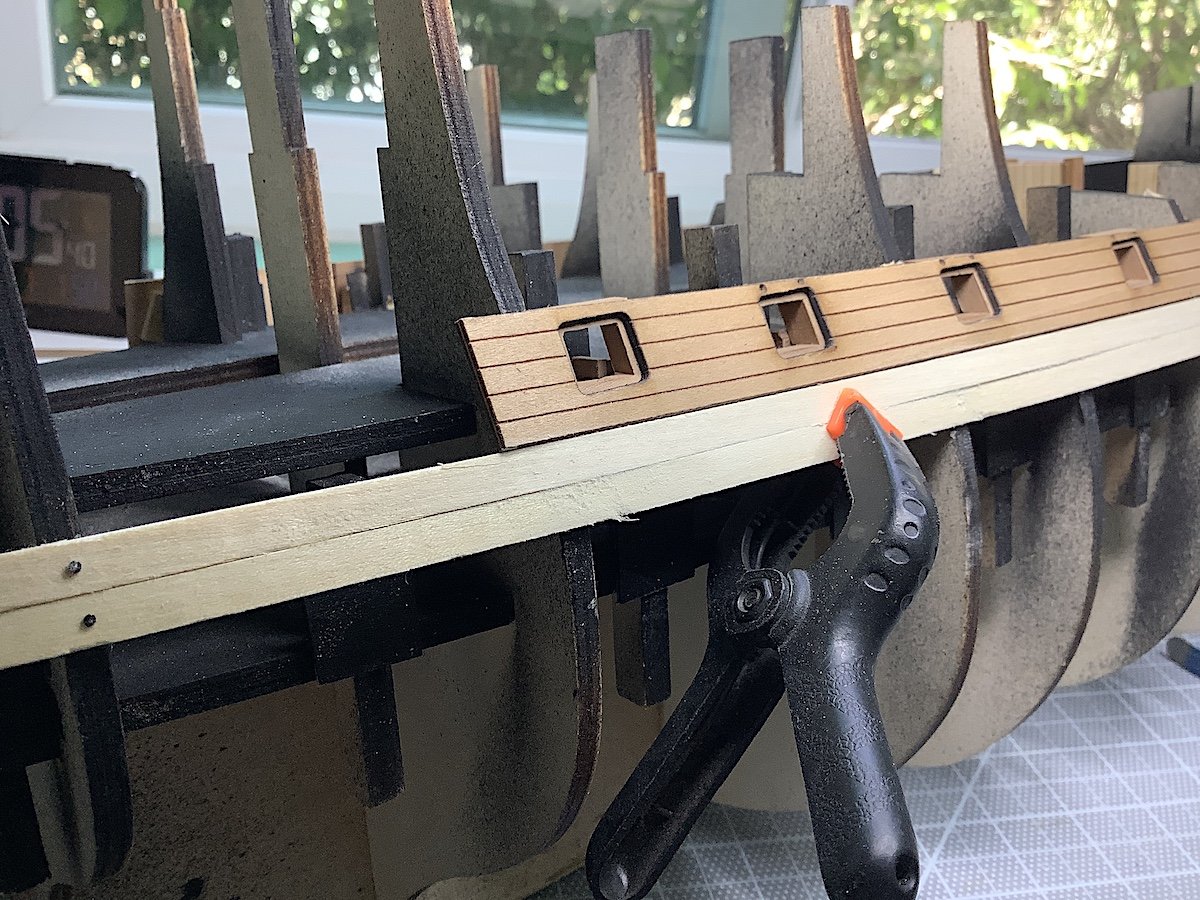
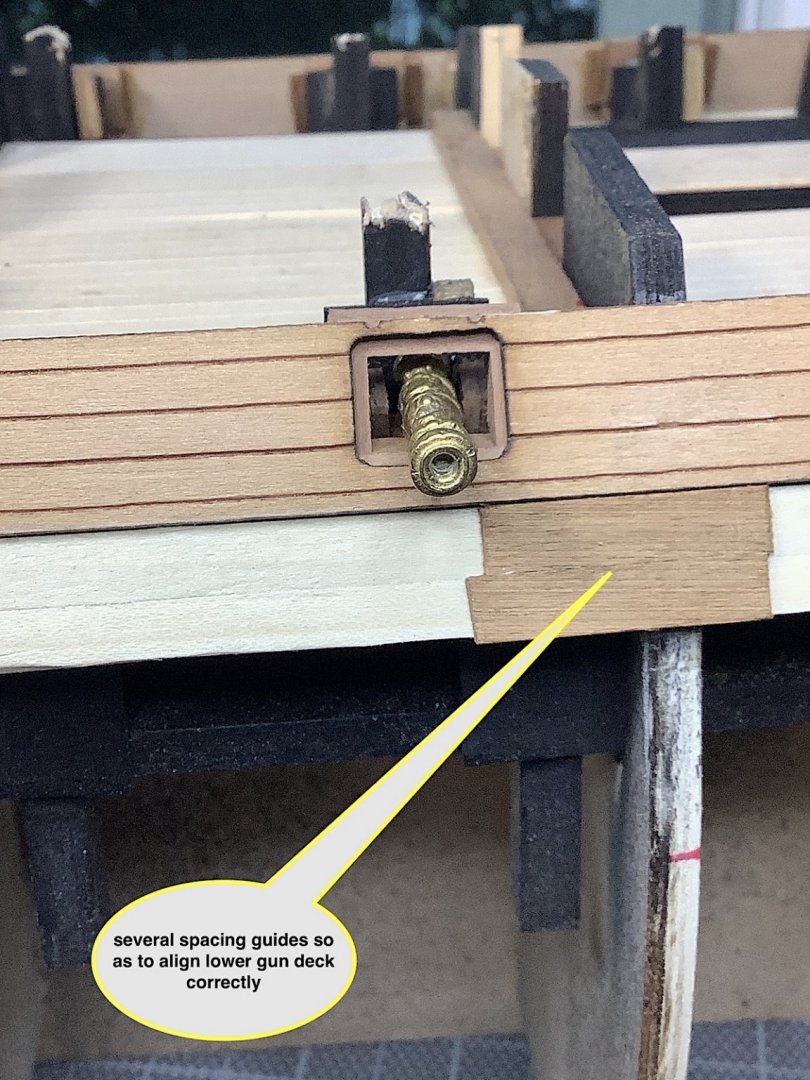
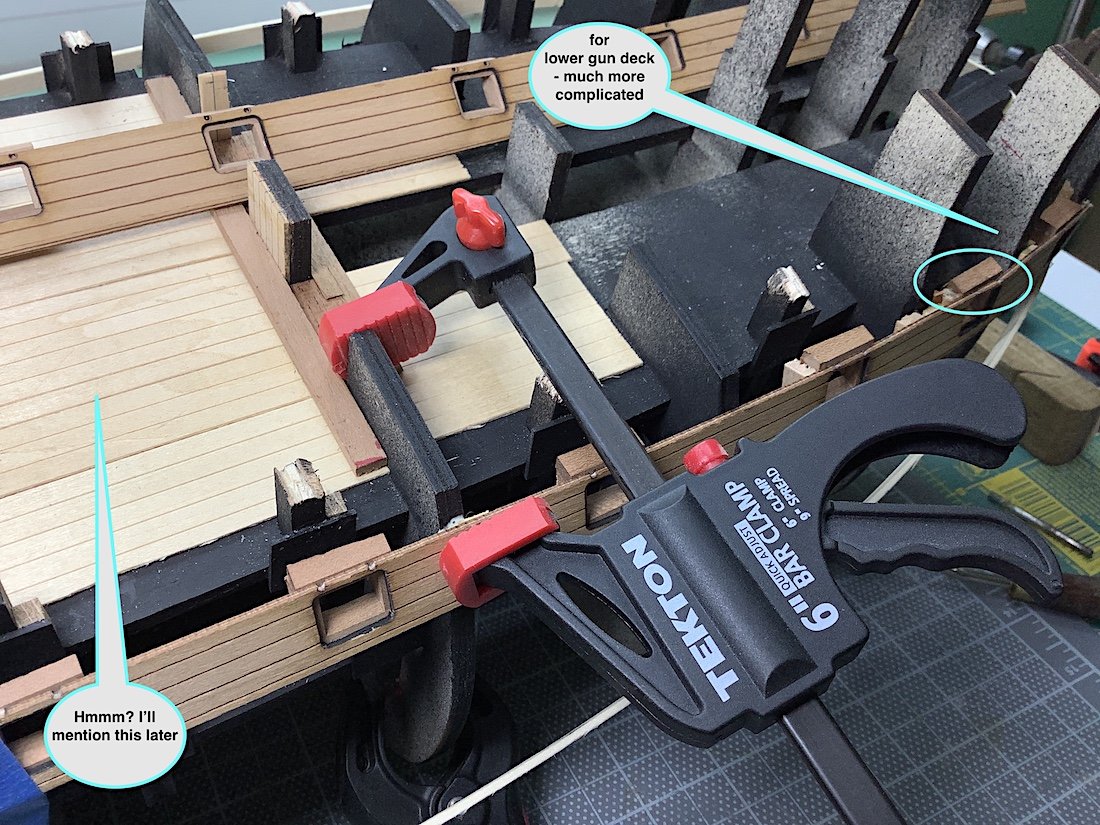
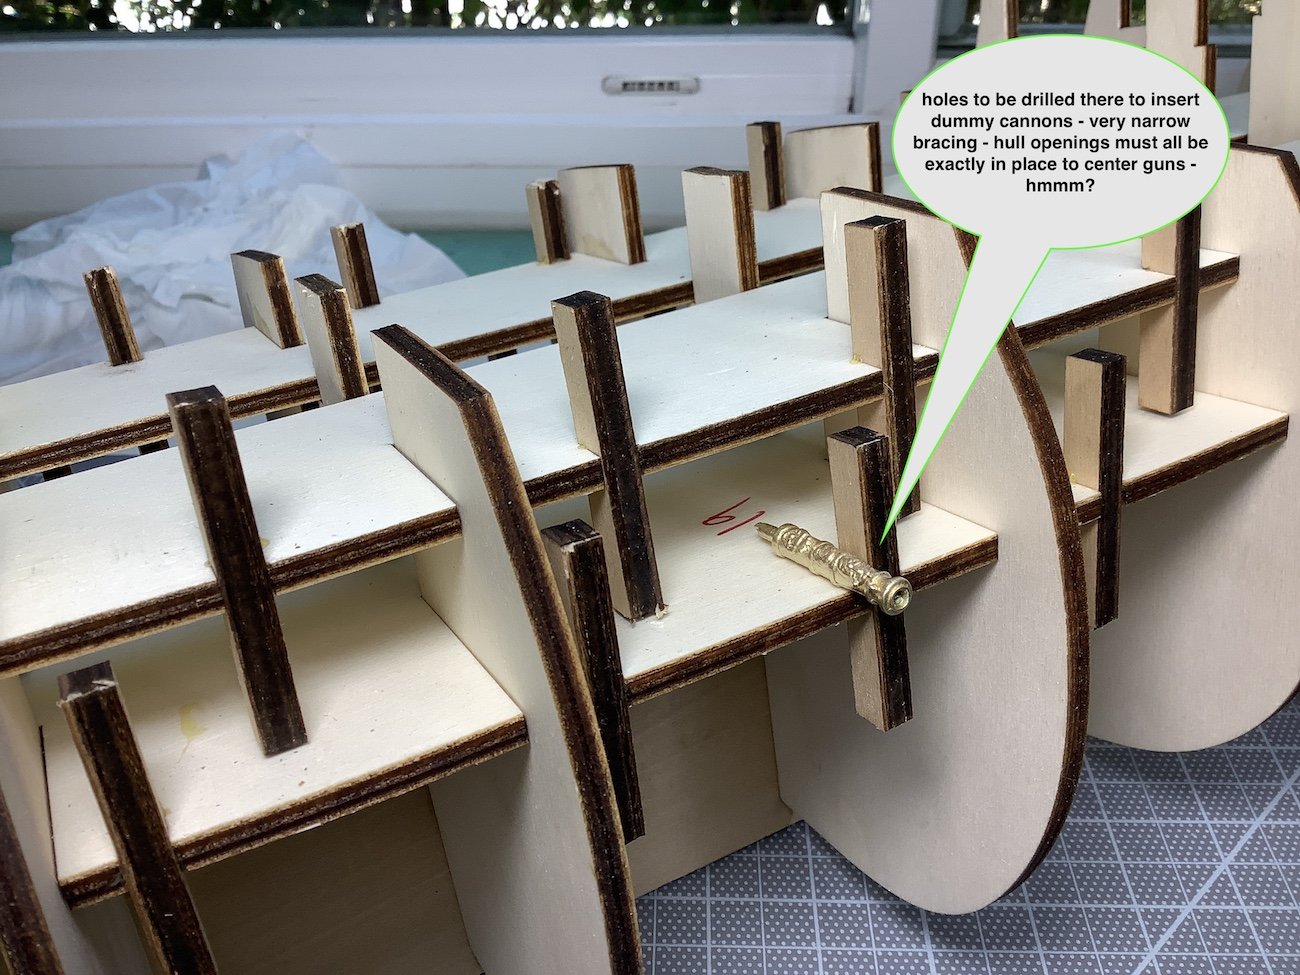
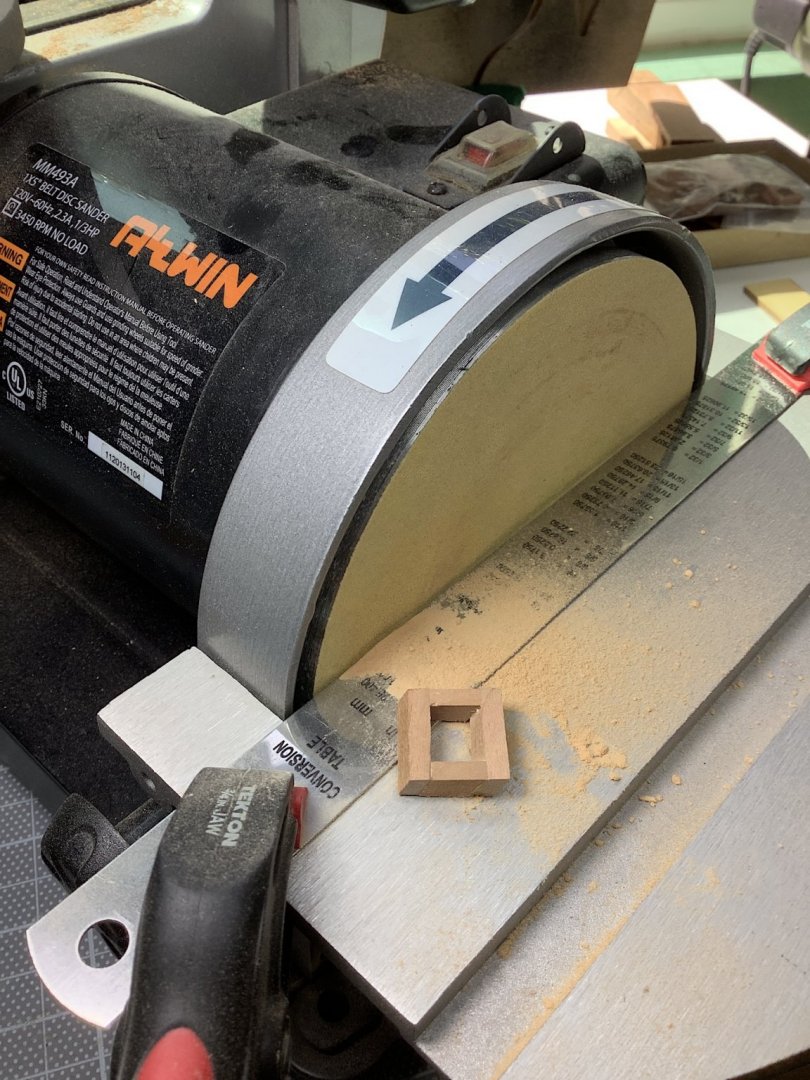
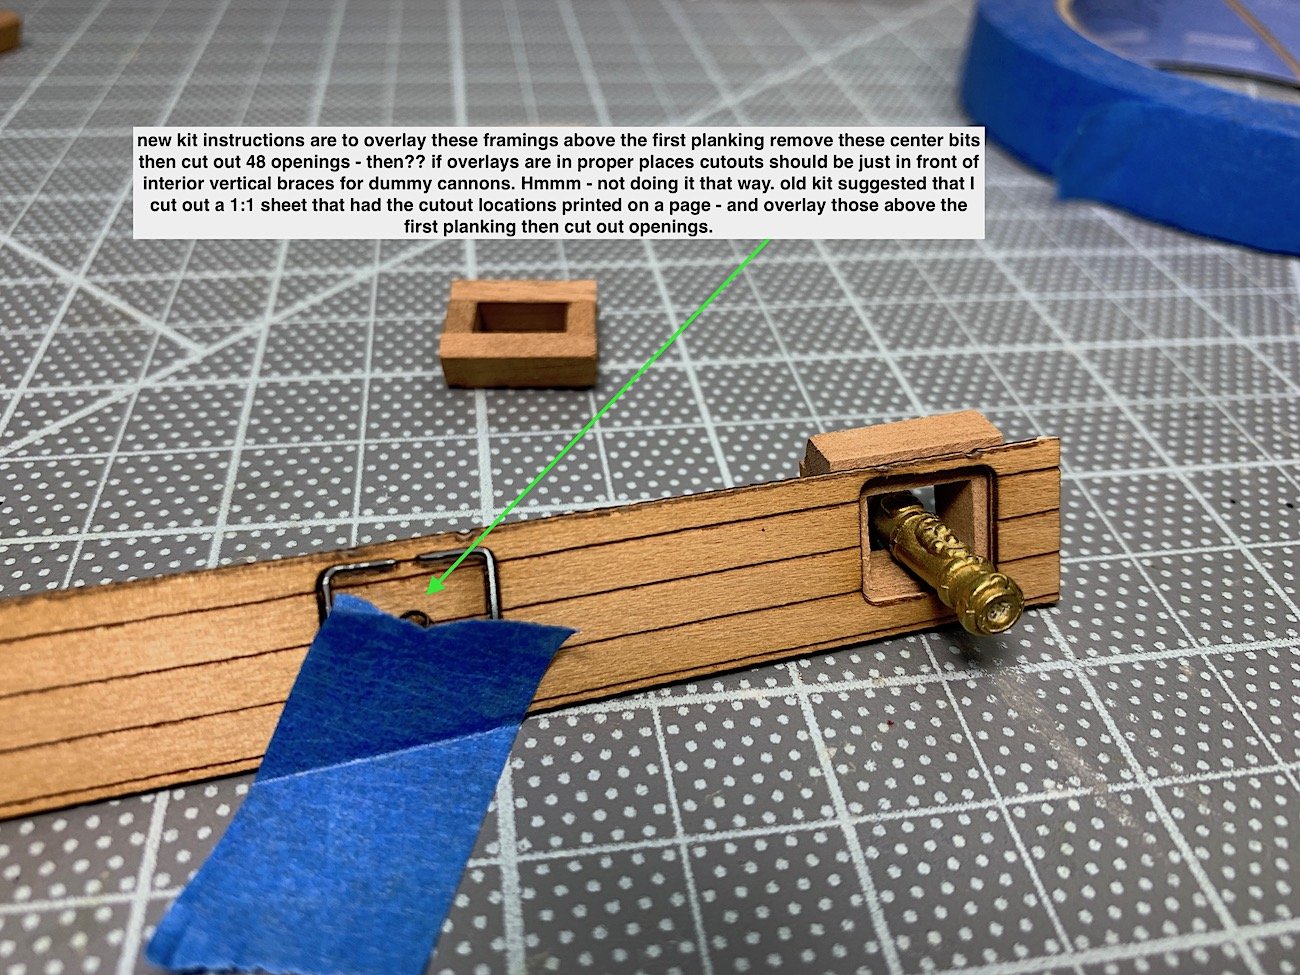
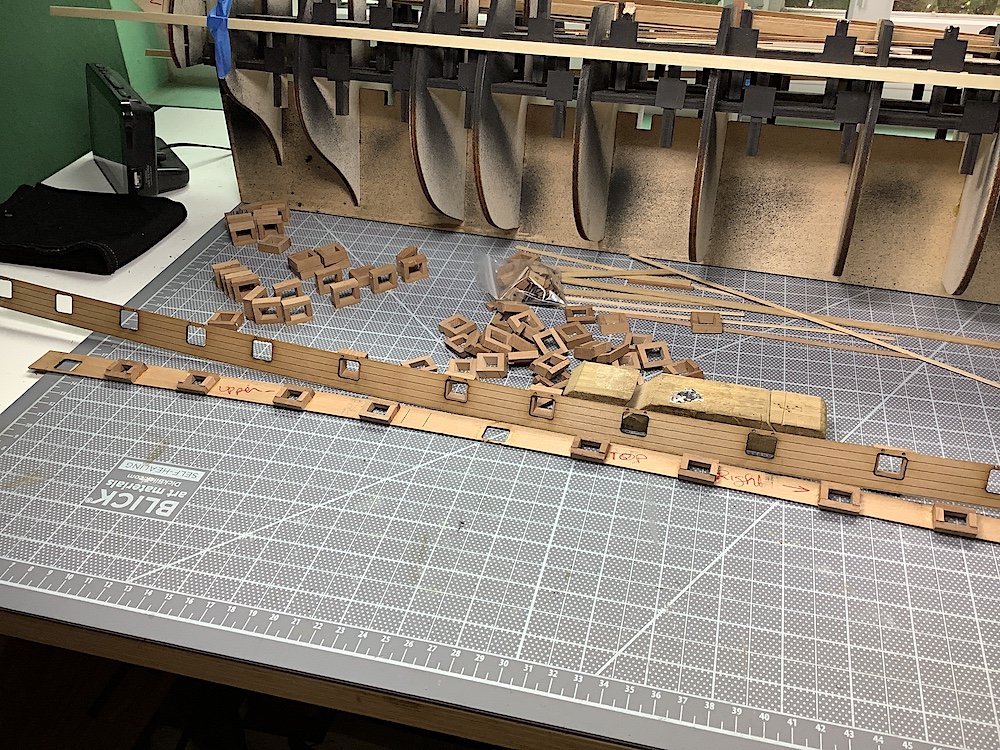
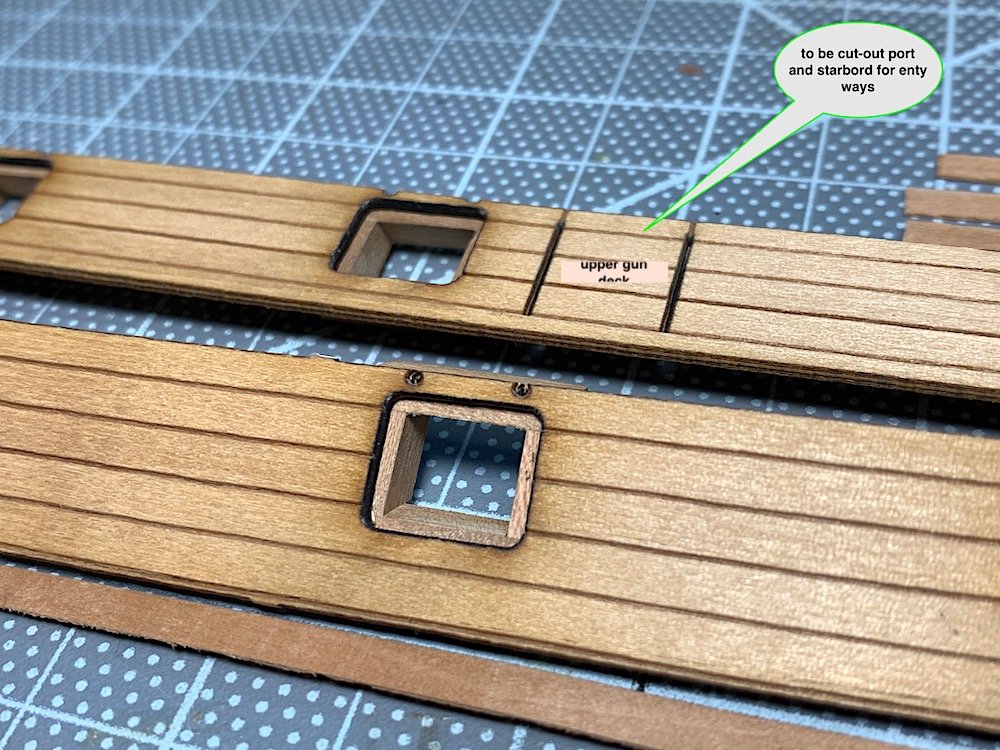
OC: to be determined – Are you asking about the round tuck at stern controversy? Marc: thanks indeed – big welcome aboard Eilelwen: thanks as well! Moving forward – adding dummy carriages in upper and lower gun decks (48). Needed to do this for upper gun deck first before installing the lower gun deck templates – this allows for room to work from under. That done; Now, I can install the two lower gun deck templates, pre-drill the cannon holes then add carriages as was done above. Thanks for dropping by, comments, and thanks so much for your interest in following along this new log. Regards,


-
Greg, Just found your log - went back to page 1 - brilliant work in all areas especially the metal etched bits - WOA - the wood deck, aging along with your paint work are also a treat to look at - well done indeed. Cheers,
-
Jonathan, Great start - I may have missed it in your notes - how did you caulk the planks so perfectly?
-
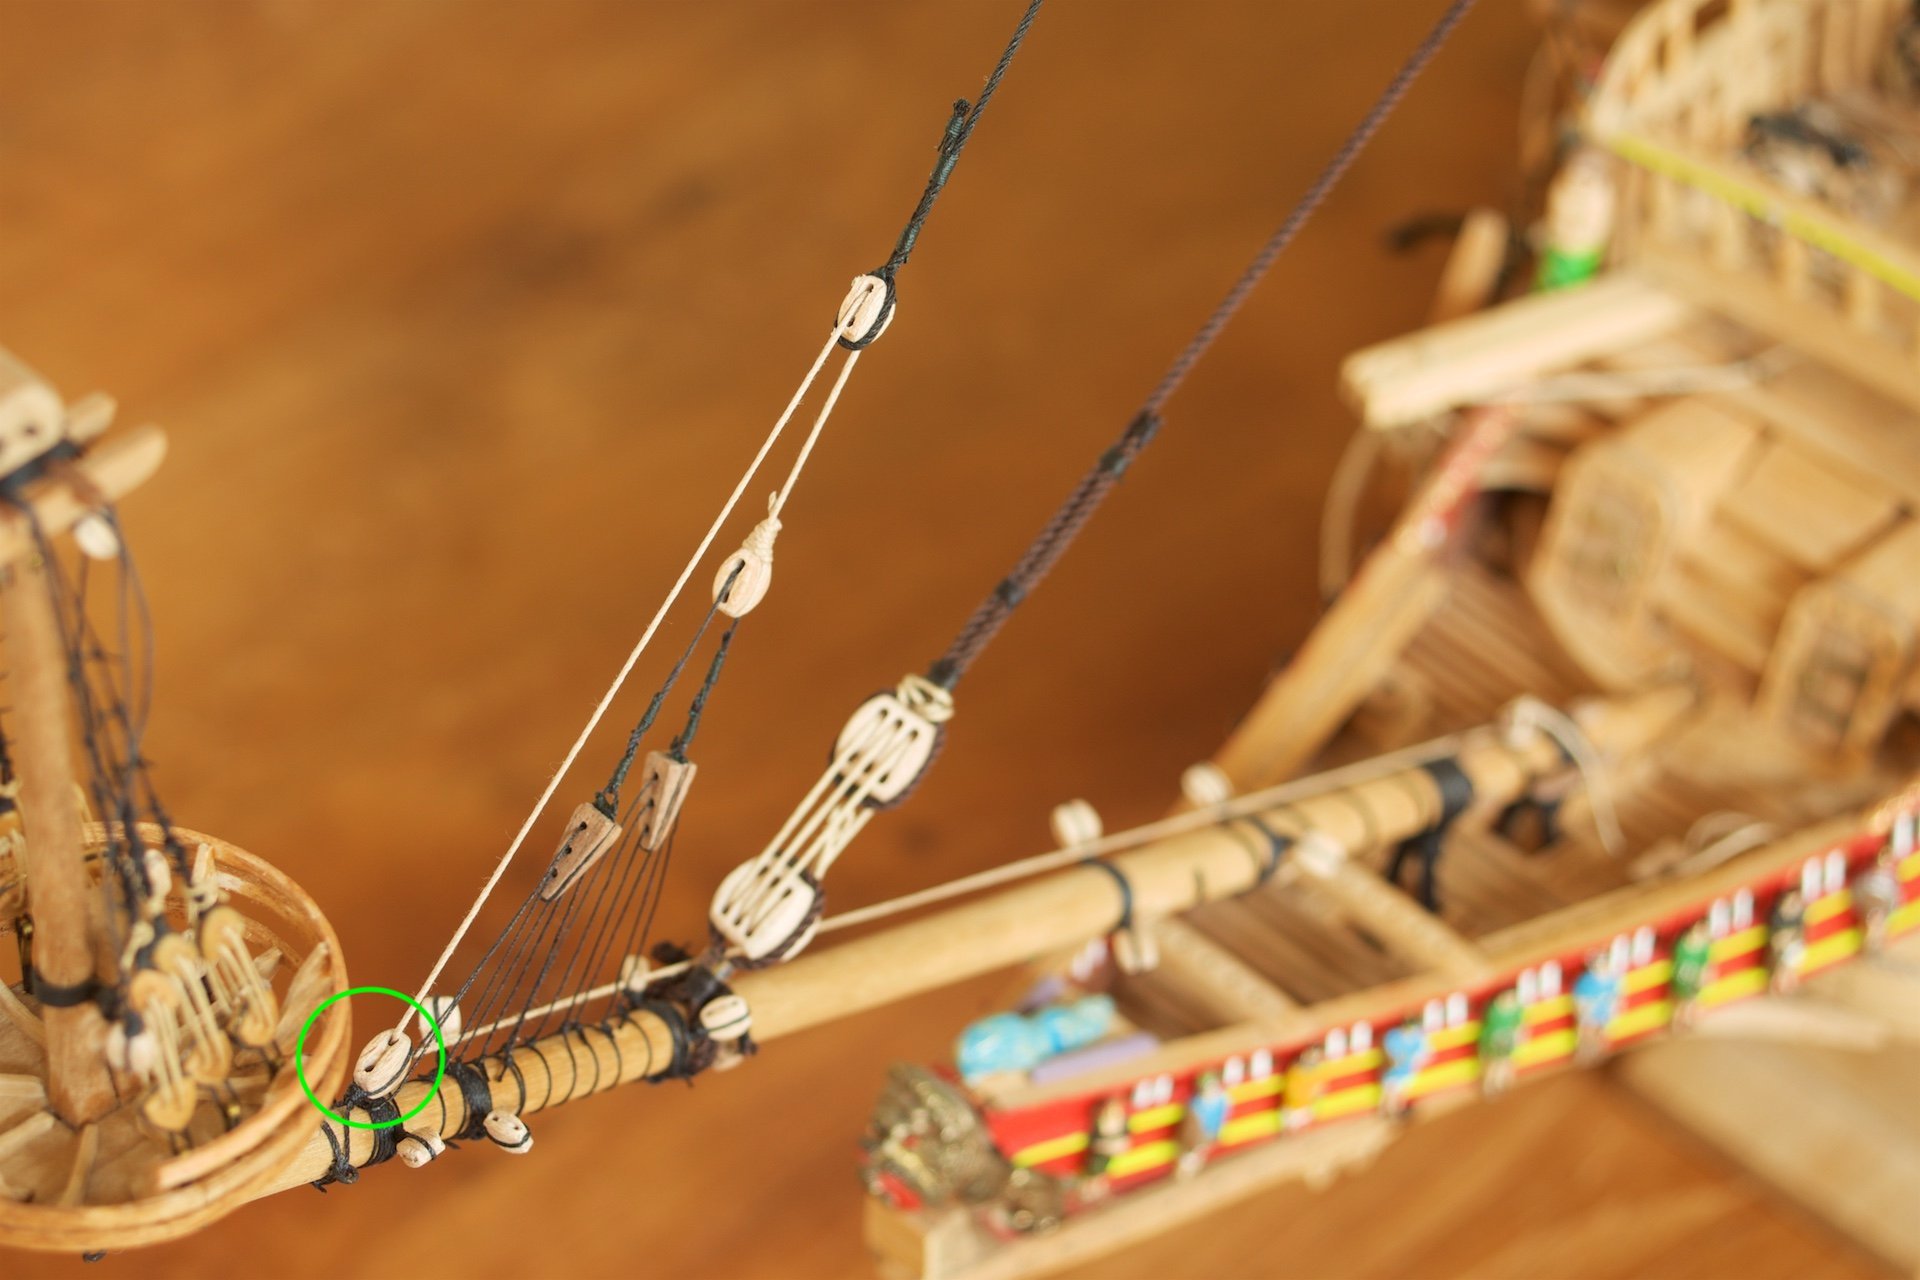
Hi mates, Thanks for your interest in following along - very much appreciated. And thank as well for dropping by - PS: Ryland big indeed!!. 1:1 sheet from vintage kit - next to Corel 1/75 Wasa No long text images include notes. (need to make adjustments to my signature) Regards,
-
Mark, Nice staircase work!!. And, as Frank just said Syren ropes and blocks are super excellent. Chuck's products were big parts of my last two projects, and will be as well for the one I just started.
-
Hi mates, Need to just add "Finished" images to this log then done - and, if you happen to be interested; I just started a new log over at - kits - 1501-1750 for Sergal's Sovereign of the Seas. She will be an interesting challenge.... Cheers,
-
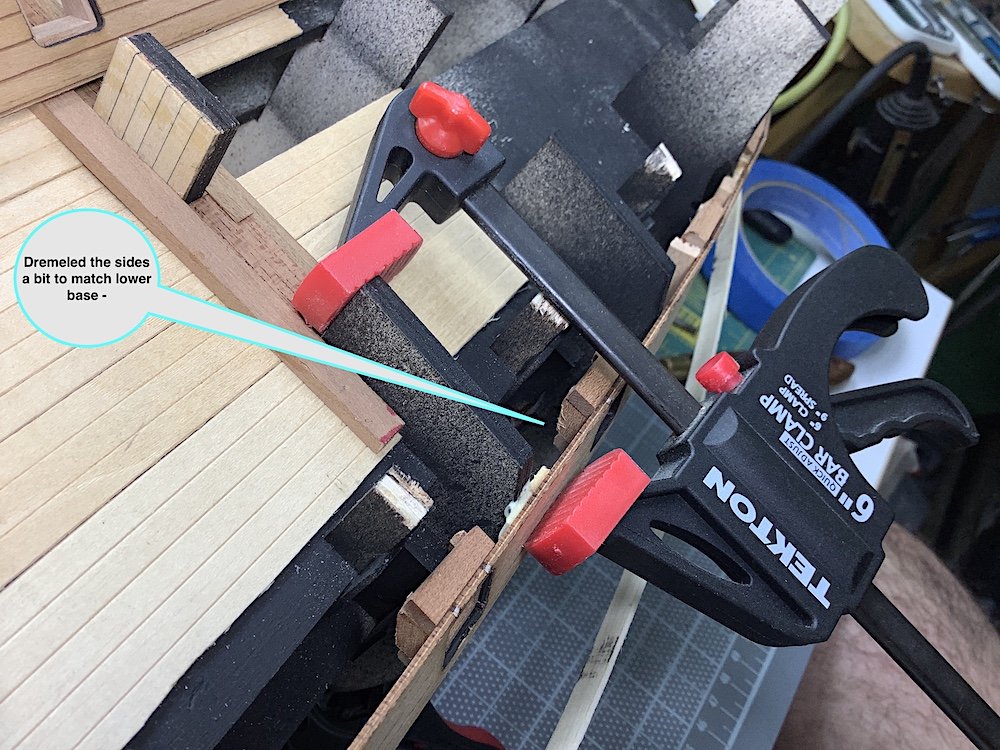
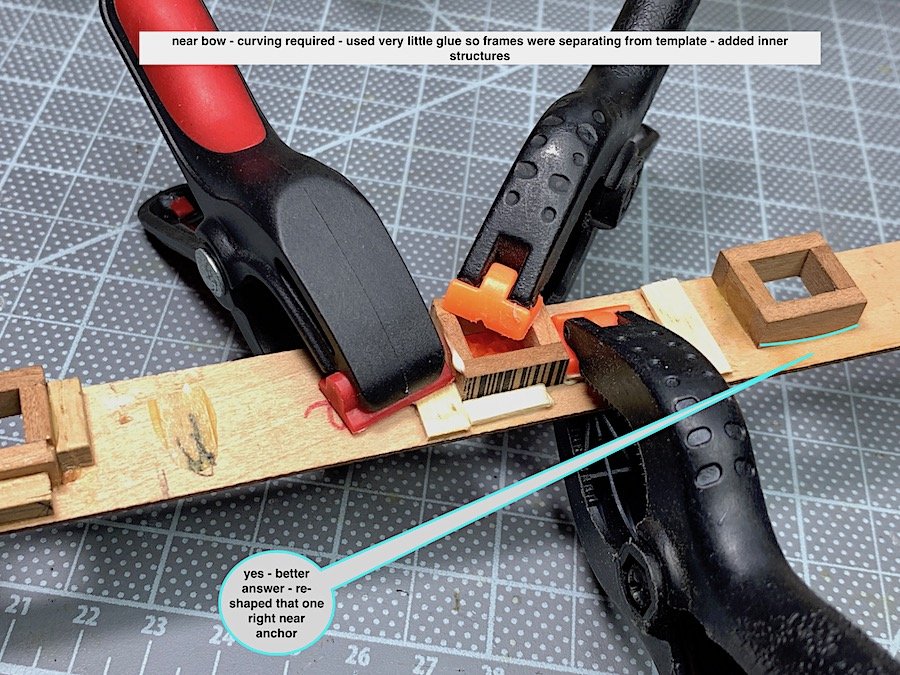
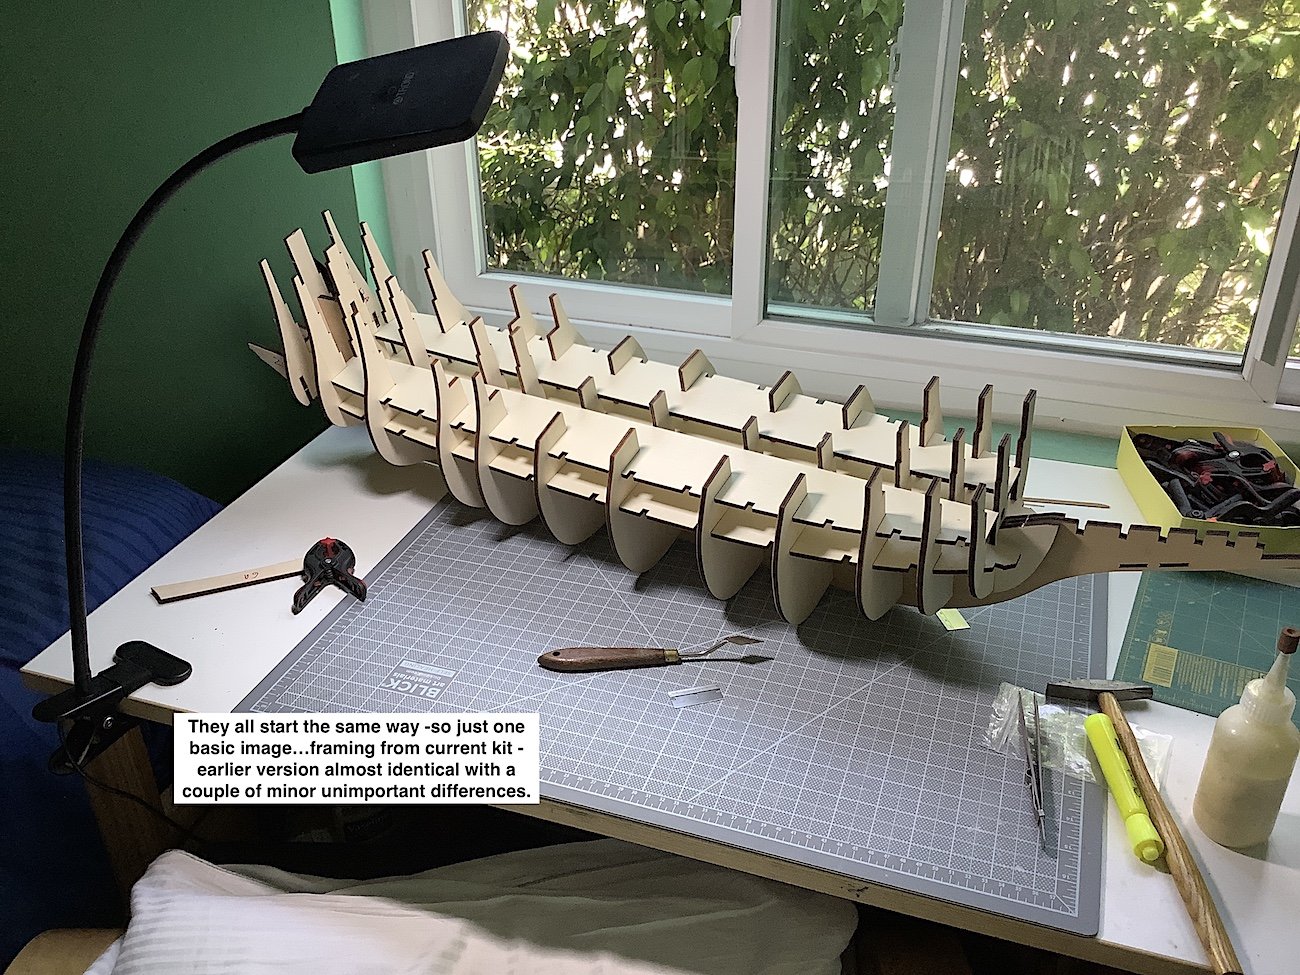
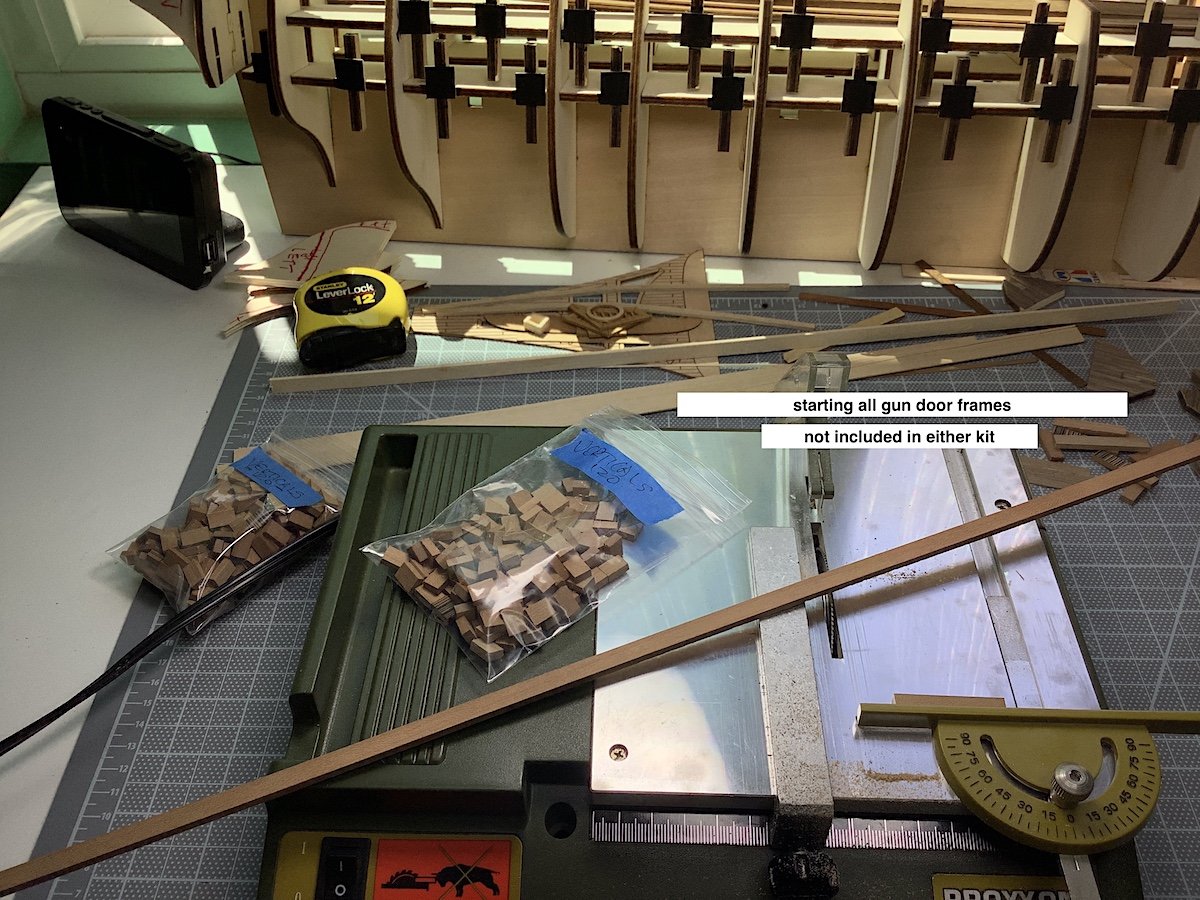
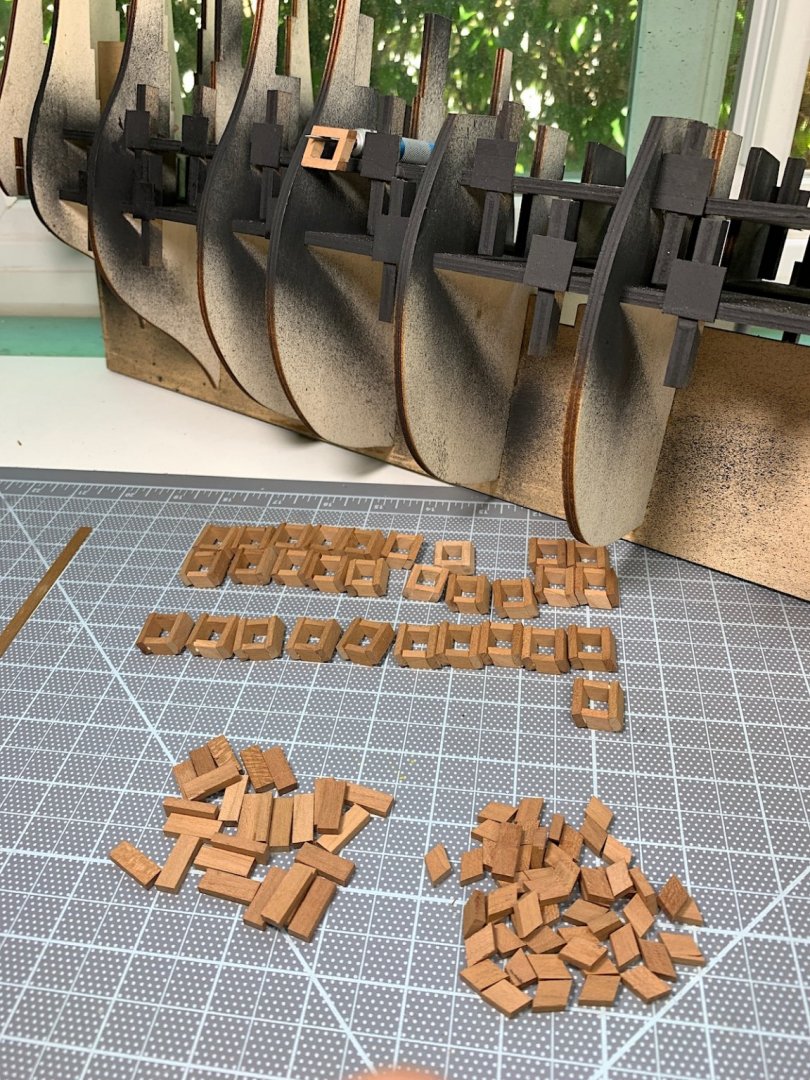
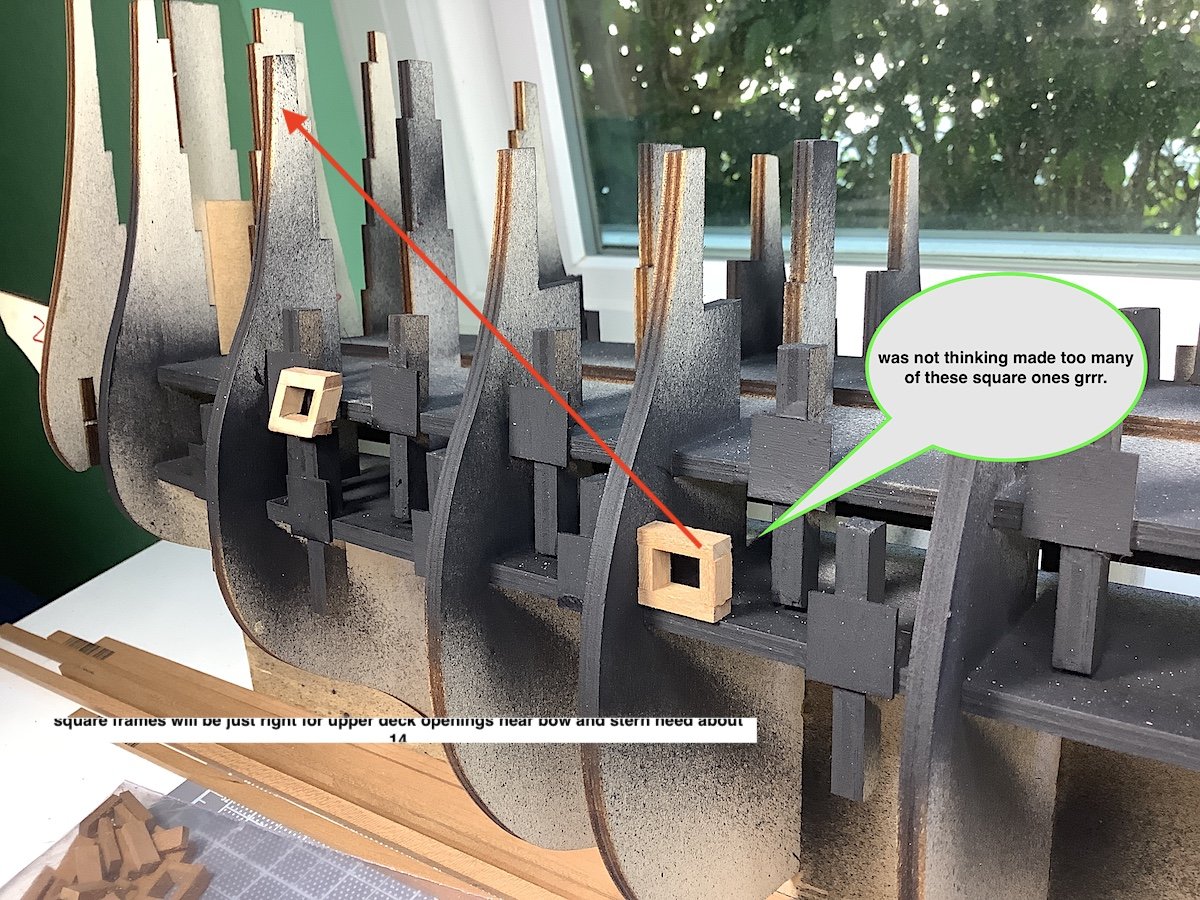
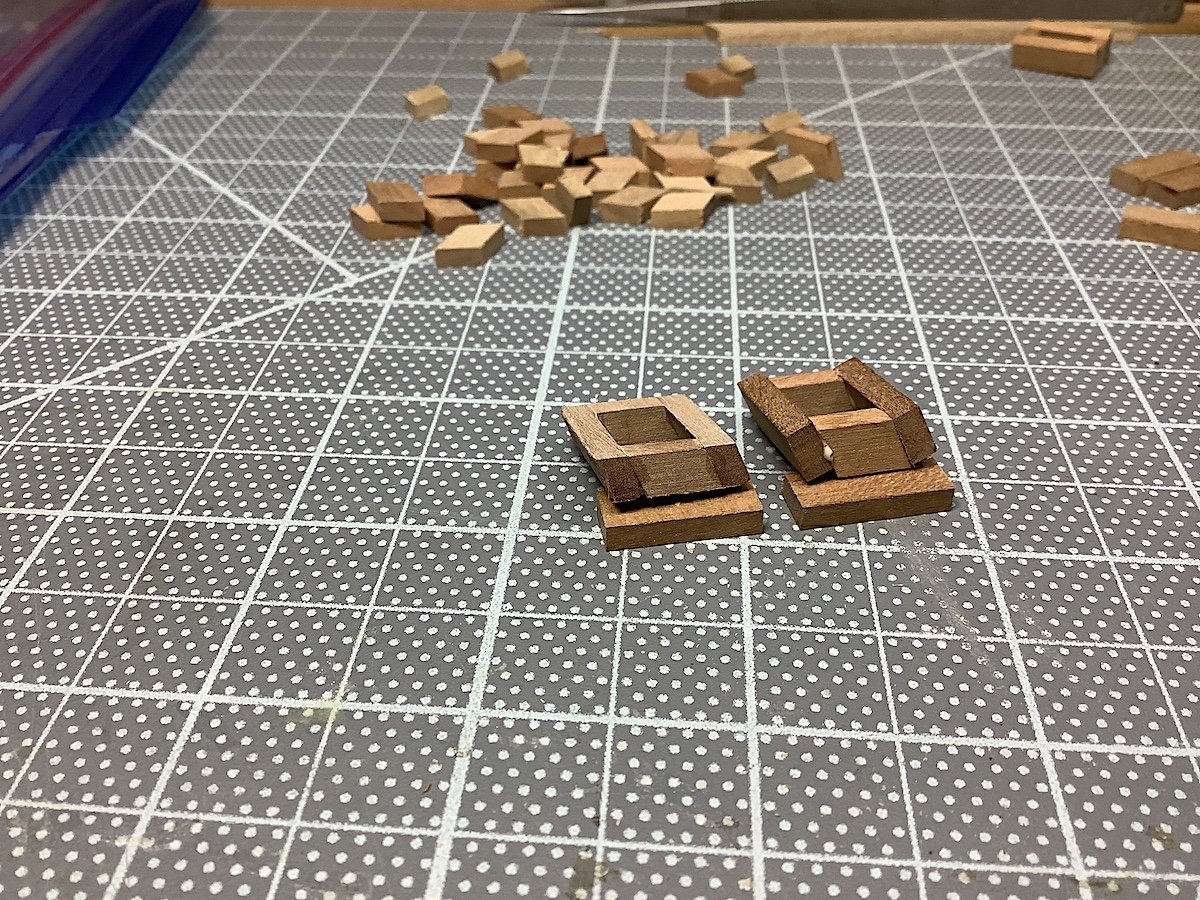
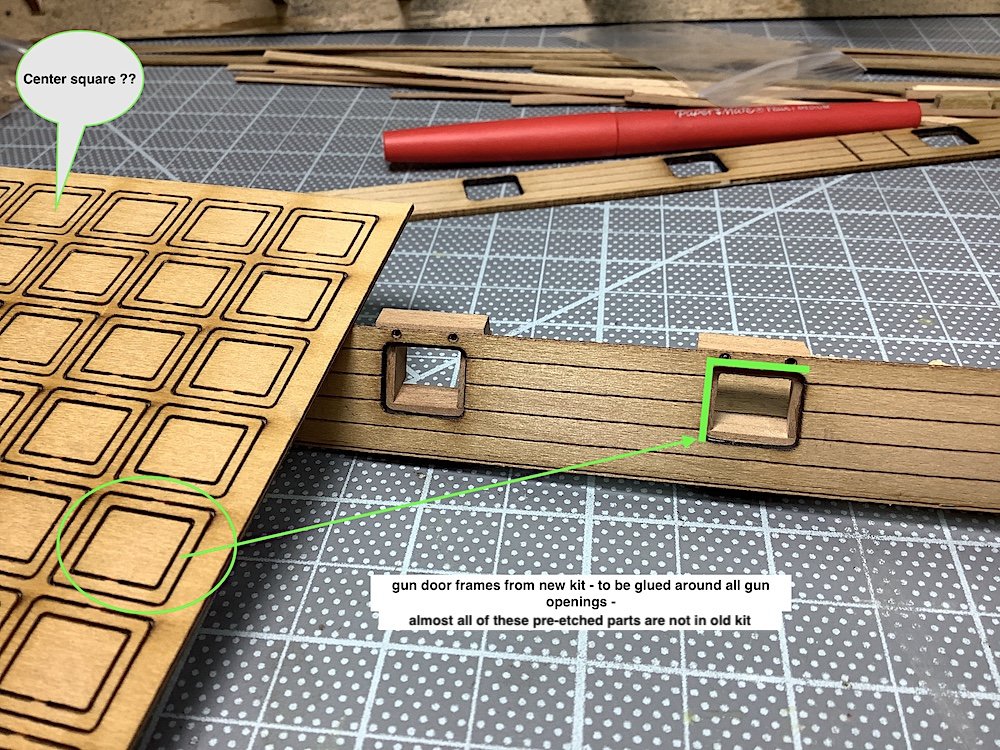
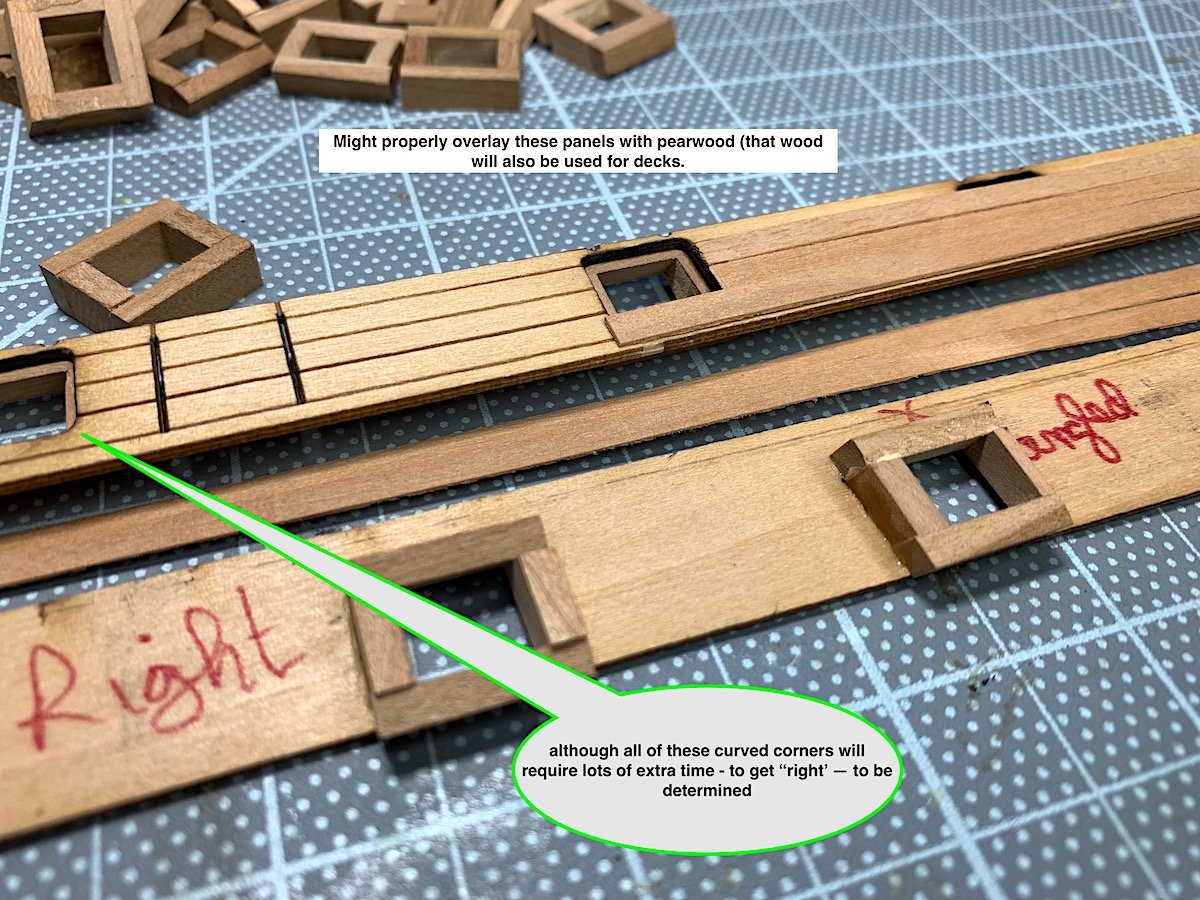
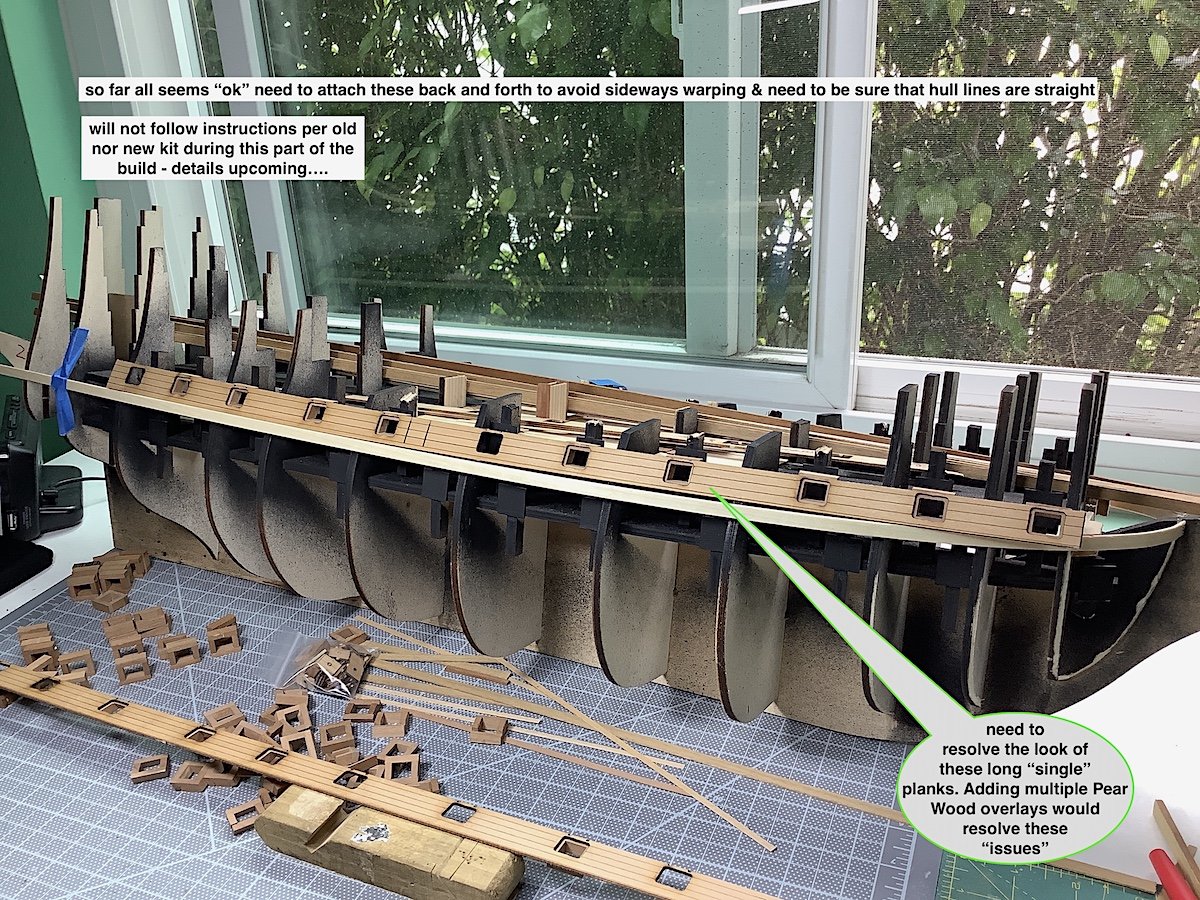
Hi Mates. I have wanted to build this kit for a long time, I will also attempt to super detail this project beyond the “out of the box” kit – as excellent as it is. I have “bashed" my two last builds – enjoy the challenges of added detailing -- I have the McKay book that is filled with many line drawings and images; it will be an excellent guide. Along with incorporating great ideas seen in other build logs of this ship here at MSW. I recently acquired a 1980s “new in box” kit from a member who had one available. He contacted me after I had made a request for one here at MSW. That specific vintage kit was of interest to me because the 650+ included decorative bits were all cast in solid bronze (that number includes cannons). The current kit is supplied with 650+ white metal bits that have been electroplated, and apparently, from what I’ve been told, may result in some lost of casting details?? (TBD) – many other advantages are certainly in the current kit’s box as well, and not part of the 1980s box contents. Given that this ship’s beauty, for-all-intent-and-purposes, was because of its 600+ ornamentations I got intrigued with the idea of solid bronze castings; luckily found one (Big thanks Jay L) That said, instructions were really non-existent, included lumber still looked very good, other included kit’s amenities were, well from three decades ago. Bronze sculptures were, for me, the prize….as well as the 1:1 plan sheets (nice) only in Italian. Jay's kit did not have a single super tiny missing bronze ornament – all were mixed up in 15 or so zip lock baggies – took hours to go through them all –haha. all other parts were 100% there as well. Moving forward two weeks – a large heavy UPS box arrived at my door hmm? – Turns out that I was gifted, for Father’s Day, with the current Sergal #787. So best of both kits will be blended into this single project. My family did not know that I had already purchased a much earlier edition. The current kit certainly has its many advantages, but the earlier kit shines in many ways as well, many of which will become part of this project. I will balance this log with some, as needed, comparisons between the old and new kit versions – No criticisms of either just occasional comparisons. That said, this log will focus on the build as it goes forward. I am lucky to have the best of both available for this project. PS: I have listed this log as a 1637 ship – I know that she was around for many decades after, and that her stern ornamentation (provided in both kits) is more reflective of a much later example. But for builders 1637 is the “agreed to” year. First log entry with some notes. – will also (thankfully for you) keep the writing to a minimum going forward. Thanks for looking in, and if you are interested Welcome to the shipyard. Regards,
-
Patrick, Very nice work with deadeyes - look just perfect. PS: re: Samsung it's on your screen as free advertising for them 😂 I believe, I'm sure you know -- that if you go into your settings, you can remove that Samsung watermark. Where in Settings is the question? I've been a Mac only fanatic for everything for Decades so maybe someone could post where to go into your phone settings to rid the "add" Cheers,
- 756 replies
-
- 3
-
-
- galleon
- golden hind
- (and 2 more)
-
Mark, Yes it is - indeed - an ongoing problem. Yesterday we had Frontier Communications come out to do some "other" work in our condo building. He mentioned that since copper is being fazed out issues are much more common now, especially during this lockdown. Our condos happen to all be Fios optical - we have had no issues whatsoever. He also mentioned that these issues will get worse as copper goes into retirement.
-
Stunning
-
MIchael and Mates, Thanks so much - She's finished - will post some proper images along with the case after it's made. Framing is done (wood) - now at plastic shop getting plexiglass sides, front and top fitted. Then need to connect the wires to bat. pack along with a few other details... Just started my next project - will start a new log as well. Sergal's Sovereign of the Seas - planning (hopefully) on bashing it as well. The new McKay book will be very helpful. Just started doing basic framing - not interesting - every kit starts life the same way 😂 Cheers,
-
Yves, Just catching up WOA!!! -- Superb project in all areas. Also such an interesting insight into these, then, such feared and dreaded machines. Your log has been an also great learning experience indeed. Years ago I saw the 5 hour German Das Boot German TV series - Just discovered it again on HULU - PS: This one must be listened to in German, the dubbed version is IMO much weaker. May watch the series again. Cheers,
-
Well - I'm hoping that my second planking (coming up) looks something as good as your first planking.
-
Michael, BTW you hull planking work is also so perfect. I also like your method for fitting in the keel - Super nice work. Are you going to hide everything with copper?
-
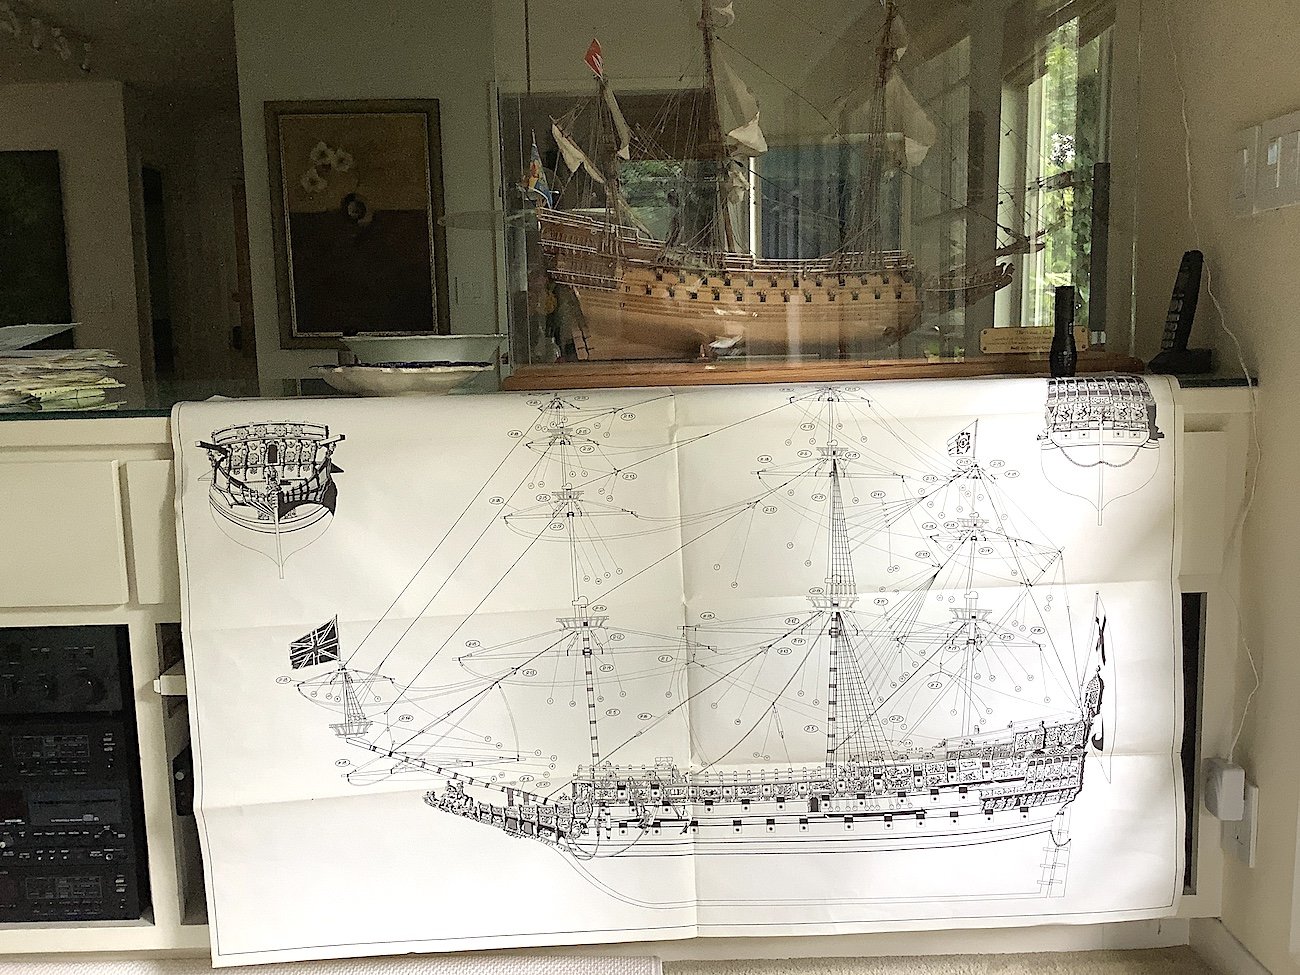
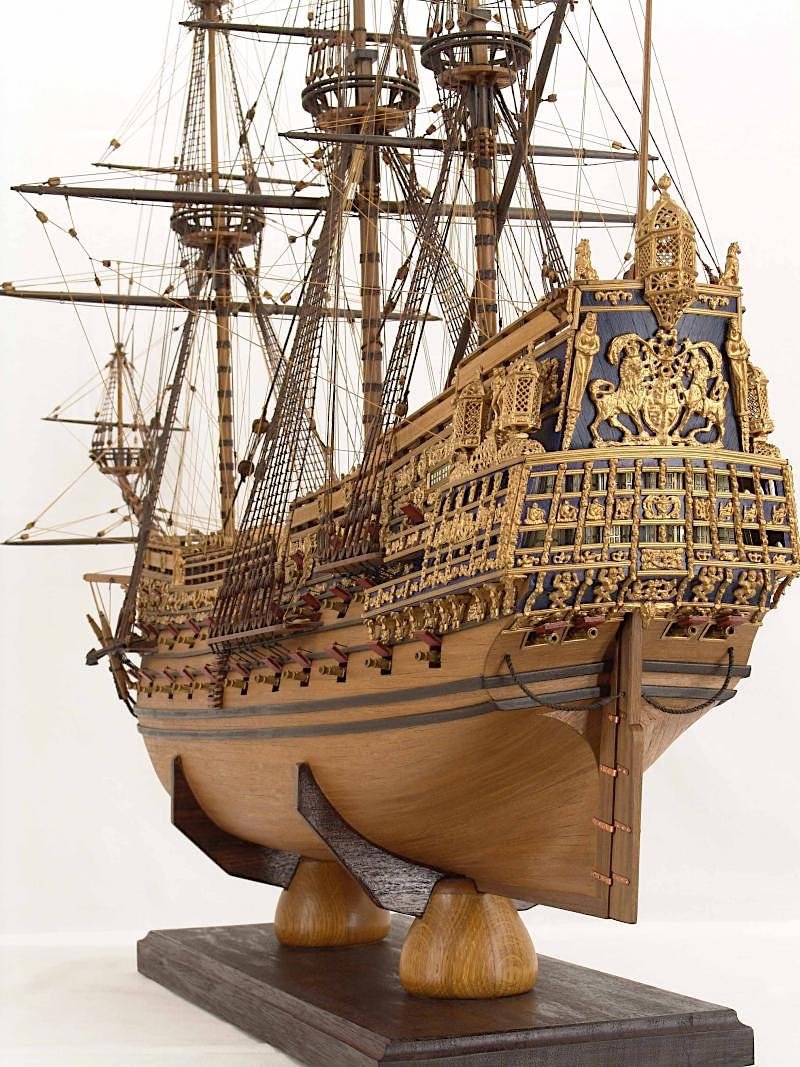
Jagger - I so agree with you. I have the book --- it is, IMO, excellent. I will start this ship soon. I don't have the skills to properly master a well done round tuck, so I will compromise with a minor square tuck - see image below. The McKay book will be gone through very carefully indeed. Though I will adapt one of the upper decks with Fox' thoughts in mind. My next build will be this ship - Amati discontinued that product - so Sergal are the only option available... PS: I don't know whom to credit for this amazing Sergal example below - Brilliant work!!
-
EJ - that last image On my list!!! great work