md1400cs
-
Posts
2,870 -
Joined
-
Last visited
Content Type
Profiles
Forums
Gallery
Events
Everything posted by md1400cs
-
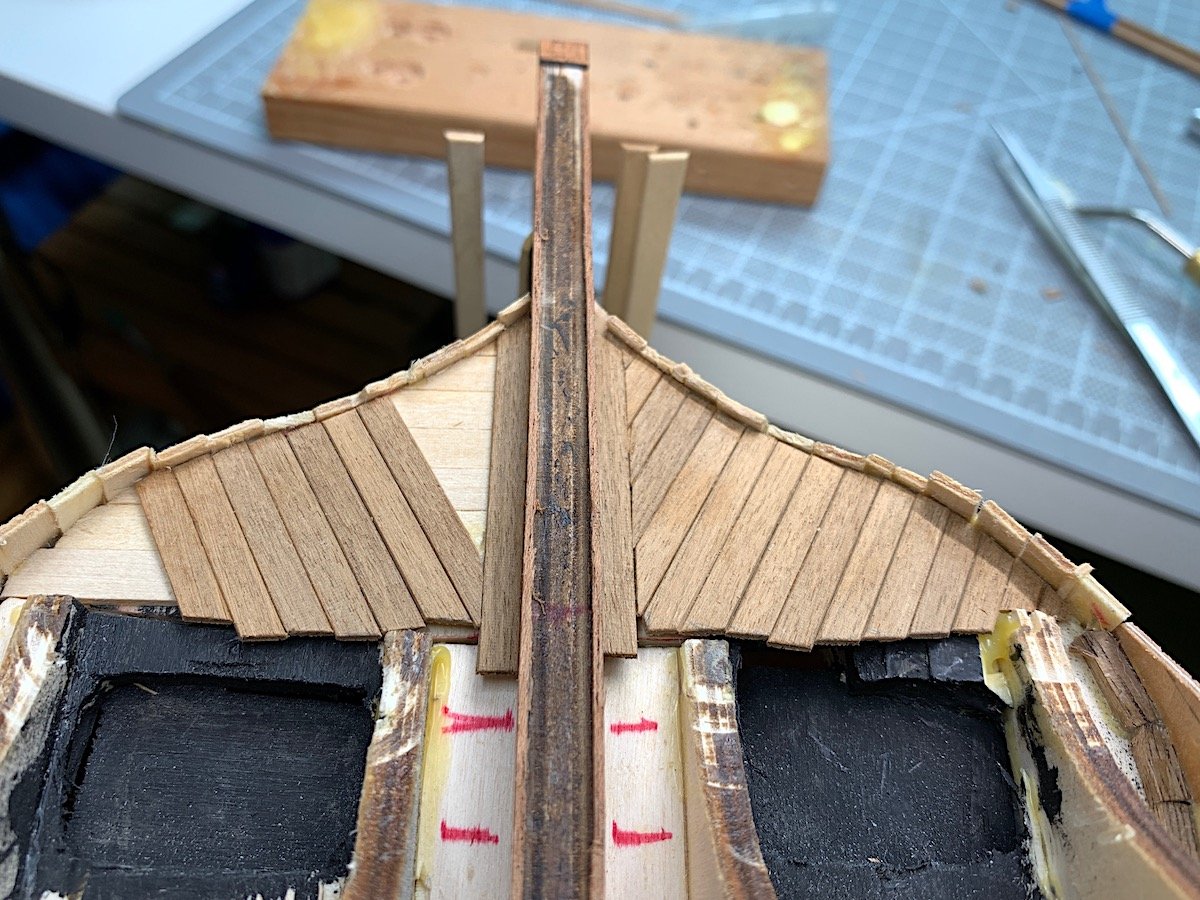
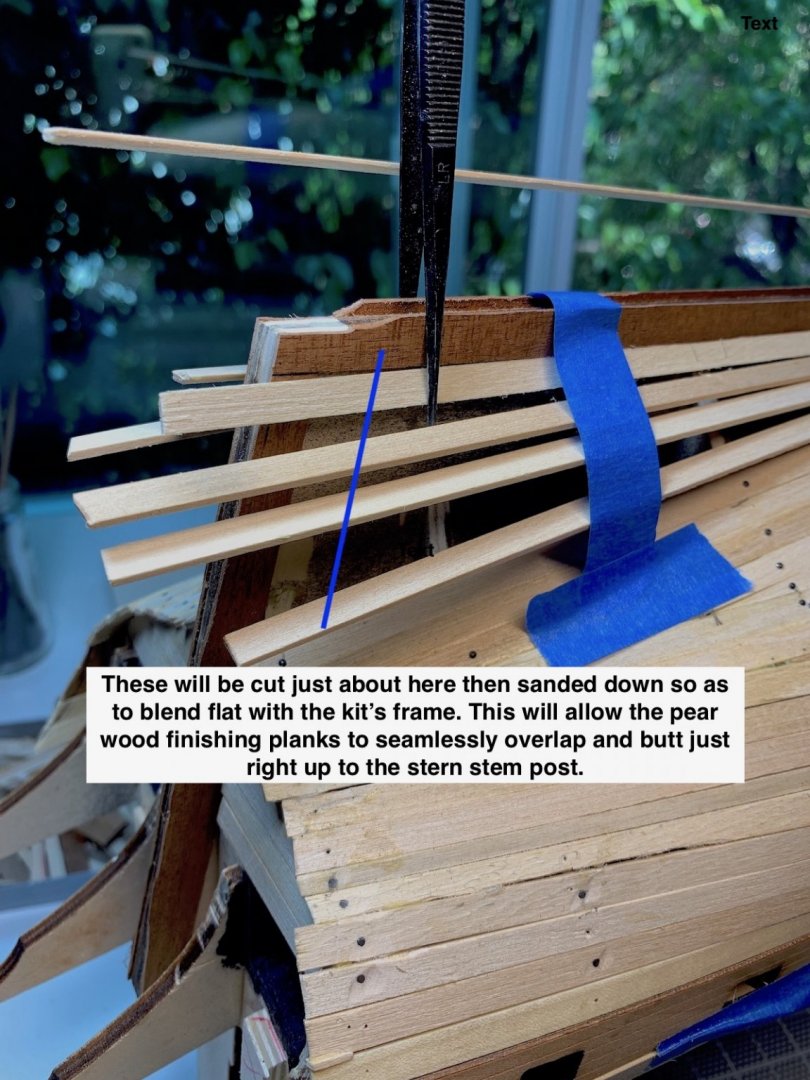
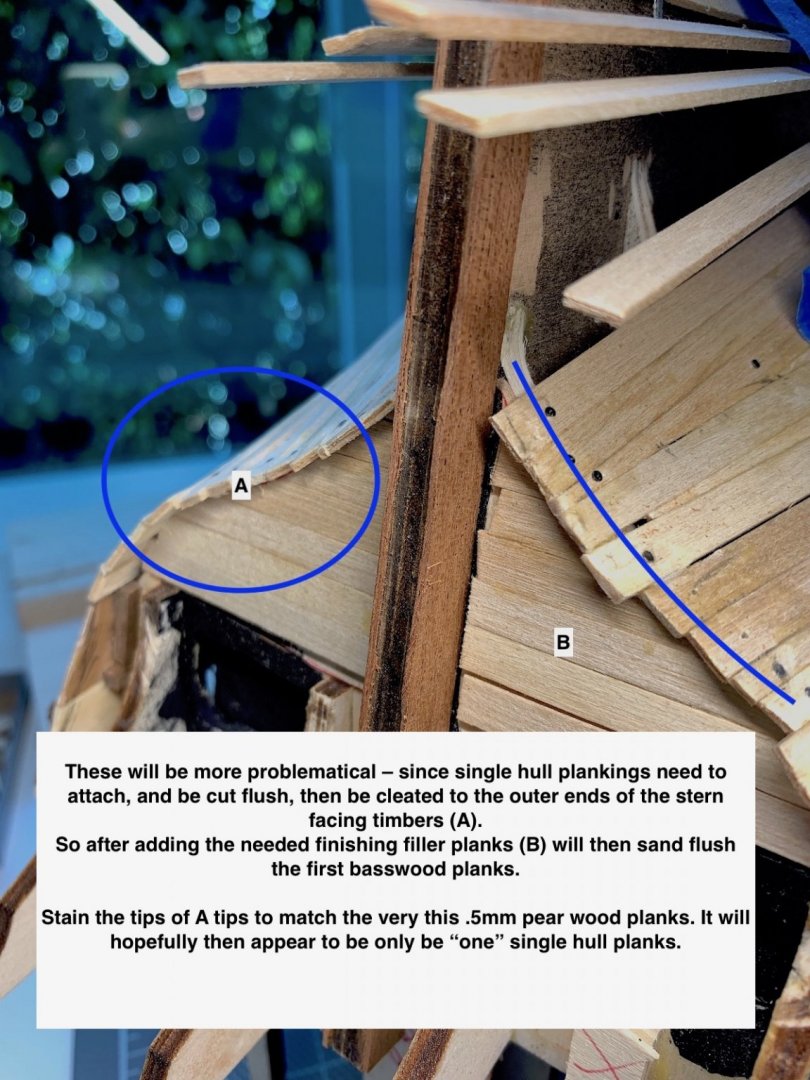
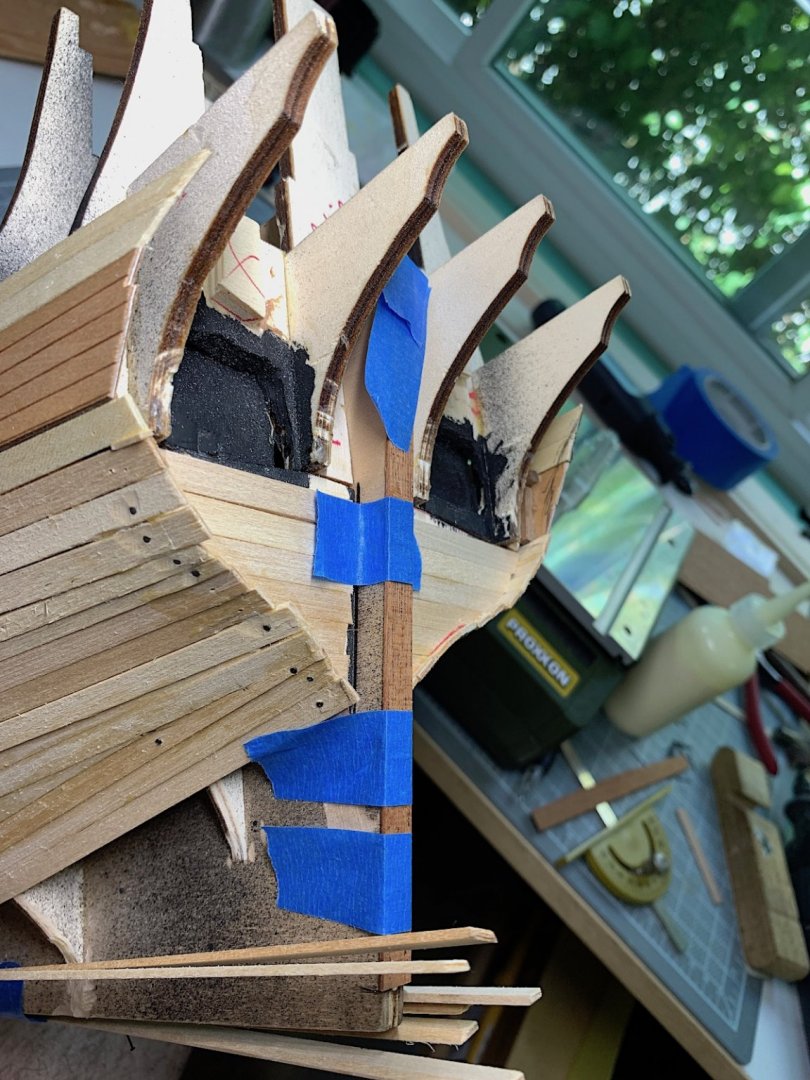
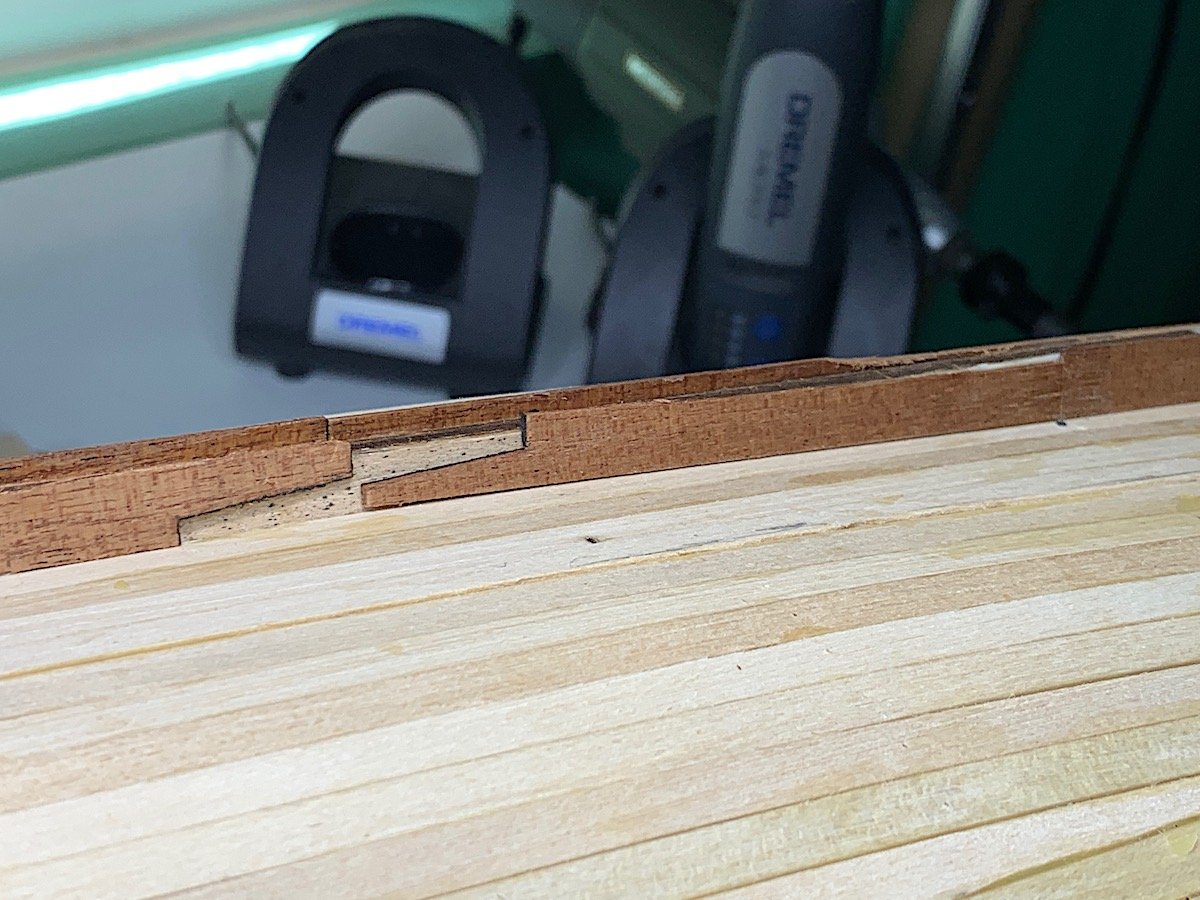
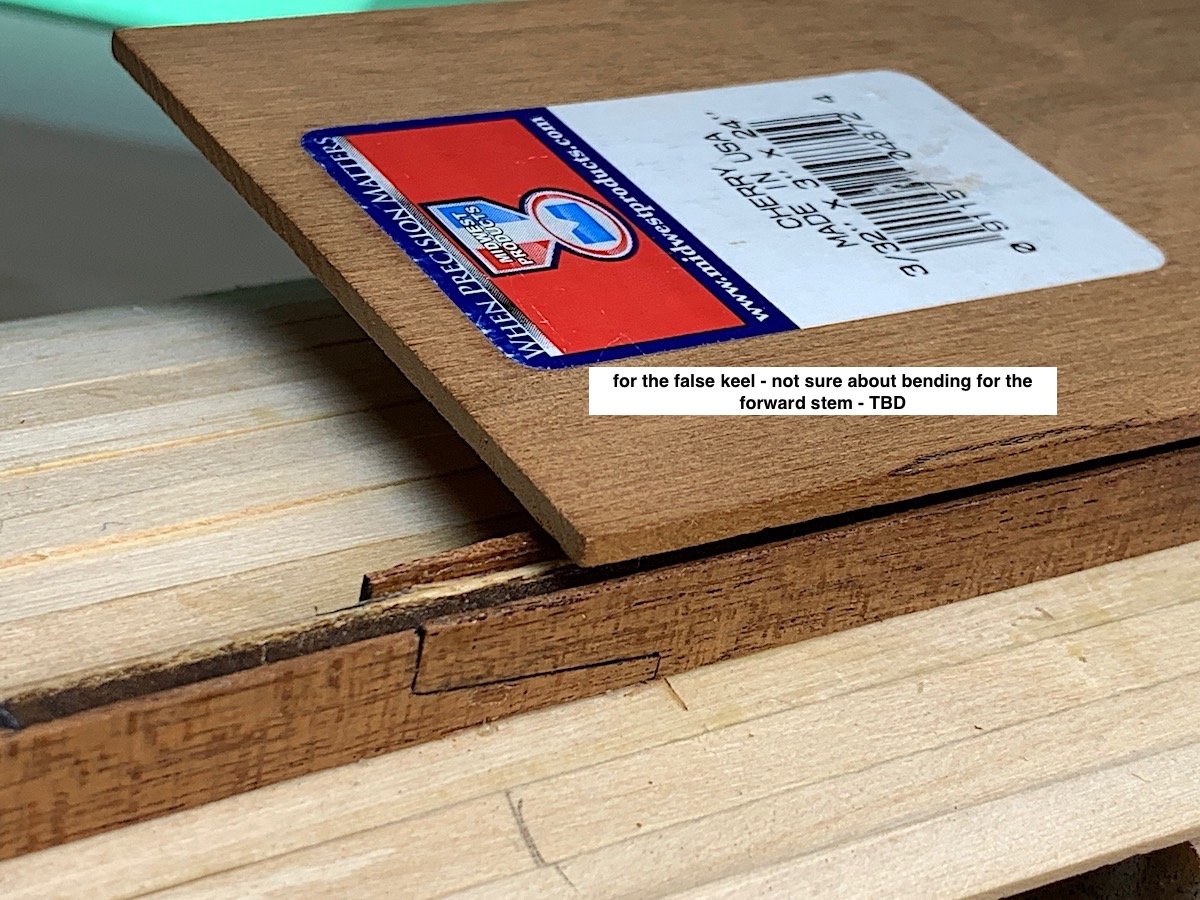
 Took a detour to work on the transom, sternpost and false keel as well. As always thanks so much for dropping by.
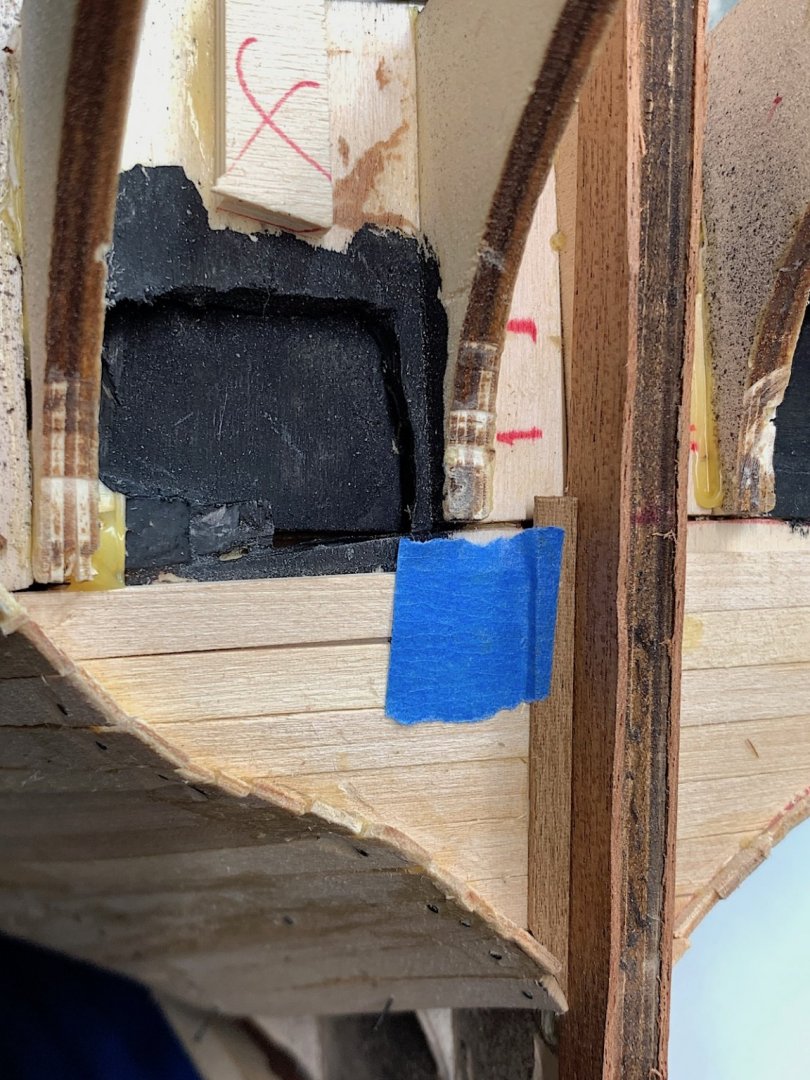

-
Hi Frank, I've clicked a lot of likes - but said little. 🙁 Well your current build is really brilliant. The needed accurately spaced bits to really give justice to this very complicated boat (ship?) are so impressive. Superb work - in all areas - indeed. Cheers my friend - hope all is well for you and yours in our Brave New World. MJD
- 510 replies
-
- 1
-

-
- reale de france
- corel
- (and 1 more)
-
2021 NRG CONFERENCE
md1400cs replied to kurtvd19's topic in NAUTICAL RESEARCH GUILD - News & Information
Good news. Excellent smaller maritime museum located in a nice small town north of Los Angeles. Ed Marple also has his, arguably the best scratch built Sovereign of the Seas on permanent display within. Looking forward to attending as well. Regards, -
As Steven just said - yes! - and Vasa platform are indeed helpful 😄 Cheers,
- 756 replies
-
- 3
-
-
- galleon
- golden hind
- (and 2 more)
-
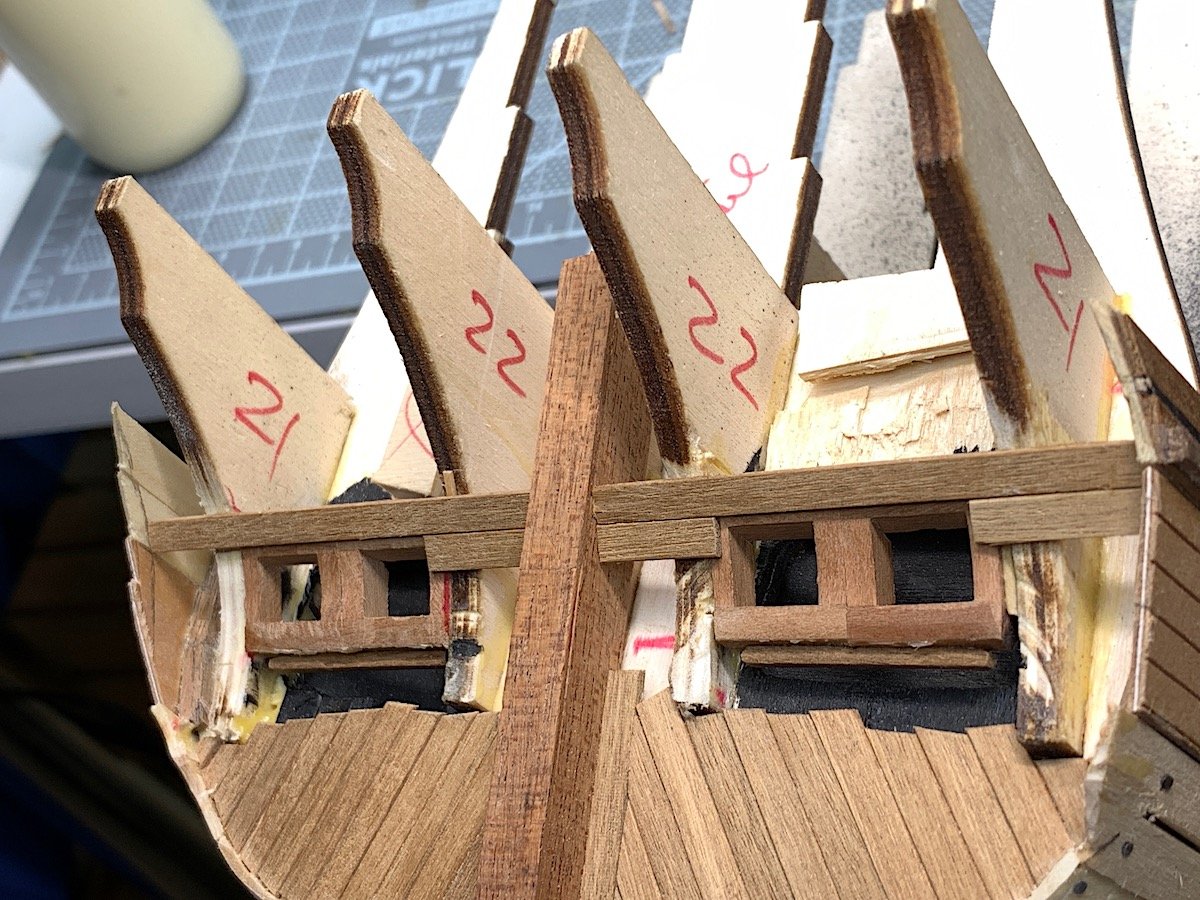
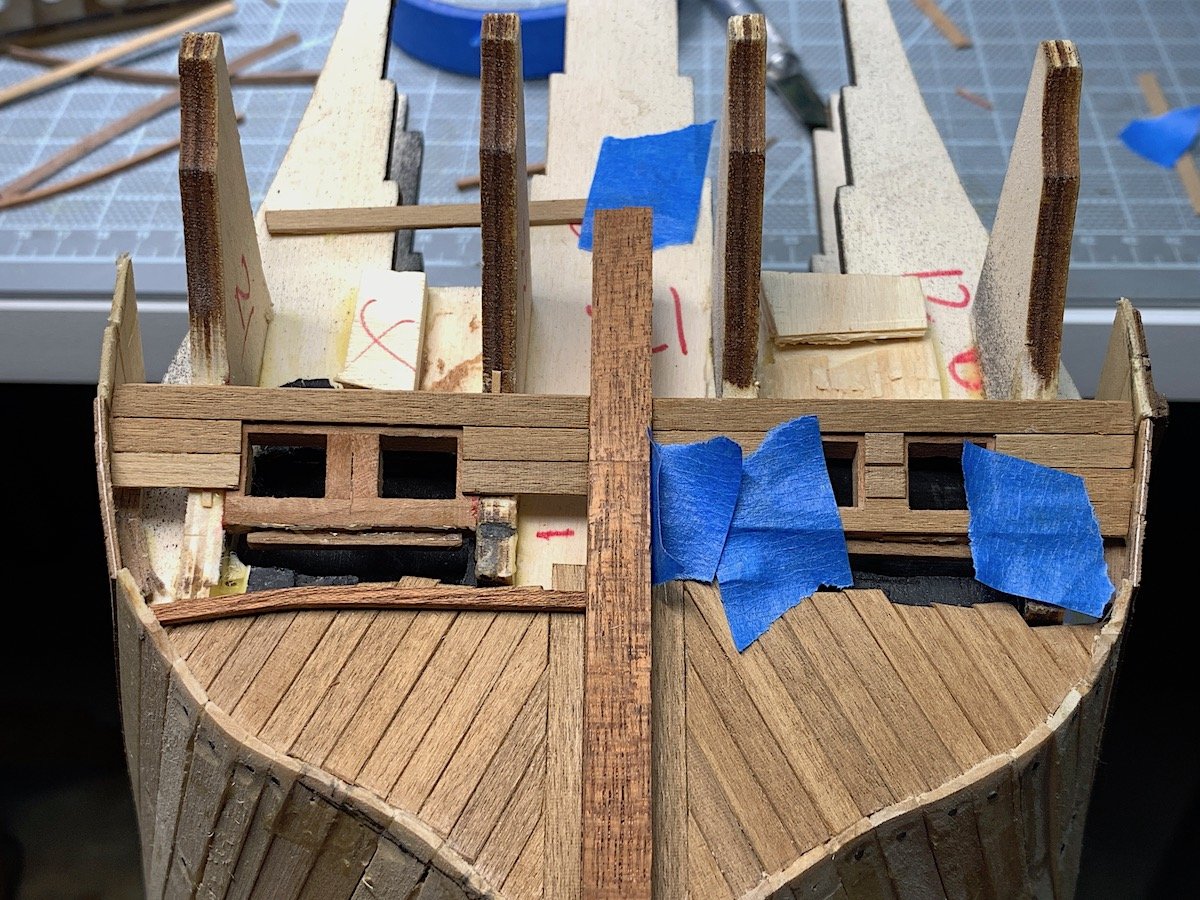
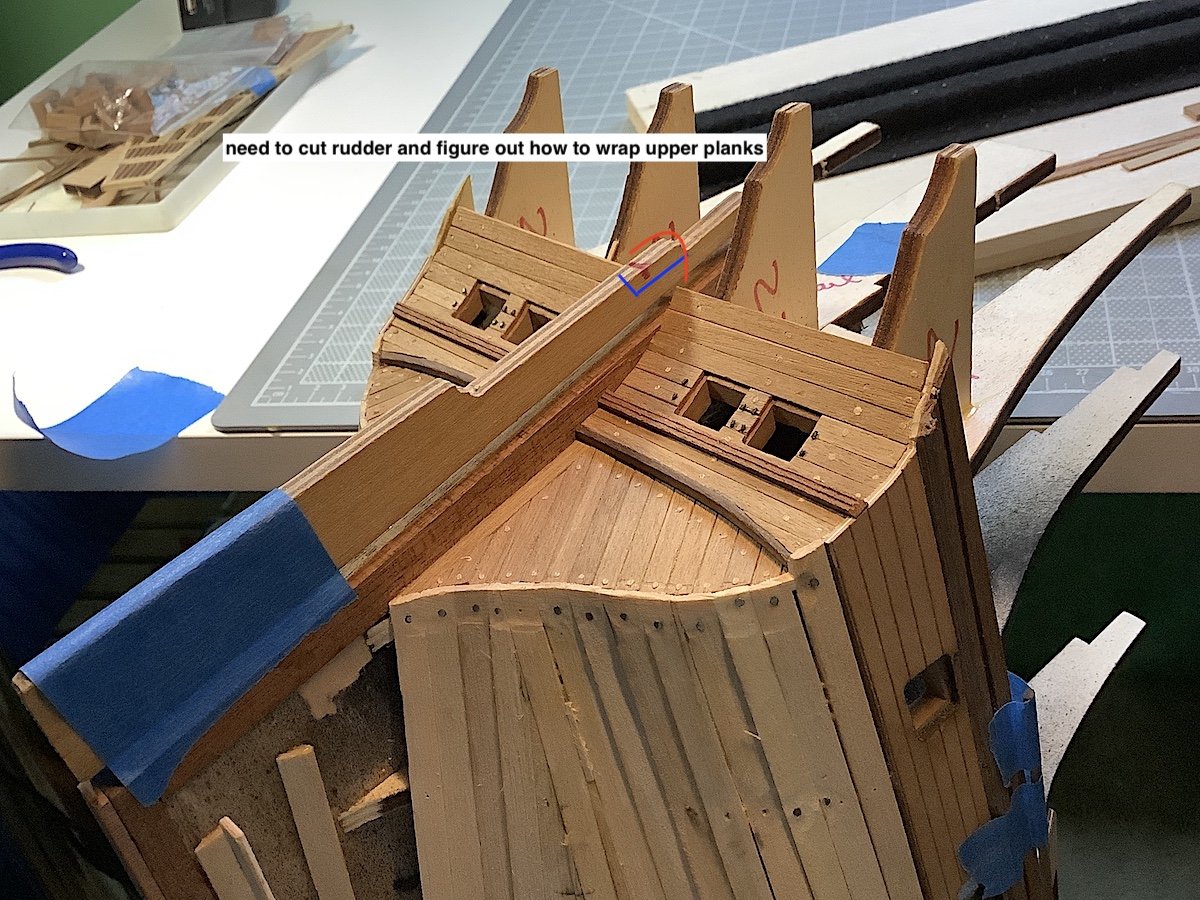
Frank, and OC - thanks - yes a "scary stage" needs to be just right - not such a "fun" part of a build (for me in any case) - but just can't mess this up. Here is what I need to do next, before sanding and so on....
-
EJ, Your tucked stern looks very good. Oh and the lights!!
-
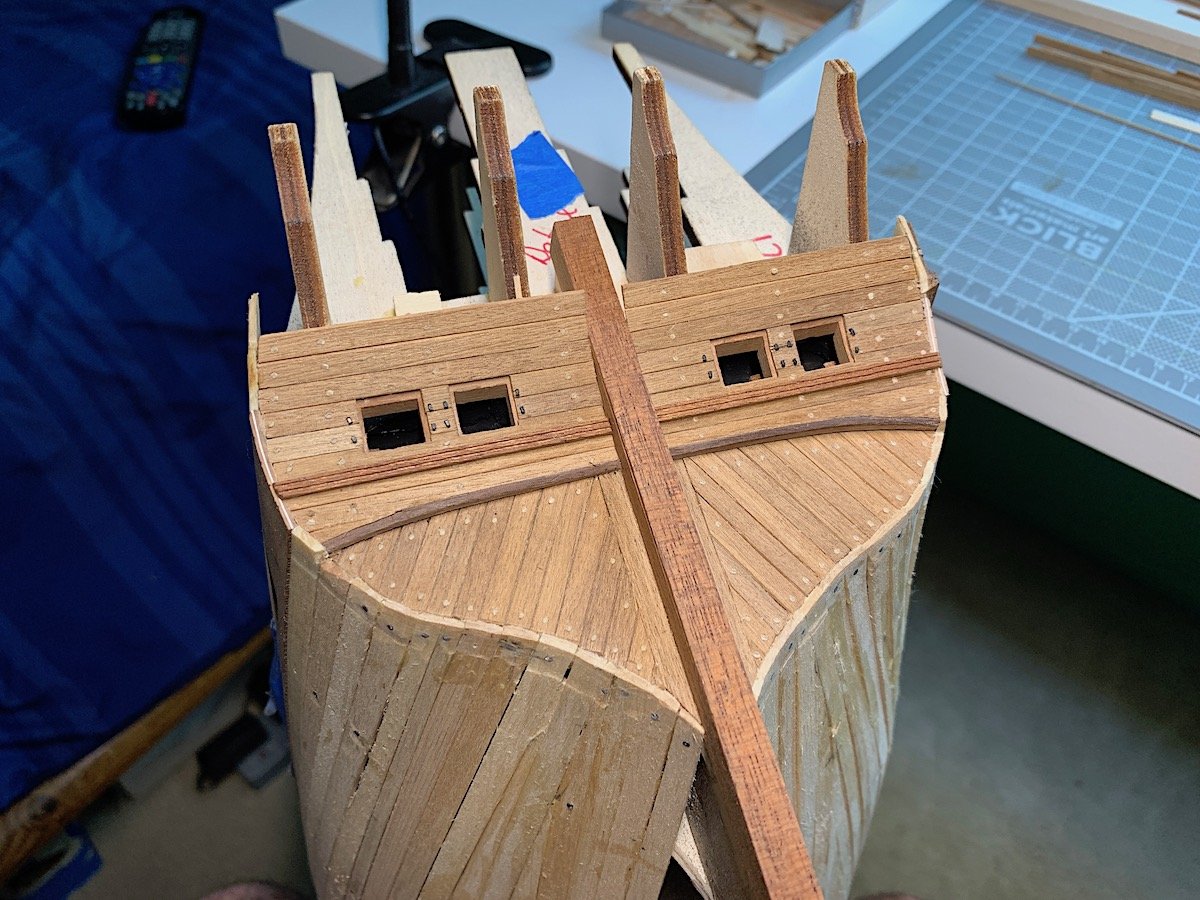
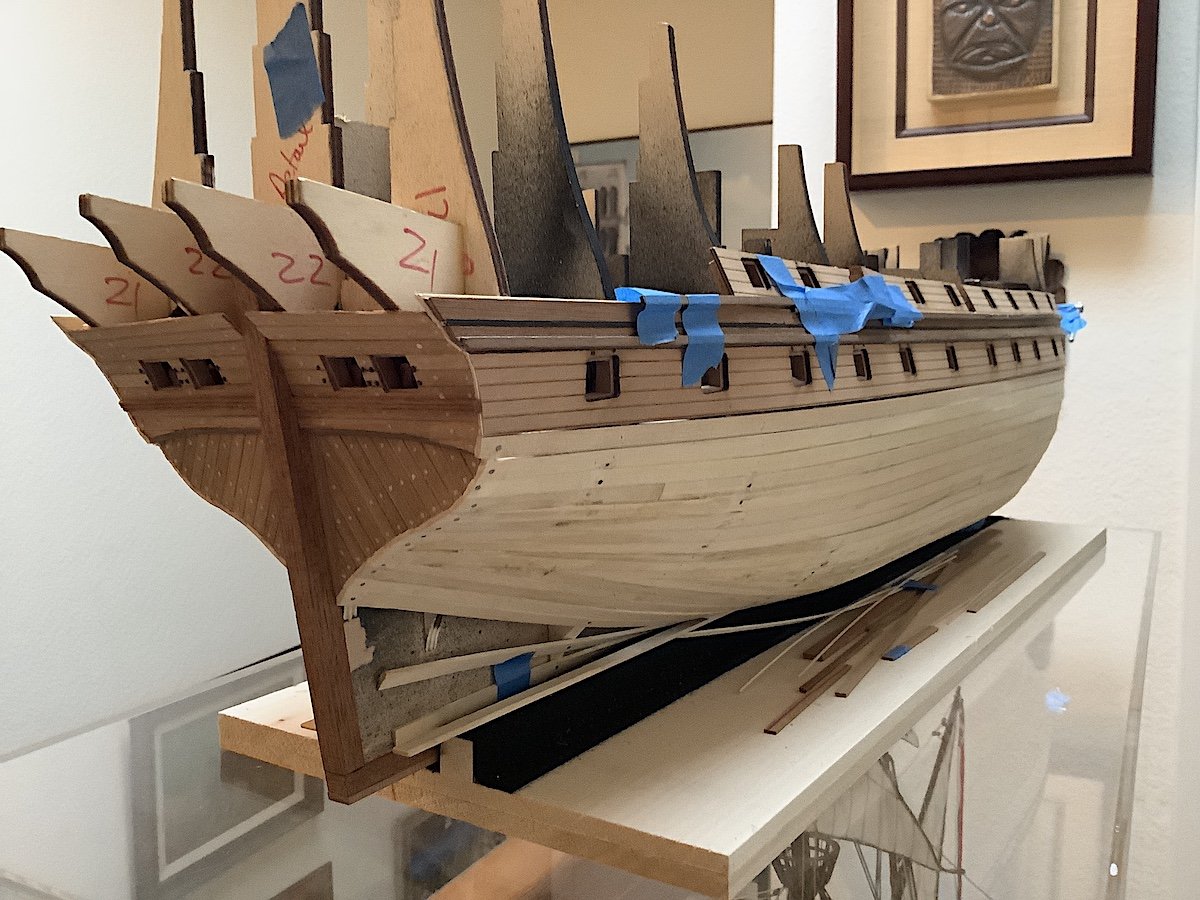
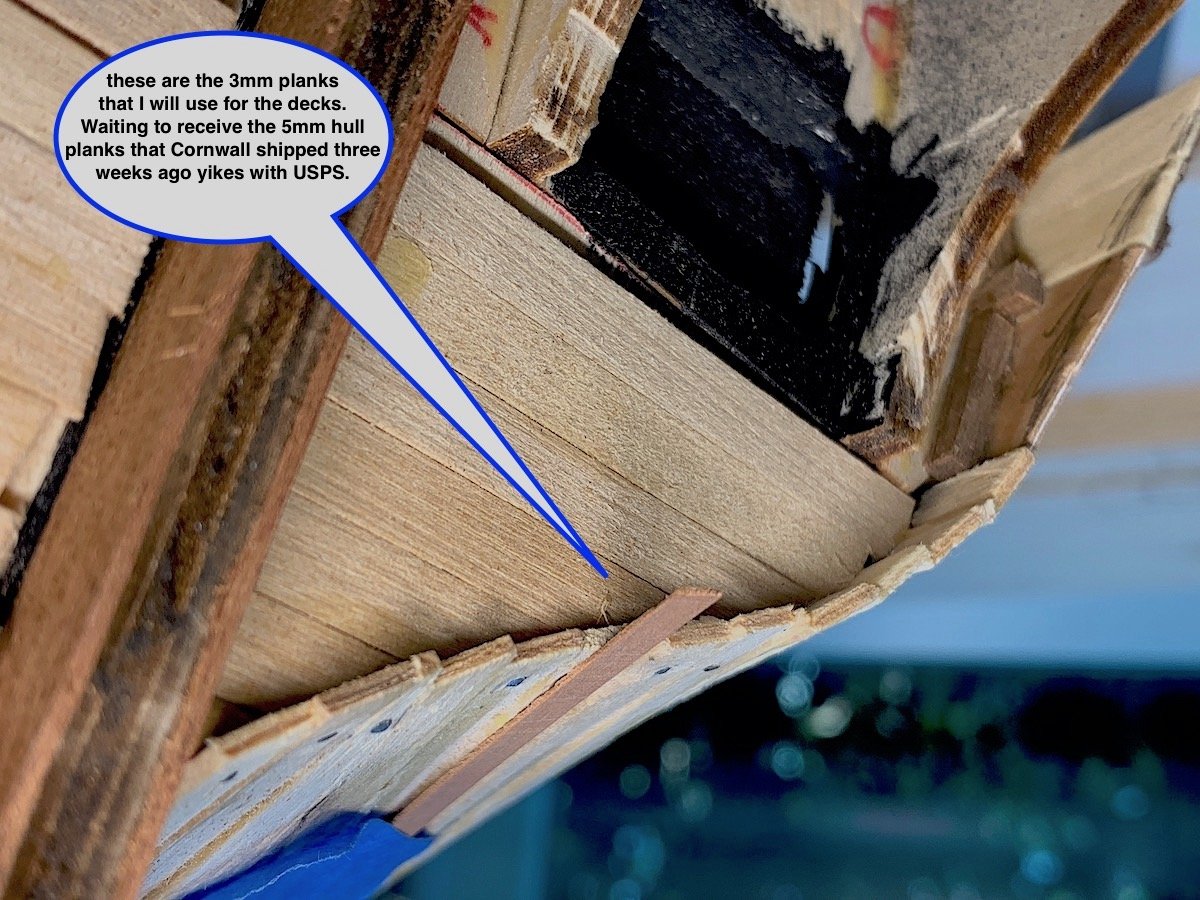
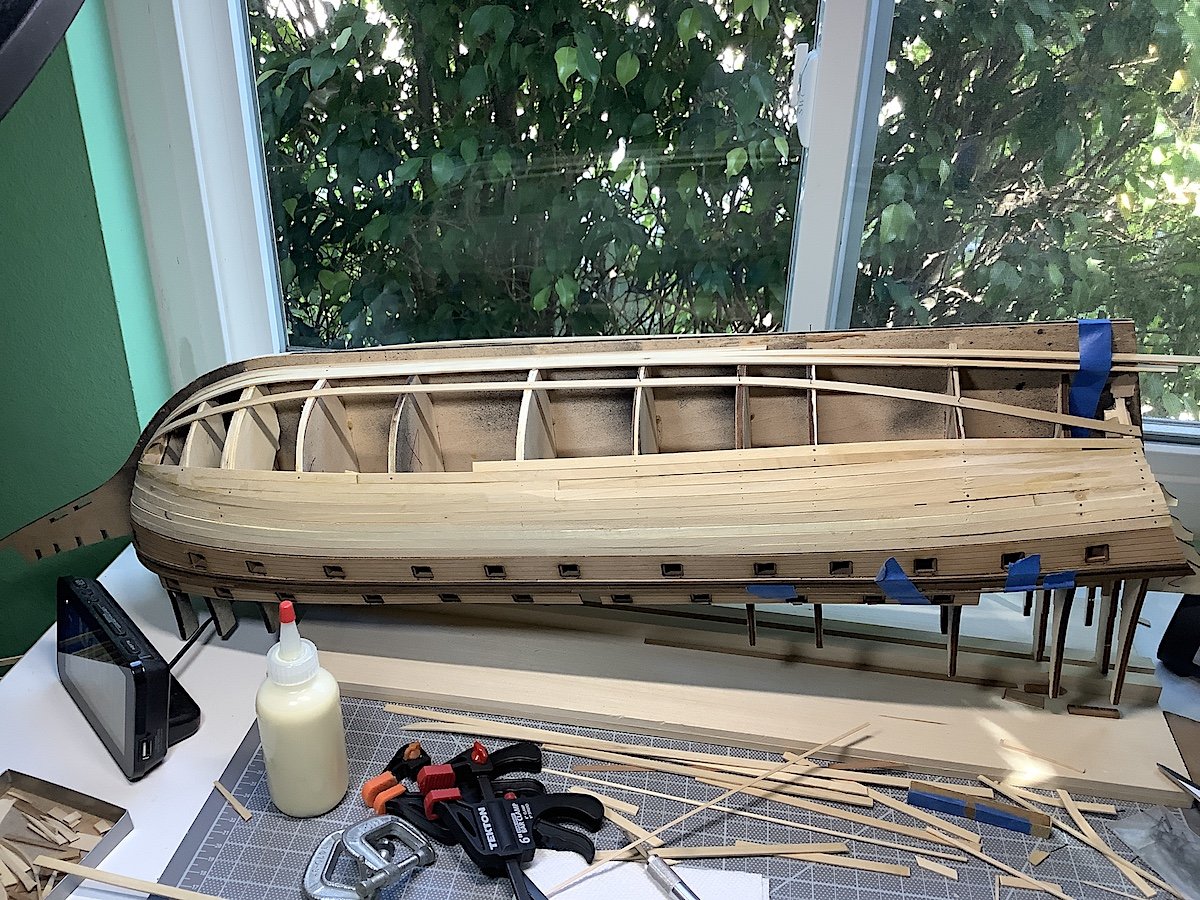
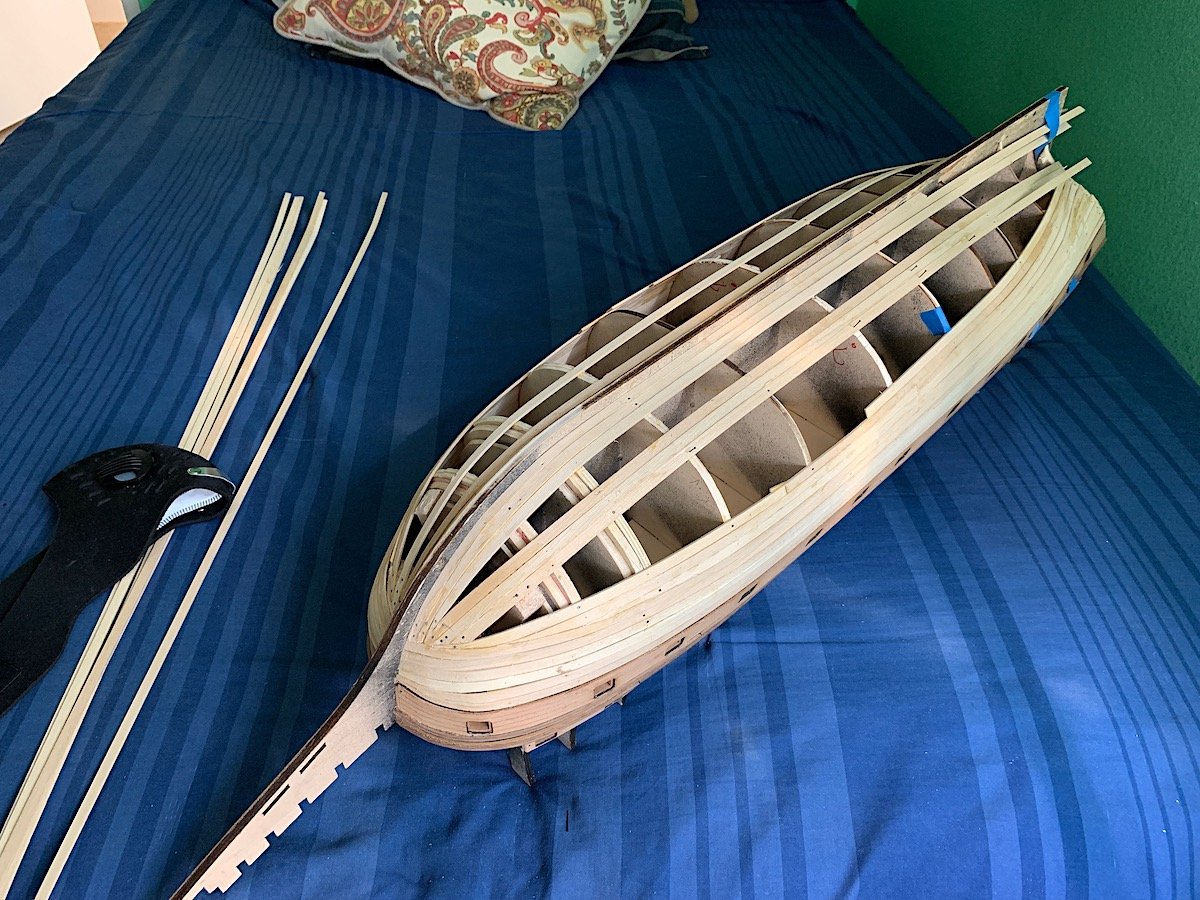
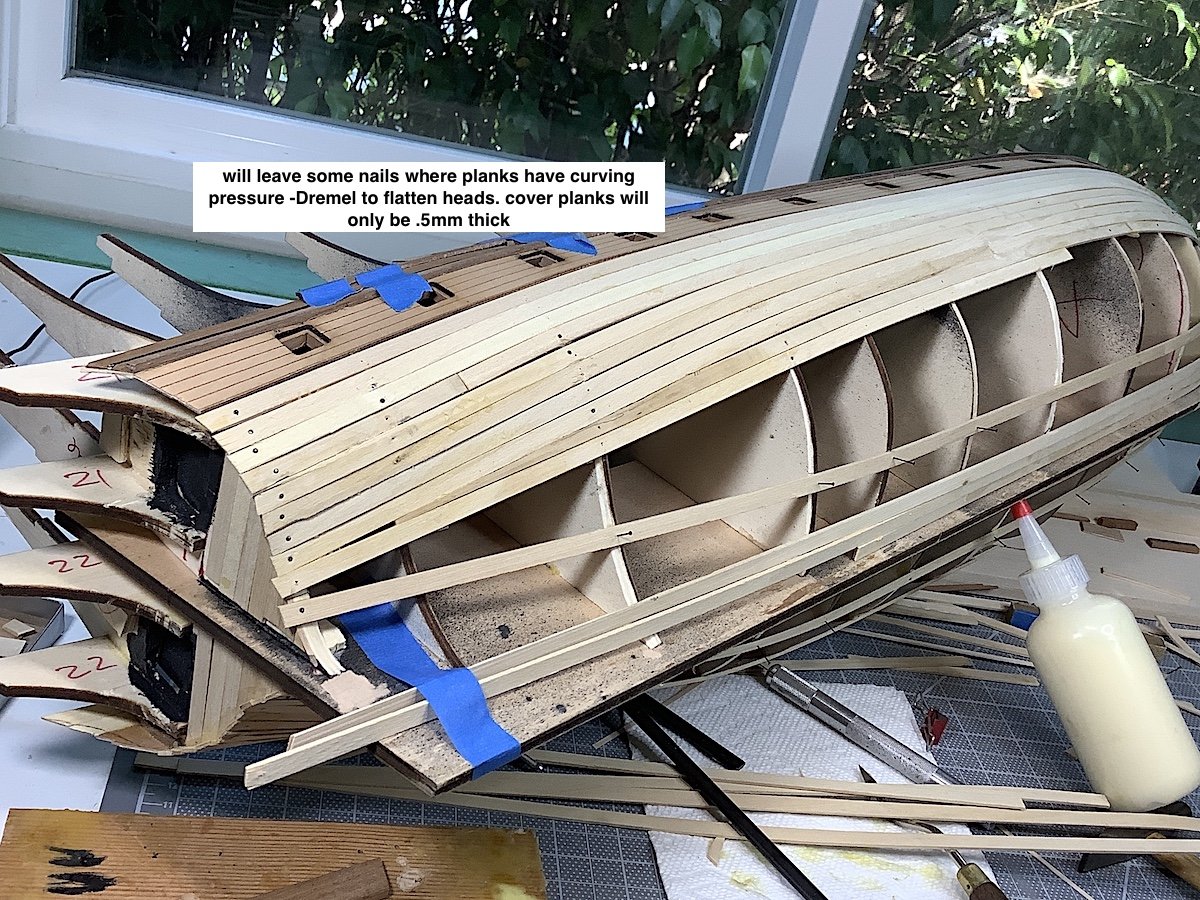
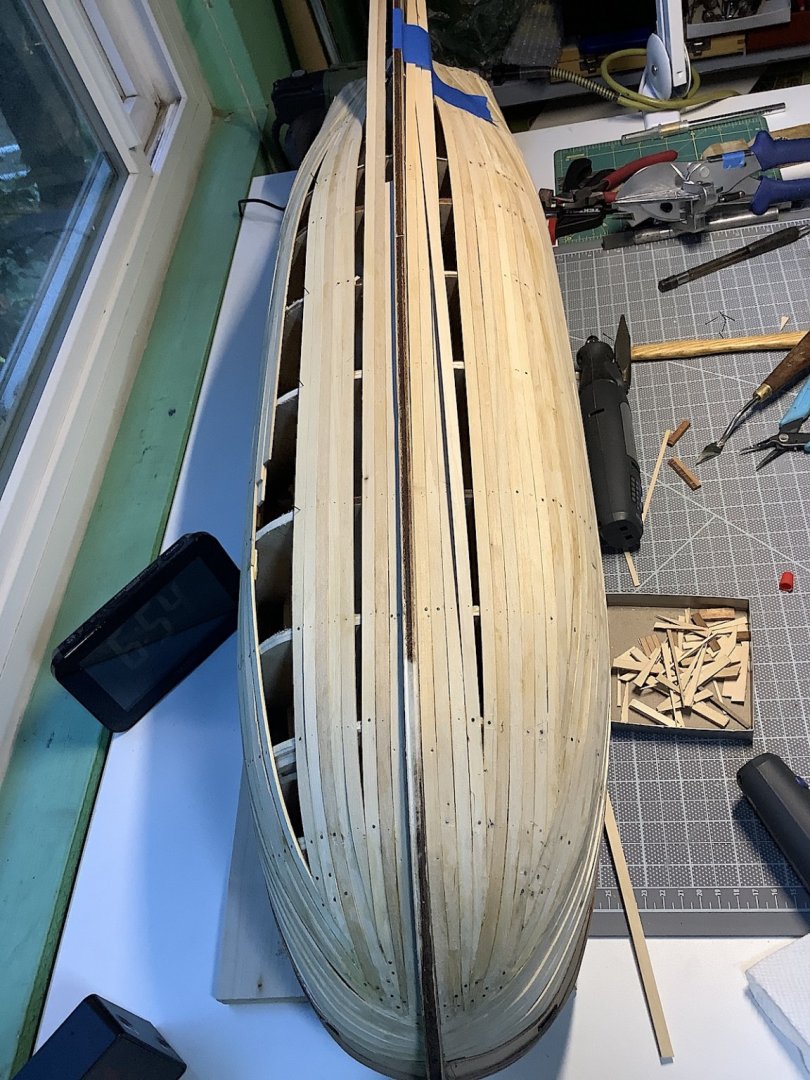
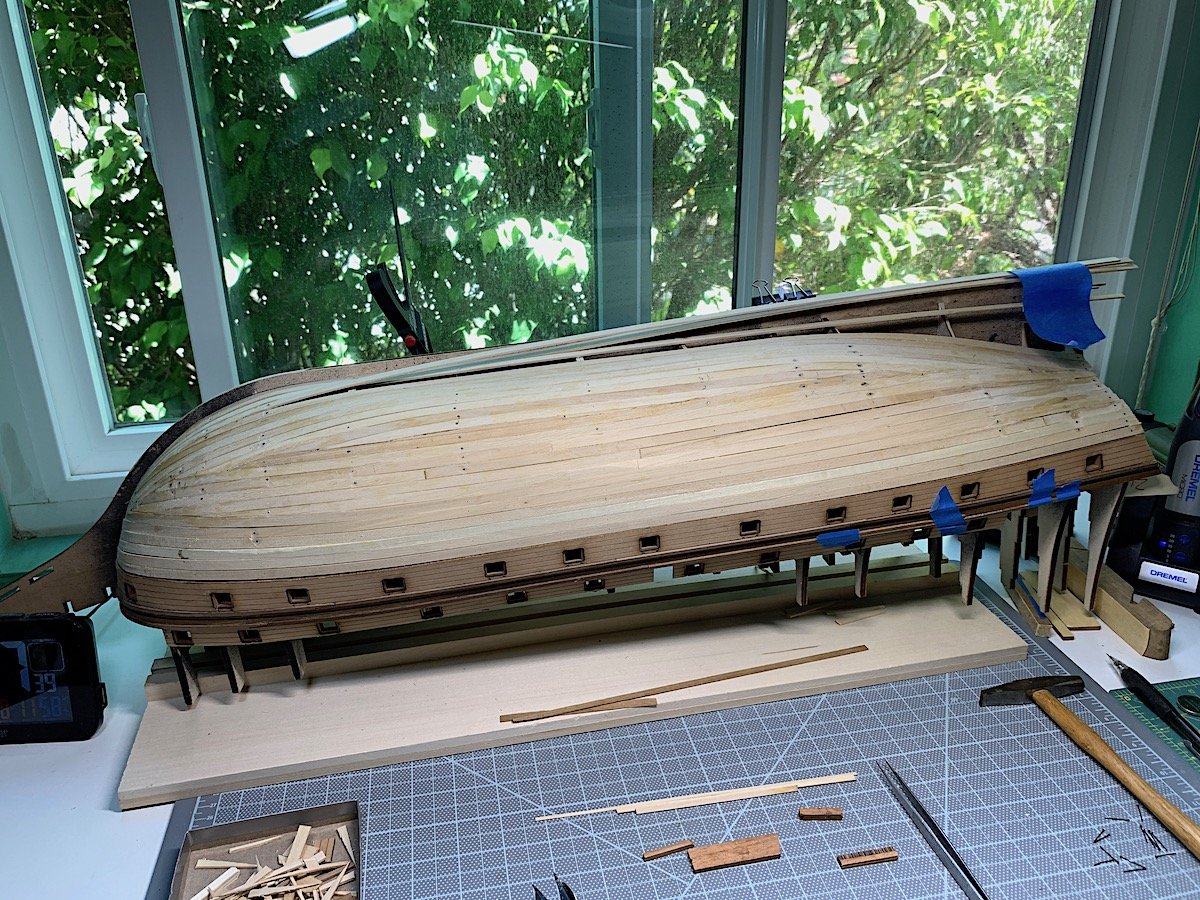
Hi all, Working on the first planking as well as fixing a stern stem post and the keel filler. Next, as you all know, will be sanding, sanding, filler and then sanding. Thanks for your visits always much appreciated.


-
Dave, Just found your log, saw current page first thought whoa this is huge! - then it became much smaller going back through your log 😀. As always brilliant work PS: Your backyard is awesome. Regards,
-
James, Grabbed my chair, but really needed a ladder your shipyard is, as it should be, already a very full one indeed. 👌 This kit does look to be of amazing quality. Will follow along, learn and enjoy as well. The Victory has and always intimidated me, still does. But so appreciate the talents of builders here who can do her proper justice. Regards,
-
Yes, great update. You raise the bar to levels hardly ever seen. That image - holding the bits in your fingers speaks volumes
-
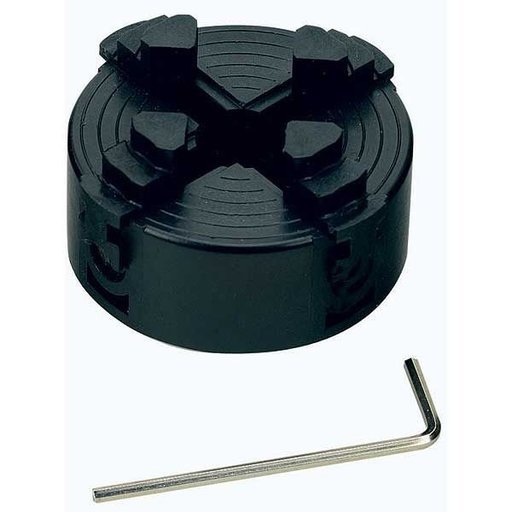
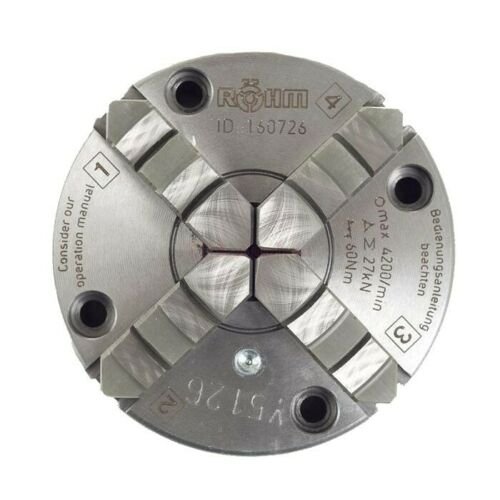
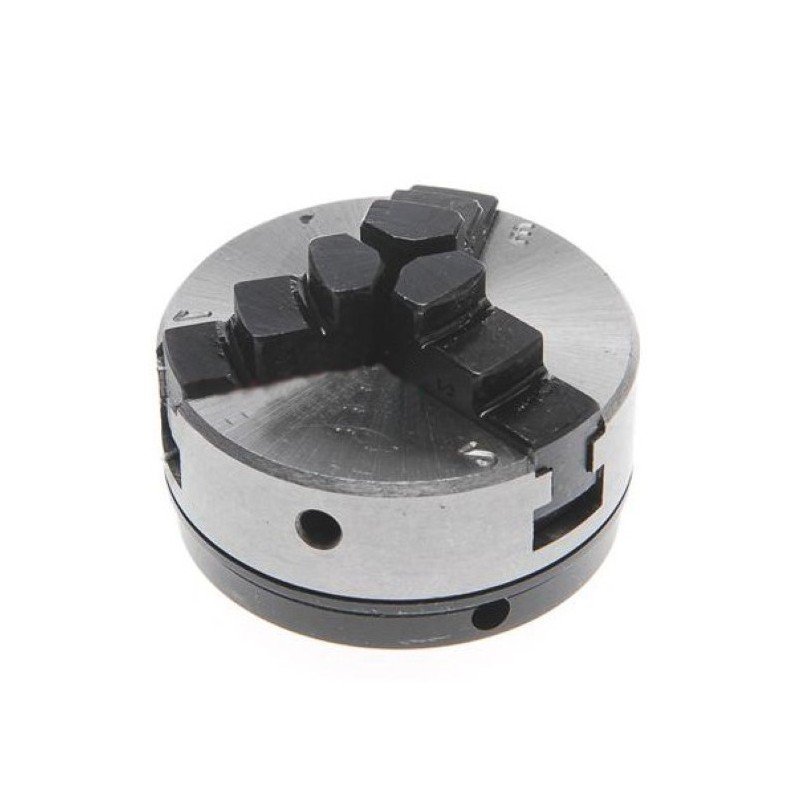
4 jaw chuck for a Proxxon lathe??
md1400cs replied to md1400cs's topic in Modeling tools and Workshop Equipment
Hi Jimbyr, Looked on their site - no luck I then spoke with them - they told me that they don't make any chuck with 16m - largest is 14m - Hmmm But thanks anyway. I'll keep using the Proxxon plastic one -
Mark, Parenthetical question - one of your images above shows a sail with a hole in it, as in the image below. Certainly you would know why this was done. Any thoughts? - my guess is to make the sail "flap" less hmmm.... PS: Can't give credit to this amazing example - found in Google Images, with no credit - though it was from a builder in the UK.
- 2,699 replies
-
- 3
-
-
- heller
- soleil royal
- (and 9 more)
-
Flint, Nice second build. Your hull planking looks great as well. Will grab a seat. Regards,
-
Bob, Great - on my list - big thanks!!
-
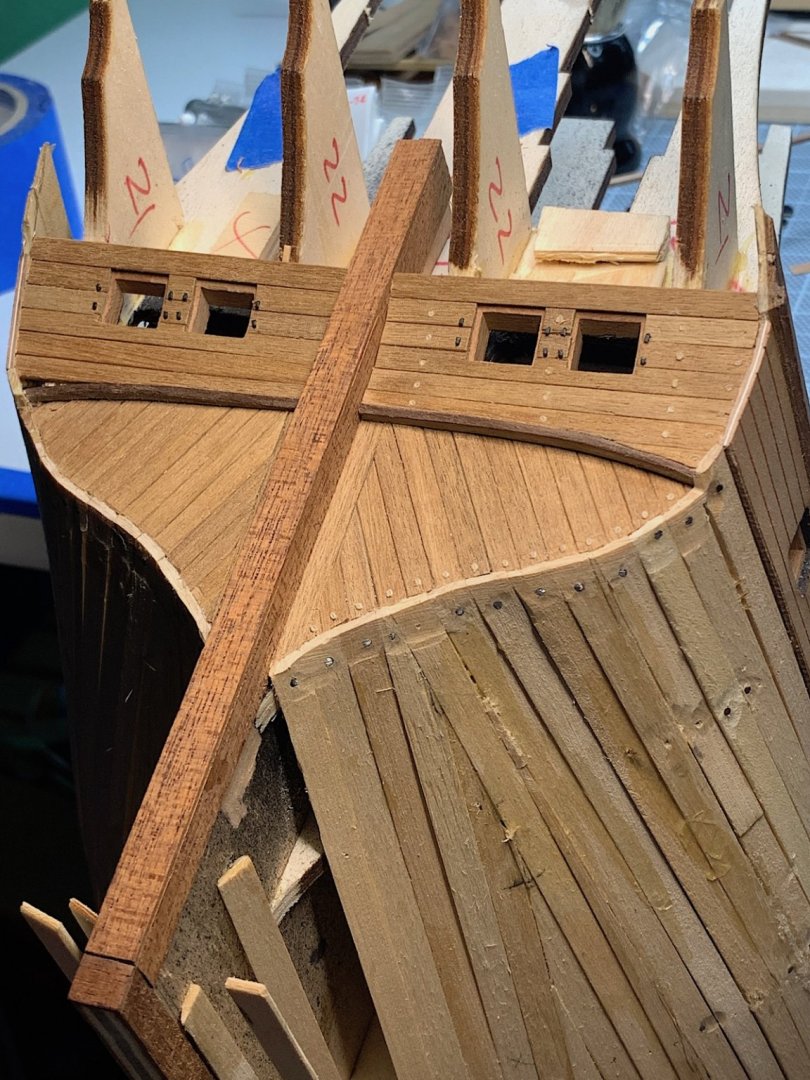
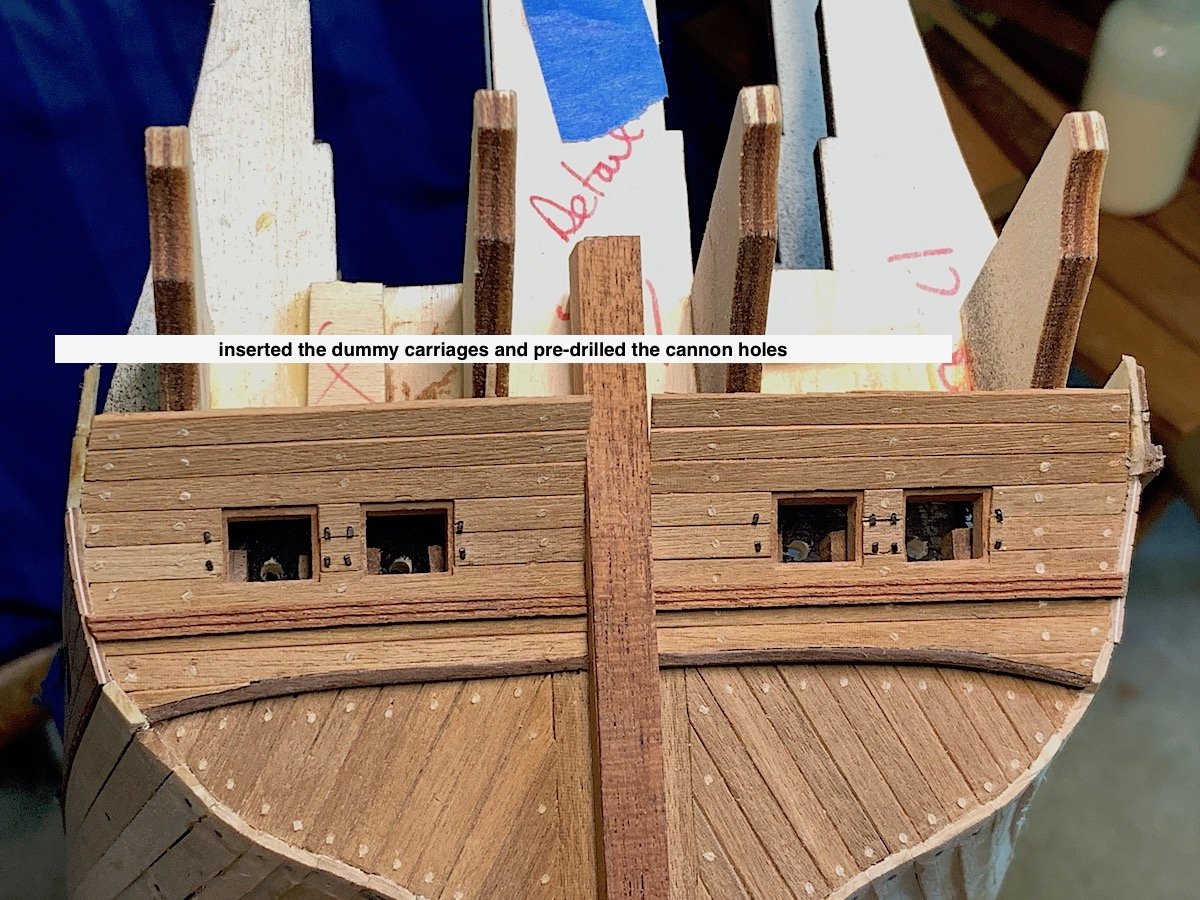
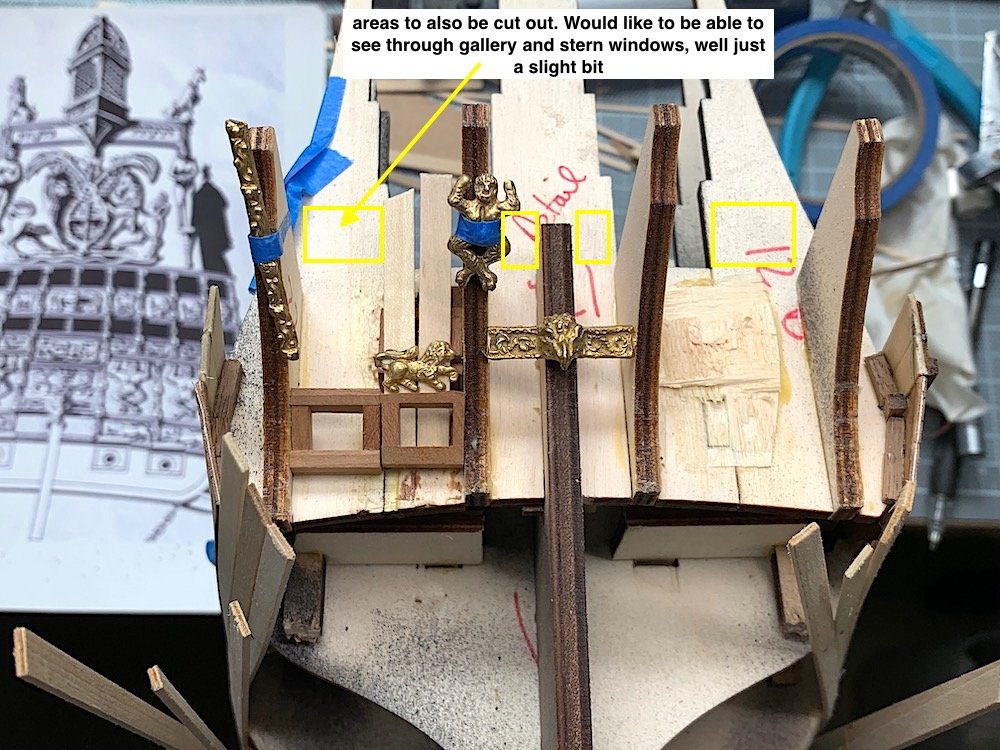
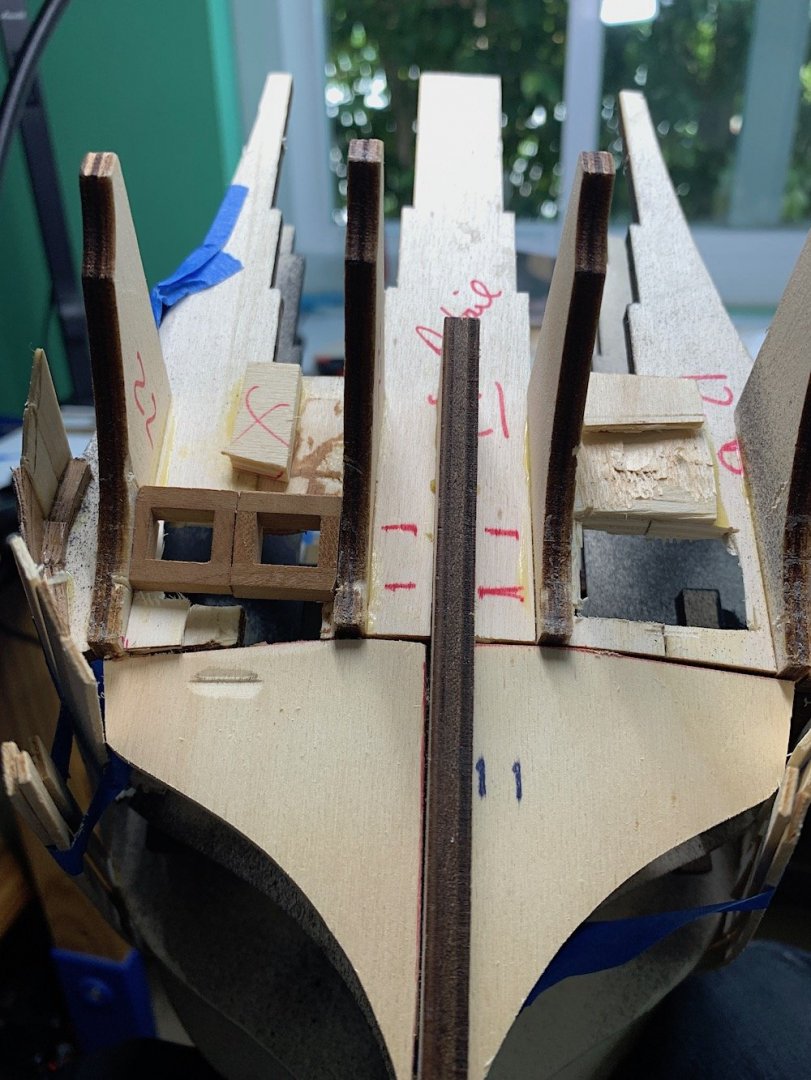
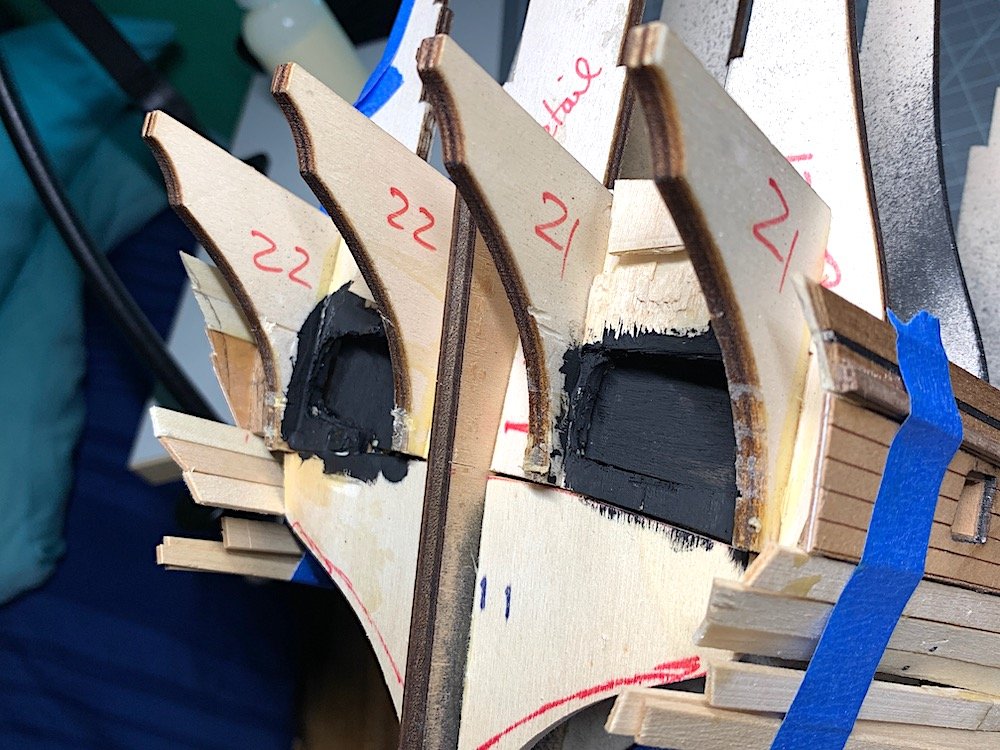
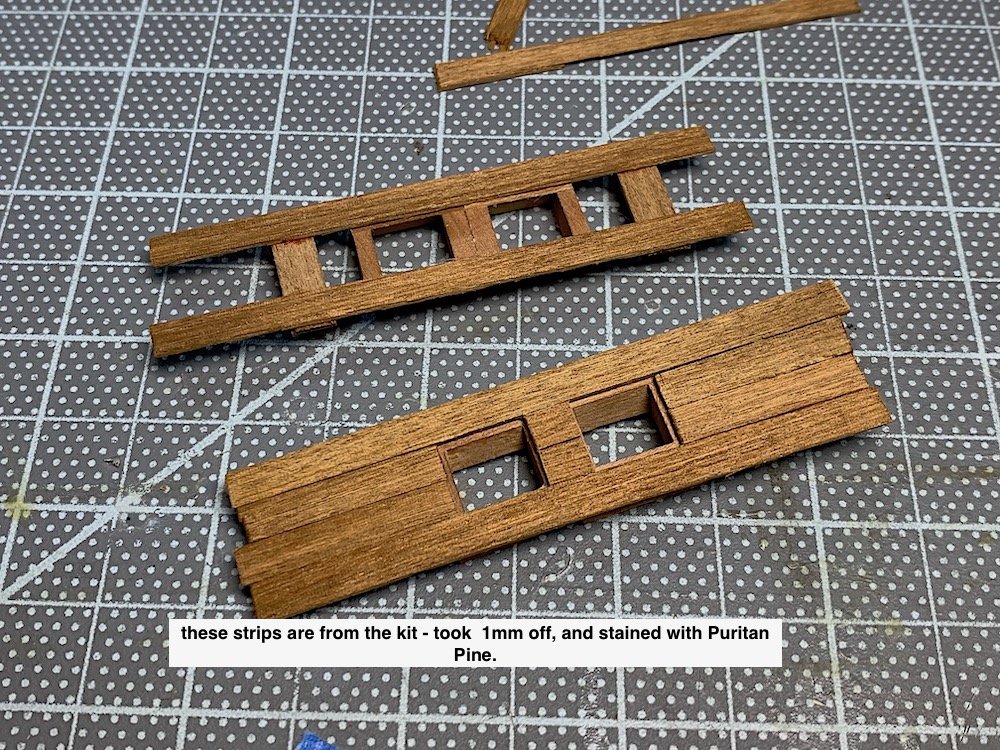
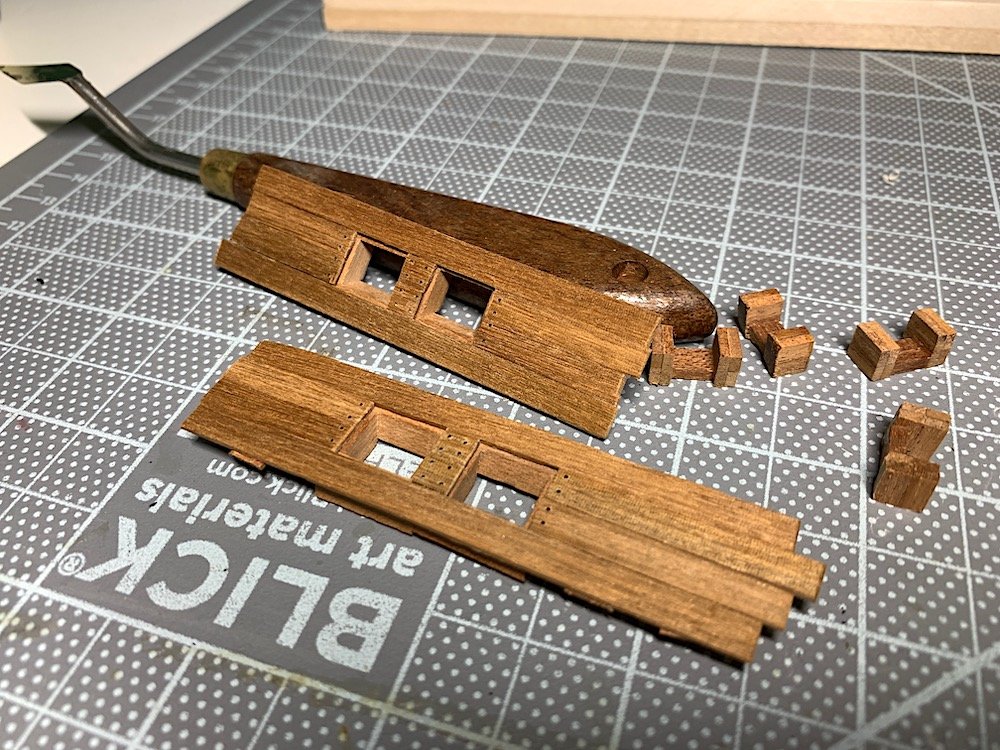
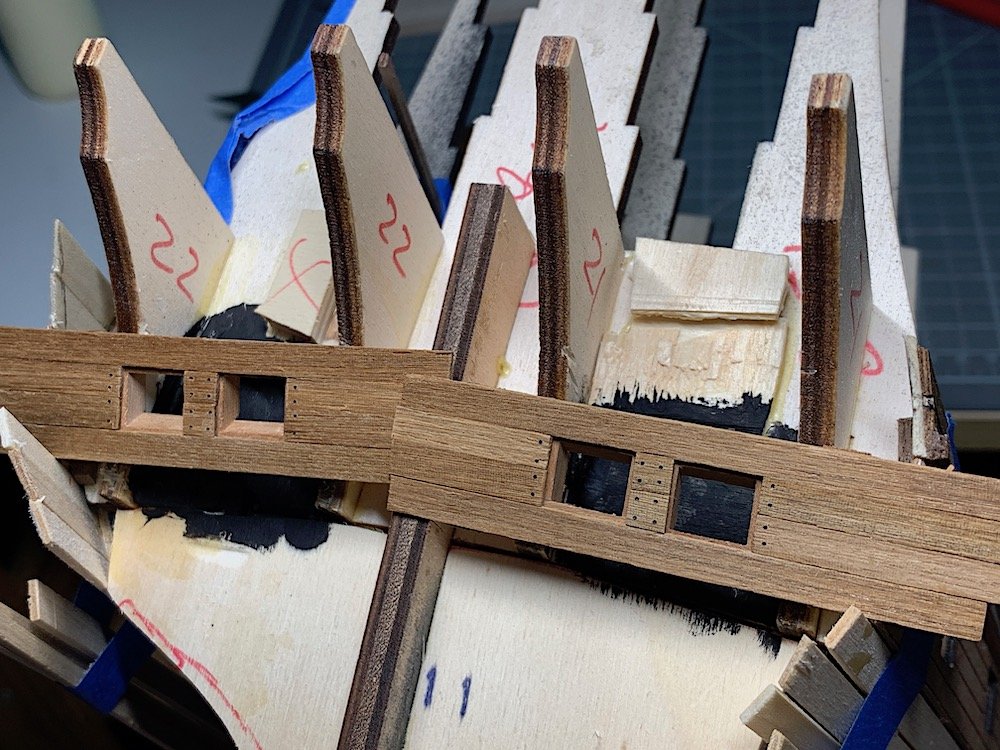
Minor update – did some work for the stern cannon doors. Needed to be sure that the required openings were not to high up. Looking at an image from old kit helped, along with positioning some decorative bits. Needed to also cut out two spaces because gun door frames and dummy carriages would not fit. Added a back filler and painted area black. Carriages will now also fit. Will drill the four gun holes after installation. Put together the gun frame facings. Now set aside – now back to first hull planking.


-
Jonathan, Hmmm Metal could be an issue? I tried experimenting with that idea on my current Sergal Sovereign, with their large solid bronze lanterns (from their 80s original kit metal bits). Did not go well. The Testors product dried opaque and greenish. There was an interaction with the metal. It was a mess to remove from one of the five lanterns that I experimented with. Have not thought of plan B. In your case just adding some clear plastic behind might be better???
-
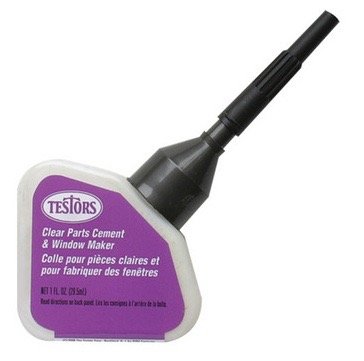
Jonathan, Just a suggestion. You might want to use this to add clear windows to your stern area - It looks as if your frames are plastic, so it should work well. Airliner model builders sometimes use this for all the windows.. Just a thought
-
4 jaw chuck for a Proxxon lathe??
md1400cs replied to md1400cs's topic in Modeling tools and Workshop Equipment
thanks for your posts, Just checked the Proxxon website and these are the data for the 3 jaw metal chuck; Three jaw chuck for the lathe DB 250 Used for concentric clamping. Made from steel and offering 1/16" - 1 13/32" (1.5 to 32mm) and 1/2" - 2 14/32" (12 to 65mm) when reversing the jaws. The chuck has a M16 x 1 thread for fitting directly to the DB 250 headstock spindle So I need 16mmx1mm for thead?? - looked at the chuck did appear to be 15mm+- and 1mm threads. will check with Sherline thanks!! -
Hi mates, Have been looking for a self centering 4 jaw chuck for my small DB-250 lathe. I have their annoying non self-centering plastic one. Their 3 jaw metal one is great!! I did find a self-centering one for their PD 400 lathe. But that goes for around $400. USD – yikes – might not even work on their small DB-250 lathe? Many generic 4 jaw types are available on eBay but who knows if they would screw properly for use with the DB-250?? Has anyone found one that would work? Any thoughts are appreciated. Thanks in advance. What I have What I would like,
-
Karl, indeed stunning work. I have learned so much about "details" by following your work - followed by my attempts at trying to emulate, as best I can, some (a very few 😃) of your visions. Congratulations!
- 87 replies
-
- 2
-
-
- royal caroline
- yacht
- (and 1 more)
-
Patrick, Nice work with mast - reminds me of the Vasa I did some time back. I have the mast parts from the museum if you like - I can find and post them here? Looks as if you have it just right however. Cheers,
- 756 replies
-
- 2
-
-
- galleon
- golden hind
- (and 2 more)
-
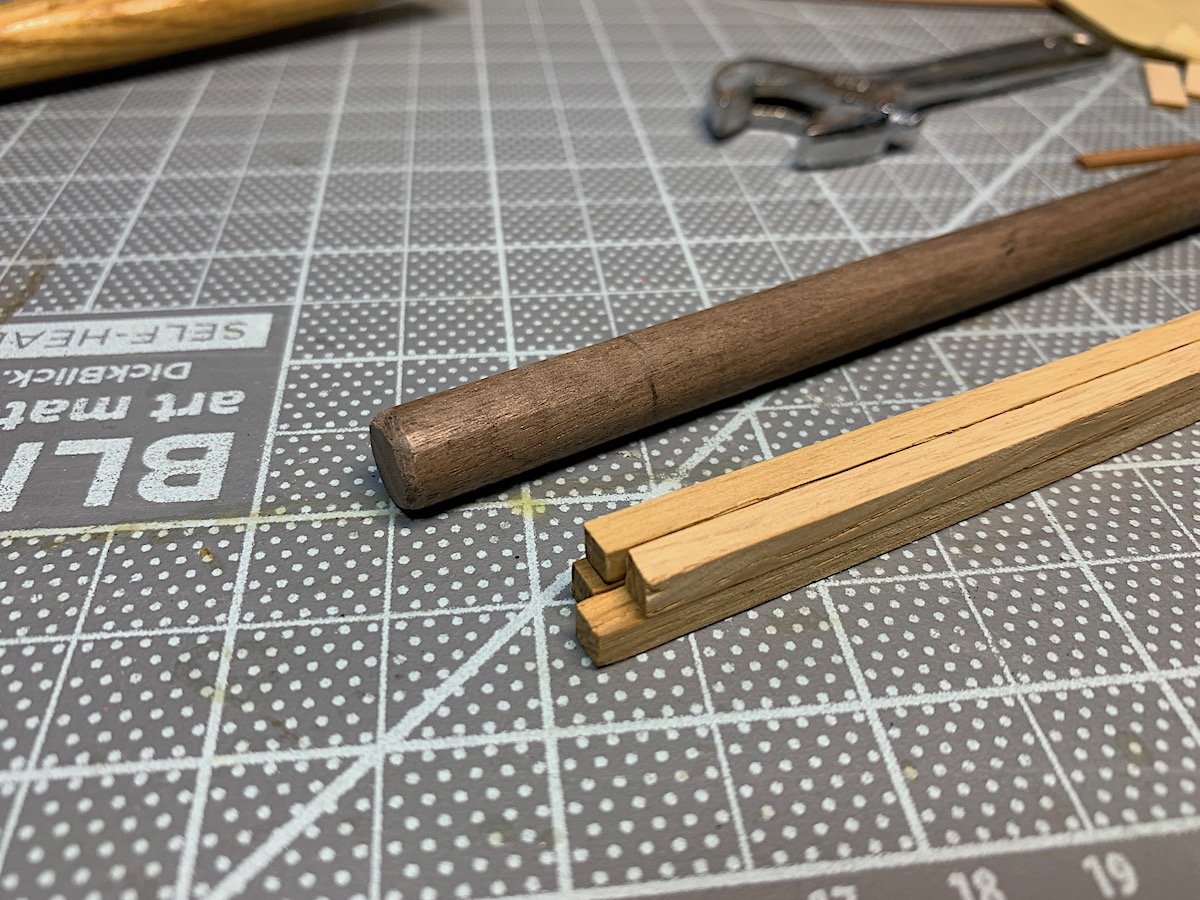
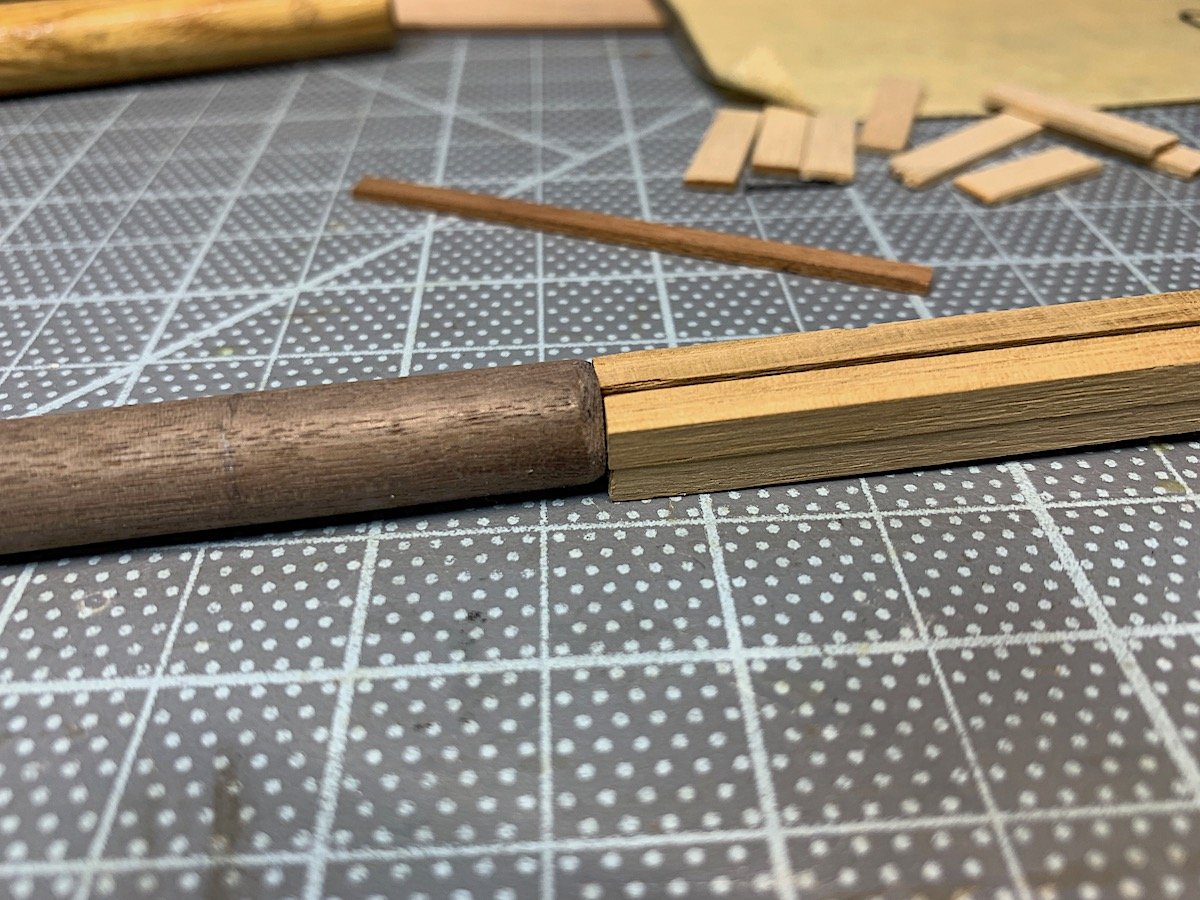
Marc, It was something I would have regretted not trying. Already wishing that I had overlaid the gun deck templates with pearwood - so "had to" at least try the offset. Thanks for following along. Welcome aboard. PS1: not too impressed with kit provided walnut dowels, may glue together 4 oak strips + a bit of filler and make that mast - hmmmm?? sorta how they were done way back when. PS2: Your Cutty is a beauty, enjoying your work as well !!
-
NIce updates. My brother is super involved in the painting of historical figures hobby (mostly Pegaso). Sent him the link to that one that was painted for you. He also thought that it was an excellent example. He wondered about the size 75mm?