md1400cs
-
Posts
2,868 -
Joined
-
Last visited
Content Type
Profiles
Forums
Gallery
Events
Everything posted by md1400cs
-
 Richard, Beyond so envying your skills I can now also dream about having a shipyard as perfect as yours. lol
 -
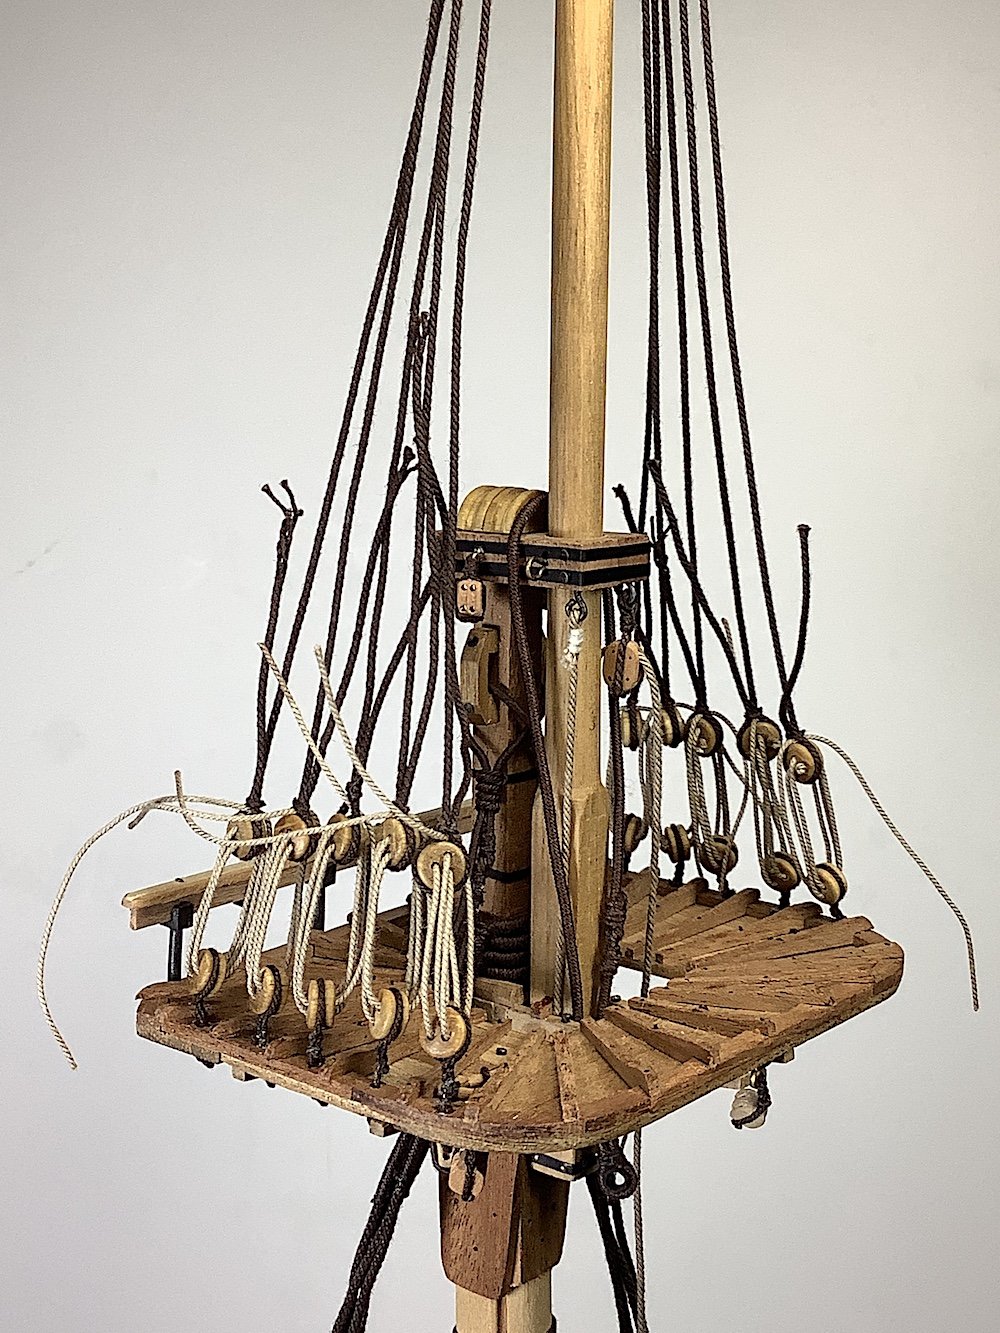
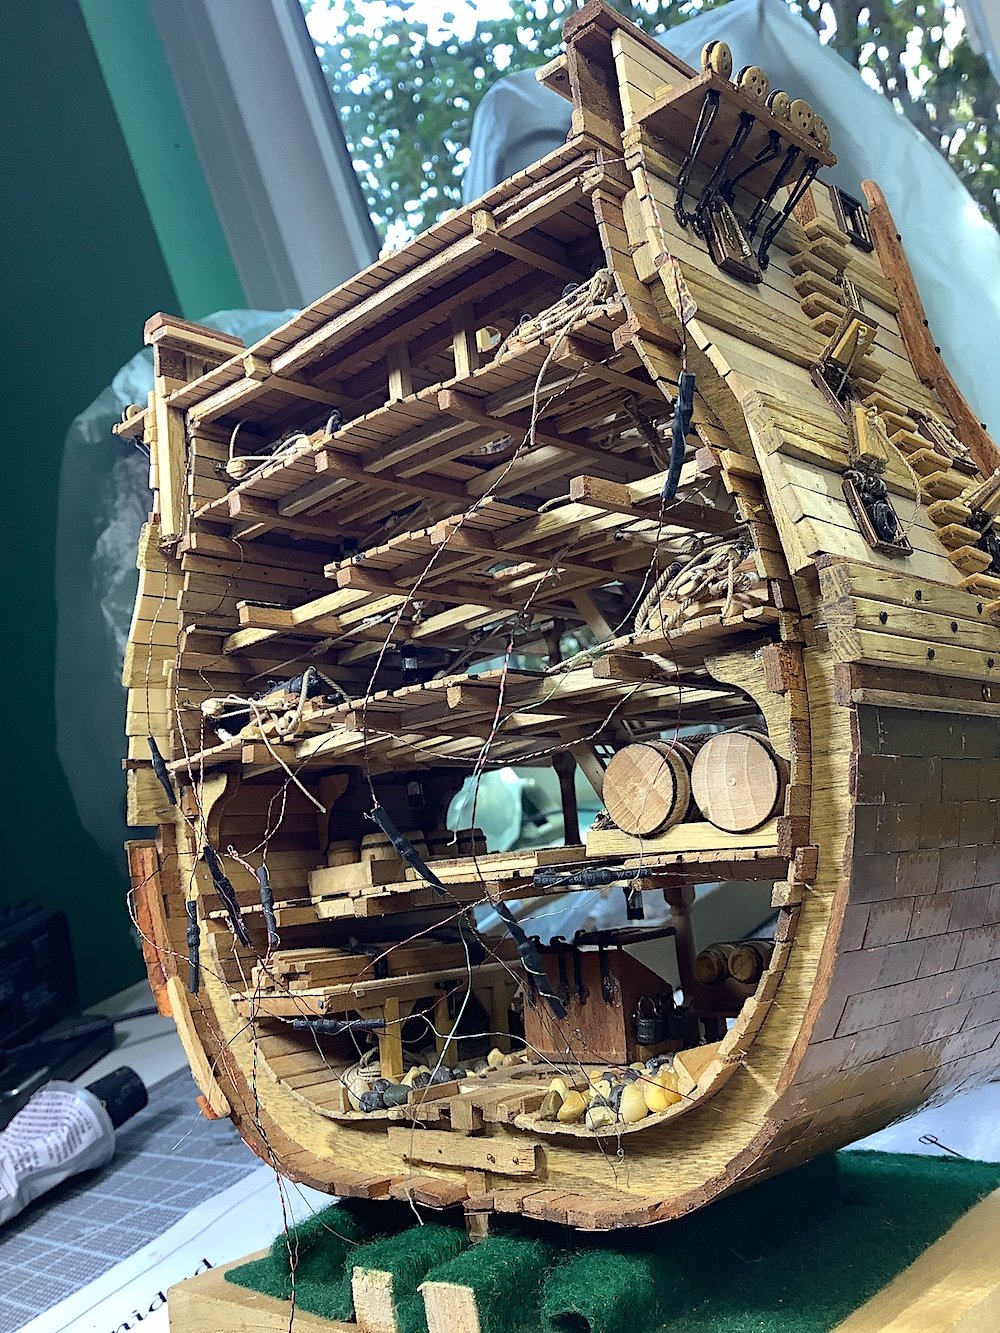
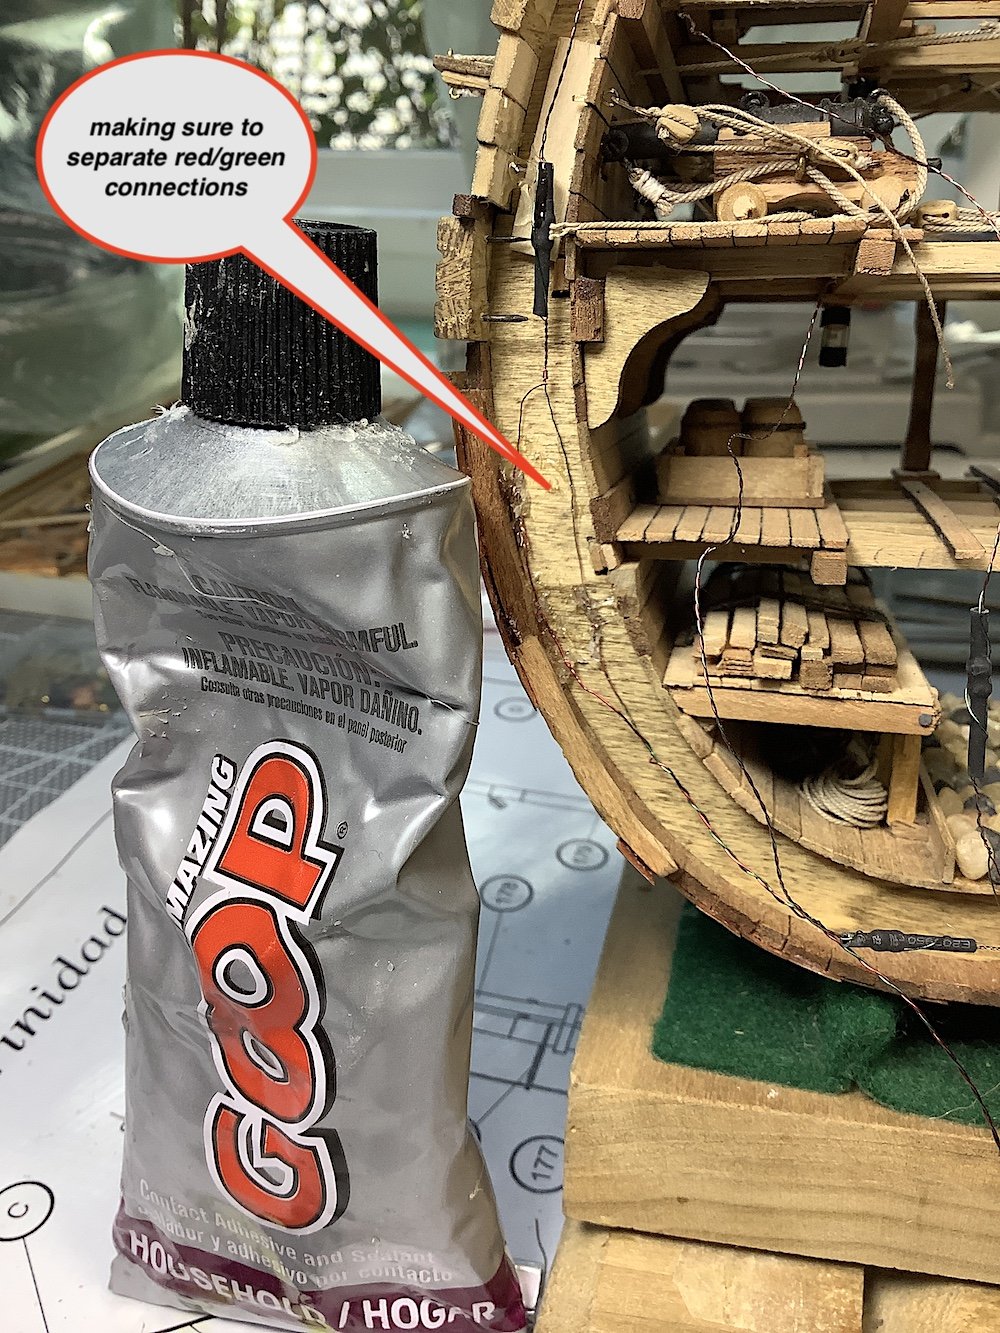
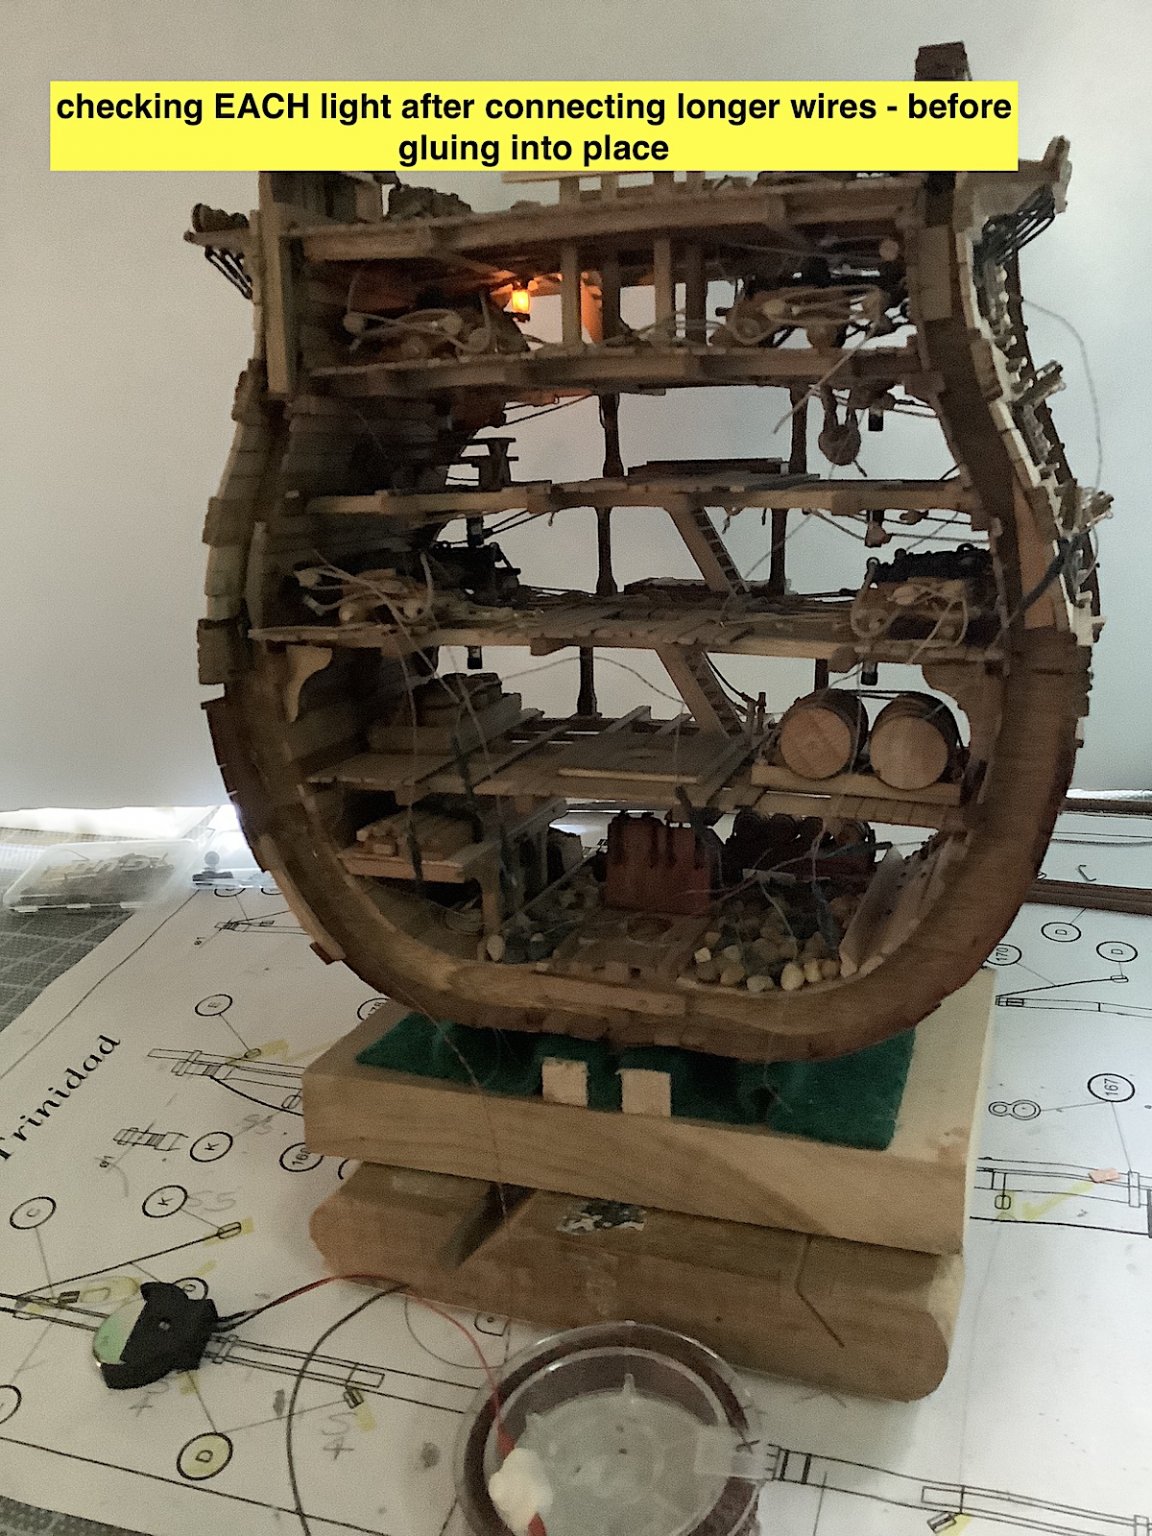
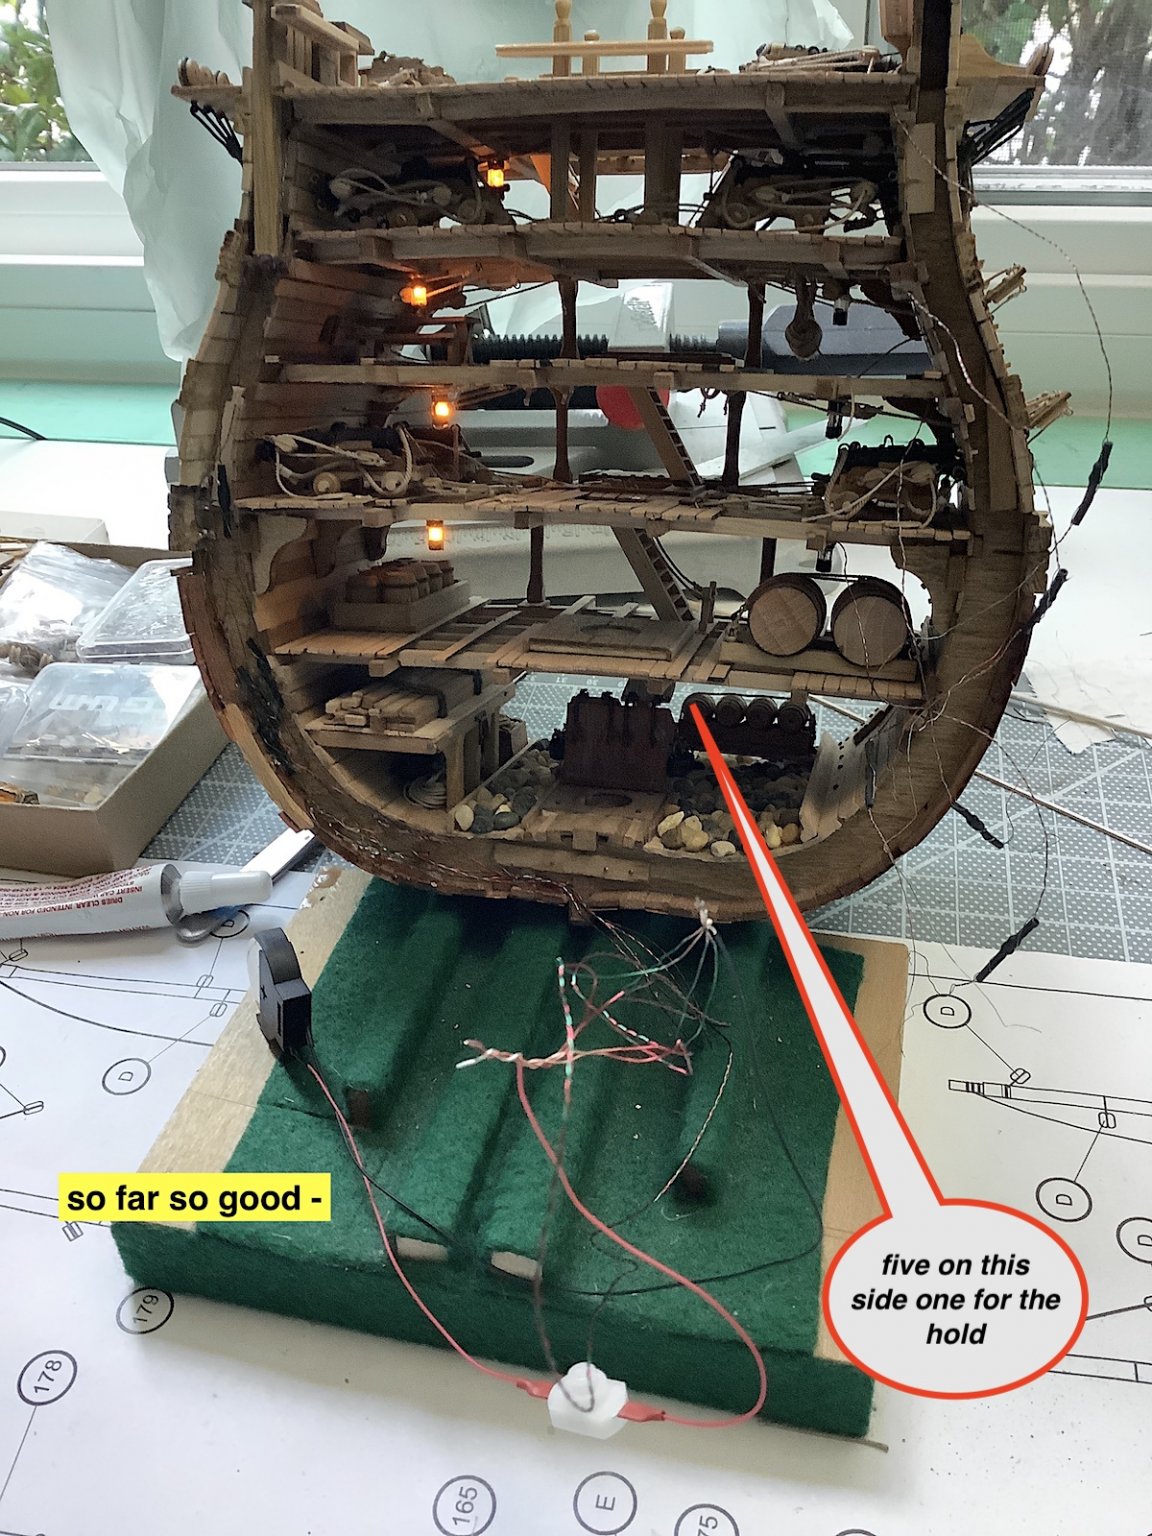
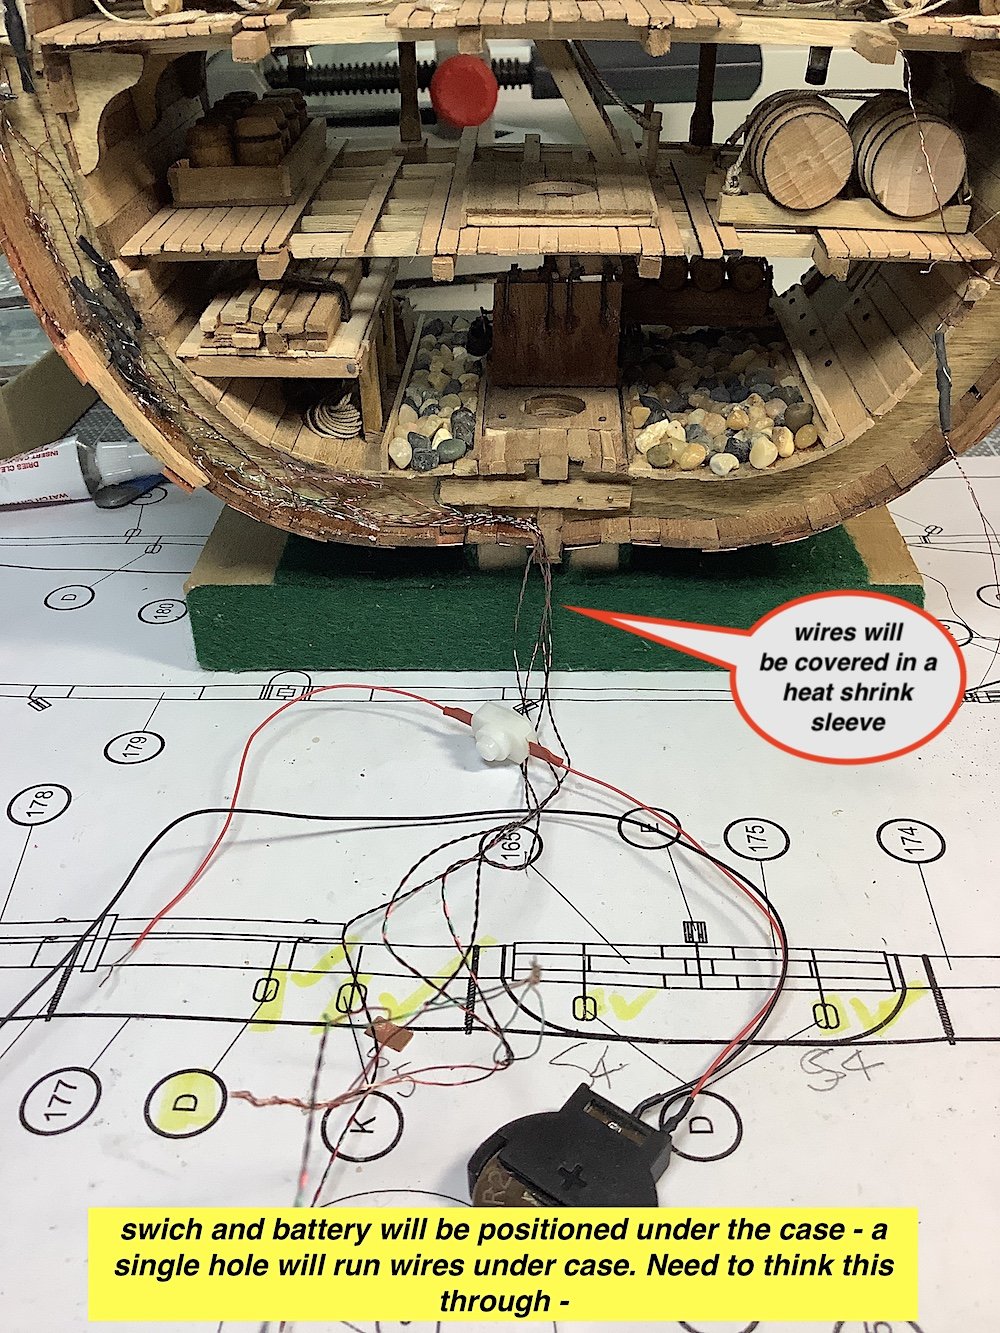
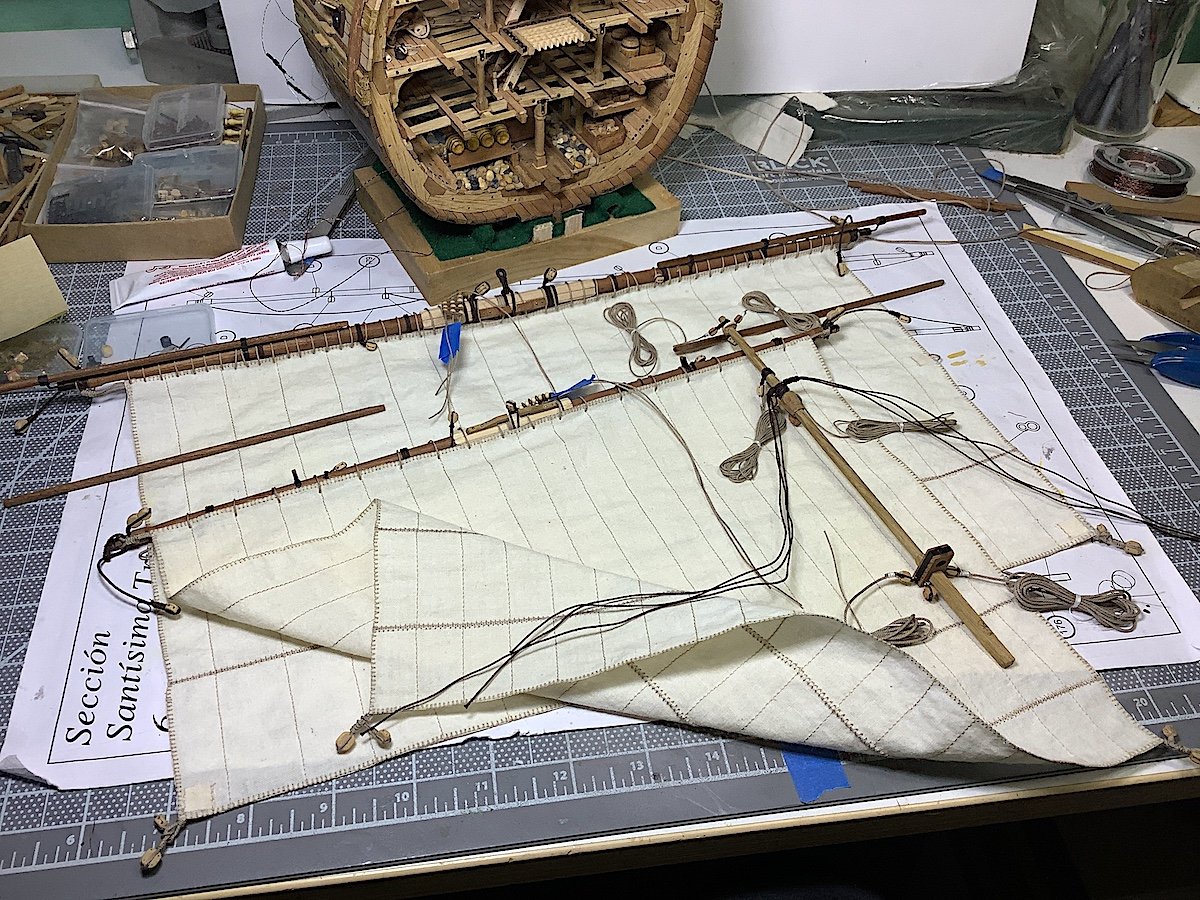
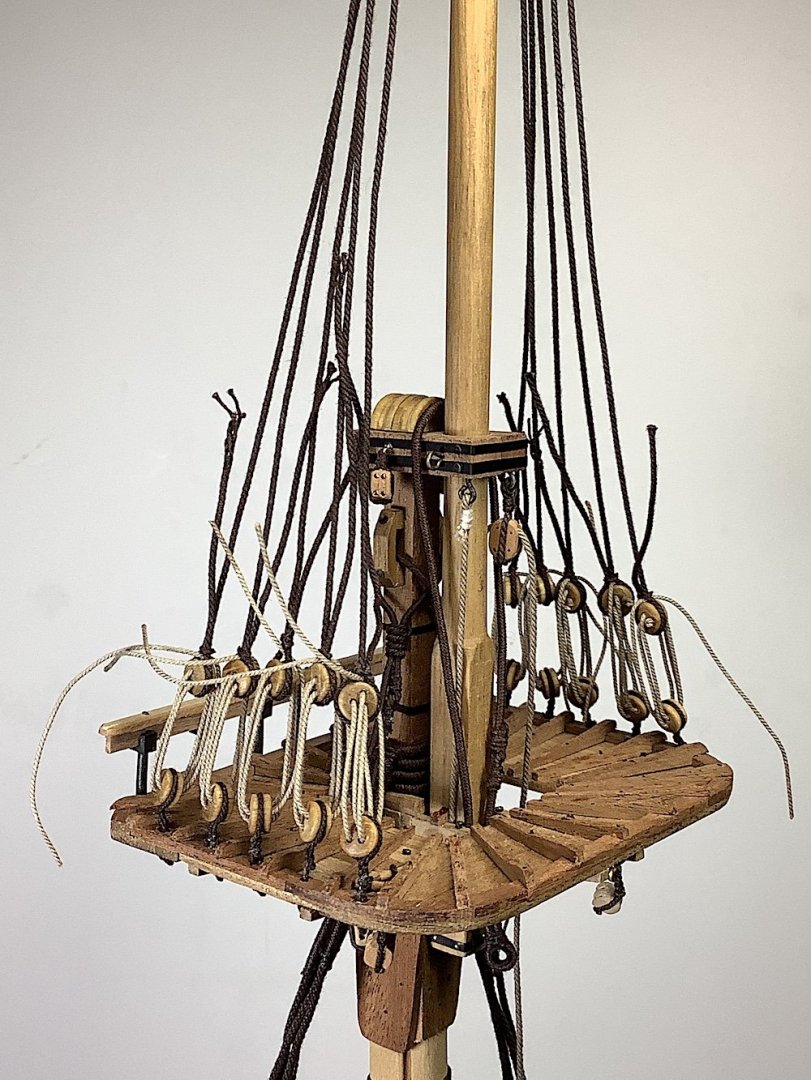
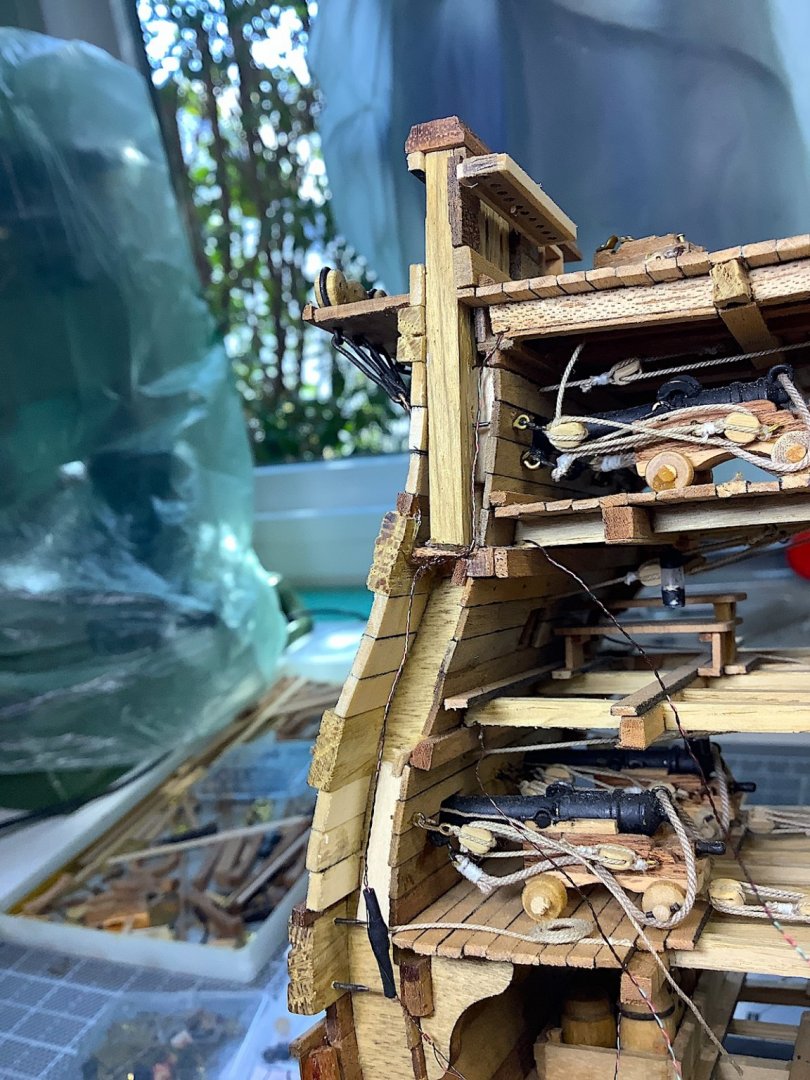
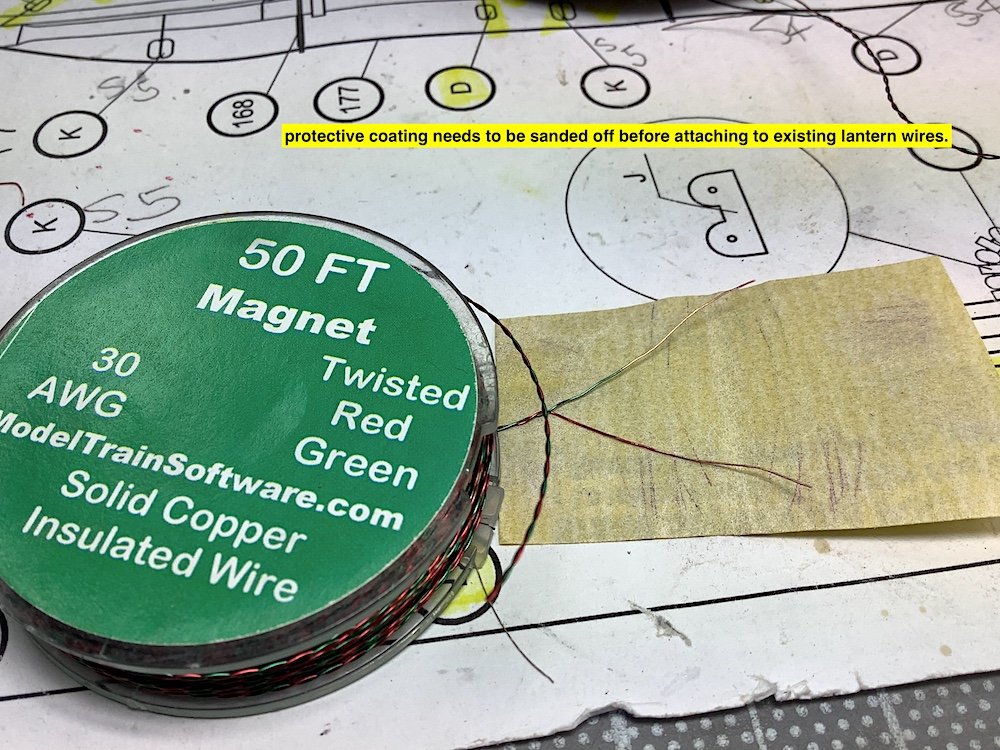
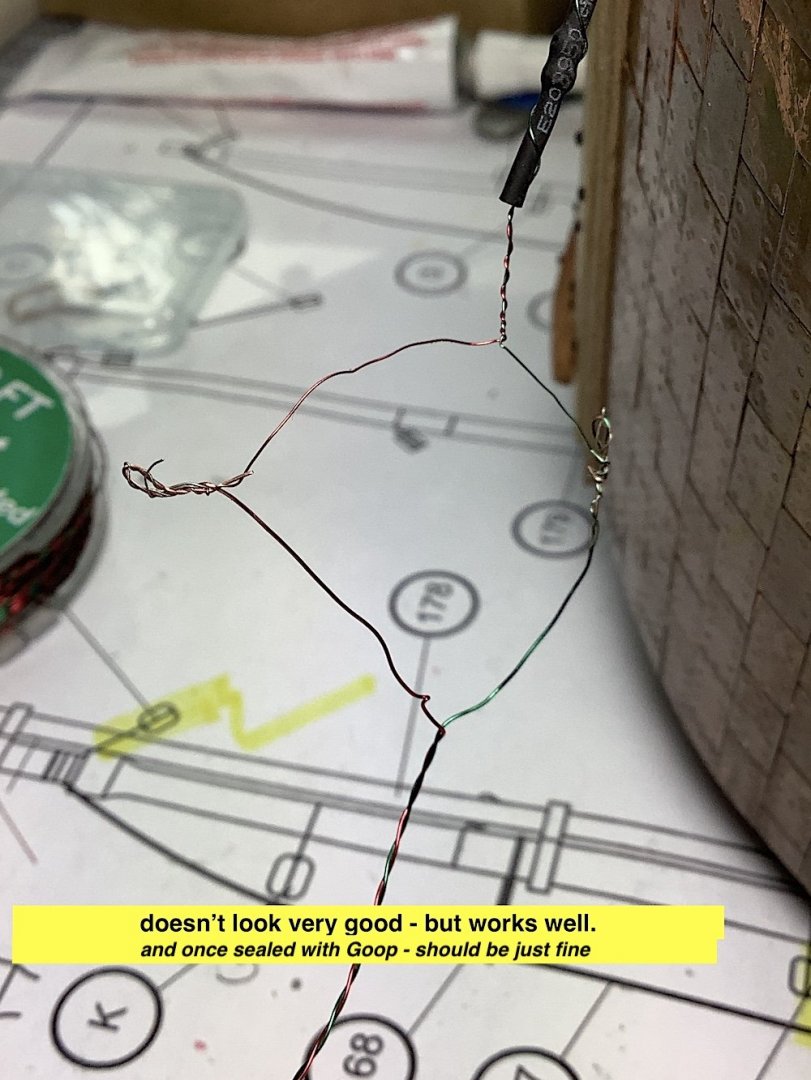
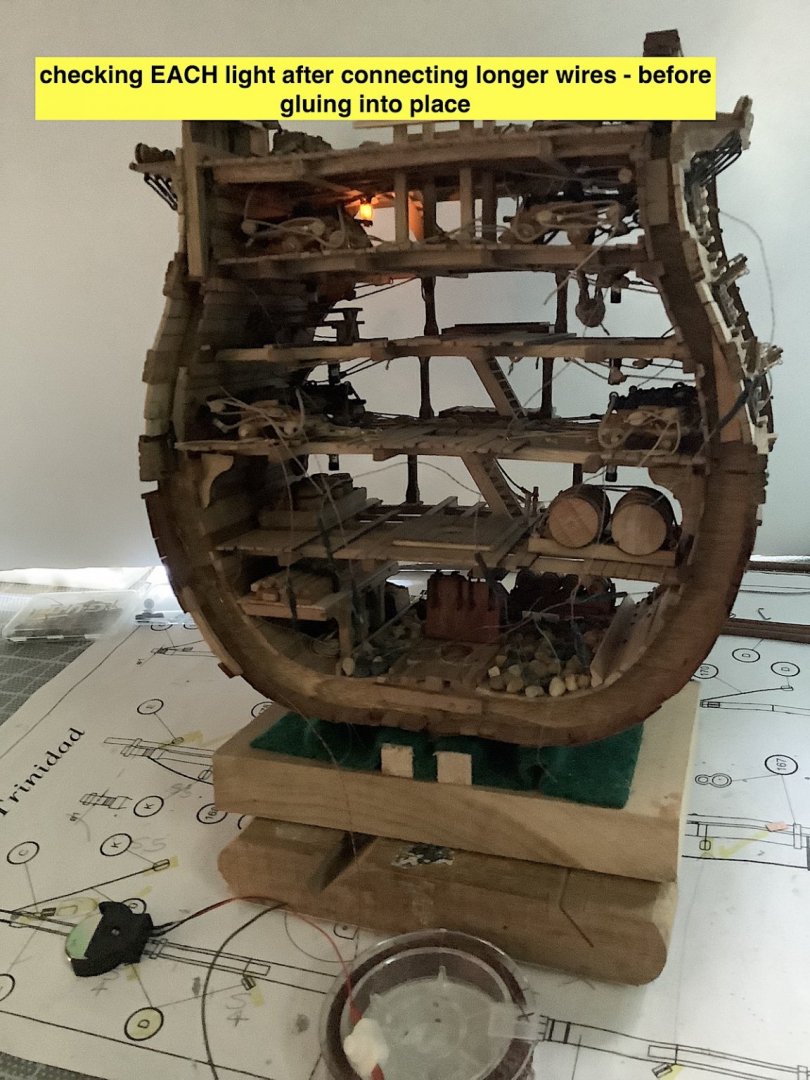
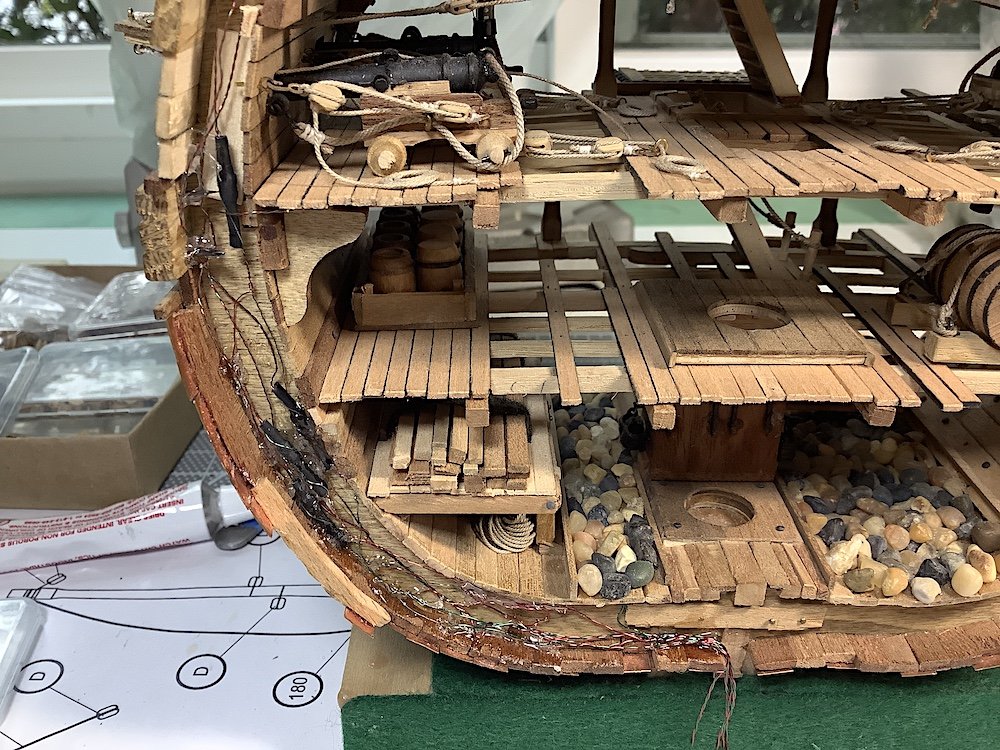
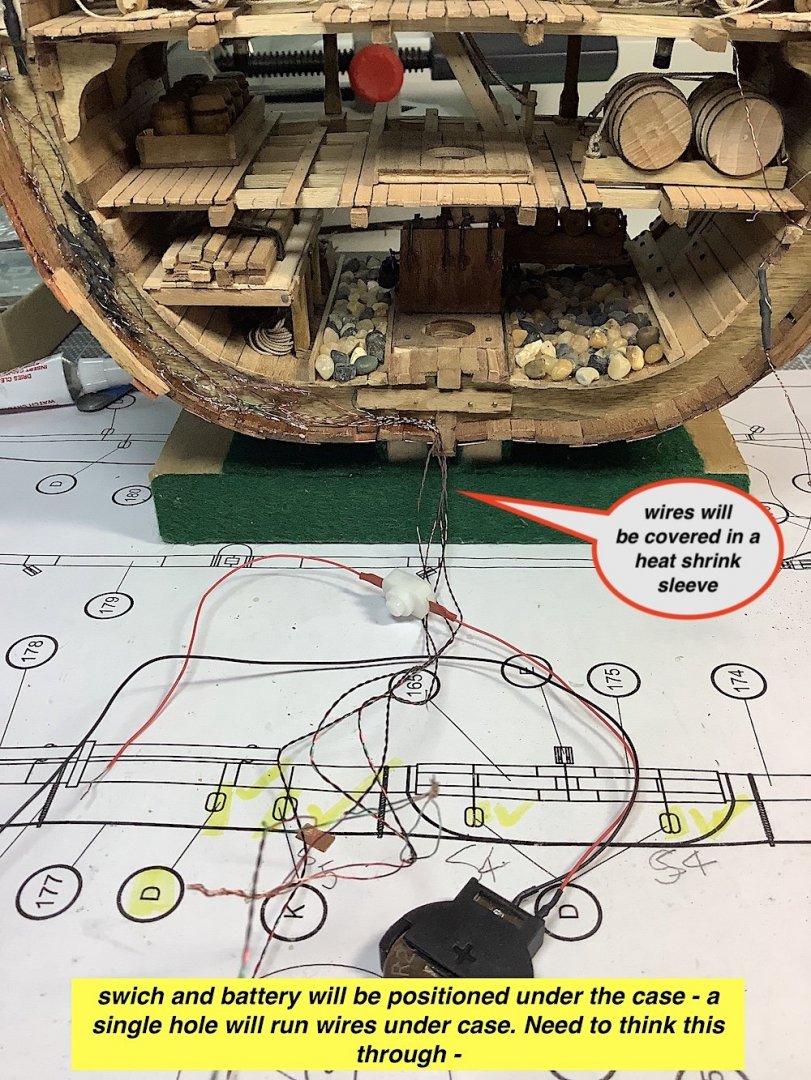
Hi Mates, Minor updates – been away, and decided to also give the shipyard a rest, but did manage to do a bit more recently. 1) Attached the top sail to its yard along with adding needed blocks. 2) Attached the shrouds and deadeyes to the lower platform 3) Now fixing into place the lantern wires. note the backside is NOT “finished”. The ship will be fitted into a clear three sided case, hung on a wall and only be seen from the front and to some extent the sides; so not an issue. Will, later, do some lateral detailing to even the side edges a bit more uniformly Adding needed extra lengths of electrical wires and then hiding them along the sides. Goop is perfect – it also serves as a sealant for the otherwise exposed connected wire twists. I thought of soldering the connections, but thought that it might create too much resistance especially when all the wires will then attach to a single battery. AND did not want ro risk melting these super tiny wires. gggrrrrr. FYI: purchased all of the lights and wires from Evan Designs (one of our retail sponsors) Here are a few images -- as always thanks for dropping by….


- 371 replies
-
- 11
-

-
Martyn, I also remember that Clayton on the Vasa site had some photos of the boat - he built one, if I remember - iffy these days haha


- 91 replies
-
- 3
-
-
- deagostini
- vasa
- (and 1 more)
-
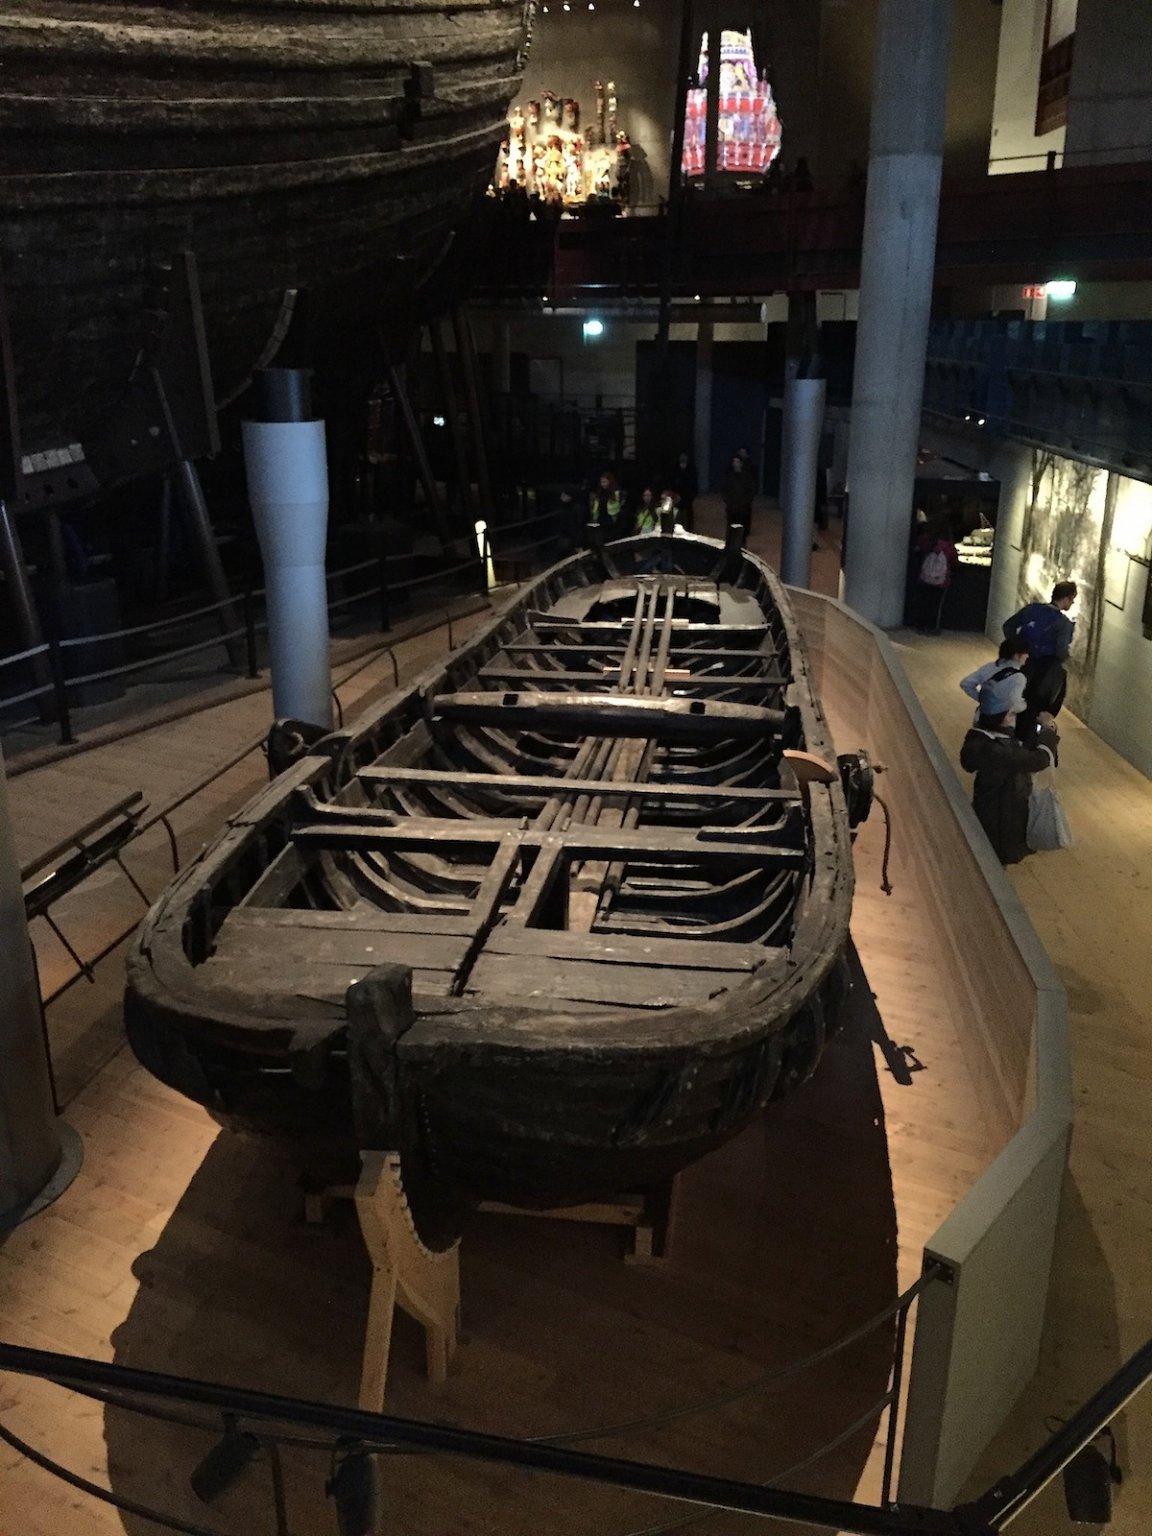
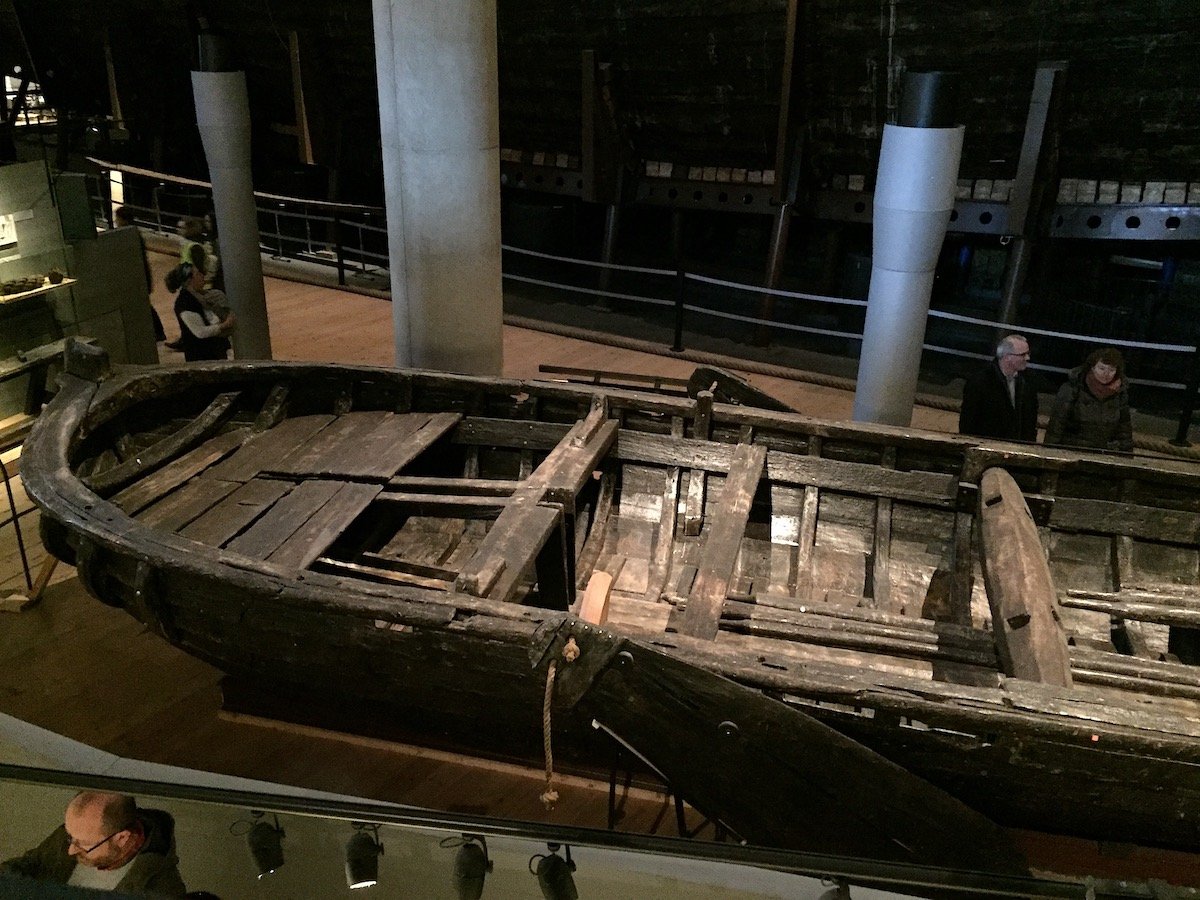
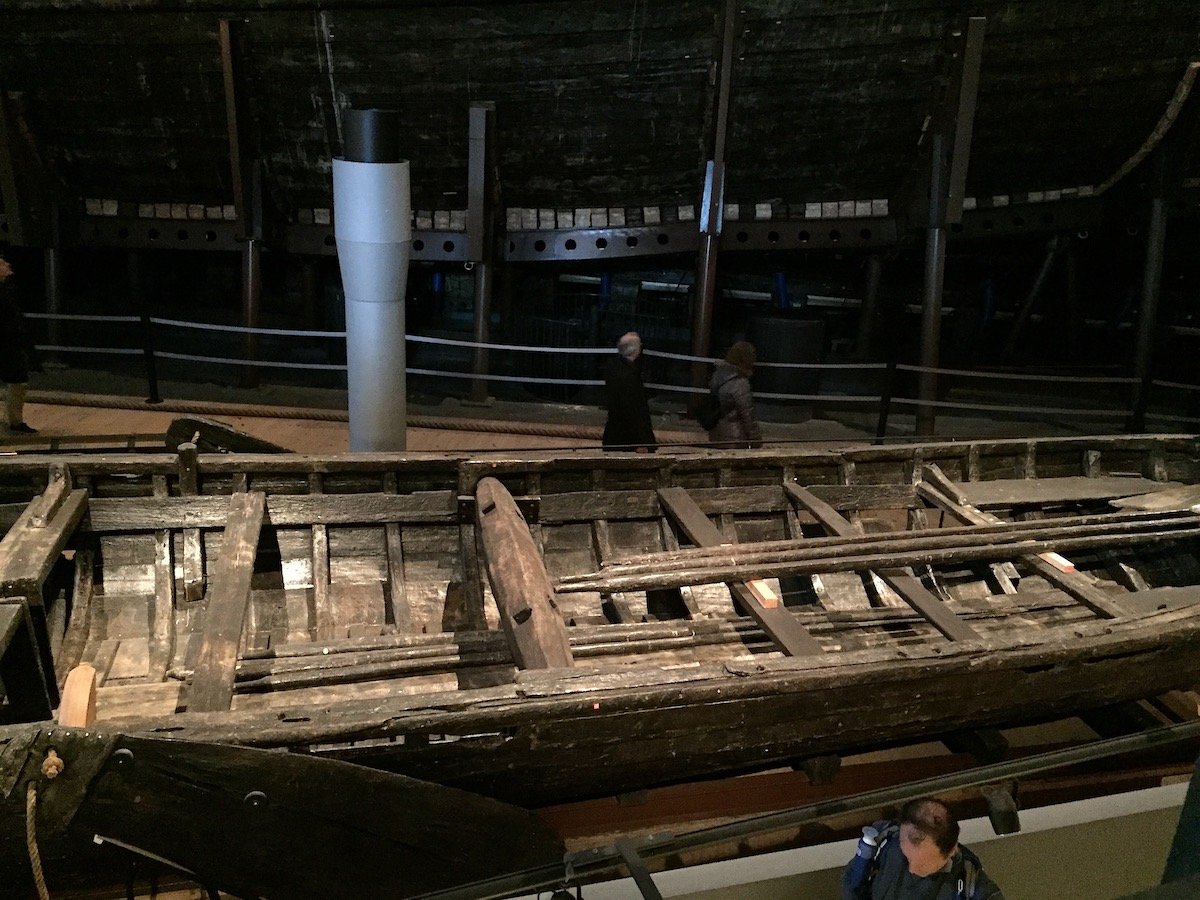
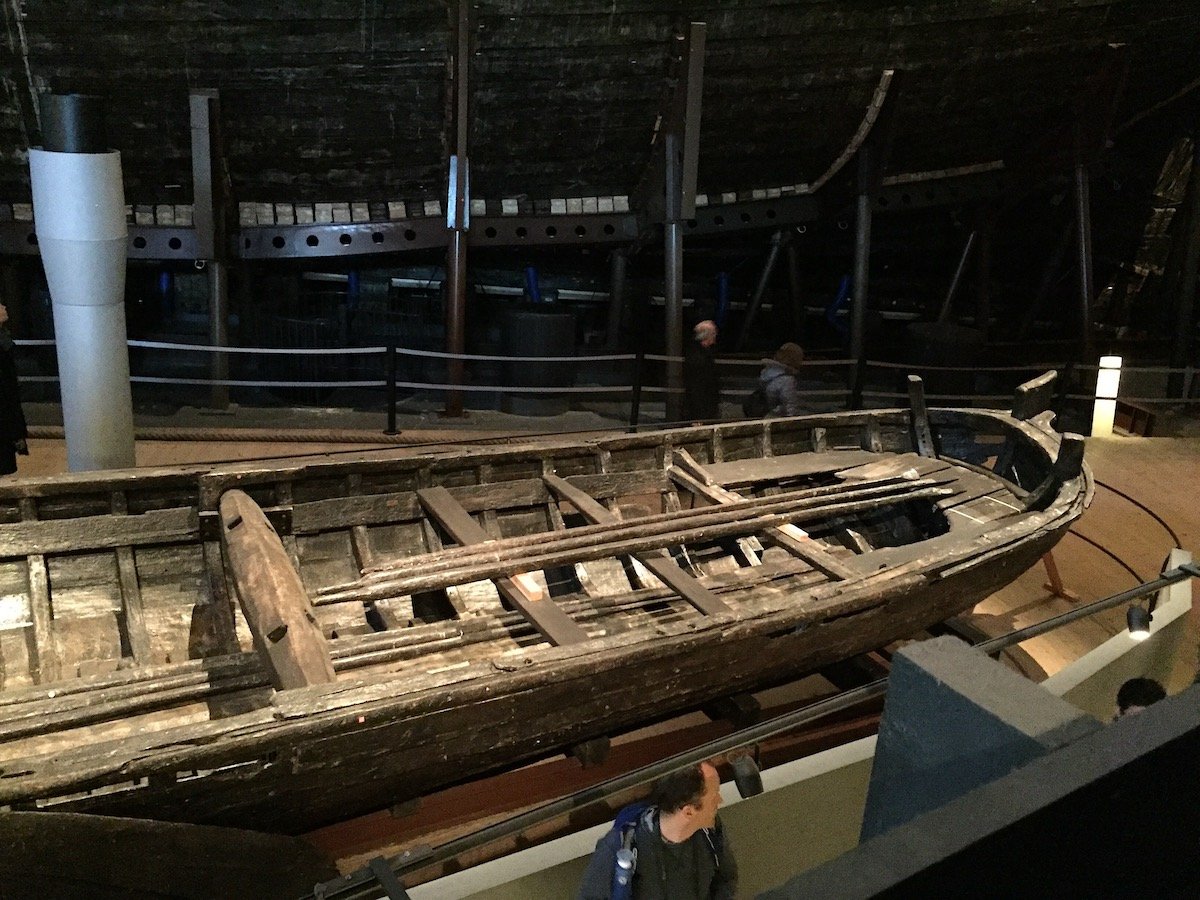
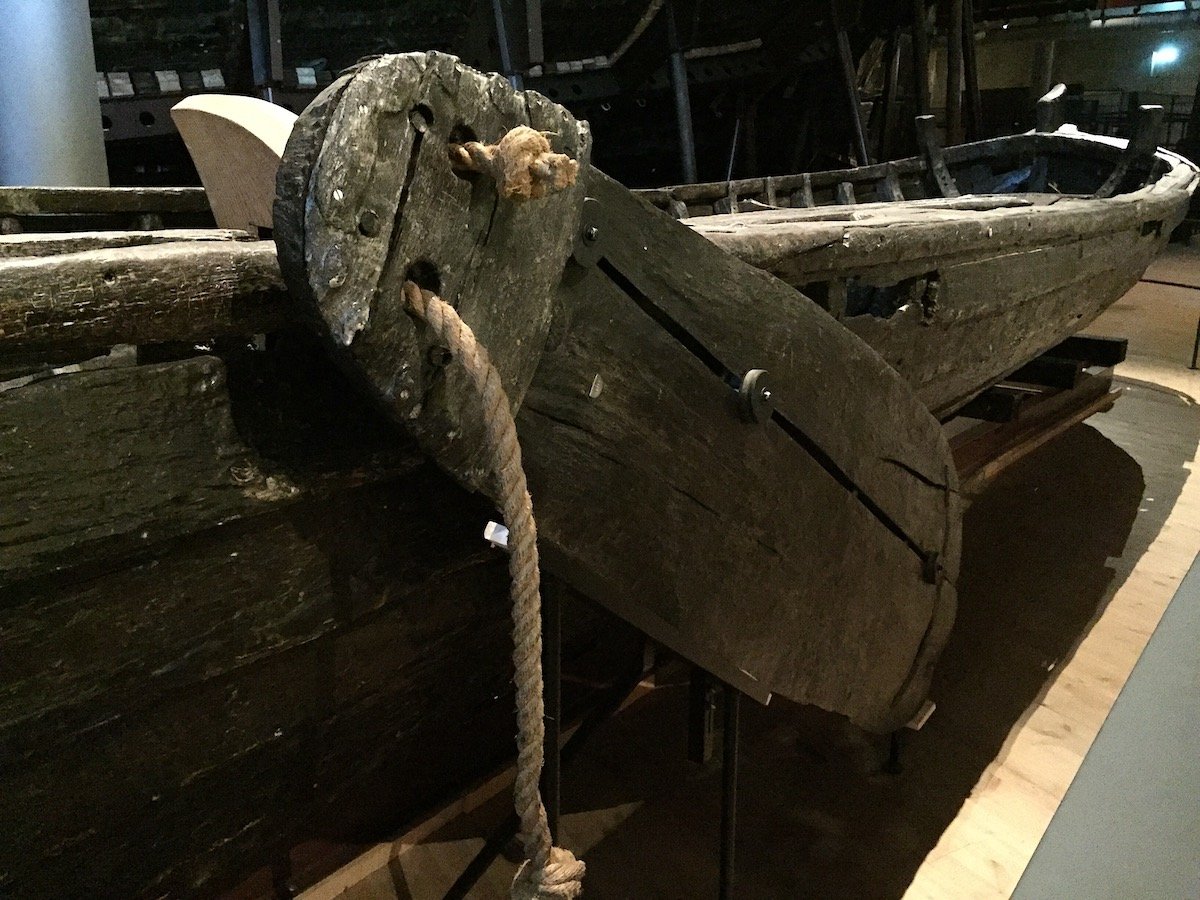
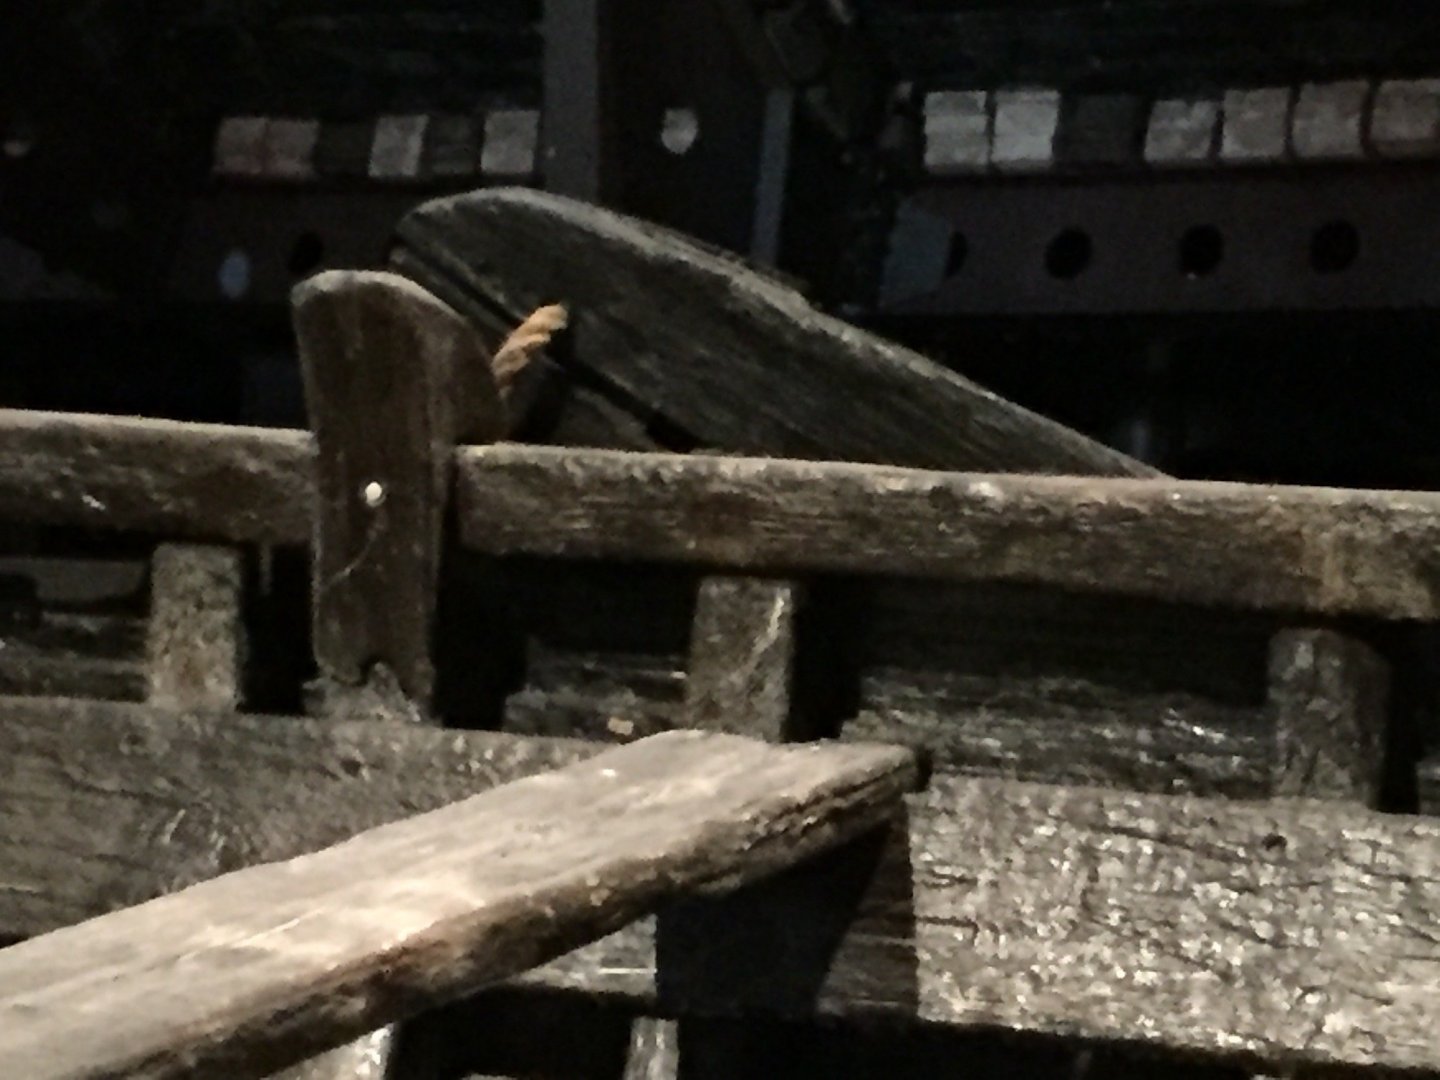
Martyn, I checked the DeAgostini instructions - interesting that the kit would not include "a" lantern, especially with the Museum being involved. Yours looks great. As you know I'm working on a "fix" for mine. Doubtful that it will be found - though glass bits might offer a clue, assuming that it was mounted at launch. PS: your painting details for all of those figures is absolutely superb Took a bunch of photos of the long boat when I visited the museum in 018, tempted to try to scratch build one -- or not haha So what's next - a rest first I would imagine. Cheers,
- 91 replies
-
- 3
-
-
- deagostini
- vasa
- (and 1 more)
-
Peter, Points well taken - and indeed the empirical data are not yet well seasoned in terms of 787 cycles. Yes ground collisions may be better hidden. After JALs batteries were catching fire (now as you know fixed) decided to buy BA - good call. I read a comprehensive article written by an engineer that questioned the ability of the 787 fuselage to hold together after a crash landing. --- The Max, however is another all together diff. issue - might have some criminal potential. PS: Sorry to take away from your log with these side comments - all done here Cheers,
- 366 replies
-
- 2
-
-
- bellerophon
- victory models
- (and 2 more)
-
Steven, Been away the last couple of weeks – been following on my iPad, but forgot my login info haha – now back at home so I can post again to builds that I follow 🤔 Your work and log are allowing so much learning as well as following a beautifully done build.
-
Peter, Been away the last couple of weeks – been following on my iPad, but forgot my login info haha – now back at home so I can post again to builds that I follow 🤔 Nice work PS: The crew of my return flight let me upfront for taxi, climb to cruise - and then some - My first time in a B787 sweet machine. Start ups are - well - not the way I used to have to do them haha
- 366 replies
-
- 2
-
-
- bellerophon
- victory models
- (and 2 more)
-
E.J, Been away the last couple of weeks – been following on my iPad, but forgot my login info haha – now back at home so I can post again to builds that I follow 🤔 Nice updates. Liked your yard supports haha Yes that book is great - So sails - well that will be a new challenge good luck - could be the most difficult bits to get right unless you keep them all furled then much easier IMO. PS: as you know they (sails) add huge amounts of work adding many lines and blocks - then finding enough pins to locate the ropes - have fun my friend. Regards,
-
Marc, As alway brilliant work especially in the medium that you are working with !!
- 2,699 replies
-
- 5
-
-
- heller
- soleil royal
- (and 9 more)
-
Richard, As always brilliant work!!
-
Martyn, Been away the last couple of weeks – been following on my iPad, but forgot my login info haha – now back at home so I can post again to builds that I follow 🤔 A big congratulations!! indeed a beautiful example of the Vasa - PS: Also really like the stern lantern - was it part of the kit? Cheers,
- 91 replies
-
- 4
-
-
- deagostini
- vasa
- (and 1 more)
-
Been away the last couple of weeks – been following on my iPad, but forgot my login info haha – now back at home so I can post again to builds that I follow 🤔 Really nice Frank - She will be a beauty!!
- 510 replies
-
- 1
-
-
- reale de france
- corel
- (and 1 more)
-
Frank, This kit is way above my skill set - really enjoying following your excellent work. It's nice to dig into something totally "new" keeps this hobby stimulating IMO. Your research is certainly also part of the pleasure of your current log. Cheers,
- 510 replies
-
- 2
-
-
- reale de france
- corel
- (and 1 more)
-
Richard, Brilliant. PS: Your shipyard table looks way to organized haha PS2: Is that a big BMW you drive around on? Regards,
-
Well said Bob - indeed the best way - this also avoids possibly splitting narrow planks when hammering in nails however small. Emmet - welcome back
- 50 replies
-
- 2
-
-
- soleil royal
- first build
- (and 1 more)
-
Richard, Again, you raise the bar very high with you super detailed skill set - congrats - looking so good.
-
E.J., Just catching up - Woa your ship looks awesome outdoors in natural light. I'm still so impressed with all of those well detailed carvings - great addition to your skill set. Lower standing gigging and stays also look just right. Cheers,
-
Marc - you're responsible for this fix -thanks SO much PS: Glad that it meets with your approval I'll revisit here one last time - now back to current very slow project
-
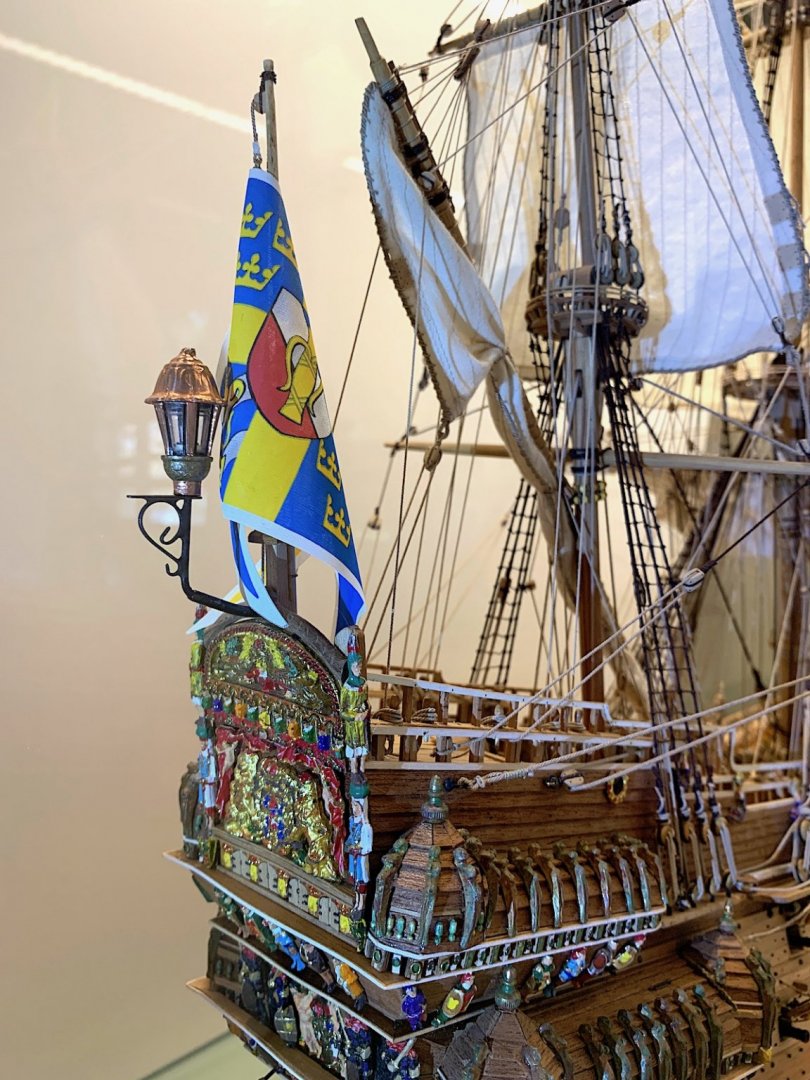
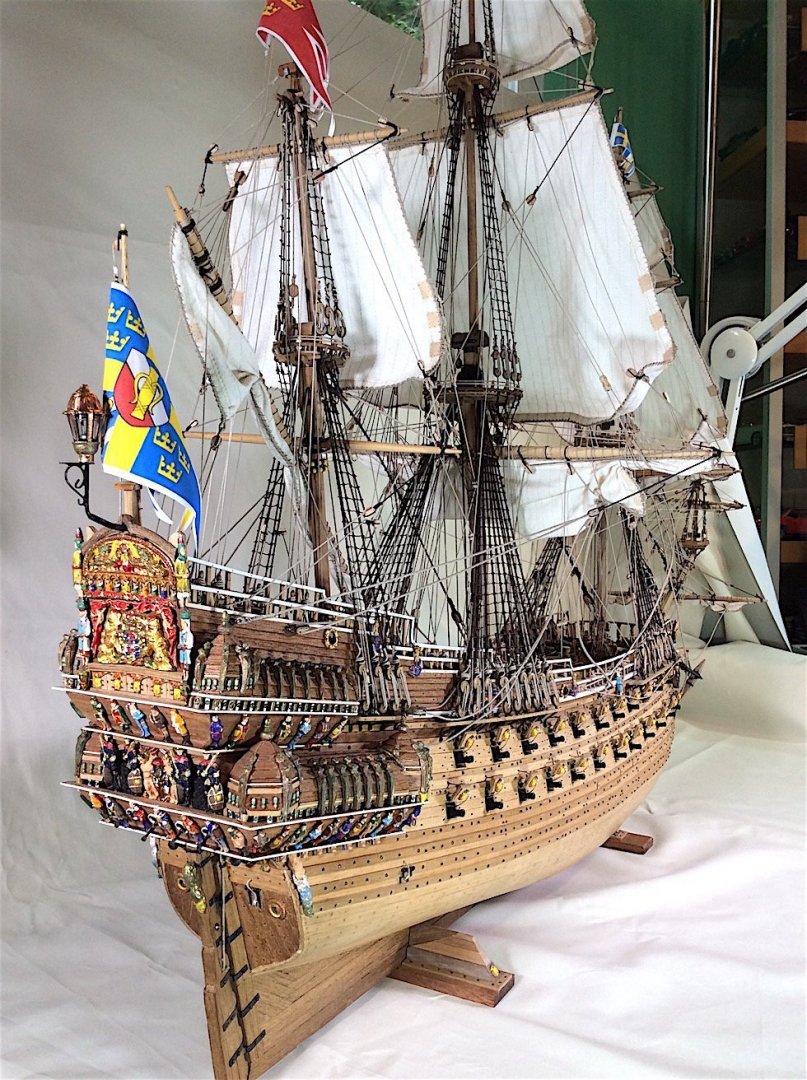
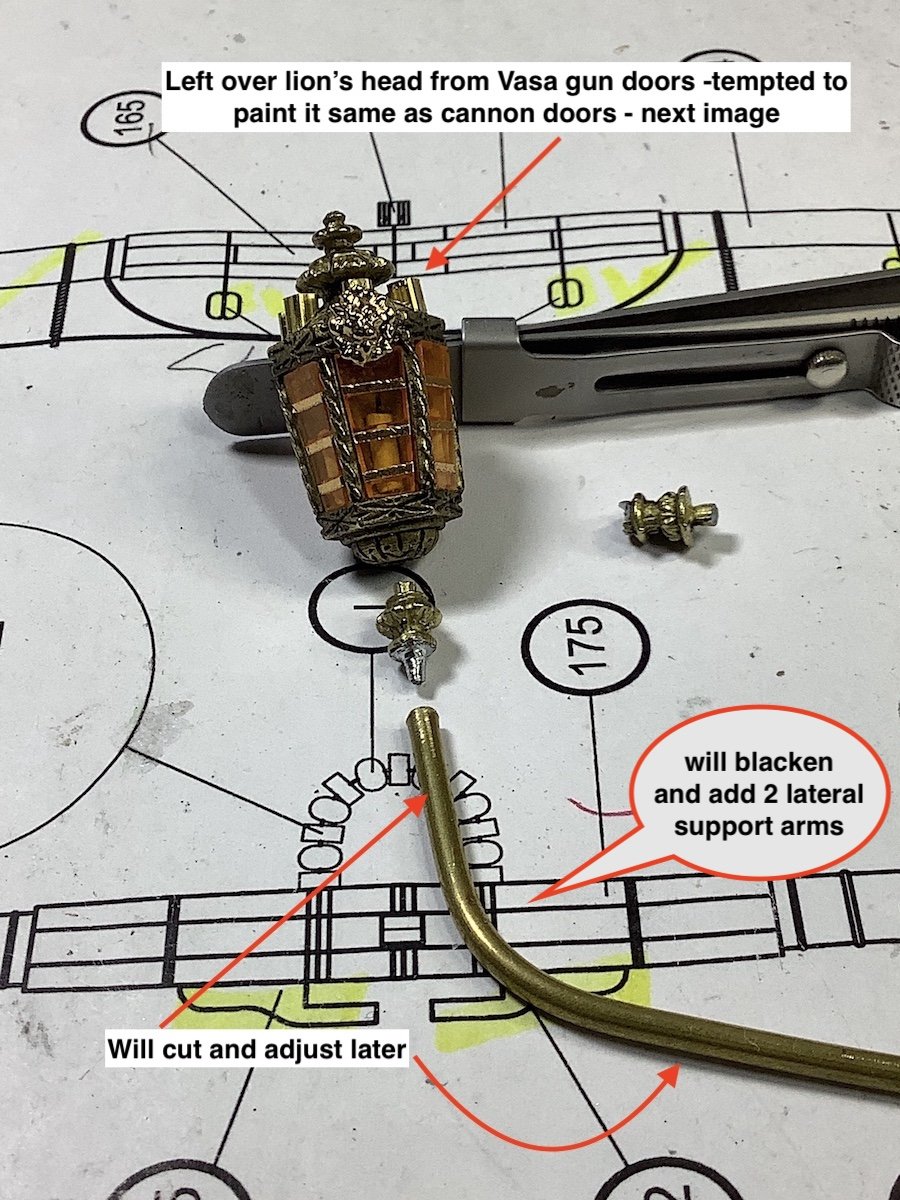
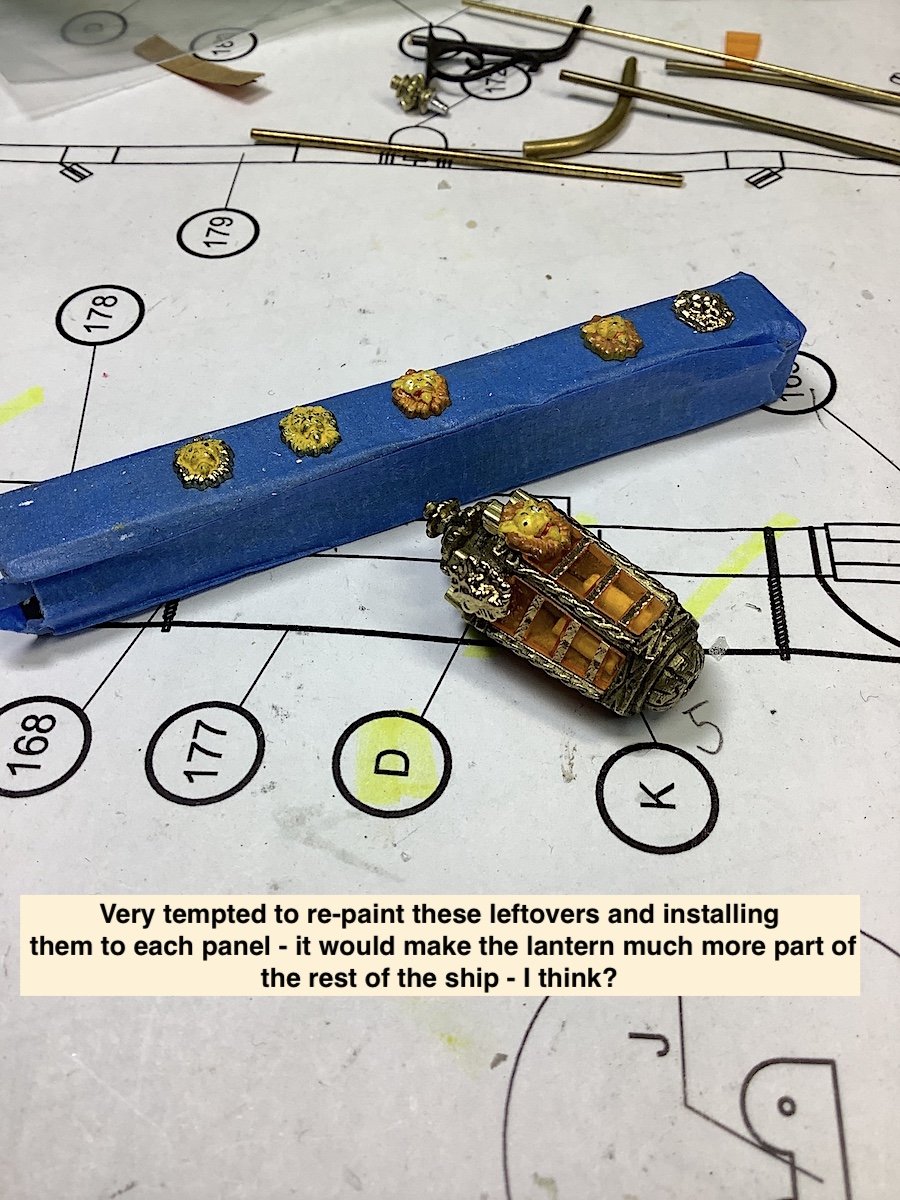
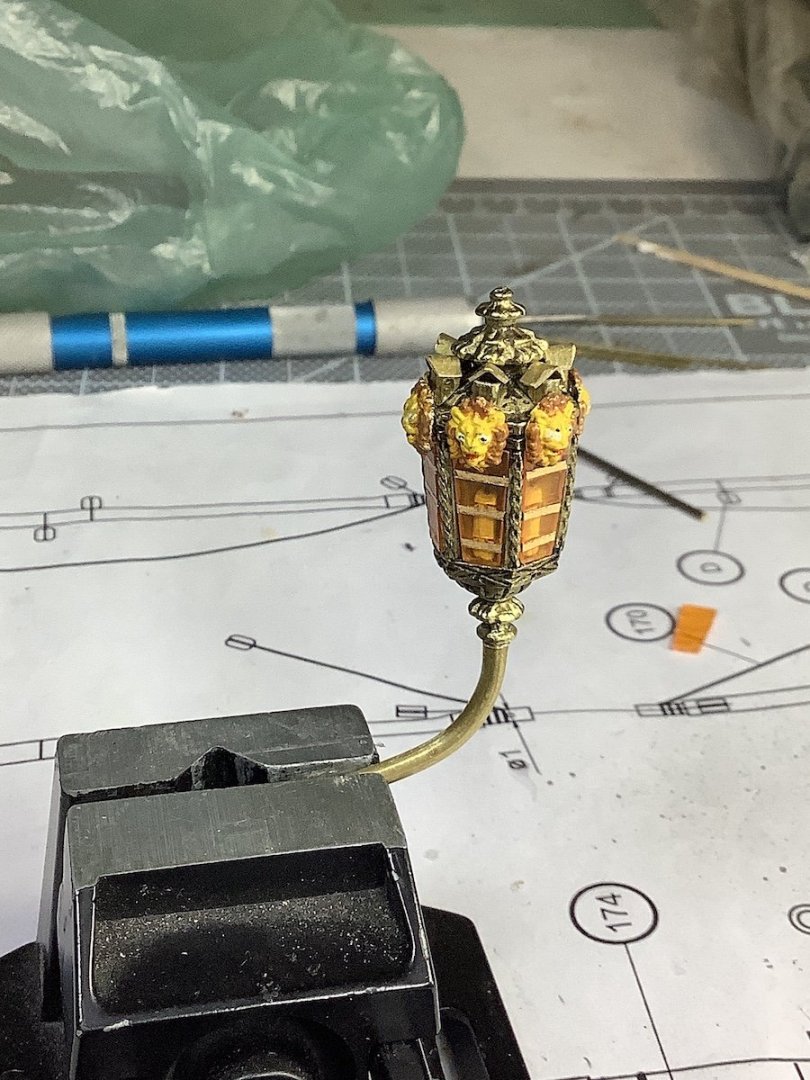
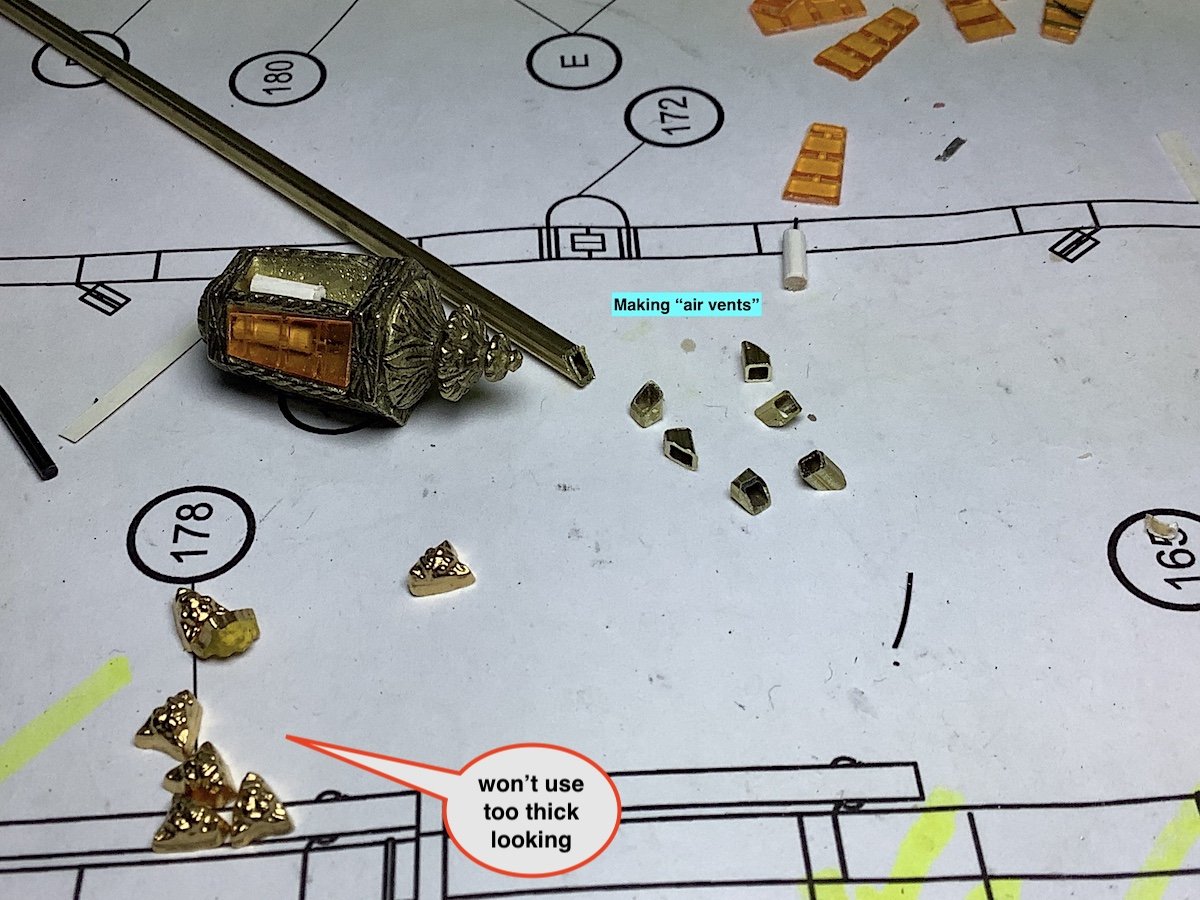
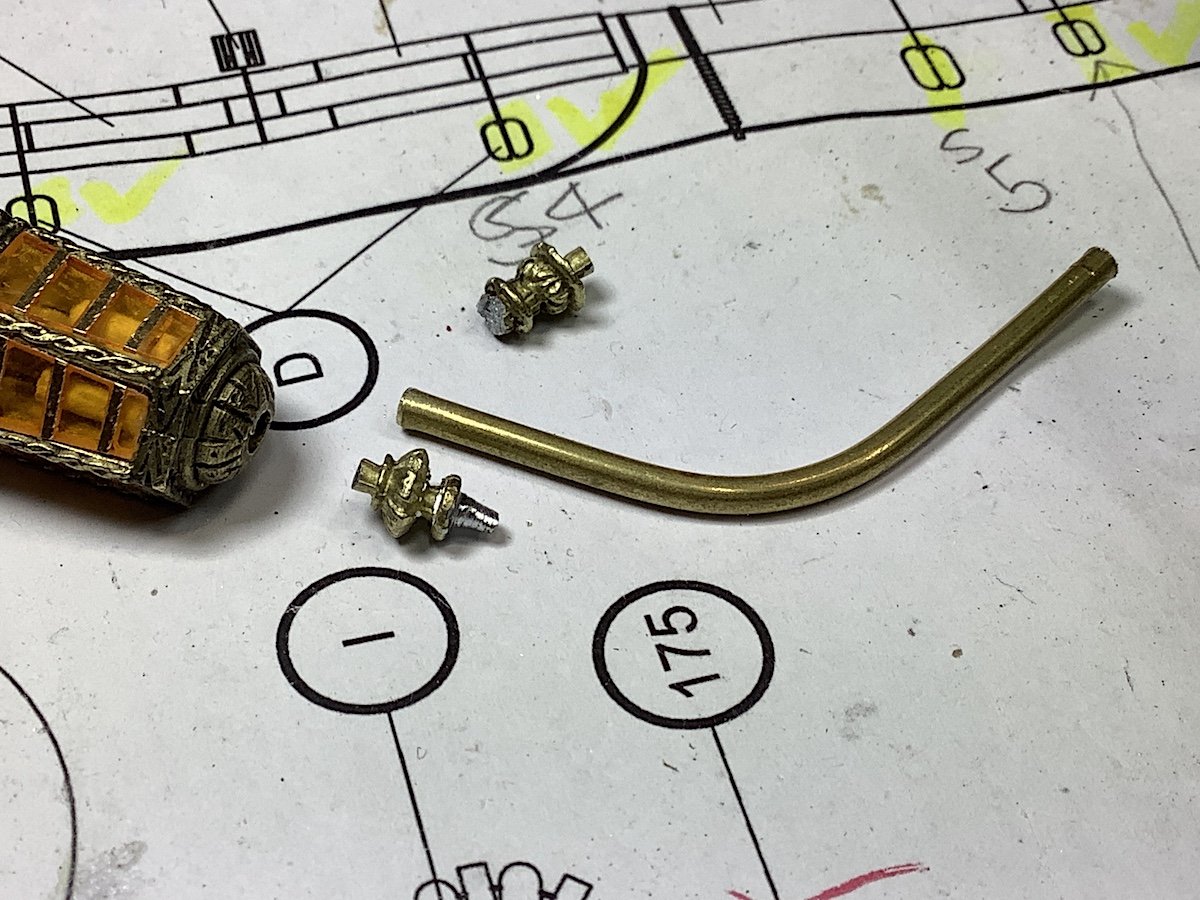
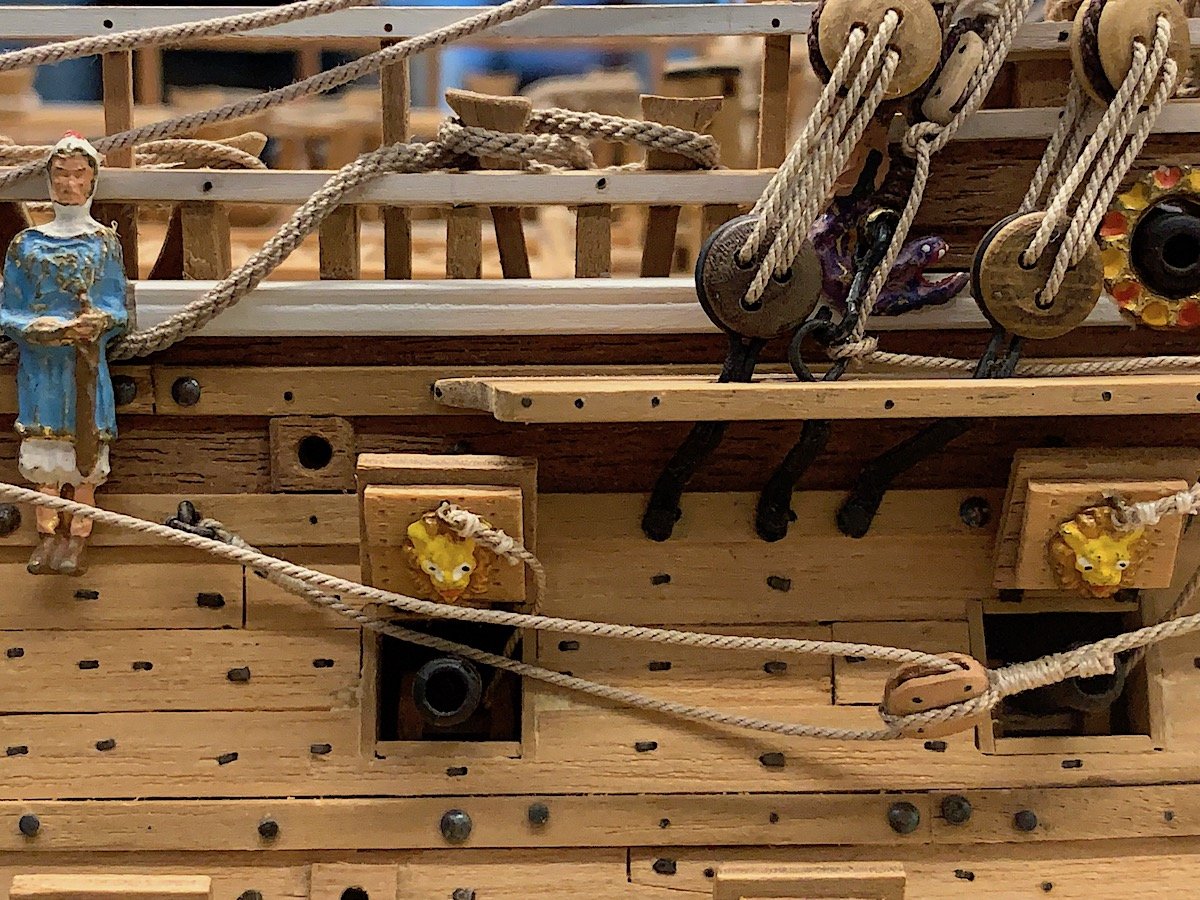
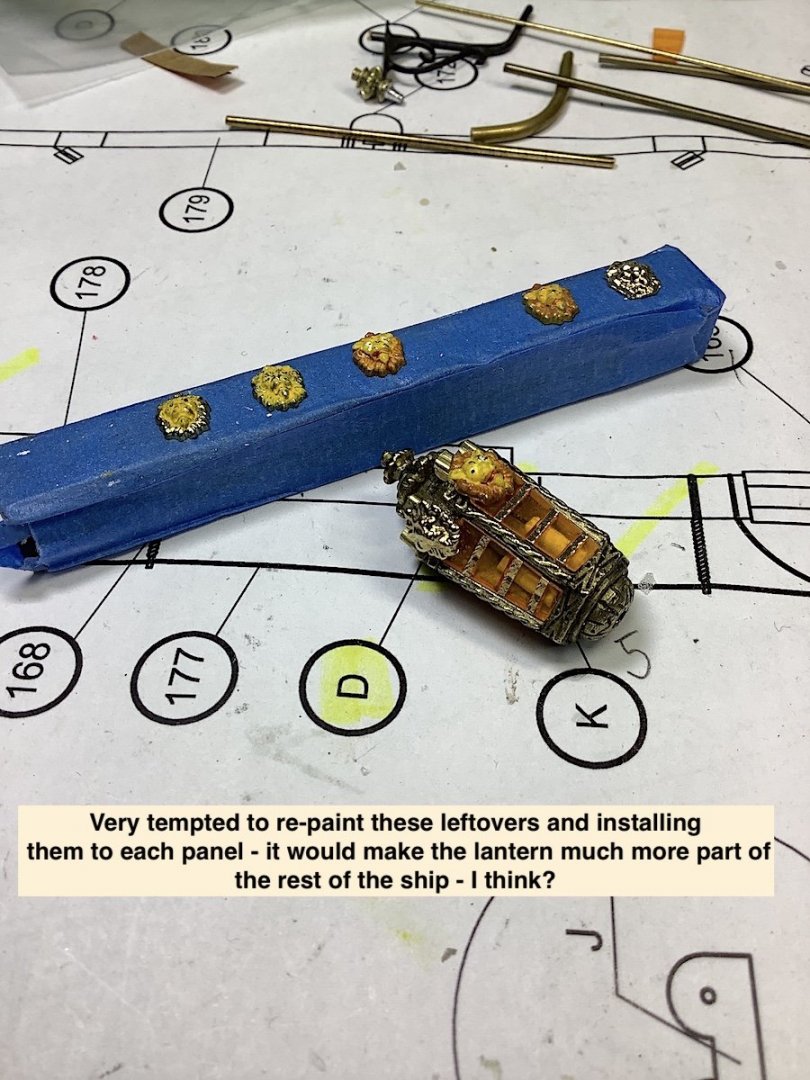
Javlin: way too kind – thanks so appreciated Dark Angel: Glad that you will find some inspiration – so kind of you to post. I’ve also found so much inspiration from builds that I follow here as well. Cheers. Richard: Thanks so much – your work, BTW, is brilliant indeed EJ: We’ve been following each other’s builds for quite a while now – as always so kind of you thanks. Not quite finished – but now done. Afterthoughts made me think that those vent stacks (not correct anyway) but still needed a bit more of a fix. So done here – now for the install – Need to coordinate with the Admiral - she will need the Vasa's resting space in Feb for a party she’s having (baby shower –for a friend’s daughter) – so will remove the Vasa, and its case then. This lantern will certainly look more appropriate - glad that I finally got around to this bit. Mates thanks for the likes and just dropping by,
-
Doris, So nice to see your work (no art actually) back on site again. Beyond stunning !!! Respectfully,
- 1,035 replies
-
- 3
-
-
- royal katherine
- ship of the line
- (and 1 more)
-
Richard, As always dropping by your shipyard is a real treat - your work with metals combined with wood is superlative -beyond well done indeed. And the scaling of these bits together is just first class. Nice informative sheets as well. Cheers,
-
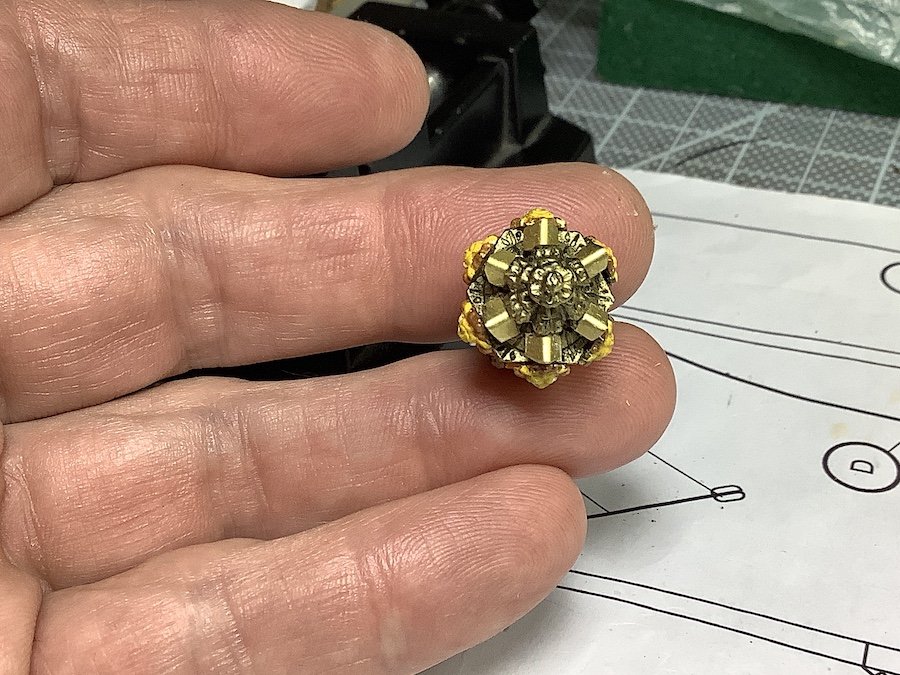
Hi Mates, Thanks for your nice thoughts and visits, Here are some updated images. Next post will be when installed. Cheers

-
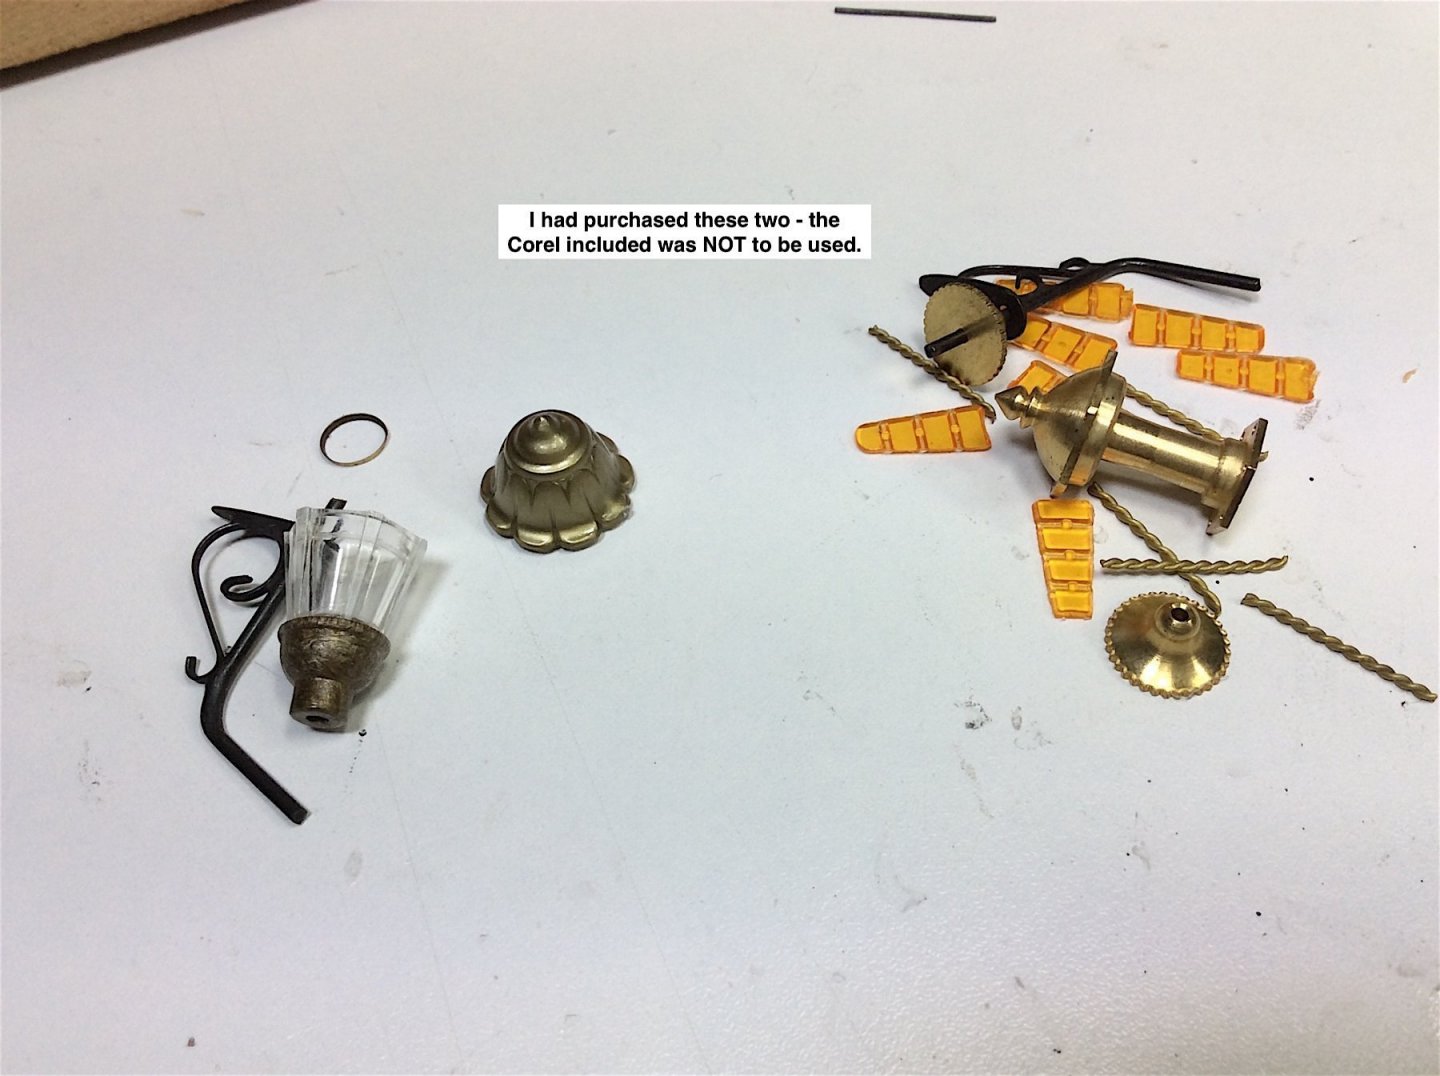
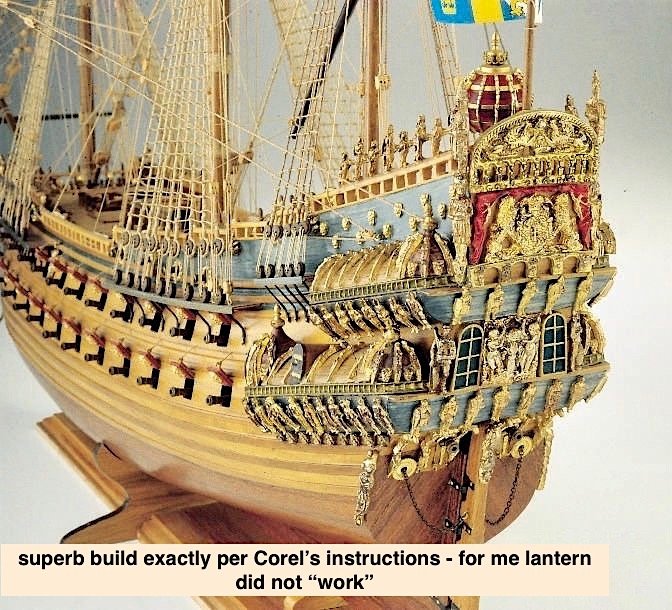
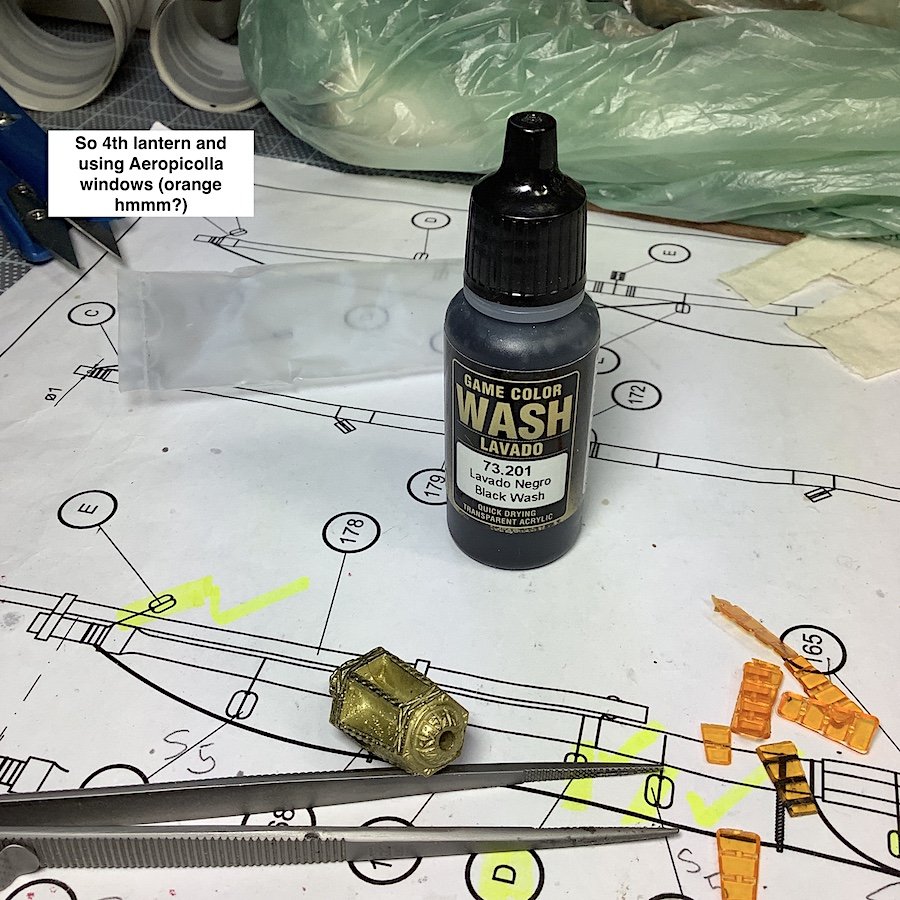
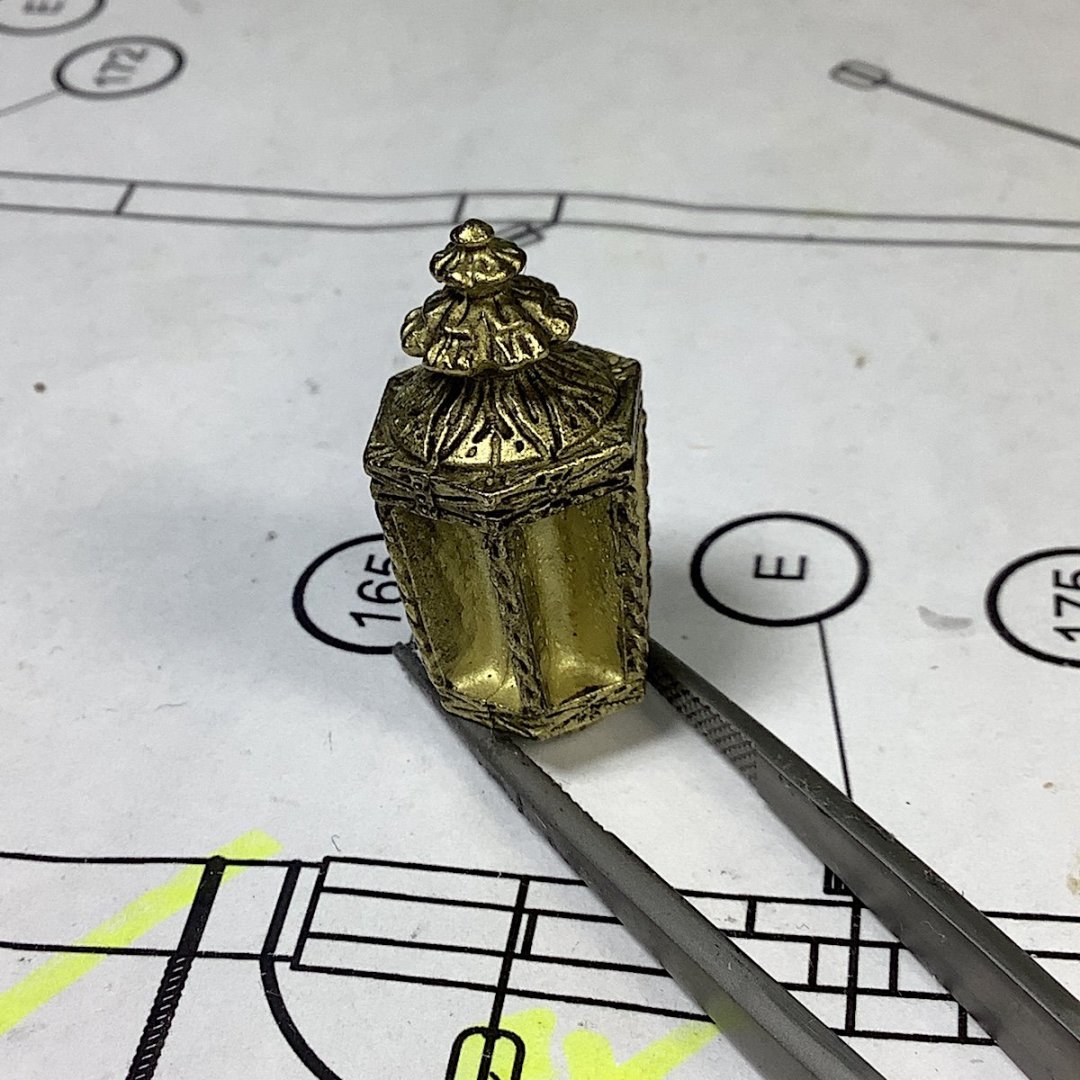
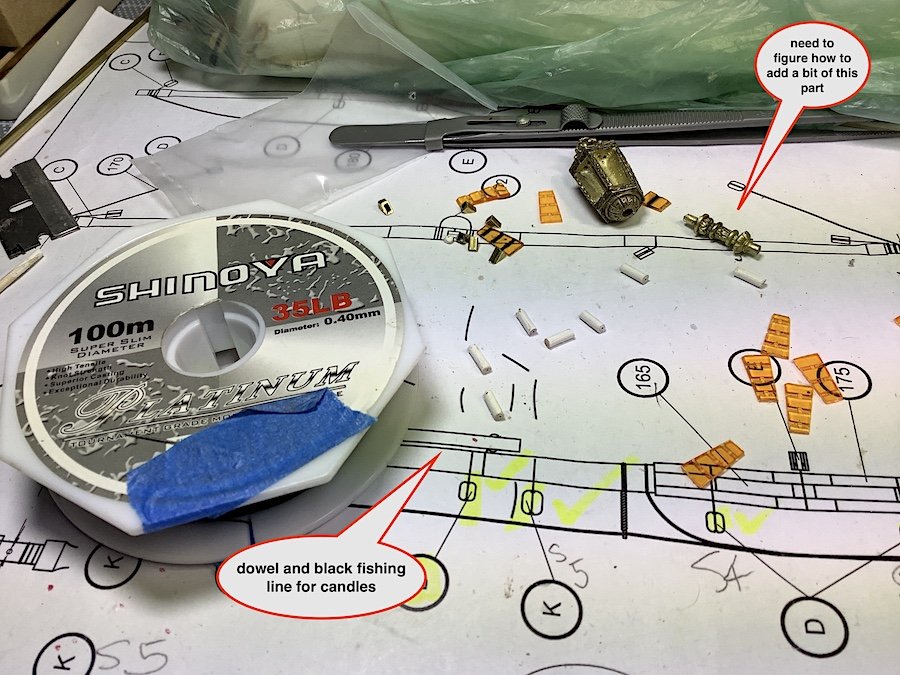
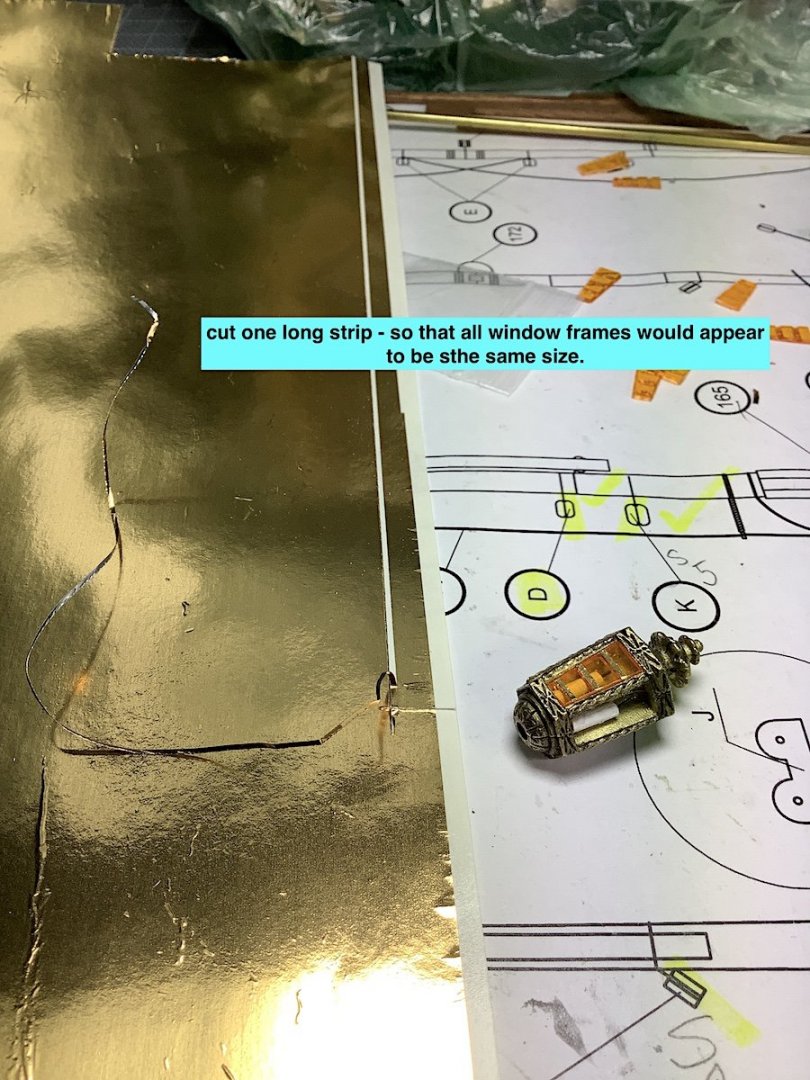
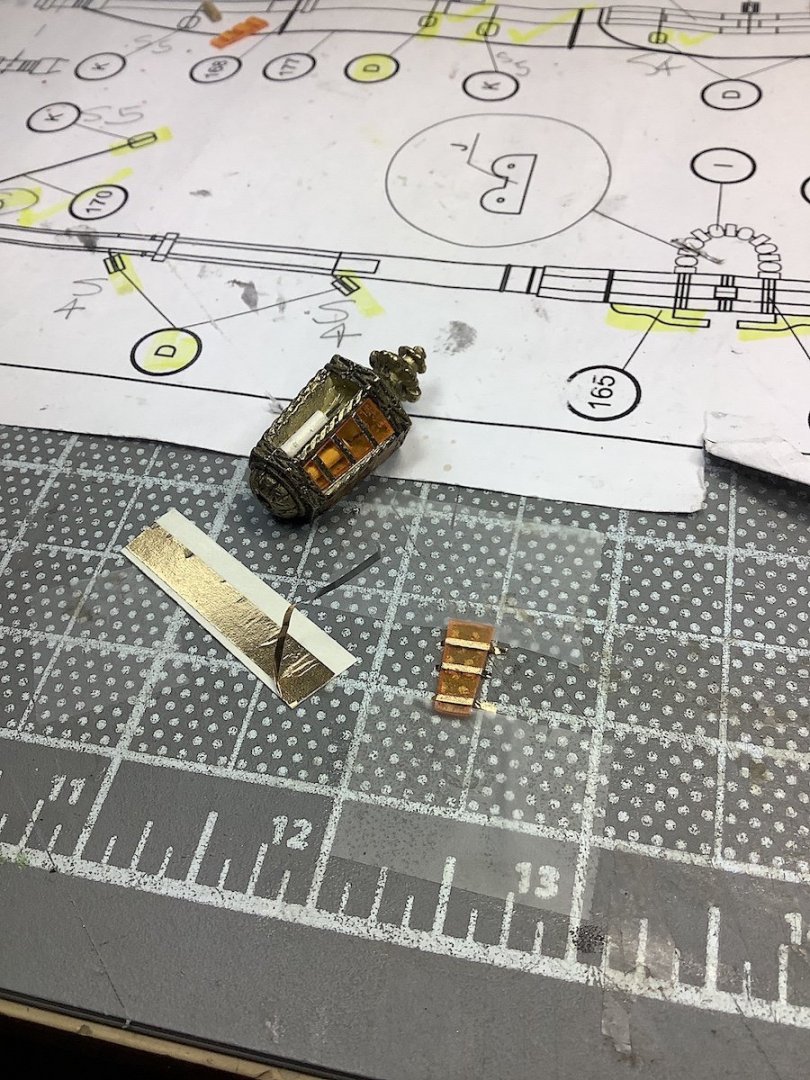
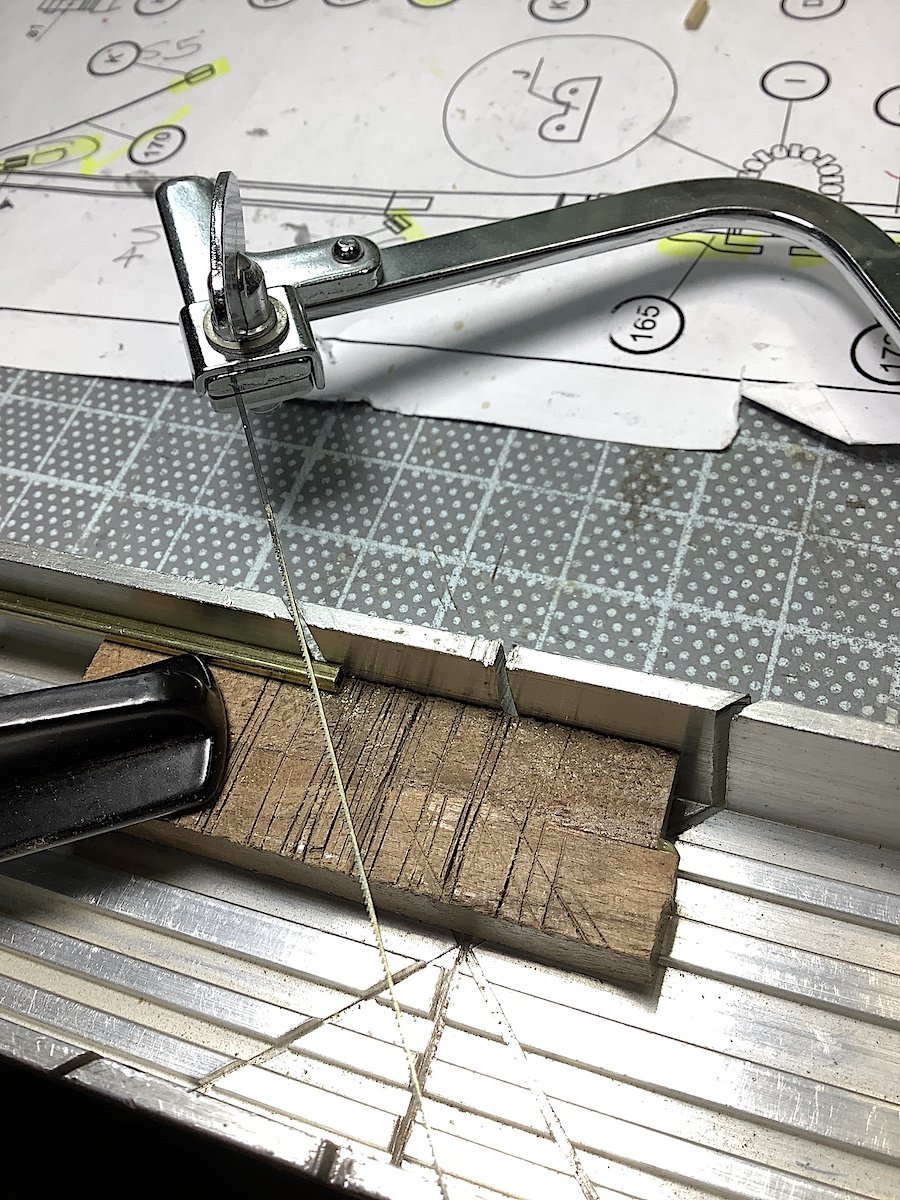
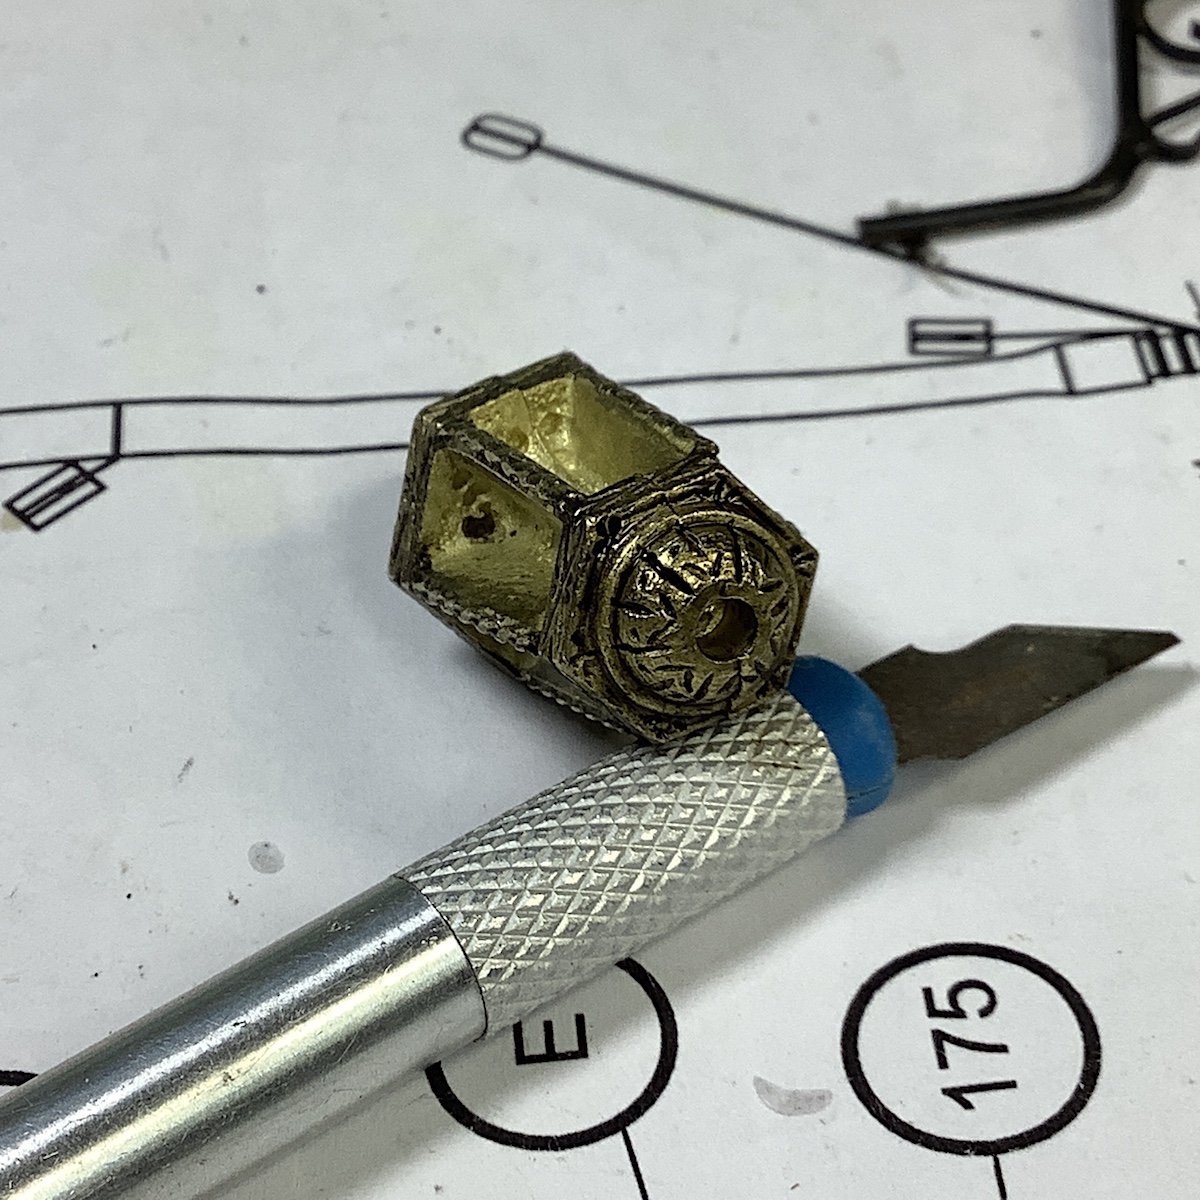
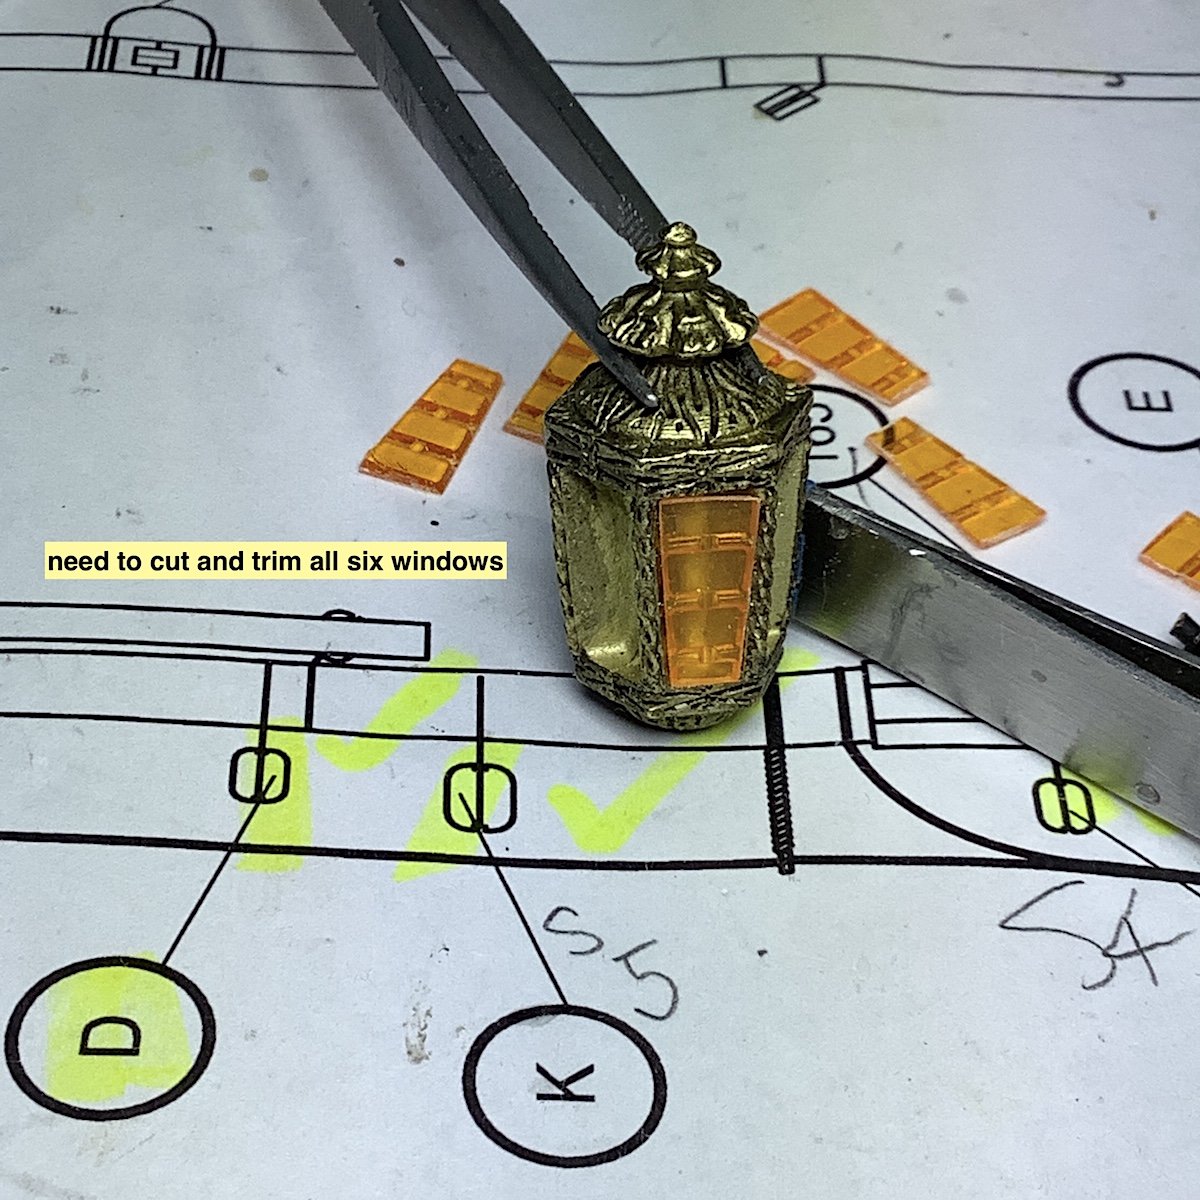
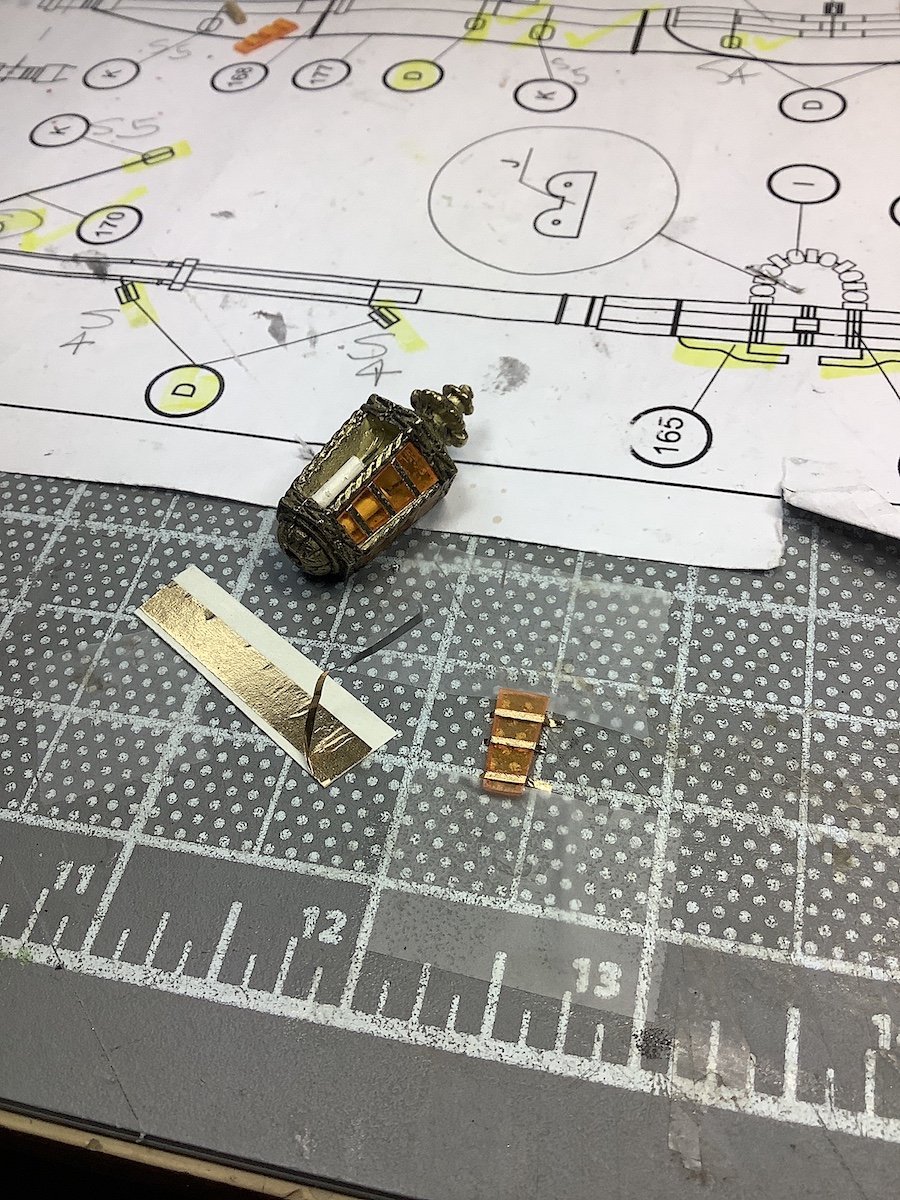
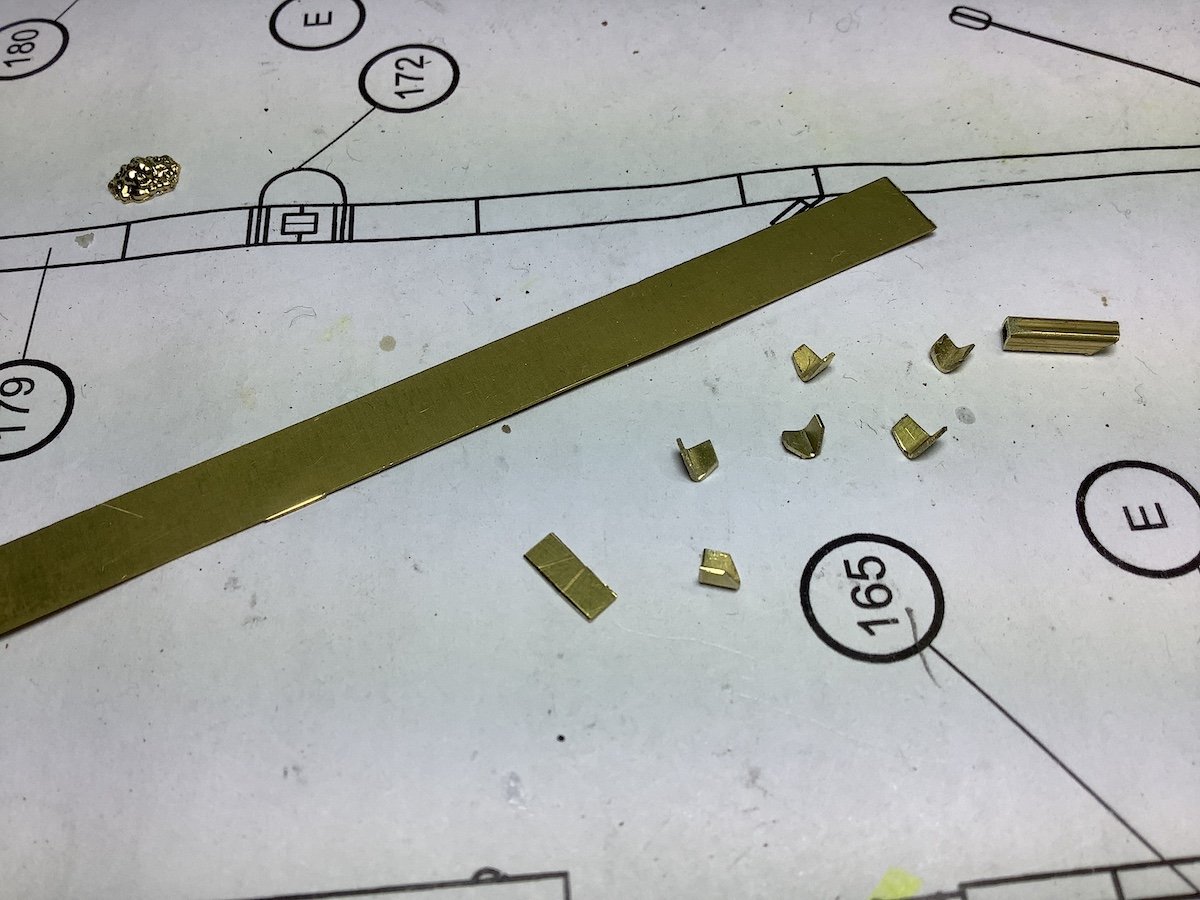
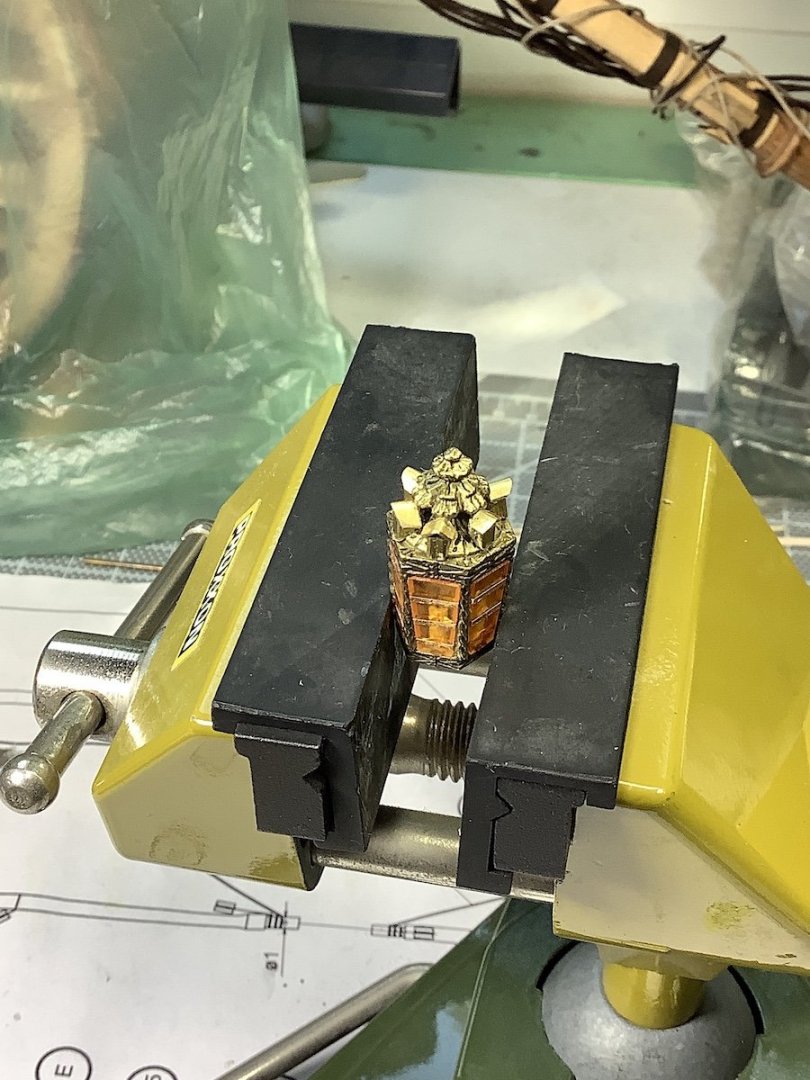
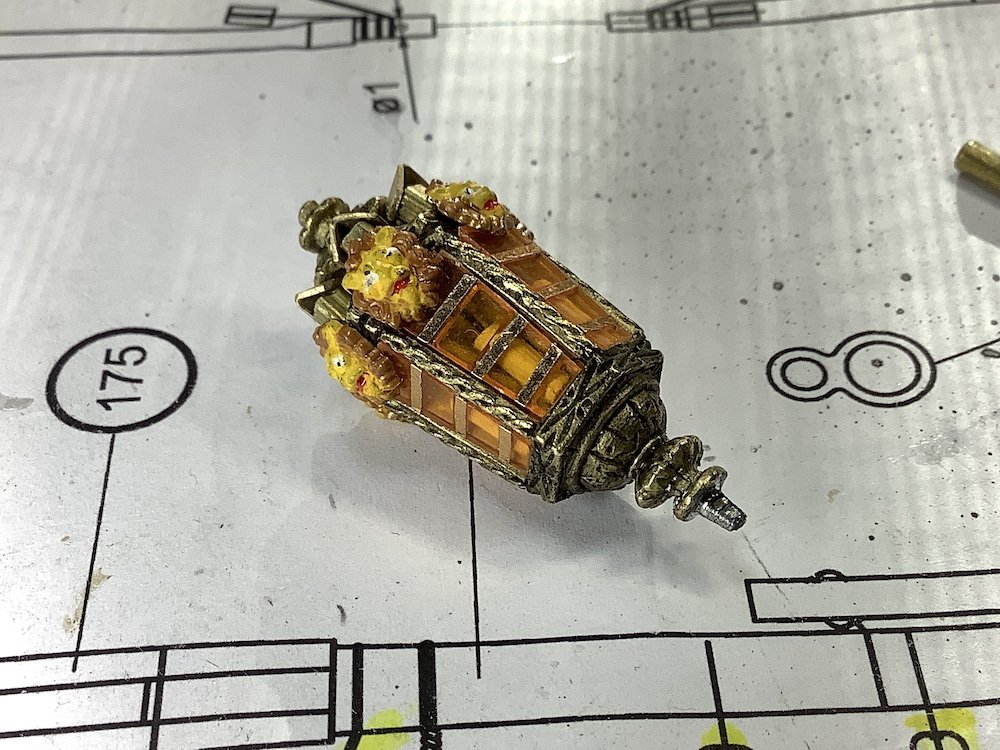
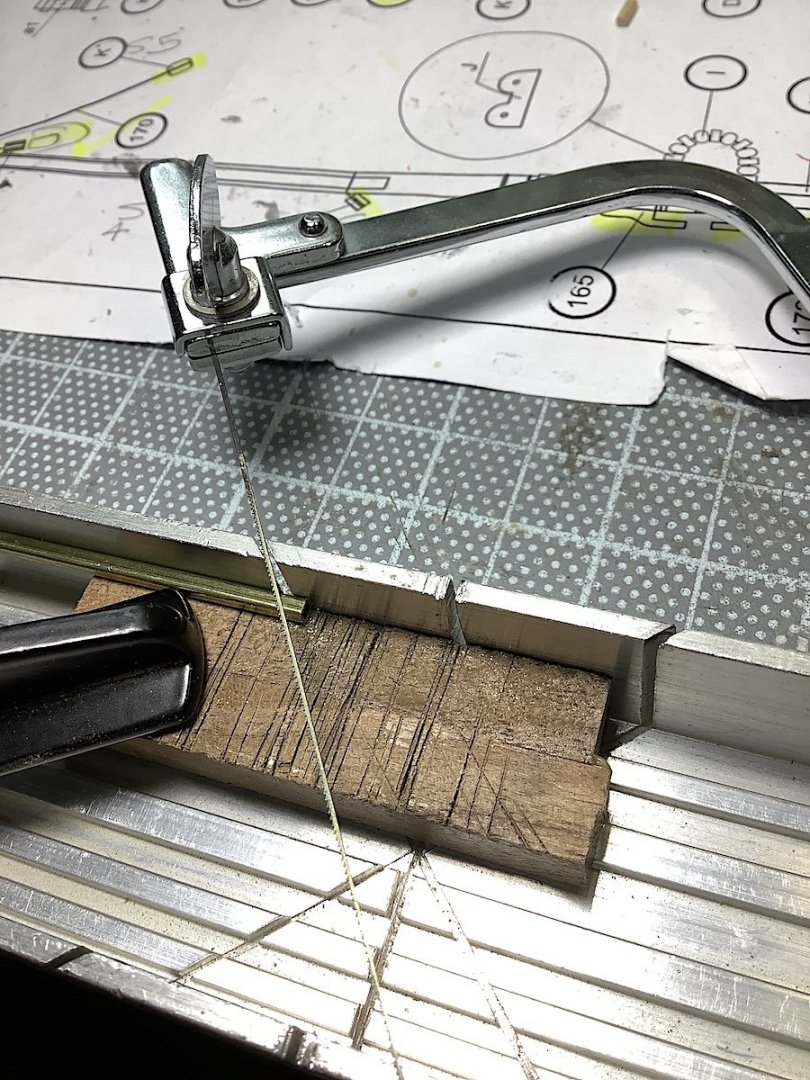
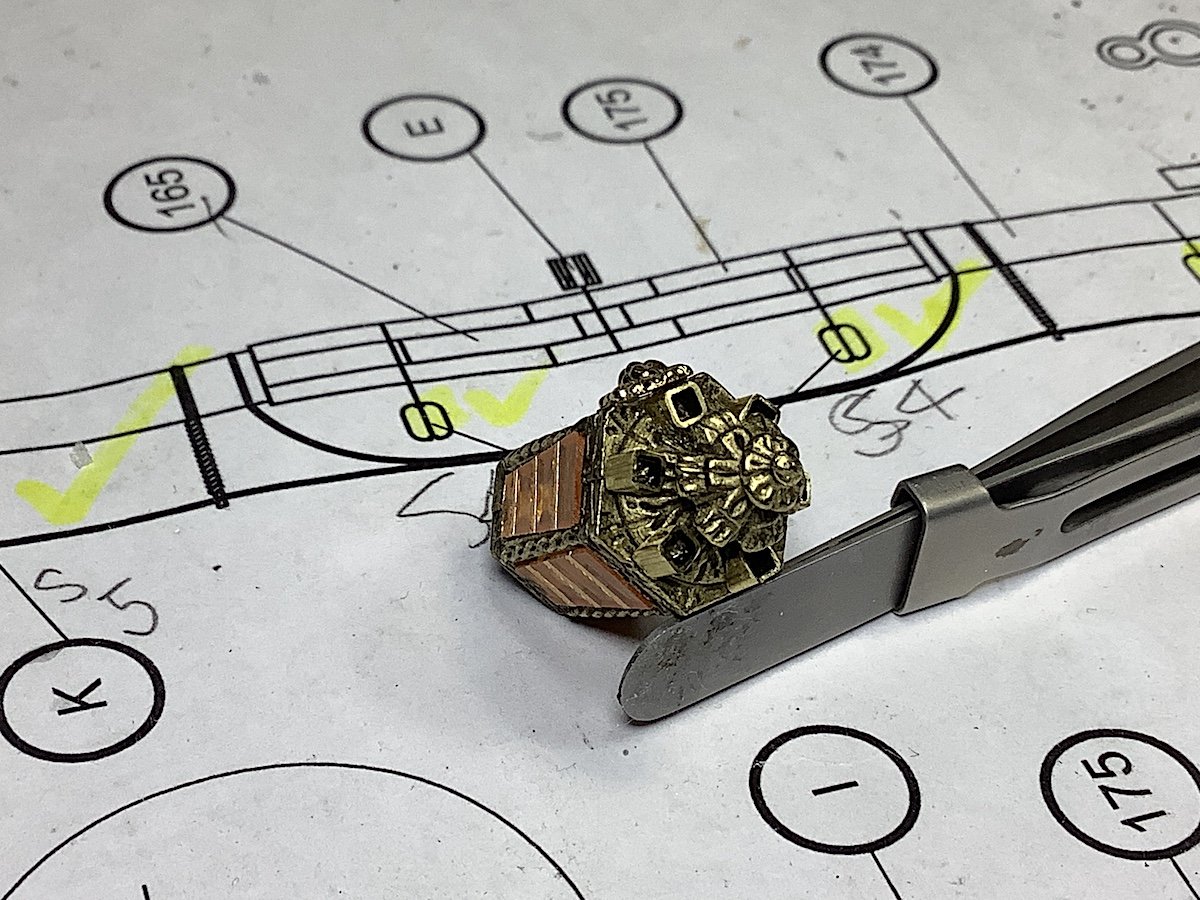
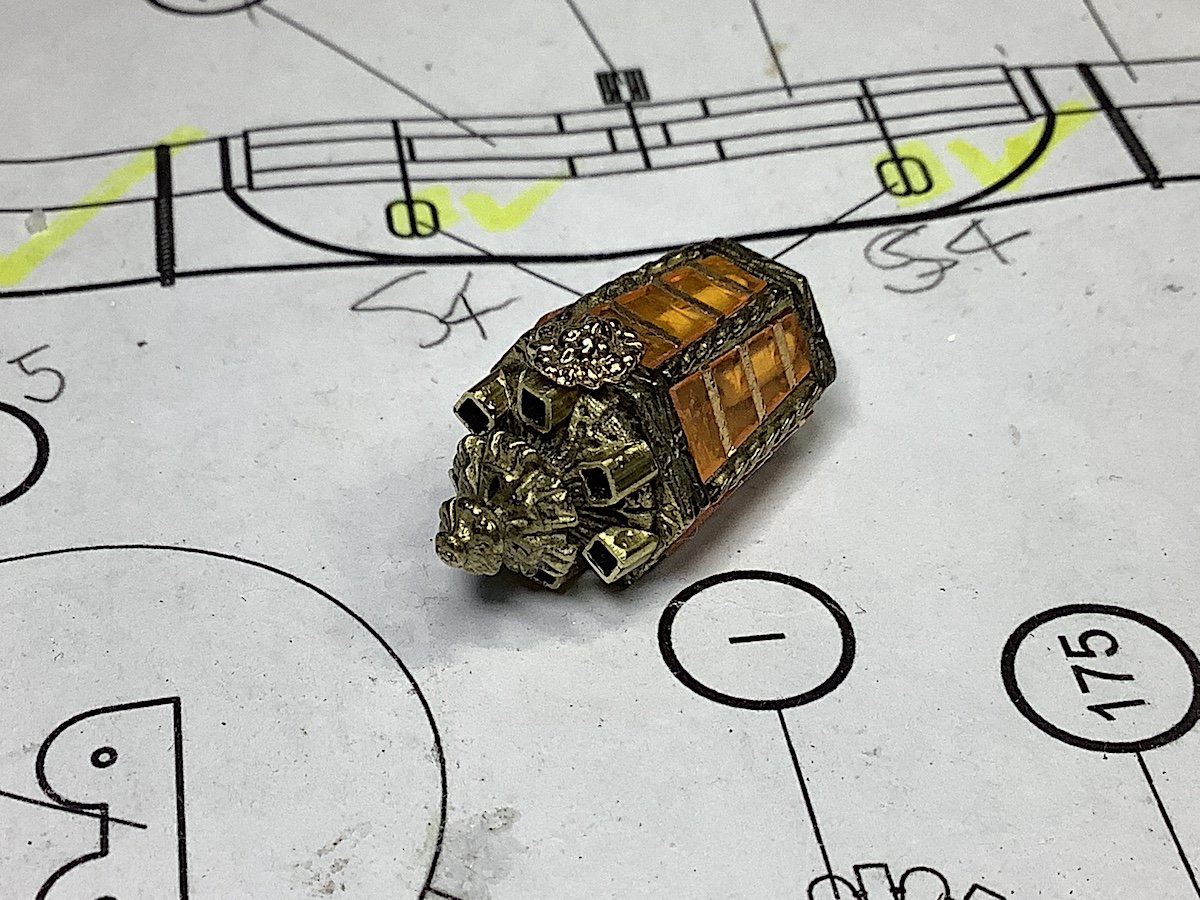
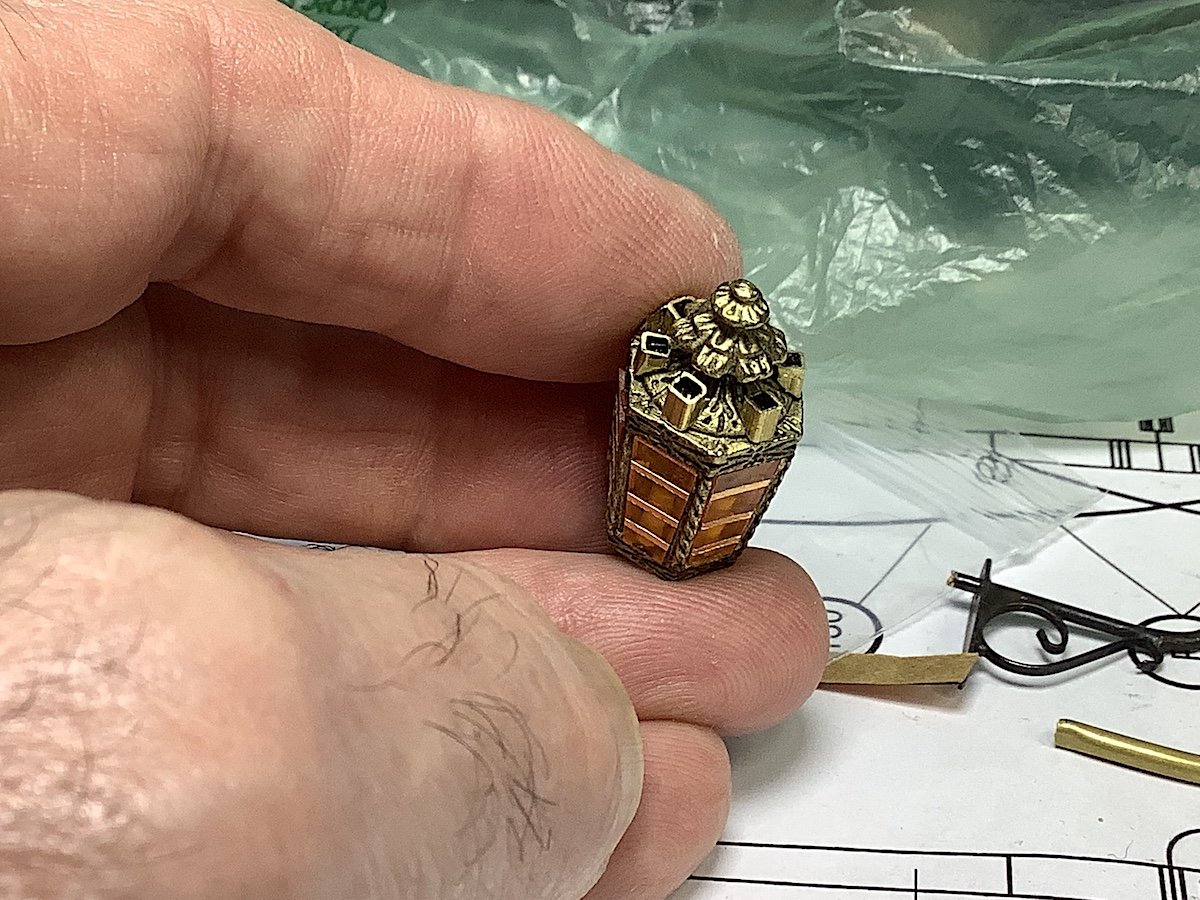
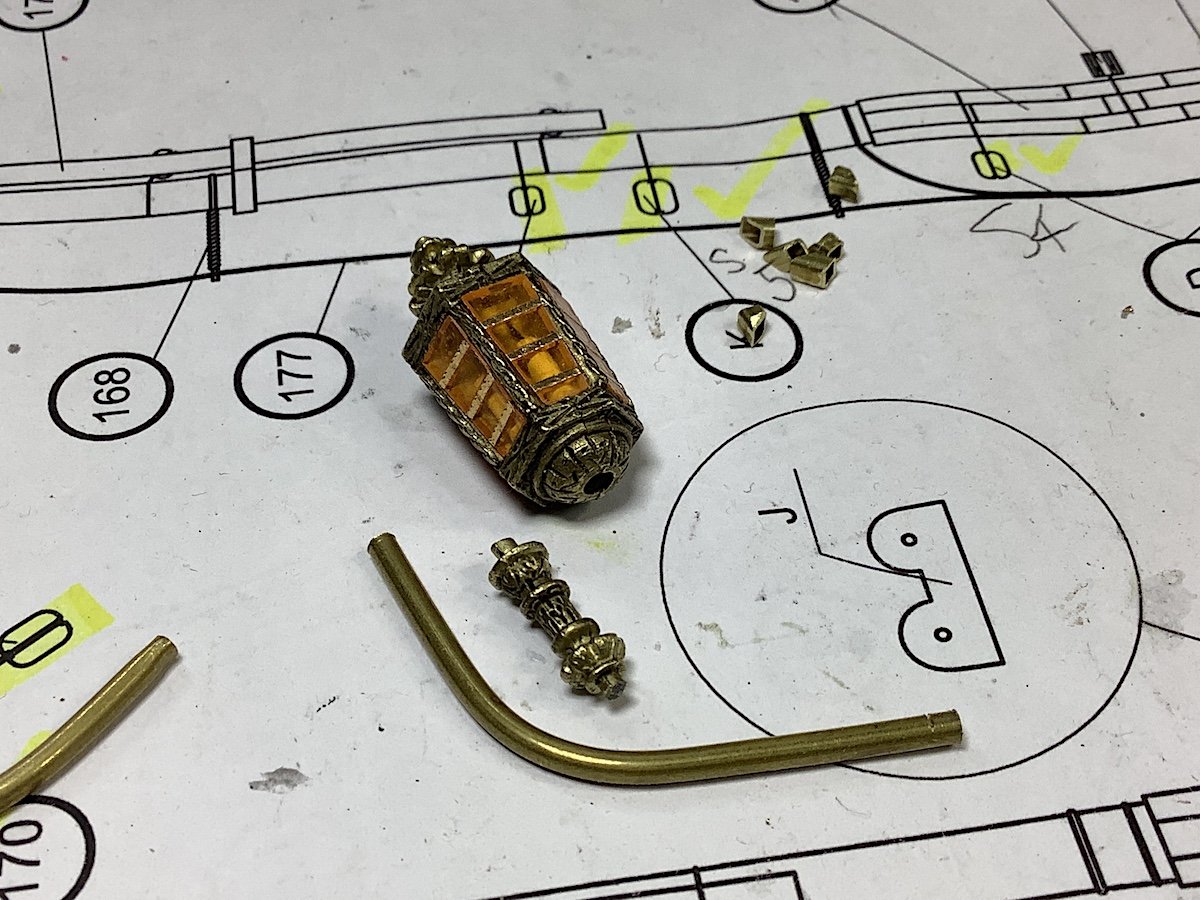
Hi Mates, This needed to be done – so taking a slight break from my current build, to revisit the Vasa for a New Lantern The one I installed was indeed “just wrong”, as was also very diplomatically pointed out by Marc (Hubac’s Historian) some time -- way back…. And it’s mounted too high as well. Still learning…. Note – that the Vasa stern lantern has never been recovered – so it’s really a sort of guessing game as to how it might have actually looked. I got a new (third one – 4th counting Corel’s) more appropriate, example so finally doing some preliminary work. I had, to first decide whether or not to gut the interior in order to add a center candle (a detail that I wanted to feature) – well that was not an option – skill set not there. Could have just added the plastic windows and be done. Windows came from another source after some cutting and trimming – they look just fine. (YES very incorrectly) added candles to each of the six panels. Here are some beginning images of the work, so far. Thanks for your re-visit to this log.