md1400cs
-
Posts
2,868 -
Joined
-
Last visited
Content Type
Profiles
Forums
Gallery
Events
Everything posted by md1400cs
-
 Johann, Indeed stunning work. Beyond anything that I will (most of us?) see in this "hobby". I was laughing, in kindness, my work, by comparison, is from a Lagos box --- haha I have learned so much from just following your work - Thank you ! Sincerely,
 -
Regarding windows the perfect mirror glass finish is what I was thinking of. I'm guessing, but I assume that back then glass had visual waves - not perfectly mirror flat - hence the idea of adding a clear "something" to visually remove the super flat glass look. But, if your glass panes will be so small it would, then make no difference.
- 2,699 replies
-
- 4
-

-
- heller
- soleil royal
- (and 9 more)
-
Hi Frank, Just catching up - As was mentioned I agree that the kit provided guns look better. As you know those others are English - The French would go nuts with English guns on that ship haha Your build looks really great.
- 510 replies
-
- 1
-
-
- reale de france
- corel
- (and 1 more)
-
Robert, Thanks so much for your super kind thoughts - much appreciated. A cross section was/is, for me, a great exercise in new learning. How these ships looked, and how they were built from within has been lots of fun putting it together. My intent was to only build a representative example - I now see many areas that are not actually correct - As we all know, we are our own worst critics. Your skill set would be great for a cross section, especially for adding details - In fact, as you know there are several Victory cross-sections available. The DeAgostini Victory - seems to be the most accurate example. It would look great alongside your superb current Victory build. Regards,
-
Robert, Just catching up - Woa - Your build is superb. That shot from the bow facing upwards - your planking work is just perfect paint trim work is not so bad either -- haha So many awesome details including (earlier) your staircase railings - brilliant Regards,
-
Mark, A quick, parenthetical, thought about your windows and their glazing. If you were to also add a clear coat - "dabbing" such as Model Master Clear Coat lacquer finish - this should reduce the absolutely flat look of a clear plastic (if that is what you were thinking of doing), and allow for a better look of glass produced back then. Following your build is lots of fun. MJD
- 2,699 replies
-
- 4
-
-
- heller
- soleil royal
- (and 9 more)
-
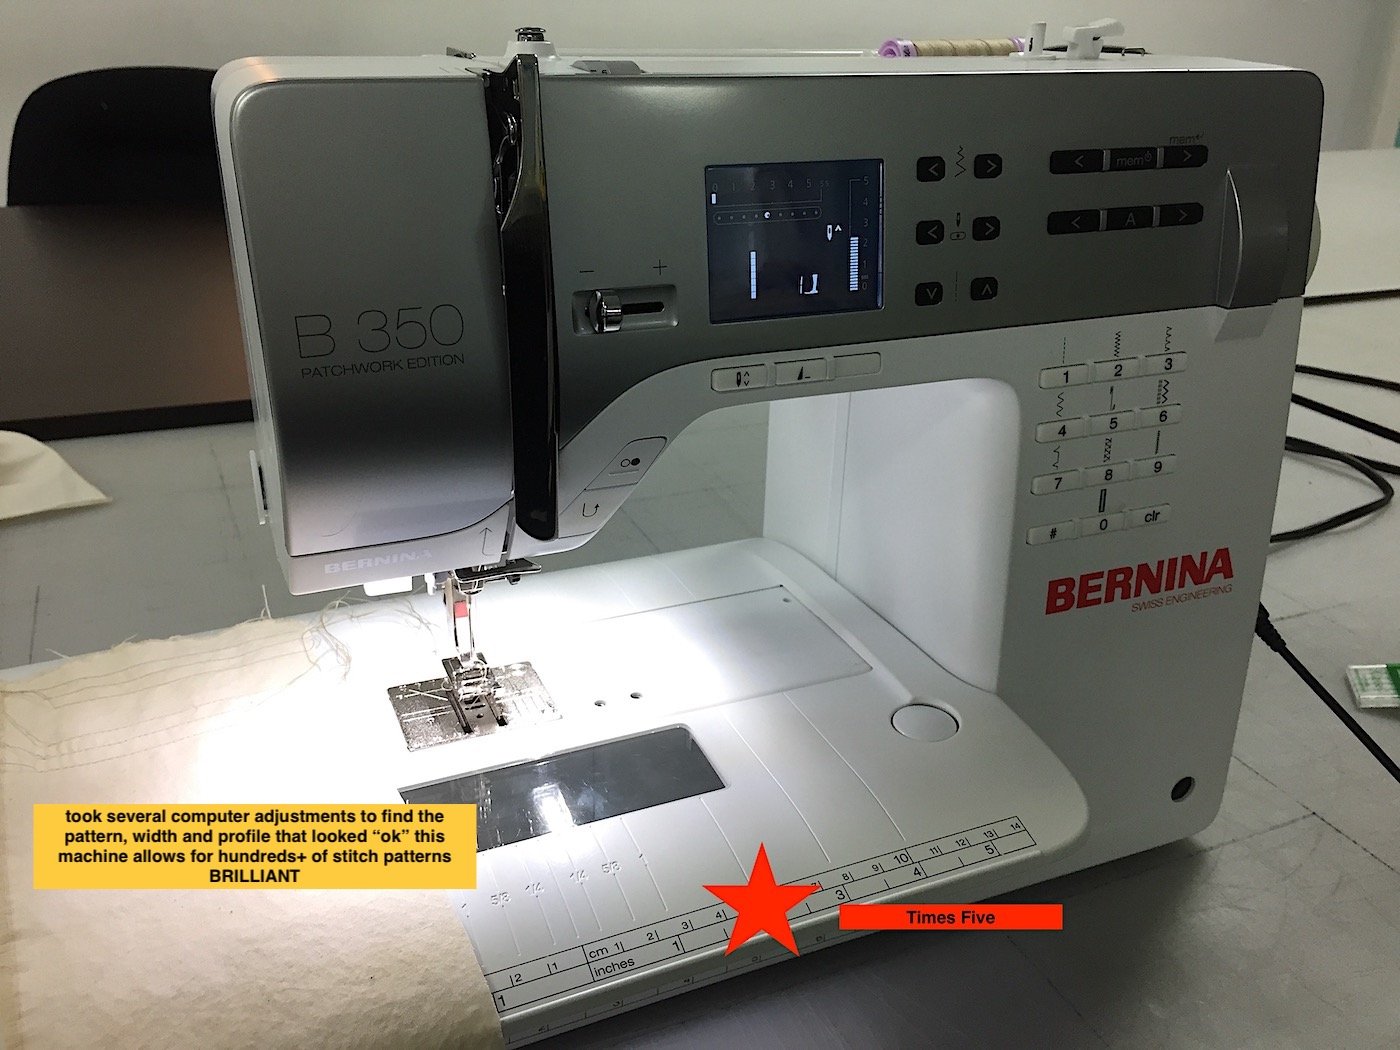
Frank, Yes, I did go to the sewing class to use the machine - And yes - not cheap think about $1,400.00 USD Lazy Saint - thanks again - for your very nice thoughts. Been away for a week or so - need to get back to the shipyard......
-
NIce E.J. as was mentioned your tops are perfectly scaled. Lower shrouds and rats are "just right". Chainplates look excellent as well! Regards,
-
Frank, Just catching up - superb attentions to details indeed. Just guessing here, but the Reale was certainly just a decorative ship used to transport the king - similar to carriages of the time. So - again guessing - that fully rigging carriages/guns was certainly less important as it would never have been used in fighting - guns might have been fired to announce an arrival - Did some searching at Google University but found very little. Interesting thread in any case. Also these bow cannons with be mostly covered. Clark's two photos might just be a perfect guide. Cheers,
- 510 replies
-
- 1
-
-
- reale de france
- corel
- (and 1 more)
-
Yes - stunning work indeed
-
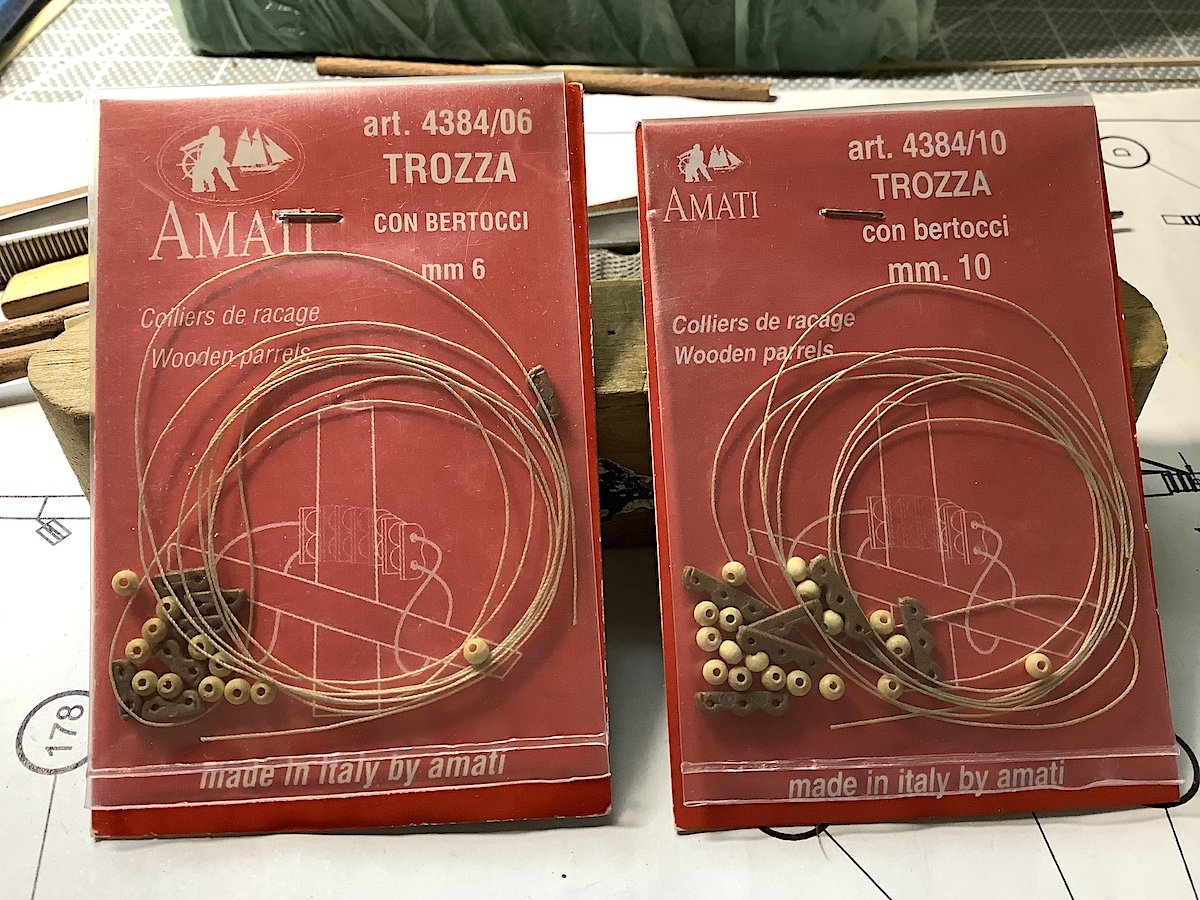
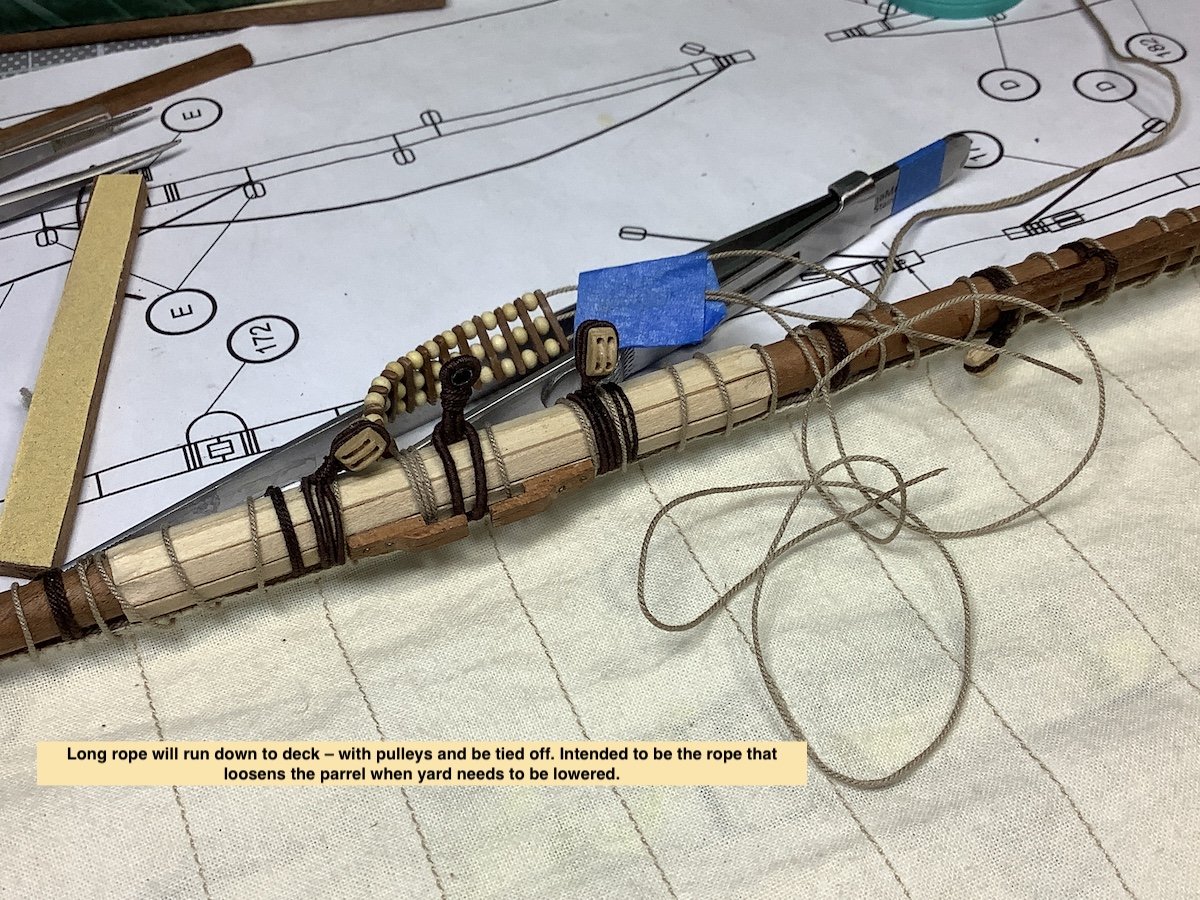
Mark - thanks for the nice words, Ferit and Mark; FYI Mates thanks for the likes as well These are aftermarket. The Occre kit included parrels are also metal and glass. Discovered these when I needed sets for my last build. Excellent !! Beads are wood and available in double or triple. The only thing that needs to be done is enlarging the holes for the dividers with a small drill bit (beads a just jine) dividers are soft plastic and accept drilling very easily. The included thread is IMO much too thin and out-of-scale. size and SKU numbers are all you need. Got these from Cornwall - certainly widely available elsewhere as well.
-
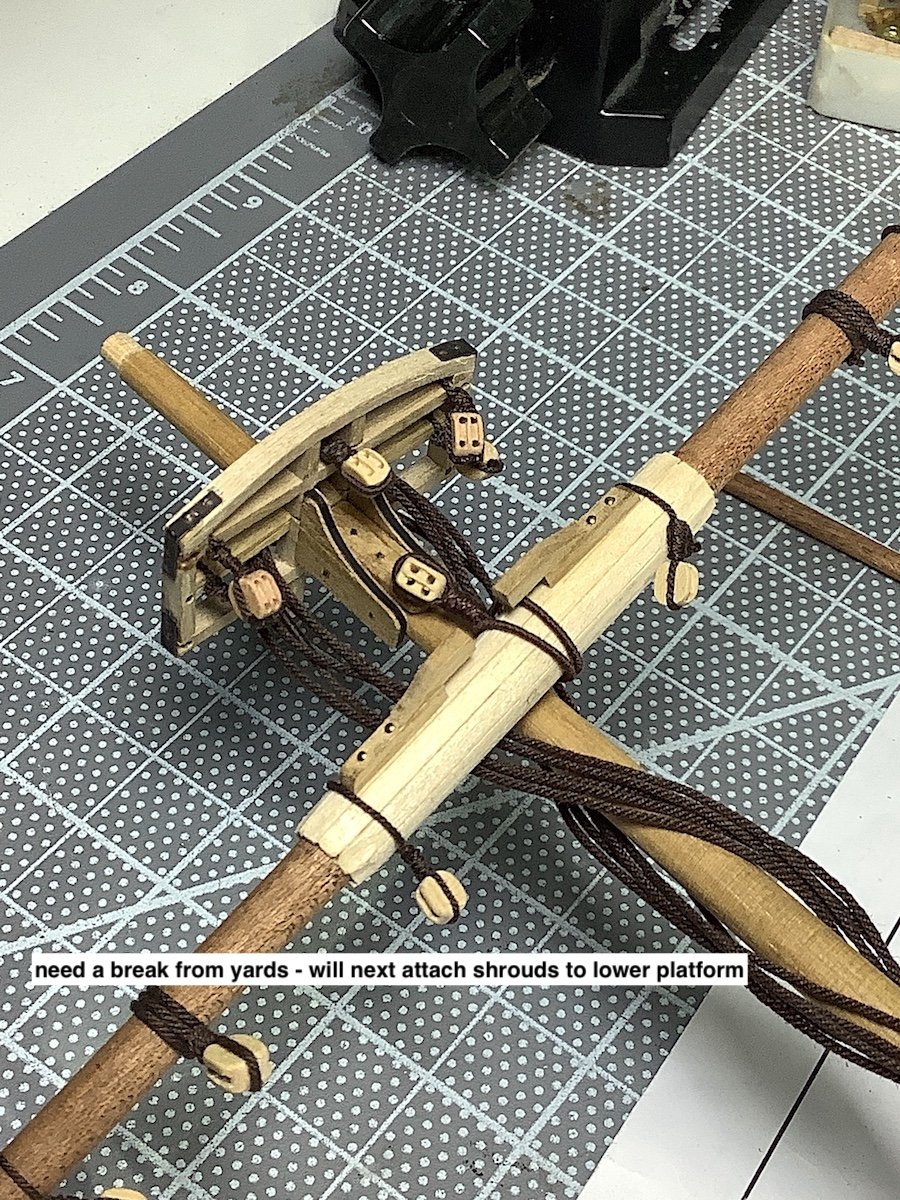
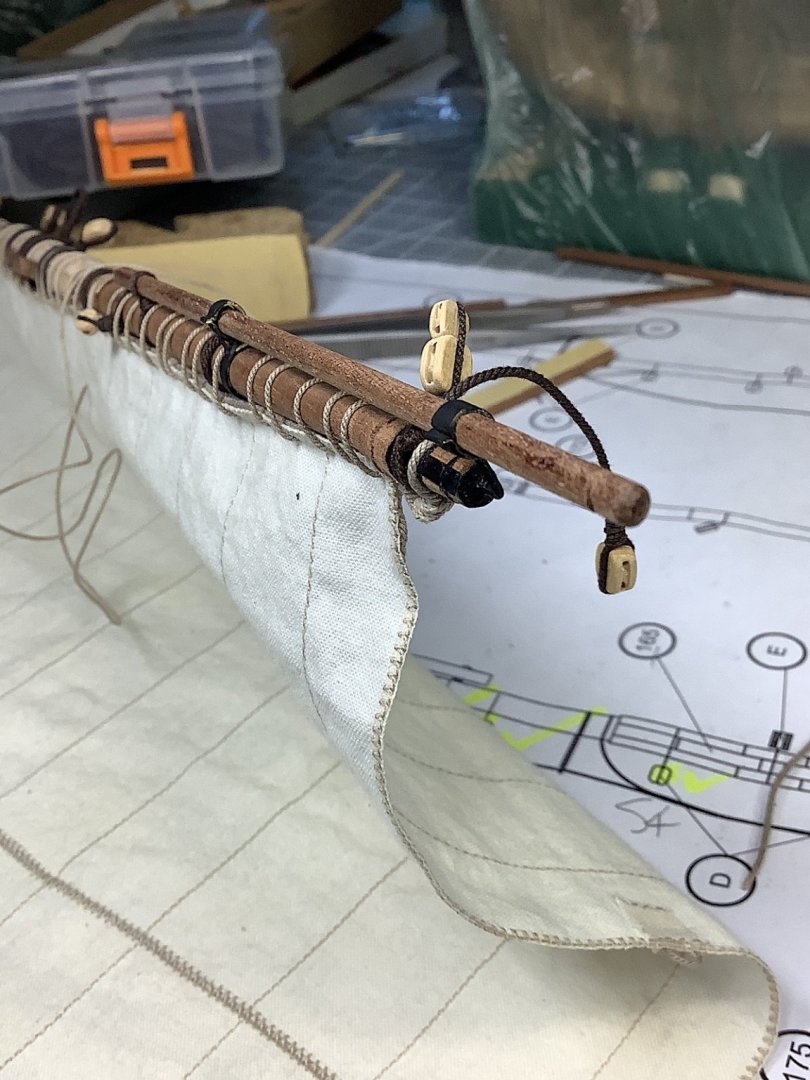
Minor same area update - pics speak for themselves - I am very happy with how the stunt boom yard came out. I need to check my settings - I'm not getting updates from the builds that I follow - some yes some no hmmmm


- 371 replies
-
- 10
-
-
David, Excellent !!! nice work. Love the lifeboat davits - great detail as Denis mentioned. Congrats,
-
Michael --- 🧸 gratulerar verkligen till dig och din familj. Cheers,
- 969 replies
-
- 5
-
-
- hahn
- oliver cromwell
- (and 1 more)
-
CK, V. nice start - will follow along as well. In case you were curious 🤔 Swiss Air flight from JFK to Zurich.
-
Mark, As fiddly as the gun port jigsaw is a lot of work - And it does result in perfectly located and sized openings - And for me this would have been a lot easier than having to cut, size, and locate 68 of these -- great job Model Shipways !!
-
Richard, In MVHO Watco is the "go to" option. I know many builders protect their work with Varathane types of sealers. Again just my very own personal opinion - I typically don't like the "looks" that result. I totally understand why builders add sealers - time would dry timbers, glues etc - protection is important. That said my Santa Maria was Watcco'd 43 years ago and still looks exactly the same. My second build (Vasa) no sealing at all. It will be the same for my current 3rd build. In any case it won't be "my" problem in the future - just my son's haha Lastly your skills with planking are so perfectly in scale - I would think that certain types of sealers would look "out of scale" given the quality of your work. And looking at your new posts those skills are continuing in Spades. Cheers,
-
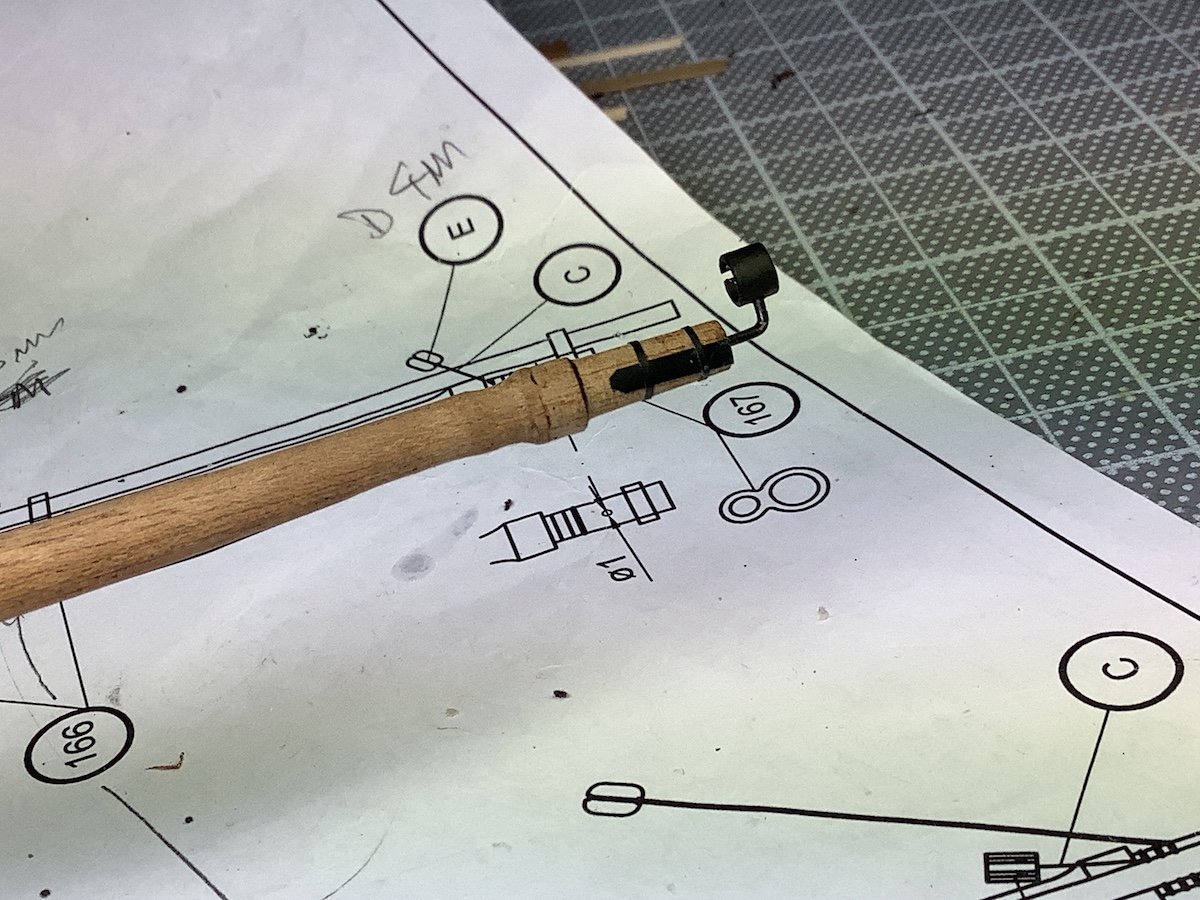
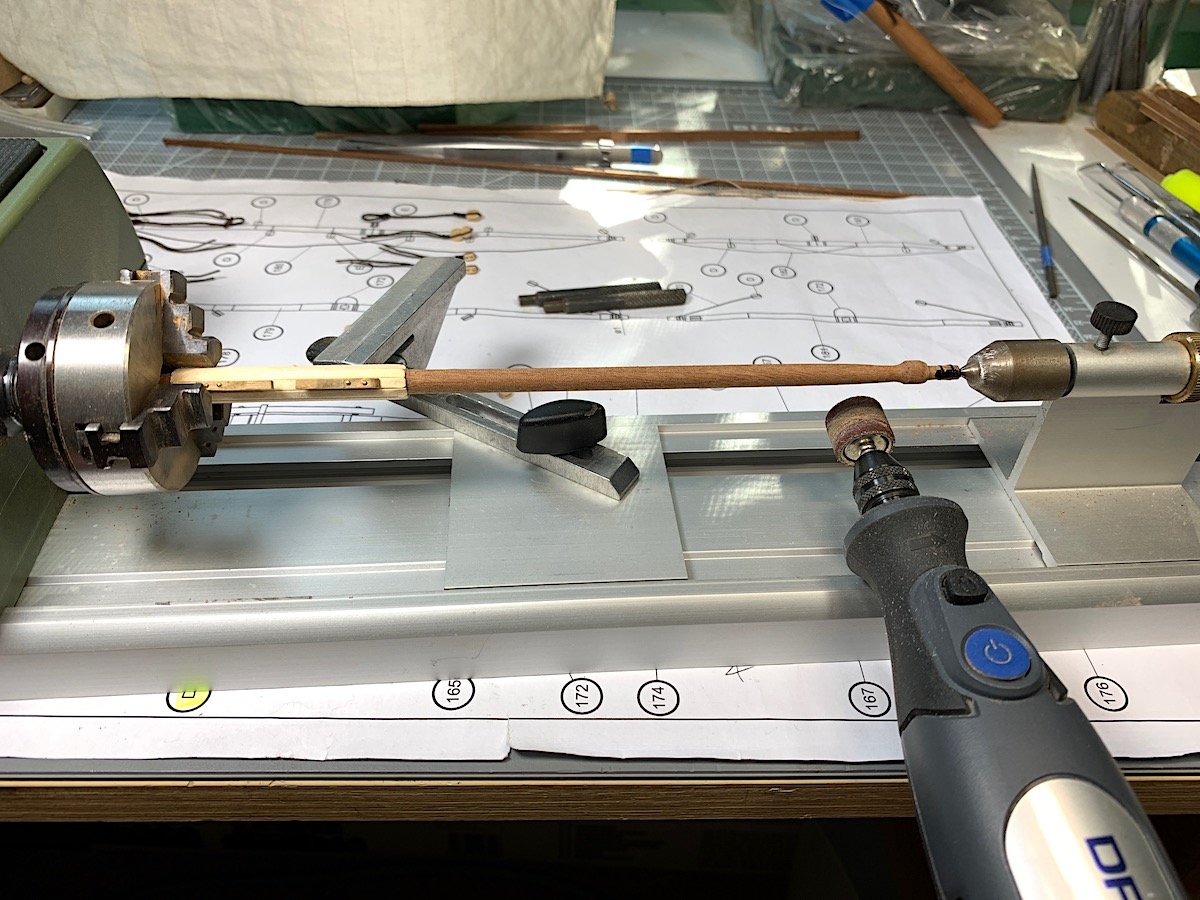
Peter, Re: the rotary tool and the lathe - it takes a bit of practice. Also several light passes work best. Turning the lathe on and off between passes lets you really see how the yard looks (spinning hides errors.). The real tricky part is pinning the end of the yard dowel directly at the center.of the lathe tip. Otherwise there will be a slight wobble - then it's almost impossible to get the yard properly reshaped. I also vary the rotary sanding wheel sizes as needed. funny 1400CS my first laptop- then, of course, needed get AOL. - could not think of a log in name - it became and still is MD1400cs - haha. (I'm a post WWII boomer - though the Admiral says that I'm still immature (glad she still notices)
- 61 replies
-
- 1
-
-
- billing boats
- vasa
- (and 1 more)
-
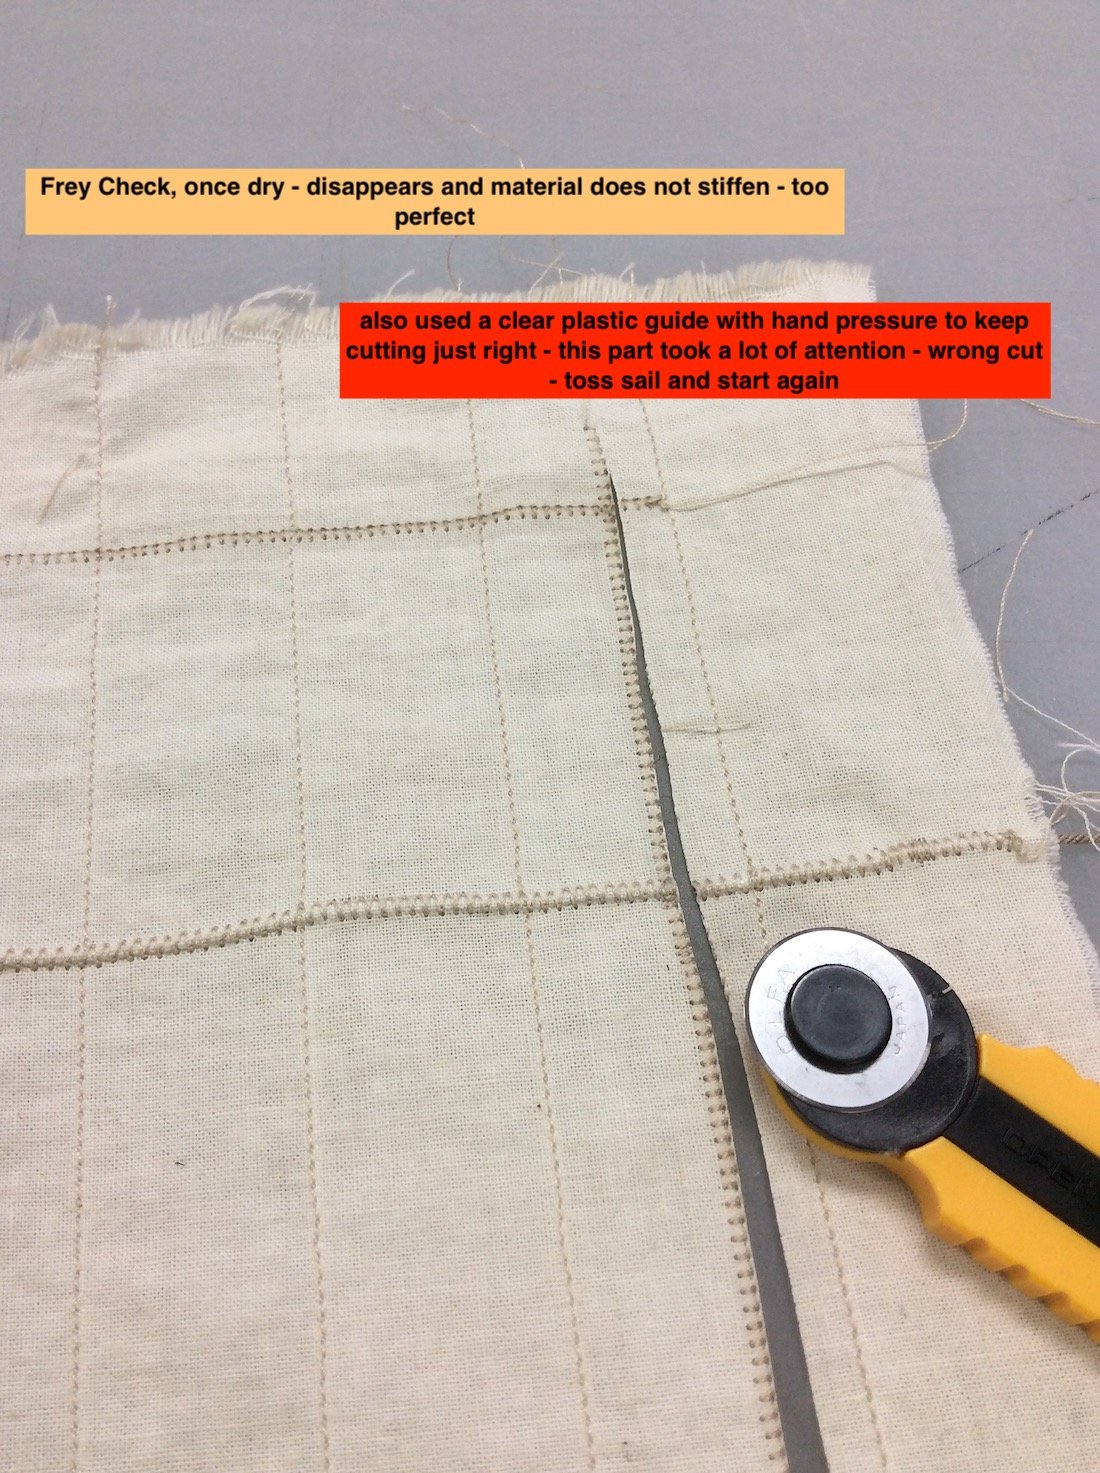
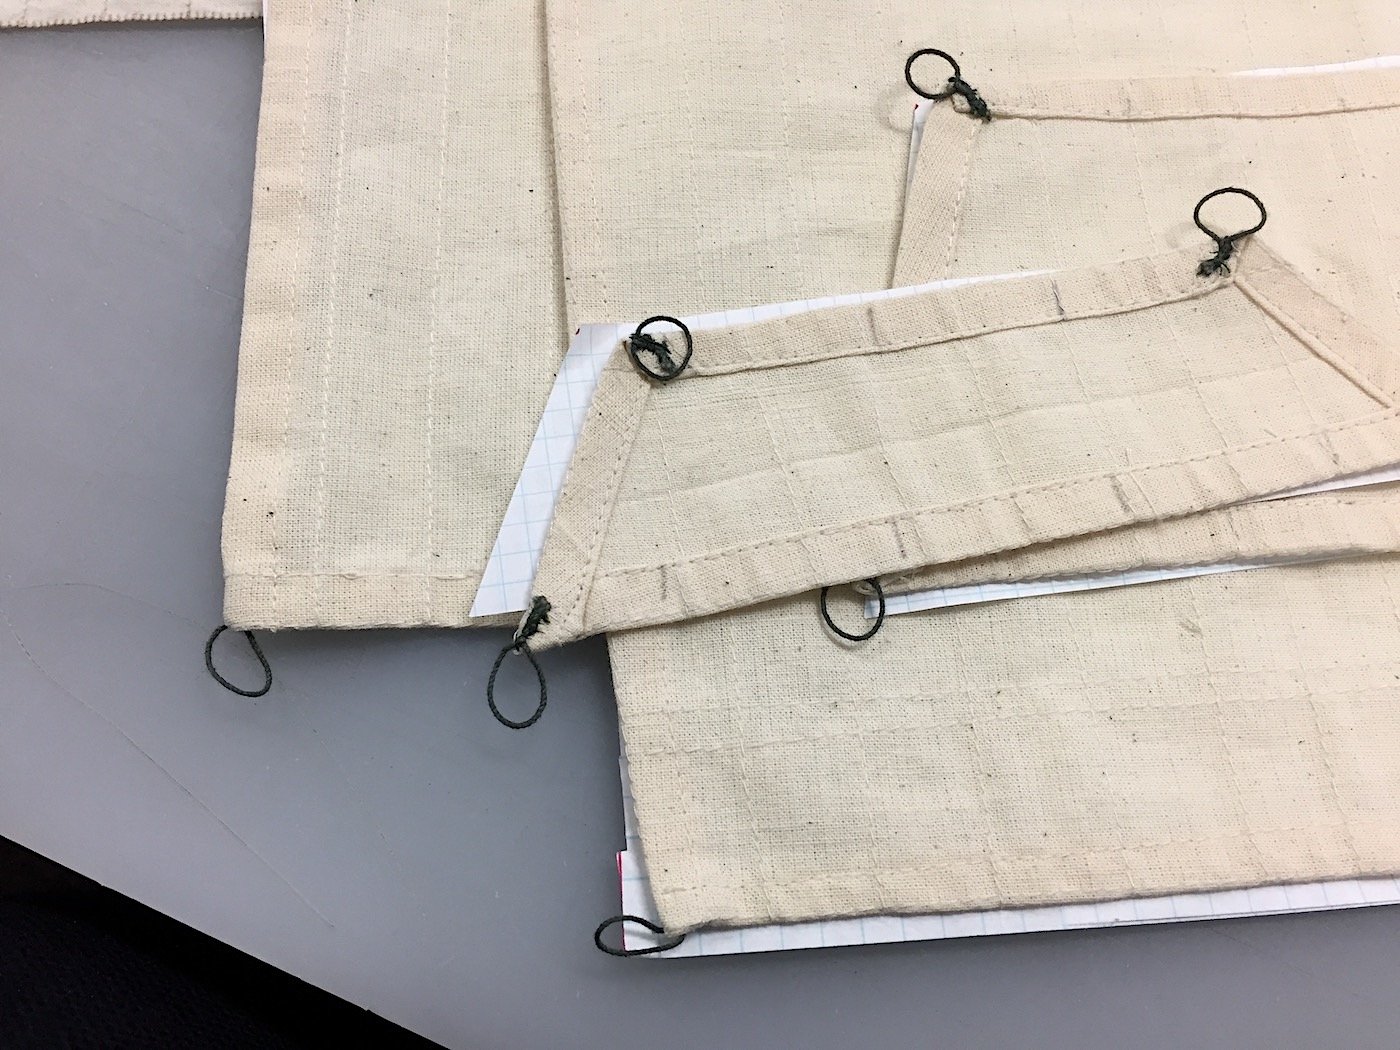
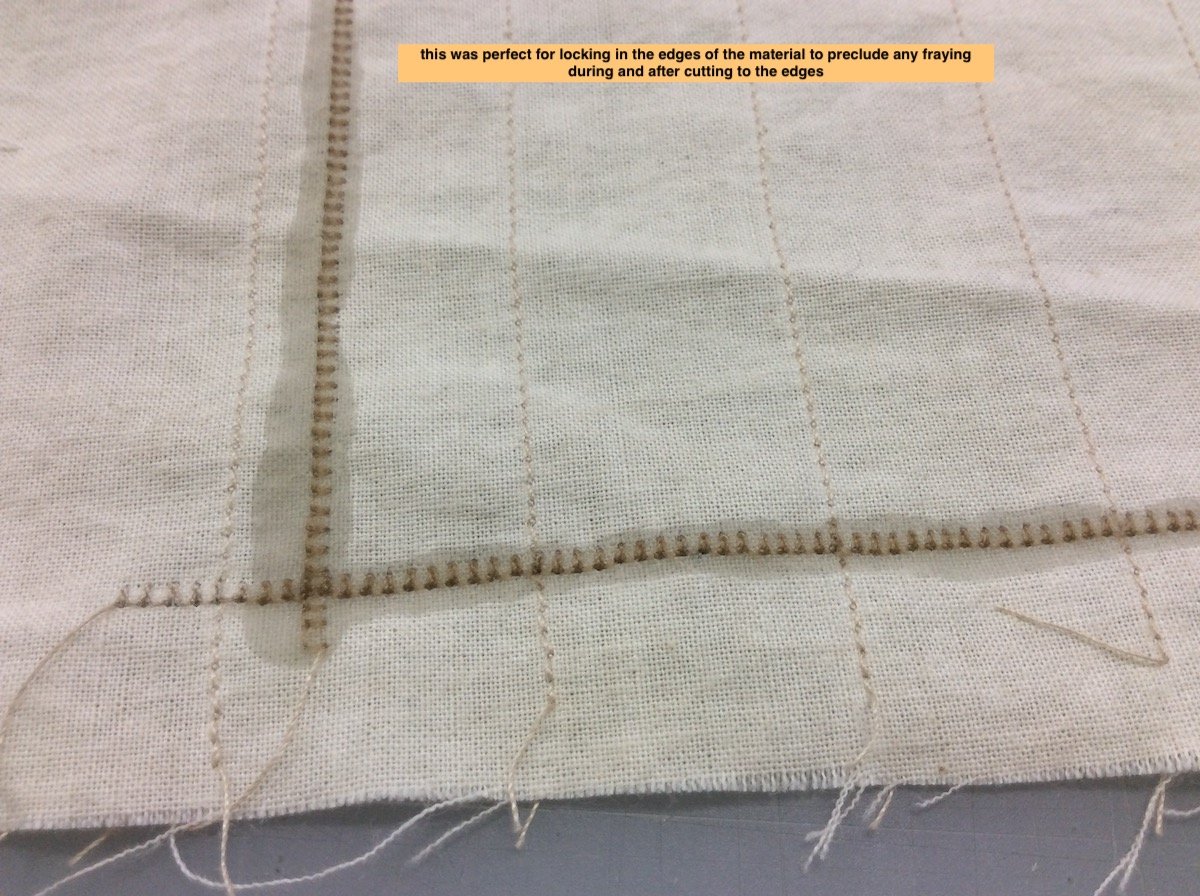
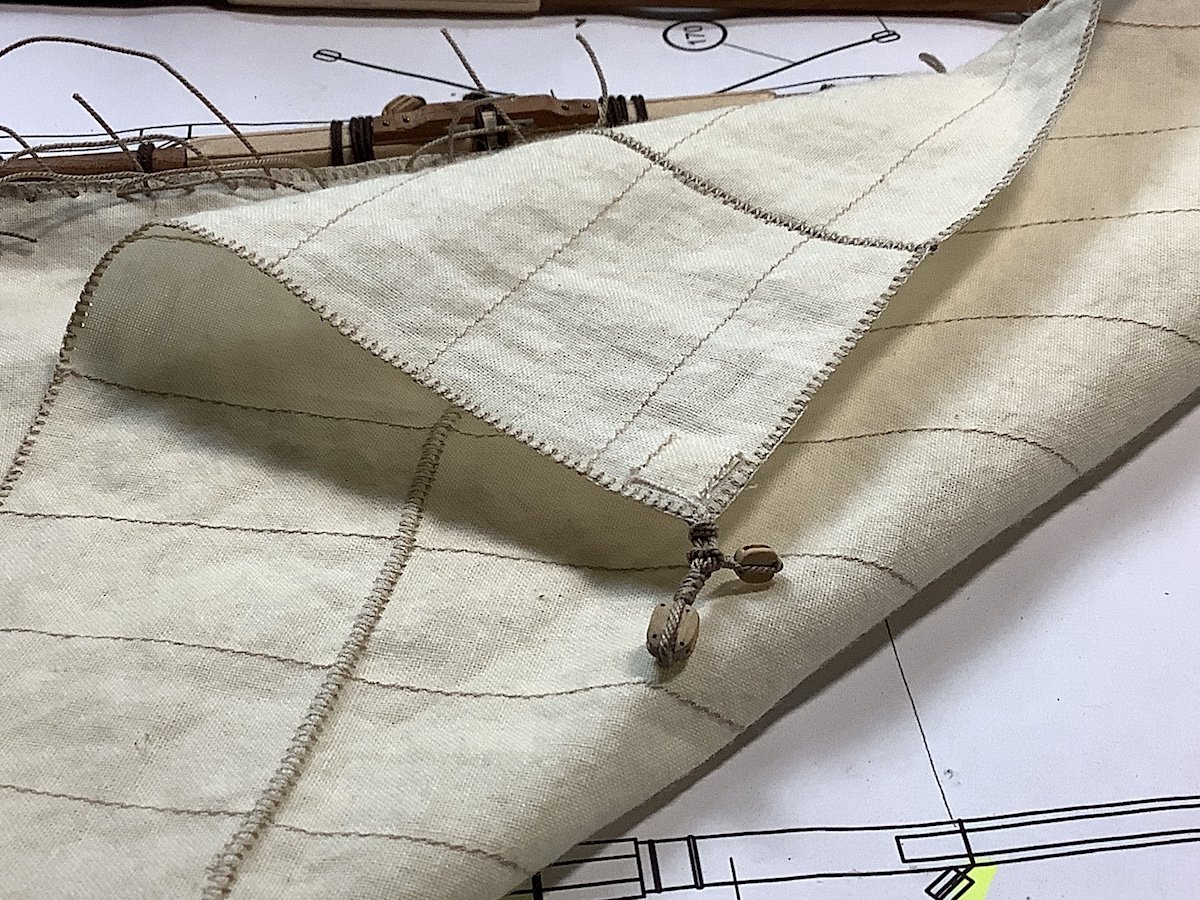
EJ, You are always so kind thanks indeed. BUT - I can only claim very little with these sails Yes: I bought the material, steeped the cloth in black tea, cut the paper patterns from kit provided sails, had an "idea" on how they should look -- that's about it Then went to the same sewing sewing school that I used for the Vasa sails. There I was totally immersed in my teachers step-by-step instructions An YES without her complete assistance and that brilliant computer machine - well you know the rest haha Here are the step-by-steps that I used. Cheers,


- 371 replies
-
- 10
-
-
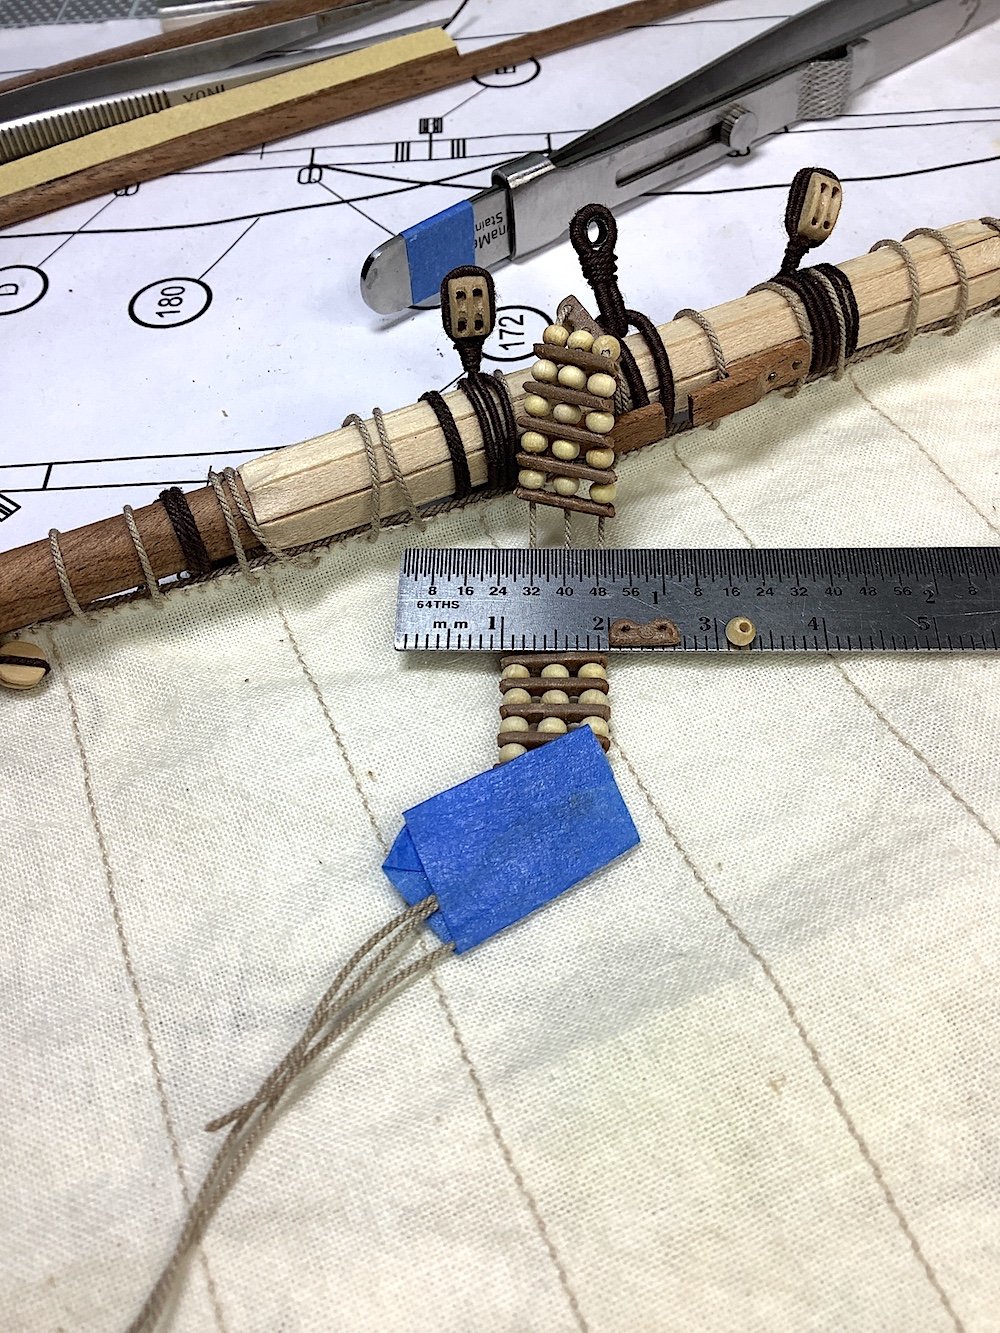
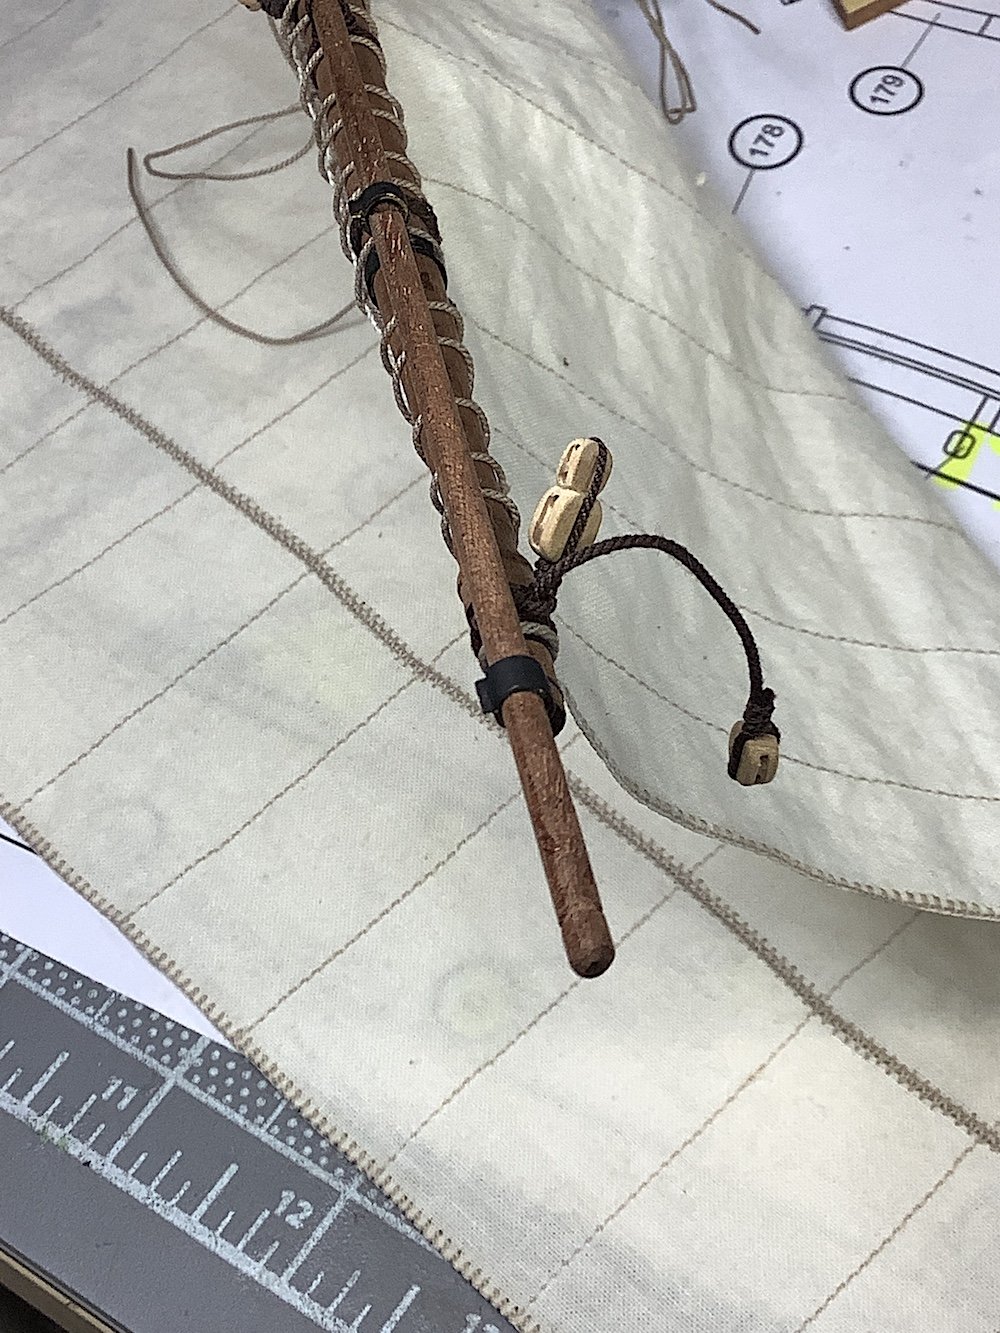
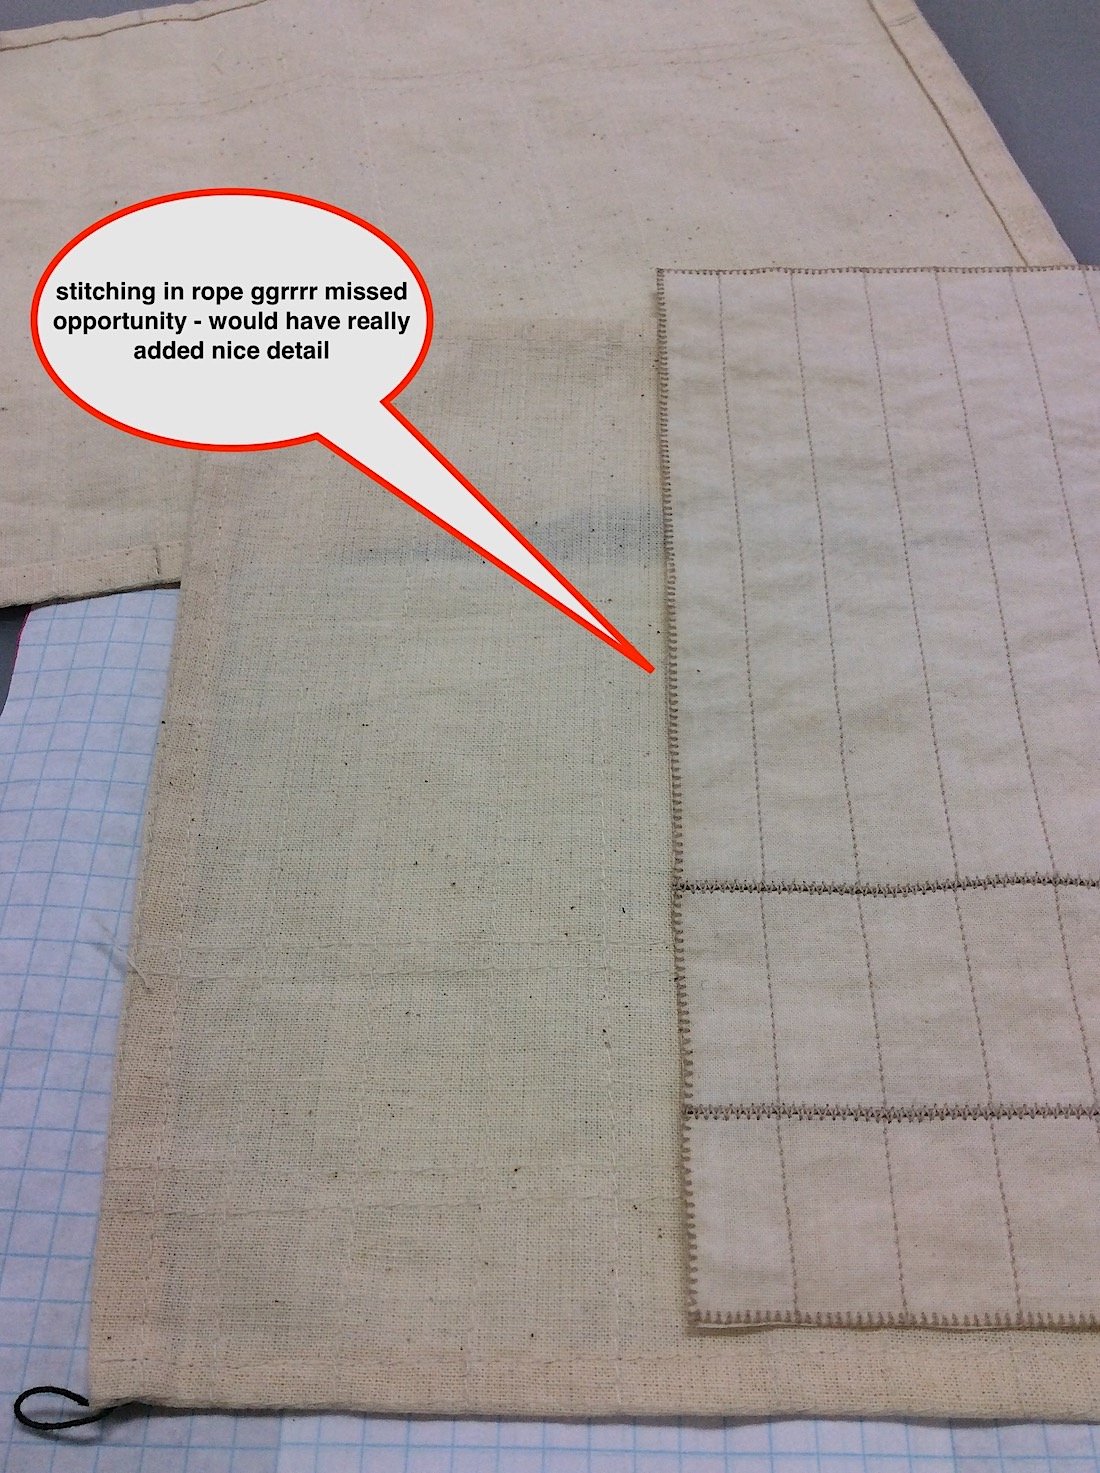
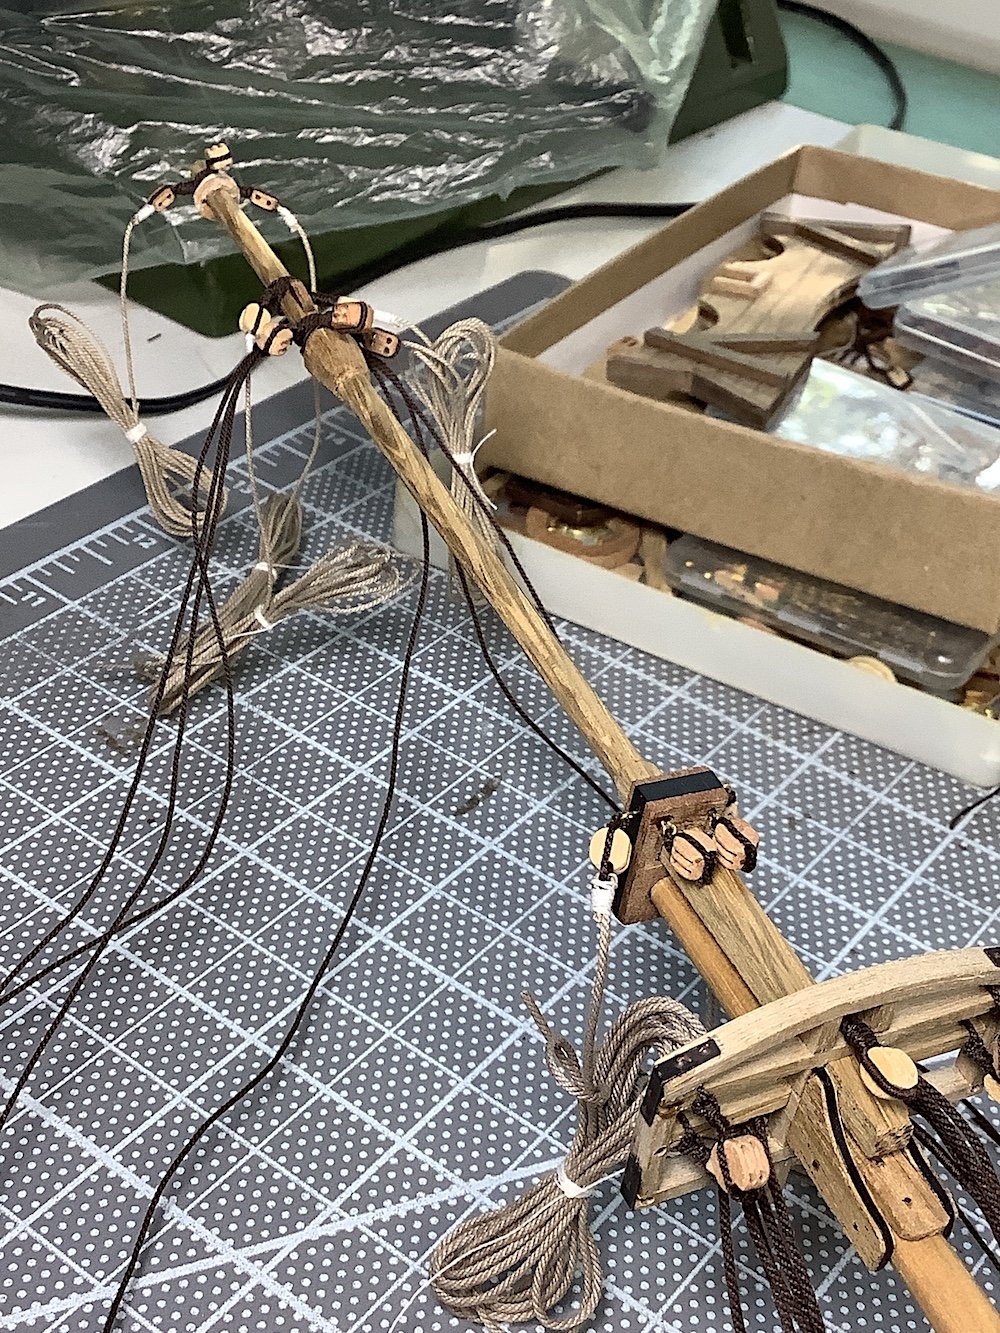
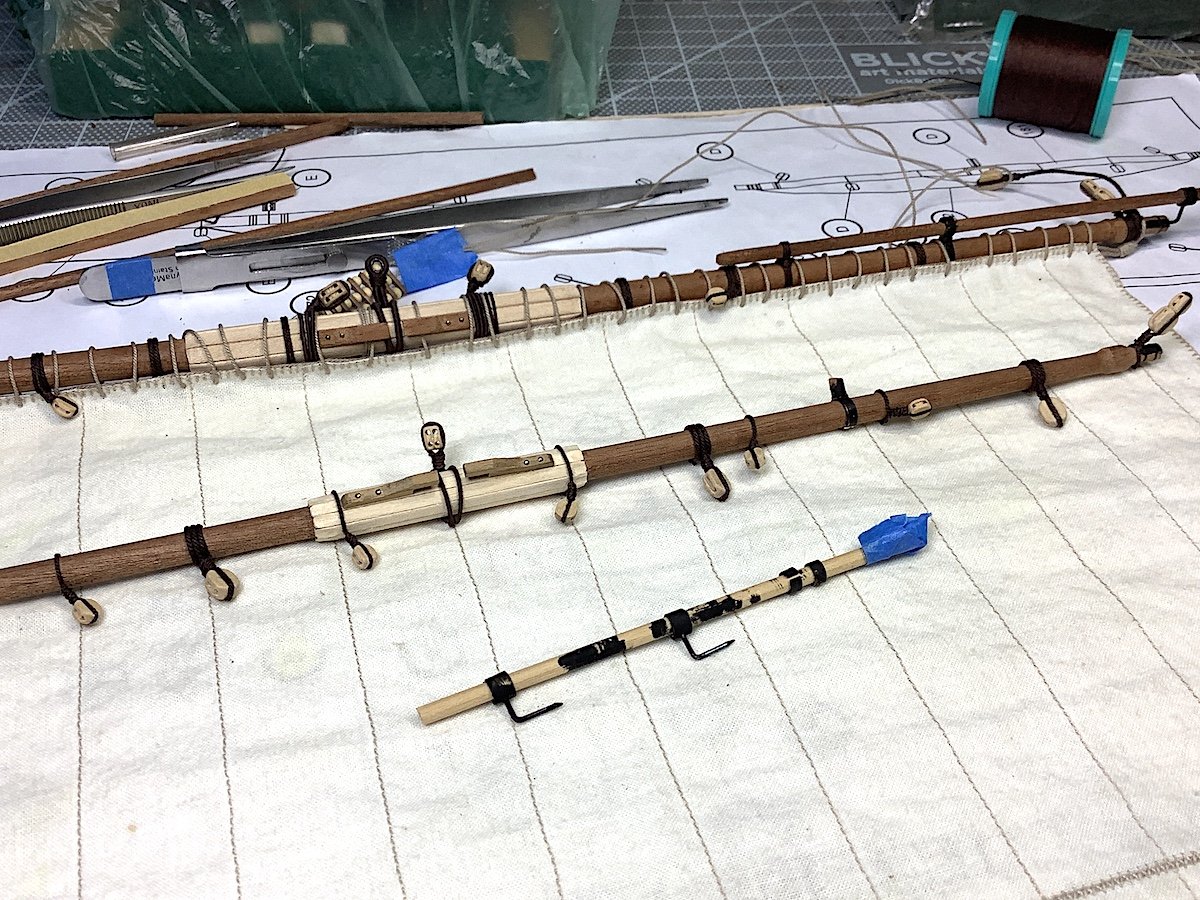
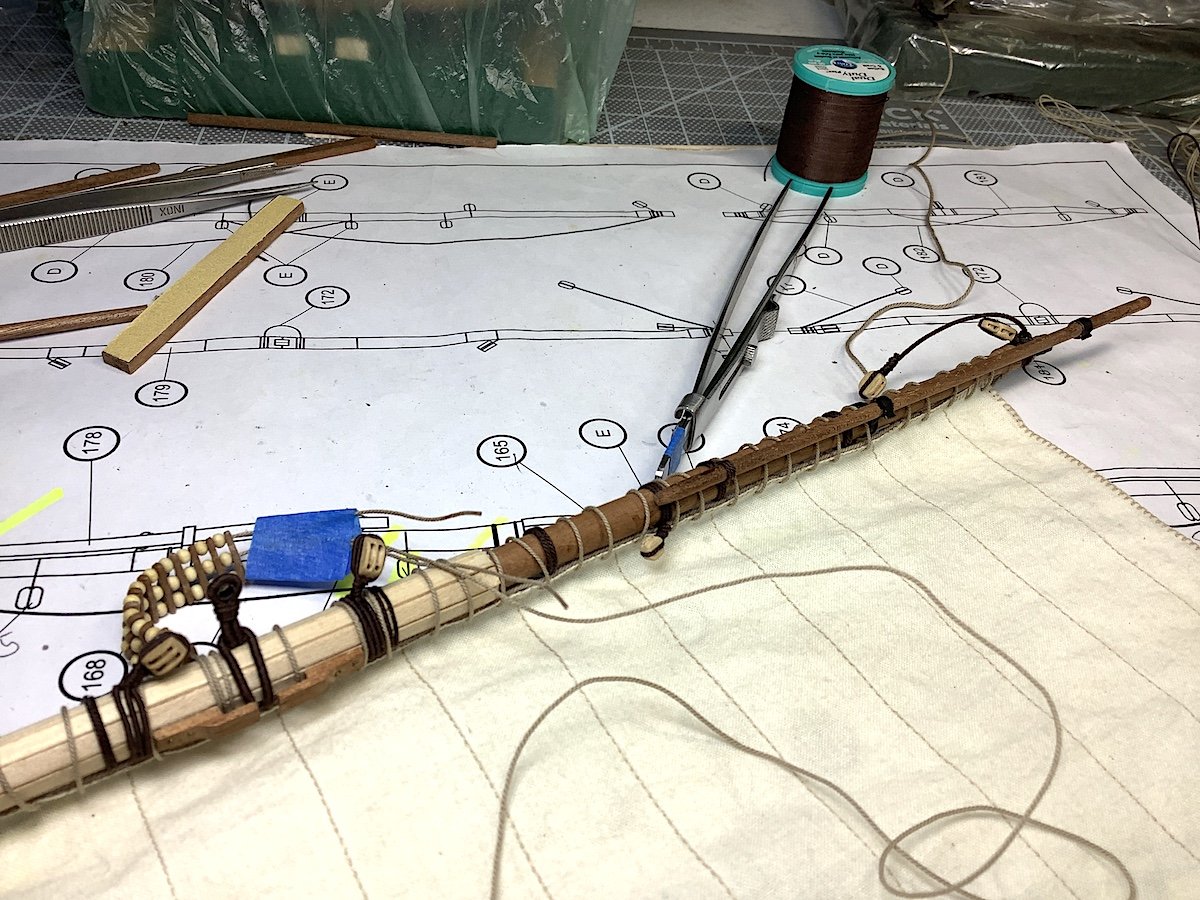
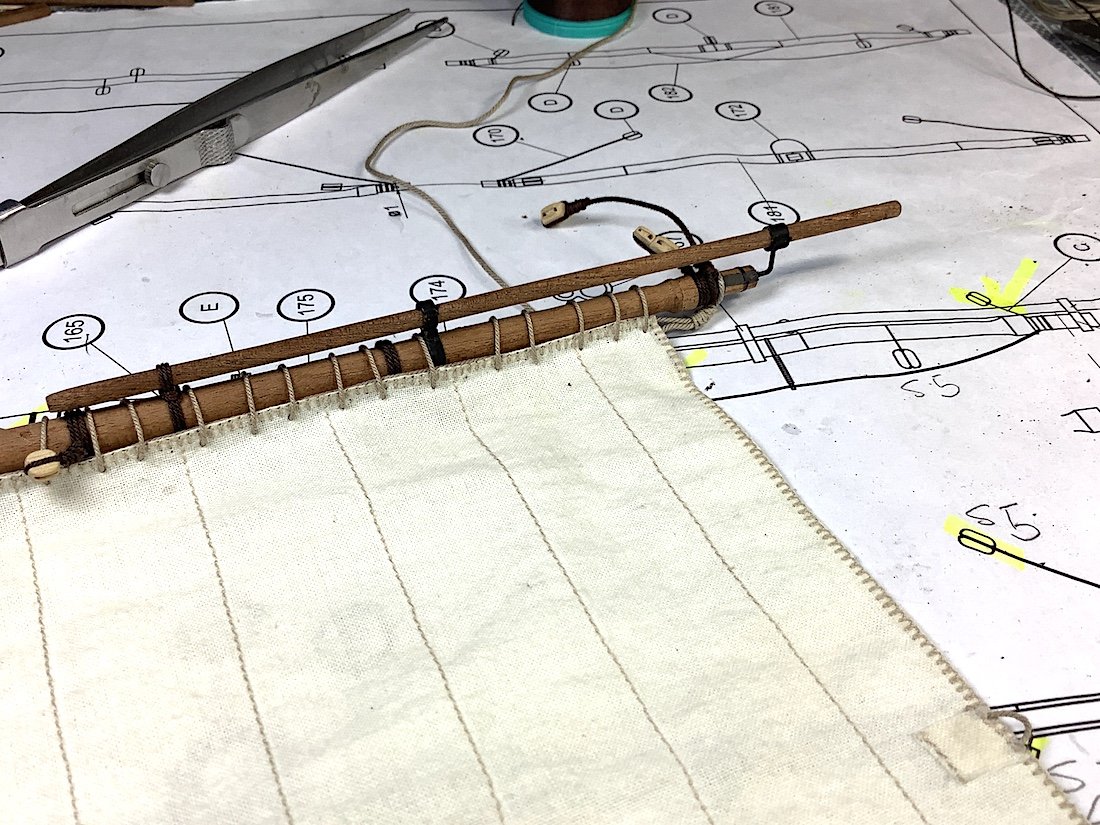
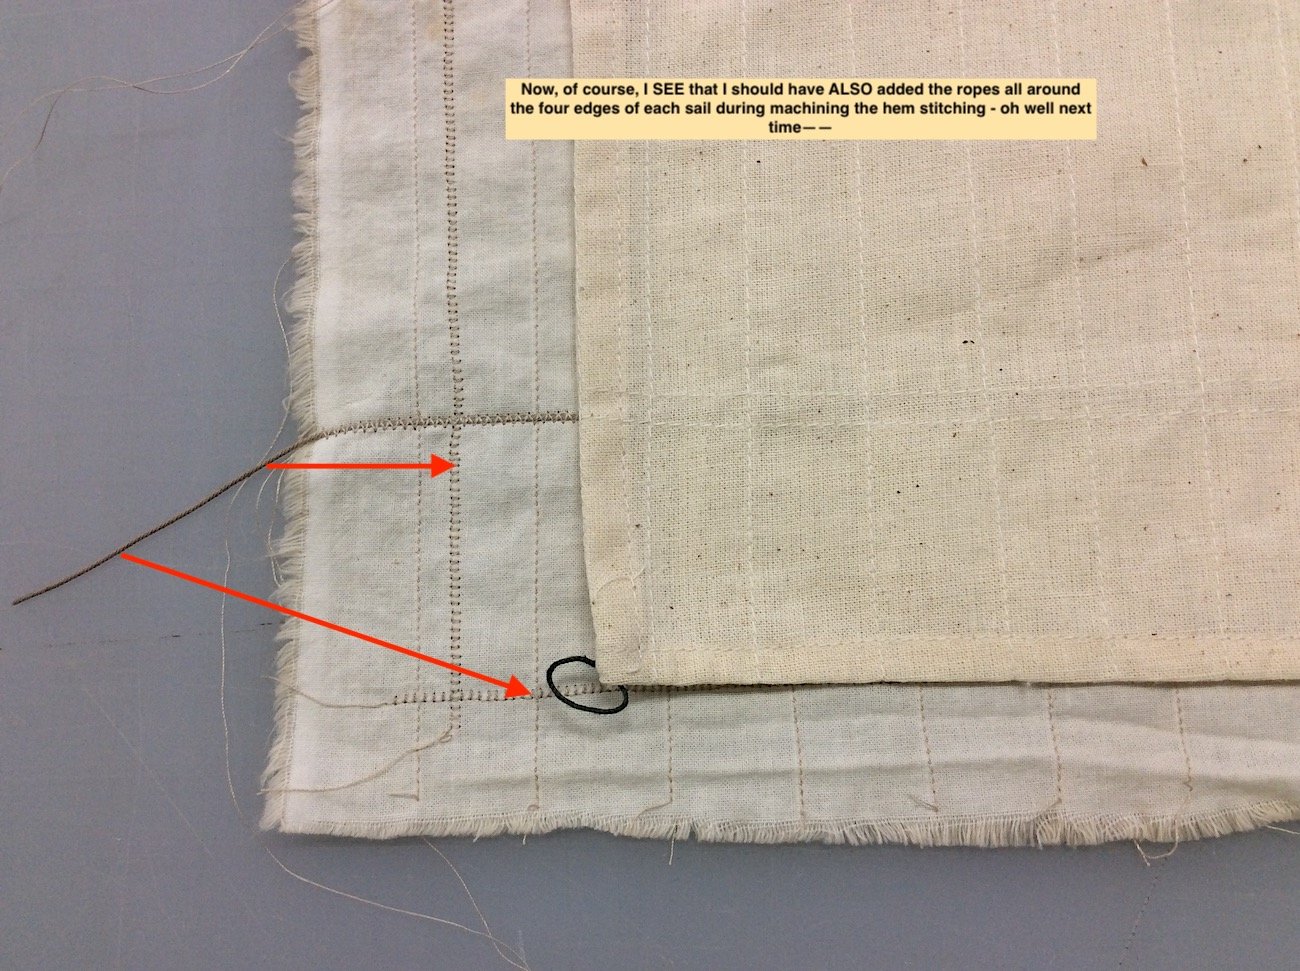
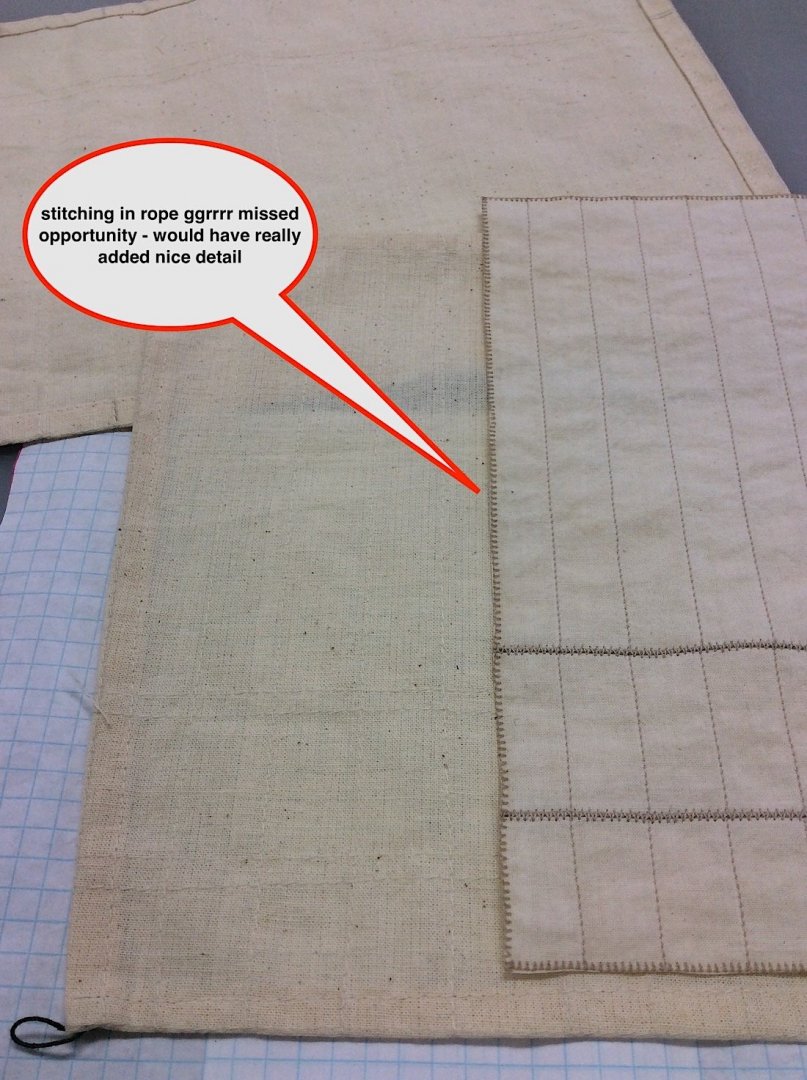
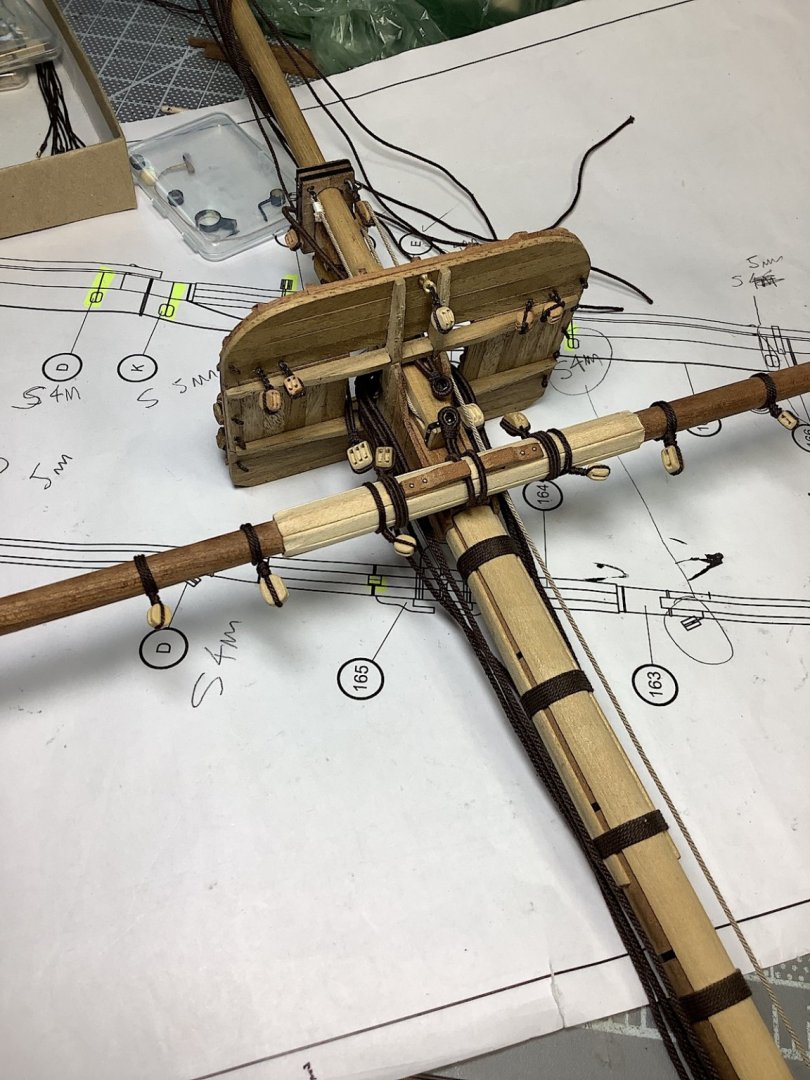
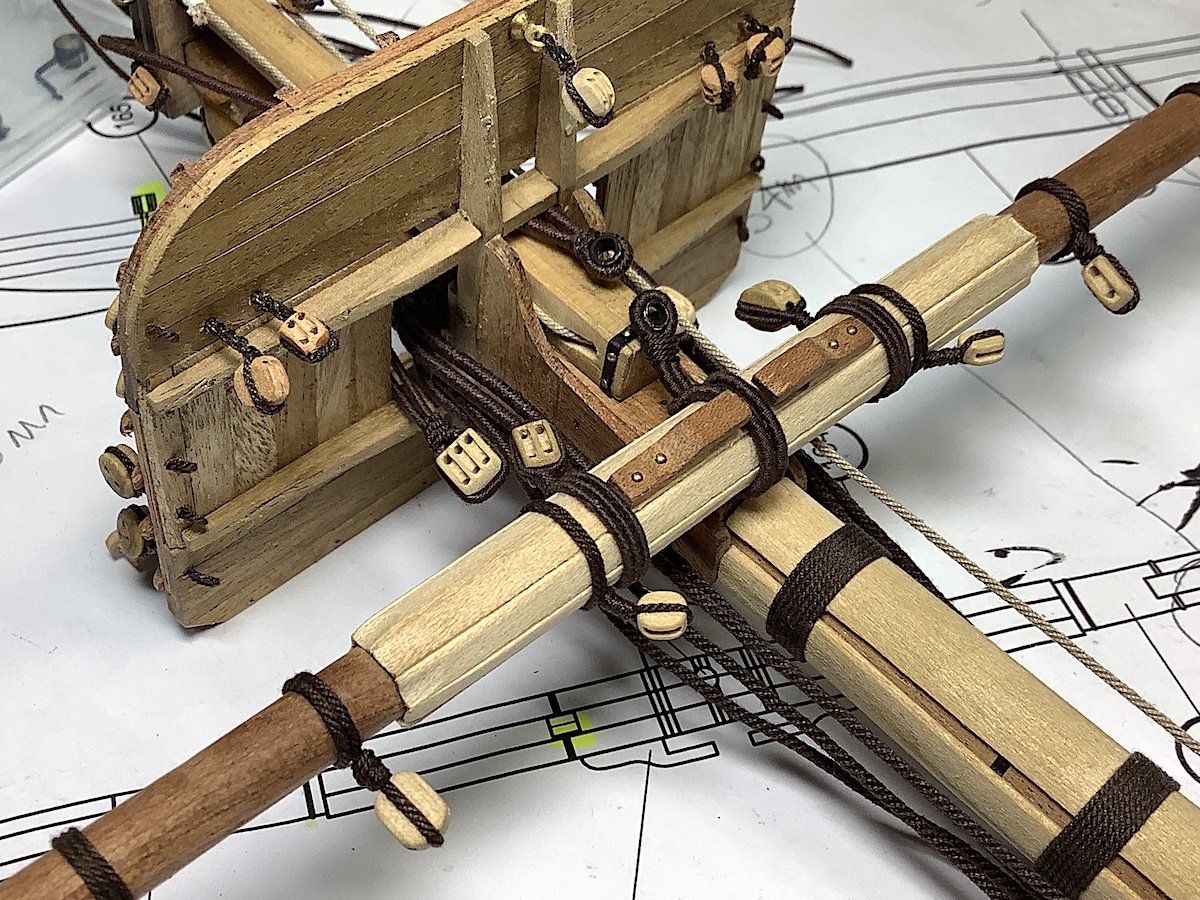
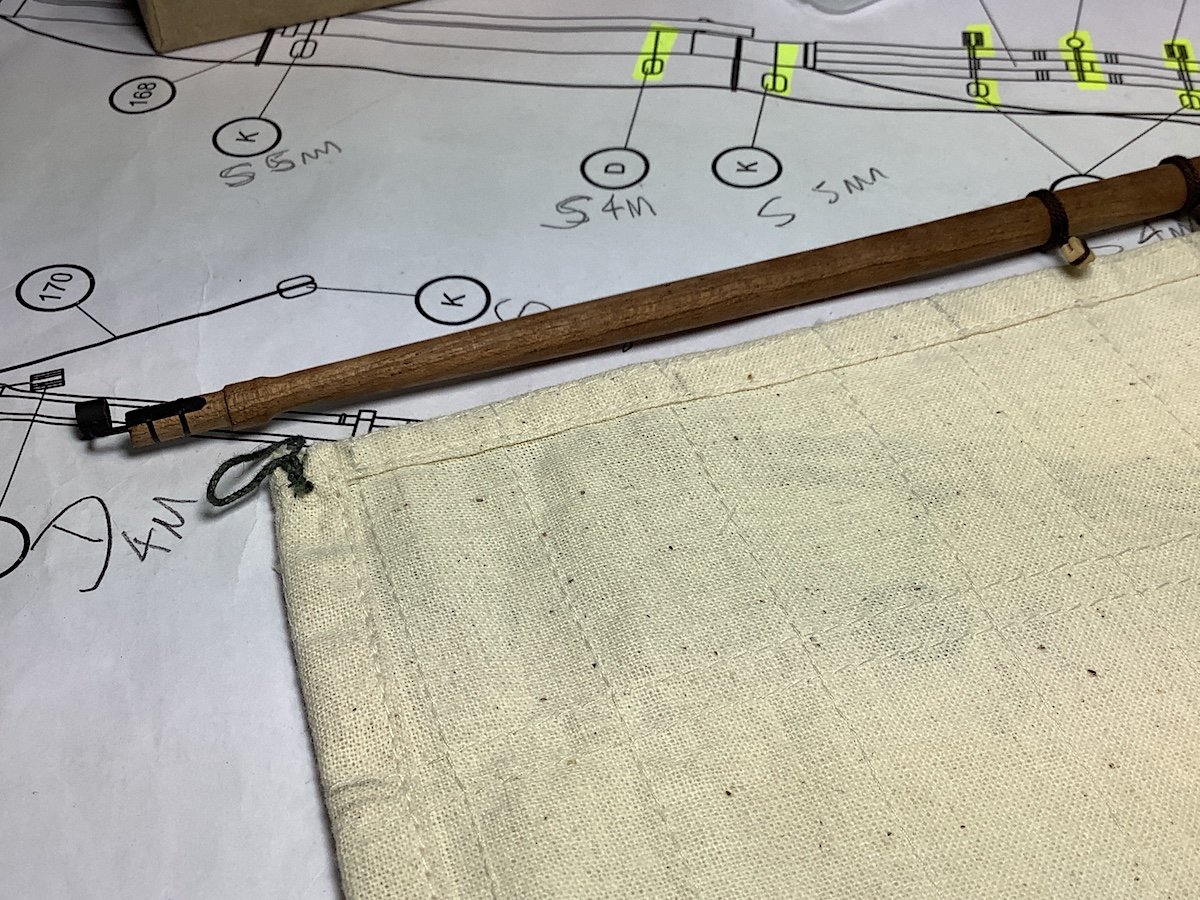
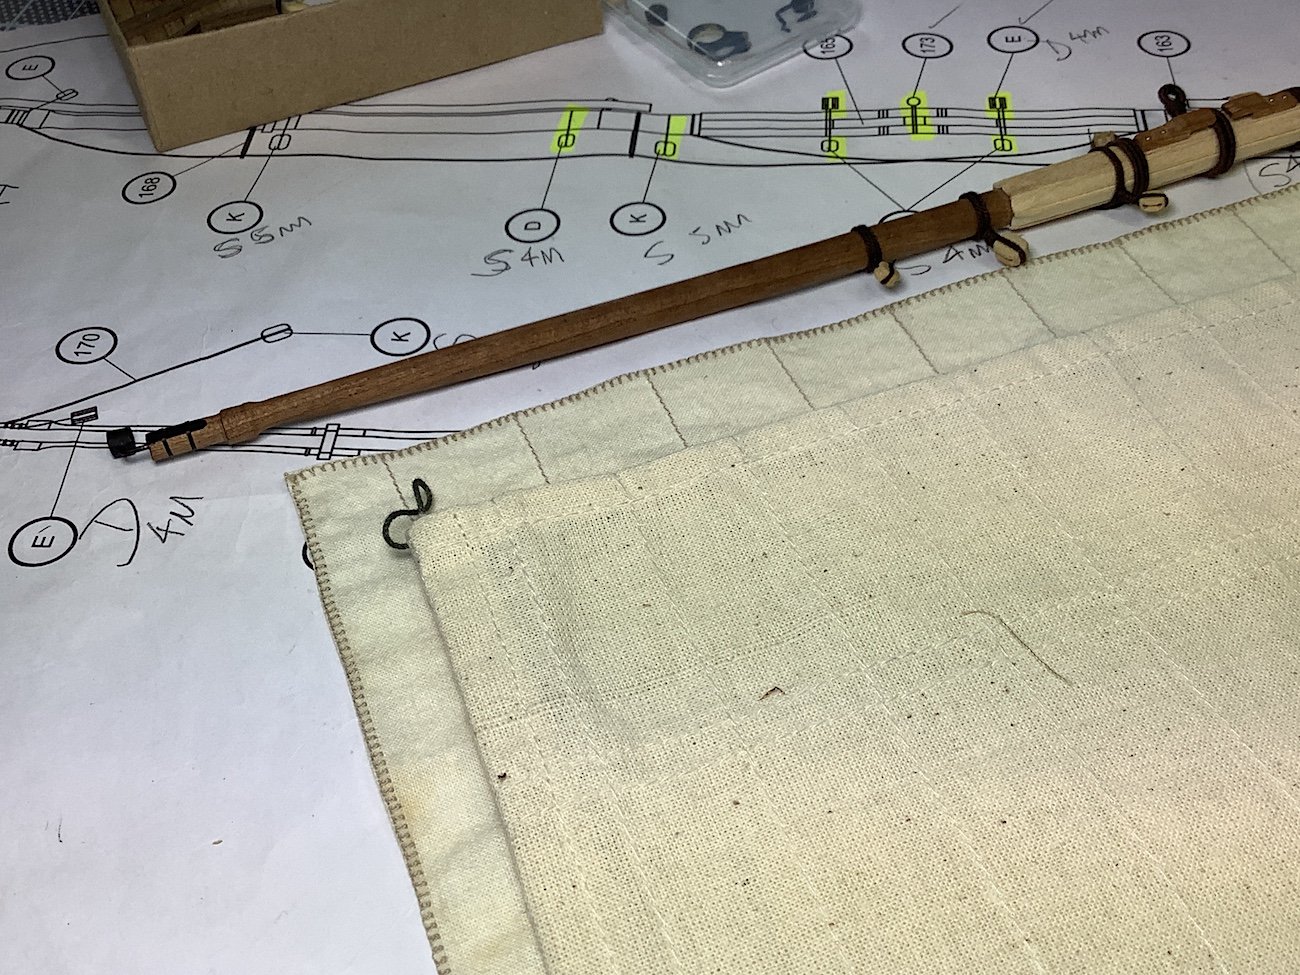
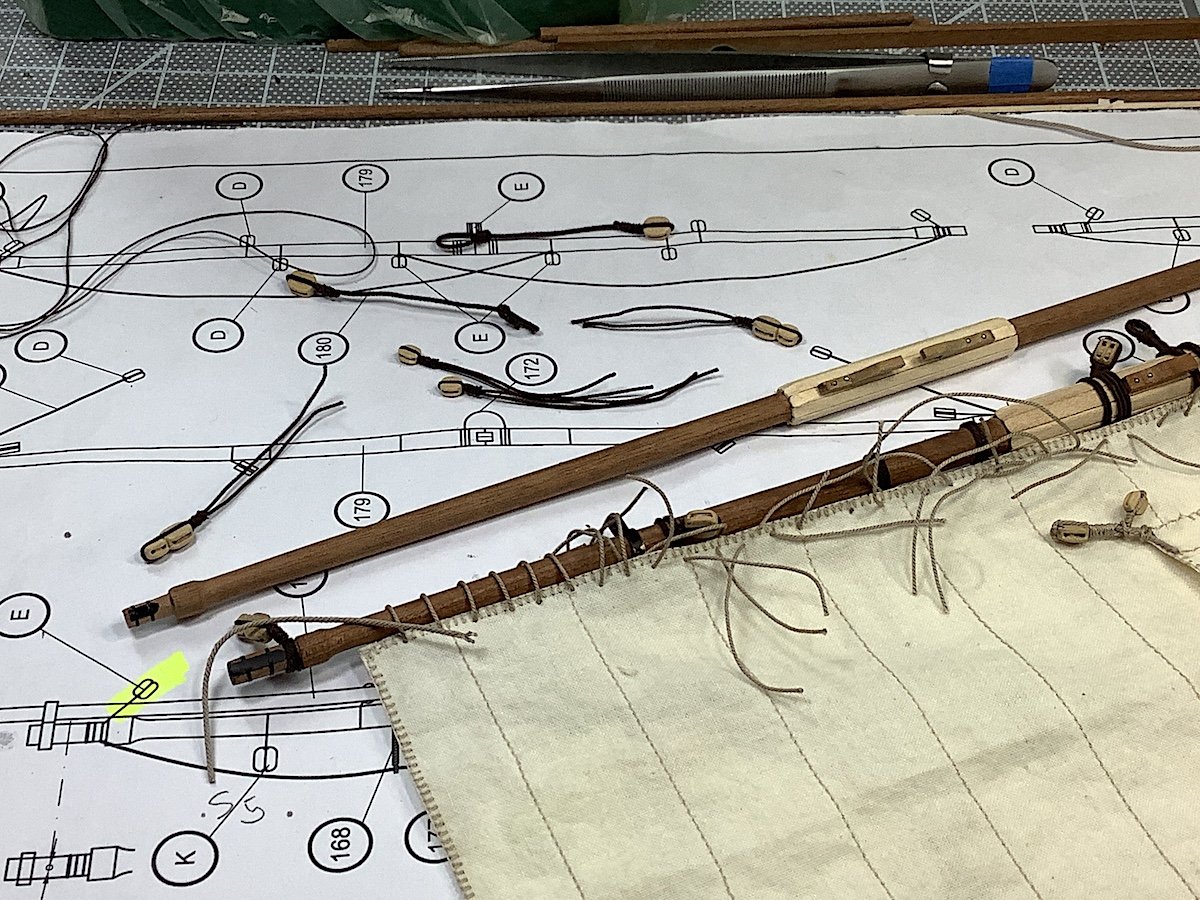
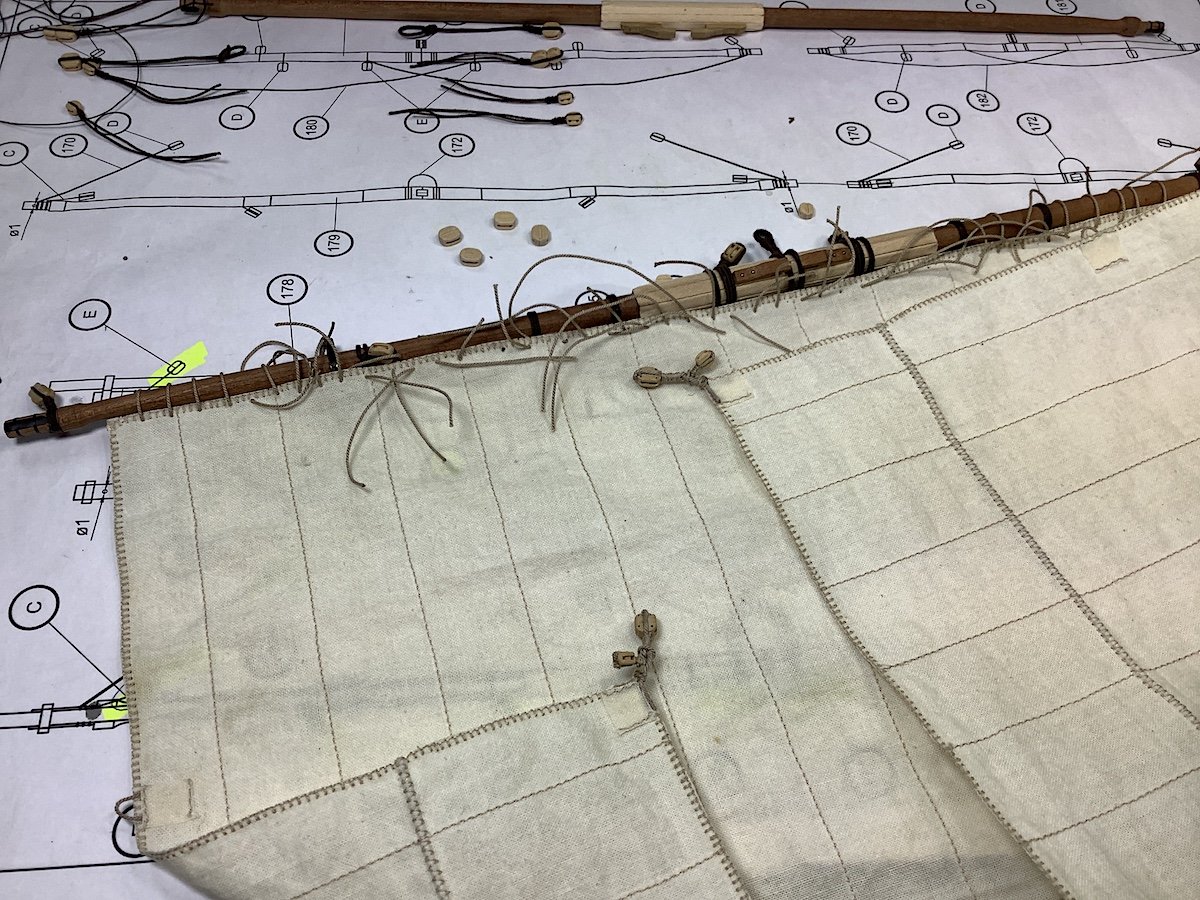
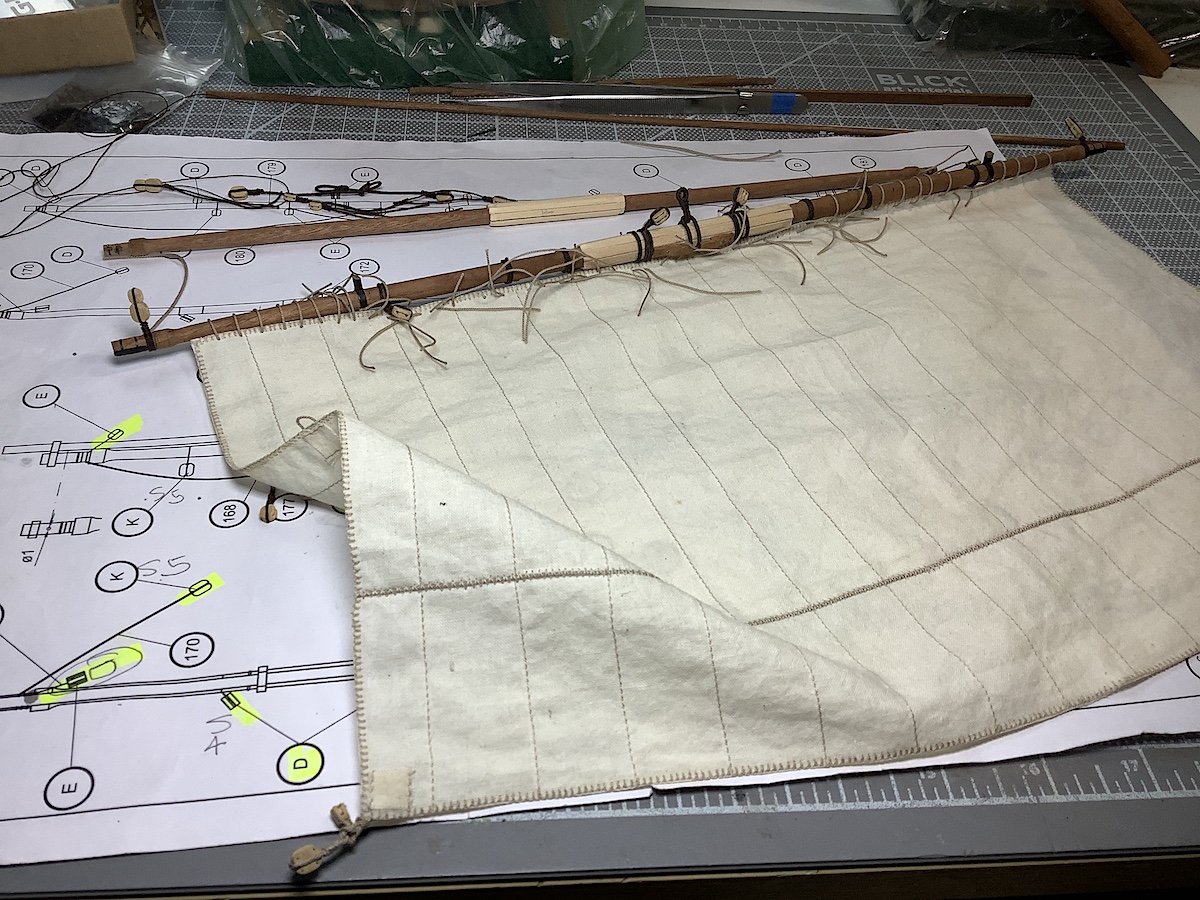
Hi mates, Finishing up the other two masts as well as attaching the yard hailing ropes; decided to somewhat divert away from the Occre specific rigging instructions -- including adding double fiddle blocks at each end of the yards + other changes. For example Occre’s instructions for attaching parts of the sails to yards – just below sails - are not correct IMO. Other issues as well. Re-worked the stunt boom yard structural support to “fit” the look that I wanted. That copper tape was much too thin. Instead used thicker model car pin striping tape then banded the supports with same type of tape. Will probably add two small nails to each side – to finish off how it would have been secured to the yards. Made the sails (first pic is Occre included sails) – that said, sails should probably be hemmed with rope as well (though some museum models that I have looked at do not border sails with rope – probably because the rope is wrapped within the hems?). Started to do that (thread the rope) but became too fiddly. In any case sails will be mostly furled – I think? So skipping that detail for all four sails. General pics. Give you the ideas –Hmmm need to “clean up” underside of that platform some bits are badly finished off. Thanks for dropping by Cheers,
- 371 replies
-
- 13
-
-
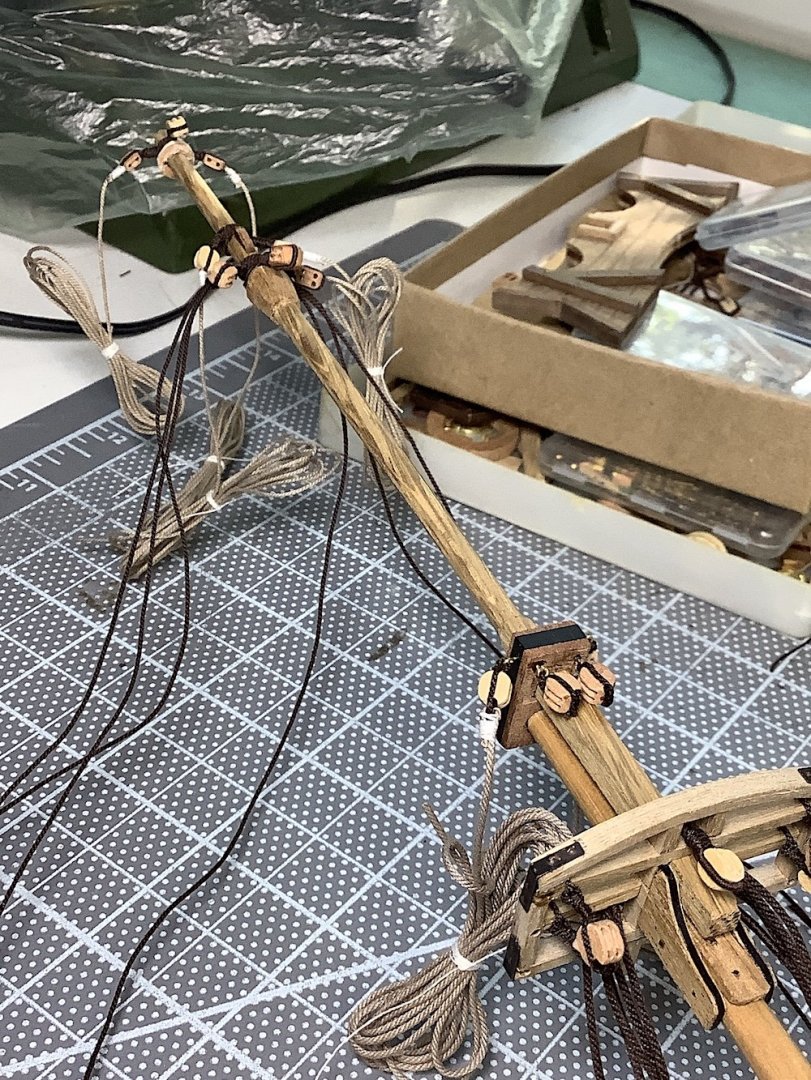
Peter, PS: I saw your photo - I used to do it that way as well - takes way too long IMO. I found this better method at one of our members build logs - so much easier, faster, and easy to shape. Took photo just posing yard FYI. If you have a rotary tool give this a try. Cheers,
- 61 replies
-
- 3
-
-
- billing boats
- vasa
- (and 1 more)