md1400cs
-
Posts
2,875 -
Joined
-
Last visited
Content Type
Profiles
Forums
Gallery
Events
Everything posted by md1400cs
-
 Richard -- again
 -
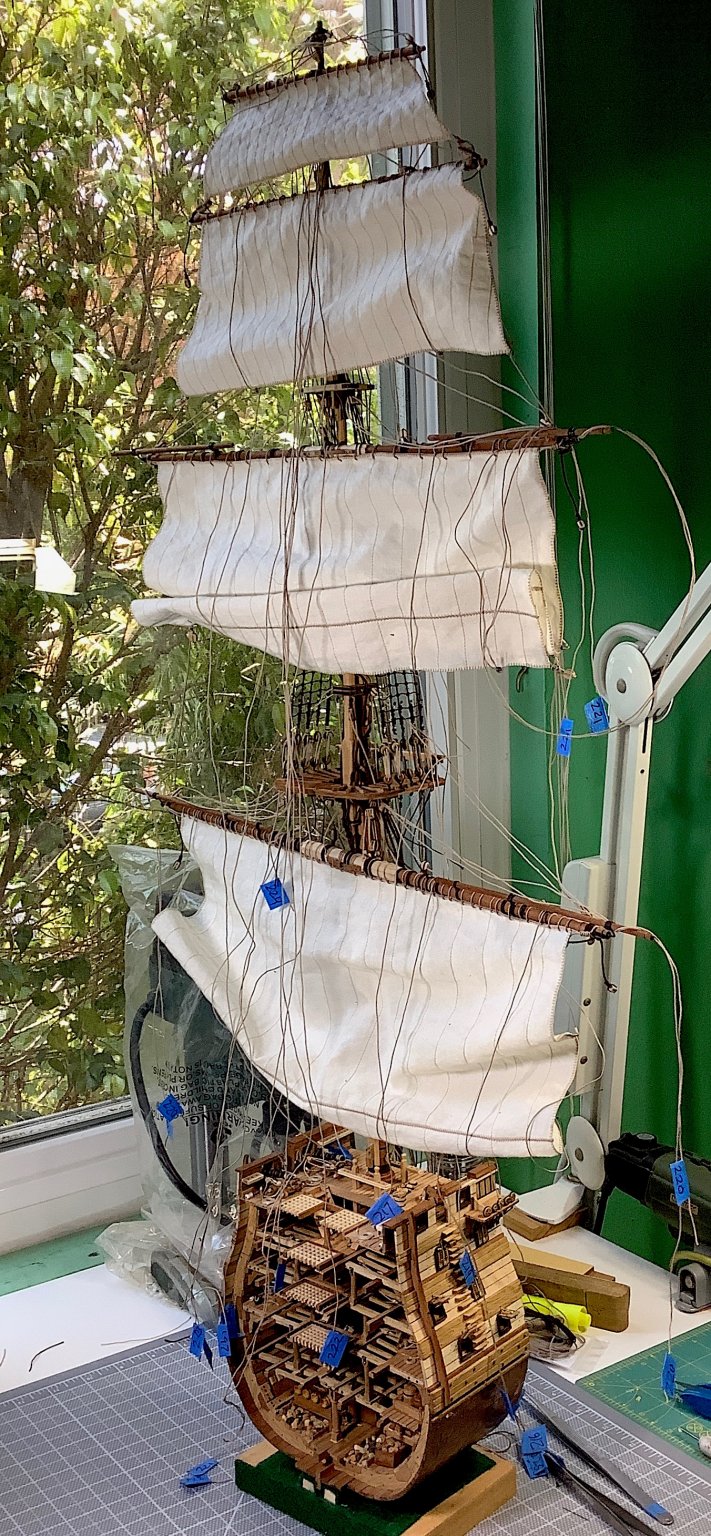
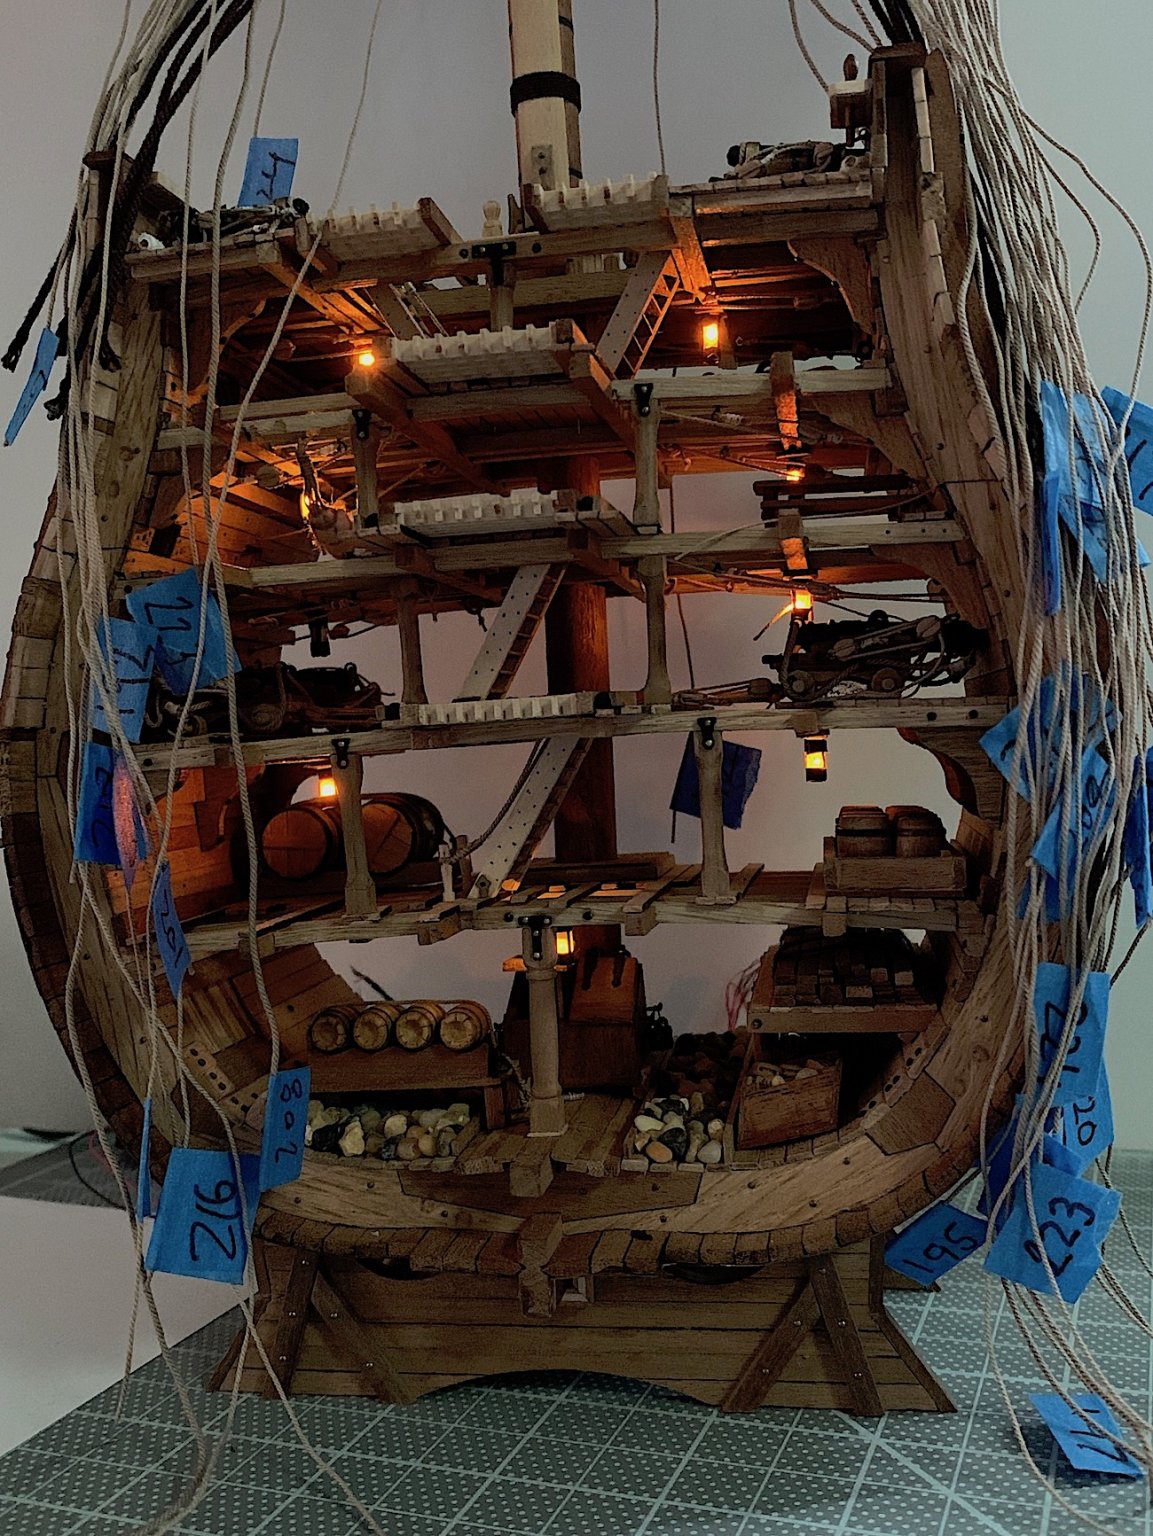
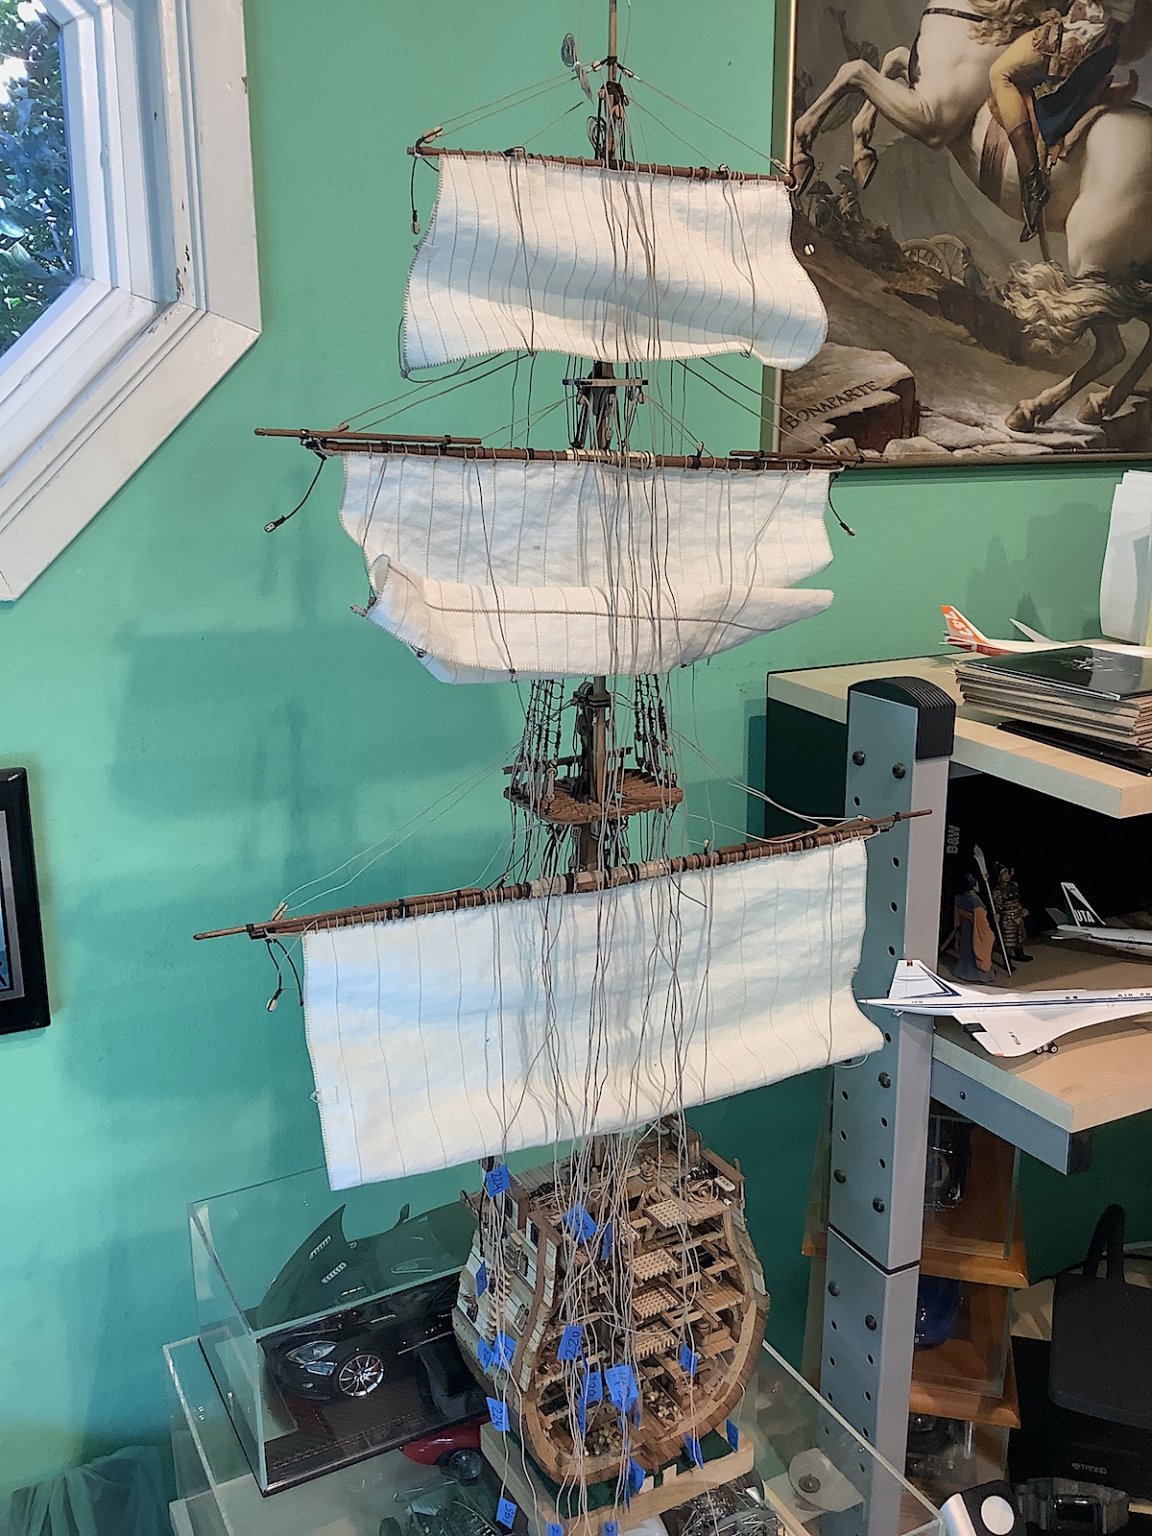
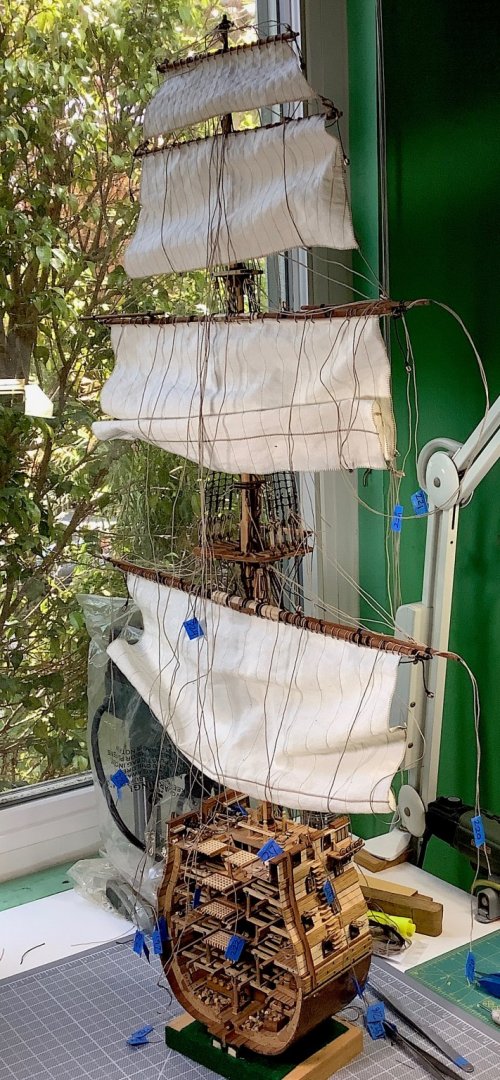
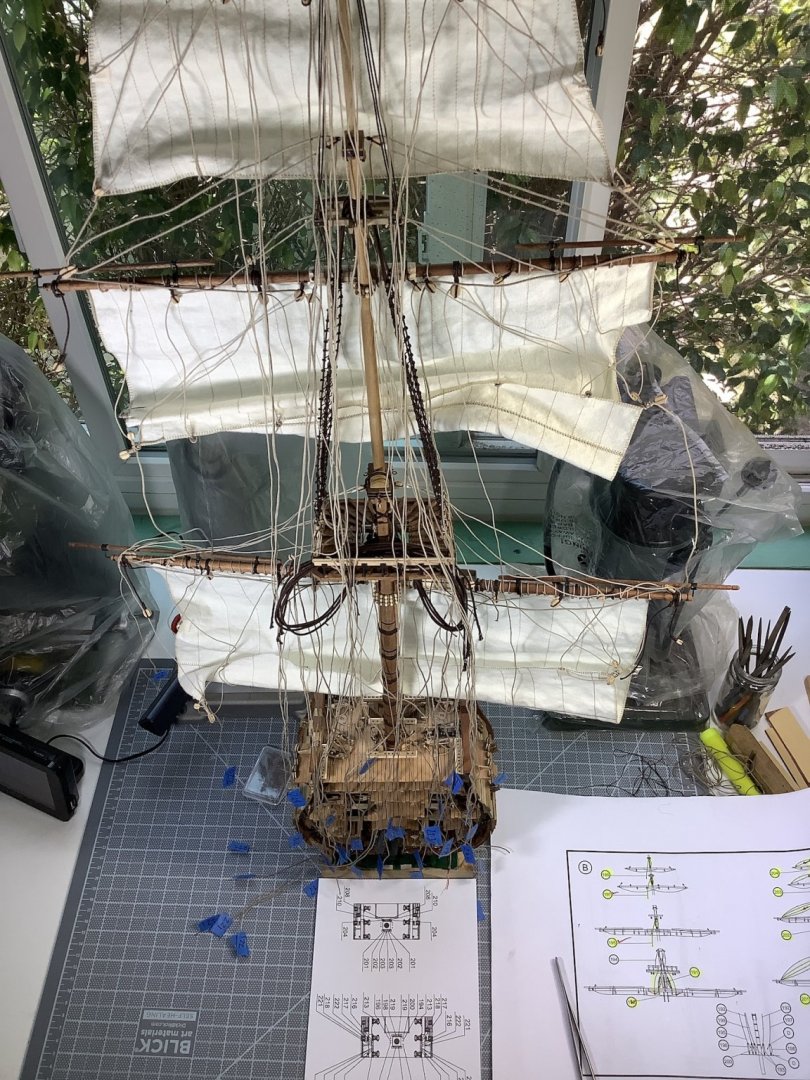
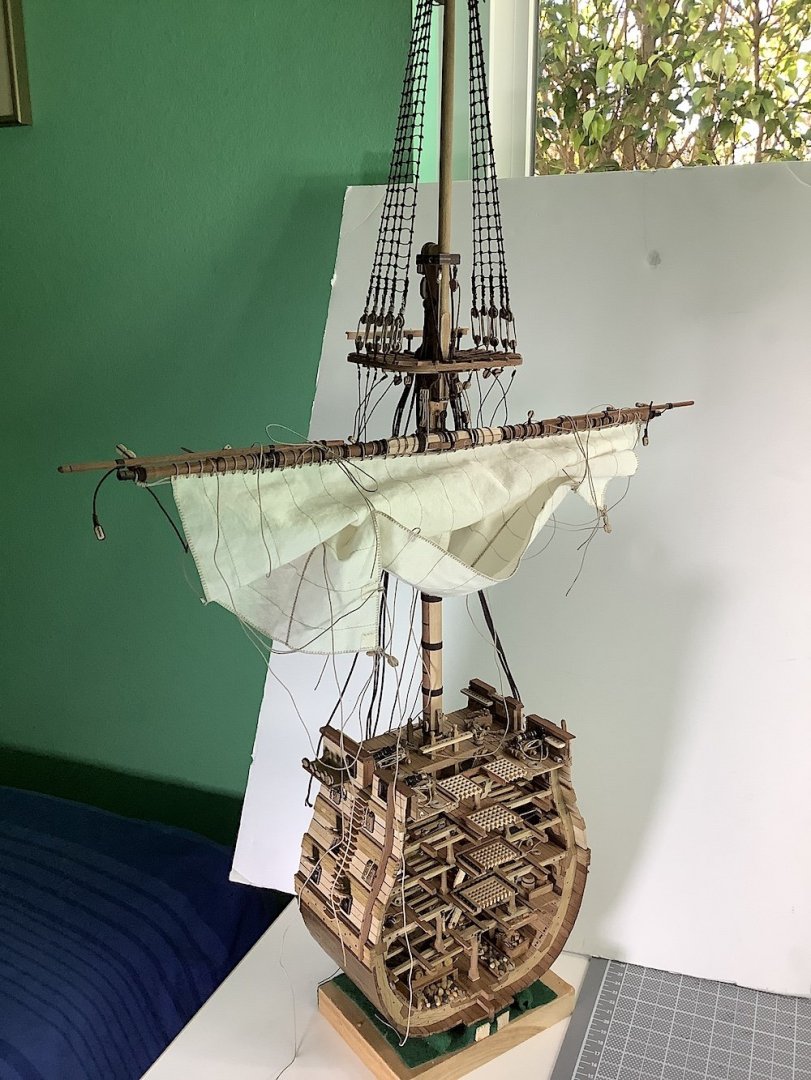
Almost done (well for me this will still be some time later) - all rigging installed. Need to spool 40+ coils to wrap at pins, then untangle and install lines - wall display case is also being made. thankfully all lanterns still OK.


- 371 replies
-
- 10
-

-
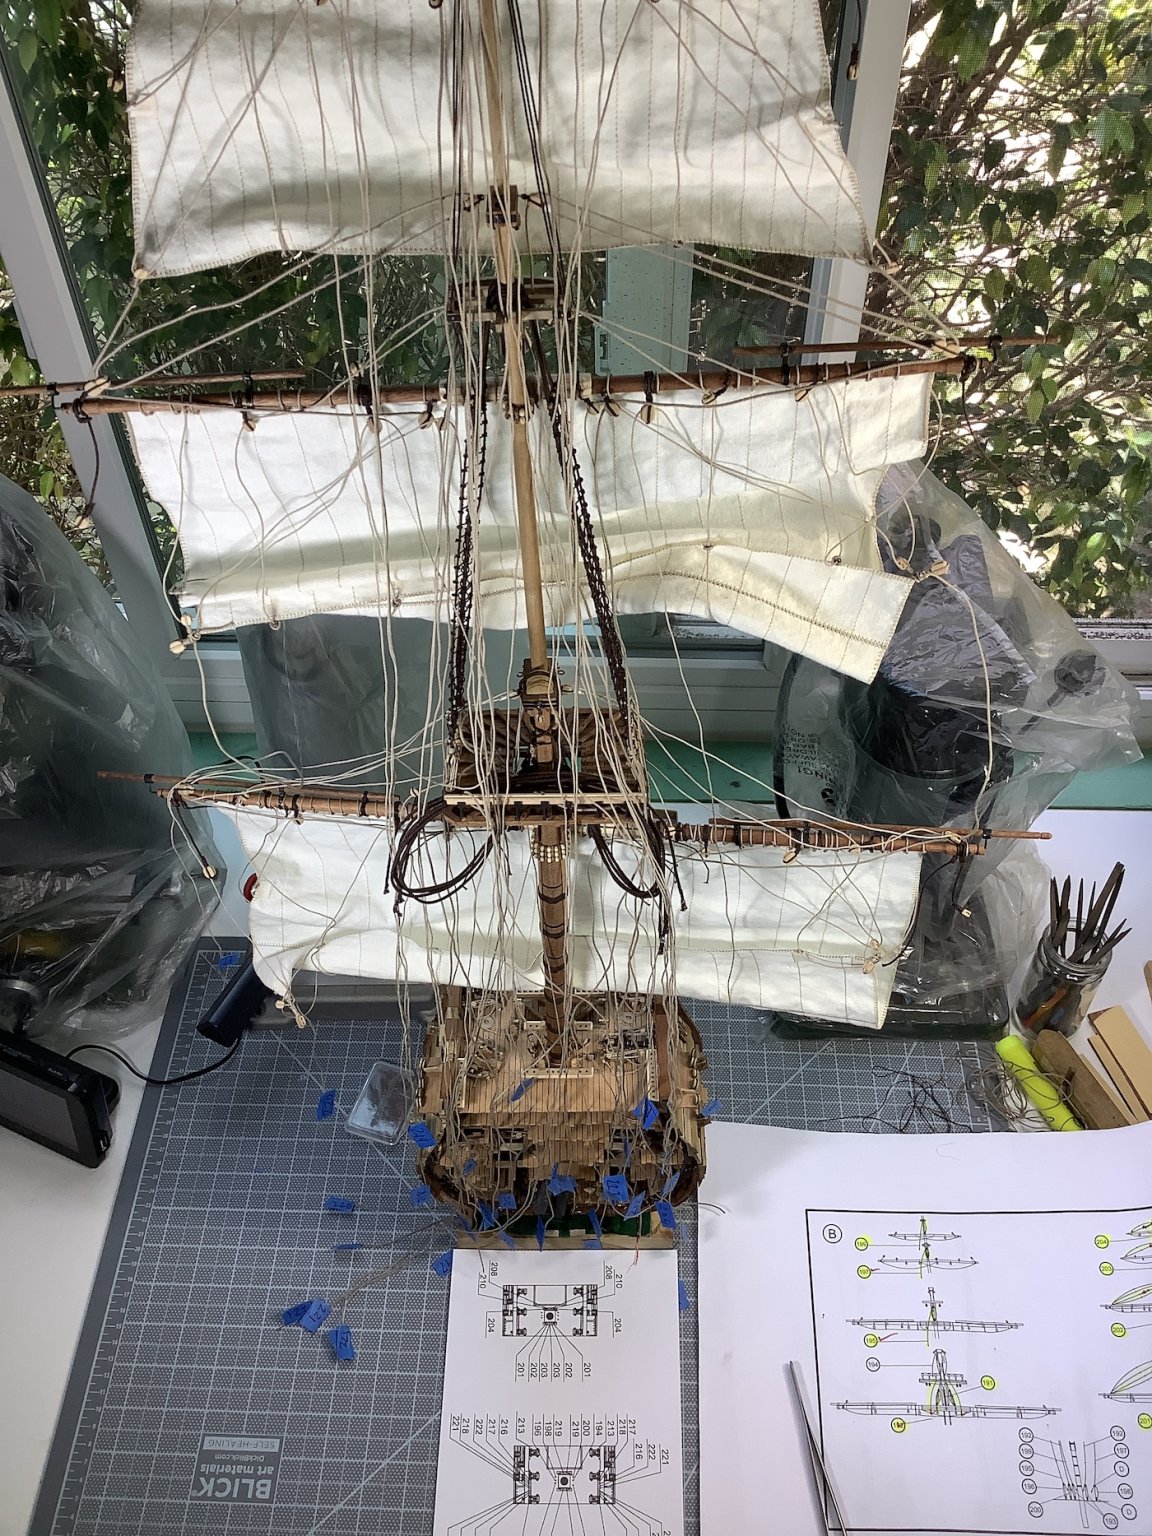
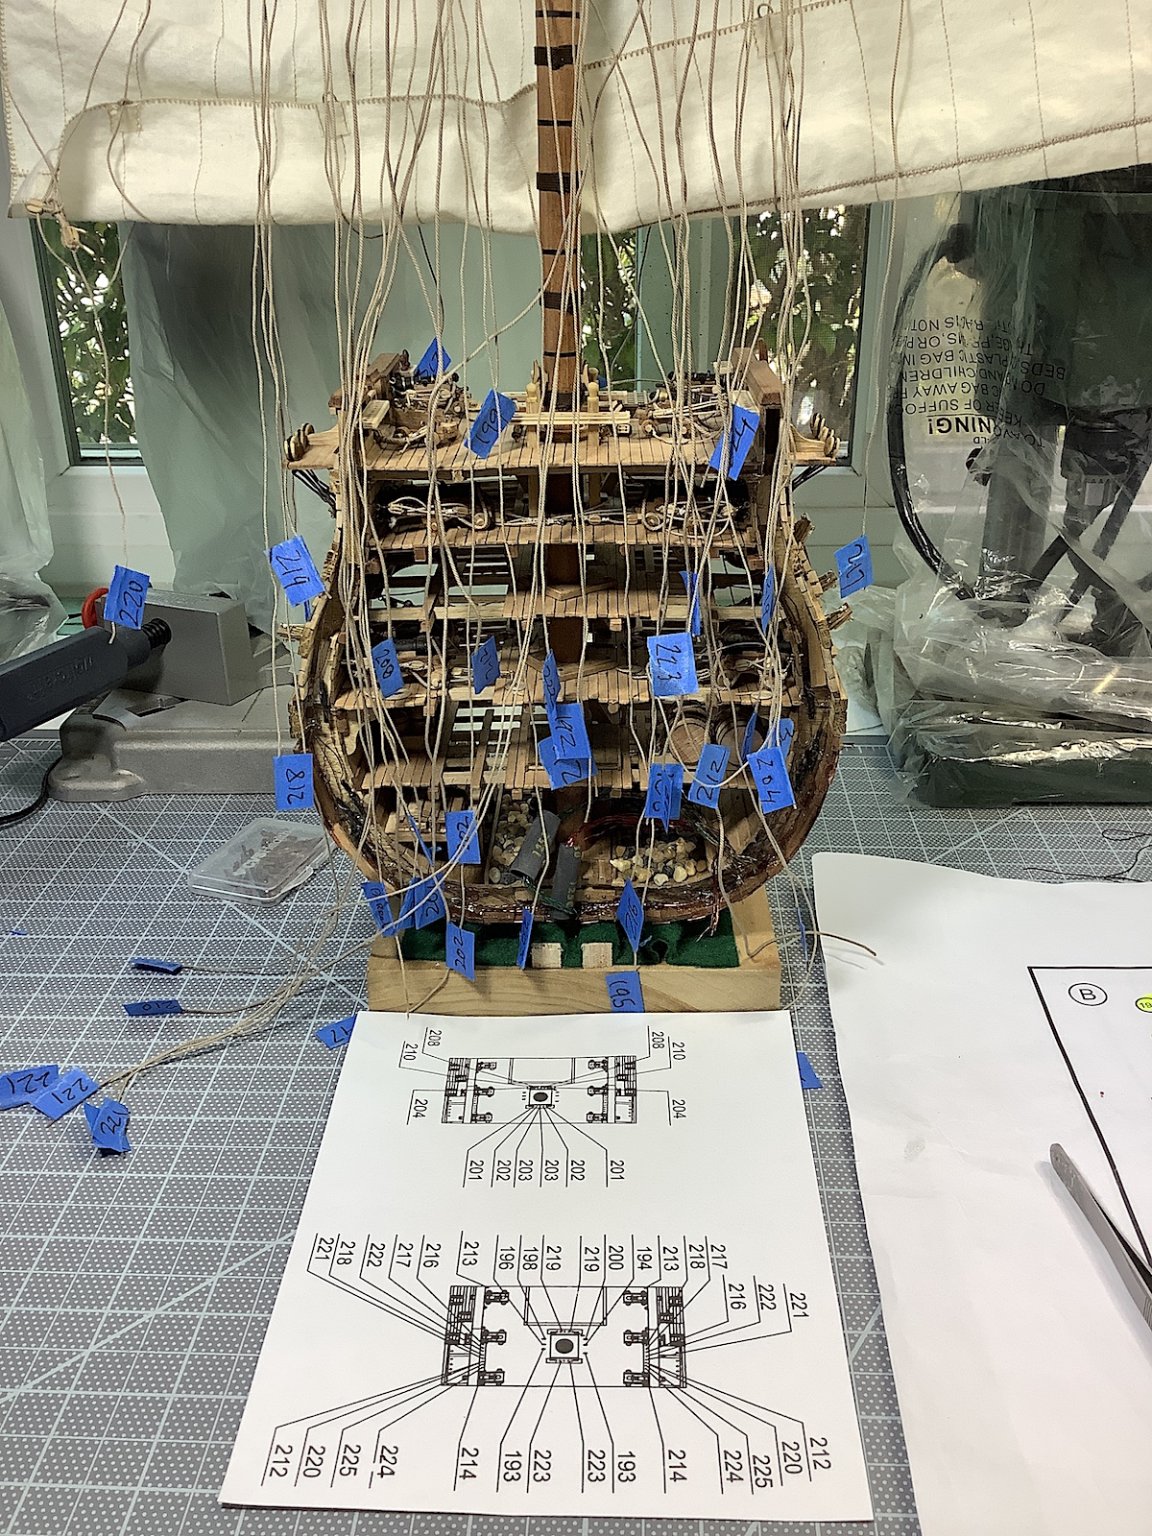
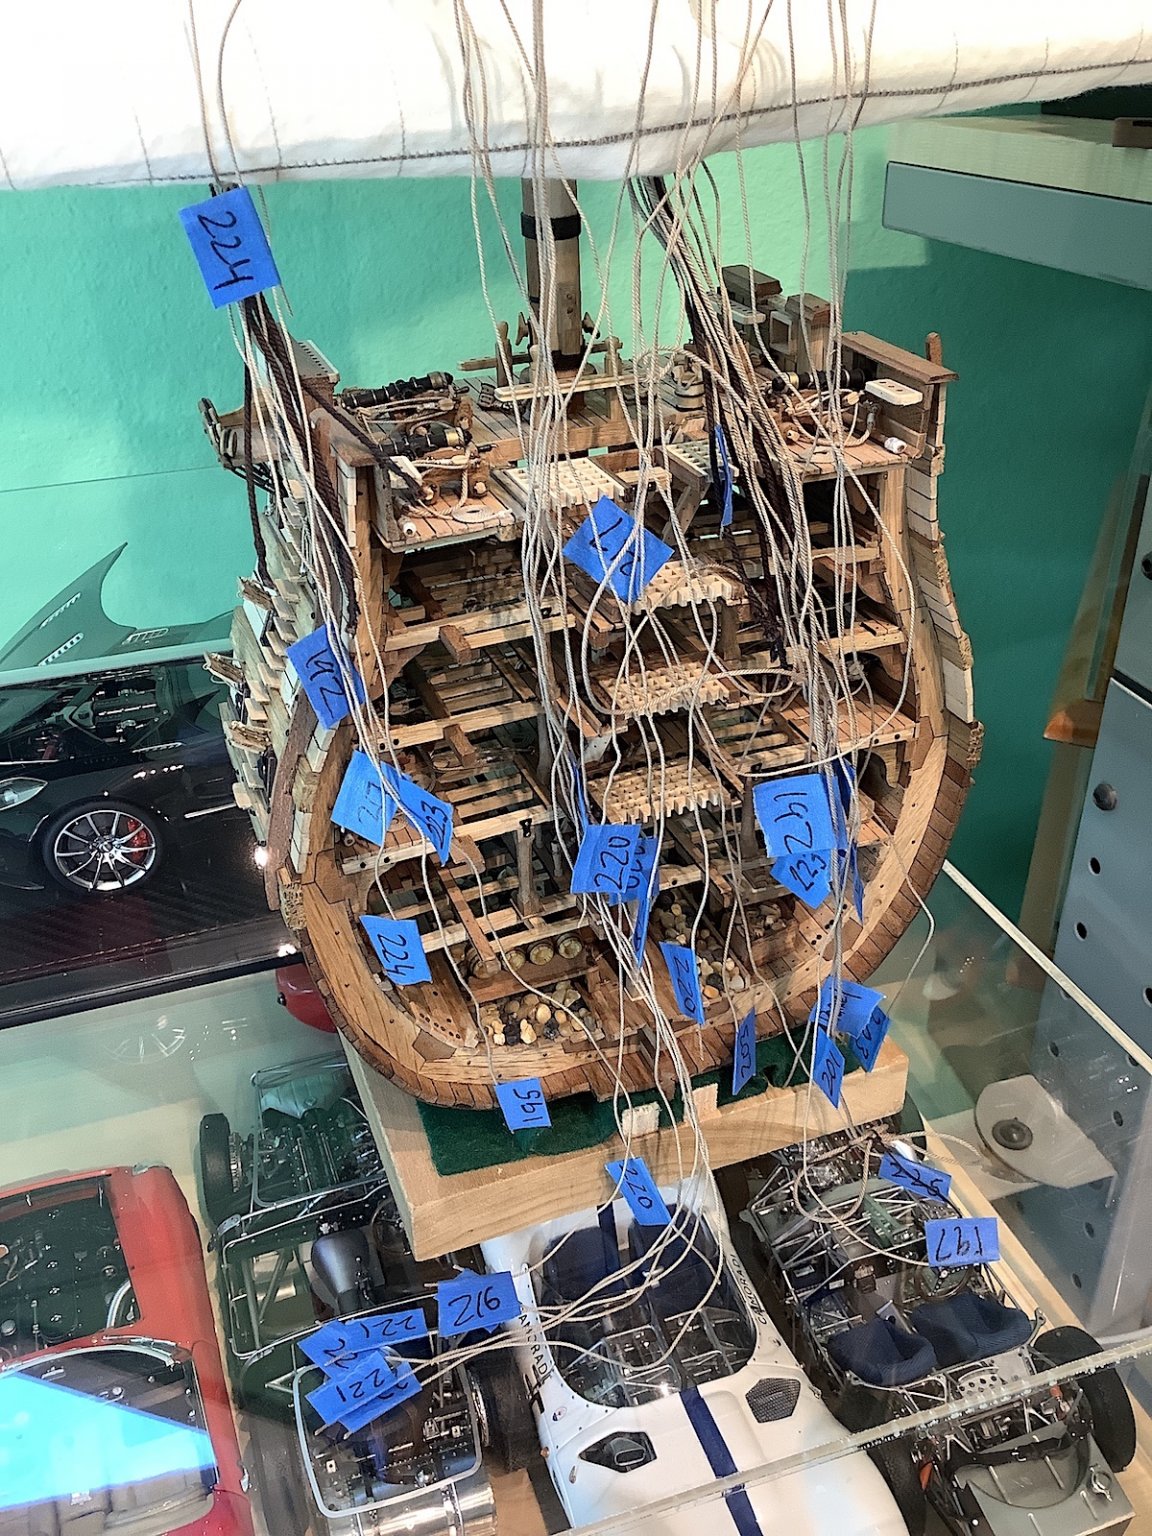
Richard, thanks - yes trying to save myself extra work. Numbering the lines should also allow a sequence for attaching - if these numbers work the way other kit rigging sheet instructions have in the past. And I want to finish this project sooner rather than later -
-
E.J, I've been following your work for a long time - this one is so superb mate. Big congrats. The 4th image from the top is so perfect - super well done details all around.
-
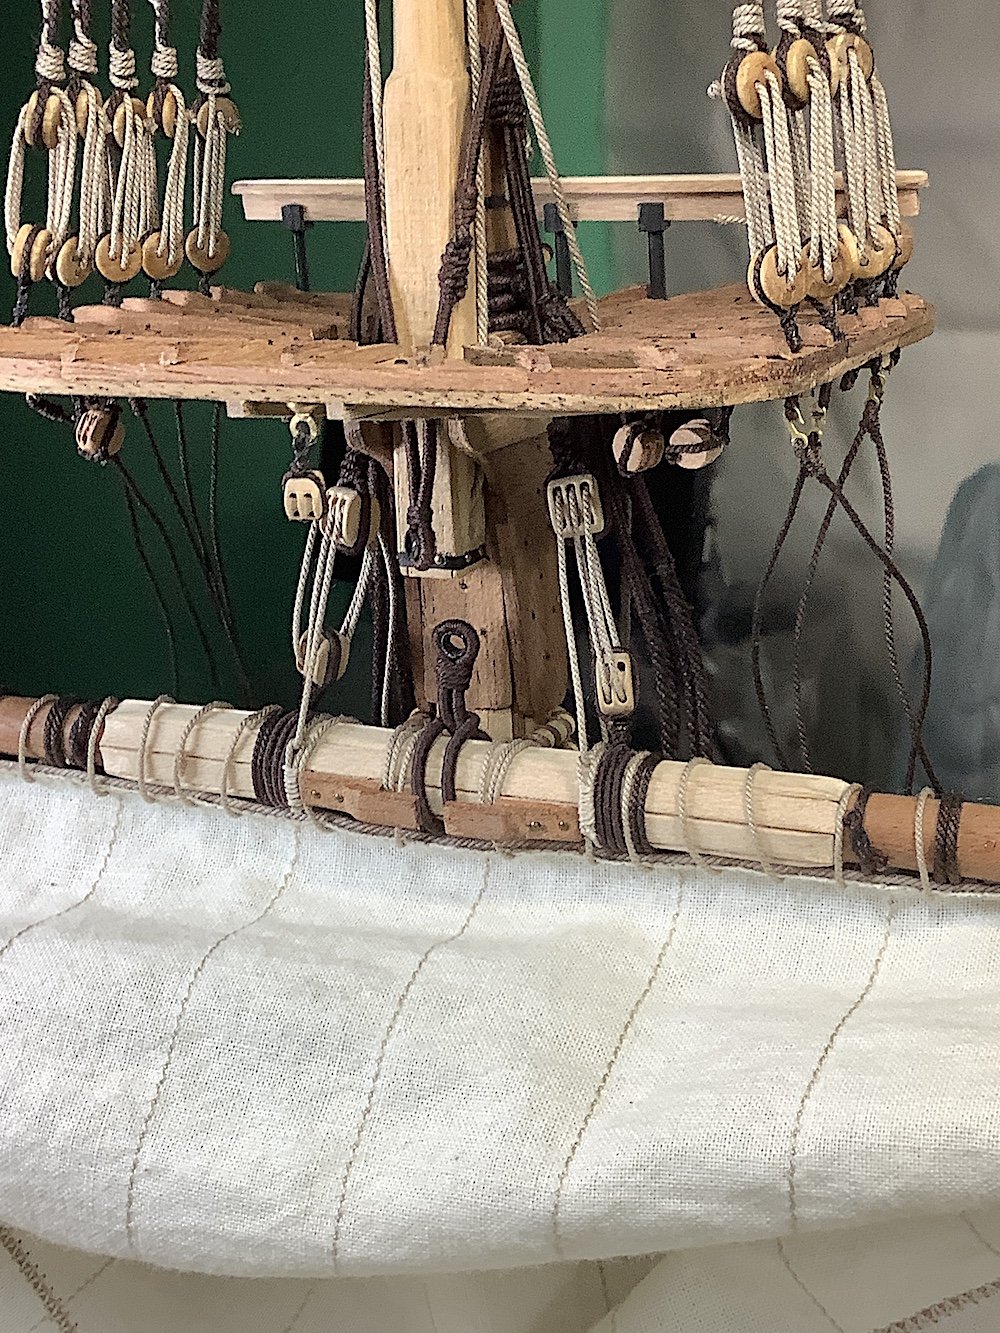
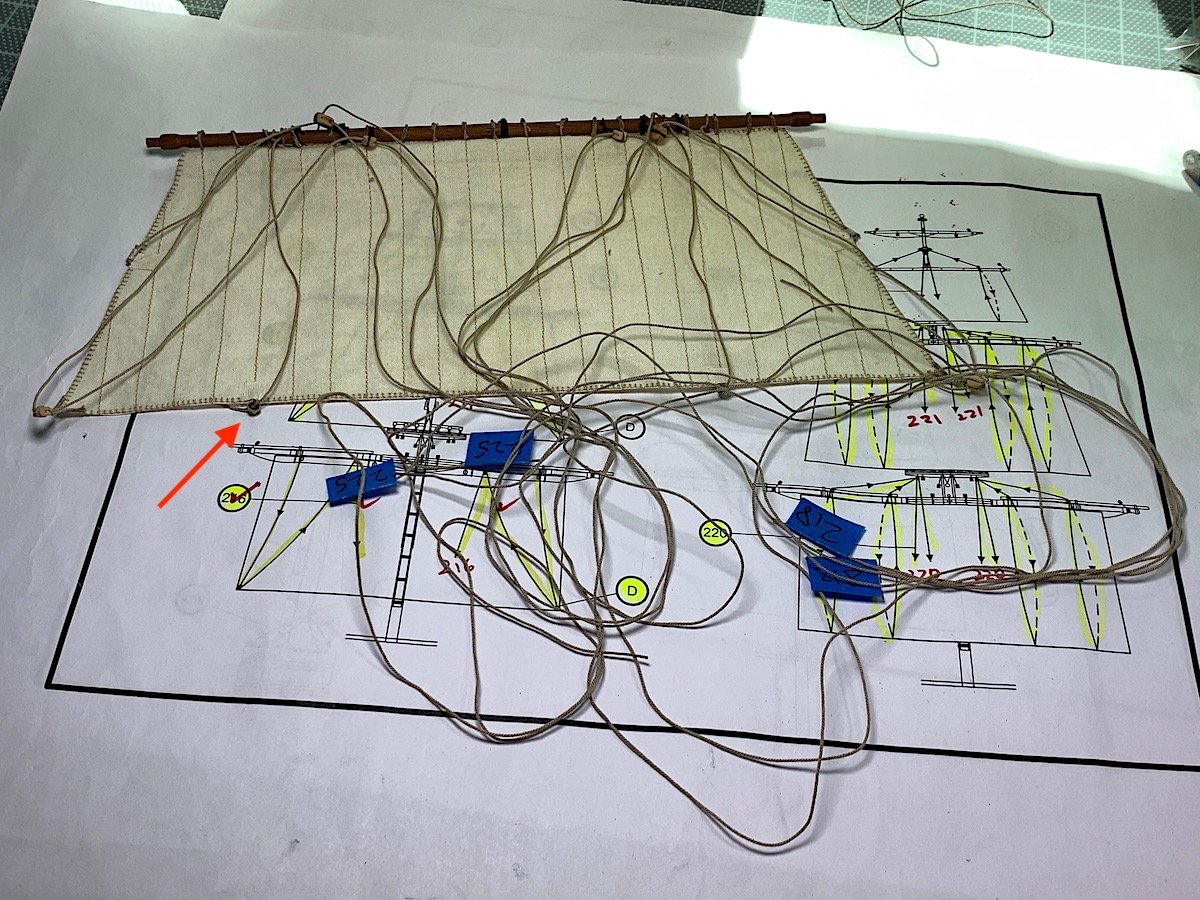
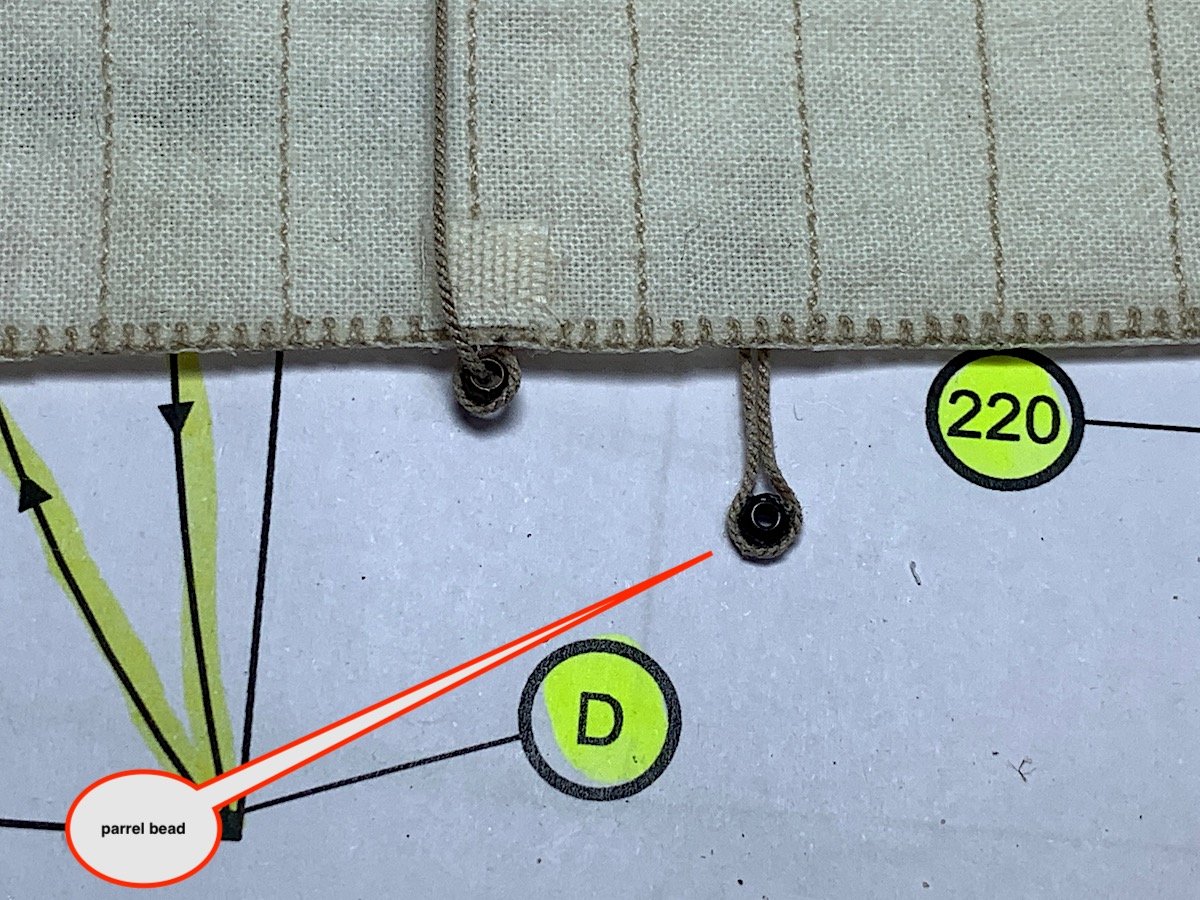
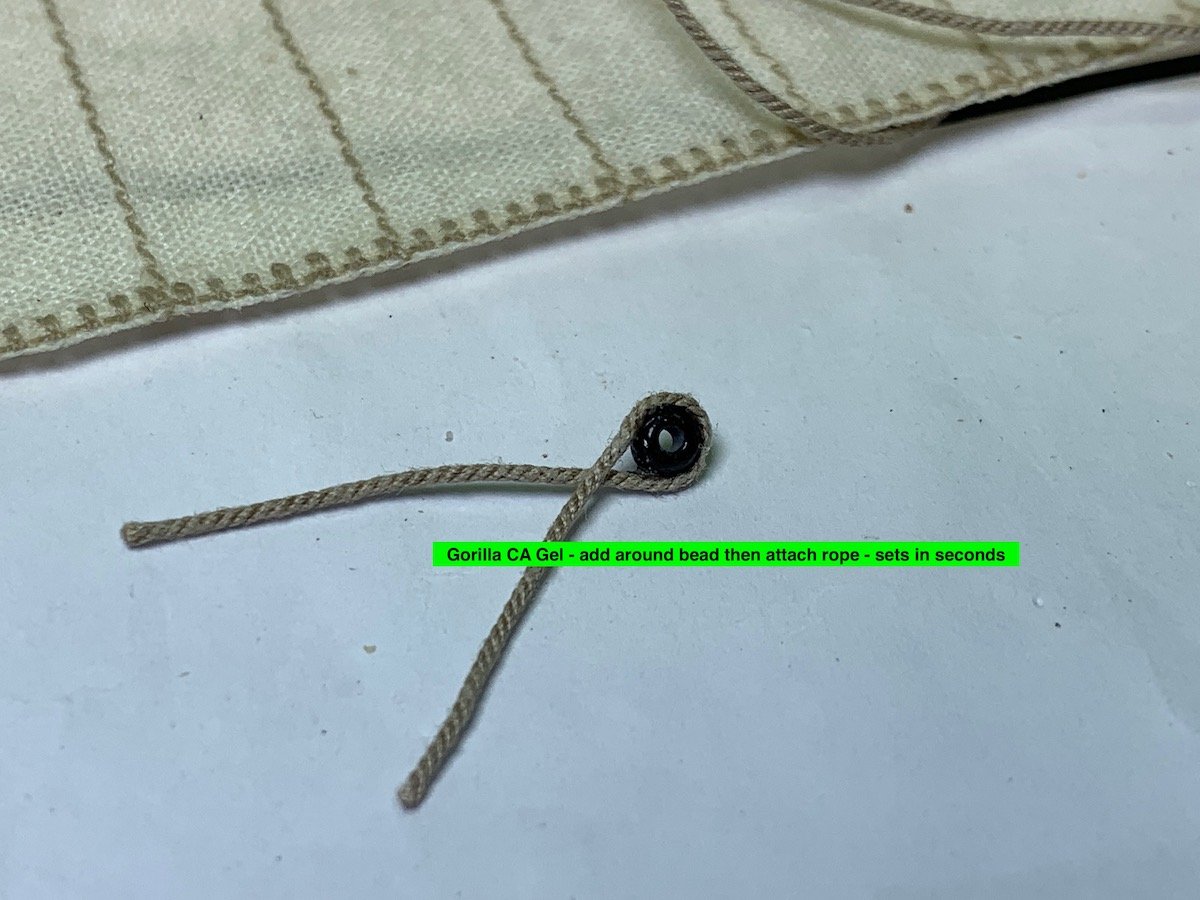
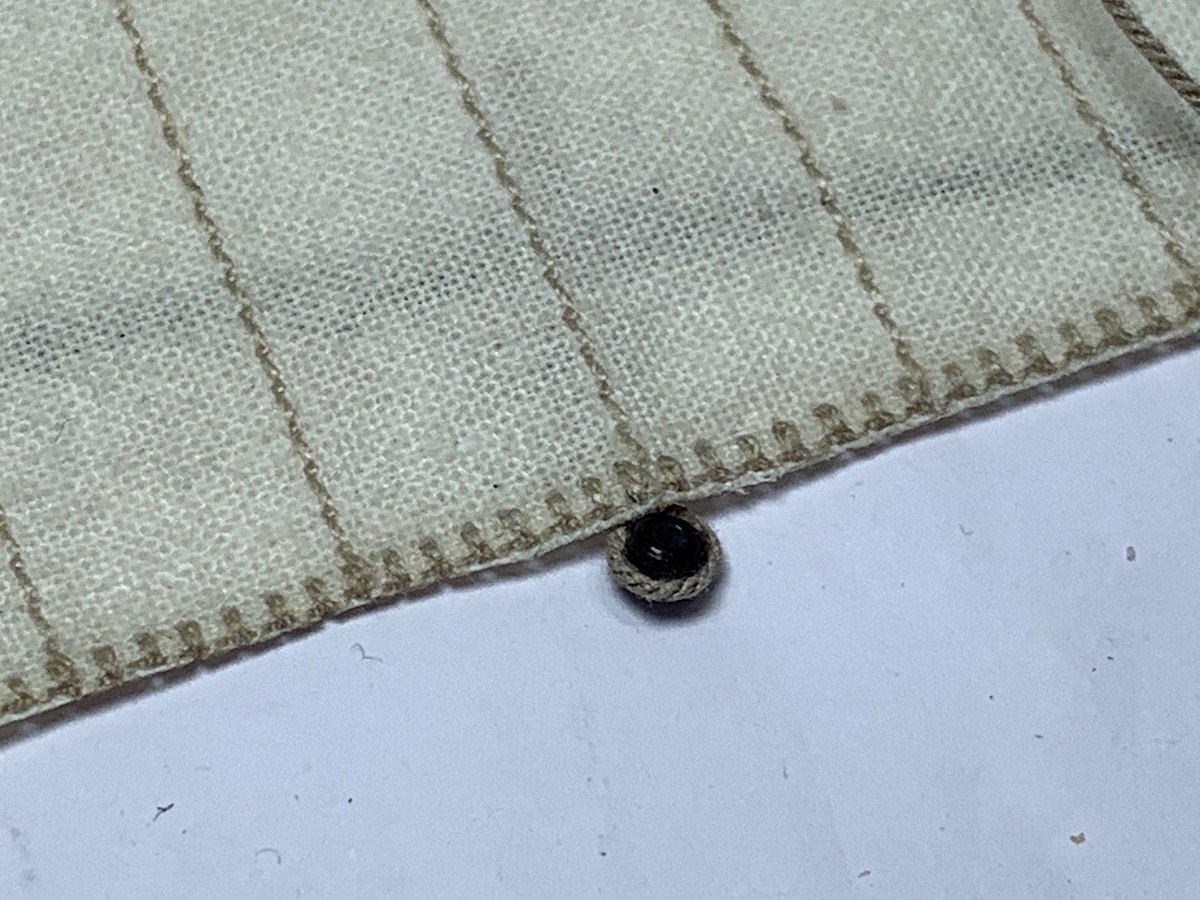
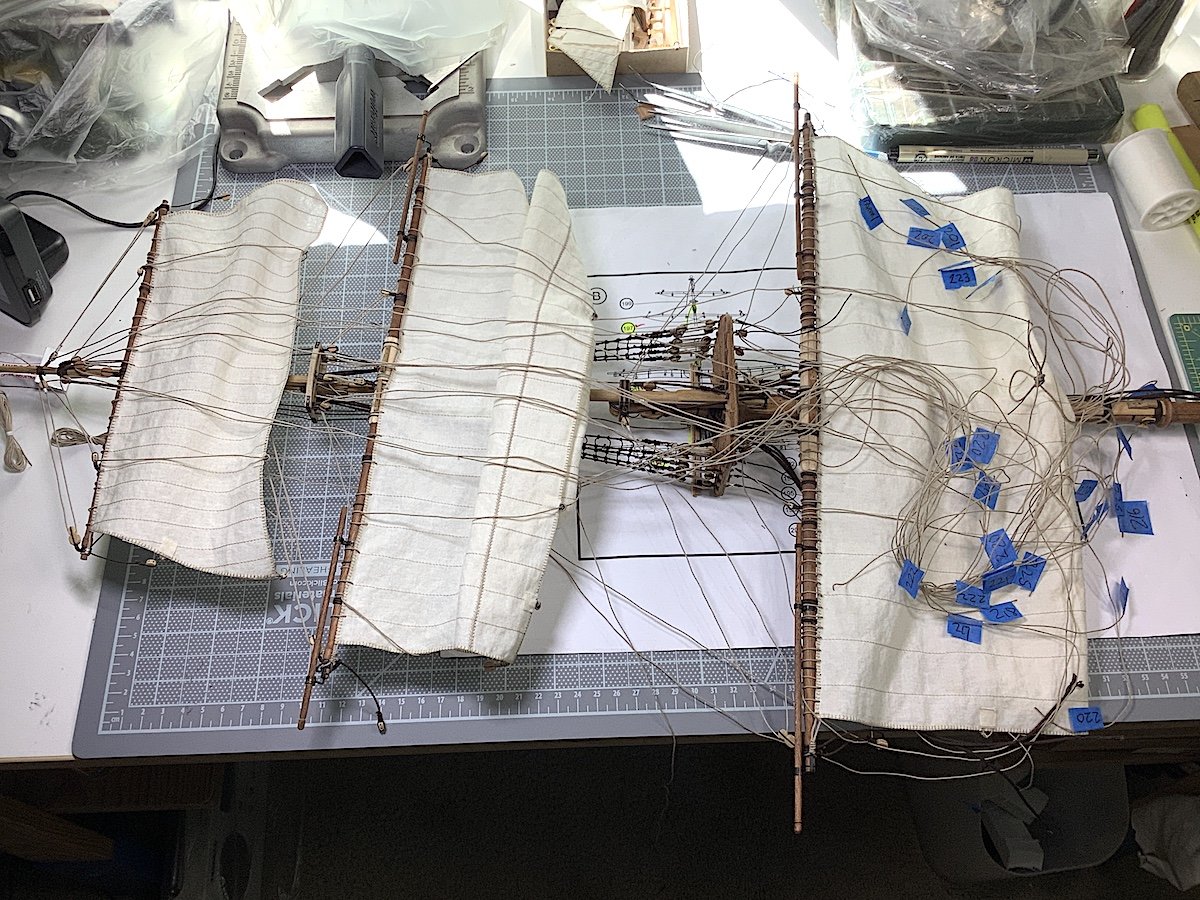
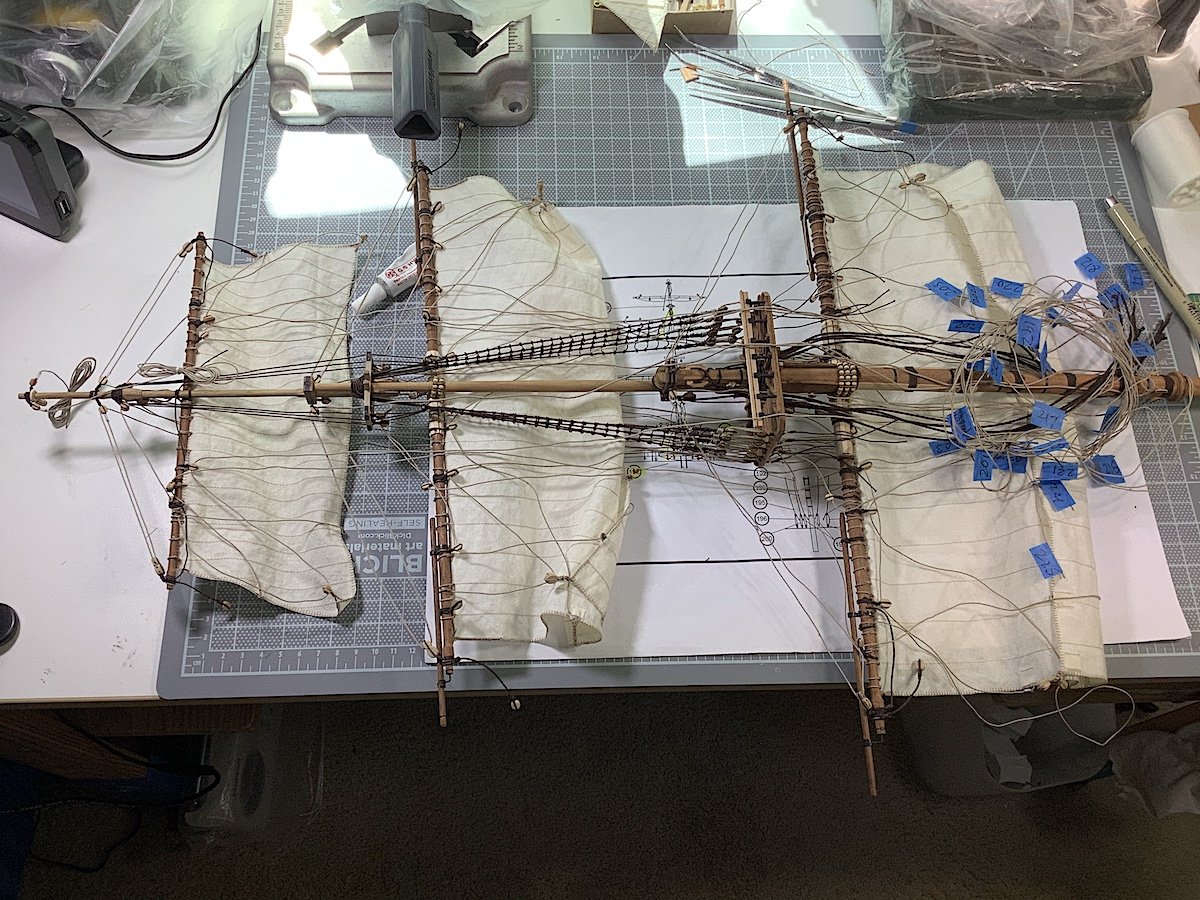
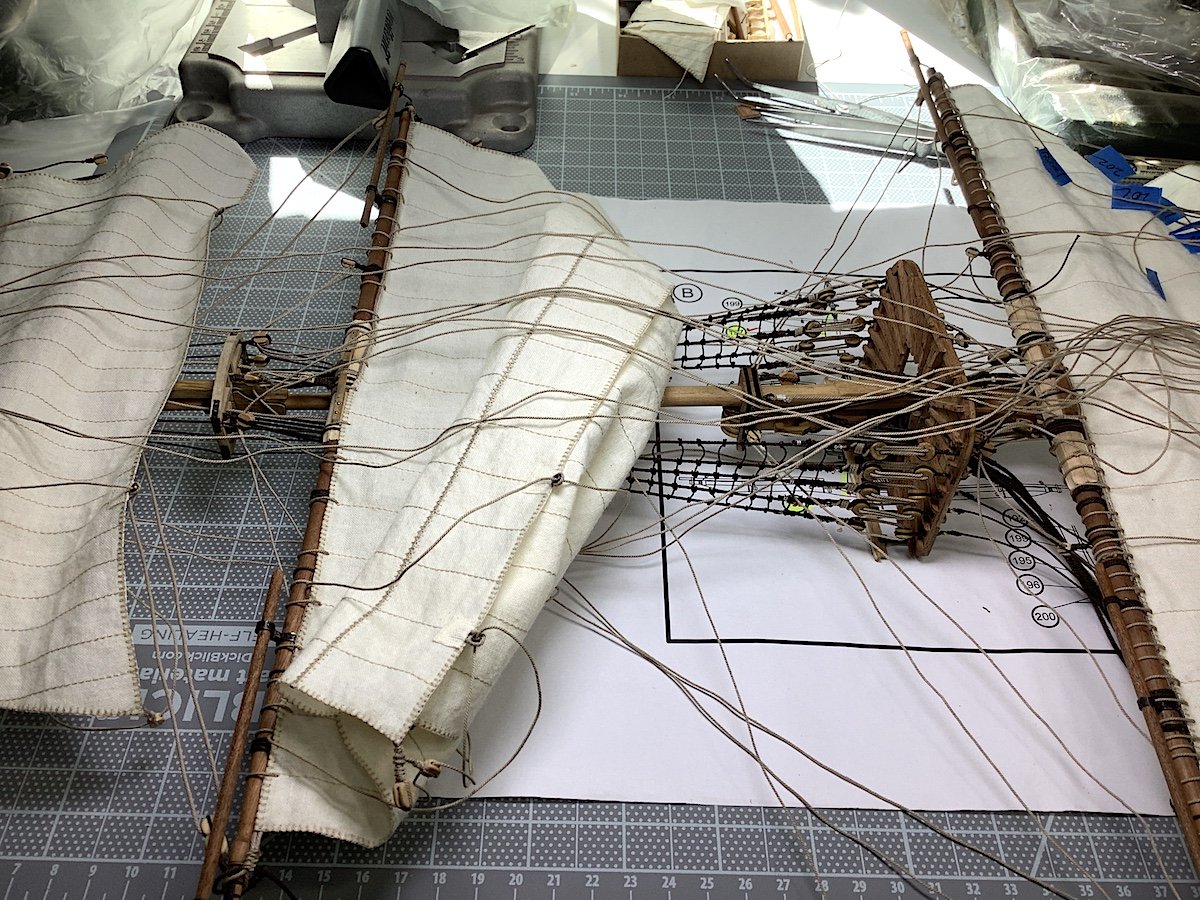
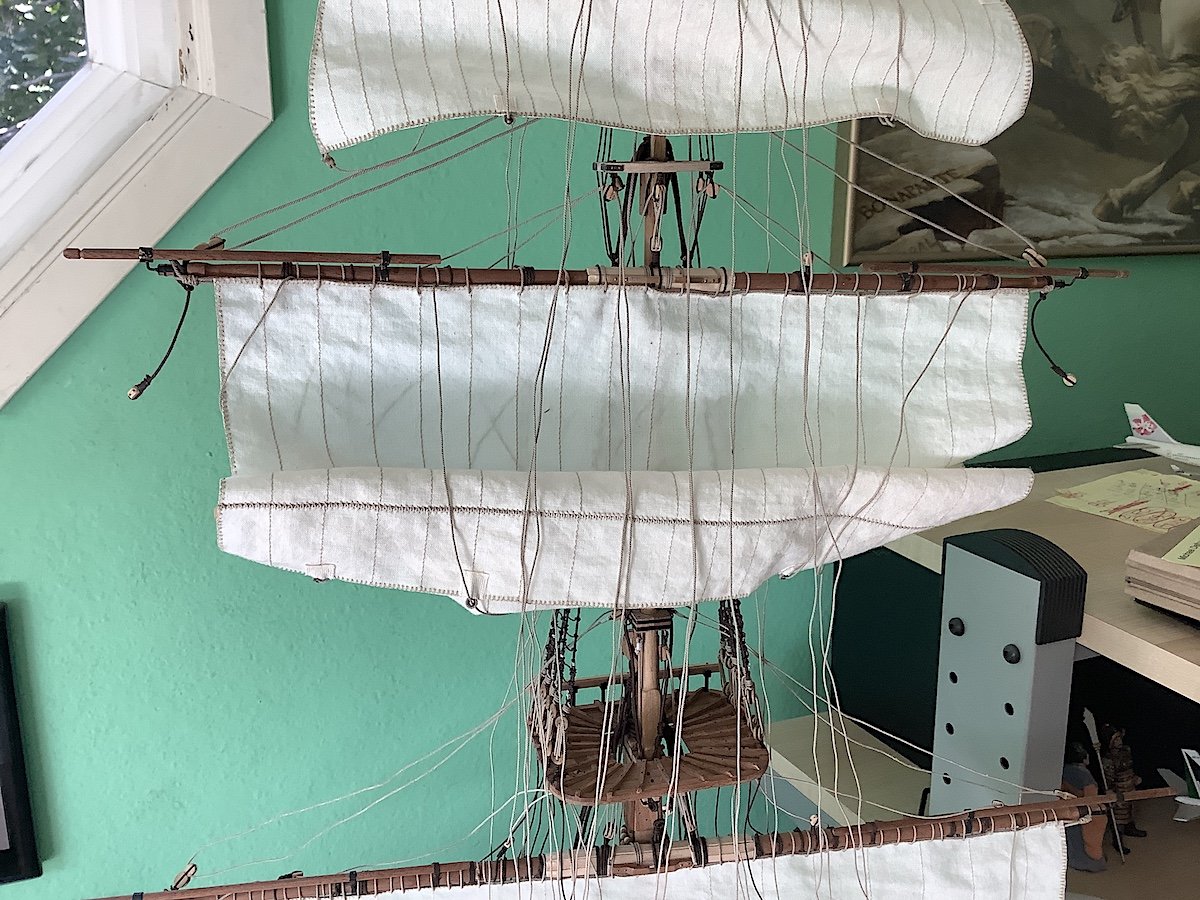
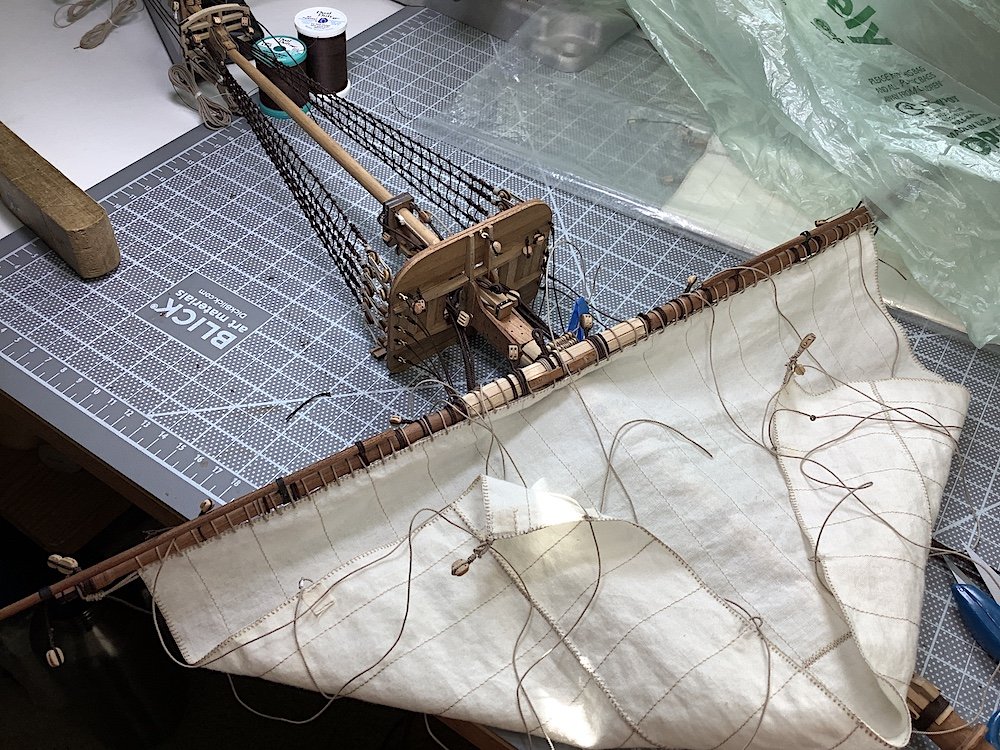
Running rigging is close to being completed. Wanted to add a bit of more detail to the sails at the Buntline connection. See arrow. The Boudriot 74 gun ship book shows these rings. I had purchased – way back when – some small eyelets but found no particular use for them (outer ring shape was wrong) but found a perfect use for them here. Also: alternatively black plastic parrel beads would work just as well (just a bit of sanding to flatten the tops would make them look excellent) I will re-do the lower mainsail and add these bits of details. ------ Then below, just general updated images – I know some of those – if not all – ropes are way too long, as they end at pins. But I messed up with Vasa and had pre-cut ropes too short. Did not want to revisit that frustration especially after I had installed all masts and connected the mast shrouds.


- 371 replies
-
- 10
-
-
Hey Denis, Ranting is good - it clears stress then you can get back on an even keel. Glad things are "working out" at work for you. PS: Seven of the then younger guys I used to spend a lot of seat time with - all got furloughed - not sure when they will return to any kind of full time work. We still stay in touch... As everybody sorta knows United AIrlines has cut 90+% of their scheduled cycles. Airports are ghost towns. Oh! the Admiral is fighting to get a refund from UA for her cancelled flight. Cheers,
-
Robert, Woa! Your gunport lids are so perfect - I hope that you will maybe leave few closed so as not to lose the visual of how amazing those added details really look.
-
Looking good! I have this kit under my table - Did not pay attention to the kit's size - Sure love this one though prob. won't build it - no room haha - really enjoying watching your's and how its coming along, Cheers,
-
Denis, Just catching up - to do that with the speed your working at I rented a hydrofoil - nice updates indeed.
-
As OC just stated superb indeed. I've also really enjoyed following along ! Especially knowing all the work you also did with the handmade decorative casting bits. Cheers,
-
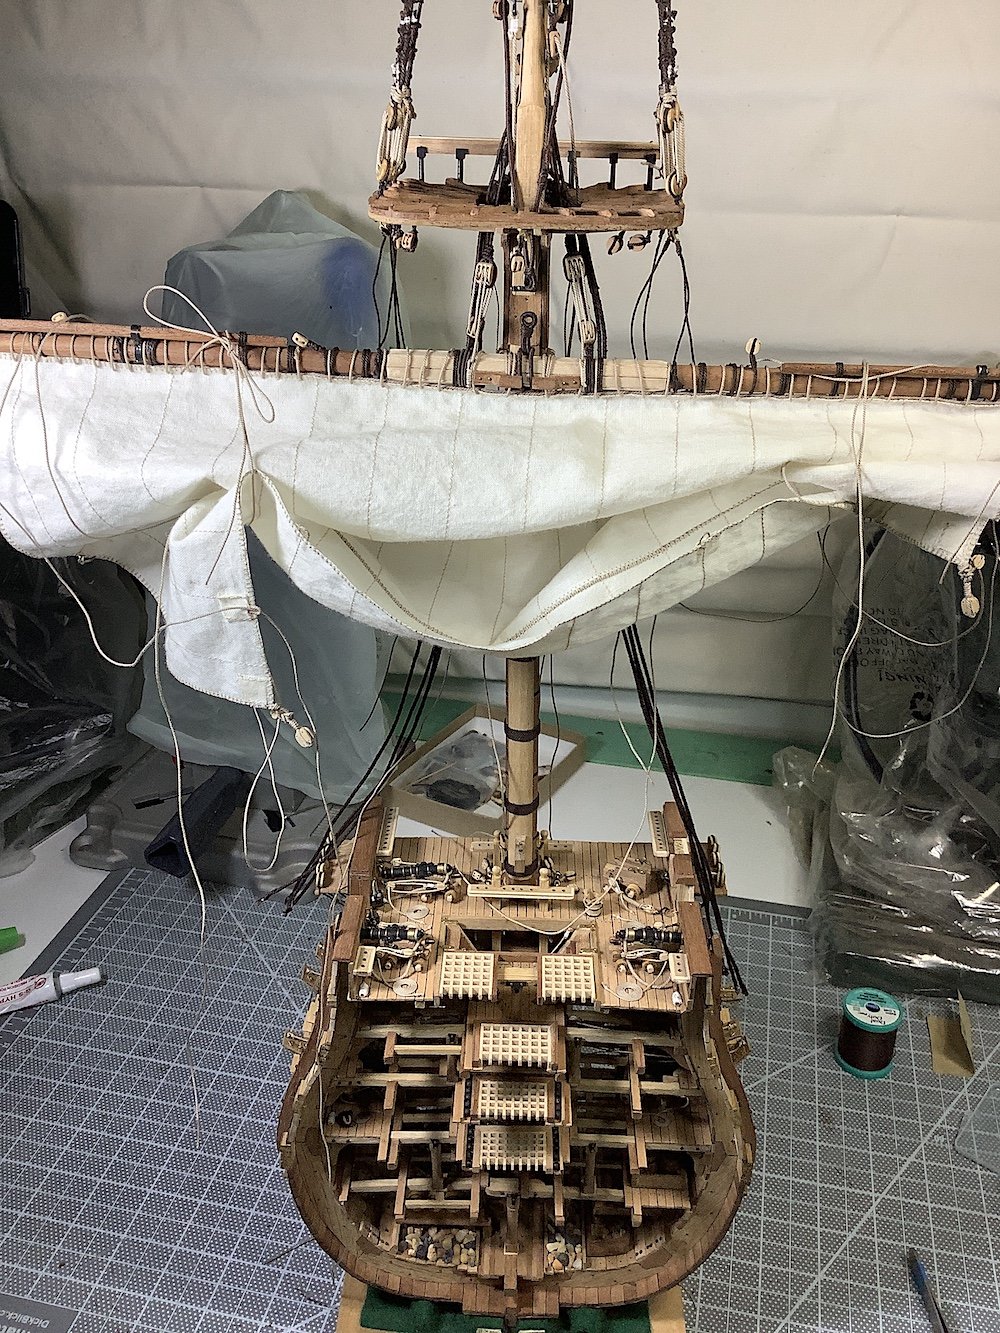
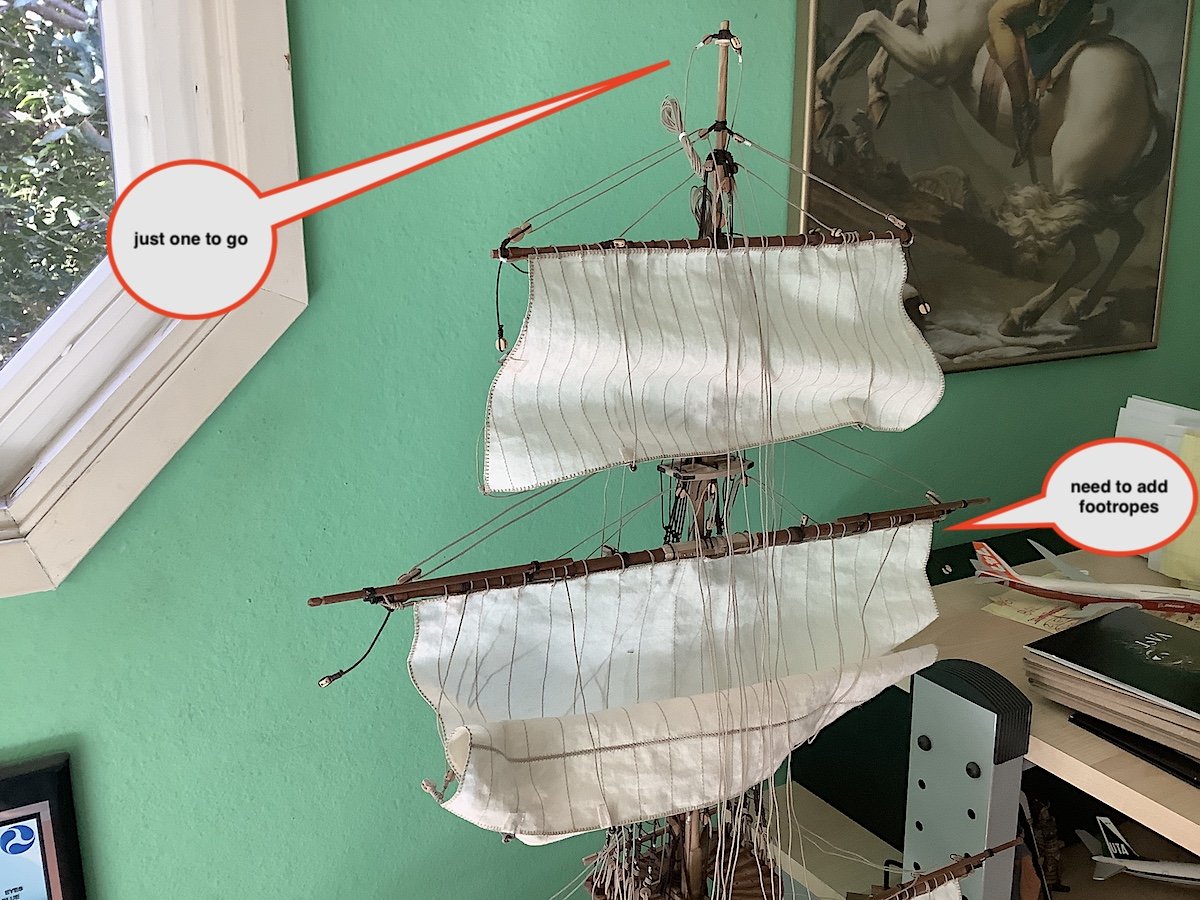
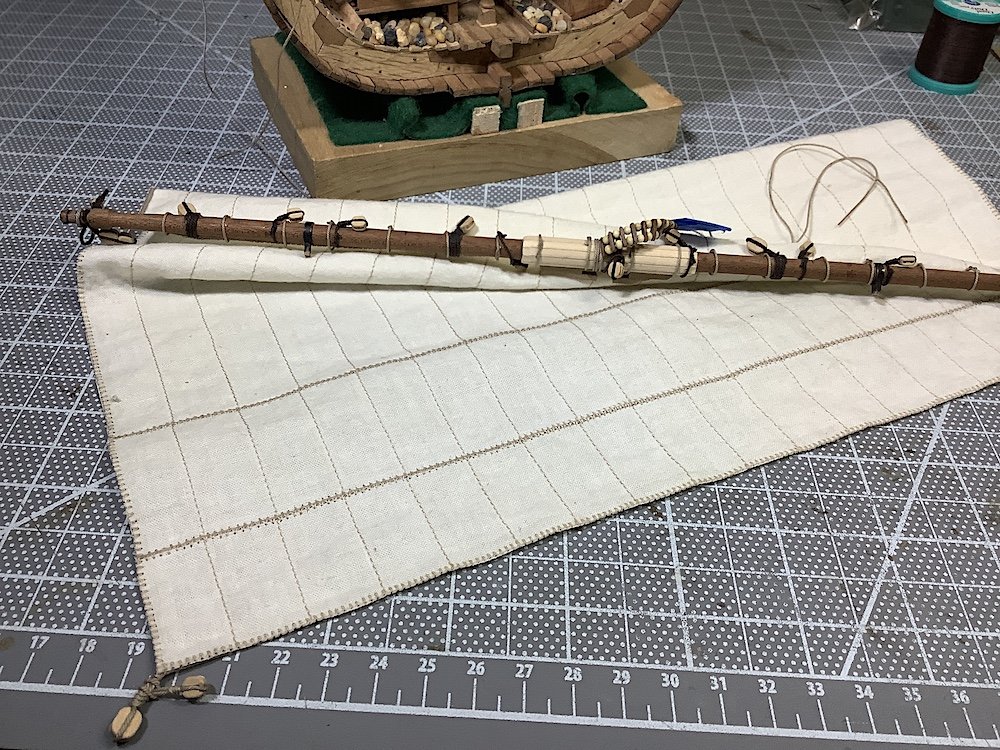
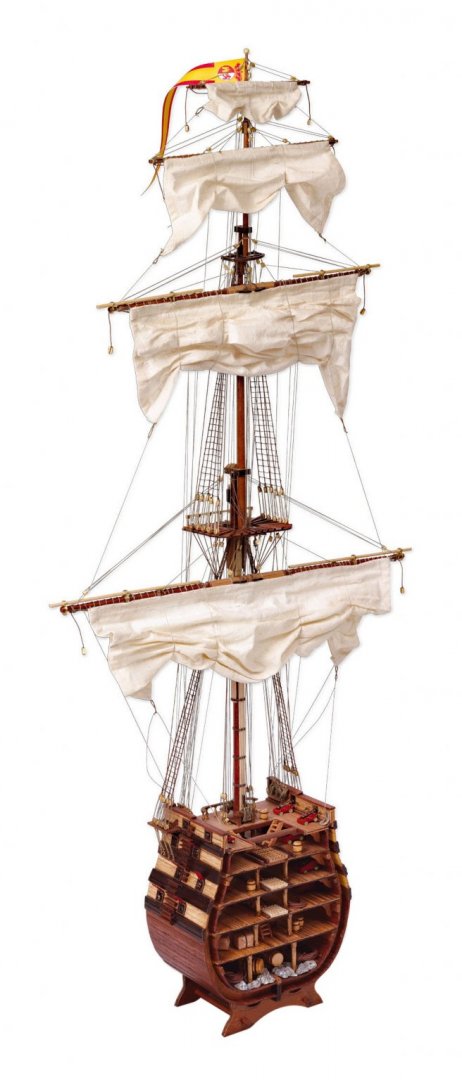
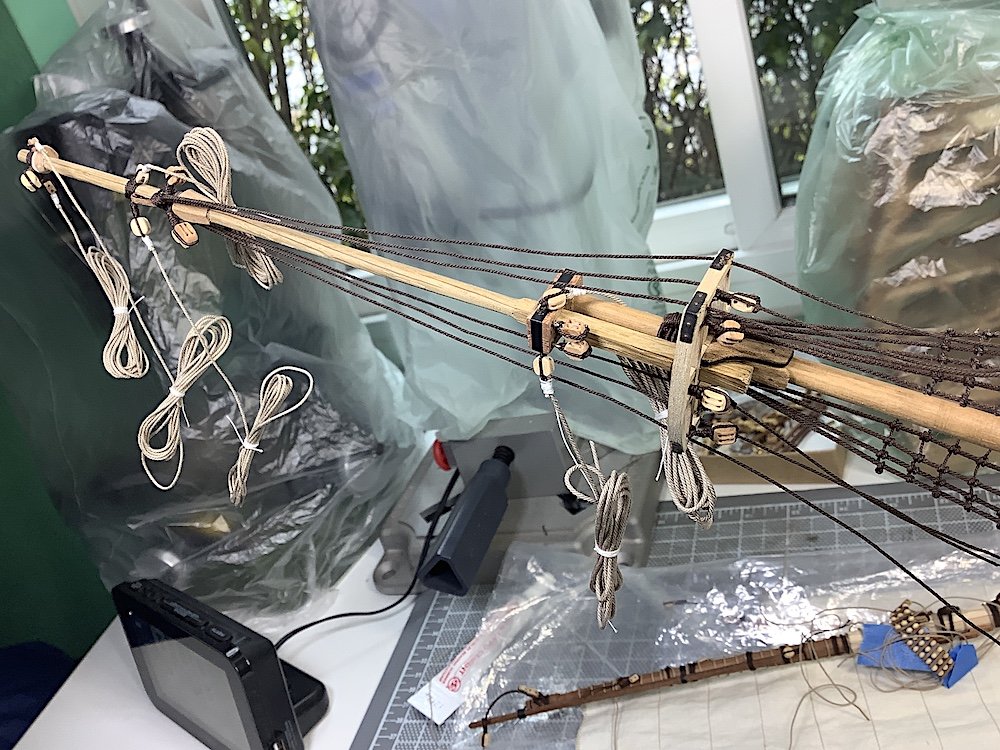
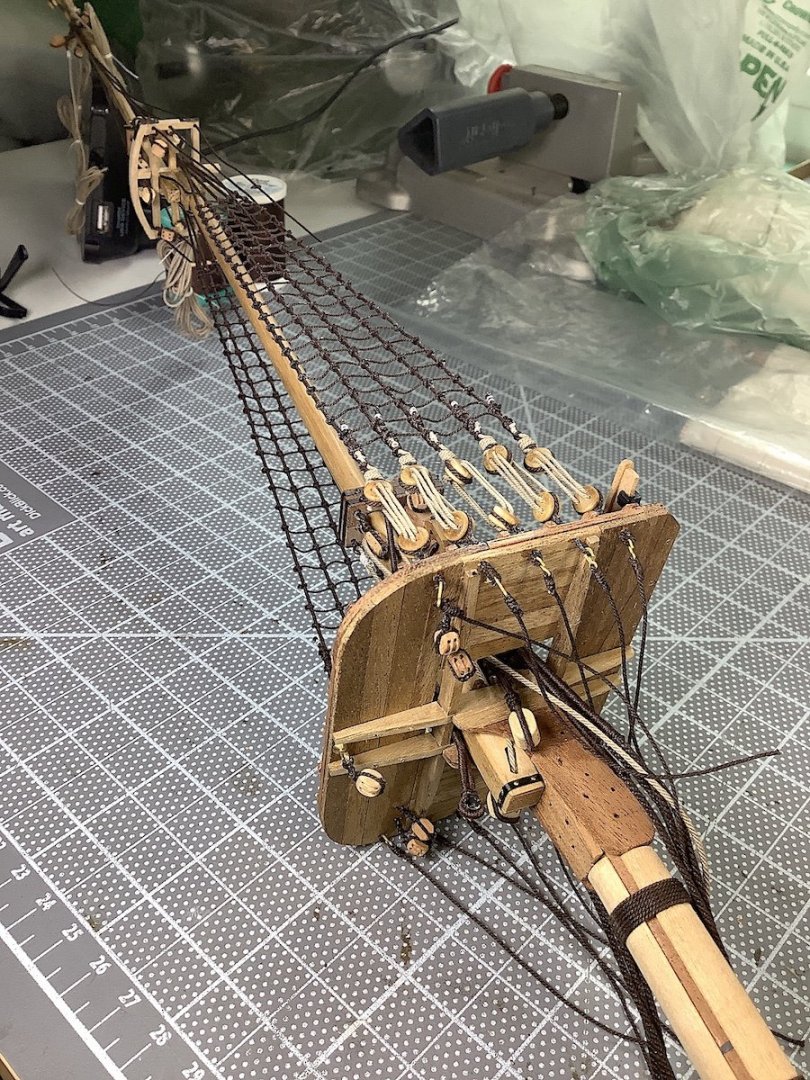
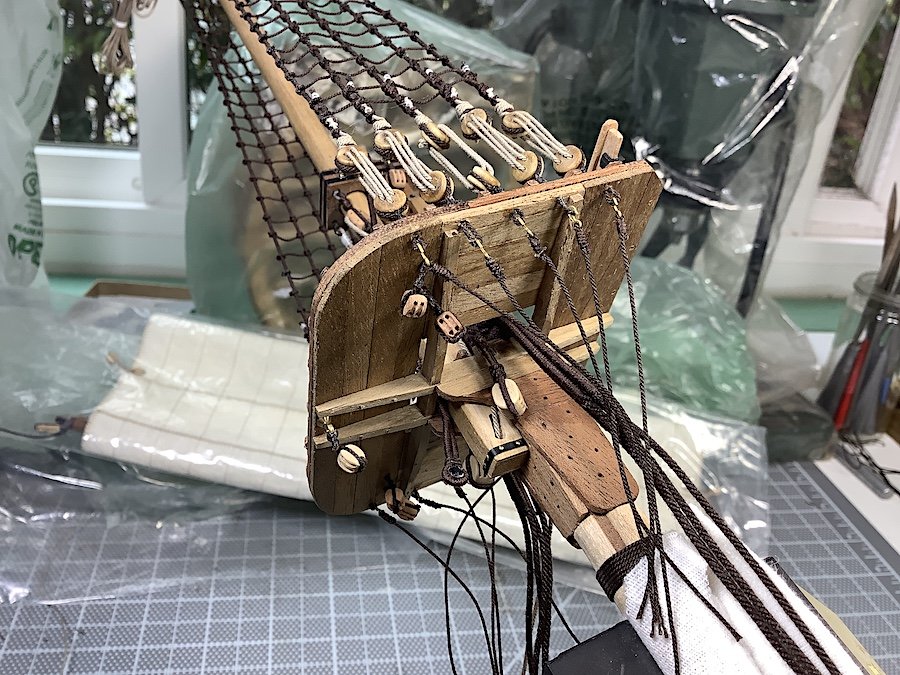
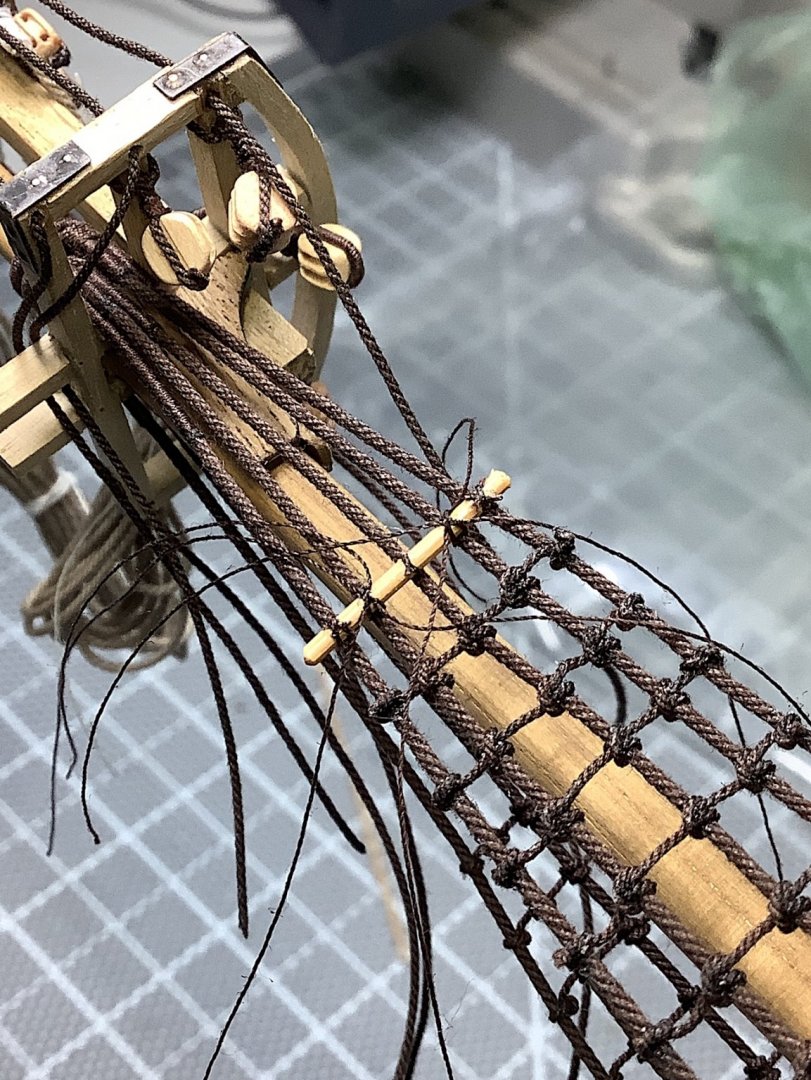
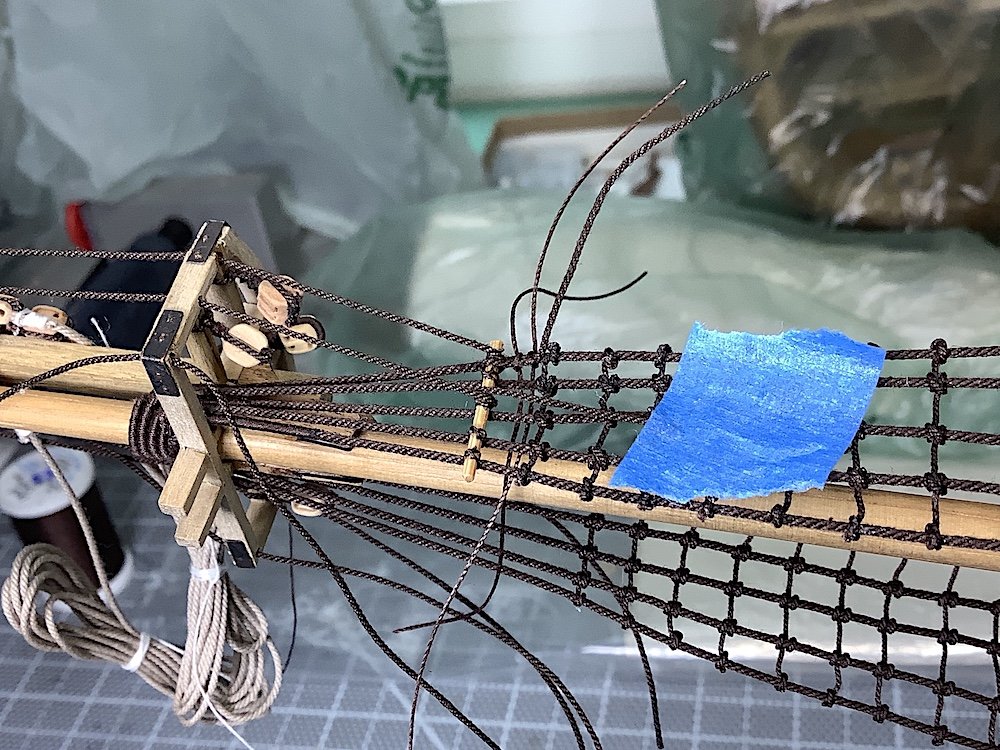
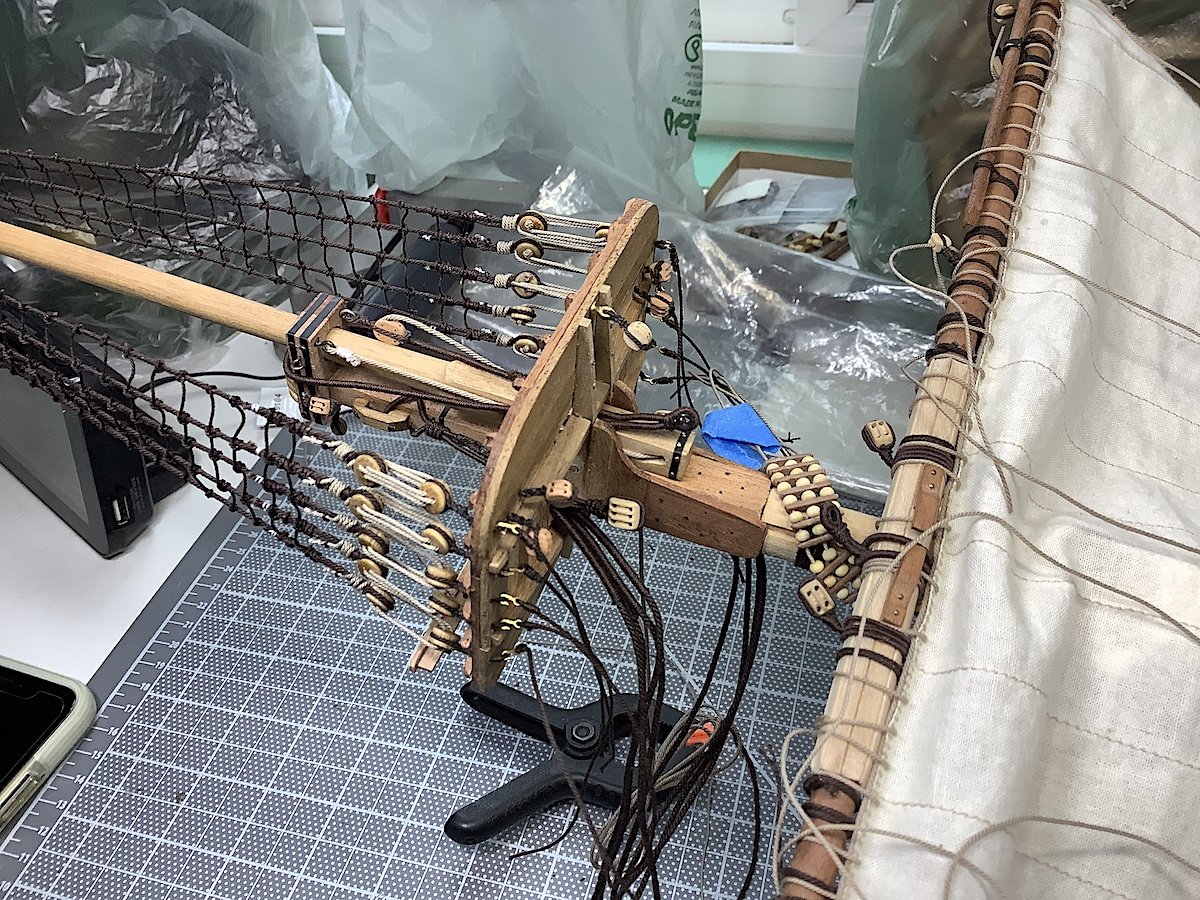
She is looking much more like a ship -- Attached the lower yard. Need to connect the sling bits - I know that with the jeers, the parrels were not needed - and probably incorrect. As I was installing the yard I almost removed the parrels - then though they were already mounted and it would be easier to attach the yard. Also they can hardly be seen from the front view - oh well. I will follow the look of the official kit photo regarding the sails - though might completely furl the topgallant - still 🧐about that - Now onto prepping the upper yard Here are a few updated images.


-
Aaaah, well - the things we sacrifice for love! Indeed - Mates Please don't start a thread in Shore Leave with that topic! it will crash this site with too many postings hahaha 😂 Cheers 🍺
- 2,699 replies
-
- 4
-
-
- heller
- soleil royal
- (and 9 more)
-
Mark, A minor thought given such impressive research and execution - that said, I have never seen such excellent capturing of the look of wood - with plastic - as you are doing with this project. Also the hull castings seem to have been really excellent, and they were well thought out. Well Heller - some things the French do well. I remember as a kid Heller aircraft kits were considered really high end. Stay well
- 2,699 replies
-
- 5
-
-
- heller
- soleil royal
- (and 9 more)
-
NIce indeed Patrick - looks like a perfect 16th Century art work. I will also attempt a first dragon head carving for my Viking project coming up - New learning for both of us -- very nice first attempt
- 756 replies
-
- 3
-
-
- galleon
- golden hind
- (and 2 more)
-
John, Nice work - you sure are working quickly A Viking longboat is my next project. After binging on "Vikings" TV series - along with how they thoroughly researched as much as possible when making the sets, costumes, shields, and the ships - got real interested. Michael Hirst, the producer/writer, has also written a very enjoyable book about the research for the series. RE: the the Shaw article - be sure to use a boulder for an anchor attached to a "Y" piece of tree 😊. Kits always seem to add a metal traditional looking anchor.
- 38 replies
-
- 1
-
-
- finished
- marine model company
- (and 1 more)
-
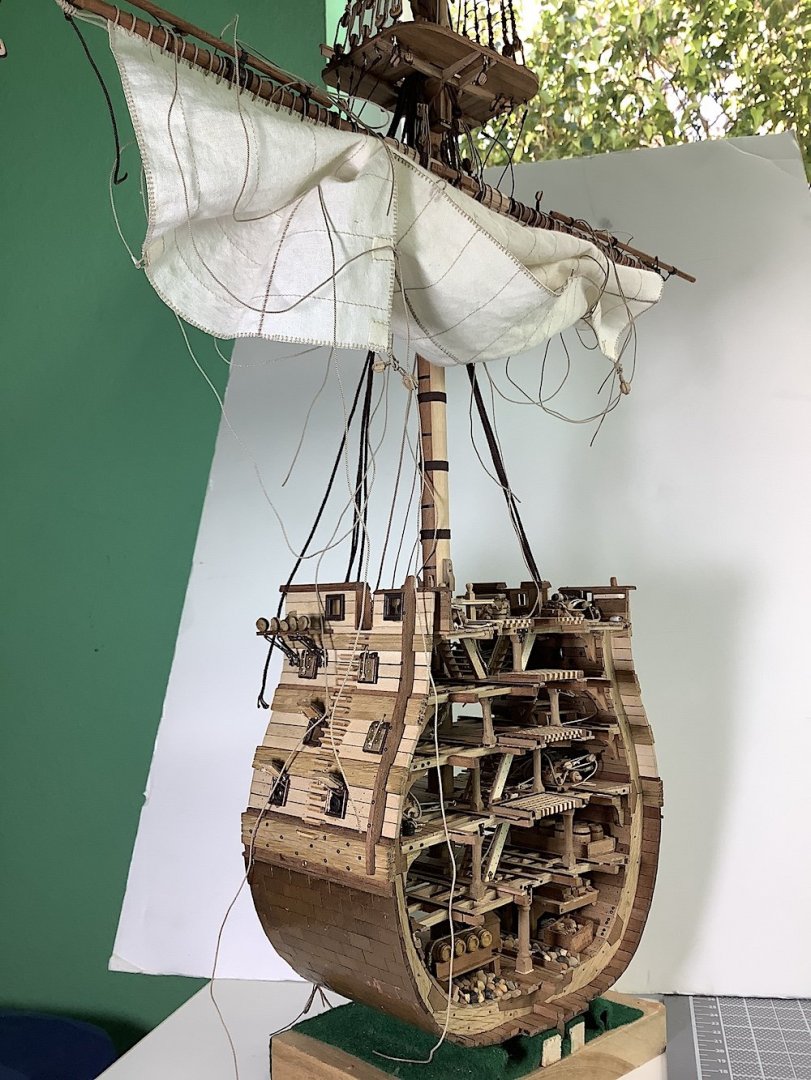
Hi Mates, Thanks for the likes and comments. Tom: Yes rather tall indeed including the small base she's 36" (91cm) X 18" (45cm) for the lower yard.
-
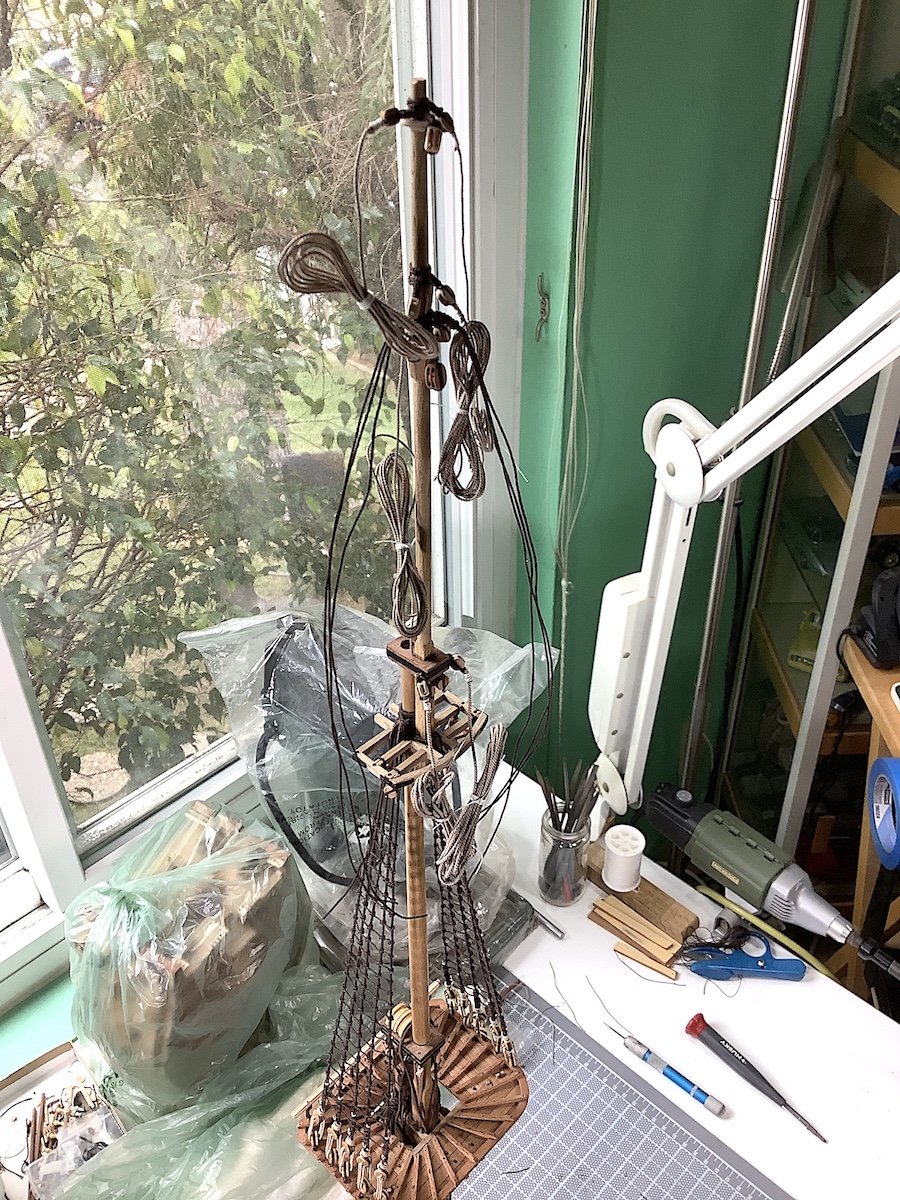
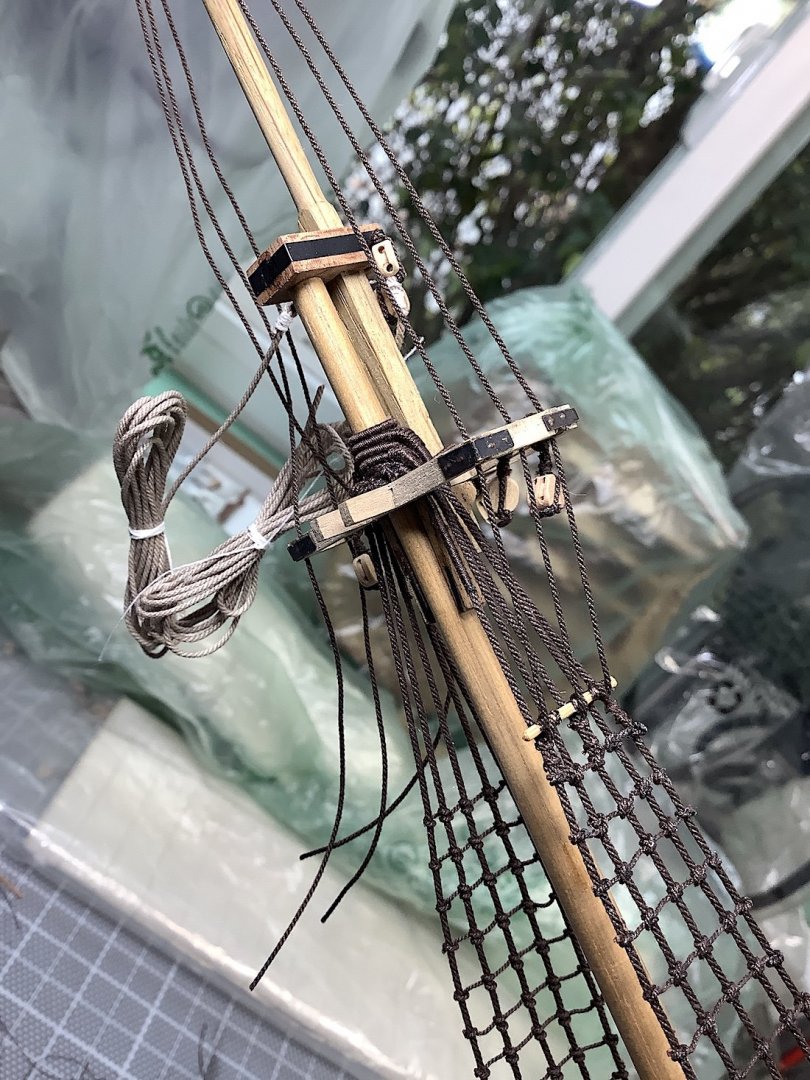
Minor update; Attached topmast and top gallant to lower main. All came out ok. Finished topmast shrouds and ratlines. Added Futtock staves, kit instructions precluded those, even for lower mainmast. Staves are simply tied to and glued to shrouds. Installed Futtock shrouds as well to lower platform. Next step is to attach all ropes, jeers, and parrel to lower main yard. Topmast yard is almost done as well – will install it next. Stay well everyone –

-
John - glad that it might work for you! - Your ship is an excellent work in progress - So enjoying following along. This ship was very tempting - it was between Le Soleil and the Soreign.. in between my next Viking coming up. Toss-up The Brits won - Both are such great kits. PS: big thanks for your appreciated notes re: Vasa Cheers,
-
John, Yes I have a method that works very well - I will look through my last build and lead you there - I think that it will work. I'll get back ASAP I was going to load some images - but easier if you go to p55 of my log I fully explain how I achieved the right look - scroll down a bit - hope it helps https://modelshipworld.com/topic/329-wasa-by-md1400cs-finished-corel-175/page/55/
-
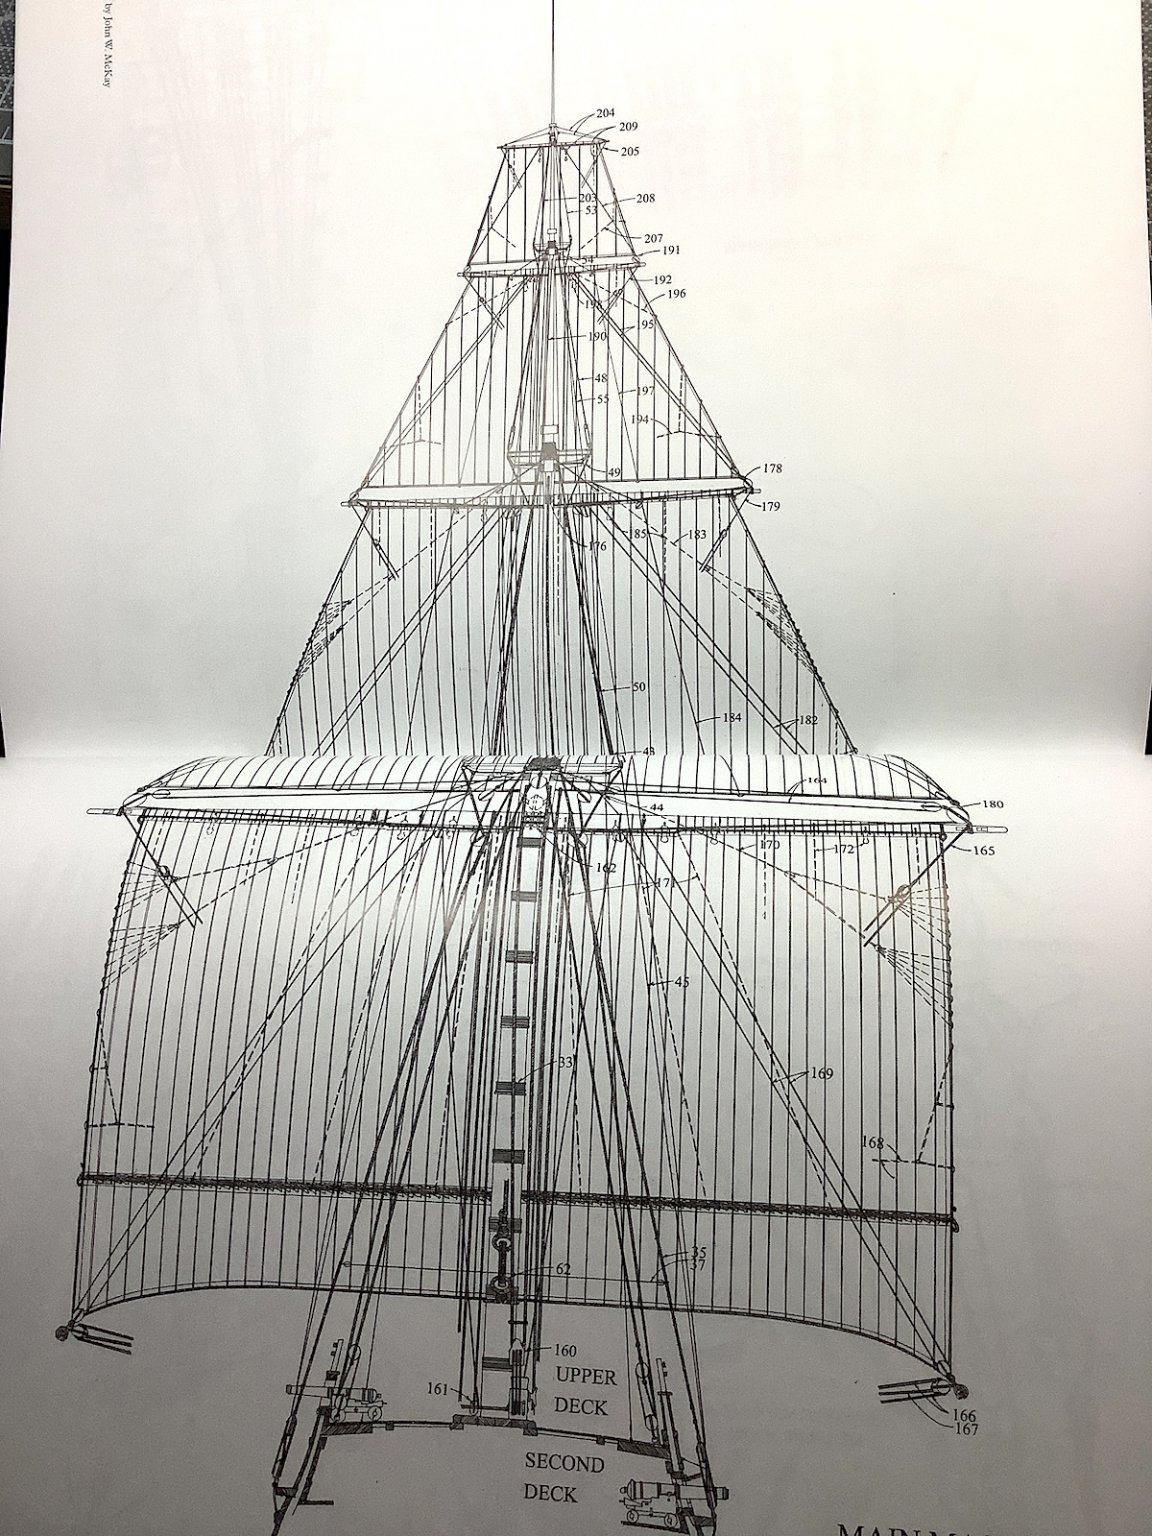
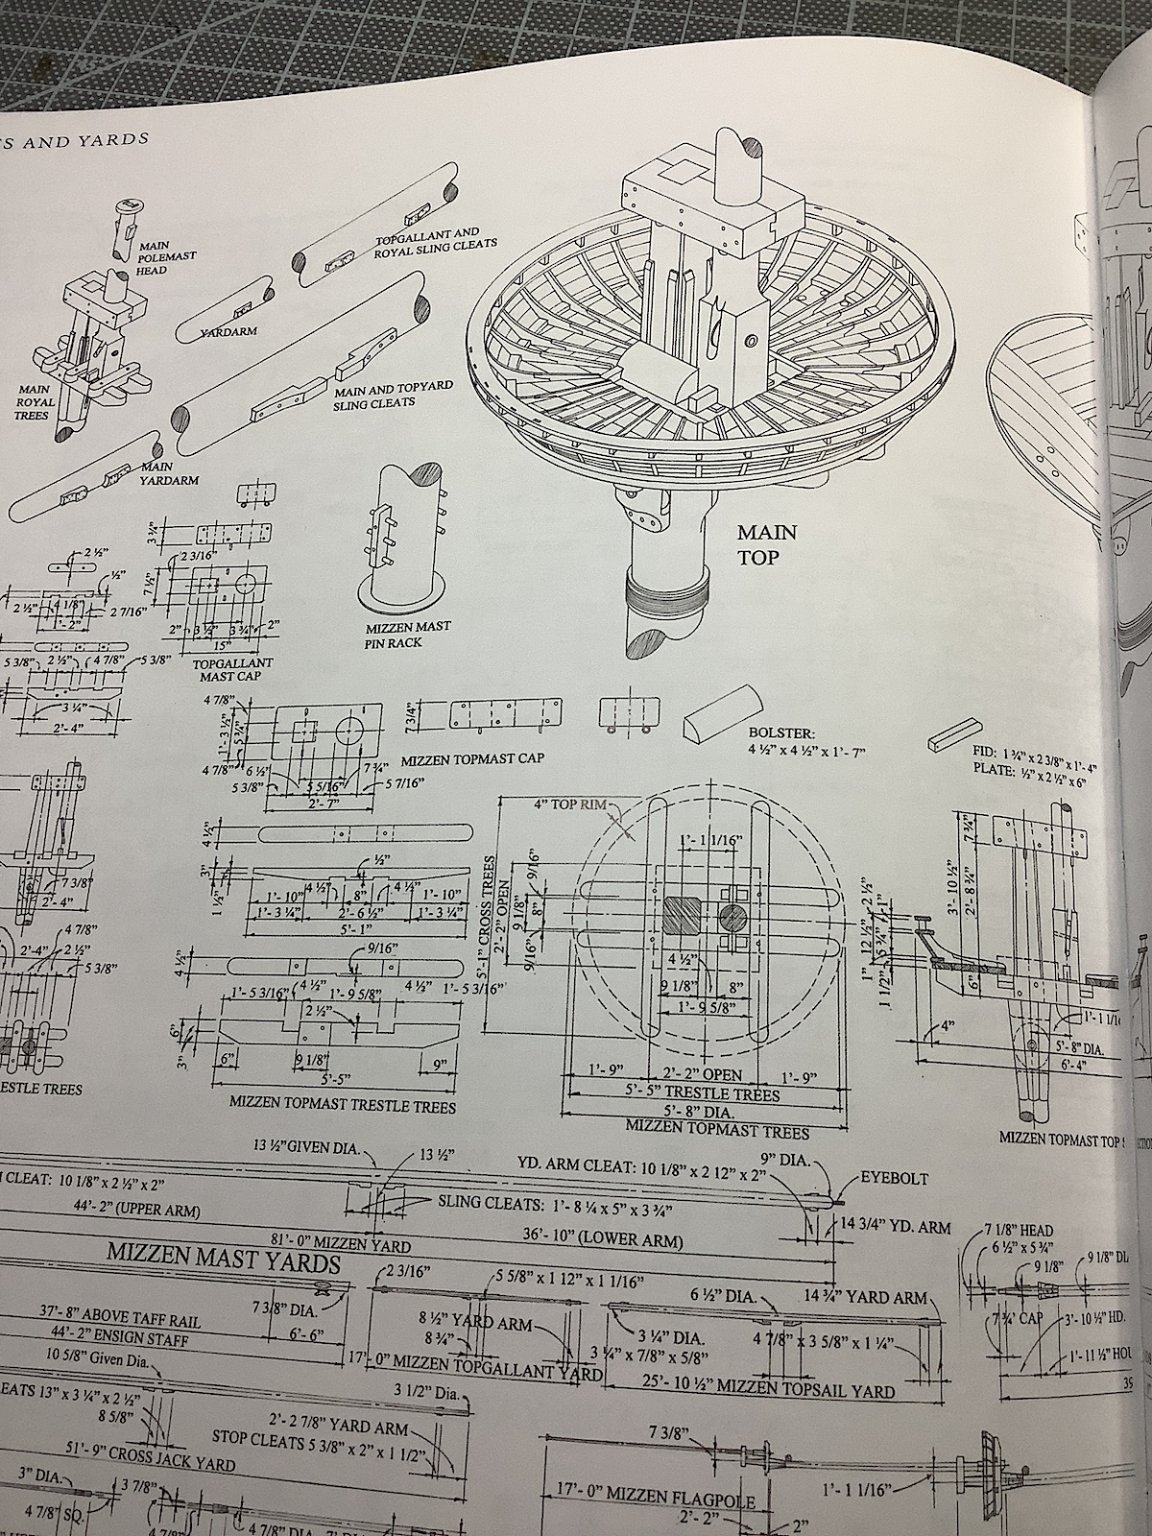
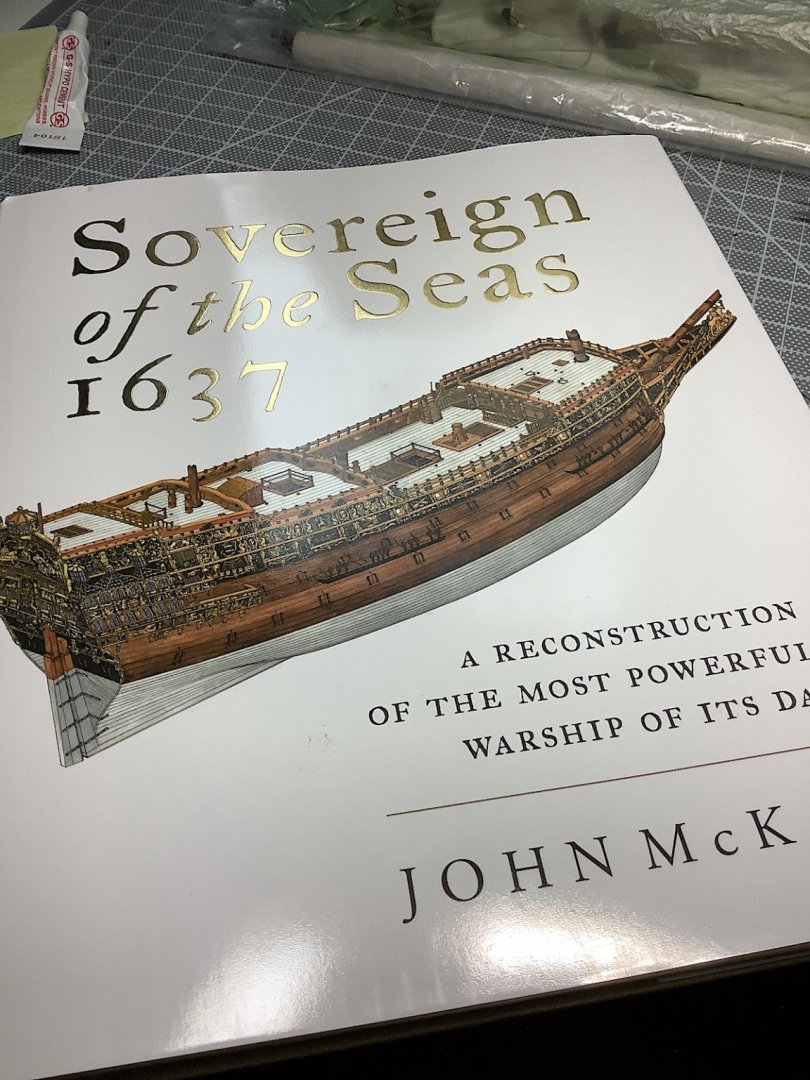
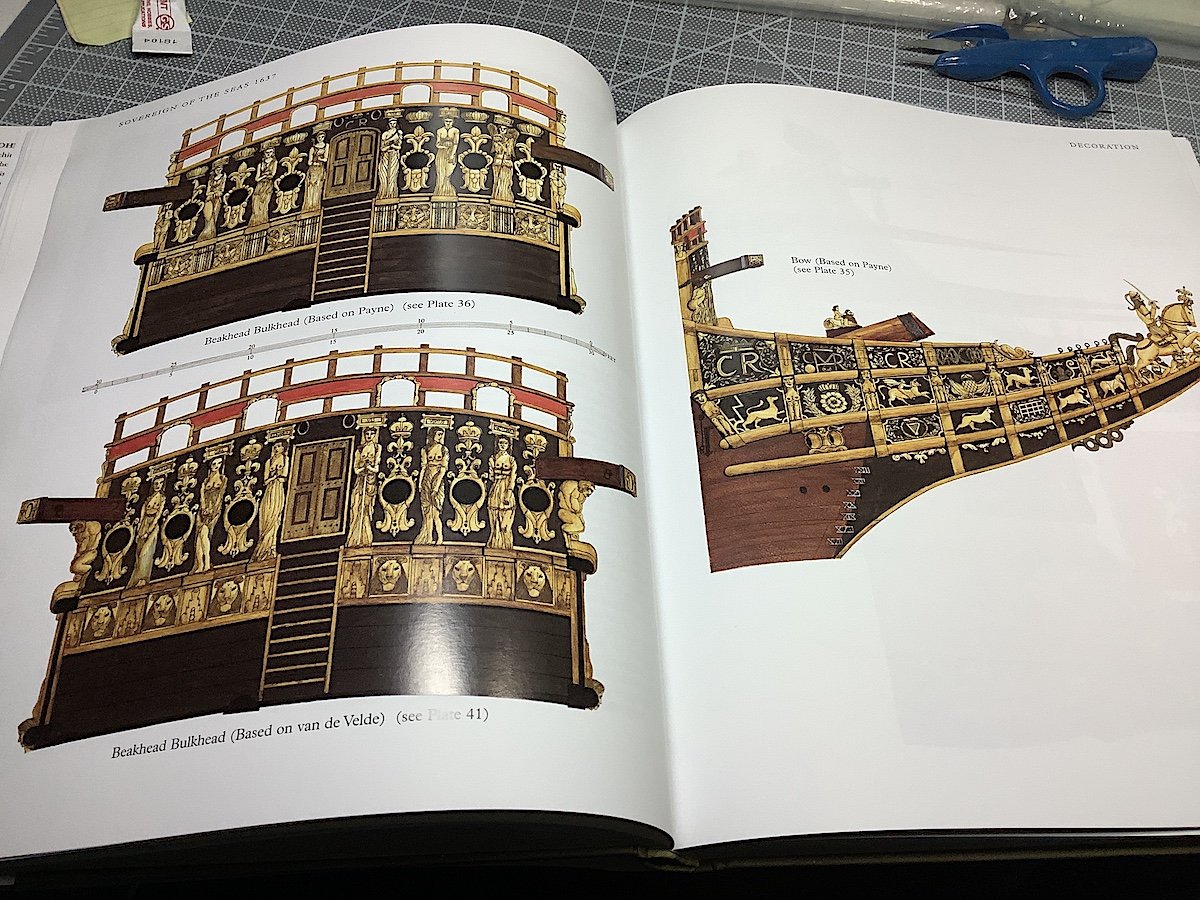
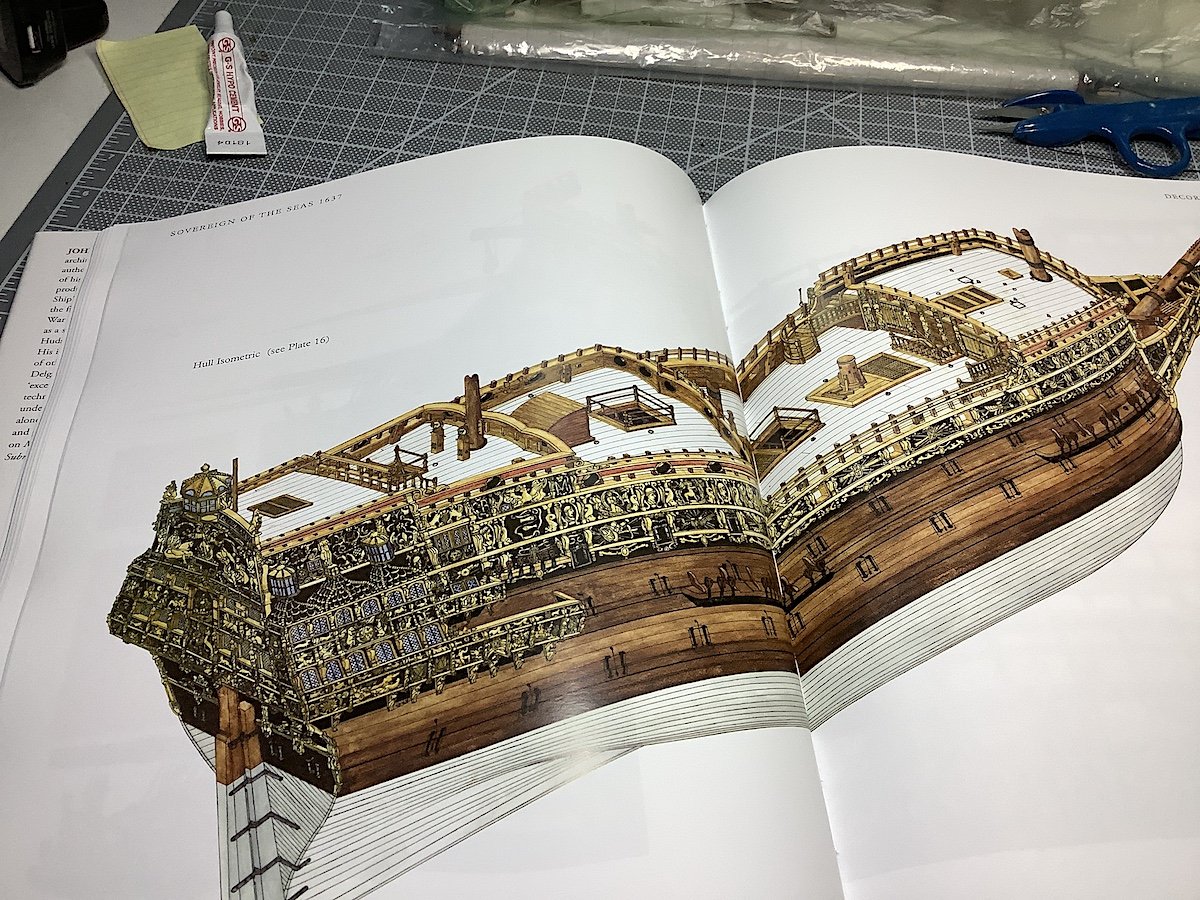
Hennie, Went back over your log - Questions -- 1) for the lower hull, does the kit include a second set of thinner planks to cover the thicker first set? I was not clear on your comments. 2) How did you make all of those gold metal parts smaller? Did that not remove the gold coverings on the sides? FYI: Just received this book (John McKay) - might be still be helpful for you. Waiting for Cornwall Boats to receive more kits - then will order one along with much more wood and proper flags I paid too much for this book - new ones are about $10 USD cheaper on eBay. Went over the book yesterday lots of great info and 100s of great illustrations.


- 192 replies
-
- 6
-
-
- sovereign of the seas
- sergal
- (and 1 more)
-
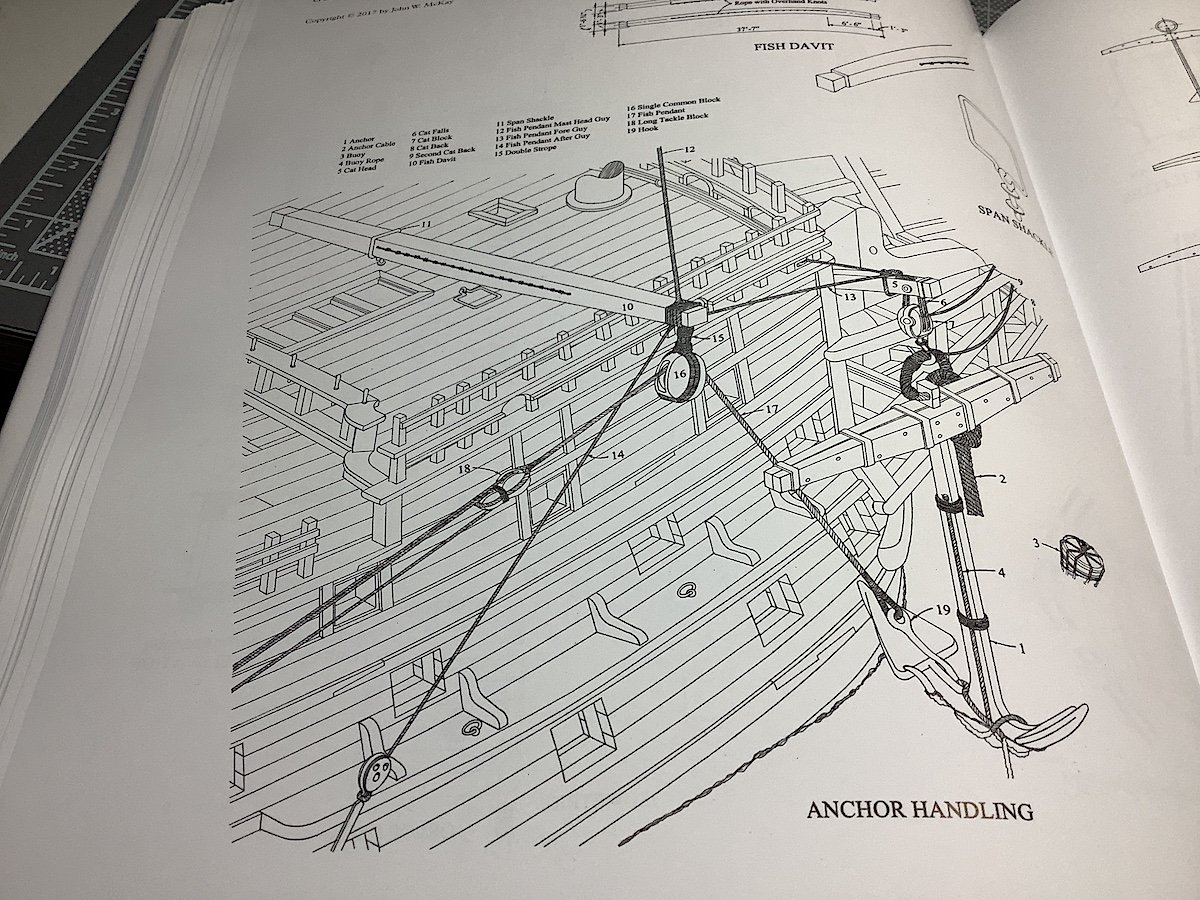
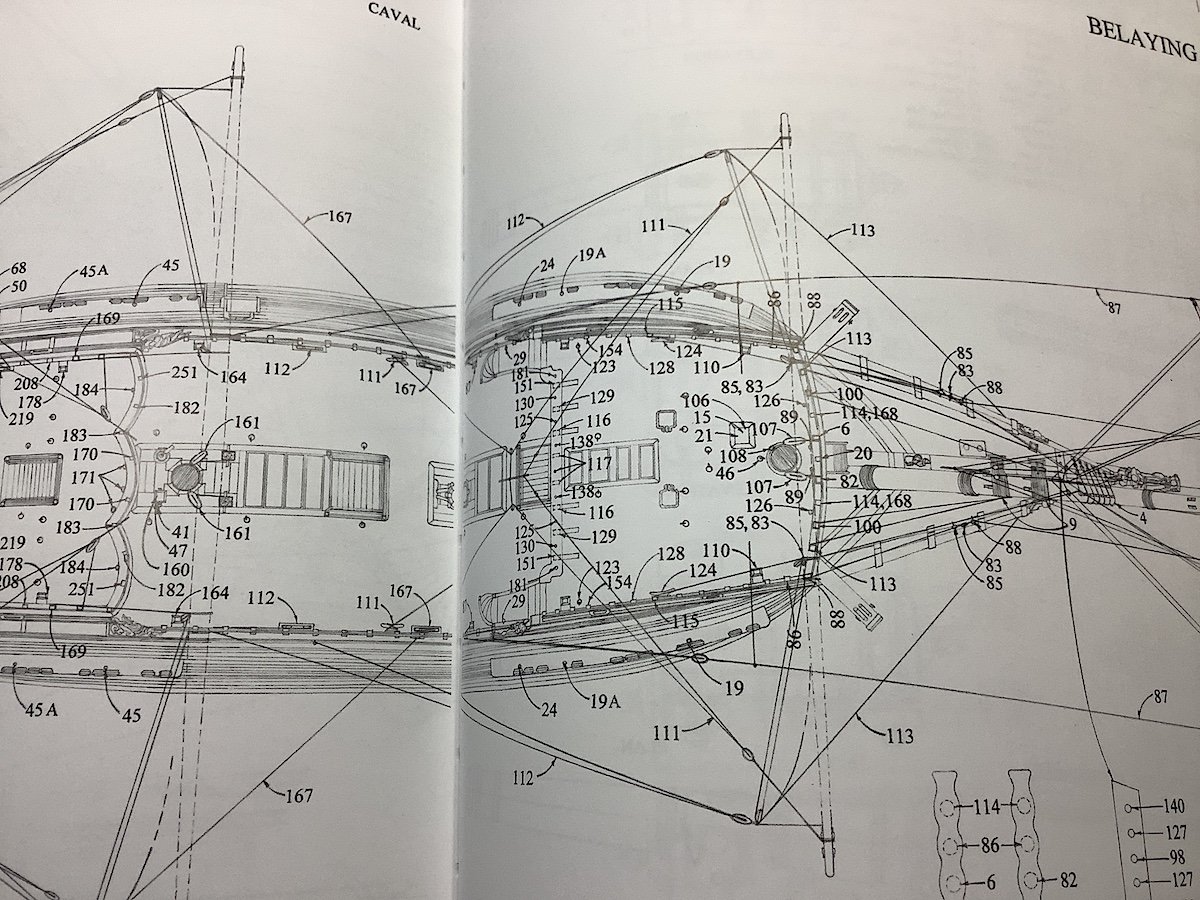
E.J. Yes indeed adding sails, as I had sorta complained about when I decided to also add them to the Vasa, adds so much extra work, ropes, blocks, pins, etc. That said I became super motivated during that part of the build learning the specific purposes of each "new" rope. These ships which were then the state of mechanical art - makes this hobby, for me (all of us), a wonderful new way to learn and keep mentally active by researching where these ropes should also pin on rails port & starboard. Great fun. My book library is getting large! That said, we today can almost, in our minds eye, understand the "Beam me up Scotty" possibility a century or two from now. I doubt that captains of those ships could ever imagine machines crossing the oceans at 35,000' with all onboard sitting in chairs (I was going to add comfortable - well for some indeed) - along with only two upfront driving the machines at 570 mph. We did have Concorde 1/2 a century ago - 1,200mph... Of course a 100 years from now folks will look back in history and say, "oh my! can you imagine all of those poor souls stuck like sardines inside an Airbus A380 for 13 hours going from Los Angeles to New Zealand"? hahaha PS: I was very low on ropes glad that I got my order in from Chuck before he was forced to close. Otherwise current project would have ground to a halt. Apologies for the added distracting notes - but with so much free time now well... Stay well mate
-
Denis & Martyn - Thanks for encouraging words. Now working on ratlines - bit slow but you know that these bits are time consuming, and need to be properly spaced along with so many Clover hitches, - well not so stimulating either. 😐
-
Denis, Went back and did some catching up - nice project - also very much like your choice of wood for the deck.
-
The last three images of your deck are also just beyond. One could think that the images are from an actual ship.