md1400cs
-
Posts
2,875 -
Joined
-
Last visited
Content Type
Profiles
Forums
Gallery
Events
Everything posted by md1400cs
-
 Martyn, Nice work - This De Agostini Vasa does indeed appear to be THE kit to build. I'm tempted to revisit this ship, but I would end up with an international real estate war. My sweetheart is from Brasil and I'm originally from France haha - My current one is still without a future resting place and then with Vikings next - hmmmm
- 91 replies
-
- 5
-

-
- deagostini
- vasa
- (and 1 more)
-
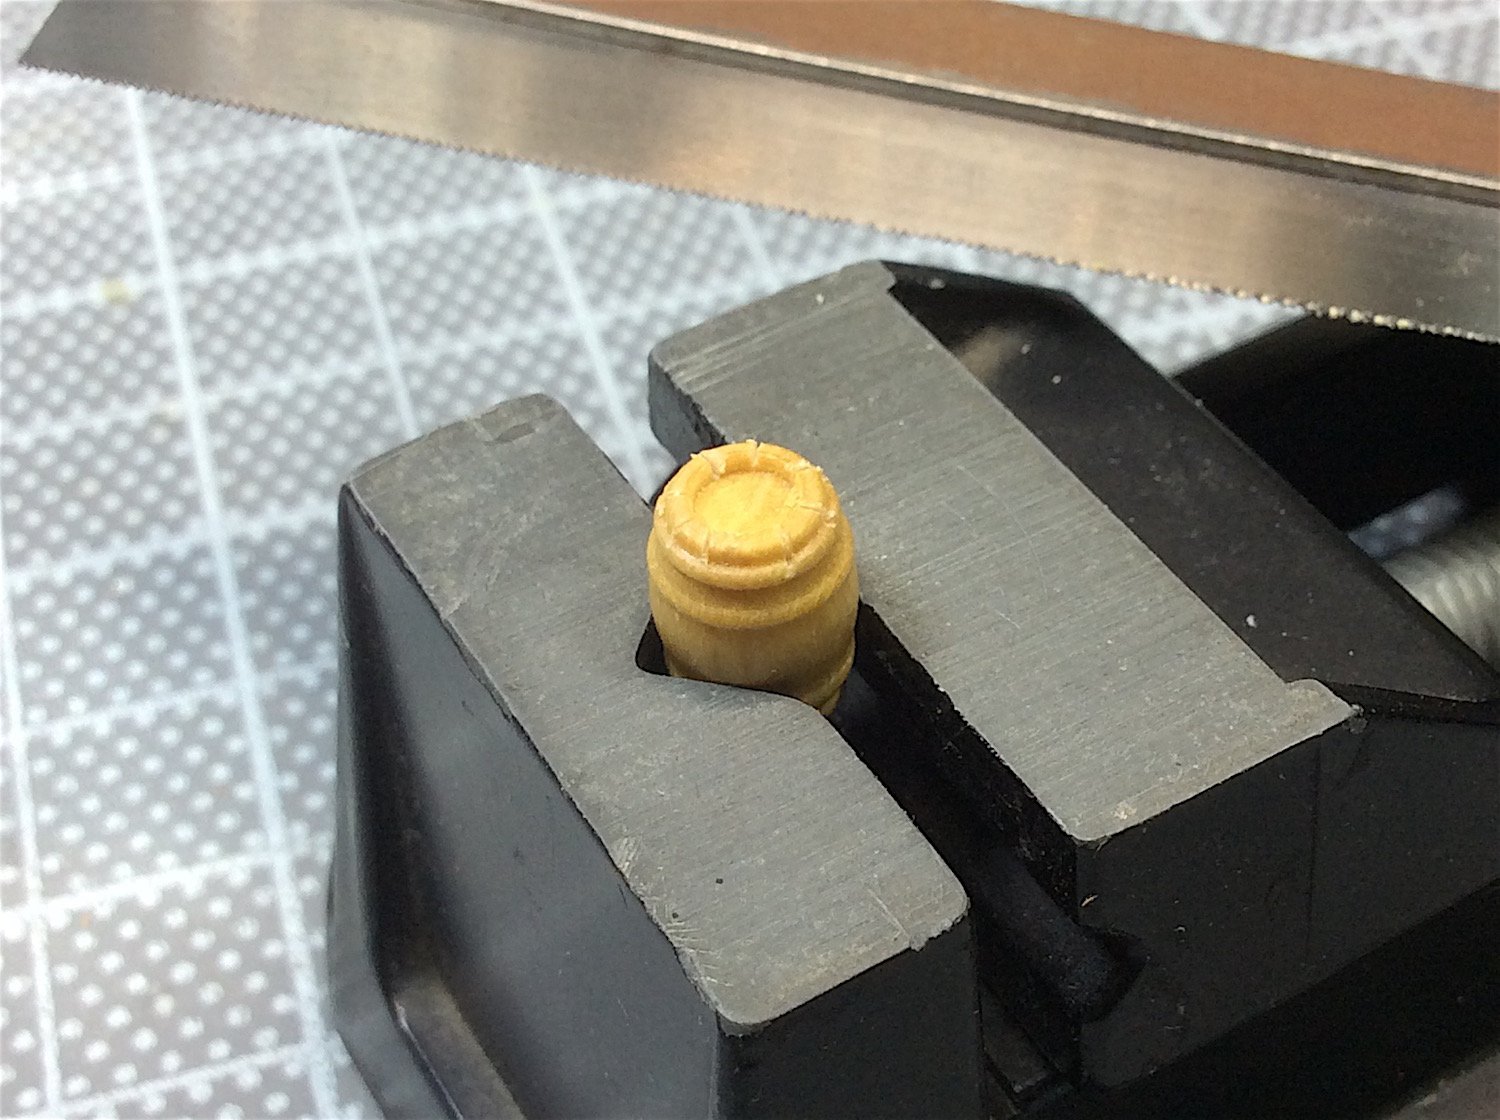
Hi mates, Thanks for the likes - Frank a poor attempt at adding the details from the pic below. I should have also scored the sides as well - too much work for lost detail.
-
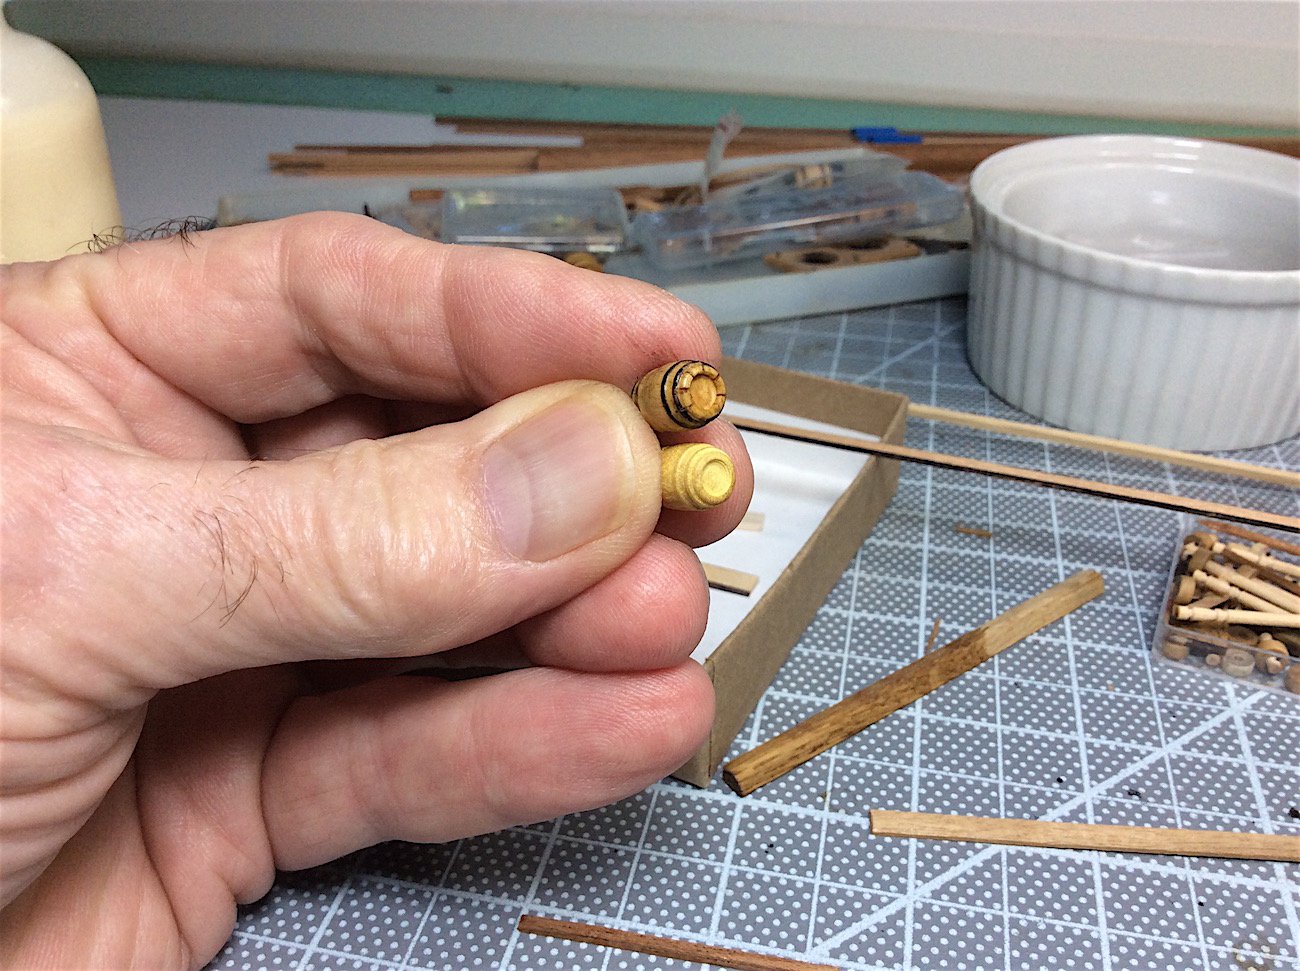
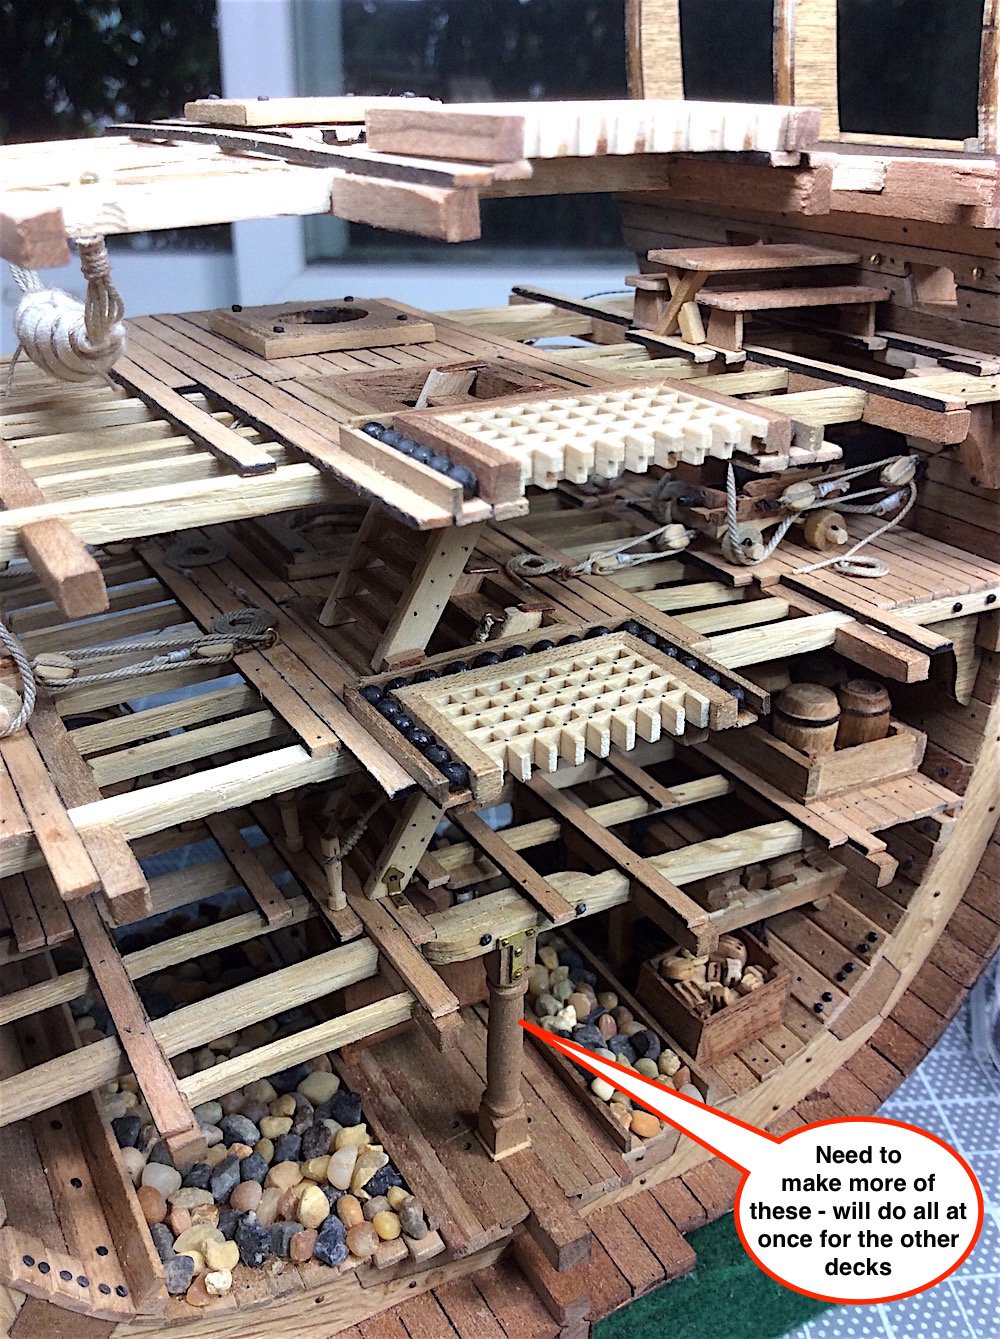
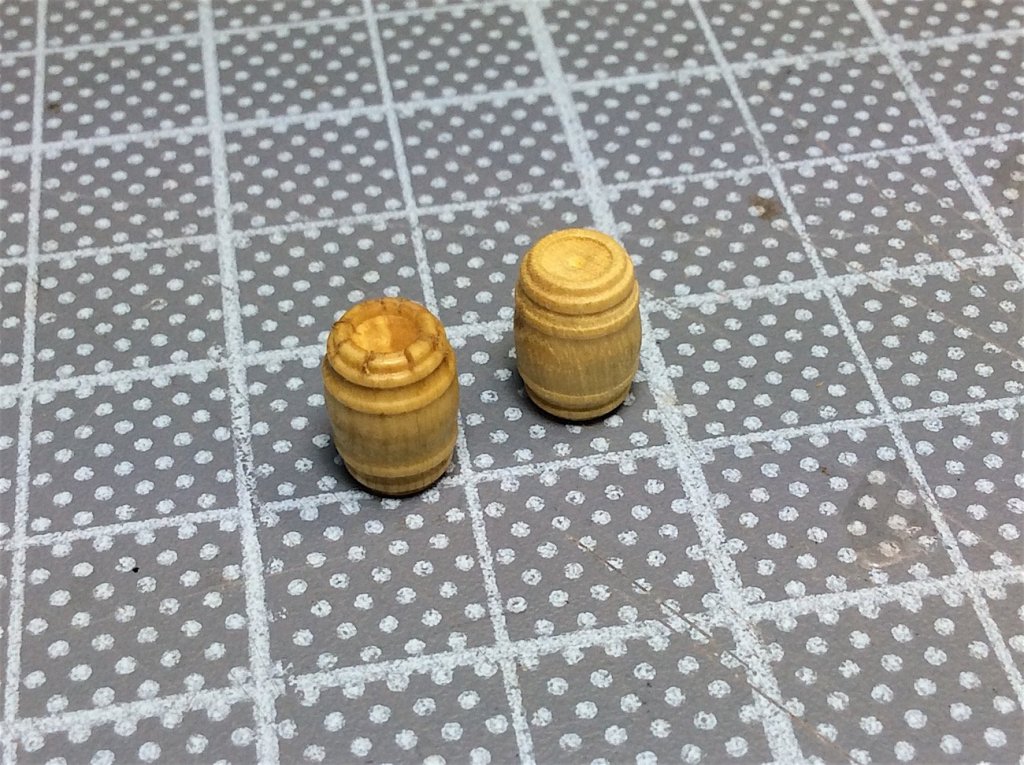
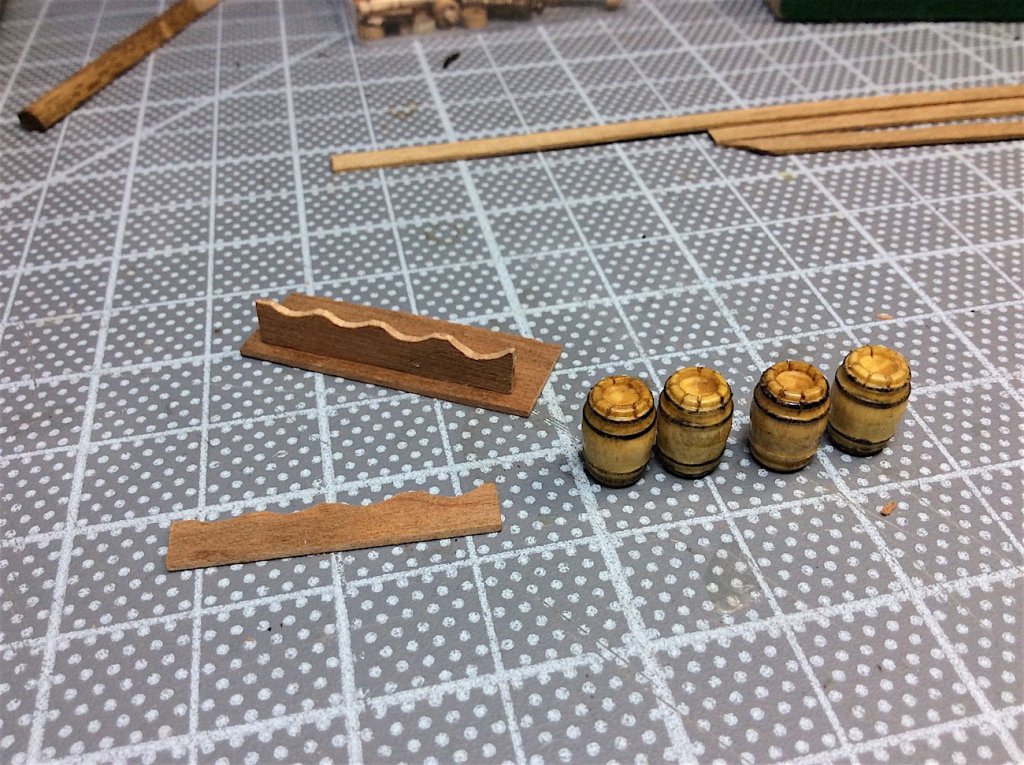
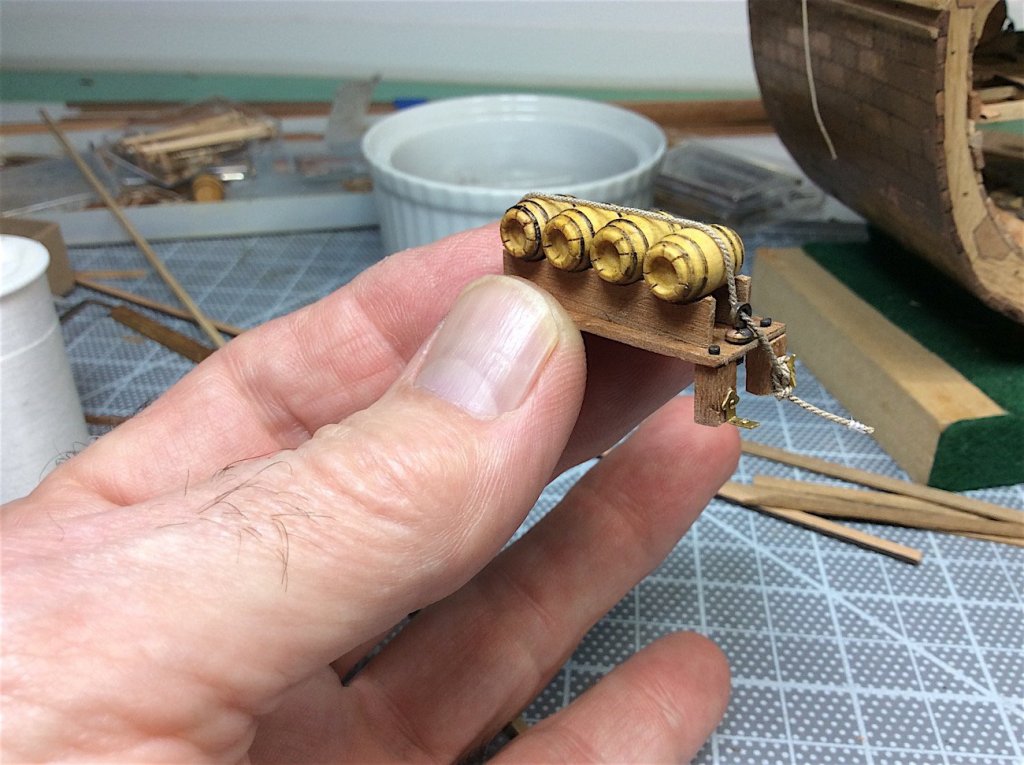
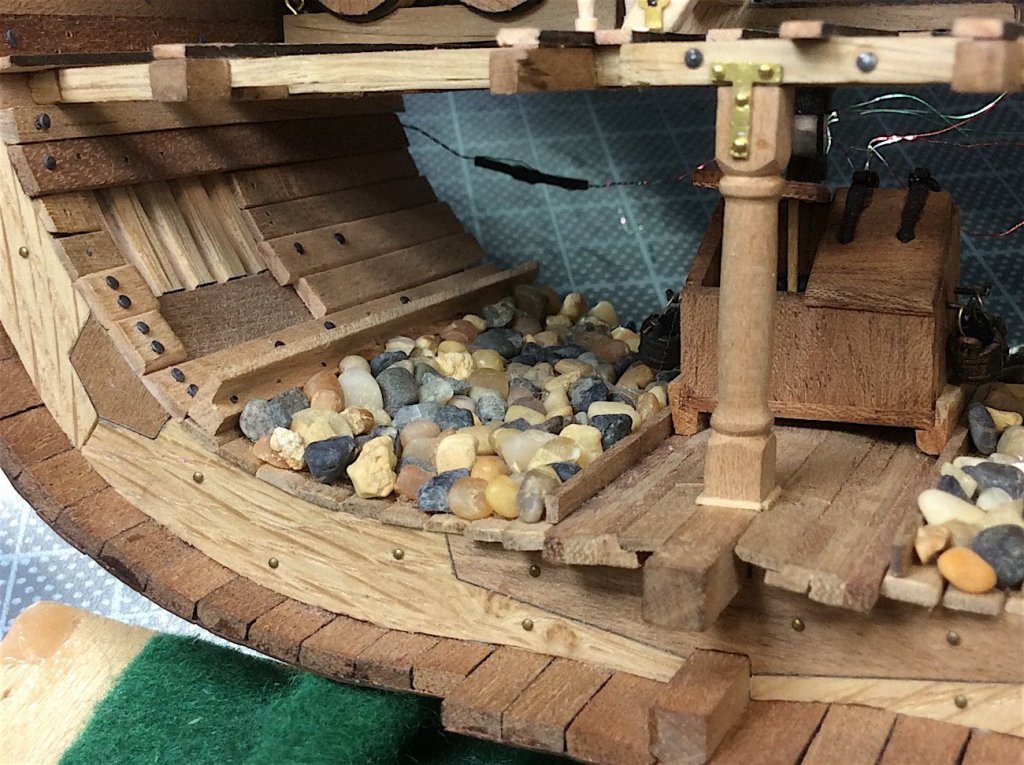
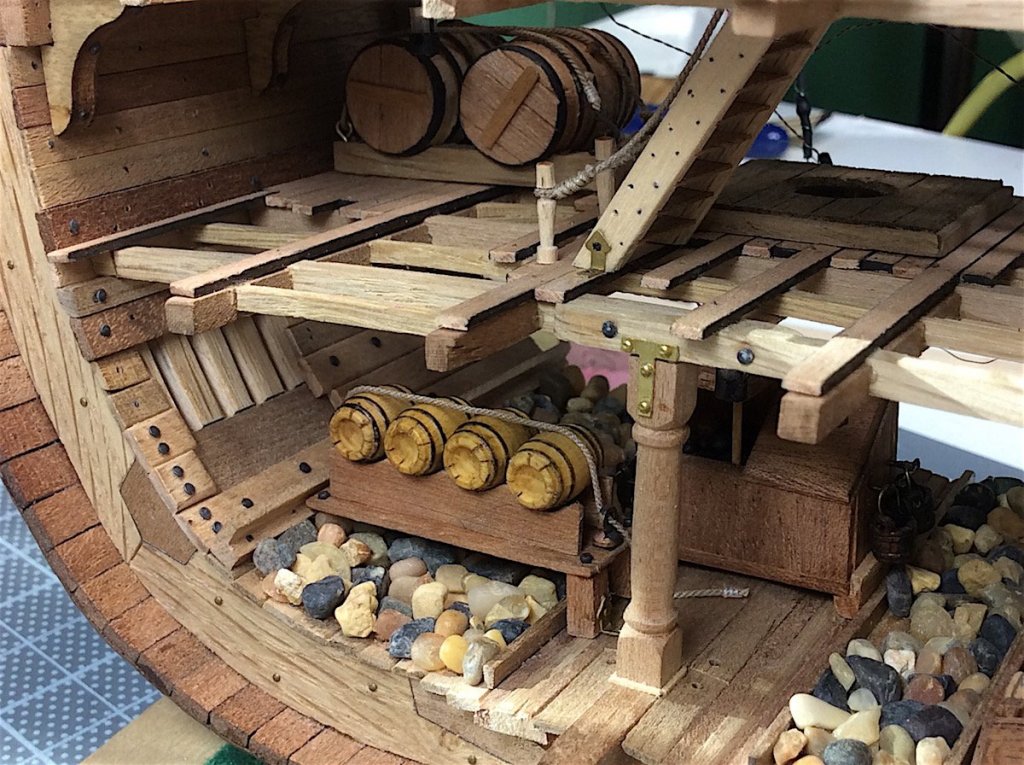
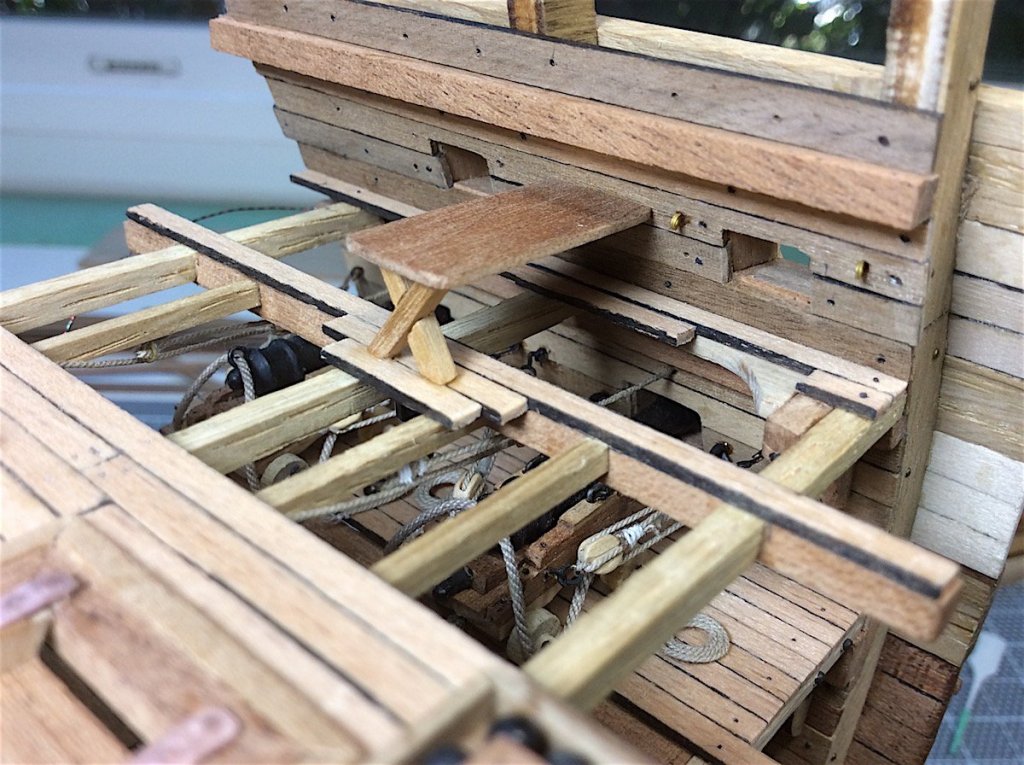
Continuing work on upper and main decks, but decided to revisit the hold. I always thought that it was too empty. It at least needed a few barrels. Did not like the look of straight out-of-the-box barrels so played with them for slight visual improvements, oak stain, then built a small framing. Holds were certainly filled with such barrels but this gives a bit more to the hold’s visual emptiness. As always thanks for looking in.


- 371 replies
-
- 13
-
-
B.E., Brilliant work on the capsquare detailing - Well done indeed!! Cheers,
- 574 replies
-
- 2
-
-
- cheerful
- Syren Ship Model Company
- (and 1 more)
-
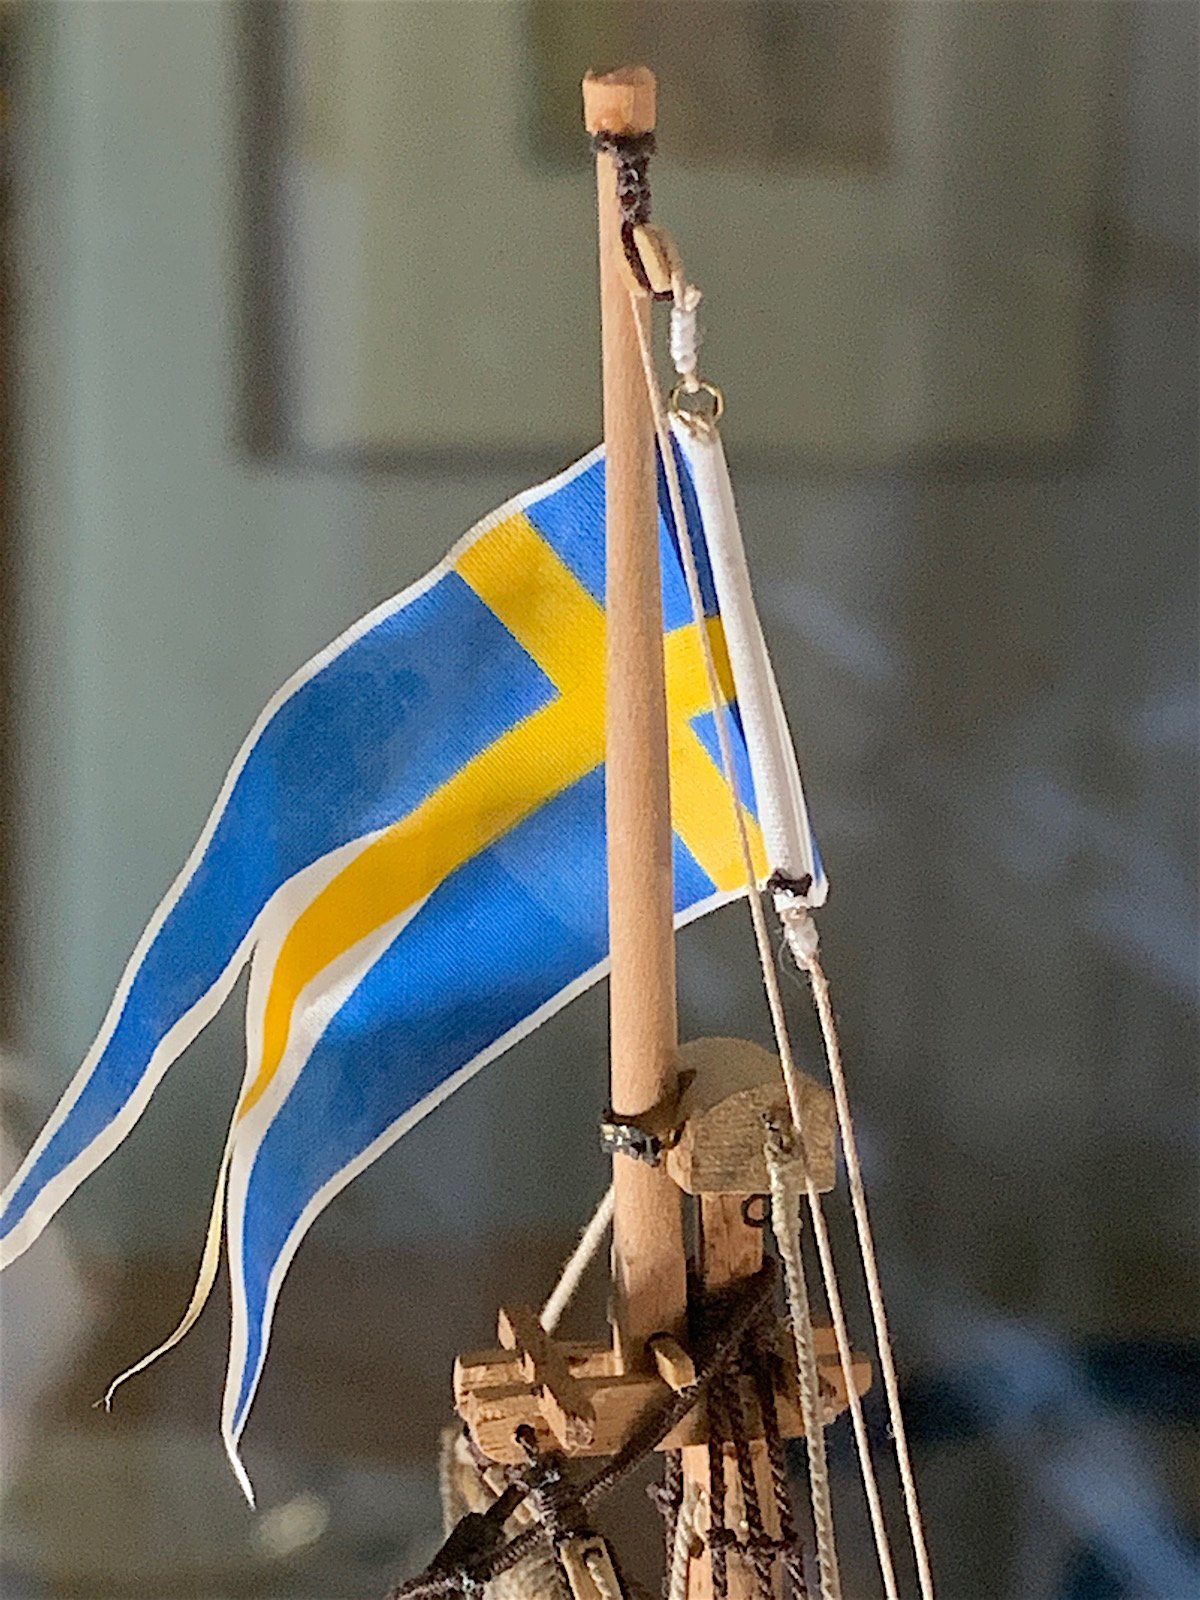
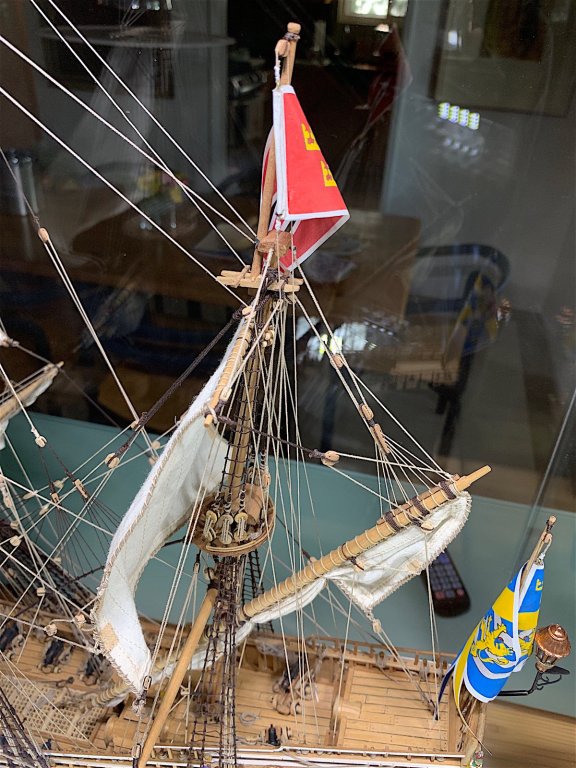
Ferit, Very nice solution - also the support pieces for that flag staff are very delicate and look excellent! PS: thanks Dave - I have saved the photo that you included for my files as well.
-
Frank, Those hatches sure raise the bar - Nice work.
- 510 replies
-
- 1
-
-
- reale de france
- corel
- (and 1 more)
-
Jose, Brilliant work. Your knowledge, skills and this build are a pleasure to follow as well as a great learning experience for me. Your log is a miniature ship built plank by plank - amazing learning indeed- Thanks for sharing this log here at MSW. Cheers,
-
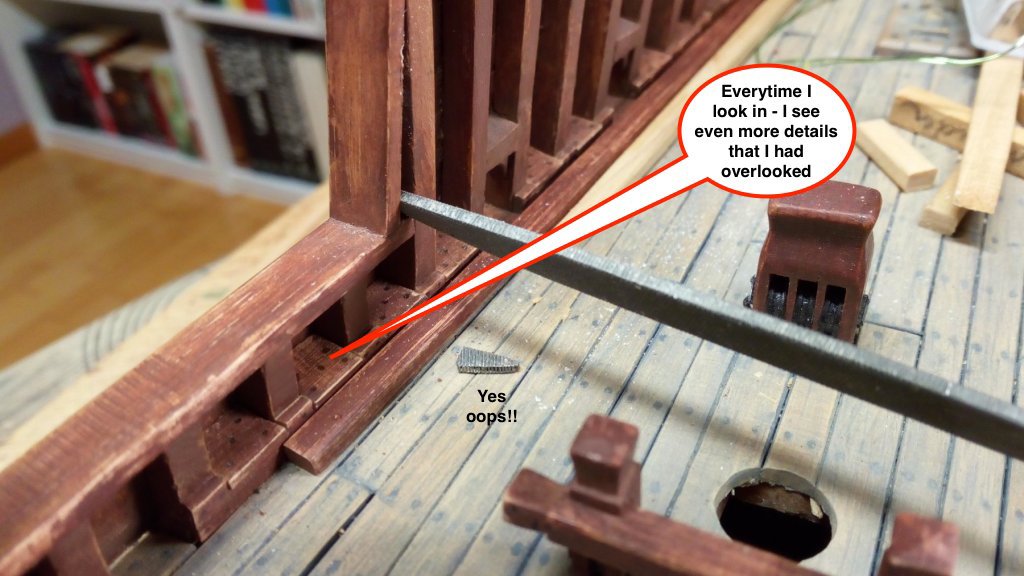
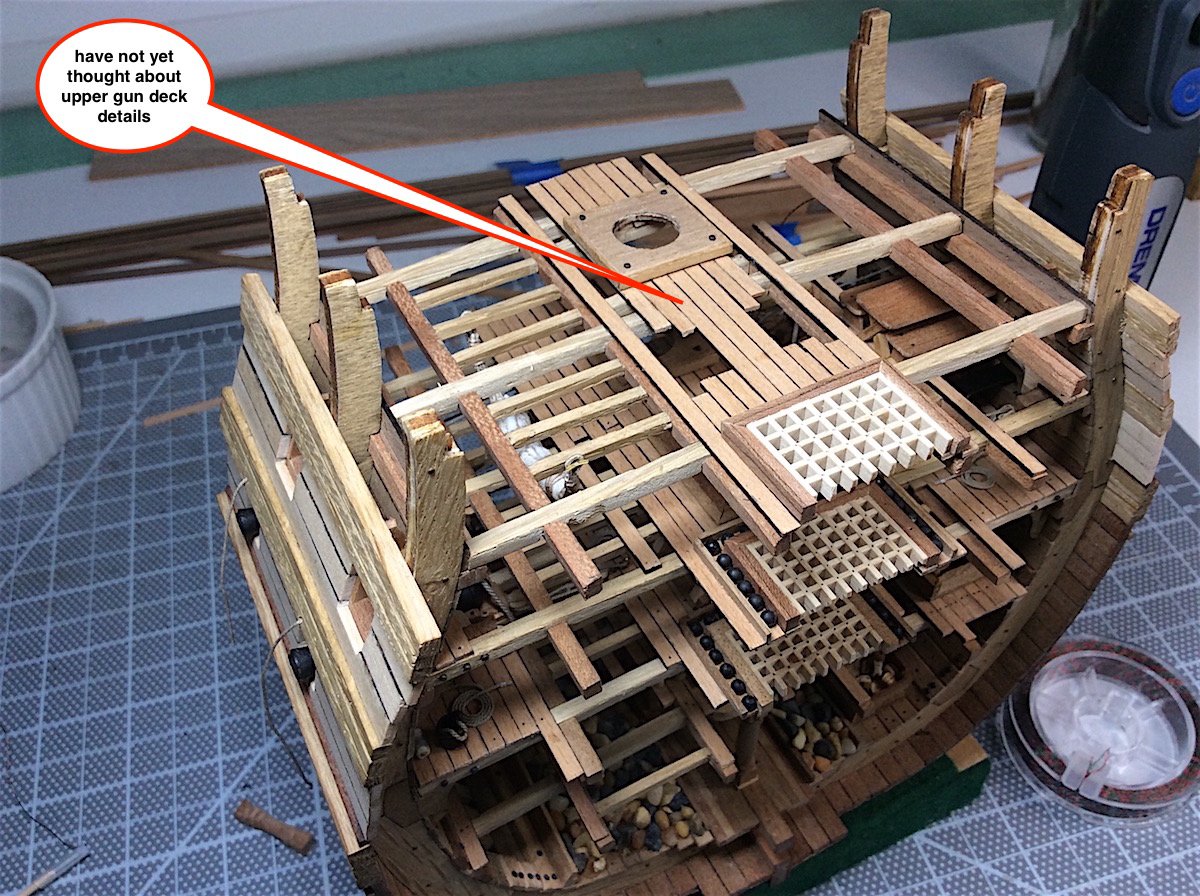
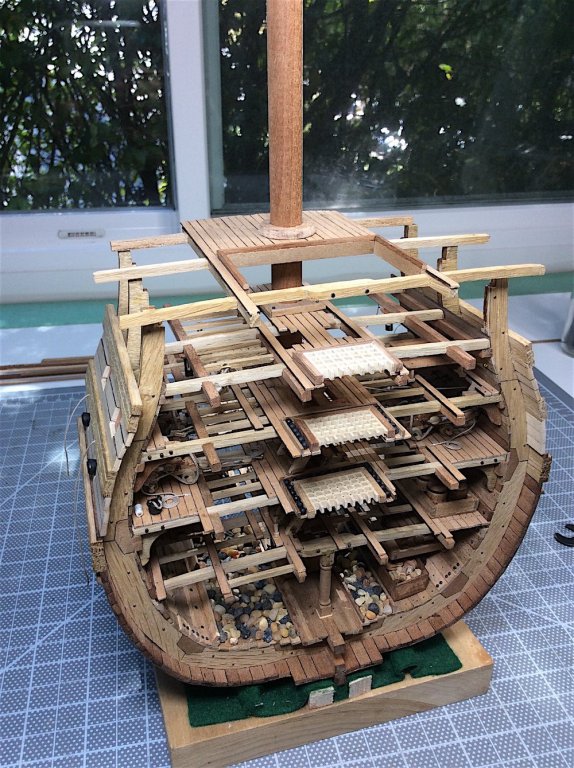
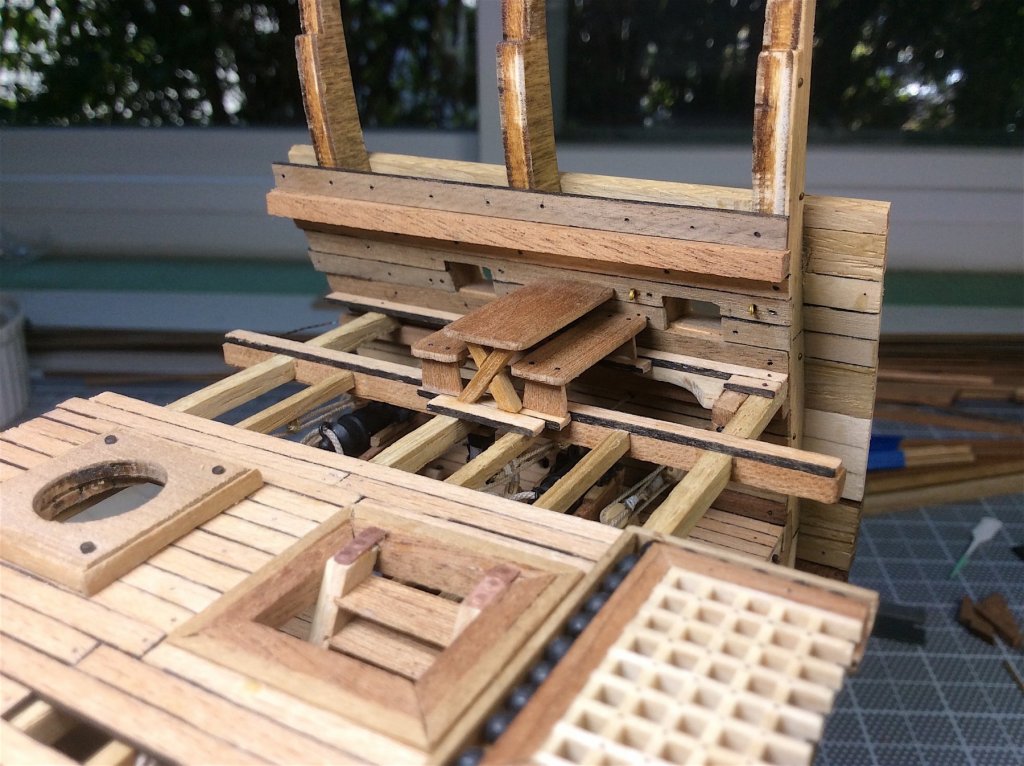
Hi Mates, Thanks so much for the nice comments/likes much appreciated. Sort of in a quandary – Don’t quite know what I want to do with the upper gun deck?? As it is, the mid gun deck is sort of empty. So in the interim I started the main (weather deck) will continue with outer and inner hull side planking, add the gun openings and so on. Will leave the upper gun deck unglued for now. This will give my eye a better perspective on how to add inside details - tempted to add two smaller fully rigged guns to one side of the upper gun deck Main deck will be probably fully planked along with four rigged guns. Want to leave out some of the inner and outer side hull planks in order to see the upper futtock frames (as I did in the hold) just thinking…. PS: kIt provided deck was perfect as a template. As always, Cheers

-
Frank, Looking very good. Paint work is top notch as well.
- 510 replies
-
- 1
-
-
- reale de france
- corel
- (and 1 more)
-
Oh Martyn, Thanks -- BTW it was your cross of same ship that gave me the idea for adding a table .
-
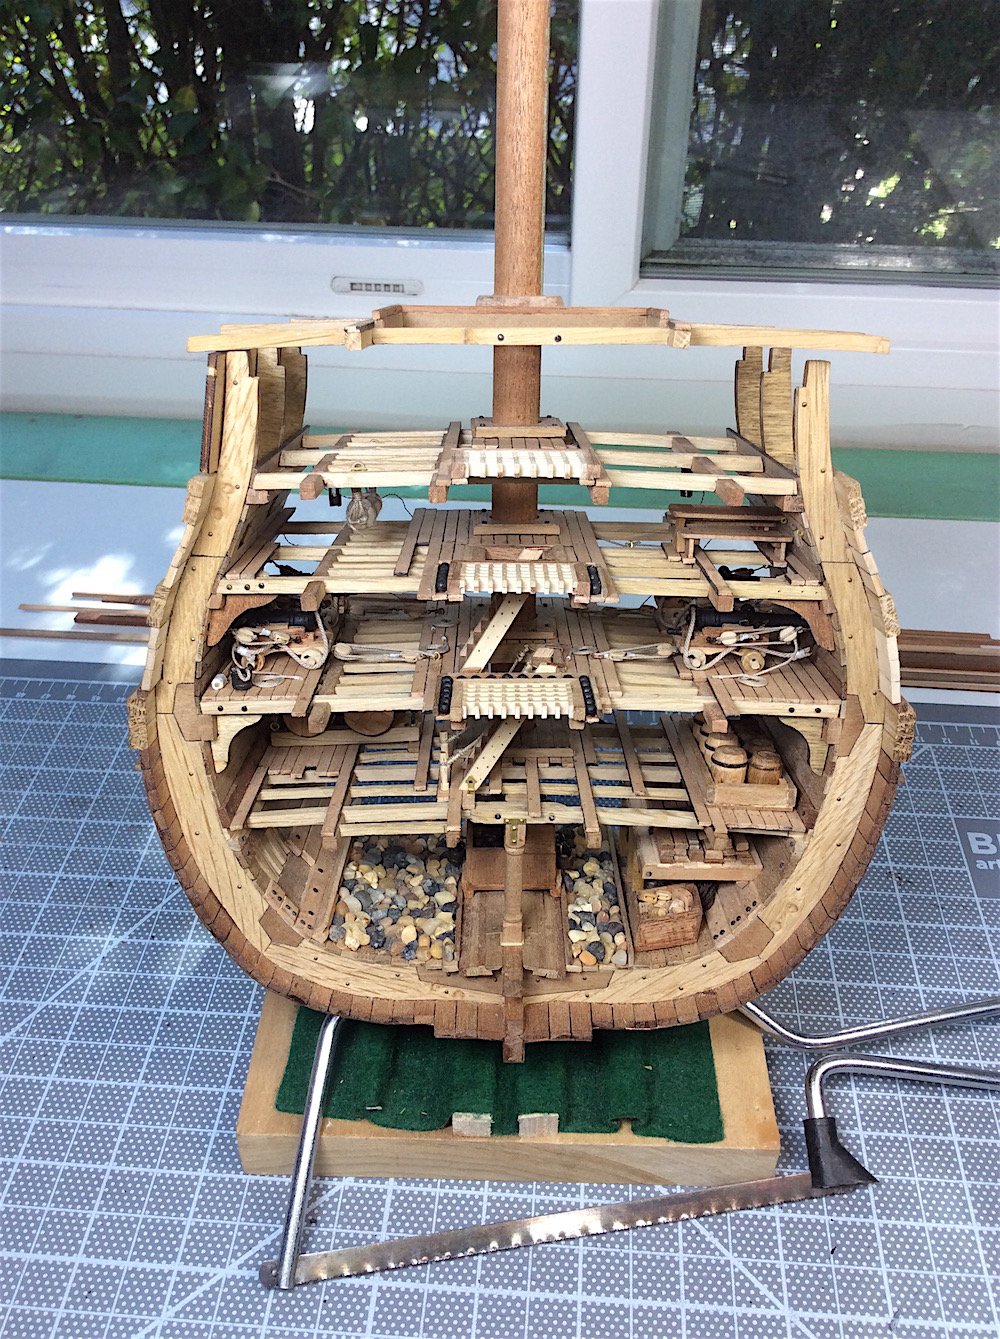
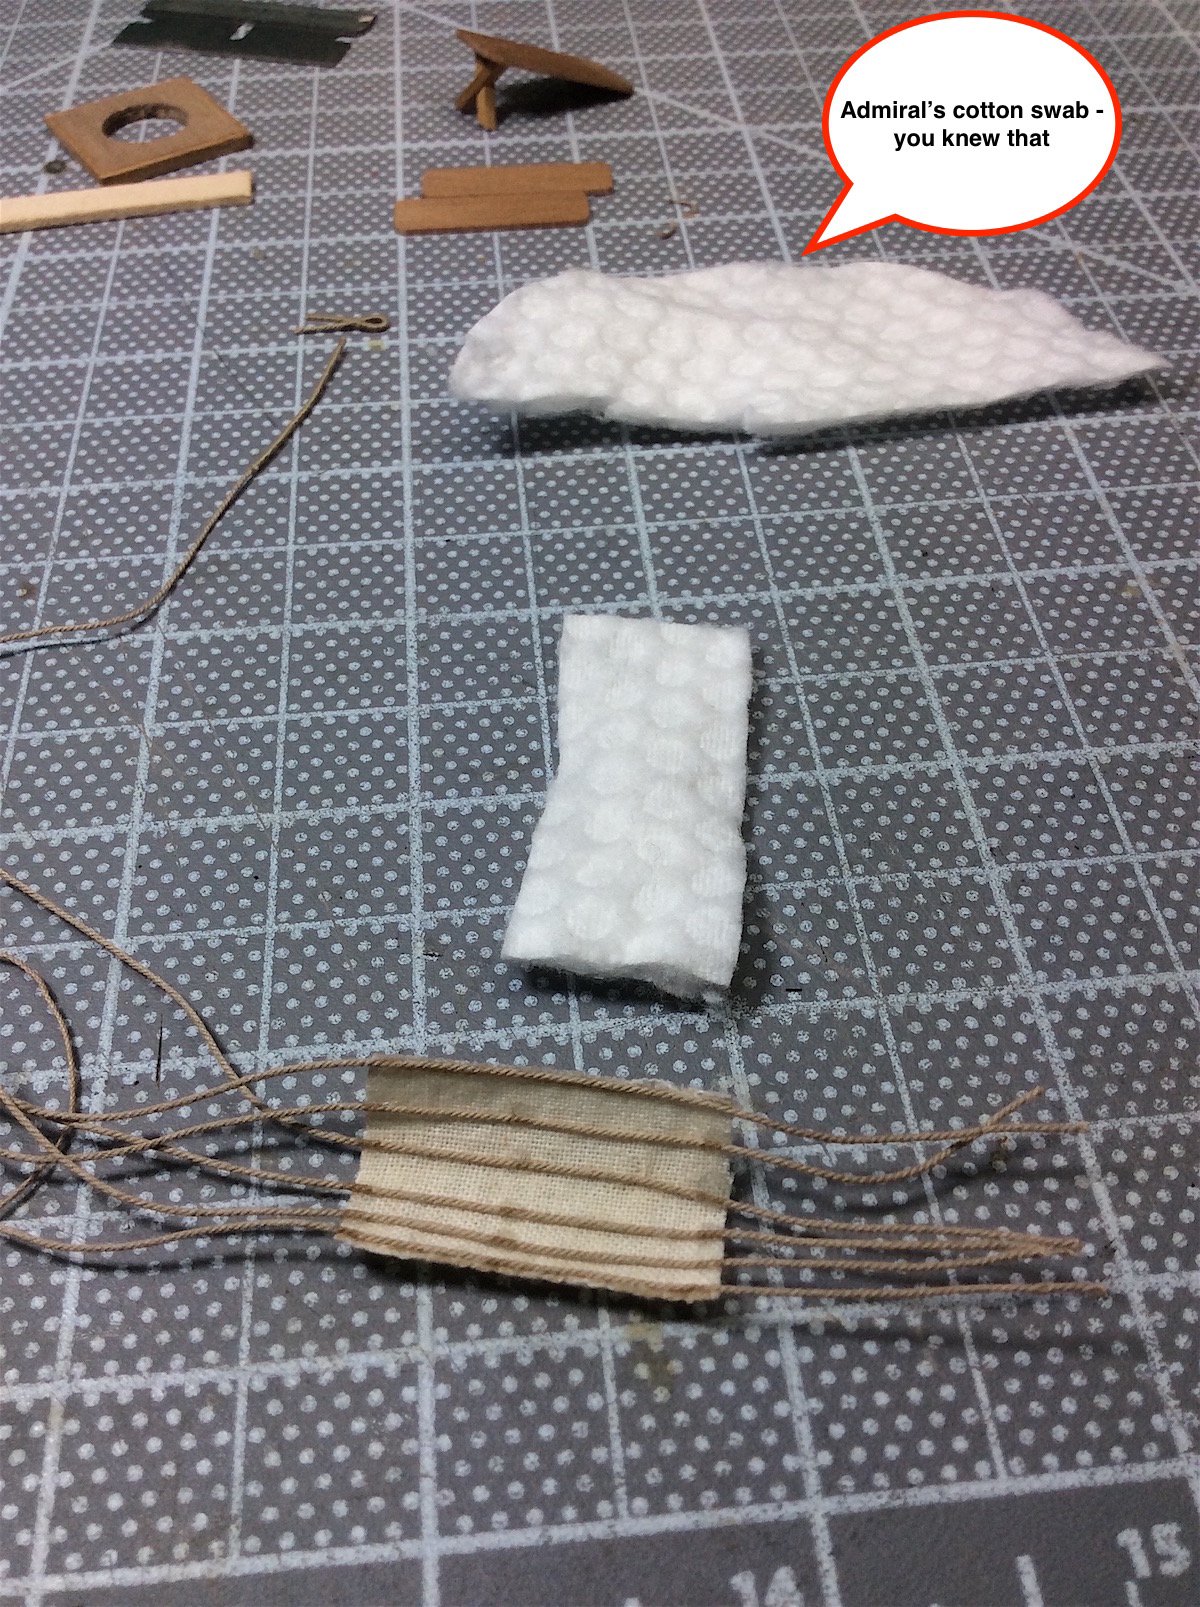
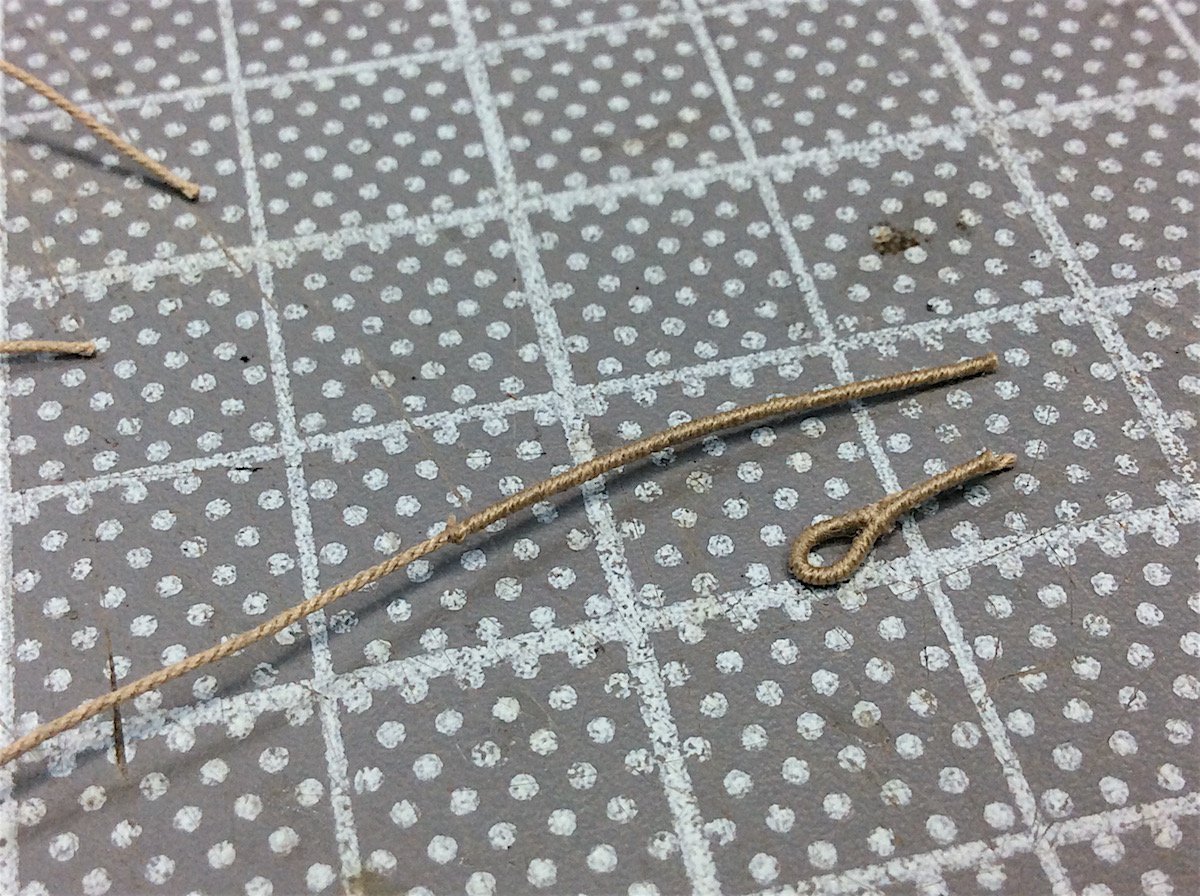
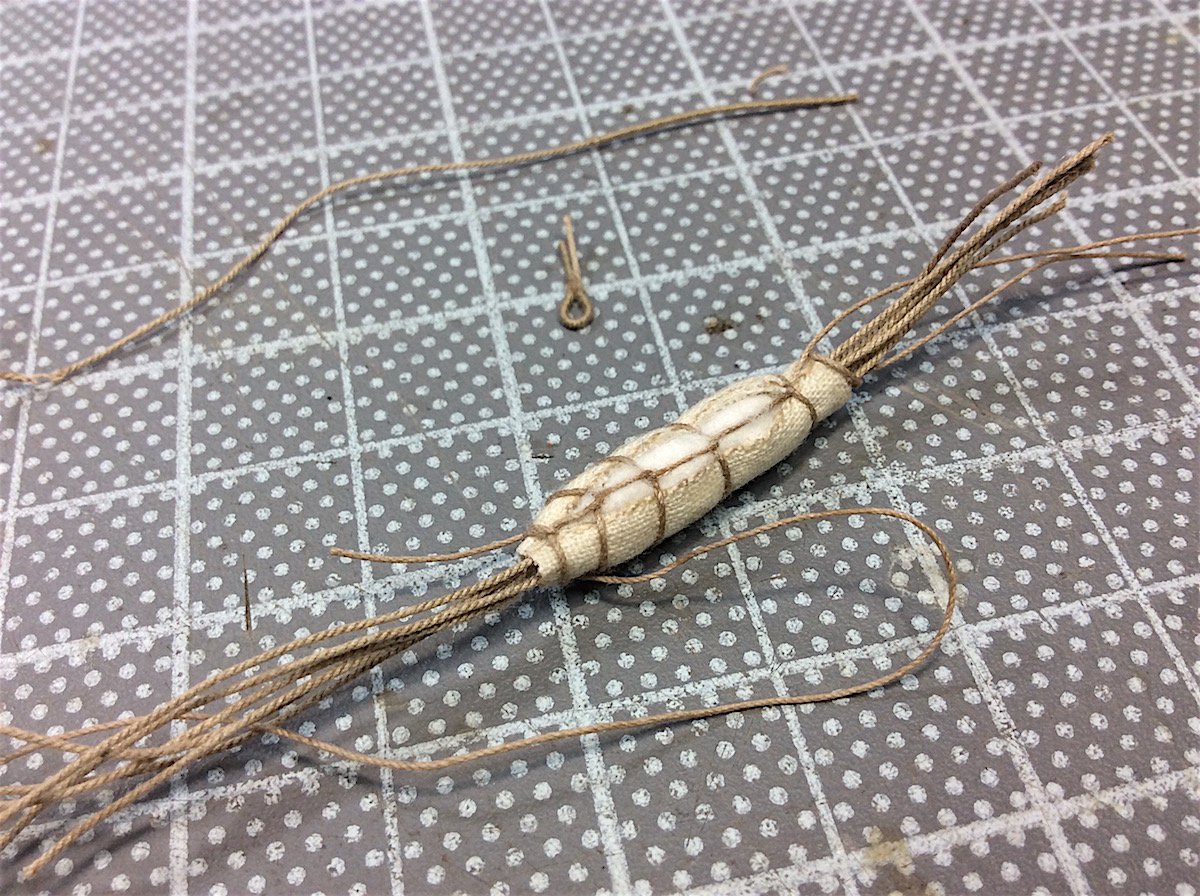
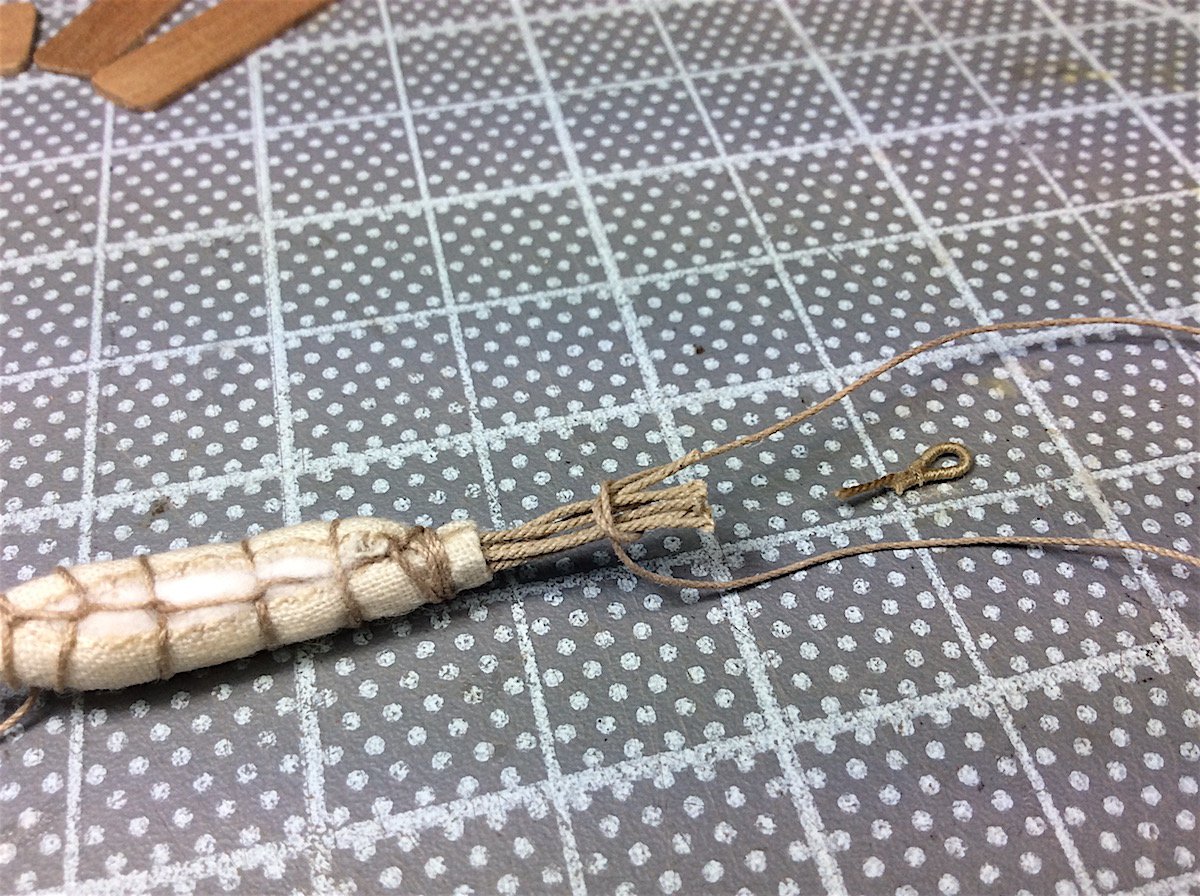
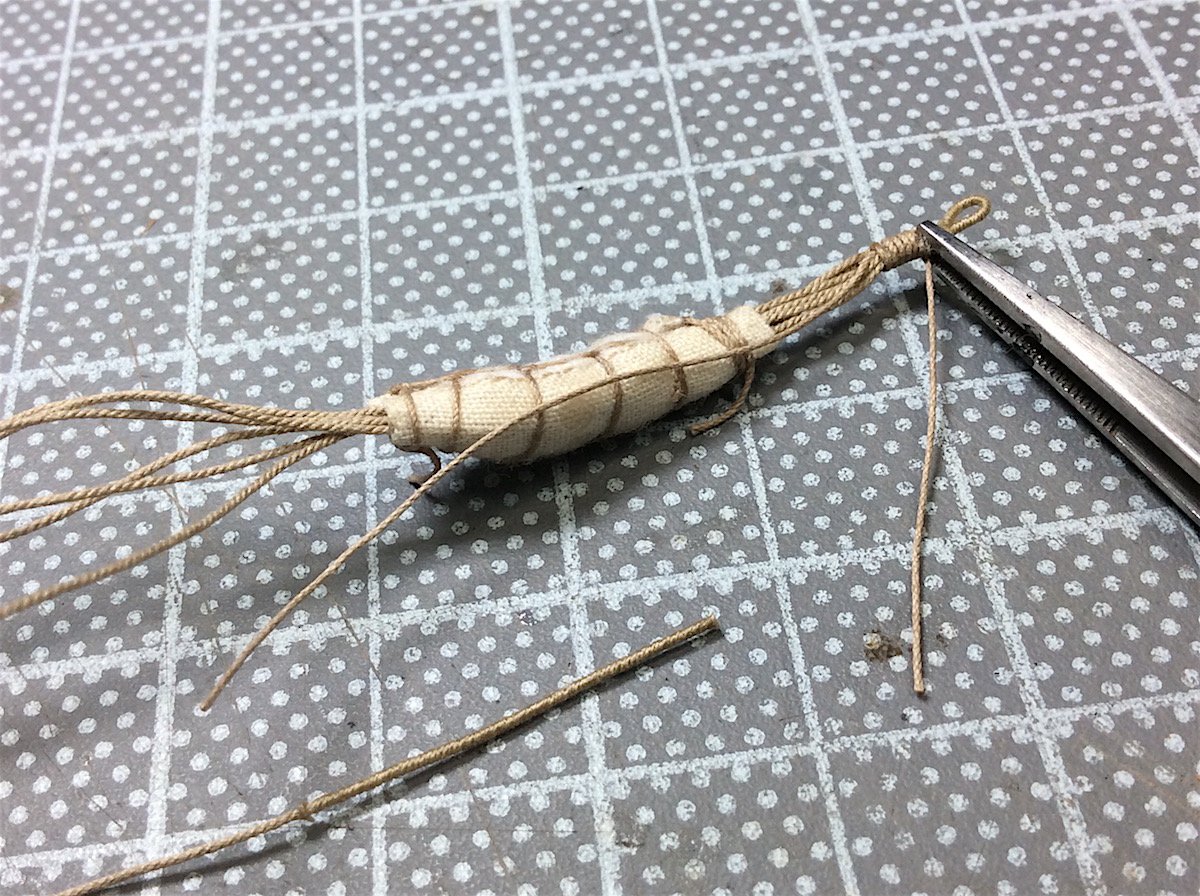
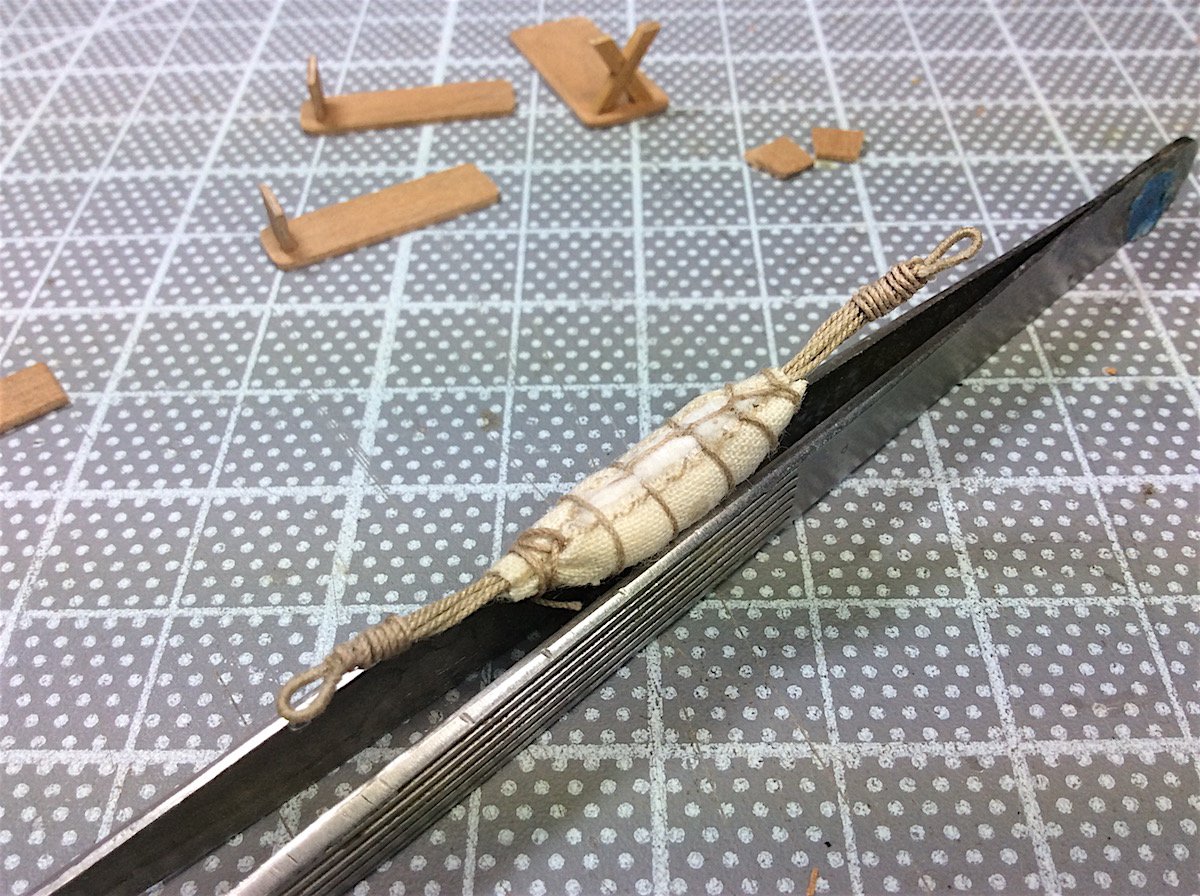
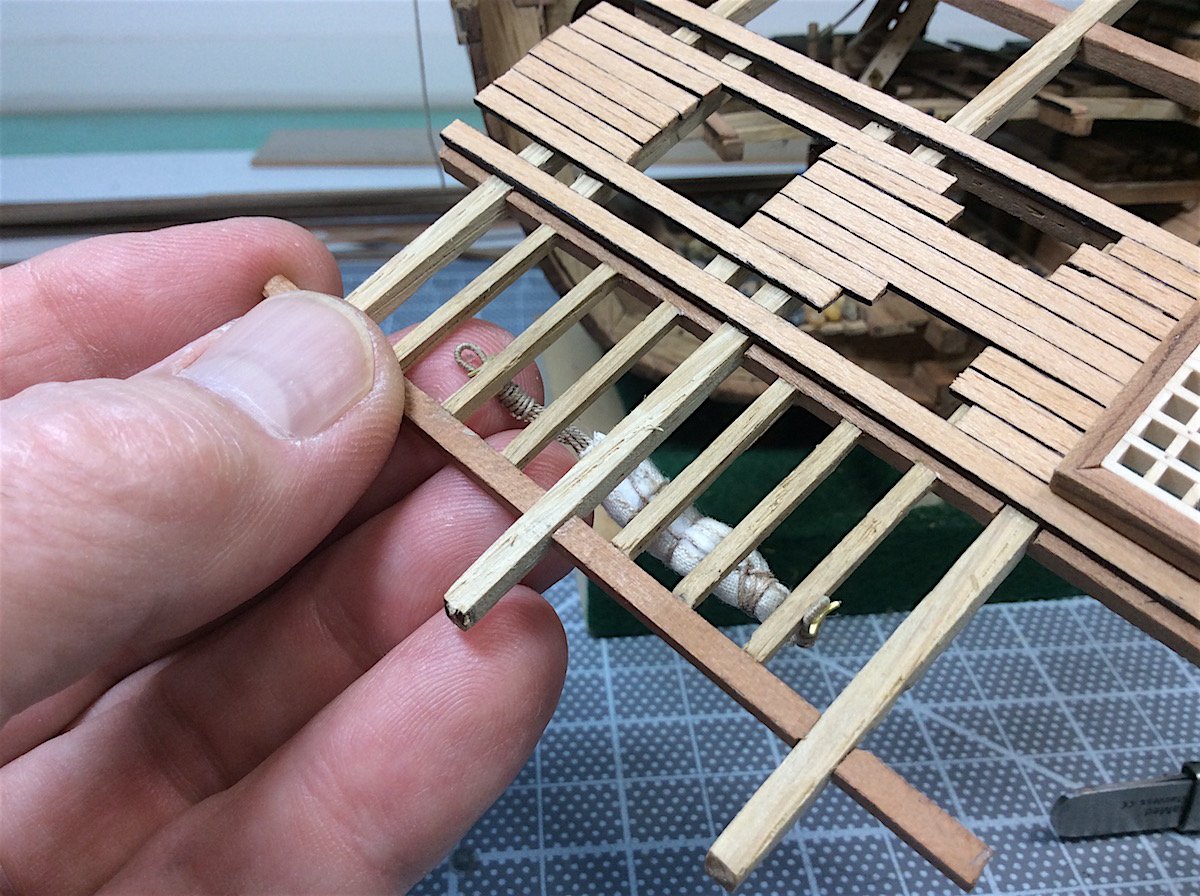
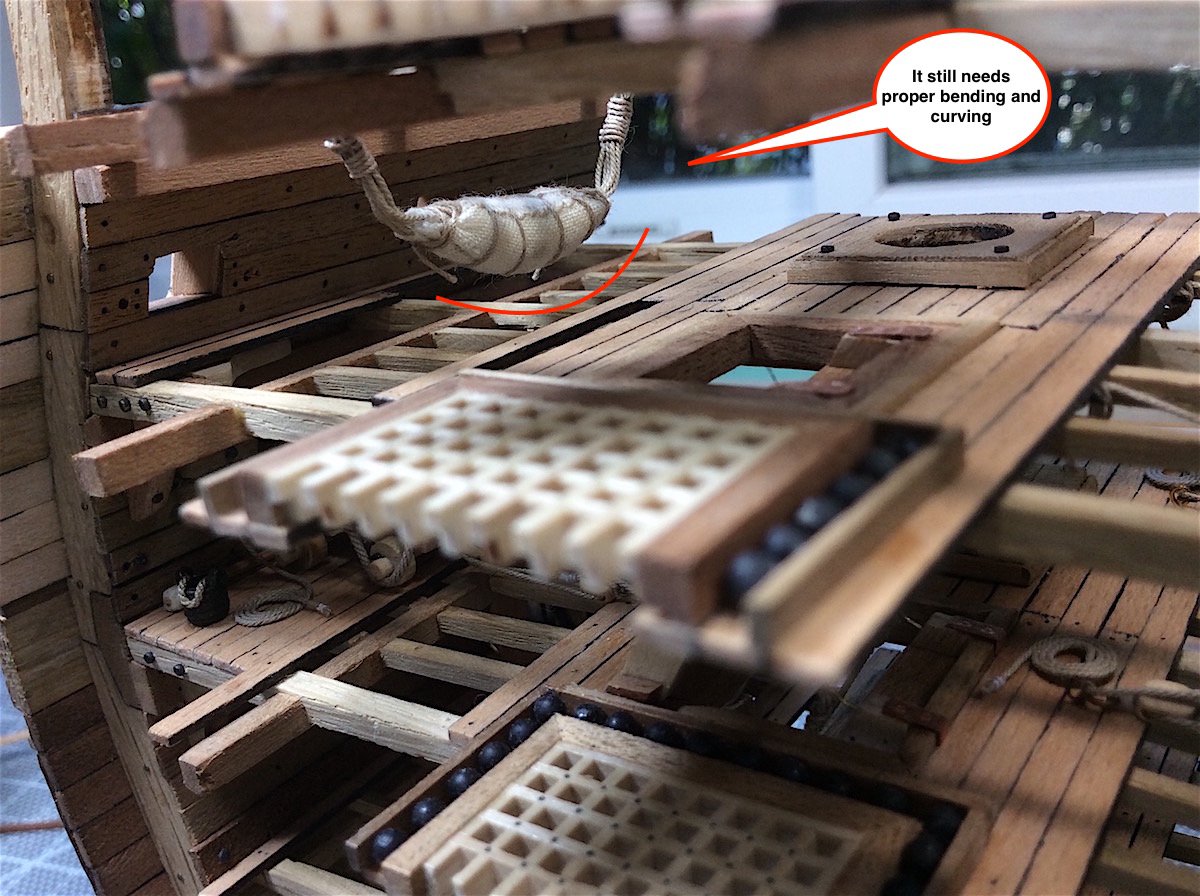
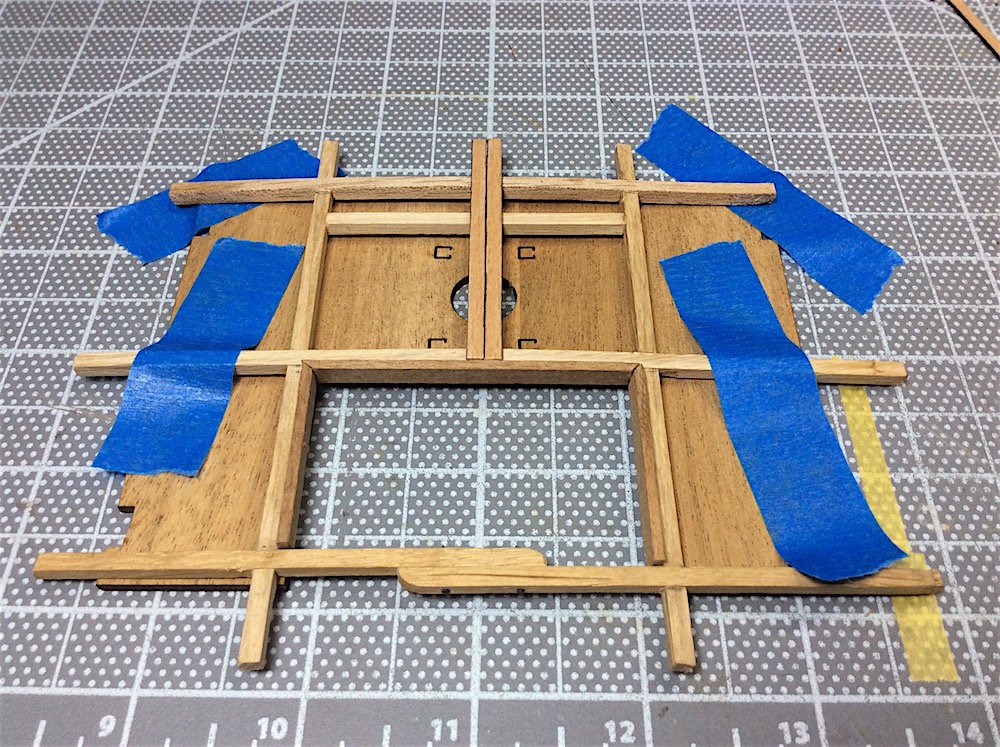
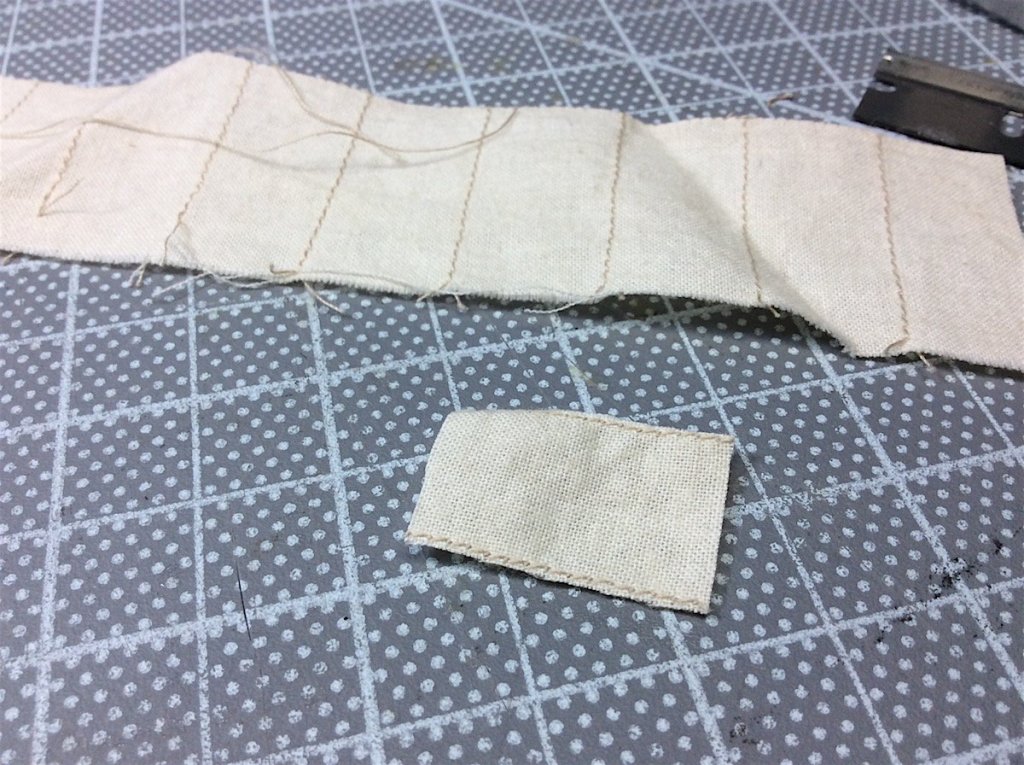
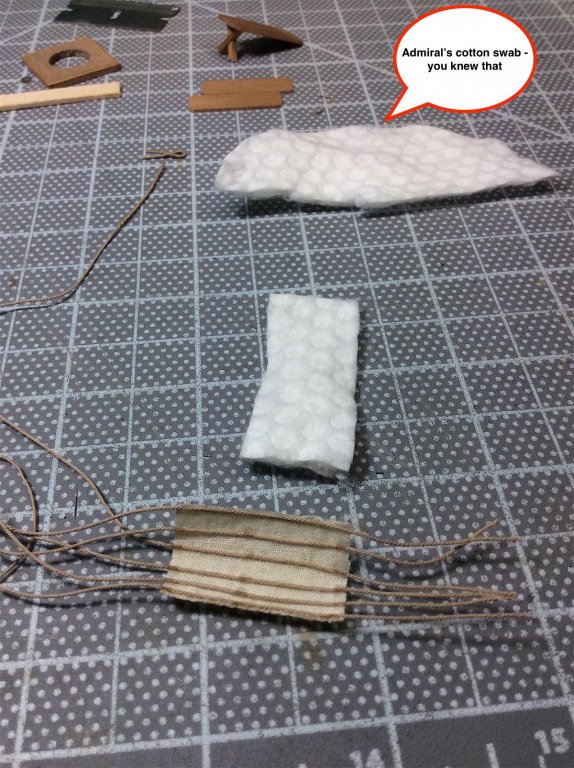
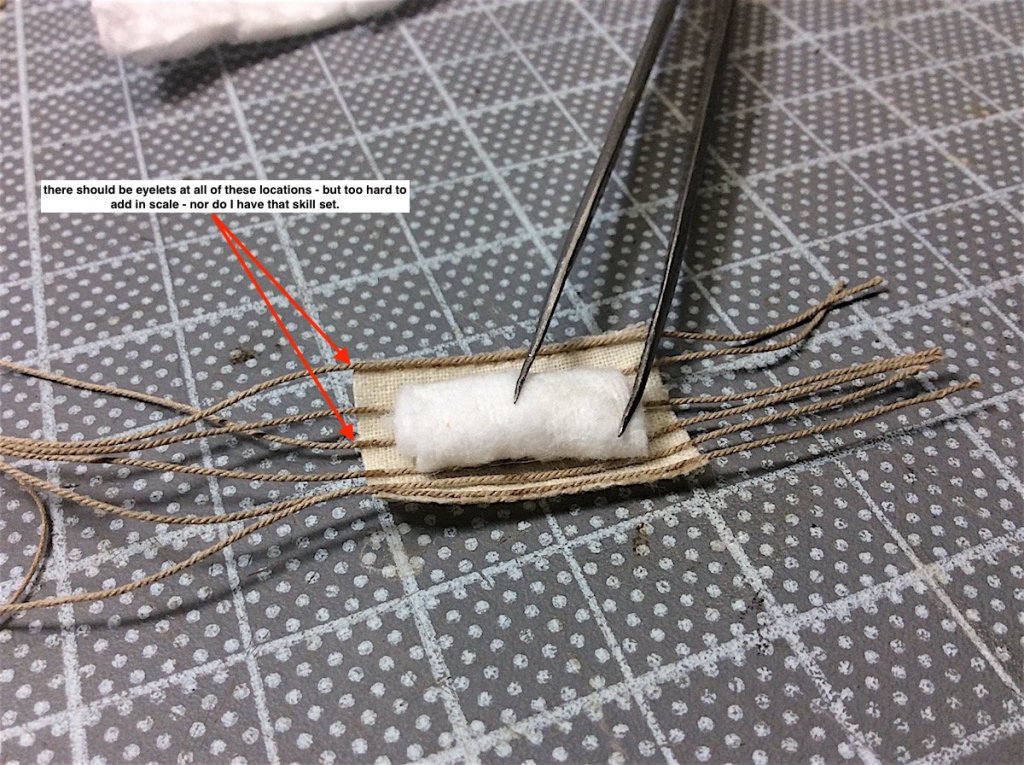
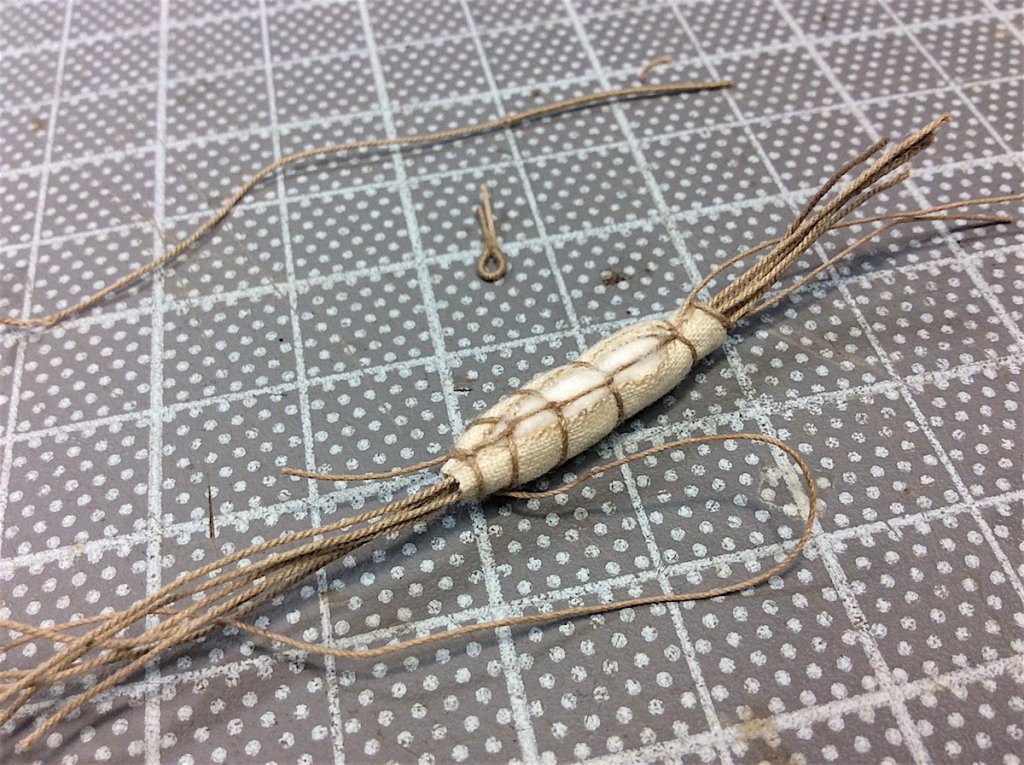
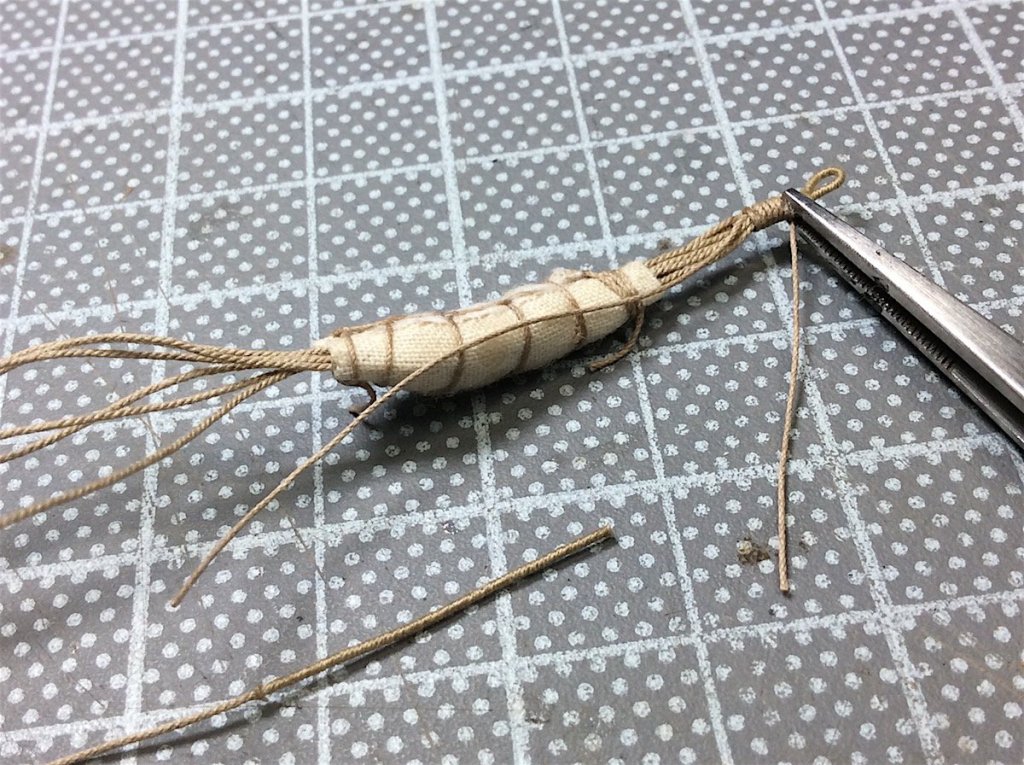
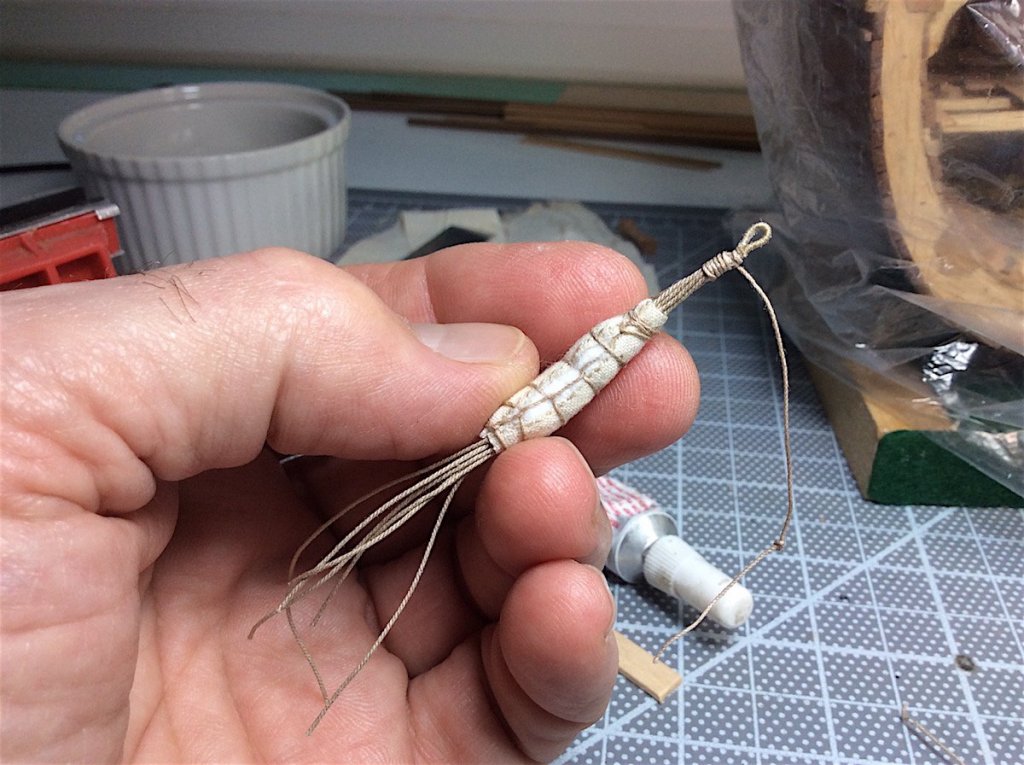
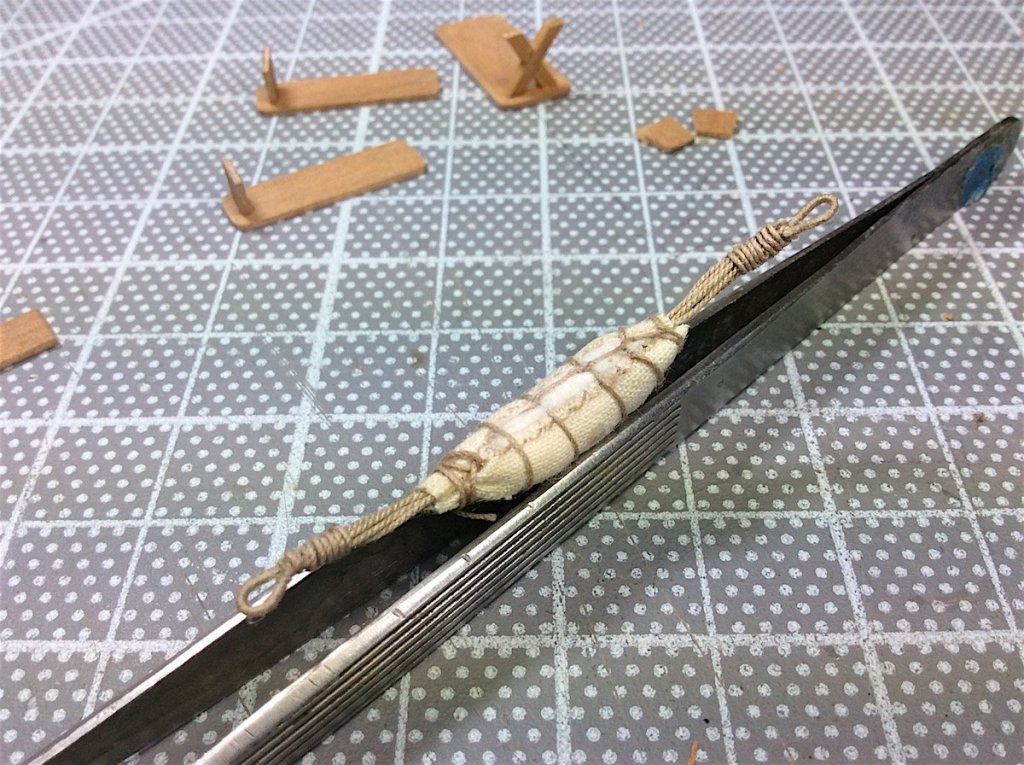
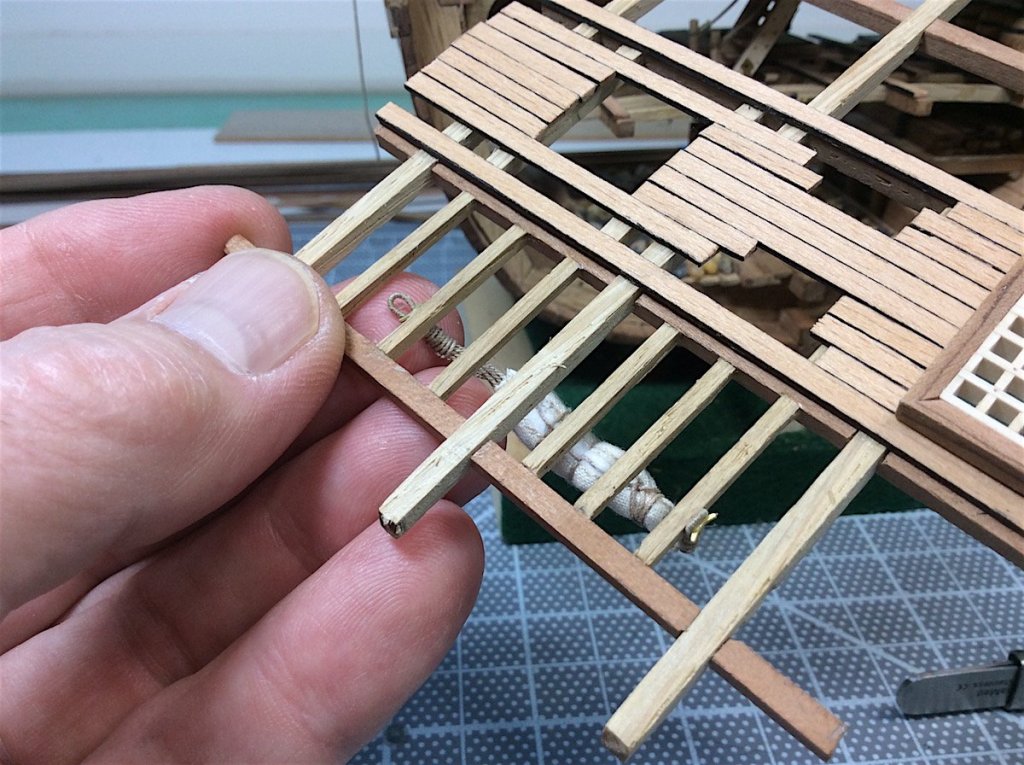
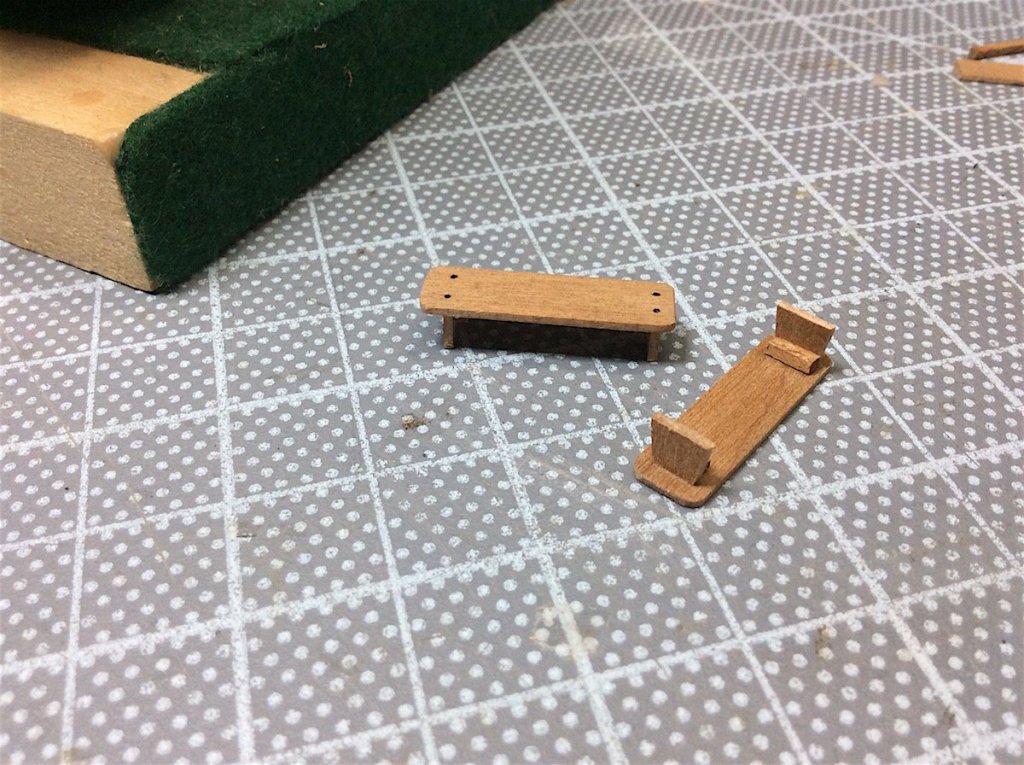
Hi Mates, Shipyard has been closed for a bit longer than expected. Minor update but a big one for me -- the yard is actually open again. Beyond getting involved in some other outside work, turned out that it had also finally come time to no longer avoid fixing my right wrist. So four weeks after of a carpal tunnel procedure, fingers can now feel as though I never had that issue in the first place. Enjoying full use of right hand. ================= So what to do with mid-gun deck? Decided not to completely rig four more guns and carriages, but instead do a minimalist look at how some sleeping and eating was achieved on gun decks. Mid gun deck seemed the right place. This would also keep a continued open look to this cross section. I had some leftover material from sails - I have already finished them for this build; Incorporated a scrap to fashion a hammock. Pics are self explanatory so minimal “how to” – also added a table – many of which were placed between gun carriages - as you all know during meals. Will add lanterns as well as several other details. Also considering adding one rigged carriage, but one that is in a “stored” sideways position inside the deck – have not located any drawings on how that should look. (Not even sure that this is correct?) Hmmm –here are a few updated photos As always thanks for your continued interest in this semi-part time log. Cheers,


- 371 replies
-
- 12
-
-
Joachim, So happy that you are again updating posts for this incredibly beautiful build. Your work is indeed superlative. Your spar mechanisms for the masts are brilliantly articulated - as are all other details of this project.... If I might suggest - please post a single updated full view of this ship at the At a Glance thread. It will allow others who may not know of this log to see this amazing build. Home page --Nautical General Discussion then At a Glance Cheers,
-
Ulises, Very nice work on your spars - I don't remember if you mentioned if you will also add sails and running rigging on this one? Regards,
- 786 replies
-
- 2
-
-
- Royal Louis
- Finished
- (and 1 more)
-
Mark, As Peter just said - your logs are indeed great to follow. So 18 builds !! - hmmm, I'm only my third and already the Admiral is asking me where I plan on putting my current small build - as there is certainly no more space in our home haha Cheers,
- 331 replies
-
- 1
-
-
- nuestra senora del pilar
- occre
- (and 1 more)
-
Ferit, I also tried to research this for my Vasa (1628) I could not find much information. Though all the information that I found had flags going all the way up to the tip of the flagpoles, not under the upper caps. So I decided to just add blocks then run the flag ropes down to pins (any close by) on the deck. But I think that the way I attached the flags to the ropes may not be correct. There must have been a way to remove the flags from the ropes.

-
Steven, I have been following "silently" not fair to your brilliant log. Your attention to every detail is really interesting also given the rarity of these types of projects. Super interesting to follow along. Cheers,
-
Ferit, So glad to see an update from you. Rigging work is Very First Class - excellent work !
-
O.C. has this right. And when you have also done all of the gilded carvings for this current project of yours E.J it becomes even more impressive !!
-
Frank, Nice paint work, trim lines and perfect French colors. Looking good that tool would be great for your build - 1st time I've seen this. PS: when I enlarged the last shot - it does indeed seem to be "home made" The two grooves have pencil marks along the edges PS:2 nice museum model http://kativ.eu/files/IvoHobby/Ships/La Reale de France/Model museum/
- 510 replies
-
- 1
-
-
- reale de france
- corel
- (and 1 more)
-
Very nice indeed. Your paint work is very well replicated from details available at the Museum 👍 Regards,
- 146 replies
-
- 3
-
-
- deagostini
- vasa
- (and 1 more)
-
Mark, Just catching up - nice as always - your bow area mast/riggings are so well done Regards,
- 331 replies
-
- 4
-
-
- nuestra senora del pilar
- occre
- (and 1 more)
-
Dave, Just catching up - as always your work is superlative. Your rigging details are so excellent indeed ( as is the rest of the build) Regards,