HOLIDAY DONATION DRIVE - SUPPORT MSW - DO YOUR PART TO KEEP THIS GREAT FORUM GOING! (Only 53 donations so far out of 49,000 members - C'mon guys!)
×

md1400cs
-
Posts
2,839 -
Joined
-
Last visited
Content Type
Profiles
Forums
Gallery
Events
Everything posted by md1400cs
-
 Paul, Frank, Thanks for your advice - this is new territory for me - so the help is much appreciated. You are both certainly correct and as Frank thought - the chafing would also become an issue. I just did a search of the USS Constitution, and the ropes are also indeed pulled from above. Easy fix - in that the middle gun deck has not been installed, I can add the ropes/blocks to the upper beams before installation. Thanks Guys Cheers
 -
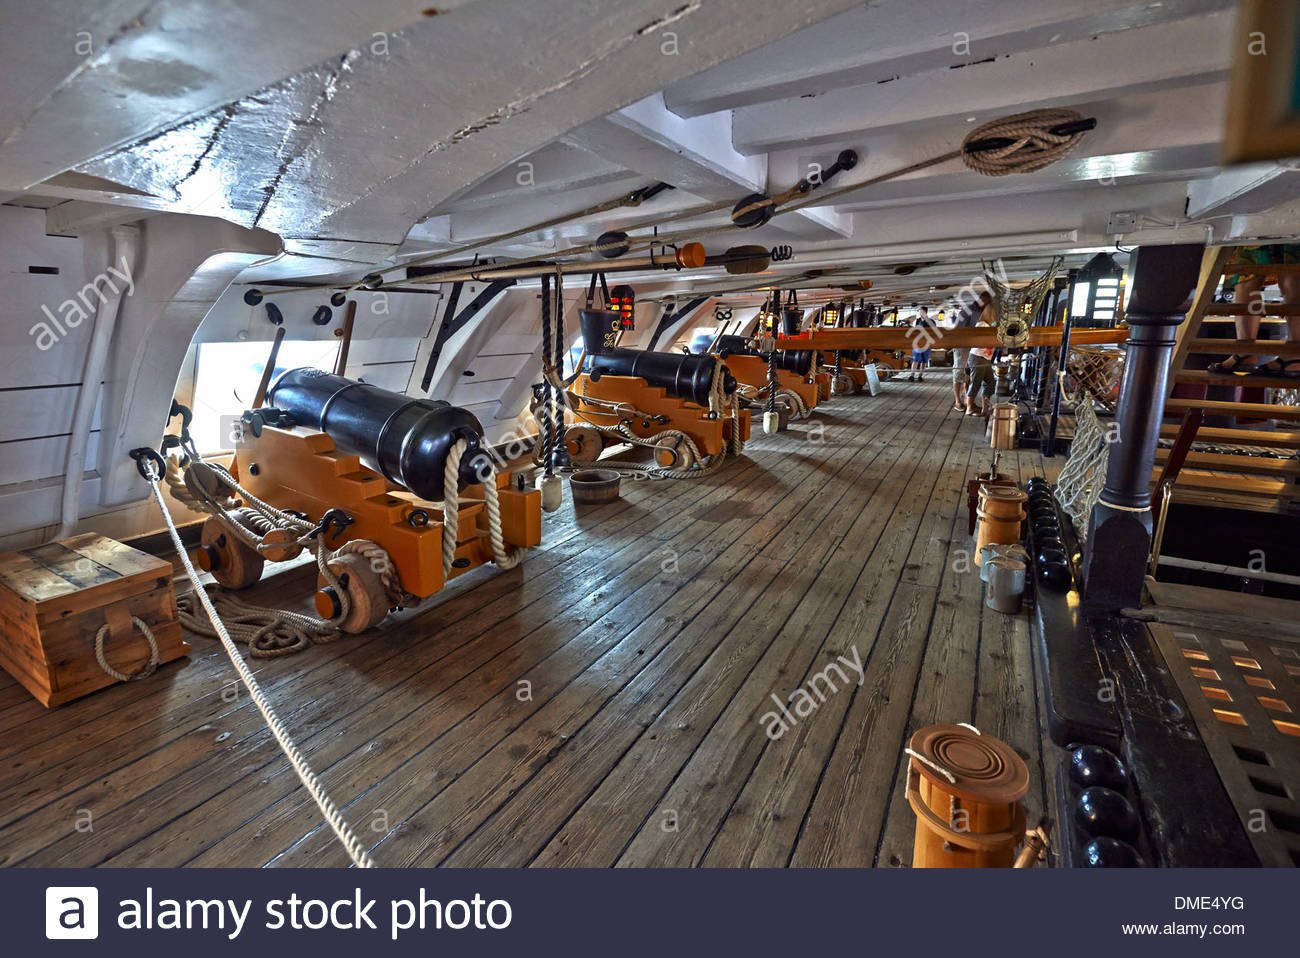
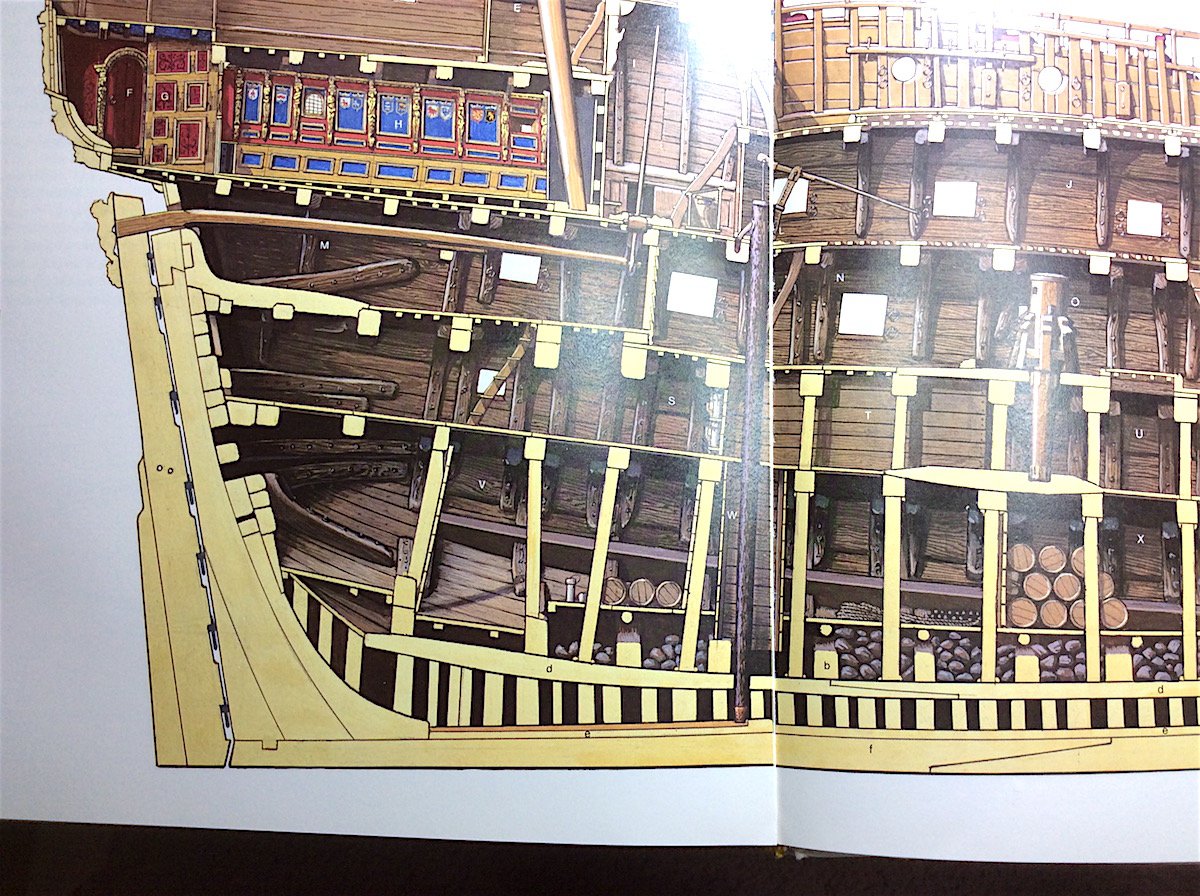
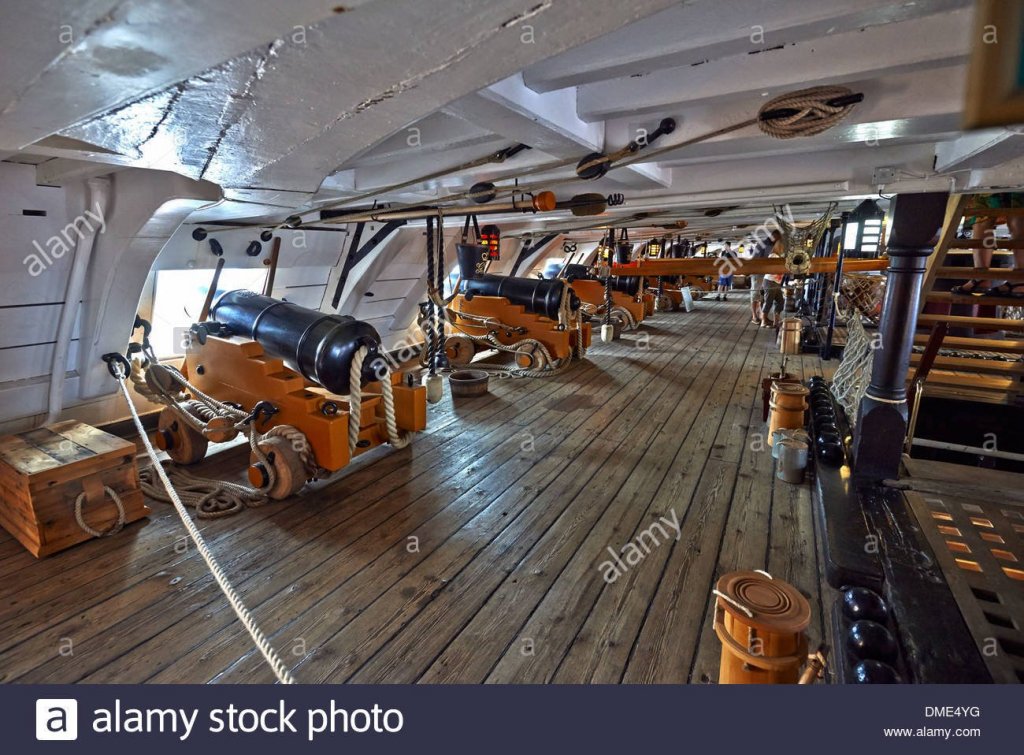
Patrick, Thanks for the post. I had not thought to looking at the Vasa museum photos, but given that these two ships were separated by a century or so - I did not..(Santisima 1769 Victory launched 1765) Yes diff. countries 😊..... This lead me to do a Goole 17/18th cent gun deck images search. I also looked at the HMS Victory - so many actual photos available, and same vintage as Santisima. Below is the Victory photo. That is the one design that I ignored because it would have added details that would have been almost out of view. But it got me thinking of using blocks for the leverage potential. Then found photos of a kit one of which used two blocks, and one that used only one. Yes the Vasa solution is indeed an even simpler solution. In fact that was my thought in the first place even before doing any searches. But I think that I will stay with the single pulley/block idea "just because" (In American english) that means one does not have an actual reason for something, but will do it anyway I would imagine that every language has a similar phrase. As always thanks for the help, posts and likes !!! PS: Almost all images of gun decks excluded the gun door ropes. Regards,
-
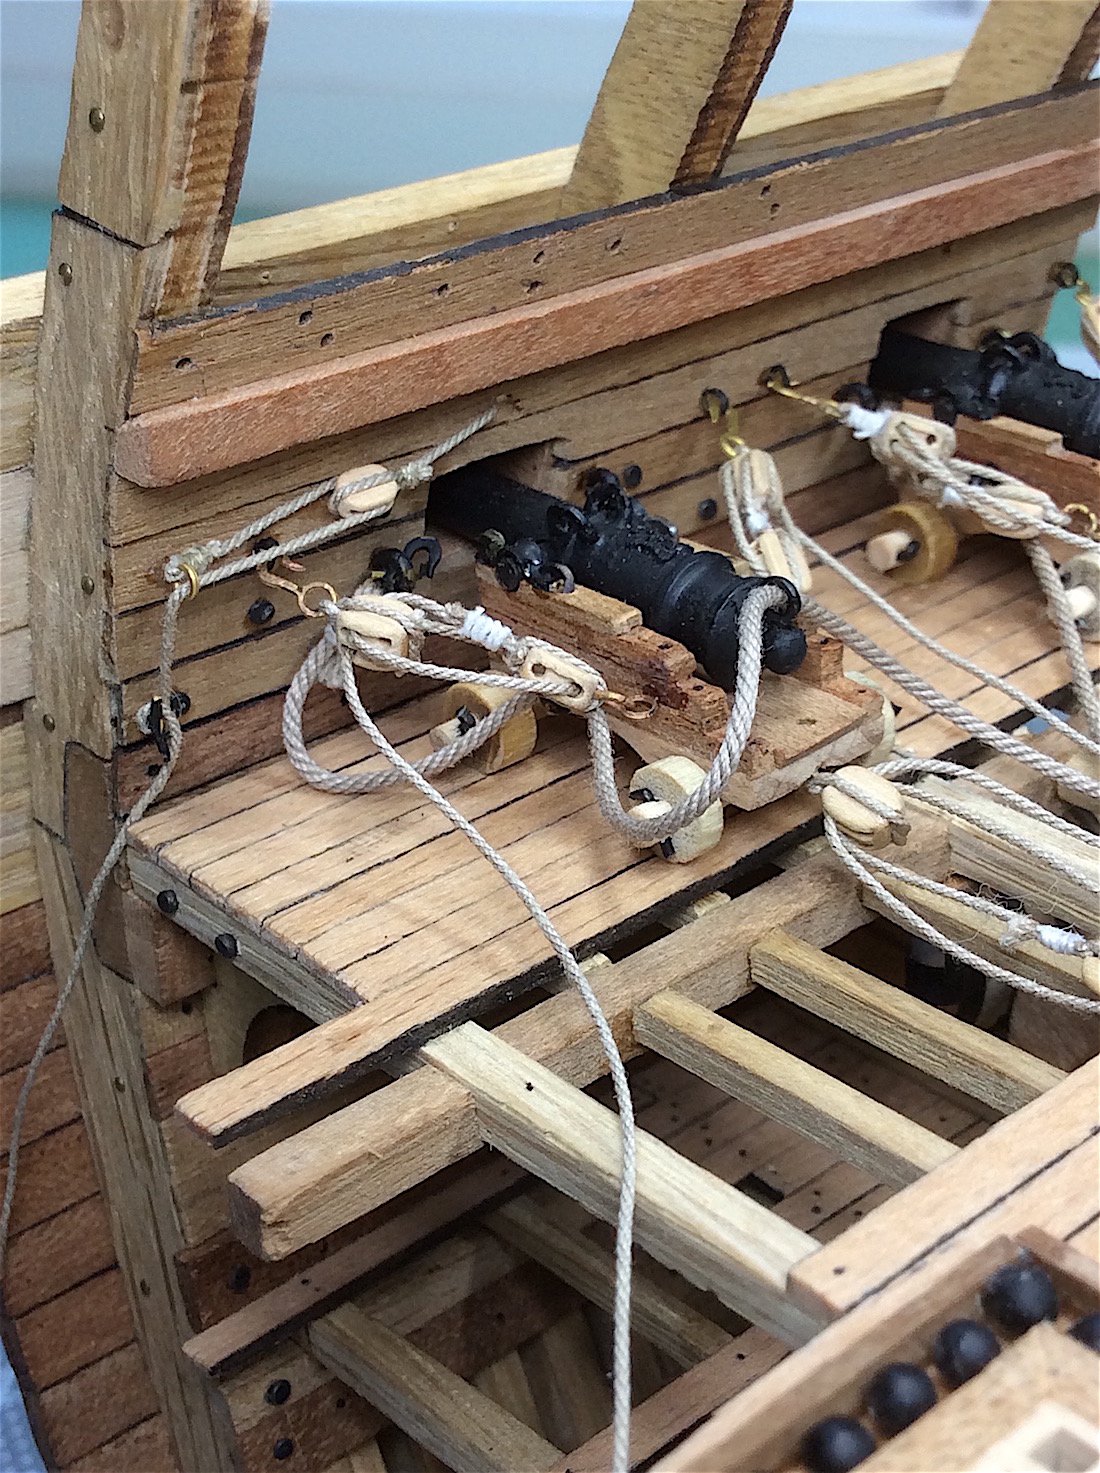
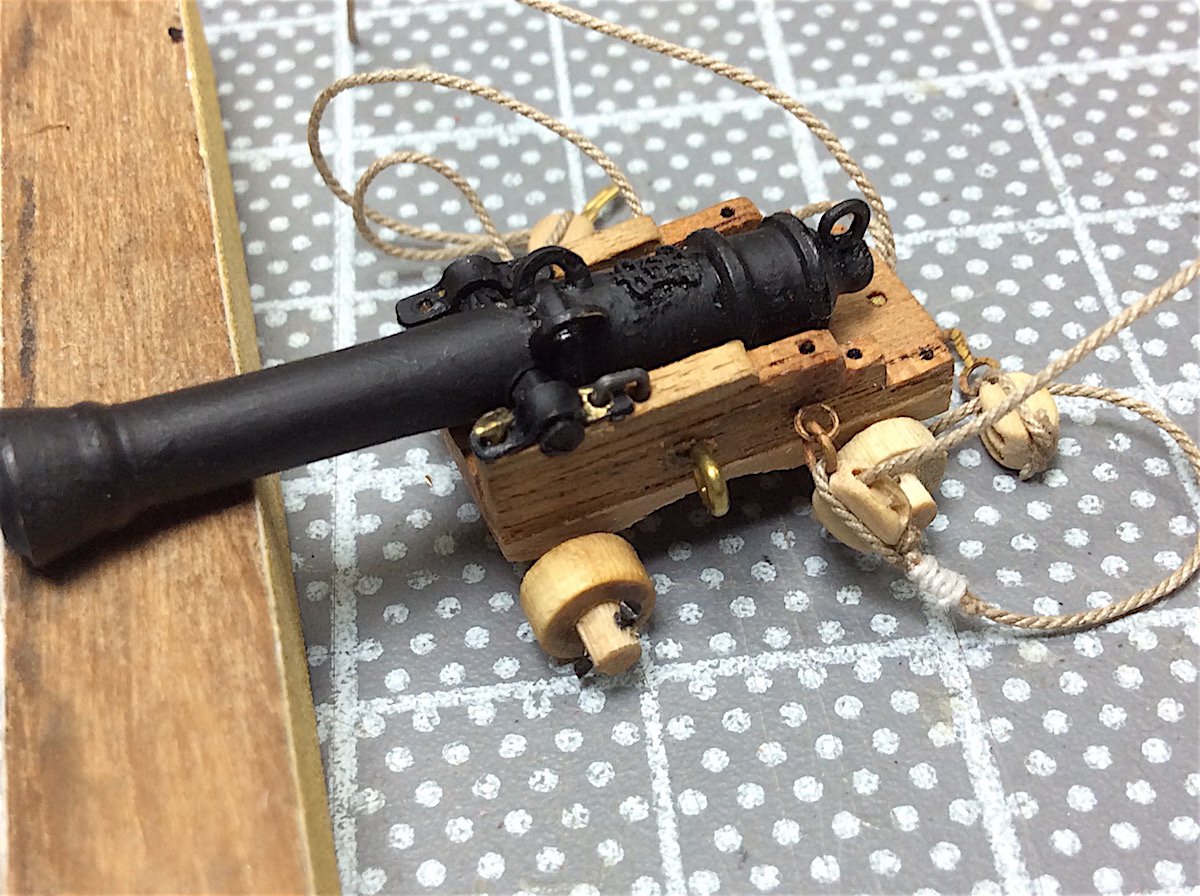
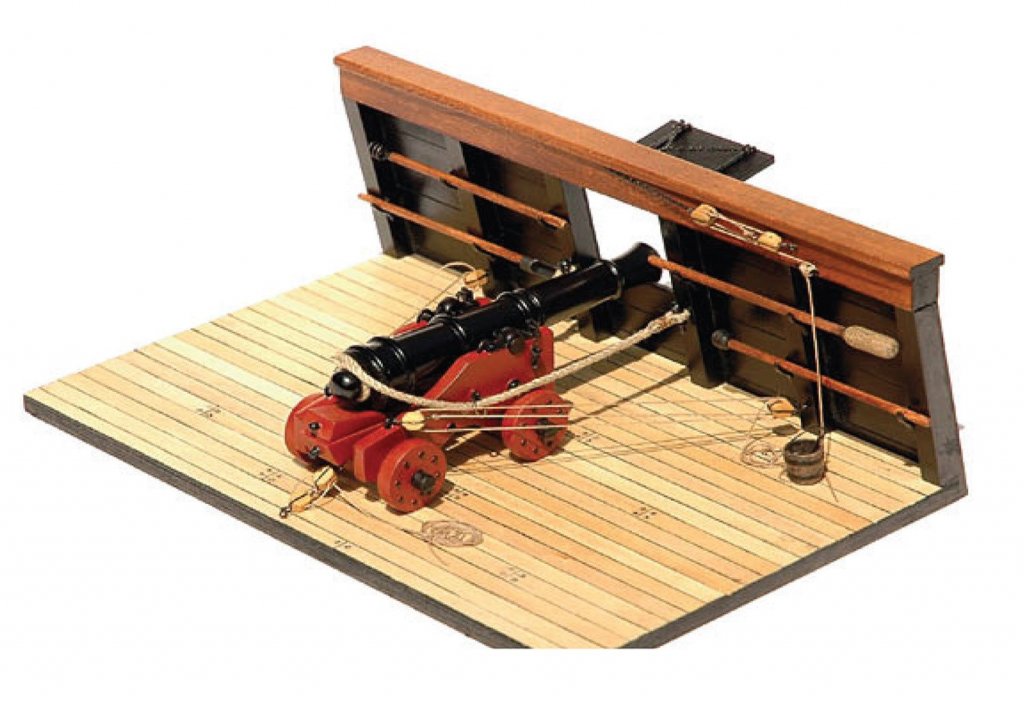
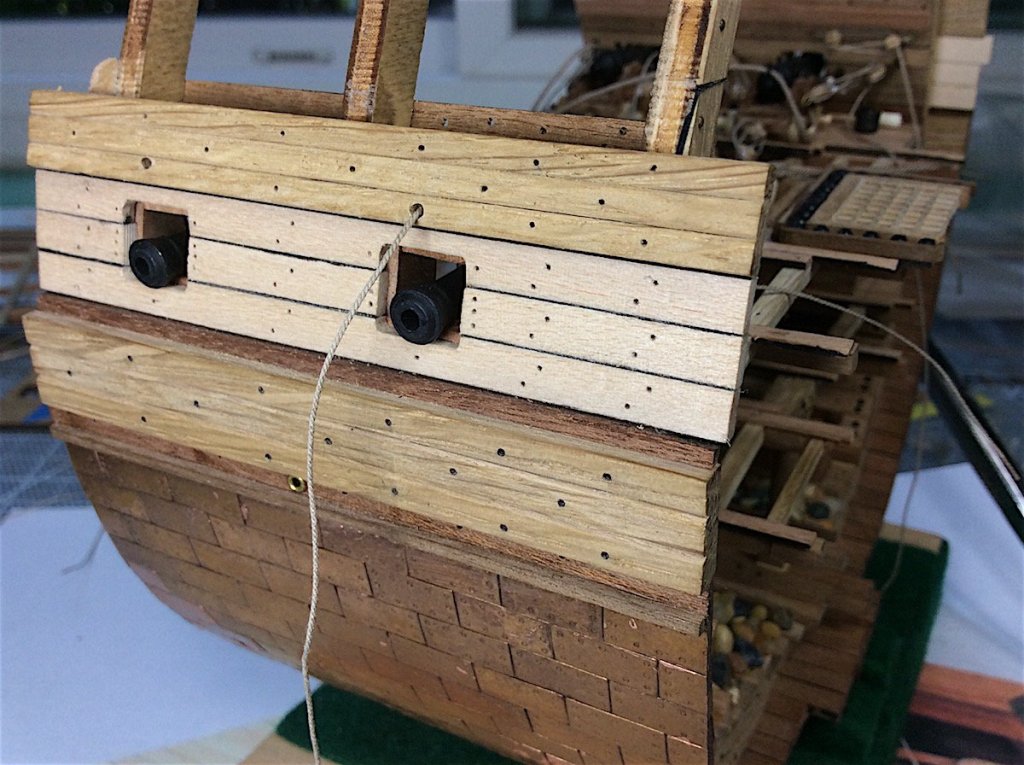
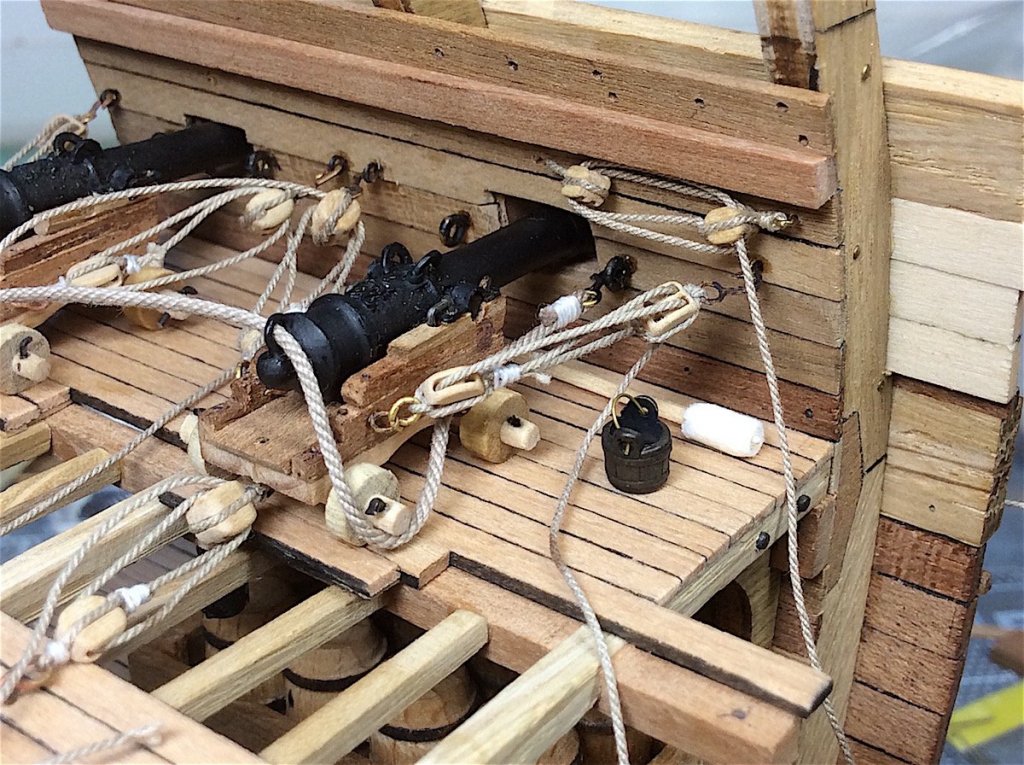
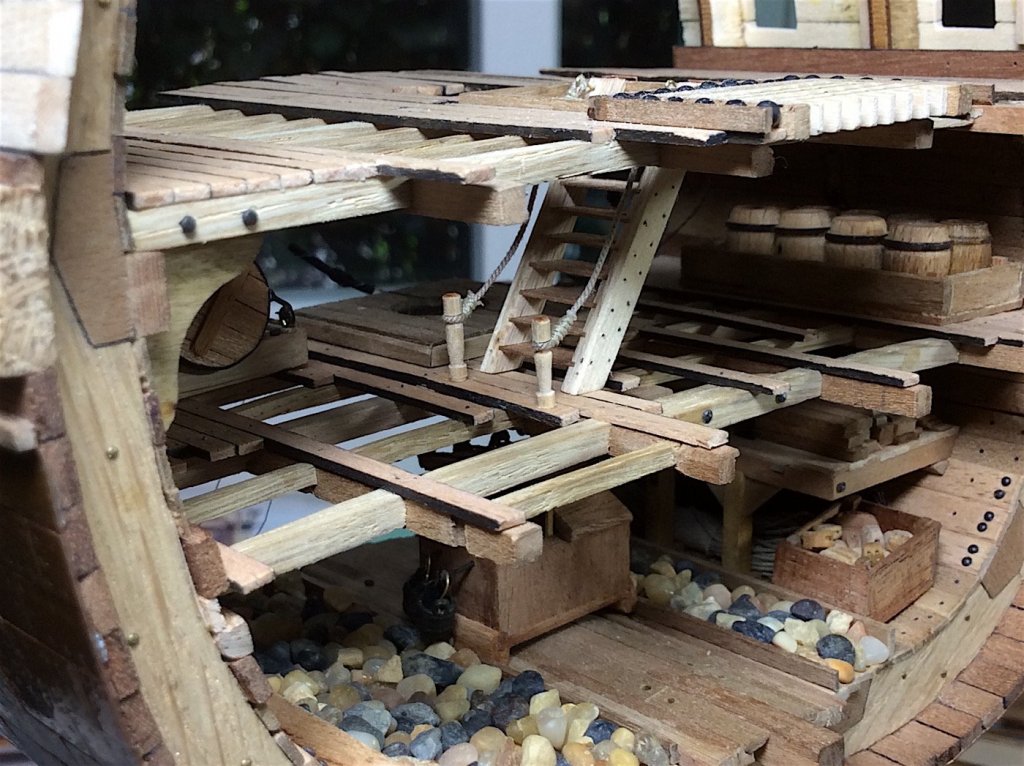
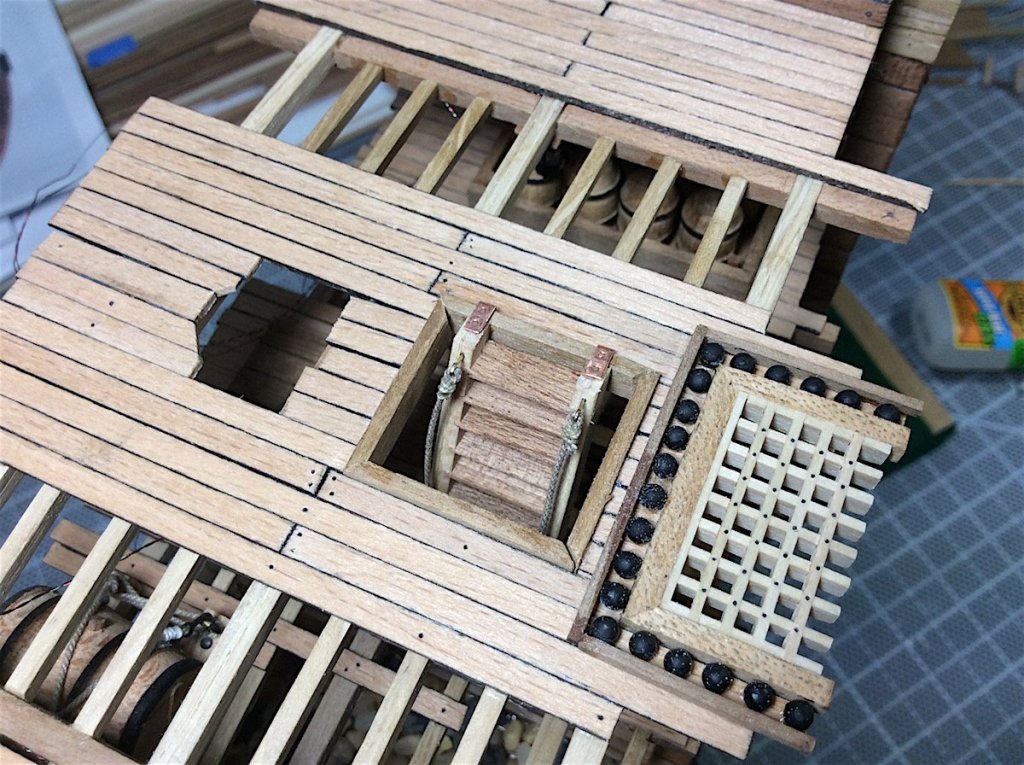
Hi mates, So - got sidetracked thinking about my last build and the canon door ropes simply attaching to each door and burying rope ends inside the hull. Then, this being my first cross-section, the interior becoming the primary reason for this type of build, I started wondering how those door ropes were raised or lowered and how they looked from the inside. Googled some searches and came up with these two solutions. there was one other but ignored it. I think that I will use the single block pulley one – the double block version would probably be better suited to larger wider gun doors that had two ropes attached to the outside of each larger door. And having to do twelve of these it would be easier as well. Here are some shots of what I came up with. Also those double blocks are too crowded looking. I also need to add treenails to deck here and there –hmmm forgot to do those bits. Cheers,

-
Jason, Indeed a joy for the eyes. Cheers,
-
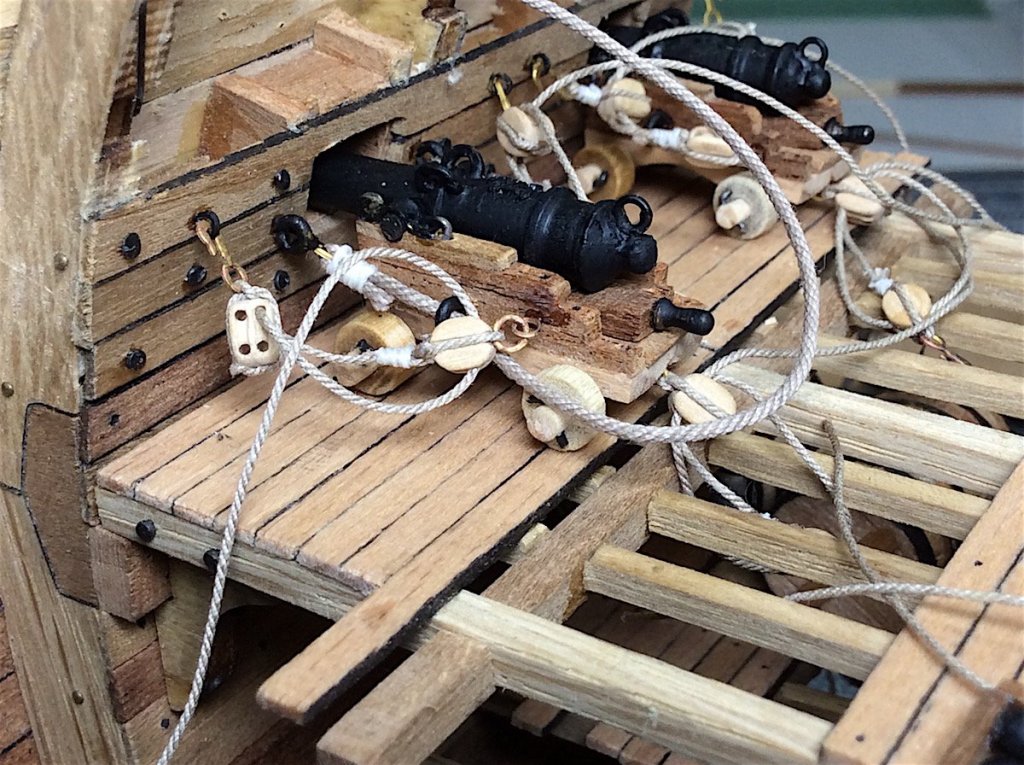
E.J, Thanks - much appreciated - Really enjoying following your current log ....... Denis: Yes indeed, doing those two bits reminded me of how glad I am that I did not think of this during the Vasa. That would have really been a bit too much. Now working on how to secure these first four carriages. Won't post again until they are properly lashed and buttoned up. In the meantime I did set up the framing timber bends for the mid deck - it will be a relief to be done with these piddly details. Cheers,

- 371 replies
-
- 10
-

-
Steven, Ooops - sorry - I have been following silently- not fair- for your superb build. I, as many others, so appreciate this log. So enjoy your work. Sincerely,
-
Looking super nice indeed. Like the white off-set a lot
-
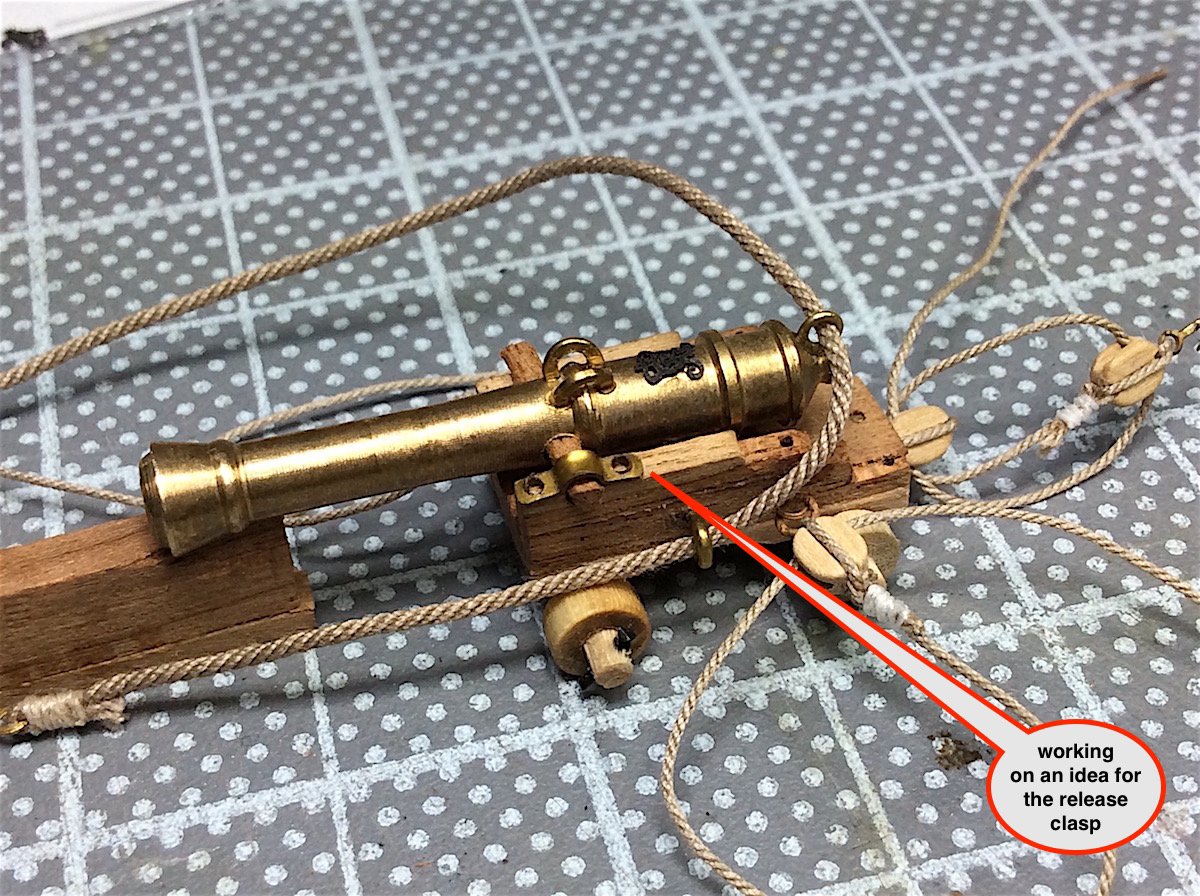
Pter, Thanks for your nice post - much appreciated. Working on some ideas for adding capsquare details to the carriages. A lock key and chain should also be added - not sure yet --needs paint - will thin some black and carefully apply. in any case I plan on only doing the front facing carriages, and weather deck ones with these added bits.


-
John, Regarding all that gilded metal work are all of those bits "right out of the box" or did you do some filing and extra detailing before attaching to the ship? Regards,
-
Mark, I feel your pain your rigging dilemmas reminds me of the one I just finished. As they say. "it all works out in the end" .... PS: The running rigging is even more fun - but as a veteran builder I assume that you have been there before. Cheers.
- 331 replies
-
- 1
-
-
- nuestra senora del pilar
- occre
- (and 1 more)
-
Tim, Catching up to your beautiful ship. Great work!!
- 115 replies
-
- 1
-
-
- Scottish Maid
- artesania latina
- (and 1 more)
-
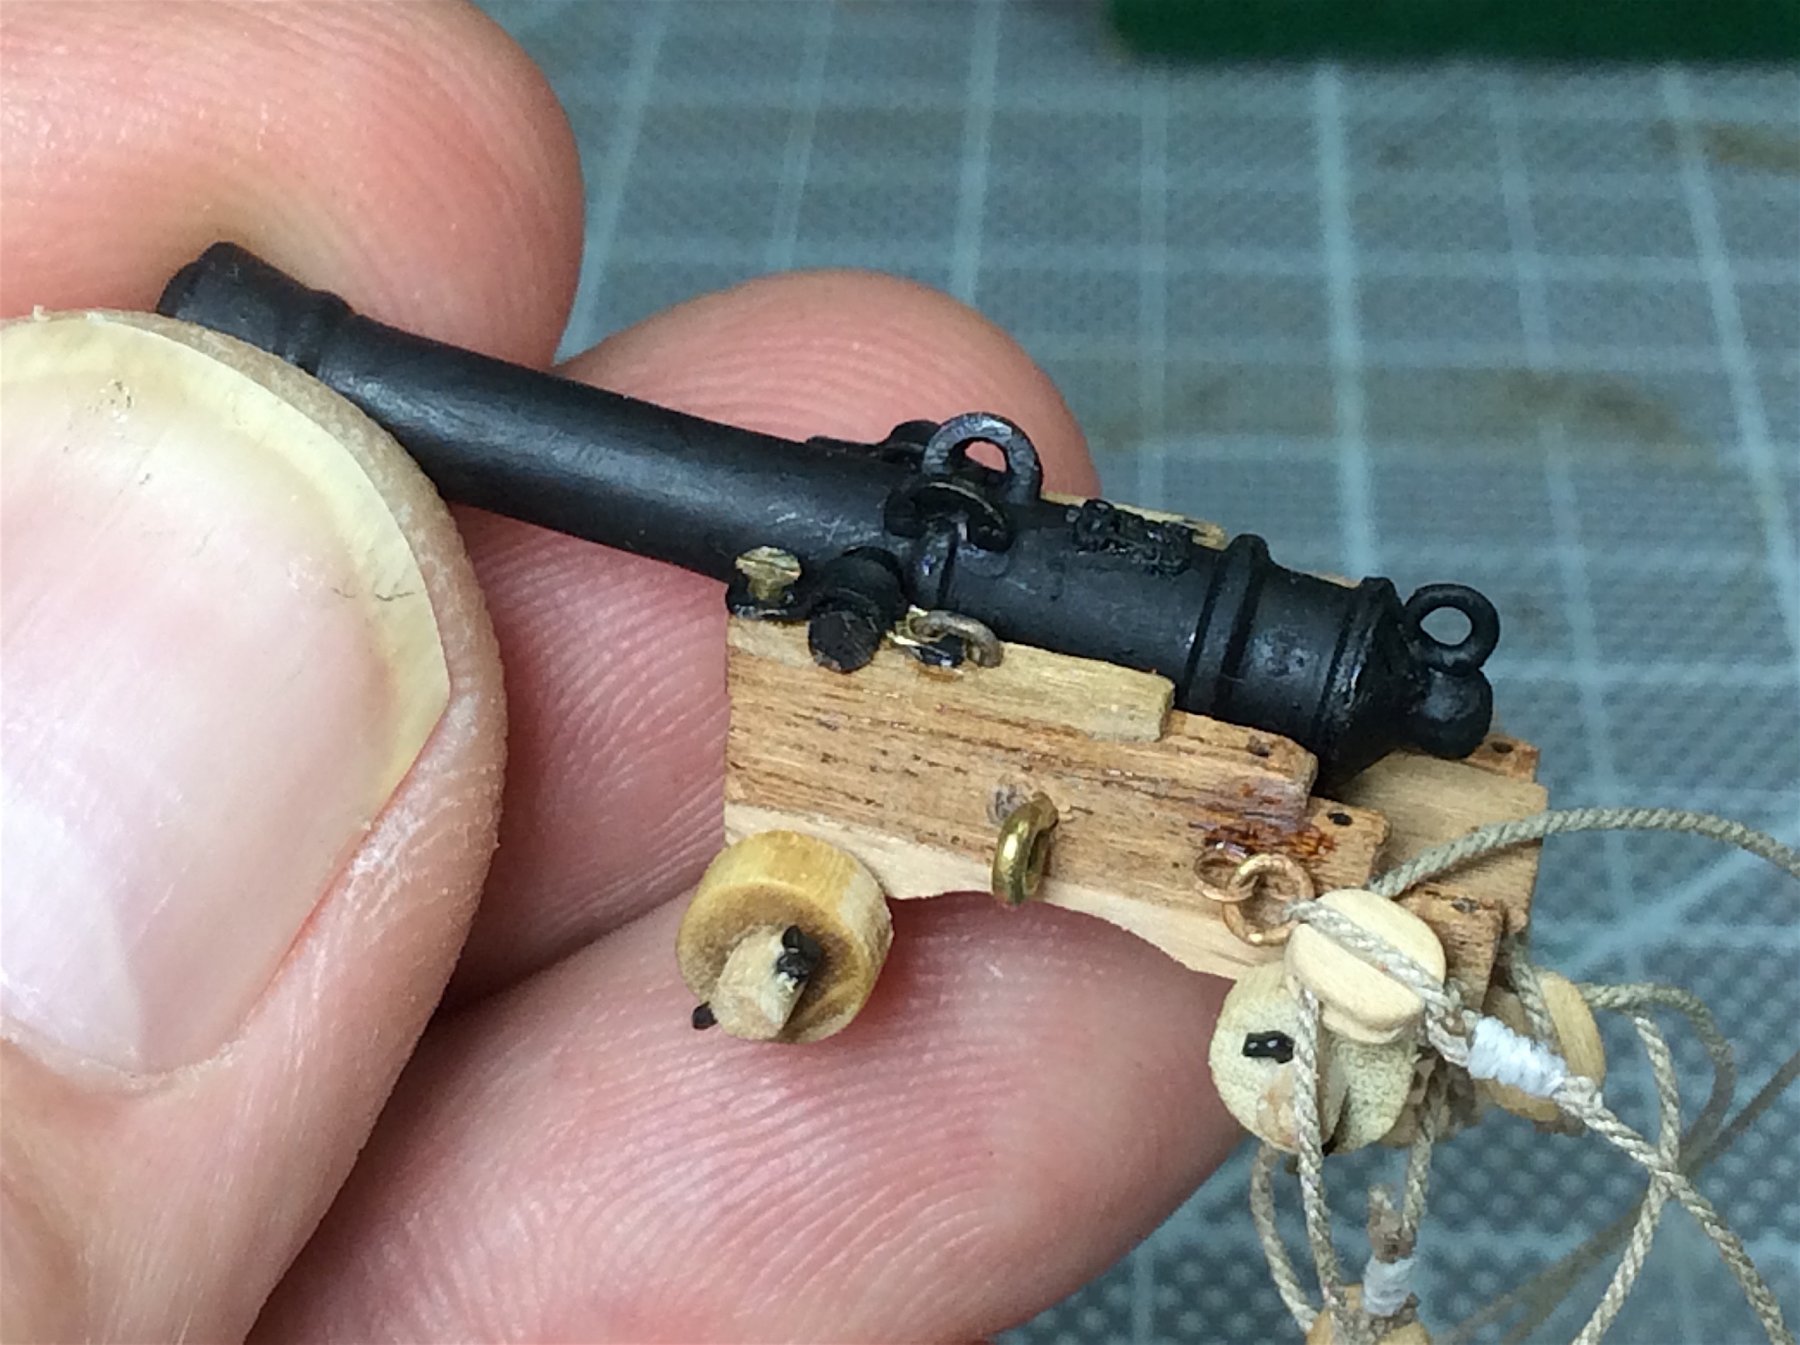
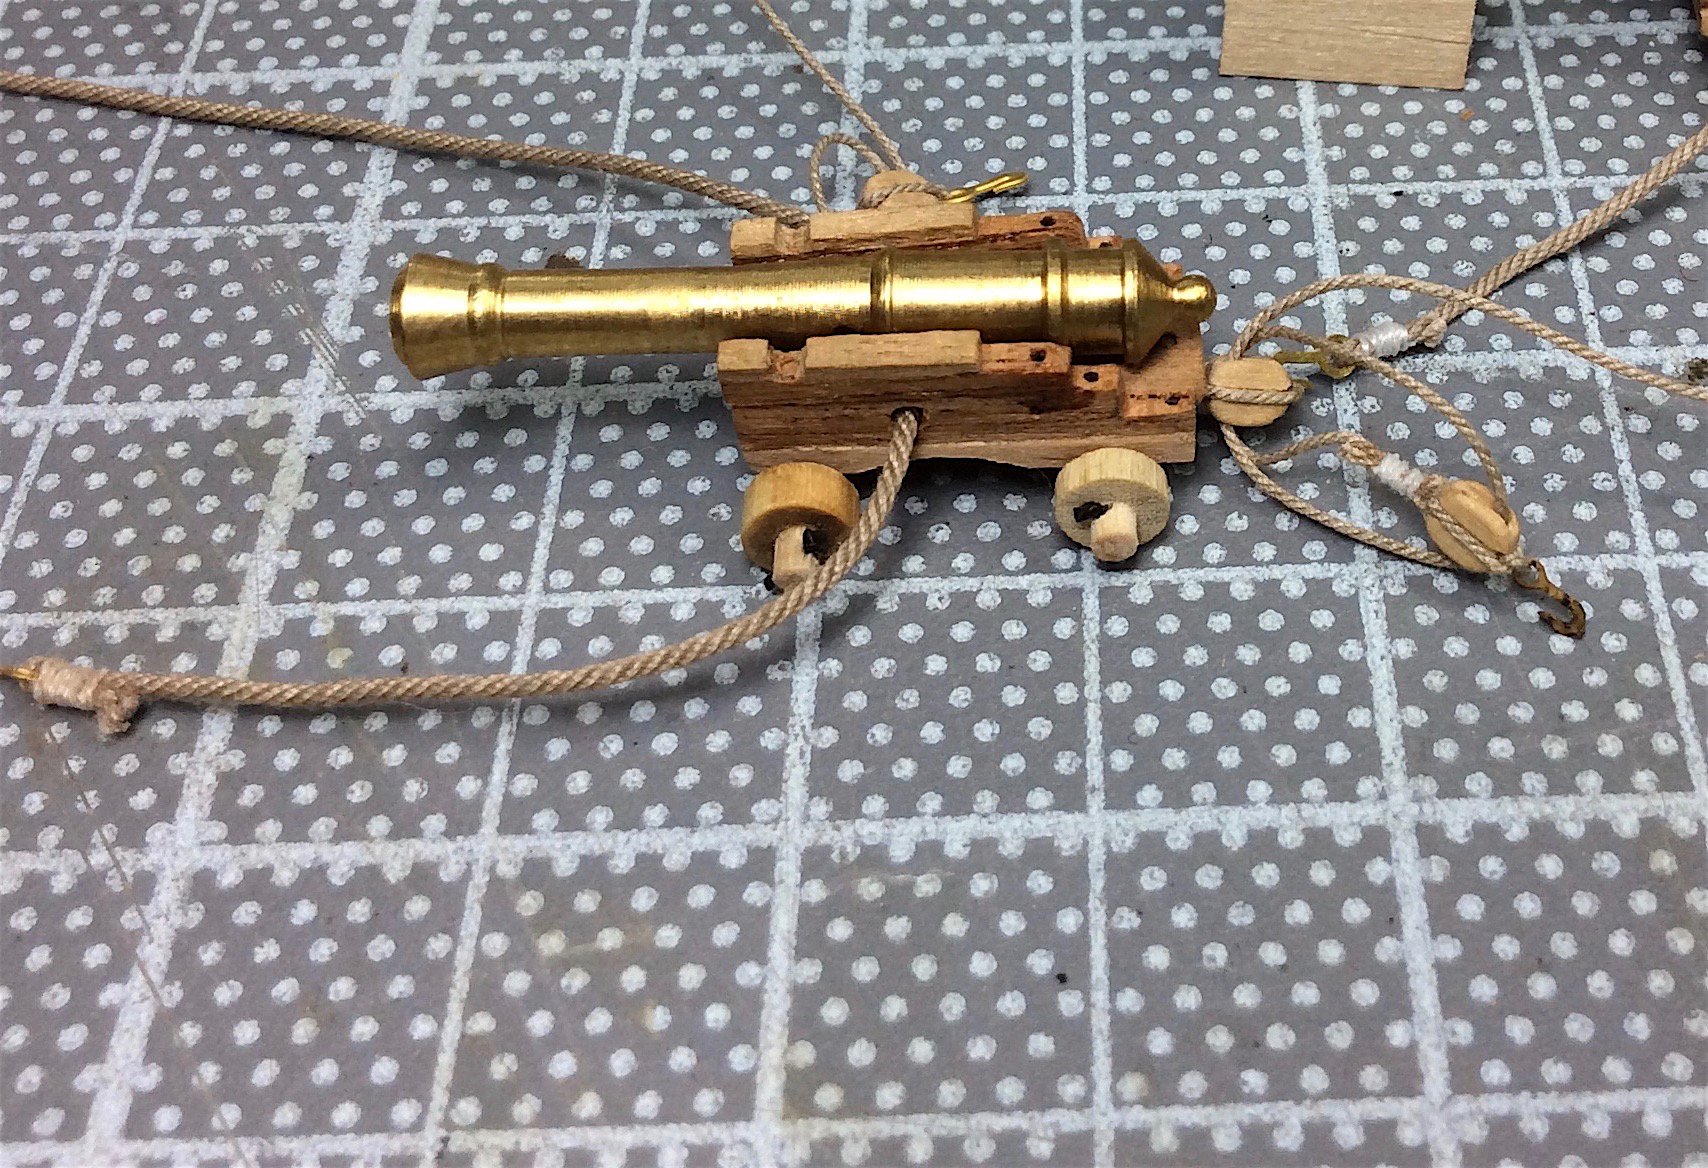
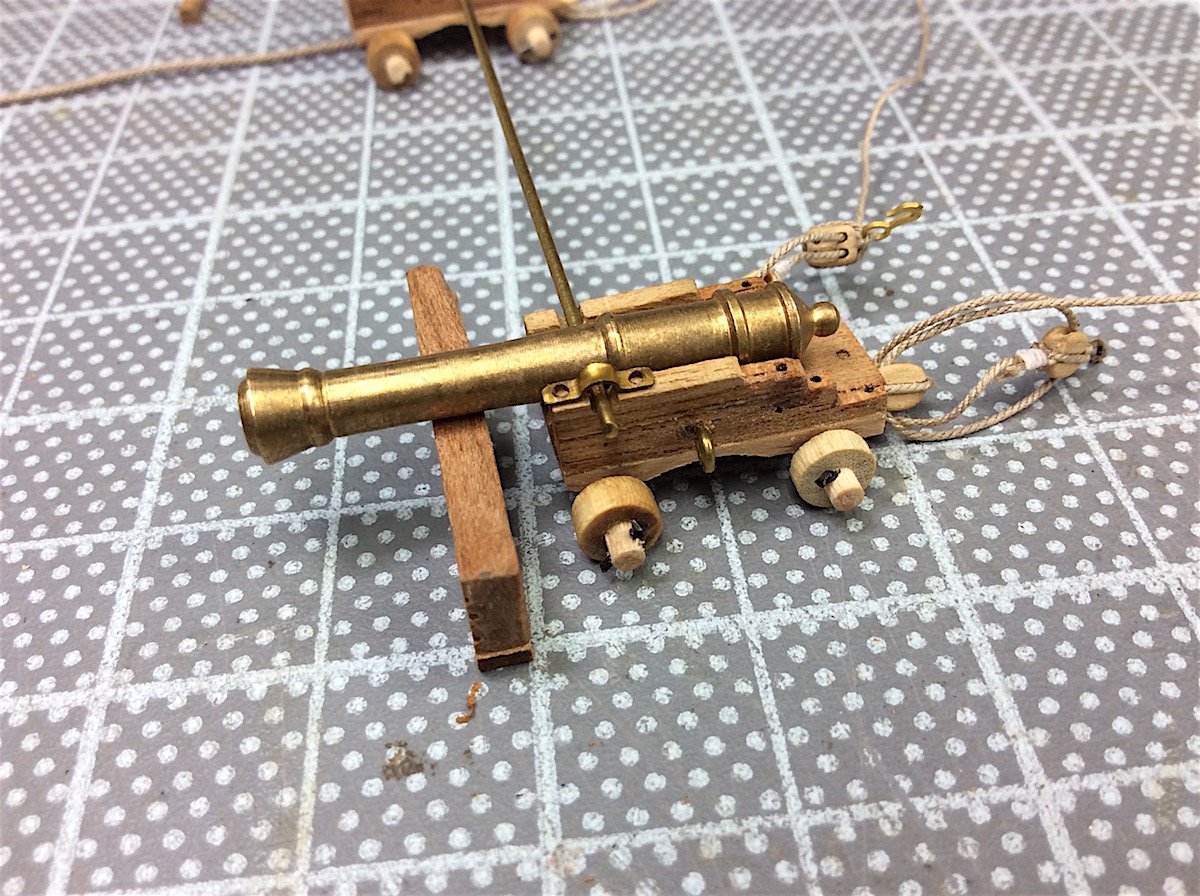
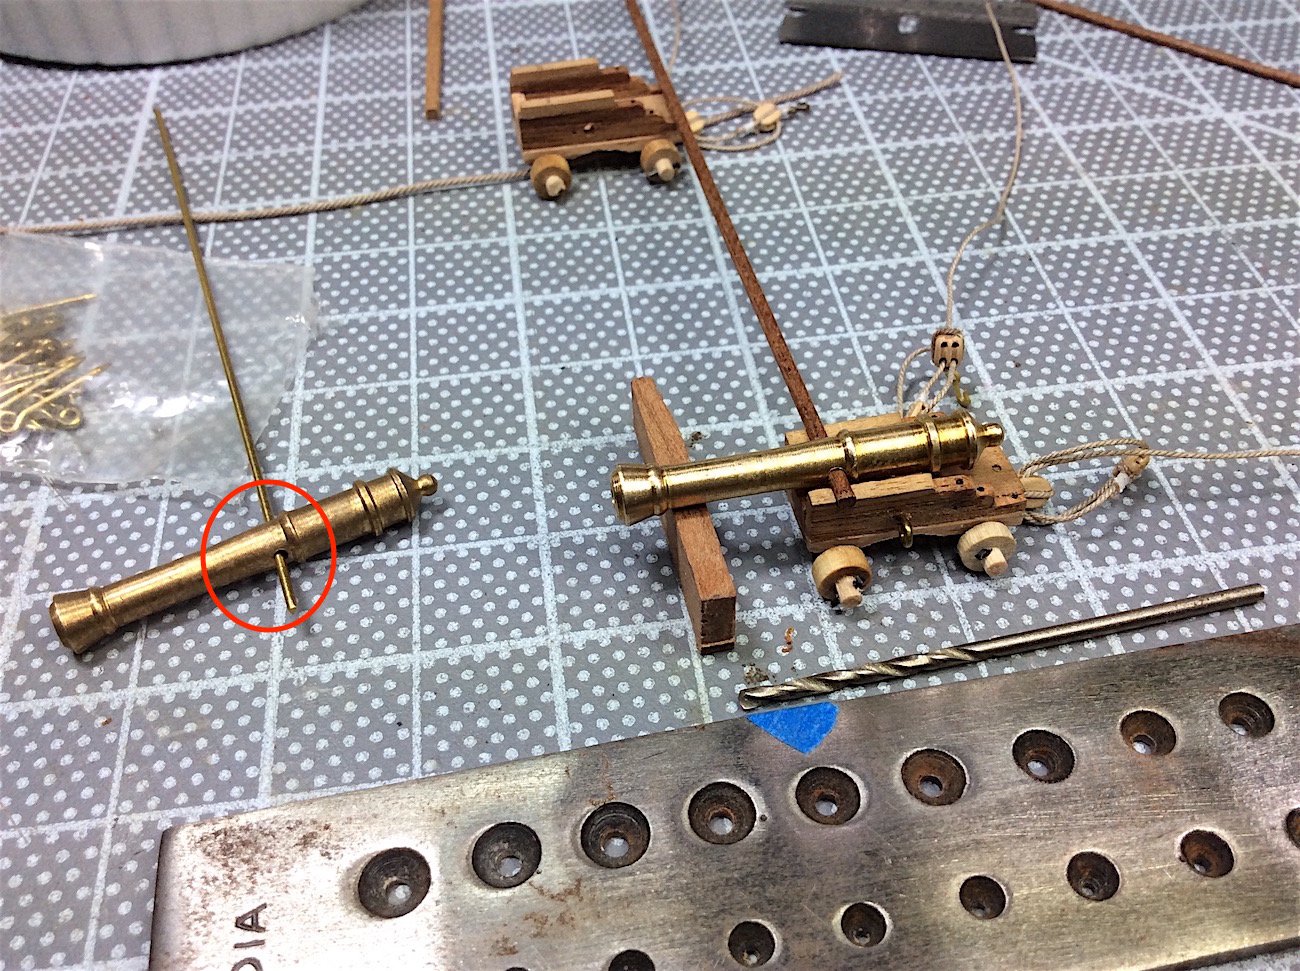
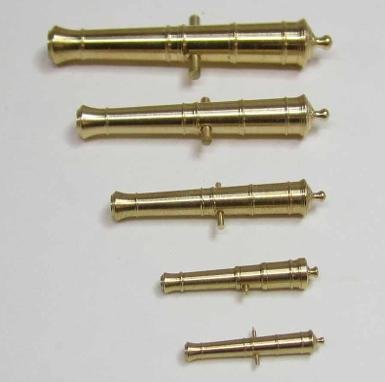
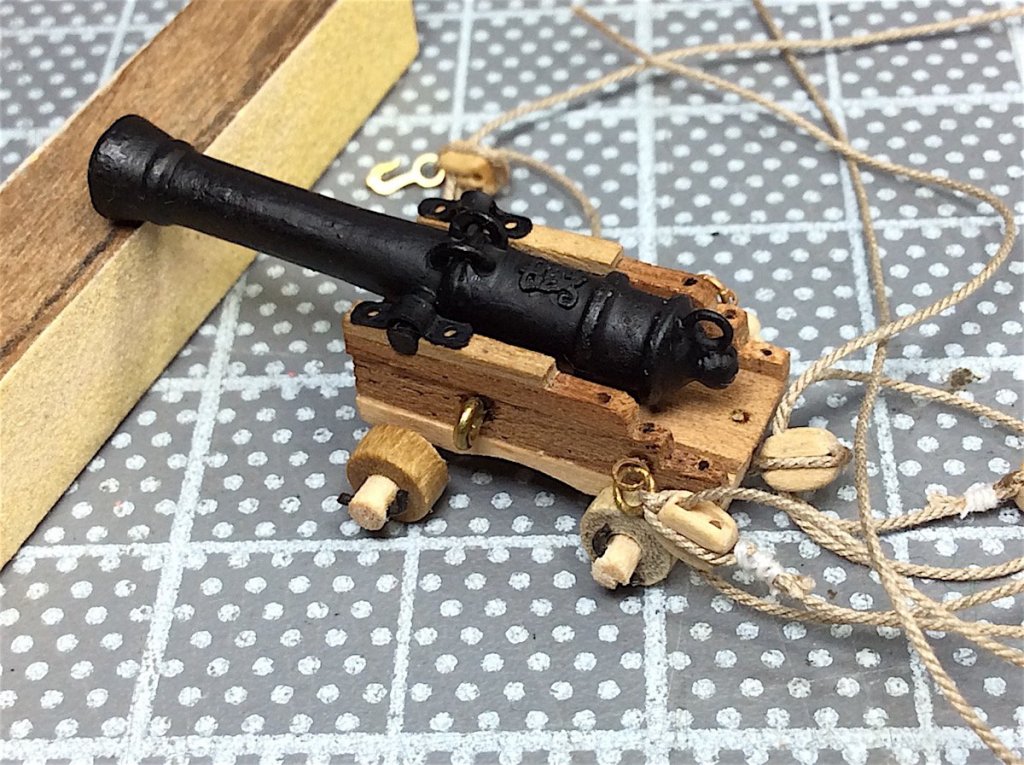
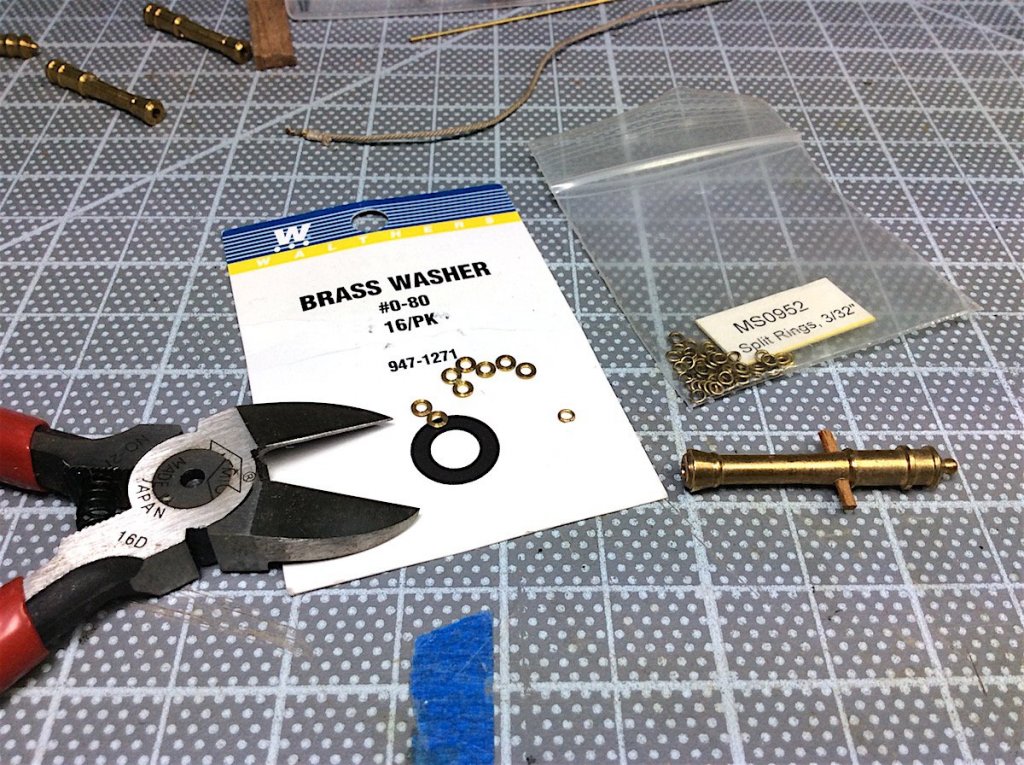
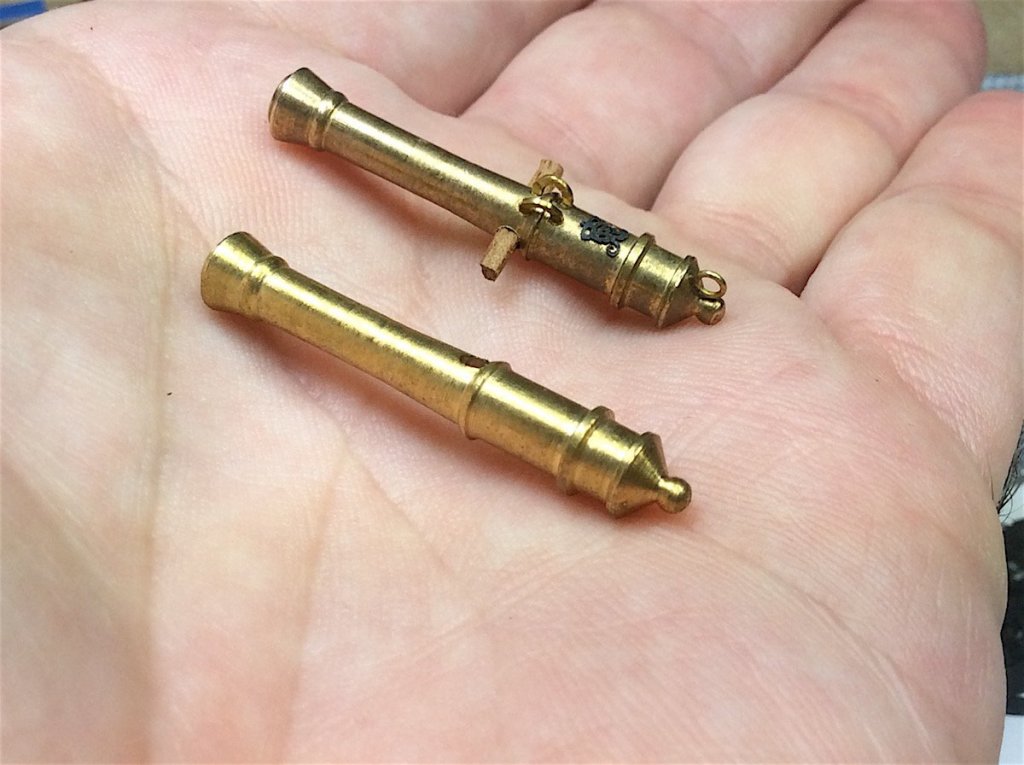
Peter, Thanks for your kind words, advice and note. Yes indeed you are correct, trunnions were indeed part of a casting. So I needed a compromise trying to get a more realistic look. Wood looked to fill that visual void. Alternatively I had thought of ordering some after-market cannons from Chuck (he has great looking brass ones with trunnions [thought prob. not period correct for this build] - first pic). But this is such a minor detail compromise that wood it will remain. Pics of the first still not completed carriage/gun. And for all intent-and-purposes the compromise will visually disappear.... and look like part of the casting Again thank for your kind post. Regards, PS: Syren emblems came out PERFECT !!


- 371 replies
-
- 12
-
-
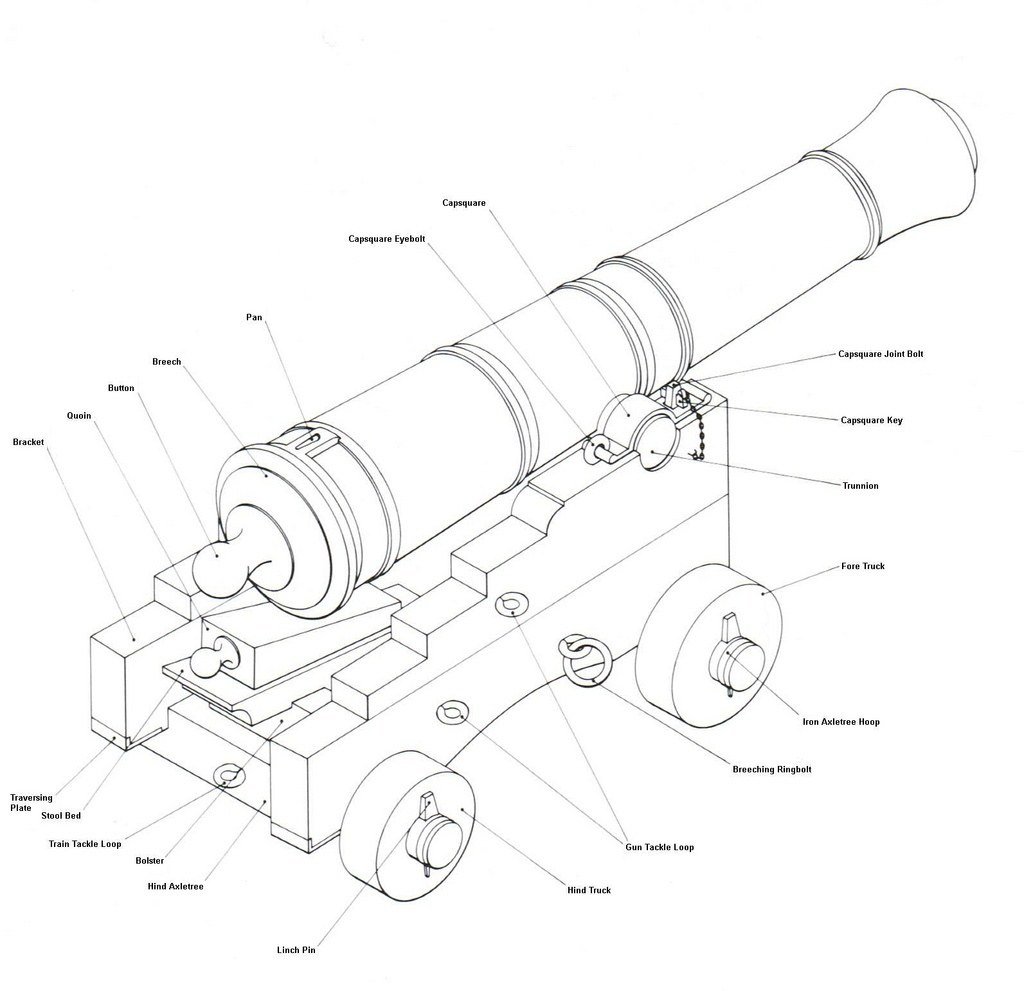
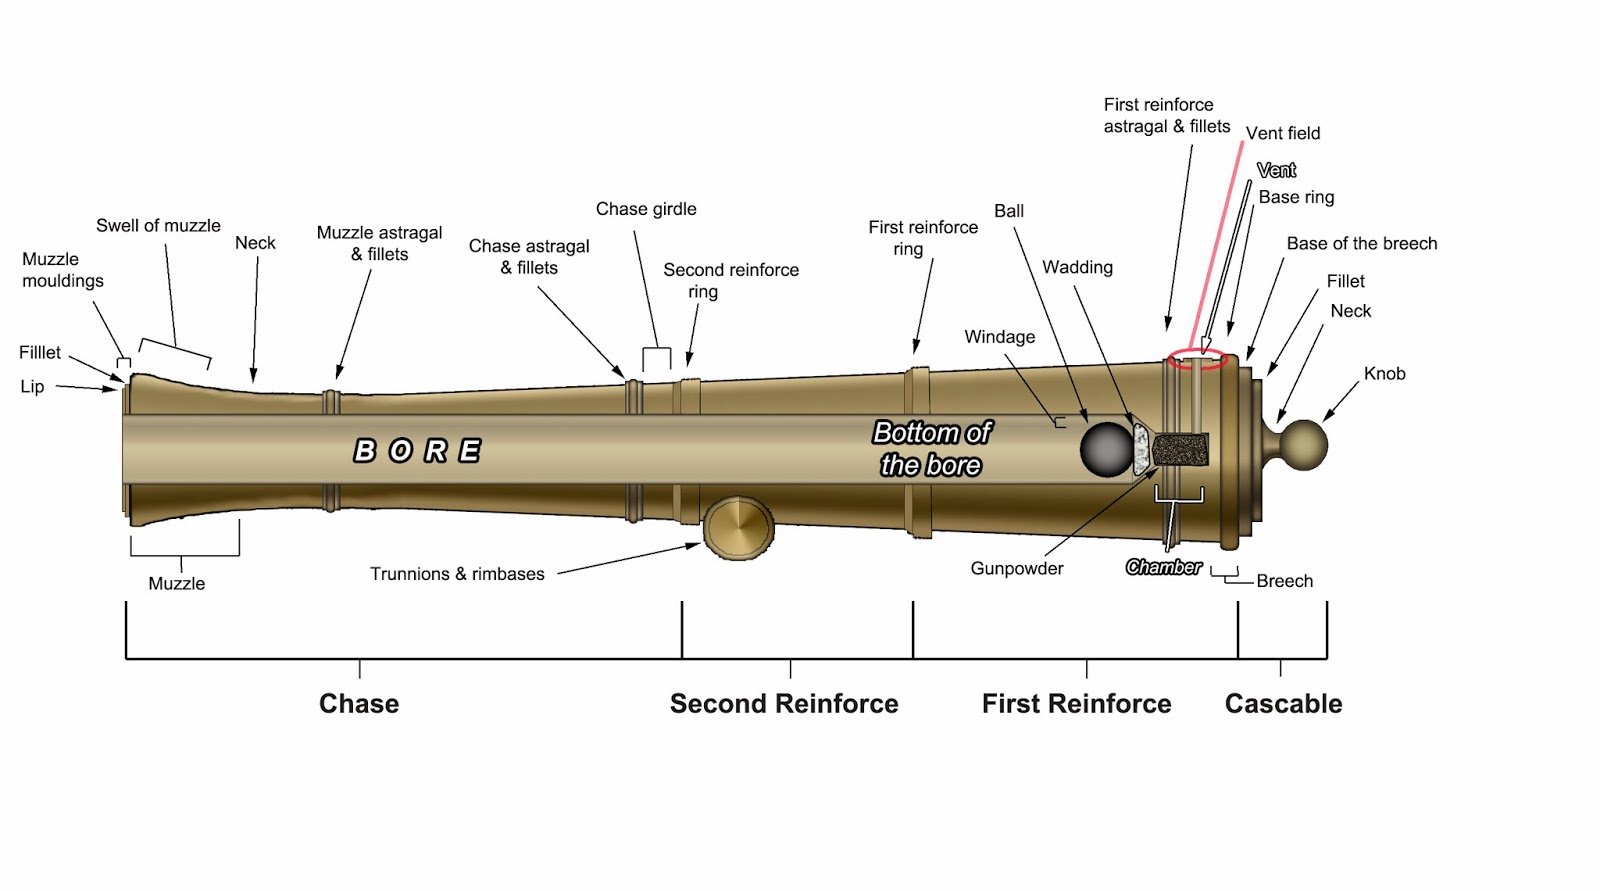
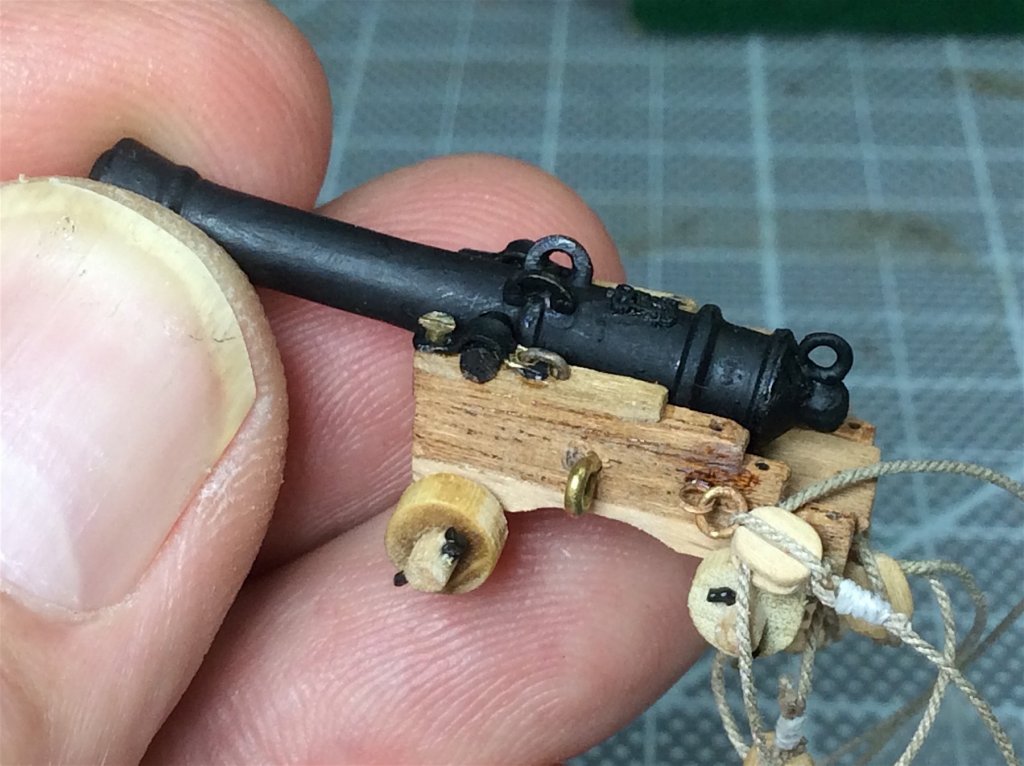
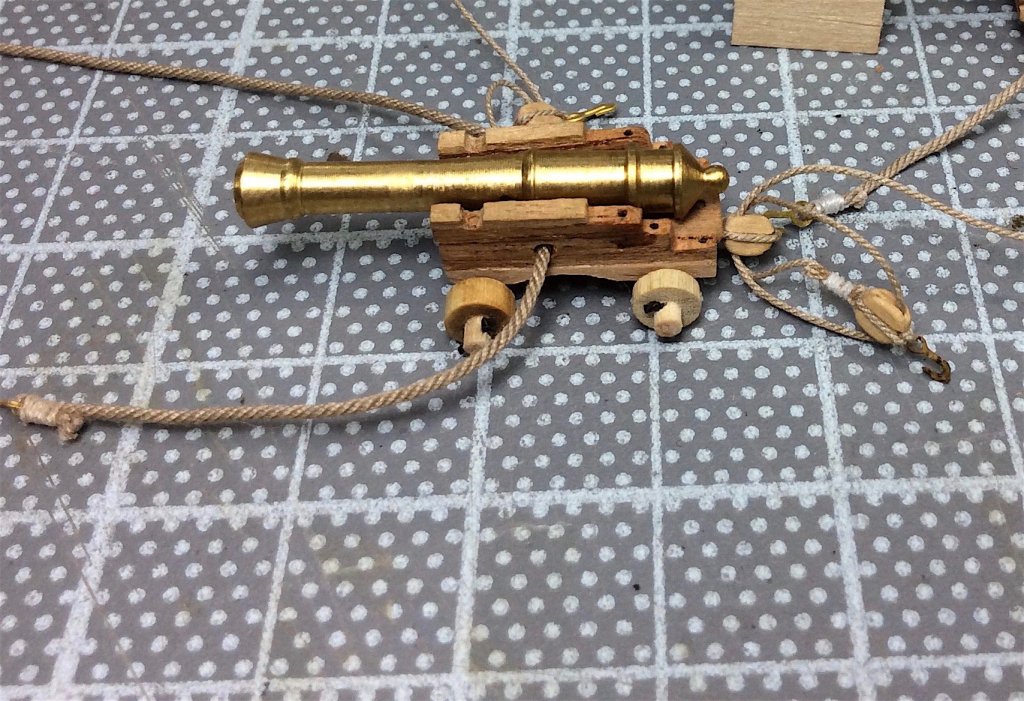
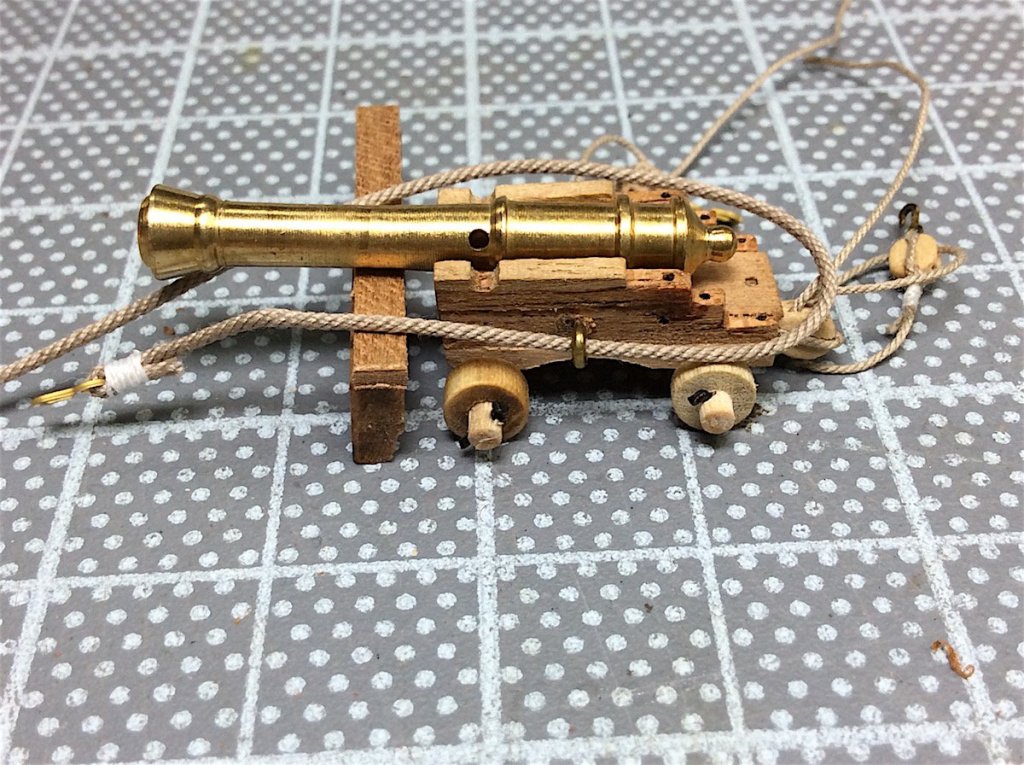
Denis, they are in fact the two loops. I needed to Google canon part names to come up with my "educated" post haha Still learning ship part names. Cheers, FYI
-
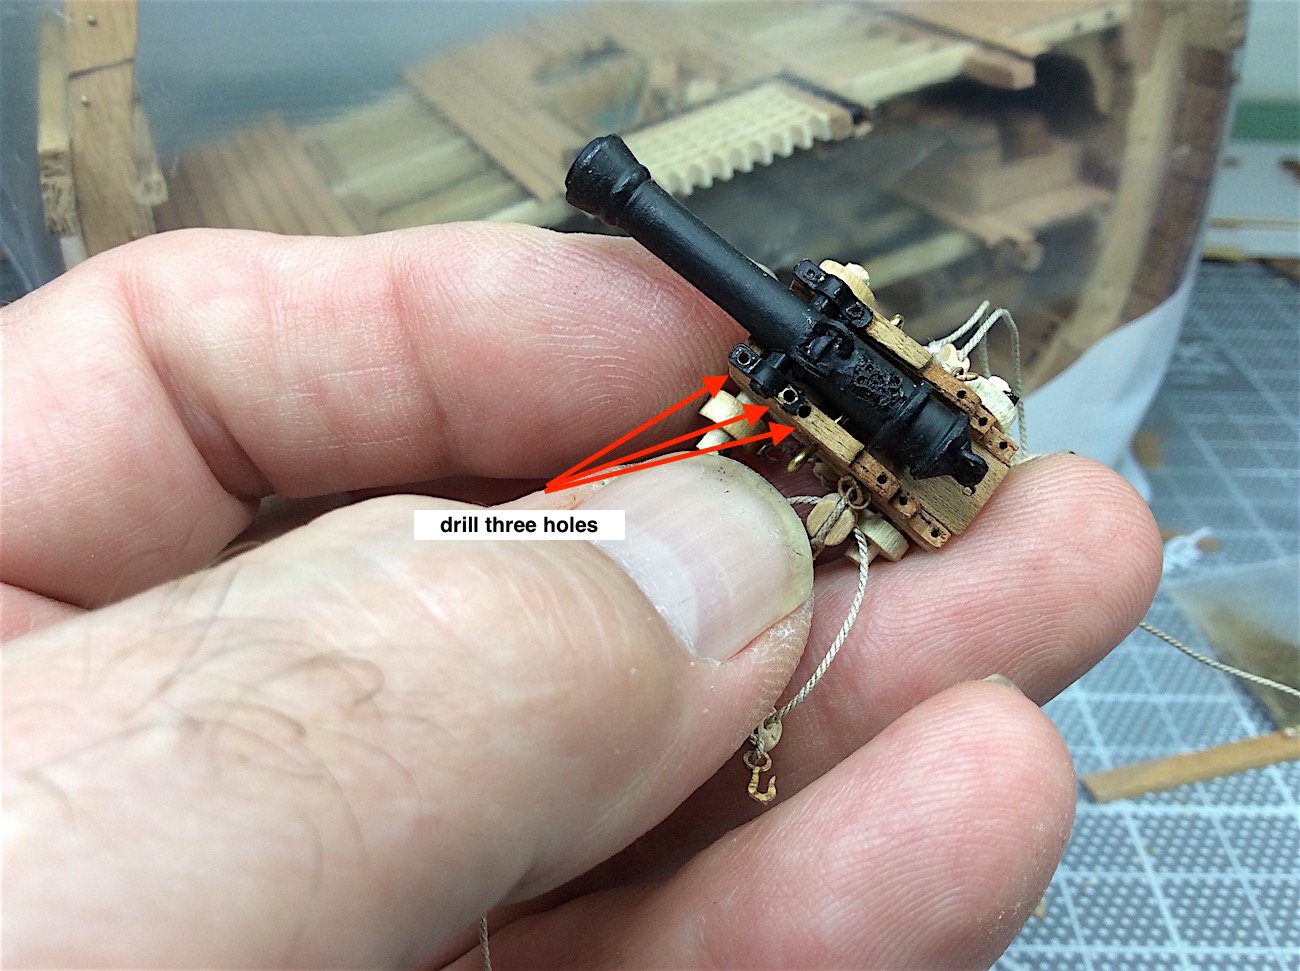
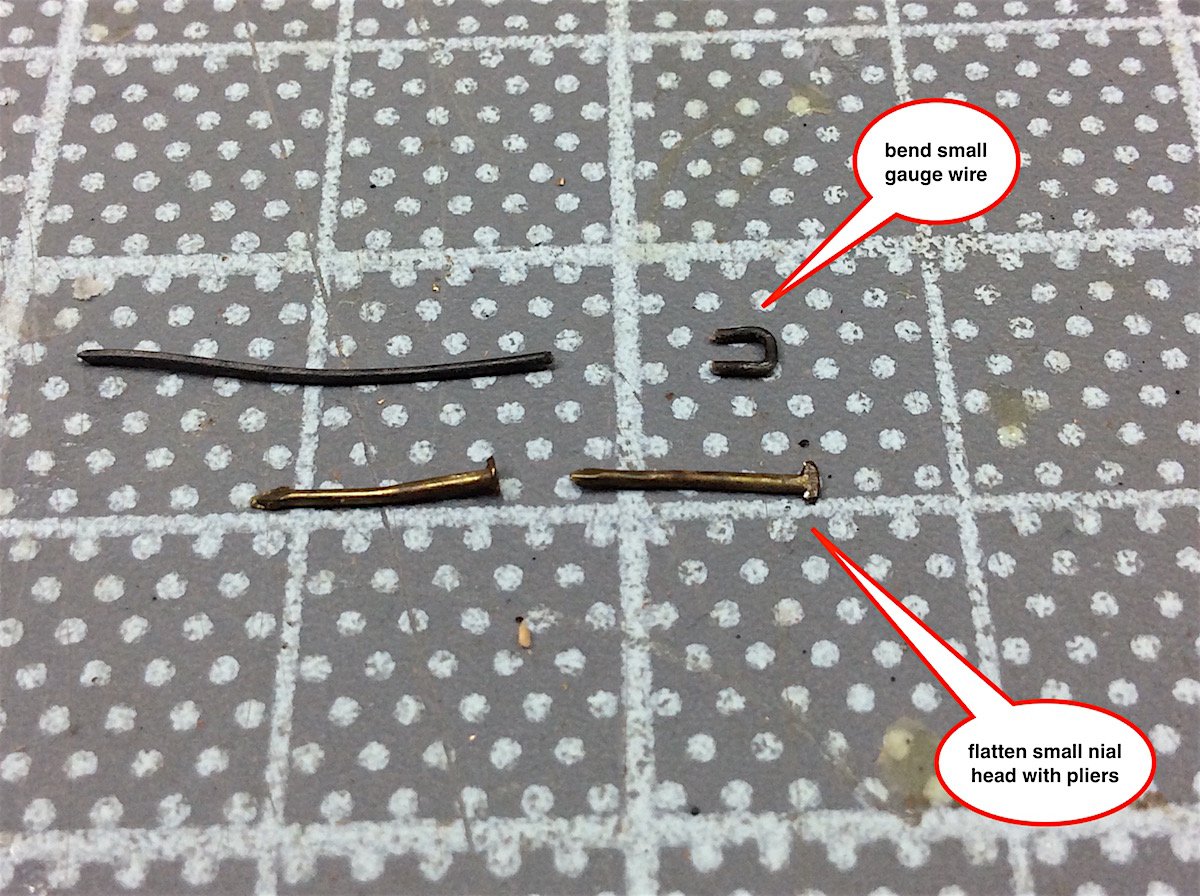
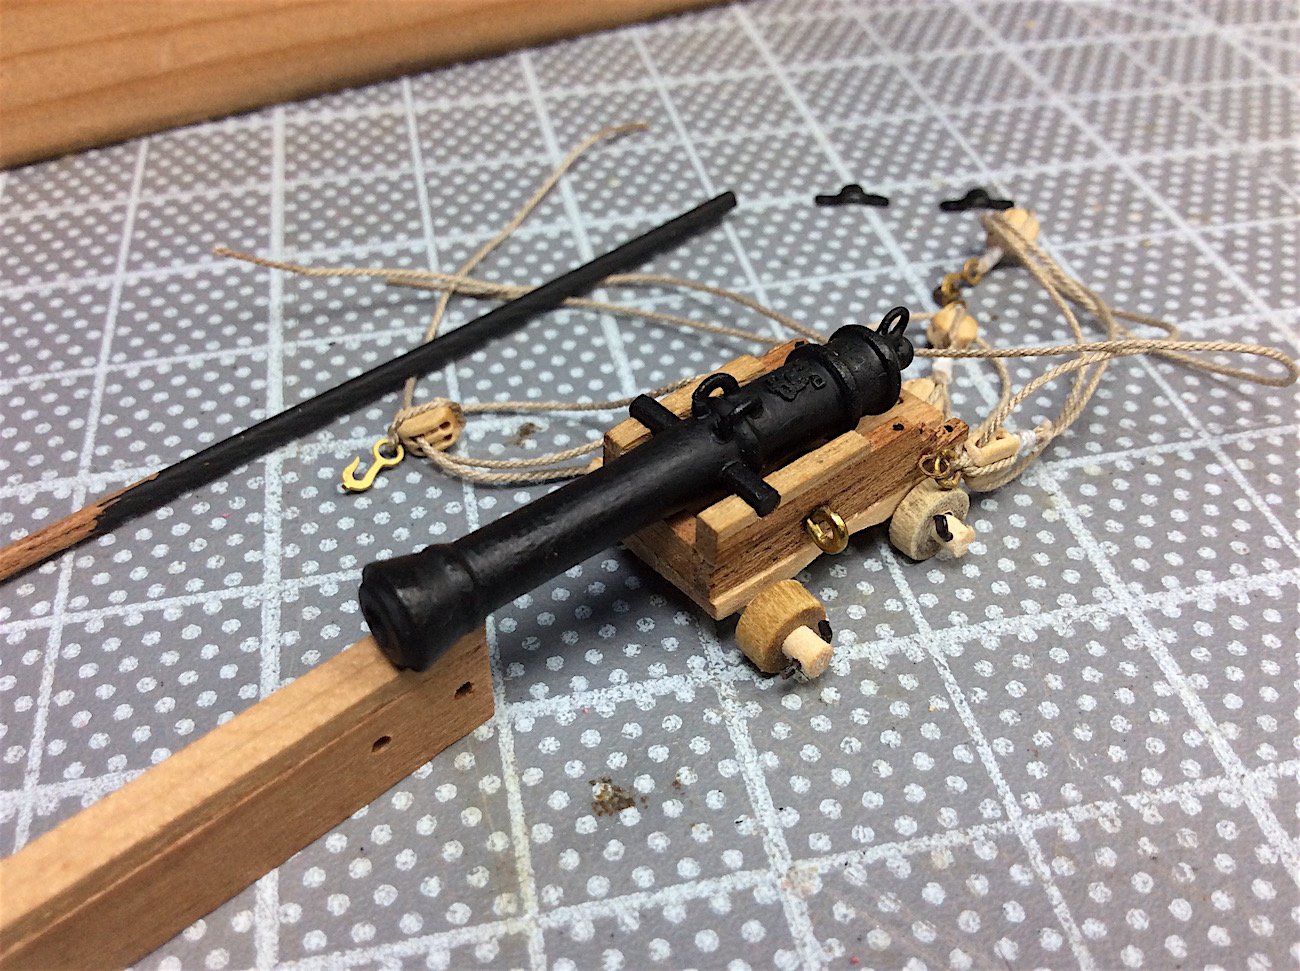
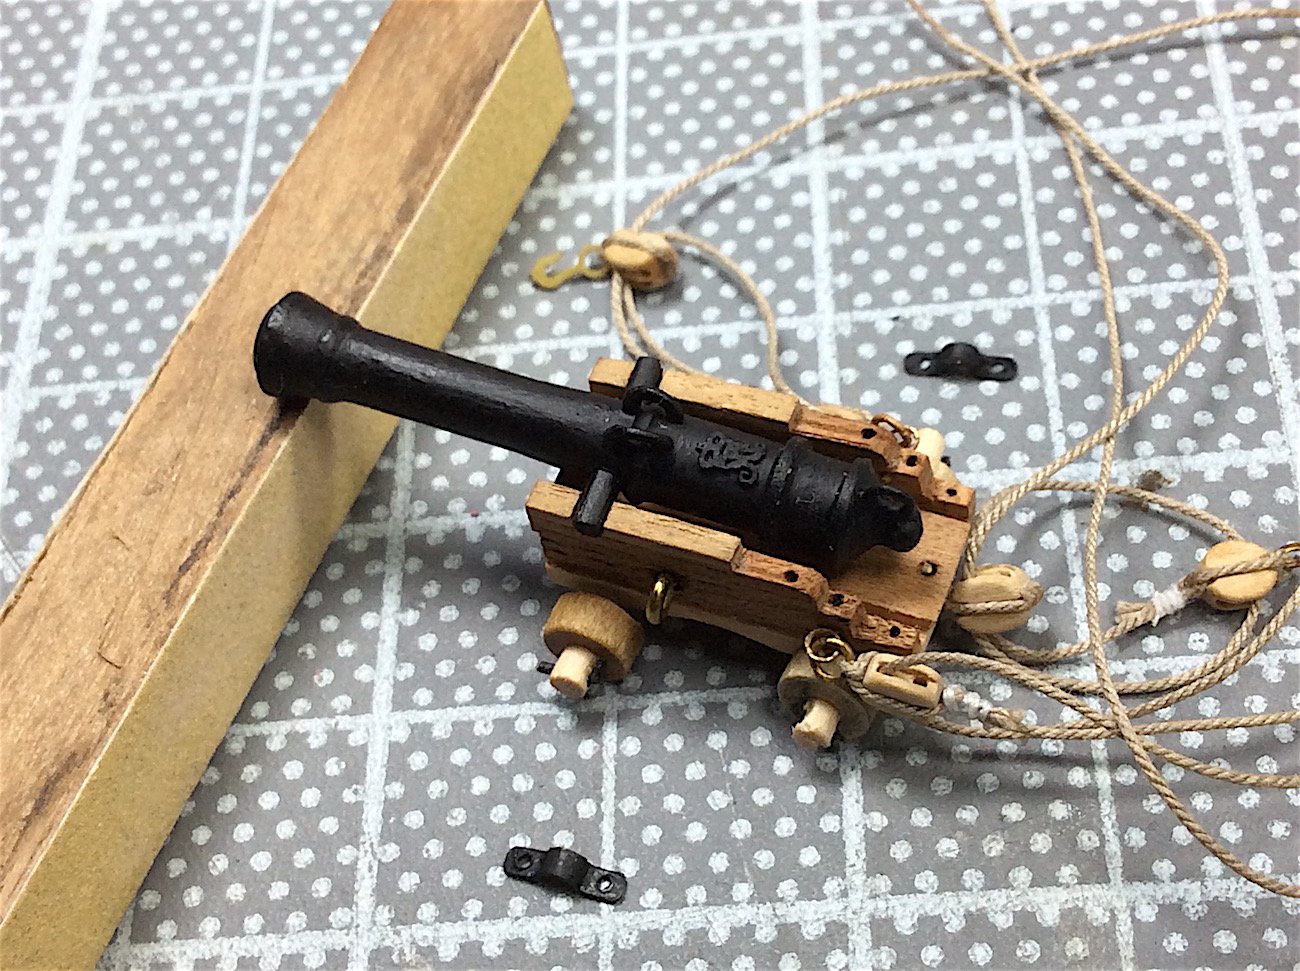
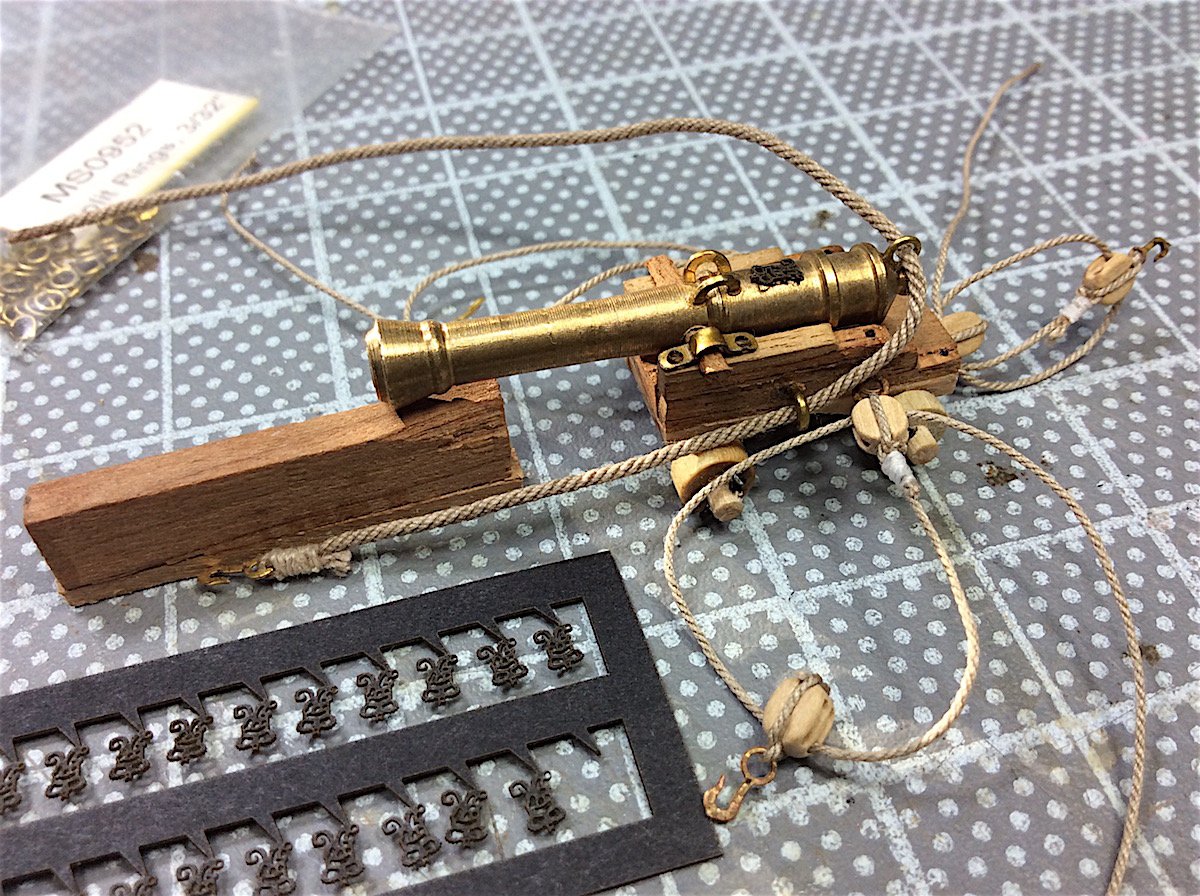
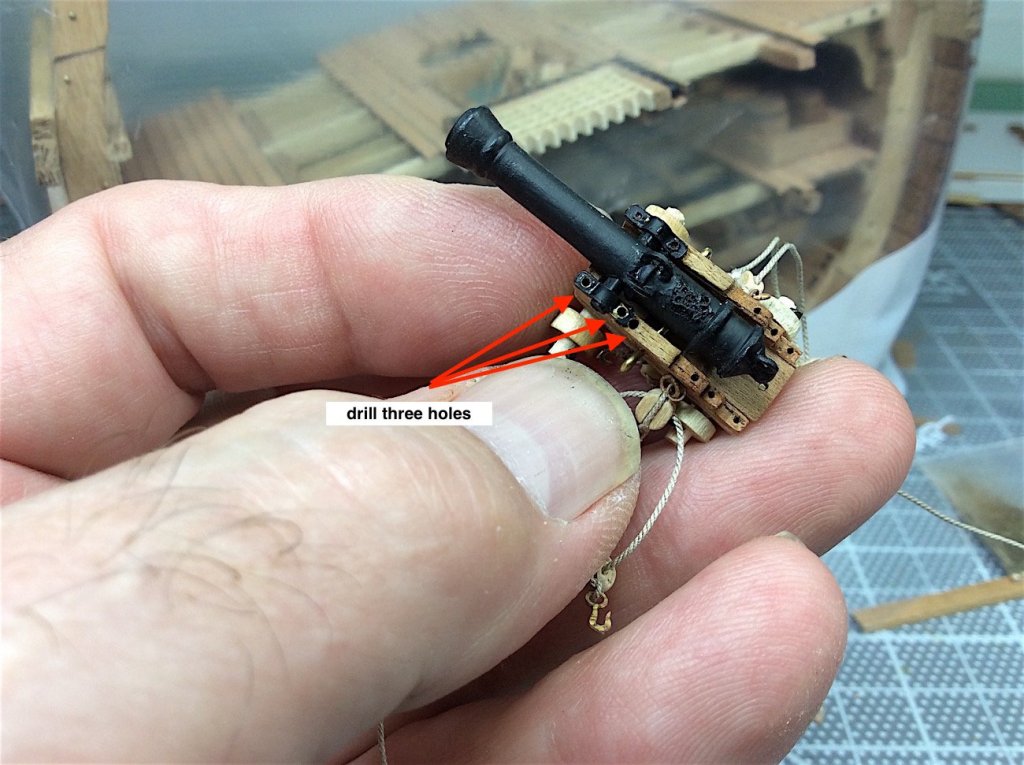
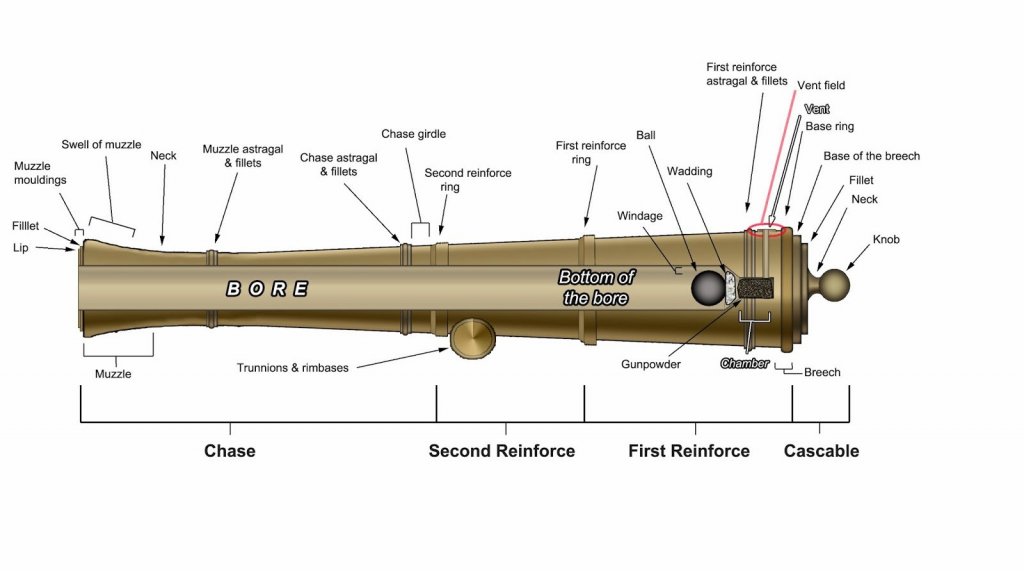
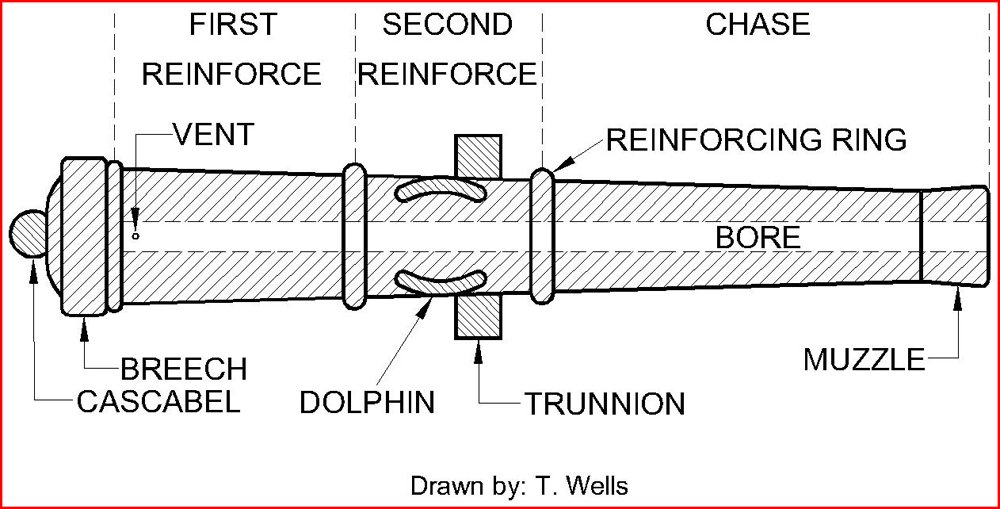
Hi mates, Preliminary cannon barrels detail upgrades. Intended to run breech rope through center of carriage – but then decided to instead run rope to the barrel’s necks and looping - as many have done. In this case did not like the look of it (lack of proper neck) Hence the added detail needed for guns themselves. Here out-of-the-box; Also noted an Issue with kit provided brass wire –much too thin and trunnion holes were also too thin easy fix indeed Now also added detail bits to barrels. Emblems from Syren – easily curved. Just testing at this point – once barrels are air brushed emblems might look just perfect indeed. Washers were intended for the wheel axles, but did not fit -so plan "B" struck - hmmmm One issue – not crazy about the location of the gun's second reinforcing ring, my looping the dolphin over might not be correct. But it appears to be at the 50% weight of the barrel. Any suggestions mates - should I move the dolphins forward a bit – though they should be just above the rimbase – I think?? PS: Used Gorilla Super Glue Gel – the bits are very secure…. I will do the others then get the air brush to do its job As always thanks for your help, dropping by, and the likes… Cheers,


-
Dave, APOLOGIES REQUIRED - I have been silently following along-all along no less - not fair to you, your work, as well as your SUPER informative and creative build log. I now also add my kudos to your amazing log. Sincerely, MIchael
-
Thanks Frank, PS: on page 3 I have a complete explanation regarding light choices, power and where to buy - much easier for you Regards,
-
Martyn, Thanks - yes I remember your light nightmare with your ST cross (though it did work out very well indeed)- As I keep adding lights percentages for failure go up, don't they. Hoping to add at least six more lanterns -
-
Denis, E.J,. thanks mates ! Now thinking of how to add extra details to brass guns. Will post some ideas....
-
Denis, YES! - Nice to see you back at your river yard....
-
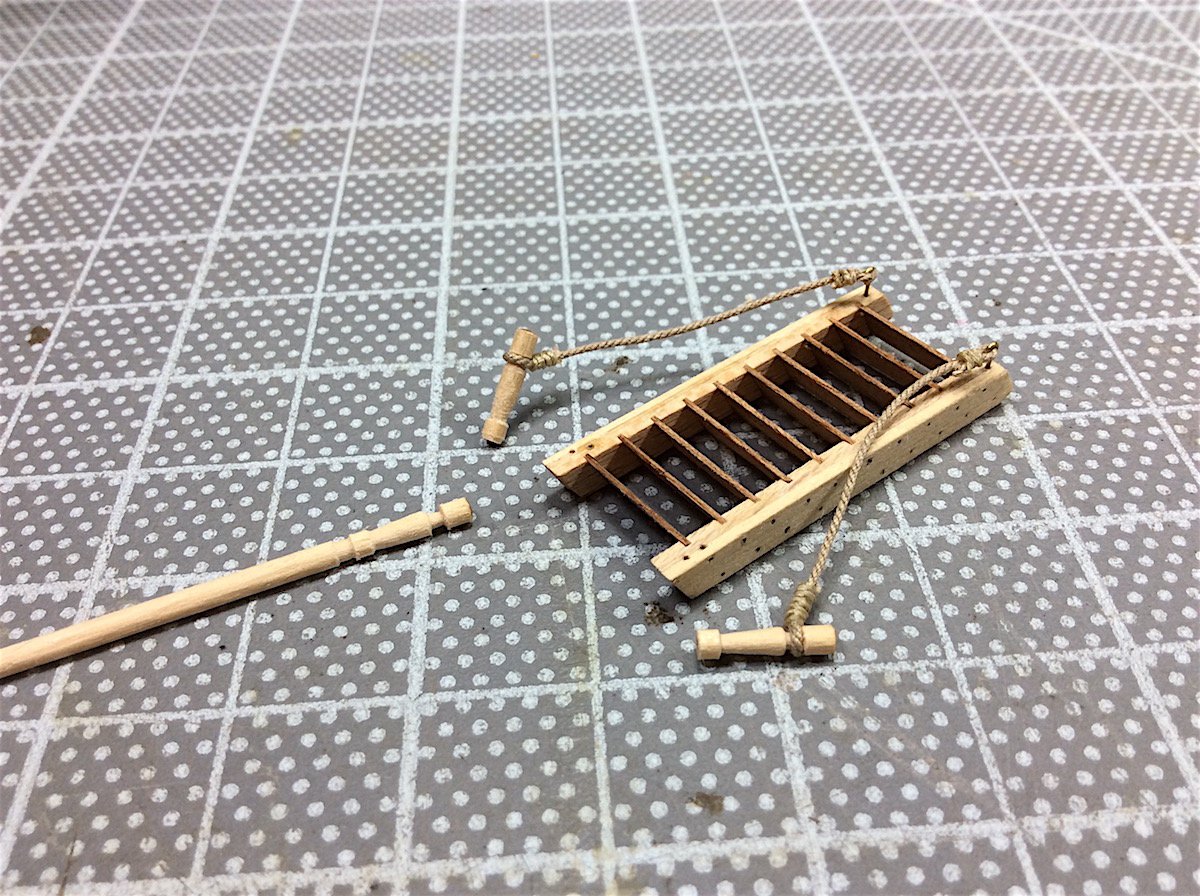
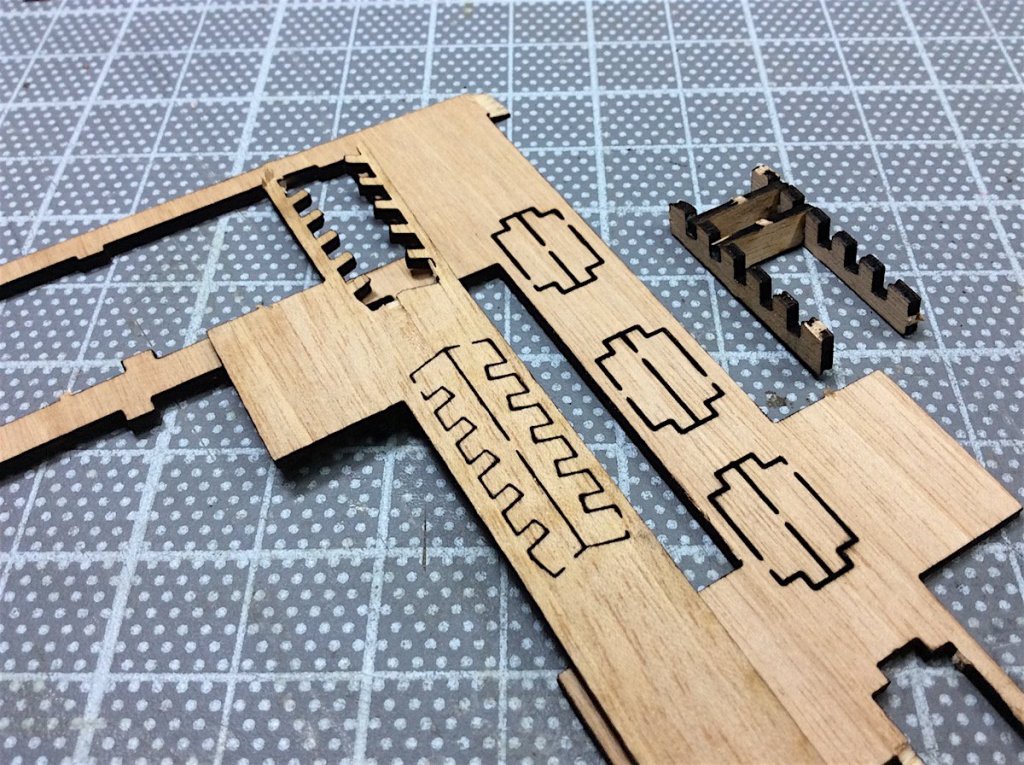
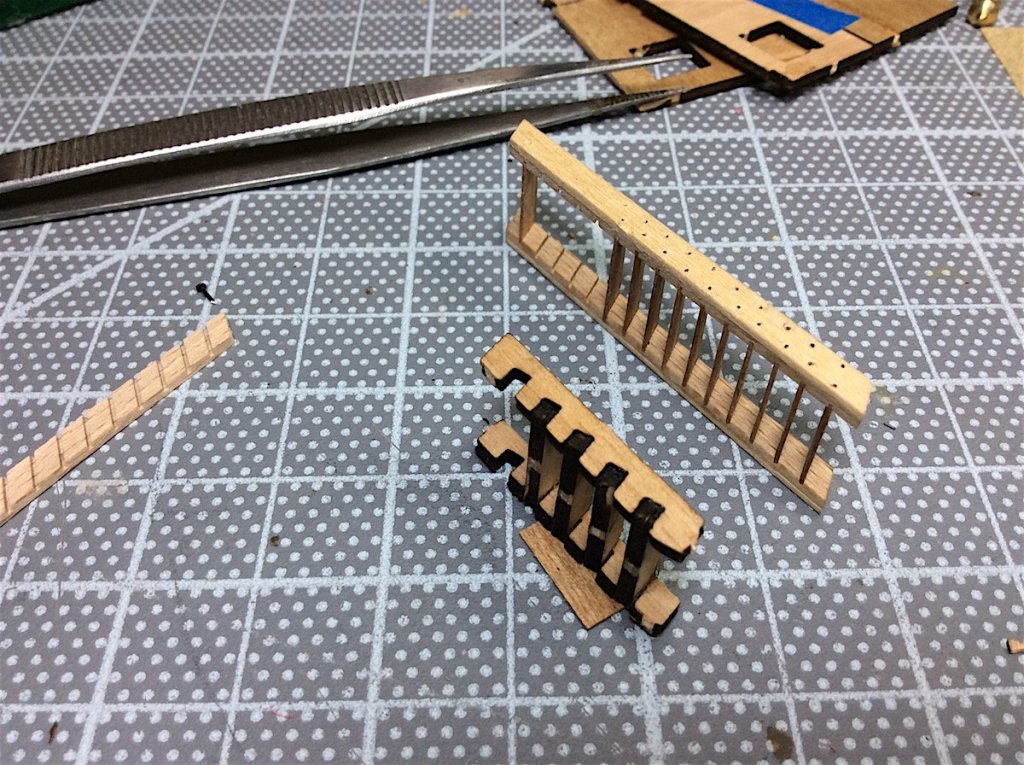
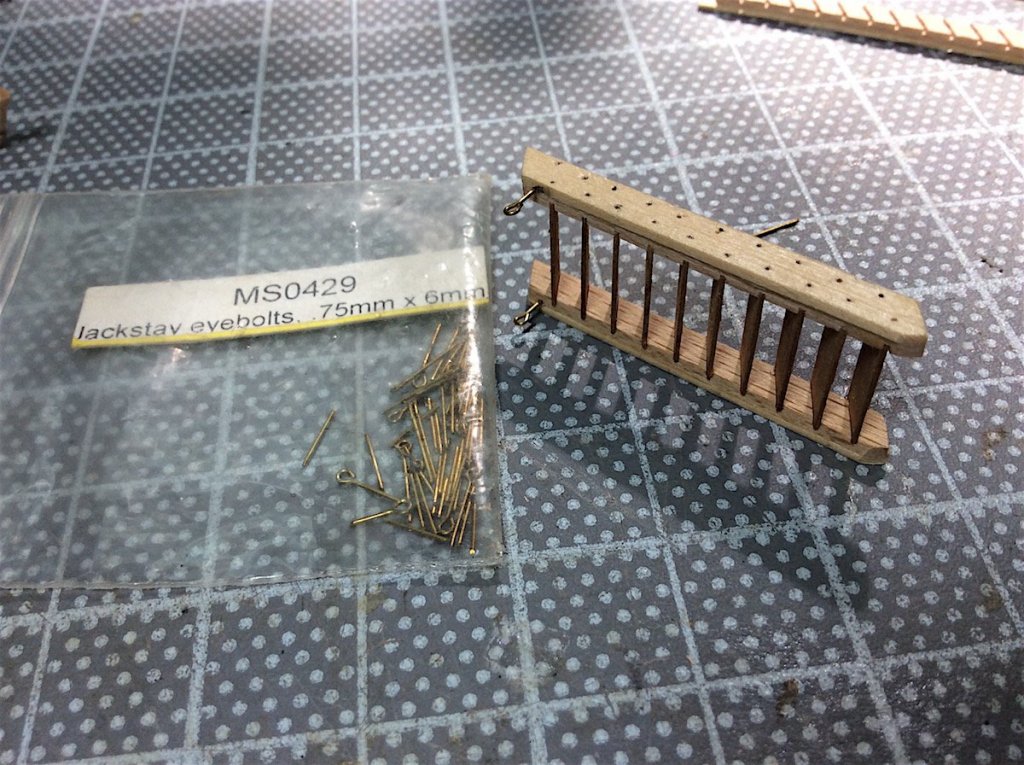
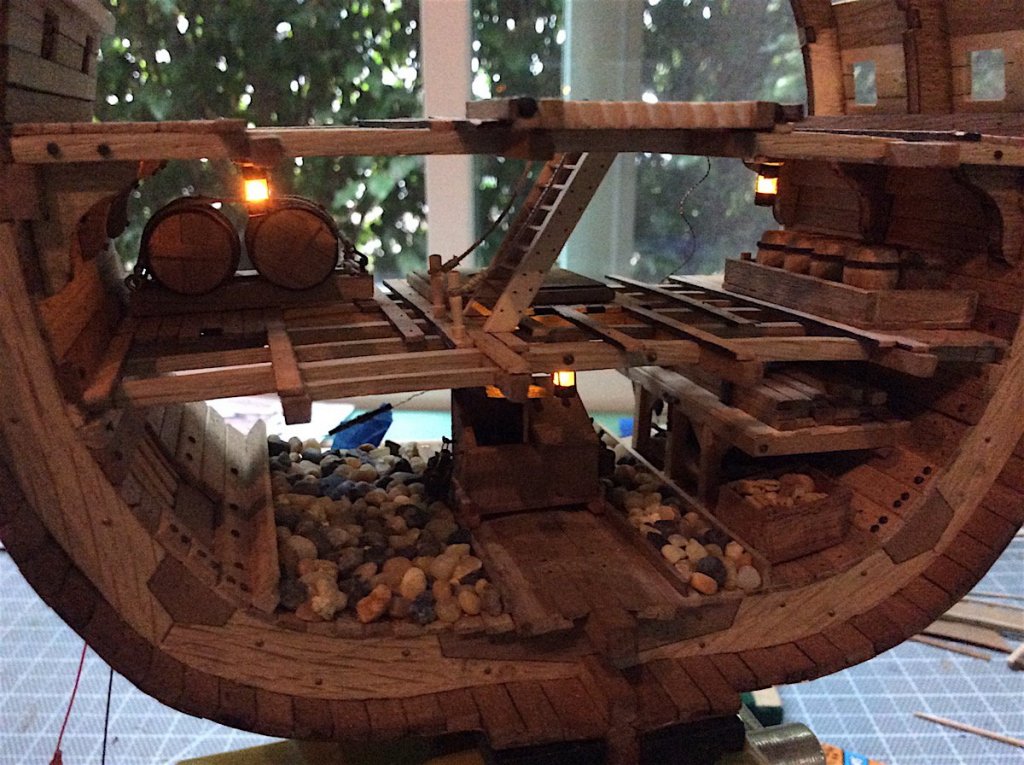
Minor update, did not much care for the kit provided ladders, so used some after market bits as well as adding some extra details. Happy with the results – especially seeing that the just installed lights are also working properly.

- 371 replies
-
- 12
-
-
BRILLIANT - this hobby at its absolute superlative best !! Sincerely,
-
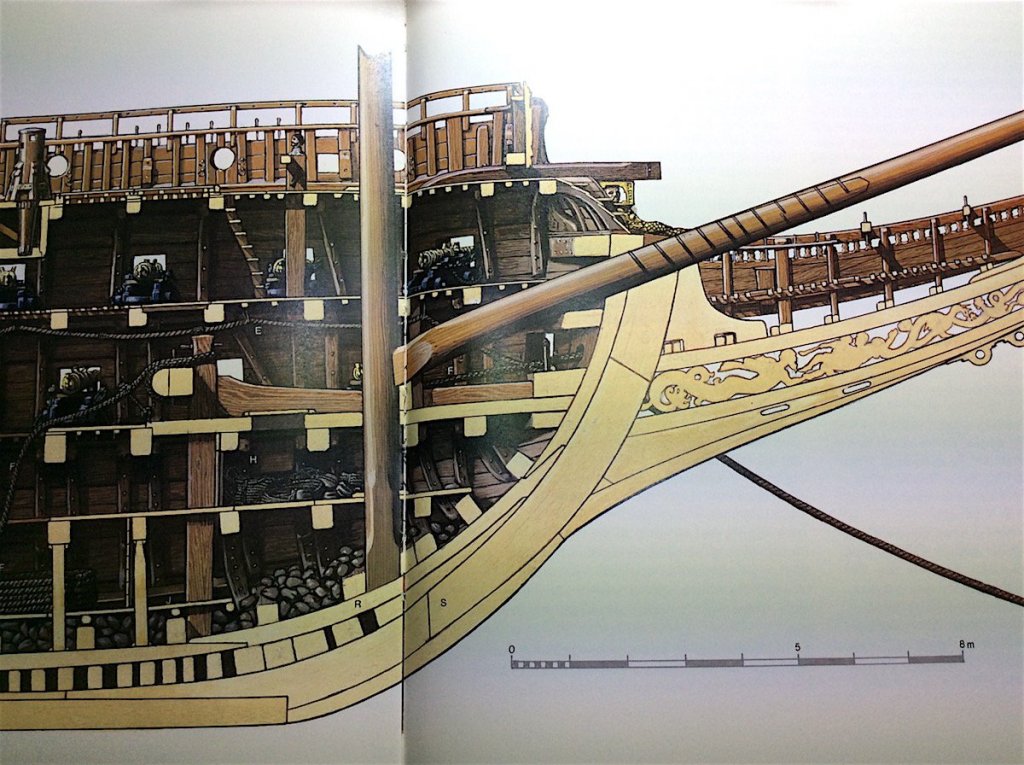
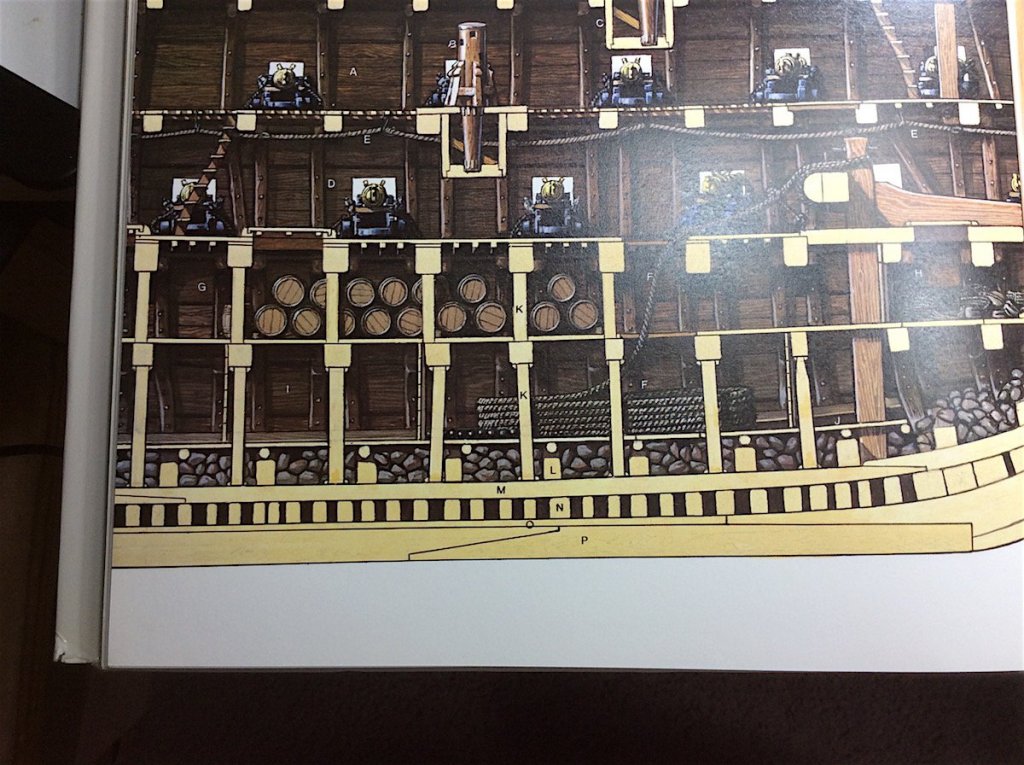
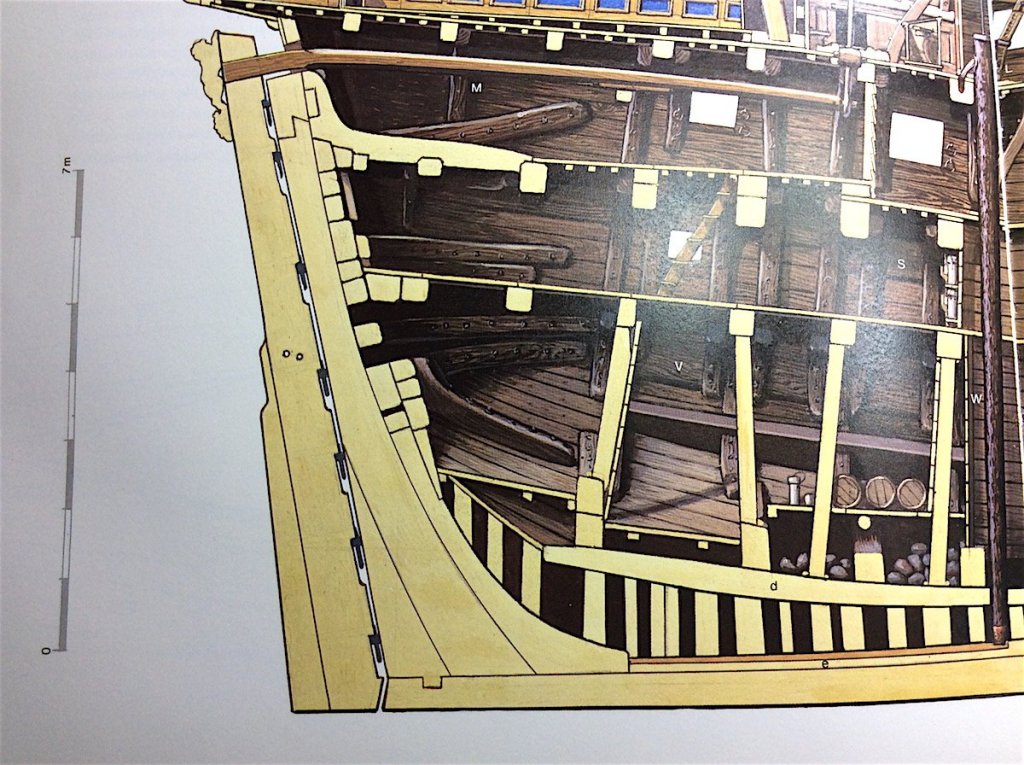
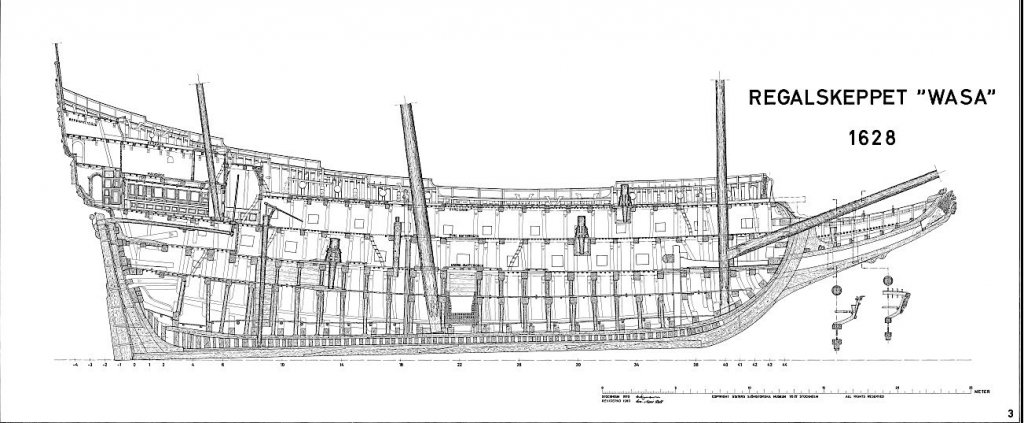
Martyn, FYI: There has been some criticism regarding your kit’s instructions on how to overlay keel timbers from stern to bow. Surprising that they got it wrong – you're probably aware of this as well. In any case I enclose drawings of how it should look from the Landström's book, as well as a profile from the Vasa Museum in case that you are interested in going that route with that bit of the build. Mine is wrong – was not aware of how keel timbers should actually be assembled way back when..... Regards,

- 91 replies
-
- 7
-
-
- deagostini
- vasa
- (and 1 more)
-
Patrick, Take care - time does heal most things (or so I've been told)
- 756 replies
-
- 3
-
-
- galleon
- golden hind
- (and 2 more)