md1400cs
-
Posts
2,868 -
Joined
-
Last visited
Content Type
Profiles
Forums
Gallery
Events
Everything posted by md1400cs
-
 Hennis, Glad as well that your shipyard has re- opened.
- 192 replies
-
- 4
-

-
- sovereign of the seas
- sergal
- (and 1 more)
-
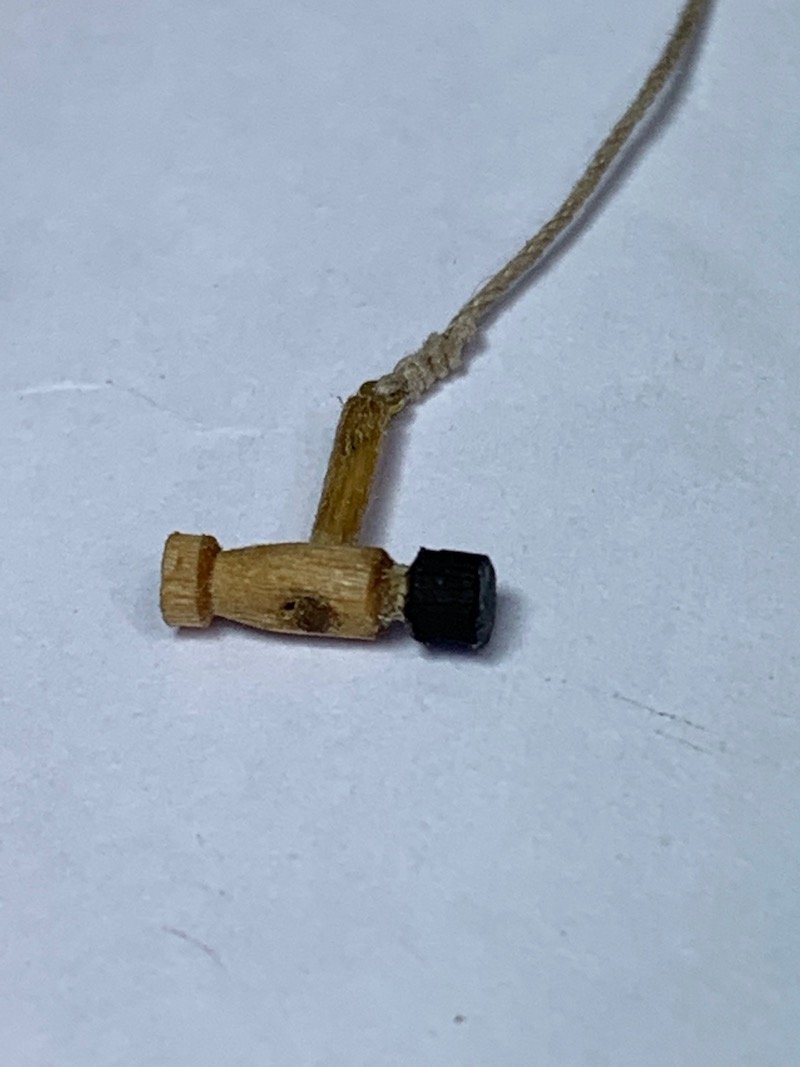
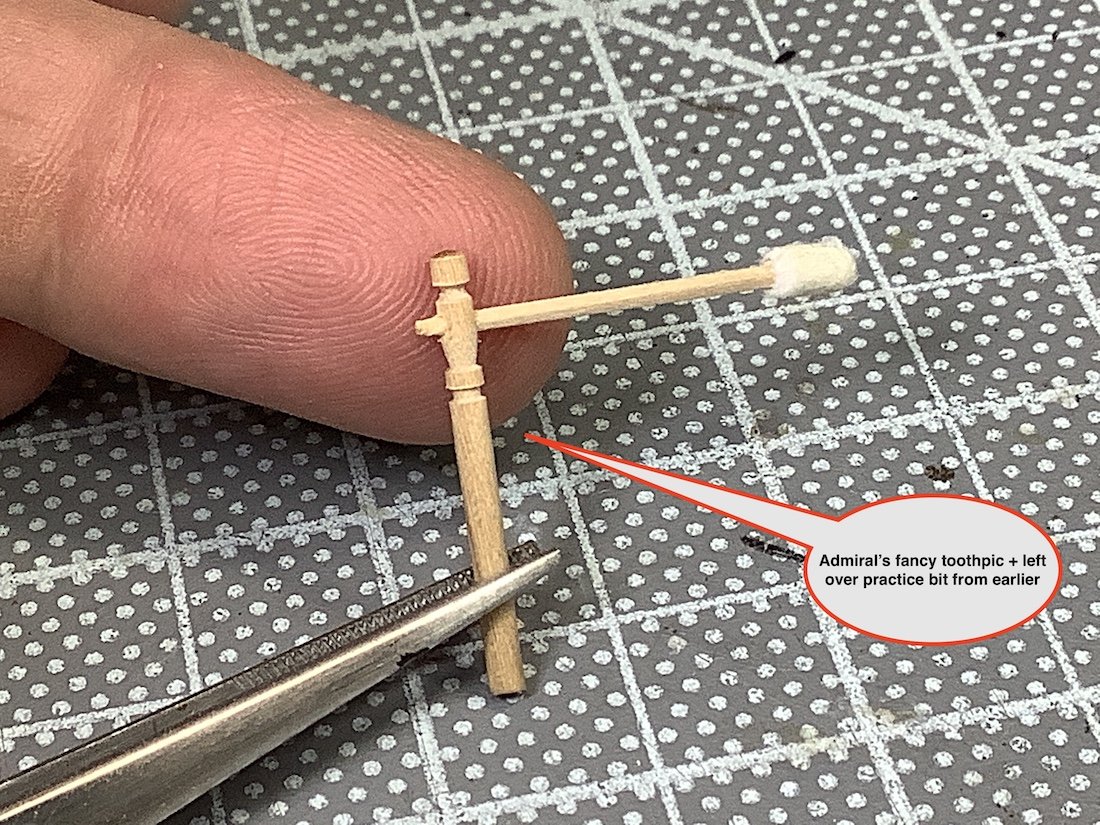
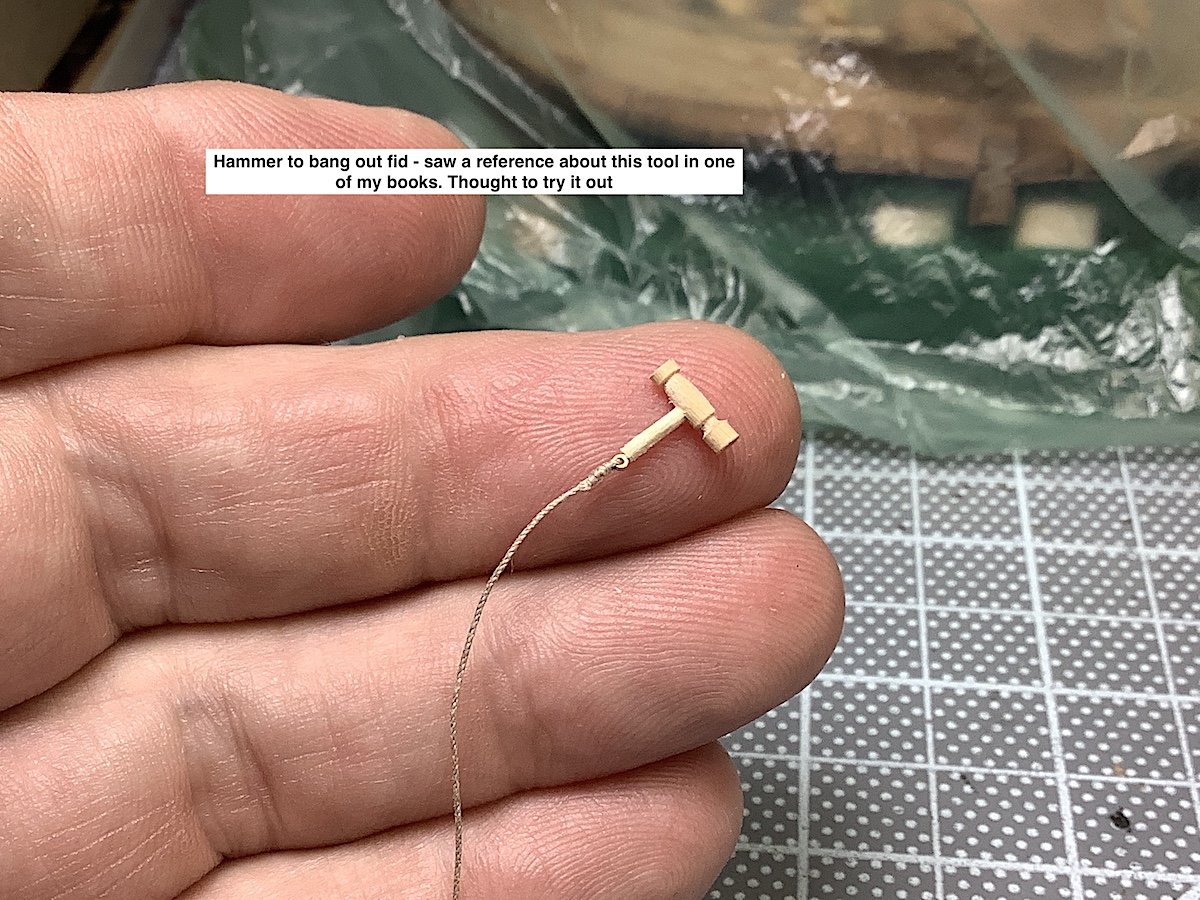
Thanks Frank, and thanks for the likes! Hammer needed a "little something" bit of stain and a metal face. I read somewhere that fids were also, at so point, made of iron, so as not to wear out as easily - might just add black painted wood bits on each side for sids. Not sure if that would apply to this ship however? As most of us always say "close-up pictures are not good for our egos" haha Cheers,
-
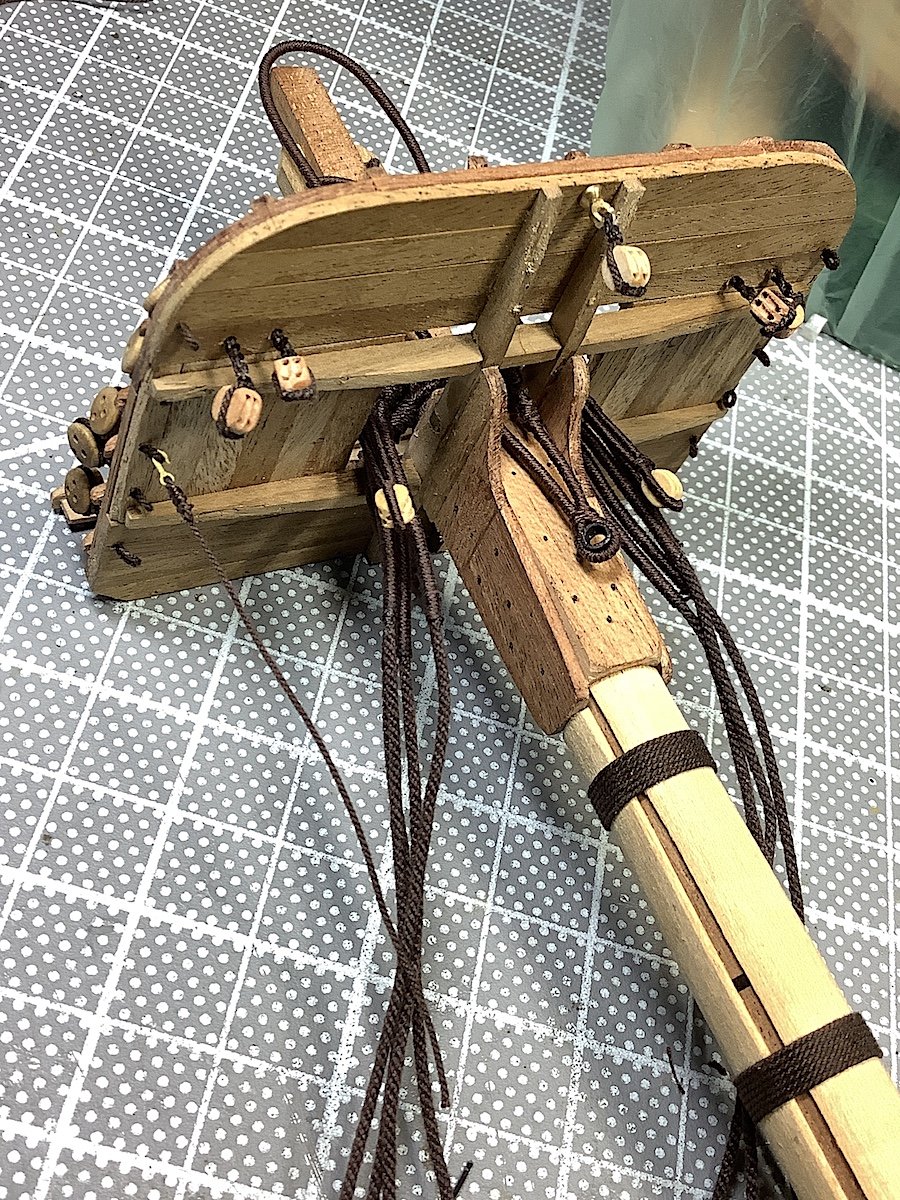
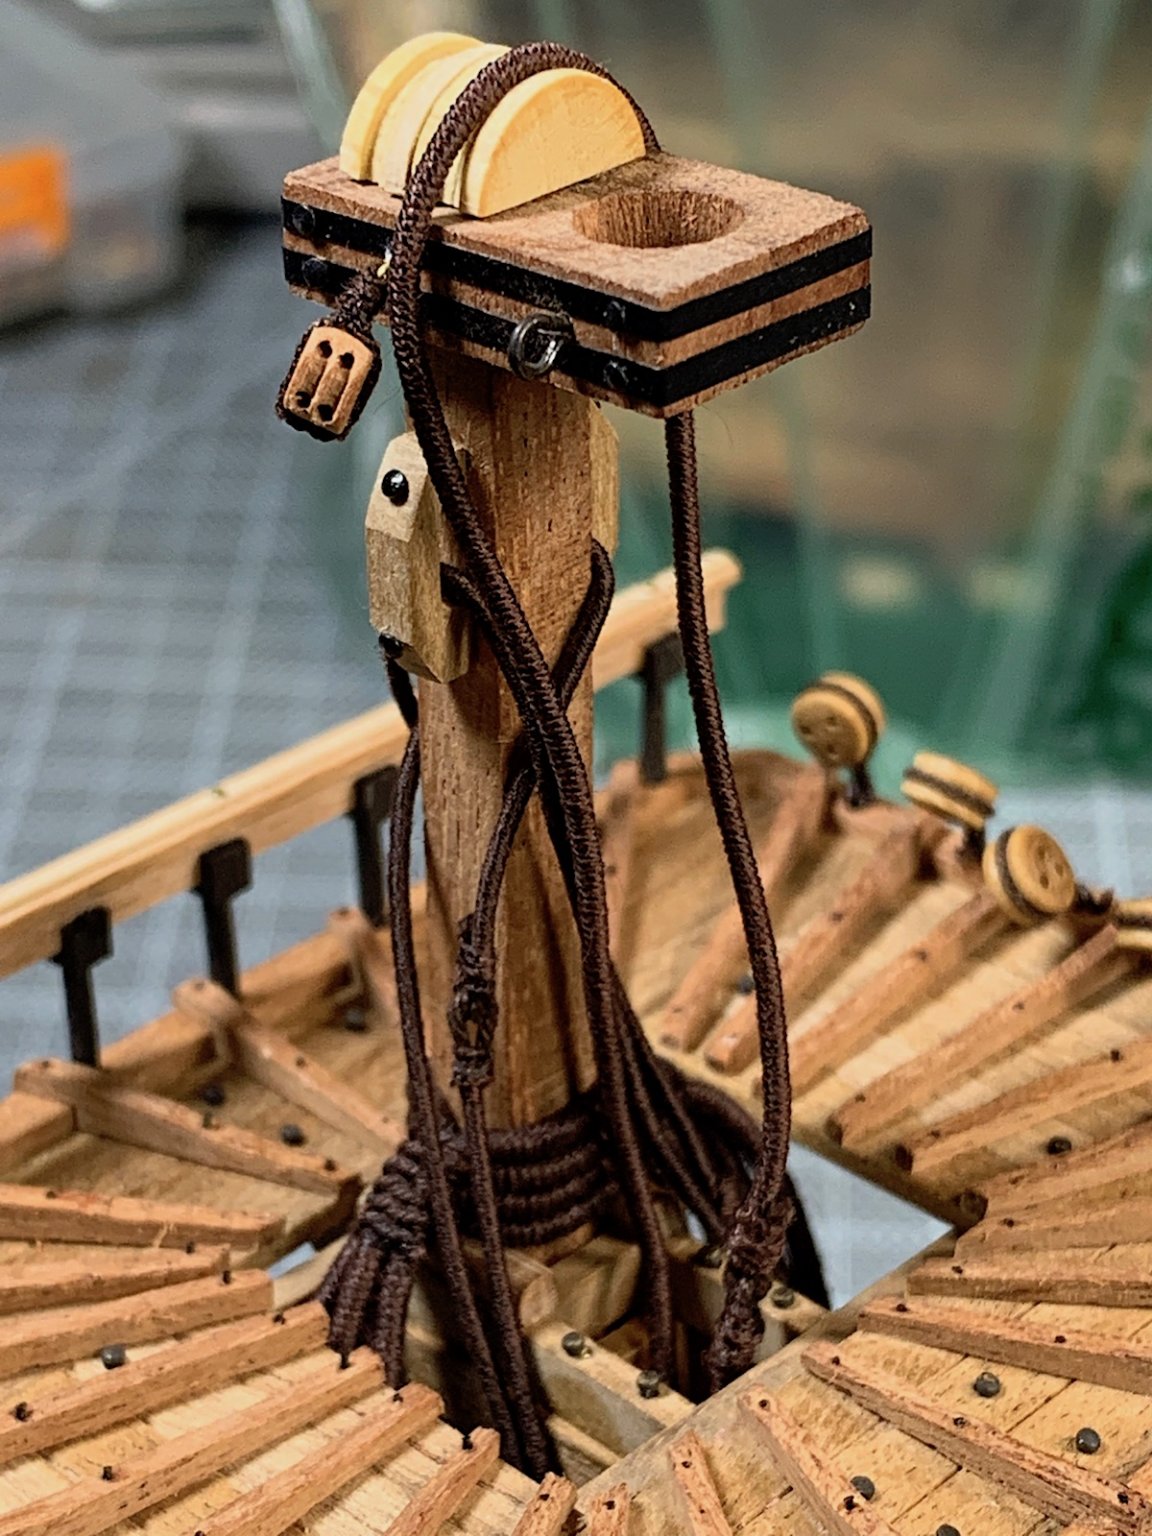
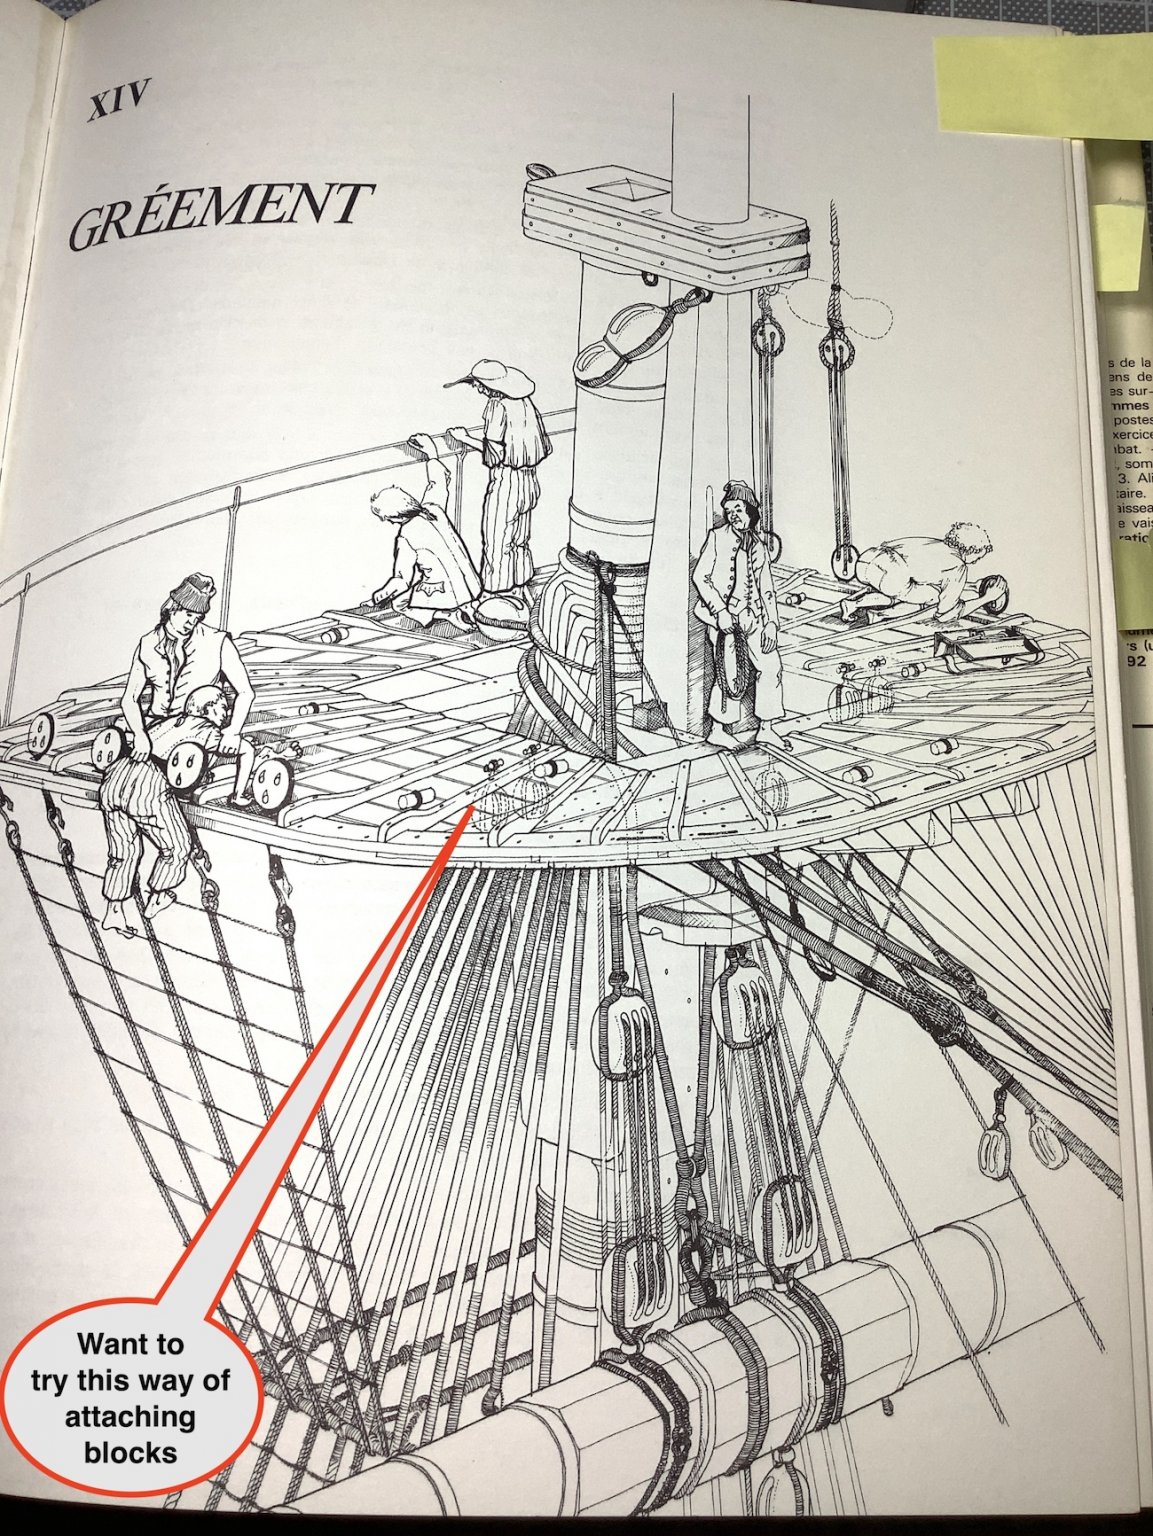
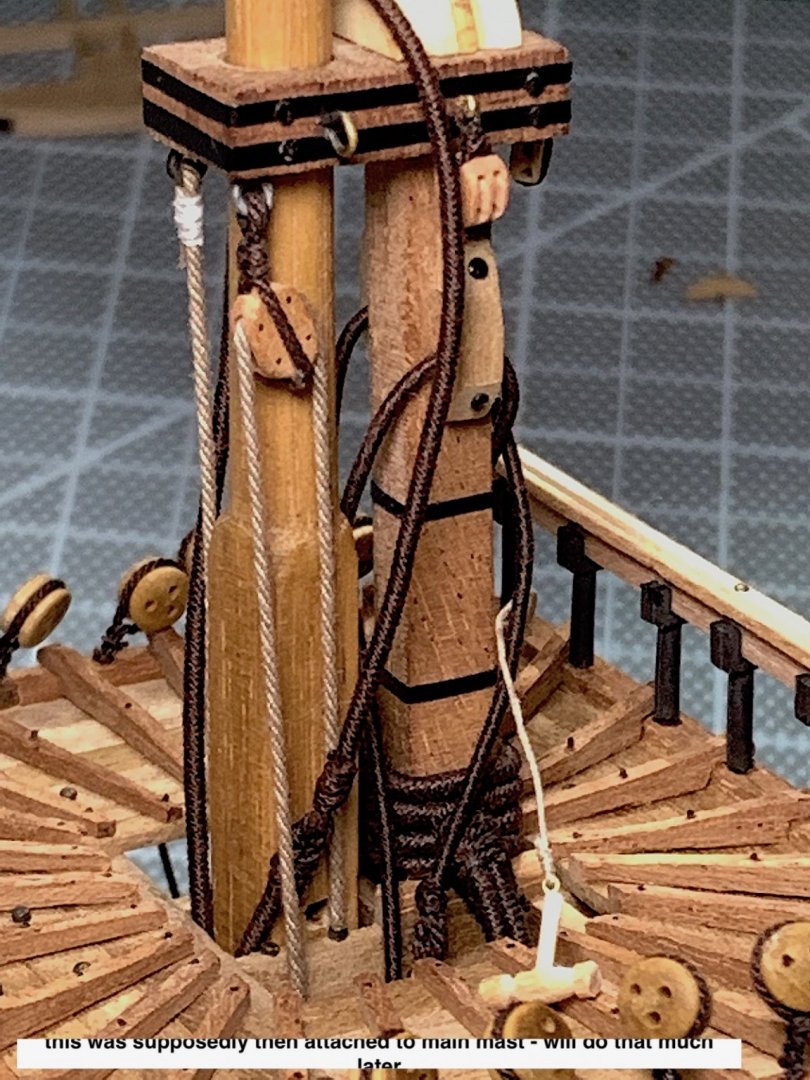
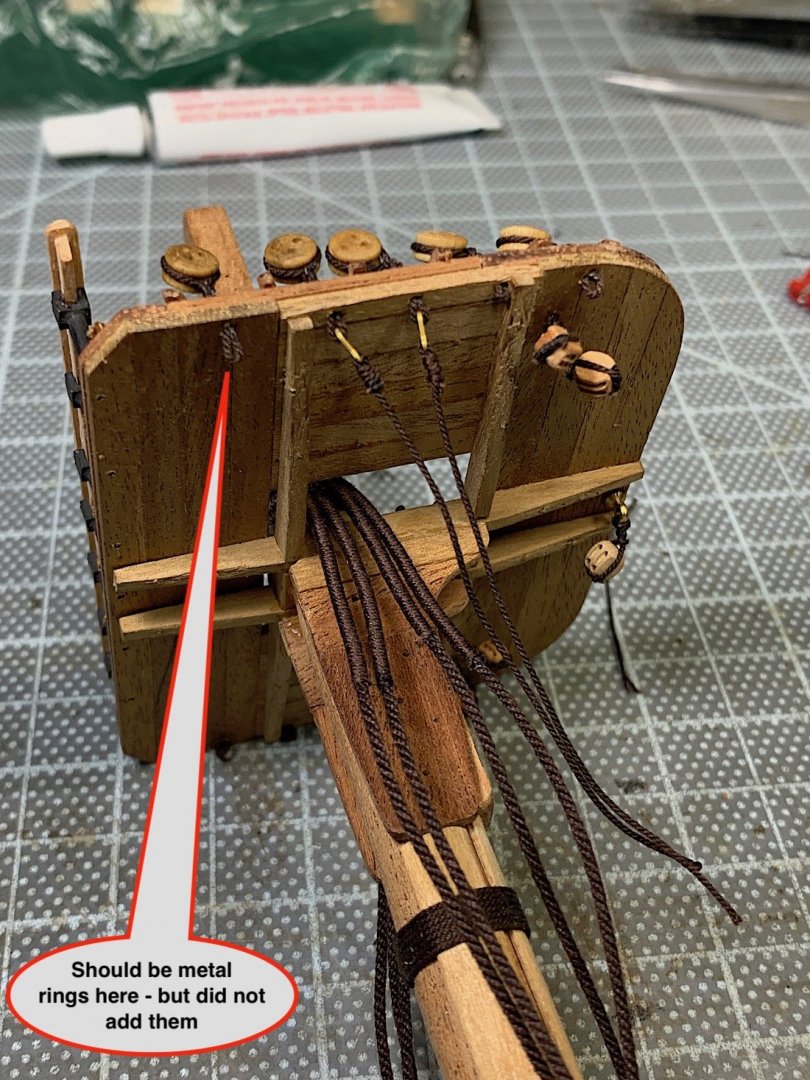
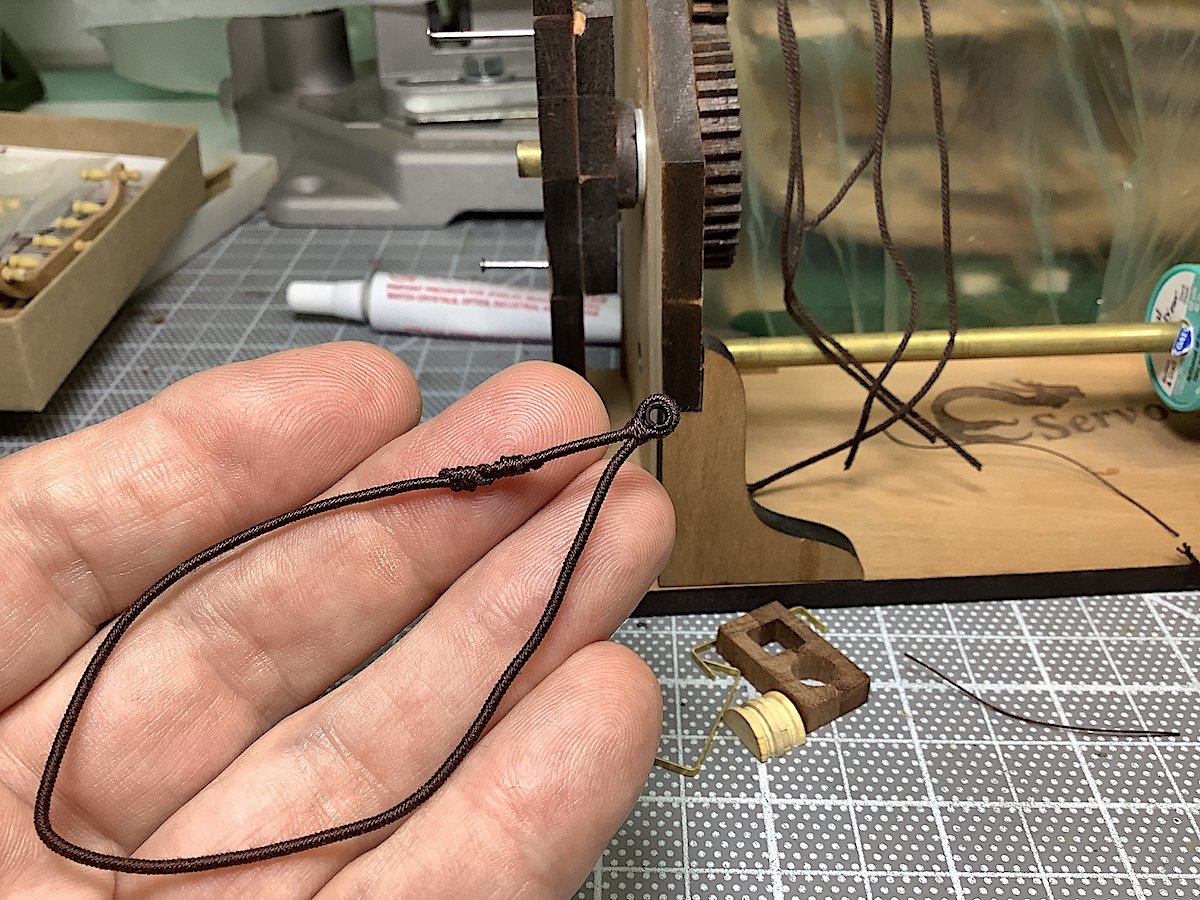
Hi Mates, Done with this section - A few updated pics (apologies regarding photo 8 - but you get the idea - PS: Not sure about Burton pendants for this ship. Too late in any case. Cheers,


- 371 replies
-
- 10
-
-
Gaëtan, Beyond stunning - PS: Your work studio is also, obviously, a superb space Regards,
-
Mark - Again big congrats!!! She's looking superb. Well done --- again Cheers,
- 331 replies
-
- 1
-
-
- nuestra senora del pilar
- occre
- (and 1 more)
-
Patrick, Clever and well done details. I don't remember, were you going to also add sails as well? Regards,
-
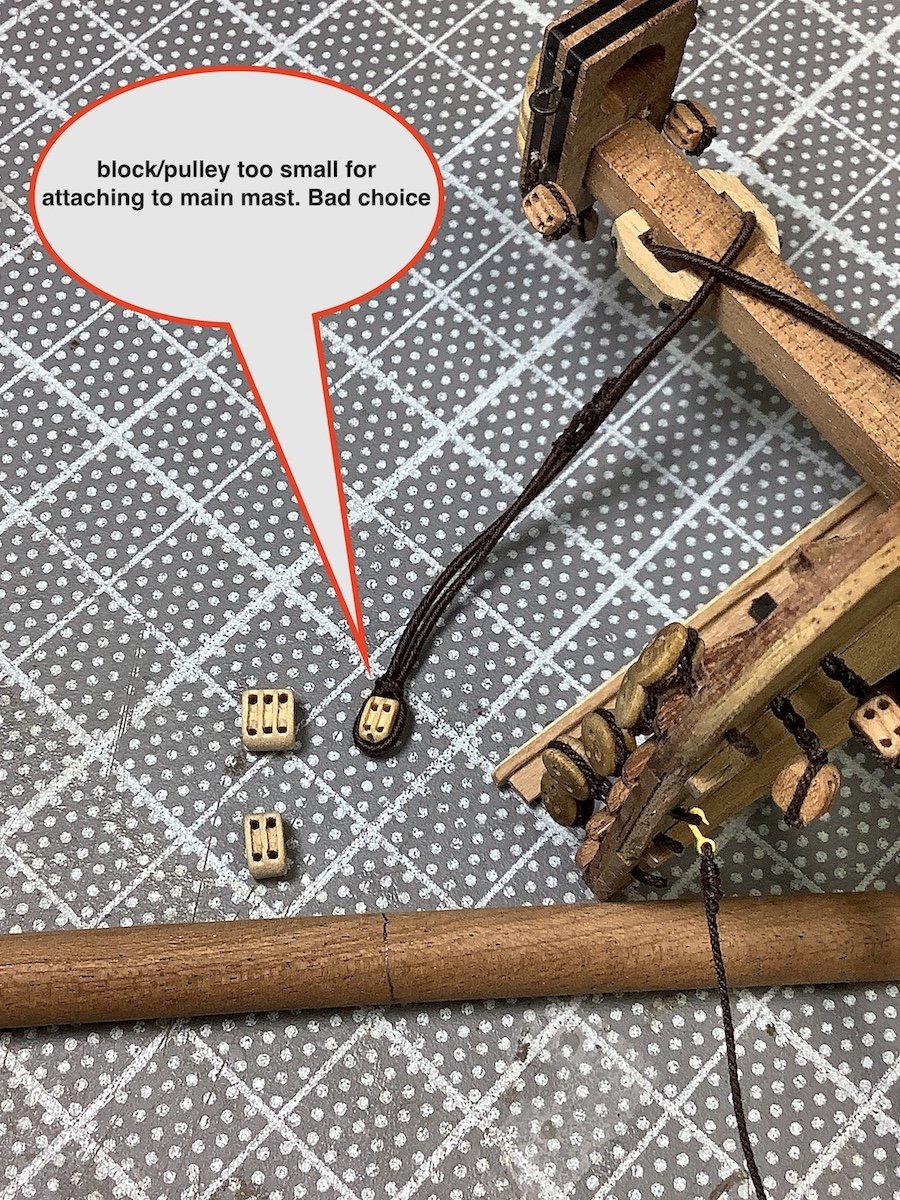
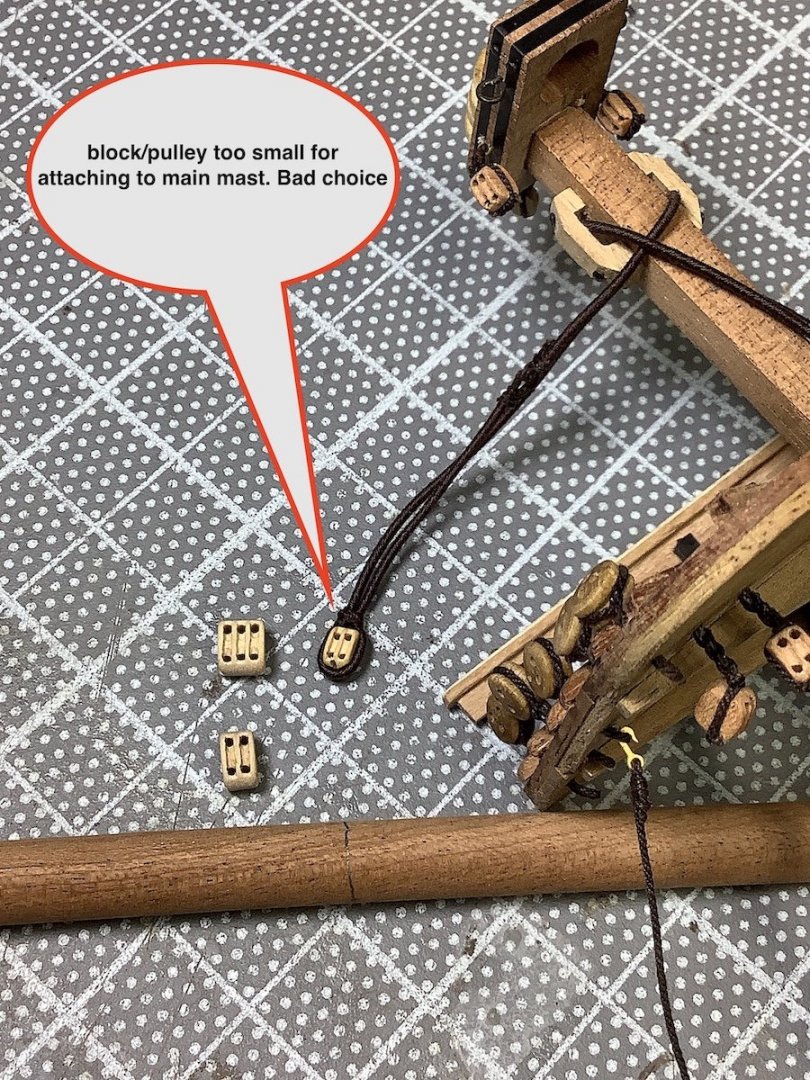
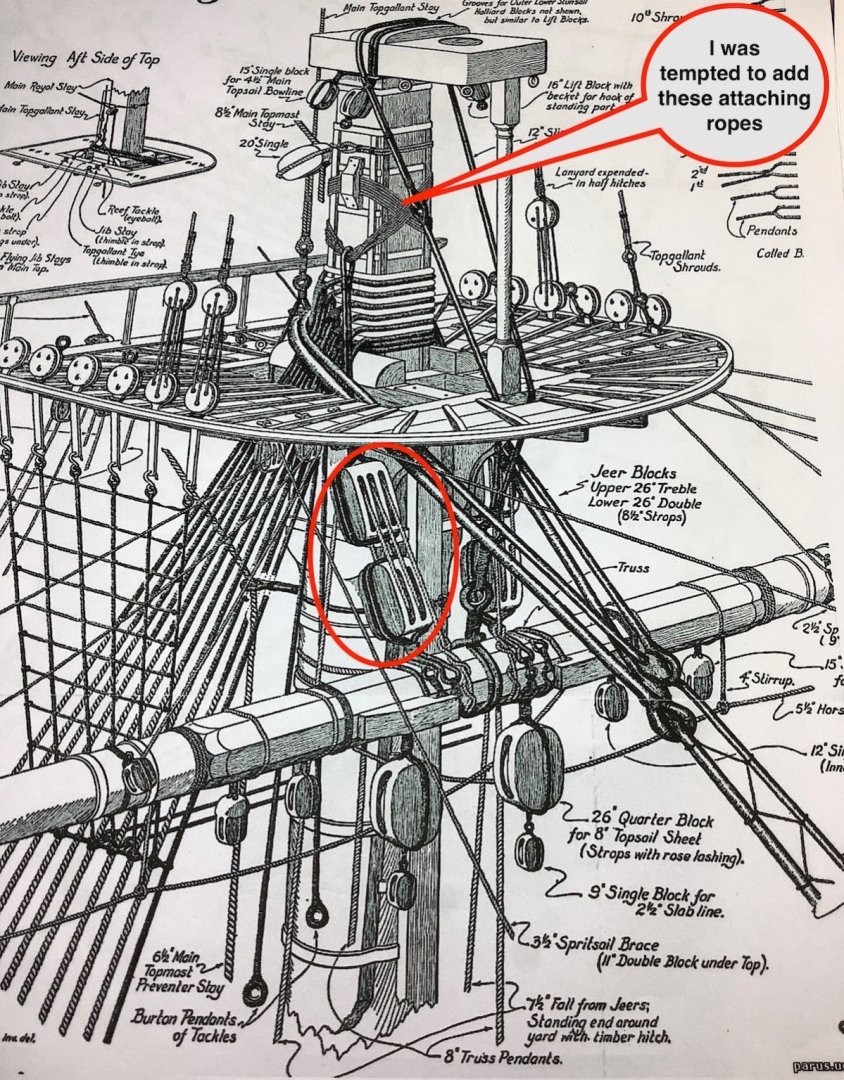
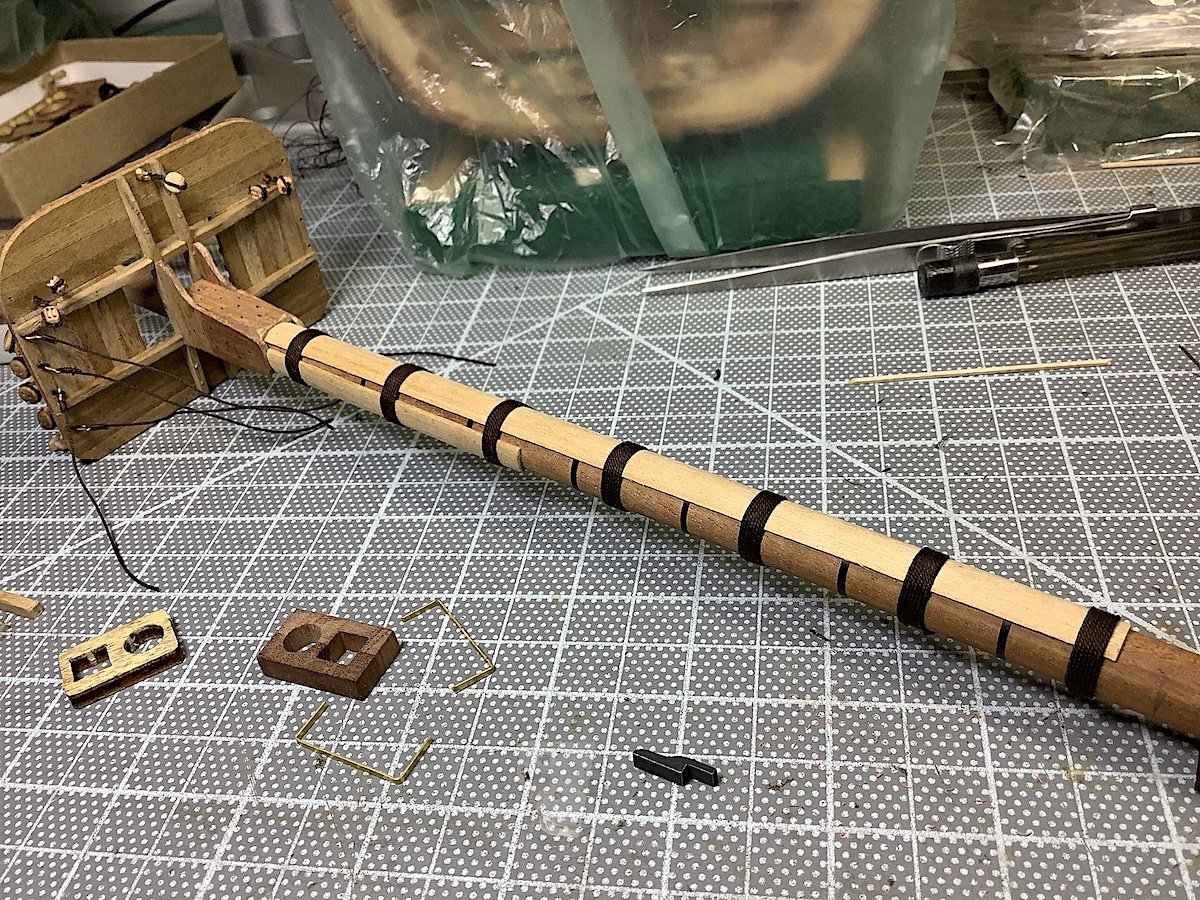
Had second thoughts when I started looking at the main yard measurements for the lathe. The two pulleys I rigged to those two served lines are too small IMO I like the double/triple combination with the larger bits. Using that drawing (foremast) as a general guide. PS; I find it very surprising that the lower main yard is not attached using parrels (per Ocree instructions) -- I think that I will add them to that yard right or wrong? The topmast yard does indicate using a parrel per Occre.
-
Mark, Had missed some updates - catching up - very nicely detailed work. The sails do look excellent !
- 331 replies
-
- 1
-
-
- nuestra senora del pilar
- occre
- (and 1 more)
-
Ferit, Nice work - PS: I plan on using your ideas for the boom stunsail boom irons, and now these knots BIG thanks !! Regards,
-
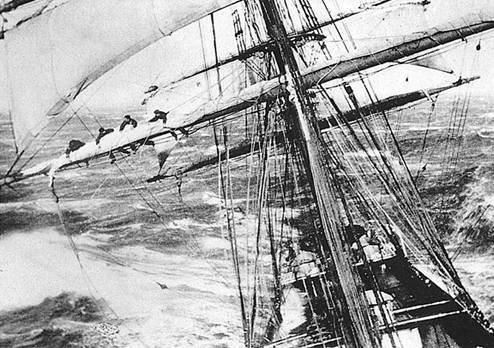
Federicoaa Thanks for the photo. Ferit, Martyn as always big thanks. And mates thanks for the likes I had thought about painting her as she was in 1805 at the battle of Trafalgar – decided not to - But did copper the hull. as a first time experiment for me. As you know she did not do well in that battle. Captured towed and then scuttled. In 2009 the Spanish Navy thought that they had found her but results proved inconclusive. There is a replica Santísima in the harbor of Alicante, Spain. No plans were left for the original so this replica not quite “right”. It (the replica) was constructed from the shell of a metal ship; hull planks were added and so on. It was a restaurant, night-club and who knows what else. It certainly is NOT the Vasa or the HMS Victory. haha I had several photos available as well. Painting her was tempting ! She looks very first rate with the added red, black, yellow paint details Cheers,
-
Peter, Excellent kit choice - as well as an excellent start. You will have lots of back-up info here at MSW if needed as you have noted -- the Vasa is a popular build. And yes The Vasa Museum is INDEED spectacular. I'll grab a chair and follow along as well. You might also be interested in the following if you are unaware of these sources http://warshipvasa.freeforums.net/ http://www.wasadream.com/Index/indexenglish.html http://www.wasadream.com/modeles/Clayton/wasaclaytonenglish.html I used much from these to help "fix" the very inaccurate Corel - hmmm Cheers.
- 61 replies
-
- 2
-
-
- billing boats
- vasa
- (and 1 more)
-
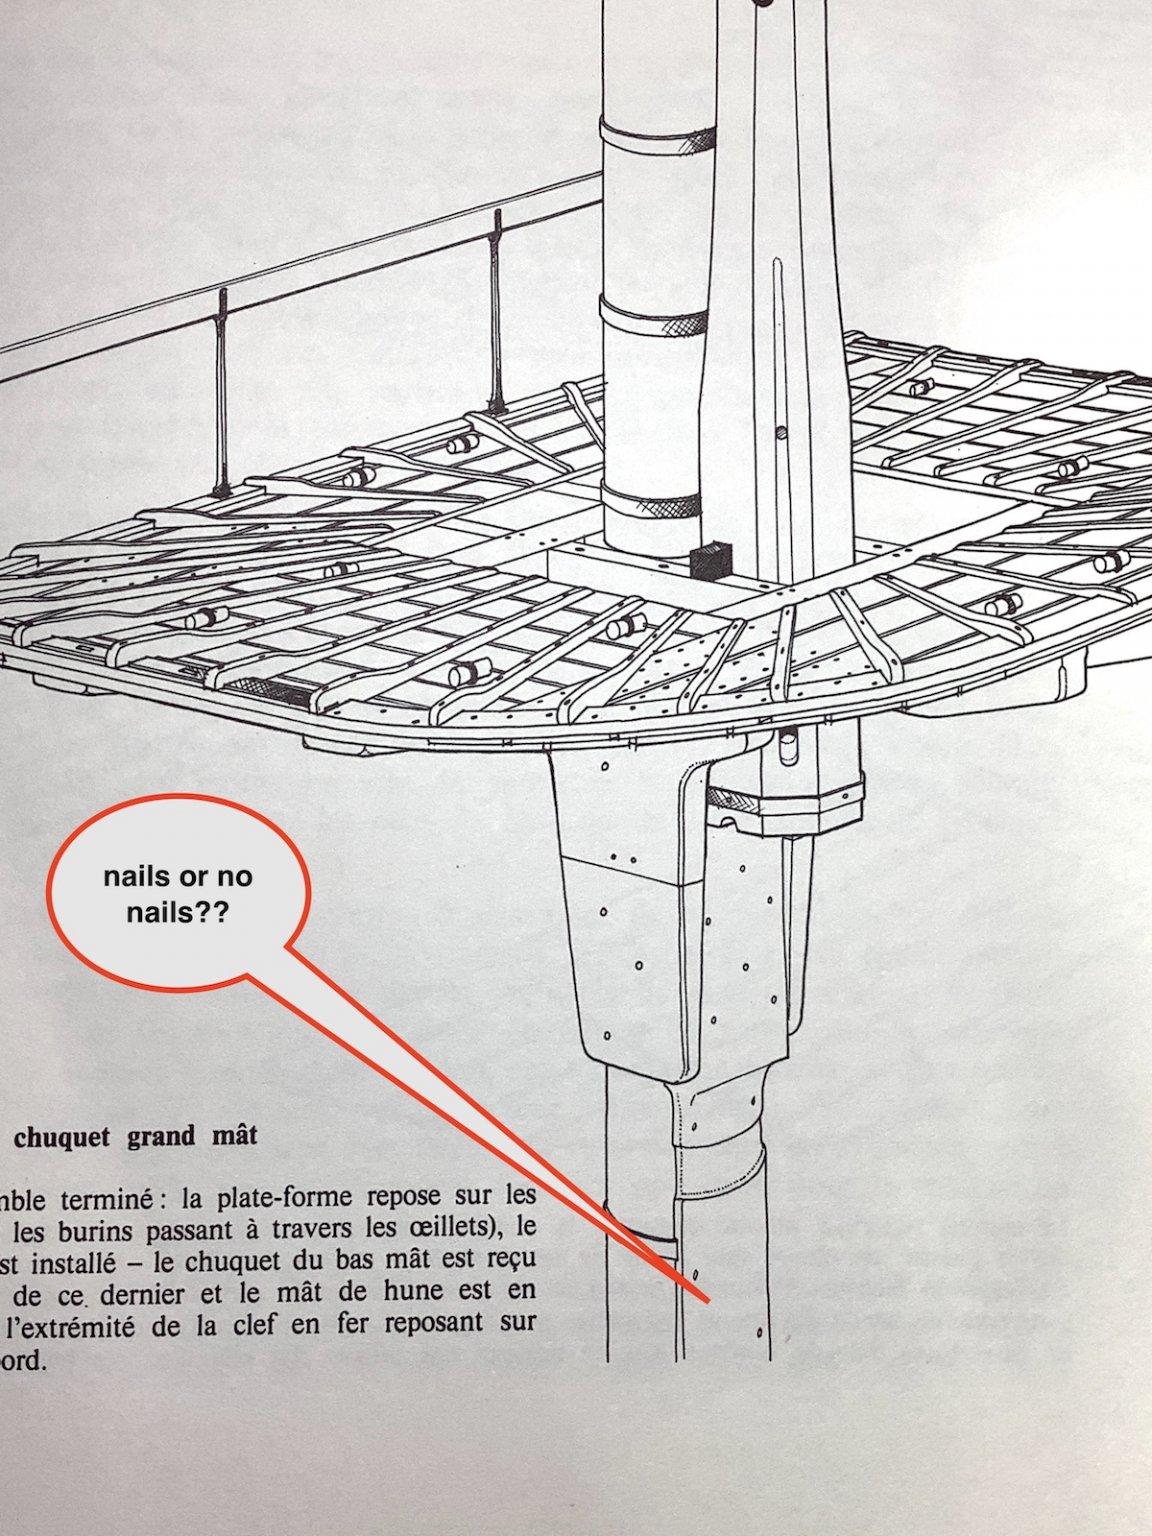
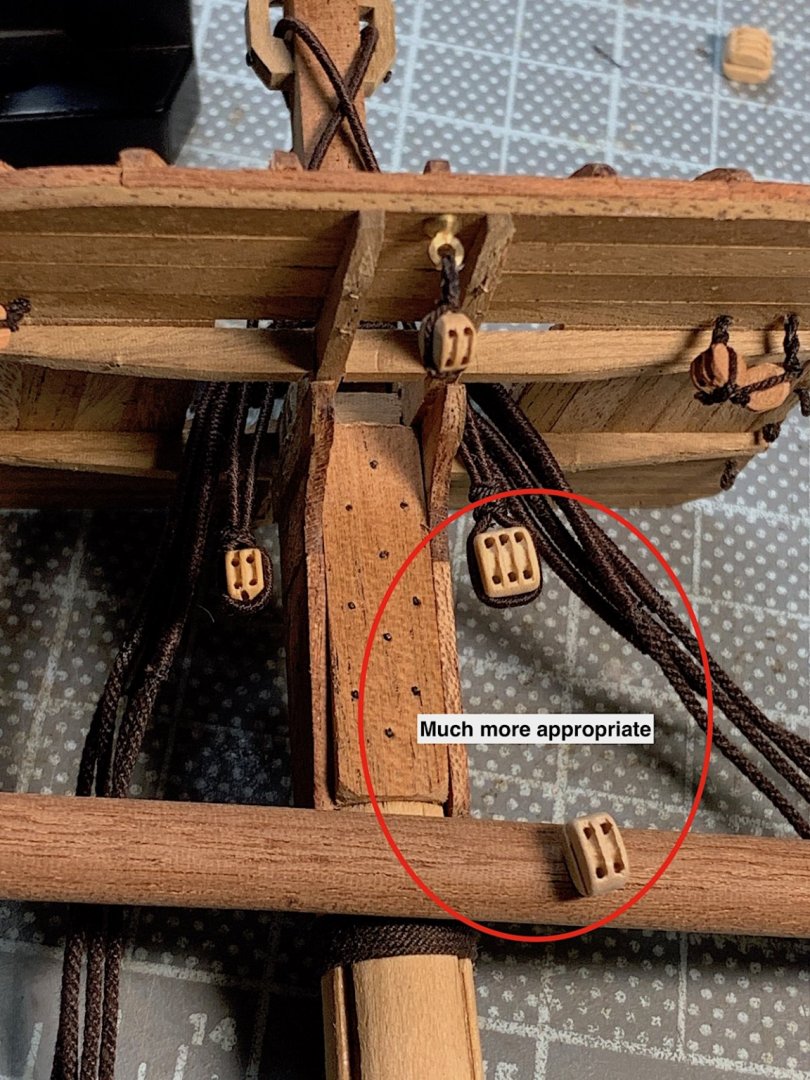
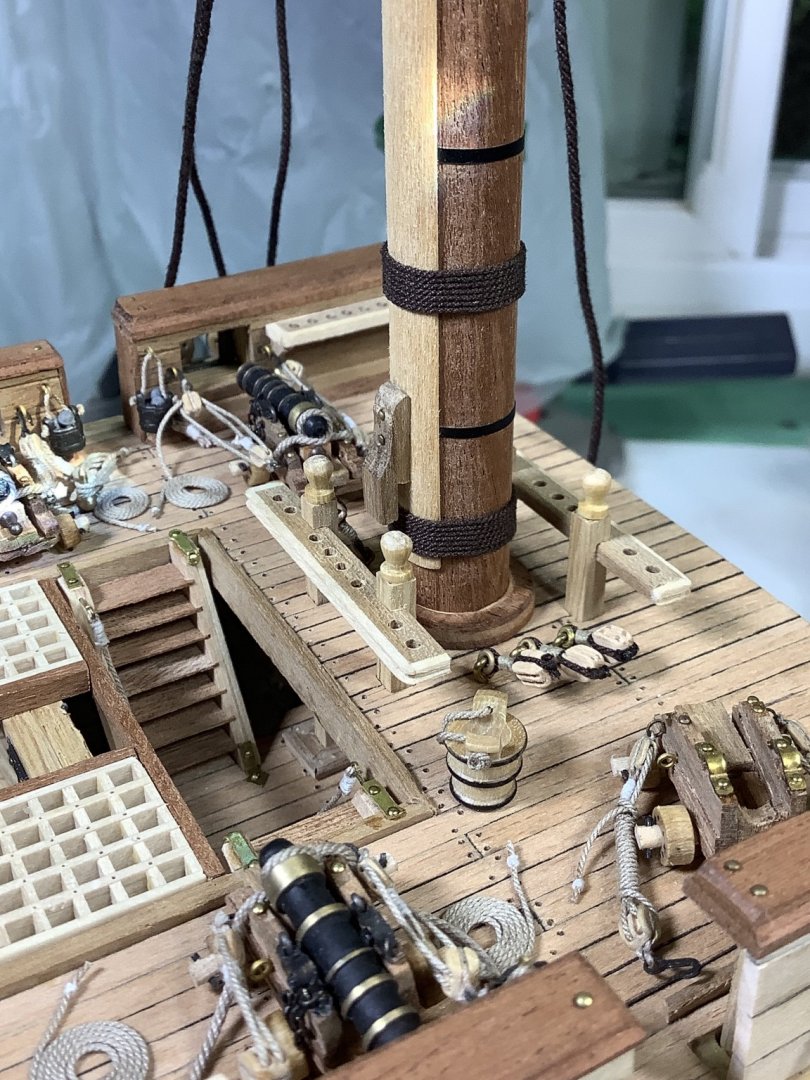
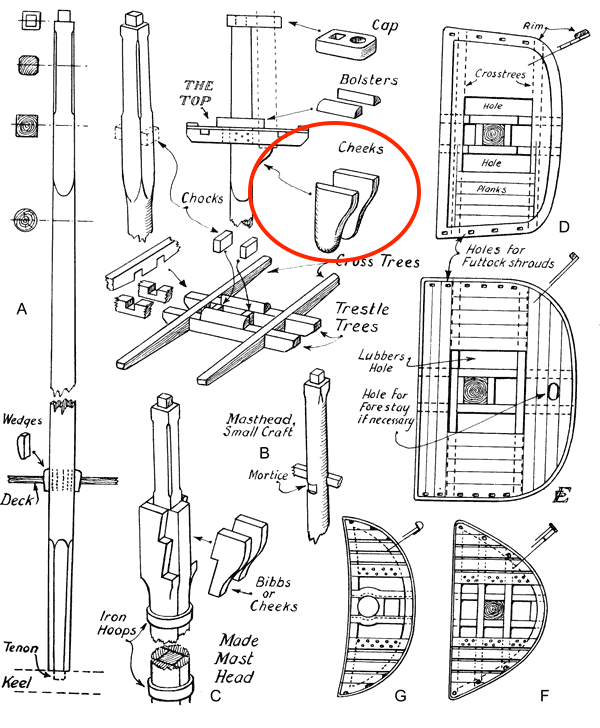
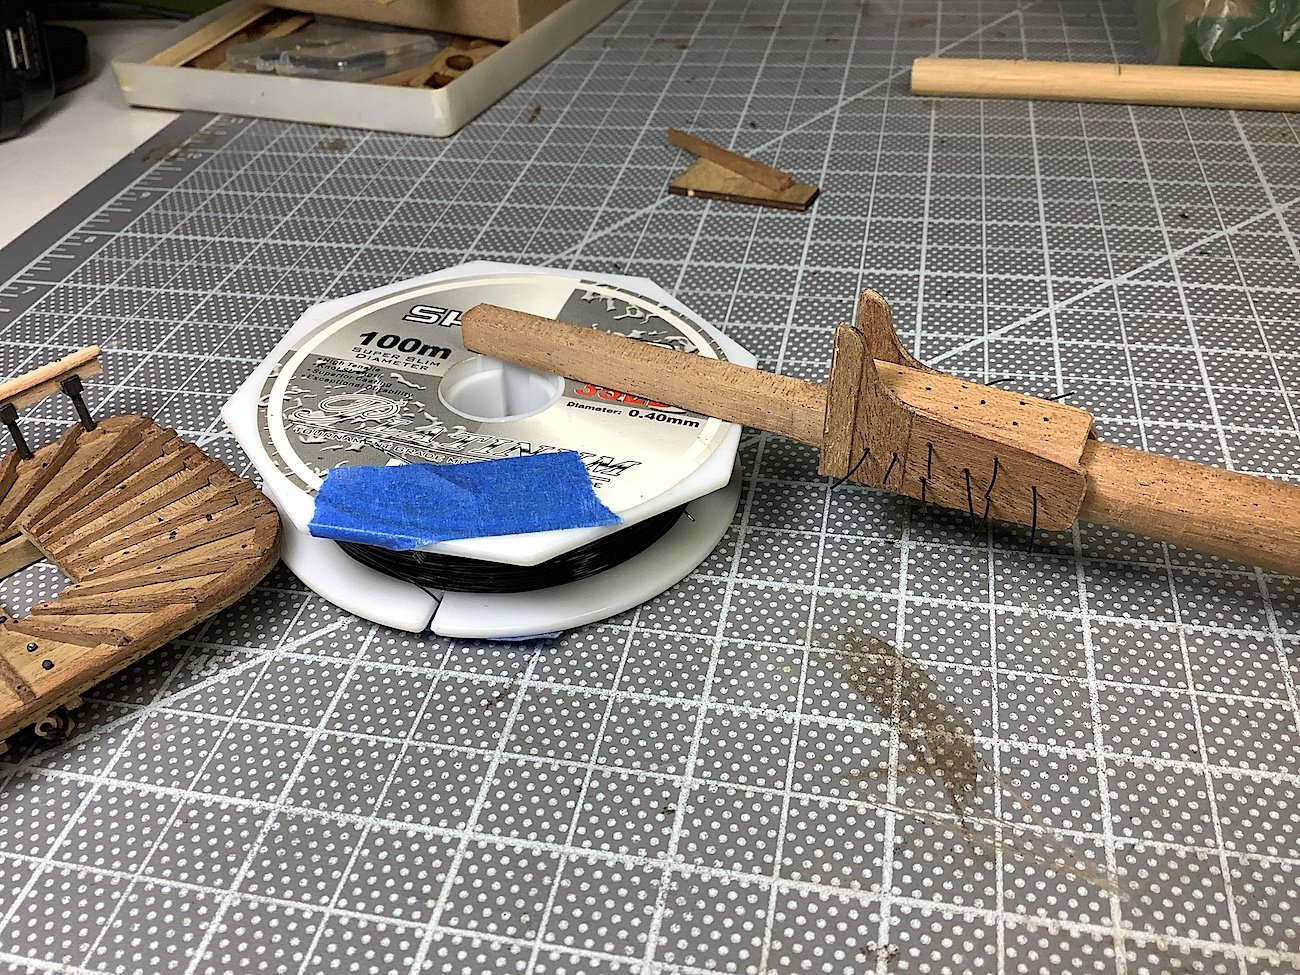
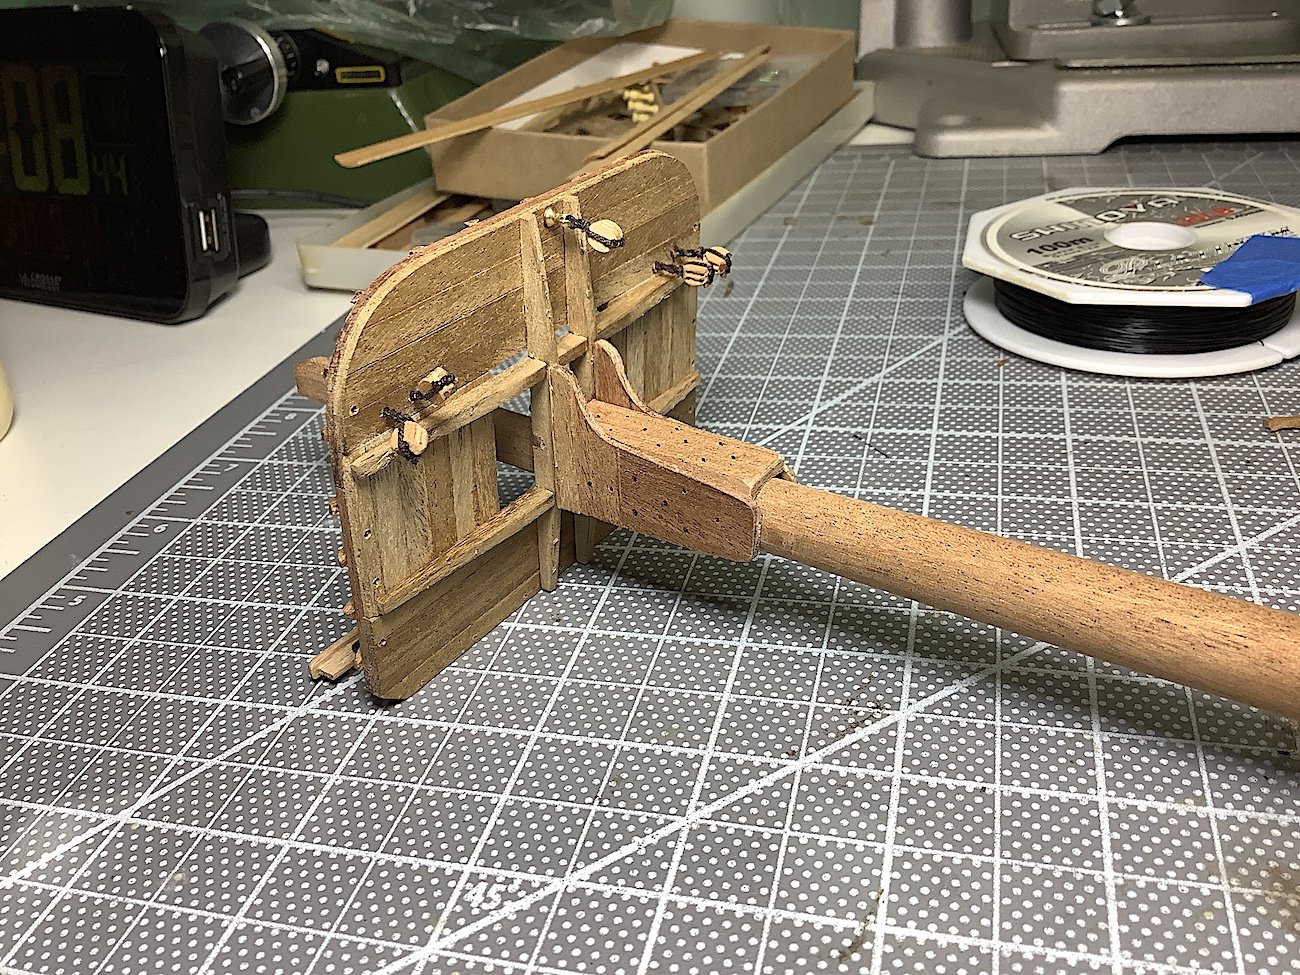
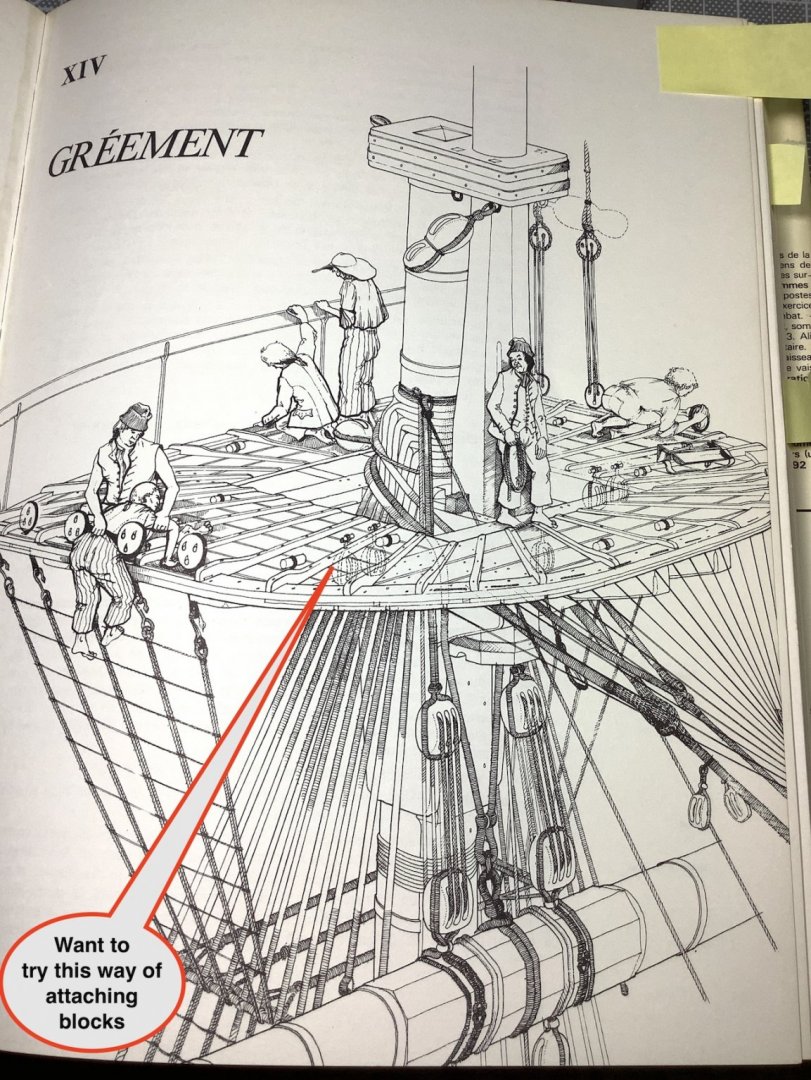
Hi Mates, Denis, Frank, E,J, thanks - glad that you might use this idea. Patrick, as always thanks as well Some updated work in the same area as before. Finished up the mast cheeks or are they bibs?? See lower pics. That said, should those long mast cheeks? that are wrapped in ropes ALSO have some nails pounded through into the mast?? I spent a lot of time looking through my books, and at “Google University” looking through many photos – found nothing helpful. The only hint was the Boudroit Book (see pic)– it offered a slight hint at a yes. I don’t have his book 1 (hull construction)– that one certainly details mast construction as well. I have not seen nails in any of the brilliant Russian museum quality models that I have looked at. Hmmmm? Any suggestions are appreciated. I just don’t have enough knowledge to decide nails or no nails. L PS2: I know that historically this area should be painted black – Regards

- 371 replies
-
- 10
-
-
Funny Yes Chuck's serving machine rocks as well as his ropes and blocks - as you know. re: friends who would never know "anything" right or wrong about our hobby - I know many of these kind folks, in fact I live with one hahaha. The other one (great son) is finally off of my payroll living large in SF CA. Cheers,
-
E.J, Super nice job serving the shrouds! It's time consuming but much worth the effort. Cheers
-
Very nice indeed. Paper art work came out just about perfect. Looks smashing. Regards,
-
Peter, Been following, but Needed to mention -- looking great - stern work also is first-rate indeed. Cheers,
- 366 replies
-
- 5
-
-
- bellerophon
- victory models
- (and 2 more)
-
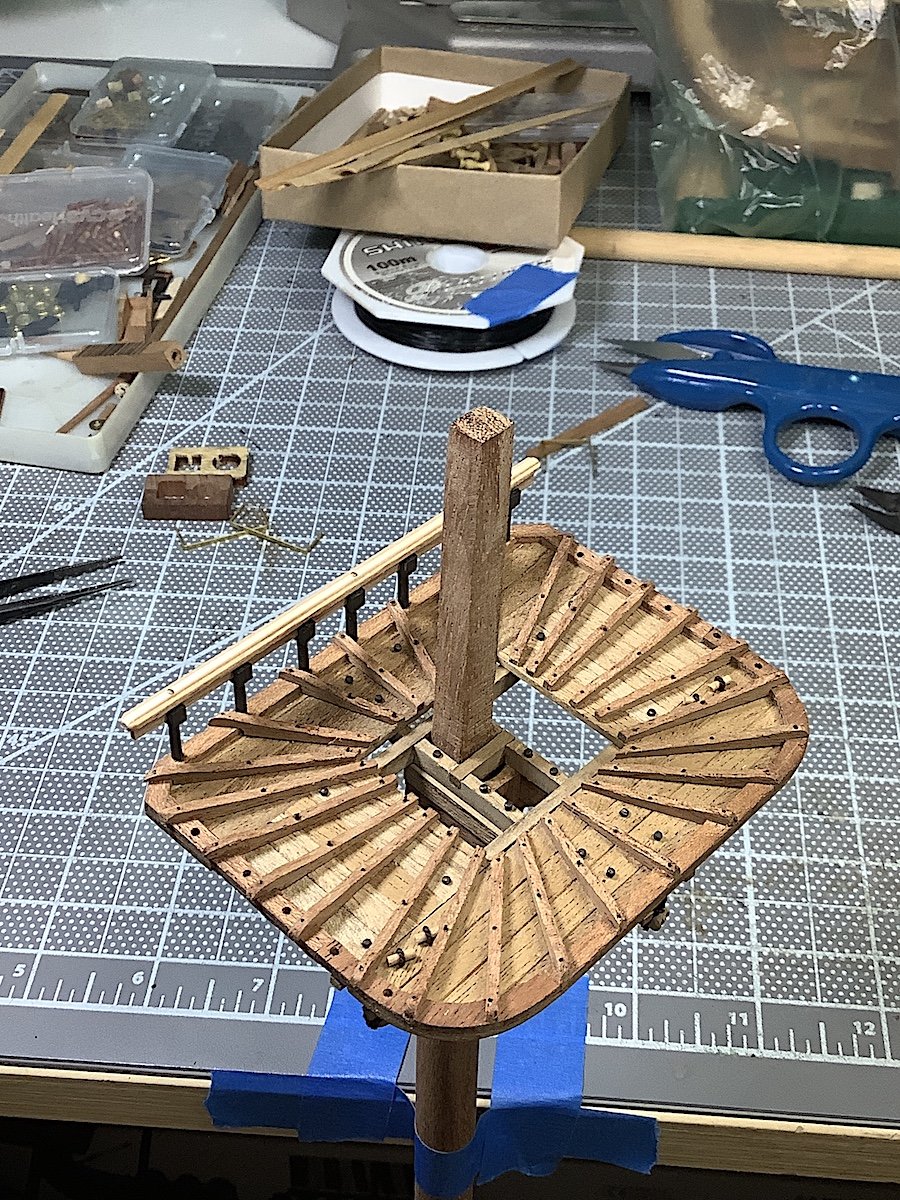
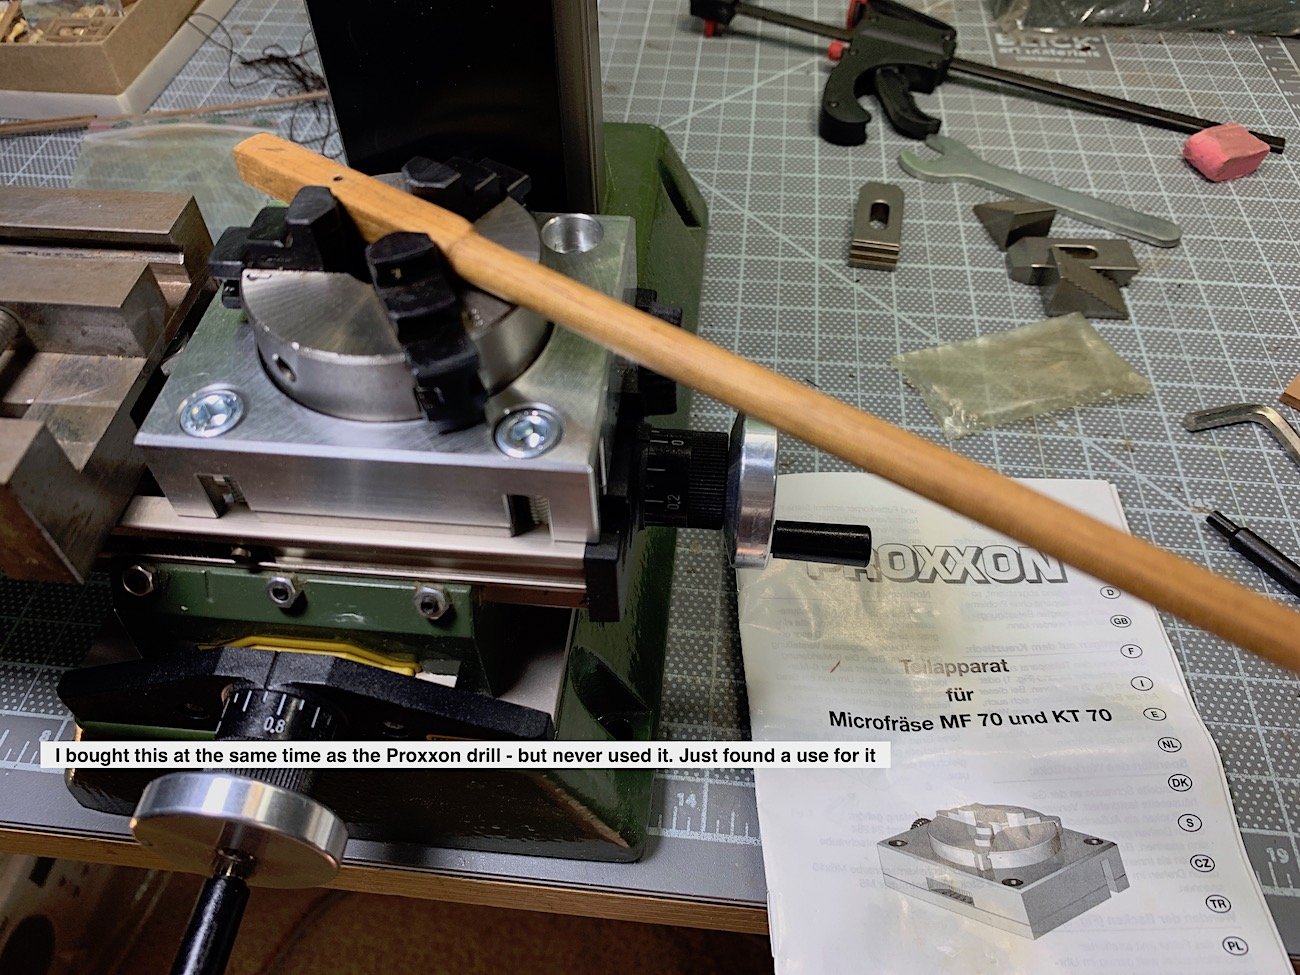
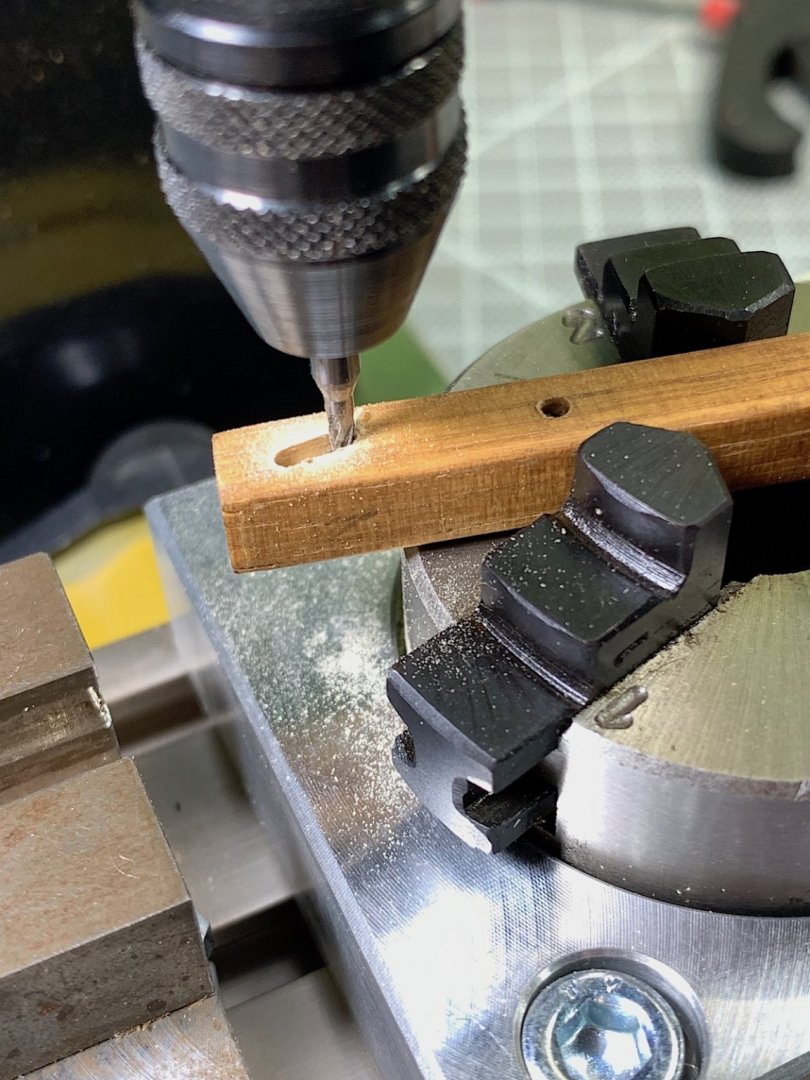
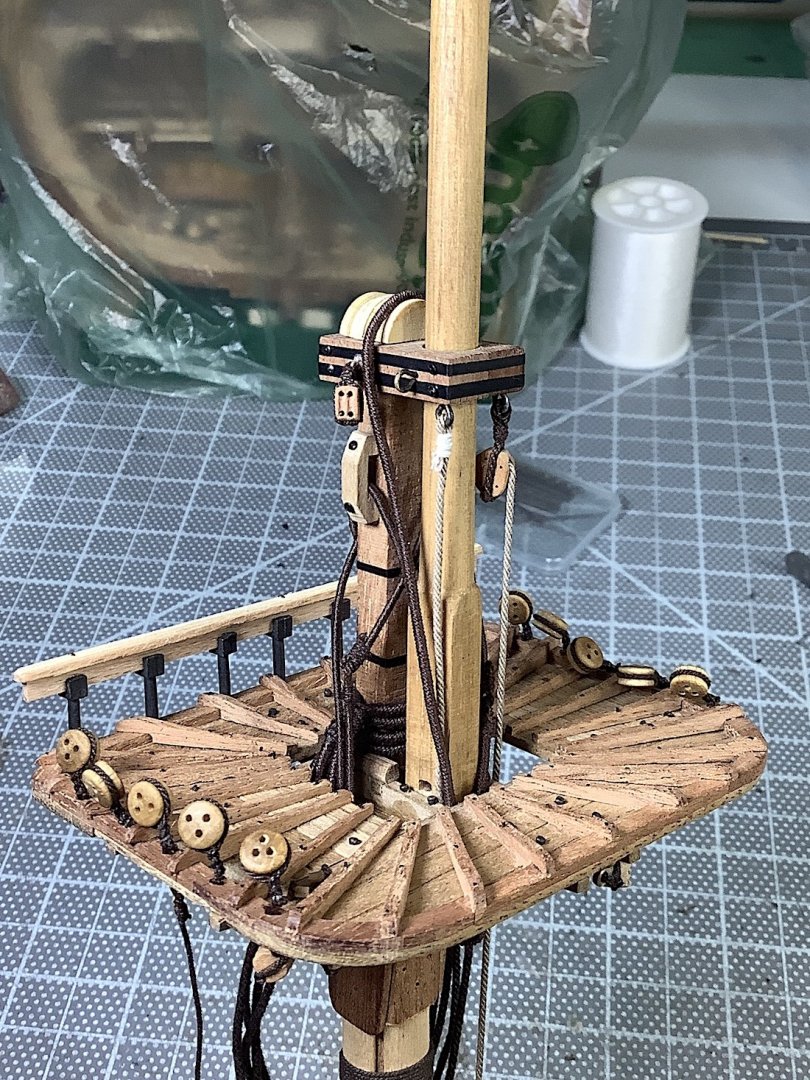
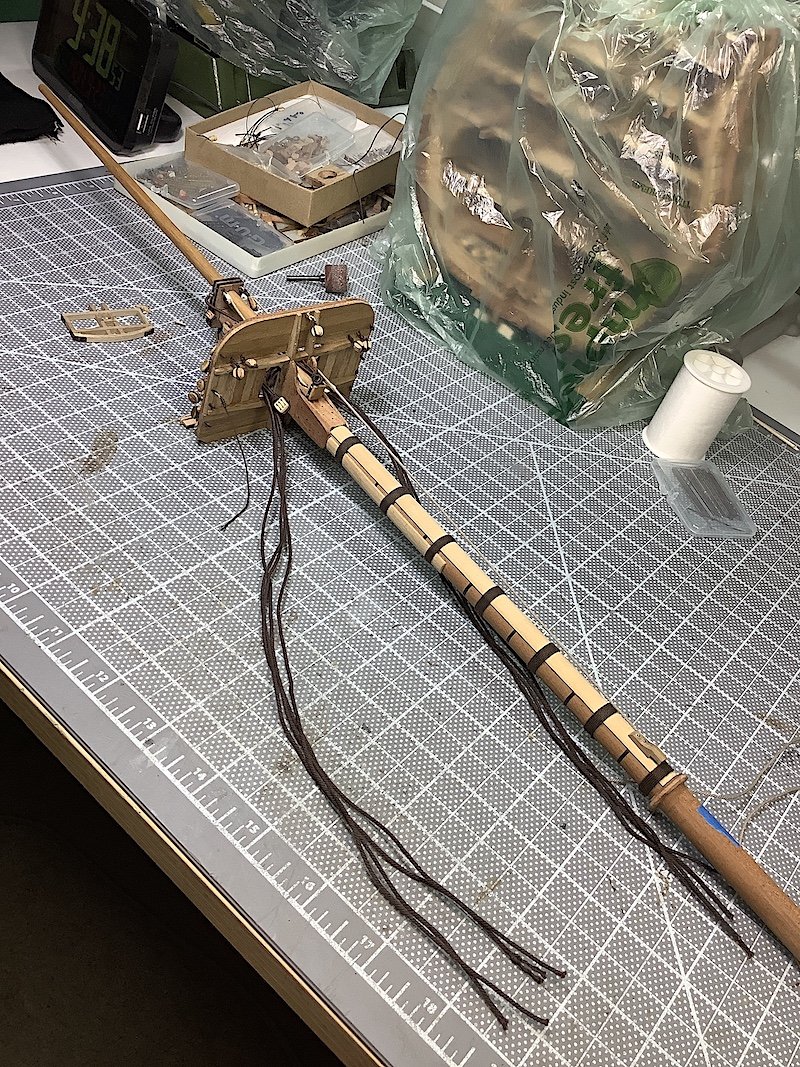
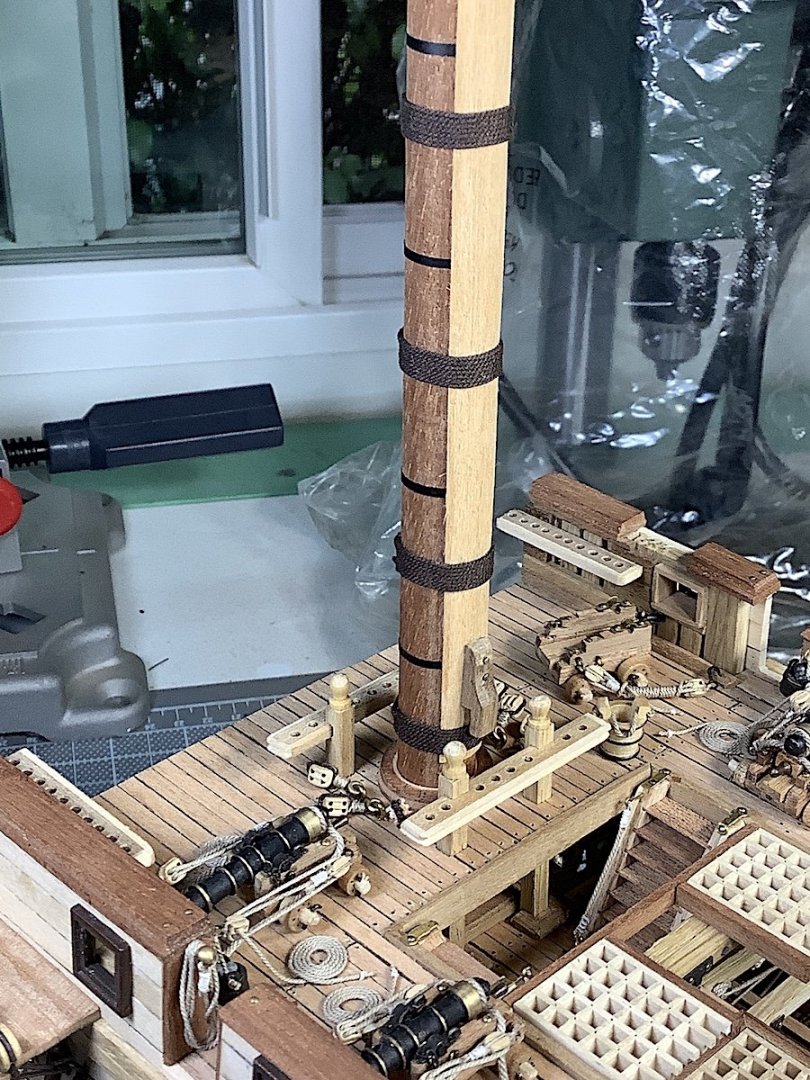
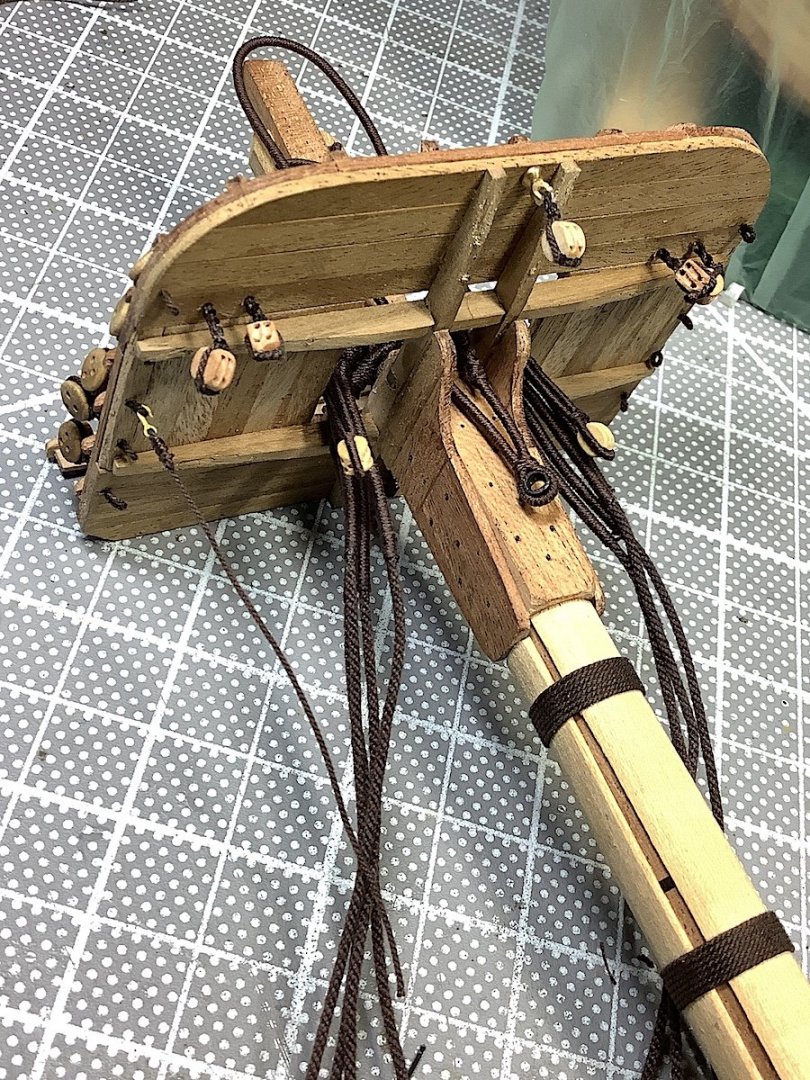
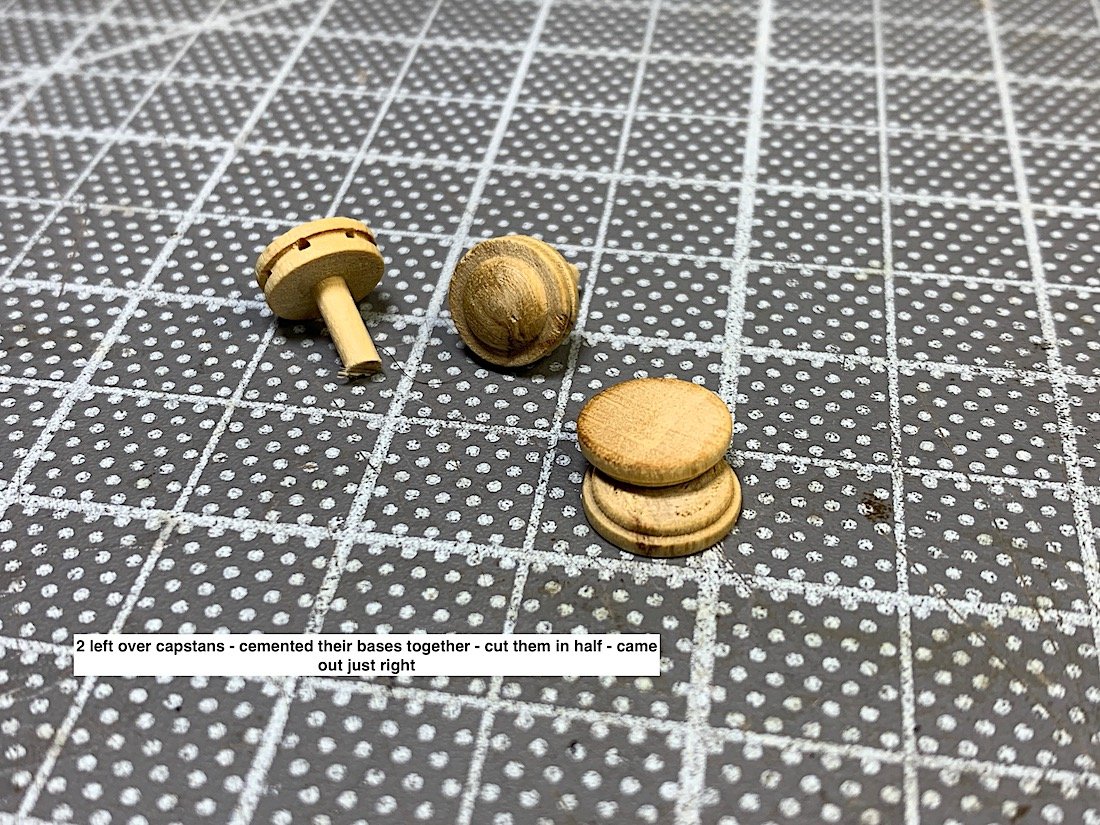
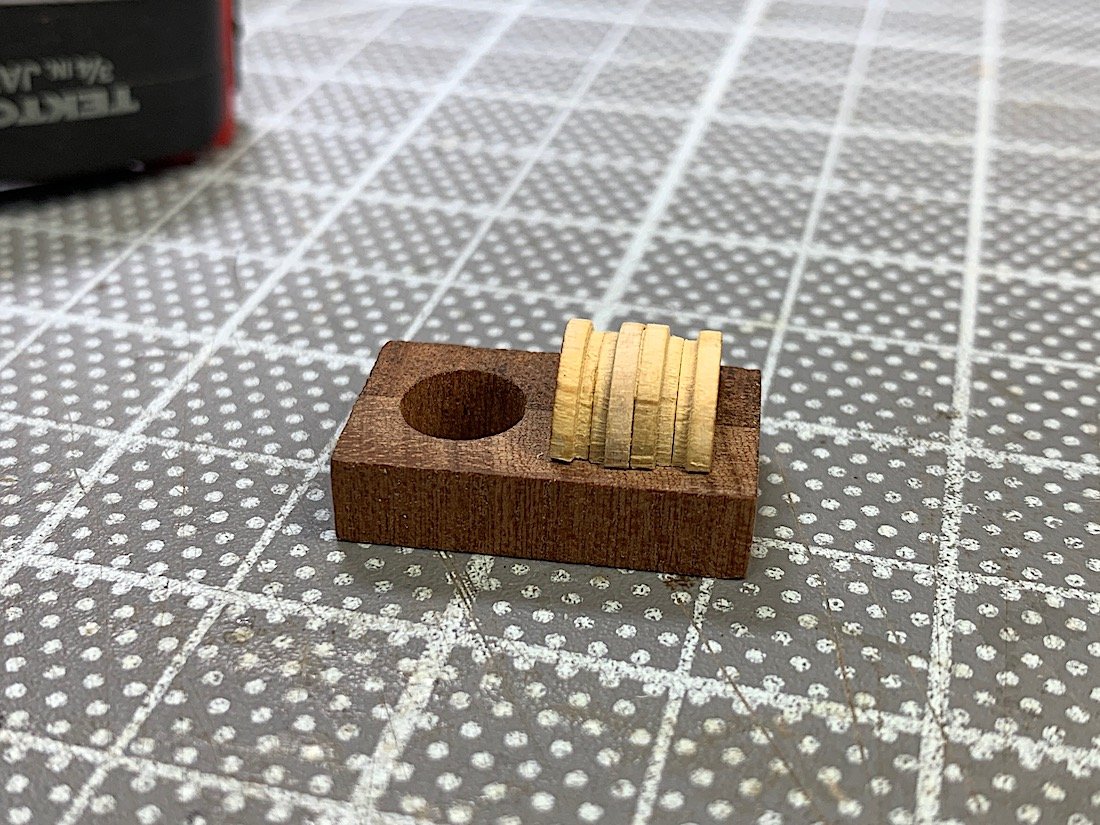
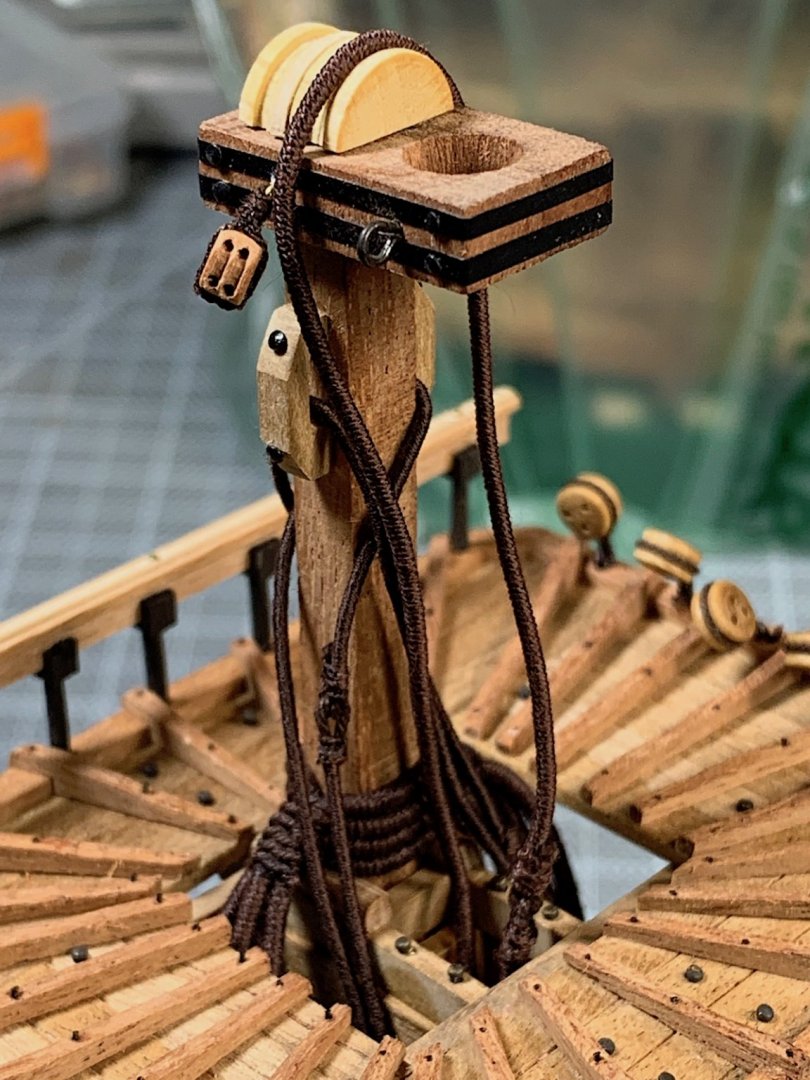
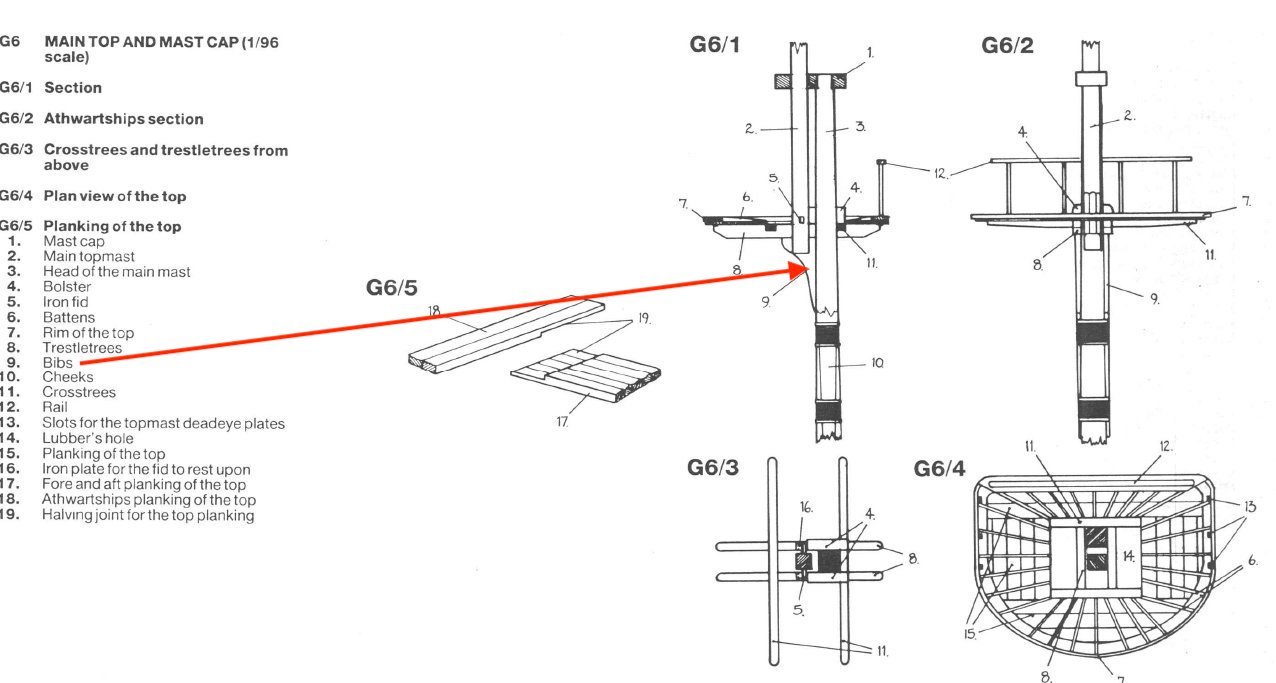
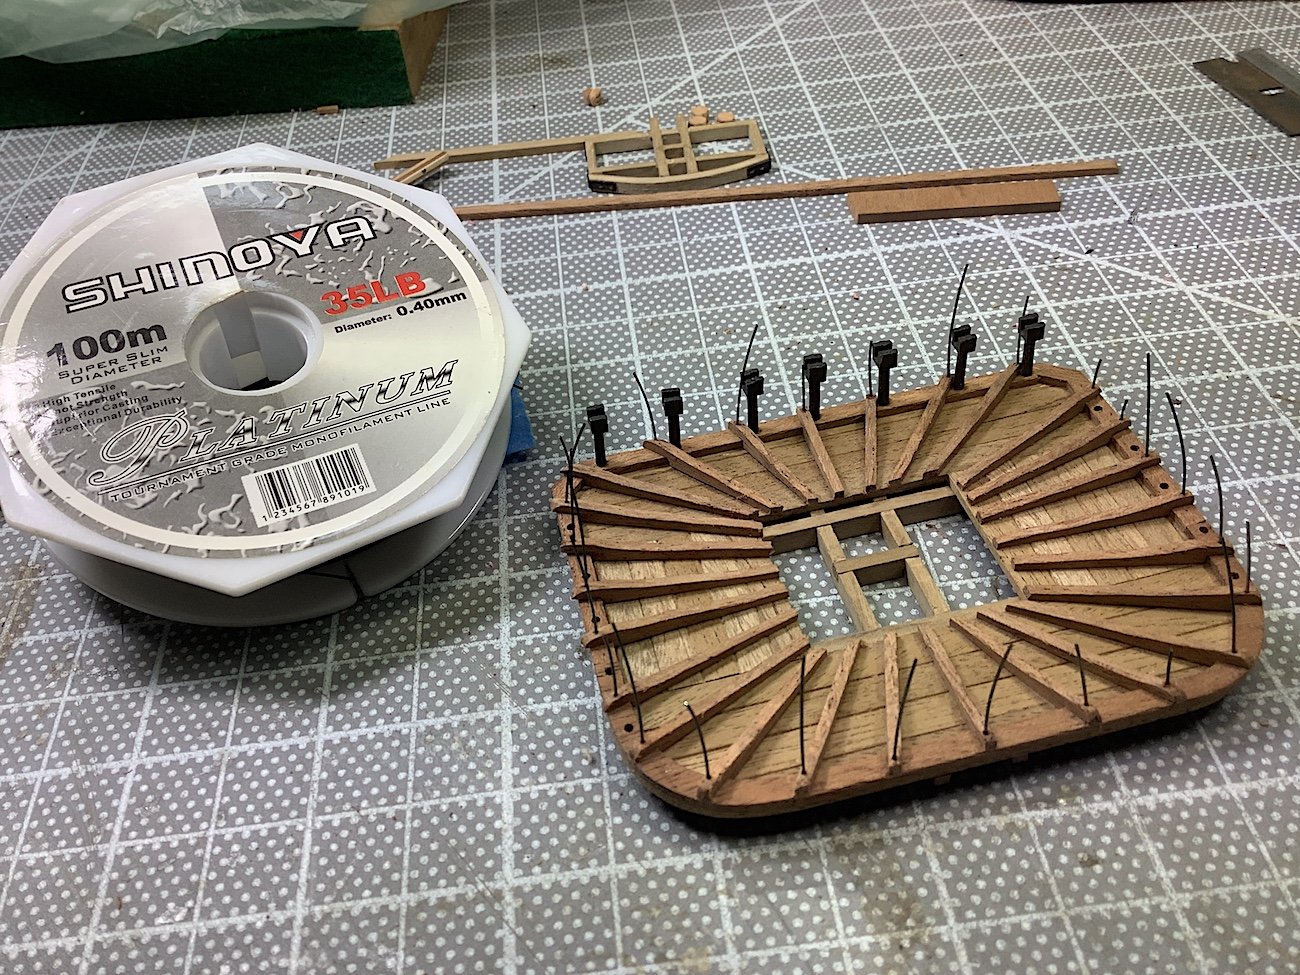
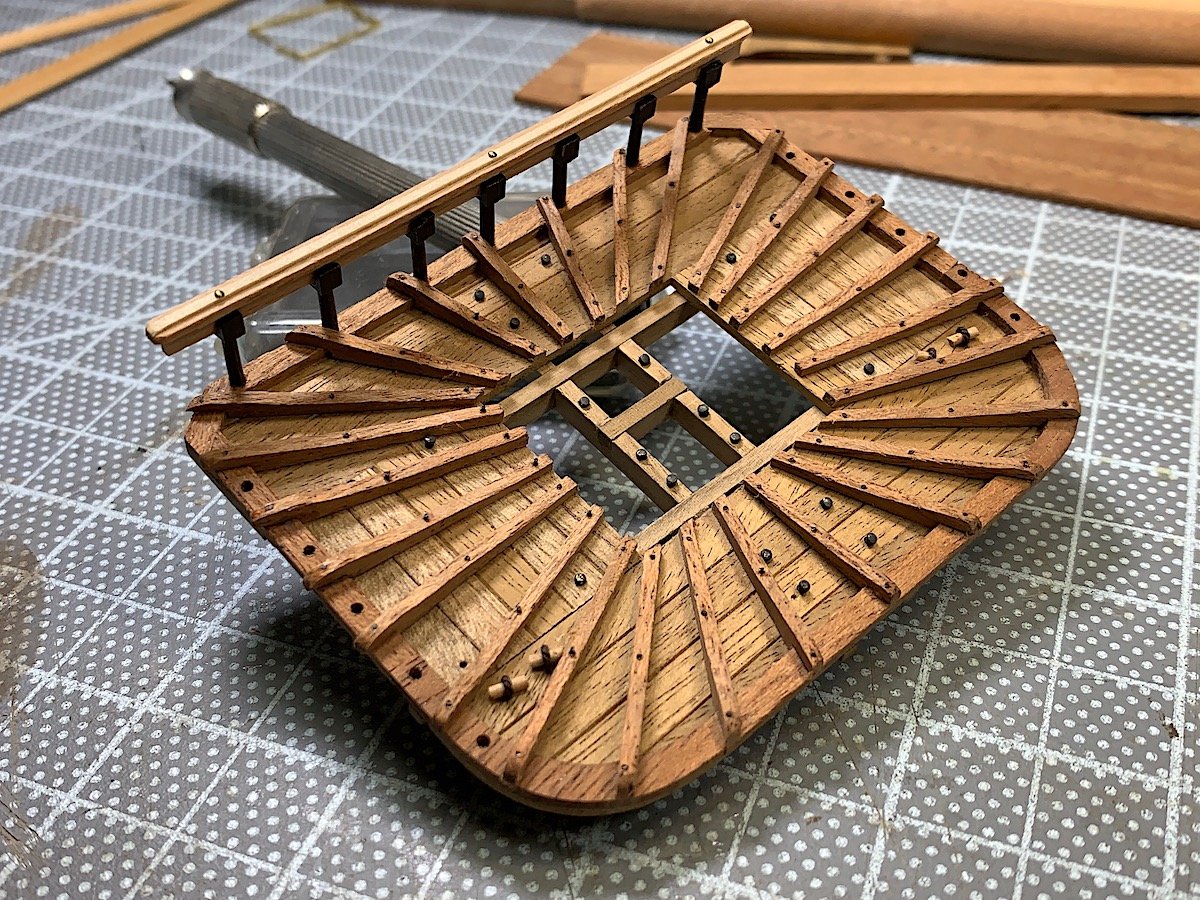
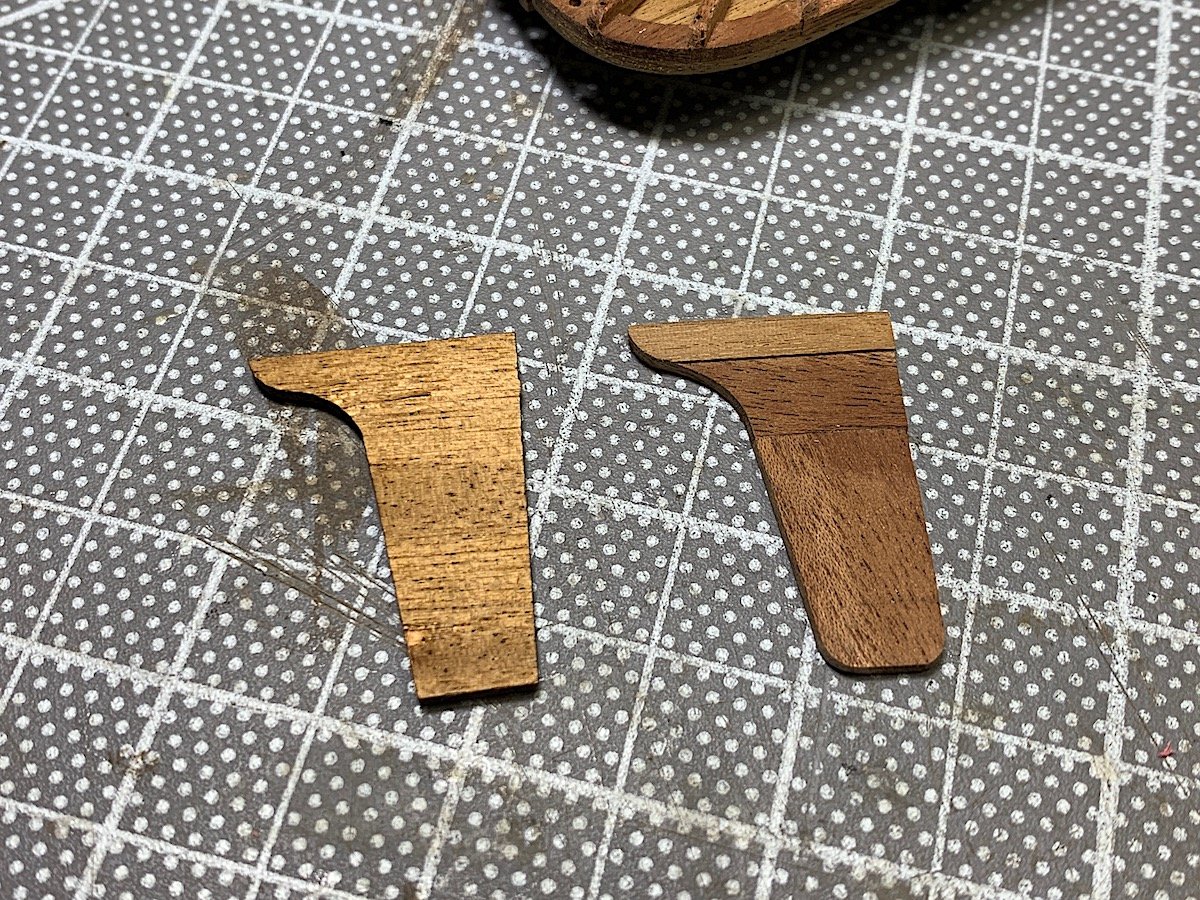
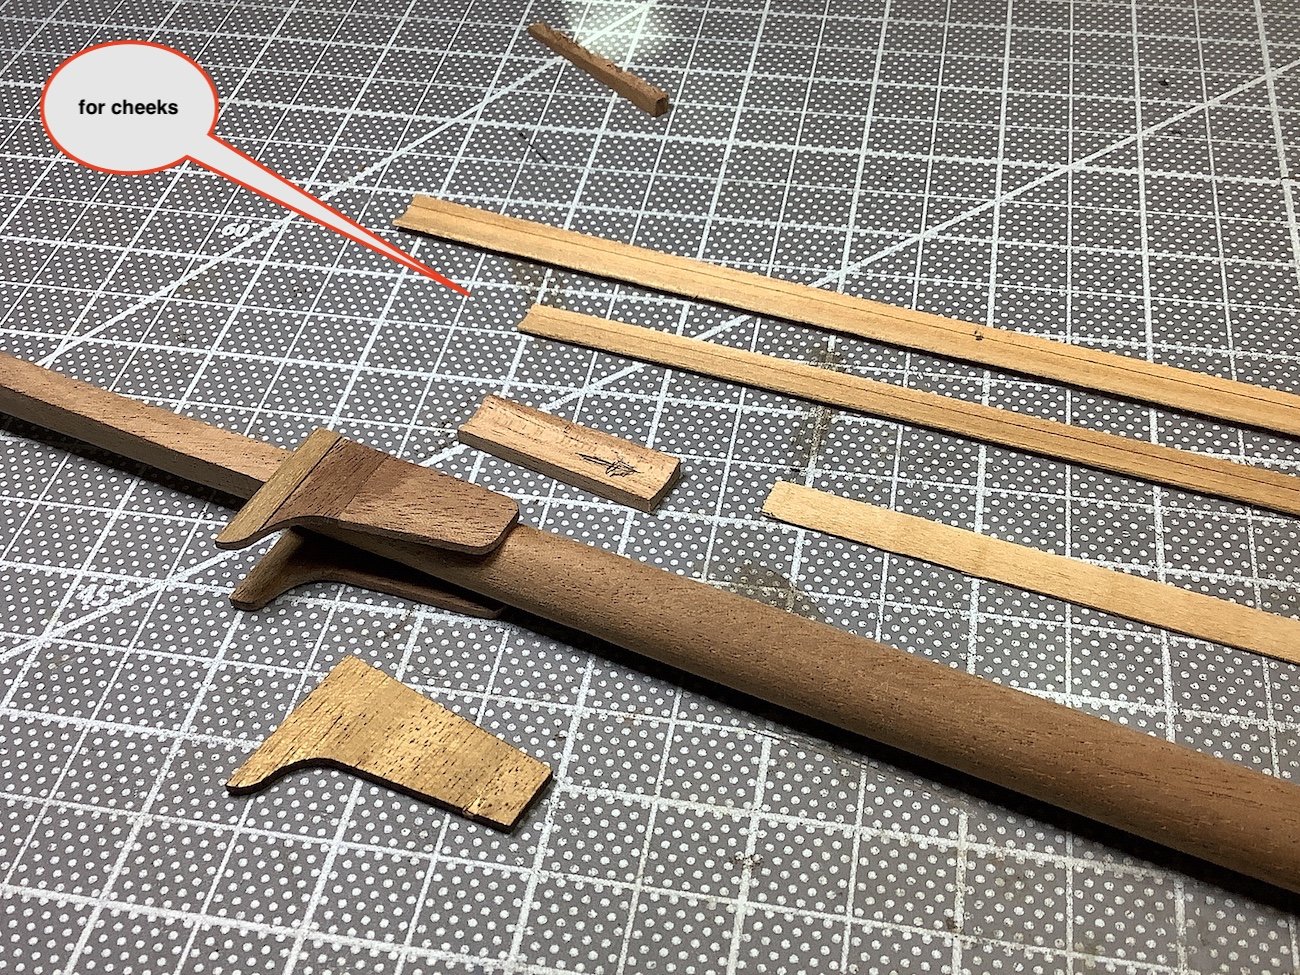
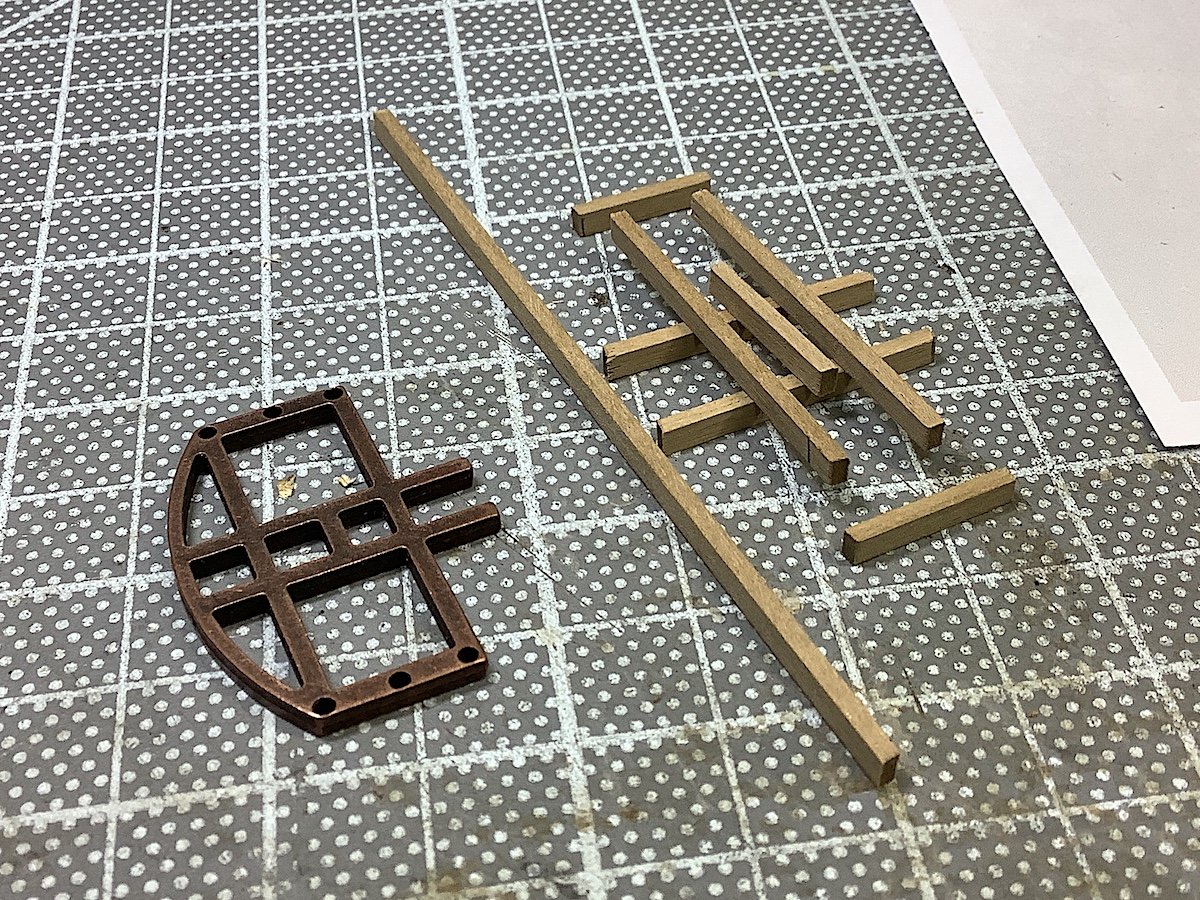
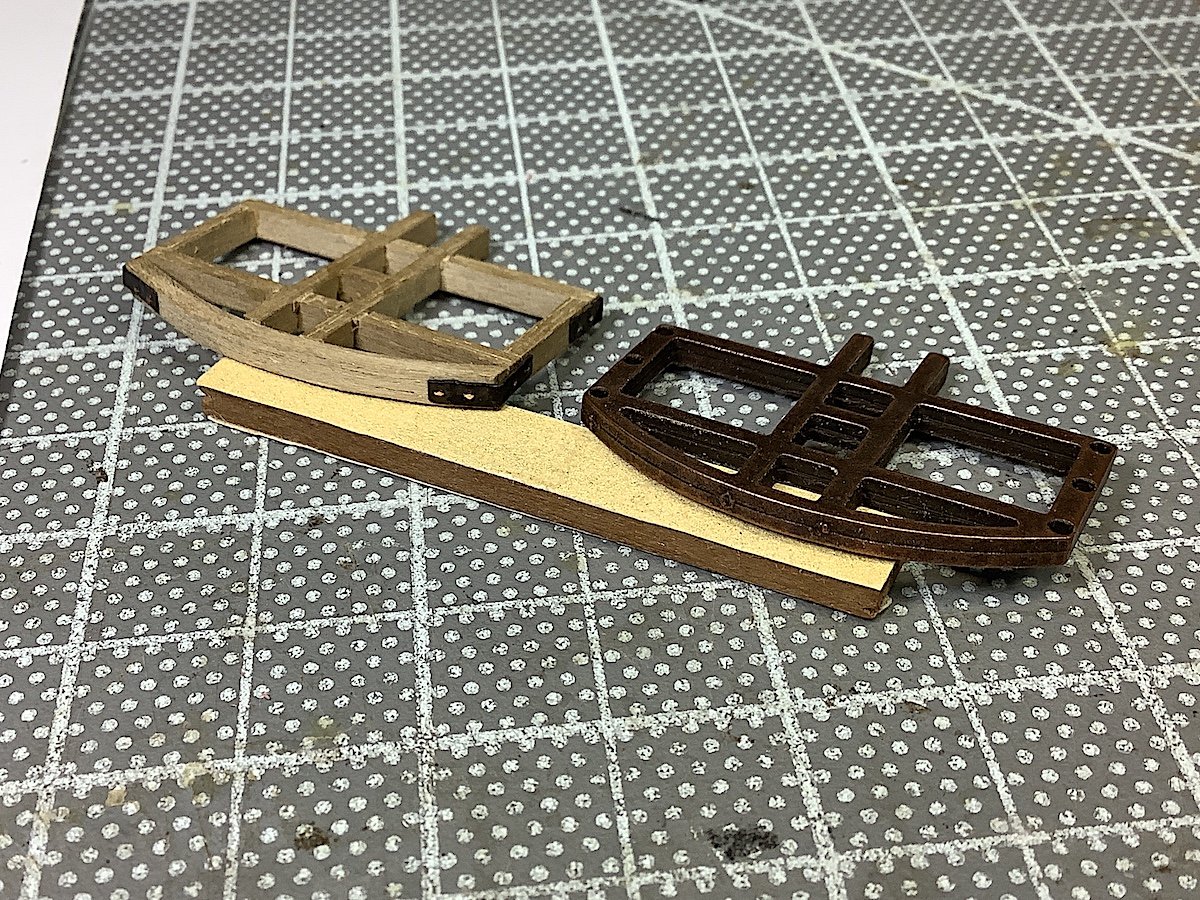
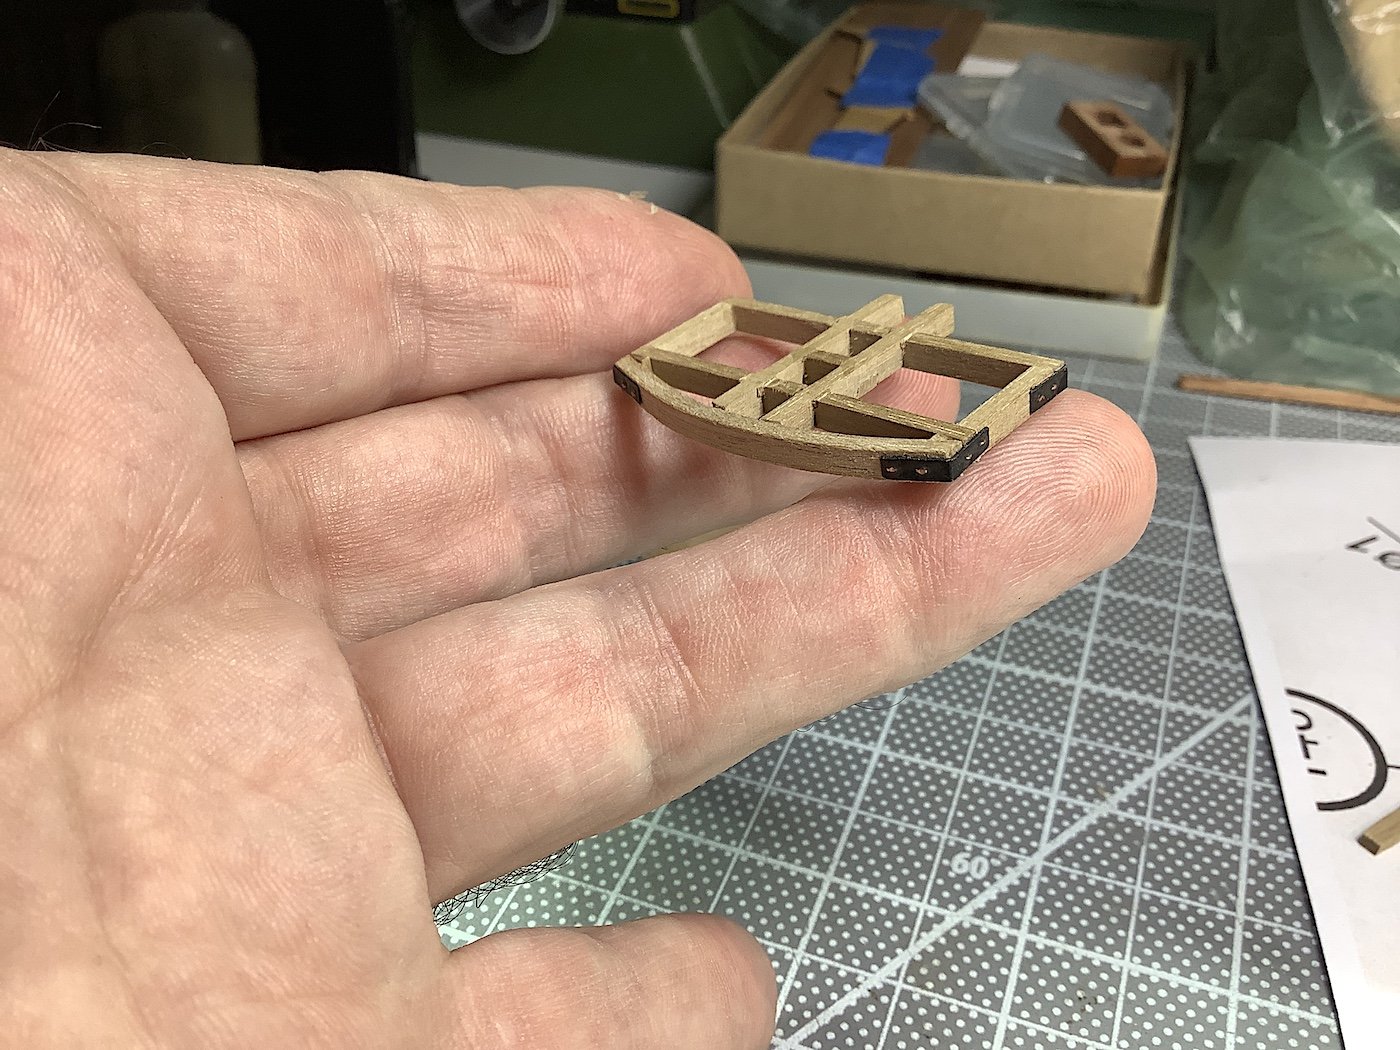
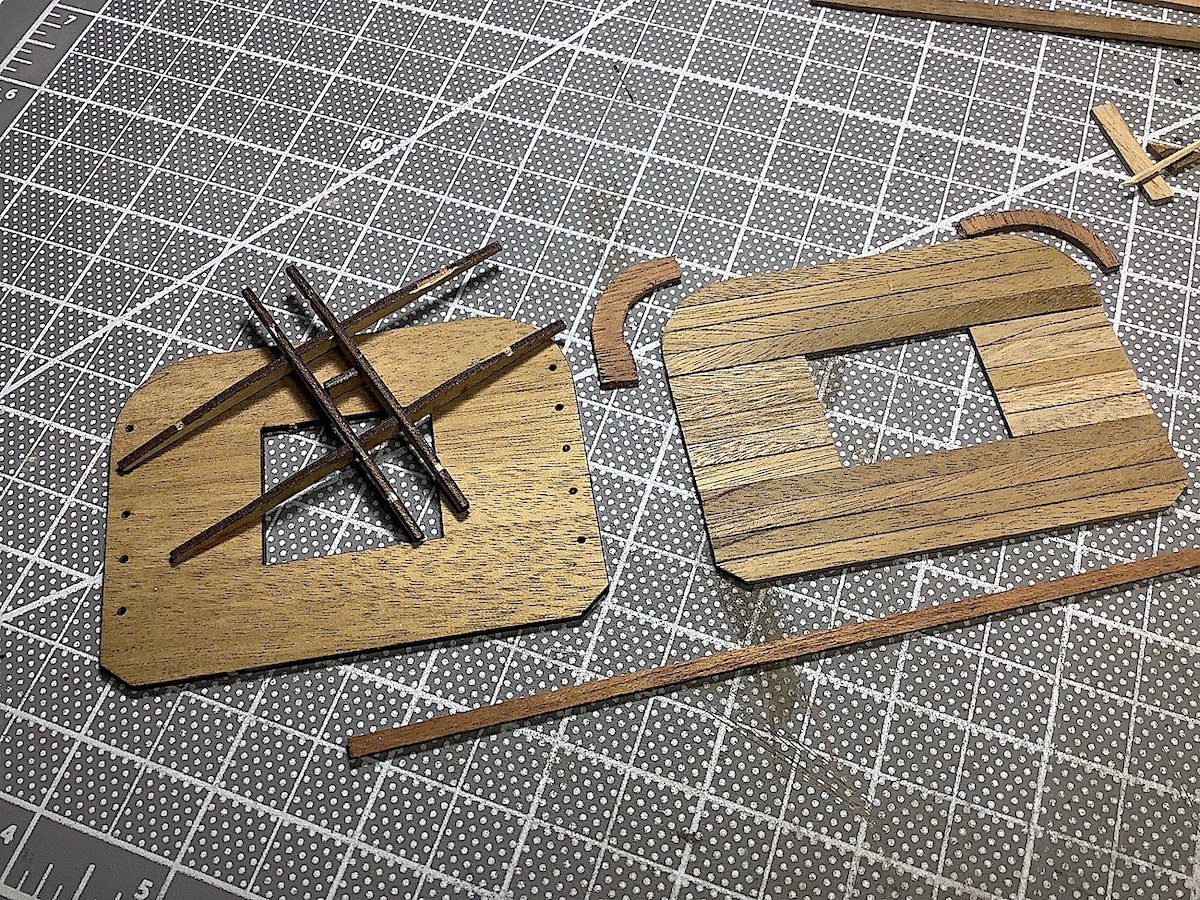
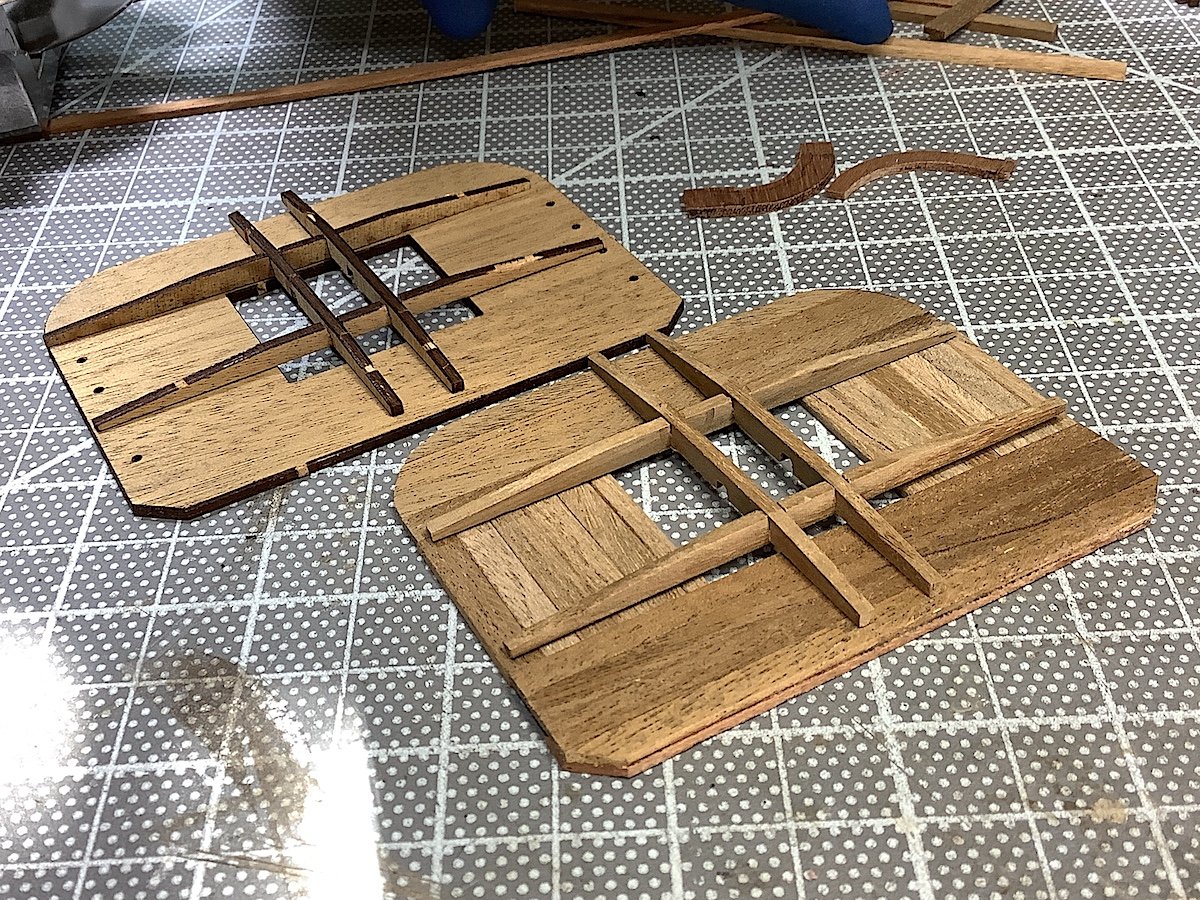
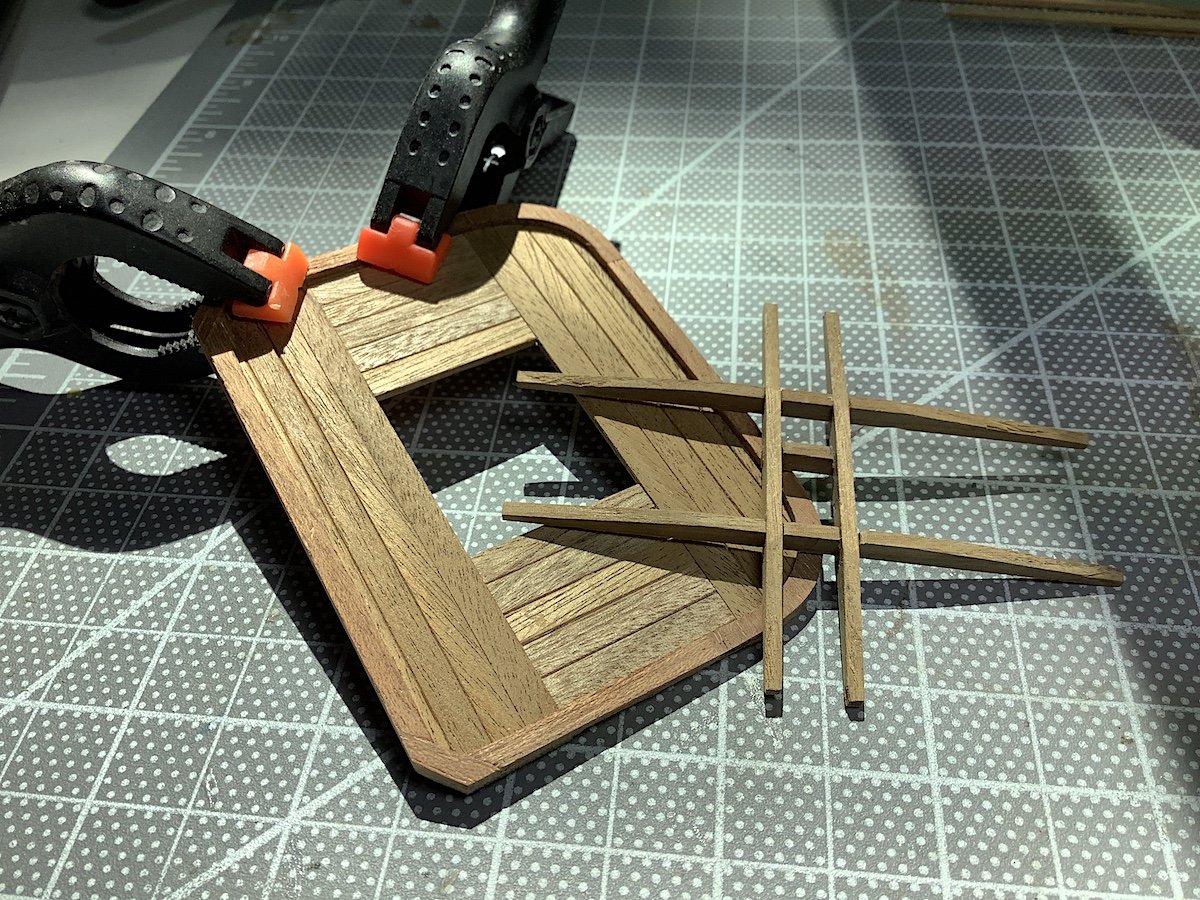
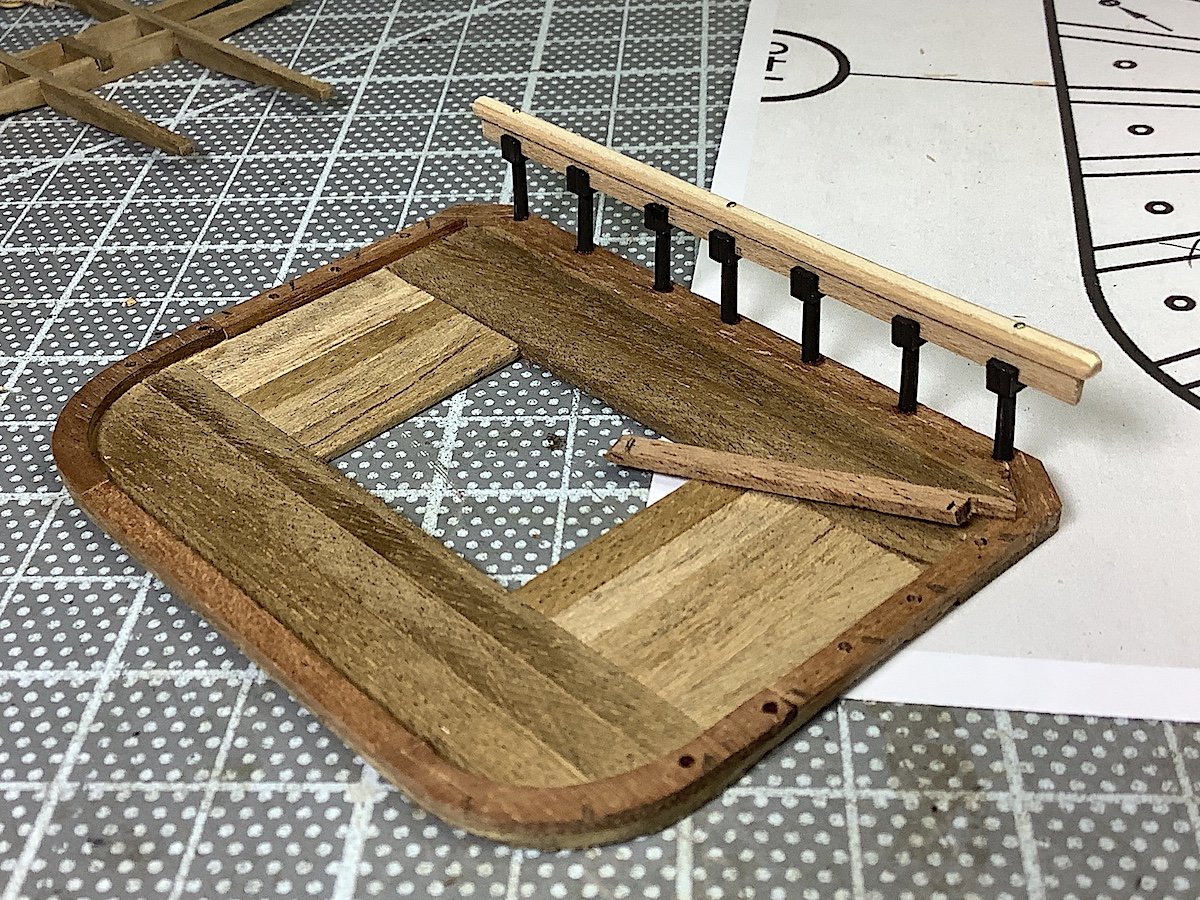
Minor update; I discovered (previous build) that using black nylon fishing line is an acceptable way of adding “in scale” nails to some needed areas. Finished up the platform still need to add the ten deadeyes. Now focusing on the lower main mast. Used the kit provided dowel, but used the kit bibbs only as a template. Again went to the Boudroit’s book for a guide in adding some extra details. Bibbs should be made up of several pieces of lumber. My results are much simpler than what is in his book. (platform not attached - just for a look) For the cheeks I used pre-scored deck plank sheets. Easier to bend when wet. Now need to see how to properly rope these three cheeks around the mast. Some references have two sets of mast bracing ropes, then cheeks are added above pre-installed ropes and then an outer layer of ropes is added. Hmmm? Need to work that out. Then on to the mast cap, and other needed blocks. Regards,

- 371 replies
-
- 10
-
-
Marek, SUPERB work. Your detailing skills with painting are also brilliant - You have built a beautiful example of this new DeAgostini kit. Cheers indeed.
- 146 replies
-
- 5
-
-
- deagostini
- vasa
- (and 1 more)
-
OC, Funny - above they are on a Rum break (but true as you said) Now THESE guys are working
-
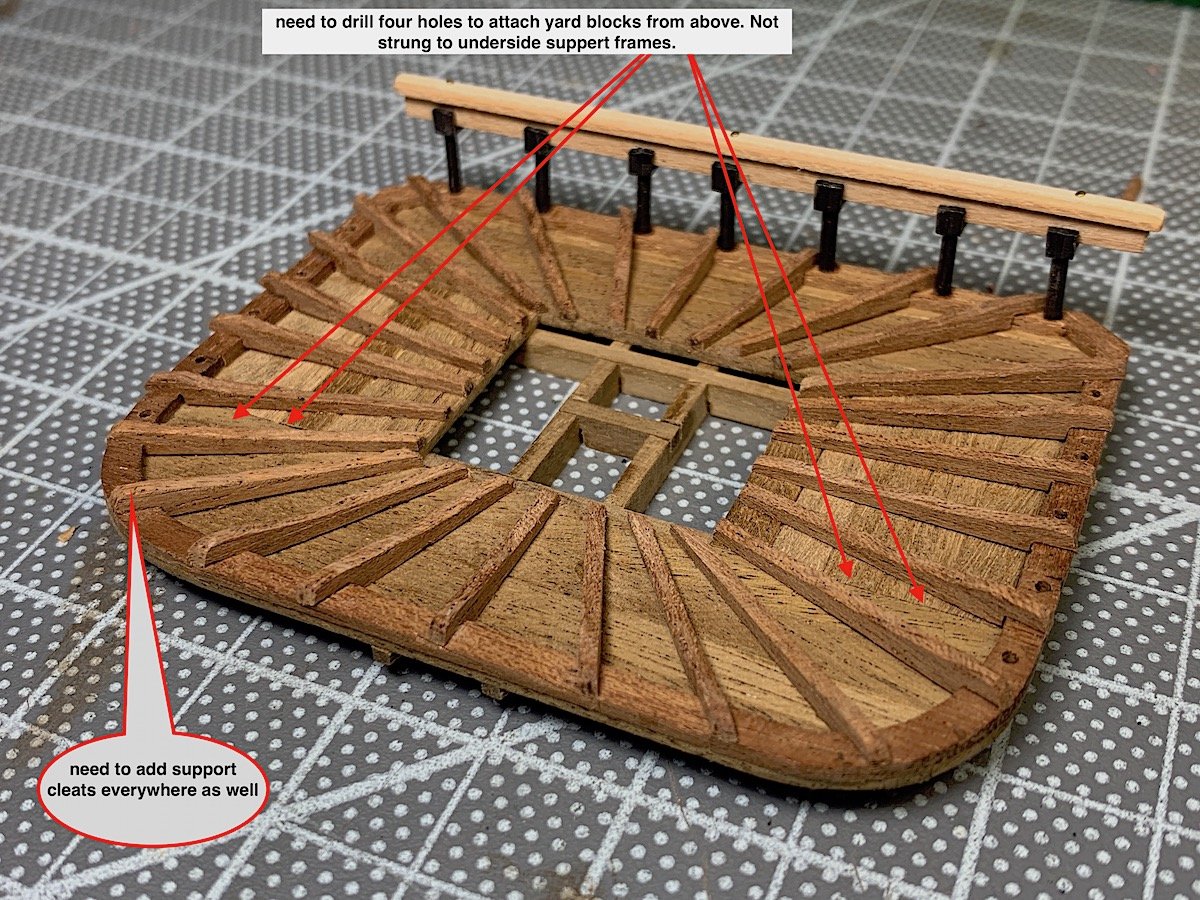
Hi Mates, So appreciate the nice comments! – thanks for your continued interest. Work in progress; Topmast crosstree & main lower platform; kit provided bits were useful as templates. I know that the lower platform should be painted black (as well as ship hull trim red/white etc….) but I prefer the natural look of woods - crosstree done, platform getting there. The mast and all of those attached side support bits will be a first time effort for me. PS: Using Boudroit book three 74 Gun Ship as a guide - yes French ship but similar timeline. Regards,

-
Steven, Super interesting build along with brilliant detailing - a real history lesson here - thanks as well
-
Johann, Brilliantly scaled detailing !!!!! Your work is superlative within this hobby - as always thanks for sharing this log.