md1400cs
-
Posts
2,866 -
Joined
-
Last visited
Content Type
Profiles
Forums
Gallery
Events
Everything posted by md1400cs
-
 Patrick, Just catching up - super nice work with the sails and repairing that classic Singer 🏆 lol Regards,
- 756 replies
-
- 3
-

-
- galleon
- golden hind
- (and 2 more)
-
Frank, Just catching up - superb updates! Your attention to small details is excellent as well. Regards,
- 510 replies
-
- 2
-
-
- reale de france
- corel
- (and 1 more)
-
E.J. Just catching up - really great work, banister railing, curved steps and your figurehead - super nice progress indeed. Cheers,
-
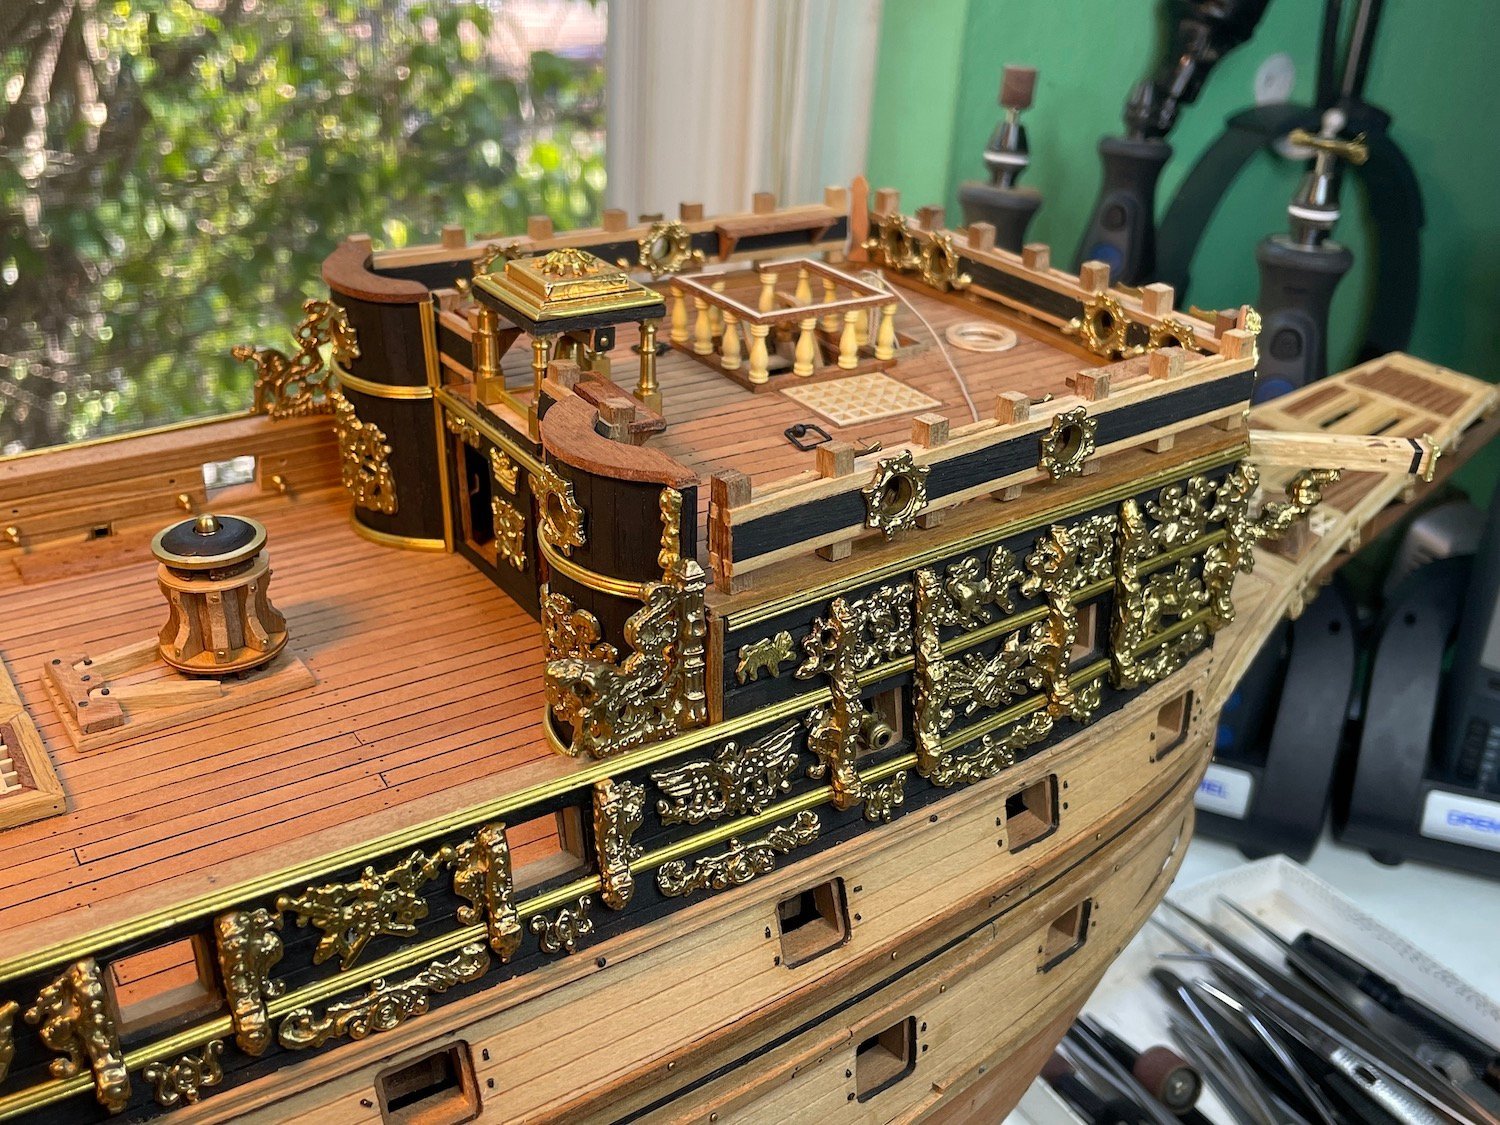
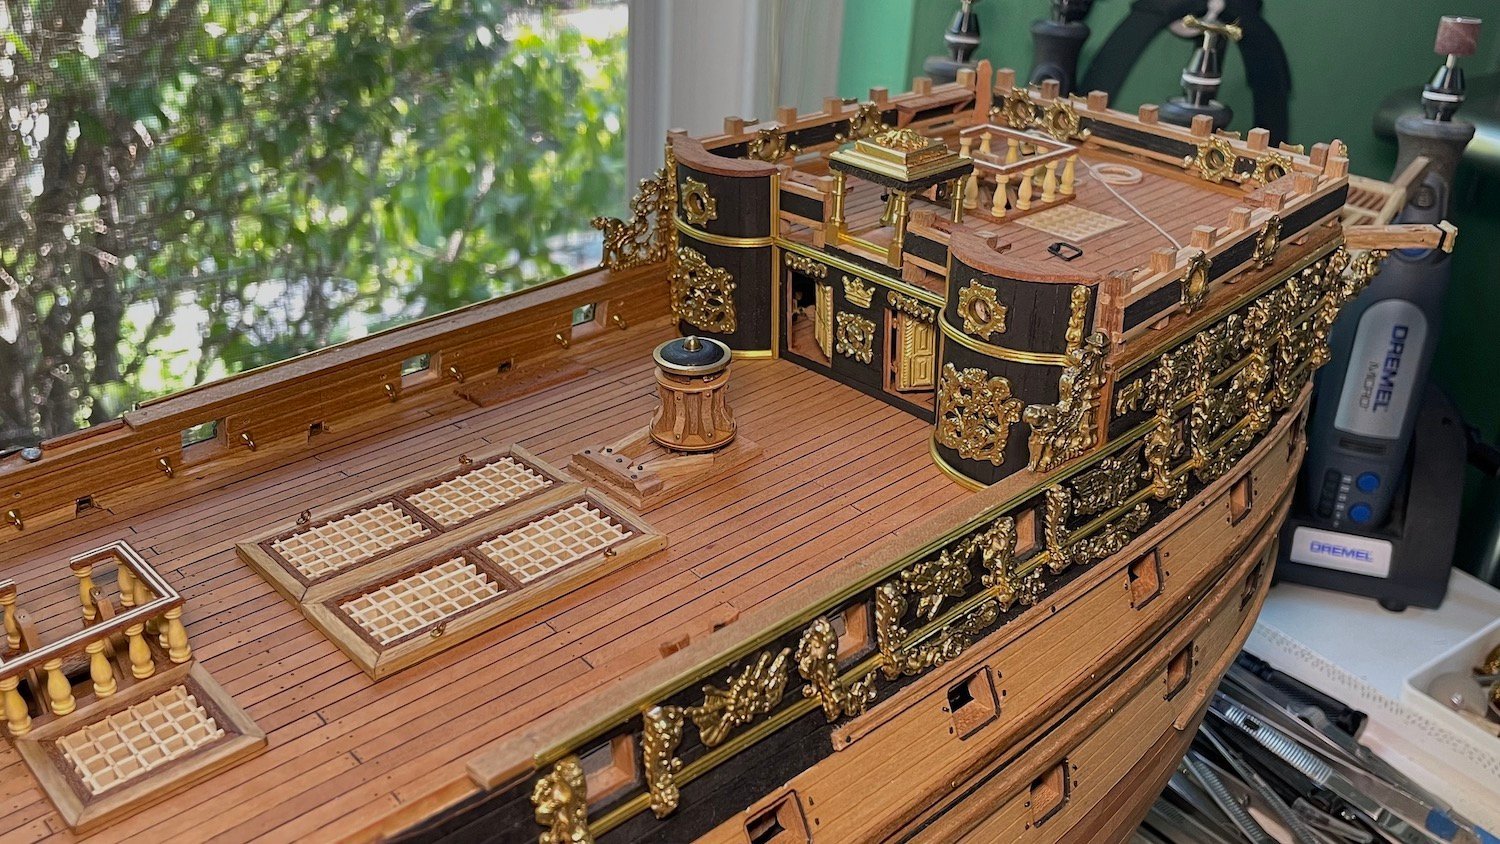
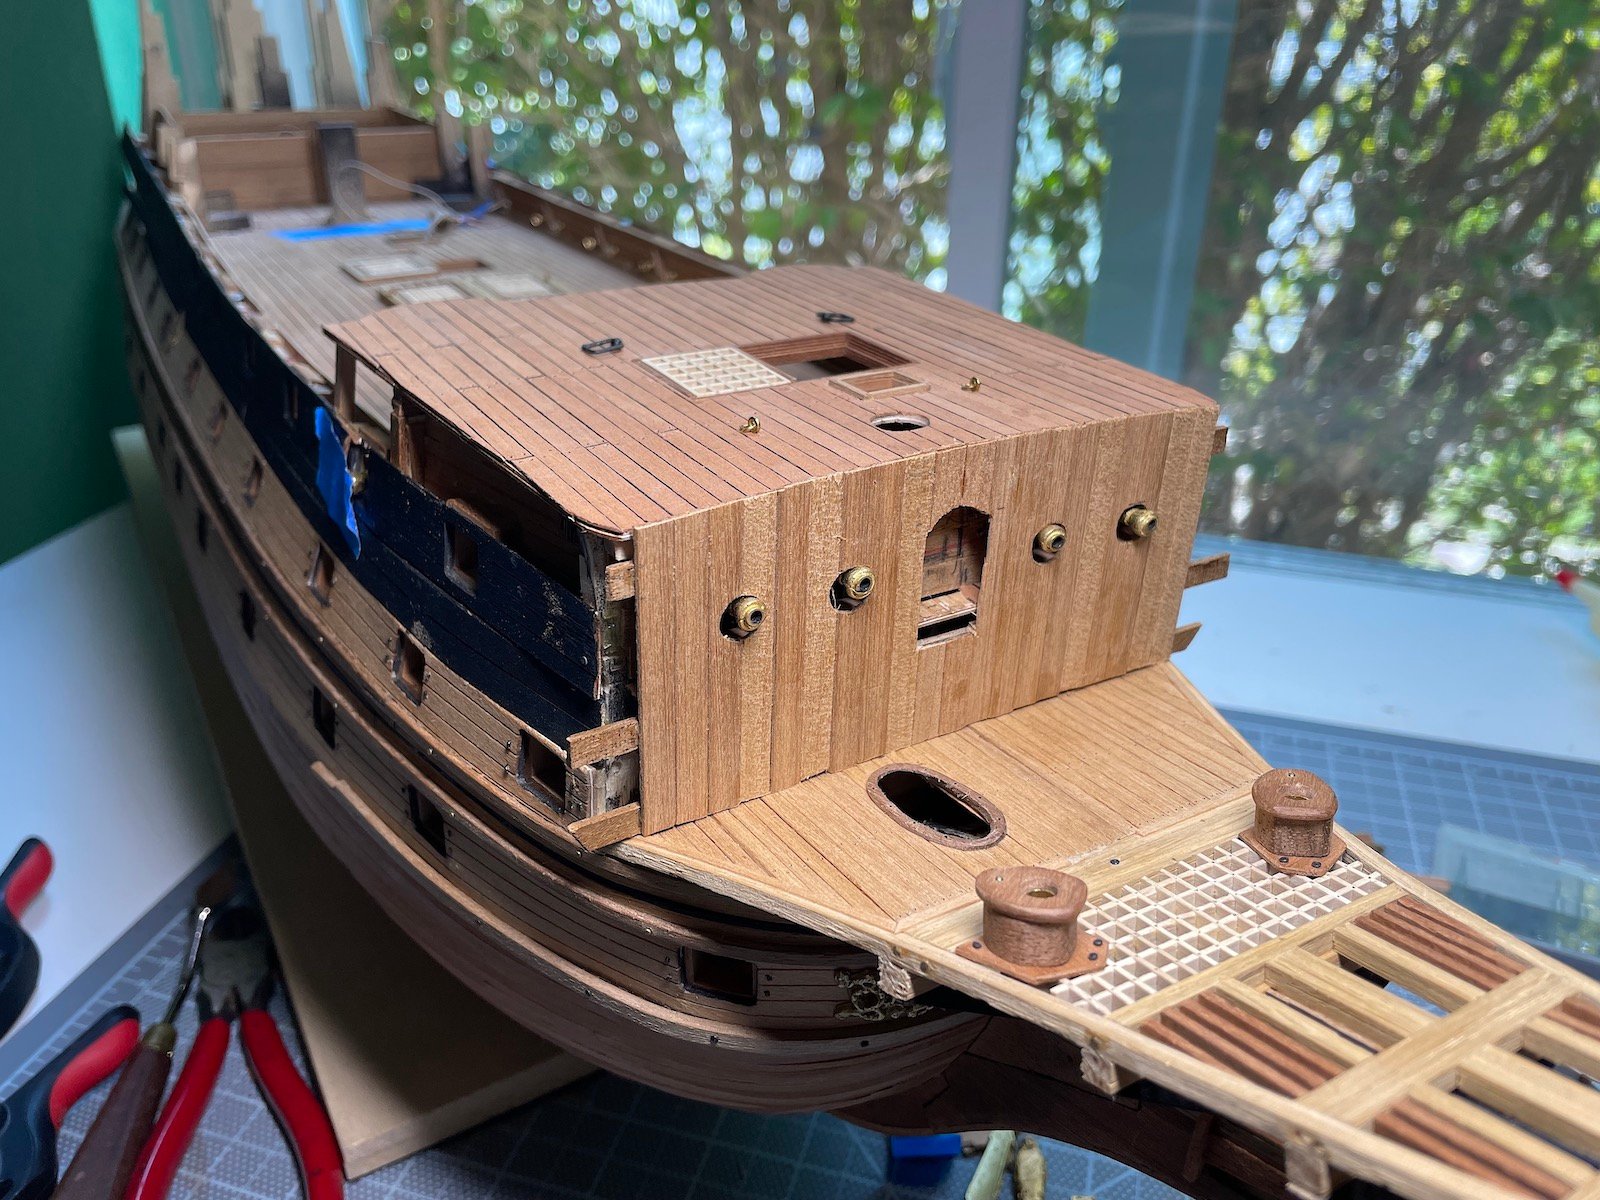
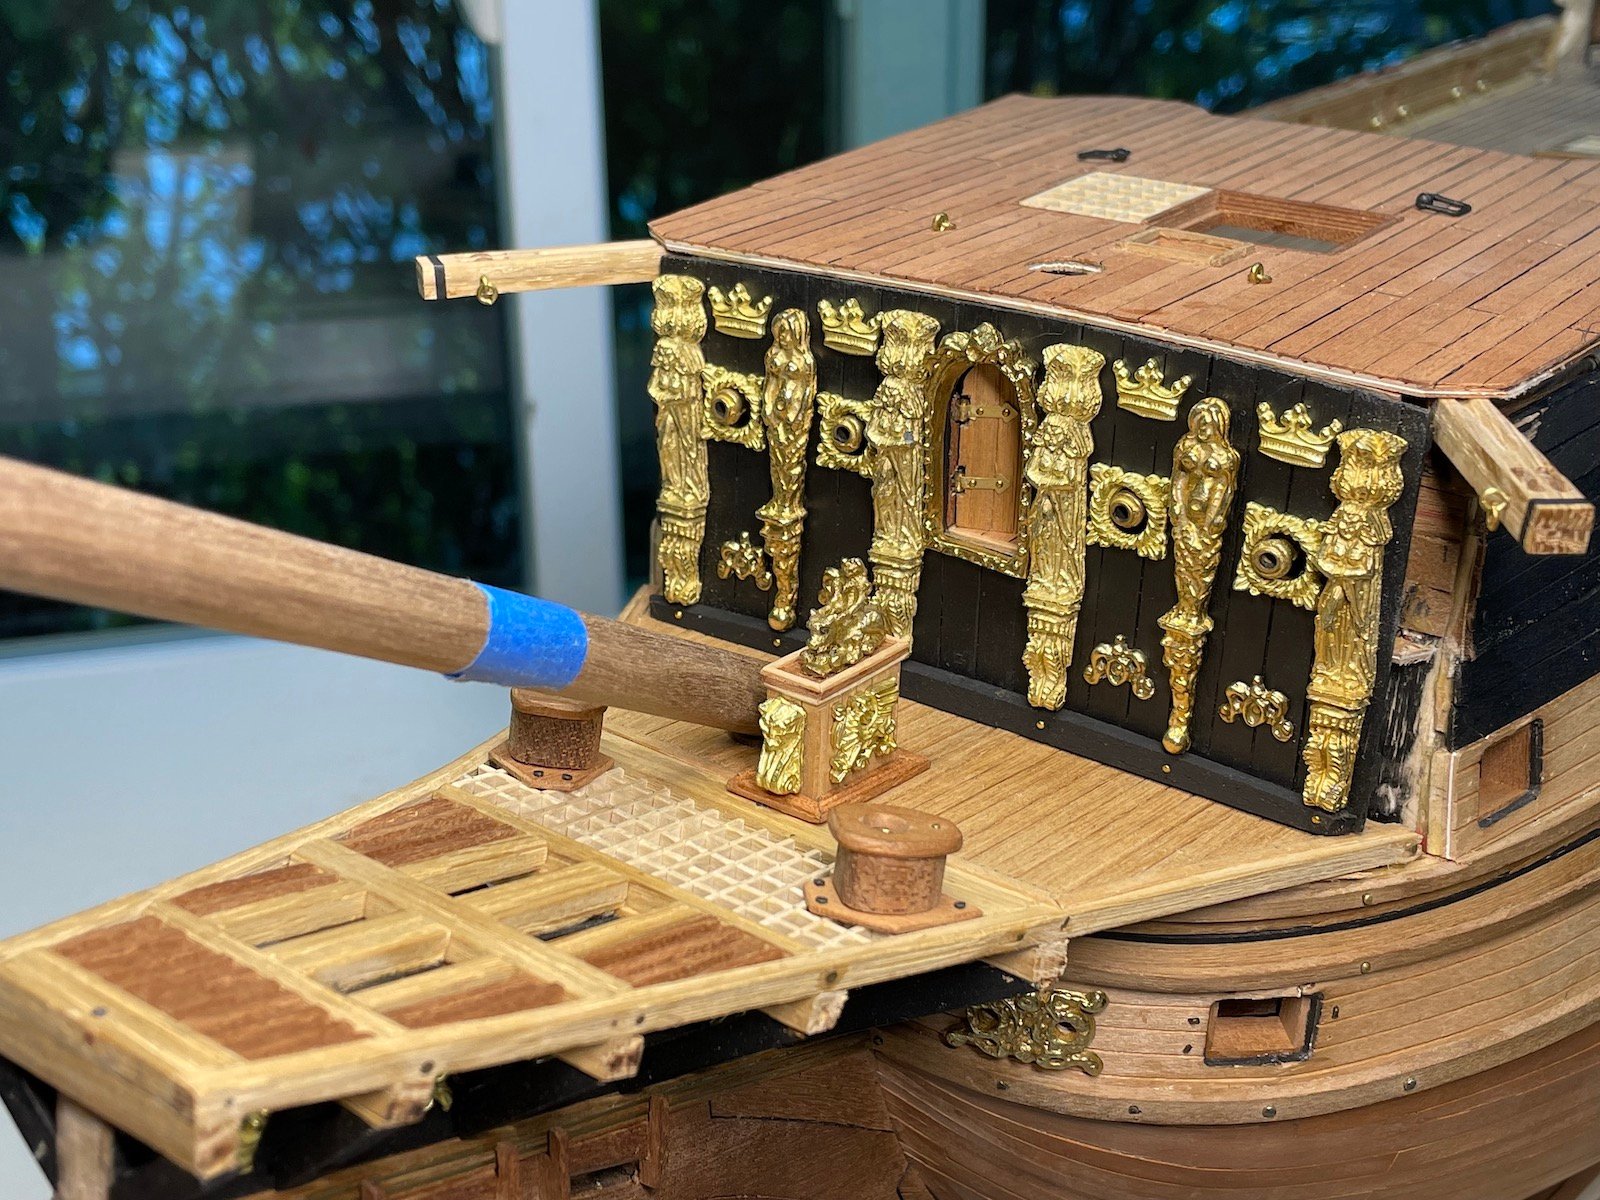
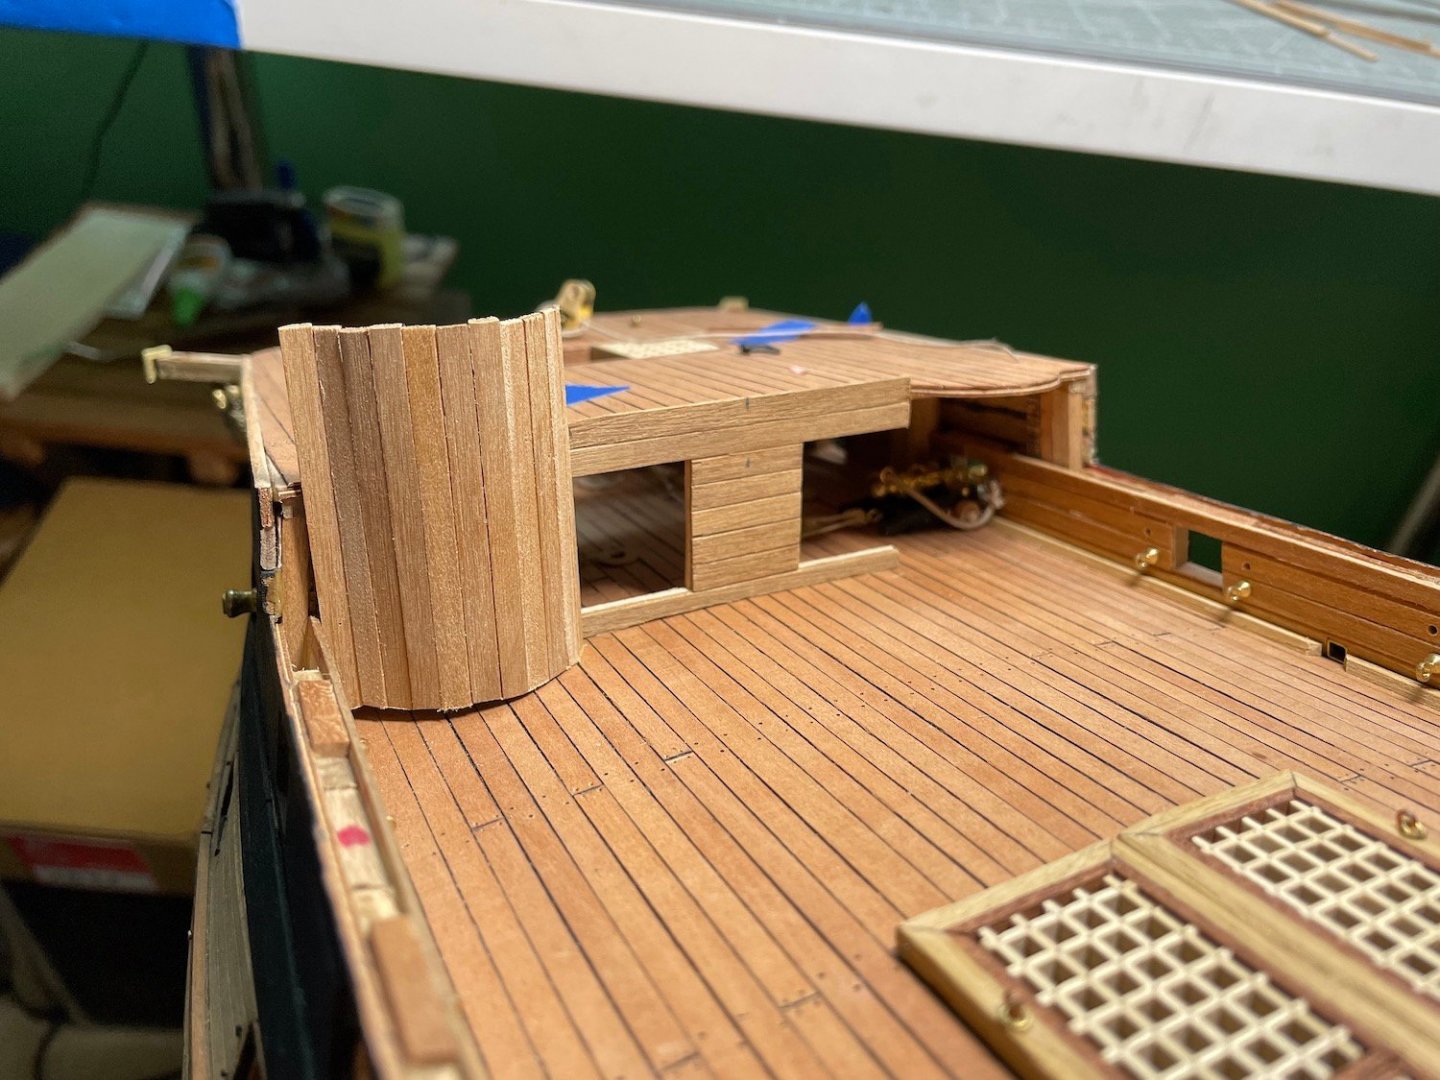
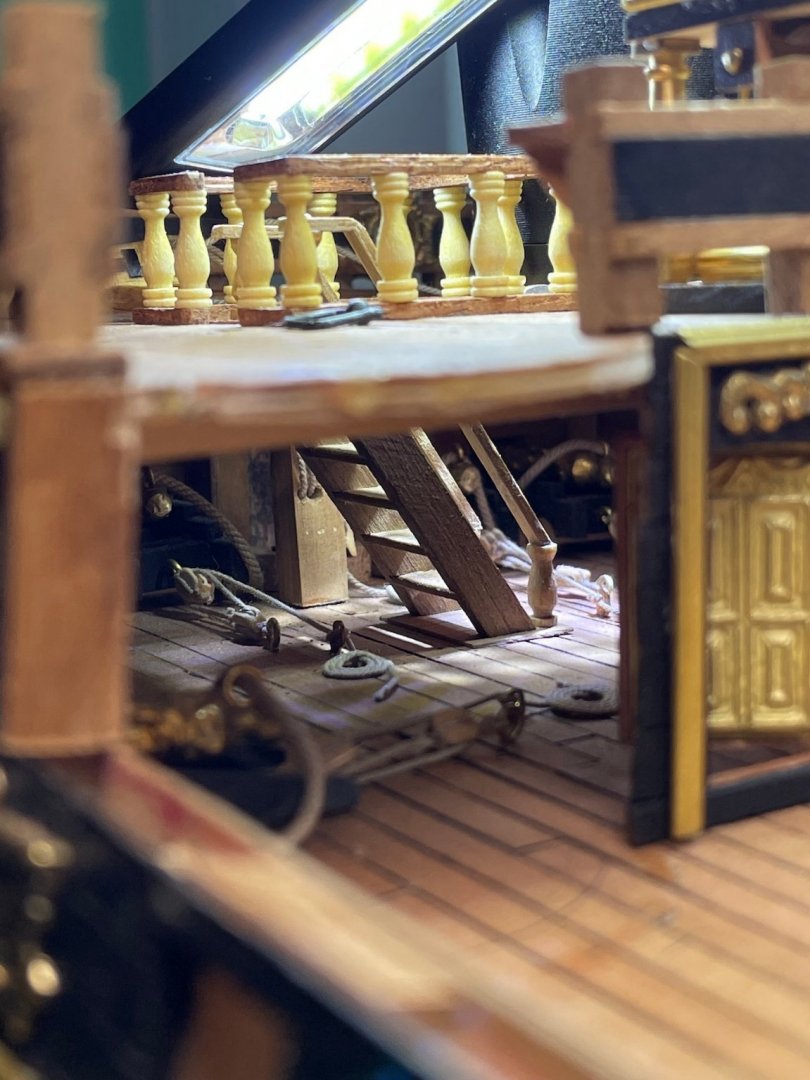
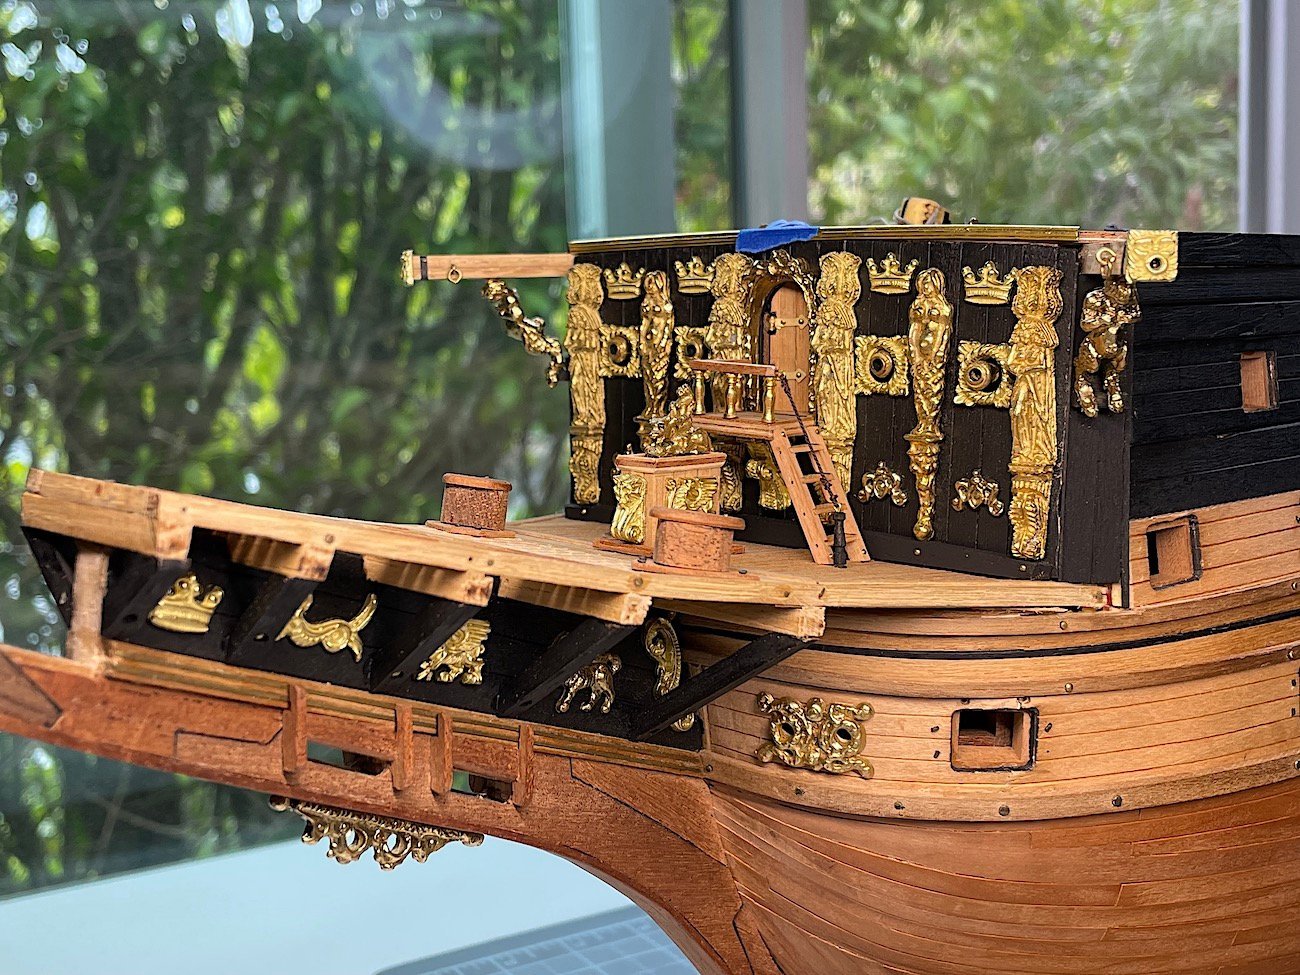
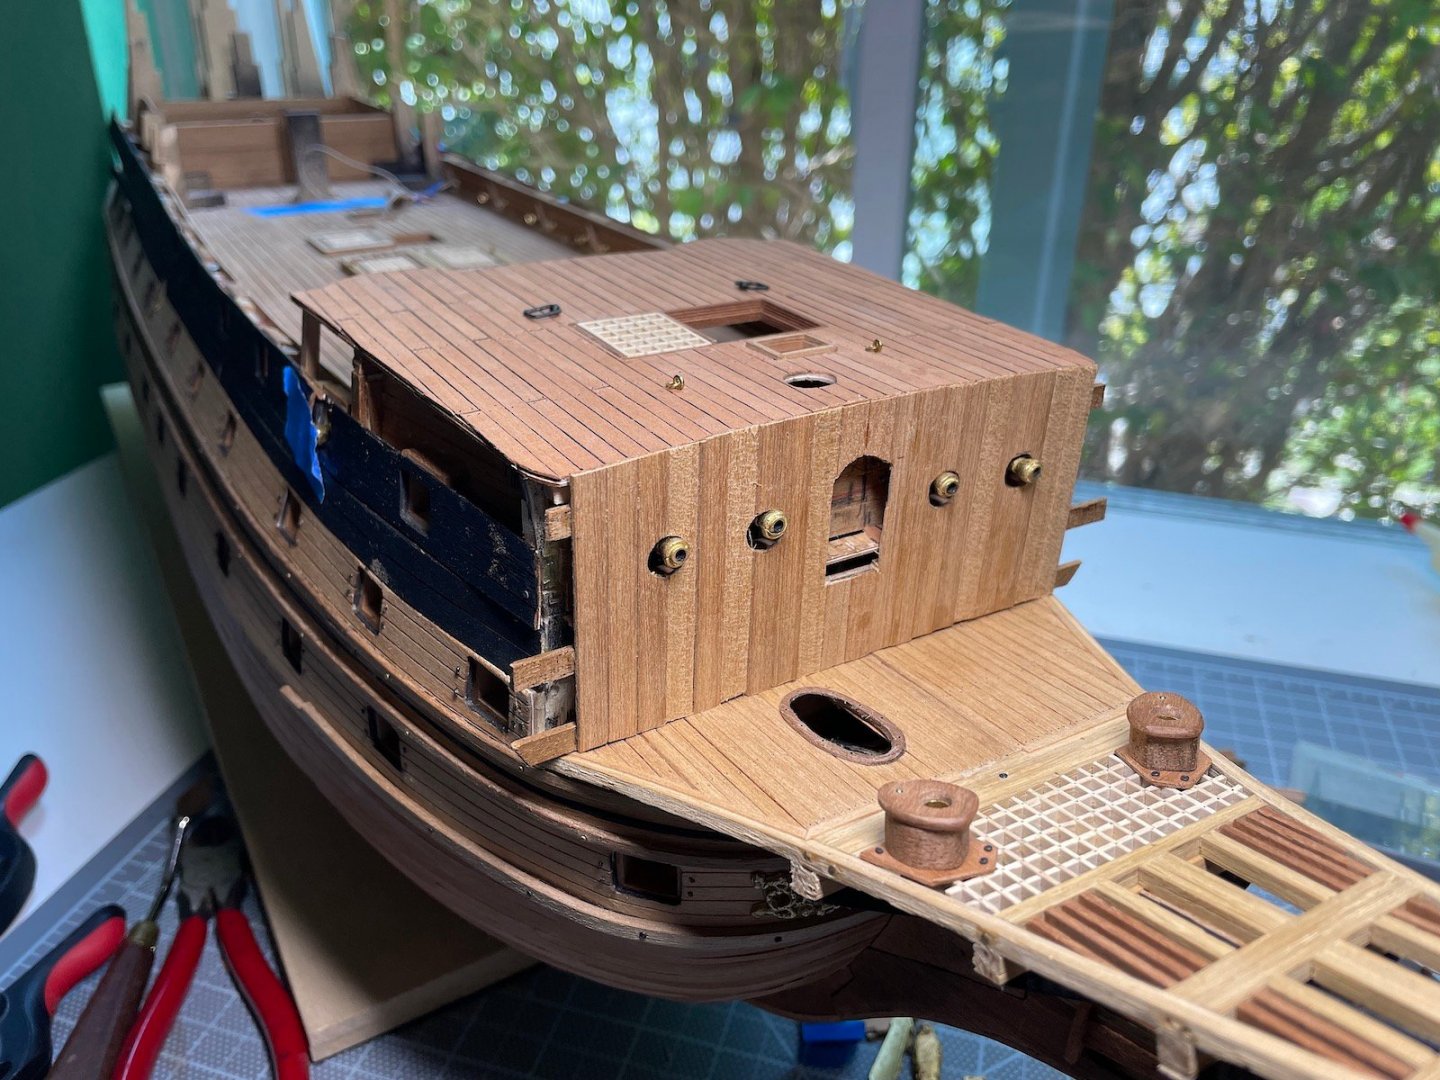
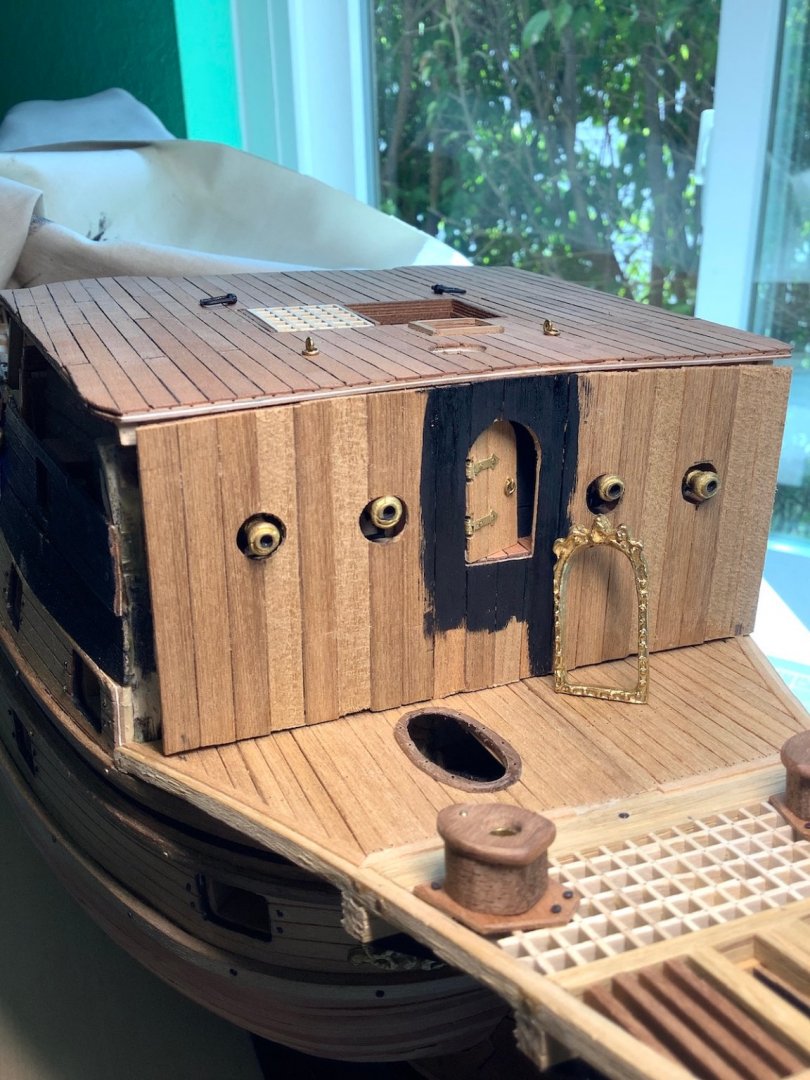
Hi – have not at all visited MSW for what seems like a couple of months – yikes!!! Been busy with a new work opportunity that required a lot of seat time, new learning, re-certifications and a test Grrrr. But during my free “mental time” I only worked on the SotS –, doing almost nothing else - good therapy (;-)) During that time finished up the forecastle. Here are some images (probably too many). As always thanks for dropping by, likes, and comments. Next up the side support railings for the bowsprit deck….. OK - Now back to a more normal routine -- need to catch up and click likes at the great build logs that I am following here. Lot’s of catching up to do. Cheers,


-
moreplovac, Very nice indeed - thanks for the step-by-step instructions. Had not thought of Golden Oak stain (always used tea), nor cutting strips - excellent work looks very good. Let us know how the glued together strips hold up after much still needed handling of the sails. Your ship is also looking great; your rigging work and details are 👌. Regards,
-
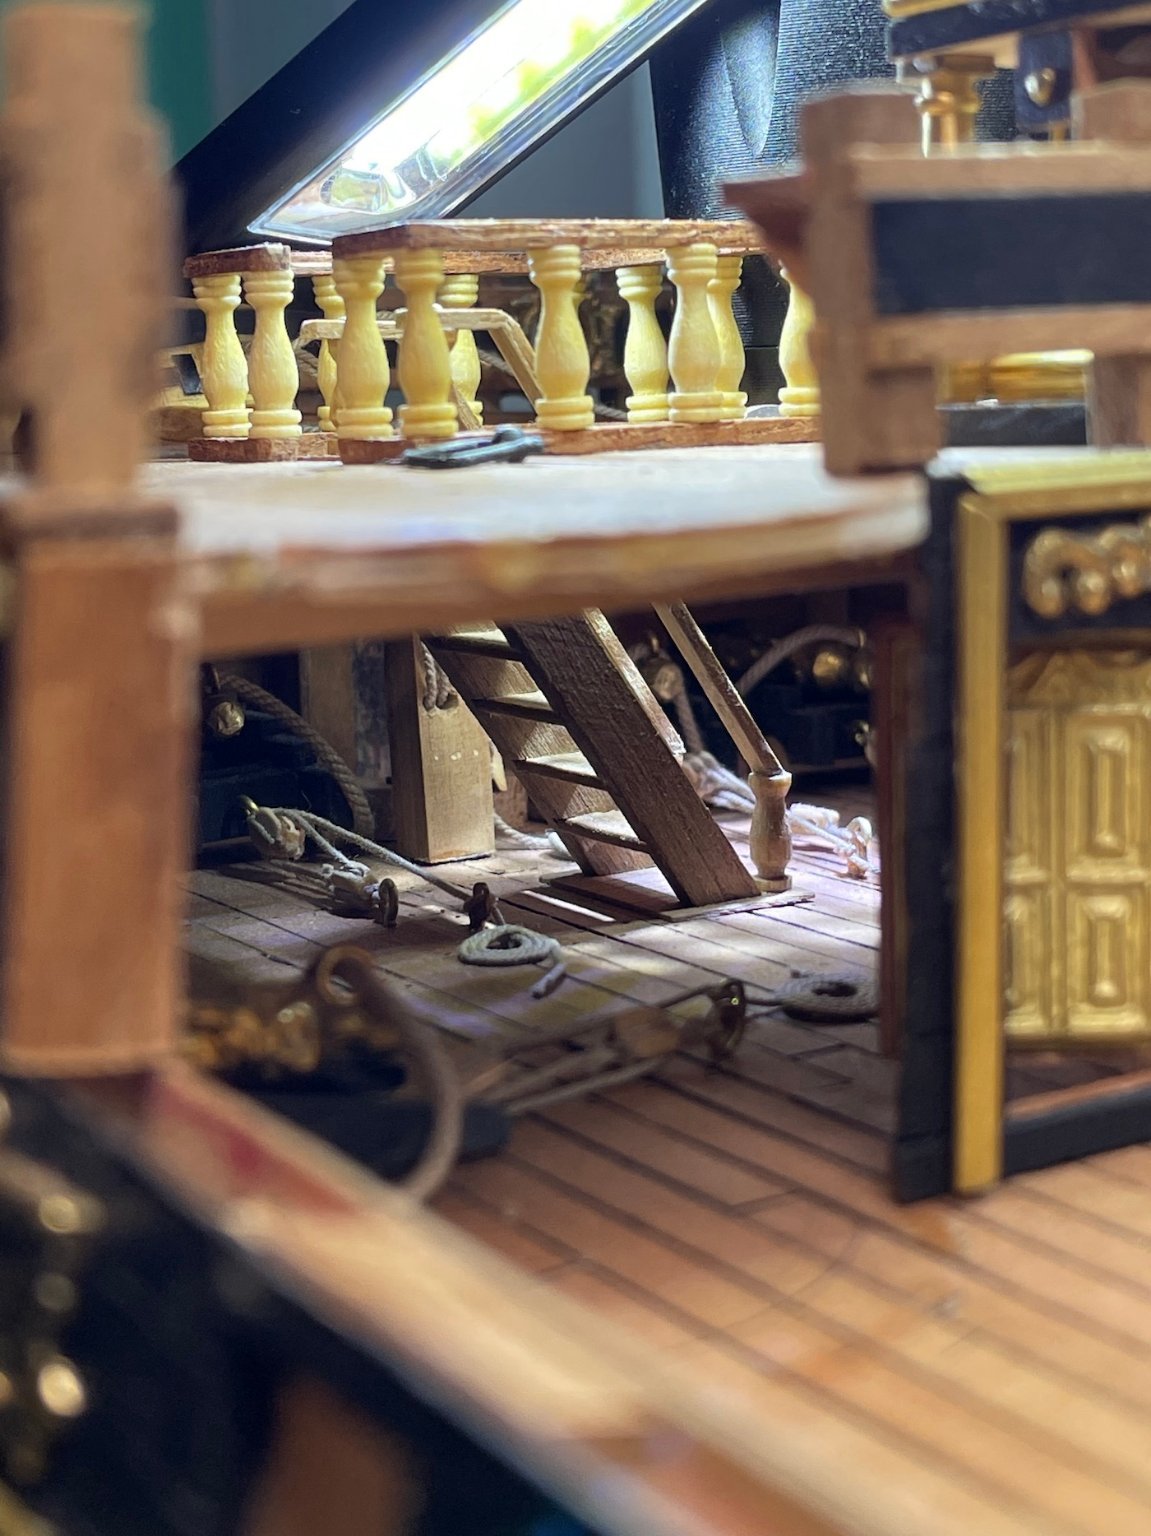
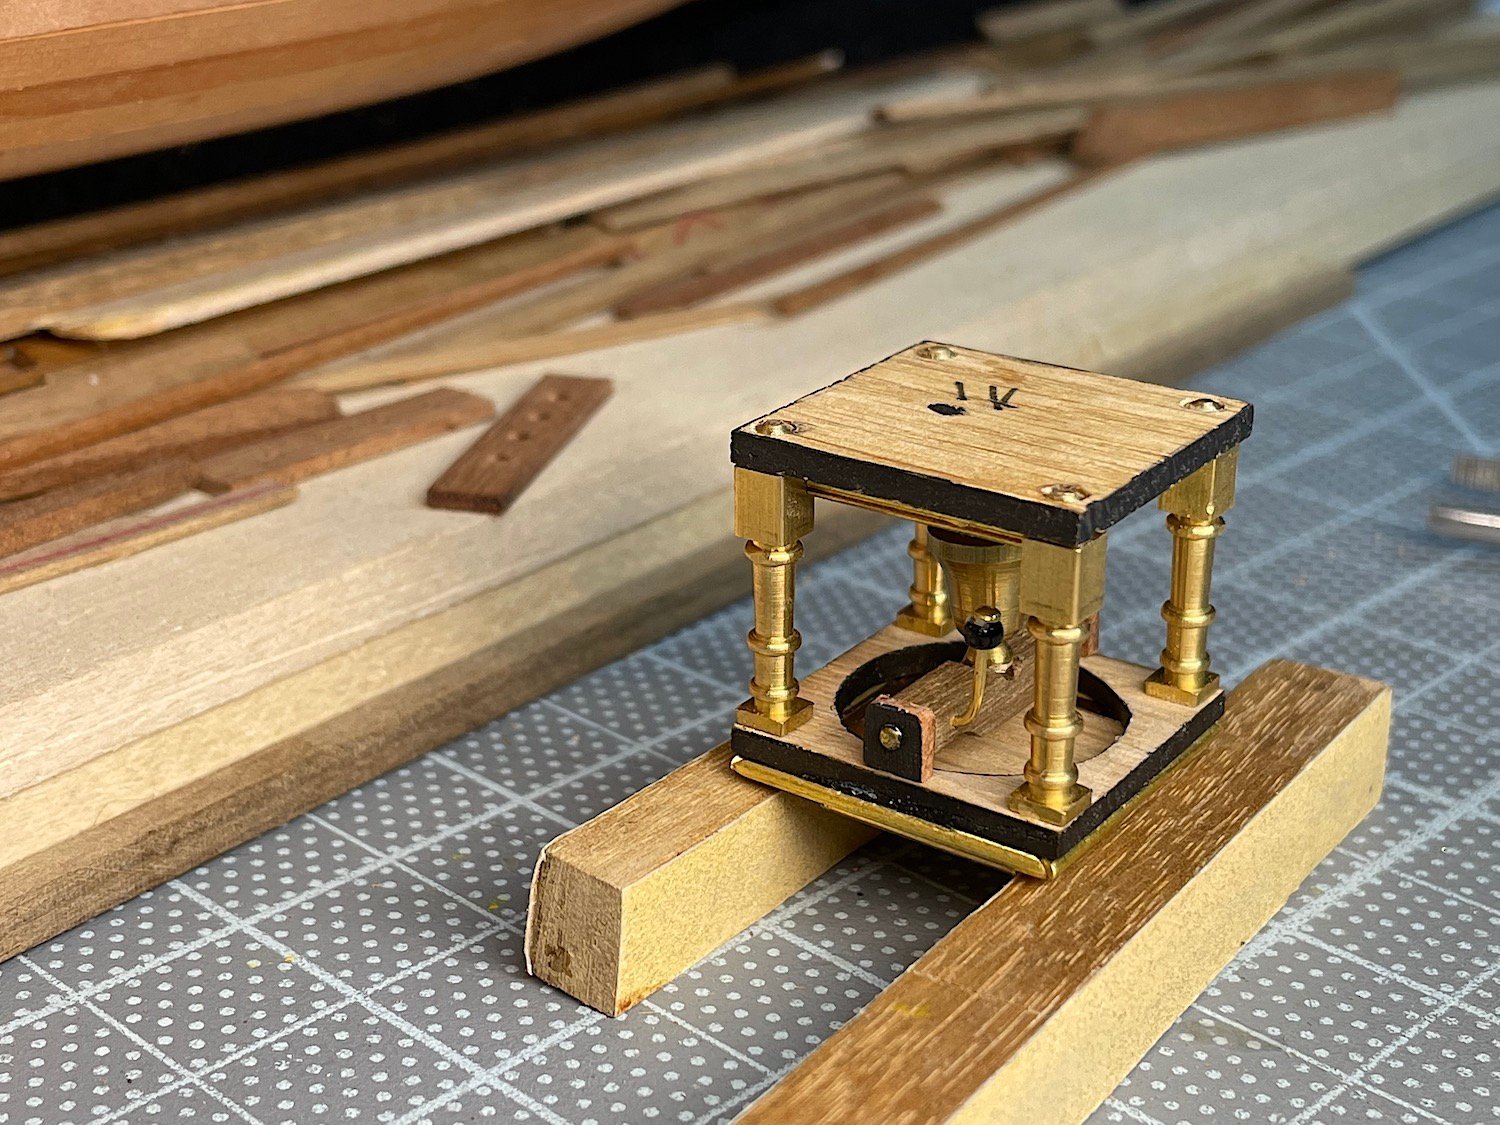
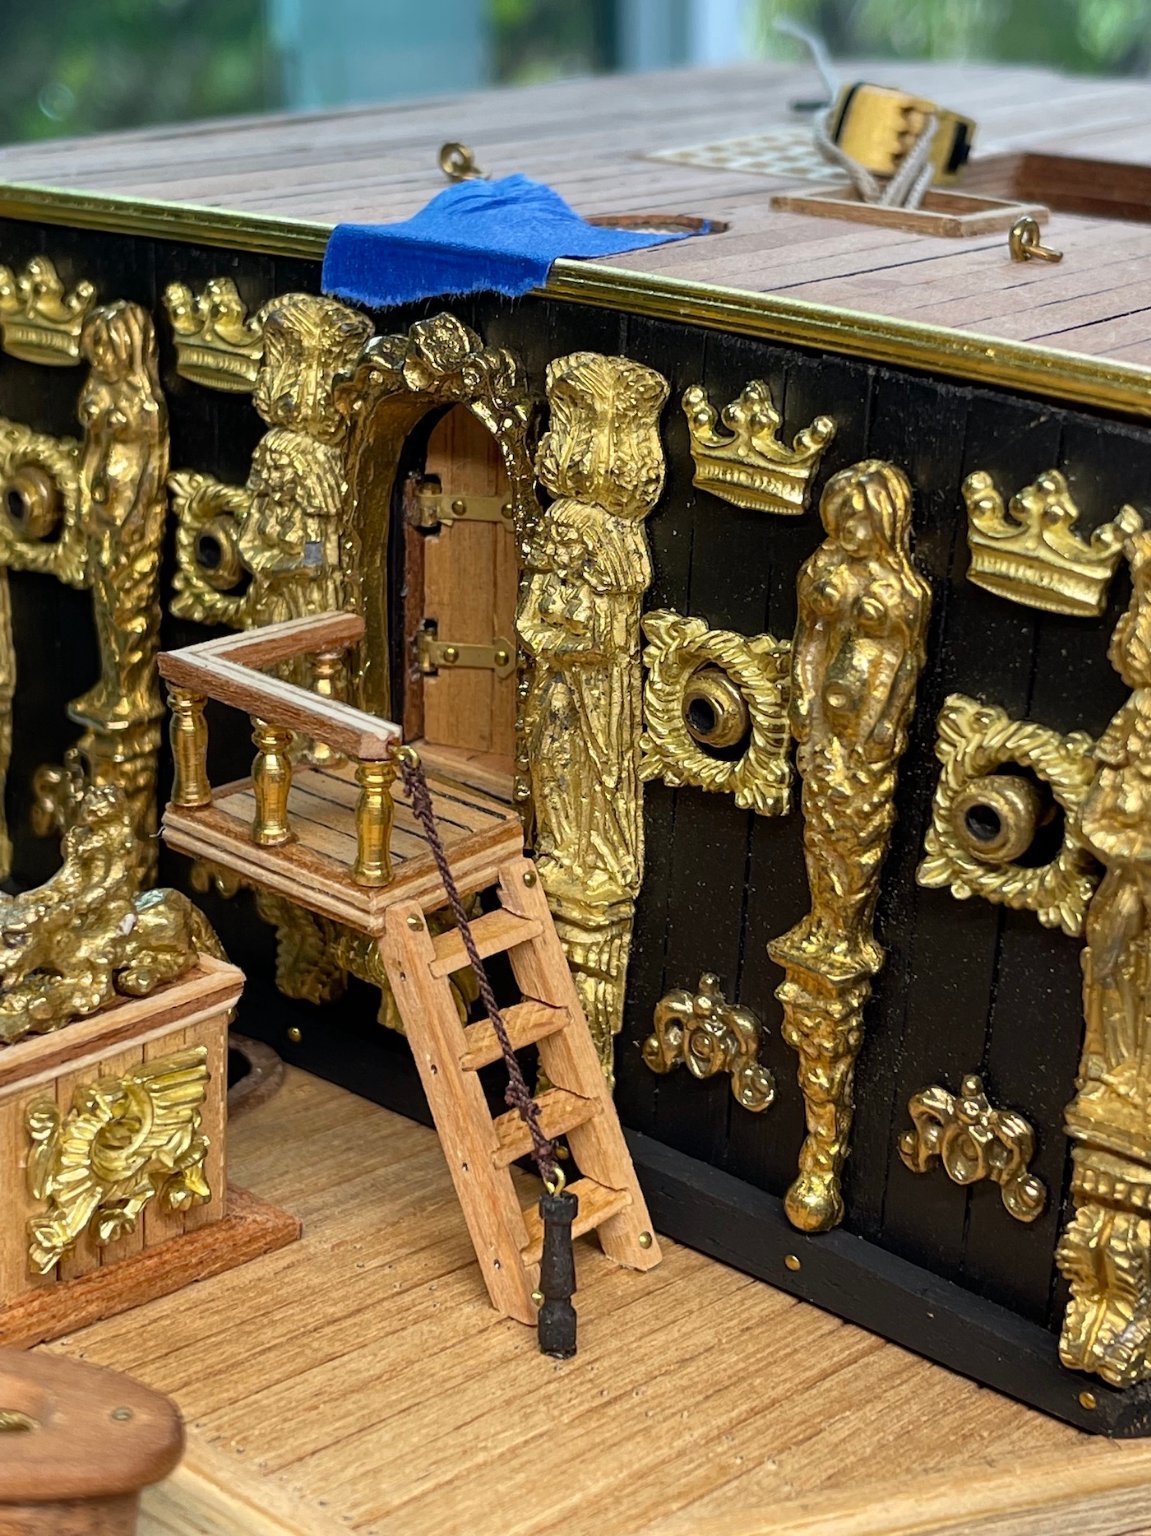
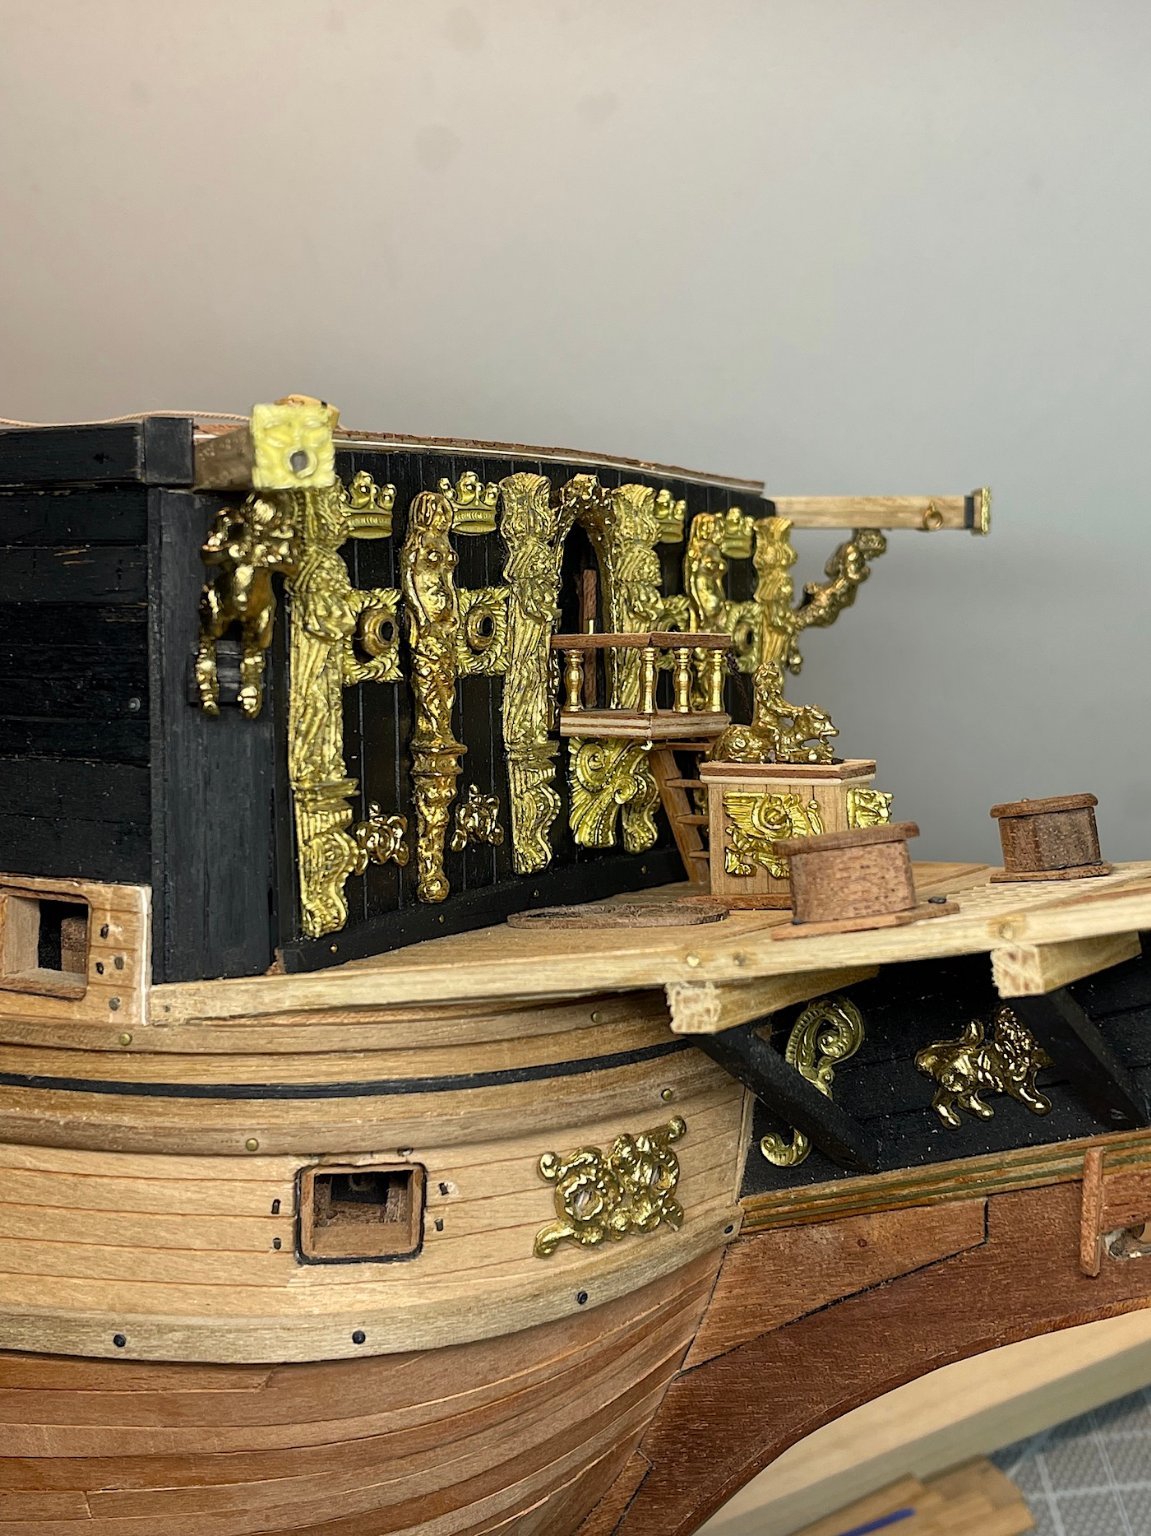
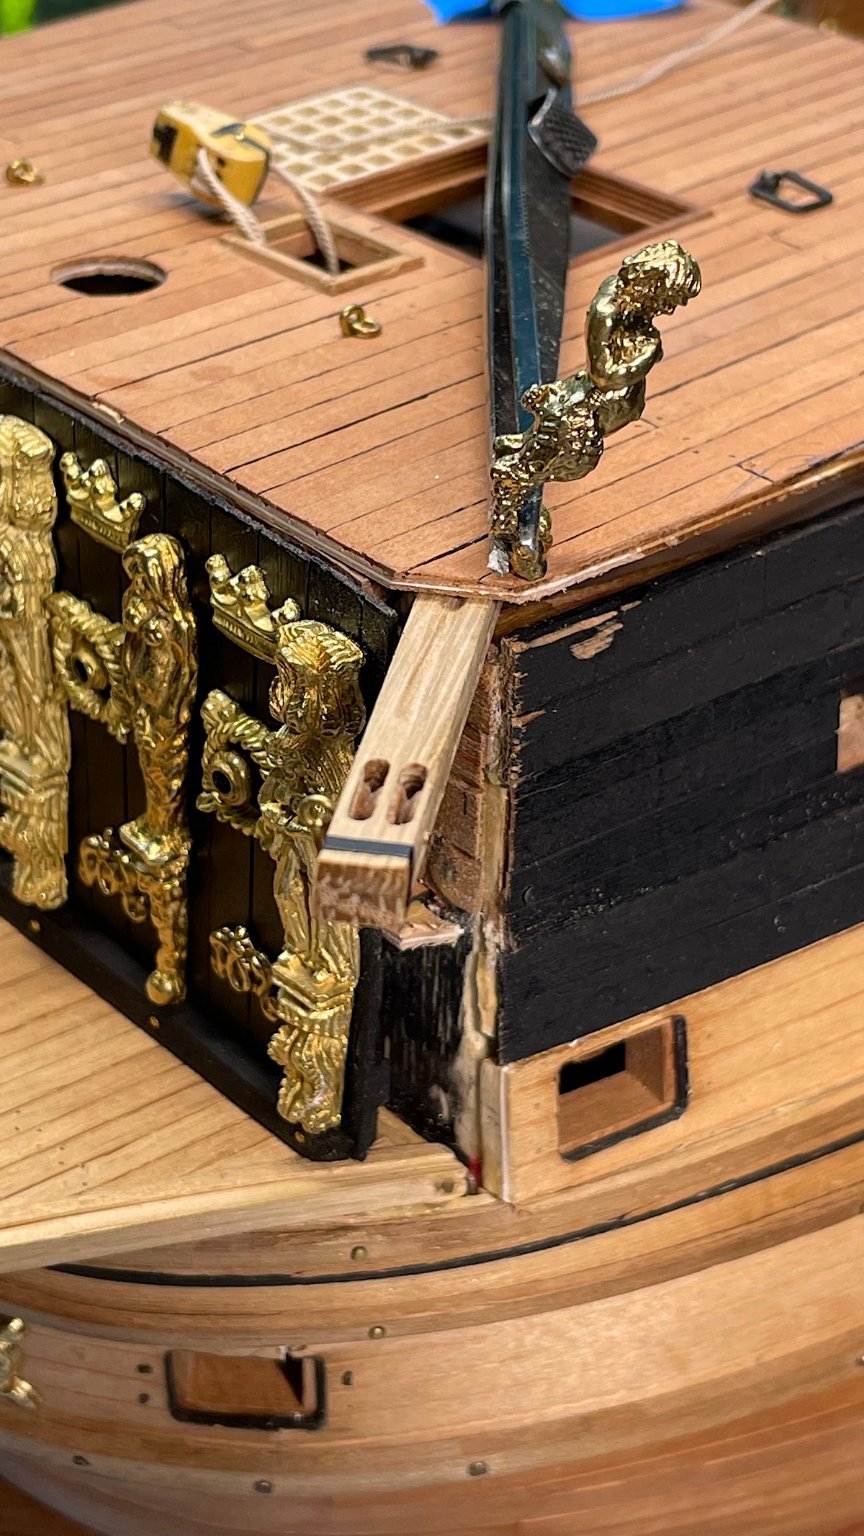
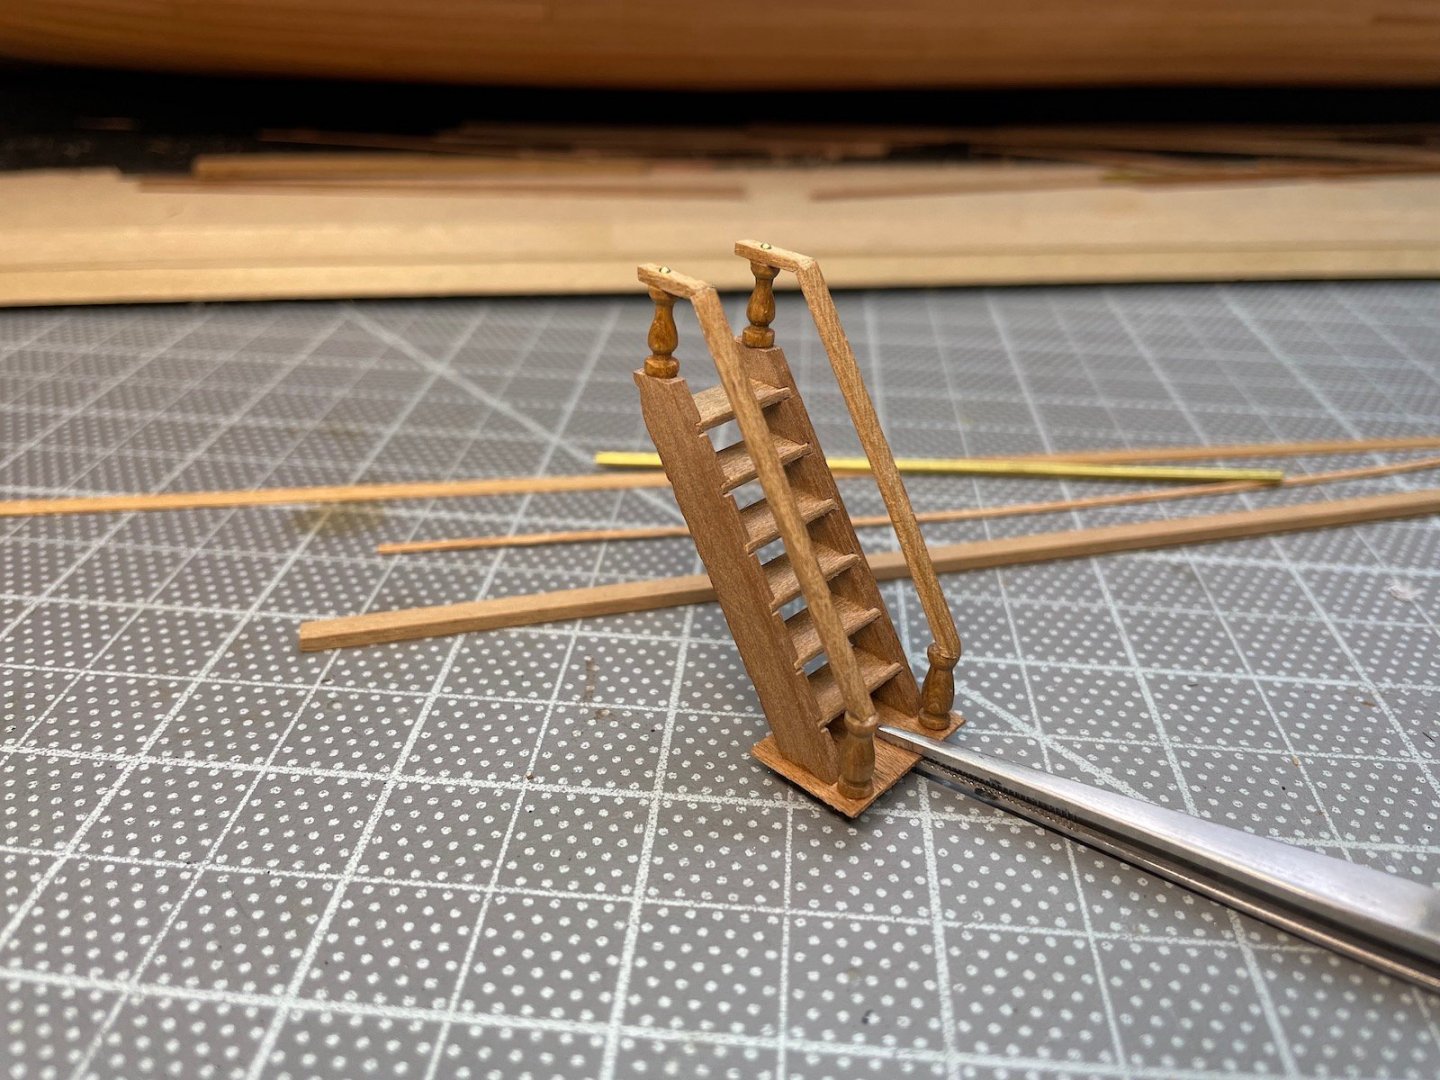
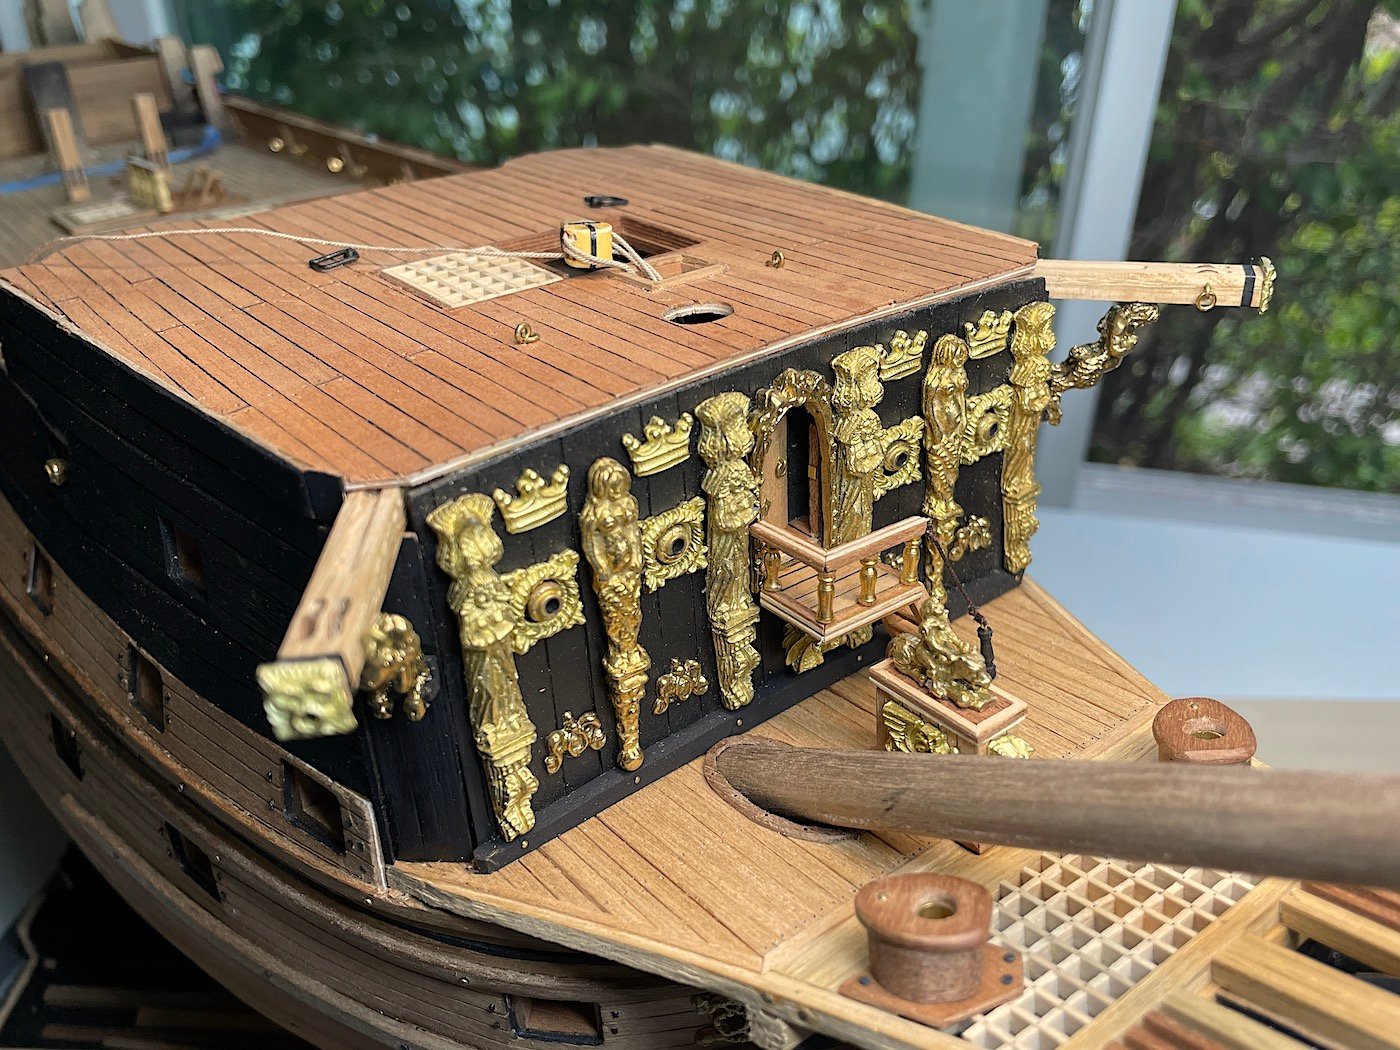
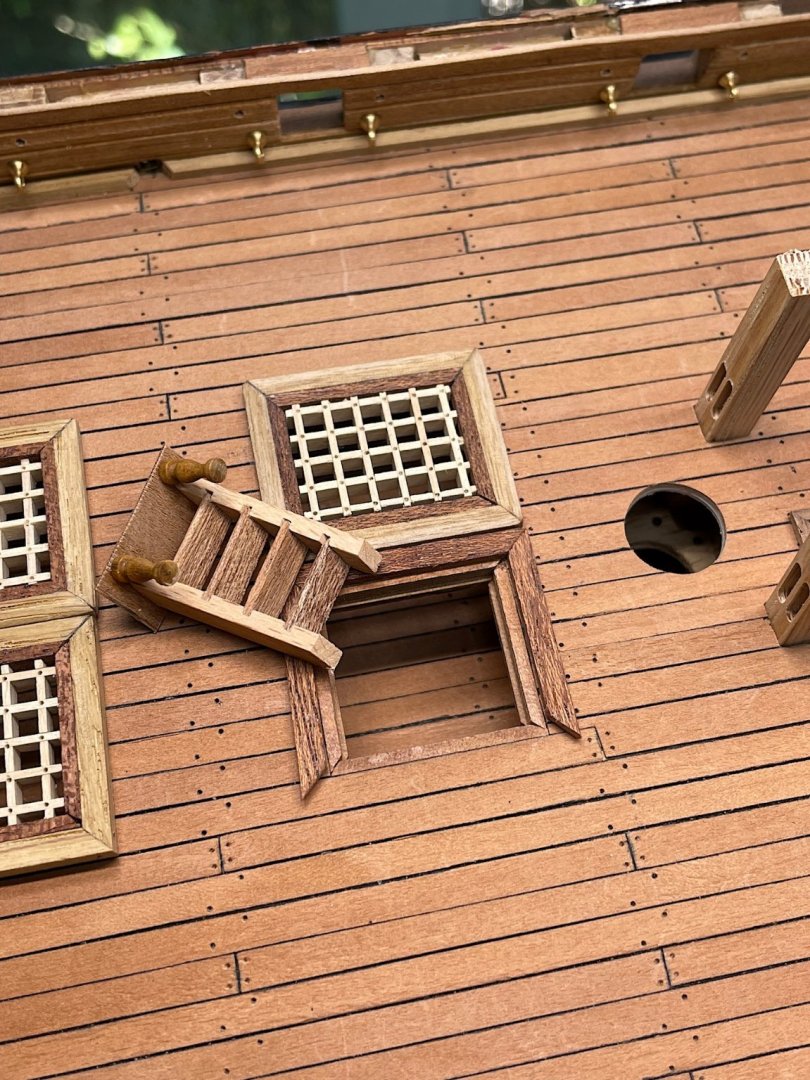
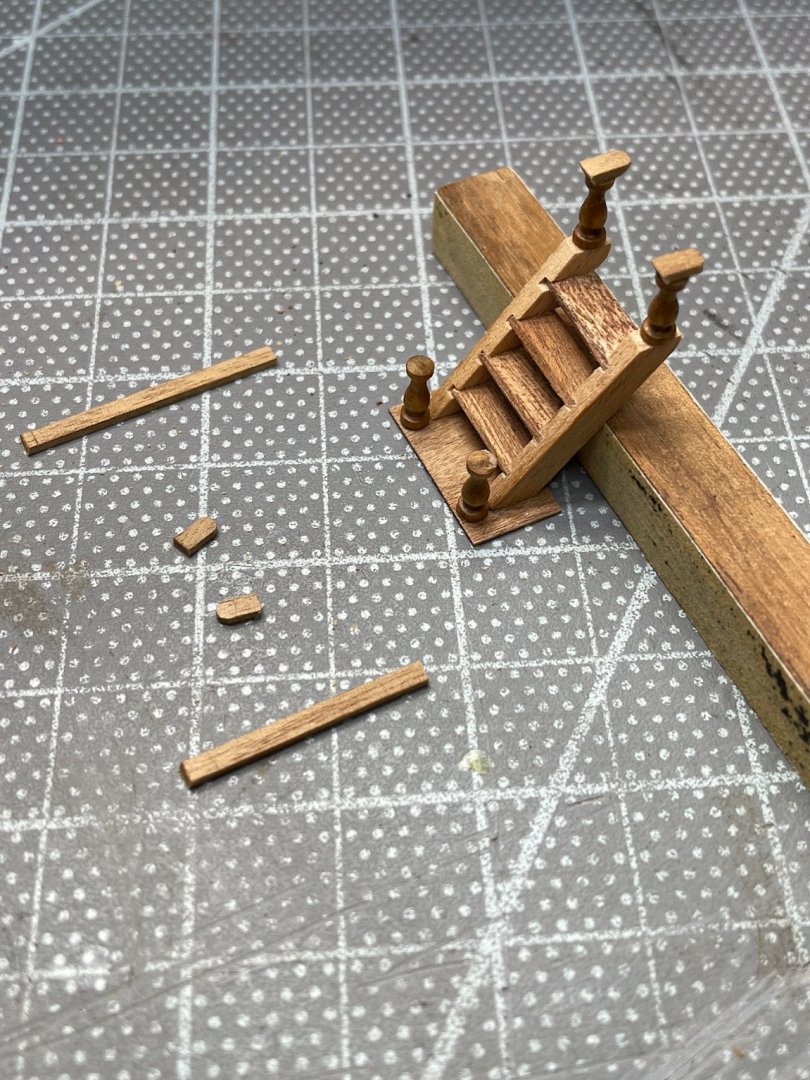
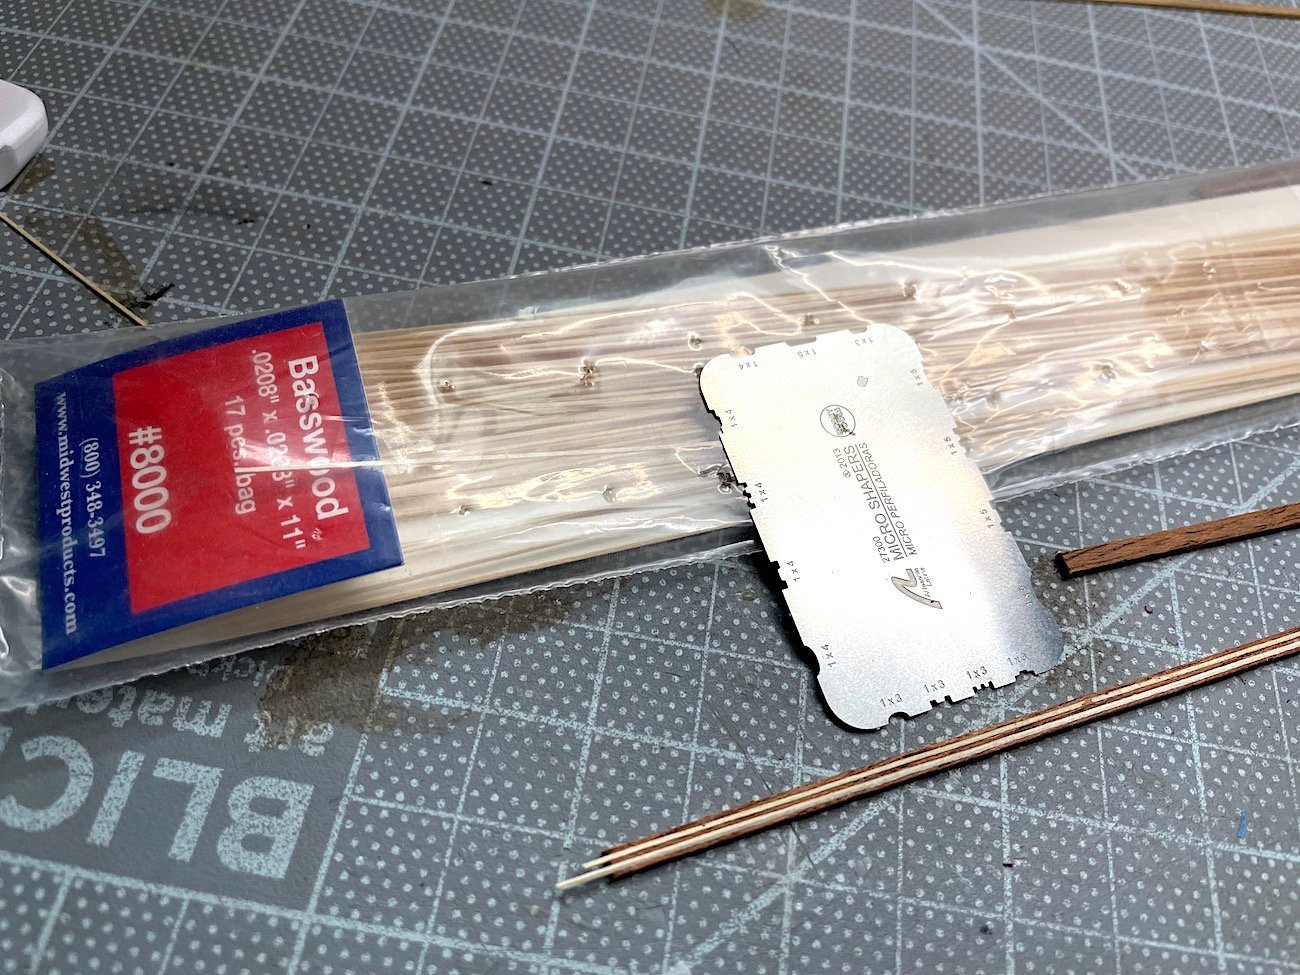
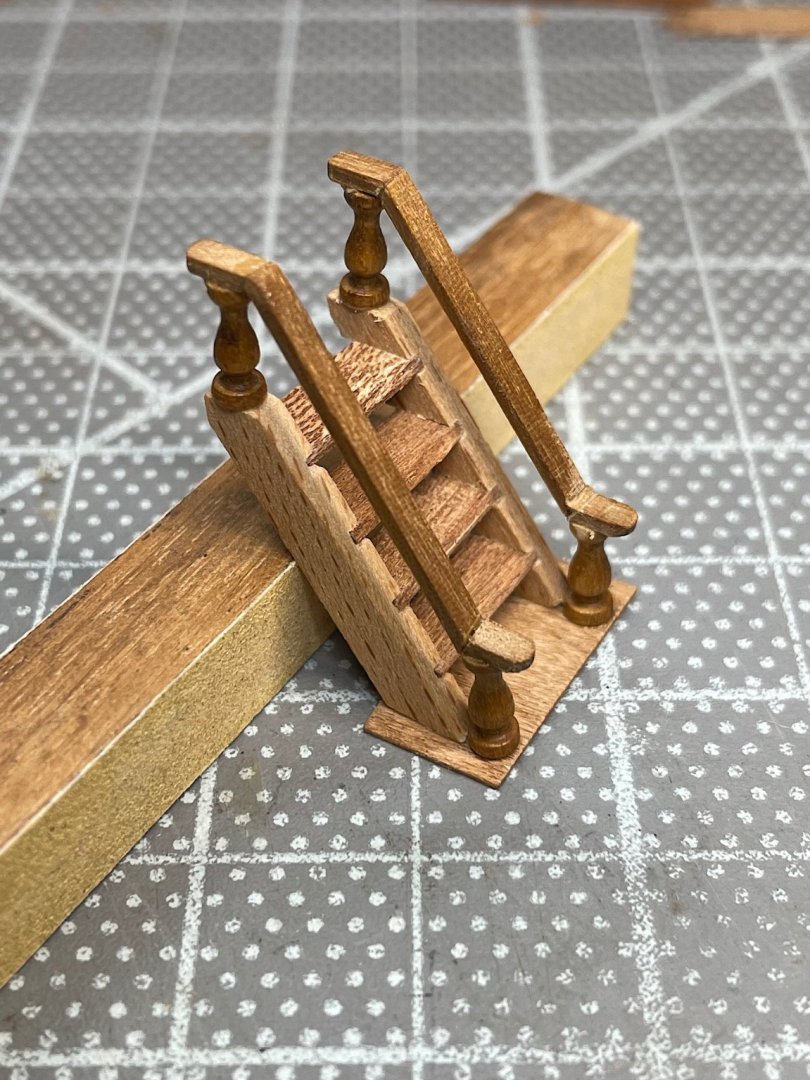
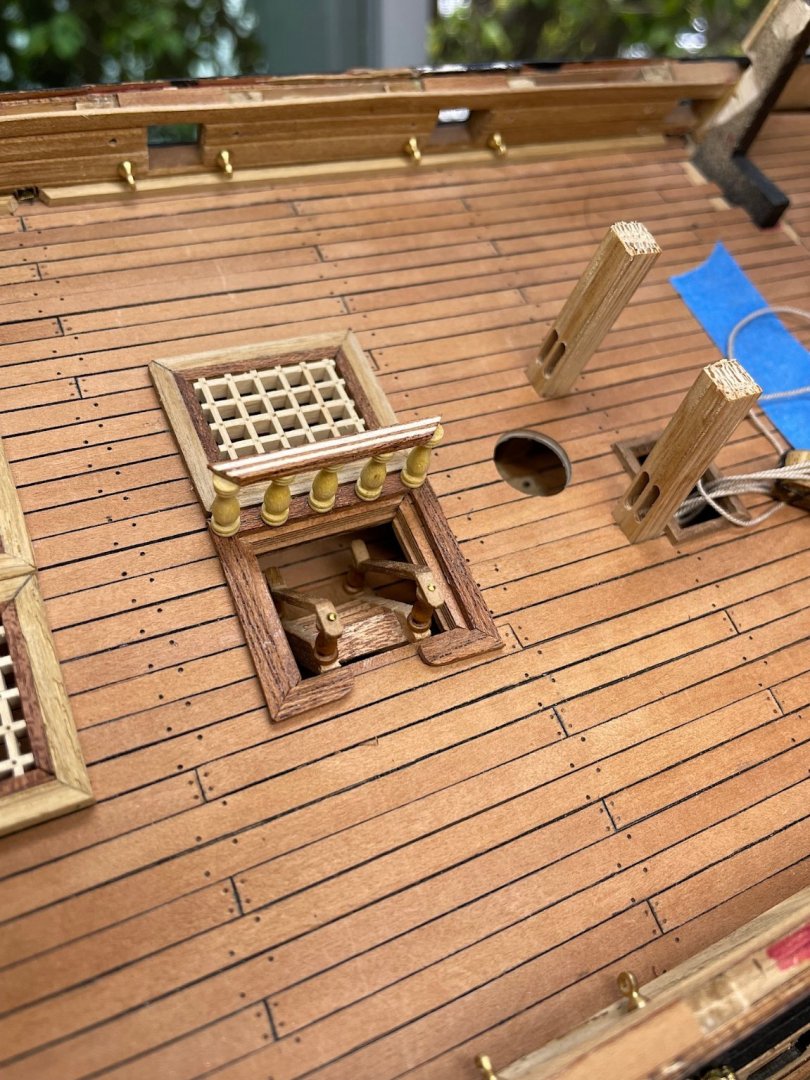
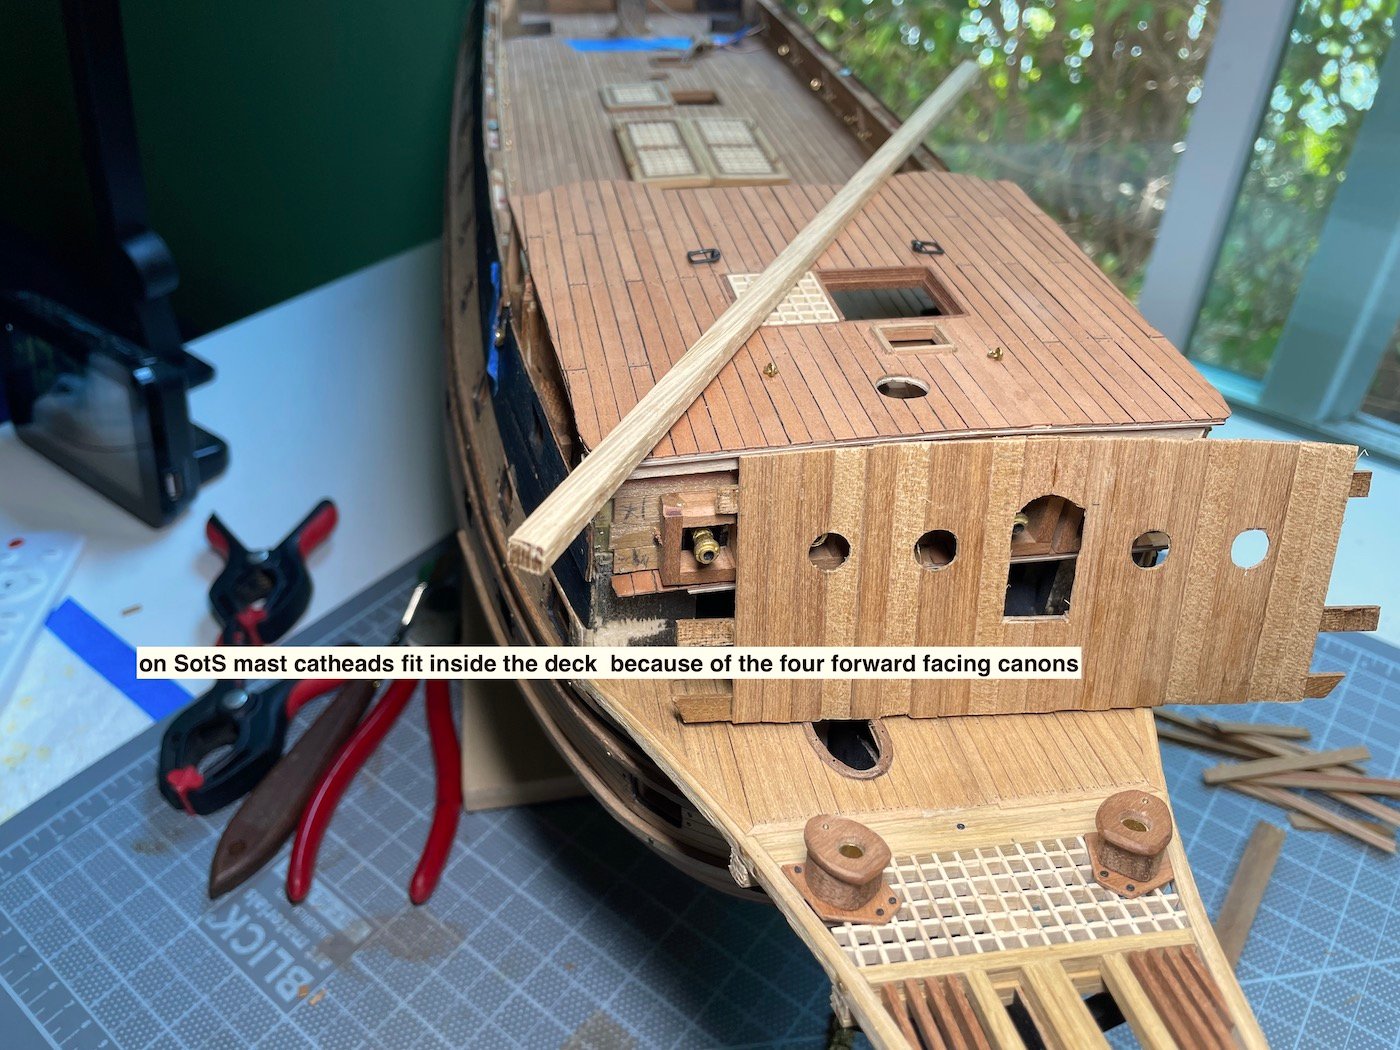
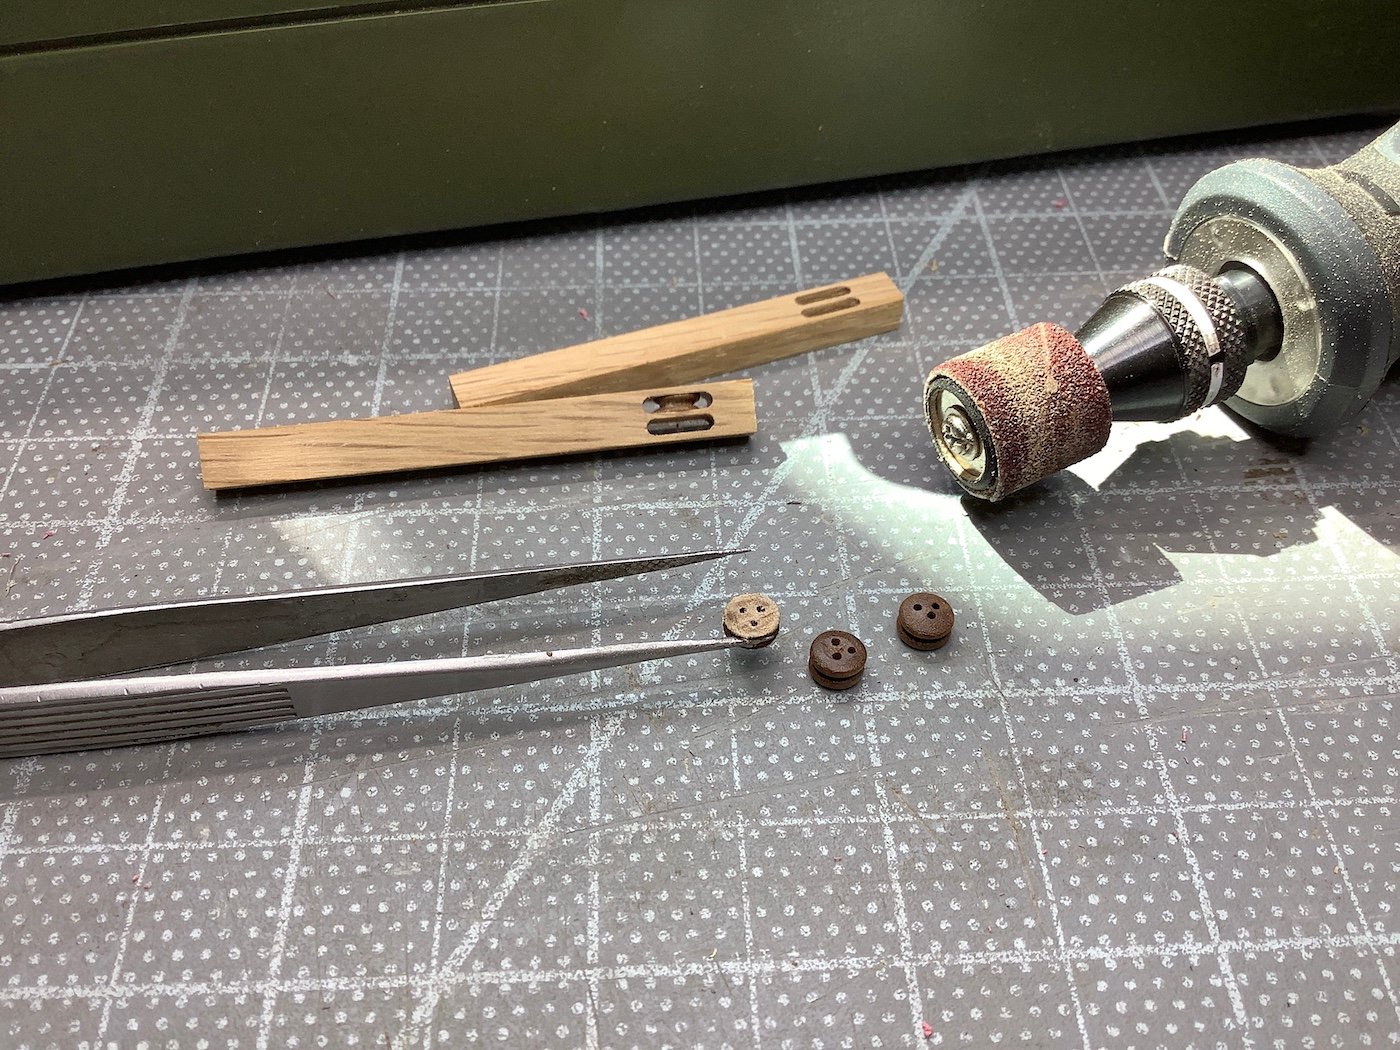
Continuing work in same areas, but now added two staircases as well as anchor knighthead details. Images will do all the talking. Thanks for your visits…. Regards,


-
You and Kirill are absolutely beyond any comparisons working in plastic - such awesome work. Wow!! Also, for me, I'm constantly learning, and will hopefully add some of the details to my work from reading your notes and other very knowledgeable builder's comments who are actively following this build. Cheers,
- 2,699 replies
-
- 4
-
-
- heller
- soleil royal
- (and 9 more)
-
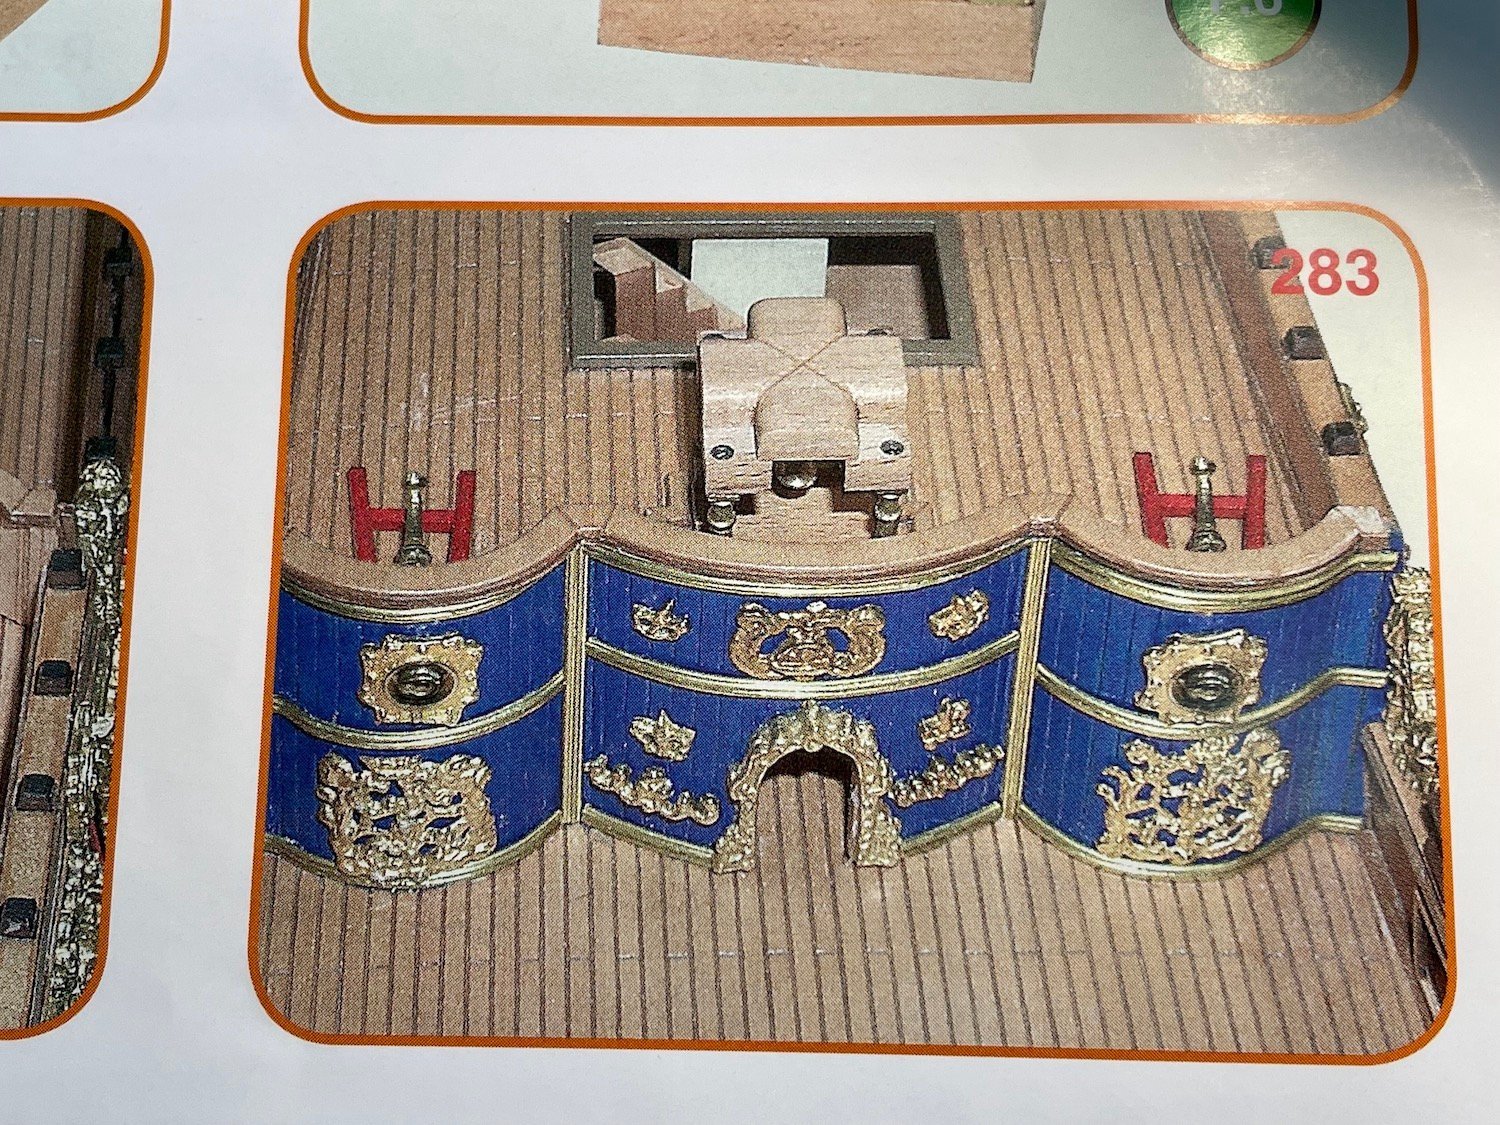
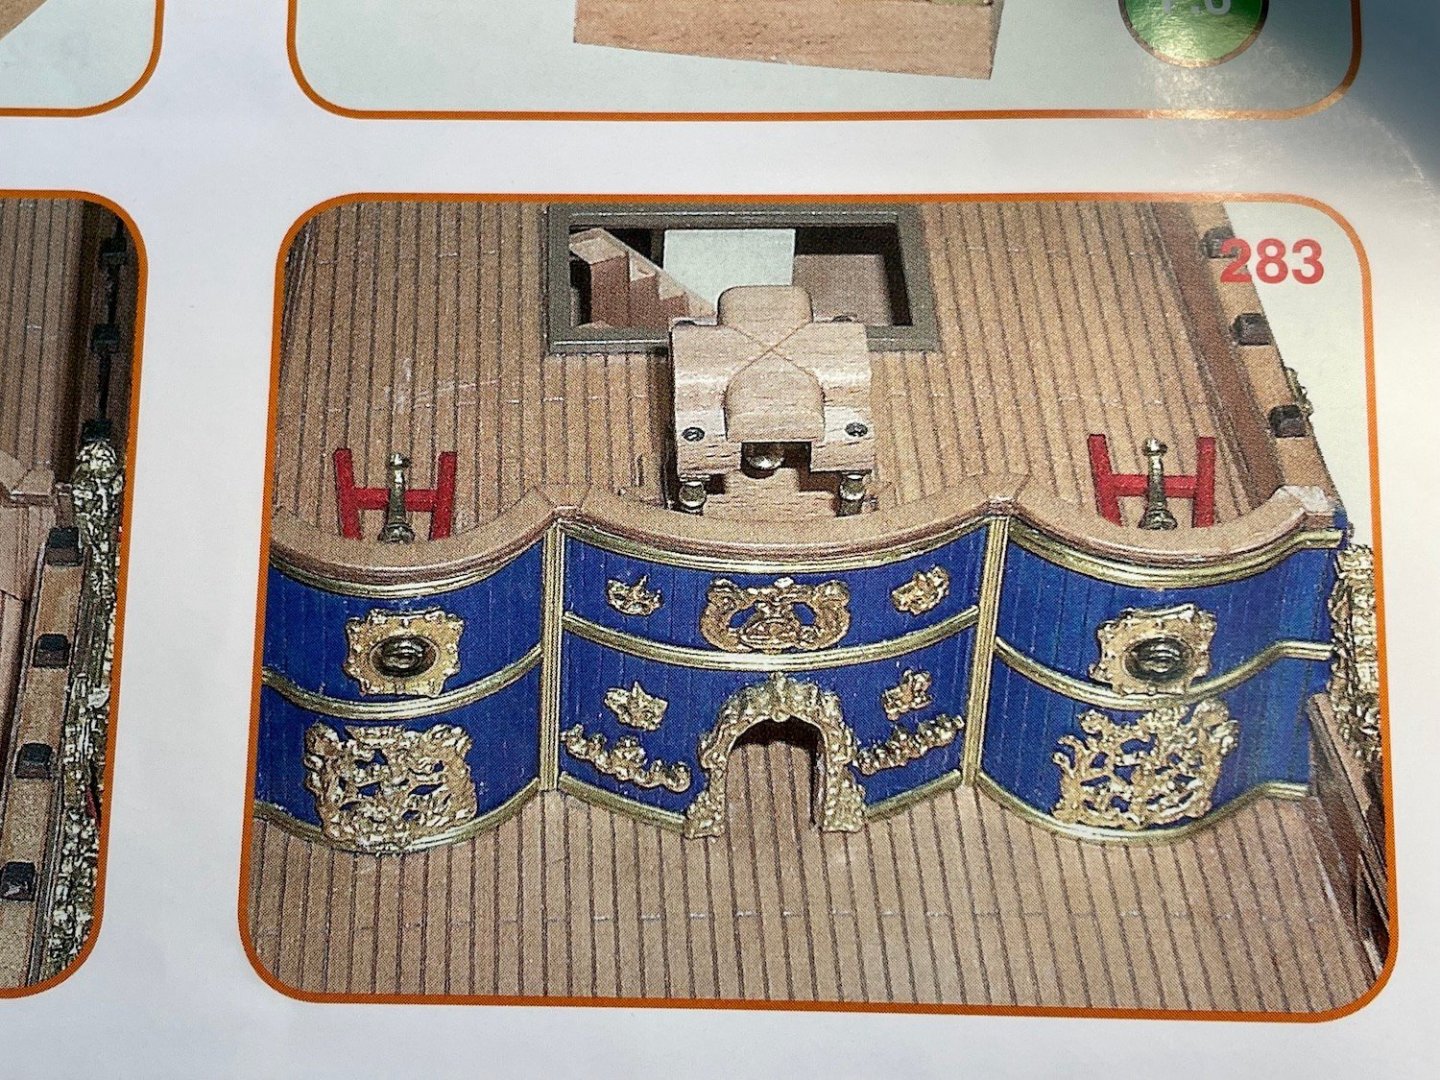
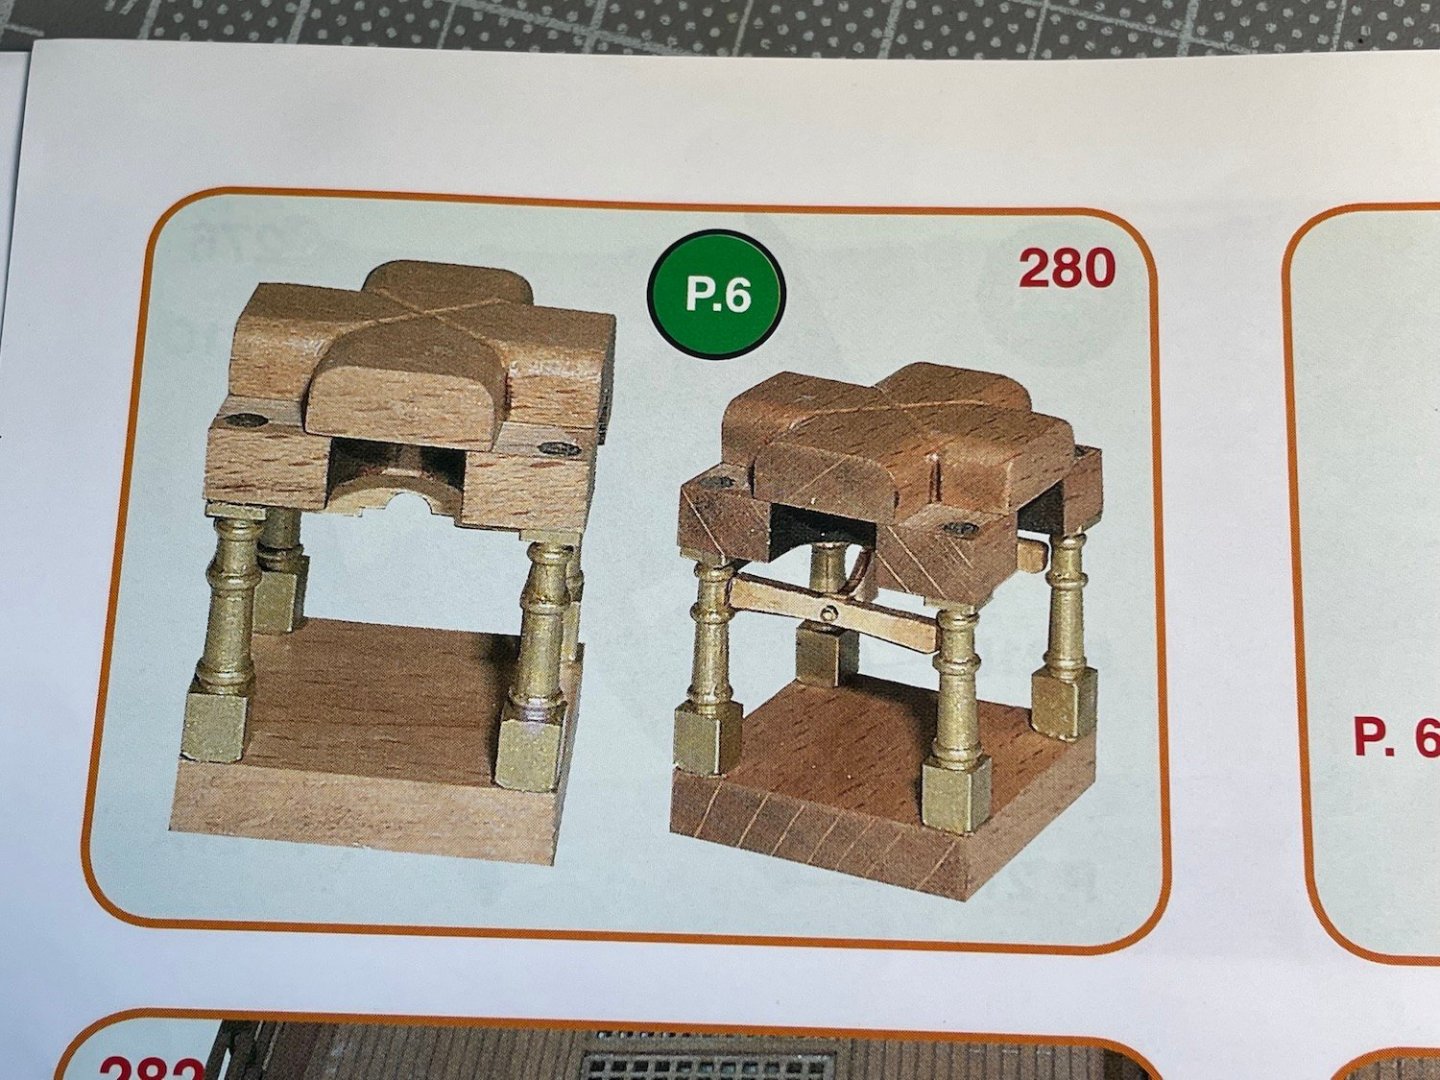
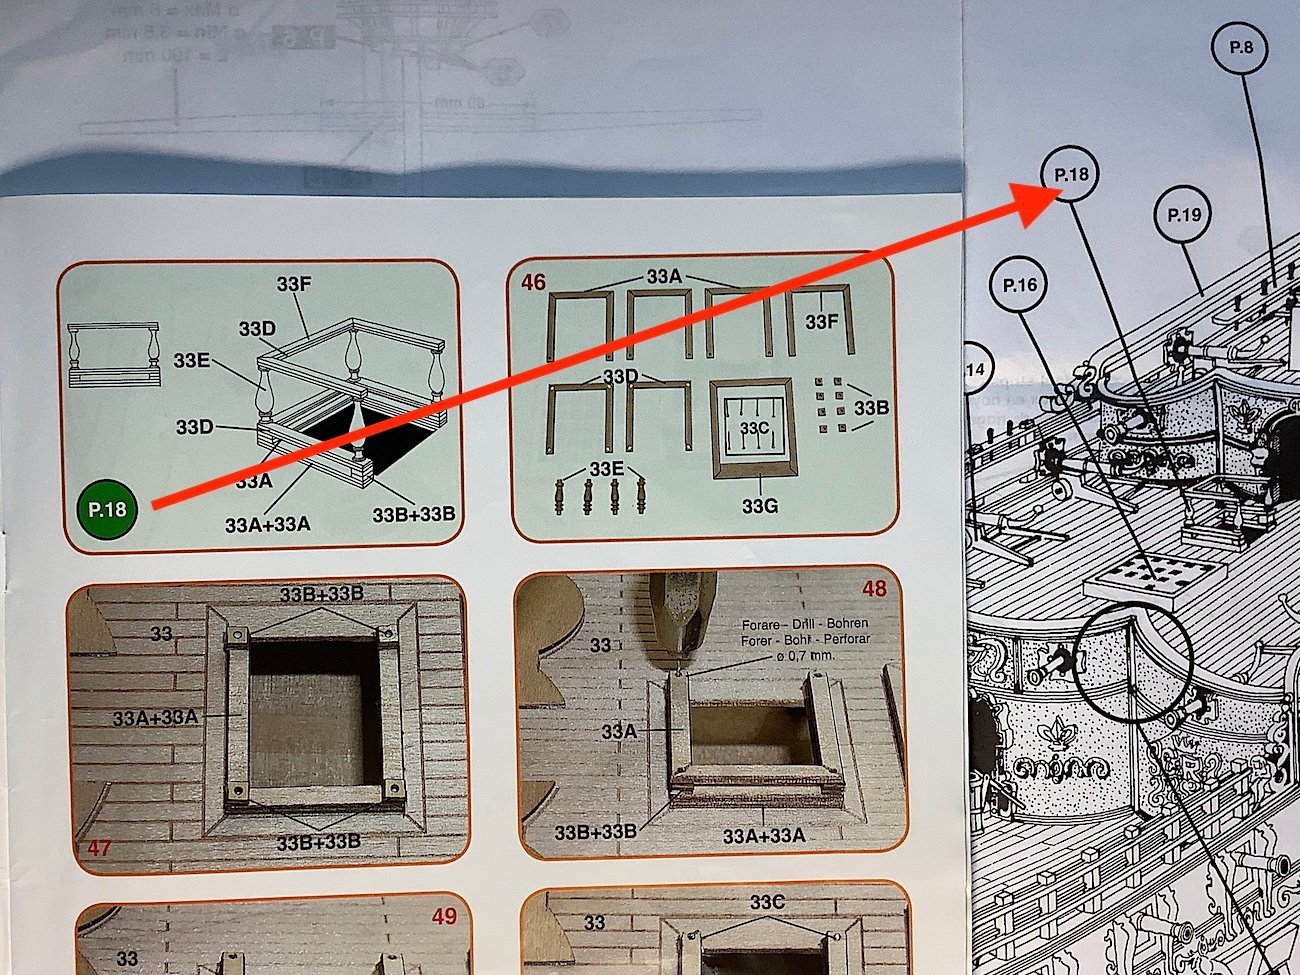
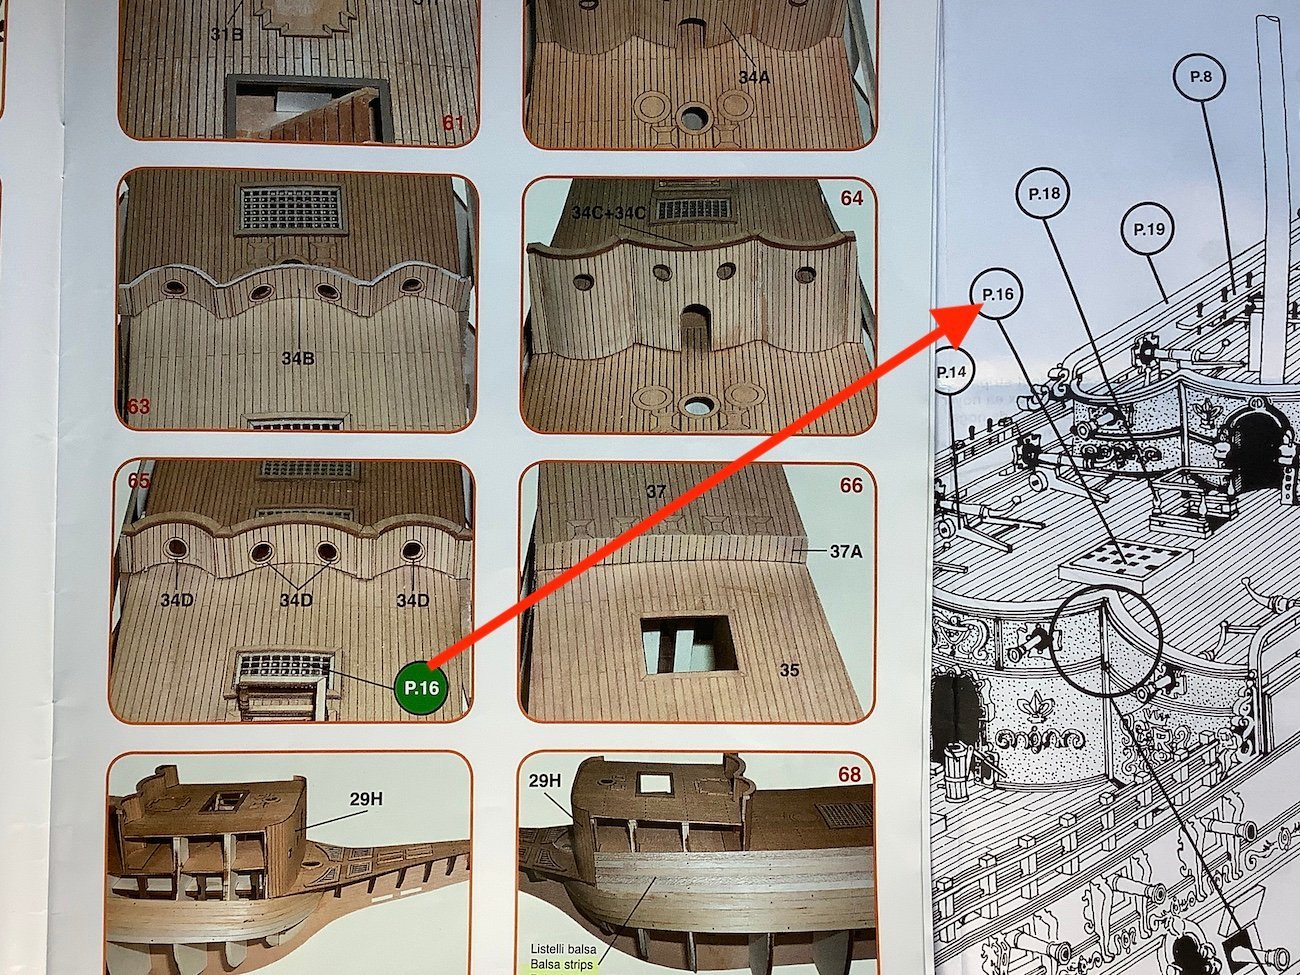
From build booket to references on large folding sheets.
- 35 replies
-
- 5
-
-

-
- Mantua
- Sovereign of the Seas
- (and 1 more)
-
Very Excellent results. Looks just perfect I very foolishly tried do so same with my 1/75 hahaha
-
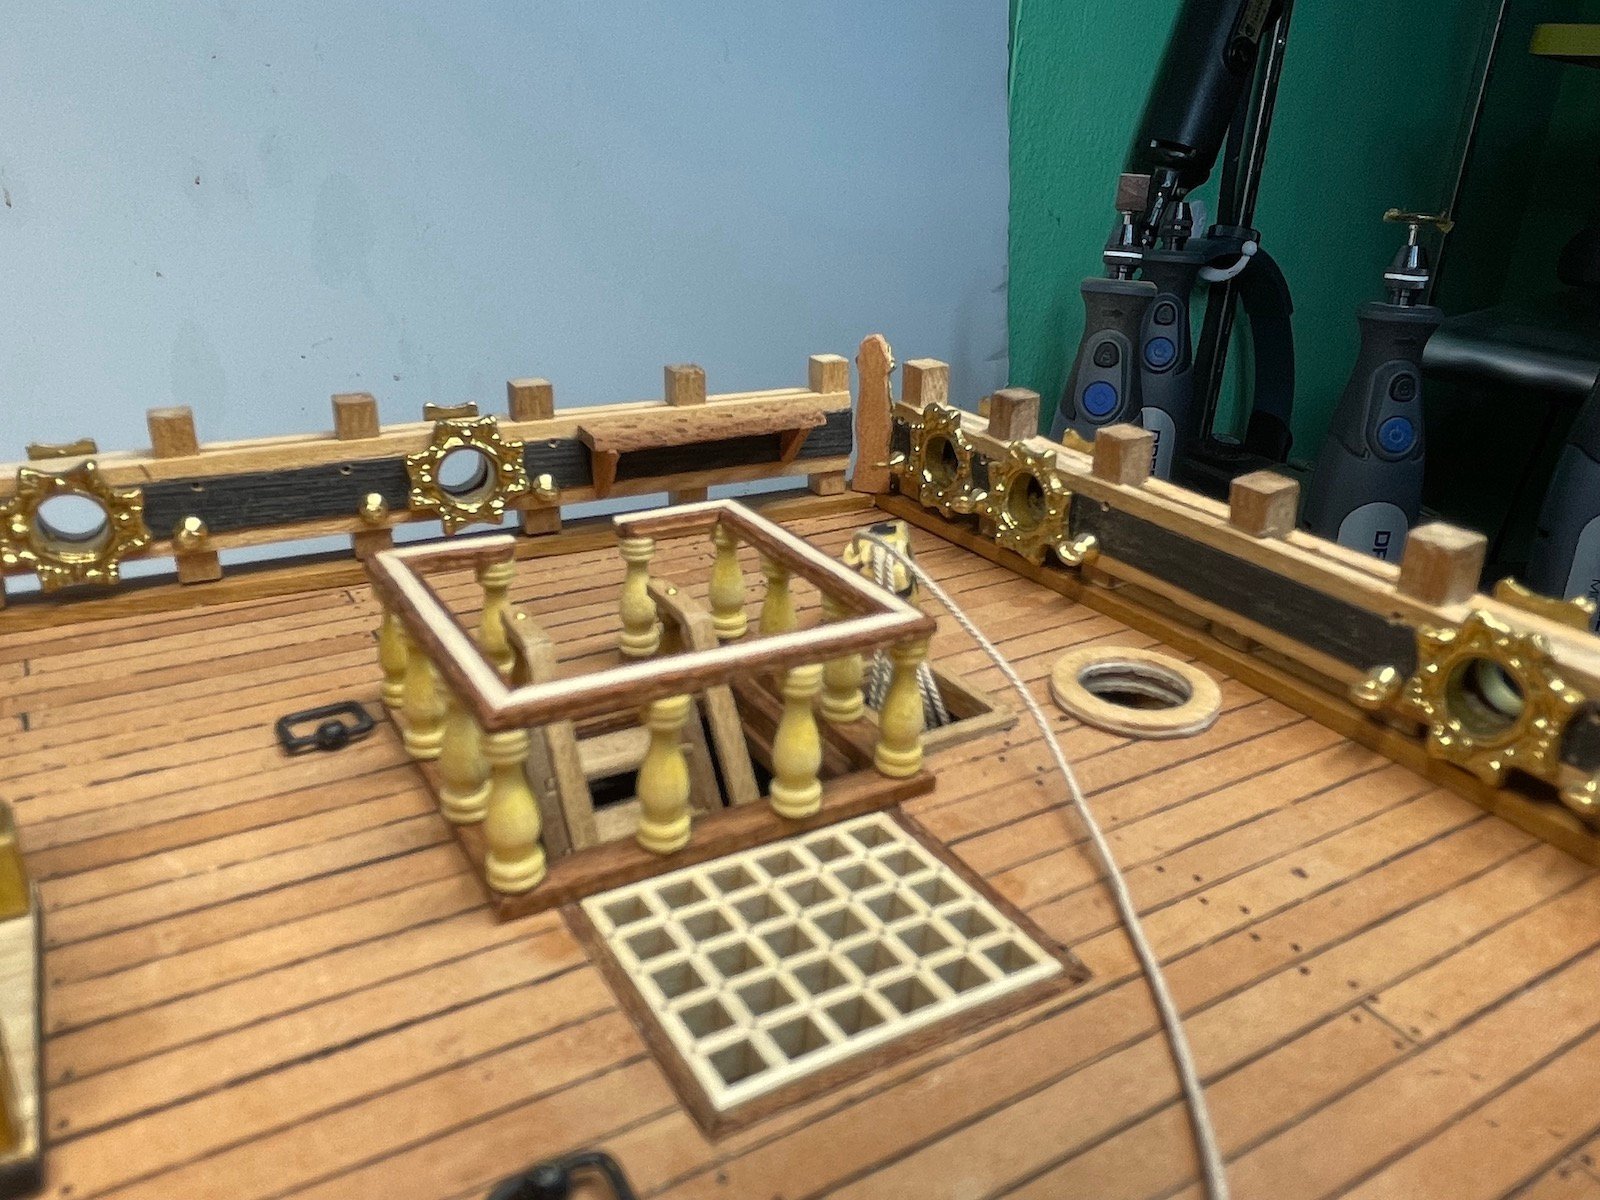
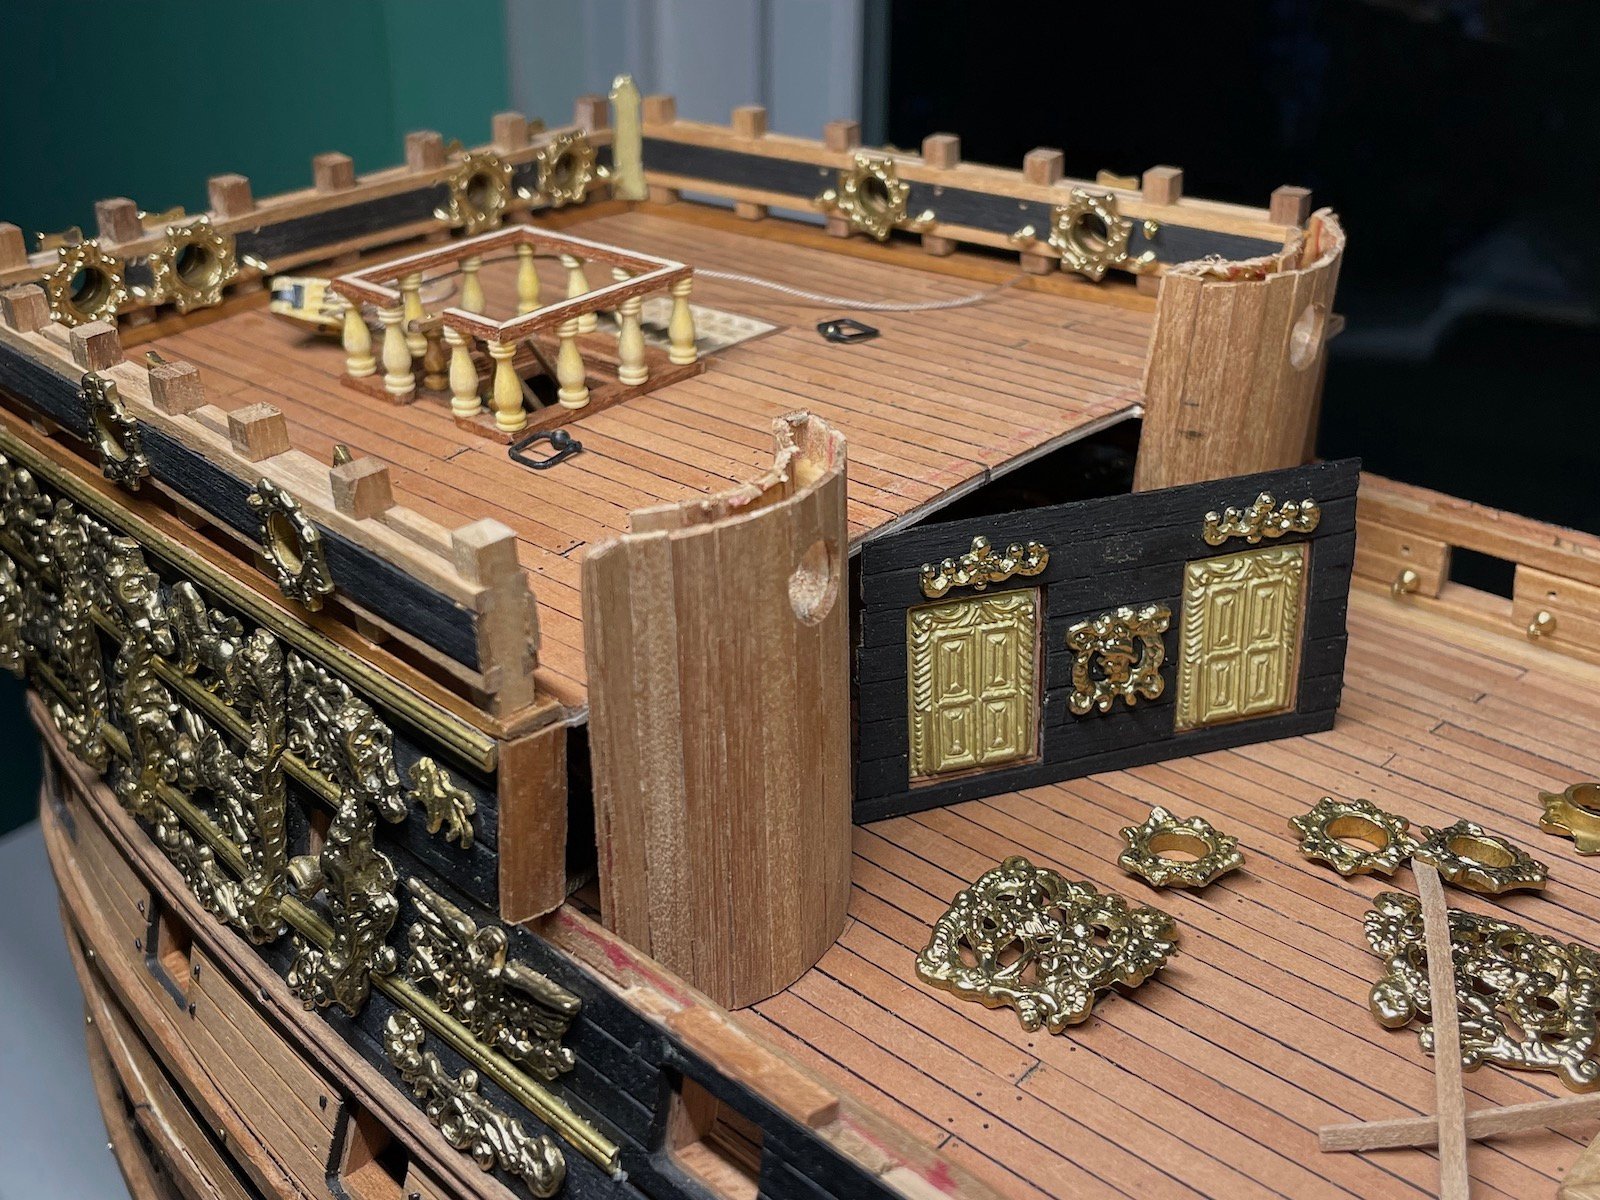
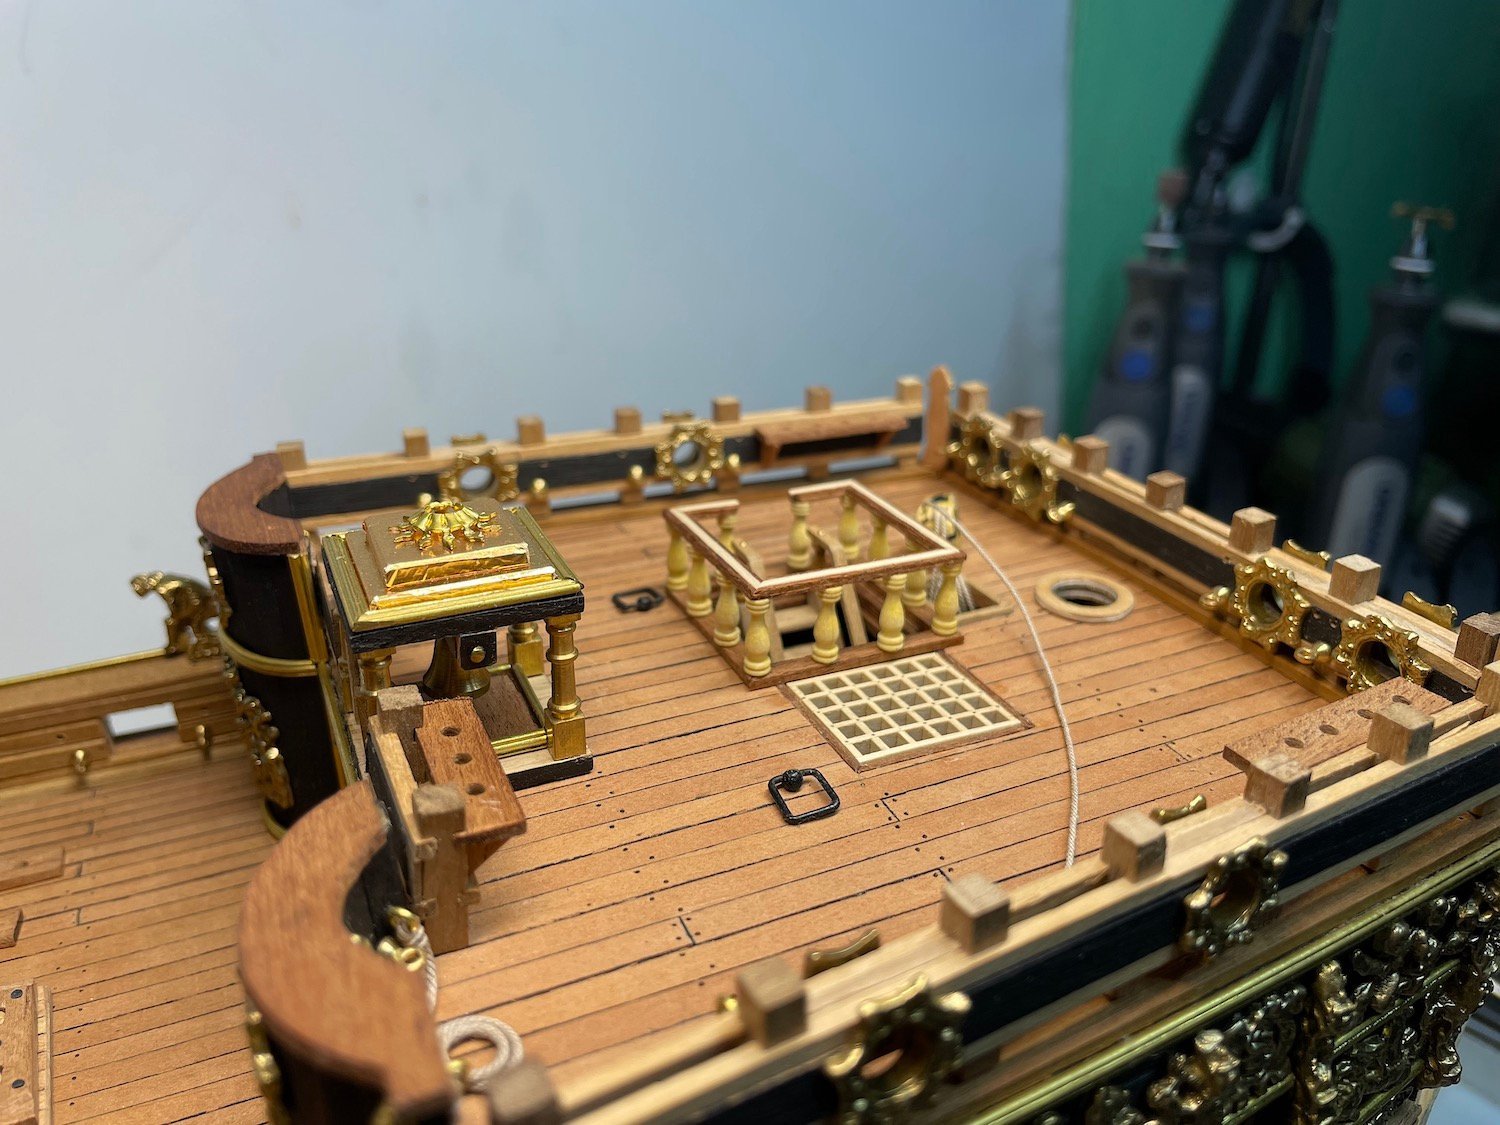
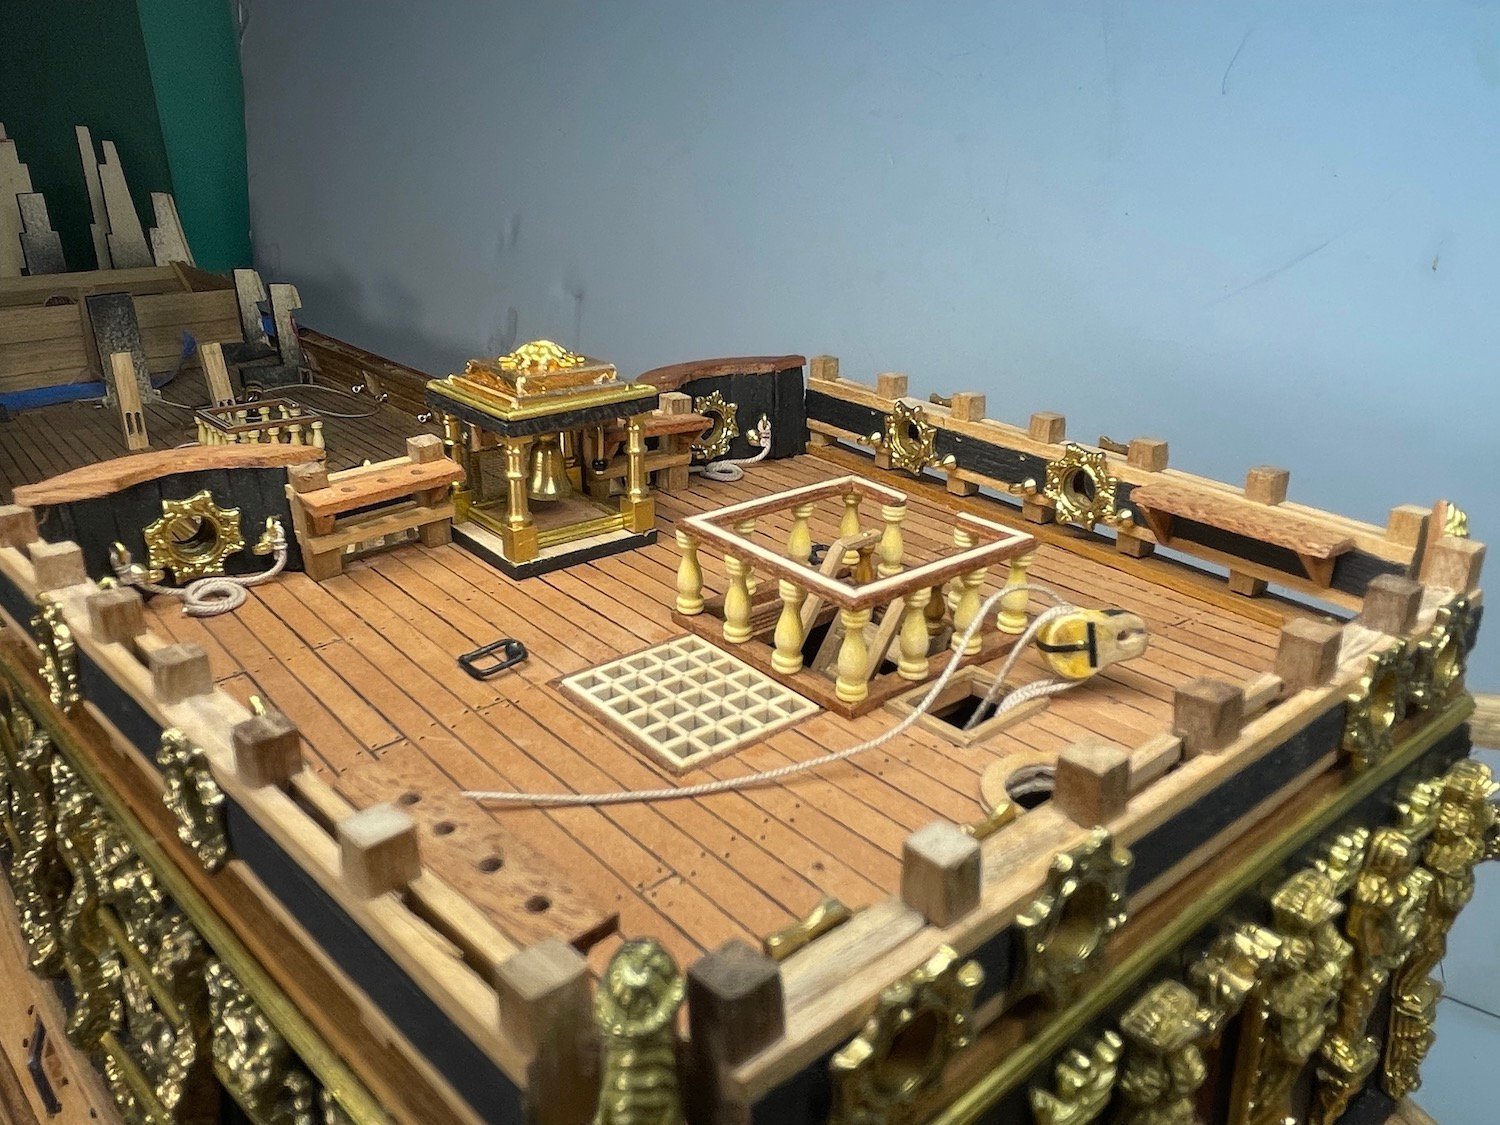
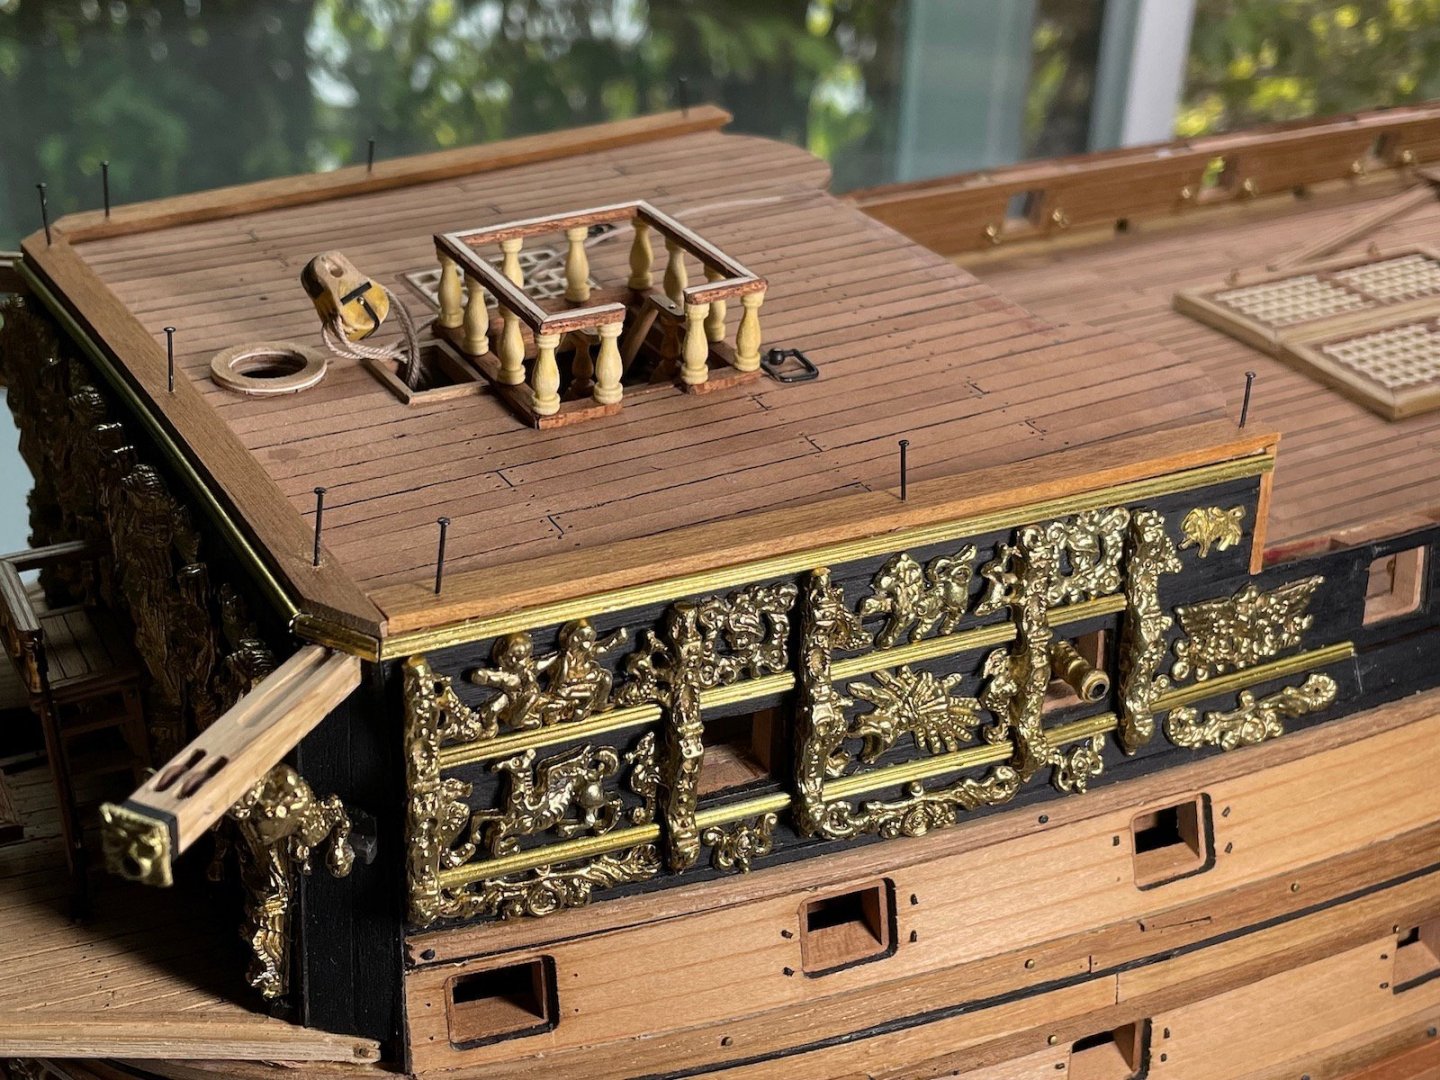
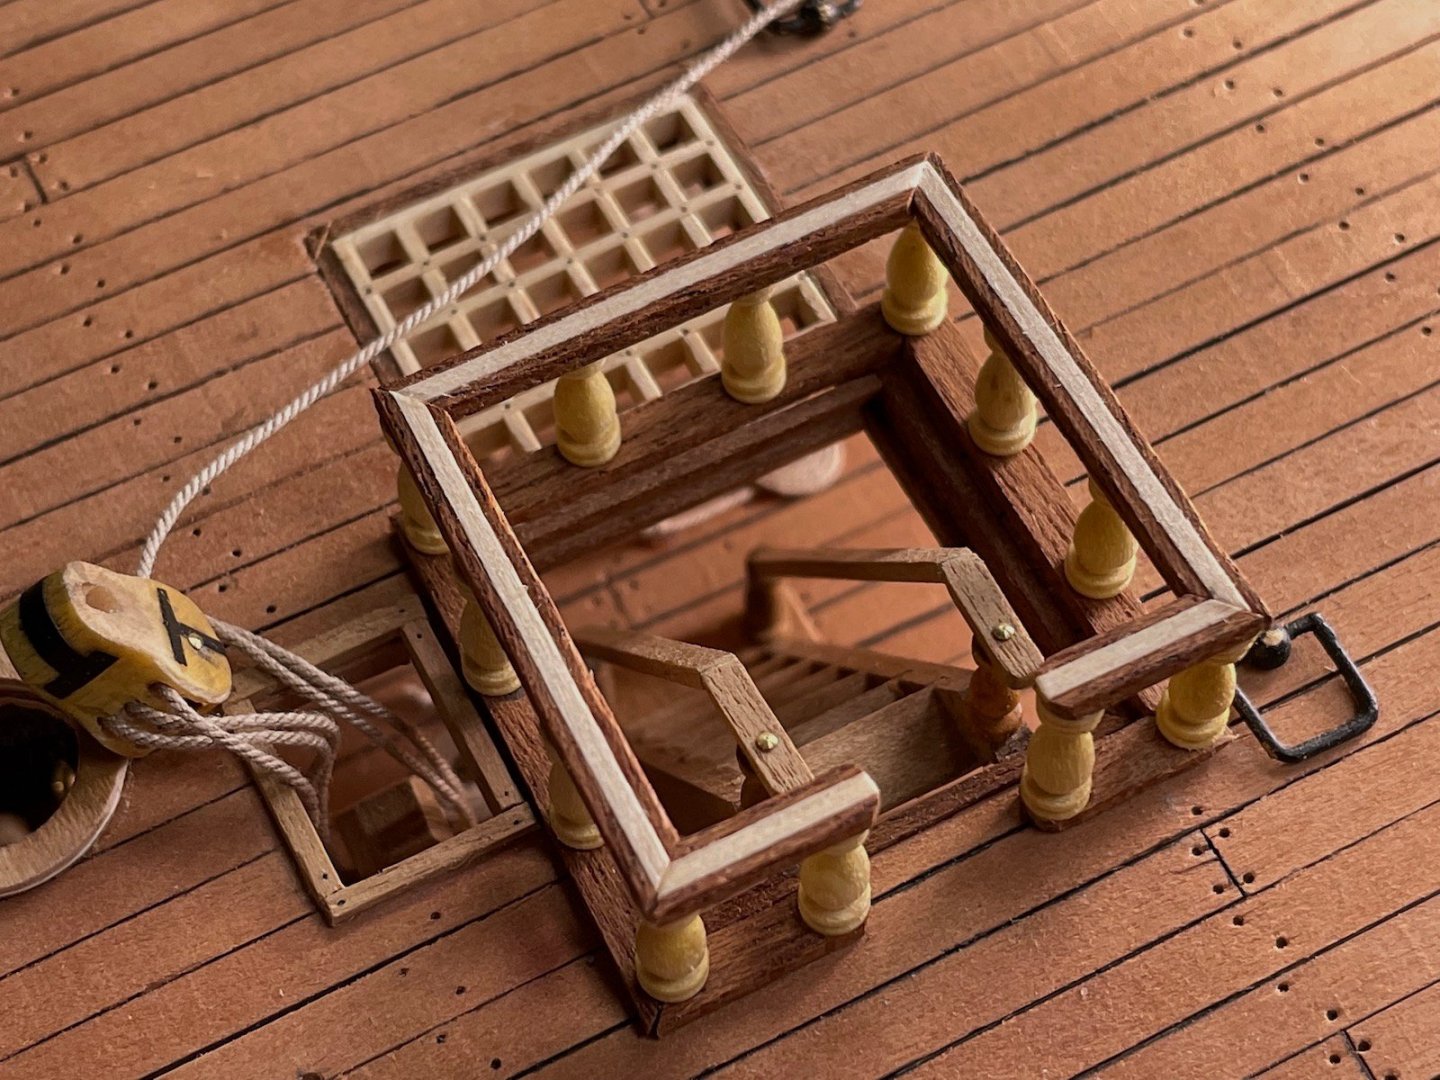
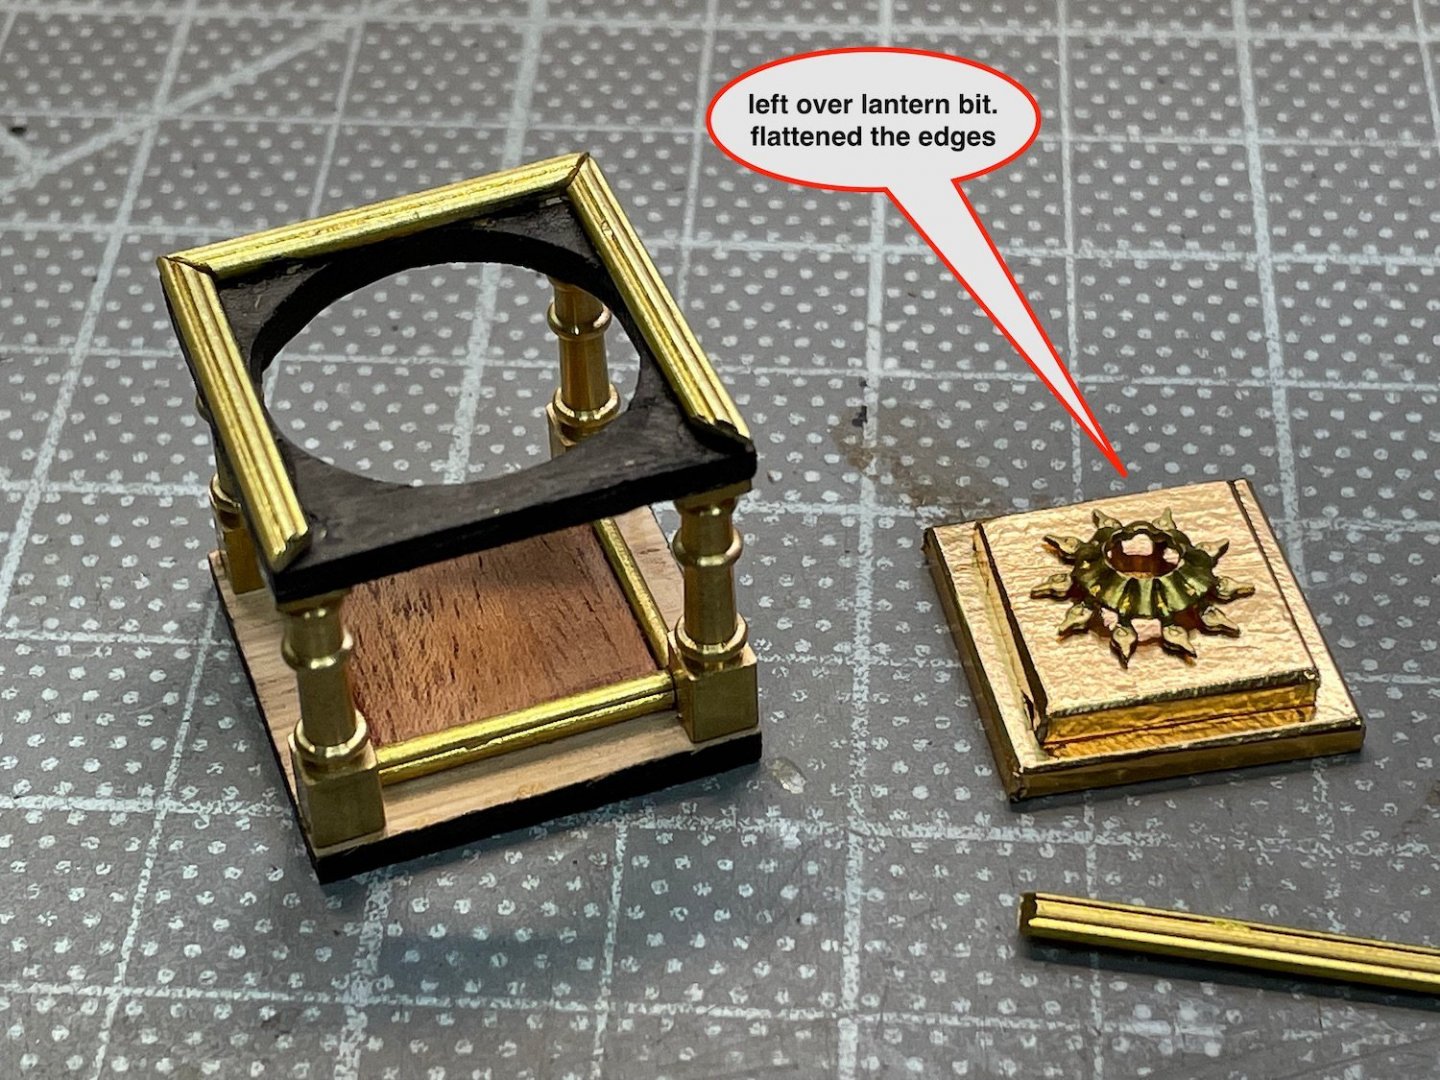
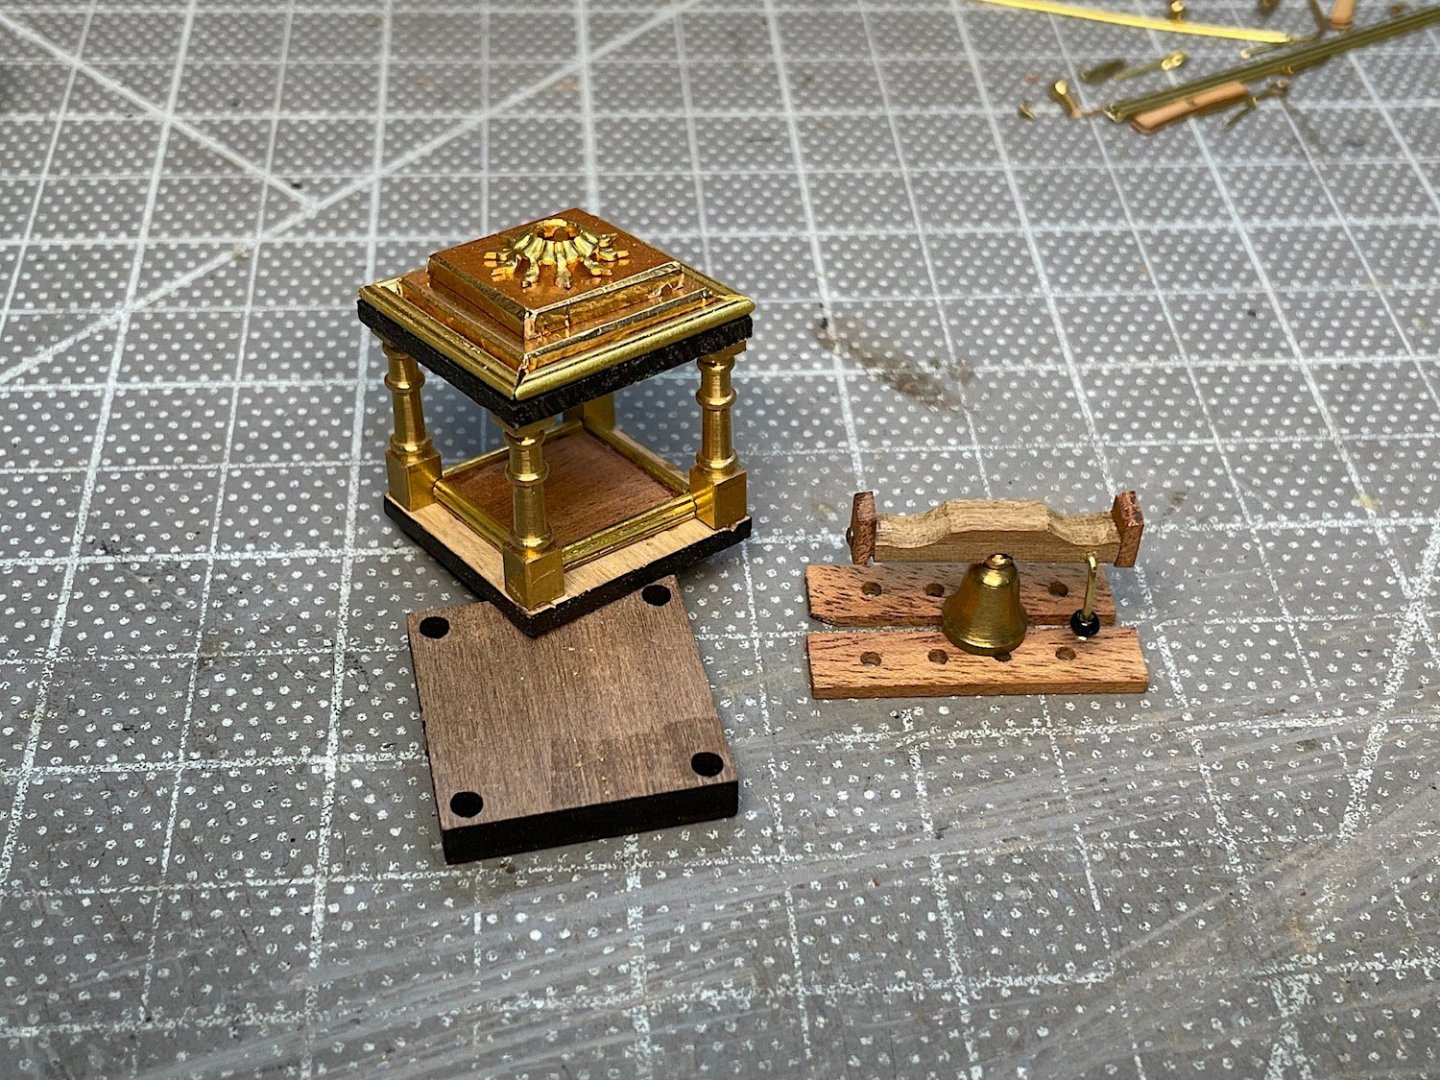
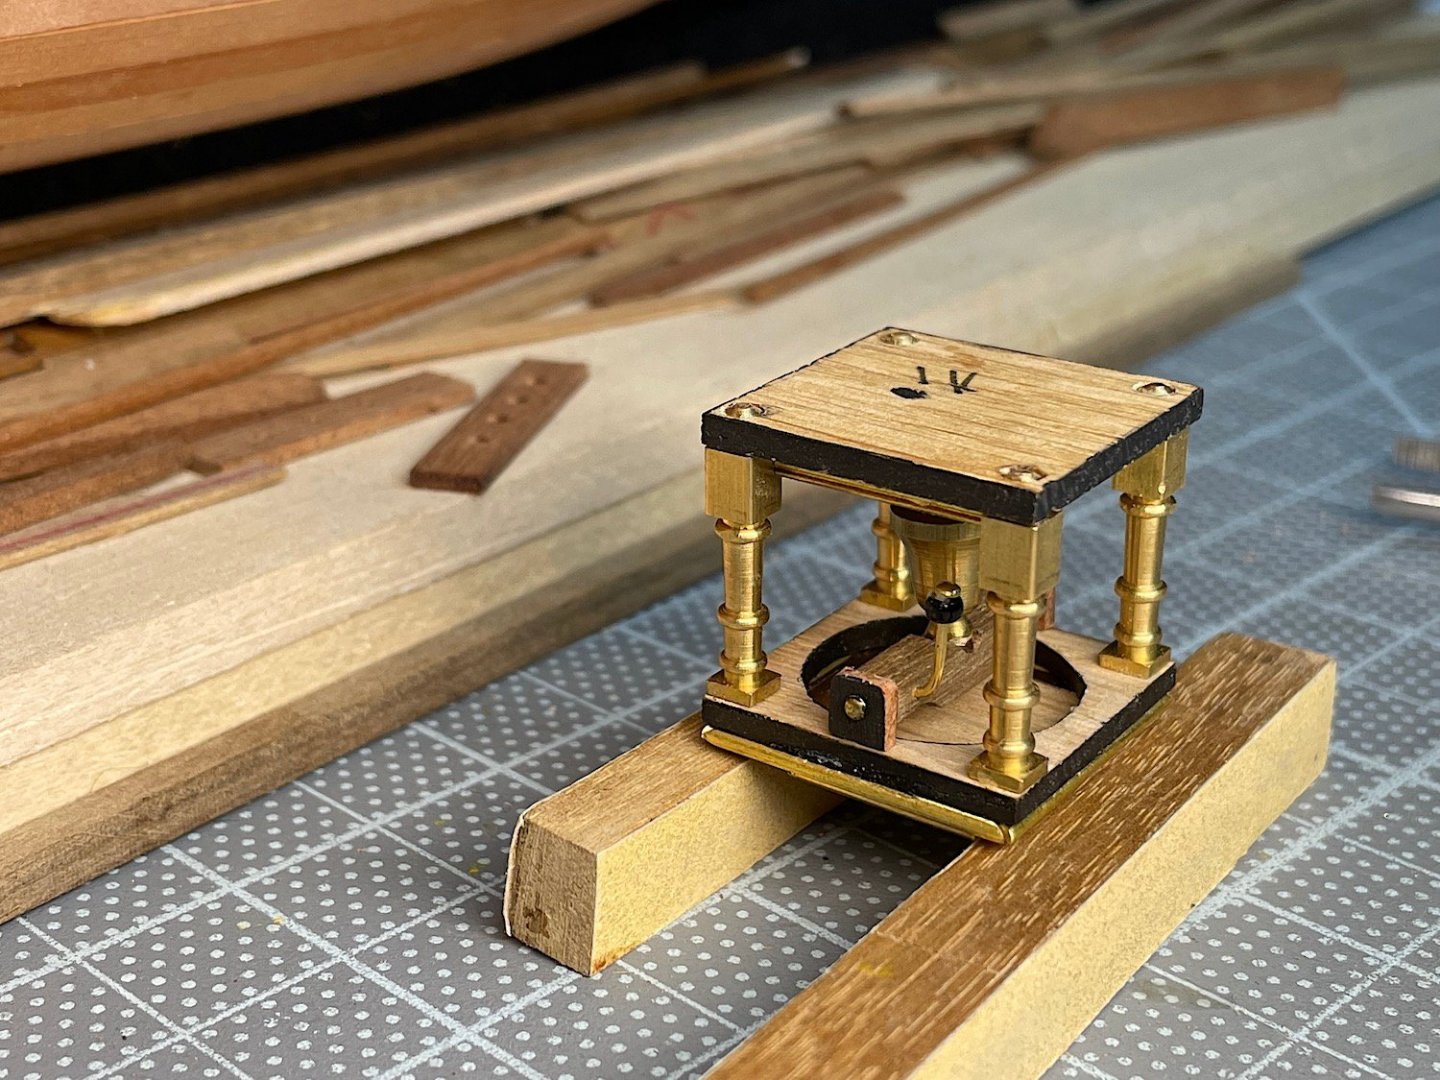
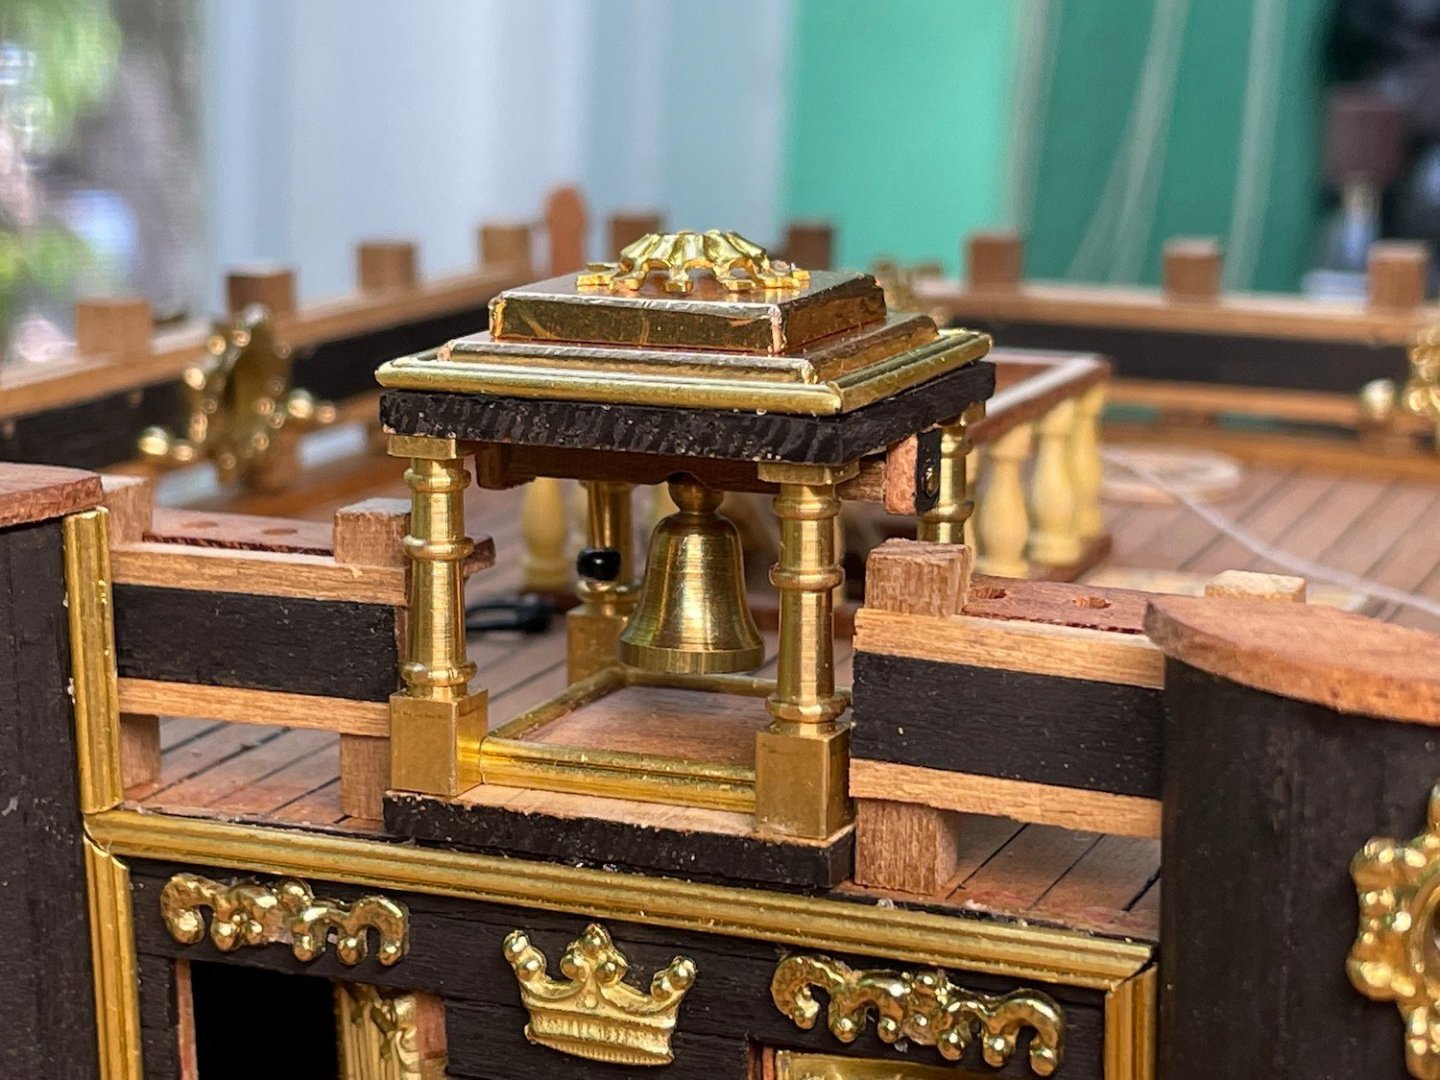
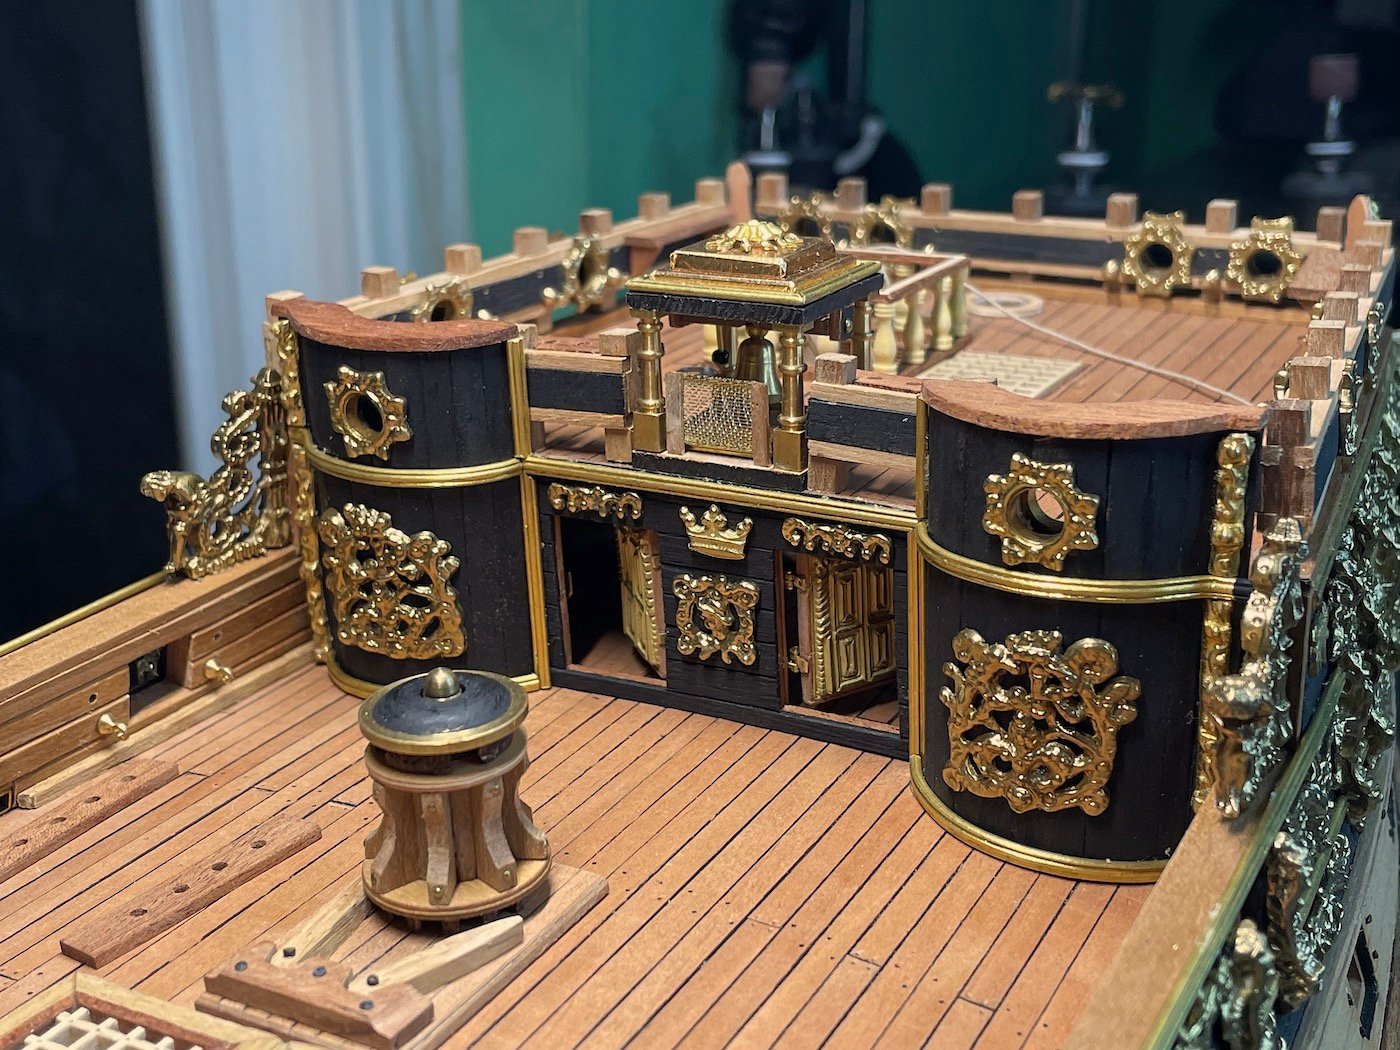
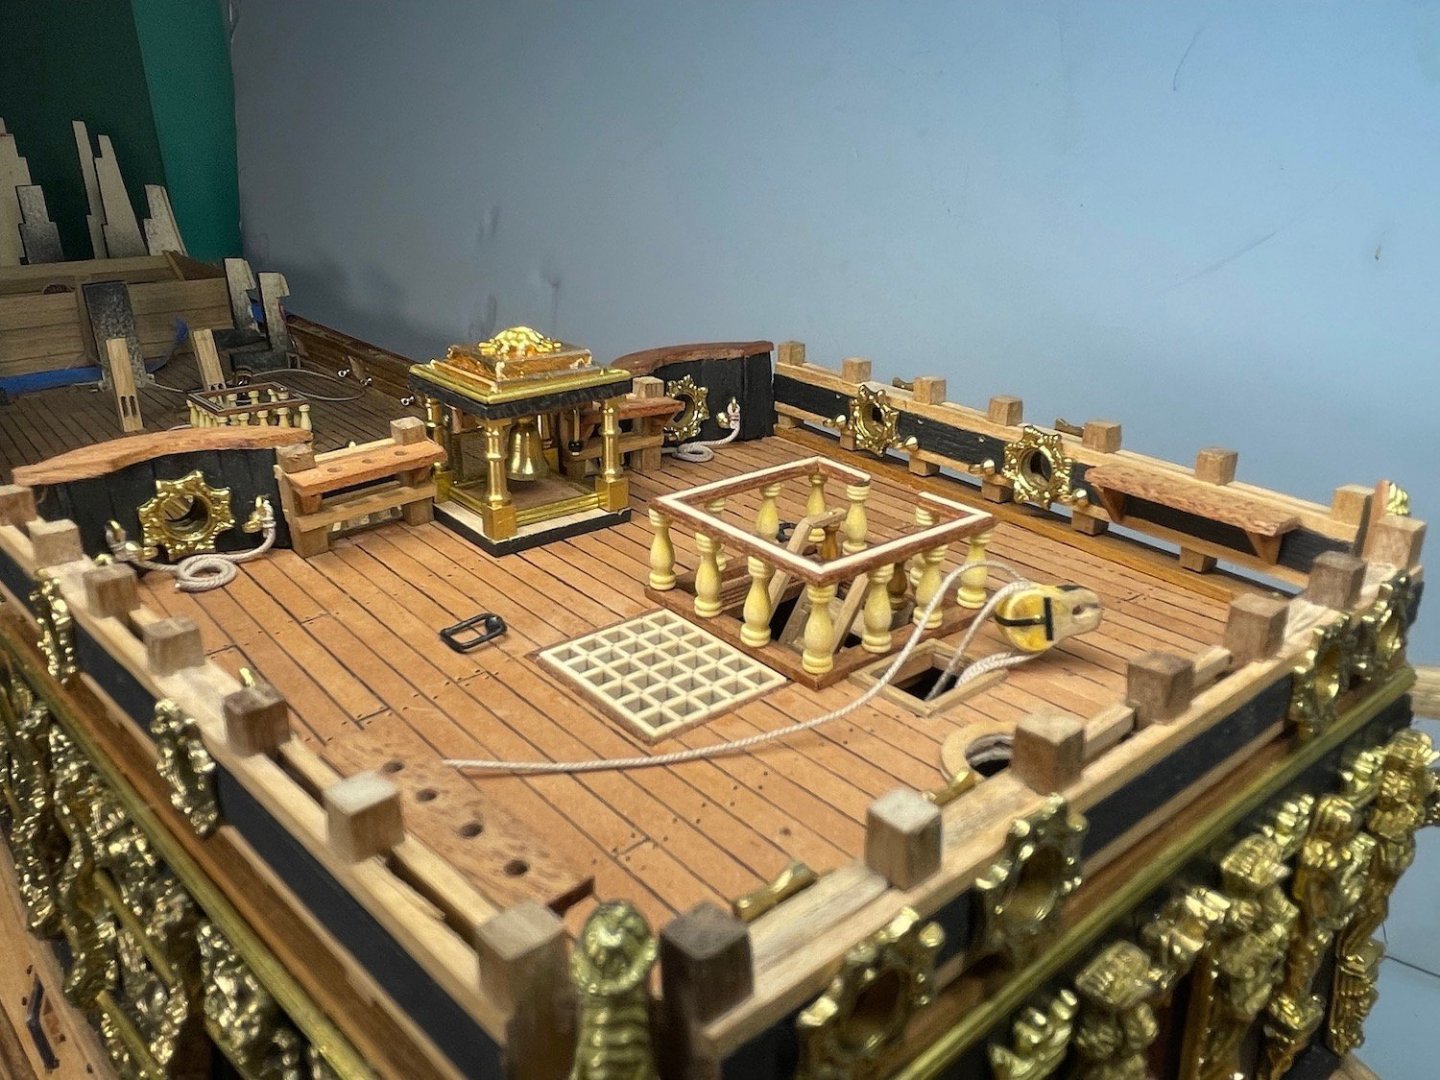
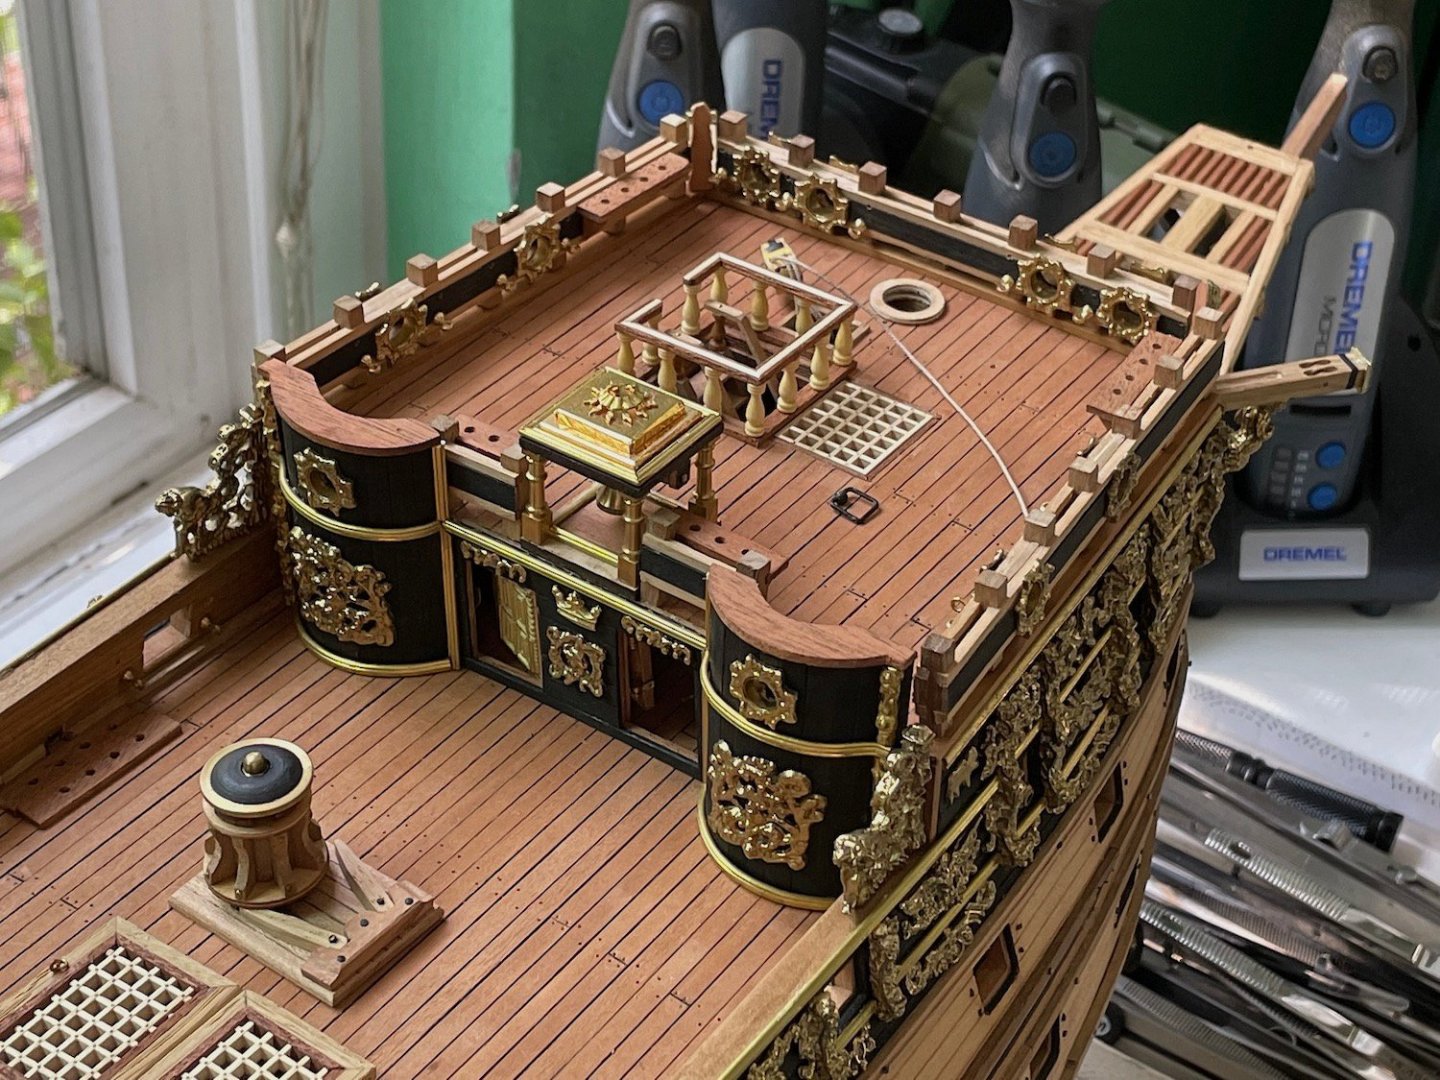
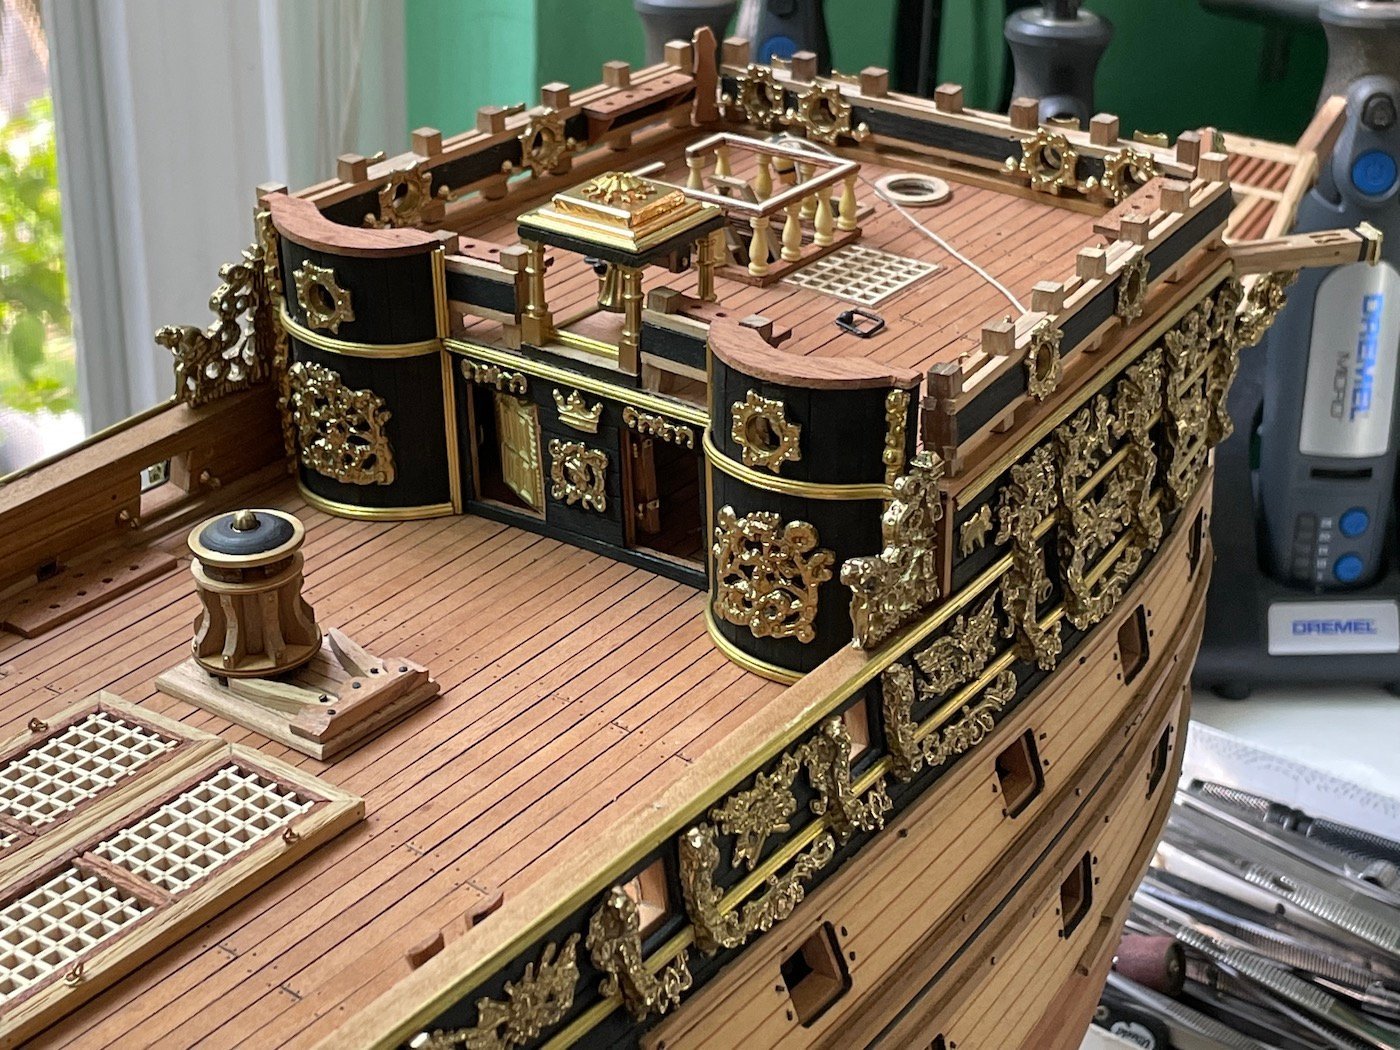
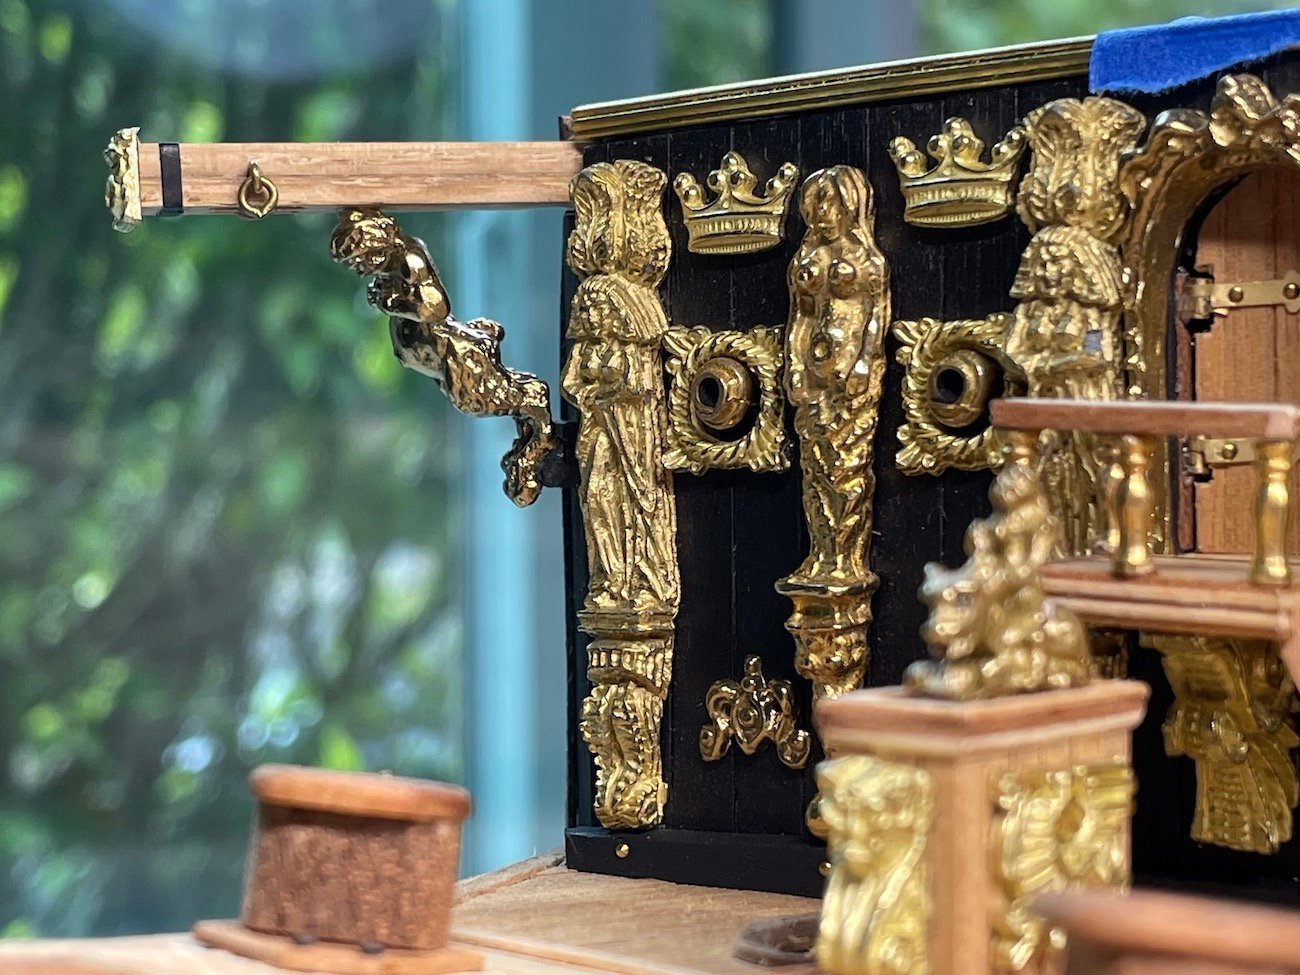
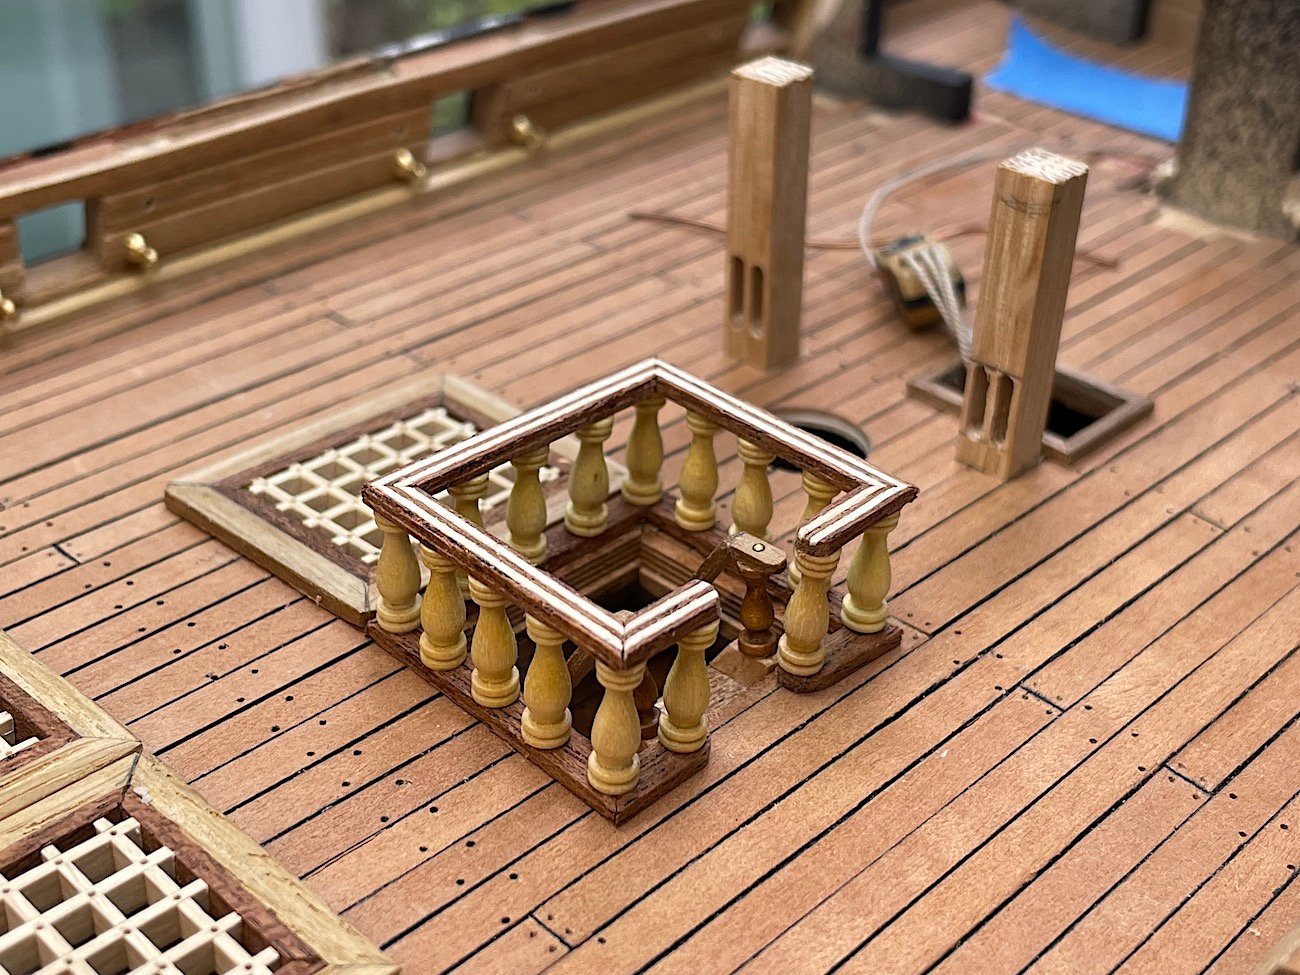
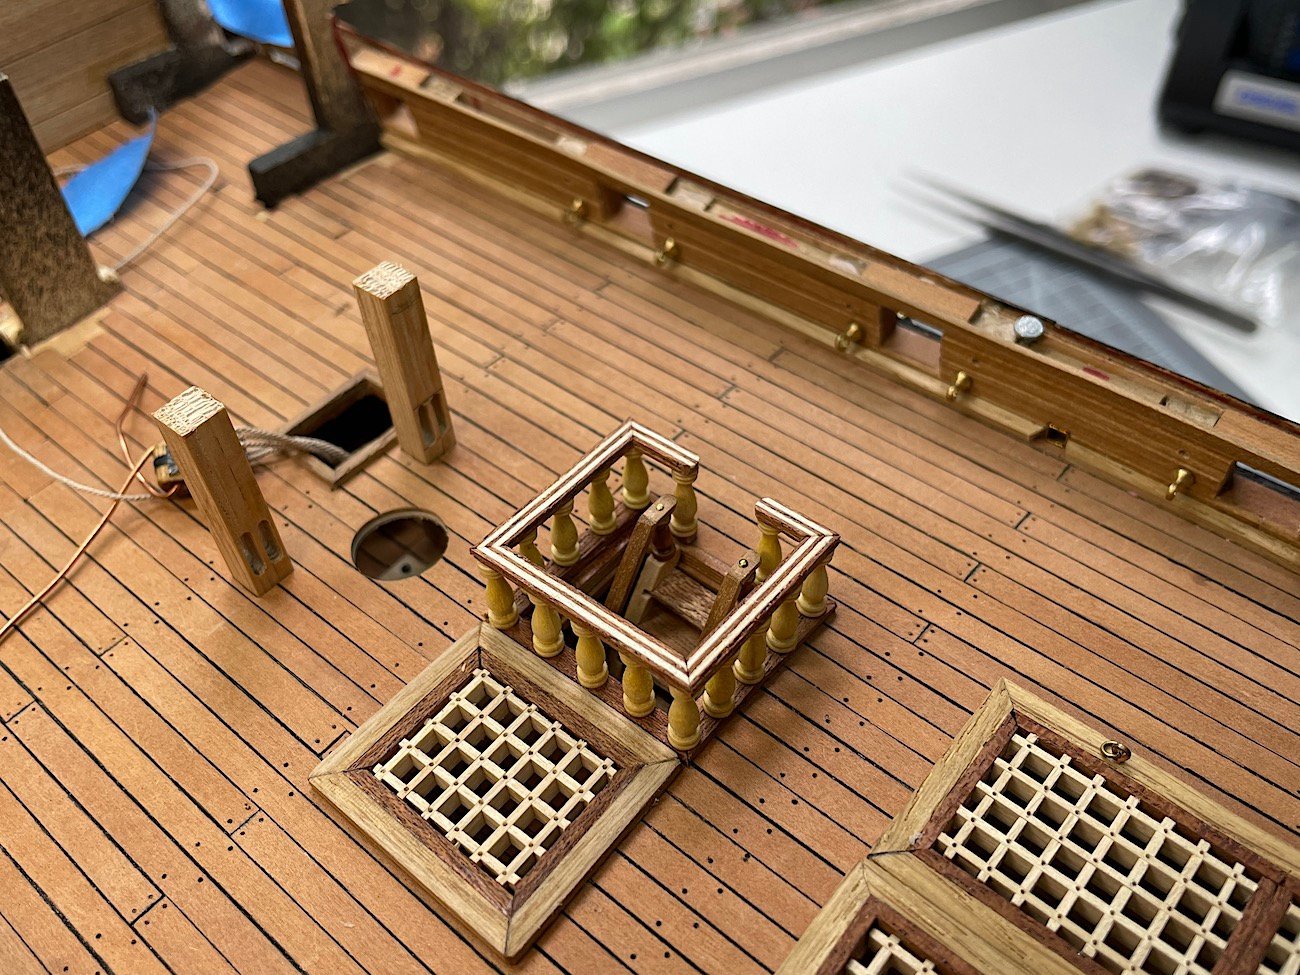
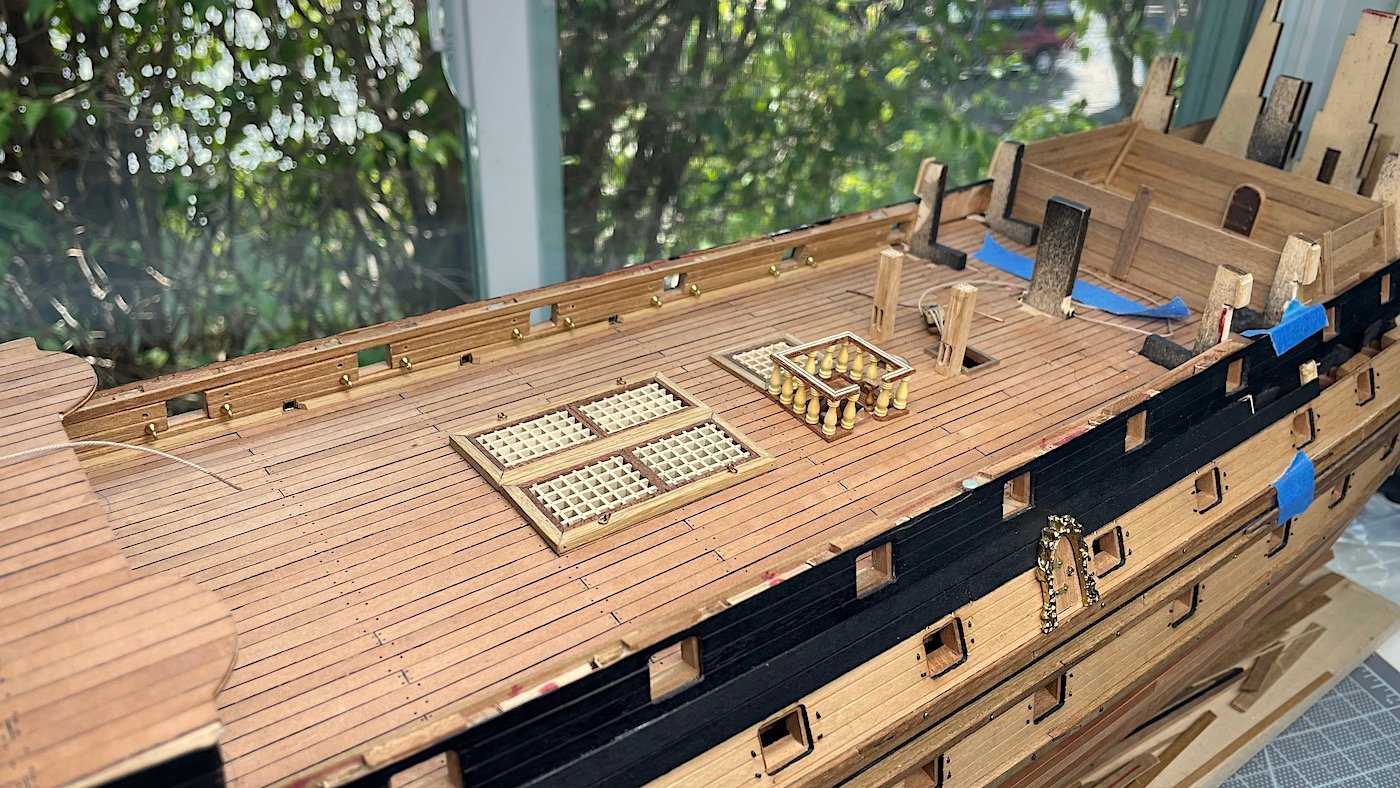
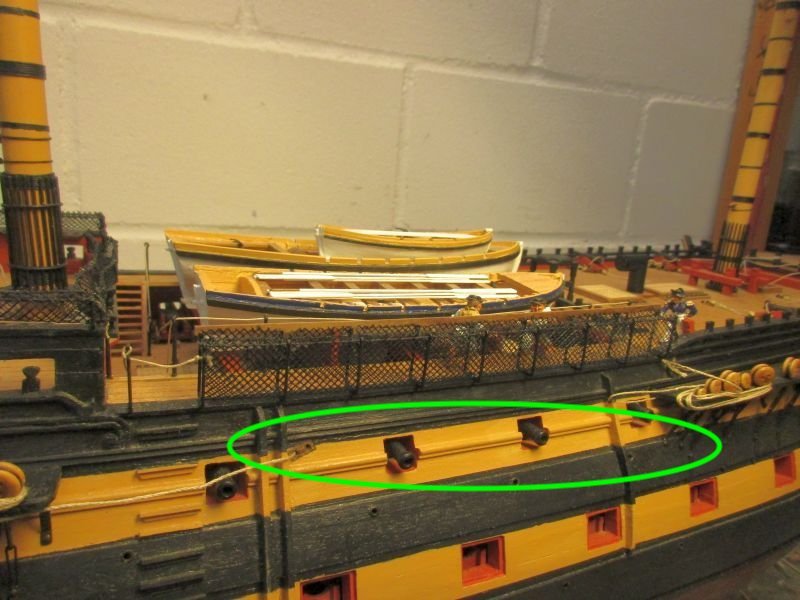
Hi all, Some updated images of continuing work on this area of ship. Thanks as always for your likes and comments 👌


-
Peter -- easy thanks. They are my "go to" vender. Will add some of those bits to my list.
- 366 replies
-
- 1
-
-
- bellerophon
- victory models
- (and 2 more)
-
Peter, I really like this shaping detail - I don't remember if you covered that earlier - in any case I need to copy that 😉 . May I ask how you made that shape?
- 366 replies
-
- 1
-
-
- bellerophon
- victory models
- (and 2 more)
-
E.J INDEED - Love Lagavulin - my all time fave of the super smokies - Congrats on your new ship the Royal Caroline is a beauty - we've all seen amazing logs on this awesome ship - good luck - I'll be on-board as well. You are way ahead of me - I can only handle one at a time. 😬 but your thoughts make sense..... PS: your rope work looks great - I'm a bit nervous I don't think that I have enough of Chuck's to do my current build. I did not notice that he was dropping that products from his company, so did not buy any extra - yikes lol Regards,
-
Went back over the log --- Chris stunning kit. The level of included details, the time saved from scratch building so much that is pre-included in this upcoming kit is spectacular. James - amazing high quality work indeed
- 355 replies
-
- 5
-
-
- vanguard models
- Sphinx
- (and 1 more)
-
James, Just came across you log -- Wow! - Superlative work indeed. Bookmarked will ge back and spend time admiring your work.
- 355 replies
-
- 5
-
-
- vanguard models
- Sphinx
- (and 1 more)
-
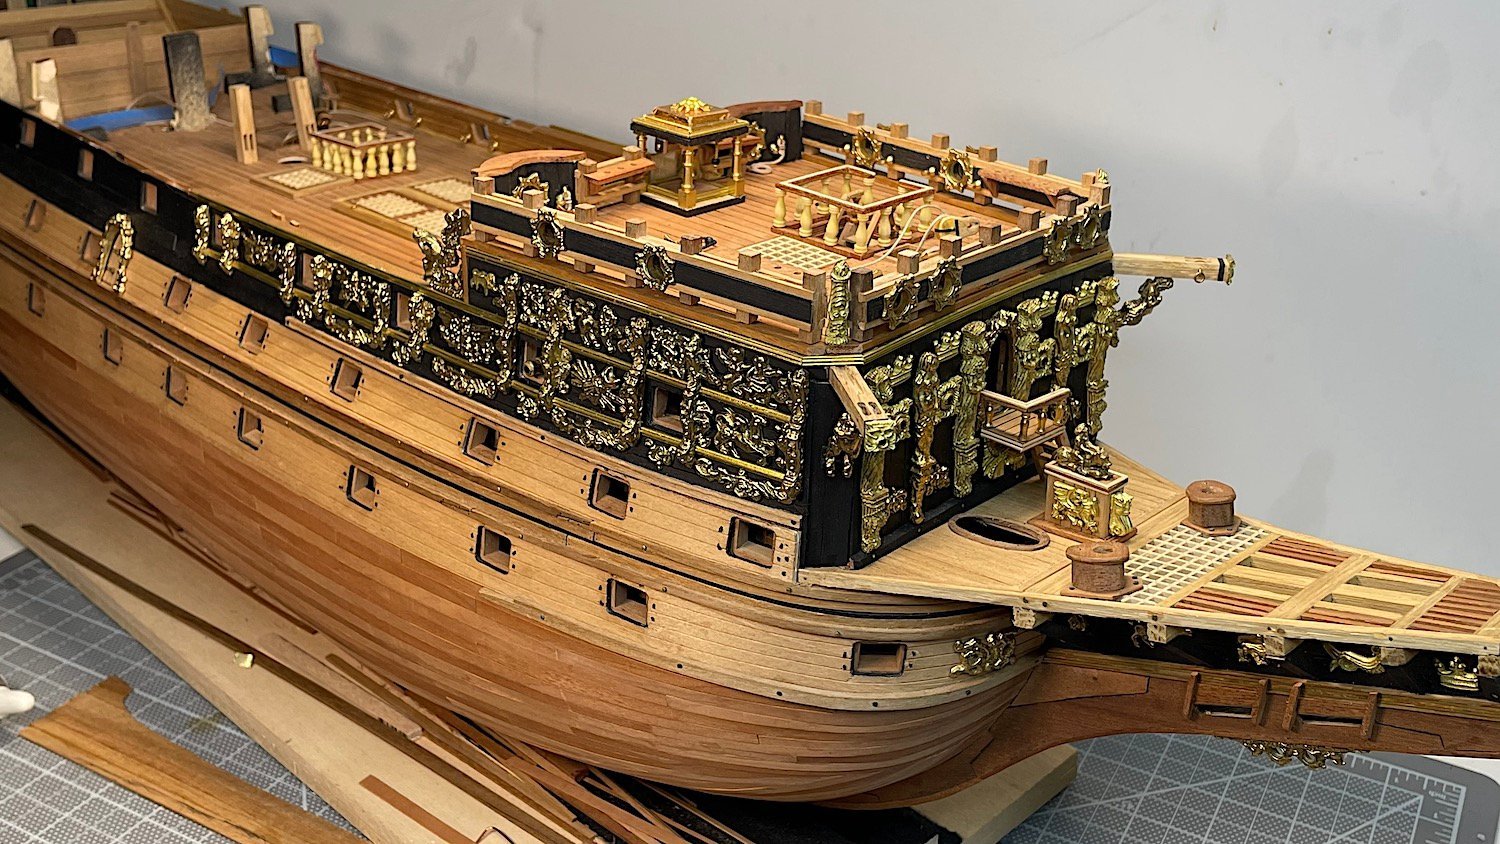
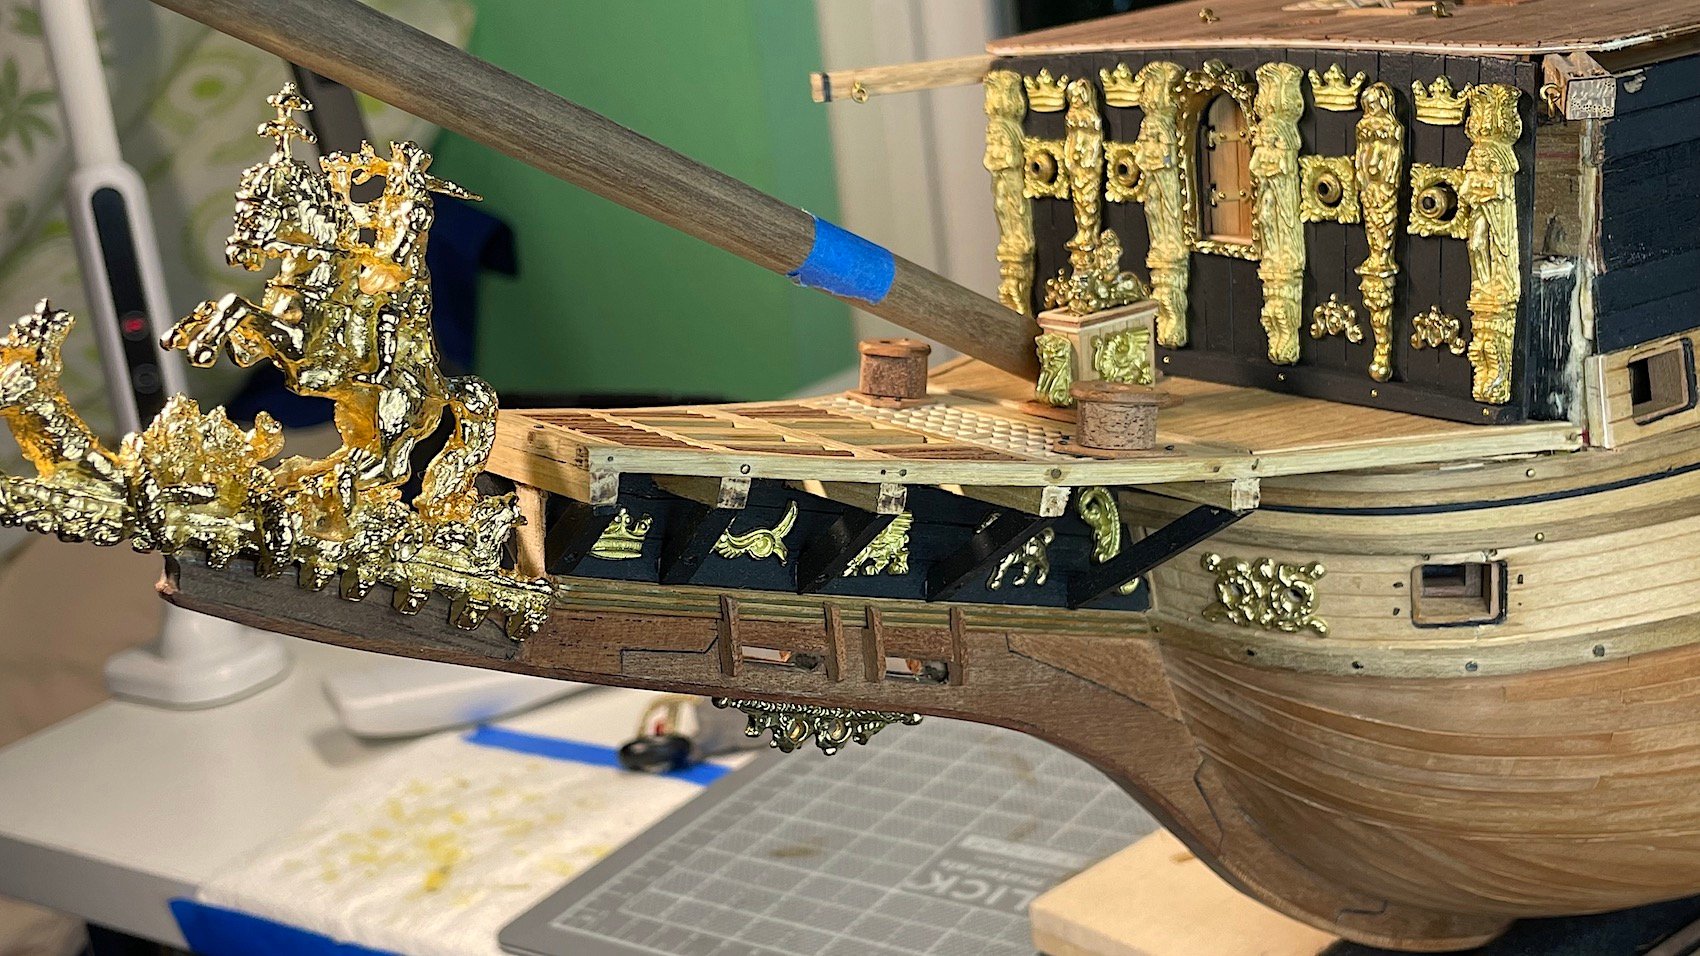
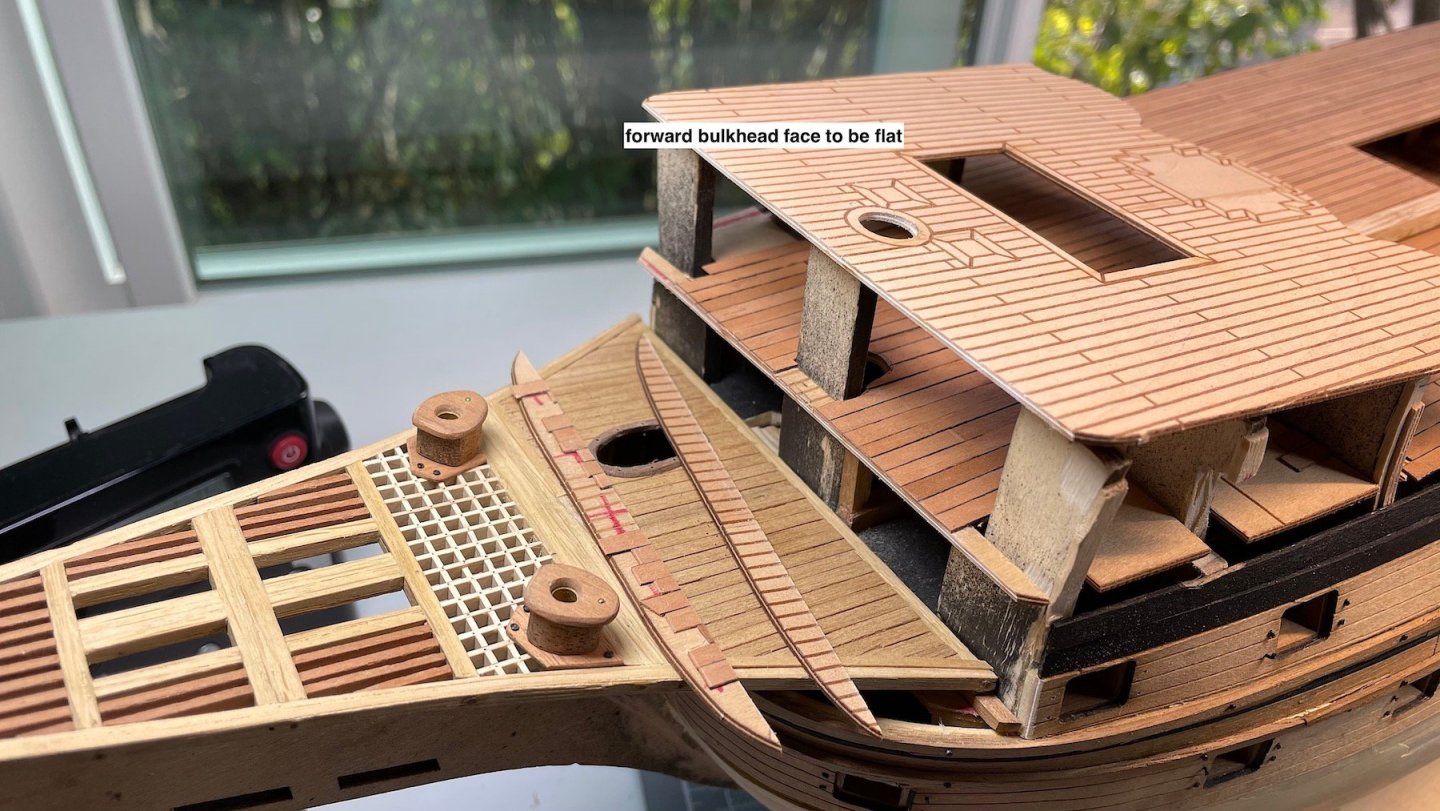
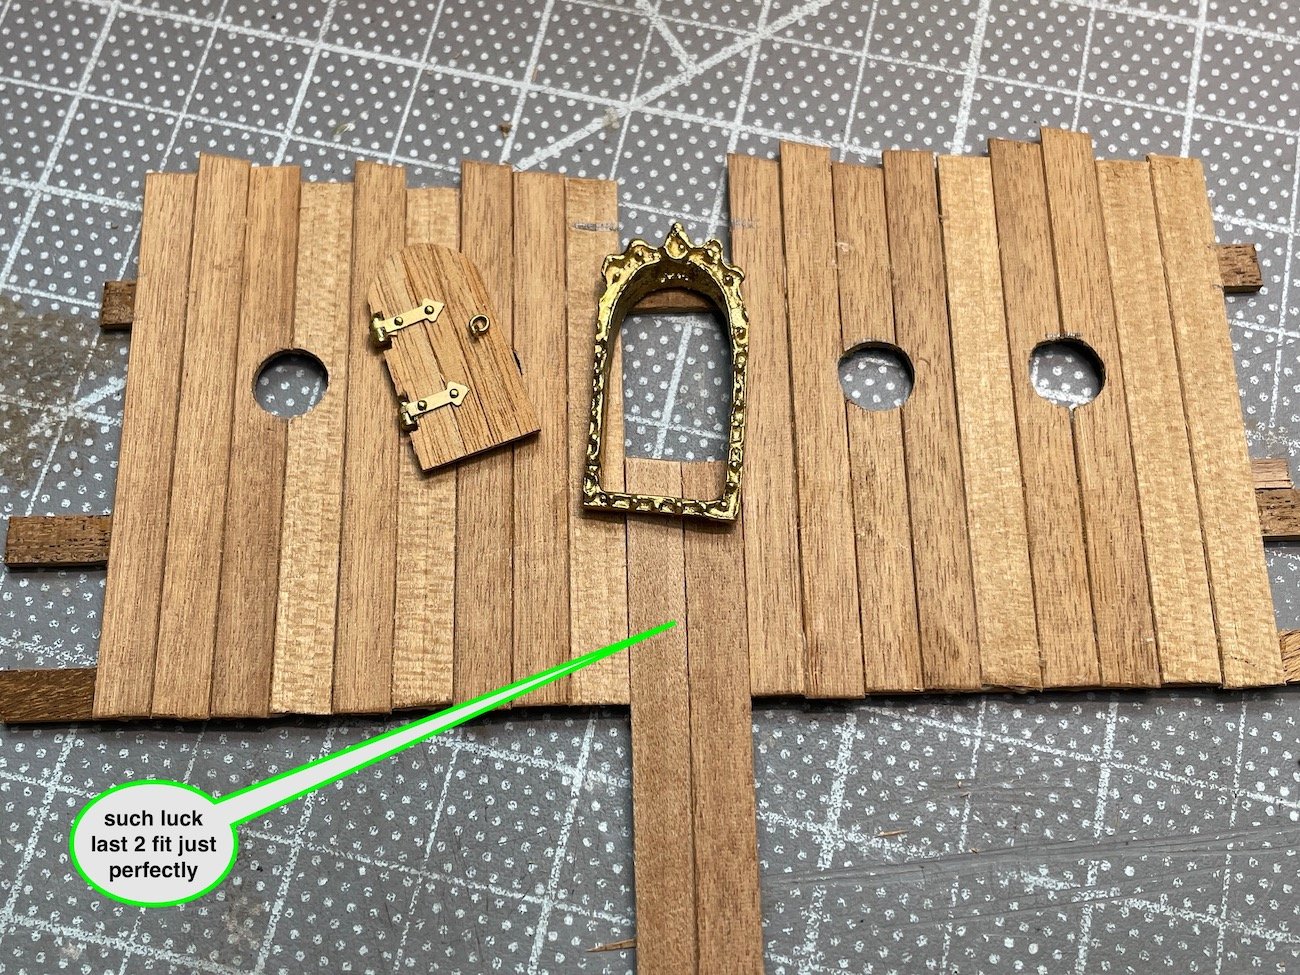
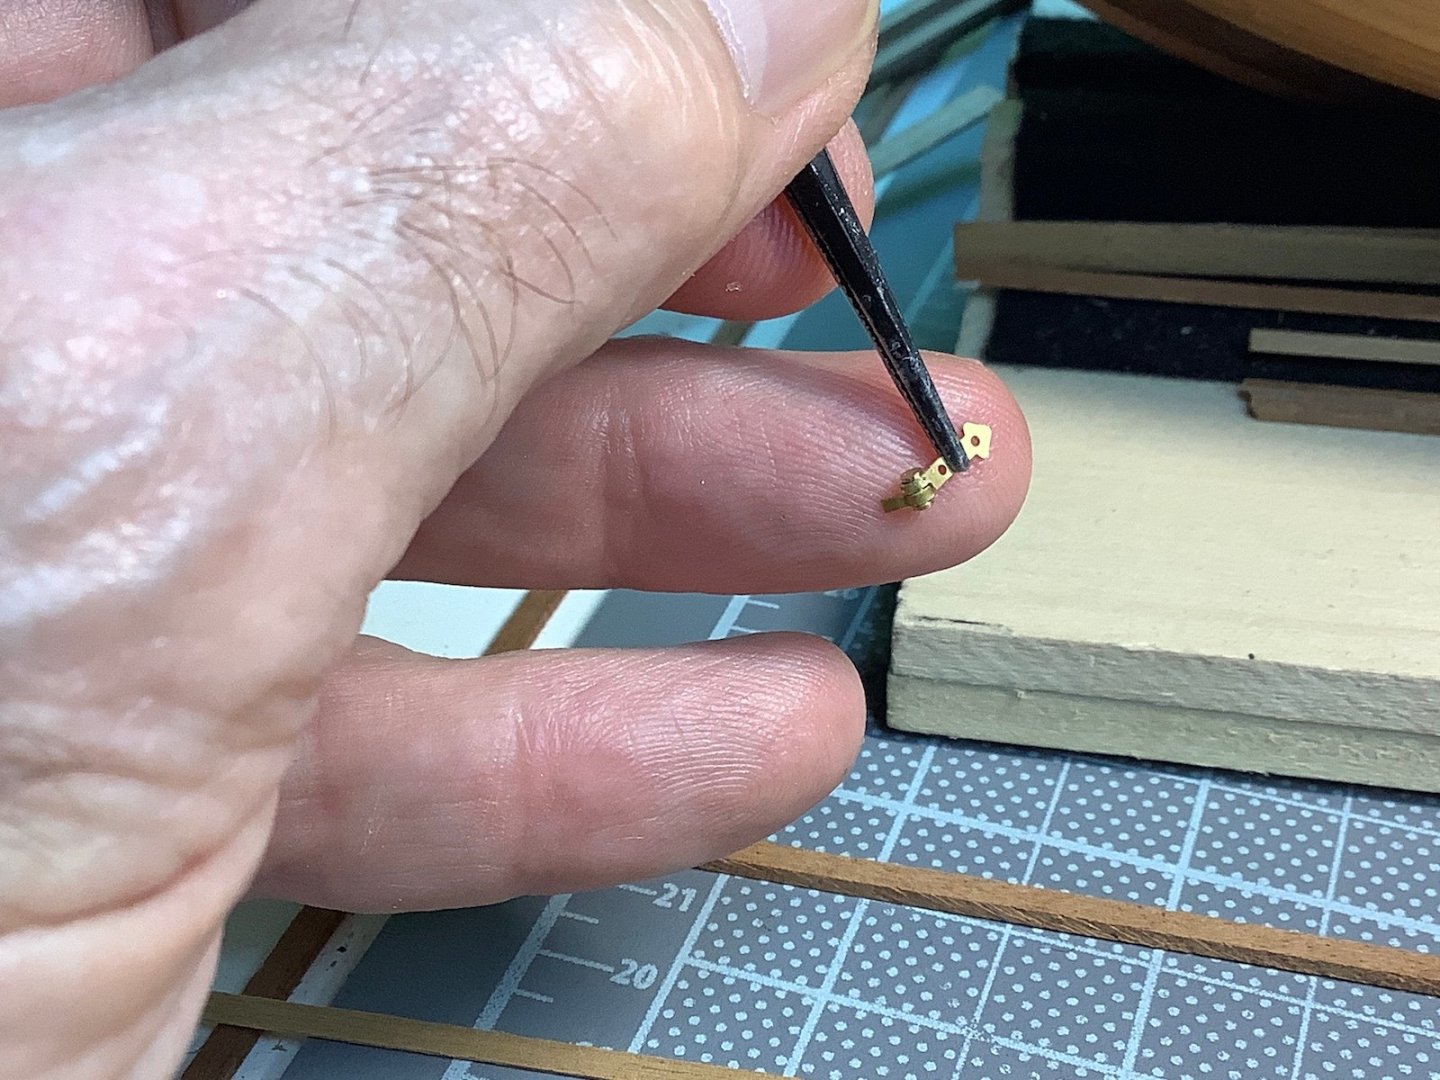
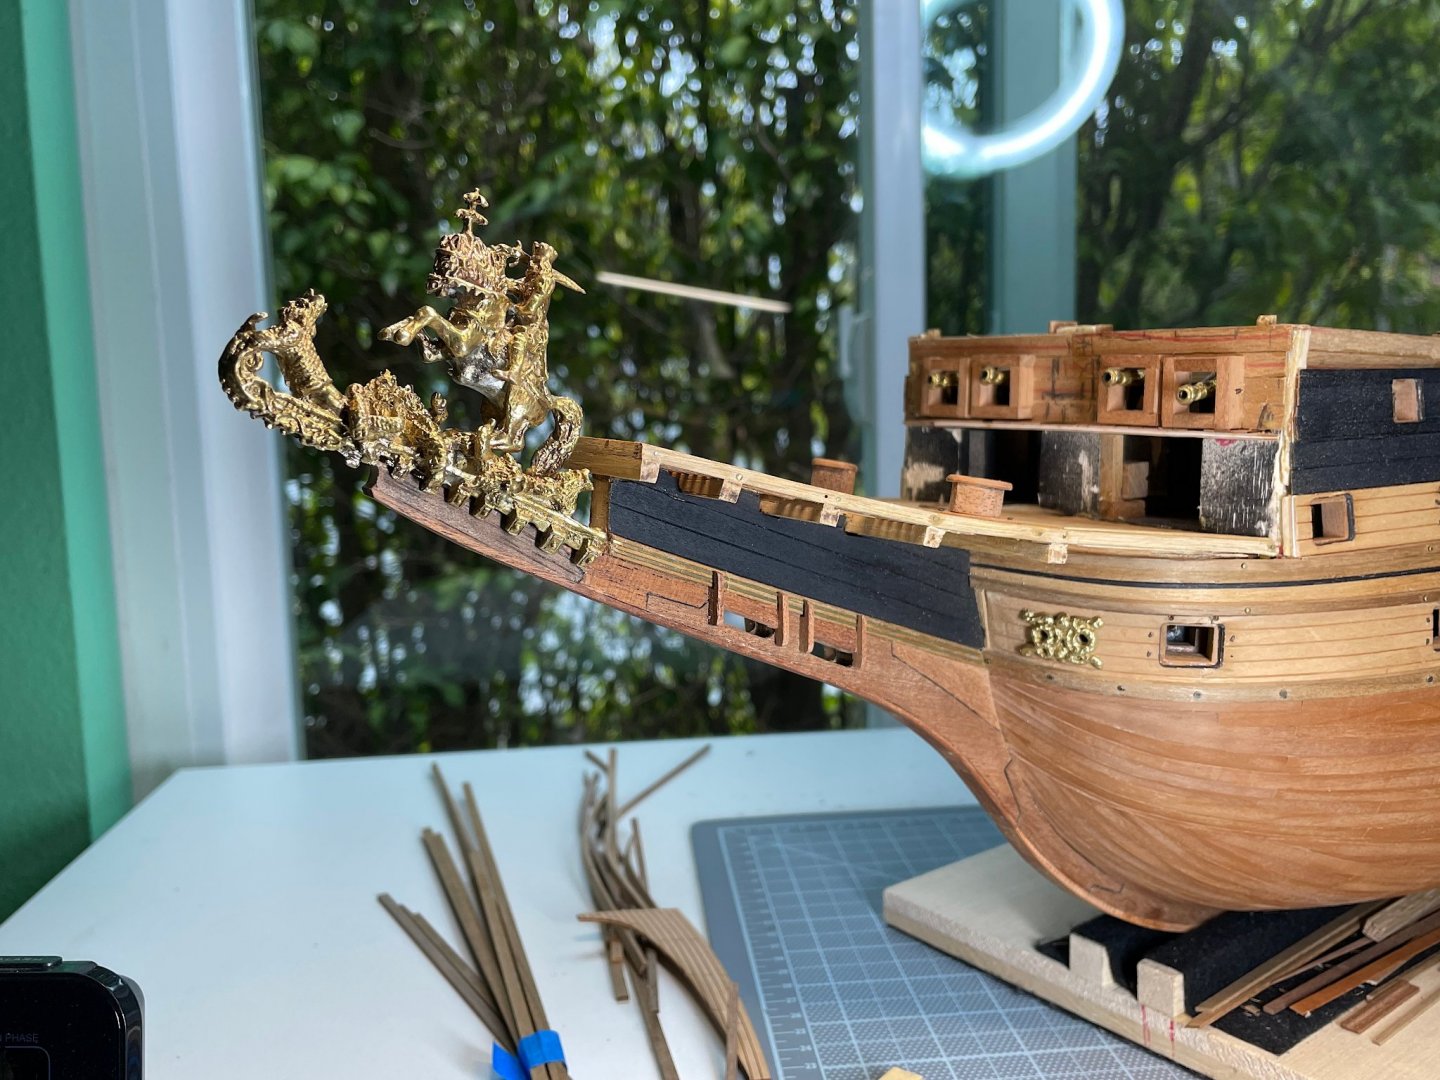
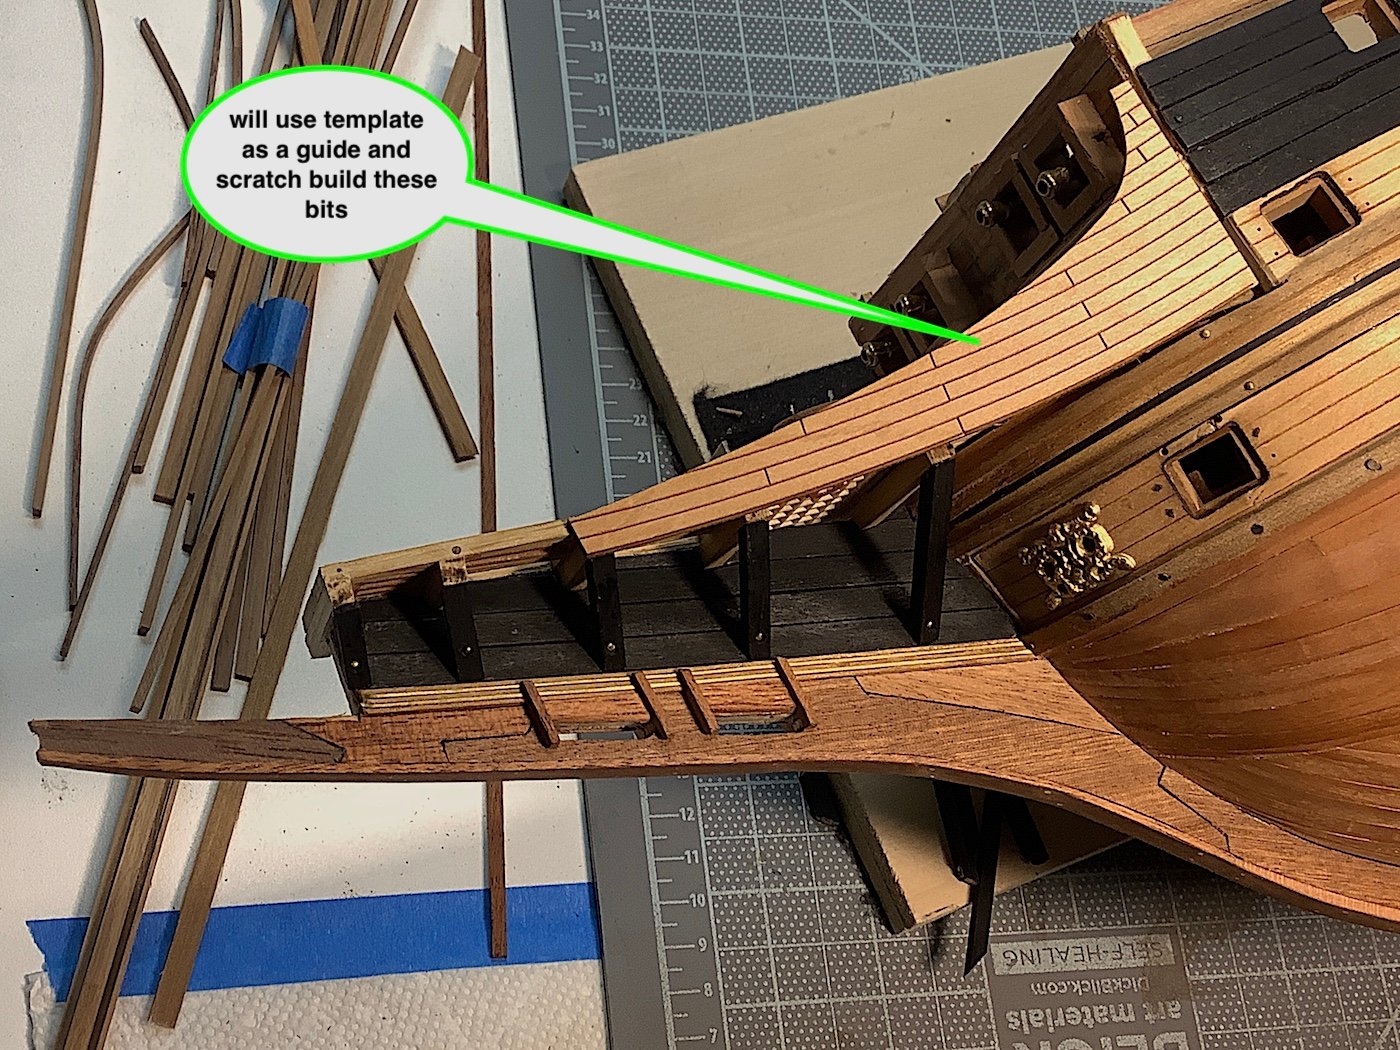
Hello, Update on bow area work. Images self-explanatory so will keep text to a minimum. I am very appreciative of your continued interest in this log – thanks so much.....


-
Nice work Frank!!
-
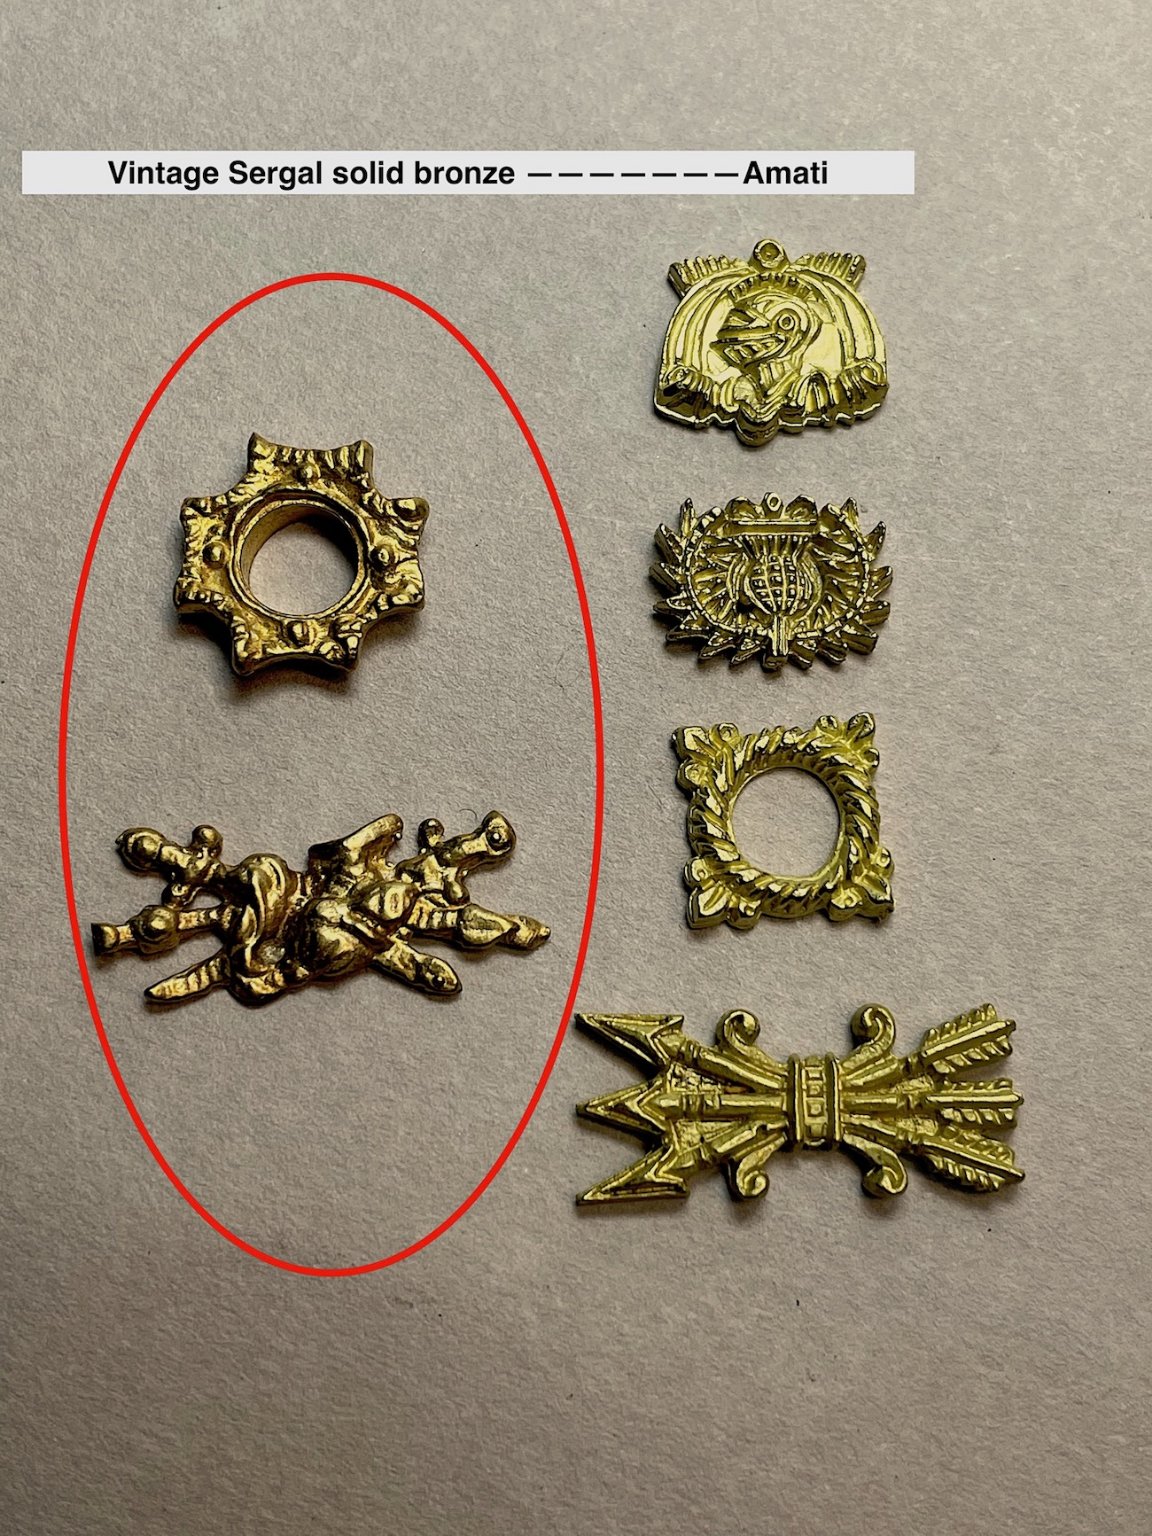
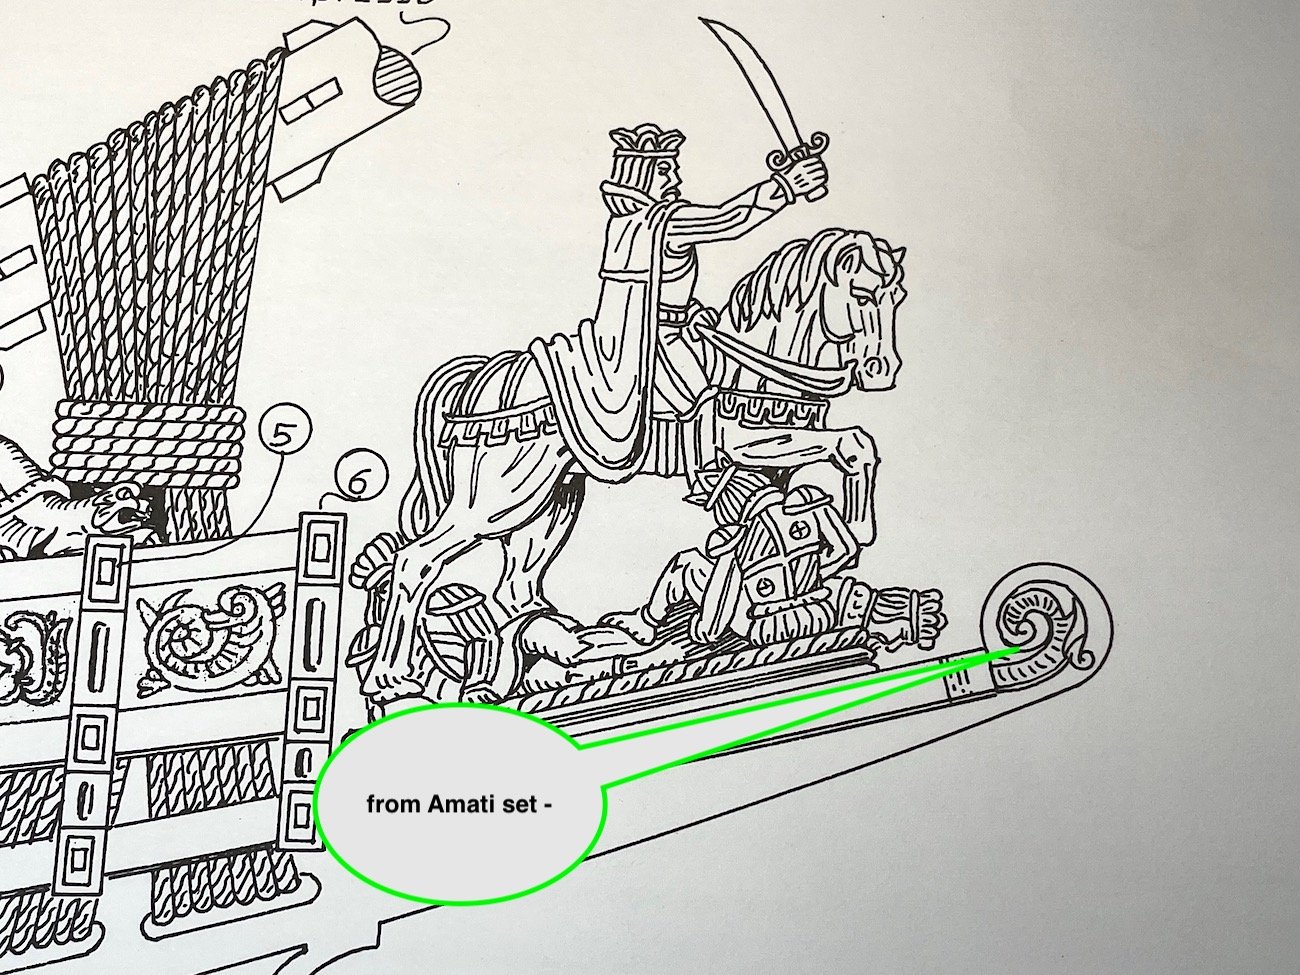
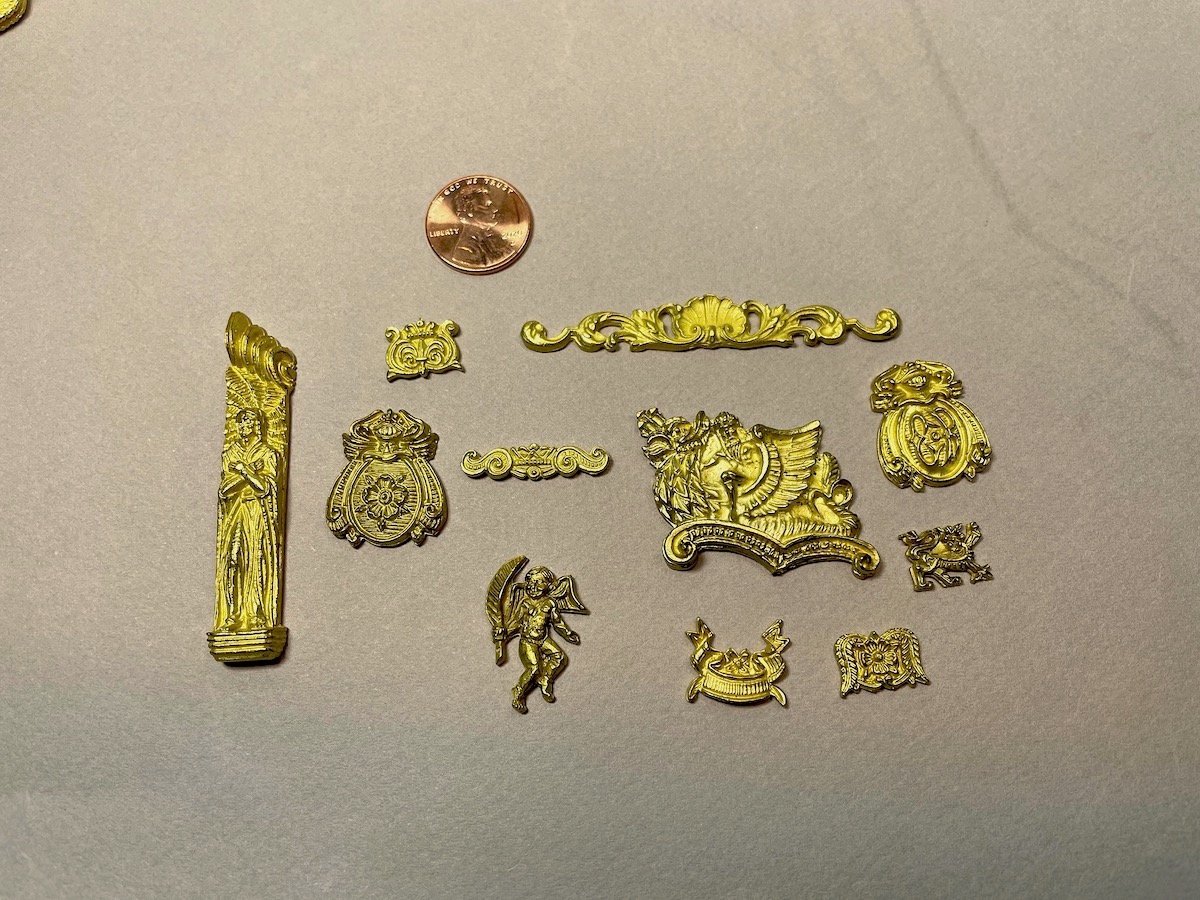
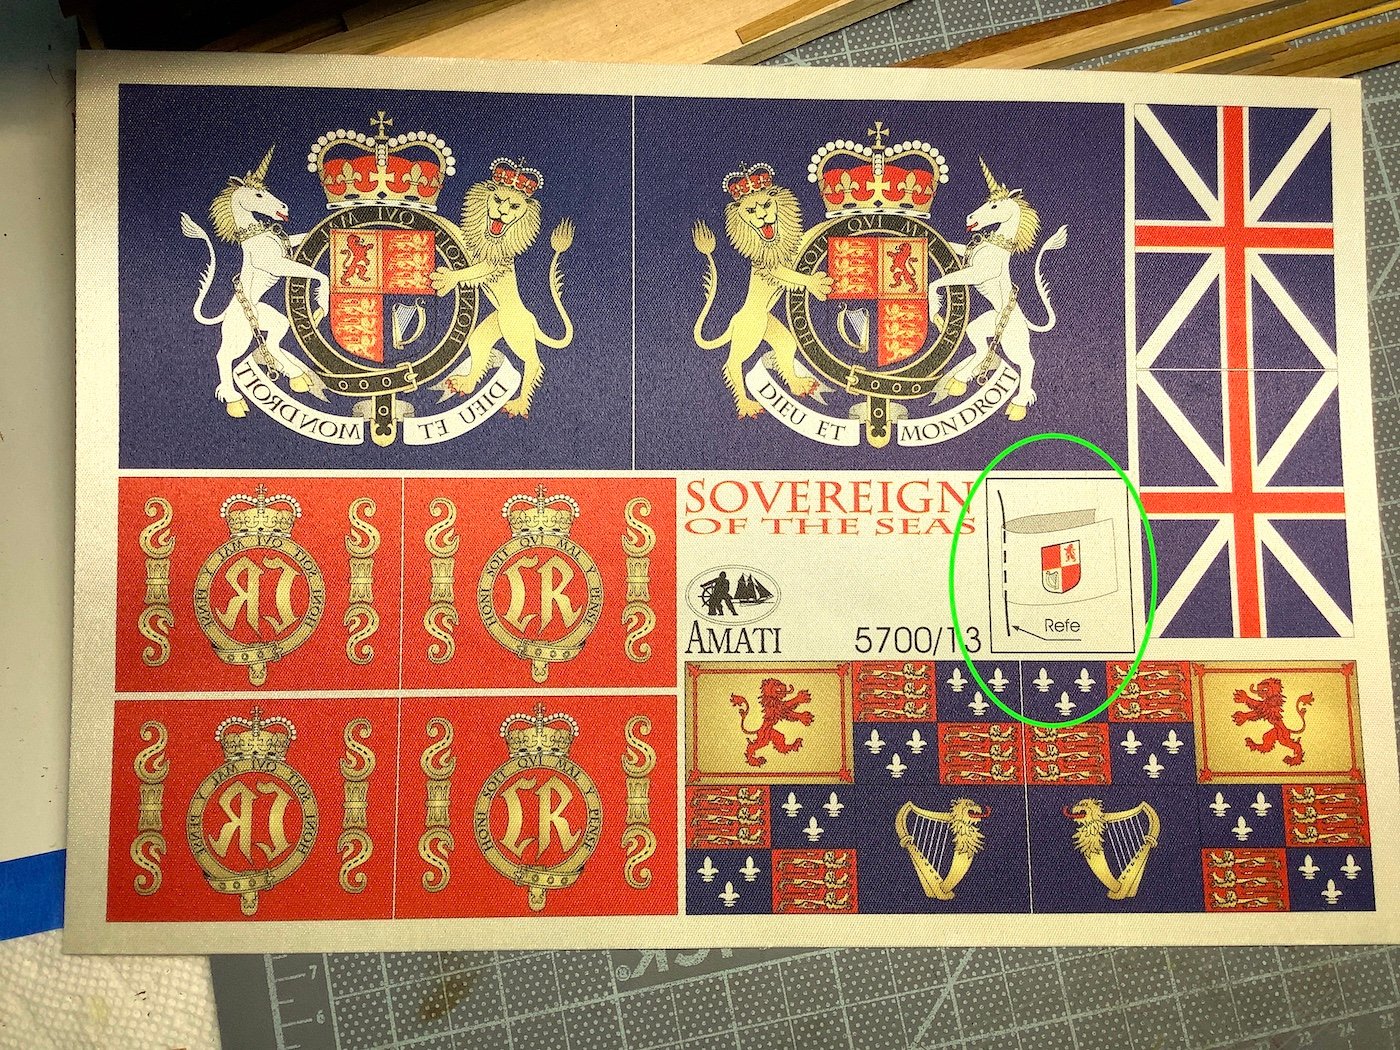
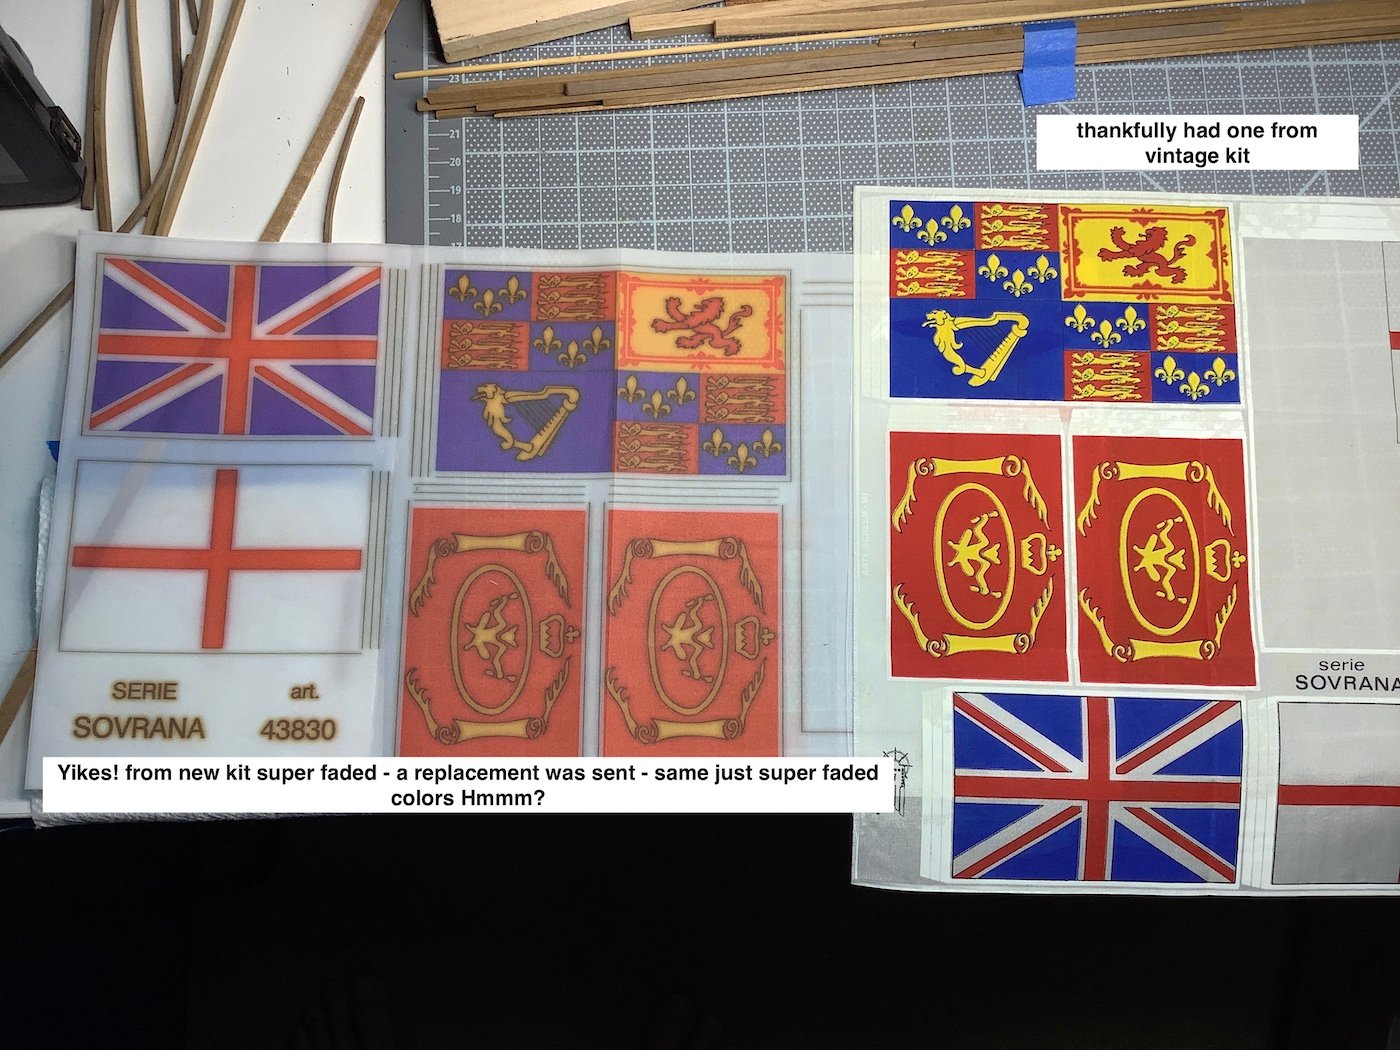
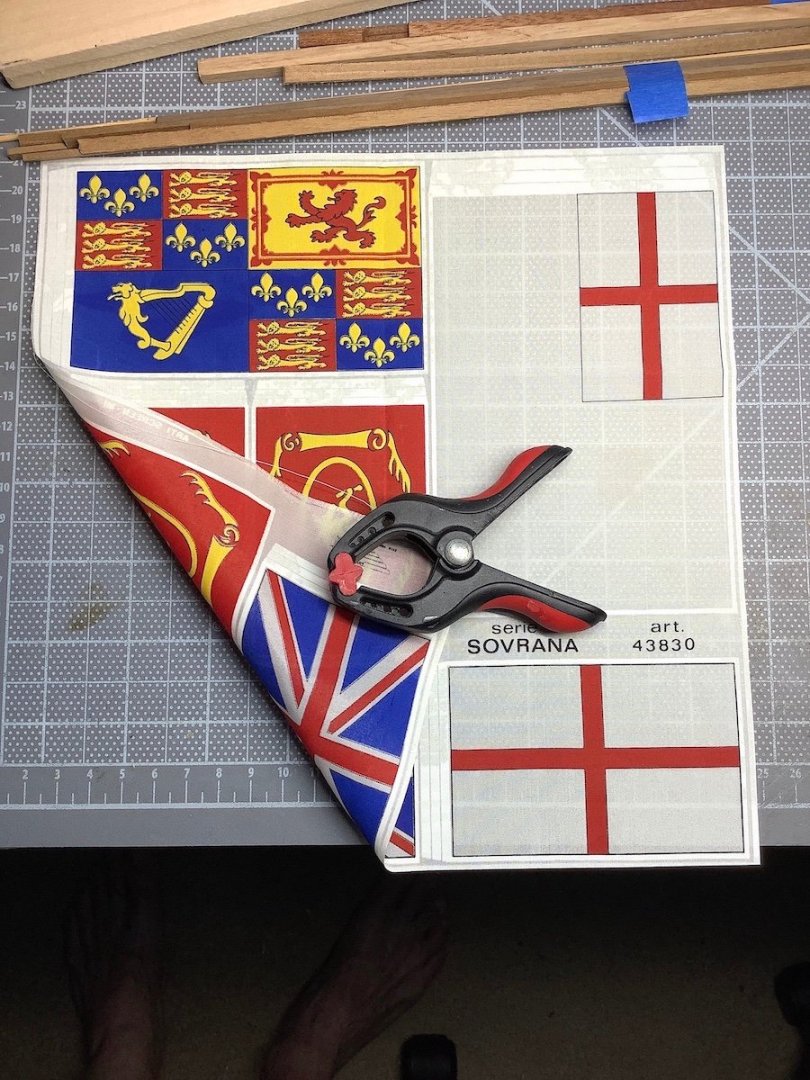
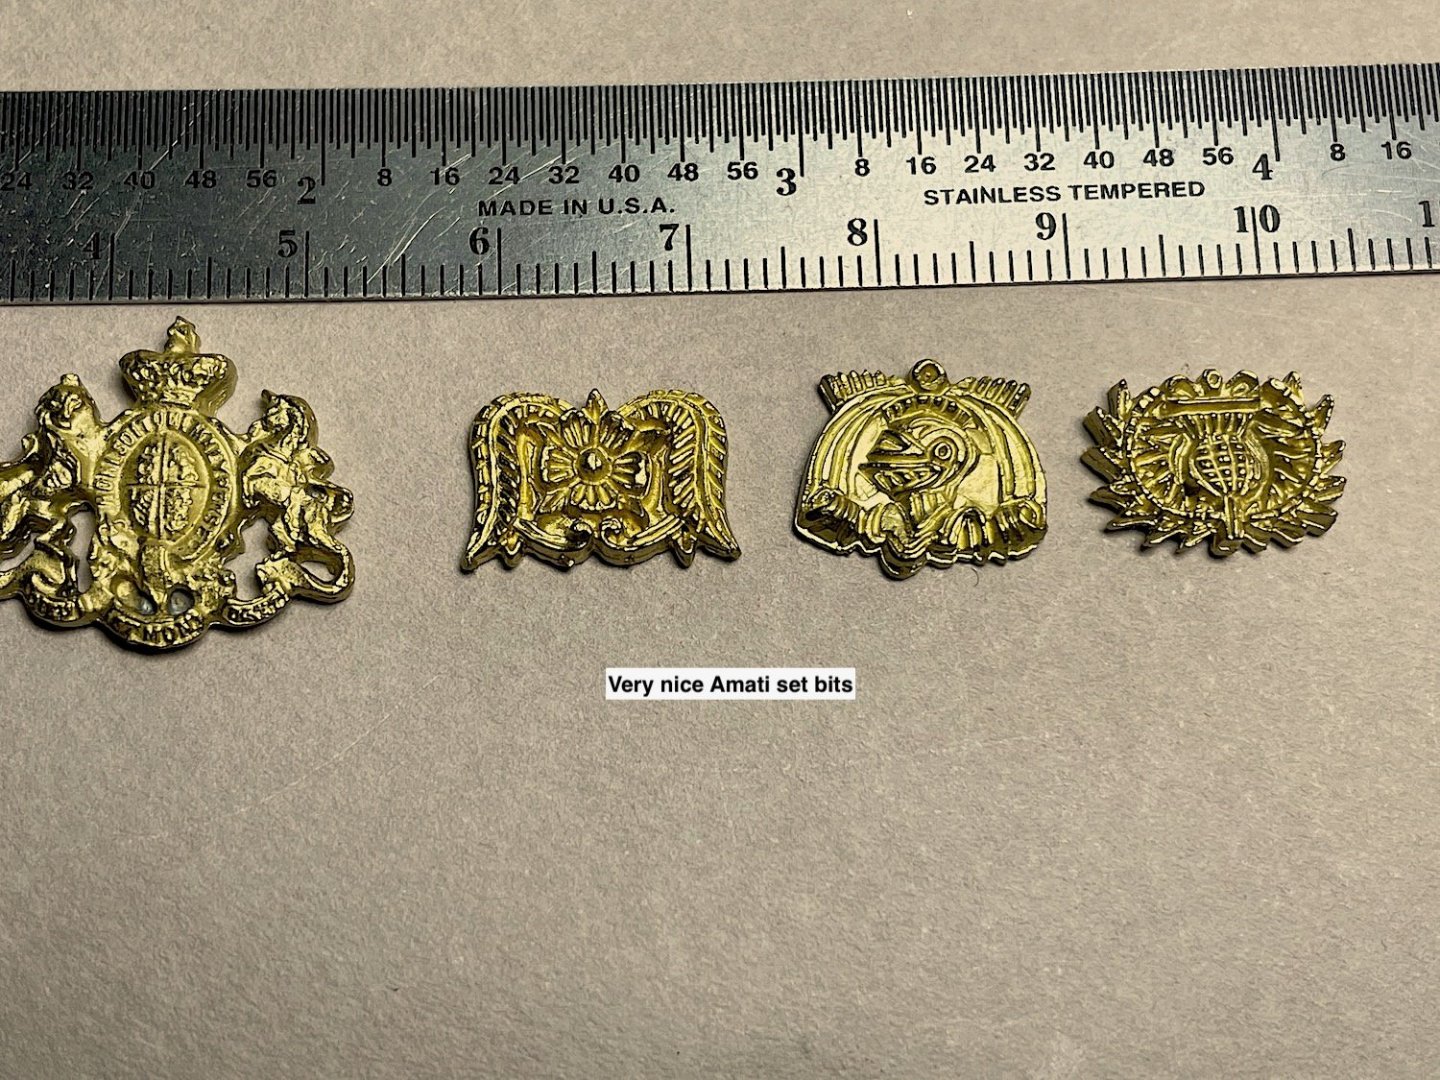
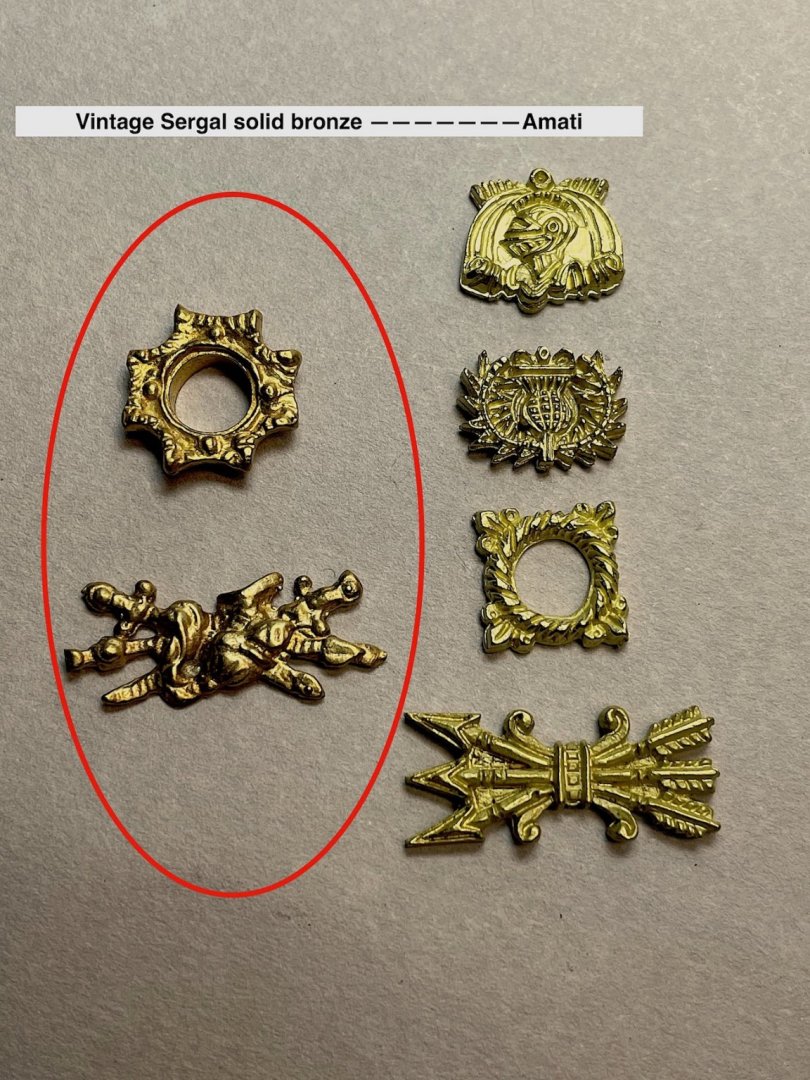
Kevin: Yes indeed very nice bits from Amati as well as vintage Sergal – and regarding Doris – beyond genius work – I’ve called her the Michelangelo of this hobby. Oh and thanks so much for following this log as well – you were more than kind with your comments on my Vasa log back in the day…. Robp125: So encouraging – thanks so much – Indeed a beautiful ship in its first iteration. SO appreciate your interest Ulises: The complete Amati kit can be purchased as a set or piece by piece. Got mine from: https://www.cornwallmodelboats.co.uk/cgi-bin/sh000001.pl?WD=amati seas sovereign&PN=1831-Sovereign-of-the-Seas-Cast-Decoration-Set-A1831.html#SID=353 You can also buy the Amati plan sheets as well as the Flag sheet (their flag sheet is excellent) Ok Ulises you asked lol – for the 144 individual pieces by their part numbers I will send you a PM – If other members are interested let me know I will just copy and paste the item numbers on this log…… It will just be a sea of Amati part numbers with no reference to what the bits actually are - once the part # is copied and pasted to Cornwall (or other Amati retail provider) it with return with an image as well. PS: I tried ordering several fittings directly from Amati in Italy -the purchase was rejected in the USA - I needed to order from a retailer. Here is one last image of Amati bits FYI Here are images of Amati and Sergal flag sheets FYI: Amati - double adhesive sided Sergal Vintage Sergal after so many years in box looks perfect on both sides
-
Ulises, IMO!!! toss the instructions - I also had big problems at the onset. If I might be so presumptuous - you will have much better luck if, at this stage, if you were to look at my log - and just follow my detailed lead - took me a while to figure it out - Also DON'T follow the instruction book for placement of the upper and lower canon templates IMO! - you would have to sort of guess where you just positioned those too small dummy cannon vertical anchoring wood bits, to cut the square openings for the canon openings.. Up to you, but for this part of the build - I knew it would cause me grief later on had I followed the Sergal booklet Oh can you imagine it also wants you to glue on all the gilded bits BEFORE even adding second planking hmmm??? Regards,
- 35 replies
-
- 5
-
-
-
- Mantua
- Sovereign of the Seas
- (and 1 more)
-
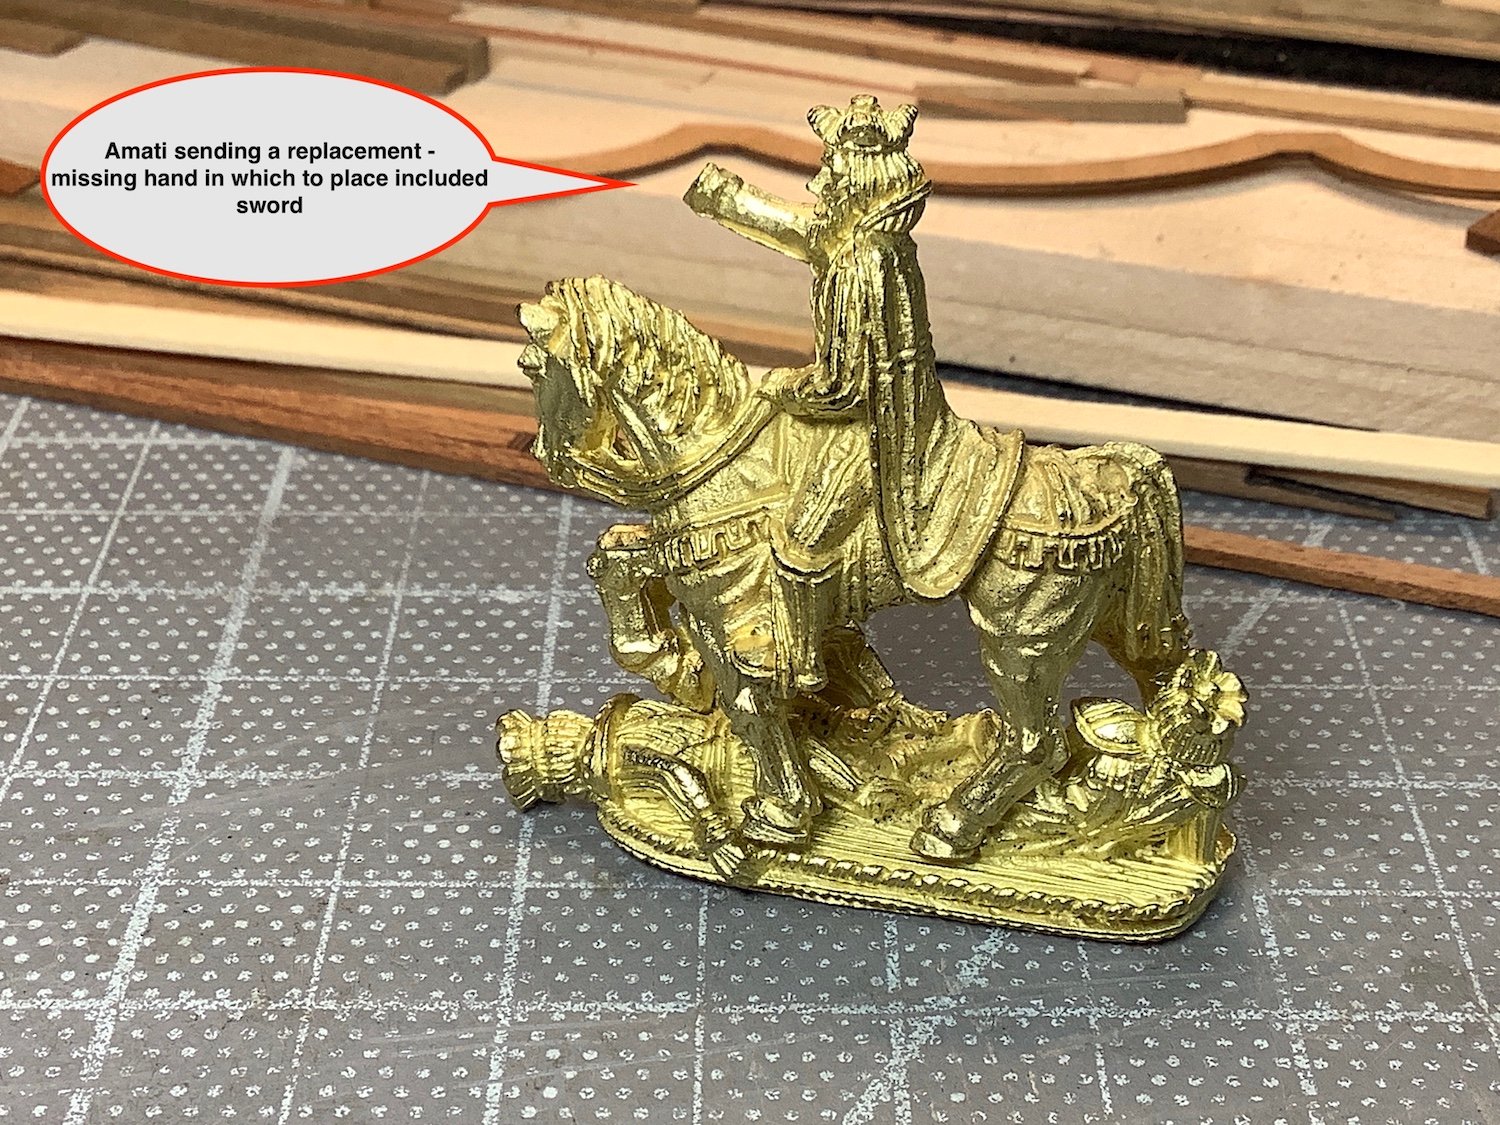
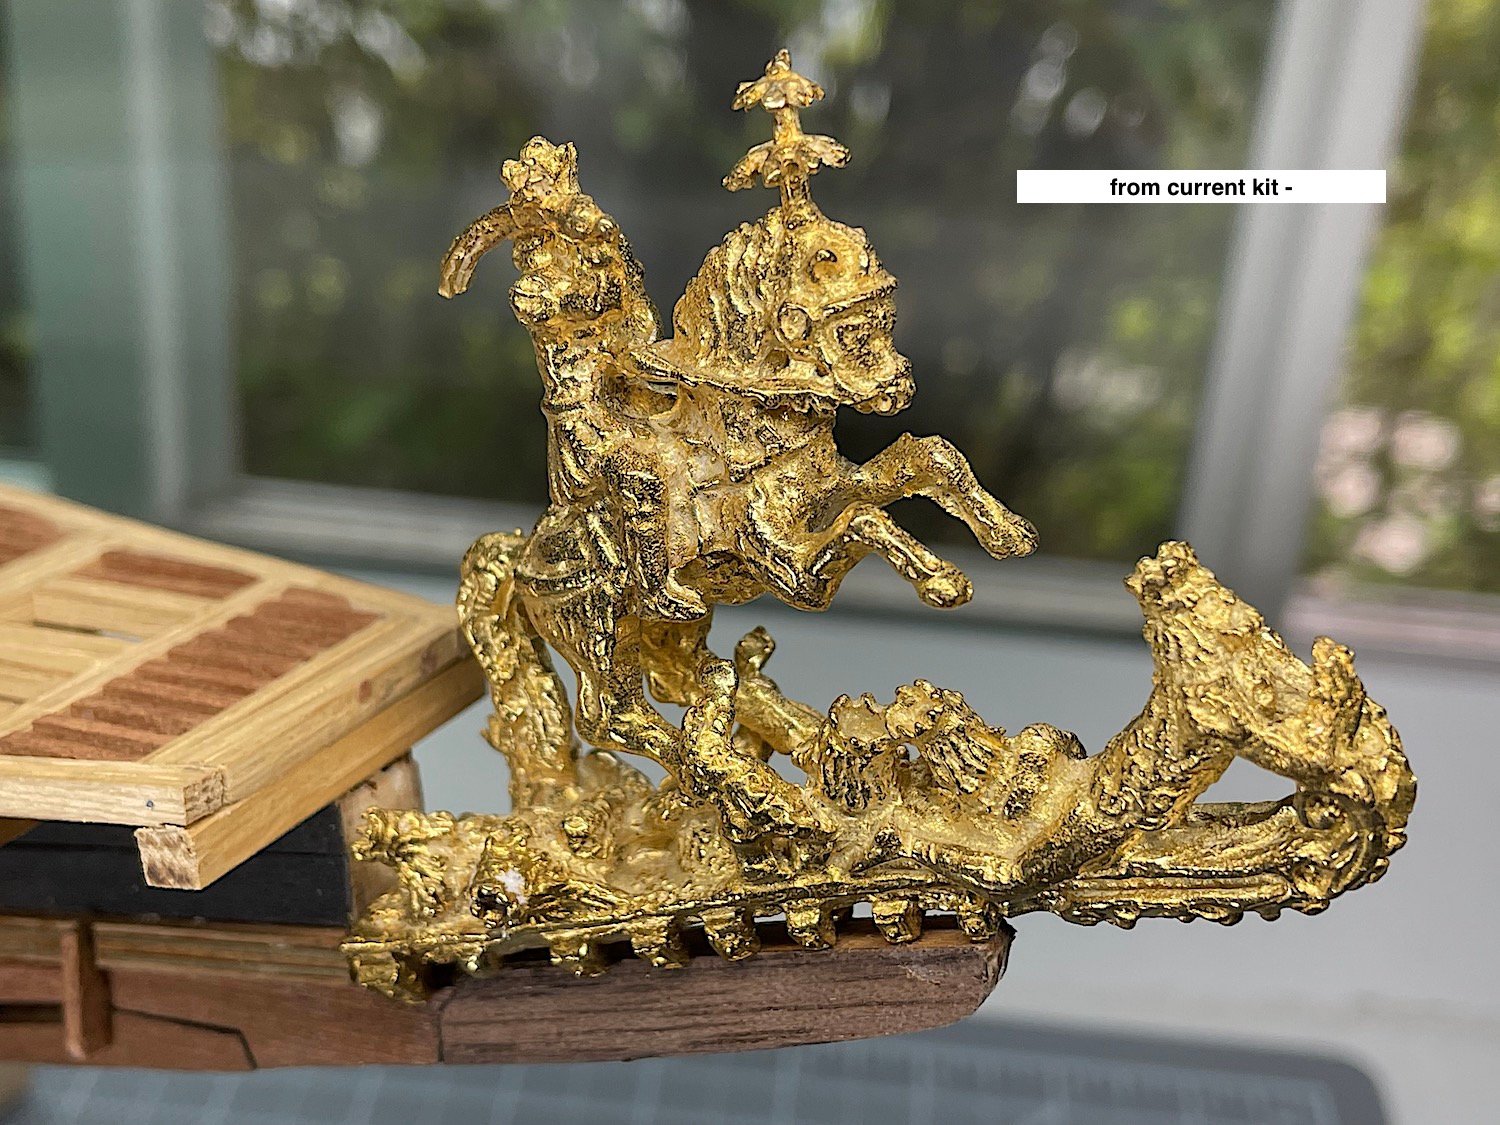
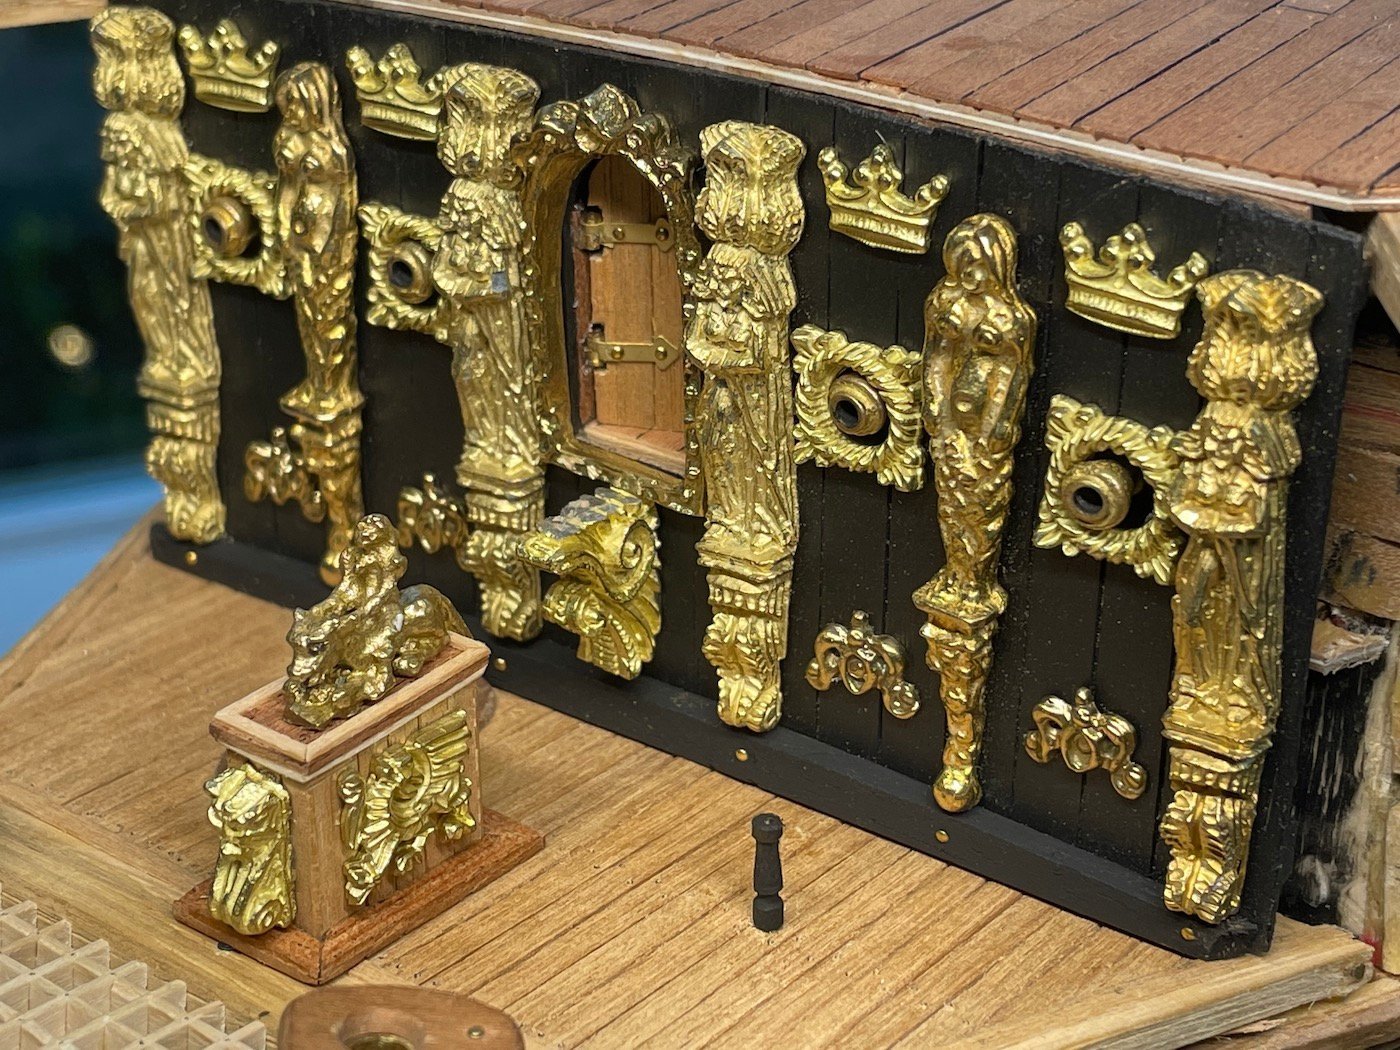
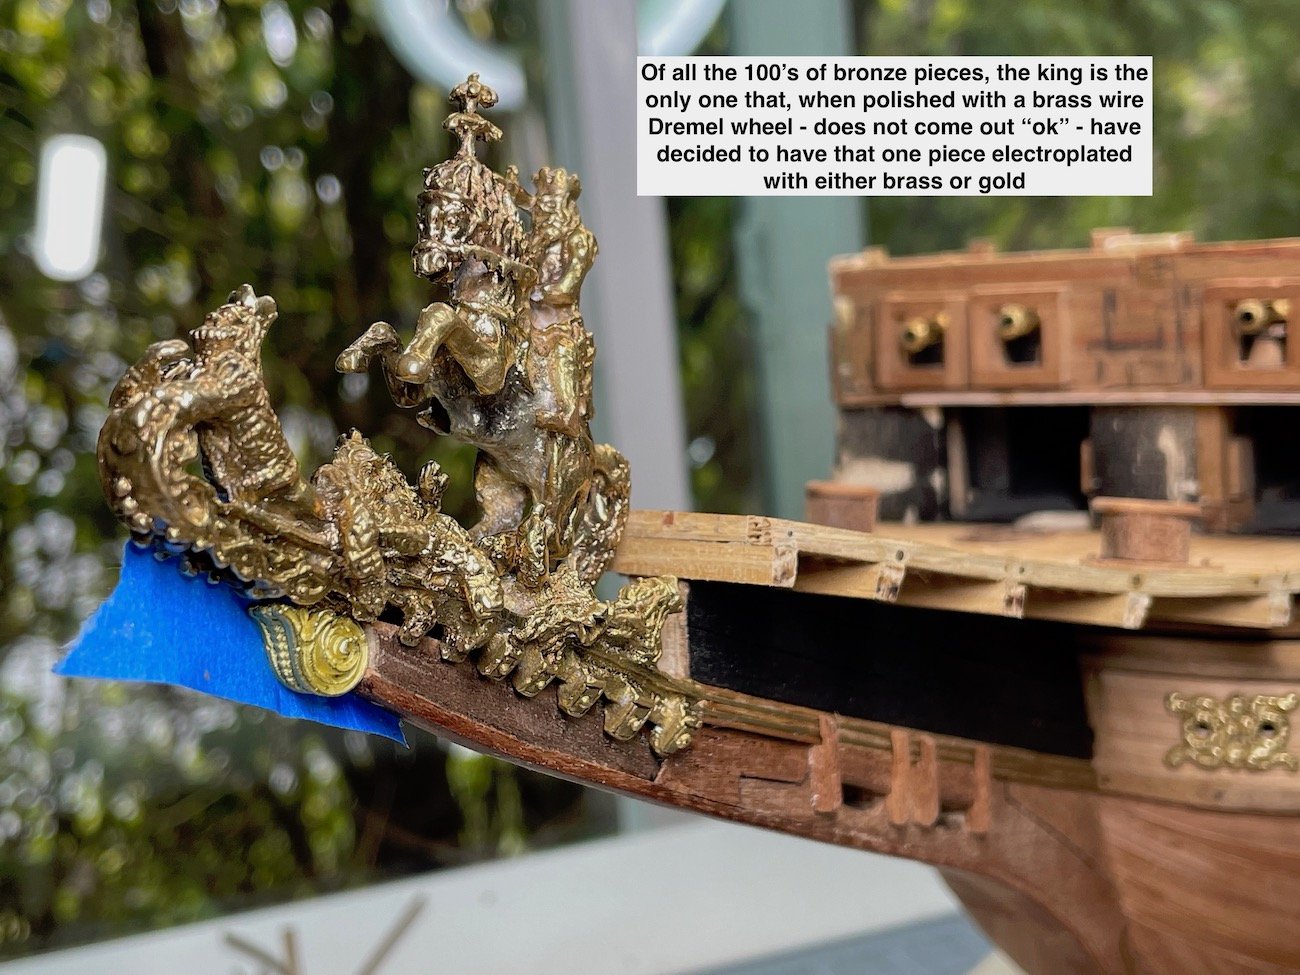
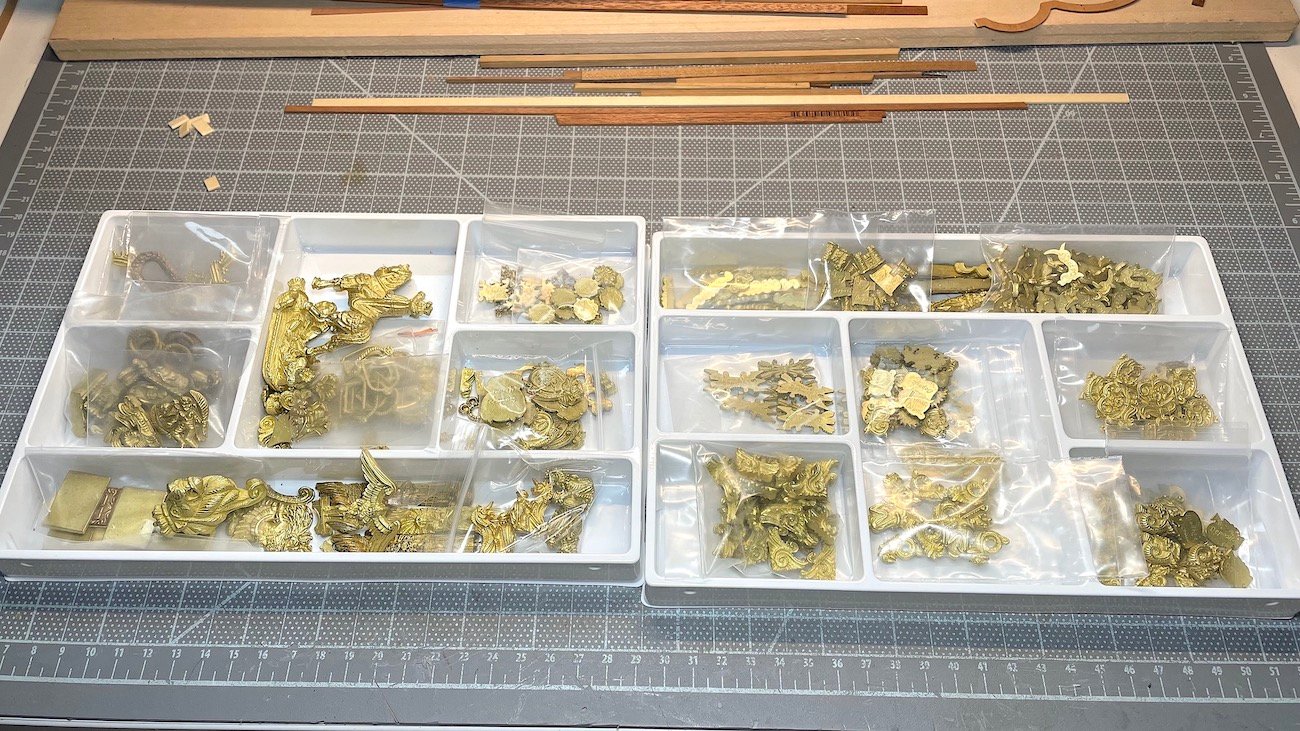
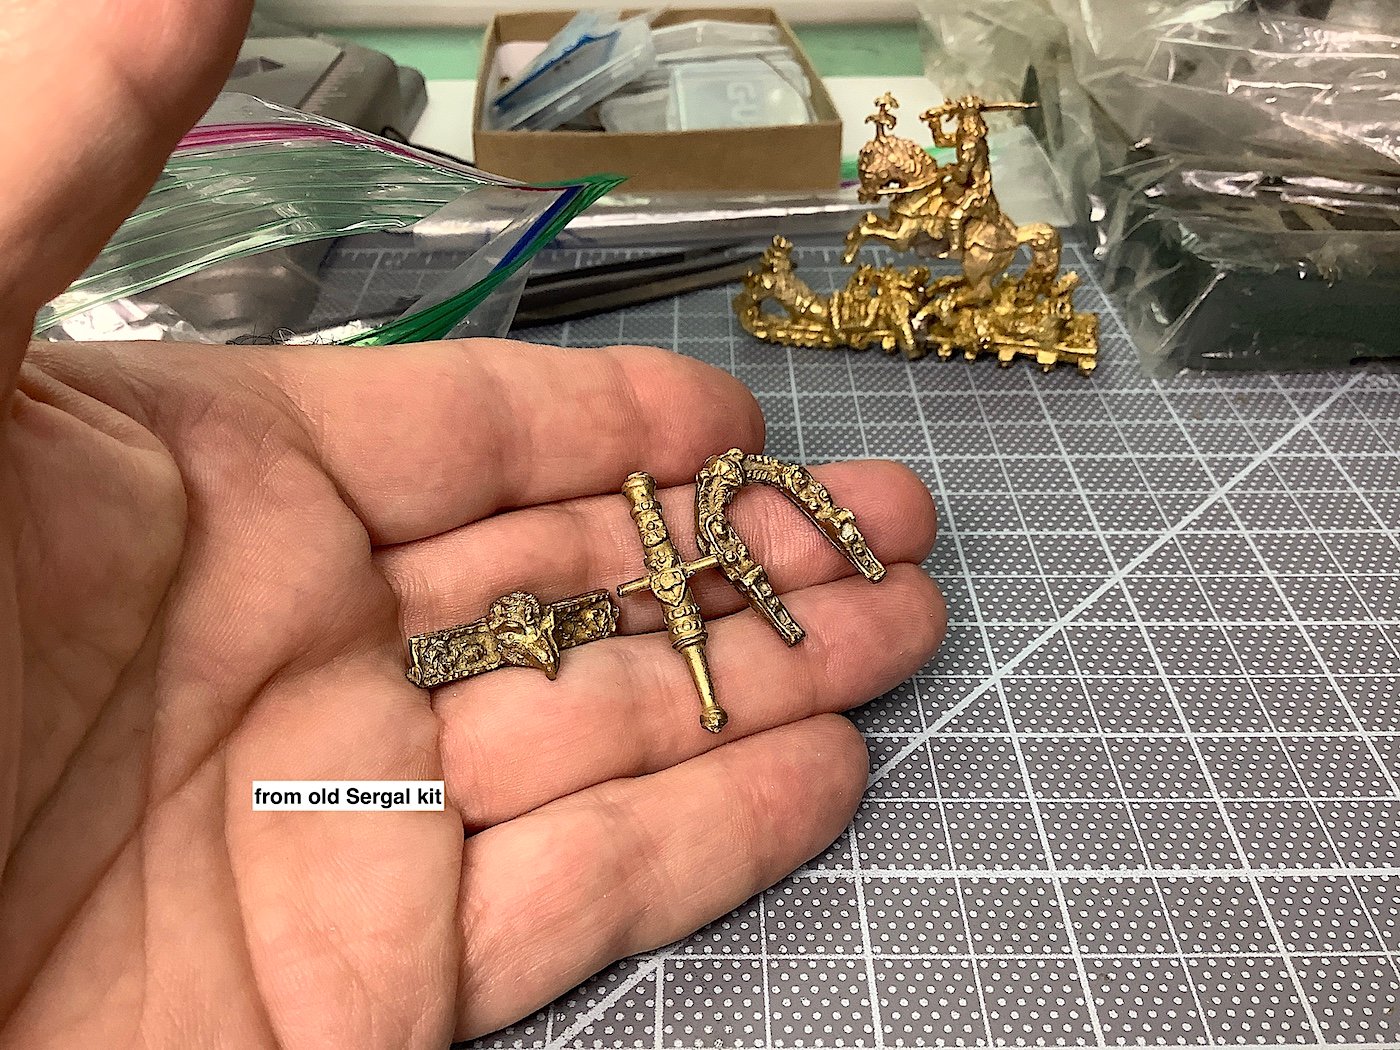
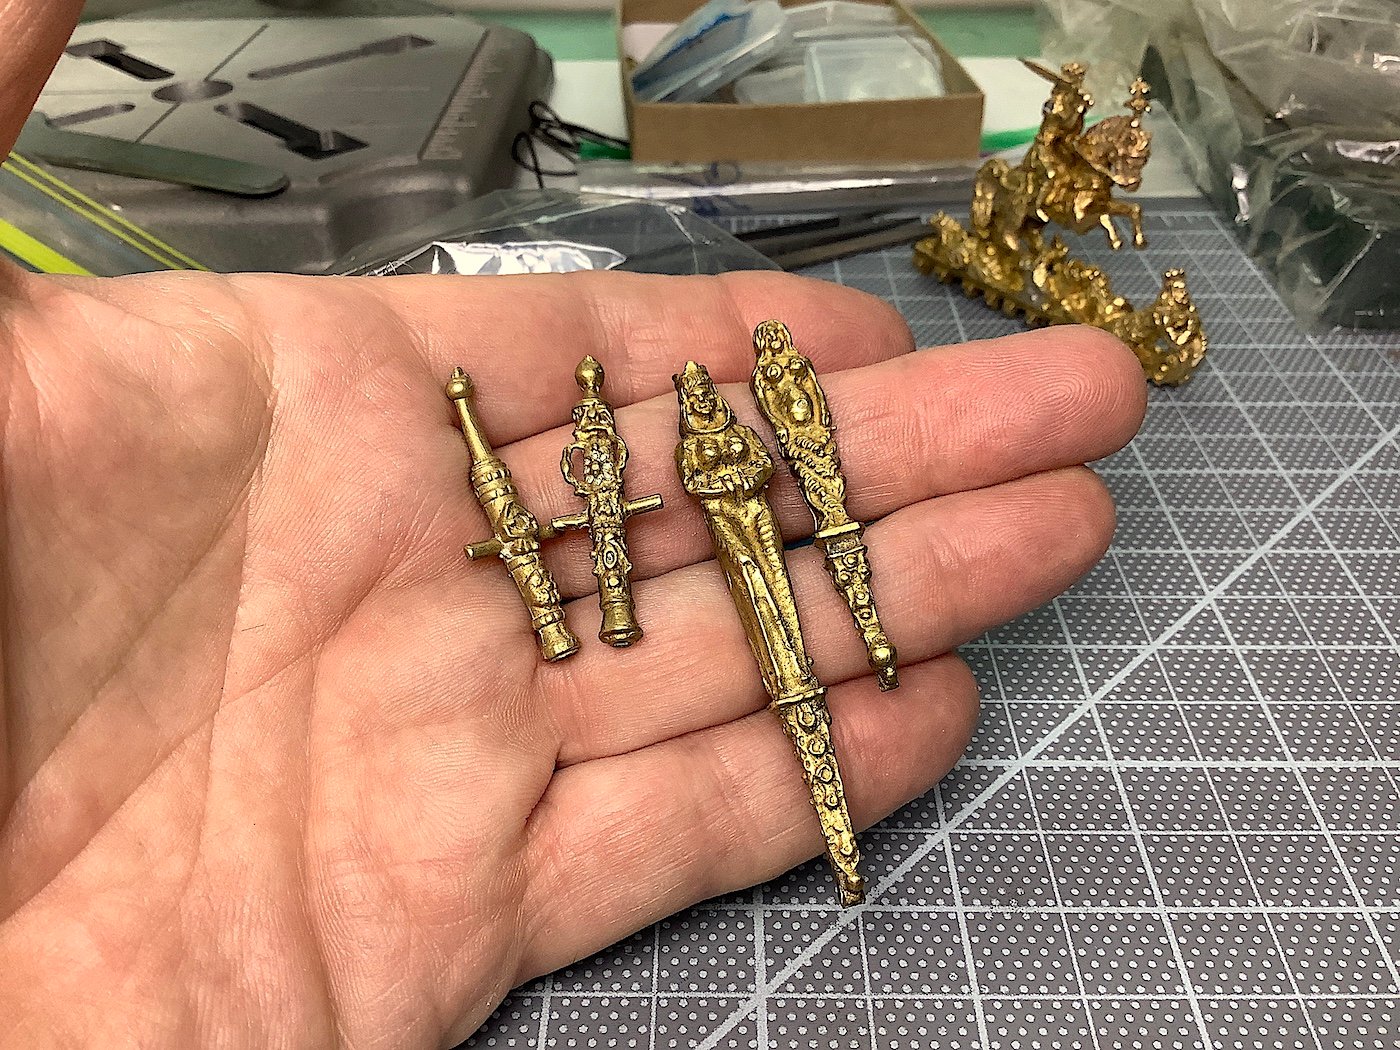
Thanks for your interest in this ironic dilemma. From what I had read, Sergal some years back was sold, or went to new management for cost cutting measures. They then revised some of their products; one of which was their SotS. They “improved” the new release by including pre-scored decks, laser cut gratings, a build booklet as well as other pre-ready bits. Then, it was also decided to delete the expensive solid bronze castings with cheaper white metal electroplated substitutions. The resulting castings lost some details. I have no information regarding casting molds. That said the blister packs showing the exact location of the many 100s of castings is indeed excellent. Also solid wood pre-cut bits (carriages, deck vertical railings, etc), were replaced with laser cut non solid wood sheets. When I chose to build this one – having wanted to for many years – I hesitated after learning about the loss of casting details given, as well, the price point for this expensive kit. I then queried here at MSW and, as I had mentioned in my first post, found a seller who had a vintage kit available. I subsequently also received the current kit for Father’s Day in 020….. I am very satisfied with the solid bronze castings. Then adding to this silliness also purchased the still available Amati complete SotS castings set – those are really something. I will blend Amati and Sergal bronze decorative castings onto this project. PS: Amati diff. scale but for decorative bits not important.... Thanks for following along – bit too much text this time around lol Finishing this thread topic - a few more images, then back to build log....

-
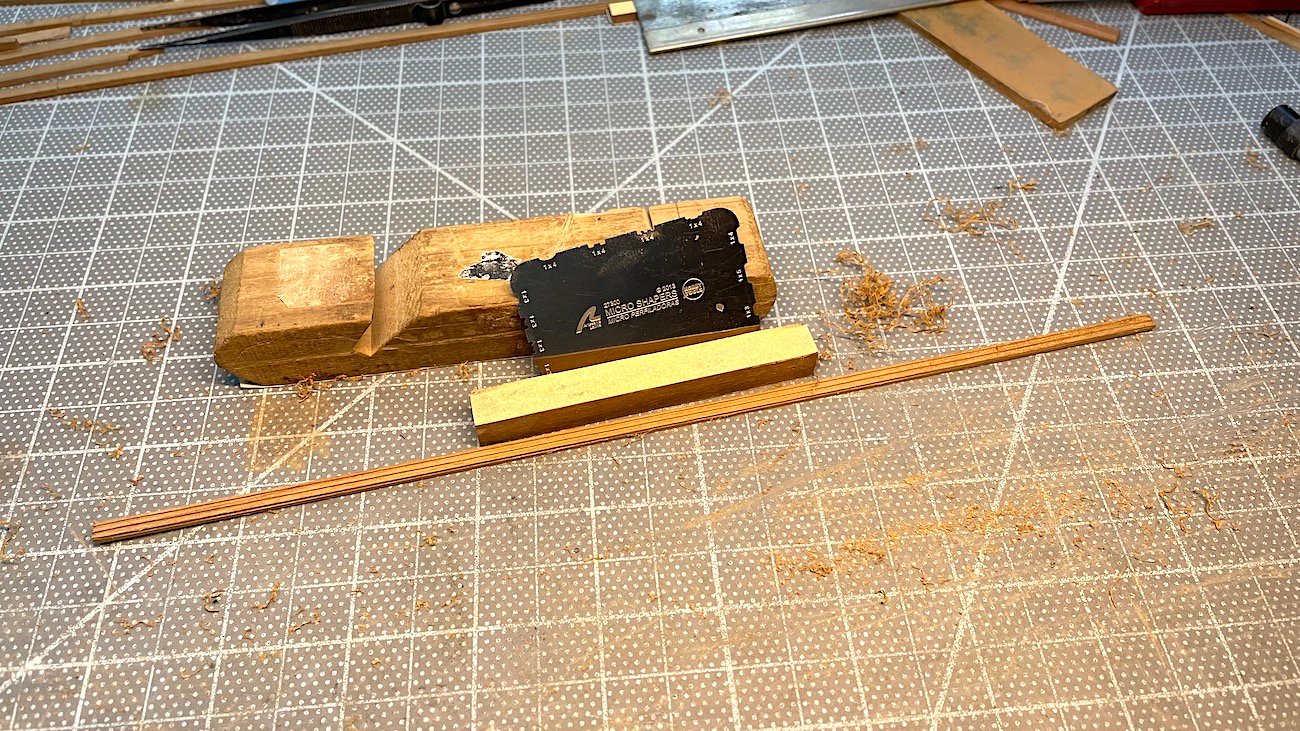
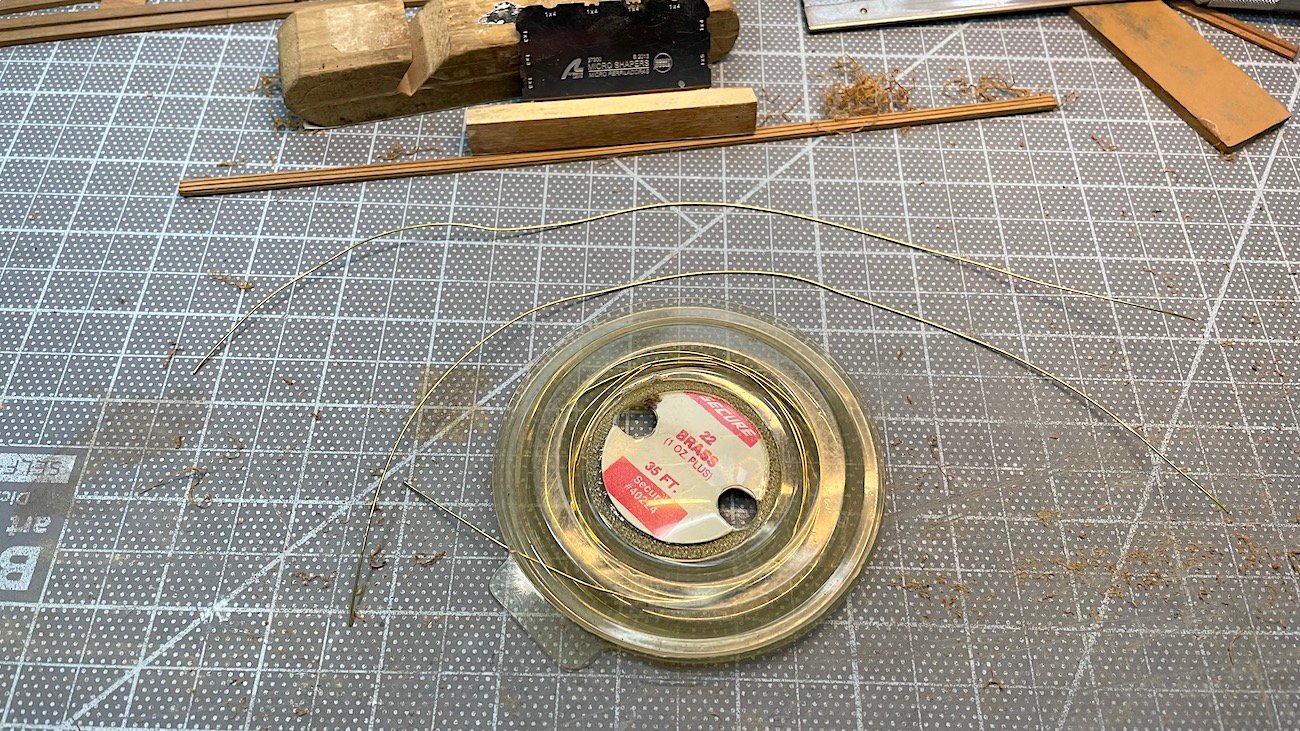
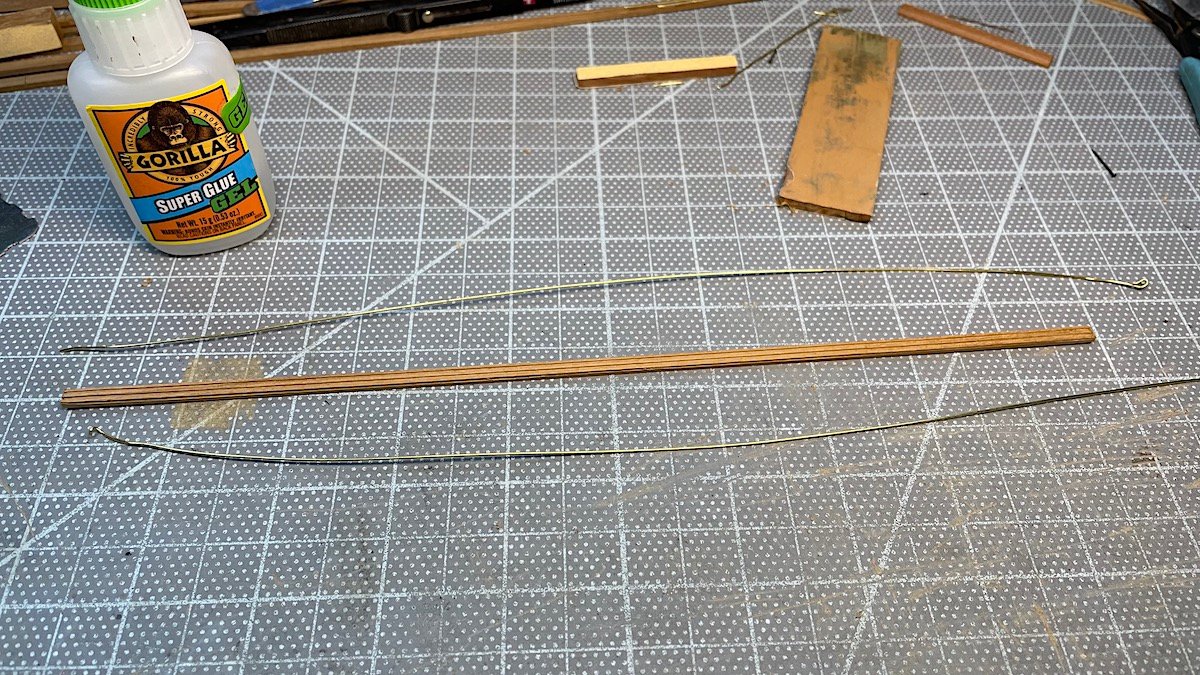
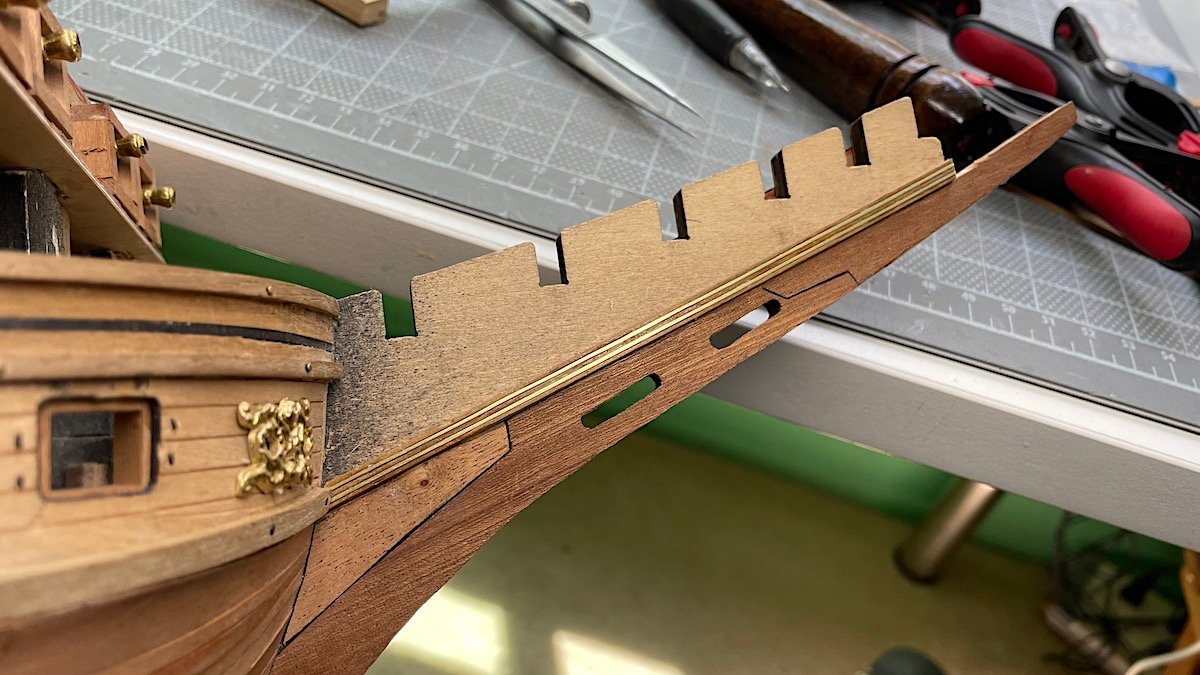
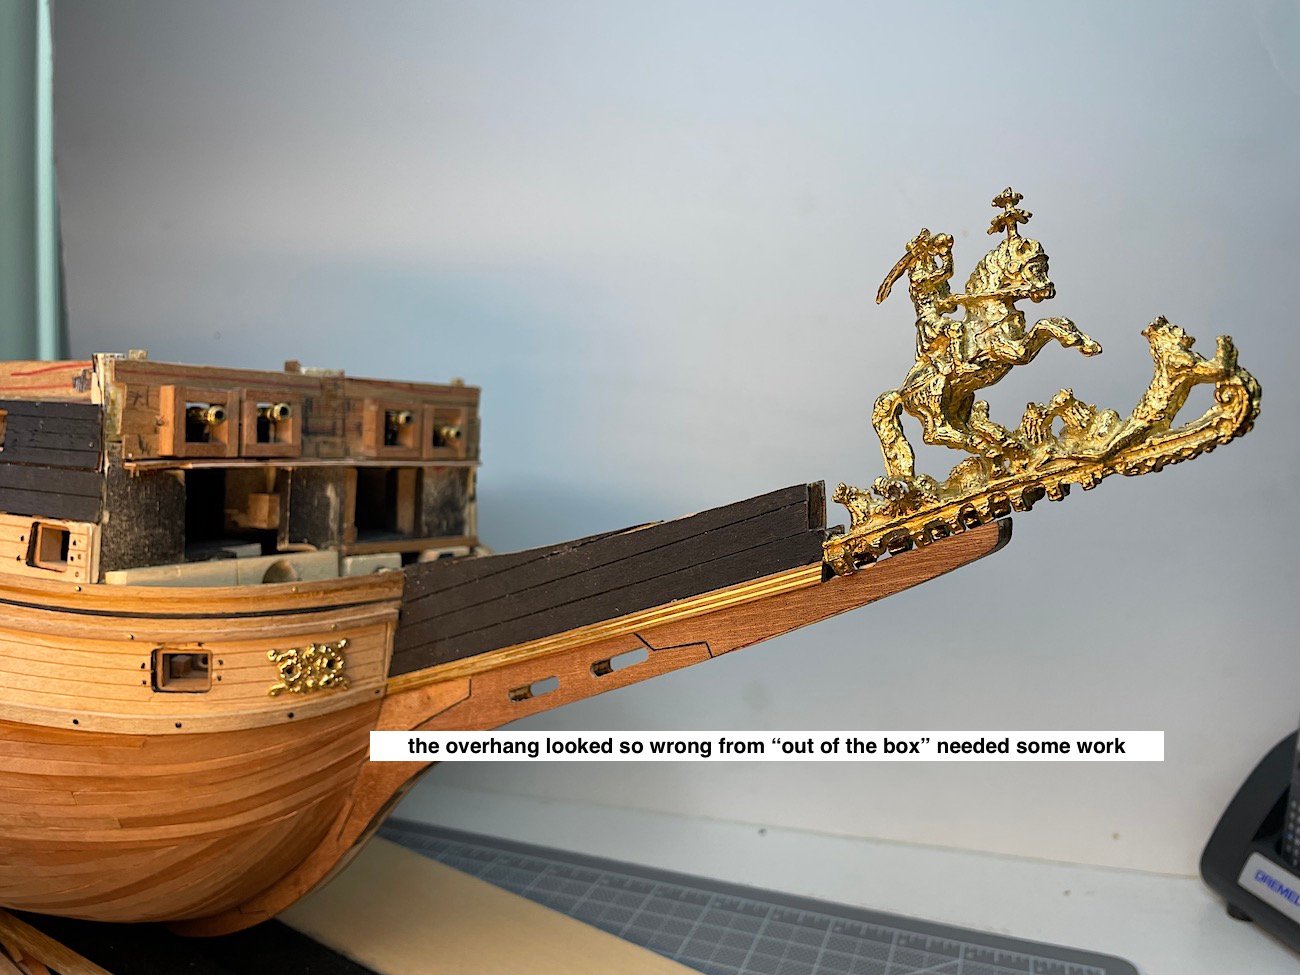
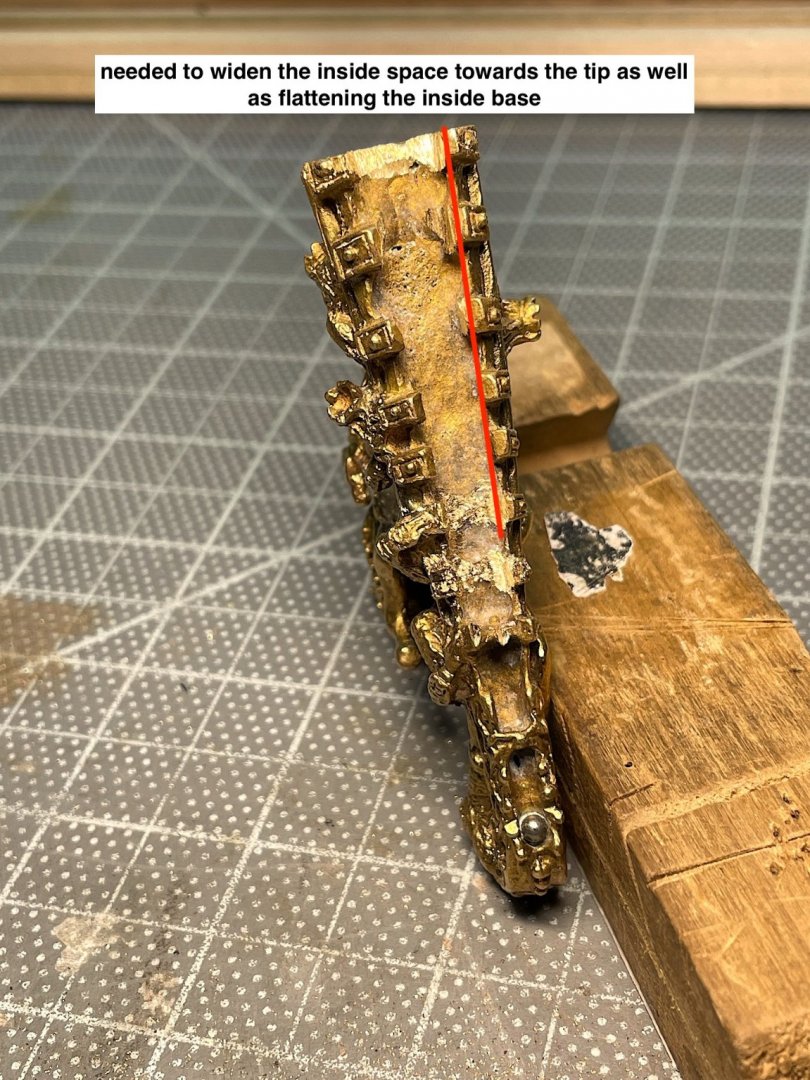
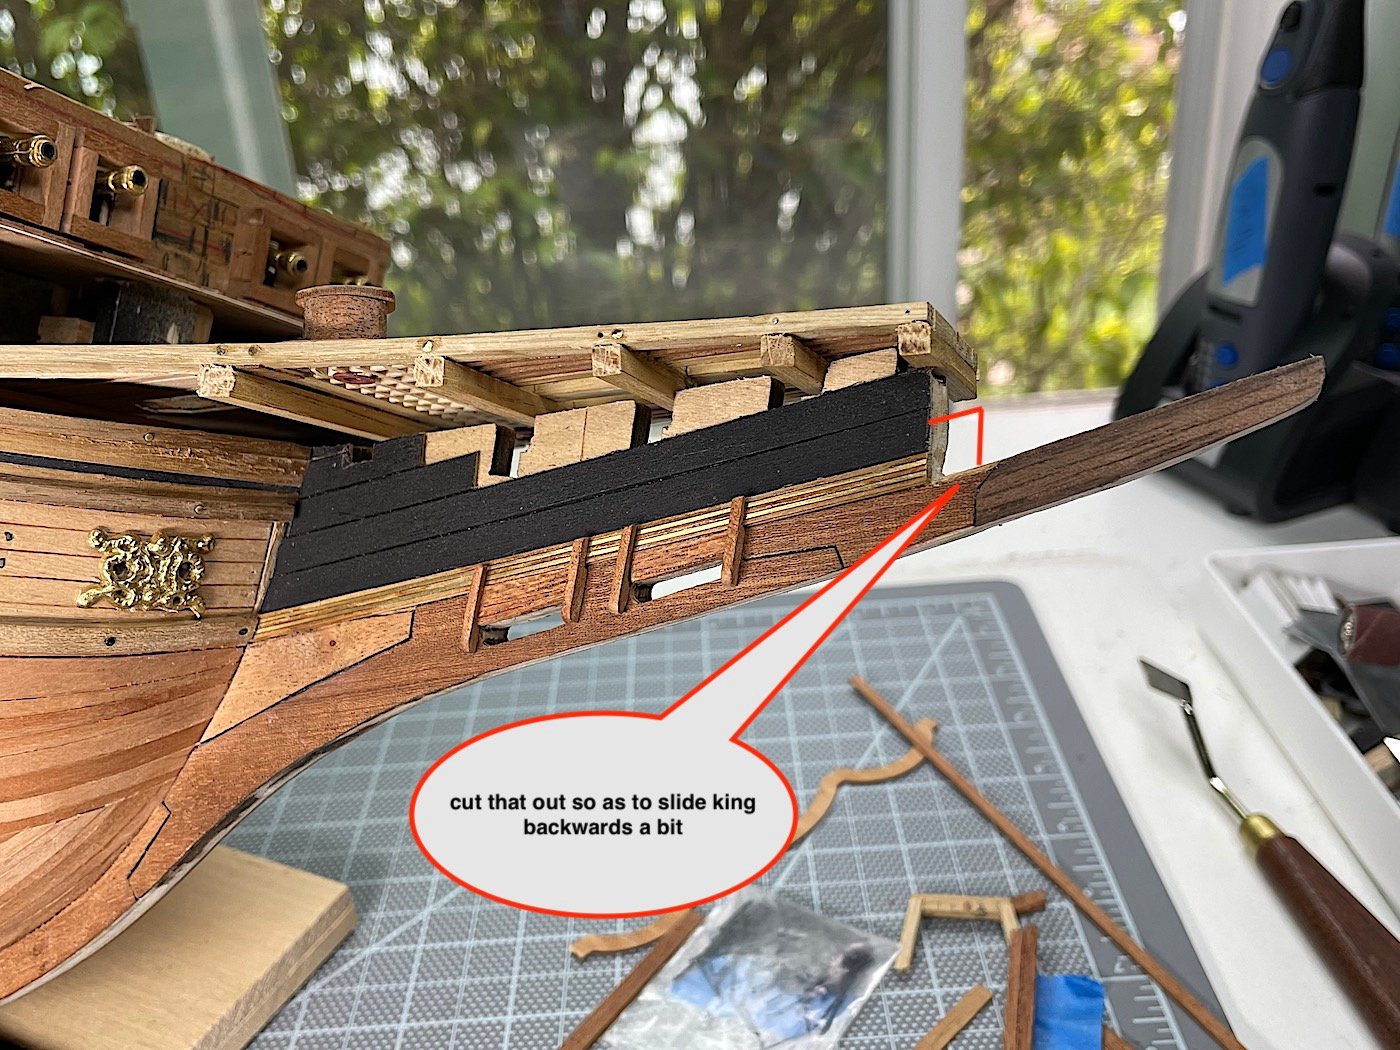
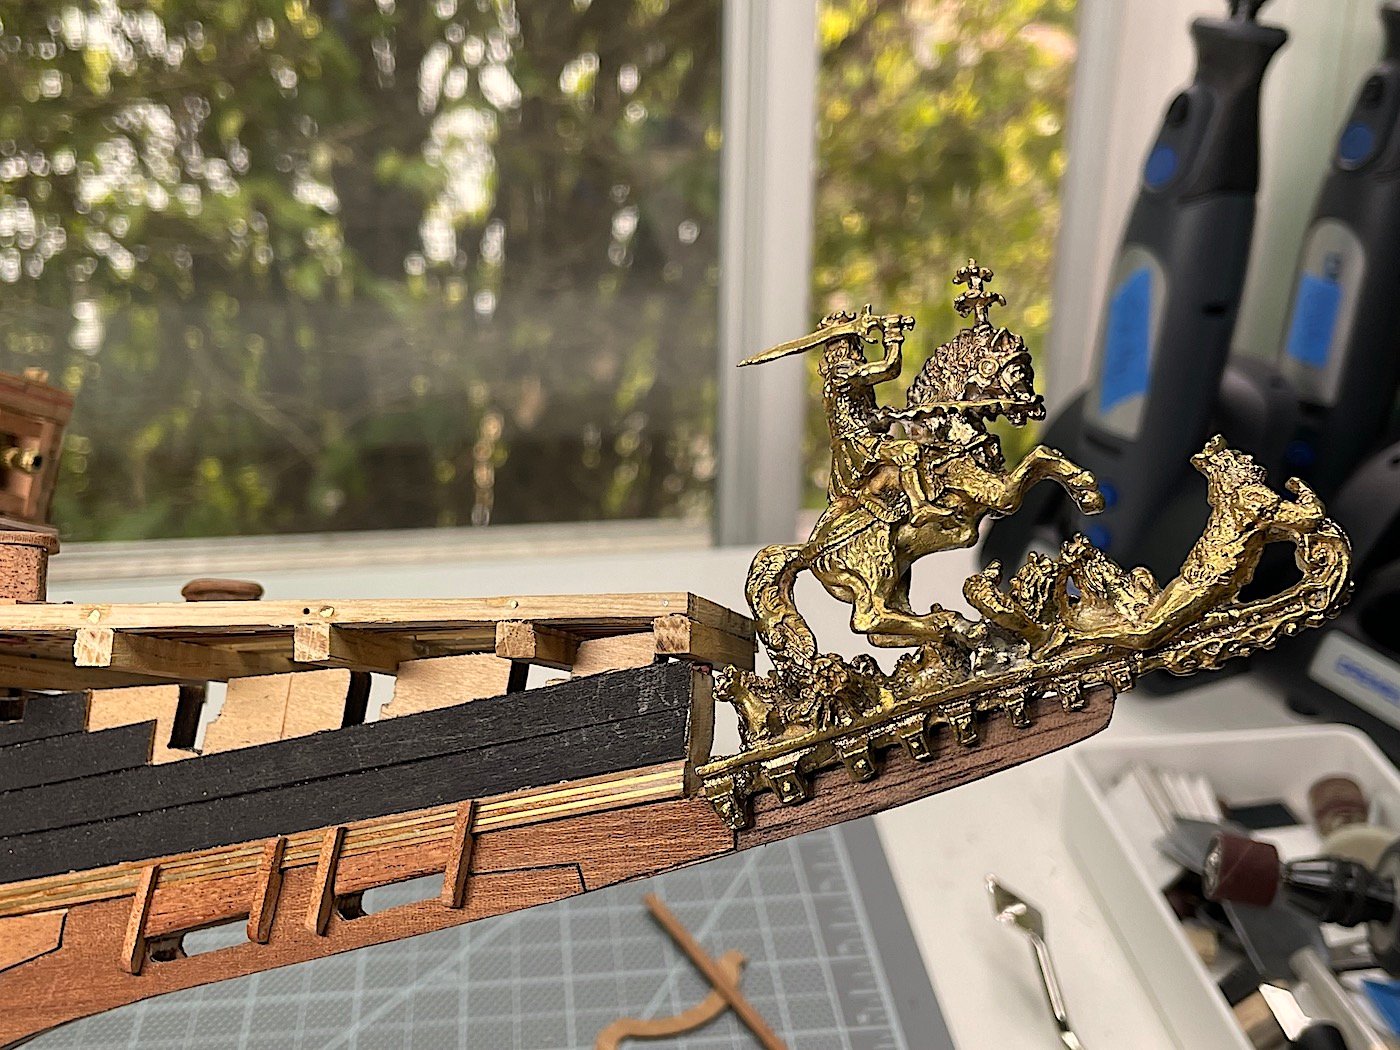
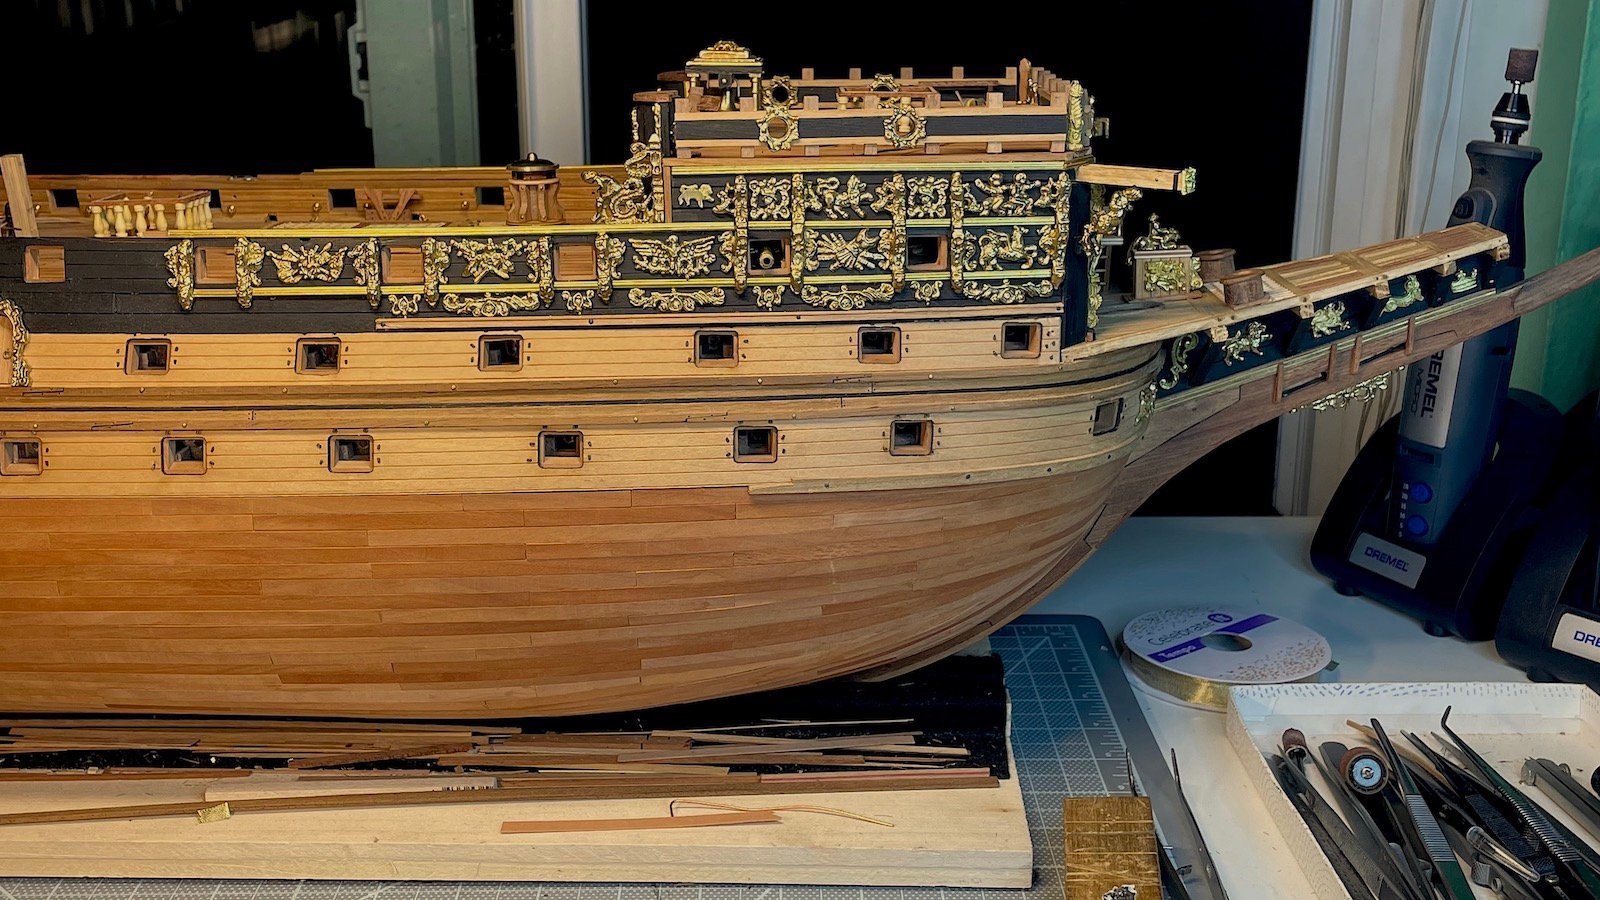
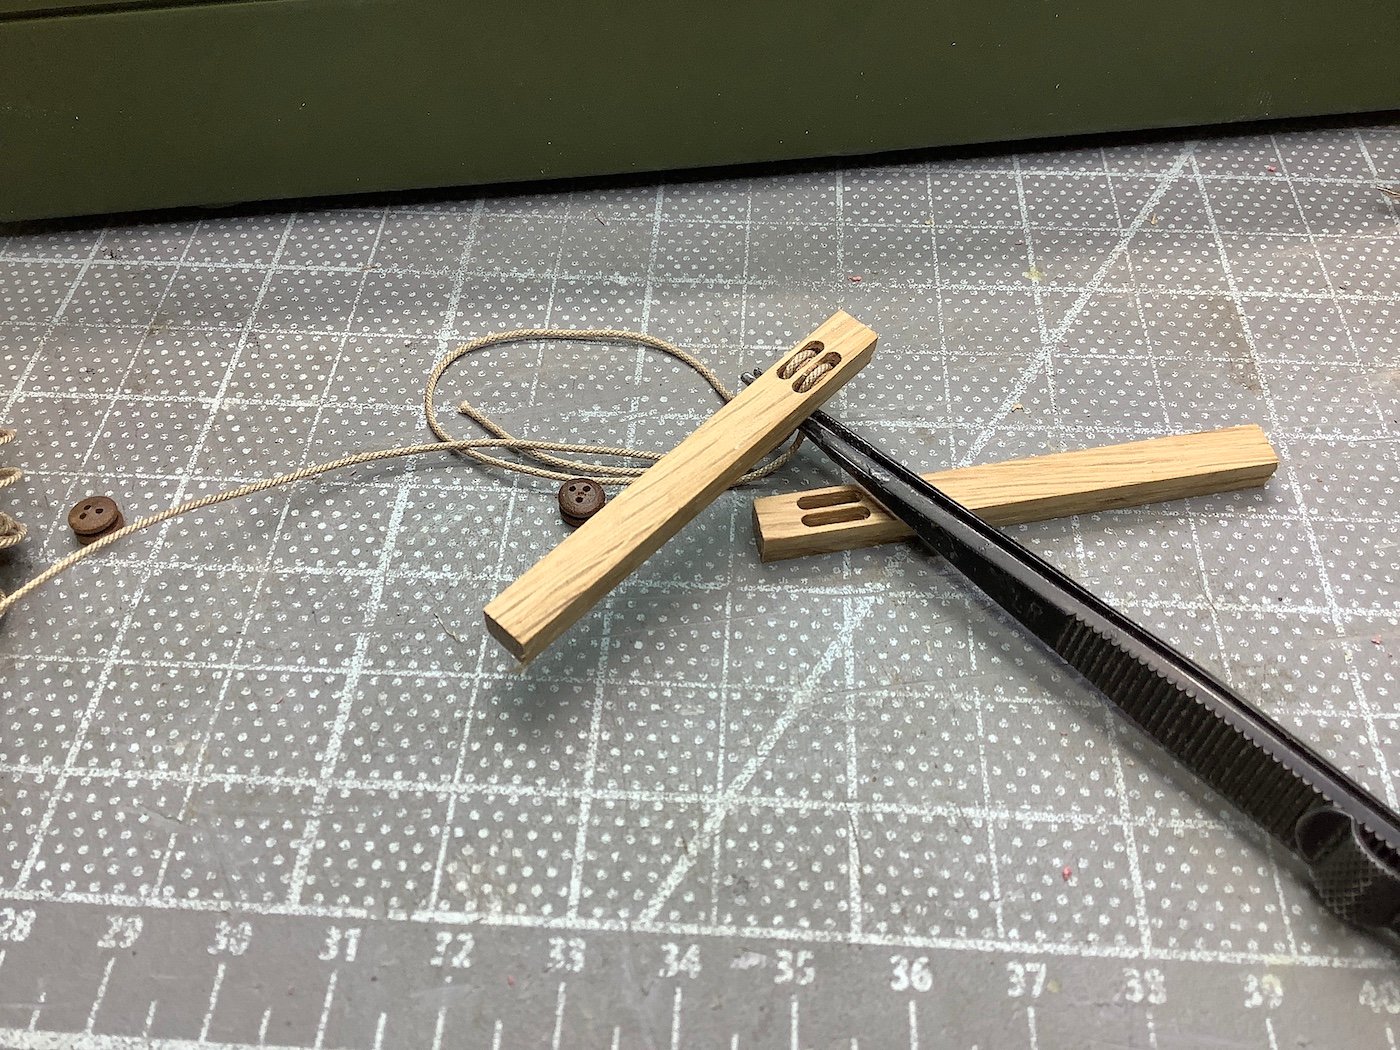
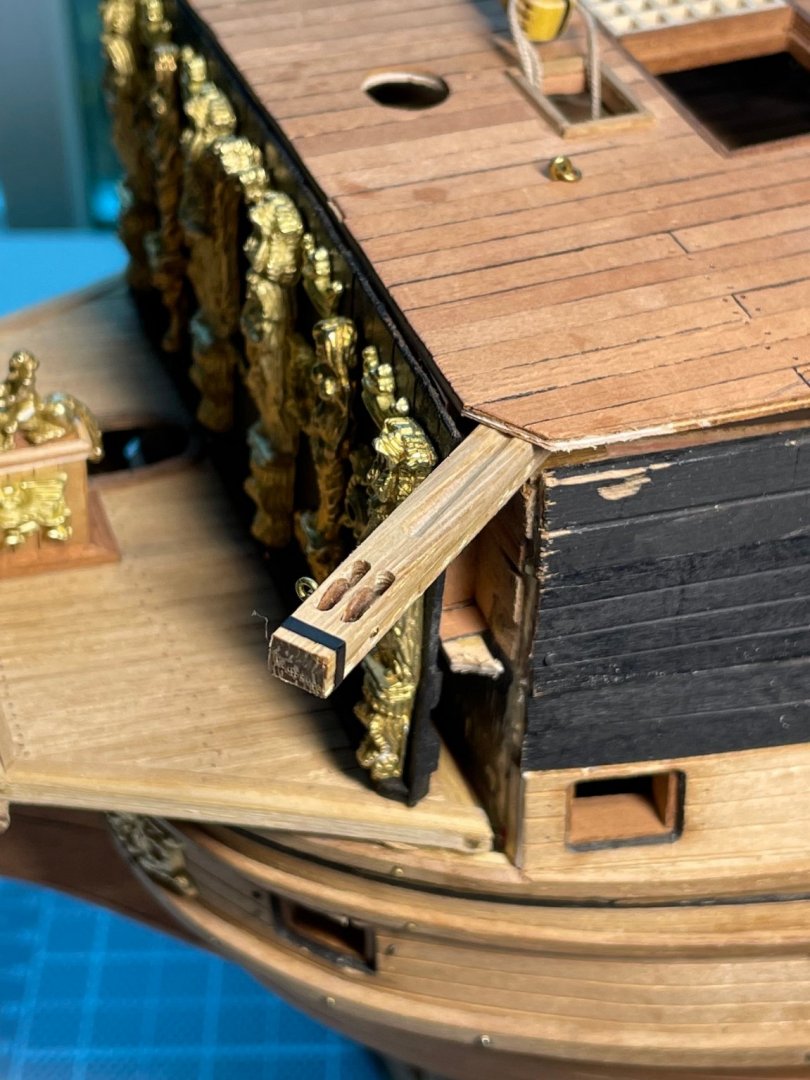
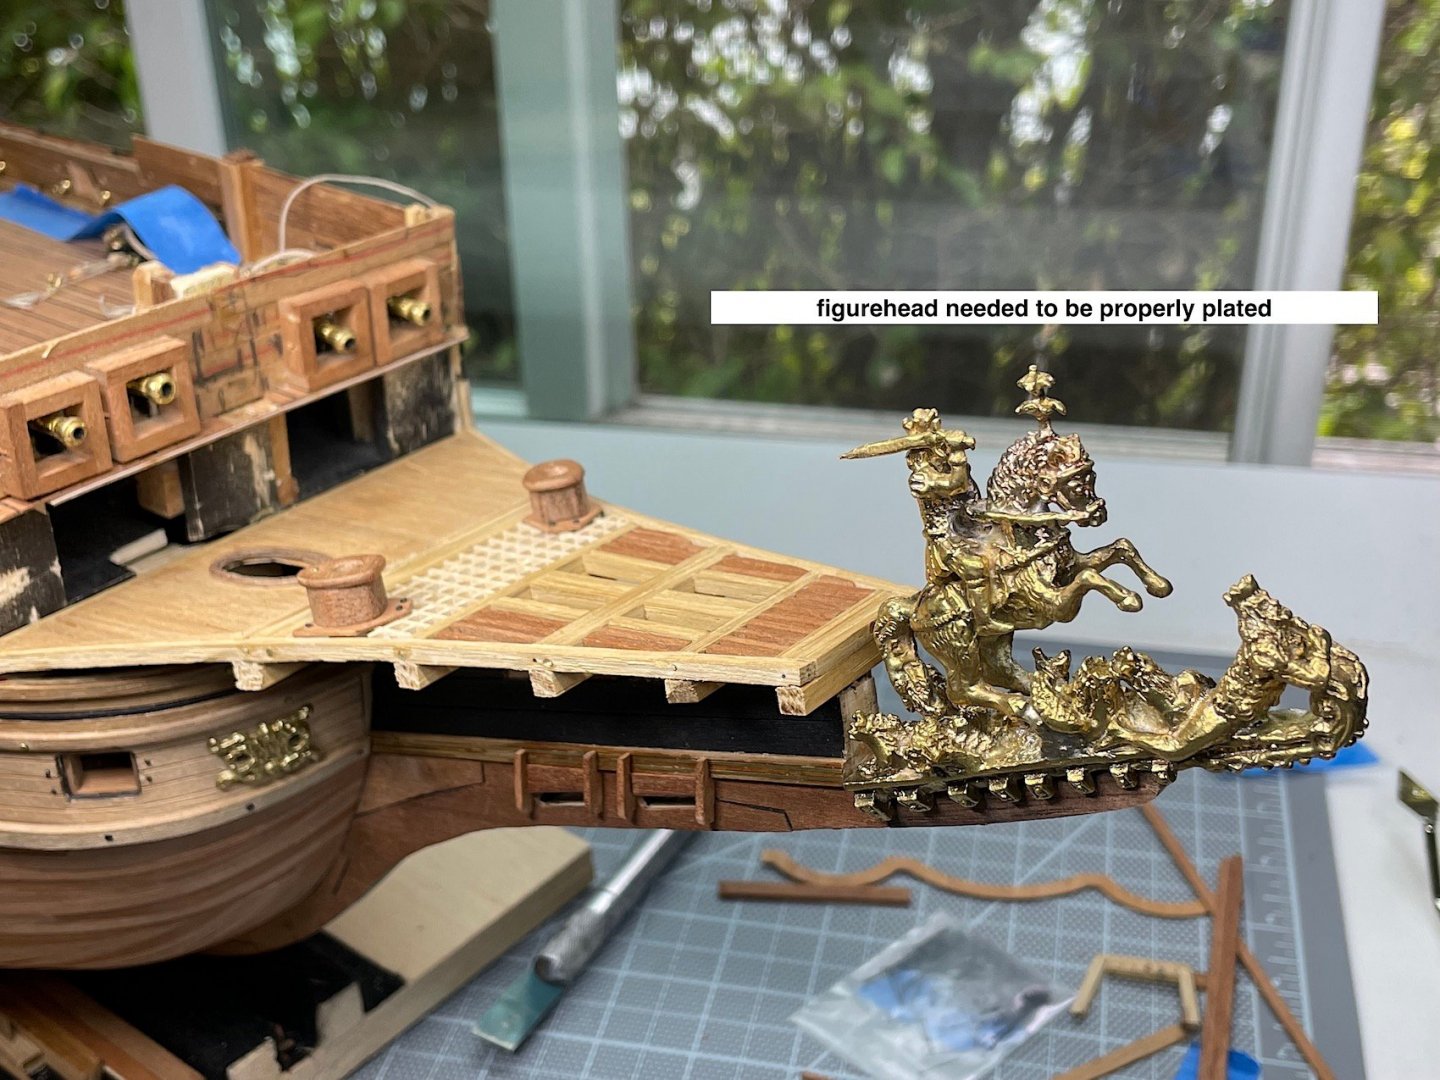
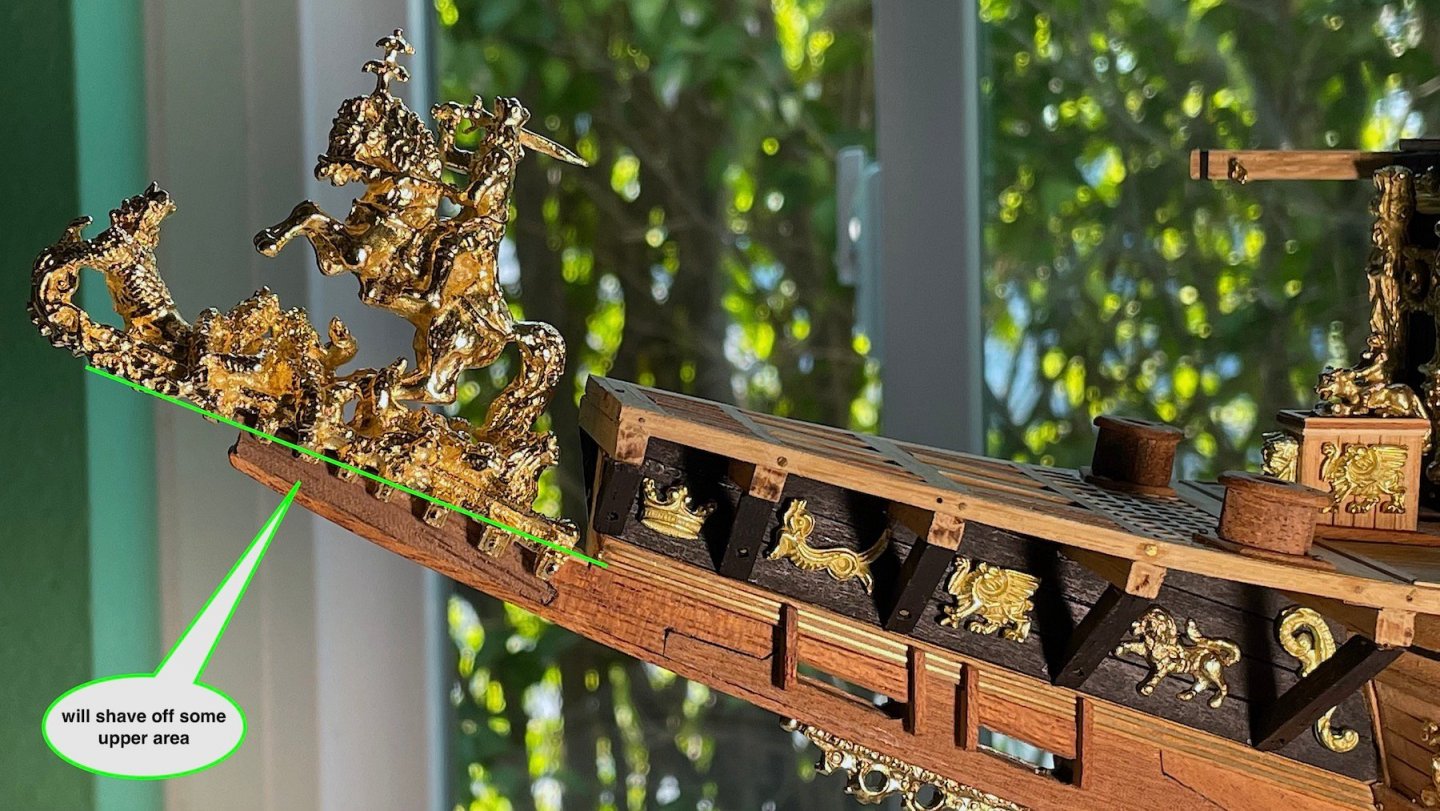
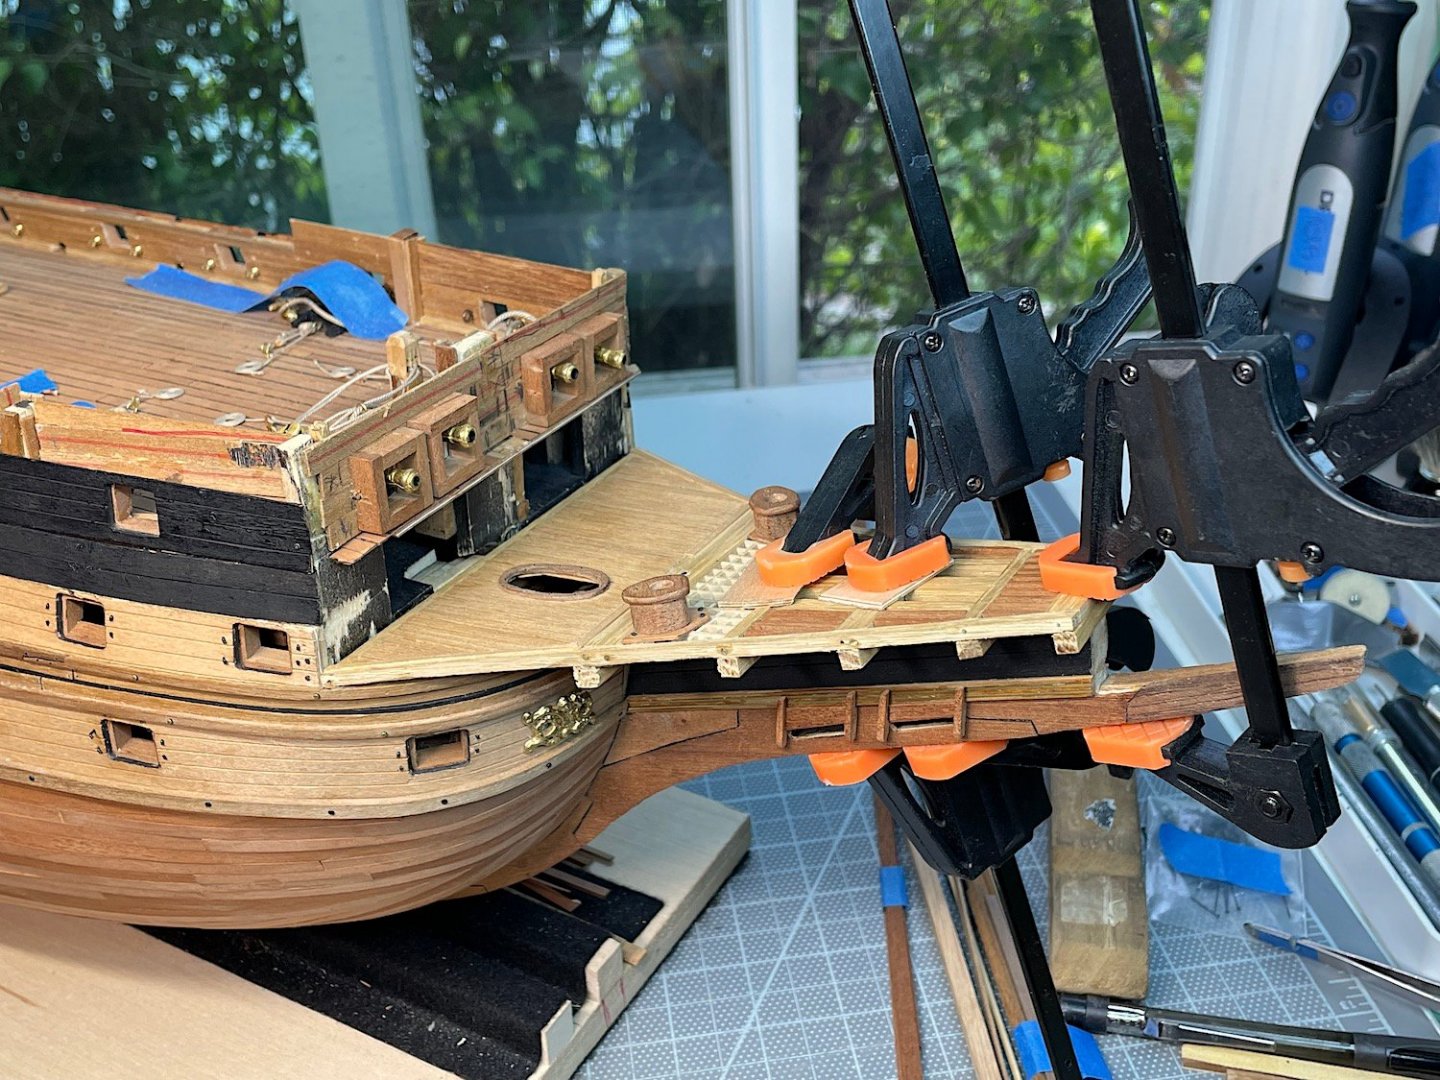
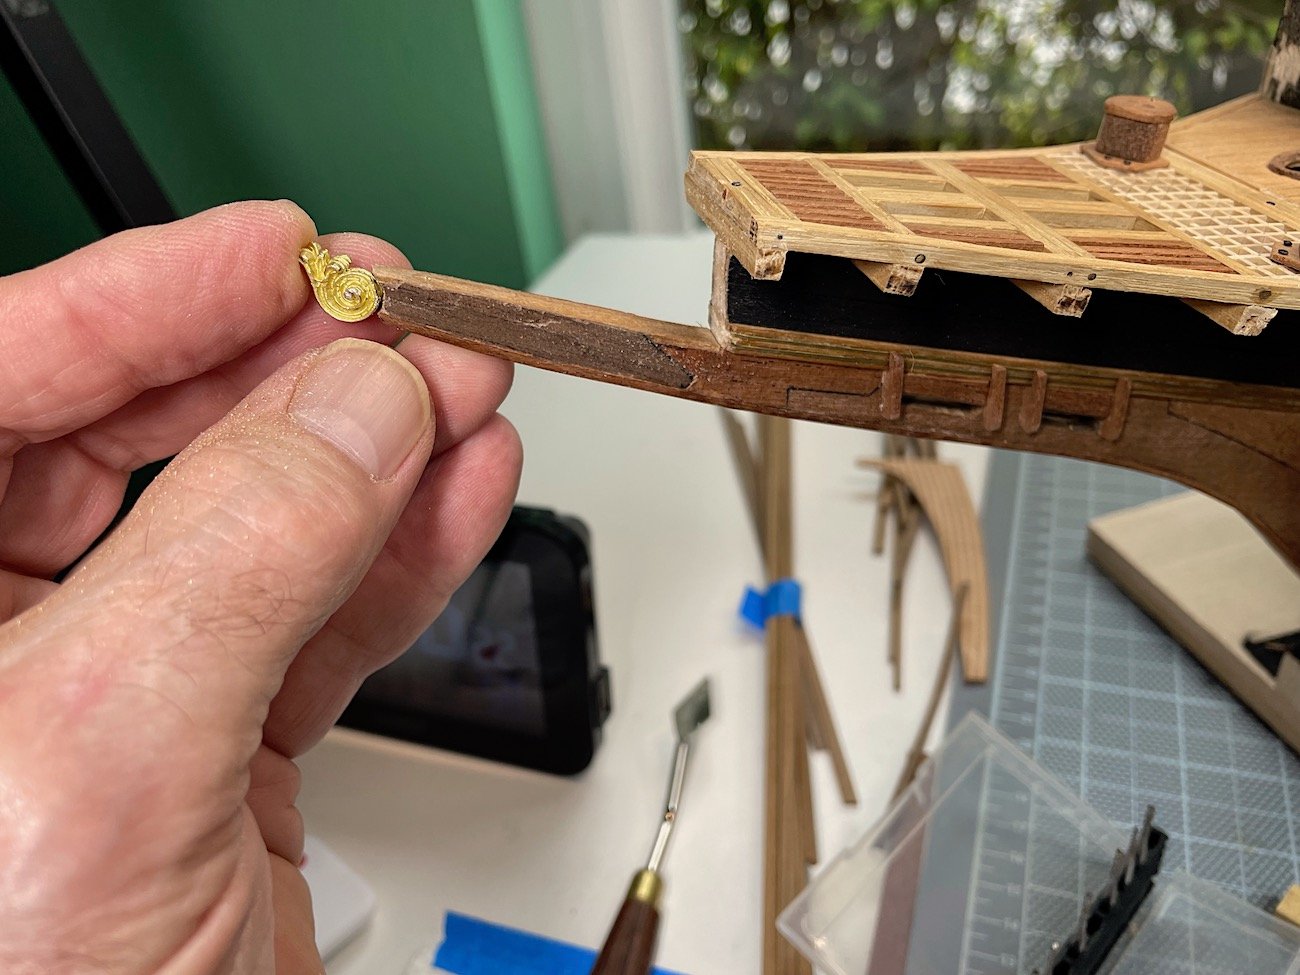
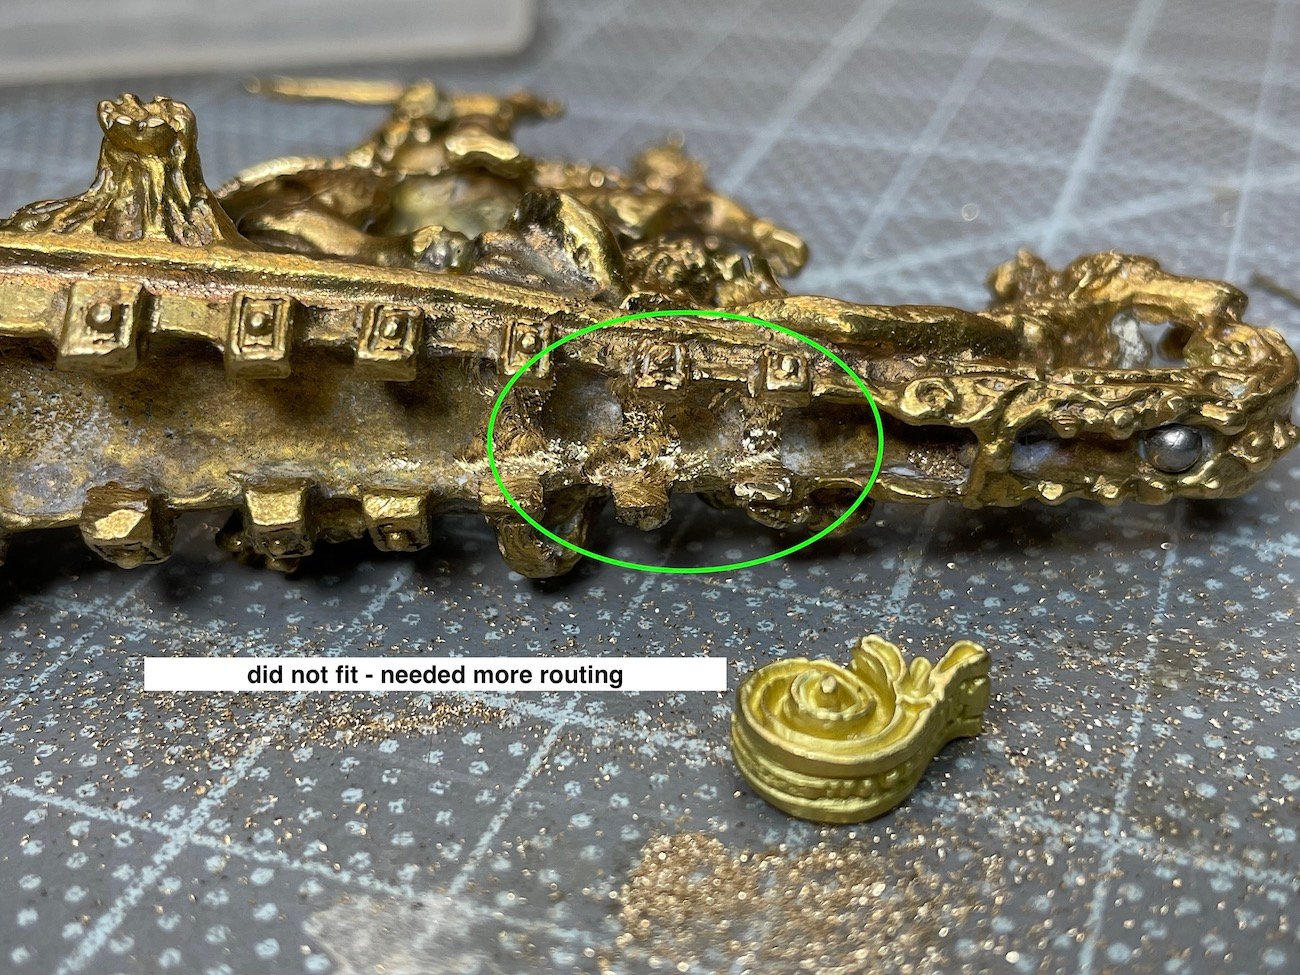
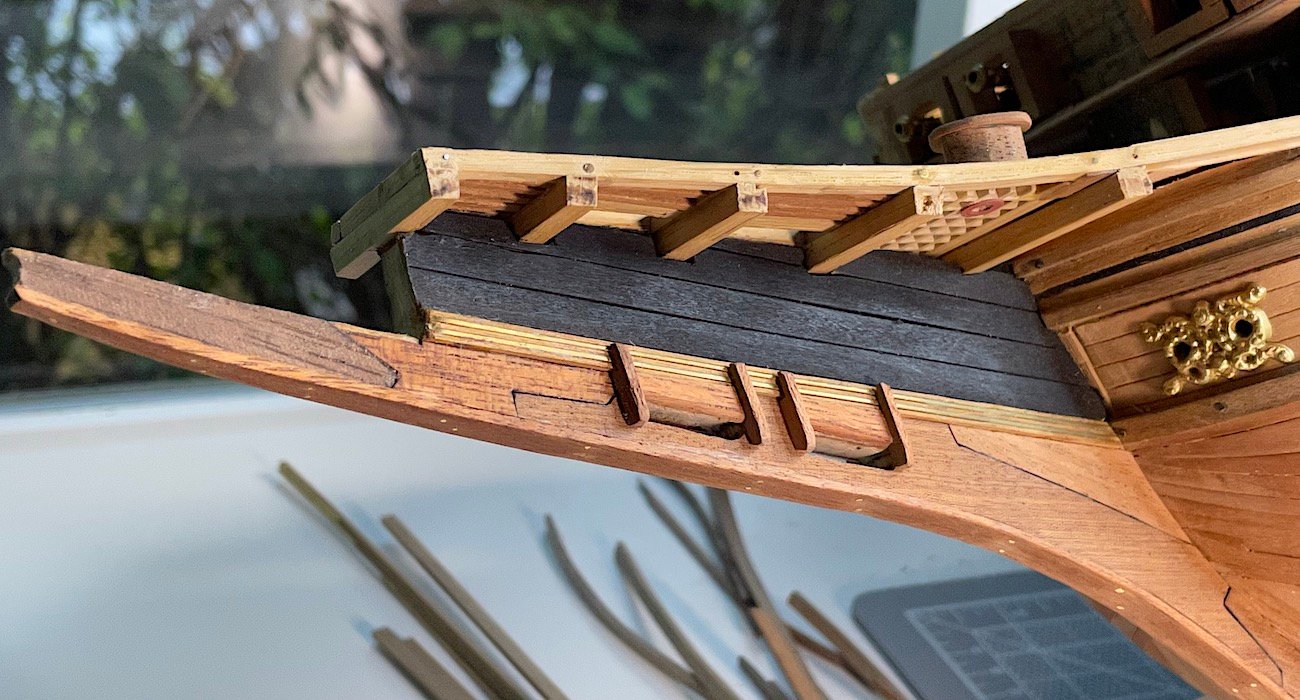
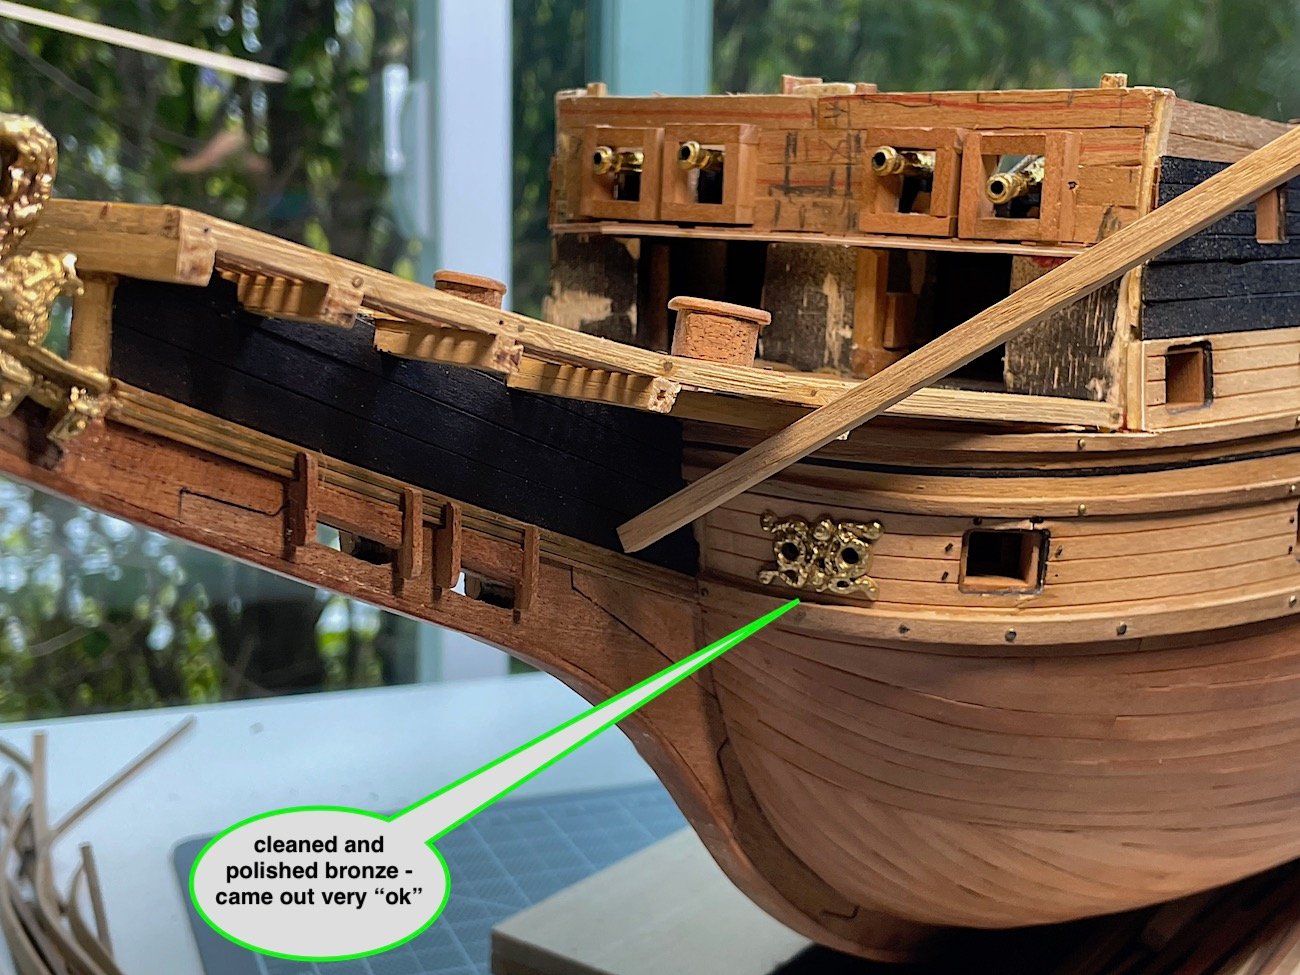
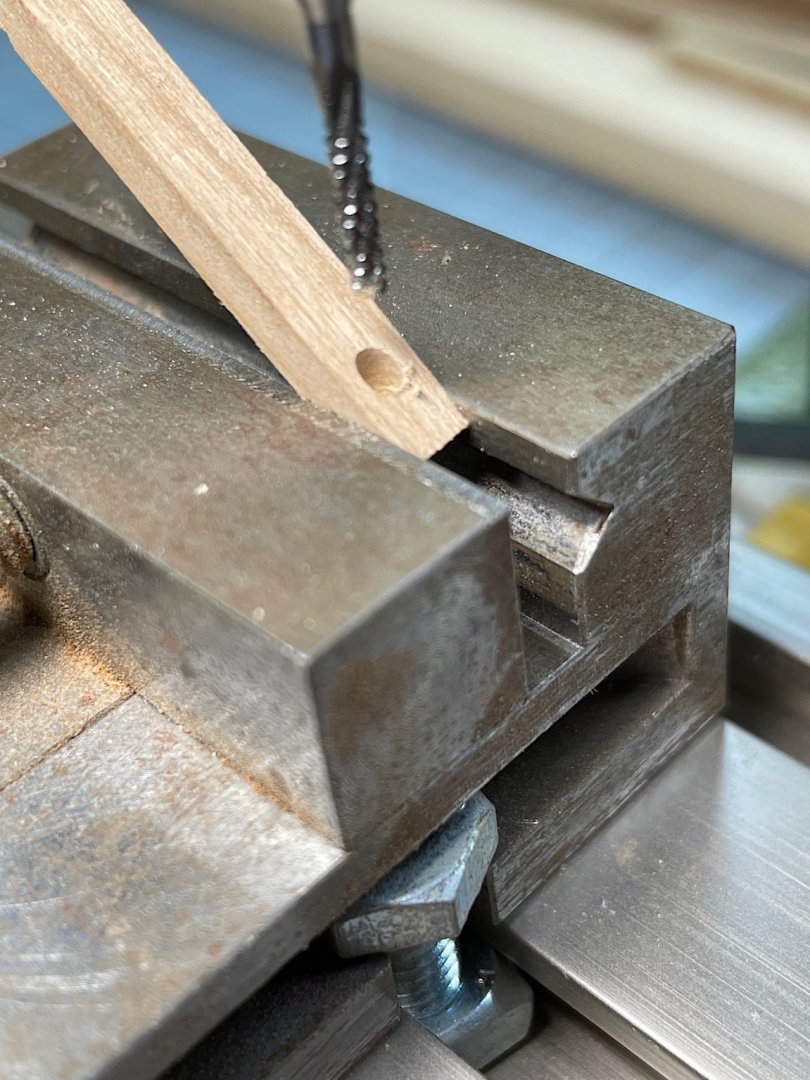
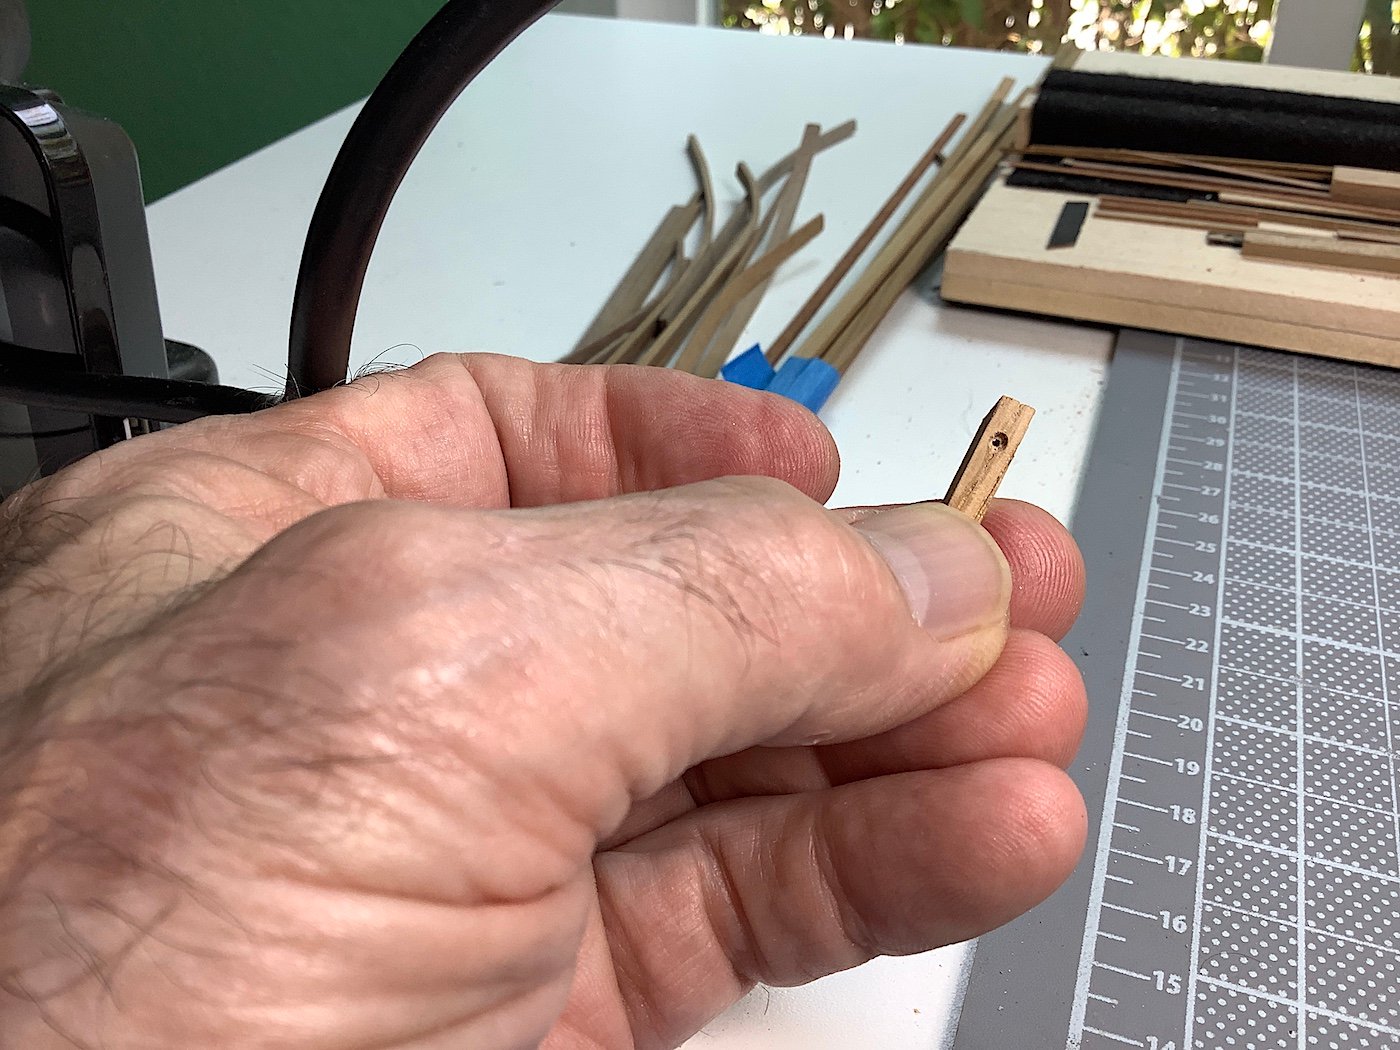
Hi, Minor update – still working on forward keel, beakshead and stem areas; adding details that have taken some time, and of course some areas don’t come out right on first attempt, or areas also have to be redone 😬 --- Thanks for dropping by, likes and any comments or suggestions…