


mtaylor
-
Posts
26,273 -
Joined
-
Last visited
Content Type
Profiles
Forums
Gallery
Events
Everything posted by mtaylor
-
Looks to me like the that first two or three steps are going to whoppers.... "Over the side, lads!!!!"
- 446 replies
-
- 5
-

-
- zebulon b vance
- deans marine
- (and 3 more)
-
Forget the play and the movie... one needs to read the books. Or at least the first one. I think your hull is looking great. A bit of filler where the red circle is along with a light sanding and you're ready for the final planking of the hull. I'm not sure if they have you do other things between the first and second planking so follow directions.
-
I've been cheating a bit then lately by not using ebony. I've been using boxwood, cut, fit, sand, get it look right in position and they dye the wood with ebony stain. When dry (2nd coat if necessary) a mild light sanding with 800 grit sandpaper and glue into place. It's a bit of a pain, but the wood looks good and I'm not having to contend with ebony dust.
-
Eric, Wouldn't need for hogchains be more important for down river with the heavy cotton bail loads then up north? I'd think on Missouri, that a bit of hull flex might have been good thing just because as you state, they had the sandbar problem. The Ohio has it's shallows upriver as I recall so what worked there might be good for the Missouri.
- 599 replies
-
- 4
-
-
- sidewheeler
- arabia
- (and 4 more)
-
Super nice build, CDW. And flight videos are just stunning in my opinion. Spent more time than I should have watching those on Youtube and following various links around to other videos.
-
Welcome to MSW. Since you didn't say if its the San Francisco or the San Francisco2, go to the link below and click on "wooden ships". It will download a PDF of all the builds for wooden ship kits here on MSW. There's a pile of San Francisco's listed.
-
Is the brass clean? Sometimes they coat brass and nothing sticks to it. Test by putting two small pieces into some acetone for a while and rinse, dry and see of the glue sticks.
-
Hmmm..... this might be a good time to do that. I'll put the kit and make a list of supplies I'll need (paint and glue mostly).
-
Thanks Downer for pointing that out. Seems I'm missing the obvious sometimes and once it's mentioned, it's face palm time and "Dooooh".
-
Lou, You're missing a perfect opportunity here that even has doctor's orders. You're sitting. Do with a build. Evil, I know I am.

-
I did some re-work without breaking anything (yeah for me!). The pieces are now back in place.
-
Welcome to MSW, Jan. Sounds like a good plan to me. By all means start a build log for your Elidir as that will you tap into the knowledge and also a good way to make some friends.
-
I used white glue. But not that much, less than drop in two places. I managed to pop off those bits with no damage. I have reworked them for a better fit and reglued them into place. Looks better, but I'm not handling the boat until the glue dries completely.
-
It does seem to be a trait of AYC. I've only used it, so far, for planking decks and areas that don't need pressure. If the hull planks are pre-bent using heat, water, whatever method works for you and do fit with minimal pressure, run some wood glue along the length with gaps. In the gaps put a drop of CA to tack the piece down. There might be an issue with things setting up fast if you're using one long plank instead of a few shorter ones.
-
Mike, Give some thought to this... it's not difficult but it might help you based on your feelings about the stern. Put a piece of filter paper over the vacuum inlet nozzle. Create a bunch of ebony sawdust by whatever means. The dust will be captured in the filter paper. When you think you have enough, take the dust and make a paste of white glue, a tiny bit of water, and the dust to make a paste. Use that to fill in the gaps and let dry. Lightly resand it and it should be smoother. I've this method on my own projects and it works well.
-
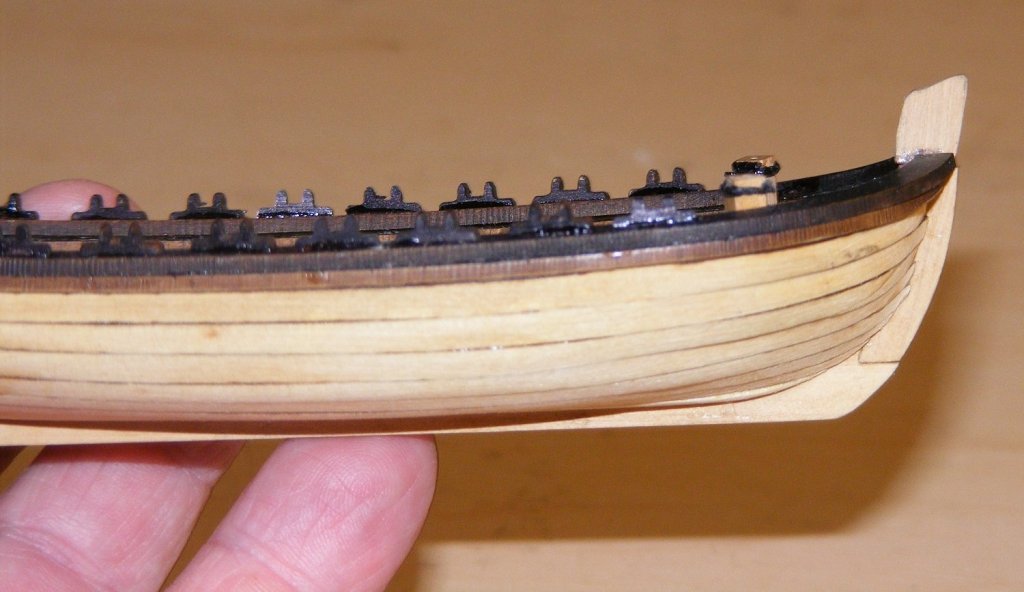
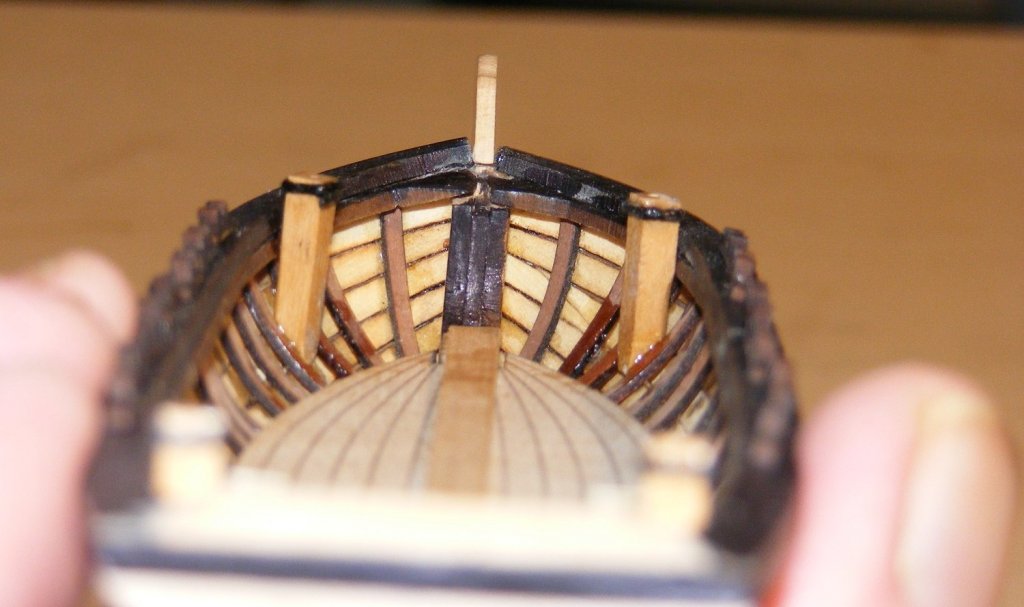
They are angled out a bit. I'm not sure what happened as during the test fits they were vertical. I suspect that during the glue up I didn't get them fully seated. One of the few things I'm not happy with. I'm afraid to try to unglue them as what ever I use will probably basically destroy the boat by releasing the frame, planks, etc. in that area. I may just have to redo the whole boat. I'll think a bit and try some things before I engage is mass destruction. If the glue bond isn't that hard, I might be able to just pop them off.
-
and I think the illustrator who gave the saracens a flag with a cross on it must have been having a senior moment, and put it above the wrong set of horsemen. Not necessarily. It could have been those were acting as mercenaries or agreed to go under his banner. If it was emperor's banner, it could be a misuse of the term "saracens". Part of why I think the "dark ages" were called that is lack of definitive history. So much was amplified, slanted, tweeked, etc. in the name of "religion" which was really power.
-
Question about table saw technique
mtaylor replied to jdbondy's topic in Modeling tools and Workshop Equipment
PM sent JD. -
Thanks Carl, but the blue is only temporary tape to be removed later. I hate dropping parts into bowels of the ship never to be seen again.
-
What a joy to see this model coming along. As for the ebony, it looks like the grain is not straight across the plank. You might try scrapping a bit more or just some very fine sandpaper. And, as been suggested, do wear a breathing filter even if it's a paper mask like doctors and surgeons wear.


