mtaylor
-
Posts
26,273 -
Joined
-
Last visited
Content Type
Profiles
Forums
Gallery
Events
Everything posted by mtaylor
-
No problem, Gregory.
-
I've noticed from my own model work that scale in a AL kit is subject to the whims of whoever designed the kit. They used to do some good instructions especially in their "beginner" kits but from what I've seen lately... I agree with those building them, the instructions are bad.
-
Girona by augustus
mtaylor replied to augustus's topic in - Build logs for subjects built 1501 - 1750
Whoever started this build did a really nice bit of work, Augustus. I hope you can find the answers you seek. You might try posting some pictures with your questions here: https://modelshipworld.com/forum/24-wood-ship-model-kits/ -
Amazing work, Danny. We don't (or at least I didn't) realize how tiny that is until you had it in your hand.
-
Gregory, I'd suggest doing a build log as the Gallery is actually intended for finished models and not construction.
-
Lou, There's quite a bit on tank battles here: https://nationalinterest.org/blog/the-buzz You'll have to basically go through quite a few pages as the don't have a search function as such. They have articles on WWI to the present.
-
If you can, take a drawing of an appropriate crewman type and scale him down. Paste to a chunk/piece of wood and use that as a reference for things like spacing on the deck planks. Having a "little guy" really does help when we're building. I have one and it took me maybe an hour to make but I just sketched a figure of the right size onto some scrap wood (boxwod) and carved him out. Nothing fancy but it sure does help. As for a windlass, even though the plans don't show one, I would think it would need one. Is there any mention of the number of crewmen? If you have enough, a windlass isn't needed but it sure would make things easier.
-
How much tighter would the lines be if you spread them apart to fit the boom? I did that on my Constellation build. Had enough slack to install the boom and everything came out ok. Luckly, I hadn't rigged the other masts to that point yet so boom first and then rig on those.
-
Very similar though I think (I'll have to go find my book and check) but I think it was much larger.
-
Hello Hellmuht, Your two posts above #16 and #17 aren't showing the images. The image links go to another site that is password protected. Can you upload those images here? Thanks.
-
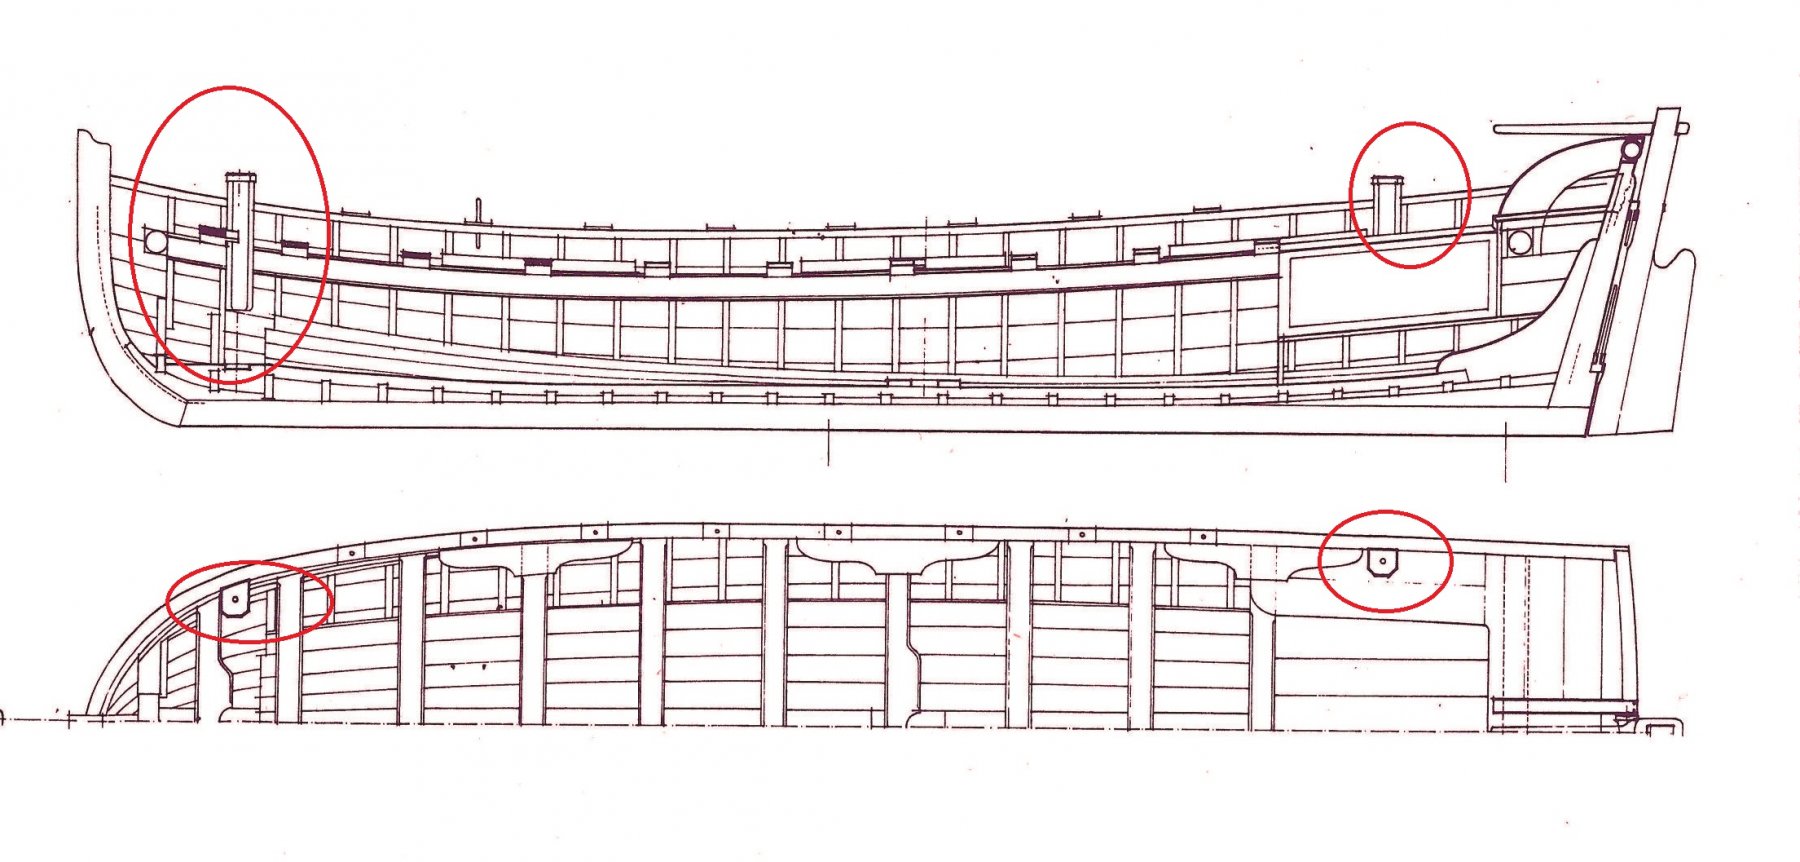
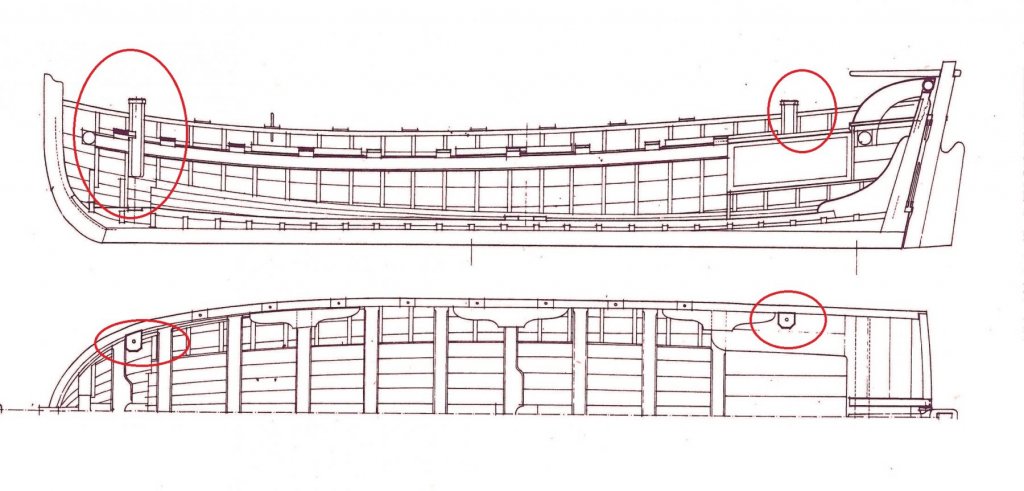
Thanks for looking in and the comments. I think I'll pass on the daisy cutter discussion. Thanks Downer. I'm using the ANCRE plans for this which, while similar, are different. The French longboat has 4 mounts, one at each "corner". See the drawing below. I've never heard that term before for these pieces. But then the Brits have a way with wording. I'll go look that up, Carl.
-
Hi Mark, No... it's a line from the drawing program I use to edit and size my photos. <sigh> I try to do better. <hangs head> I thought daisy cutters were that also. They were also artillery shells (mortars I think) with an extension the fuse so they exploded at about knee height. I'm doing a bit of Googling and not finding anything other than bombs and artillery shell. Nothing nautical though.
-
"Daisy cutters?" I didn't know that. Seems like an unlikely name for a gun on a boat though.
-
Sam, They were small cannon (1 pdr's I think) for shore landings and also during battle to keep "the other side" from using there boats to board the ship. I've not found a whole lot of info them other than the plans and some comments about how many a frigate would carry and their purpose. The long boat was the only ship's boat that had these mounts. The long boat was used for "heavy" work such as working the anchor (thus the sheave on the rear), transferring casks of water, wine, food, and also moving crew members from ship to shore and vise versa. The next size up is the "barge". Smaller but used for personal and small caskets. Then the smallest which is the "cutter" which was basically the Captain's Gig or Officer's Gig.
-
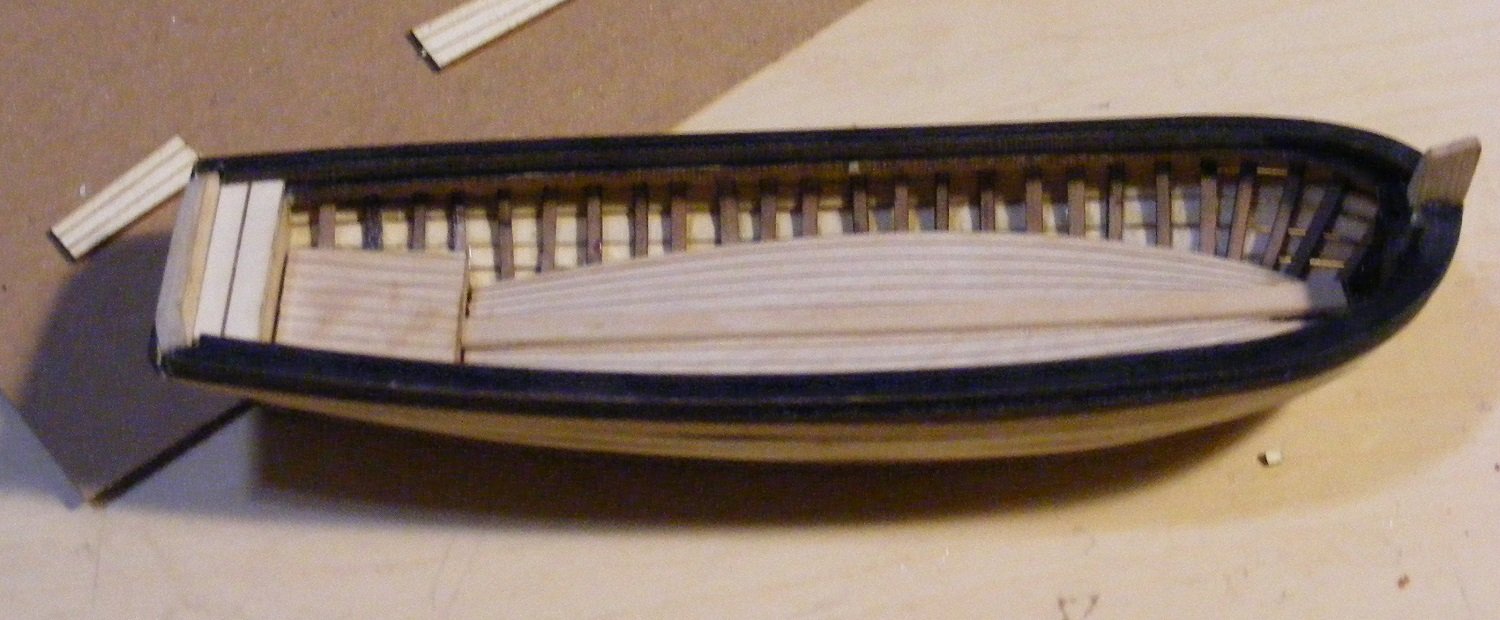
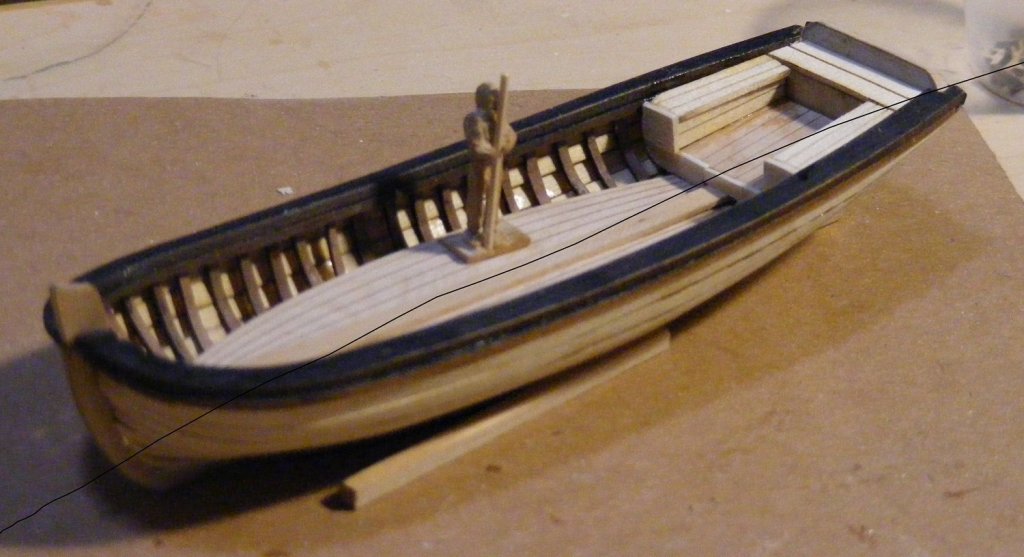
A bit of an update.... deck planking is down, the seats are in place and some visible boo-boos have been fixed. I still have to oarlocks, cannon posts, and the sheave on the stern. Overall, I'm happy. A few things I'm not thrilled about but.... we'll see when I'm done with this. I'm not sure where that black line across the last photo came from...

-
It really is hard to believe that's card and paper, Danny. Wonderful work.
-
Wood for decking
mtaylor replied to JamesT1's topic in Building, Framing, Planking and plating a ships hull and deck
Jim, There's no "one" answer for that. It all depends on the builder. It's usually lighter colored woods such a basswood, boxwood, yellow cedar, etc. What's the kit supply? -
Nikiphoros, I like the story behind the model because of the humanity, not the violence of the earthquake and death. Very touching as one can't really know the tragedy of of the event. In many ways, this represents the love of a man for his family. I do suggest that you make a copy (a simple cut out will work) of Joao of the proper size for the scale. This can just be a piece of cardboard, or if you feel creative, a carving. This will help with proportions and sizes as you go with the items you're planning on putting in the model. Kit bashing, as you are doing is really just cross between a kit and a scratch build. So you'll learn many things. As for AL... they're, in my opinion, one of the worst manufacturers when it comes to accuracy and scale. However, their kits are priced right and if you mess up too badly, one can always buy another kit and start over using what they learned. I'll be following along as will others on your journey. Be patient and ask all the questions you need.
-
That last photo is the key one. Looks pretty darn good. In some ways, making a model ship is like making sausage... a mess but the end result is what counts. You've done well.
-
Sweet work and triggering memories, Denis. BTW, mirror and windshield wipers weren't required on gassers back then. If you had them, the mirror glass has to be taped and the wipers either pulled off or taped down. I can smell the tire smoke from here.....
-
Don't feel bad, Jo. I completely trashed my first version of Licorne and I was well into the build at the time. It's all part of the learning curve. Post some pictures so we can see what's happening.