


mtaylor
-
Posts
26,273 -
Joined
-
Last visited
Content Type
Profiles
Forums
Gallery
Events
Everything posted by mtaylor
-
Indeed. I should have referenced that and failed. I'll go stand in the corner.
-
I'm hopeful that someone can answer your question in depth with some book references. As tactics did evolve and what worked in one battle may not have worked in others. EDIT: And Vossie beat me to it... there is a book. The only book I have that discusses tactics (but only in a limited sense of the battles the ship fought) is The Billy Ruffian by David Cordingly. Per the book (greatly summerized): Generally, for much of the period you're interested in, fleet actions were pretty straight forward it seems. They'd form up a line of ships on one side (call them fleet A) and the other side would form up opposite them (call them fleet B). They would then just hammer away at each other. I'm sure there were exceptions. Per the book, Nelson changed things for fleet actions by charging the line with two lines of his ships. They would then break through the line of battle and attack on the opposite side. As they broke through, they opened fire on the unprotected sterns and bows at the break points. As for single ship actions.... maneuver and fire. When a ship was disabled and could maneuver no more, close in and board. There's an old military saying that even with the best plans, all bets are off once the first shot is fired.
-
Nice work, Jo.
-
Good catch on the railing, Steve. That would have been a bear to put in after the davits. Looking super from here.
- 446 replies
-
- 3
-

-
- zebulon b vance
- deans marine
- (and 3 more)
-
HMCSS Victoria 1855 by BANYAN - 1:72
mtaylor replied to BANYAN's topic in - Build logs for subjects built 1851 - 1900
I take it that this is a "double secret furlough"? Much like the "double, secret probation" from Animal House?- 1,013 replies
-
- 4
-
-
- gun dispatch vessel
- victoria
- (and 2 more)
-
Sweet work, and as a bonus, you and her had a project. I hope there's more on the horizon for both of you.
-
-
Vought F4U-1D by Papa - Tamiya - PLASTIC
mtaylor replied to Papa's topic in Completed non-ship models
Part of the reason that navy didn't like them was the tall landing gear with the cockpit back so far. The pilot have to side slip the bird back and forth to see that he was lined up with the carrier. Once the navy learned this and spent the extra time on training, they did order in mass. I think it was the Brits who sorted this out. -
Cutty Sark by NenadM
mtaylor replied to NenadM's topic in - Build logs for subjects built 1851 - 1900
I'd love to give more than one thumbsup for that. Looks great.- 4,152 replies
-
- 3
-
-
- cutty sark
- tehnodidakta
- (and 1 more)
-
You're going to make a bunch of us followers smile with that post. Looks good from here.
-
Amazing how far "plastic" models have come. I remember when they only vaguely looked like the real thing with no detail.
-
Maybe I'm thinking of something else than... clear, pliable, insulates (electric connections) and weather proof for the most part.
- 133 replies
-
- 2
-
-
- alert class
- tugboat
- (and 1 more)
-
Hmm.... interesting. The RTV I used back in my tech writing days in engineering was a compound like a silicon gel though it also came in liquid form for brushing on.
- 133 replies
-
- 2
-
-
- alert class
- tugboat
- (and 1 more)
-
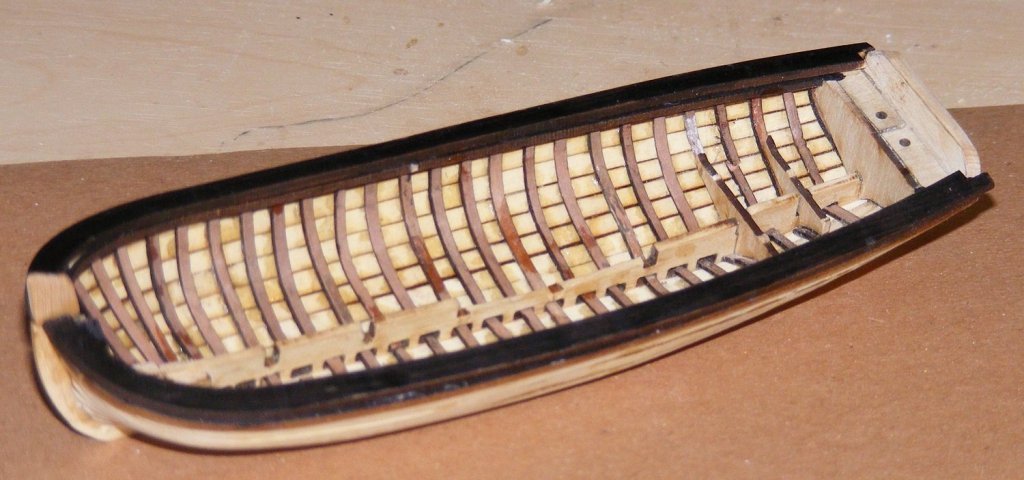
Thanks for the likes and comments. More progress. Finished up the stern. Not real happy and I may tear it out. The only good thing is that this is hidden on the model. Mark, head over to here where I've explained my absences and everything else rather than cluttering things hear up a bit:
-
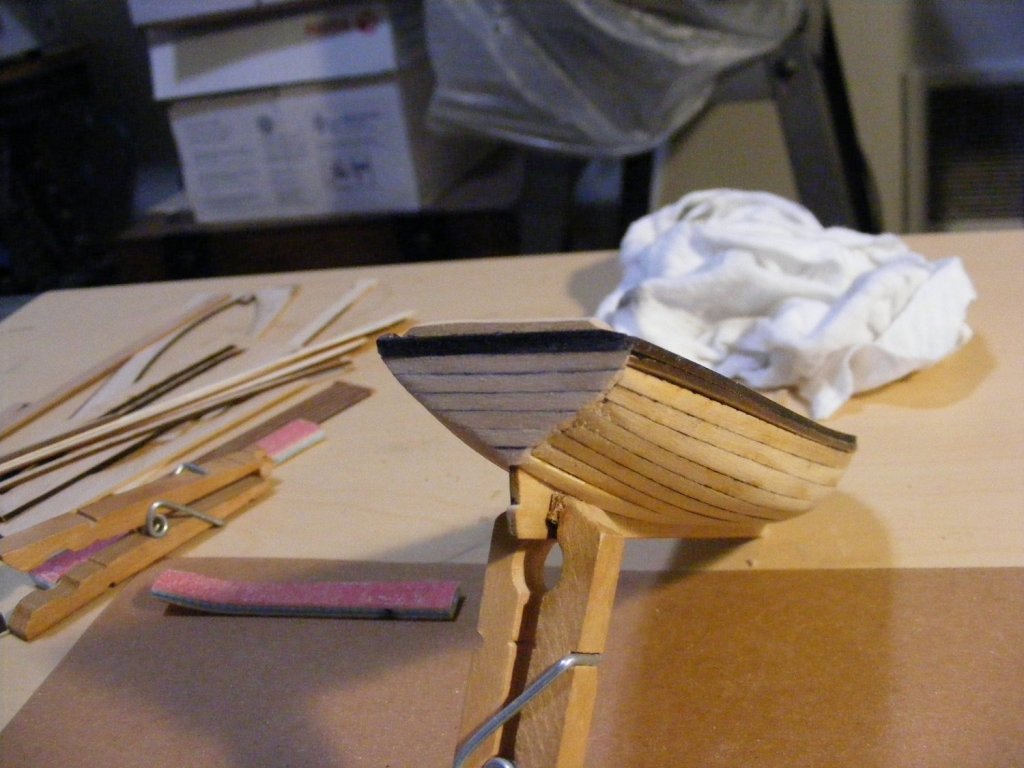
Thanks for the "likes", the comments and the support. A bit of an update. All is not quiet in the shipyard but has been rather slow dealing with family and doggie issues. I repaired the stempost (replaced it actually), trimmed down the transom, and then stained and installed the gunwales. Hopefully, over the next day or two, I'll be able to re-cut the formers I need and install them along with some other bits and pieces I need.
-
If I'm reading this right, you're planning on painting the clear piece? Why not shoot some primer on it before cutting then?
-
I was thinking the same as Pat on those "holes". Hmm... the Admiral spoke... the translation I always used this: "Abandon all hope, ye who enter here .".
-
Cutty Sark by NenadM
mtaylor replied to NenadM's topic in - Build logs for subjects built 1851 - 1900
I'm saddened to hear about Adrian, Nenad.- 4,152 replies
-
- 2
-
-
- cutty sark
- tehnodidakta
- (and 1 more)
-
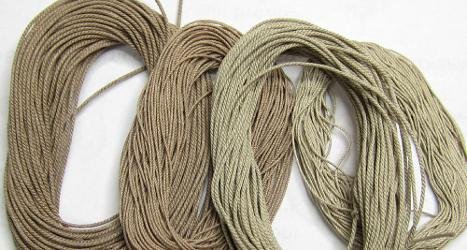
The tar used on the static rigging wasn't black but darkened with age, exposure to the salt air and reapplication as needed. It was a brownish color which is the color of the Stockholm tar that was used. The running rigging was untreated. Here's a picture from the Syren Model Company's rigging line. Take into consideration what the others have said about the line.
-
Hello Peter, Welcome to MSW. The big thing is, relax. This is a hobby There's an index of the kit models (I'm posting link below). Look up Diana and you'll see the build logs. For specific questions, use the search function (upper right hand side of every page). If there's a specific issue on the hull, there's the Building, Framing, Planking area.
-
-
New and need help to identify a mystery model? Read here first!
mtaylor replied to ccoyle's topic in New member Introductions
Hi Ellen, Welcome to MSW. To answer some questions.. yes, some do quite some displays with docks, etc. Most of us don't float our boats as they're too fragile, but in the Kit area there's an index of all the logs, pick the one that says: RC which should cover most of the ones that see water. I put a link to the index below. As for card, yes again. Same for subs. Those can be kits or scratch and again, they should be in the index. For starters, if you're thinking of building on, look around the gallery and see what draws your attention. But to start, start small, maybe a small craft like a canoe or rowboat and then one with one mast. Work from there. The advantage of starting small is you'll learn much and at not a large investment in tools or kits. And by all means start a build log when you do. You'll get help from others and also make some friends. Link to the Index:

