mtaylor
-
Posts
26,273 -
Joined
-
Last visited
Content Type
Profiles
Forums
Gallery
Events
Everything posted by mtaylor
-
Steven, I like your approach. You're thinking like someone of that era for solving the problem. Curving the wood as it grows seems logical as I don't think we know if they knew about steaming it and bending it. Fascinating watching the thoughts and research as this comes together.
-
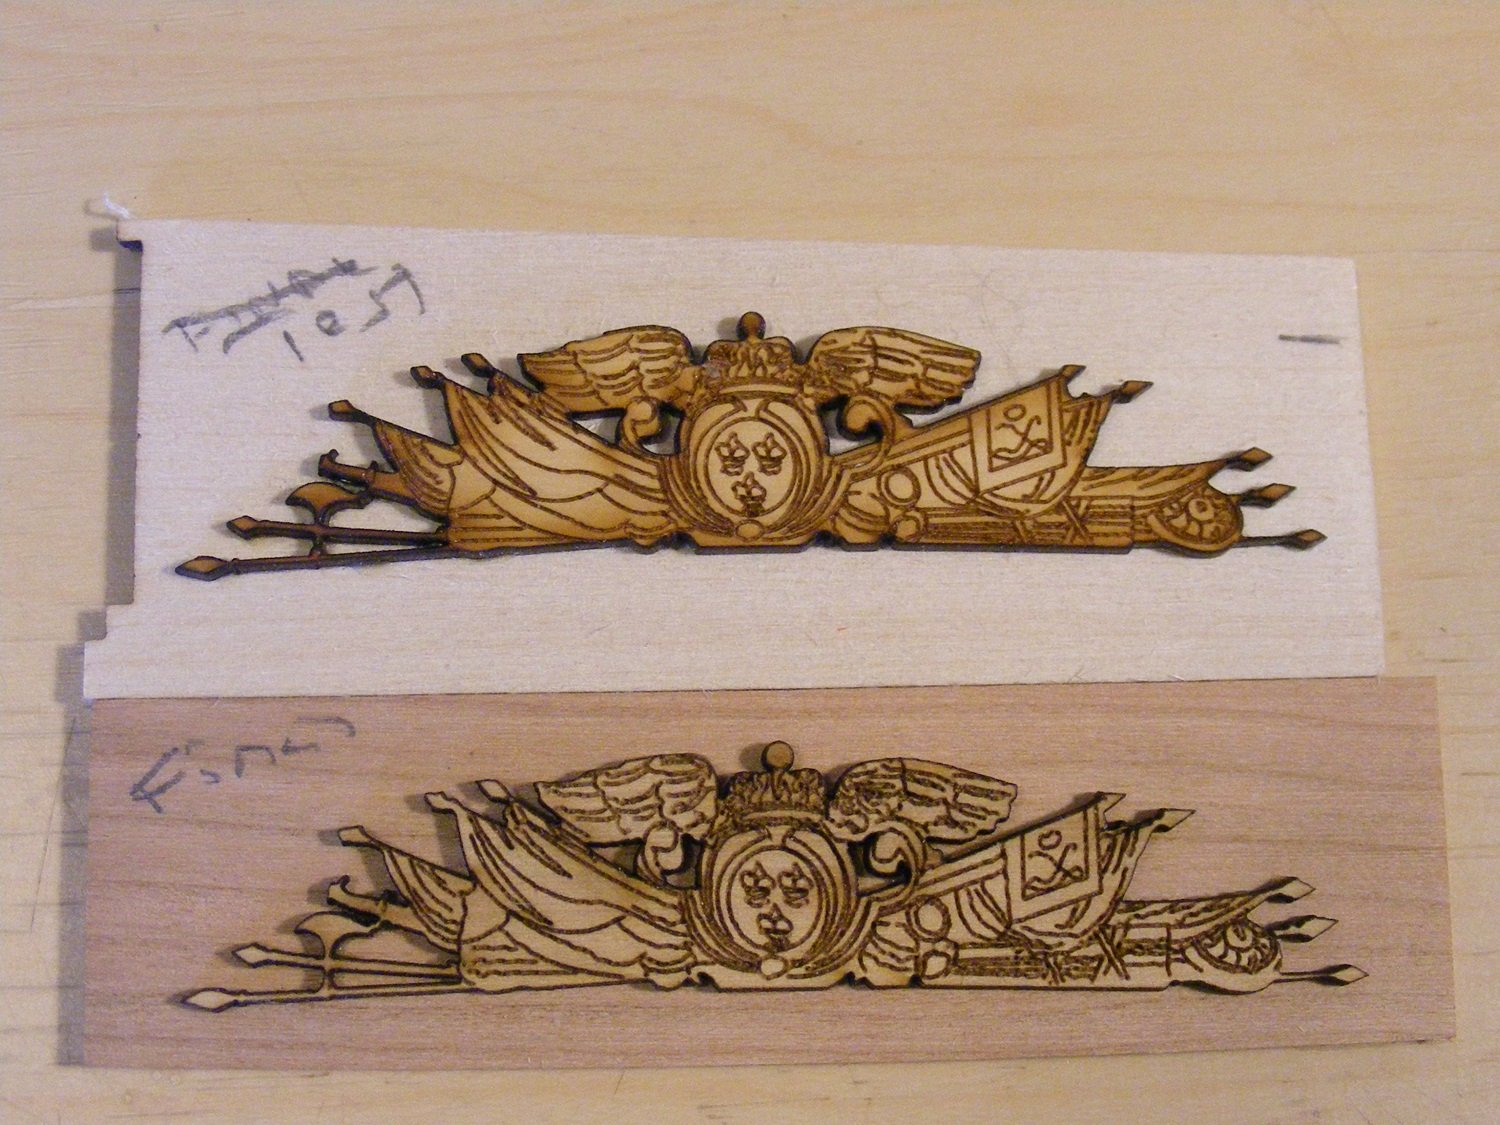
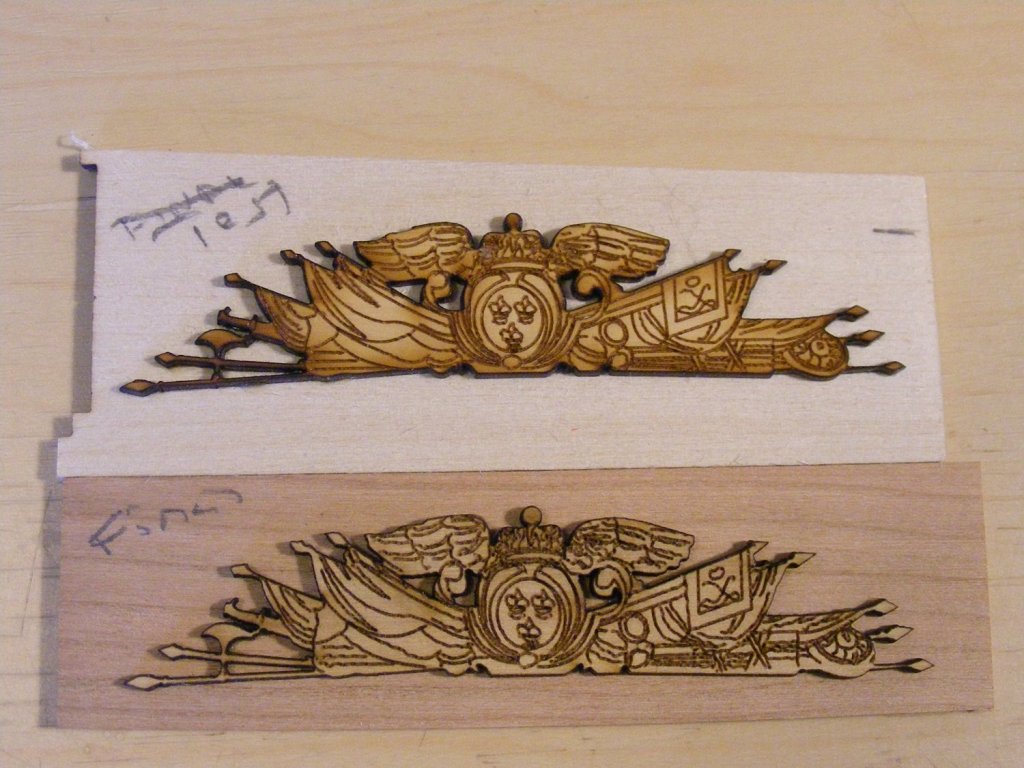
Thanks for the "likes" and the comments. Had to do a "back 10 and punt" on this boat. Still getting some oil canning and I'm not happy. Re-thinking things. I'll either add more ribs or go off in a different direction. It didn't look bad, just didn't look right to my eye. So, while thinking, I started looking over other bits and pieces and realized the DeathStar cuts just didn't look right also. <sigh>. Dove into the problem... Needed to re-calibrate things bigtime. When I replaced parts some time ago after the pump failure took out the tube and power supply, I replaced them with "upgraded" parts. Naturally, being Chinese, instructions were sparse so did some digging. Power supply needed some adjustment and then my cut sheets (speed and power) needed to be rerun. Also alignment was off due to moving the beast when working on it and cleaning the room. I'm going to have to redo all my cut specs for each species and wood thickness. Not hard work, just time consuming. The several hours work, theresults are below. The upper is "before" and the lower is "after". Big difference to these tired old eyes. BTW, those are are 3" (about 75mm) wide. I'm headed back to the ship's boats this week after more household duties have been performed. I like the look of the Master Korbel boats and what's available so I ordered the largest one in 1/72. Part of the learning curve.
-
Go back to edit. At the bottom of the screen were all the photos thumbnails are, hover your mouse over the lower left hand side of the thumbnail you see "remove this attachment". Click it. I hope this helps.
- 37 replies
-
- 2
-

-
- eagle
- constructo
- (and 1 more)
-
Welcome to MSW, Zack. I hope you can find more info than what you need as MSW is a huge resource of information.
-
Nice work indeed, Al. For the inside, a small sanding disk turning very slowly on a "L" head in a Dremal works well. Just go slow on it and check frequently with a batton as woud on the exterior. A bit tedious but for me, not overthinking the process (as I tend to do sometimes) was a key.
-
DN Iceboat by MikeR - FINISHED
mtaylor replied to MikeR's topic in - Build logs for subjects built 1901 - Present Day
Beautiful work, Mike of something we haven't seen much (well..there is Jack's build) around here. -
Hello Ivan, Welcome to MSW. Wonderful work on the armor and the weathering looks fantastic.
-
Reducing extractor noise
mtaylor replied to Williamo's topic in Modeling tools and Workshop Equipment
Absorptive material inside the box will be the key to sound deadening. One thing you might do is go here: https://sawmillcreek.org/forum.php. I use the laser forums a lot for info. The users are very helpful. You may have become a "user" and register. But a search on "dust extractor" should give you lots of hits.- 17 replies
-
- 2
-
-
- cyclone
- vacuum cleaner
- (and 2 more)
-
Pat, Most my log was "lost" during the great crash but for the resurection (such that it was) of the log, there's a link to the log and to the gallery. Do some digging on Jerry's log and/or PM Jerry. He would probably be a good starting place. The Constellation (which seems typical) used iron rods to hold the panels up. The were bent at the end and slipped into what looks like a "loop" on the deck. The hinges on the port themselves ran the length of the port (deck to top). Opening was easy... move the rod (I don't know if there was lock mechanism or rope secured them) and lower the port. Don't let it fall. To close, pull the rod (I think rope around the end aided this). I can't imagine the ports being "light" and mechanical advantage wouldn't be there with the length of the rod. Pretty simple system actually. As for US practice only? I have no idea.
-
That'll take some fiddling to convert. But not much and it looks pretty doable. I did a similar bash on my Constellation. Put more time into thinking about it, planning it than I did doing it.
-
Pat, That's the Constellation and I think Jerry Todd posted it. I'll post a couple from my build... fore and aft.
-
Reducing extractor noise
mtaylor replied to Williamo's topic in Modeling tools and Workshop Equipment
Is a there closet in your workshop? Insulate it well and put the equipment in there. Otherwise you'll have to build an enclosure.- 17 replies
-
- 4
-
-
- cyclone
- vacuum cleaner
- (and 2 more)
-
Balsa filling is a good idea especially with a blunt bow. Then again, for any bow.
-
How big a vise? As for plastic, I use one with remove inserts that held to the jaws by magnets as for many things, I don't want the wood to be marred by the vice.
-
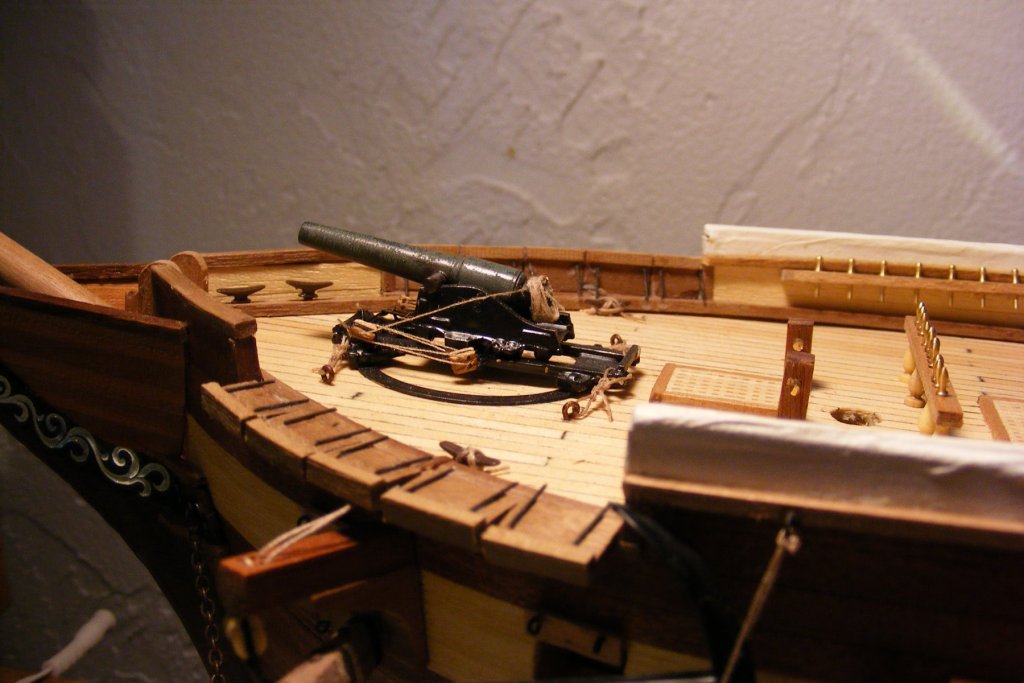
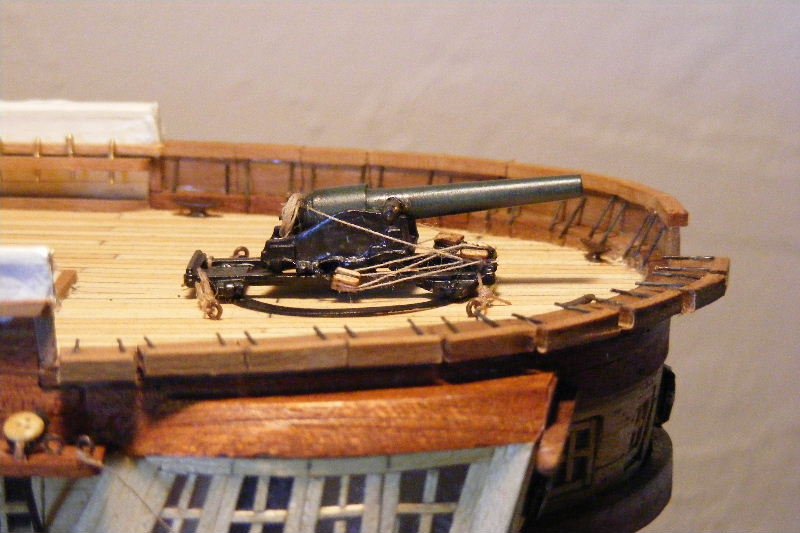
The rack would have to be cleared by your description. The Constellation of 1852 had the forward and stern bulwarks that were hinged and dropped down to allow the gun to be used.
-
kit review 1/72 HMS Vanguard 1787 - Victory Models/Amati
mtaylor replied to James H's topic in REVIEWS: Model kits
If you really want to build the Billy Ruffian, I suggest getting David Gordingly's "The Billy Ruffian". There's a wealth of detail in it. I'm guessing that the stern works weren't upgraded as there's still conjecture over what was there. Seems the plan for the stern carvings was "lost" and there were changes made due to battle damage. I've thought about this kit since it came out and it's great they've gone to PE for much of the decorations.- 18 replies
-
- 2
-
-
- victory models
- elephant
- (and 3 more)
-
Inhaul tackle would just get in the way. If needed, one or both can usually be unhooked pretty quicked from the outhauls and used. Some ships did have inhauls hanging about on the bulkheads or overhead. From my view, the more "stuff" on the gun deck, the worse it is for those crewing the guns. Pretty chaotic during a battle with the 7 to 10 men per gun, powder monkeys, and the equipment for serving the guns so the less laying on the deck, the better. I good example if you wish to see the chaos is to go look at Dafi's log for his HMS Victory kit (towards the end) and you'll get a good visual of how crowded things were.
-
Cut Denis some slack. A beer or two might just be the ticket to a steady hand. And admiral's can stop ship production pretty fast.. so got to keep them happy. A shipwright's work is never done... alas.
- 1,090 replies
-
- 8
-
-
- showcase models
- vendetta
- (and 2 more)
-
Moxis, Beautiful work. I hope all goes well sailing her and she doesn't decide to be a submarine. You've done a beautiful job.
-
Thanks for the likes, the comments, and your patience. Things are moving rather slowly as household duties are getting in the way. Still working on this boat as there's multiple bends per strake but getting there as I can. Lou, I saw that post by Master Korabel. Interesting. Unfortunately, they're 1:48 and I'm at 1:64 so while the length might work, I'm thinking the stripwood and fittings will be oversized. My sizes are roughly.... 4", 5", and 6".
-
-
I saw that also, Lou on the ship's boat. I hope it works out.