mtaylor
-
Posts
26,273 -
Joined
-
Last visited
Content Type
Profiles
Forums
Gallery
Events
Everything posted by mtaylor
-
Gawd, that's bad on them. I'm surprised they just didn't contact you instead wrapping some string a glue. I'm gong to join the others and sit back to watch and learn.
-
Richard, I hope you're not confused by my efforts. I'm on the learning curve here. Yes, the real ones did have some extreme bends. Mine are/were over extreme as I didn't have the curve of the tuck right. I'm still working on this area, btw.
-
No worries, Mick. I'm like you.. I can use the advice, critique, and encouragement. You're doing a super fine job on her.
-
Tom, Those are the planks, not battens.. just not 100% fitted and sanded. The darker one was still wet. As for tapering, only at the bow are they tapered as such. The French planking is a bit different for frigates of this era than the British or Americans used. They used use 8-12 strakes of thick and wide planking and then went to "normal" (for some value of "normal") planking. The hull is very smooth and unbroken without the obvious wales of the Engish/American ships. Footnote.. the wales are 1 foot wide, for 9 strakes on the 8-pdr frigate. The "normal" planks are 8" wide. Thanks Dan. You're probably right. I've pulled off the three planks landing on the tuck and will sand a bit more. While I agree about the eddys I'm not sure they apply on this ship (I could be wrong) as the waterline is between the lowest full transom and that small transom above the filler block. Hmm... she drew 17 feet with the lowest gun port sitting 4 feet out of the water. The stern windows lower end is at the top of the aft most gunport. They really did play on perception to make this ship look bigger than she really was. I note that the British did a similar deception with the Roebuck by putting an upper row of dummy stern windows on a 44 gun frigate to make it appear to be a 64 or 74 from astern.
-
Good on you, Dave. I think you'll be happy you did replank.
- 962 replies
-
- 4
-

-
- sovereign of the seas
- ship of the line
- (and 1 more)
-
Frank, I'm glad you're happy about the change. Rigging is tough enough but if you can't get the rope secured, it becomes a royal pain.. been there, turned the air blue. The new rails do look more in scale.
-
Wonderful work, John. The deck has look that I really like. Hard to describe, but I like it.
- 745 replies
-
- 1
-
-
- francis pritt
- mission ship
- (and 1 more)
-
Mick, Run one back when your reworking and check... It might just be my eyes are deceiving me.
-
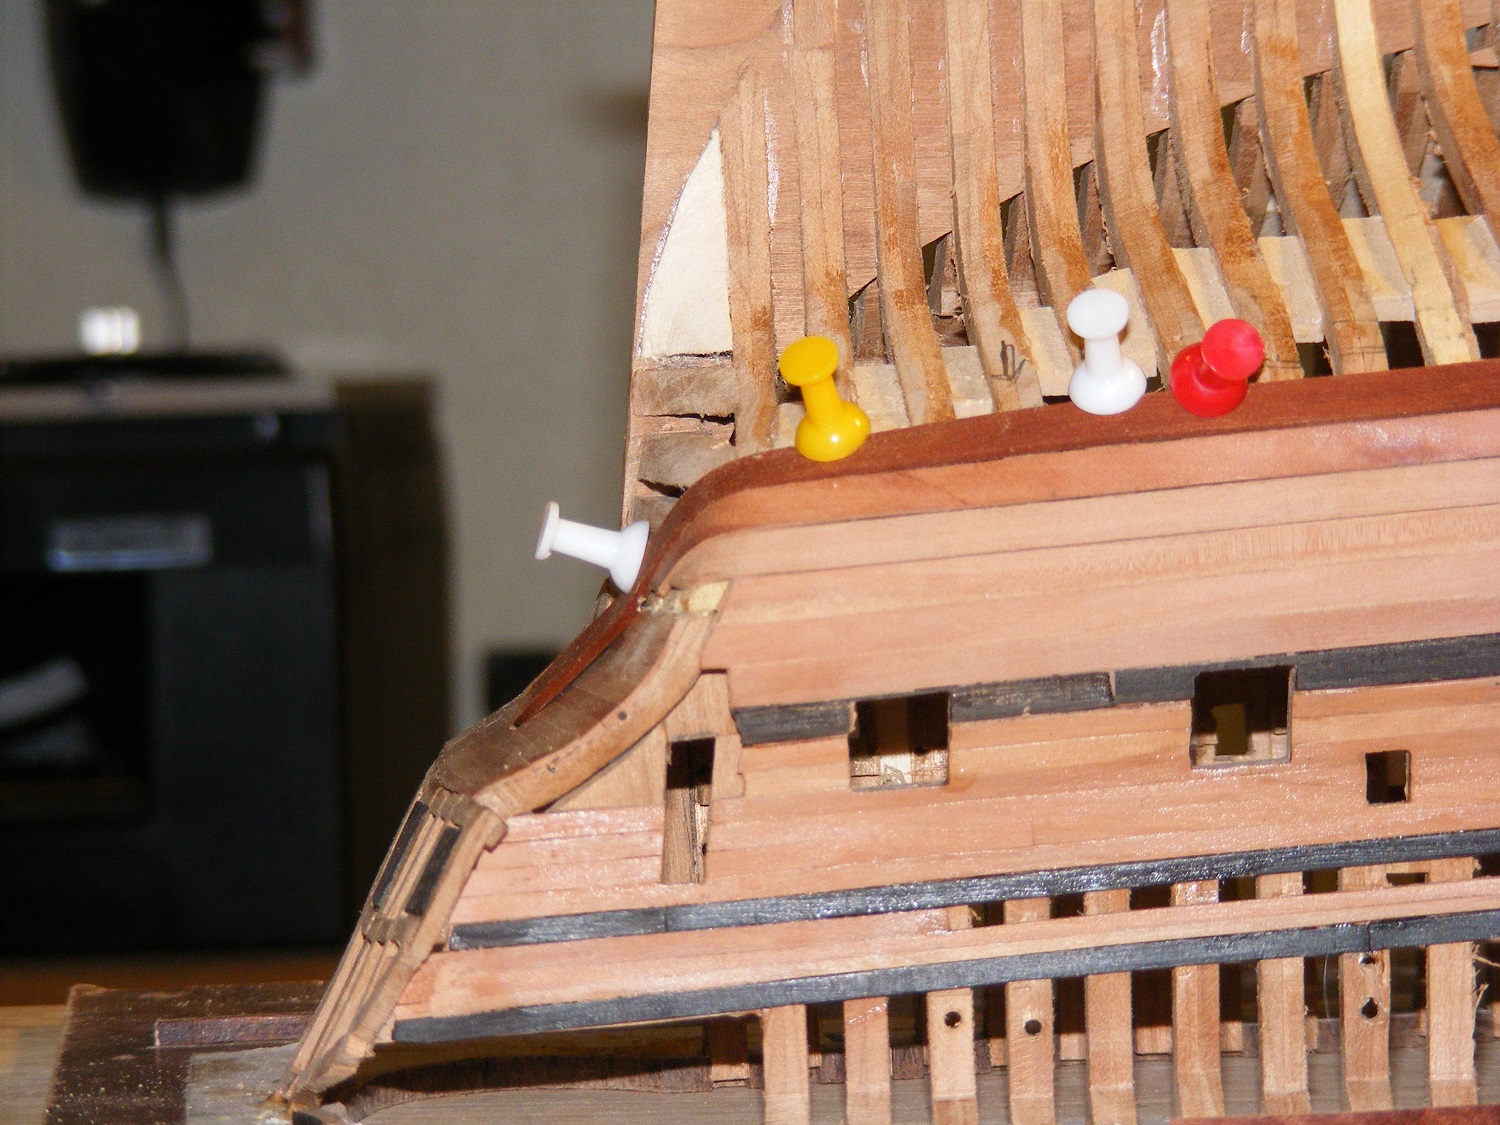
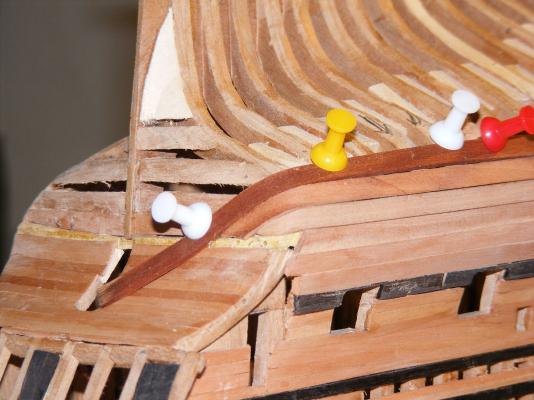
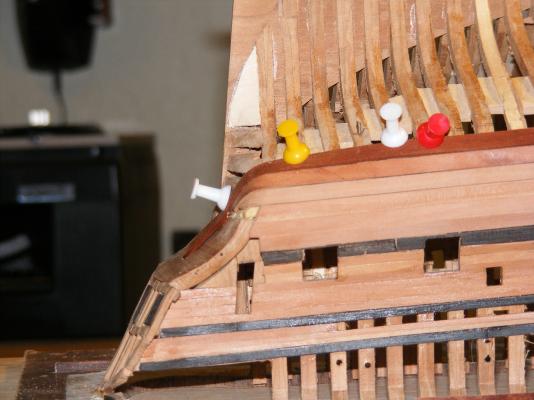
I'm hoping for opinions.. and fear not, I can take critique... I've sanded and shaped quite a bit on the last cant frame and the transoms. Is this better? Does it need more work? I removed 5 planks, the 3 now installed are only tacked into place and will need beveling, etc. But I wanted to get an opinion. I'm thinking they look 100% better, but not sure how "accurate" it is. Do I need more work on this area? I managed to sort out what my references show (unfortunately, no planking expansion but that's to be expected) for plank that's now wrapped around a bit. Which what the references seem to show. Thanks in advance.
-
Brass Black
mtaylor replied to sailor jim's topic in Discussion for a Ship's Deck Furniture, Guns, boats and other Fittings
Richard, Best information is that the company is gone. The owners were killed in a car wreck and I guess the kids decided to close the business rather than run it themselves. It was basically a two-person shop that catered to the RR hobby. -
Looking sweet Popeye. I'm glad you figured out that fascia problem without going nuts.
-
Mick, Looks super nice. Re-check your breeching line length. The look short to my eye. The gun should be able to recoil back so that the muzzle is inside the gunport.
-
ROYAL CAROLINE 1749 by Doris - 1:40 - CARD
mtaylor replied to DORIS's topic in - Build logs for subjects built 1501 - 1750
Just.... wow!!!! I go along with Danny.. only one of you? !!!!! Your model room is a museum.. better than some museums I've seen.- 883 replies
-
- 4
-
-
- royal caroline
- ship of the line
- (and 1 more)
-
Cutty Sark by NenadM
mtaylor replied to NenadM's topic in - Build logs for subjects built 1851 - 1900
The catheads look fantastic Nenad. Impressive work, my friend. Do stay cool... I think you're right about the seventh circle of hell.- 4,152 replies
-
- 2
-
-
- cutty sark
- tehnodidakta
- (and 1 more)
-
Beautiful work, Igor. The stopper just a wonderful touch.
-
Nice kevels, Frank. I hate to sound like a party pooper but the pinrails seem awful thick. Take some appropriate size line and fake a belaying and make sure it grabs and holds the bottom of the pin. Maybe it's just angle of the picture....
-
Jay, I remembered where I'd seen hammocks... Toni's log: http://modelshipworld.com/index.php/topic/198-hms-atalanta-by-tlevine-1775-148-scale-from-tffm-plans/page-24#entry177468 It might help. There's discussion after that post. I think yours look good but you seem to be not a happy camper.. I hope the link helps.
- 572 replies
-
- 4
-
-
- constitution
- frigate
- (and 1 more)
-
Have a look here: http://modelshipworld.com/index.php/topic/6633-john-bowen-retires-at-shipwright/ I don't think there will one....
-
Wow! I like that lighting effect.
-
Nice work, Mike and a nice catch on the frame ends. You're doing a super job on the frames.
- 969 replies
-
- 1
-
-
- hahn
- oliver cromwell
- (and 1 more)
-
Thanks Dan for the wishes. Status at this point: While sanding down the tuck and bending wood, I got to thinking... Dangerous, I know. And what with Druxey getting me thinking outside the box a bit.. a lot actually and re-shape things, I re-looked overall the plans in detail even the obscure things... Hahn's build article and pictures... Druxey's input.. other builds.. and it dawned on me that one thing I missed was Hahn's severe beveling of the last cant frame. See attached. Once it soaked in what I needed to do, I realized it's only possible way to get that outside edge and the rest of the tuck to work right. While digging around in the hard copy files... I found part of the problem in a post-it note I stuck to the frame drawings . I hadn't pre-beveled it as radical as needed as the frame was flimsy and taking off halt the material on the trailing edge didn't seem like a good idea at the time. Well, actually, I did try it during construction and broke both sides twice and told myself "not now". Thus, the post-it note. I should have hung a big sign on the wall: "Bevel last aft frame, dummy!!" I'm beveling even more than what's been suggested and things are coming more into line. I sometimes really need a slap upside the head. I'm currently cleaning things up such that the fashion piece, existing planking (well.. the bits I haven't ripped off anyway) and framing and transoms. I'm also cleaning up the aft end of the existing wide planking. As soon as I can get one side put together, I'll post a photo Giampiero, Dan and Druxey, I owe you your favorite adult beverages for your help in spotting problems and your input. And I owe everyone for their support. Frame 53.pdf

-
Tom, Do it the way you are most comfortable with. Many of us build the mast up as much as possible (all sections, some do yards at this point, some don't, tops) and then install. Others do that and add as much rigging (carefully labeled, of course) then install the mast. Others build it one piece at a time, on the ship. I find it's easier to build the mast up as much as possible on the bench first. Including the upper shrouds and ratlines. I save the lower ones for after installation but I hold off on the ratlines and they are the last thing done.
- 212 replies
-
- 3
-
-
- constellation
- artesania latina
- (and 2 more)
-
Yes... books (there's 4 in the series) are available from Seawatch Books. The plans can be ordered from the Admiralty Models website.
-
It's all doable and it's all good... And to be very blunt, if it weren't for MSW, I would never, ever tried scratchbuilding. The help and encouragement is priceless. So a big thank you to everyone.