mtaylor
-
Posts
26,273 -
Joined
-
Last visited
Content Type
Profiles
Forums
Gallery
Events
Everything posted by mtaylor
-
double planking a hull
mtaylor replied to pugman11's topic in Building, Framing, Planking and plating a ships hull and deck
Cricket, The simple answer is stain or paint the filler (test and re-test on scrap before doing the actual model). This will help hide any planking errors. -
Beautifully perfect, Remco.
-
Wow.. that crew has been busy.
-
Lovely work, Dan. I'm picking up some good tips.
-
Fascinating, Don, to learn the differences and how the Russian subs were designed. I'm just following long as I'm finding this intriguing.
-
Sweet, Augie. The beams, knees, etc. look just perfect.
- 2,191 replies
-
- 2
-

-
- confederacy
- Model Shipways
- (and 1 more)
-
Hi Luke, Welcome to MSW. You might have a look here in the database: http://modelshipworldforum.com/ship-model-plans-and-research.php Third article down is one on kit selection. There's also a good one on what to expect in a kit. AL... very uneven as far as instructions and quality of materials. But... for a starter kit or a serious bash, they have their place. It all depends on what the goal is. My first kit was the Scottish Maid. Not a bad kit, but if I did again, it would be heavily bashed as there some things just not right. My last kit, the Constellation is basically a fiction so I bashed it. Anyway, no matter what you choose, start a build log. It's the best and fastest way to get help and encouragement.
-
That display area is just incredible. It really sets off the displays of ships and eggs. Atalanta should be right at home in there.
-
Alan, I was thinking that the stem could be assembled as a subassembly.... It can on the Hahn style models but then again, his plans show them as one piece. But Druxey is right in that it "depends"...
-
Druxey's right...my bad. I thought the rest of it was glued up already.
-
Very beautiful, Piet. The lucky buyer will a work of art.
- 176 replies
-
- 2
-
-
- muscongus bay lobster smack
- Midwest Products
- (and 1 more)
-
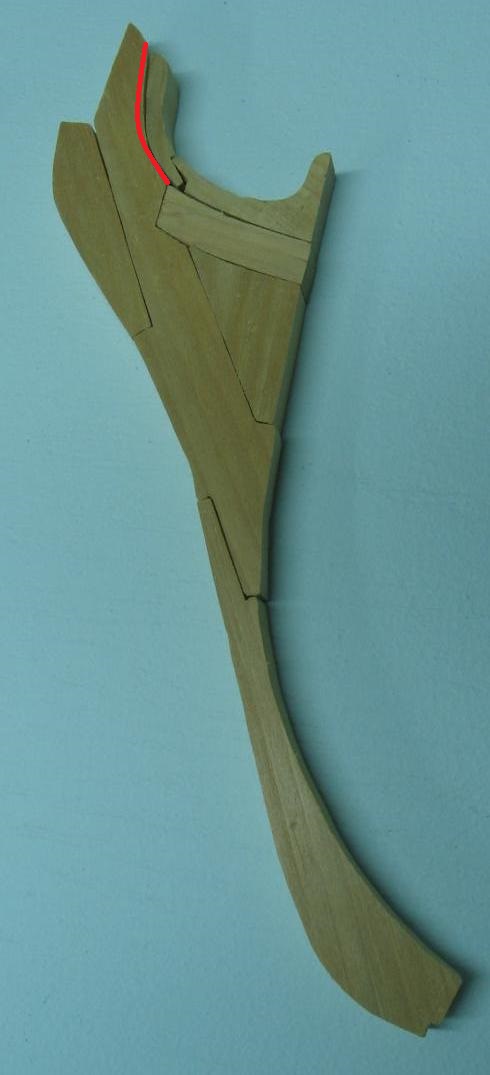
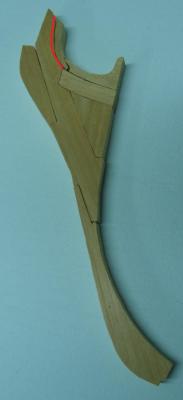
Alan, Looking good. I think your problem is were the red line is on this photo.... If you don't want to redo, work in that area so the piece rotates into place.
-
Cutty Sark by NenadM
mtaylor replied to NenadM's topic in - Build logs for subjects built 1851 - 1900
By jove, I think you have it!!!! Enjoy the movie.- 4,152 replies
-
- 1
-
-
- cutty sark
- tehnodidakta
- (and 1 more)
-
Mark, I believe the more time spent on getting the frames right and faired, the better. I found out the hard way which is why I'm on Version 2.0. Pictures are good because for some reason, things you don't see looking at the actual object really do stand out in a photo. Keep up the nice work.
-
Steve. Looking very impressive. Here's a link... for $45 it's not a bad bit hardware: http://shipahoymodels.com/equipmentforsale.htm Near the bottom of the page. I have one and while it's not fancy or high-tech like Alexey's, it does a good job.
- 569 replies
-
- 1
-
-
- shenandoah
- corel
- (and 1 more)
-
Another amazing build, Patrick. Even more amazing when one realizes that this is lot smaller than the "normal" build.
-
Good catch, Mark. I've discovered that also. It's best to take periodic measurements as the frames are set up and the spacers installed.
- 172 replies
-
- 1
-
-
- druid
- sloop of war
- (and 2 more)
-
Ah but Lextin has already been seduced to the Darkside... and also to S.I.B. He's becoming an Jedi knight at this.
- 15 replies
-
- 4
-
-
- pacific princess
- bottle
- (and 1 more)
-
Hi Adam, Nice to hear that you're healthy enough to get back in the shop. I quite agree about drilling holes.. a white-knuckle trip for sure. I hope you have the holes already drilled in the keel .. or will you mount it some other way.
-
Excellent work, Popeye. Fixes go along with this hobby for some reason.
- 956 replies
-
- 3
-
-
- andrea gail
- trawler
- (and 1 more)
-
Sweet work on the sails. I've seen the tutorial but not pictures. You've brought that all together in my mind. Thanks!