mtaylor
-
Posts
26,273 -
Joined
-
Last visited
Content Type
Profiles
Forums
Gallery
Events
Everything posted by mtaylor
-
Lovely work Dan. I noting the details as that's where the devil is... If my ship looks half as good, I'll be tickled.
-
My first ship was AL's Scottish Maid. Actually worked out quite well as it had good instructions, a great guide on planking, and good plans. However, I'm not sure that they still include all this anymore. It makes a nice model and as some have done, they've bashed it into something most excellent.
-
I think you're right on the .50 being a tracer... been too many years since played (read as: used) one. Air crews could make their own belts up so I used 1 ball, 1 tracer, 1 armor piercing, 1 incendiary, 1 armor piercing incendiary. Figured when we went hot into an LZ, we never knew what we'd run up against..... Depending on the date stamp on the bottom of the cartridge, you might want to be cautious on handling it. I love your belfry.
-
If no luck on the relevant area (please don't post the full plan sheet as that's a copyright issue), you can buy the plans here: http://www.modelexpo-online.com/product.asp?ITEMNO=MSPL2040
-
Unfortunately, that new gun won't work as it's inert. But I like the idea. Is the ship's seal: The Great Seal of Byzantium? Ok.. I'll get me coat. It's the one with "1001 Clever Things to Say on a Monday" in the pocket.

-
Planking help
mtaylor replied to Marvi's topic in Building, Framing, Planking and plating a ships hull and deck
Marvi, Have look here: http://modelshipworld.com/index.php/forum/14-building-framing-planking-and-plating-a-ships-hull-and-deck/ The first pinned topic references the database. Have look also at the other topics in the Database. The last pinned topic is captured from a build log on MSW 1.0 is a pretty good starting point. -
Simply amazing. I'm waiting impatiently to see all the bits brought together. It should be incredible.
-
Attaching / bending Sails to Yardarms
mtaylor replied to fxitgood's topic in Masting, rigging and sails
Frankie, Take Hermione with a grain of salt. Besides being new, she's a replica and also French. I've come far enough in my build to realize that there's many things the French did differently. -
Is there a better #11 blade handle
mtaylor replied to roach101761's topic in Modeling tools and Workshop Equipment
Oh... I don't let mine go "blunt"... every 4 or 5 cuts (strokes?), I re-steel it. Seems to work and Danny says used one blade for quite awhile. -
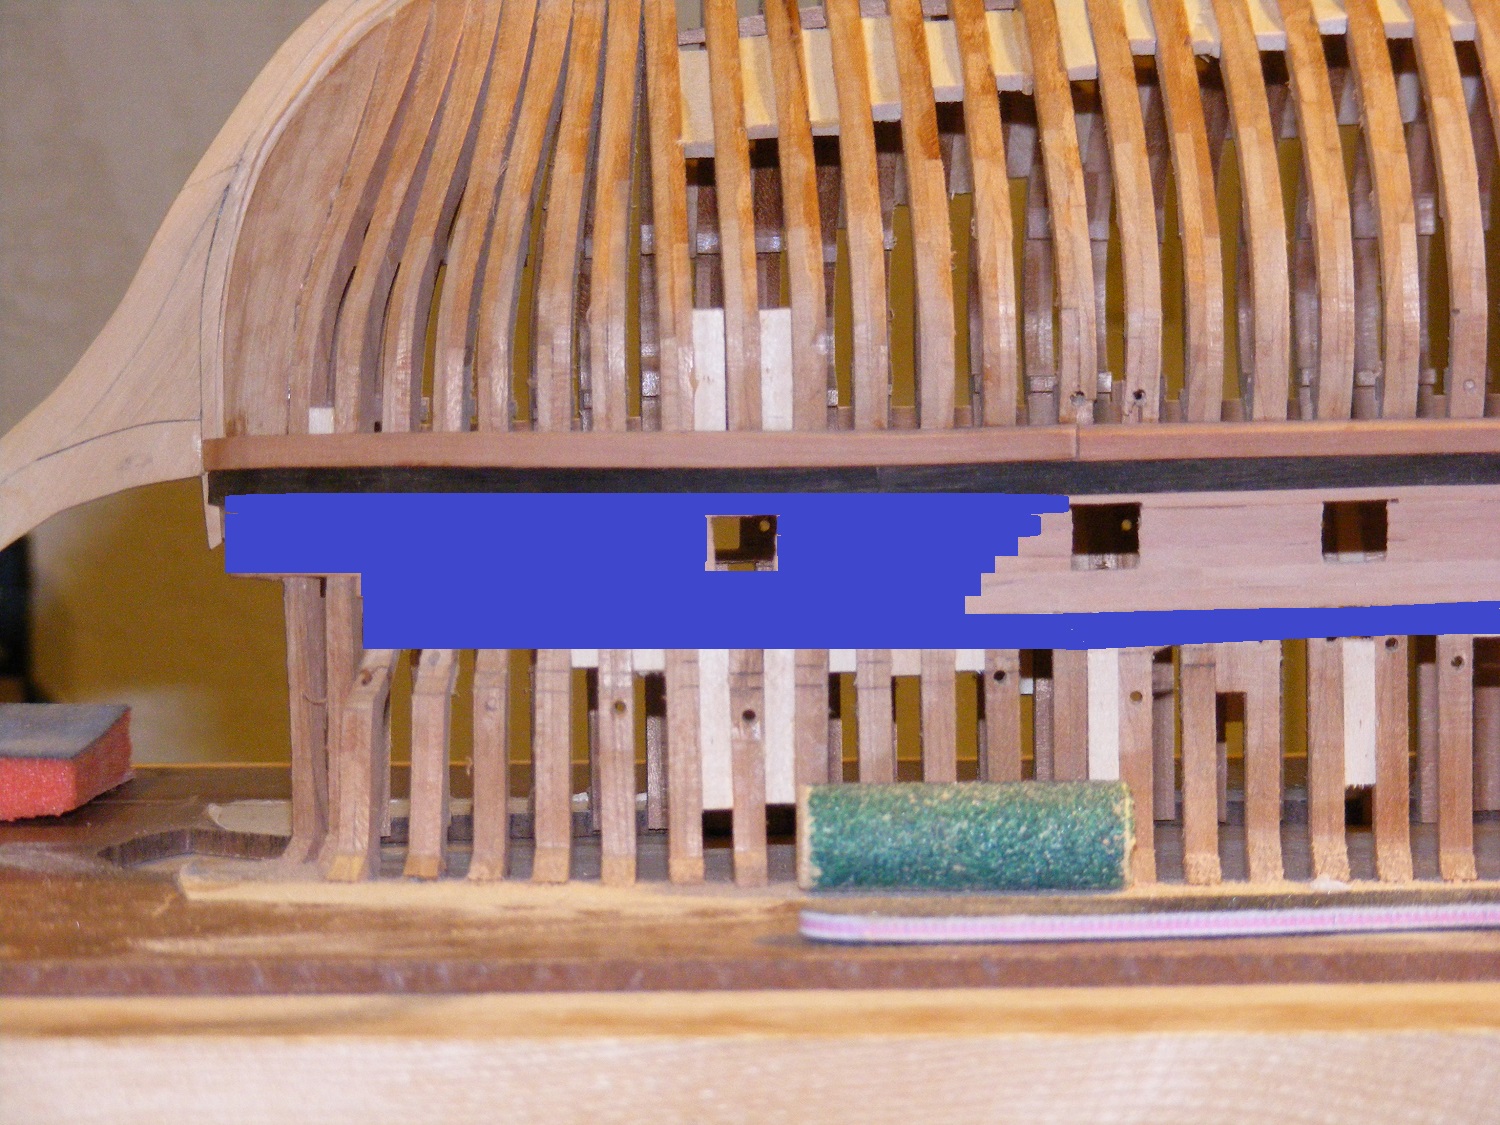
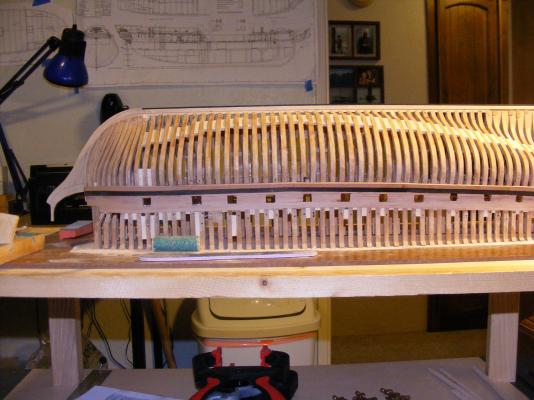
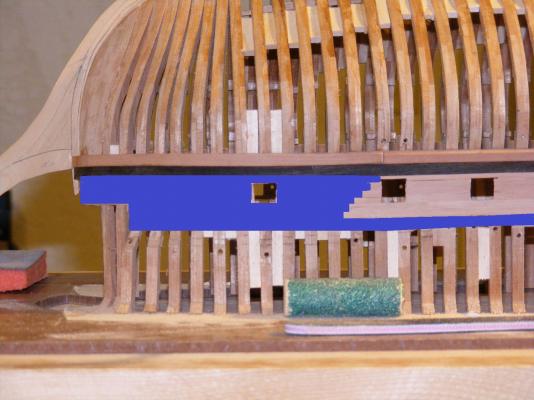
Proof of life... it ain't dead yet... The main wale needs sanding as does the next stake down (up in the photo) but I'll hold off until I get more strakes done towards the keel. Planking on the "gun port stripe" (such that it is) is done. I'm still sanding and need to finish opening all the ports and get them shaped. The bottom photo shows in blue what will be ebony..
-
Beautiful work, Piet. I'm agreeing with David. Though I think we would have just glued the door open.
-
Is there a better #11 blade handle
mtaylor replied to roach101761's topic in Modeling tools and Workshop Equipment
Phil, You don't "steel" your blades to keep them sharp? I wish I could find it (maybe it was before the crash) but Dan Vadas had a post about using the back of an old blade to steel the one lost it's sharpness. Takes a few minutes and the blade lasts a long time. -
I opted for an office chair (no arms) and a wooden kitchen stool for the tall workbenches. I had some lab chairs where I used to work they just wouldn't go low enough for the desk.
-
By the way, Daniel (Dafi) has covered much of this capstan usage in his Victory build log and other topics where he thought things like this through with the help of MSW members and research. He also explores other topics including guns, cabins, meals, and others. It's well worth a look even if you're not building the Victory as it gives insight into how and why many things were done.
- 2,191 replies
-
- 5
-

-
- confederacy
- Model Shipways
- (and 1 more)
-
Cutty Sark by NenadM
mtaylor replied to NenadM's topic in - Build logs for subjects built 1851 - 1900
You should have a smile a big as the moon or bigger, Nenad. She really looks great!!!! What tribute to your ingenuity and pushing for making it what you want.- 4,152 replies
-
- 4
-
-
- cutty sark
- tehnodidakta
- (and 1 more)
-
Lovely work, Don. I'm looking forward to any other projects you want to share. Now about that LEE.....
-
Nicely done, Popeye. That dash is wonderful and everything is coming together beautifully.
- 956 replies
-
- 2
-
-
- andrea gail
- trawler
- (and 1 more)
-
The capstan being rearward was/is intentional. They would use a messenger rope which ran from the manger around the capstan and back to the bow. The anchor hawse was tied to the messenger when raising the anchor. As the hawse go to the scuttle for the cable tier, the wraps were untied. Where the capstan is allowed it also to be used via pulleys to assist with raising/lowering the yards on the main mast, launching and recovering boats, etc. You have to remember that these ships ARE very labor intensive and so moving gratings, etc. was just part of a day's work.
- 2,191 replies
-
- 9
-
-
- confederacy
- Model Shipways
- (and 1 more)
-
Cutty Sark by NenadM
mtaylor replied to NenadM's topic in - Build logs for subjects built 1851 - 1900
I think it's perfect. If you're happy, we'll be happy.- 4,152 replies
-
- 1
-
-
- cutty sark
- tehnodidakta
- (and 1 more)
-
I think Ben did the Constitution for them. He also did the book "How to build First Rate Ship Models from Kits" which well worth the purchase price, IMO.
-
Is that a jeweler's drawplate? Hmm... I was thinking you might be drawing the wood through the drawplate the wrong way. One side, the holes are countersunk and one side they're not. Pull through the non-countersunk side and out the countersunk side.
-
That is a work of art. Wonderful to look at, and very useful.