mtaylor
-
Posts
26,273 -
Joined
-
Last visited
Content Type
Profiles
Forums
Gallery
Events
Everything posted by mtaylor
-
I hope you can get back into the shop soon, Grant. Is this a plans error somewhere?
- 456 replies
-
- 1
-

-
- finished
- bomb ketch
- (and 2 more)
-
Richard, Worst case if you can't find any is to get some 14 gauge wire, heat it with a touch and hammer away to flatten it. Might take several times with the torch and after it's flat enough, hit it again with the torch and let air cool to anneal it and make it softer for bending. Edit: Heat the copper till it's red...
-
Sweet boat, Piet. Looks exceptionally sharp.
- 176 replies
-
- 2
-
-
- muscongus bay lobster smack
- Midwest Products
- (and 1 more)
-
Sjors, The planks are scale size. Thus, a 1 foot (304.8 mm) wide plank in real life is 3/16" (4.7625 mm) wide on the model.
-
Perfect, Alex!!!!!!!!!!
-
Thanks for looking in and the "likes" and comments. Dan, I know you're right. I think I'm being stubborn again. I'll sand the pear to "close" to the ebony and finish with the scraping. Mike, Let's say ebony is interesting.... the dust is a bear to clean up, it kills blades very quickly and also discolors the tools from the oil. But!!! I love the way it looks. So it's a trade-off. As for using it again? I'm looking into alternatives. I tried some stain on some pear and it didn't take. It takes on boxwood well. Currently, I'm waiting on some Feibling's leather dye to come in. I want to try that using alcohol instead of water. Sjors, All scale planks in length, thickness, and width. If I look at the pictures of Hahn's build, I'm not sure he used scale planking but I'm giving it a try. I just need to be slow, patient, and careful.
-
I agree with what David said. Also, your block on the fence is too far back. It should end just past the front edge of the blade. I reset my block depending on how high the blade is out of the saw. The blade should be about 1/16" above the top of the wood. What seems to be happening is the back of the blade is causing the plank to rise up and be thinned down after the cut. It's a trial and error process to find out what works best for you. Just make sure to keep your fingers away from the blade.. getting cut by them tosses blood everywhere and they hurt a lot. I found out the hard way during a moment's inattention.
-
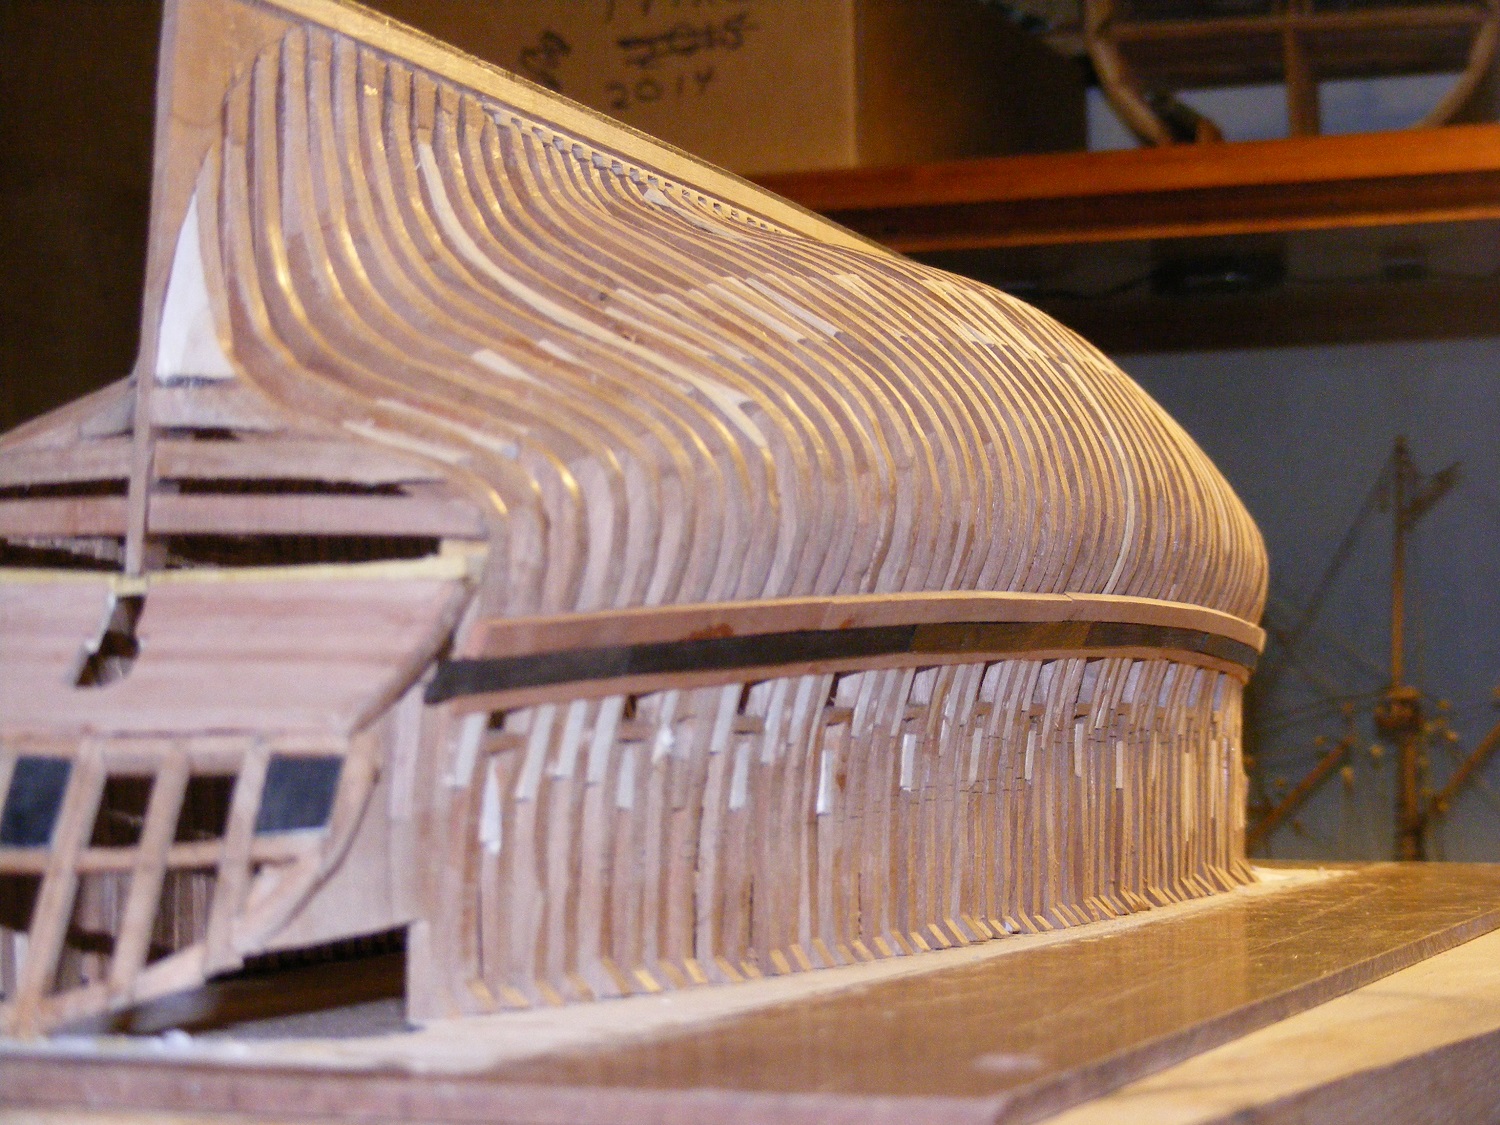
Thanks for looking in, everyone. Port side, first three strakes. Not too bad to my eye and I'm happy. The pics, though tell me that I'll have to do some sanding and shaping still around the joints and also to fair and smooth things out a bit. The big challenge here is the where the plank thickness changed and also where the hull shape changed due to the tumblehome. I'll fix things with some sanding and then finally scraping to get the ebony dust out of the Swiss pear grain. Onto the starboard side....

-
Sweet work on the bitts and pumps. And the rope coils are a nice touch. Super nifty, my friend.
- 2,191 replies
-
- 1
-
-
- confederacy
- Model Shipways
- (and 1 more)
-
Congratulations on the milestone. The planking looks extremely good.
-
I'm with Pat on this... very interesting concept. The only question in mind would be is that there should be a better way of securing the "windlass". These vessels were designed for ramming and I'd think that the hit would bow the keel slightly, maybe more then enough to shake that brace loose. I wouldn't want to be anywhere near that thing when the winding torque on the cable was suddenly released.
-
I checked... all of us building French ships are way behind you. Though I think Gaetan has a 1:24th 74 finished but not masted.
- 1,477 replies
-
- 3
-
-
- essex
- model shipways
- (and 1 more)
-
Well that's good that it's only a bar upstairs and not a bowling alley. Great looking LED's. With the stuff they're coming out with now, I'll have do some serious thinking on my next build. When I did my Constellation, the smallest LED's were 5mm.
-
Gramophone needles? I think I've seen it all now. Very ingenious I must admit.
-
That is one impressive lifeboat, even without the paint.
-
Instead of a model, having fun on a full scale house, are we? Been there.. I know the turmoil of doing it. I'm glad you're not giving but doing what you need to do to make things good. When you can.. keep us posted.
-
Jaw dropping work, Remco.
-
Row, Definitely check the runout. What was suggested to me was to put a coin at the "bottom" of the jaws and tighten the jaws. The coin should be small enough to allow the jaw "teeth" to be inside the circular opening. Then using the inside cutter, set the lathe spinning and just let the cutter kiss the jaw teeth. Move the cutter a very very small amount and cut a tiny bit off. The runout should be gone. You have to do the "kiss" with the cutter, slowly and carefully because if you try to move it too much at a time, you'll destroy the cutter and possible receive and injury from flying shrapnel.
-
Henry, Here's two links: http://modelshipworld.com/index.php/topic/5781-thimble-help-needed/?hl=thimbles#entry166944 http://modelshipworld.com/index.php/topic/539-tiny-thimbles/?hl=thimbles You might also check out this post: http://modelshipworld.com/index.php/topic/4679-the-kit-bashers-guide-to-the-galaxy/?p=281279 And also I've seen at least one in the Scratch Build area... Danny's Vulture Log.
-
Looking good, Mike. Tomorrow probably won't be a good day to sit outside if what I'm seeing on the weather for the east coast is correct.... It's hard to sand while wearing mittens. Don't ask how I know.
-
I almost missed this one.. Sweet work on the bezels. You're off to a great start, Grant.
- 339 replies
-
- 3
-
-
- dumas
- Chris-Craft
- (and 3 more)
-
Hi Brian, Welcome to MSW. That lantern looks great. If you hadn't said anyting, we wouldn't have known about it being "too tall". If you'll go to the database: here's a shortcut: http://modelshipworldforum.com/ship-modeling-articles-and-downloads.php There's a couple of articles on making flickering lights. If the light is too bright then consider putting a resistor in series to drop the voltage a bit. The LED will run cooler and last longer.
-
Nice work, Mobbsie. The nice thing about stepping outside the comfort zone is that if we do enough, it becomes part of the comfort zone. Well done!!!
- 255 replies
-
- 4
-
-
- granado
- bomb ketch
- (and 2 more)
-
Hi Jon, Welcome to MSW. I think I'll pull up a chair and watch if you don't mind.