HOLIDAY DONATION DRIVE - SUPPORT MSW - DO YOUR PART TO KEEP THIS GREAT FORUM GOING! (Only 24 donations so far out of 49,000 members - C'mon guys!)
×


Old Collingwood
-
Posts
12,098 -
Joined
-
Last visited
Content Type
Profiles
Forums
Gallery
Events
Everything posted by Old Collingwood
-
 Thankfully for me its Full Beef dinner cooked by the Admiral today, then I am cooking a Chicken curry on xmas day, and its a mixed grill on box day - not a trace of turkey anywhere. OC.
 -
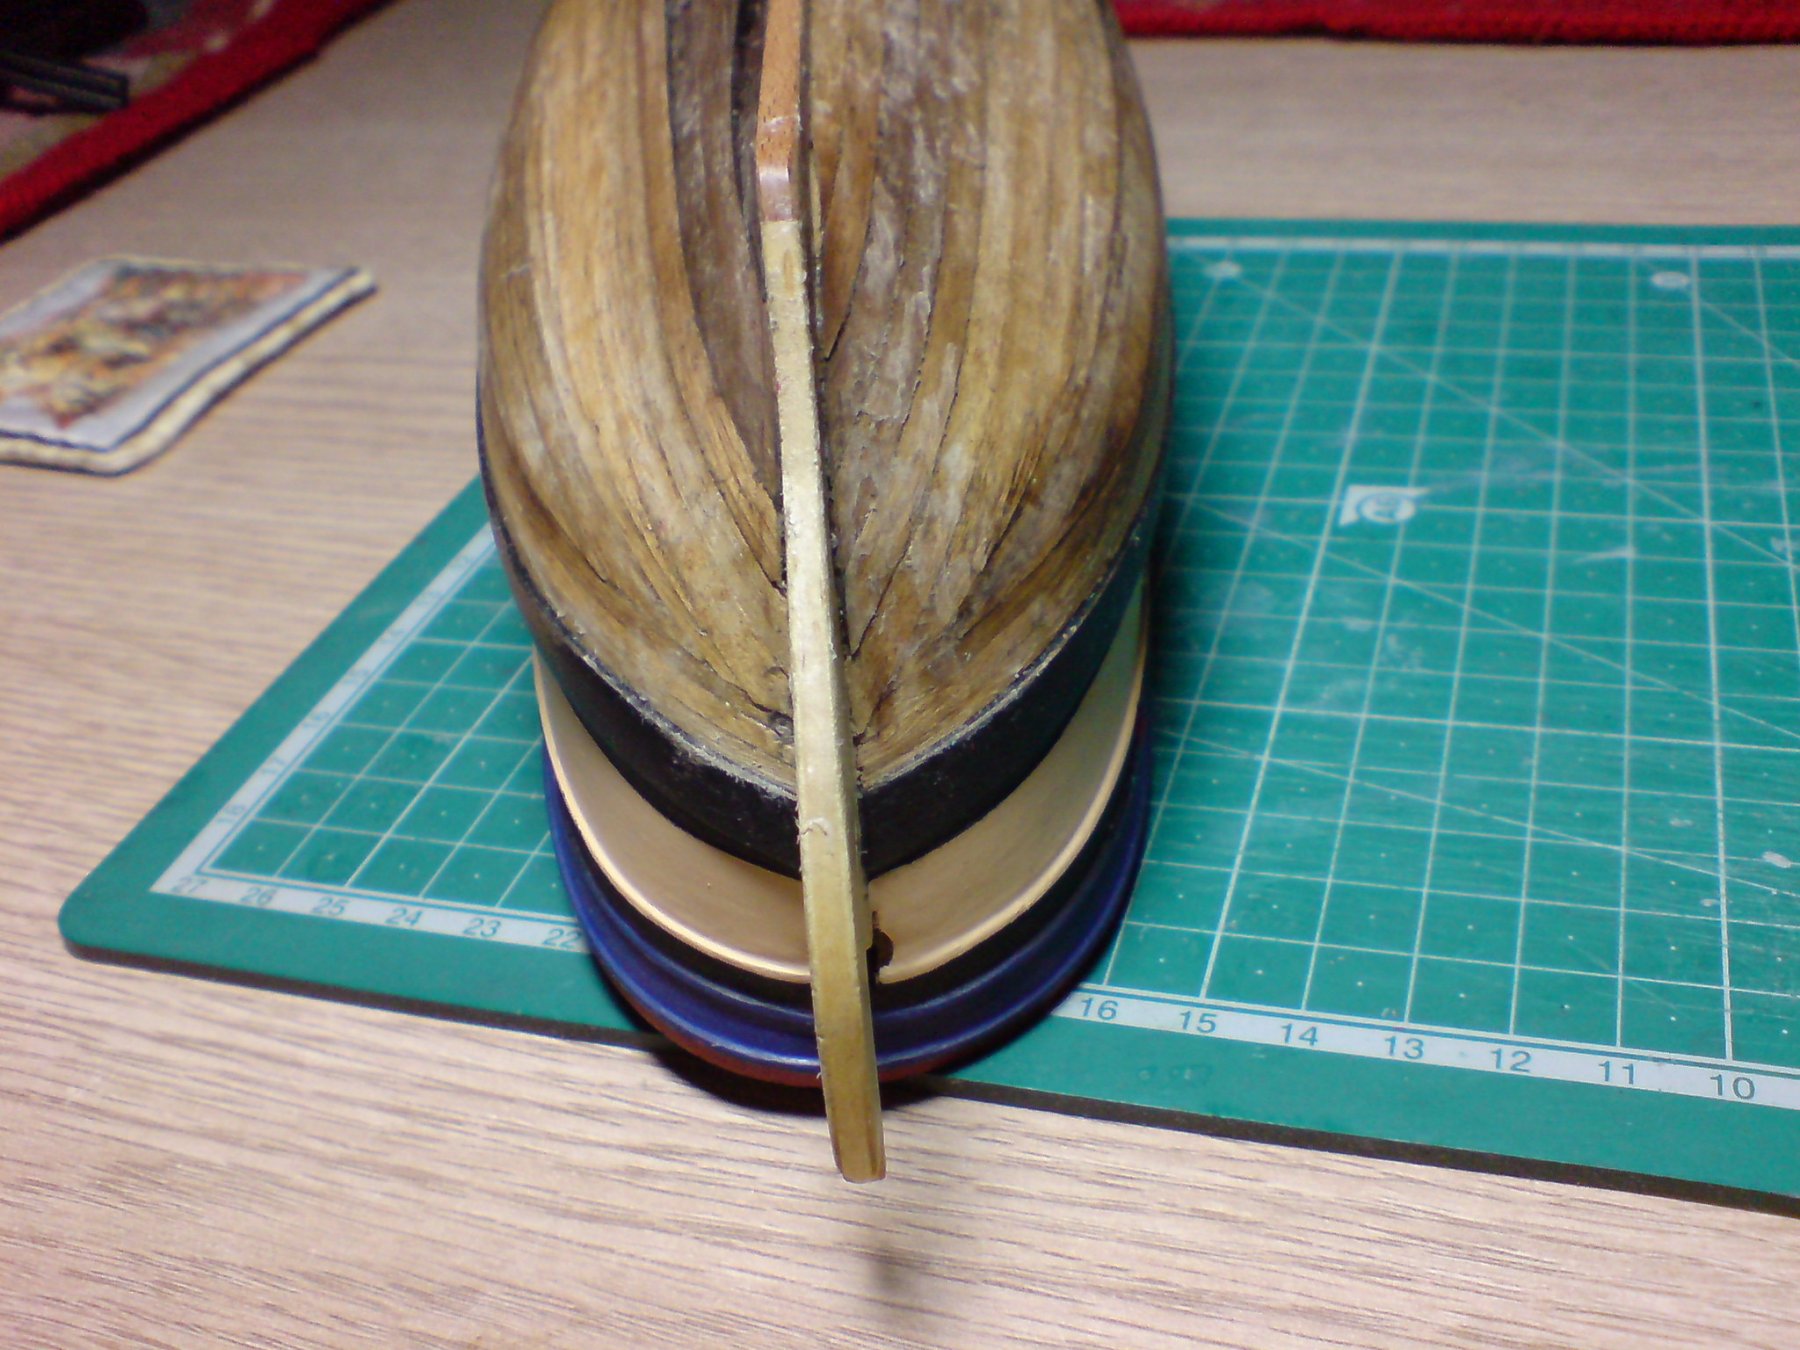
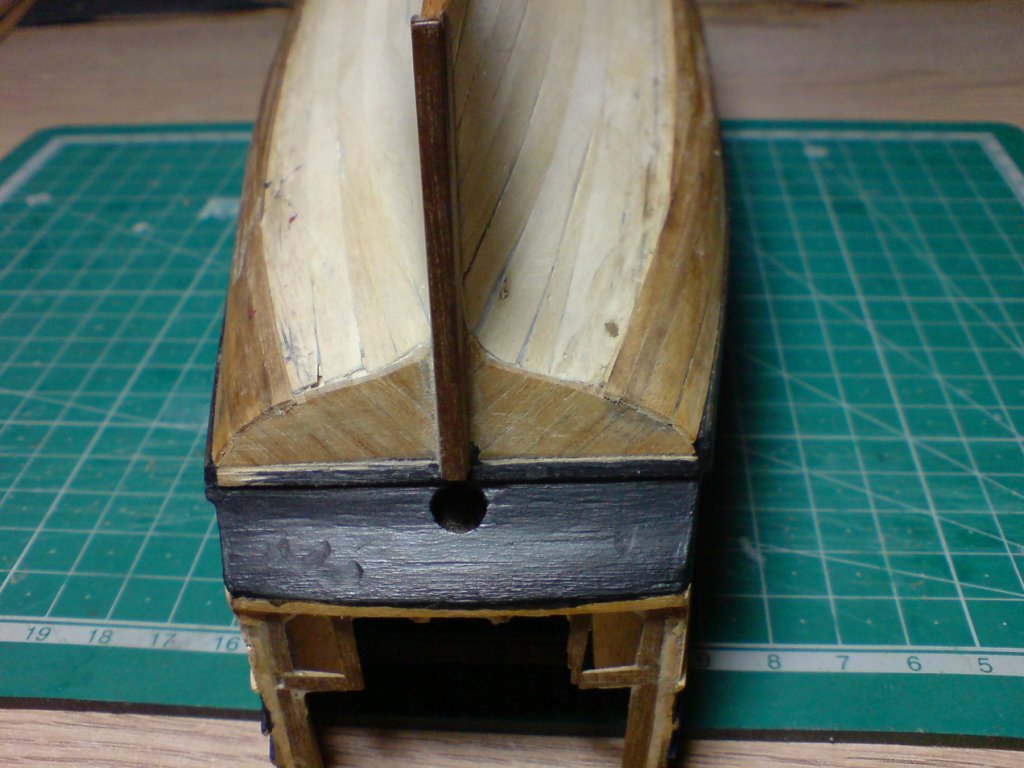
Thanks carl, doing the other side tomorrow, then I will be placing a false keel and stern post section/s of planking to make it all flush and to create a scalf joint mid point along the keel then I will be working on the front adding detail planking from the keel to the stem. OC.
- 455 replies
-
- 4
-

-
- slightly modified
- greyhound
- (and 1 more)
-
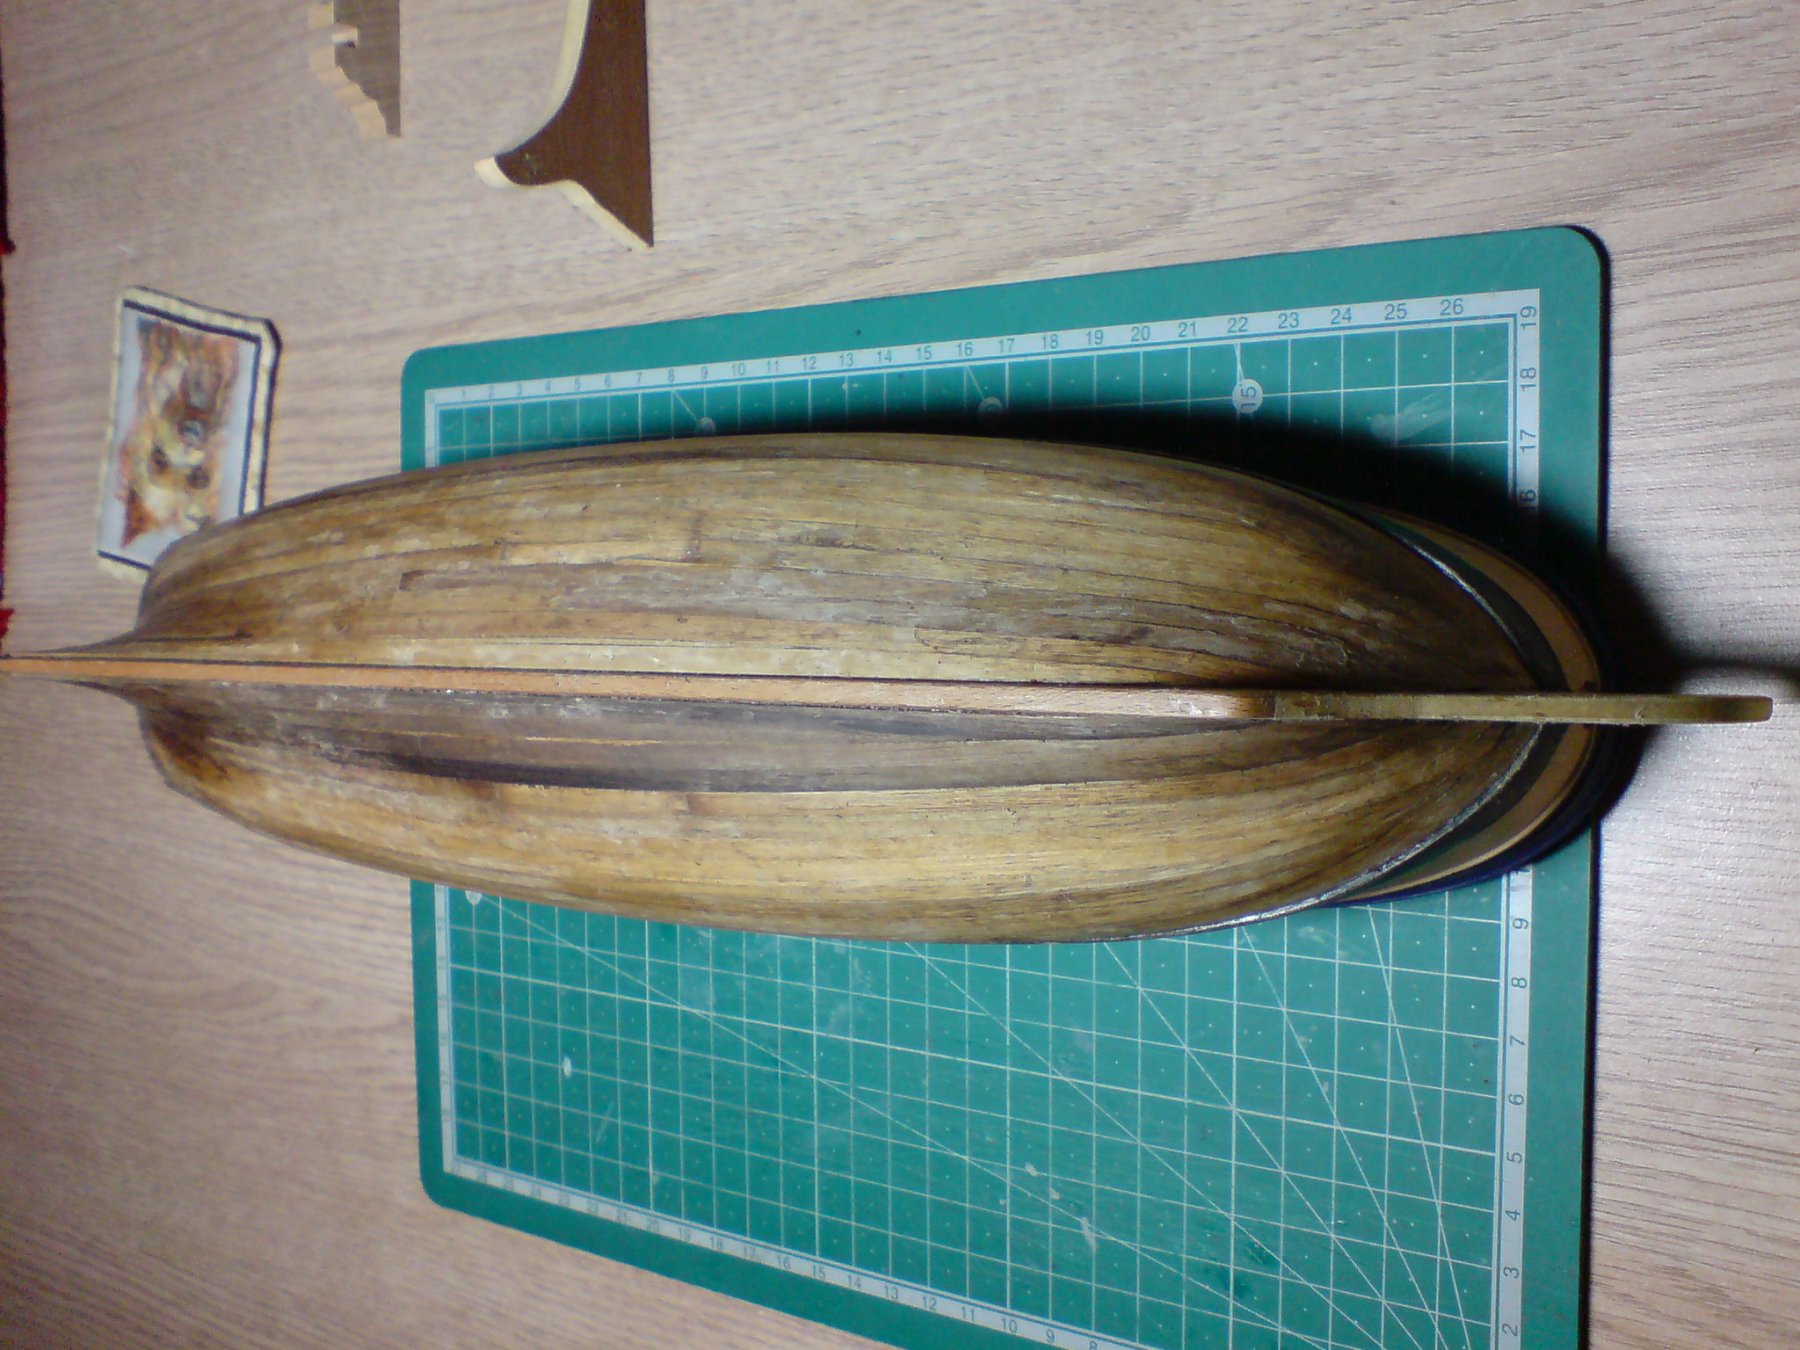
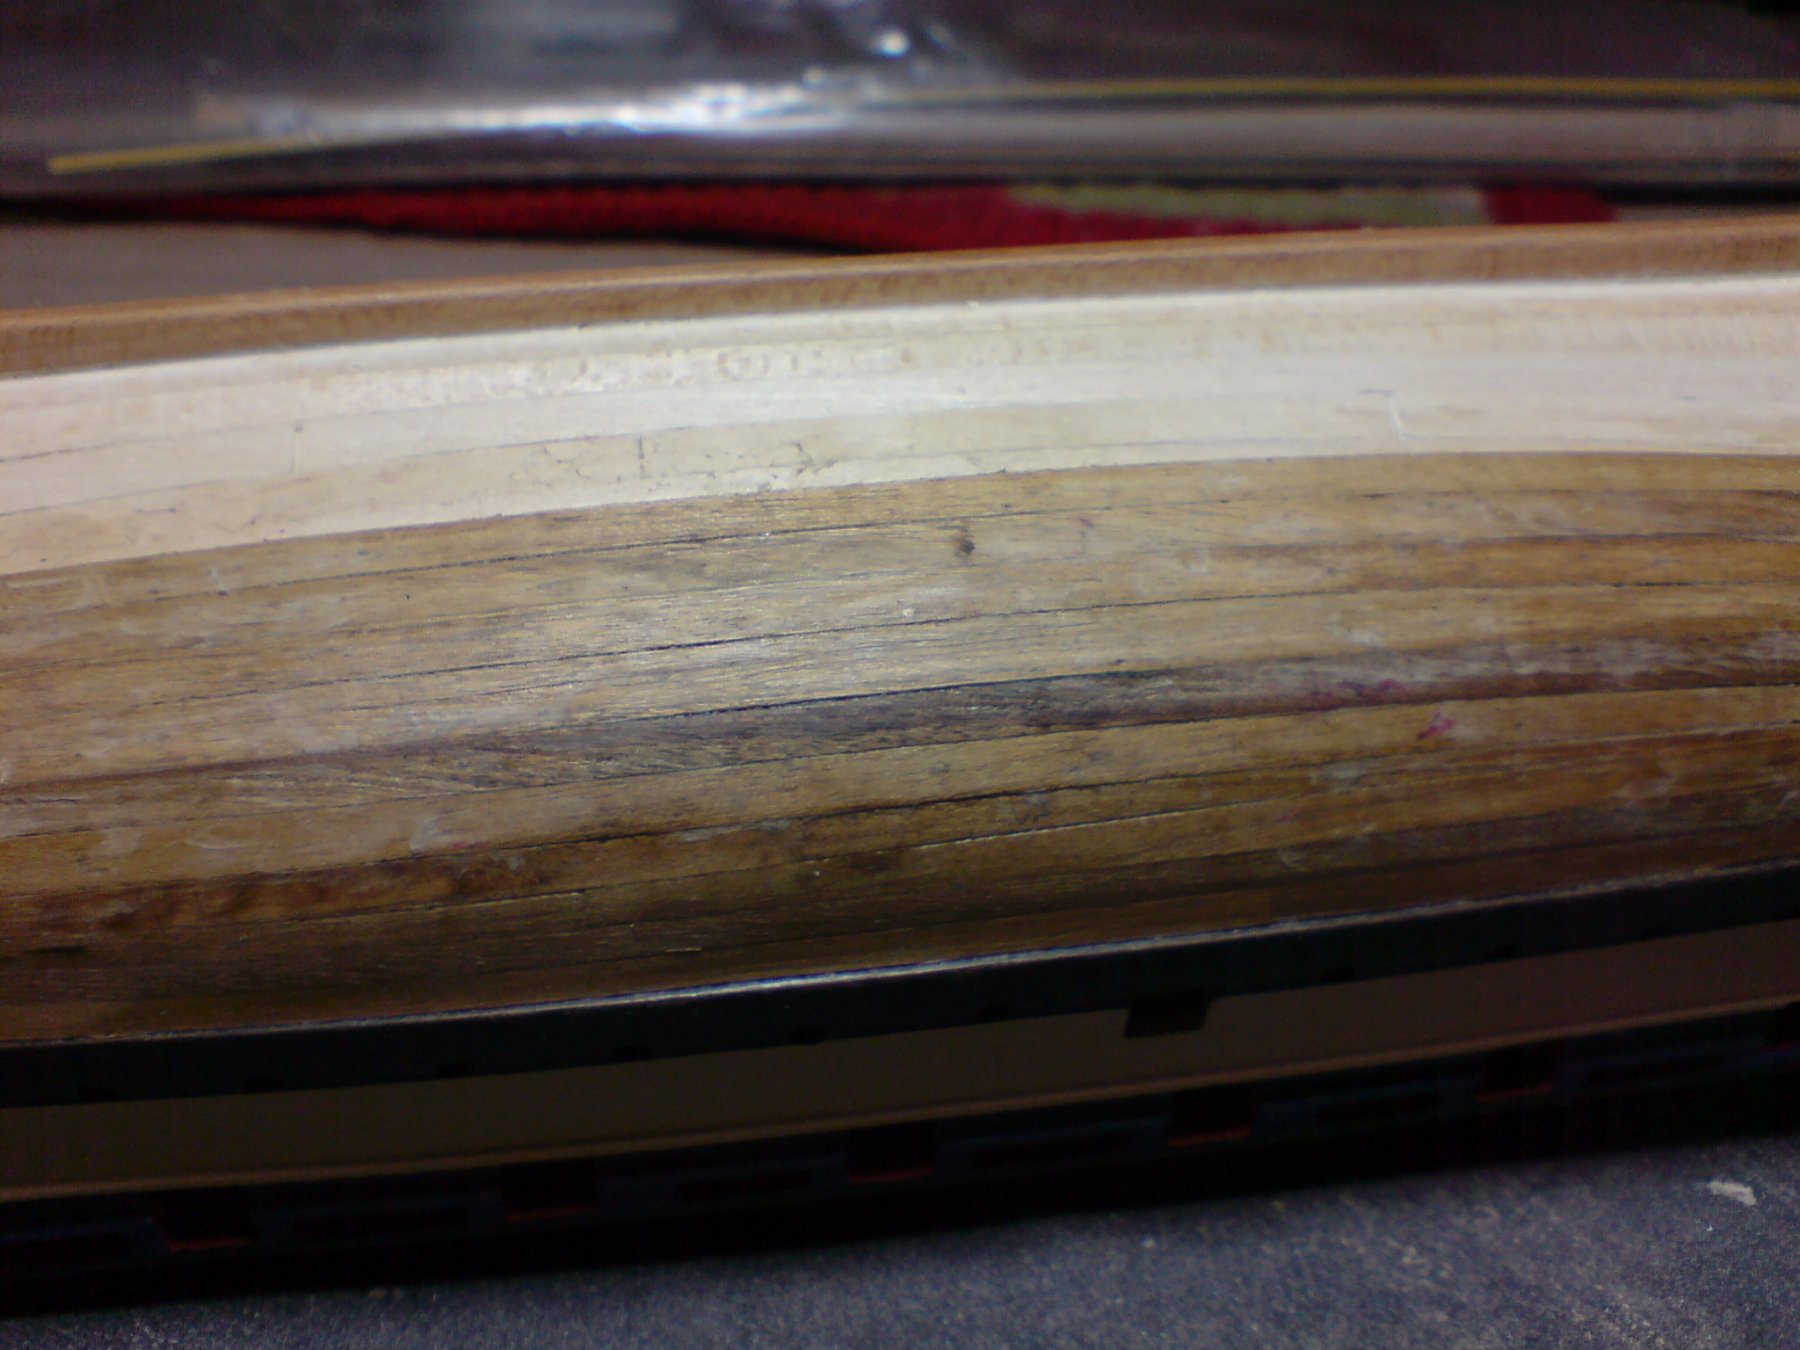
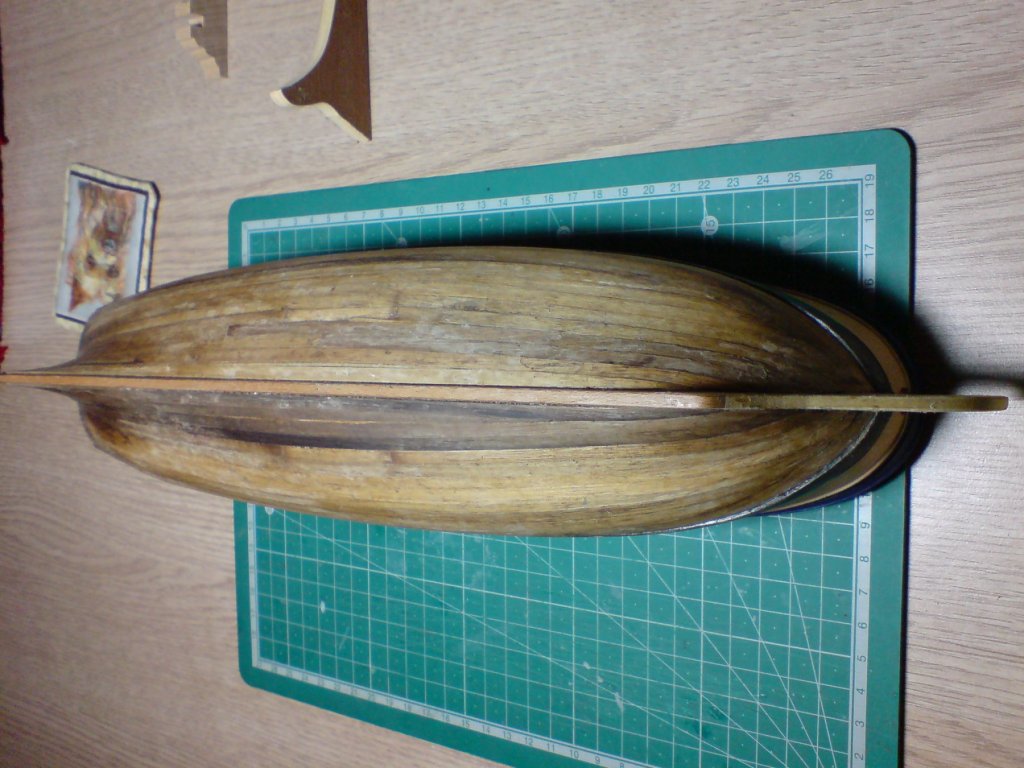
I have done the sanding on the one side of the hull and sanded around the rudder post, ready for some additional planking. Here's a few pics. OC.


- 455 replies
-
- 11
-
-
- slightly modified
- greyhound
- (and 1 more)
-
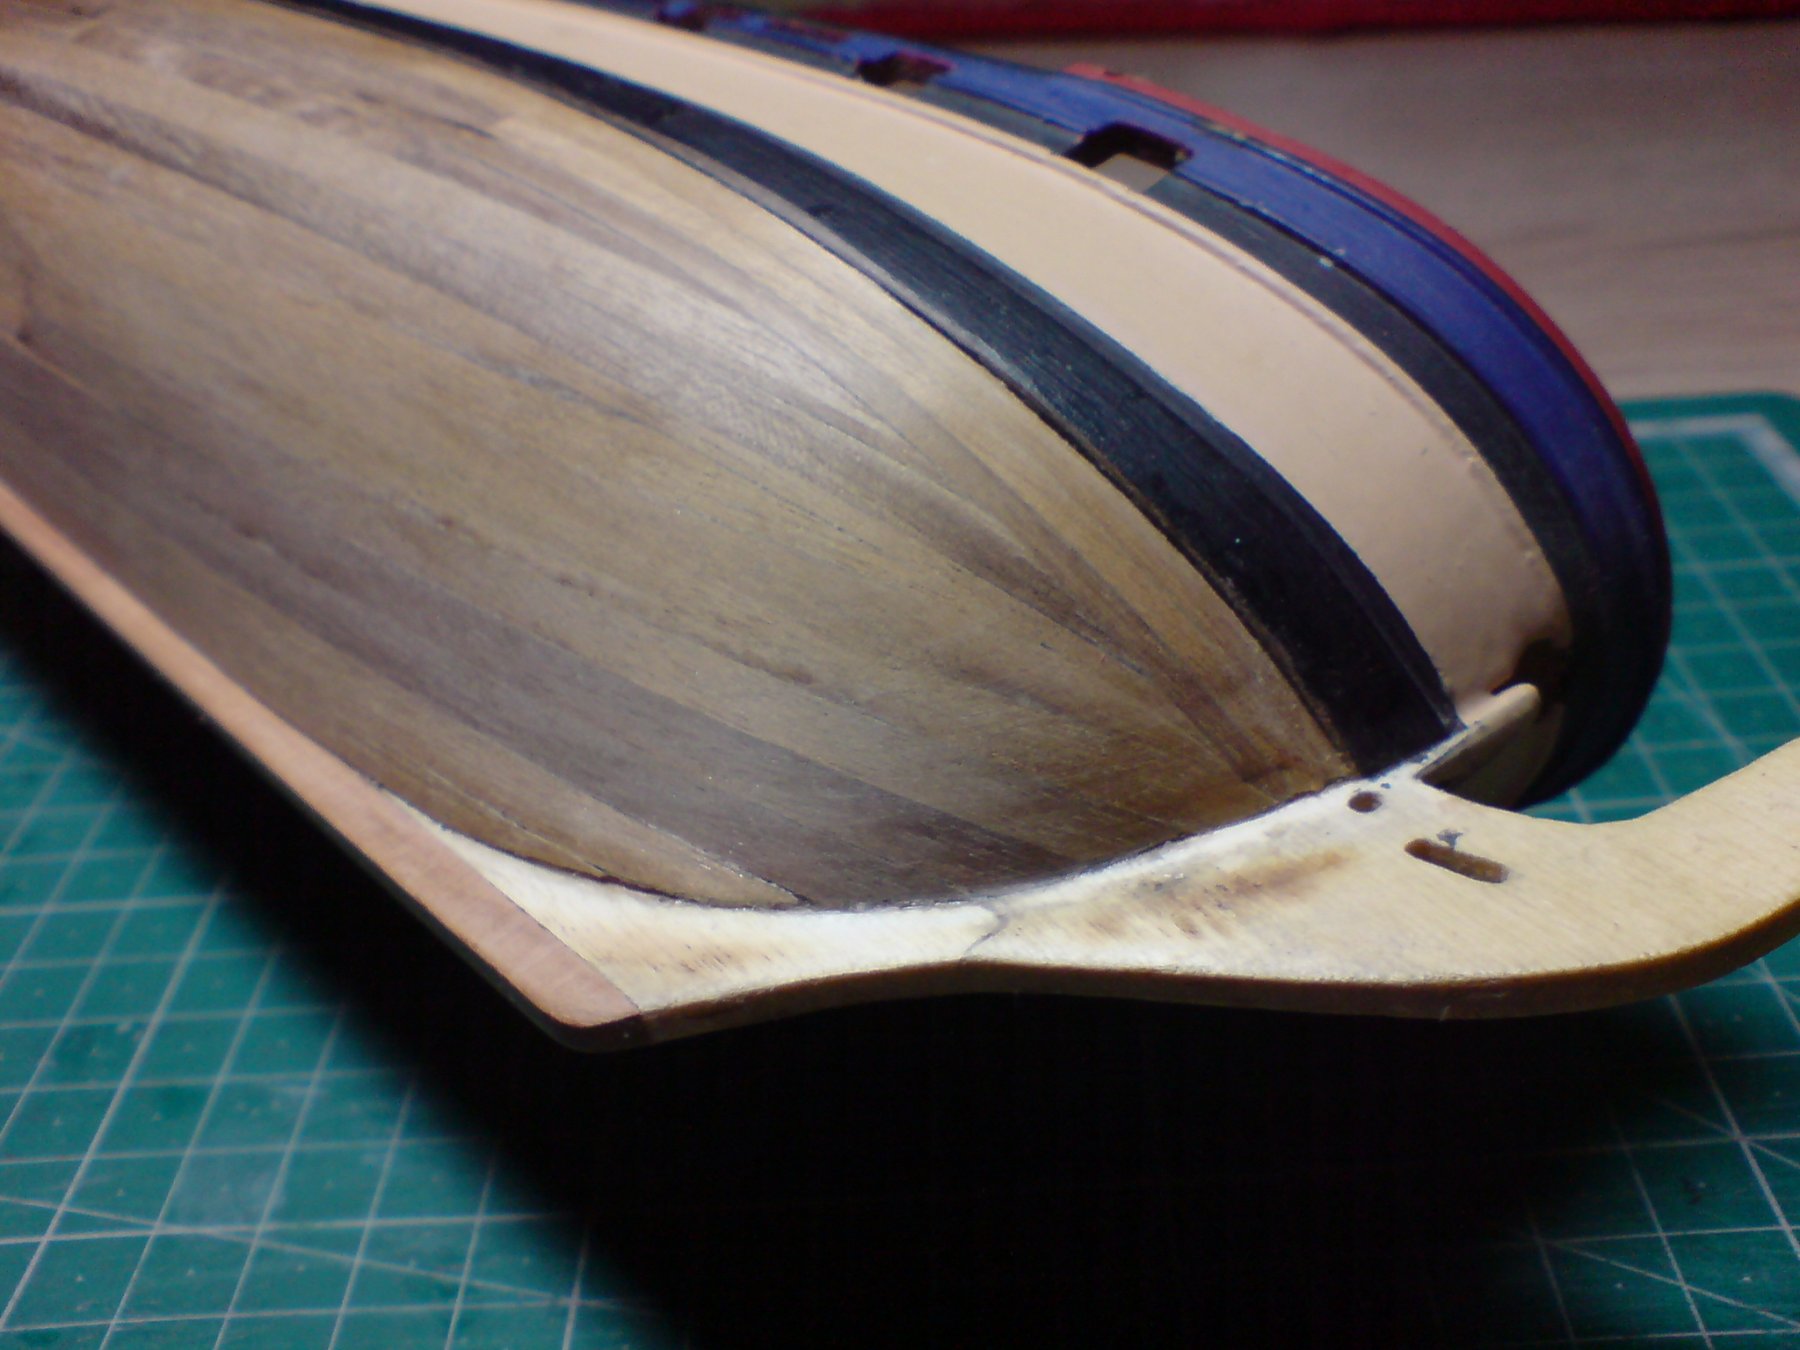
Hi folks - second planking finnished, just needs a few trimmed planks and sanding. OC.

- 455 replies
-
- 7
-
-
- slightly modified
- greyhound
- (and 1 more)
-
Hi folks, Firstly can I take this opportunity to wish everyone a great holiday and seasons greatings, hope santa brings us "big kids" some lovely kits or building stuff. I also want to thank everyone for the kind comments/remarks and help, and all the like button pusher's. So where am I at now? well I have nearly second planked the lower hull, just two planks either side and a few dropped planks, then it will be ready for a dry day so I can sand it down. OC.
- 455 replies
-
- 4
-
-
- slightly modified
- greyhound
- (and 1 more)
-
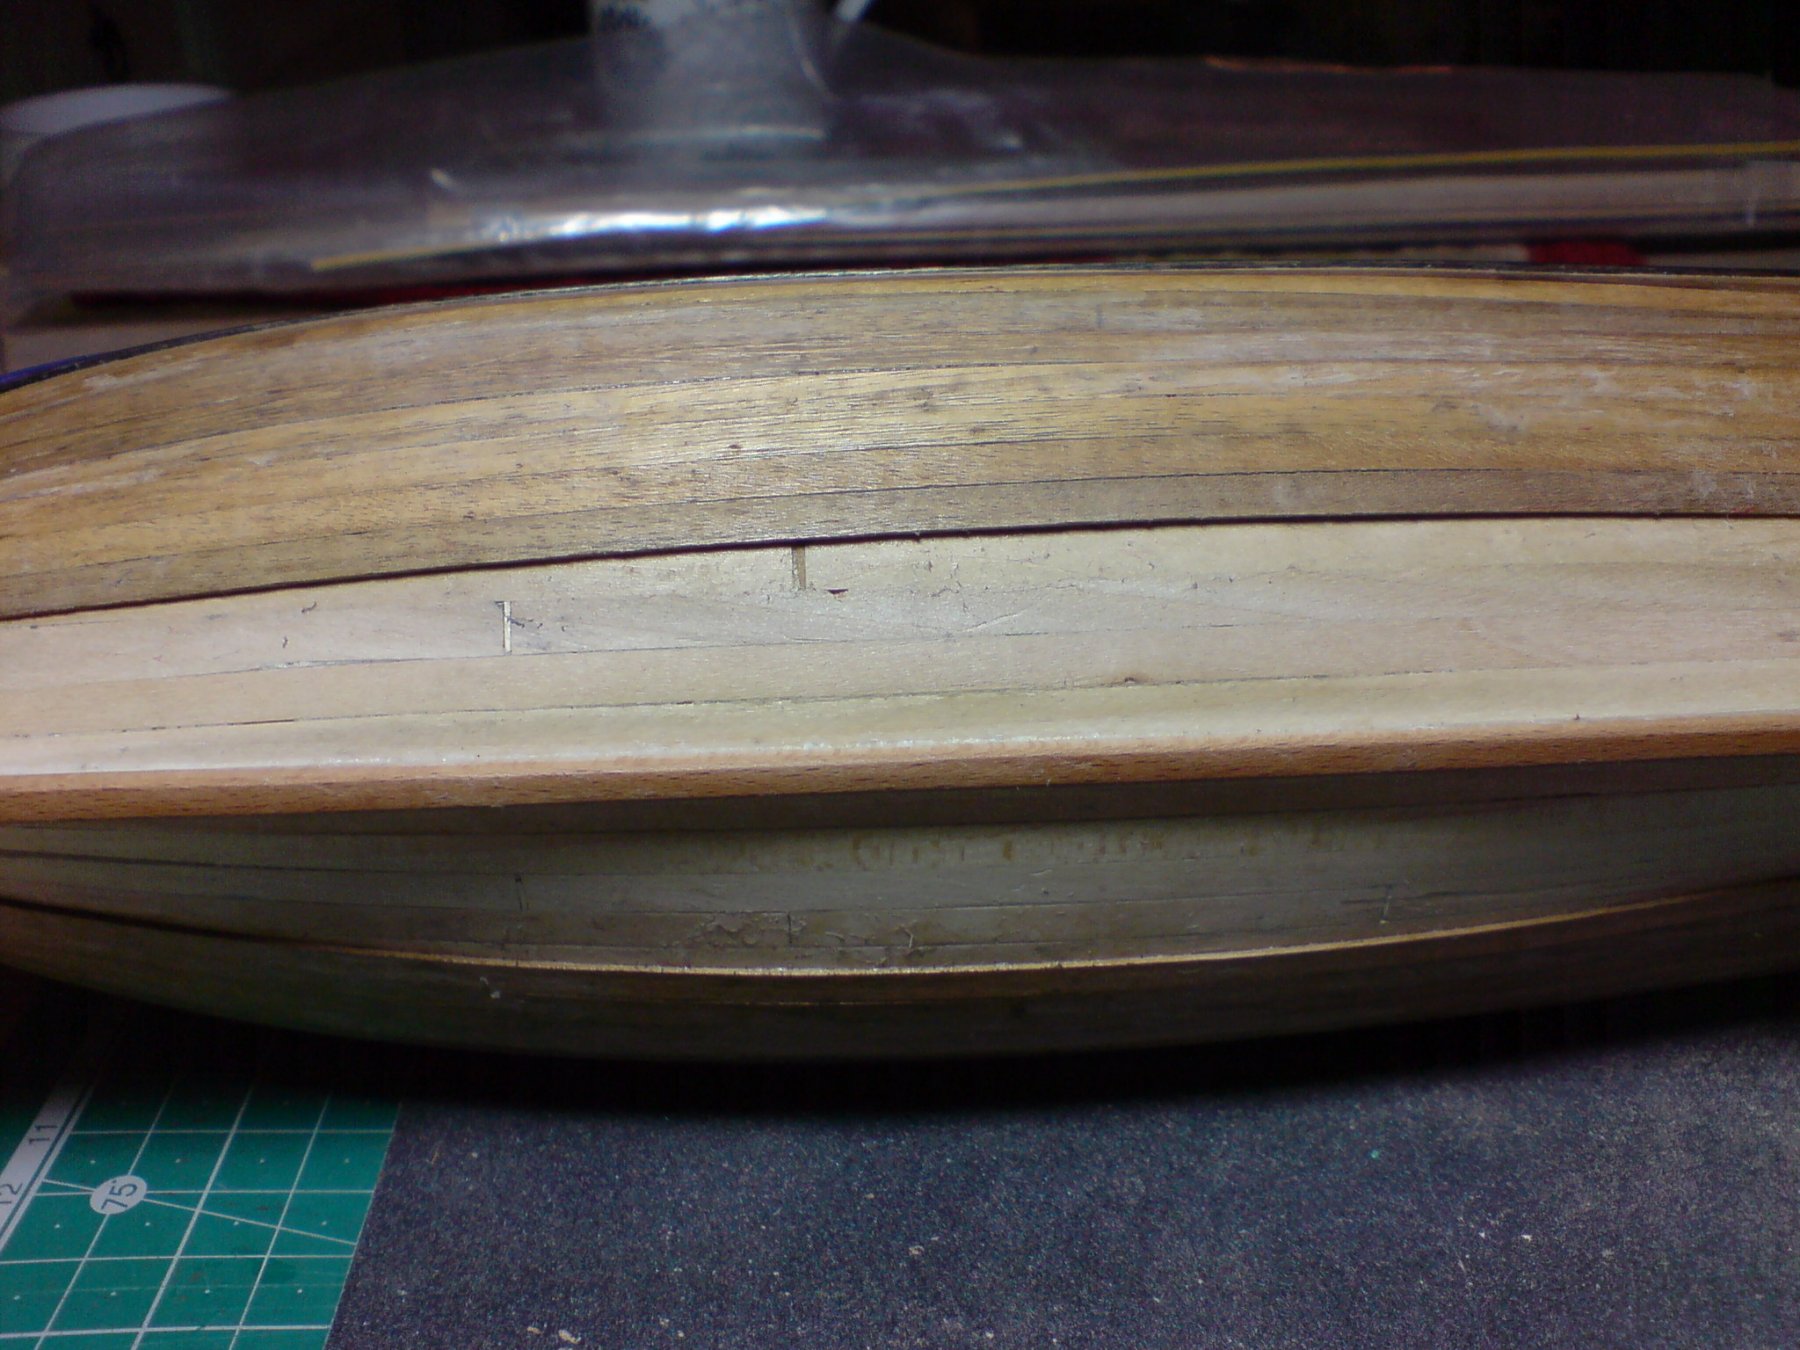
Just want to add folks - the look of my second planking isn't her final appearence, as the rough look will be cleaned up with some light sanding, and all the marks (most of it dried pva glue) will sand away nicely (I hope) OC.
- 455 replies
-
- 3
-
-
- slightly modified
- greyhound
- (and 1 more)
-
More progress with the second planking following my pattern - getting there I think. OC.


- 455 replies
-
- 6
-
-
- slightly modified
- greyhound
- (and 1 more)
-
Thats a fine looking ship denis plastic is not always our friend but you have done a great job in sometimes testing areas. Congrats. OC.
- 133 replies
-
- 3
-
-
- jeanne d arc
- heller
- (and 2 more)
-
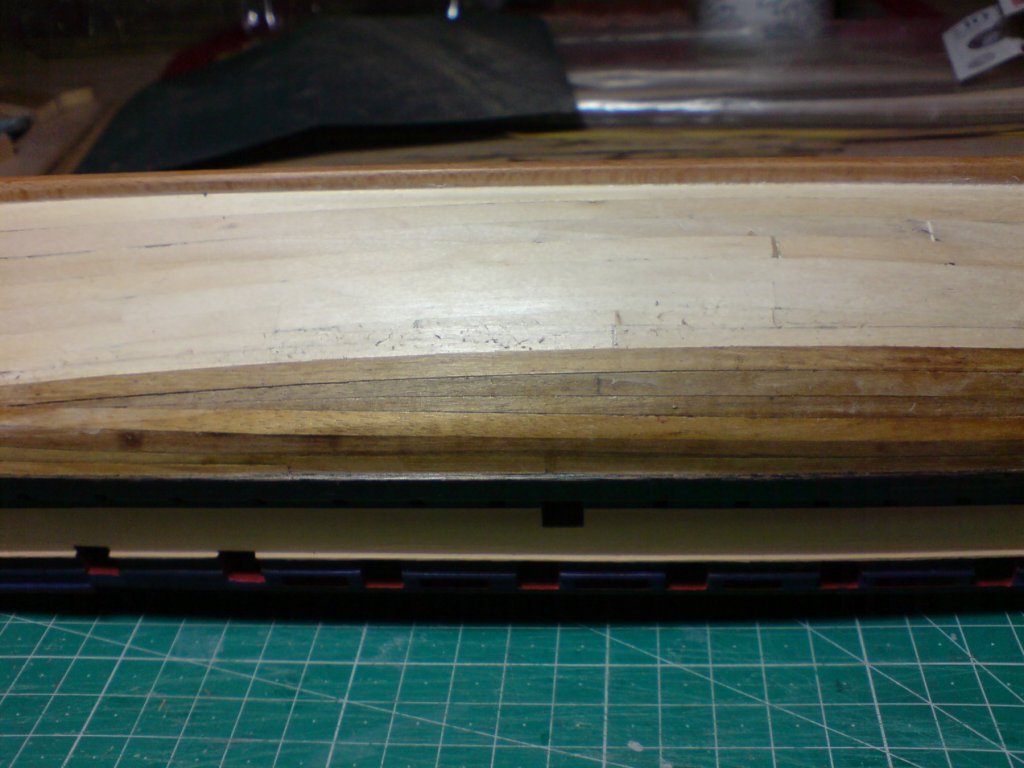
Half of me thinks I should have second planked from the keel upwards, however I will still do that and meet the wale planking somewhere in the middle, I tried laying some thin long planks over the first planking to get a feel for natural lines, but they seemed to want to go in differtent directions due to the curveture of the hull. It doesn't matter too much as there is going to be a watermark line and painted flat white below that and yellow ocre above that upto the wal. so as long as it is smooth and looks ok and matches both port and starboard. OC.
- 455 replies
-
- 2
-
-
- slightly modified
- greyhound
- (and 1 more)
-
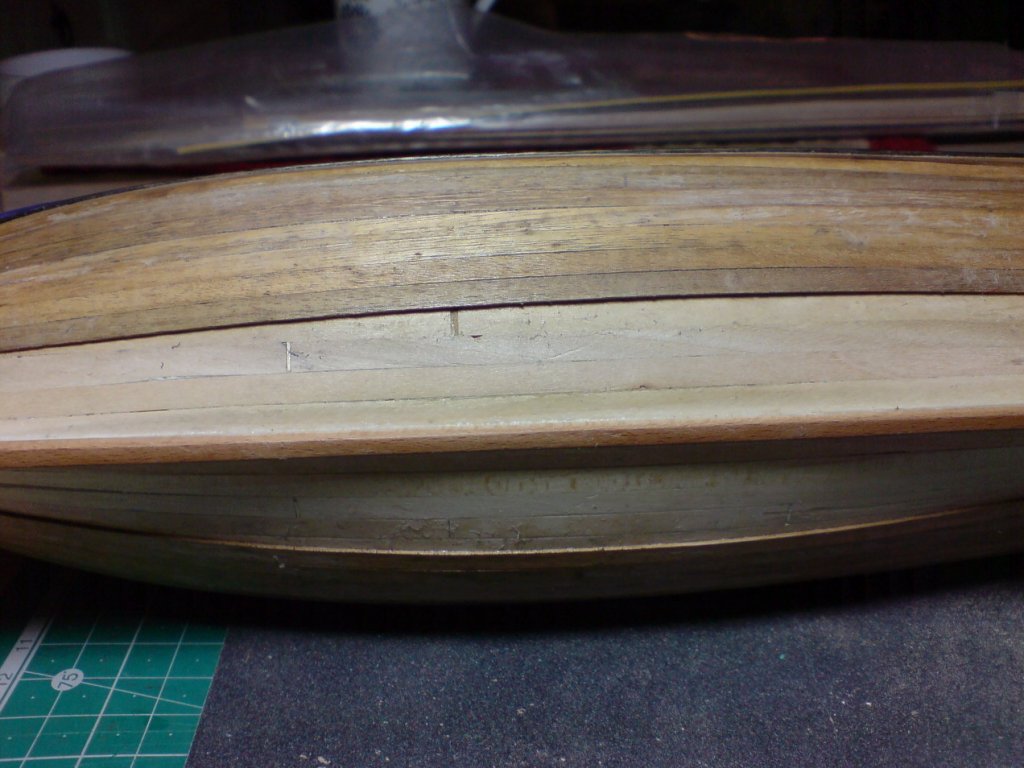
More work second planking - bit tedious to be honest, I think its a combination of the kit, how the bulkheads came out, and my original positioning of the rabbat line - garboard plank and the wale, I have been struggling to keep a smooth line of planks without them needing to twist in a clinker style. I decided after a couple of planks following the wale and including tapering the planks at the bow, I needed to create more of a curve - so I shaped a couple of planks going from full plank width in the middle to nothing at each end, I think this has helped with the natural run of the planks. OC.

- 455 replies
-
- 6
-
-
- slightly modified
- greyhound
- (and 1 more)
-
Thats an interesting looking build you have going on there, I like the idea of the frame and bulkheads being consructed in two halves - easier to get them straight and lined up that way I would have thought. OC.
- 378 replies
-
- 5
-
-
- t78 norden
- billing boats
- (and 1 more)
-
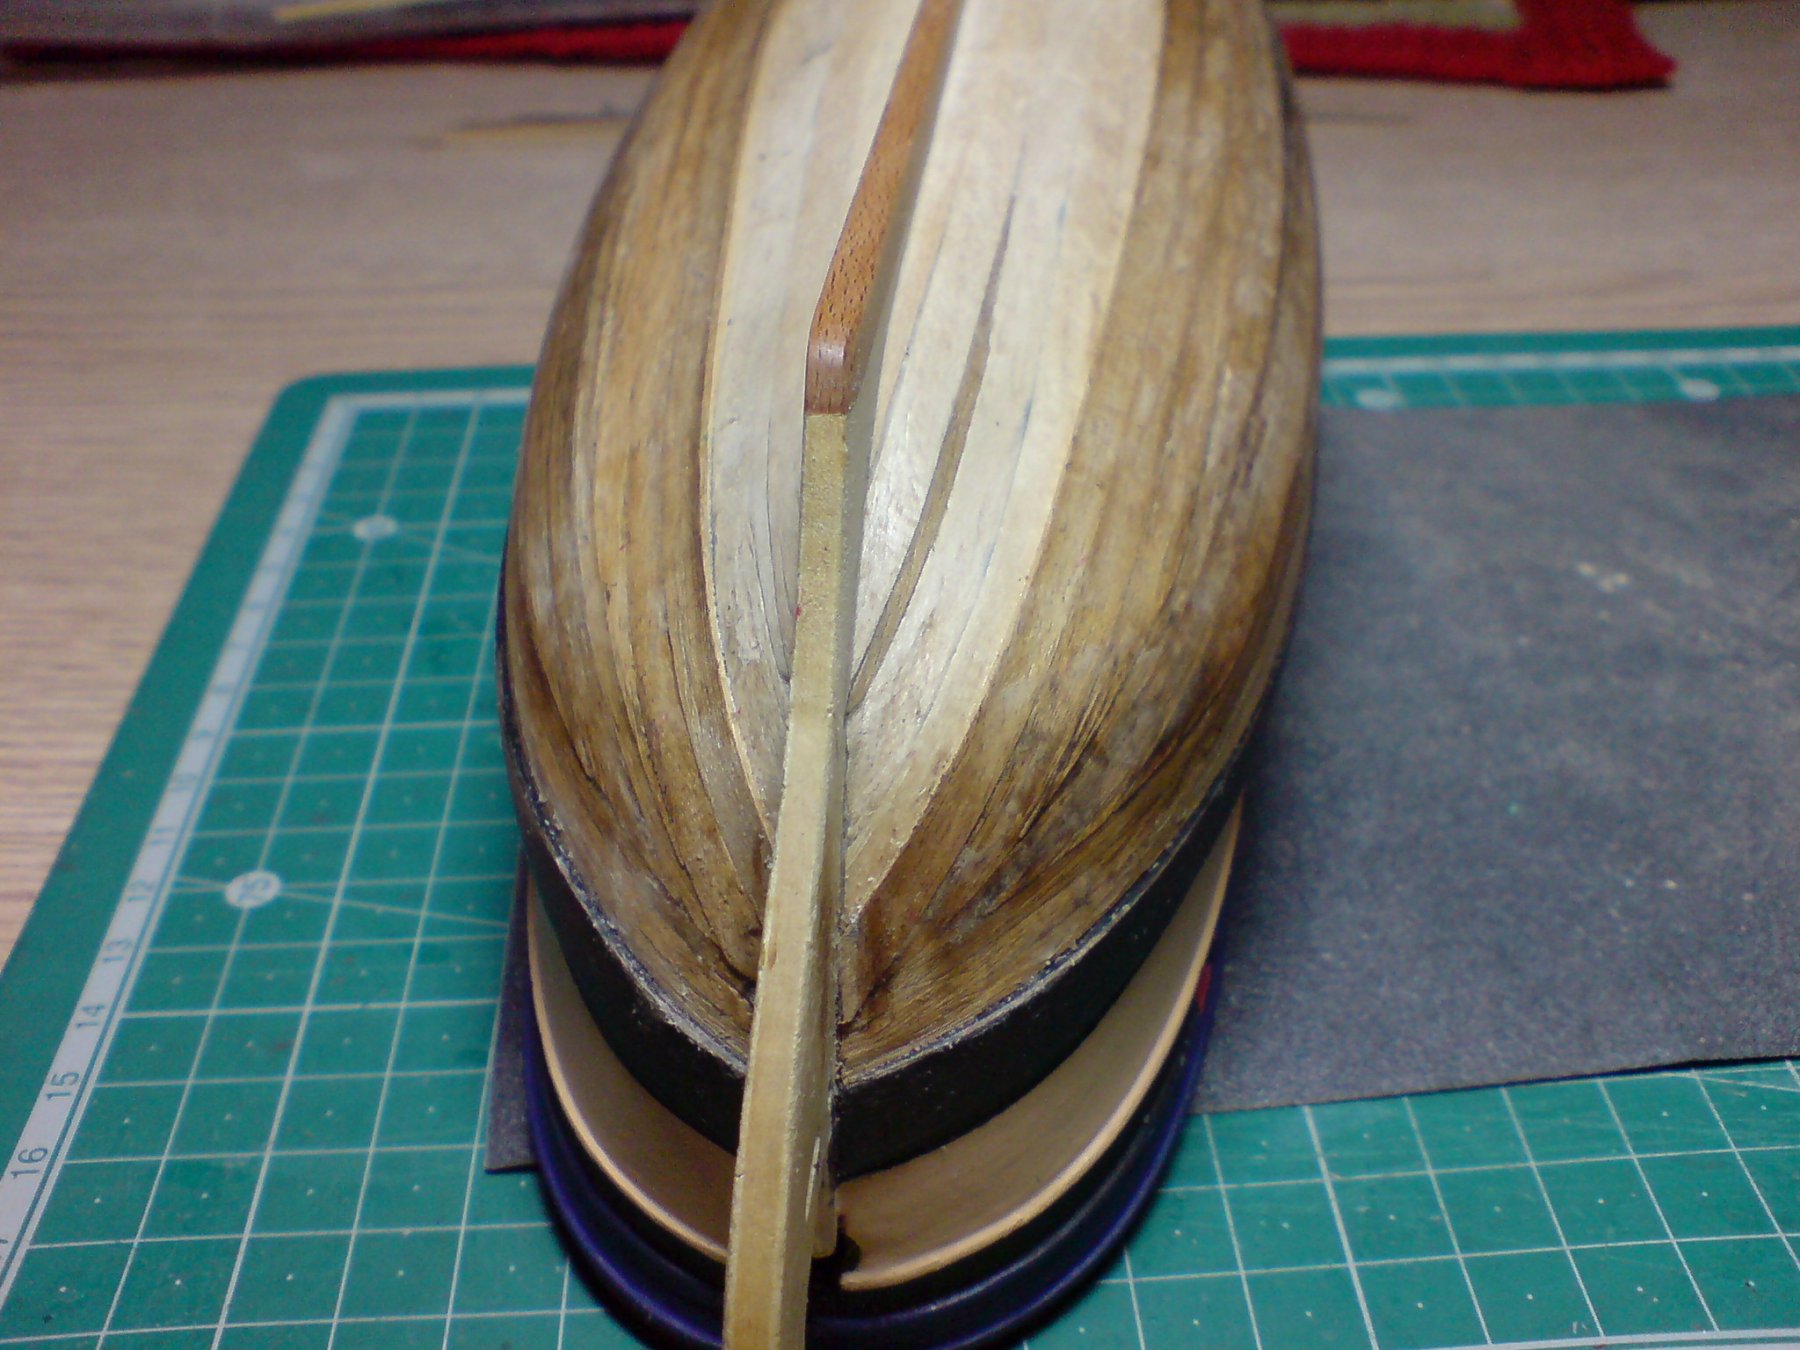
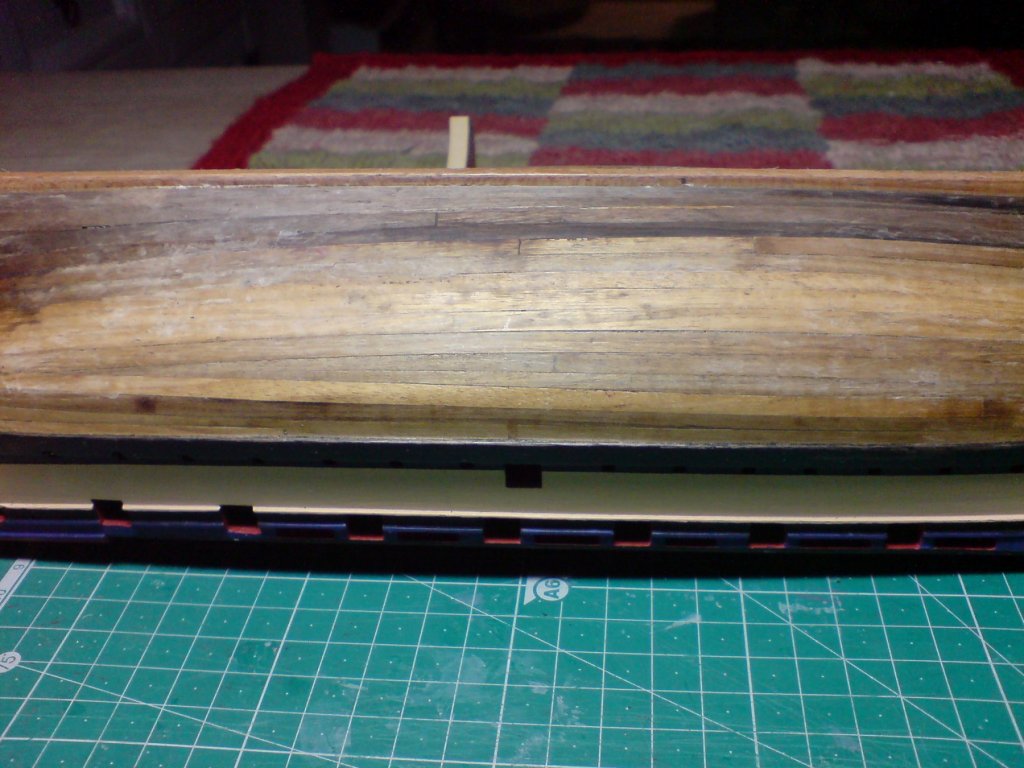
Folks the dark areas that look like burning are "ermmmm burnt wood" I used my heated plank bending tool (soldering iron with a round flat thingy on top) to super heat up the planks after they were laid on the hull, my method was to gently slide it over the plank/s thinking it would bond quicker like a heat glue gun does, yep it works but as I found out I have to be careful not to leave the heat concentrated in one place too long, or it will burn the wood. OC.
- 455 replies
-
- 2
-
-
- slightly modified
- greyhound
- (and 1 more)
-
Looking rather nice, from memory when I went over Devonshire in 1976 at pompy, she had a fair amount of wood decks along with that green painted deck areas. OC.
-
Evening folks glad we are back on - off - on anyway I have been making slow progress with my second hull planking, guess you cant rush it though, nothing really to add, I have a few pics though. OC.
- 455 replies
-
- 7
-
-
- slightly modified
- greyhound
- (and 1 more)
-
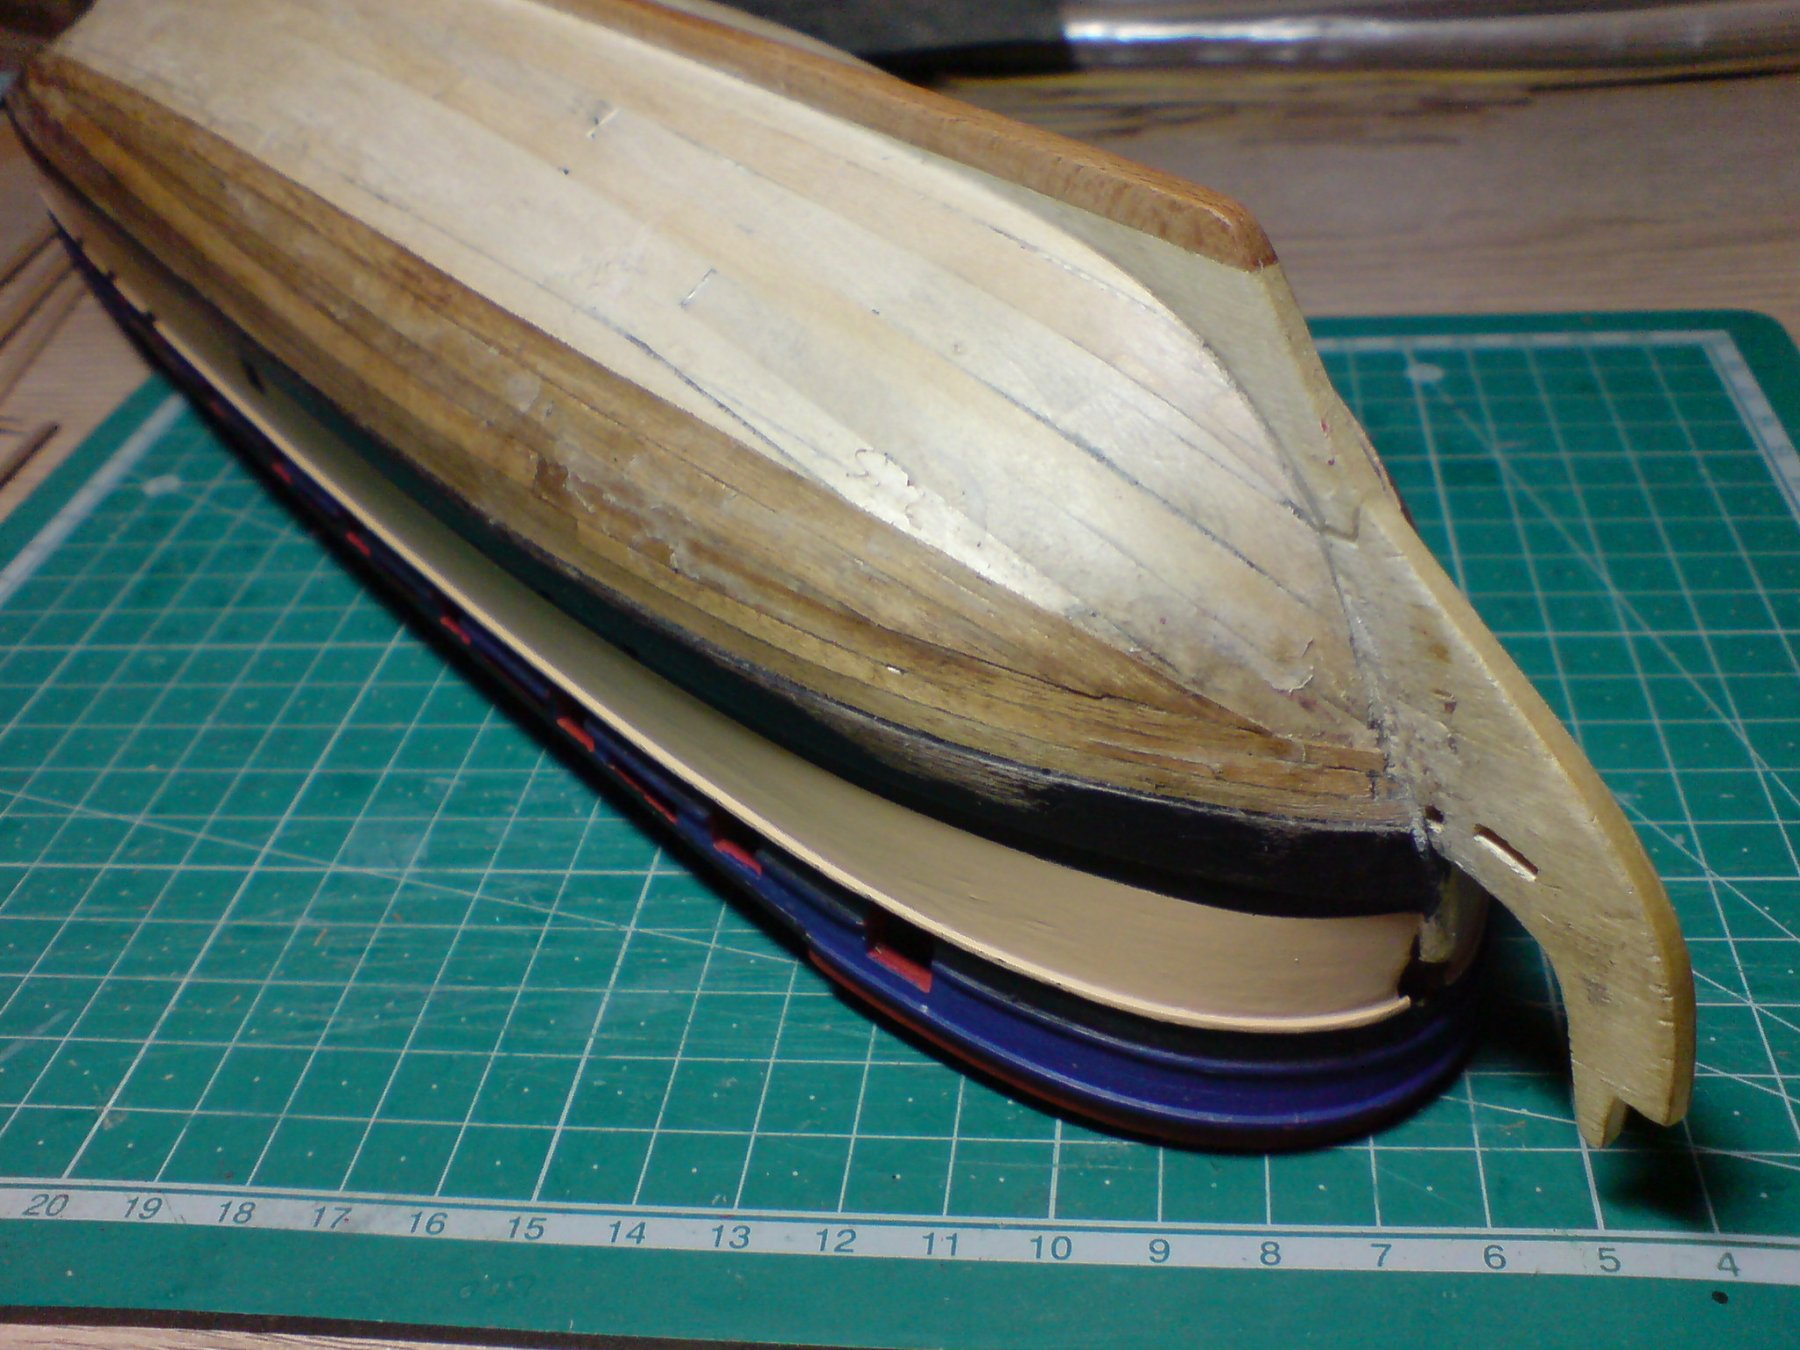
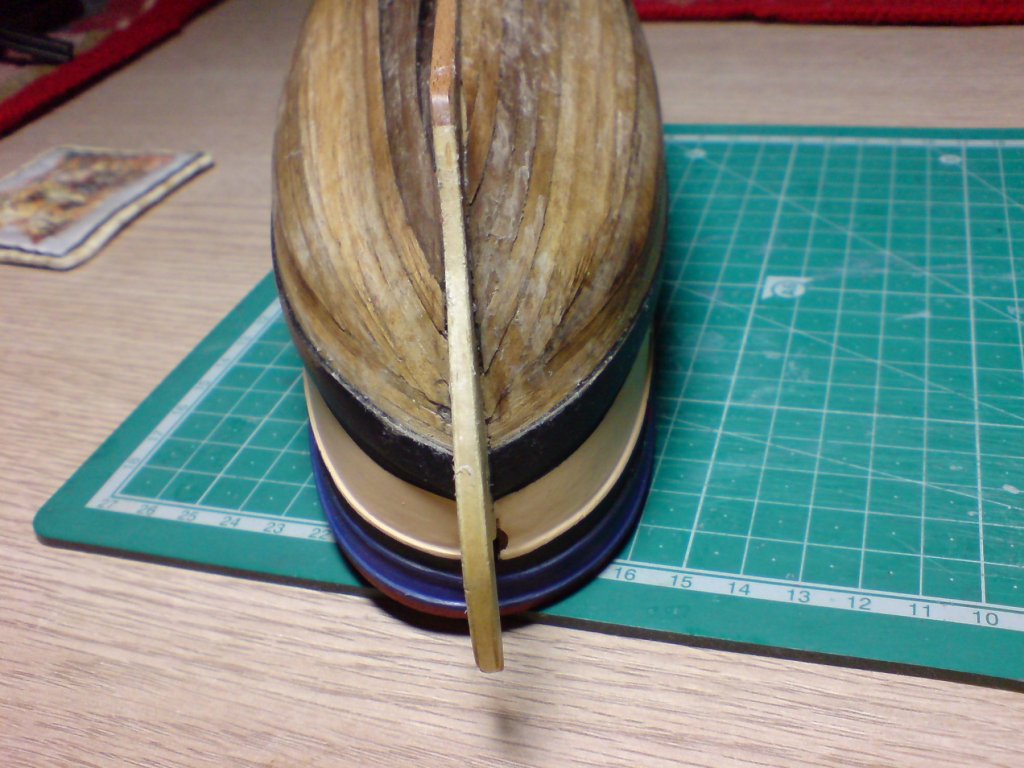
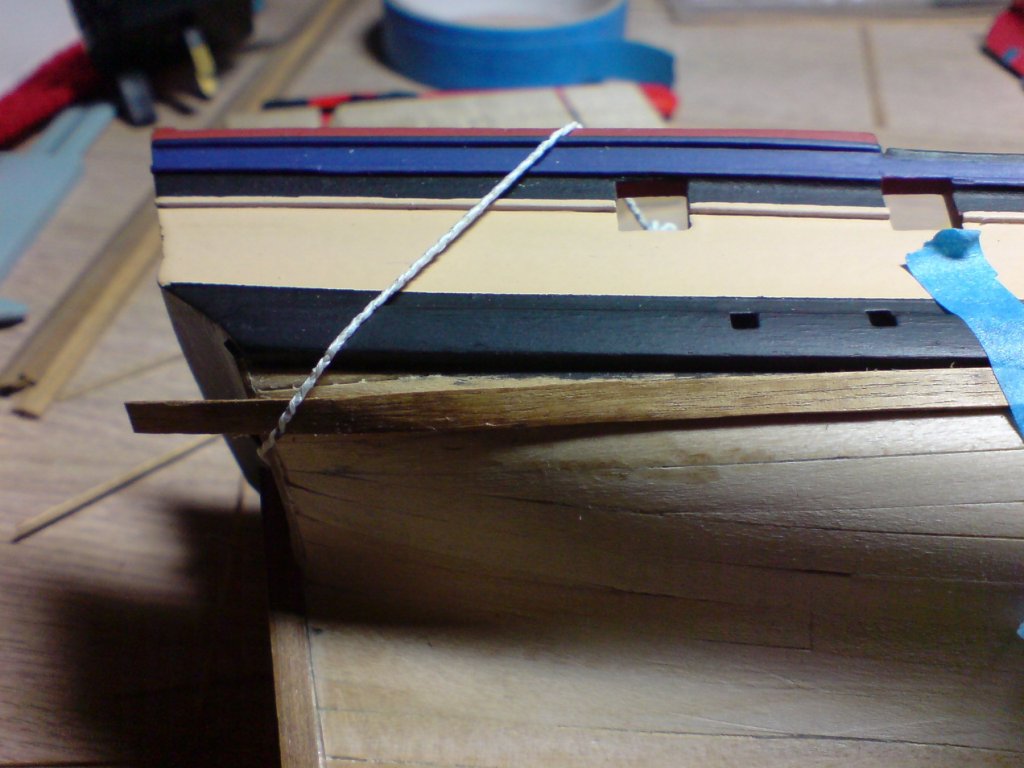
Hiya folks, Right so the second lower hull planking has begun, I sorted my planks 3mm x 1mm and taperd the top section strarting from roughly the middle of the hull, going from 3mm to 1.5mm at the bow end, I then cut the plank in two and also beveled the top edge, I then used my heated plank bender to get a nice curve for the bow and gently carried this back towards the mid hull area, I used a small amount of ca glue to hold the bow end and used pva on the rest, then I taped the mid hull end. I then checked the mid hull to the stern area with the off cut - this plank did not need tapering however to let it lay freely, I have a half stealer to fit between the bottom of the wale at the rear of the stern, its quite a long pointed gap going from a planks width at the stern and to a point, about a quarter of the way back towards the mid ship area. I guess I will need to wait till the plank has set then mark and cut out to take the half stealer. OC.
- 455 replies
-
- 2
-
-
- slightly modified
- greyhound
- (and 1 more)
-
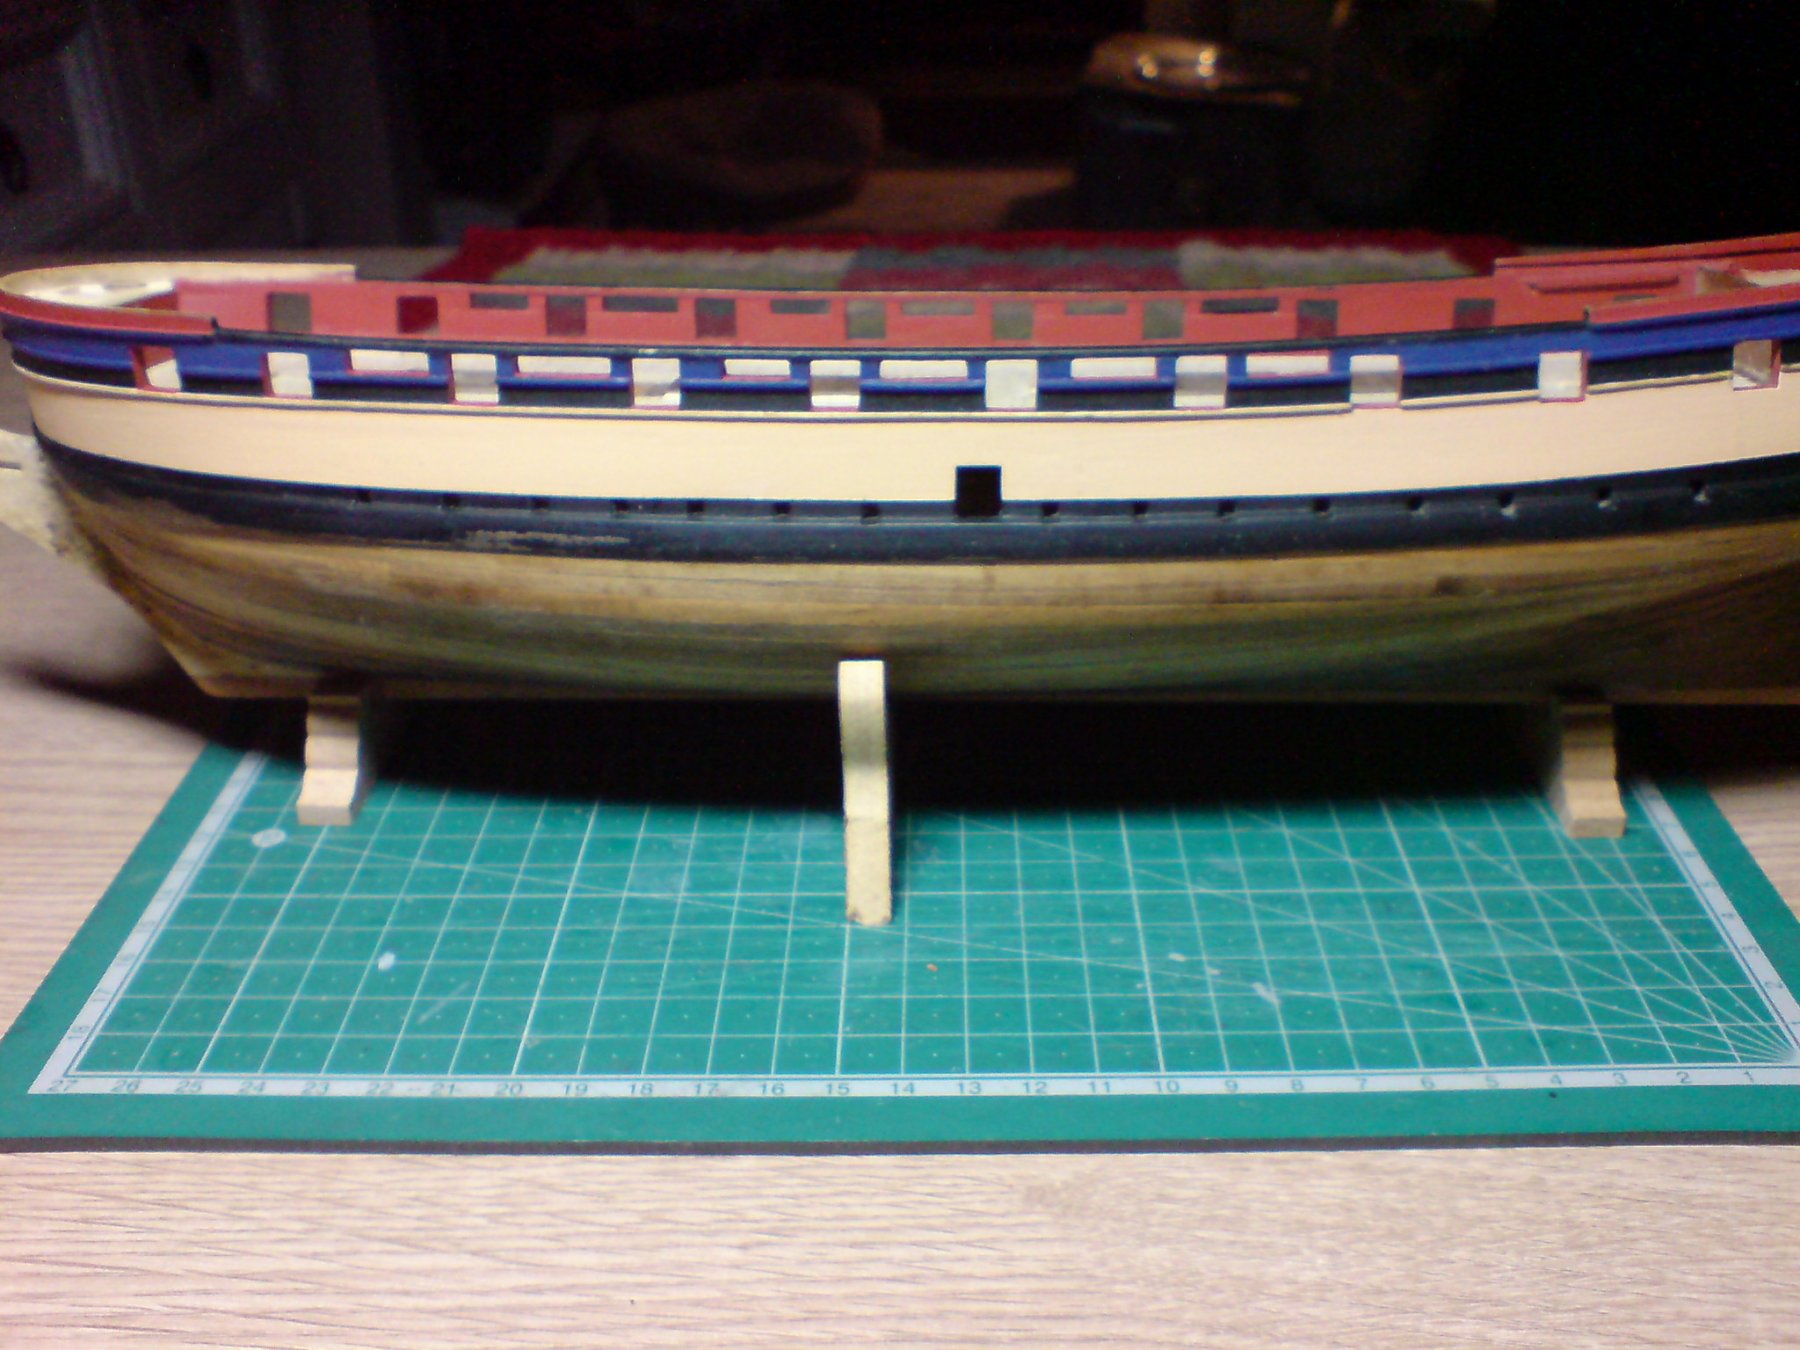
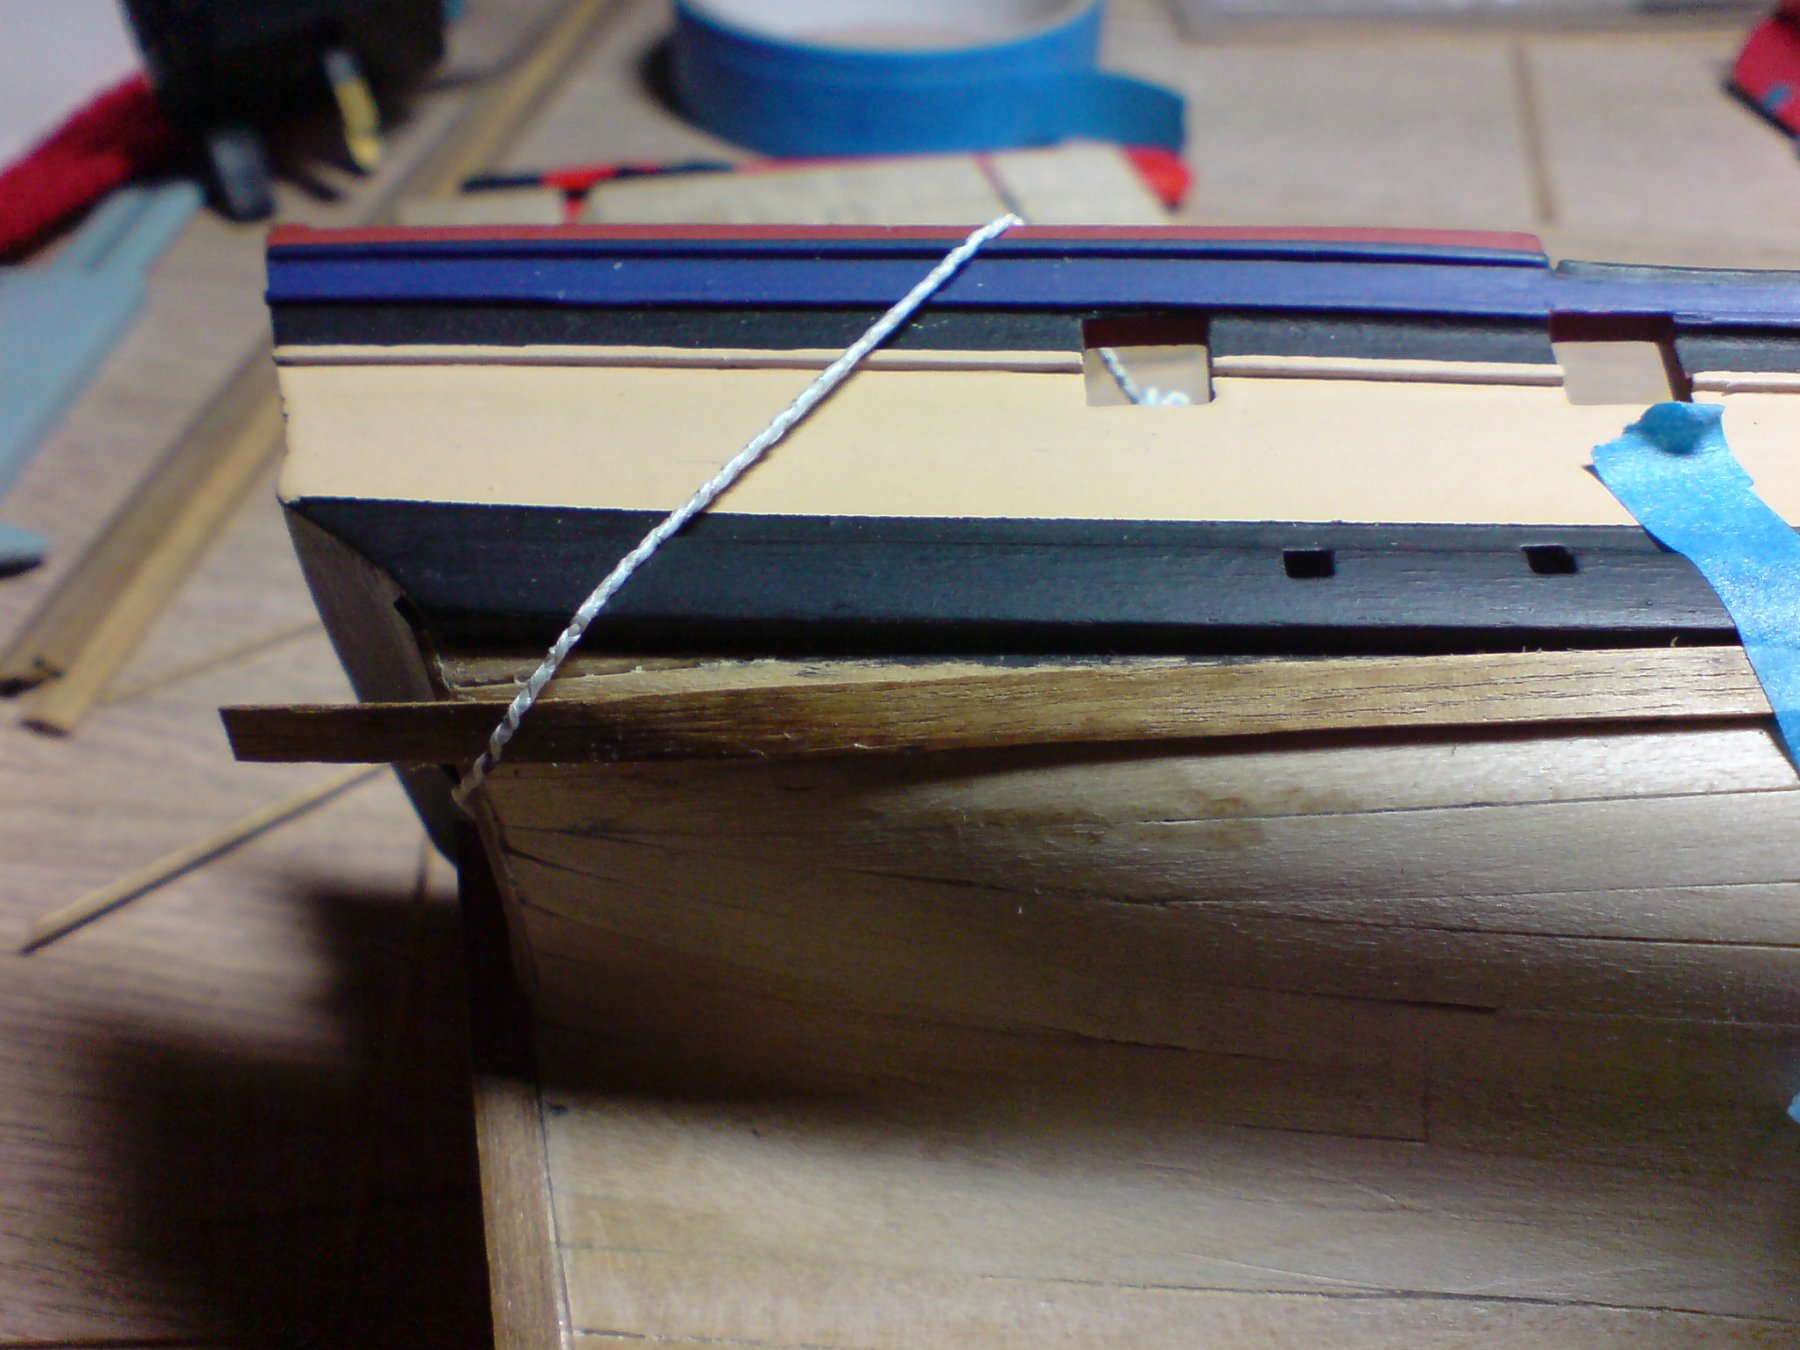
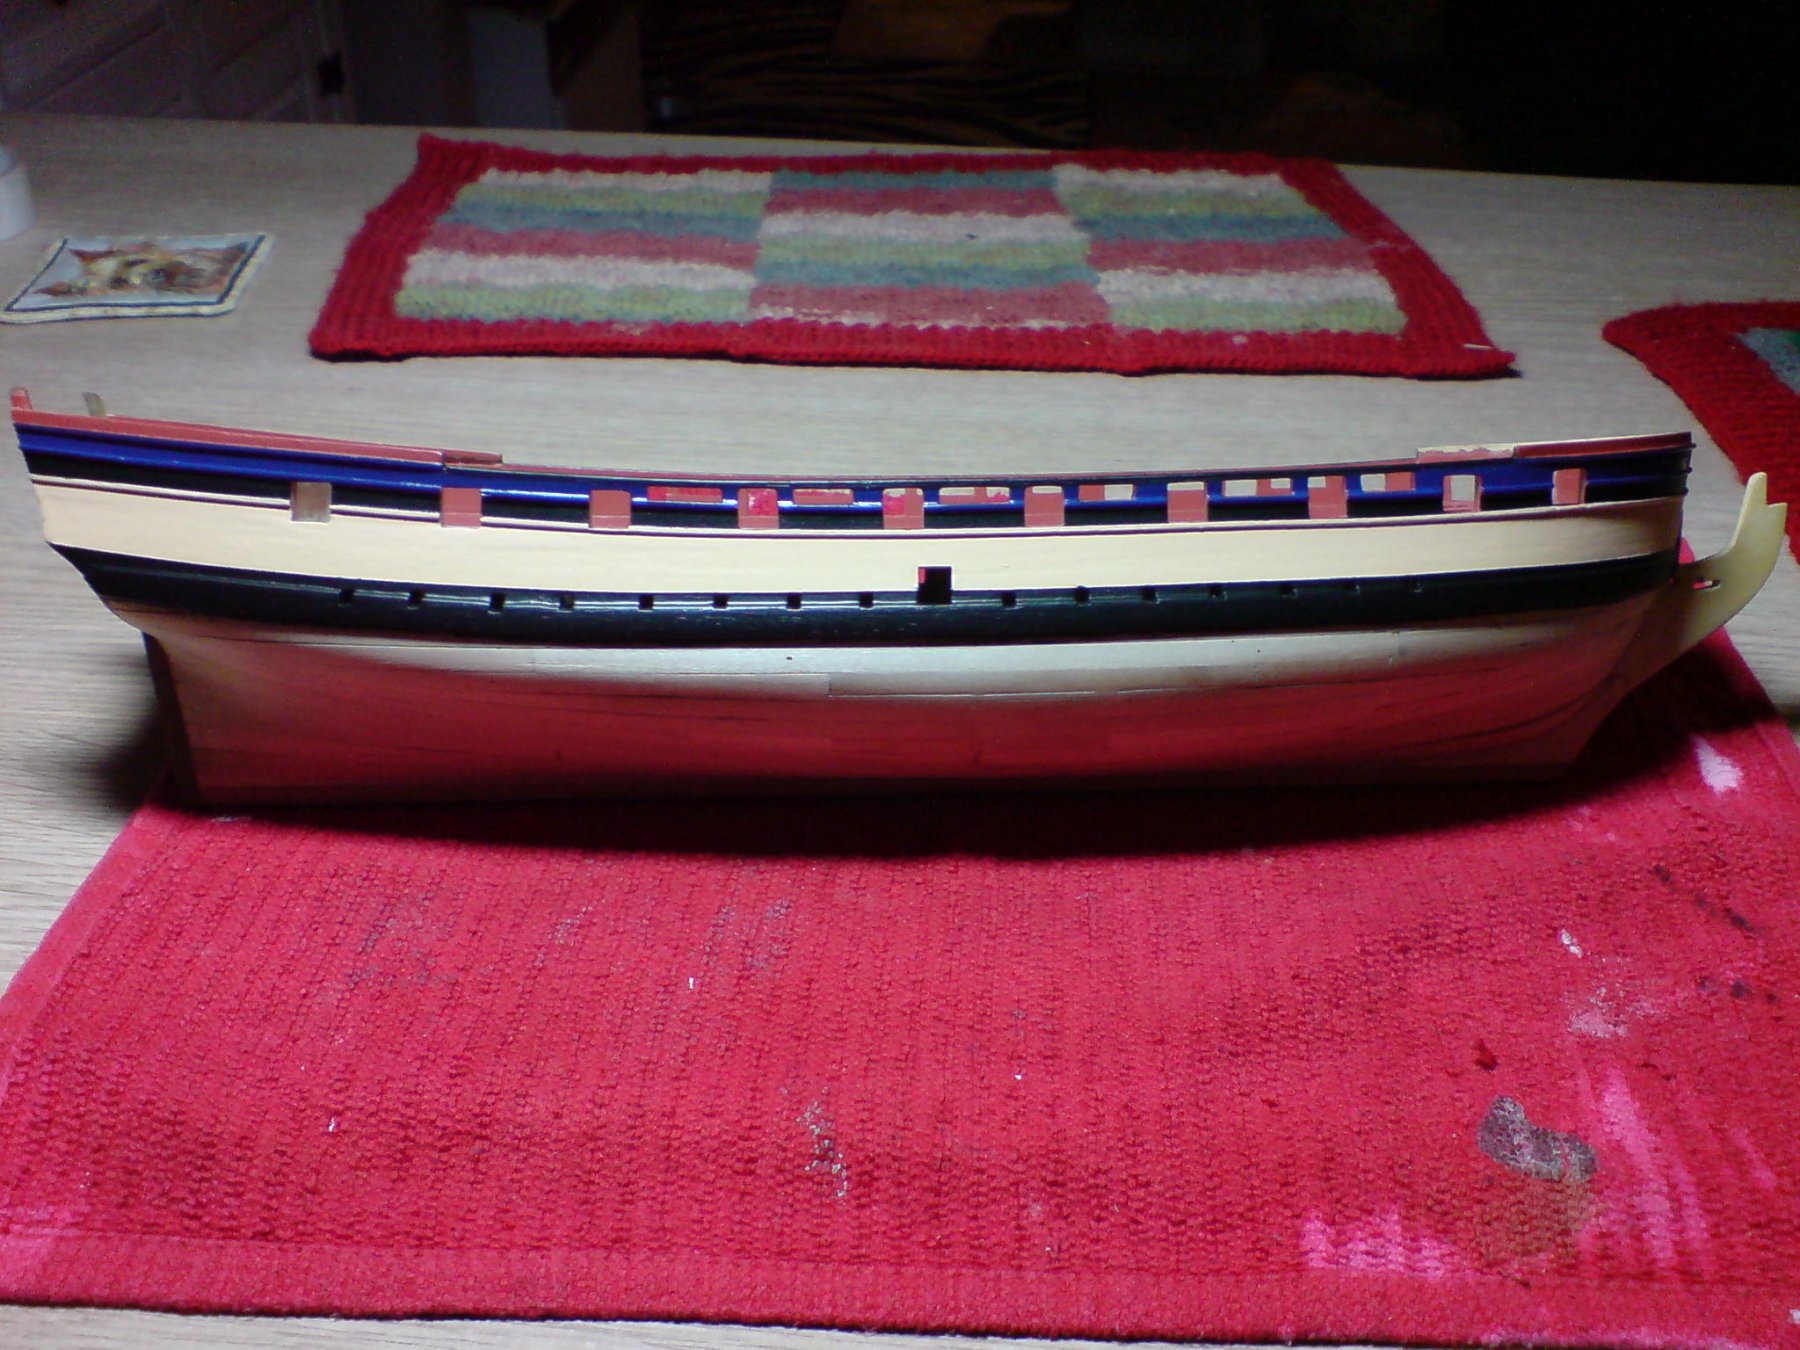
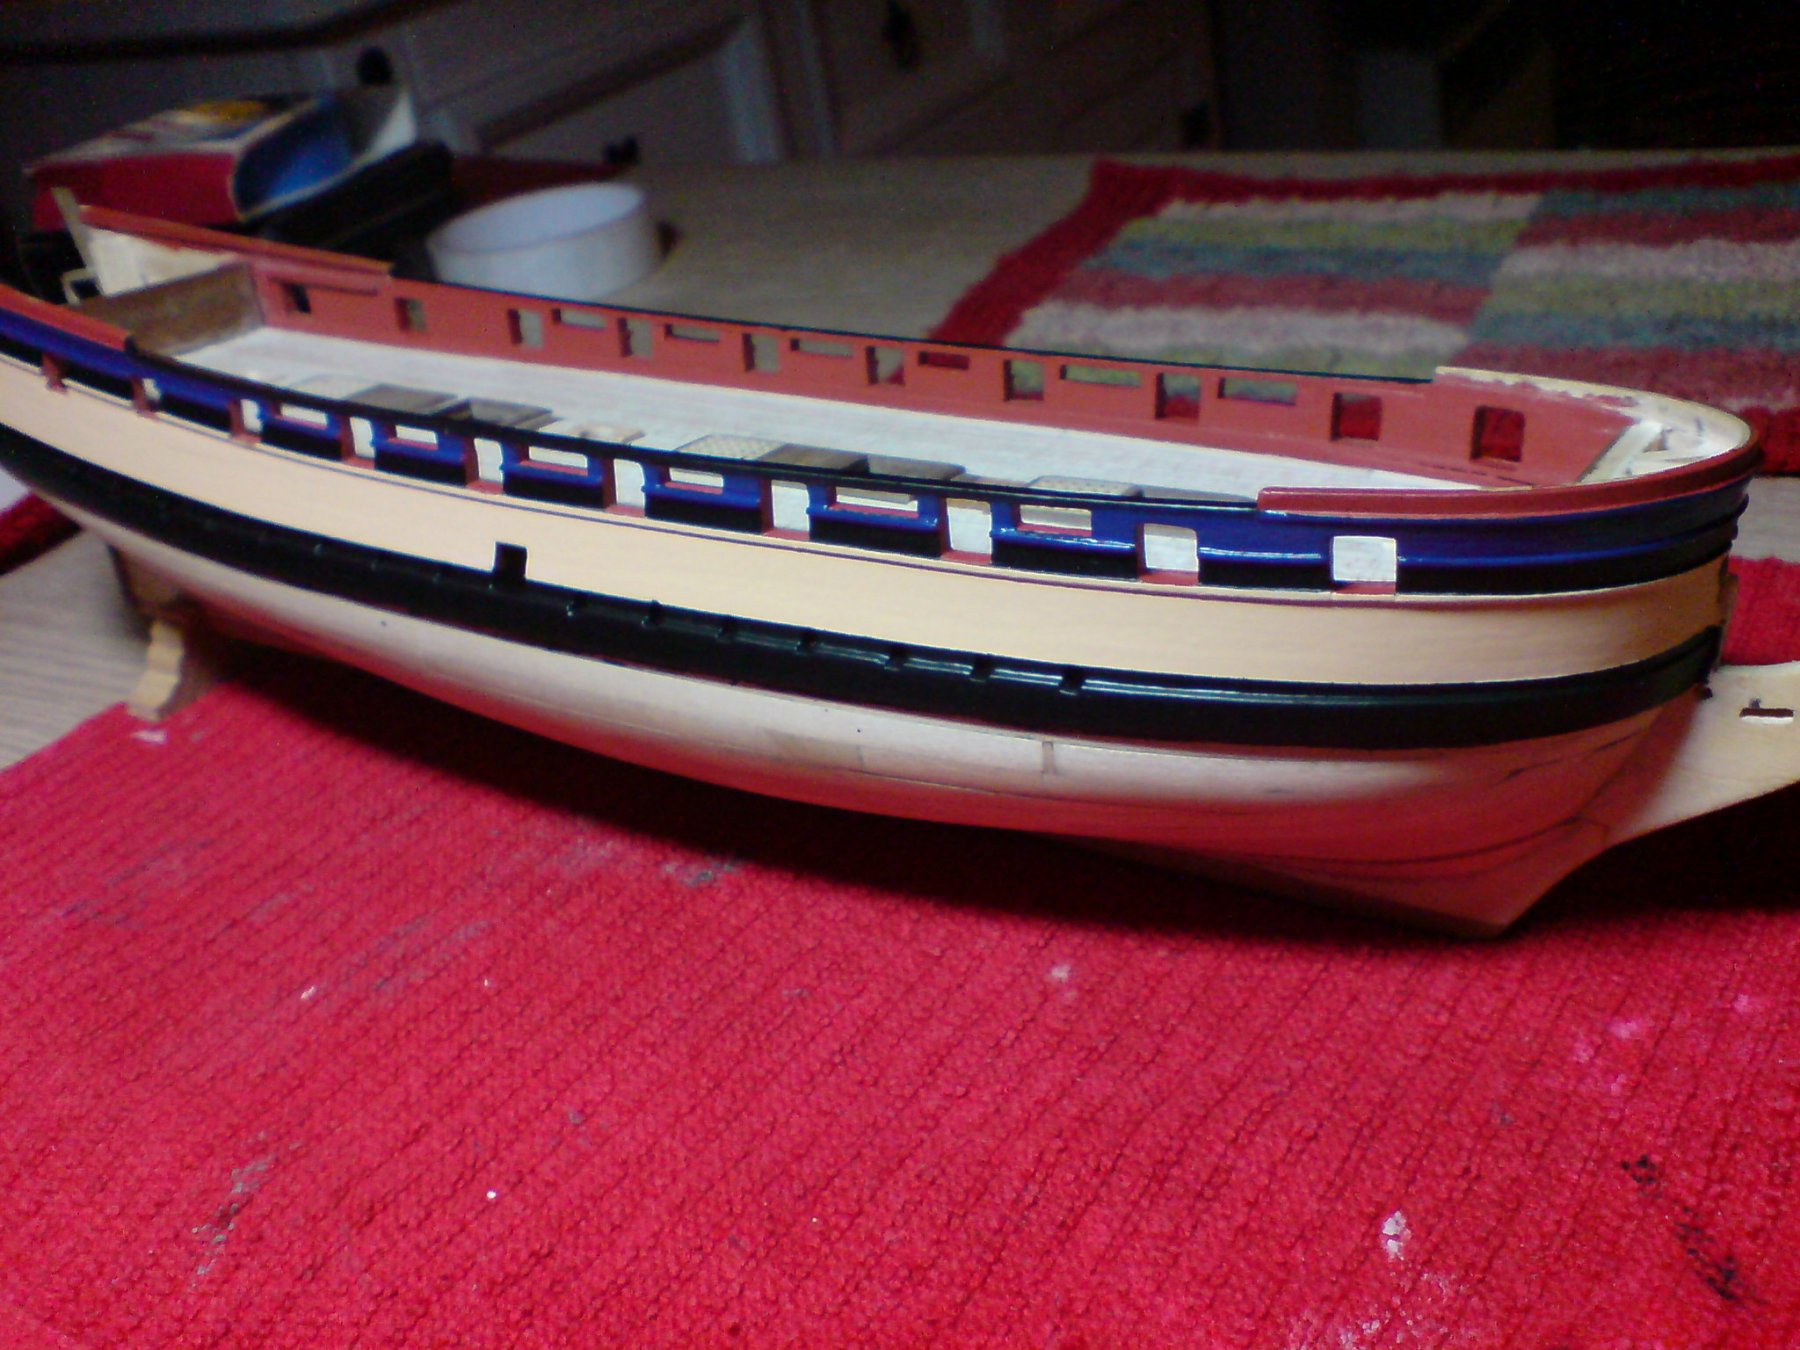
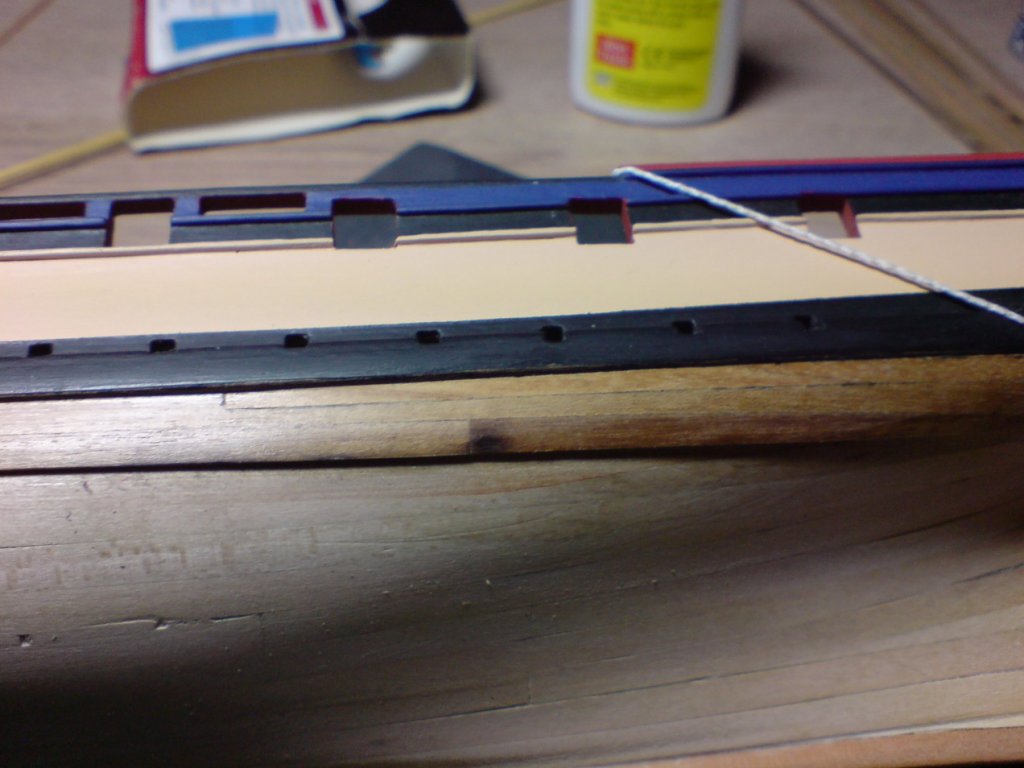
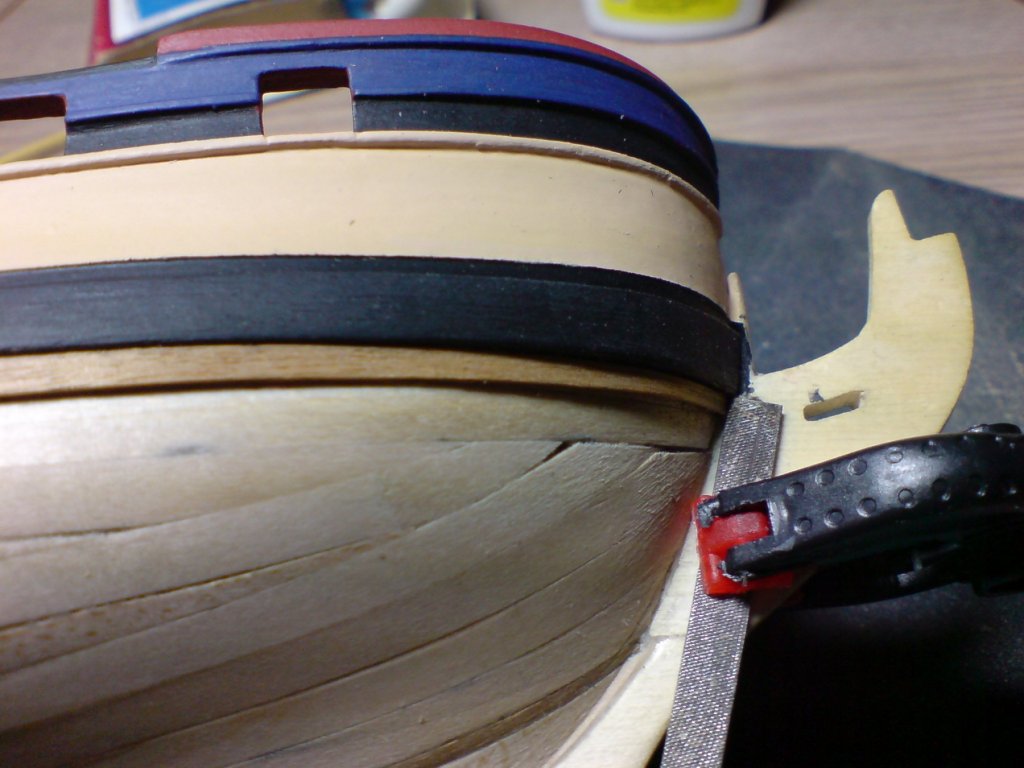
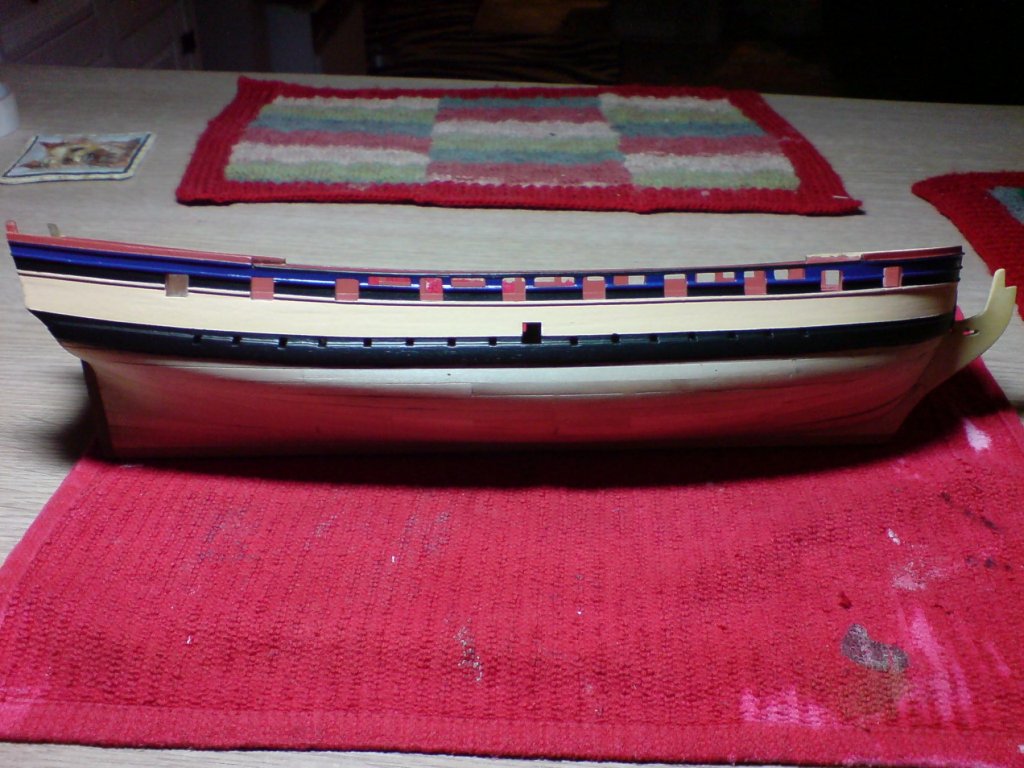
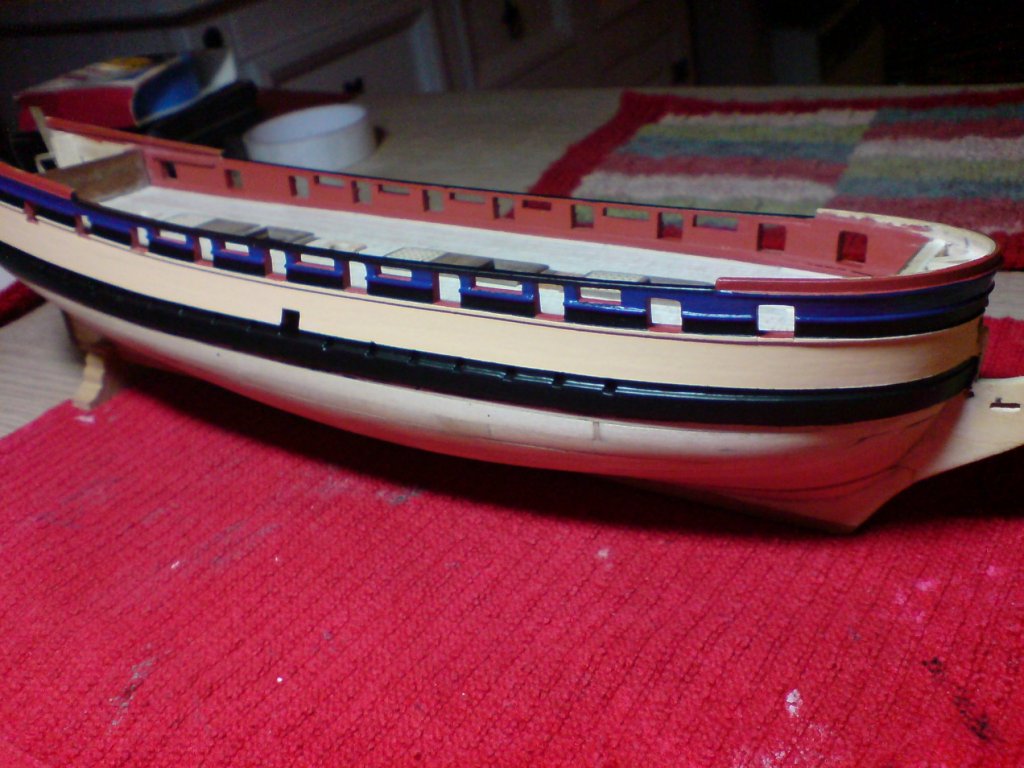
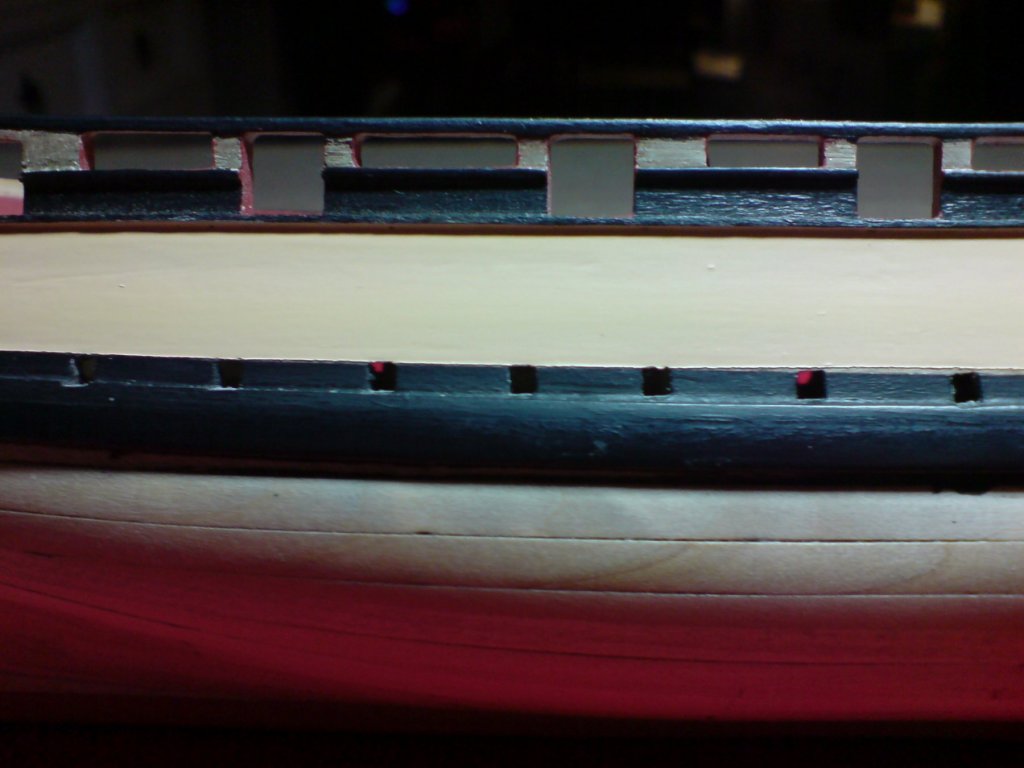
Hi folks, more work today using a hairy stick thingy and some of that colored wet stuff, after masking off the yellow ocre I painted a fresh line above the wale, and gave it several coats of dull black, after drying I removed the tape and was quite pleased with the result, I then moved up the hull painting in some of the details, till I got to the upper section where I decided to add some french blue. It was a case of some touch ups including inside the gun ports and details with red ocre. I am quite pleased with the color mix, will just need a couple of coats of flat top coat to blend it all in when its fully hardened. A few more pics. OC.

- 455 replies
-
- 10
-
-
- slightly modified
- greyhound
- (and 1 more)
-
Same as me bob. How do you make your bulwark tops around the forecastle, they cant be bent strips can they? OC.
- 682 replies
-
- 5
-
-
- halifax
- lumberyard
- (and 1 more)
-
They are looking great E J really worked out making them fit yourself rather than using the template. OC.
-
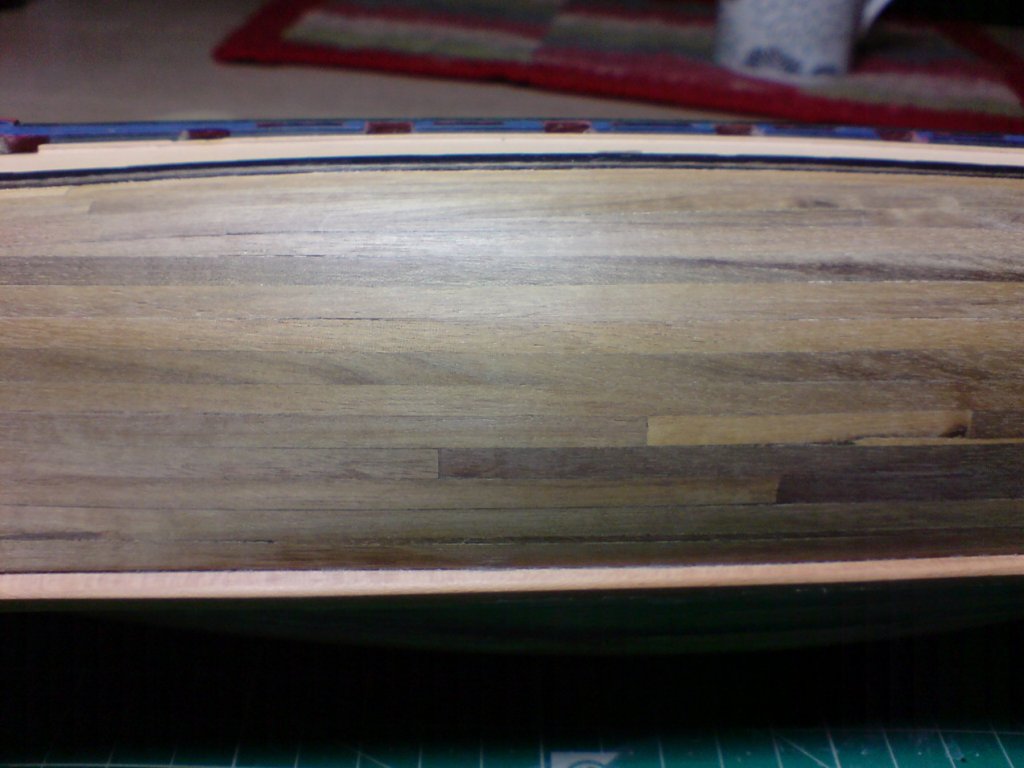
Evening folks, last time I posted I was going to fill the grooves in the upper hull with wood filler, this was only so so sucsessful as I did not want to smother the hull with too much filler, so after applying a liberal amount and letting it set, I was able to do some gentle sanding. After checking the area over - the grooves were still there just not as deep. so I decided to just paint the upper hull from the wale to line of gun ports, first off I mixed some yellow ocre with flat white to lighten the color slightly, I came up with quite a plesent shade that I feel is more appropriate, I started on the side with the grooves and applied the first thinned coat - that was dried with the aid of a hair dryer, I carried this on with about 8 layers each dried between coats, I then turned the hull over and did the same to the other side. It covered quite well Admiralty acrylic paints are always good with brush painting, and dry to a nice hard finish. The black on the wale will need some touching up a bit. Here's the pics - OC.

- 455 replies
-
- 7
-
-
- slightly modified
- greyhound
- (and 1 more)