robdurant
-
Posts
843 -
Joined
-
Last visited
Content Type
Profiles
Forums
Gallery
Events
Everything posted by robdurant
-
 Exciting news! (for me, anyway) I'm heading up to the National Archives in Kew (London, England) on Thursday (my day off) - I've signed up for a reader's ticket, and I've ordered up the original masters' logs, musters, pay logs, and a box labelled: "Ethalion . Capture of La Bellone, 1798.", which will be about the Battle of Tory Island. It'll be pretty special to look at the very documents from the ship I'm building a model of. I love history! Hopefully the documents will be available, and there'll be lots of fascinating insights coming up! These documents still exist, because although Ethalion was wrecked in late 1799, everyone on board was saved, presumably along with the most recent logs and documents, and so here they are. Waiting for me! HMS Ethalion (1797-99) makes a good study, because she had a short, but busy life... I can't imagine how many documents there are for a ship like Victory. I wouldn't know where to start! More soon. Rob
 -
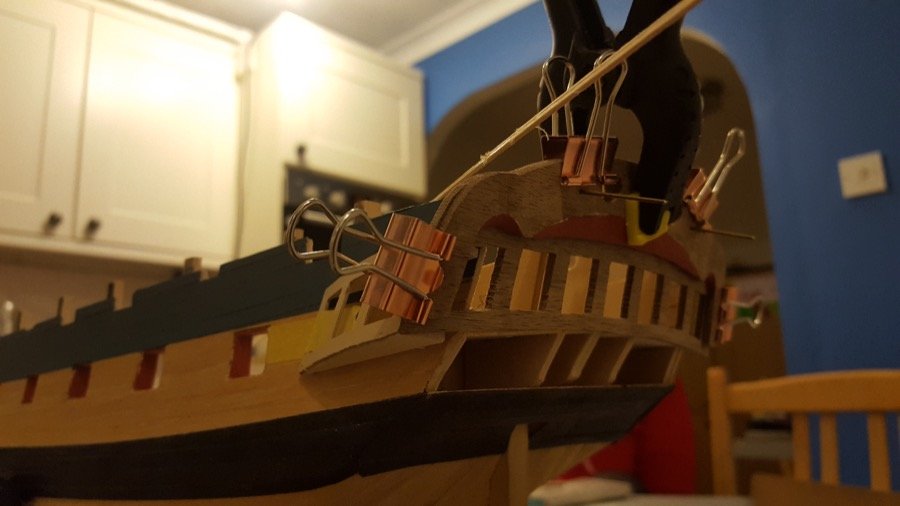
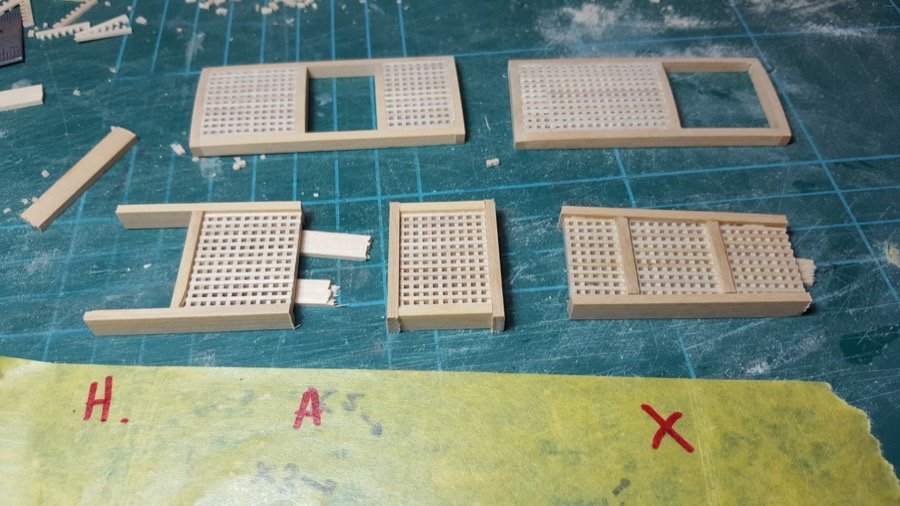
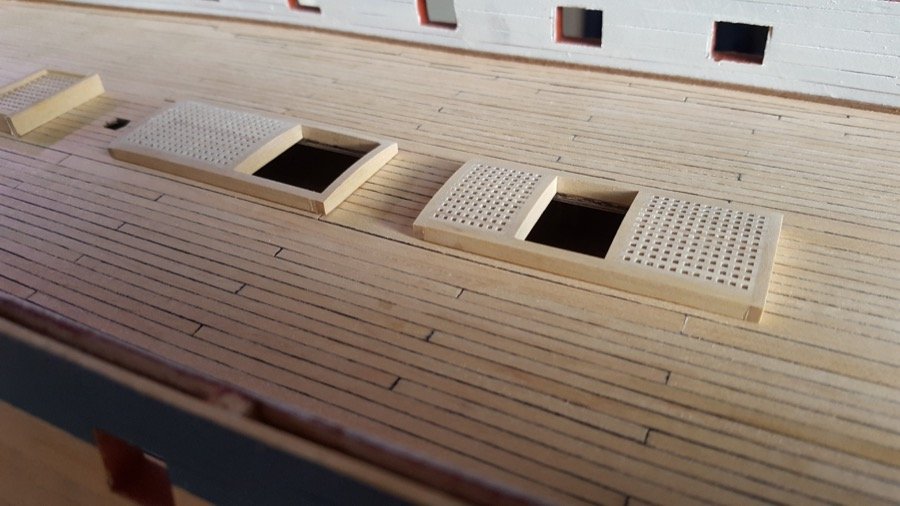
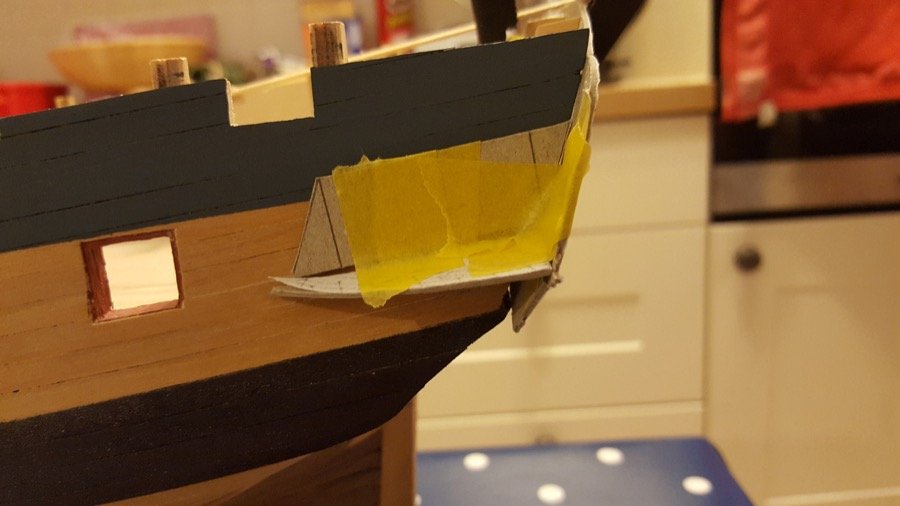
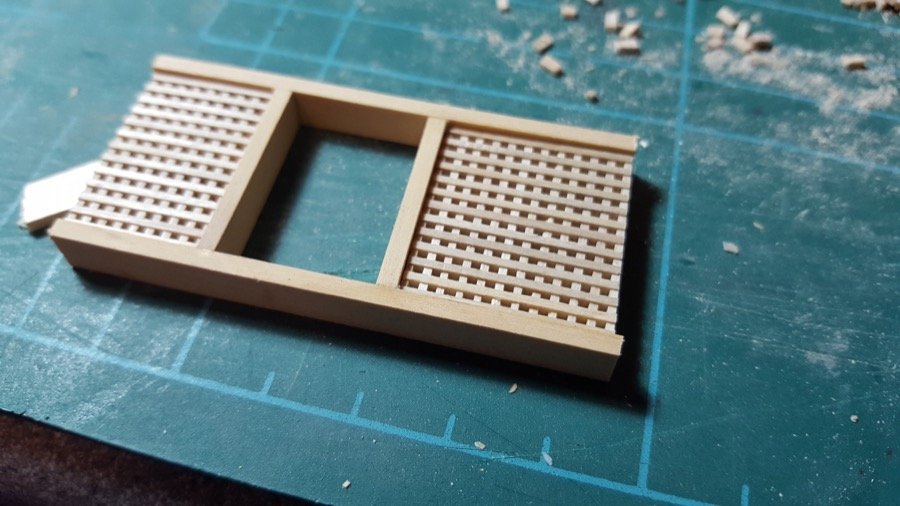
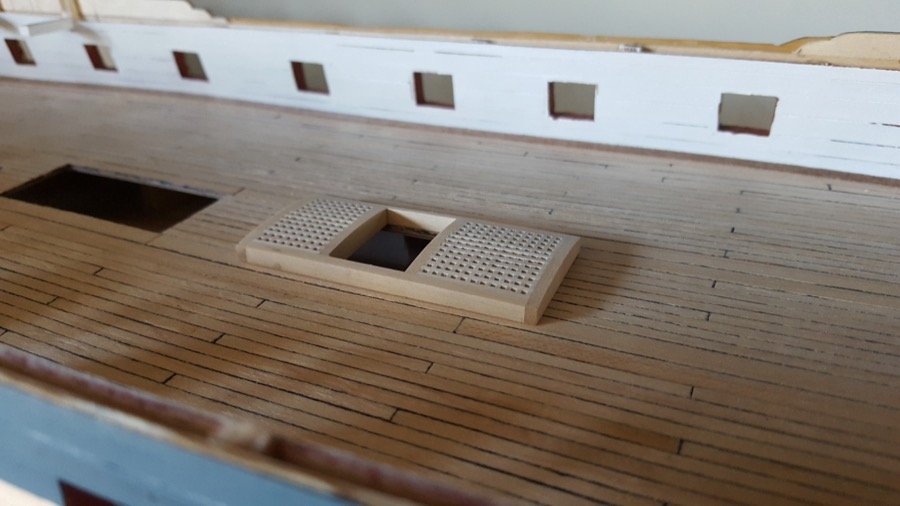
Now you say that, it makes perfect sense... A little more progress to show. I've been working on the transom again... I soaked the transom in boiling water and bent it round a frying pan (with vertical sides), and clamped it. That's resulted in a pleasing curve. I also started working on the side galleries. Looking at those photos, I'm not sure with the way it curves upwards, so a rework is called for. But I'm pleased with where they end up w.r.t. the gunports and the transom. For a little light relief, I've done some more work on the gratings, surrounding them with 2x6mm boxwood, and using a stock pot with sand paper inside to sand the curved profile on the top. Happy building Rob


-
Thanks Jason and Paul. It really does cause a fair bitof head scratching but I think I'm getting there... at least I'm over the psychological "what on earth am I doing" hurdle. It really is great to have other builds to look at and follow. There's no way I'd be getting on this well without them. The instructions are brief to say the least. Take care Rob.
-
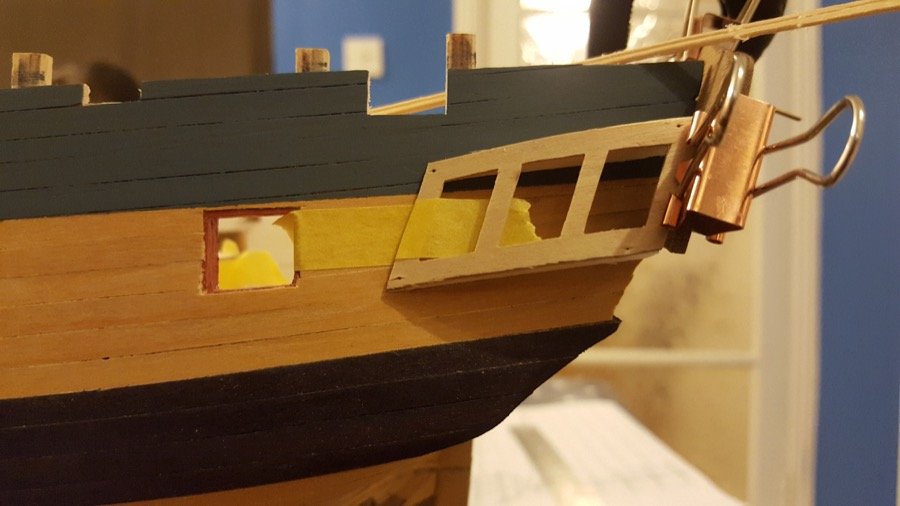
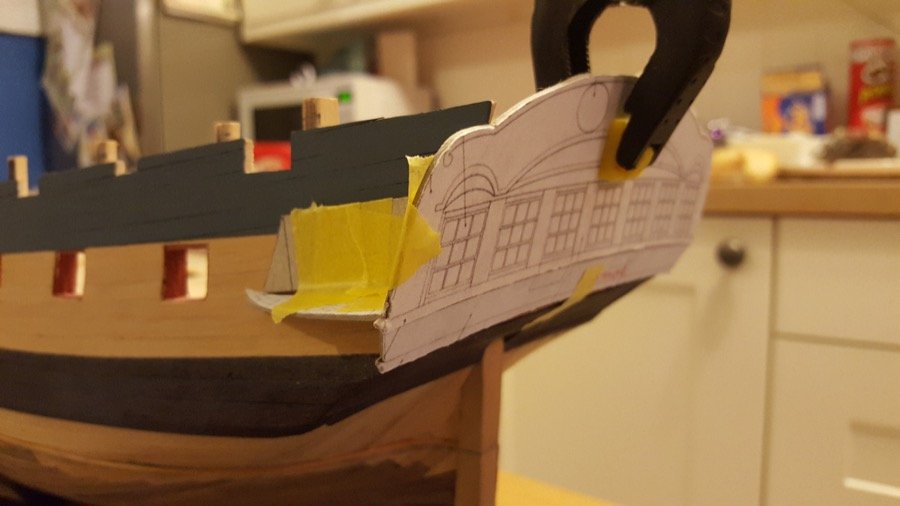
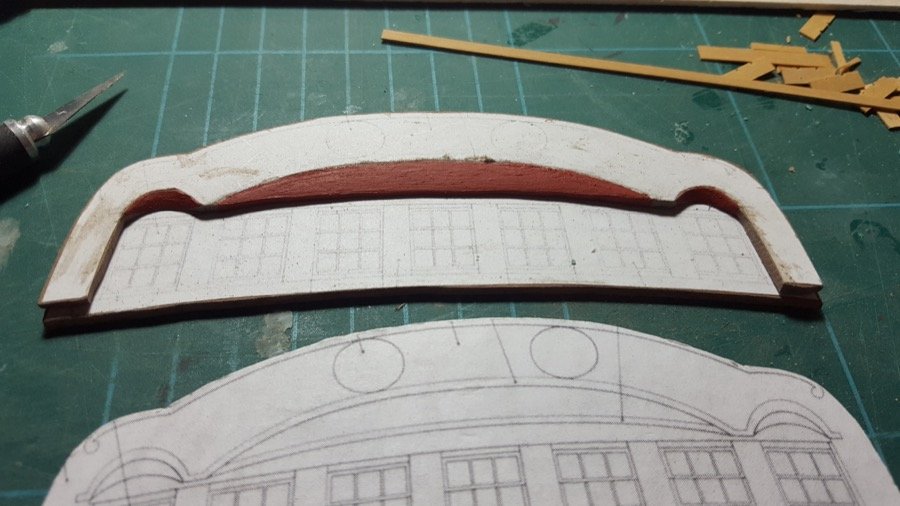
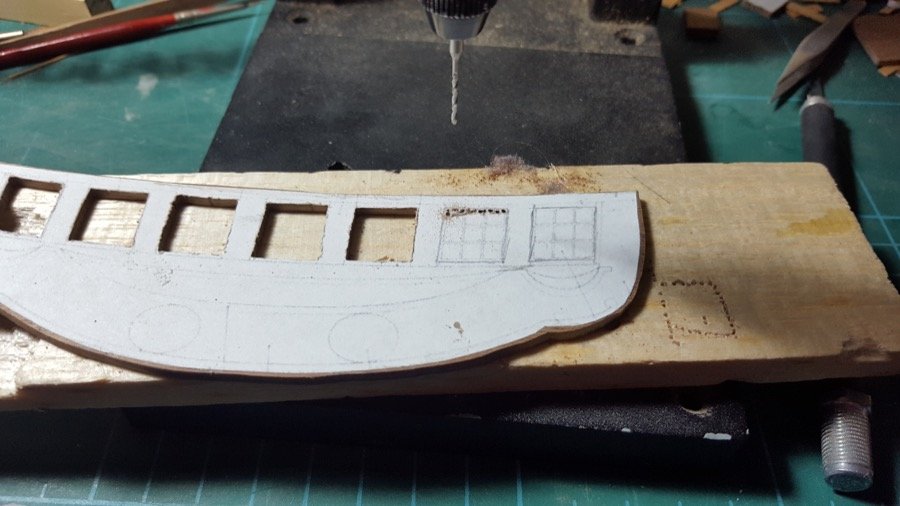
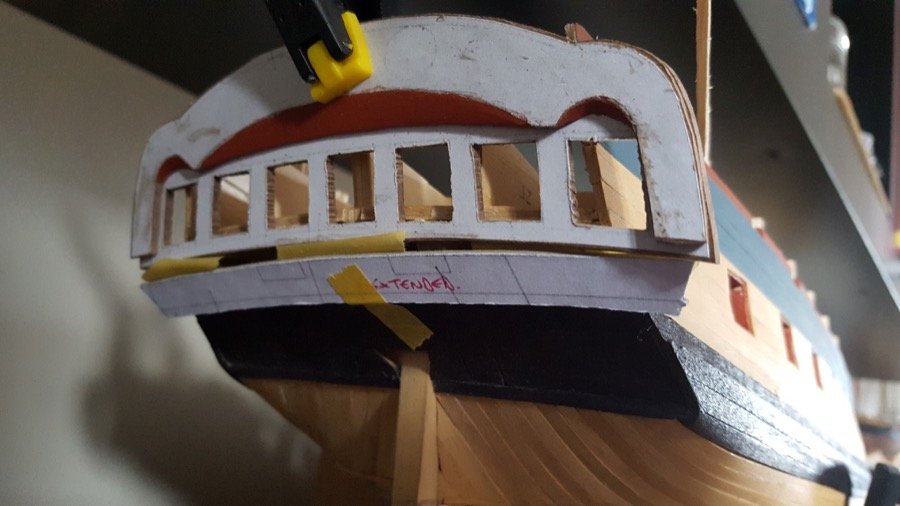
Time for another update. I've been working on the stern lights, trying to work out how to create these myself so that I could ditch the photo-etch ones, which others have documented are not the same shape as the lights in AOTS... they are smaller, and the curve is not uniform. To that end, I started making some 5mm deep ones, version 2 was 3mm deep, and now I'm trying some that are ~2mm deep. All out of .7mm boxwood veneer. These are built up on a CAD drawn template based on the AOTS stern view (which has been extended vertically to take into account the diagram being directly stern-on, and the actual fascia being tilted - further astern at the top and further towards the bow at the bottom. I've also been working on the stern fascia itself. I've taken "Beef Wellington"'s lead and recreated this myself. The kit parts are all 2mm ply... I've used 3mm walnut, and used the extra depth to shape the covings. They're also based on the vertically extended AOTS pattern, which was cut out and stuck onto the walnut to provide the template to cut out. The new cutouts for the lights are to proper scale, and should fit the new windows nicely (it looks pretty close at the moment, but time will tell.) As it stands I'm feeling much more confident about this part of the model. The stern will be considerably narrower than the kit, but the lights should look more to scale. It will mean that the quarter galleries will need to be shallower. If I were starting again, I would have narrowed the last few frames to bring this in... but this would have been far from simple, and it'll have to stand now. Planning: (this is all a bit Ted Heath, but I'll have another crack at it now I've got a bit further with the stern fascia.) Stern light trials... They are very uneven here, but the uneven face will face into the stern, and the even face (face down on the board) will be the side that you see... And the stern fascia... Using some maths (that was a bit of a shock to the system), I worked out that for 140mm of width, and 8mm of depth for the horizontal curvature (creating a radius of just over 310mm), the additional length for the stern fascia would only be 1.1mm.... basically, I need to leave a tiny bit on instead of sanding down to the line! Much happier with this than with the kit-supplied parts. Nothing wrong with those parts... they'd be fine... but I'm enjoying the kit-bashing aspect of this even more (and it has the added benefit of making the whole process last a bit longer, and giving me an excuse to use lovely wood.) Happy building and a very happy new year to you all! Rob
- 275 replies
-
- 11
-

-
Wow! That's a serious Bowsprit - being so long must have really increased the sail area... The rigging and hammocks in the netting look superb to me.
- 1,306 replies
-
- 5
-
-
- syren
- model shipways
- (and 1 more)
-
You can really see the shape appearing now - lovely work - doesn't look like you'll need too much elbow grease - just a small tin, perhaps? I've got a soft spot for this hull shape, because it was the first boat my father built (a Mary Ann Billings), so had a big effect on my wanting to start the hobby! Looking forward to seeing it all sanded down again. Those stern blocks look perfect. You'll be painting before you know it.
- 378 replies
-
- 5
-
-
- t78 norden
- billing boats
- (and 1 more)
-
Hi Looks like a nice subject and a nice contrast to vanguard. I wonder whether the slight difference in scale will be noticable (in terms of fiddliness) once you're working on the fittings? Hope you don't mind if I pull up a chair. Rob
- 421 replies
-
- 2
-
-
- caldercraft
- granado
- (and 1 more)
-
This is so helpful as I'm just starting out on the quarter galleries myself... They look amazing! If mine turn out half as good I'll be very happy.
-
Thanks. I can't take any credit for the choice of blue. It's the same as on yours... the tamiya flat blue xf-18 I think? Though I'm not at my boat building table to check at the moment.
-
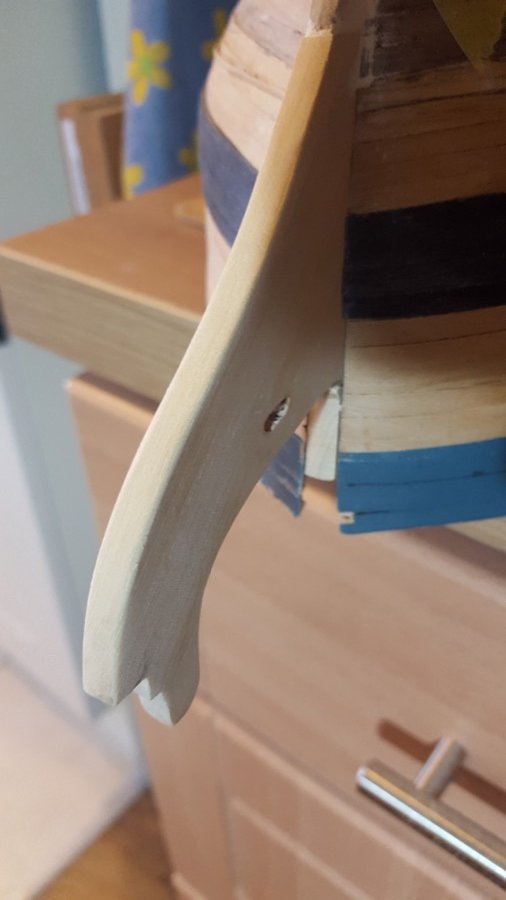
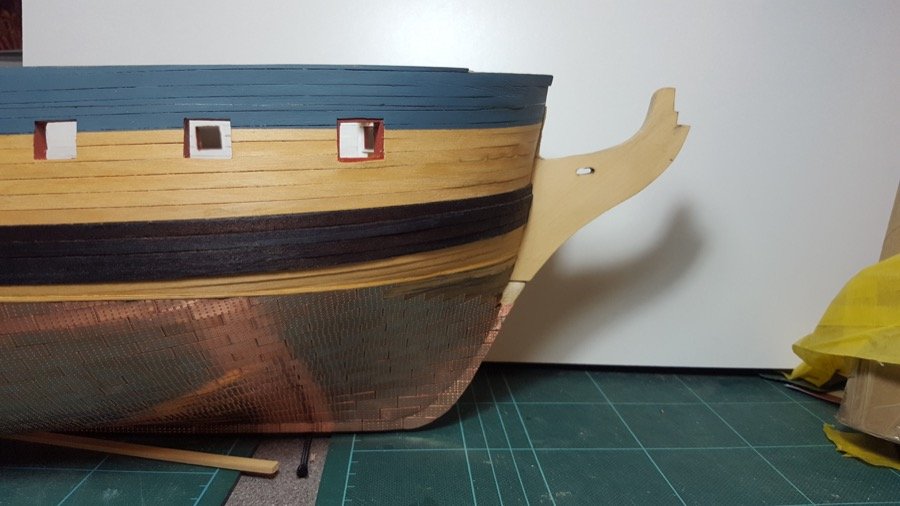
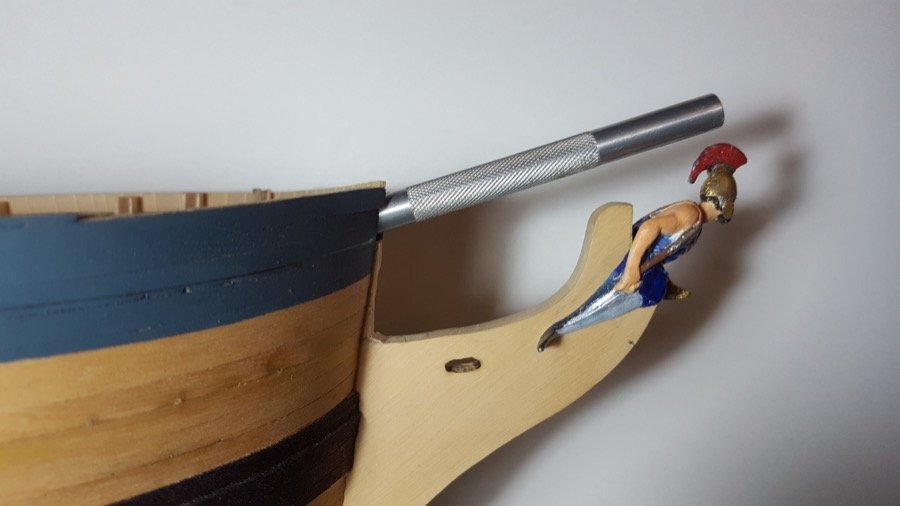
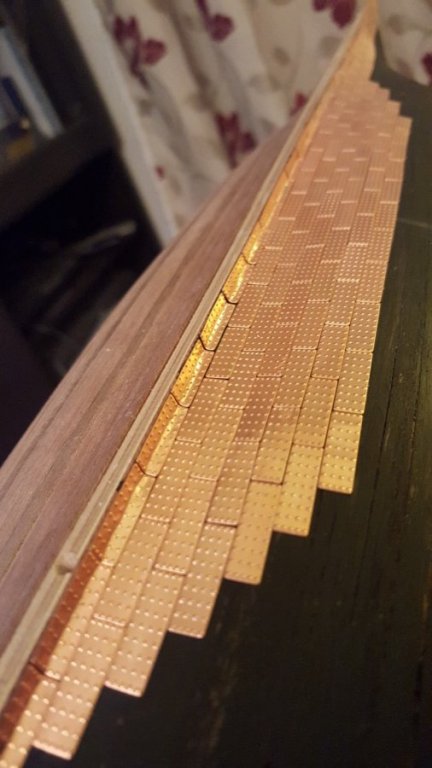
Another minor update... Last night I filled the gap between the (castello) boxwood beakhead replacement and the false keel, and this morning I sanded it smooth, narrowing the beakhead a little so it tapers as it goes down towards the keel. I also took the opportunity to smooth the beakhead a little so it's a curved profile at the front. Once that was done, I was able to finish the coppering on the starboard side... (phew!) I'm glad this hull isn't any bigger - all those Agamemnon builders have my respect - their patience is considerable! That said, I find coppering fairly enjoyable once I got into the swing of it. It isn't perfect, and there are far better examples on this site, but I'm really happy with it. I might start on the quarter galleries before I copper the other side - I fancy doing something different for a bit! Rob


-
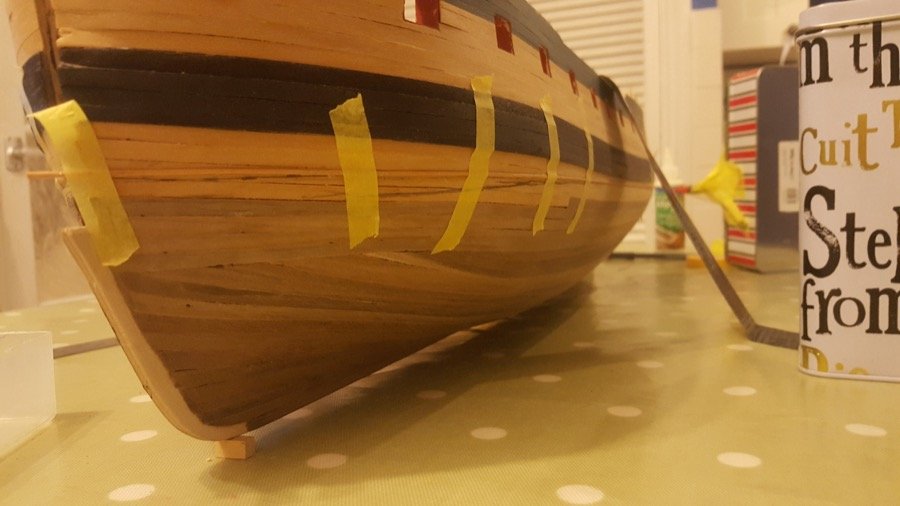
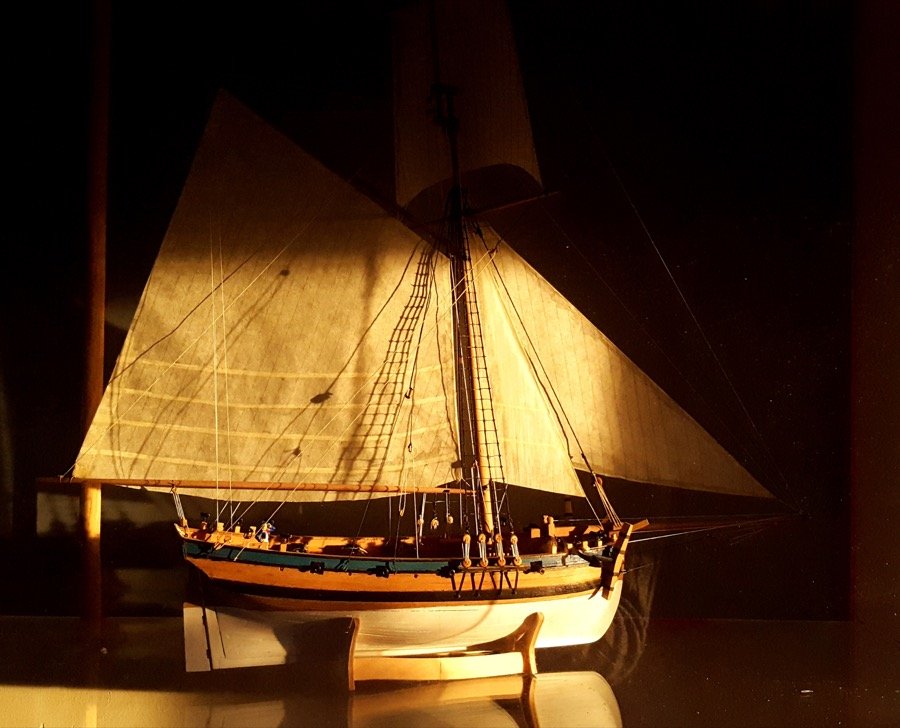
I spent some time remarking the waterline (somehow, it was way off!) and then fixing a thin boxwood strip in place to make sure it was neat... the copper runs up to this plate. The waterline was marked by attaching the hull right way up to the table with masking tape (with a 6mm block under the keel at the bow to get the waterline level as per AOTS plans), and then using a sturdy tin with a retractable pencil attached to it to slide around the hull and make the mark. The benefit of a retractable pencil is that when you get to the stern overhang, you can extend the pencil led (carefully) and keep on marking... Otherwise the hull gets in the way. It isn't sophisticated, but it works for me. A whole evening was spent making sure the strips were in just the right place. The coppering continues, but as I reached the bow it became necessary to finally fix the boxwood beakhead in place, checking the angle of the bowsprit as I went (using an x-acto knife handle.) I wasn't happy with the coppering lines at the stern, so lifted 20 or so copper tiles and re-laid them. And finally... I was walking past Sherborne a couple of days ago, and the morning sun was coming in through the window, and it looked like this... a strong argument for putting sails on your models? Have a blessed Christmas!

- 275 replies
-
- 10
-
-
I think I'm right in saying that Ray switched to beech for the rails on his fantastic HMS Diana precisely because it would bend so well when steamed. It seems to be a strength of beech wood and I noted it down because I'll need to follow in his footsteps when I get to that point. Link to Ray's post about Beech rails Fantastic build! This model is well up there on my "would like to build" list so I'm following with great interest.
-
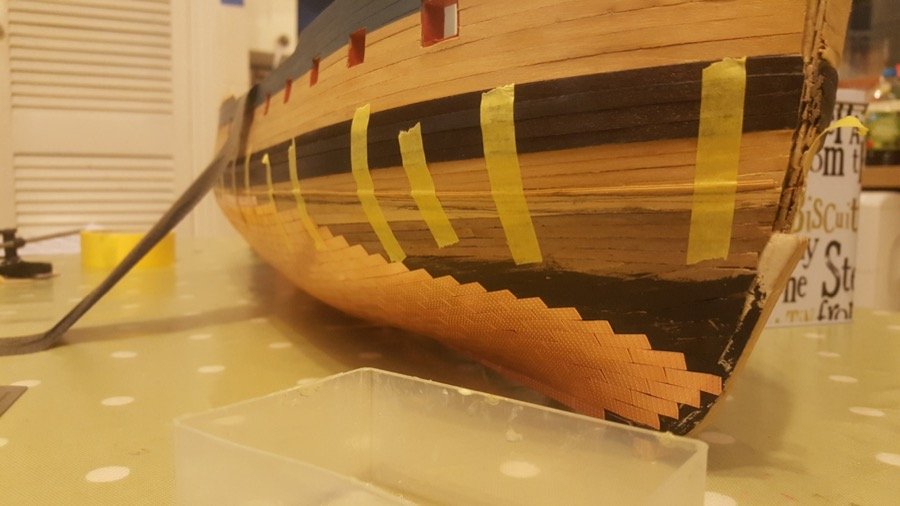
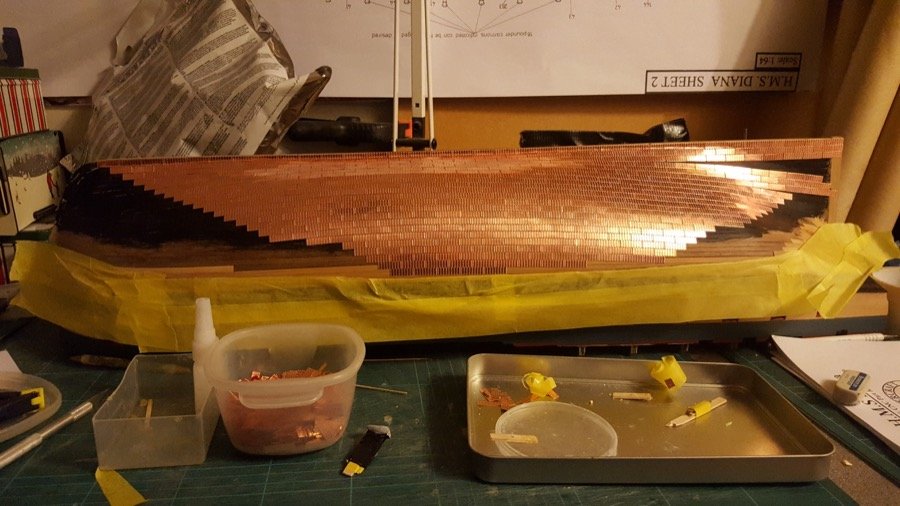
Hi all, Thanks for the likes and encouragement. Jason: Yes, I had noticed those concealed gun ports... I'm hoping I'll be able to work them into the stern fascia when I get that far. It's amazing the way the space on these ships were used in so many different ways. I'm glad I wasn't the one getting the table ready for the officer's dinner after the ship's company had pulling a wet anchor cable through that space on a stormy day! Another reminder what a different world it was. In the meantime, I'm making progress with the hull coppering. Given how long this task takes, in a confined space, I invested in a proper mask to protect my lungs from the superglue. (If anyone's interested it was a "3M model 4251 Maintenance-Free Organic Vapour/Particulate" mask). The difference is stark. Once it's on, I can't smell the superglue, and after at least 7 hours so far, I haven't noticed any adverse effect. Previously, when I did the coppering on Pickle (much smaller!), I was noticing after a day working on it, I was wheezing. So - I have not stocks in masks, but I'd strongly recommend this as essential not optional if you're doing a boat this size. I use a stick with blue tack on the end to hold the tile, then I use another offcut of first planking material to put superglue onto the back of the tile. The blue-tak holder is then used to position the tile, and hold it in place until dry. The superglue gives just enough time to push it up against the neighbouring tiles before it sets. This method seems to result in very little superglue going in the wrong place. You'll notice that I've put masking tape on the parts of the hull that will be exposed when finished. Early on I had a tile drop, thankfully onto the part of the hull that will be covered up, and it left a dark mark on the planking. I don't want that to happen to all that lovely boxwood! Any tiles that don't quite go in the right place can be gently lifted off with a craft knife. I've left the pot of tiles open in the hope that they'll all start tarnishing at the same time. I shuffle the pot round occasionally to give all the tiles a chance to get some air. Finally, a near escape, and a lesson that I should have already learned! I decided to move the table the boat was on, and thought to myself - "I'm only moving it a few metres - it'll be fine...I'll leave the boat on the table while I move it... " Well, the table leg got caught, and before I knew it the table had stopped but the hull was sliding towards the edge of it... Suffice it to say I had no time to do anything but cry out... Thankfully the hull slid half off the side of the table, and then stopped, and I was able to catch it... !!! To say I was shaken is an understatement. It would have dropped five feet onto a wooden floor... Anyway - by the grace of God, and with no thanks to my own stupidity and laziness - the model lived for another day! An advanced new years resolution! Don't be lazy. Move the boat somewhere safe. THEN move the table. Time will tell whether I've learned my lesson fully enough! Happy building to you all. Rob
-
Brilliant - Nelson's favourite! Looking forward to following this log.
-
Hi What a stunning build! Reading your comments on Nelson and his patch reminded me of this section from Sugden's wonderful two part biography which may be of interest "Legend depicts Nelson with a ridiculous black eyepatch, as if hiding an empty socket, but his many portraits and the few descriptions suggest that time more or less restored the appearance of the injured organ. Only the fine pastel made by Johann Schmidt of Dresden in 1800 depicts the slightly clouded aspect it presented to more intent observers. Nelson’s ‘beauty’ survived, but his vision was irreparably damaged." - John Sugden, A Dream of Glory, ch XIX.6 So your figure is already an excellent likeness. Take care Rob
-
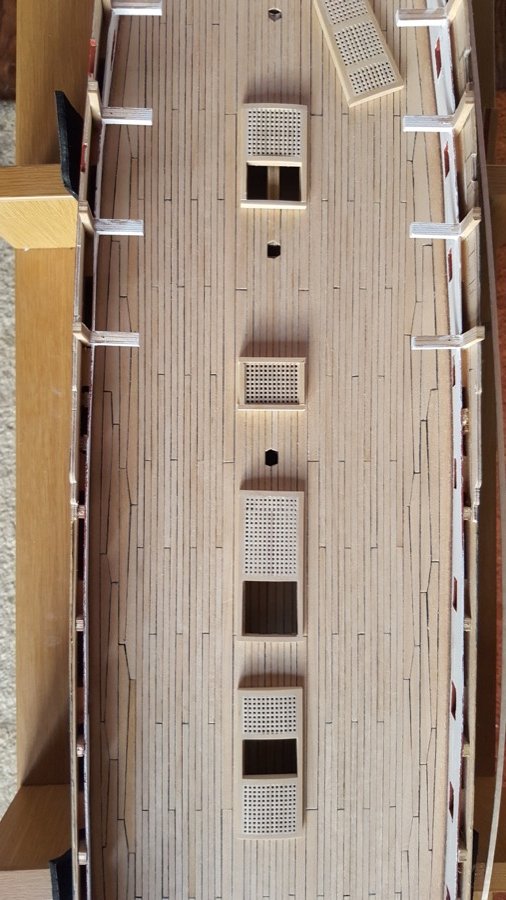
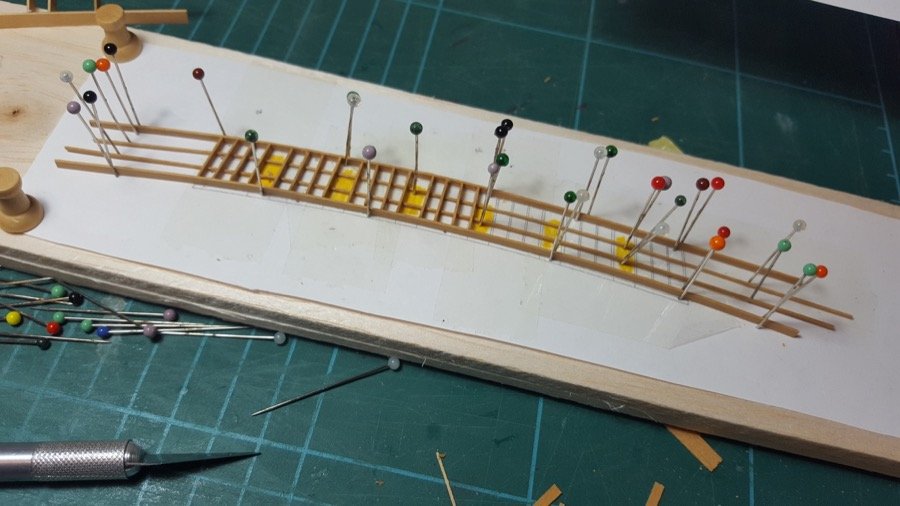
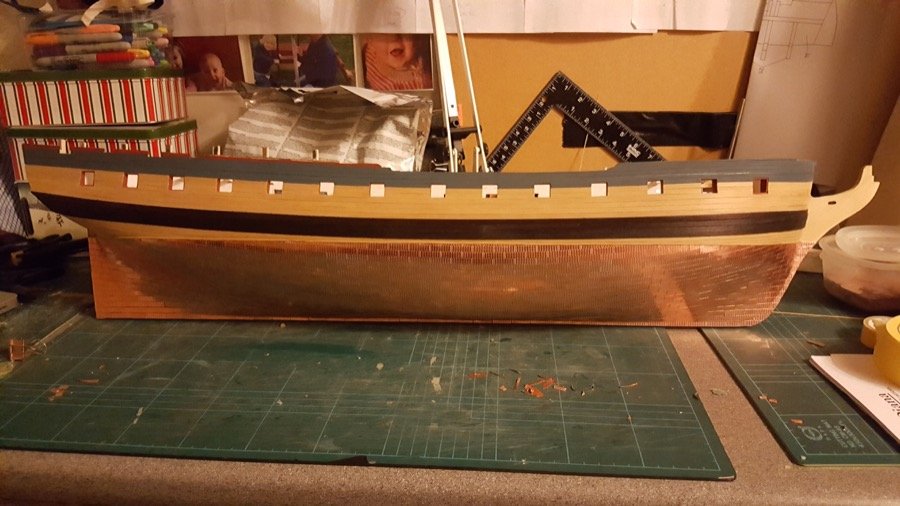
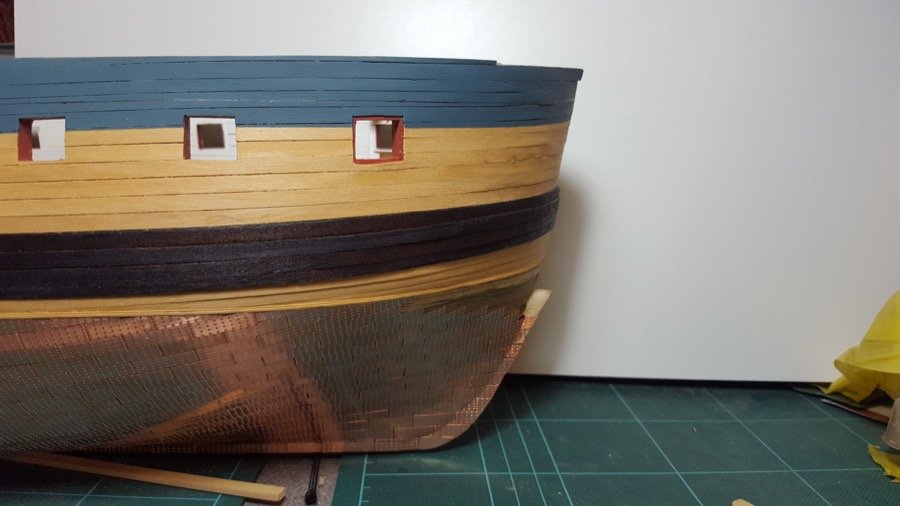
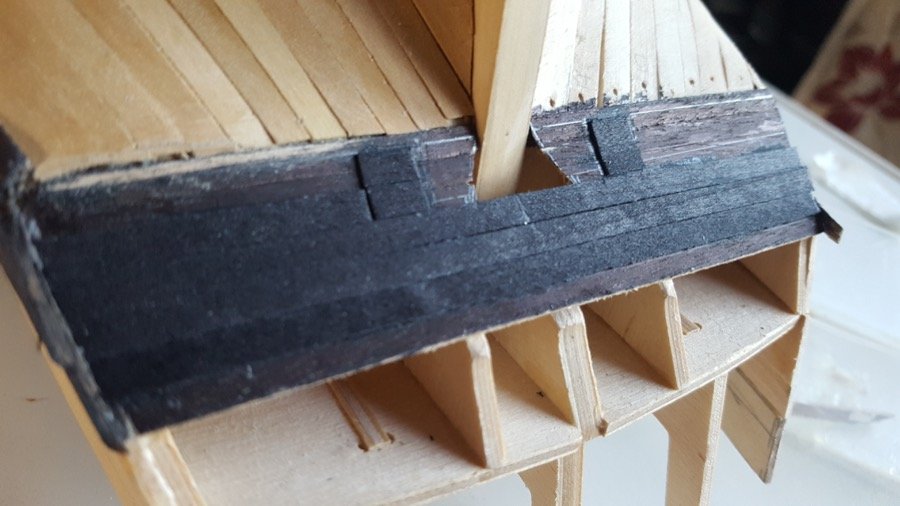
Yay! The planking's complete. I'd be further along, but last week my wife said - why don't you take the day and get down to Portsmouth Historic Dockyard - frankly, I didn't have to be asked twice. Not least because I'd already got the annual ticket. Anyway - the planking's complete, and I've marked up and painted the blue section on both sides. I've also completed the lower counter planking. Interestingly, wandering round Victory I noticed that the port in the lower counter on Victory IS a gunport... but if that were the case on Ethalion, the port would be on the lower deck - an odd place to have cannon... I was struggling to get hold of 2mm boxwood in the UK, until I realised that Guitar Stringing (the stuff they put on the edges round the body) is 6x2mm and you can get it in castello boxwood. I've bought a bunch of it, and I'm planning to use it for the companionways and gratings. I put a sheet of sandpaper inside a stock pot to sand the curve into the top. It's the perfect radius. Once I was satisfied that was going to work, it was time to get on with the hull again. And following the lead of Jason (Beef Wellington) and Ray, I've decided to copper the hull earlier than the instructions suggest. One day in and I'm about 150 plates in to the task... It just about feels like I've made a dent in the task! Each tile is picked up with a stick with inverted duct tape on the end, and a little CA applied to the back with another stick. Then it's placed on the hull, with just enough time to position it before it sticks. I painted the hull below the the waterline black to seal it a little before I started the coppering - that stops the CA leaching away into the hull... I was getting through a lot of CA on the first few tiles before I realised that was the problem! I'm using the Caldercraft copper... I quite like the effect, even if the rivets are way too pronounced for scale, and once it's gained its patina it becomes less noticeable. As it stands, it's looking way too bling for my tastes, but time will fix that I figure I'm going to be coppering for a while, but I shall retreat to working on the quarter galleries if I need a break. Happy building. Rob
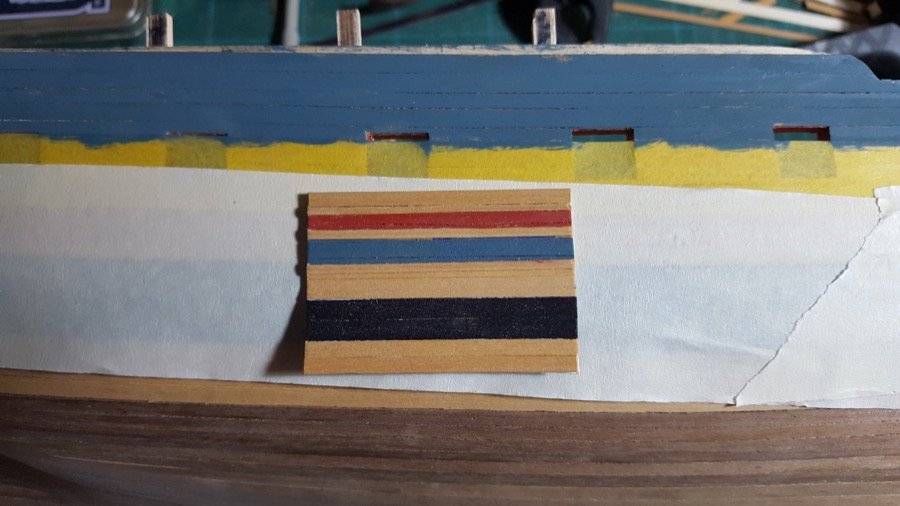
-
The white really compliments the rest beautifully. Nice!
- 192 replies
-
- 4
-
-
- sovereign of the seas
- sergal
- (and 1 more)
-
Looking forward to seeing another Syren come together. Sounds like you've already found some excellent places to look for inspiration ways to go about each task. All the best for your build(s) Rob
-
Hi David, Hope all's well with you? How are you getting on with Diana? Have you got the gunports cut out yet? Looking forward to seeing your progress. Rob
-
Here's a slightly better picture of the second planking of the lower counter underway with the lower deck ports.
-
Thanks to everyone for the likes, Thanks Old Collingwood for the encouragement. And thanks TigerSteve, donrobinson and Beef Welljngton for the advice on wipe on poly. I think a bit more detail needs to go on the hull (decorative strips etc.. ) before I varnish... but your advice is very helpful.