


robdurant
-
Posts
837 -
Joined
-
Last visited
Content Type
Profiles
Forums
Gallery
Events
Posts posted by robdurant
-
-
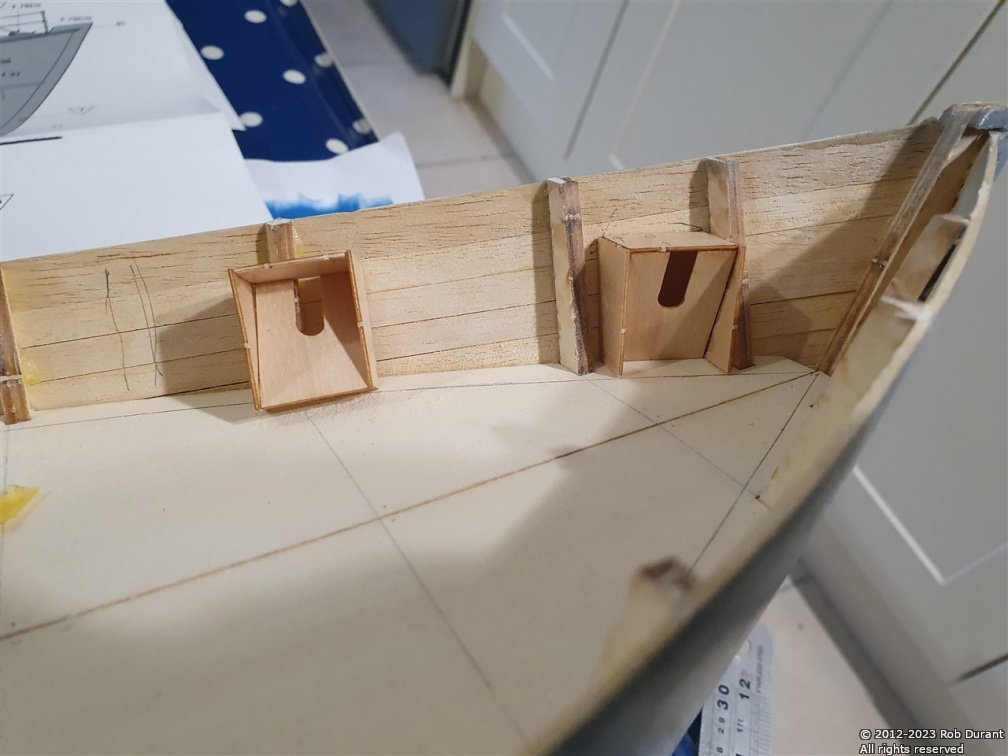
My day off today has given me a good shot at getting some things done on Nordkap. I've opened up the scuttles (?) and built and installed the recesses on either side of the bow for the anchors. Each hole was started with a drill, and then opened up carefully with a craft knife and then a file. Once glued in place, the anchor recesses had any gaps filled with a wood, superglued in place, and then sanded flush.
I've also installed the cap rails... These were temporarily pinned while they glued, as otherwise they don't sit flat on the tops of the bulwarks.
Built and installed (temporarily) the rudder... before I glued the two wooden parts together, I bevelled the front edges to create a v-shape that the rudder post could sit in. Once glued together, the rudder was sanded to make it narrower at the rear - I always think rudders look slightly strange when they're chunky at the back... it just looks wrong to me. Then it was time to go into town a get a pasty for lunch!
I also made some progress with the bow weather deck and stern superstructure (this is easier once the cap rails are on, as the height of the rear area of the superstructure is determined by the cap rail (to ensure there's no gap).


Finally, it was all cleaned up, and another coat of the Eze-kote resin was painted on to seal all of the exposed wood on the outside of the hull (and in the scuppers). I need to do some testing to see whether I can put Eze-kote over the deck planking, or whether I'm better off with just matt varnish...
Thanks for following along.
Rob
- yvesvidal, DB789, Theodosius and 4 others
-
 7
7
-
So... here's the progress.
I did a lot of reading up, and the whole question of whether to use fibreglass along with the resin, or whether the resin itself is enough seems to be very much a Marmite one... I've opted to try without the glass. Many have said they've had success this way, and it certainly seems to have done the job from all I can tell. Time will prove me right or wrong
") I am grateful to you, @Ian_Grant for your advice, and you will absolutely have the rightn to say "I told you so" if this heads south as a result of my decision 🤣
I am grateful to you, @Ian_Grant for your advice, and you will absolutely have the rightn to say "I told you so" if this heads south as a result of my decision 🤣
Lots of prep, four coats of Eze-kote, with very light sanding in between, and the hull has taken on a lovely sheen - re-installing the prop and rudder shaft with some grease, and it was time for a test in the bath. It's years since I've done this, and I thought I'd ask my son to give me a hand... Here are the results. There was a brief false alarm as we mistook some bobbles of carpenter's glue for water coming in, but thankfully it was all a false alarm. She's dry as a bone inside.
Here are some photos of her.

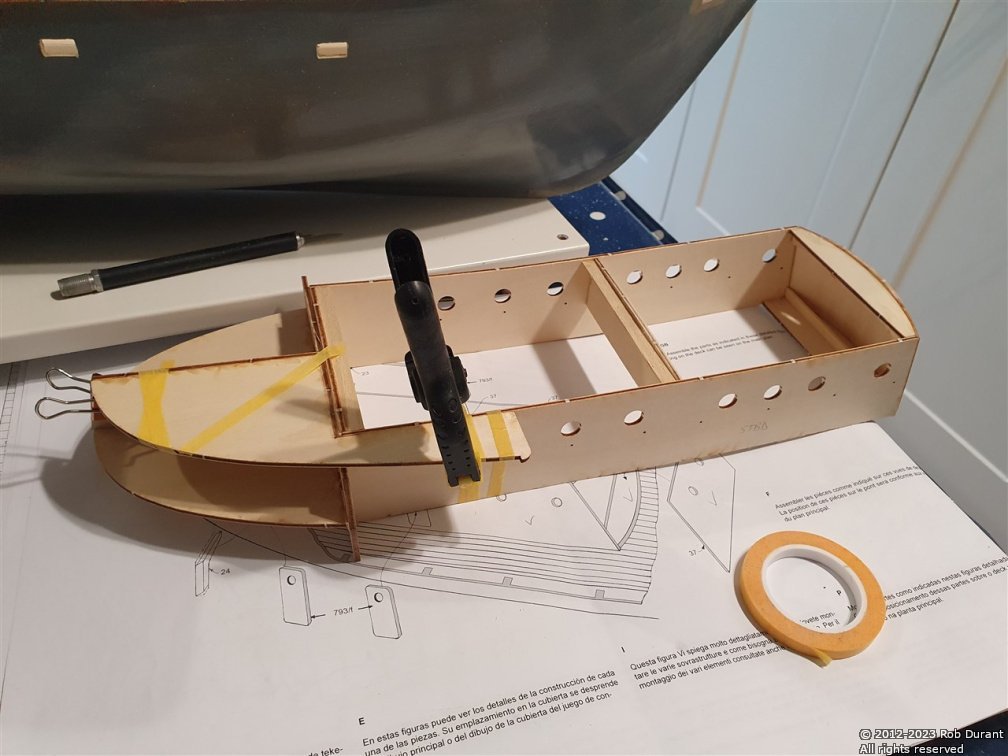
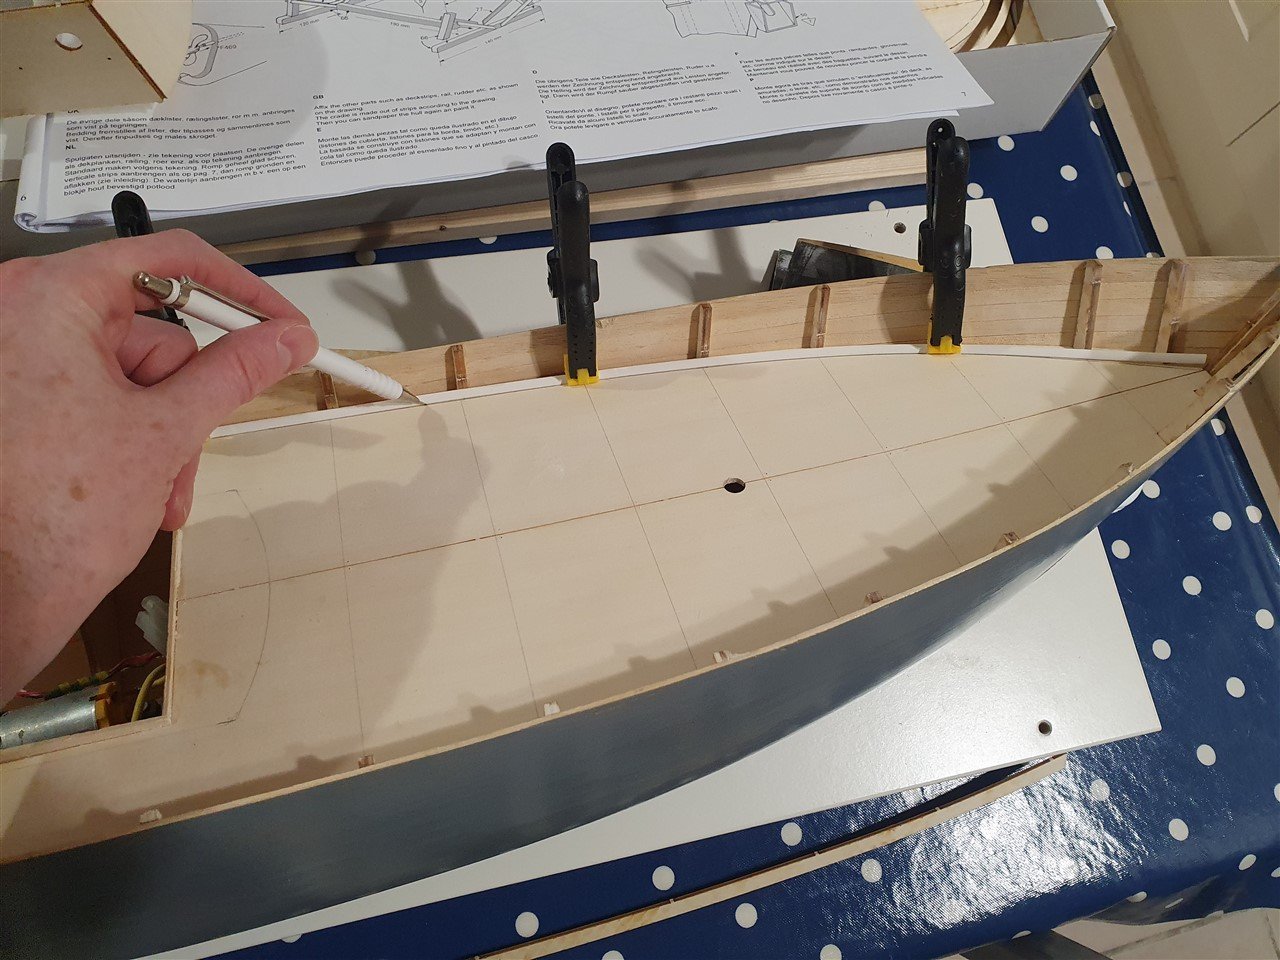
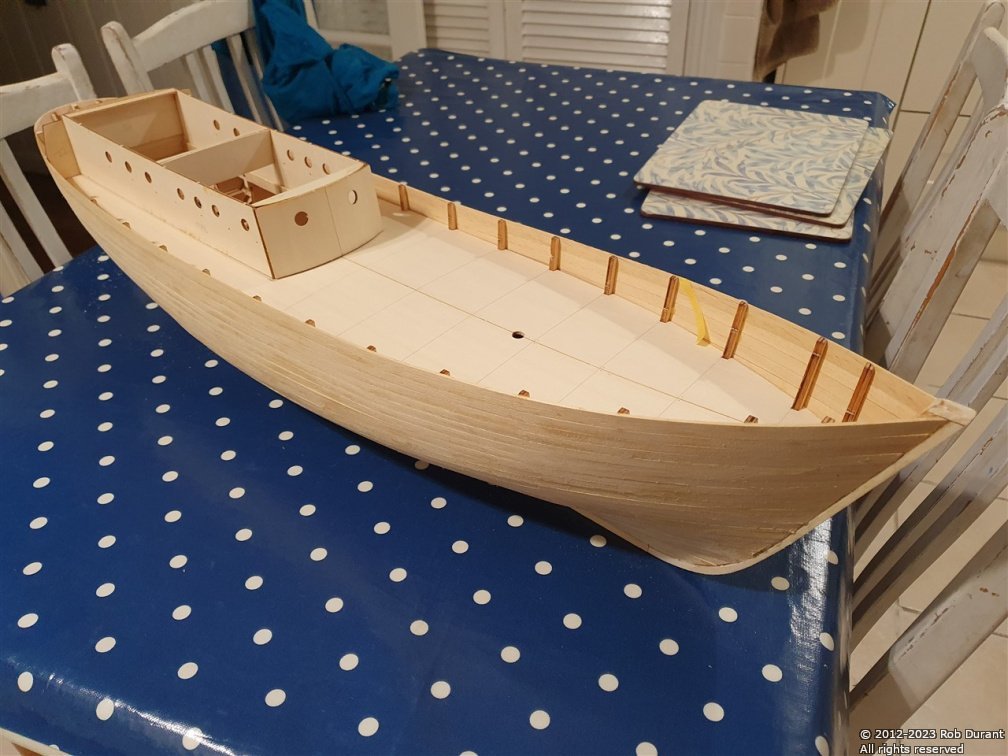
In addition, I've begun marking out the deck for planking. The strips of planking provided are pretty rough, but thankfully I have a shedload of tanganyika left over from my HMS Diana, Caldercraft kit, that I'll substitute. Before I do that, I need to cut out the bulkwark openings (the anchor port, and the scuppers), and then paint the edges of the deck that will remain unplanked. Onwards and upwards!
As always, thanks for looking in, and for the likes, advice and encouragement.
Rob
- Ian_Grant, Ras Ambrioso, DB789 and 4 others
-
7
-
2 hours ago, scrubbyj427 said:
Off to a great start. Have you found the framing plan for the Portland class yet? It’s available at the NMM.
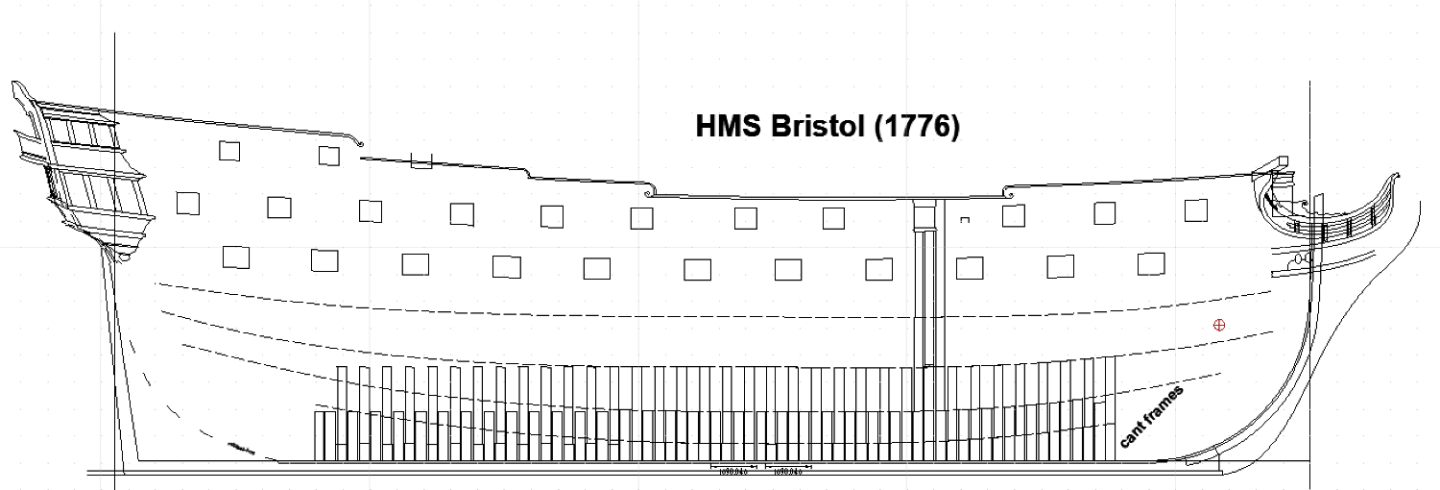
Yes, I also own a copy. I've been working from that for the framing plan. It pretty much lays neatly over the Bristol side profile plan, although the caprail height towards the stern is considerably different (raised higher in Bristol), and the transom posts are at a slightly different height, even though the quartergalleries are at the same height... Considering the complexity of these drawings, they really are magnificent achievements in themselves.
Thank you for the prompt, though. I also received this in the post today, which I'm expecting to be very helpful... It was £4.50 on AbeBooks, and only £2.50 postage, so an absolute no-brainer!

Much happy reading is in store!
Rob
- bruce d, AnobiumPunctatum, allanyed and 5 others
-
8
-
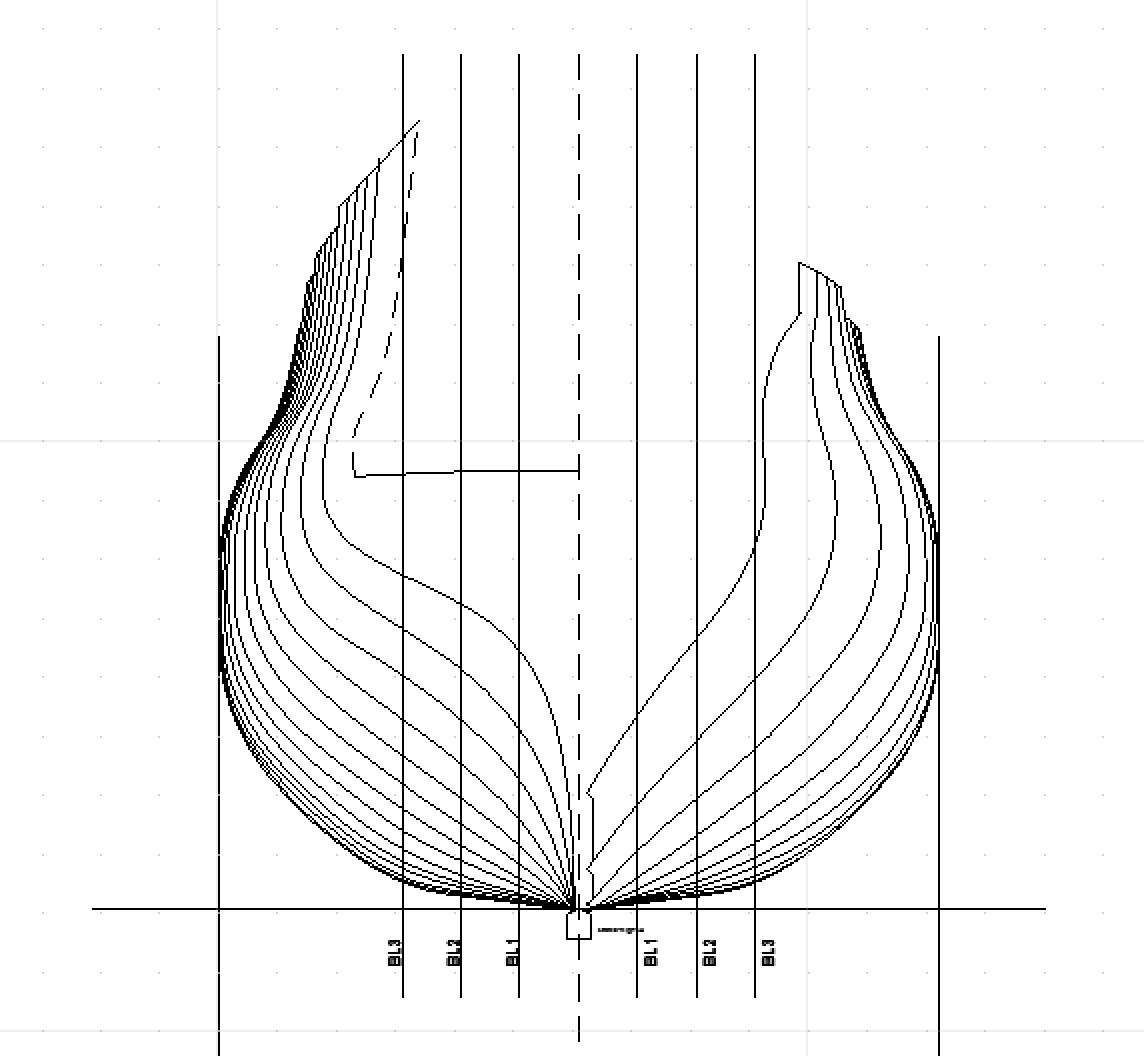
Time to revisit this thread... I haven't stalled, but I have been spending lots of time thinking, reading and revisiting how I've approached this. I've gone right back to scratch with all I've learned, and redone the drawings from the plans, and I'm much more happy with the results (shown below)... they're all works in progress, but reconciling the profile, half-breadth and body plan, suggest that the fairing process is going well so far. Plotting the buttock lines went perfectly with no changes required, which was very satisfying indeed. I'm indebted to Wayne Kempson for his article on this site (Drafting Ship Plans in CAD) - it's been a massive help.
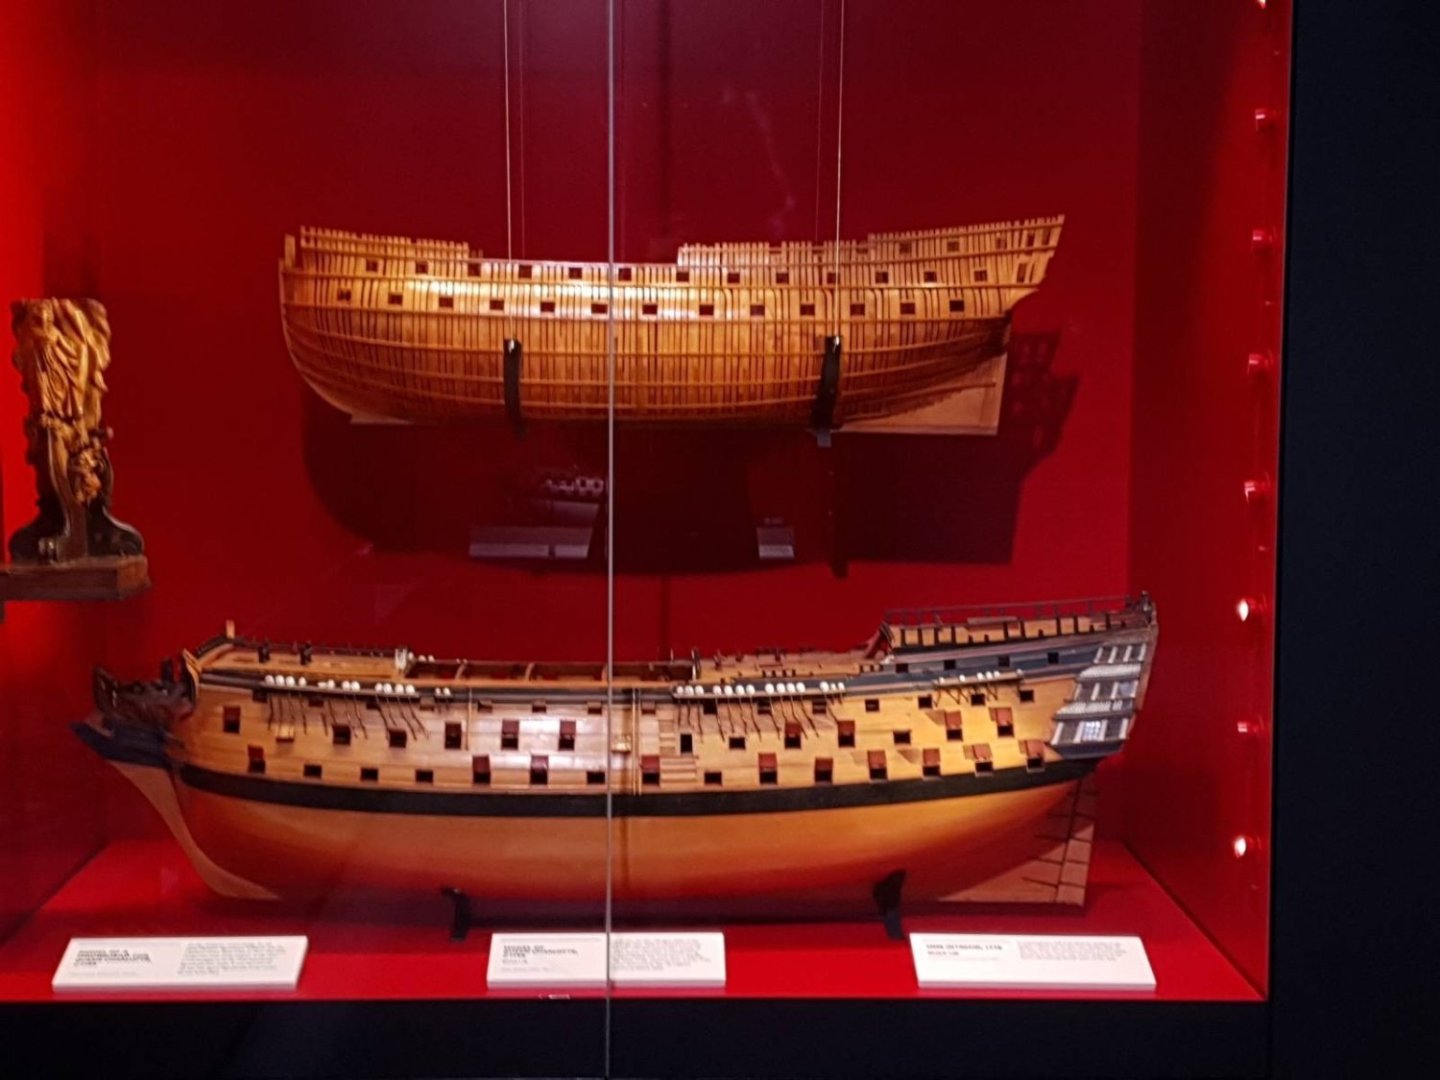
So - initial lines... There are decks, the two wales, buttock lines, and the rabbet line at the stern... As the plan stands, I'm now hoping to build this as a fully framed model without any planking, except possible the wales, much like a model (I think of Centurion?) I saw in Chatham a few weeks ago... (Apologies for the quality of the photo)

Beginnings of a frame plan... (this will need redoing, but it gives some idea of the flow of the frames)
And the body plan...
My next step is to confirm the heights of the caprails...
- bruce d, scrubbyj427, AJohnson and 4 others
-
7
-
-
That's some cool looking stuff you've got there, Ian... and that book looks great, too. I've been really enjoying watching your progress with your Roman warship. A magnum opus, to be sure!
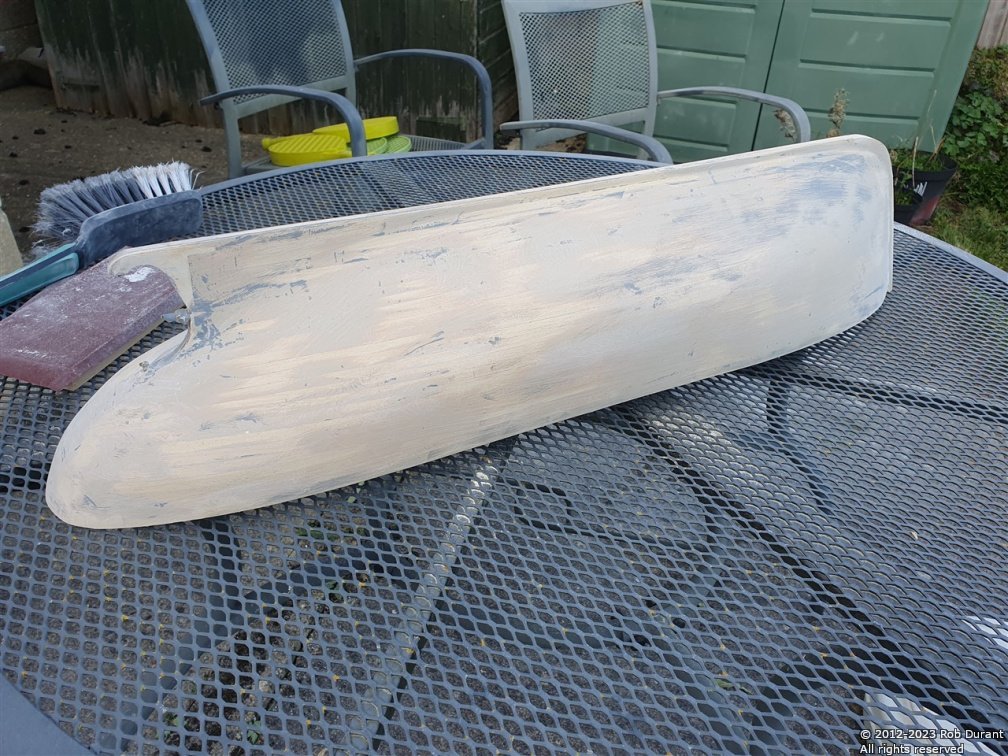
Okay - so here's the plan for waterproofing... Having sanded the hull some more the other day, I noticed that when I hold the hull up to the sun, I can see not only thin areas where the planking had gaps, but more than that, I can see pinholes where the planks and the filler haven't completely bonded... Suffice it to say, if I were to try and float this boat right now, the water would be getting in right away... So... I've had a bit of a look around, and this is the plan.
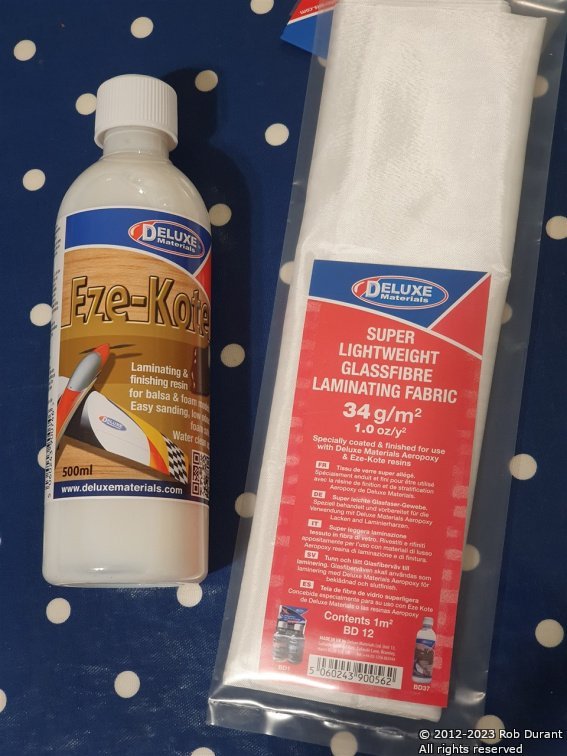
It's called Eze-Kote, and it's designed specifically as a finishing resin, but it's water based, so clean up is easy, and it's low odour - it's a much nicer chemical to be dealing with. In addition, I've bought the lightweight glass fibre they recommend to go with it. I wanted something very light weight, so that it forms round the hull shape nice and easily, and is relatively smooth out of the box.
Last time I used fibreglass resin, I used automotive stuff, and both the results (I used fibreglass mat, not knowing that was a disaster in the making), and the resulting headache and rough breathing for a few hours after were enough to tell me I hadn't taken enough / appropriate precautions, so I'm hoping this experience will be far less unpleasant.
I'll let you know how I get on, but there's a little more prep to be done first round the prop shaft and rudder post. I'm working on the assumption that good prep is always time well spent.
Thanks for looking in, and for the advice and encouragement.
Rob
-
Hi everyone,
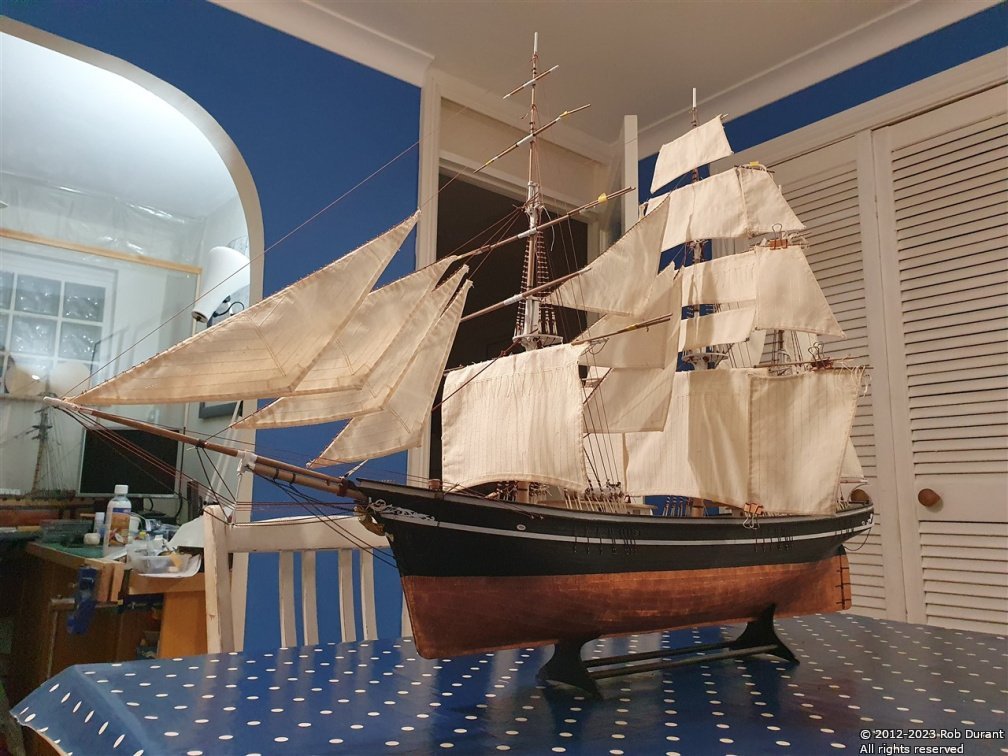
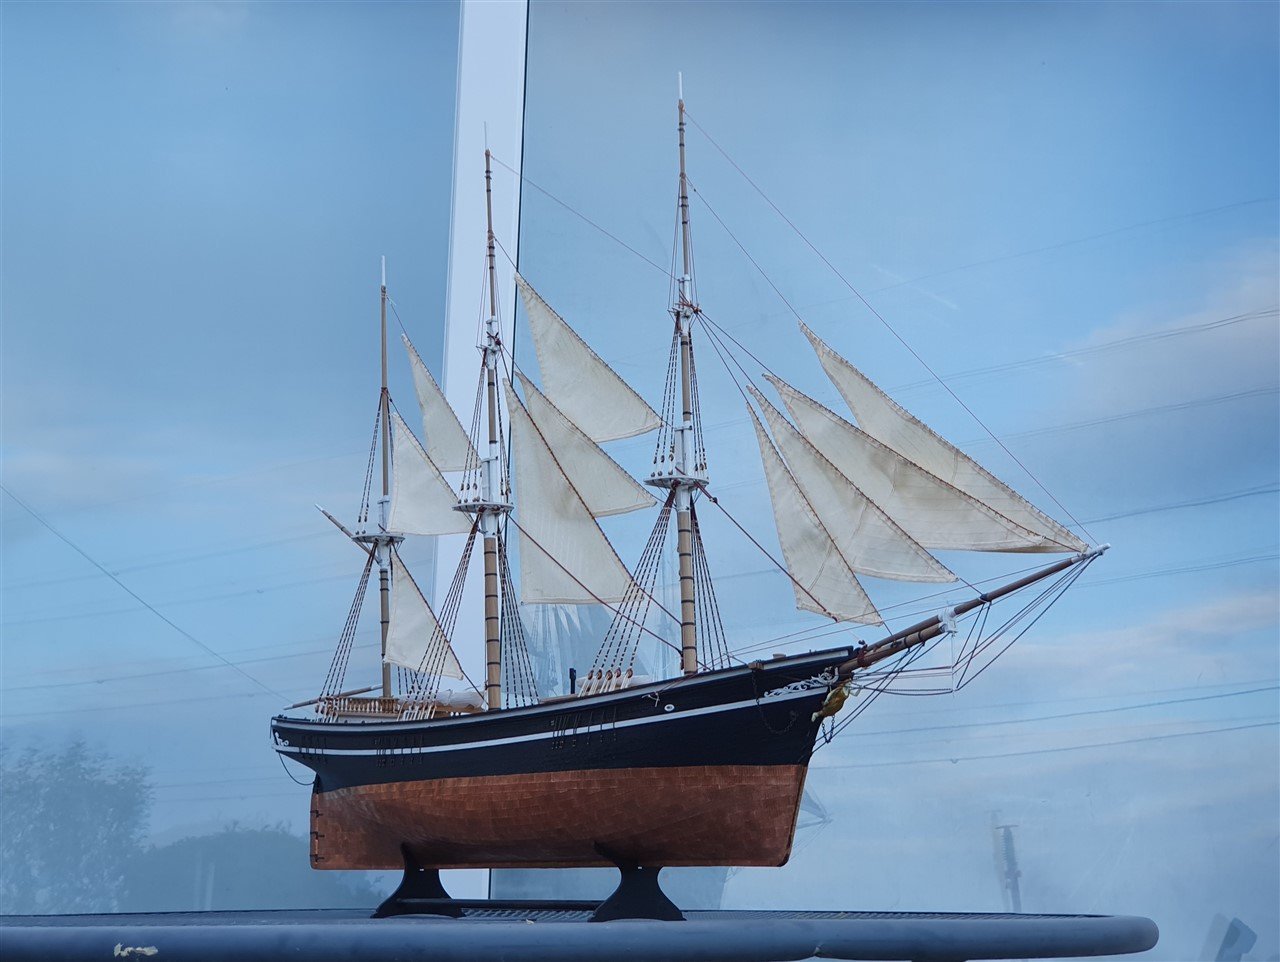
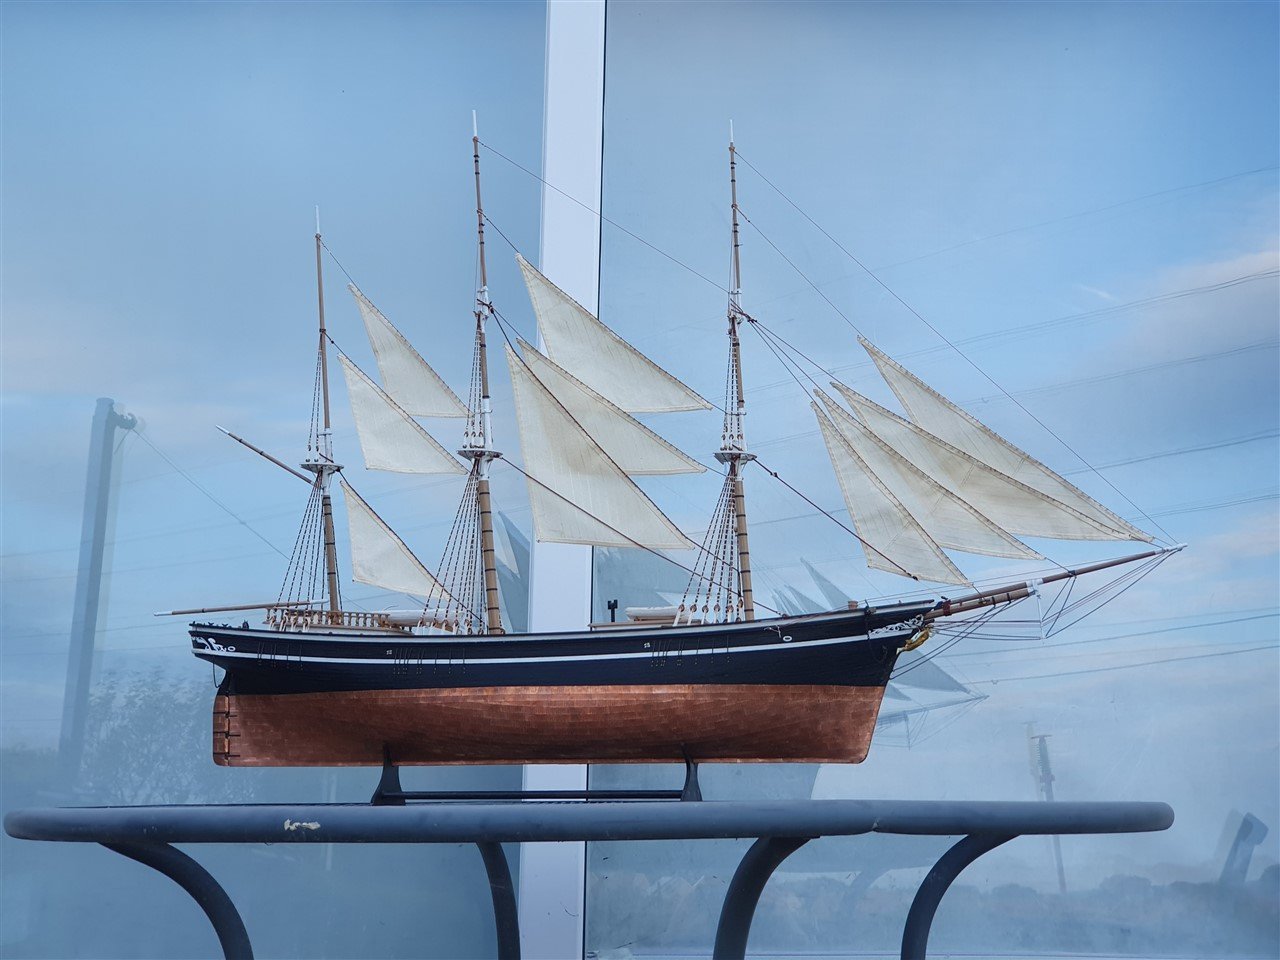
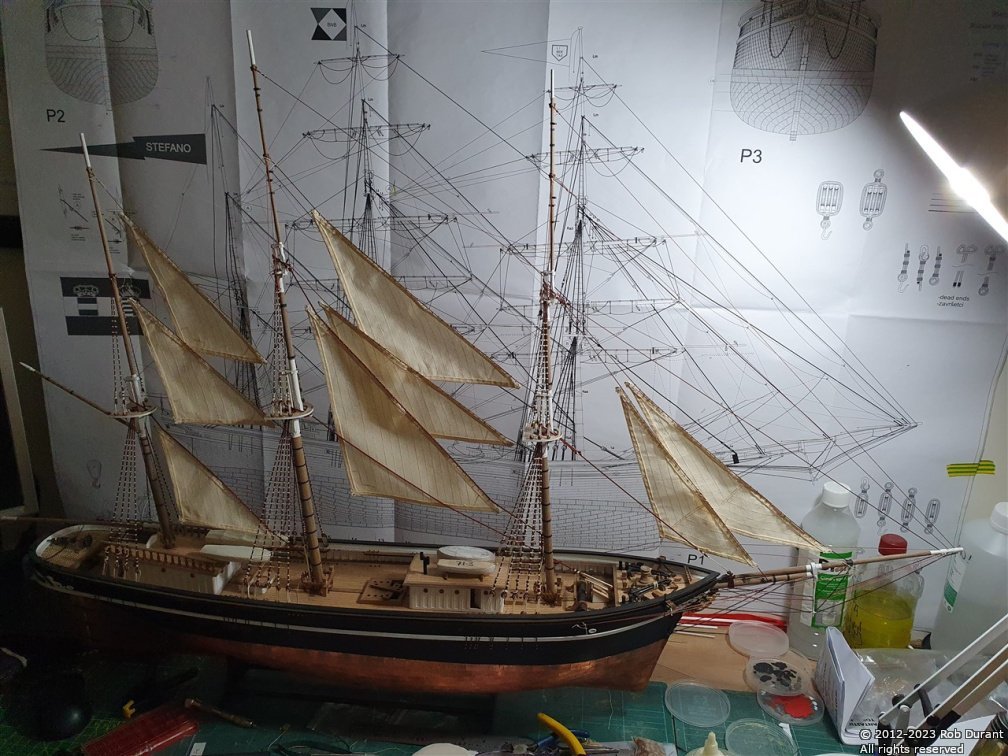
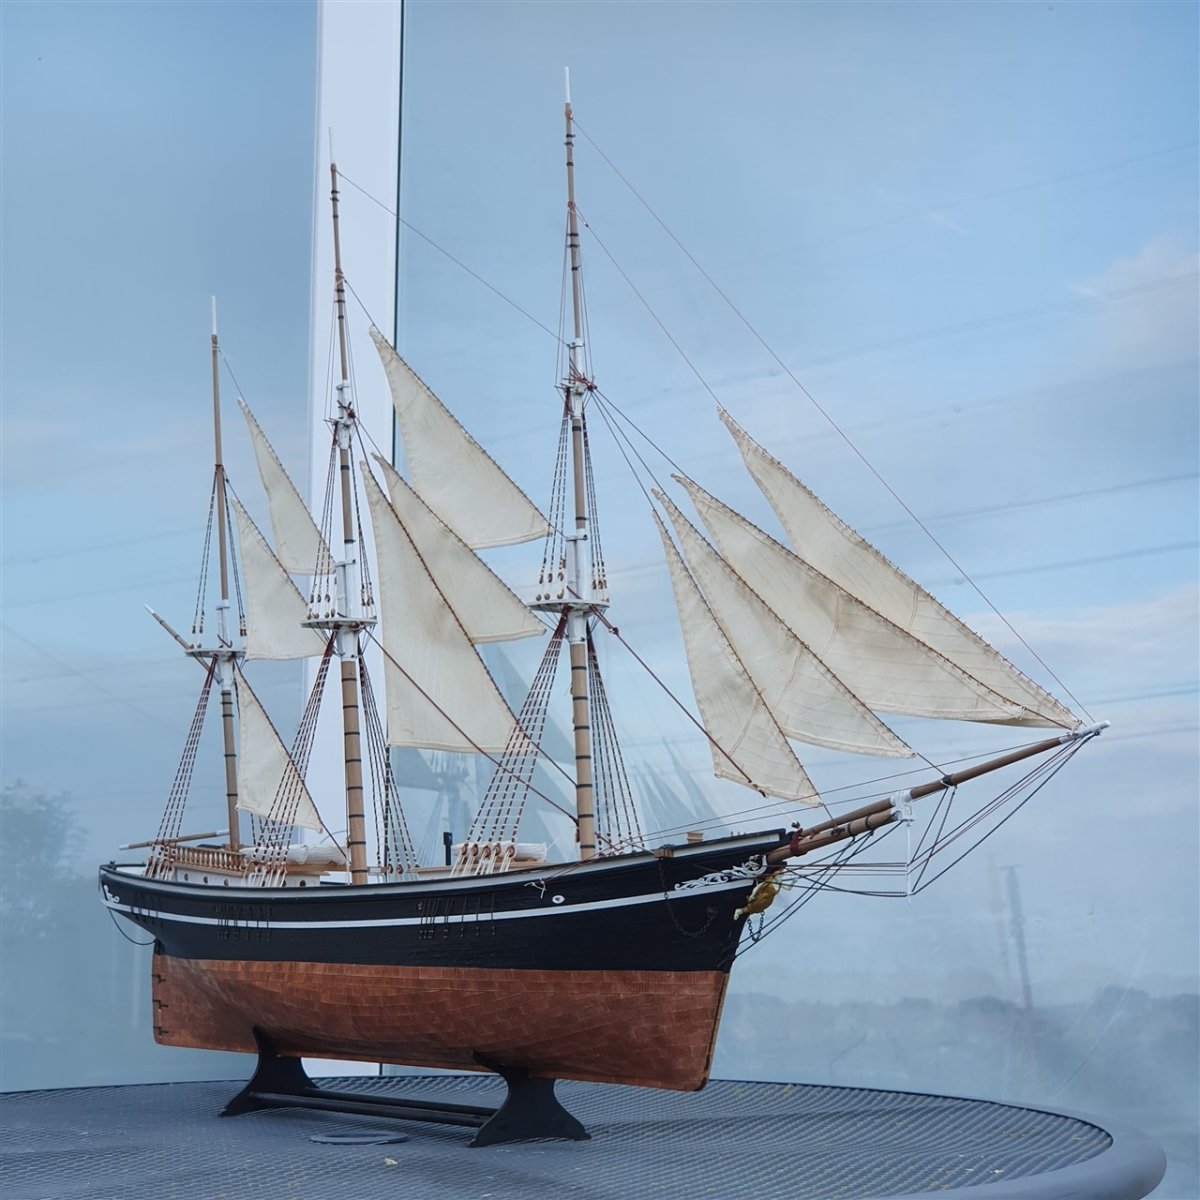
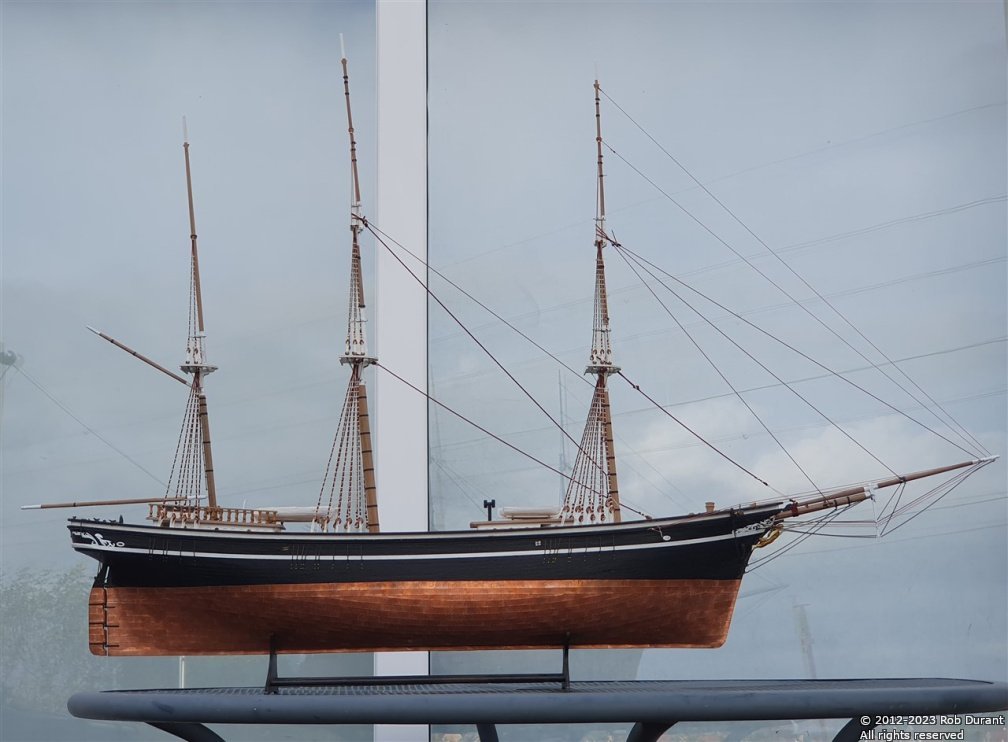
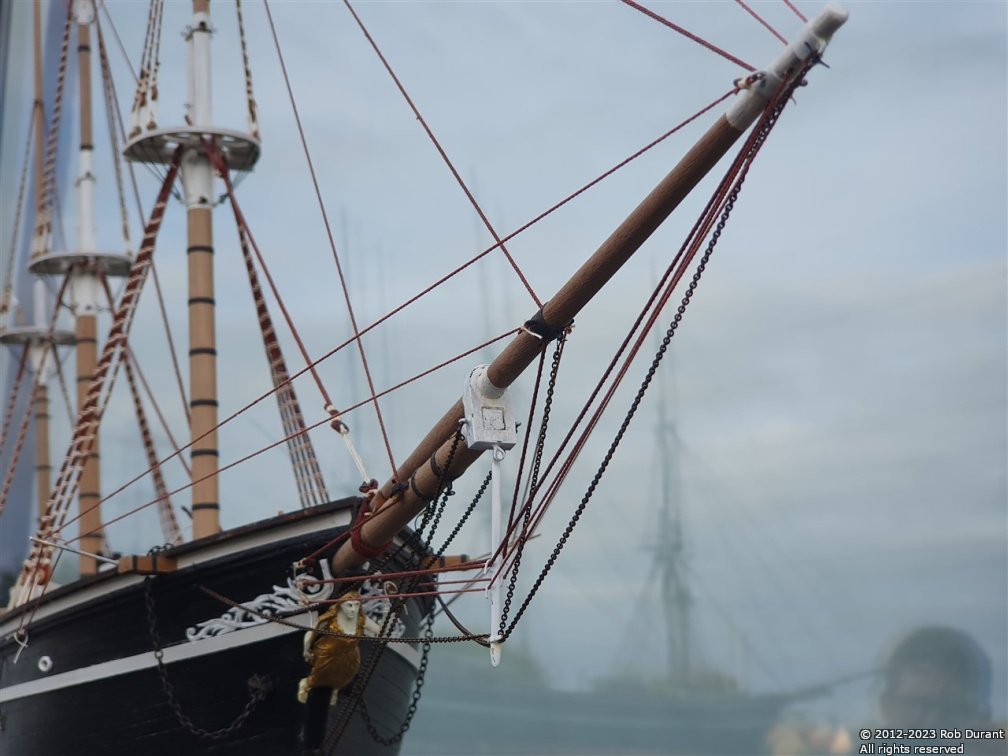
Three weeks later, and I've had another good day to work on Stefano. I finally made and died some more .5mm rope for the standing rigging, which allowed me to complete the backstays. I've also got some more work done on the yards, adding eyelets, blocks, and bending the forecourse to the main yard on the foremast. Again, this has caused the model to take up significantly more space on my desk, but it feels like we're on the home straight now as we move towards running rigging. I counted, and I think I have 8 sails left to bend to yards / stunsail yards. There's a lot of tidying up to do with rope ends fixed with watered down PVA (a big advantage of making your own rope with DMC cordonnet thread, as it's natural, not synthetic), and trimmed to make them neat.
Thank you so much to all of you who've hung in there through what has proved to be a lengthy build
Here are a few shots of how she stands right now.
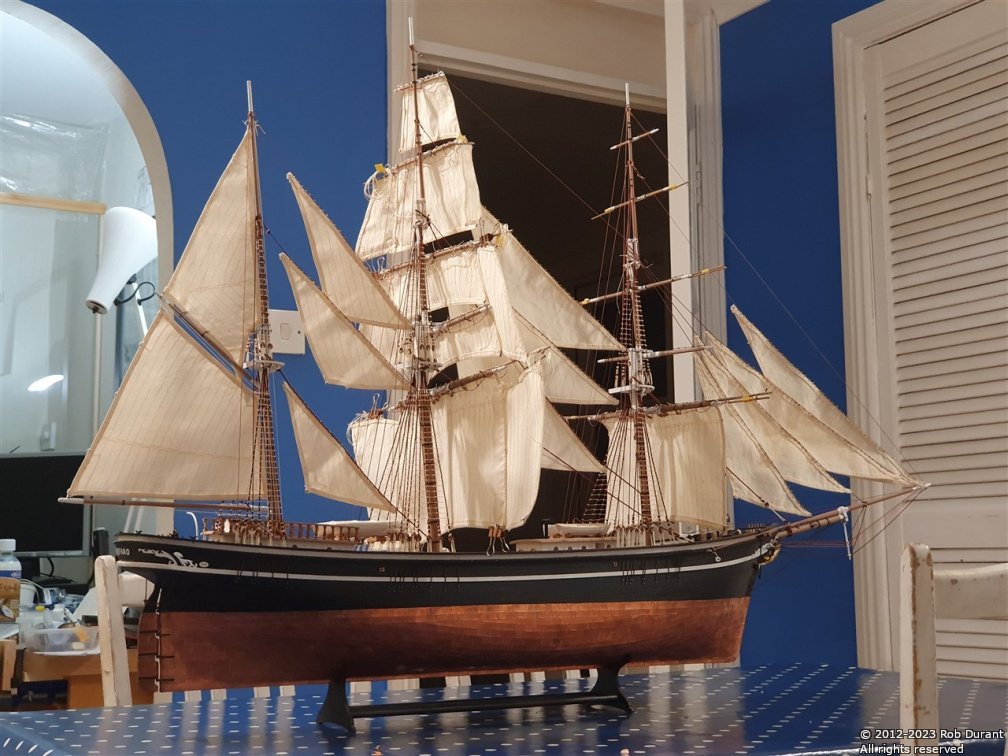

Happy building
Rob
-
-
-
20 hours ago, Ian_Grant said:
Yes, modern ESC's are vastly superior to the old big clunky rheostatic speed controllers used in the 70's, which needed a servo to move their control arm and wasted a lot of battery power. And remember cleaning their contacts? 🙄
Aah yes.... I seem to remember they were called "Bob's boards", or something similar... and my Tamiya Grasshopper II had one in it... Back in the days when you had a race to use the RC before both transmitter and car ran out of charge. I seem to remember it had a ceramic heat sink to get rid of all the wasted power (not a sign of great sophistication!)
Something like this... ?
.thumb.jpg.bd9852c1e1806265697a25764d2d3829.jpg)
Times have certainly moved on
That brings back memories, for sure! Many a happy time was spent zipping it round the garden and collecting wet grass all over it until it crawled to a stop!
-
@rwiederrich - It truly is.
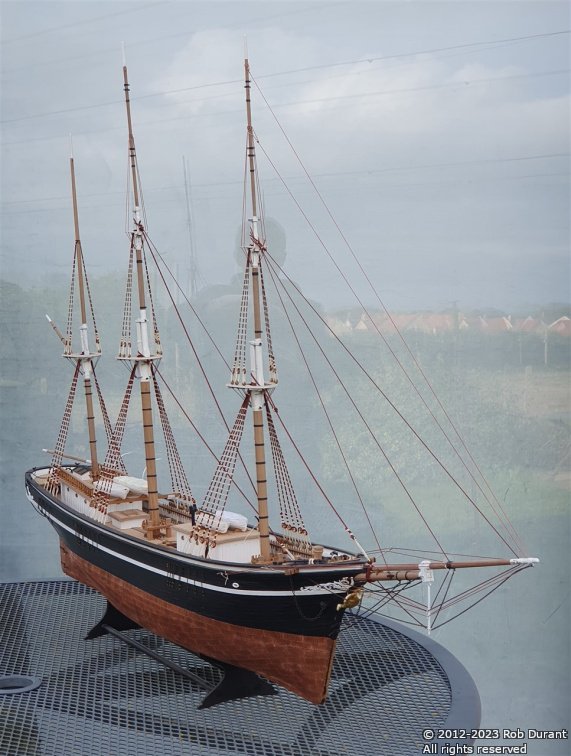
I had a good day yesterday working on Stefano - I've added the mast hoops to the Mizzen topmast - these 9 hoops were formed from brass wire and chemically blackened. Then they were put in place on the mast and thread tied to them ready to attach the sail. I added the running rigging holding this sail in place, and then went on to add the spanker sail.
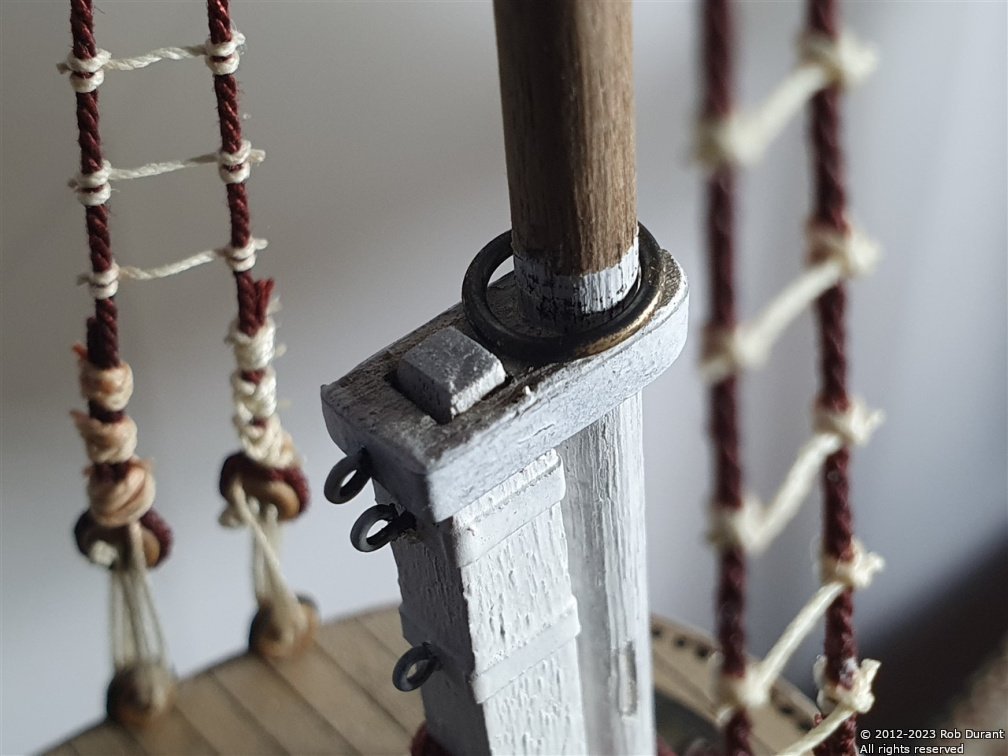
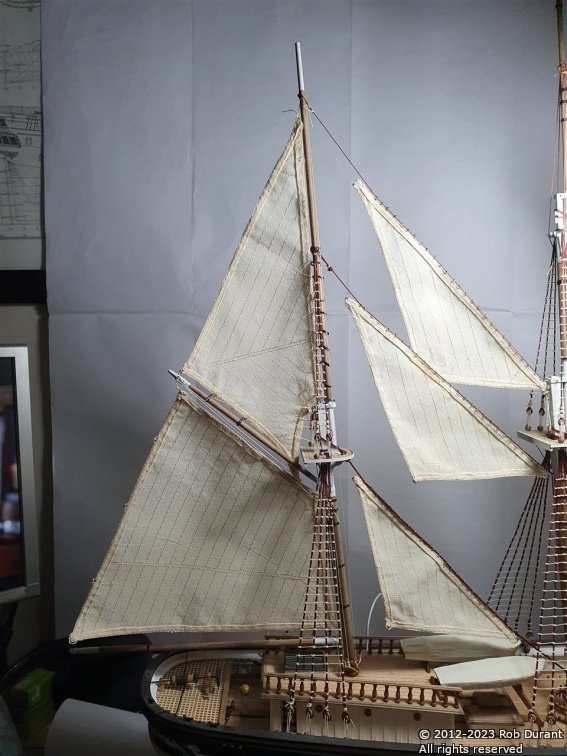
Now that these fore and aft sails are in place, I can add the backstays. So far I've added the starboard foretopmast backstay.
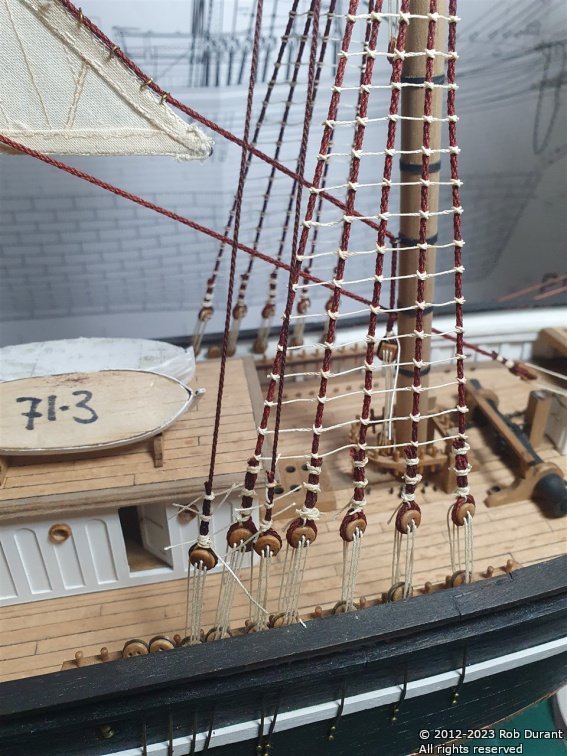
Thanks for looking in, and for your kind words and encouragement. Getting to this stage is really spurring me on to complete Stefano, but there's still a fair bit to do.
Rob
-
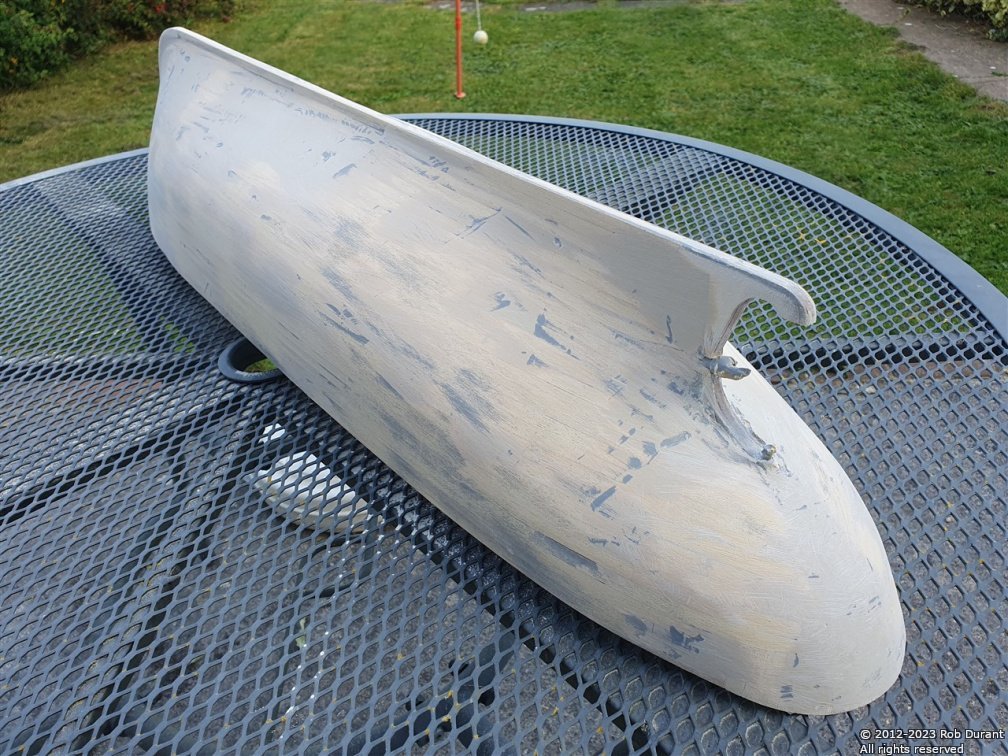
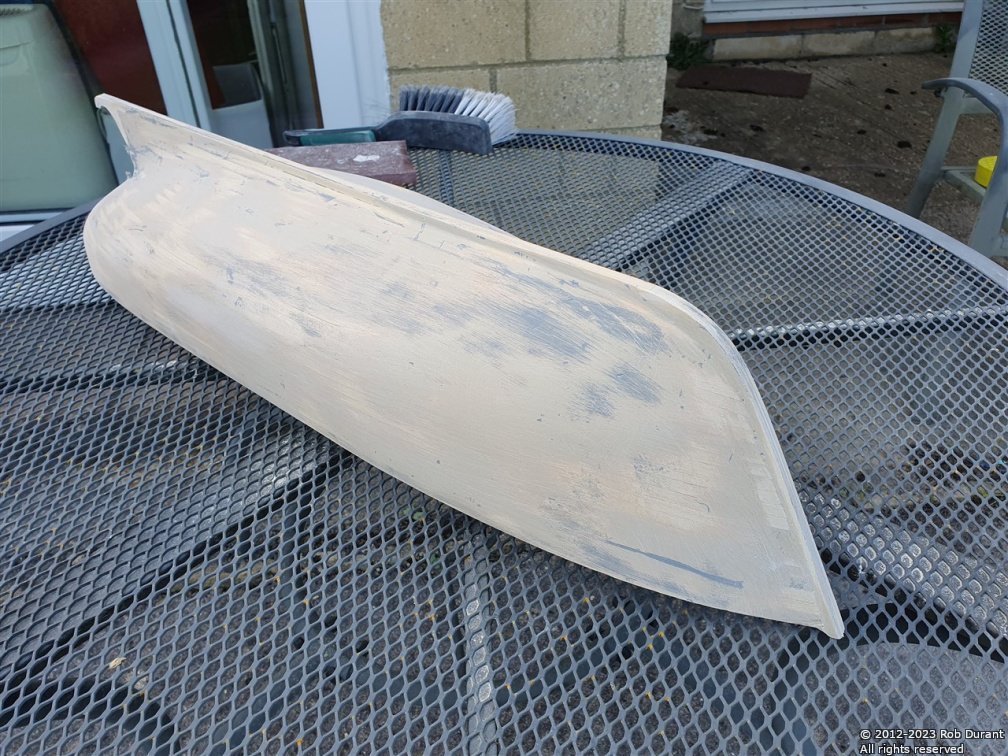
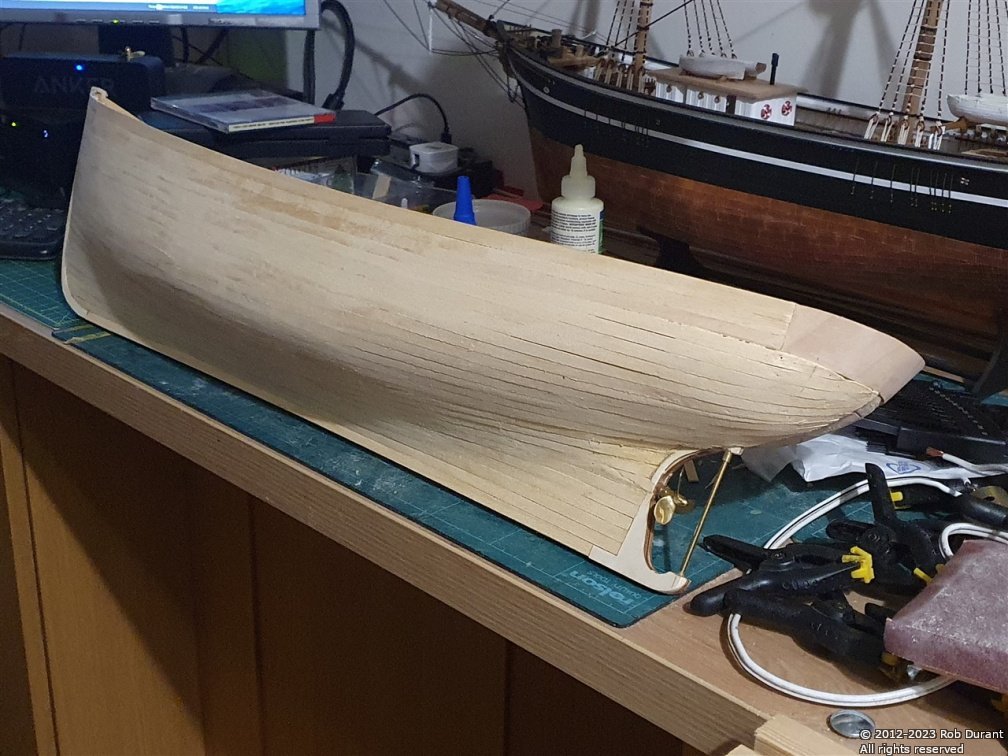
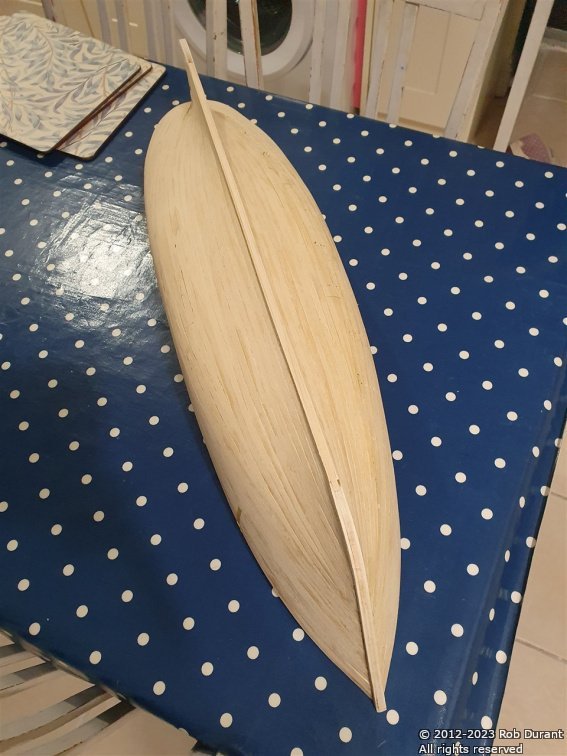
Thanks @Ian_Grant - yes, I need to source some light fibreglass cloth. I'm hoping to get a really smooth hull before I fibreglass it, so that the tidying up after is as limited as possible.
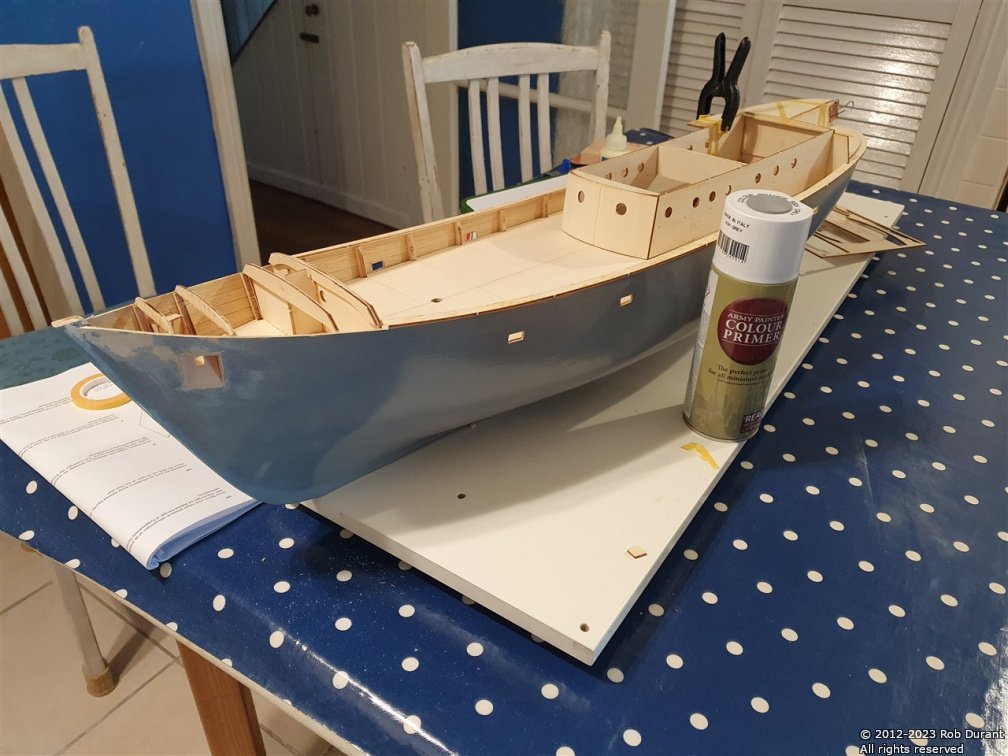
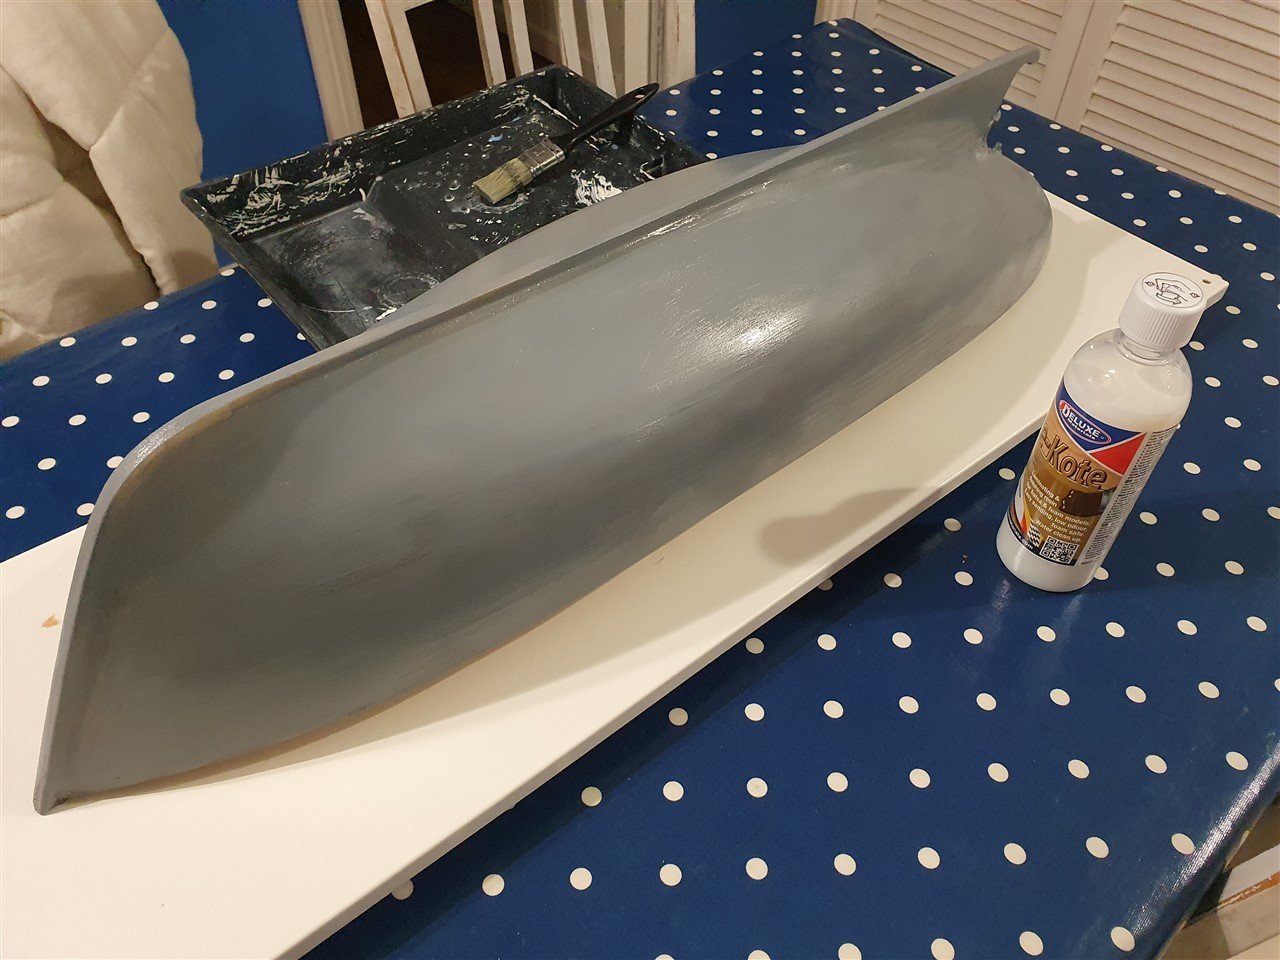
I've gone through a few more rounds of filling / sanding, and it's really starting to look quite neat - these photos are from half way through the process. In-between filler and sanding, I put on a coat of grey primer so I can see where the peaks and troughs are...
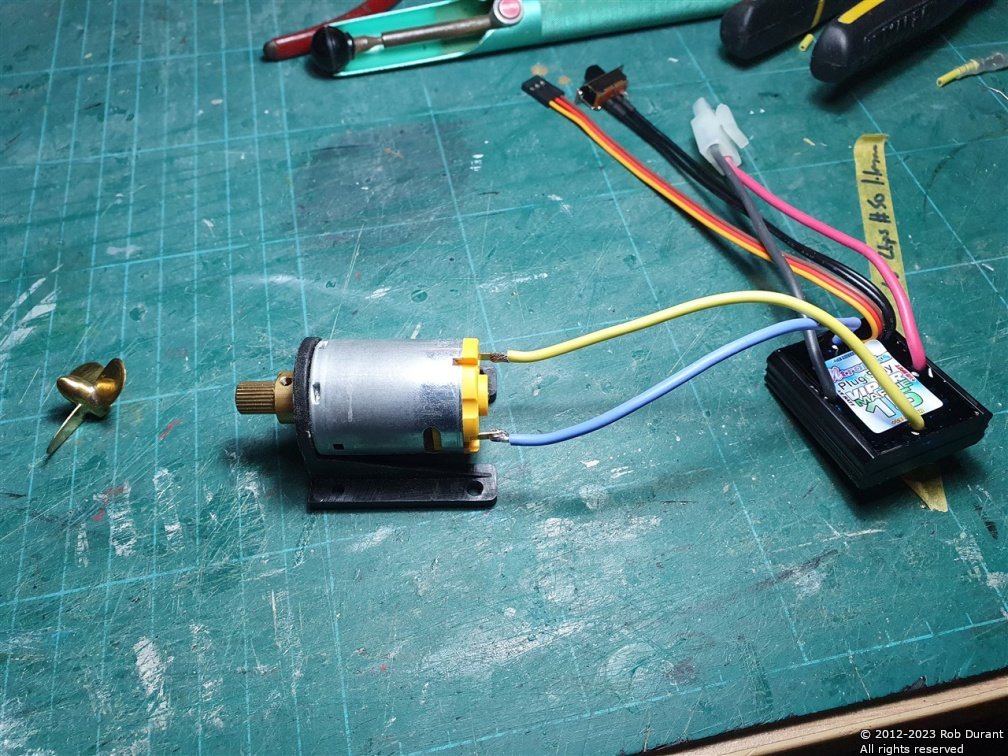
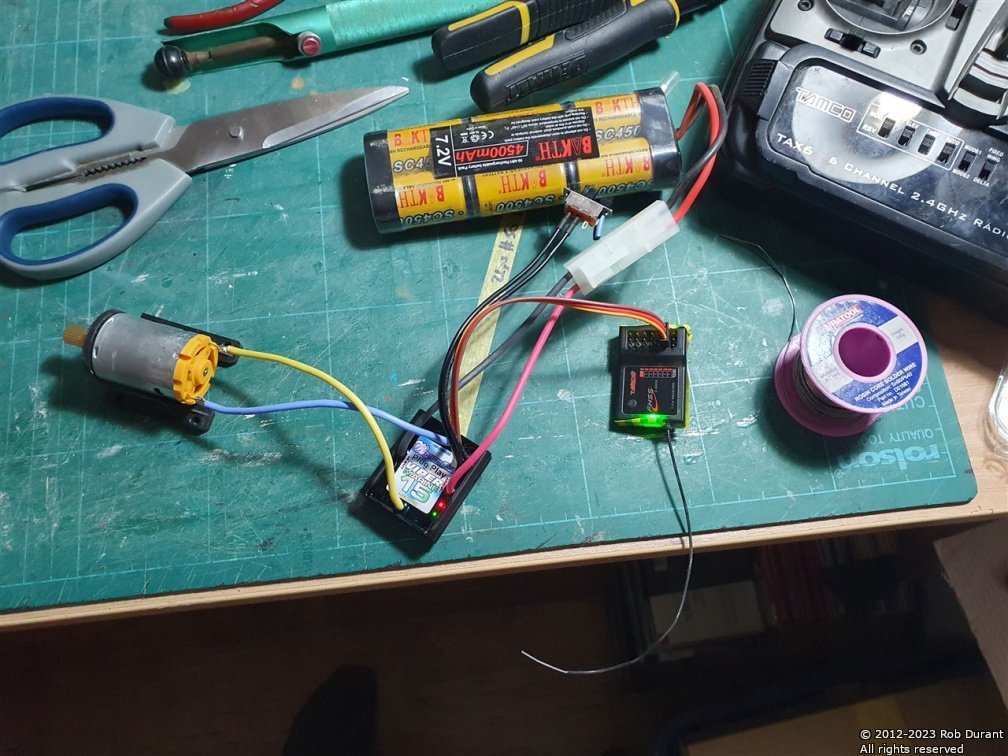
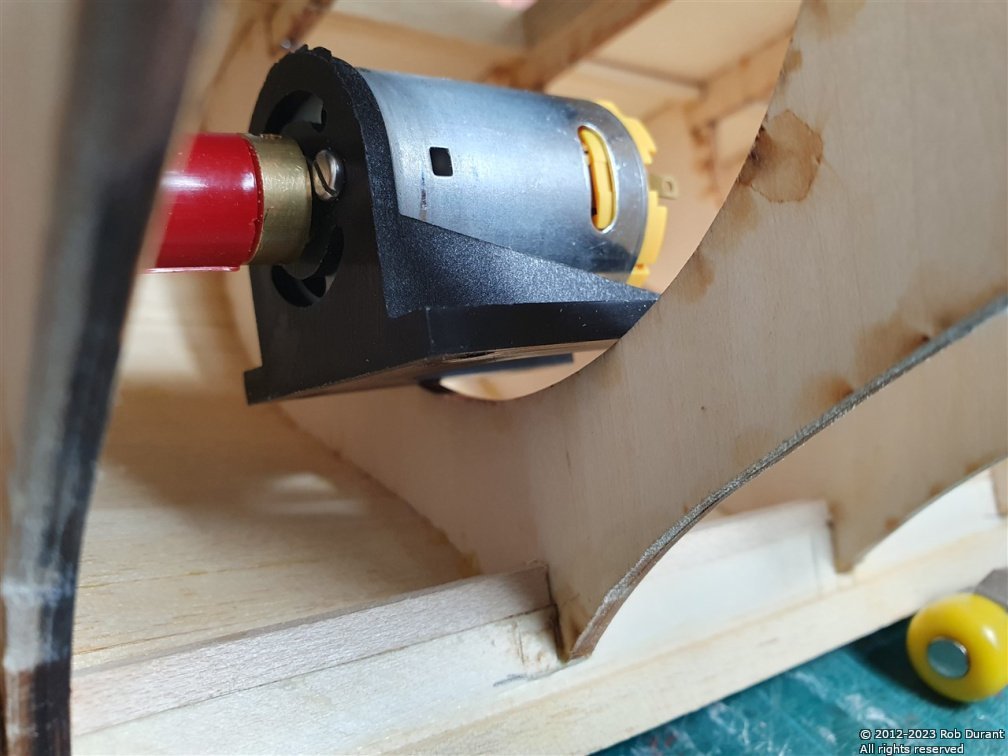
The new speed controller arrived, so I've set up all the electrics and tested them. They'll do the job nicely. Things have moved on since I last made a radio controlled model, and this clever speed controller works out which way is forward based on the first direction you push the throttle stick on the radio control! Clever stuff! I had to solder a new receiver plug onto to the servo for the rudder, but otherwise, all very simple and easy. Rudder is channel 1, and Throttle channel 2. I tested the motor with an AA cell before I soldered on the speed controller to check that the prop would rotate in the correct direction - (clockwise as you look from the stern). It ended up as shown below.
I've also been looking at what colour to put on the hull... I don't want a bright blue, but something a little more towards the teal end, and somewhat more subtle... To that end, I've been experimenting... I need to re-run these experiments on grey primer, as I suspect the mix will need to change, but the picture below gives some idea of the colour I'm looking for... It's a 1:2 / 1:3 ratio of Vallejo blue/green and Vallejo blue... I tried Andrea Blue but it was too light.
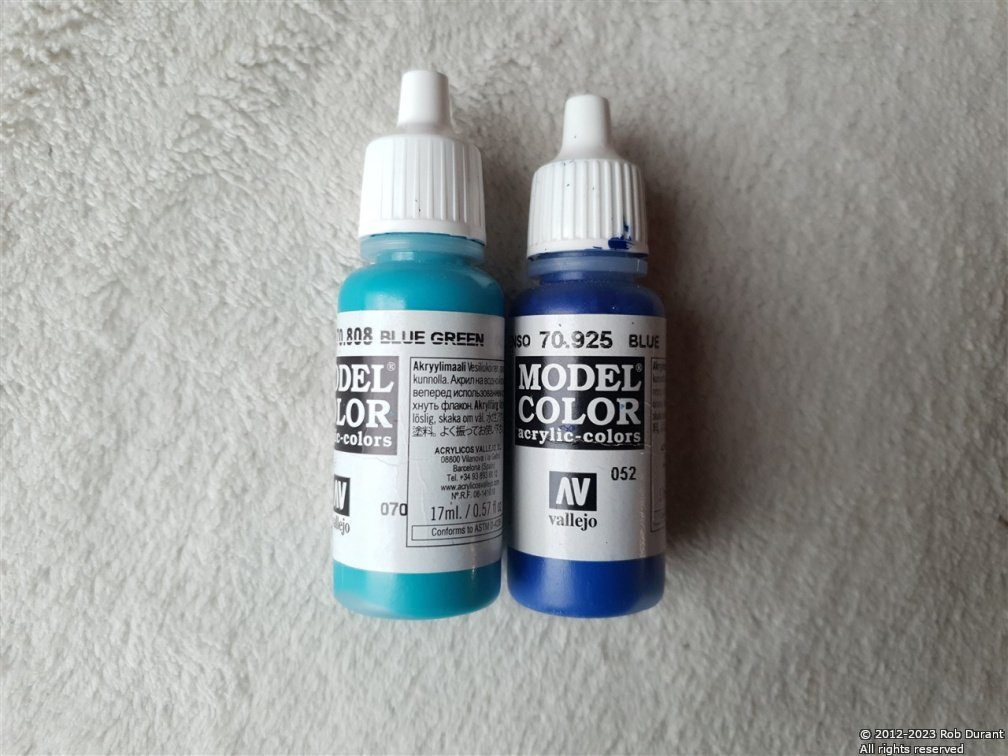
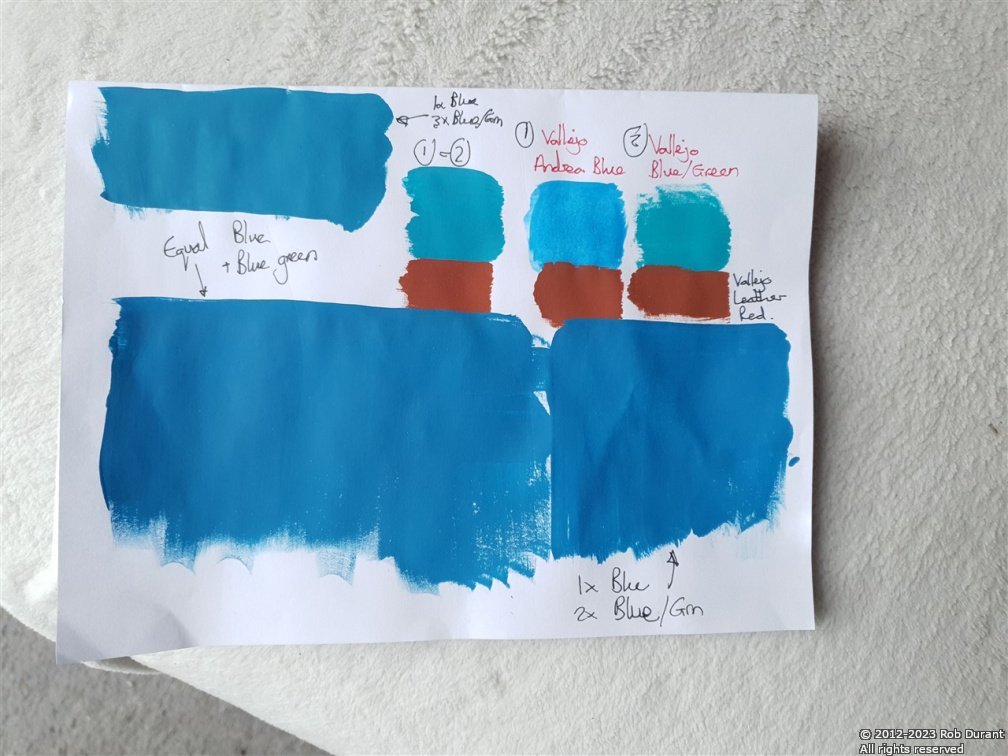
I'm looking for something like the top left tone... Admittedly that tone will look different on each screen that displays this, but I've been looking at this in daylight and under daylight bulbs, and I'm pretty happy with the tone in real life. Having a 1:2 / 1:3 ratio makes it very easy to replicate should I need to. I just get the appropriate number of bottles and mix them in their entirety.
Big thanks to everyone for looking in
Rob
- yvesvidal, hof00 and Ras Ambrioso
-
3
-
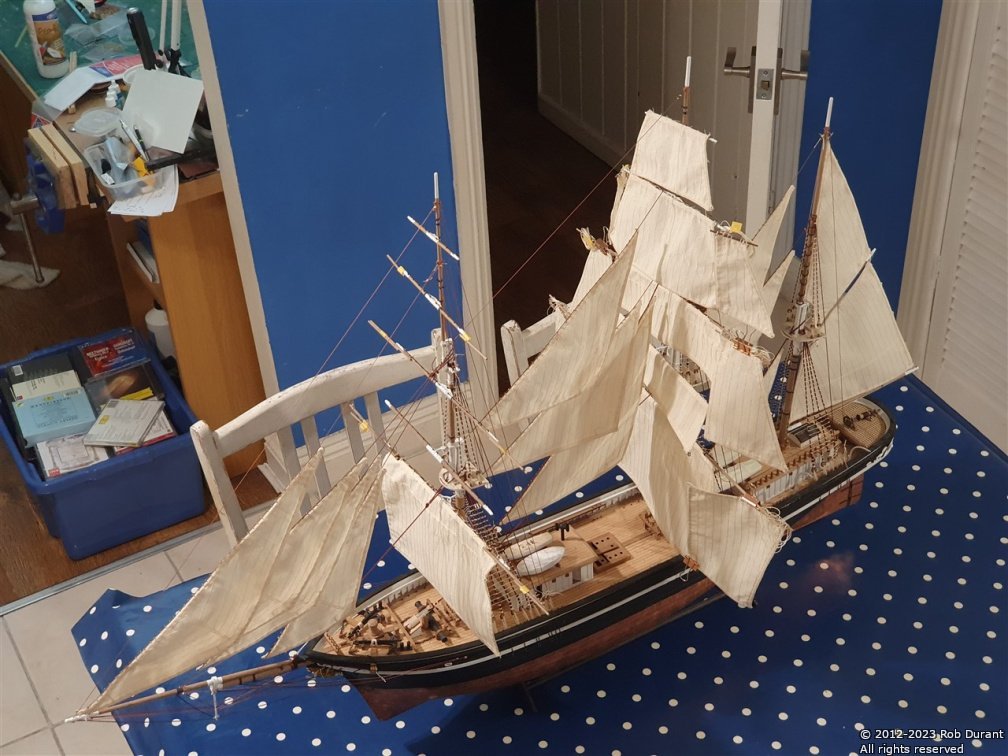
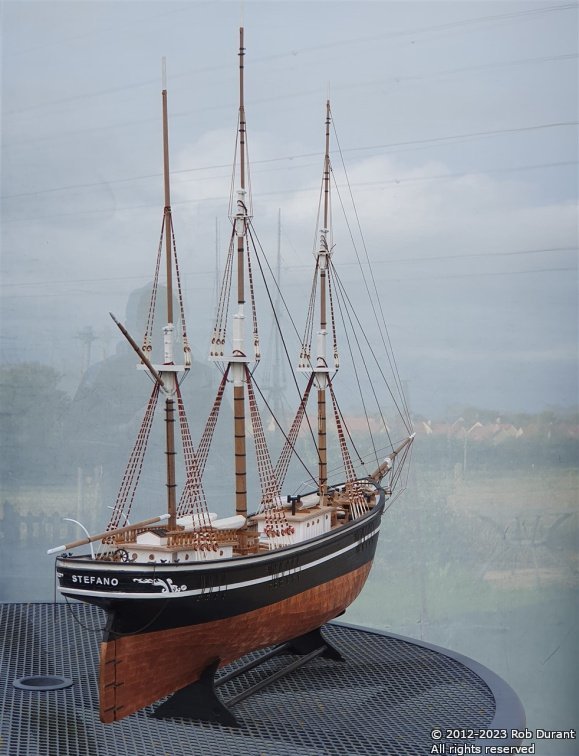
Some nicer photos of Stefano with her stay sails attached to the stays...

-
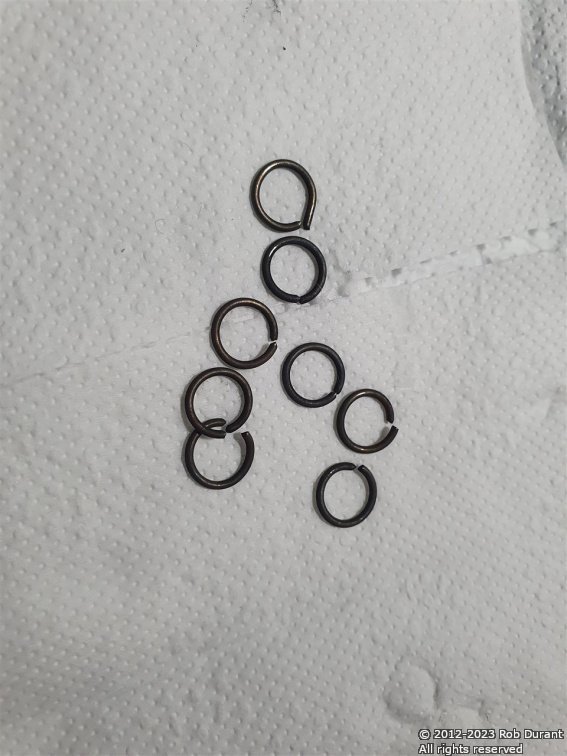
After a very enjoyable day off, more progress has been made. I've been attaching the stay sails... These are attached with tiny rings which are opened up one by one, and threaded between the bolt rope and the sail... The sail is then lifted into position and the rings closed one by one. I've found that a pair of tweezers is essential for holding and opening the rings, then a pair of pliers with grooves helps to grasp the ring to close it (a smooth pair of pliers won't stop the ring pinging round flat, and that led to considerable frustration at the beginning of the process. I've got quite good at it now.
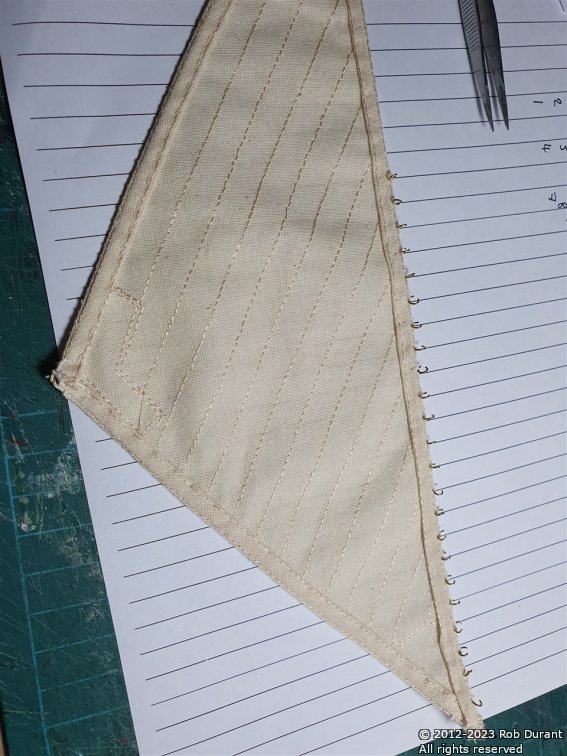
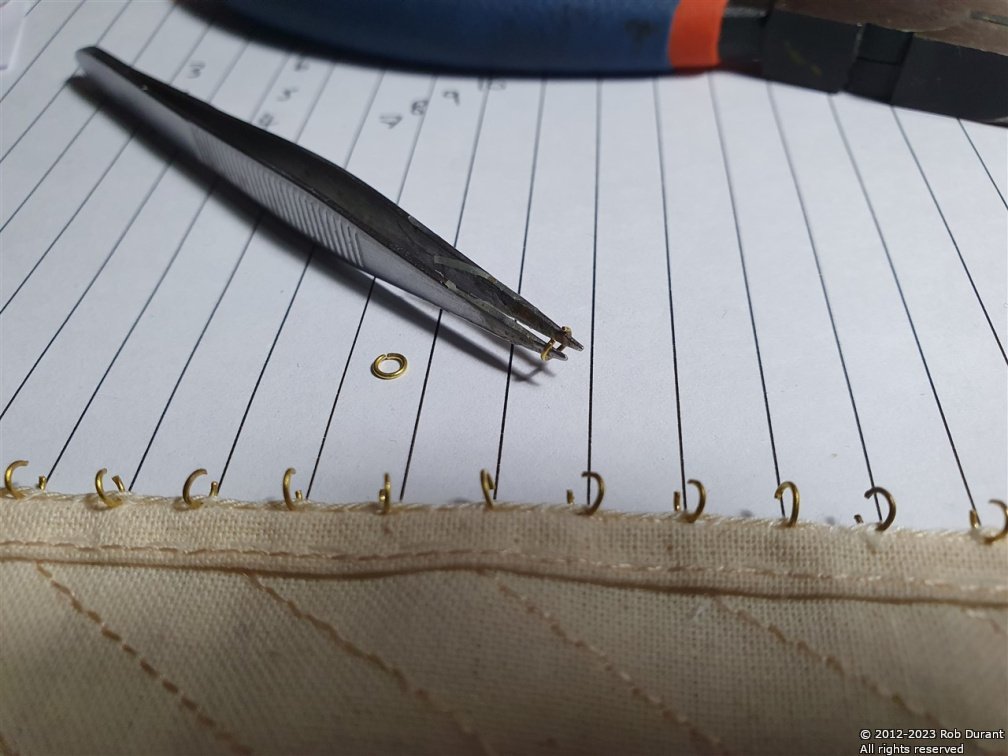
There are two staysails waiting to be attached. I wanted these in place before I added the backstays, so that I still had easy access to the centreline of the model, where all this takes place. I think that's proven to be the right approach.
Thanks for all your comments, and for showing an interest
Rob
- egkb, Thukydides, gsdpic and 2 others
-
5
-
-
1 hour ago, rwiederrich said:
I'm sure this has been asked.....are you building a case for her yourself?
Rob
Sadly, the cost of cases is prohibitive for such a model - last time I looked it would cost over £500, and the companies I talked to were unwilling to take on the work - it being of too large a scale for them to want to try delivering the case once it was made... Time will tell, but I do have a willing recipient, so I suspect Stefano will end up on display out of a case... I haven't got Ethalion into a final case - she's behind a perspex screen so that I can see her, at the end of my boat building desk. The enjoyment is absolutely in the building for me, so if someone comes along, admires her, and wants to put her in a case, I'd probably be tempted to pass her on
-
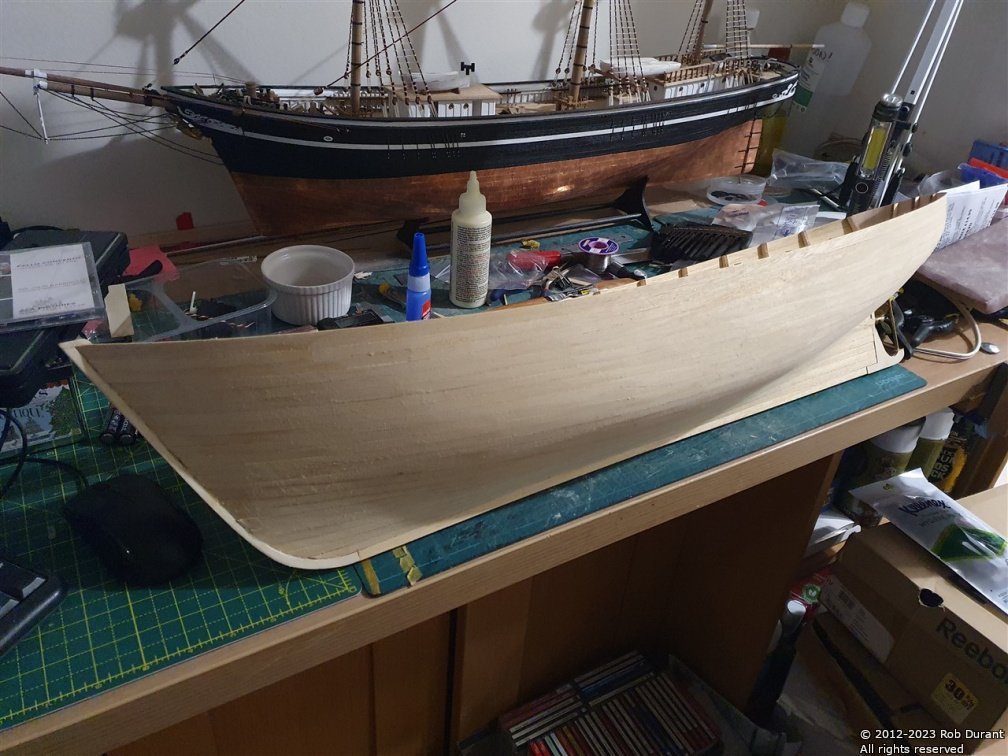
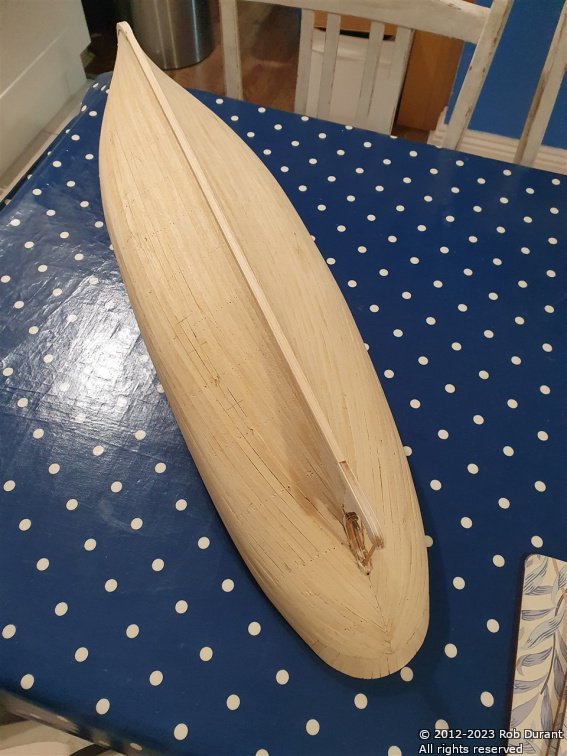
So... it seems like something of a crime to cover up planking, but I've used some car body finishing filler (polyester-resin) to begin making the hull watertight... and now begins the sanding... and more sanding... and then filling... and then sanding... and (you get the picture...)
First comes the filler...
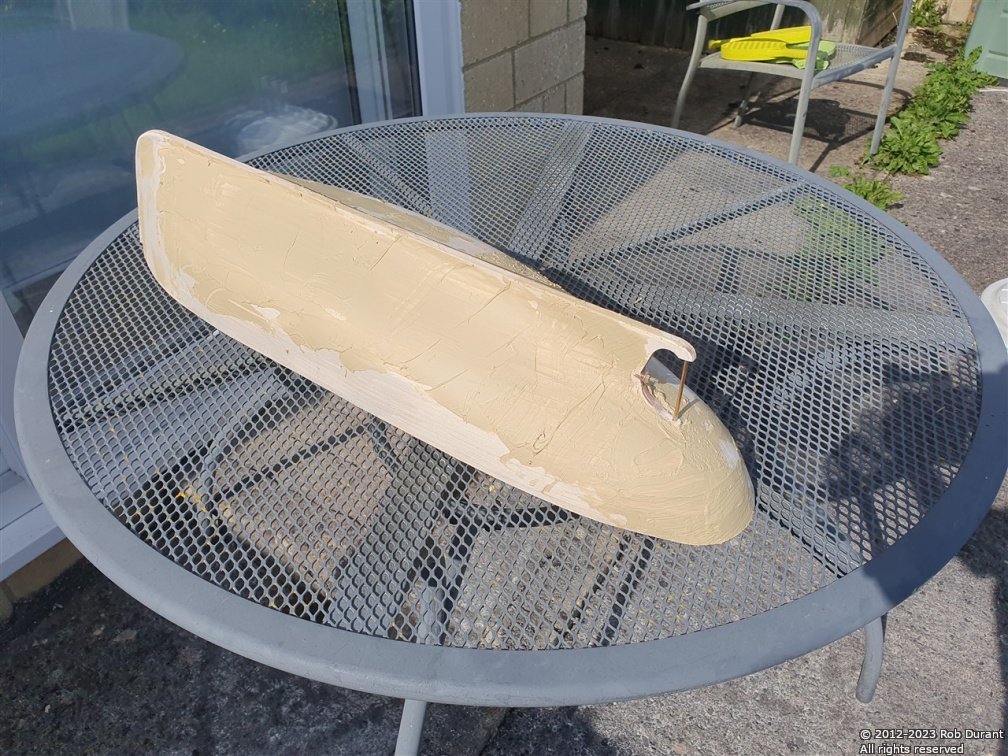
Then, after 20 minutes it's set enough to be sanded... and it's worth sanding it sooner rather than later, as it only gets harder... I'm using a very coarse paper glued to wood to ensure I don't sand peaks and troughs into the hull... This is most certainly a job to be done outside, with a mask on, and with the door inside shut... the amount of dust is considerably...
It's a start. And it suggests that I will, indeed, end up with a watertight hull.
Thanks for looking in and for the likes and encouragement
Rob
- hof00, BobG, Ras Ambrioso and 1 other
-
4
-
2 hours ago, dunnock said:
She is a lovely ship Rob and an beautifully built model
David
Thank you for your kind words, David.
-
-
-
-
Thank you for these suggestions, Ian.
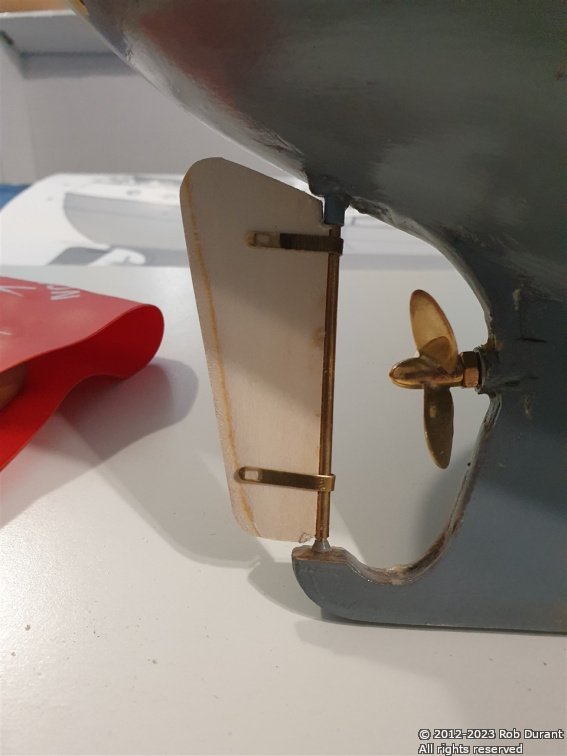
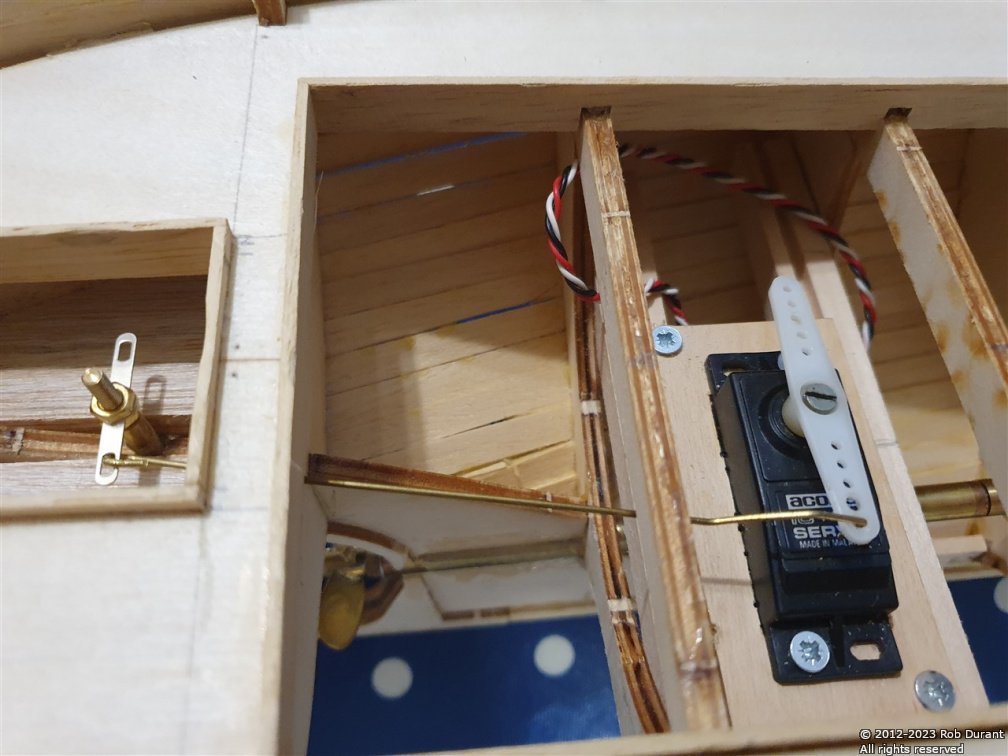
I've moved the linkage in from the end of the servo arm to be approximately the same distance from the pivot as the on the rudder horn. I agree that this is a more sensible setup. As far as the rudder horn holes, I'm not sure why they'd be designed like that, but that's how the Billing Boats part came (unless I've just misidentified the part, and I'm using something that's meant for another bit of the build, which is entirely possible! 😂) I'm not too concerned about a small amount of slack in the system, as this is a scale fishing boat and not a high performance motor launch, so I'm not anticipating I'll need to be doing any precision manoeuvres at speed. It feels remarkably secure, and there's not a lot of slack in the system, so I'm happy enough. It helps keep the budget under control, and it's how I've always done it in my other RC boats
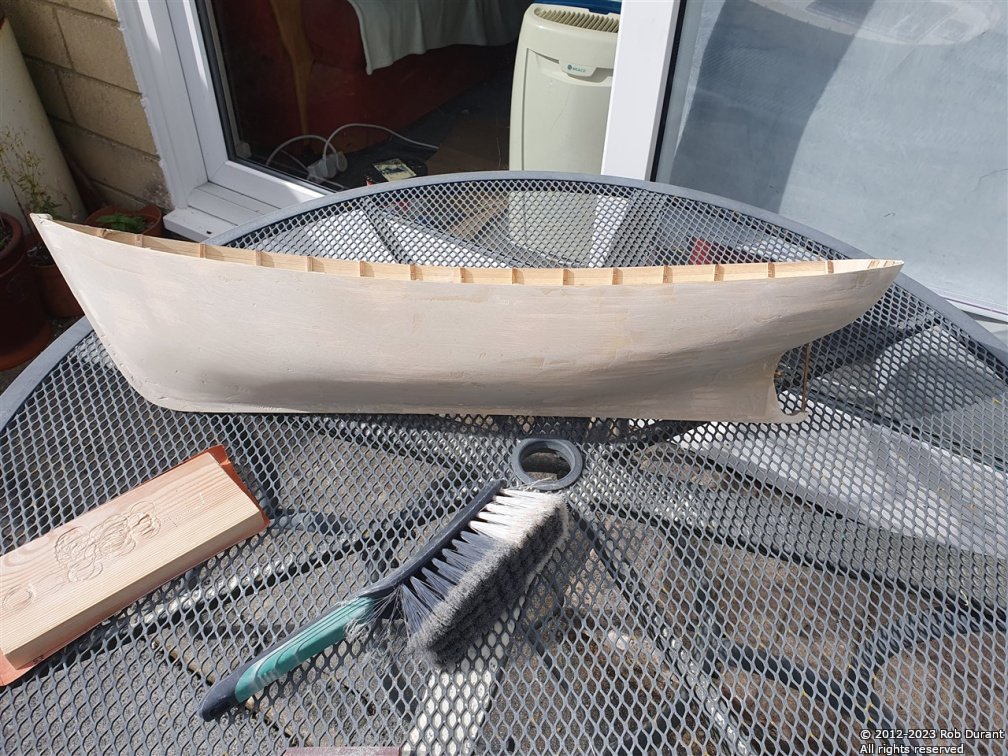
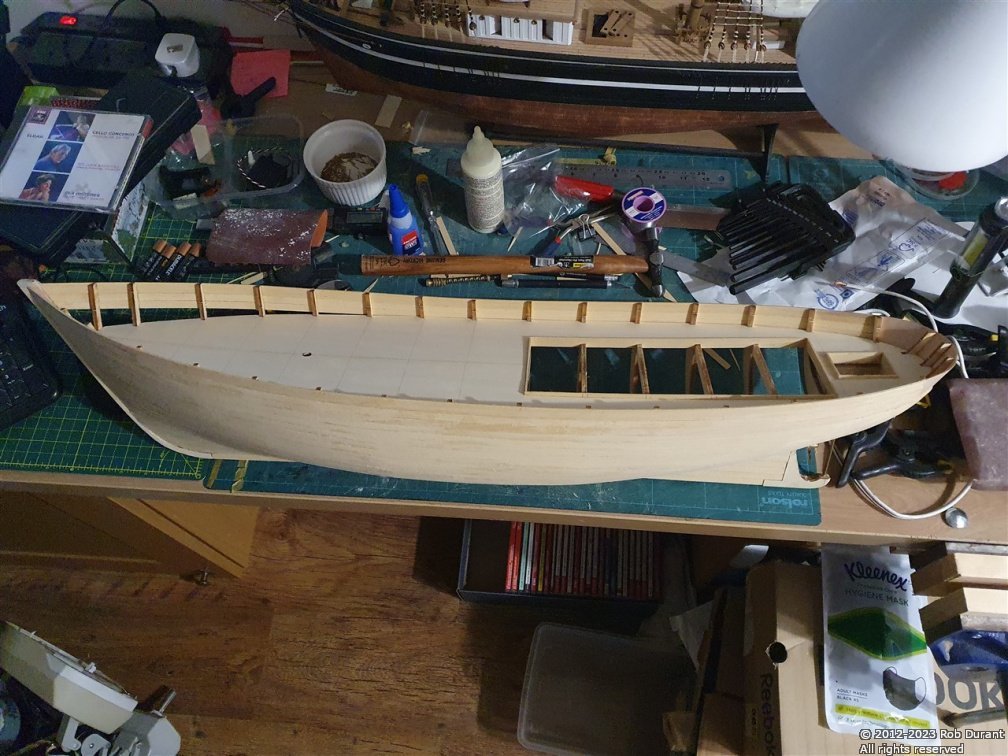
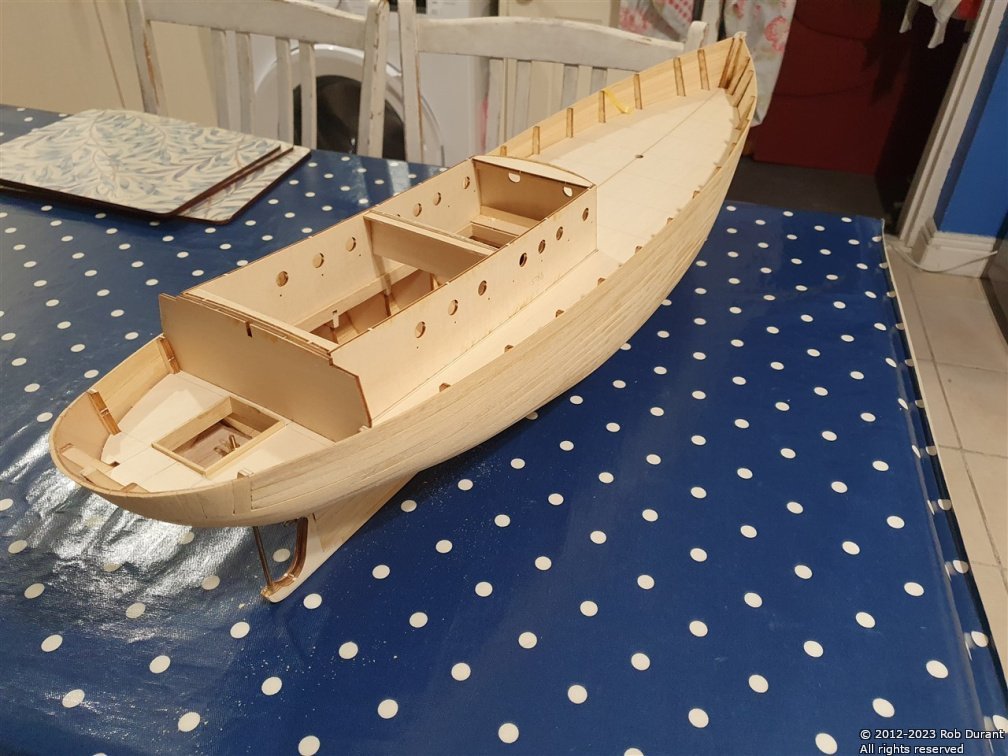
There's not a huge amount of "interesting" progress to show, as I'm essentially just planking the other side of the hull to close her up... but I have planked vertically around the stern to bring the planking out to the same level. I've used offcuts of the planking strips to do this.
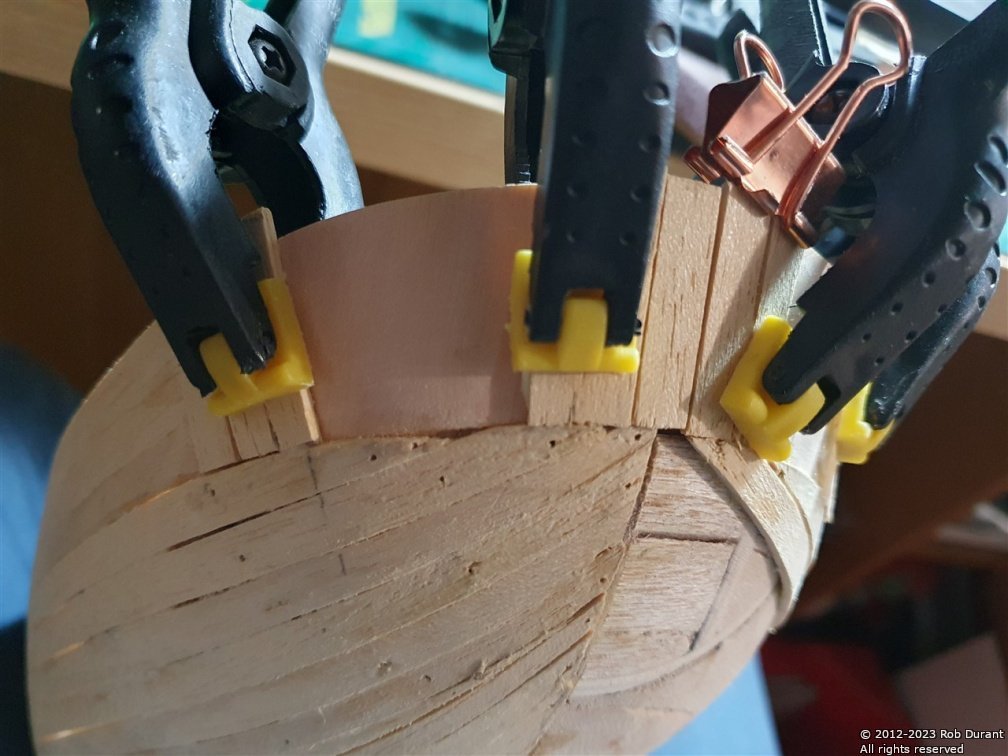
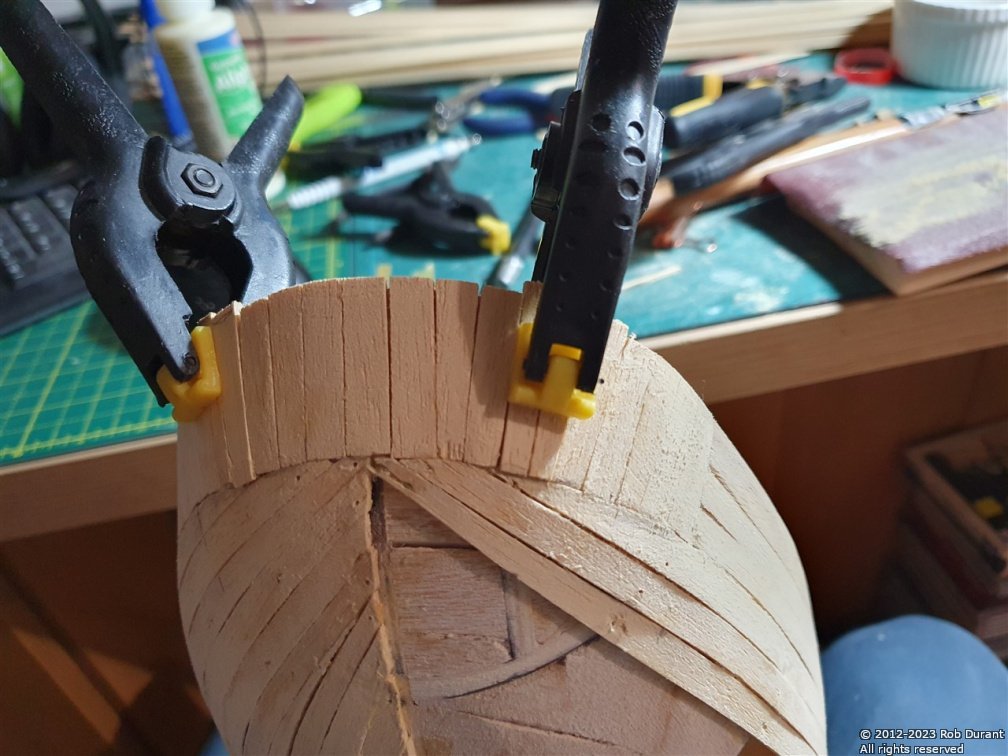
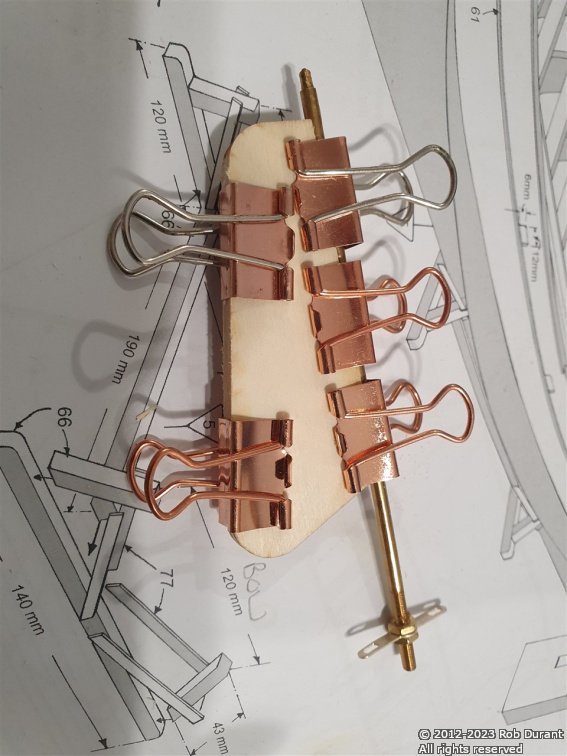
And, planking on the starboard side, so far... I can normally get between three and five planks on in a session... The first nine planks from the bottom of the hull are full width... It won't be beautiful when it's finished, but it will be a solid base to fill and smooth. Planks are glued to the bulkheads, and edge glued to make it as solid as possible. The clamps towards the centre of the hull are to help the planks to glue nicely edge to edge, and to avoid clinker, as the bulkheads have quite a distance between them.
-
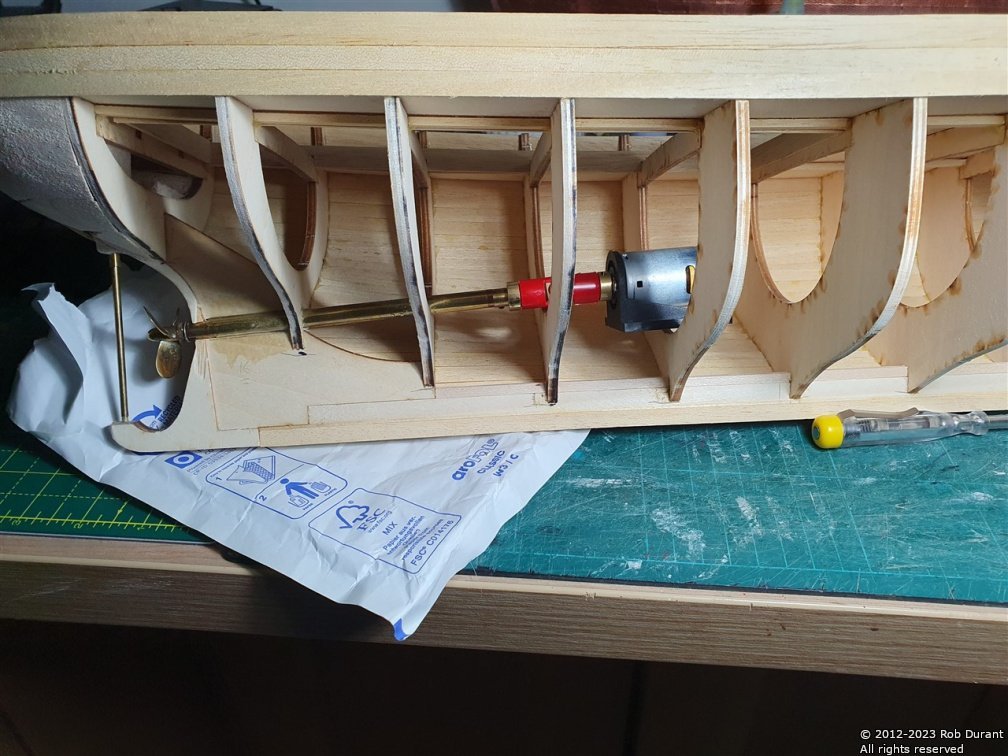
Thank you for the words of encouragement, @Ian_Grant. Yes, the prop-shaft and prop are from George Sitek - I've always been really impressed with their product, and that's no less true on this occasion.
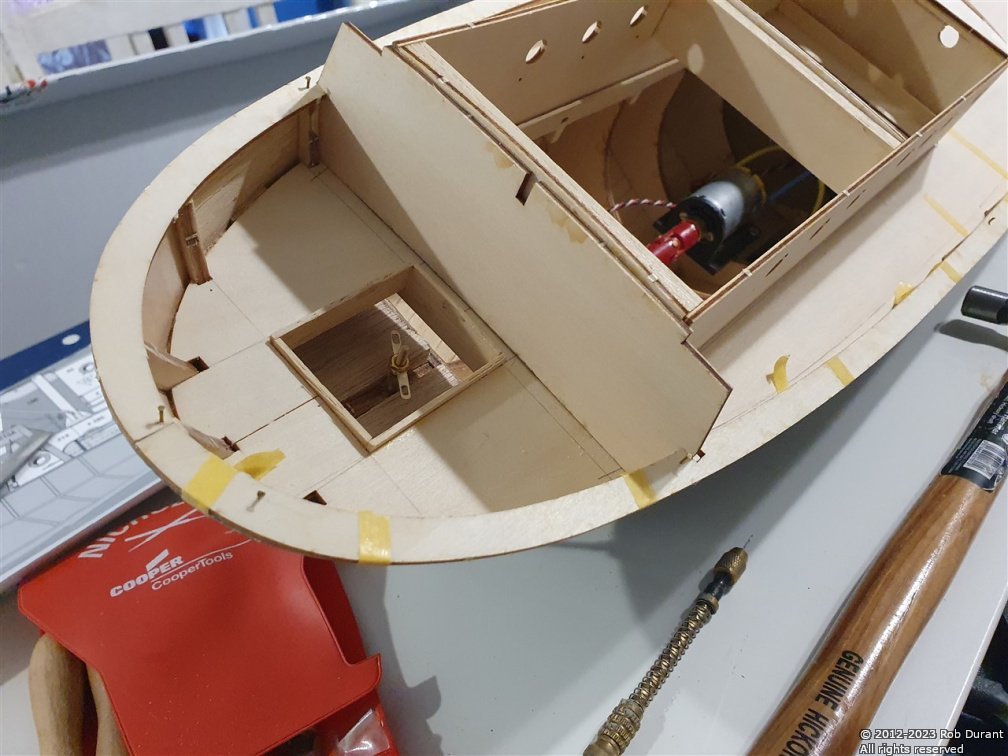
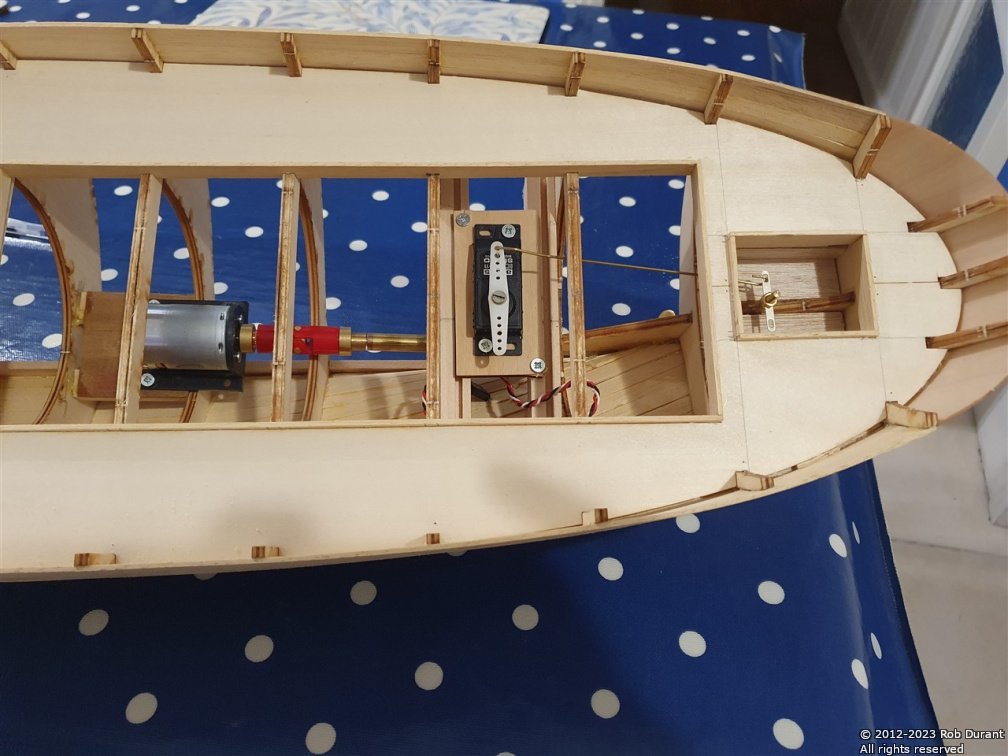
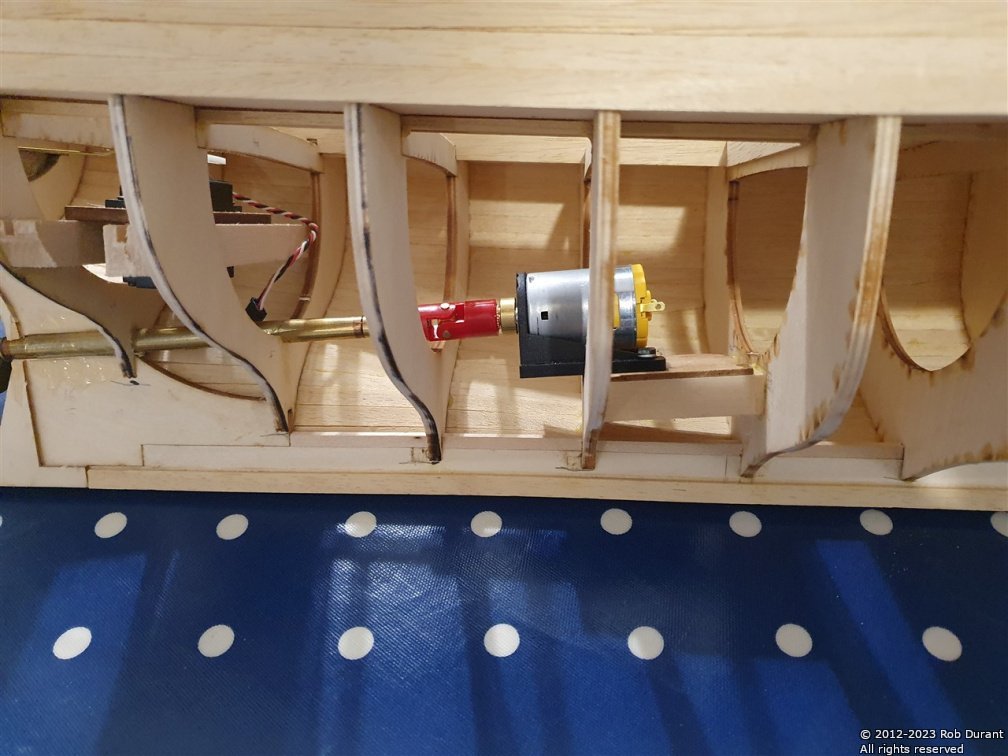
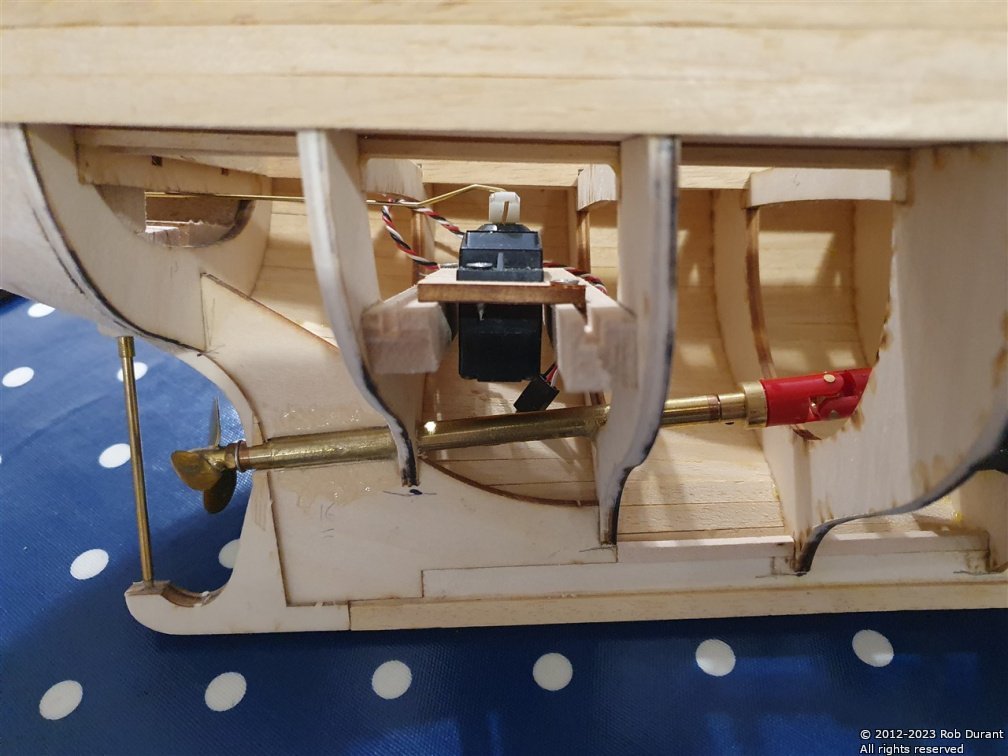
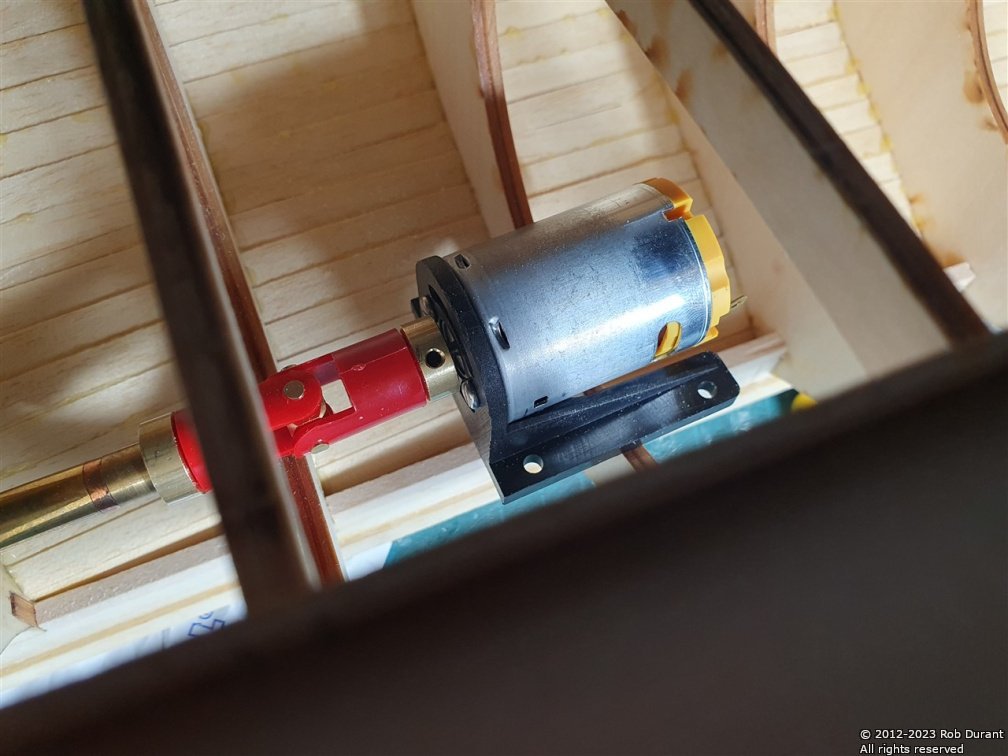
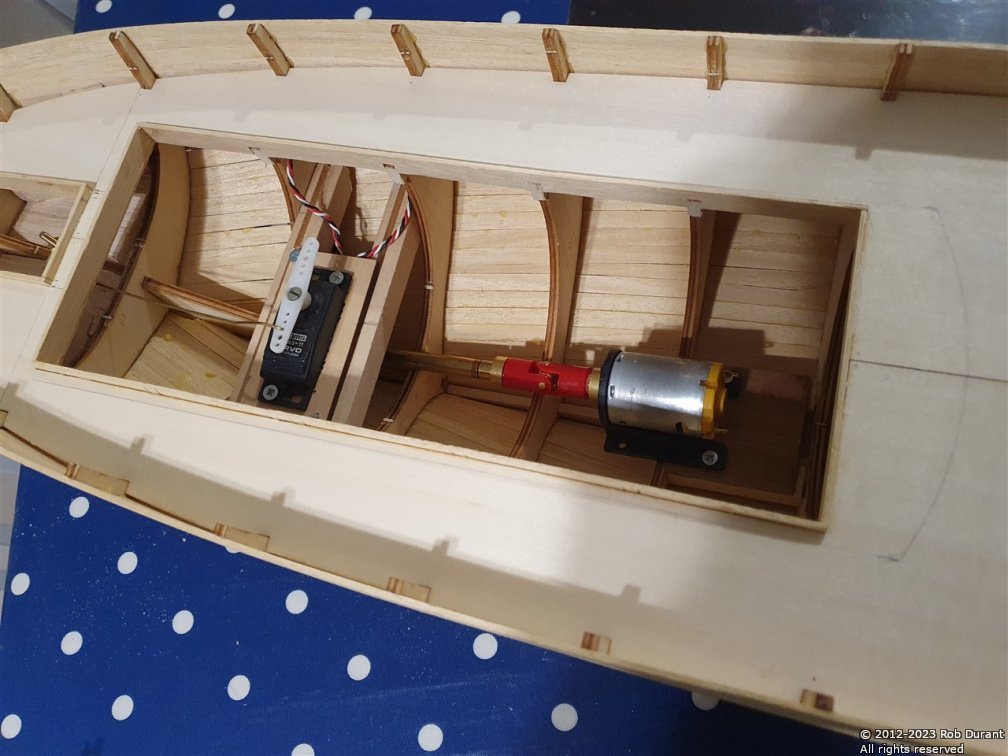
The rudder servo tray is constructed, with the servo mounted and fitted... I've also installed the motor on its own tray and mounted that between two bulkheads. Everything's screwed in place so that it can be removed as necessary through the access hatch above. The receiver will go next to the rudder servo. A bit of brass wire has been used as the linkage between the rudder post and the rudder servo. This is bent so that it doesn't hit the bulkheads as it passes forward. Altogether, I'm quite please. Here are some pictures of progress so far.
I'm really glad I decided to do all of this before planking the other side closed... it's made life WAY easier
- dj.bobo, chris watton, BobG and 4 others
-
7
-
Thanks for the likes
Planking continues... Port side is now planked, and starboard side well underway... I'll leave the serious sanding until I've got the whole hull planked.
Also, the right parts for the universal coupling, along with a new motor arrived...


.jpg.175ad6e61b99e125d62c0df76a231fd1.jpg)
Nordkap by robdurant - Billing Boats - 1:50 - RADIO
in - Kit build logs for subjects built from 1901 - Present Day
Posted
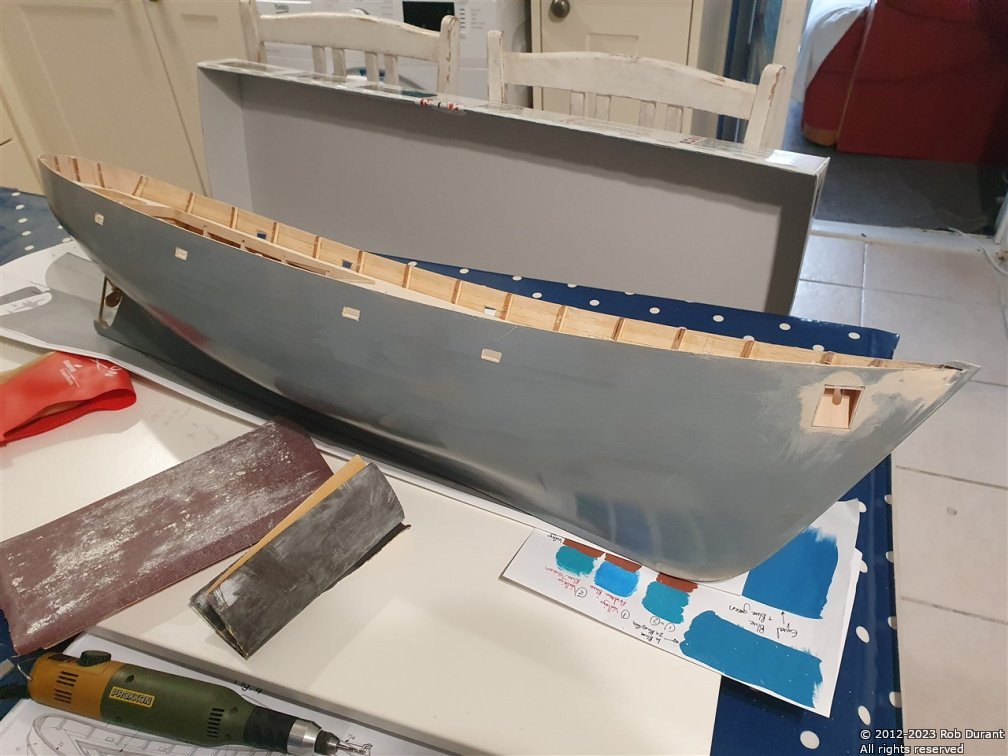
Ten more days have given me time to mix up some blue paint for the hull - I've used whole bottles of vallejo paint so that I can re-make this colour if I need to... it's four bottles of blue, four bottles of blue-green, and one bottle of light green-blue.
I've did a test on the planking (which is left over from Barque Stefano), to make sure that Admiralty (Caldercraft) Matt Varnish didn't make the sharpie I used to add caulking, run... it didn't. I also painted the insides of the bulwarks light green-blue, and the top of the superstructure will be this colour too.
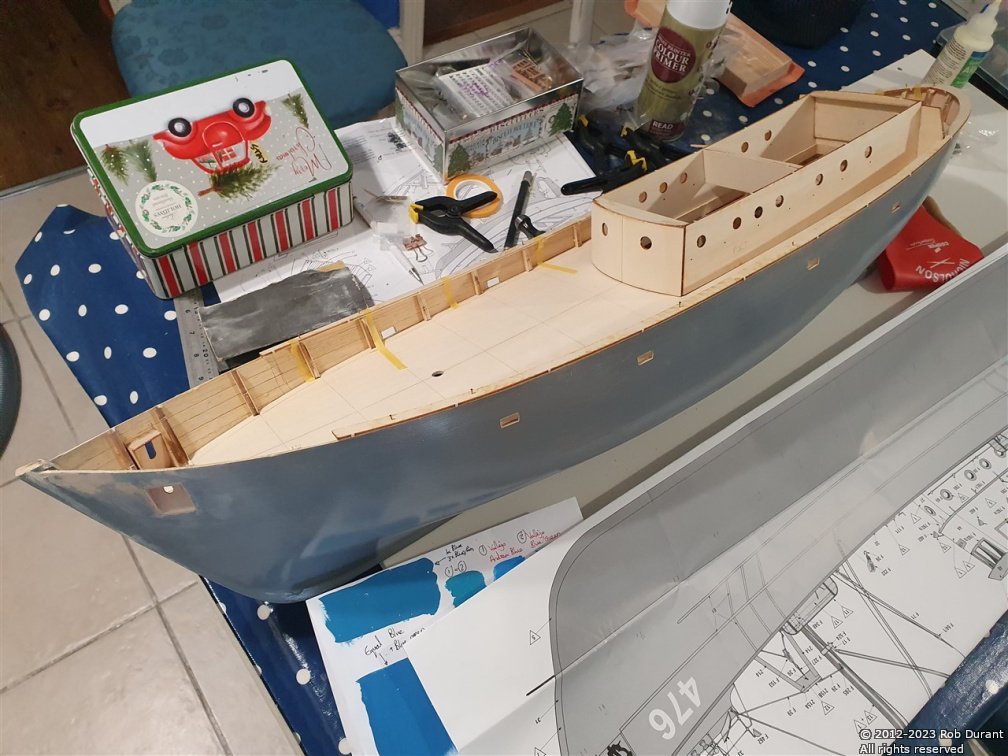
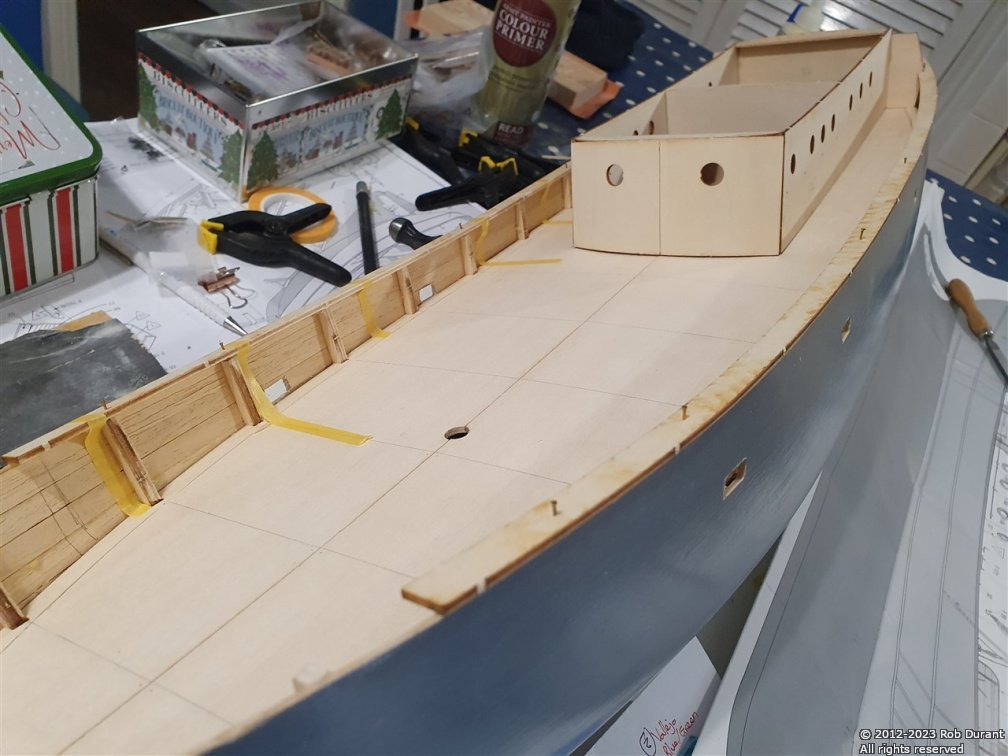
The planking was stuck in place with carpenter's glue. Once varnished, it should be fine for fairweather sailing. The edging of the planking was achieved by adding a margin plank, which was glued just inside of the bulwark posts. I'm pretty pleased with how it's turned out. Here are some pictures of progress so far. (There are still a few lines of planking to be added on each side to finish the job.)