scrubbyj427
-
Posts
1,714 -
Joined
-
Last visited
Content Type
Profiles
Forums
Gallery
Events
Everything posted by scrubbyj427
-

1/200 Trumpeter IJN YAMATO - issued by MRC/Gallery Models
scrubbyj427 replied to yvesvidal's topic in REVIEWS: Model kits
Oh Washington or North Carolina are two of my favorites. Probably my first battleship model as a kid was North Carolina, i would love to build her in 1/96 or even 1/48. I agree on the dreadnaught as well. Ahh too many models and never enough time.- 104 replies
-
- 4
-

-

-
- MRC/Gallery
- Yamato
- (and 1 more)
-
1/200 Trumpeter IJN YAMATO - issued by MRC/Gallery Models
scrubbyj427 replied to yvesvidal's topic in REVIEWS: Model kits
Apologies for my poor grammar but yes, I meant the Yamato’s. I wish I could find the article I read that compares the two but you pretty much summarized it. Nevertheless, I find both classes of battleships fascinating and worthy of the attention they receive. I’ve been casually looking at building a Yamato for years, not sure if I want to build Musashi or Yamato but I’m leaning towards Musashi. These 1/200 kits with all their PE are very very tempting but my heart tells me that the fleet scale 1/96 is the direction I need to go, with where these 1/200 kits are with all the add ons and details they actually aren’t far off in price between the two sizes.- 104 replies
-
- 4
-
-
- MRC/Gallery
- Yamato
- (and 1 more)
-
1/200 Trumpeter IJN YAMATO - issued by MRC/Gallery Models
scrubbyj427 replied to yvesvidal's topic in REVIEWS: Model kits
I read somewhere that the Iowa’s were slightly advanced in their targeting and therefore more accurate than the Yamato and musashi and if I remember correctly they had a slight advantage in range. But there is no doubt they were the most powerful battleships ever built, it was also quite a task to finally get them to go down according to us navy pilots.- 104 replies
-
- 3
-
-
- MRC/Gallery
- Yamato
- (and 1 more)
-
Your Cheerful and Winnie will look great side by side.
- 840 replies
-
- 4
-
-
- winchelsea
- Syren Ship Model Company
- (and 1 more)
-
Glenn your cheerful looks great, did you build her Out of AYC as well? No issues with indirect sunlight?
- 840 replies
-
- 2
-
-
- winchelsea
- Syren Ship Model Company
- (and 1 more)
-
Stunning planking Job Glenn... I want to tear all mine off and replank the Wales down. Beautiful work and right on time with your planking schedule. if your looking to achieve some more yellow tone to the wood I found that WOP coats worked but between coats i lightly rubbed on some watco golden oak oil finish after a fine sand (800 grit) and then applied another coat of WOP until you achieve the finish you want. It will look just like the contemporary models do. After more than a year mine has a nice boxwood like finish to it, AYC is a wonderful wood. https://www.amazon.com/Watco-242210-Danish-Finish-Golden/dp/B000ONVI8Q
- 840 replies
-
- 2
-
-
- winchelsea
- Syren Ship Model Company
- (and 1 more)
-
Thanks Guys, it’s good to finally cut and glue some wood again. I’ll be back at it in a couple weeks, I’ll finish chapter 7 and move right into guns again.. I’ll probably be lazy and tackle the 6 up front so I can begin chapter 8. I can handle 6 guns without losing my mind lol.
-
Beautiful work. I love the choices of wood you used in this build, it pulls your eye into every detail.
-
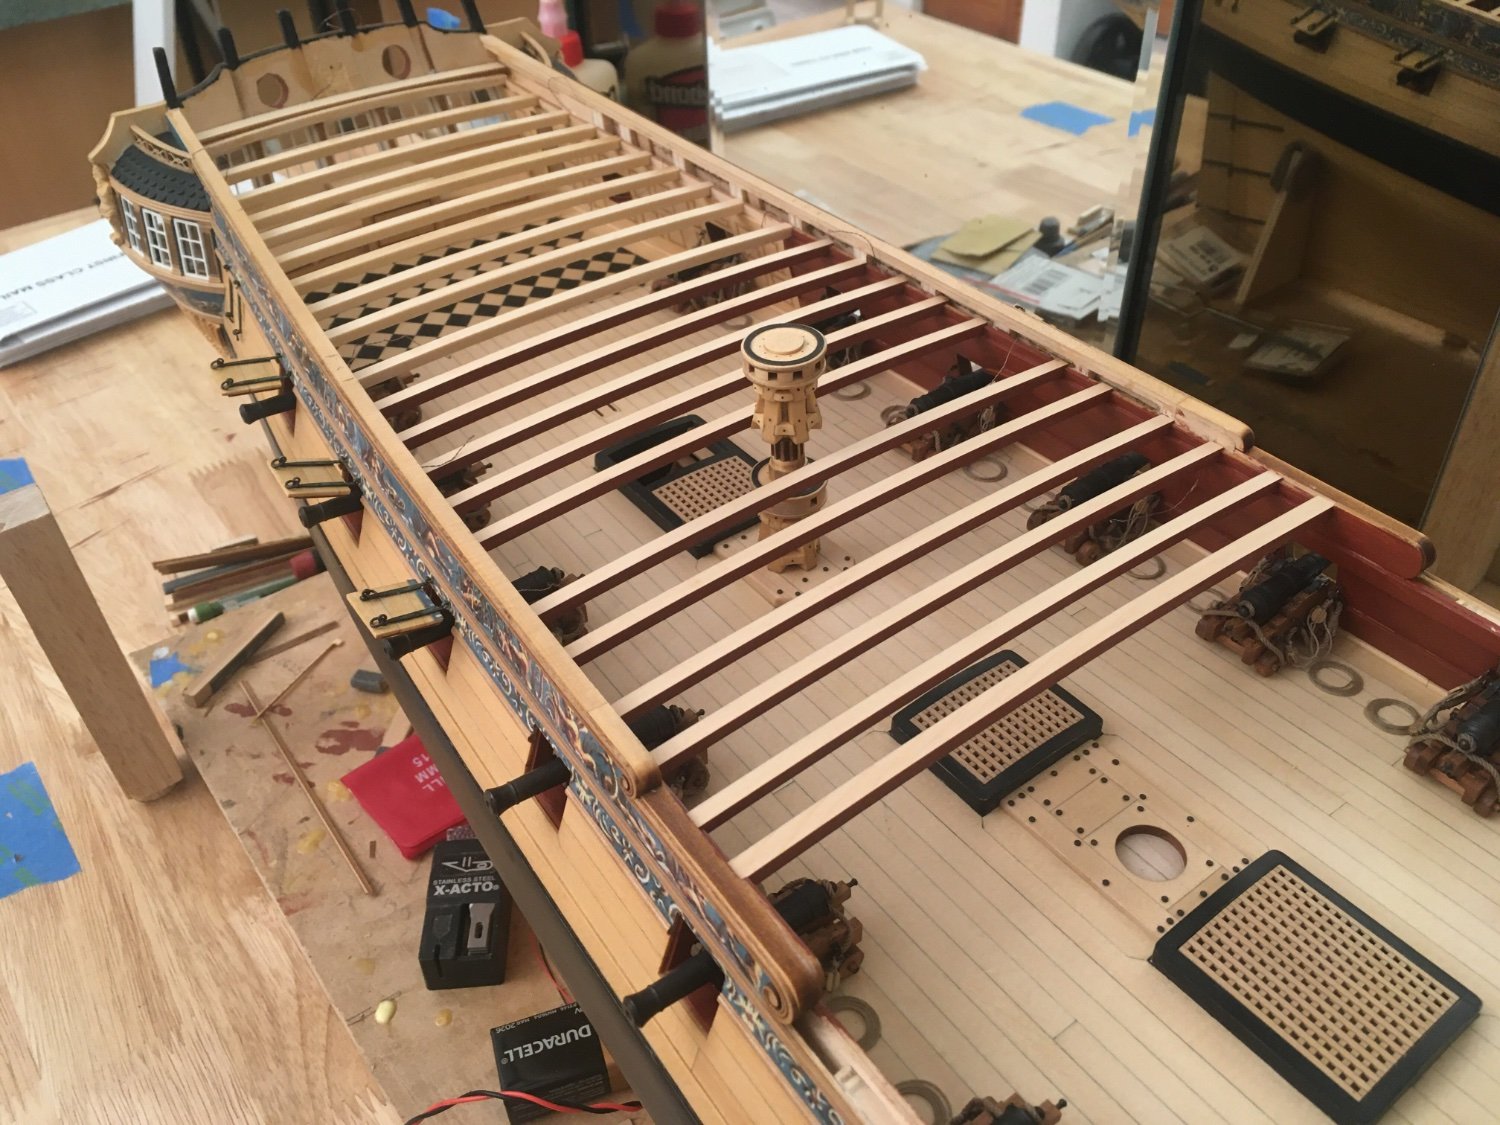
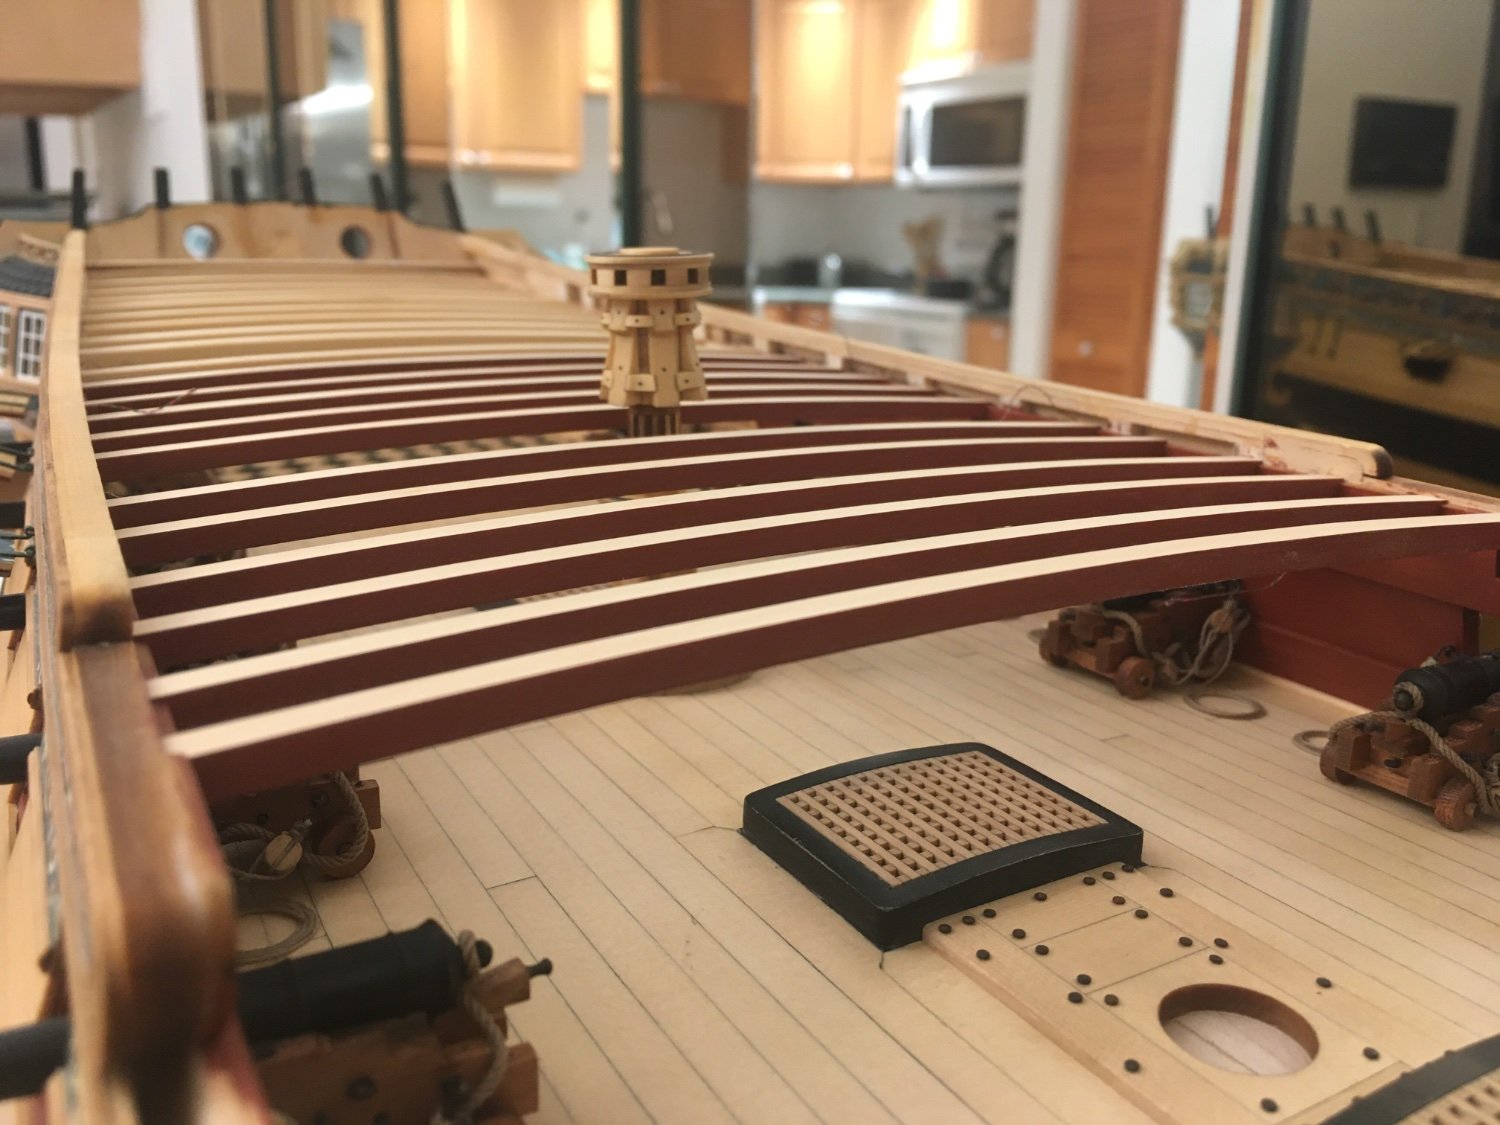
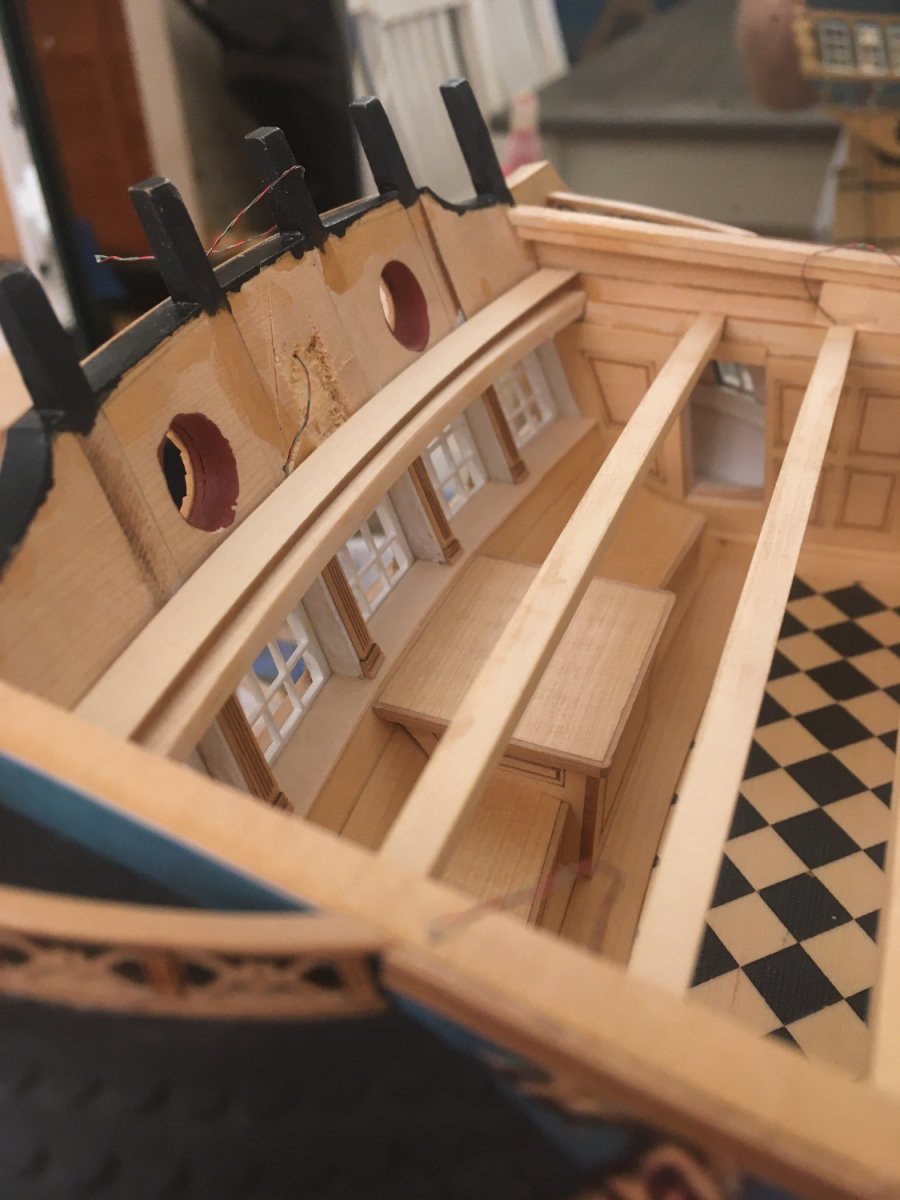
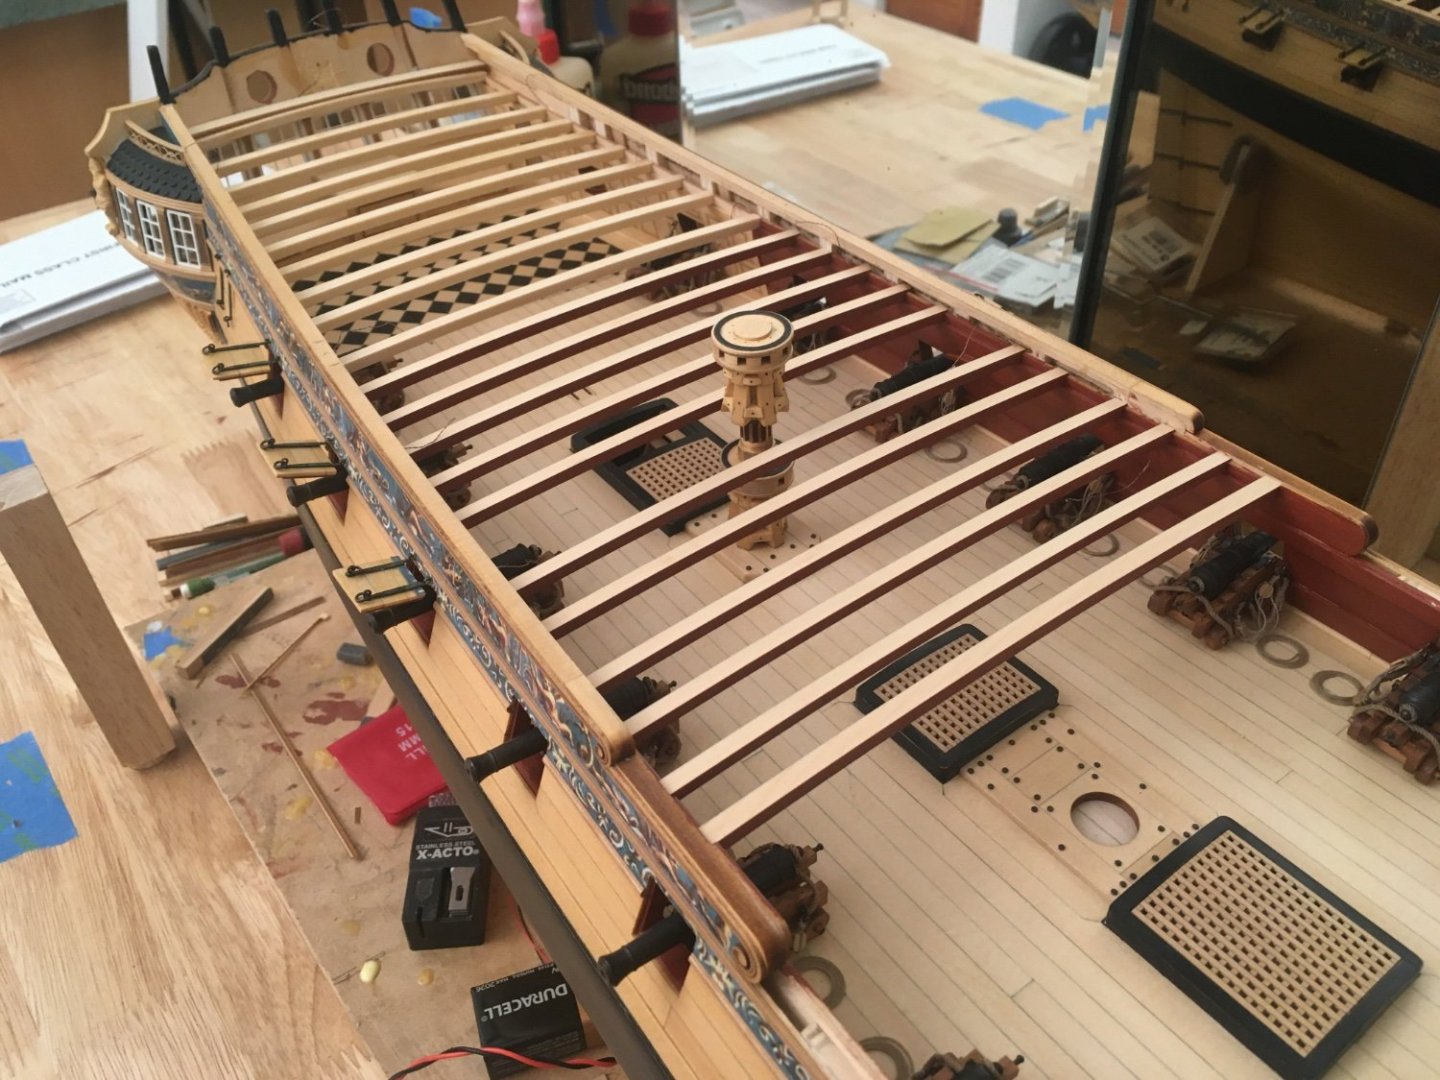
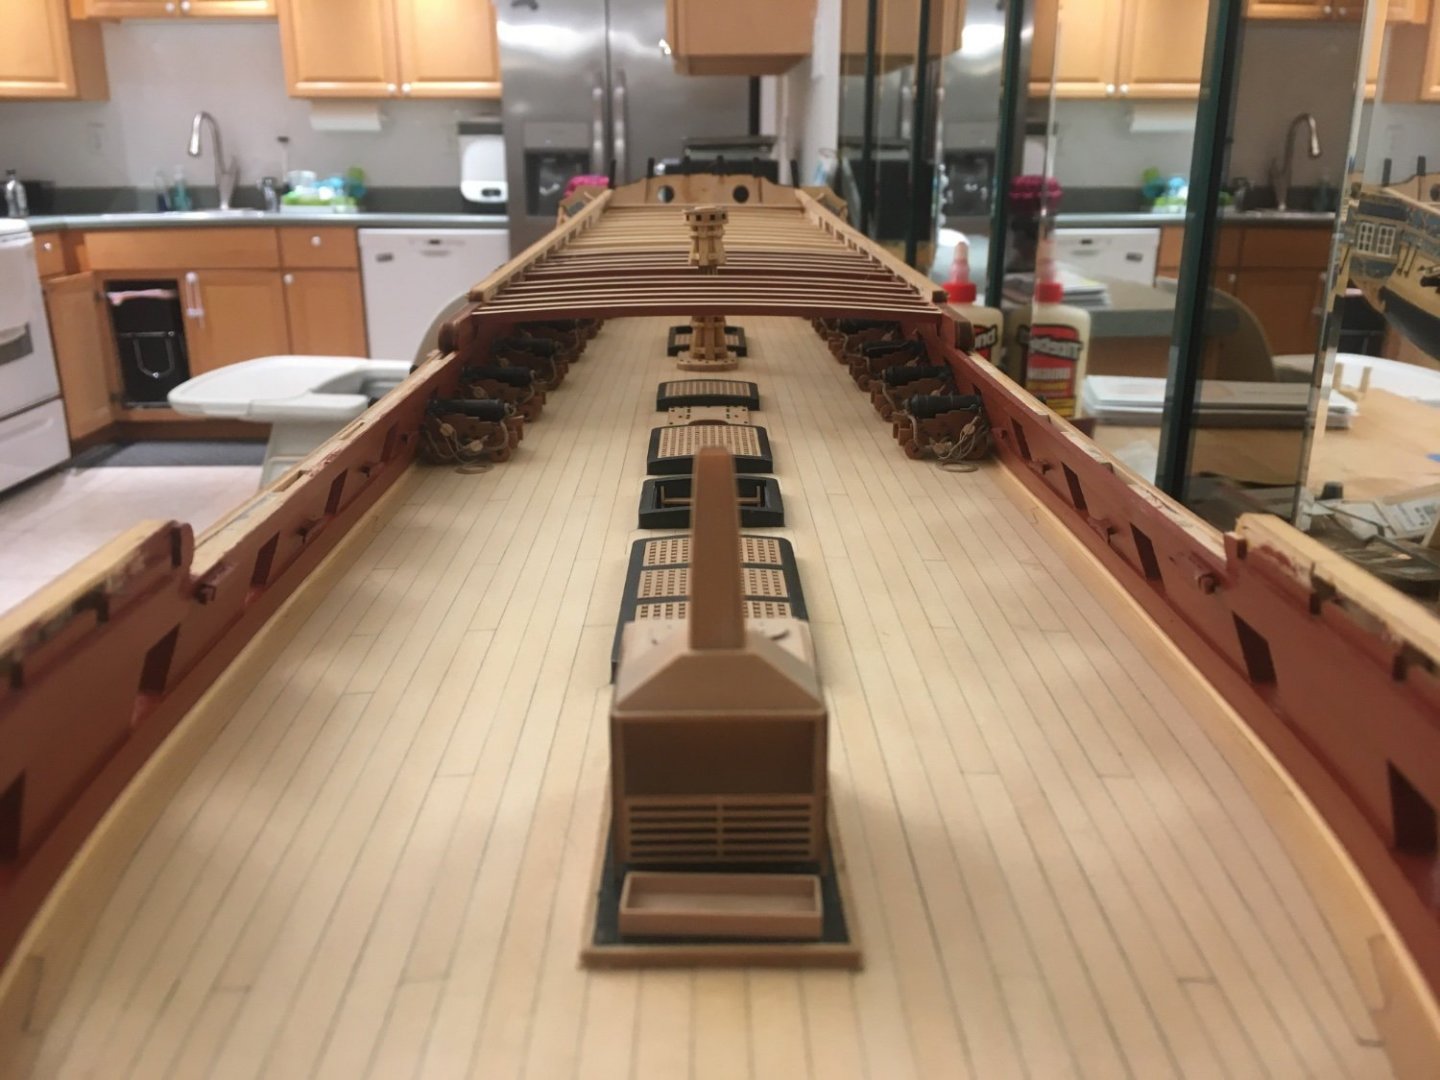
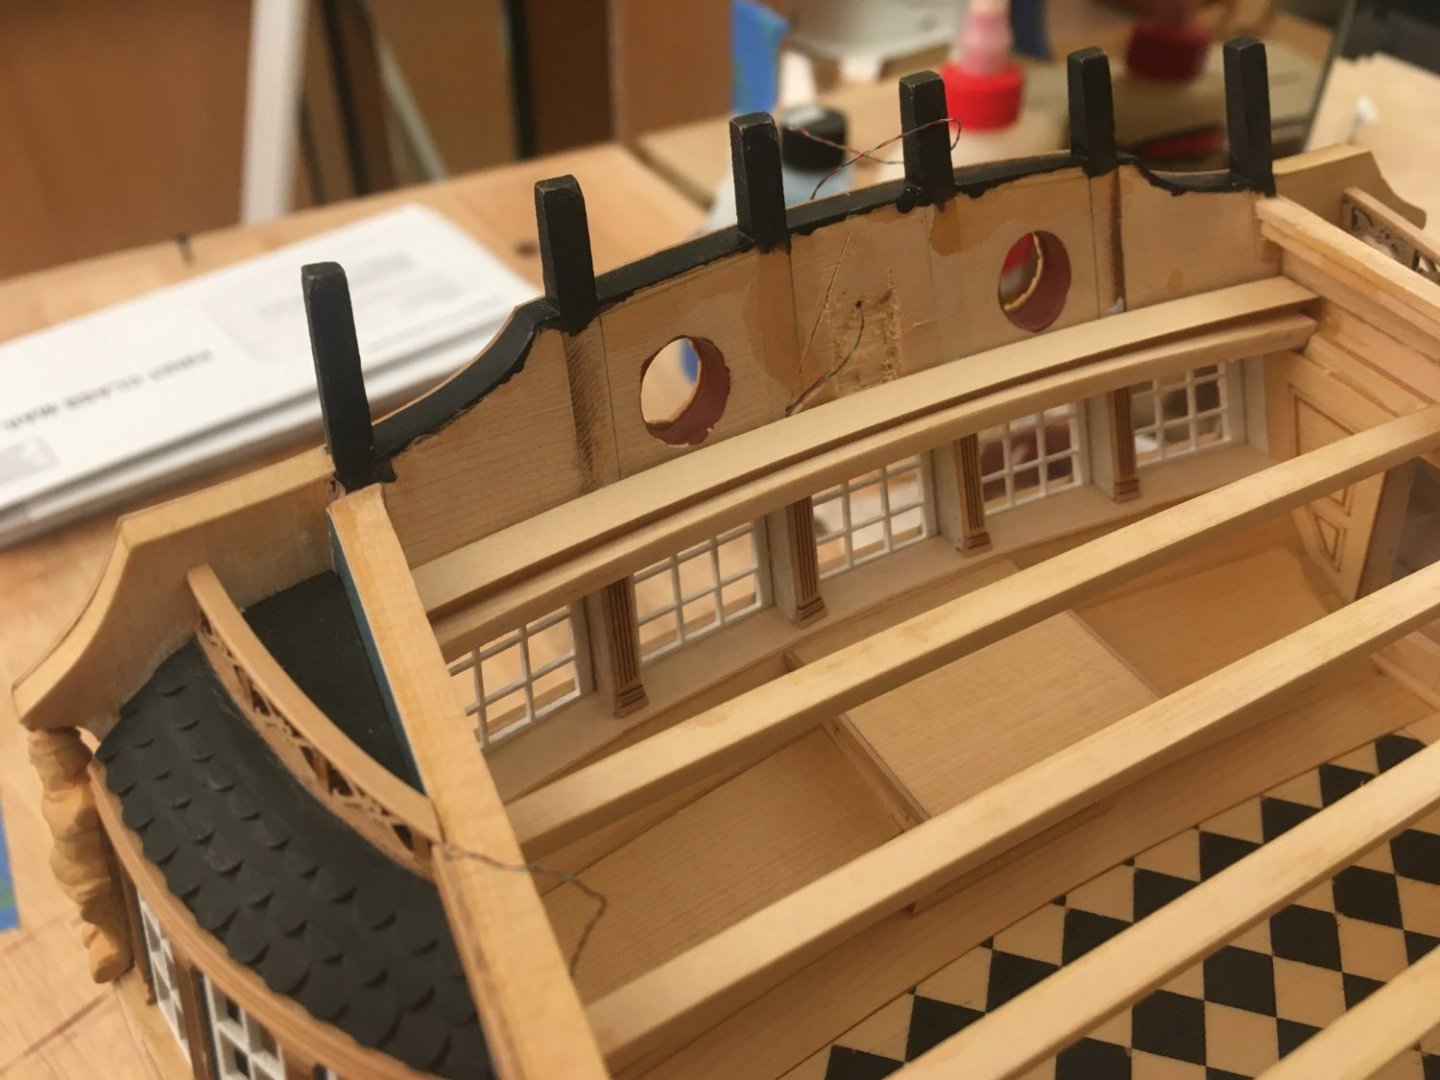
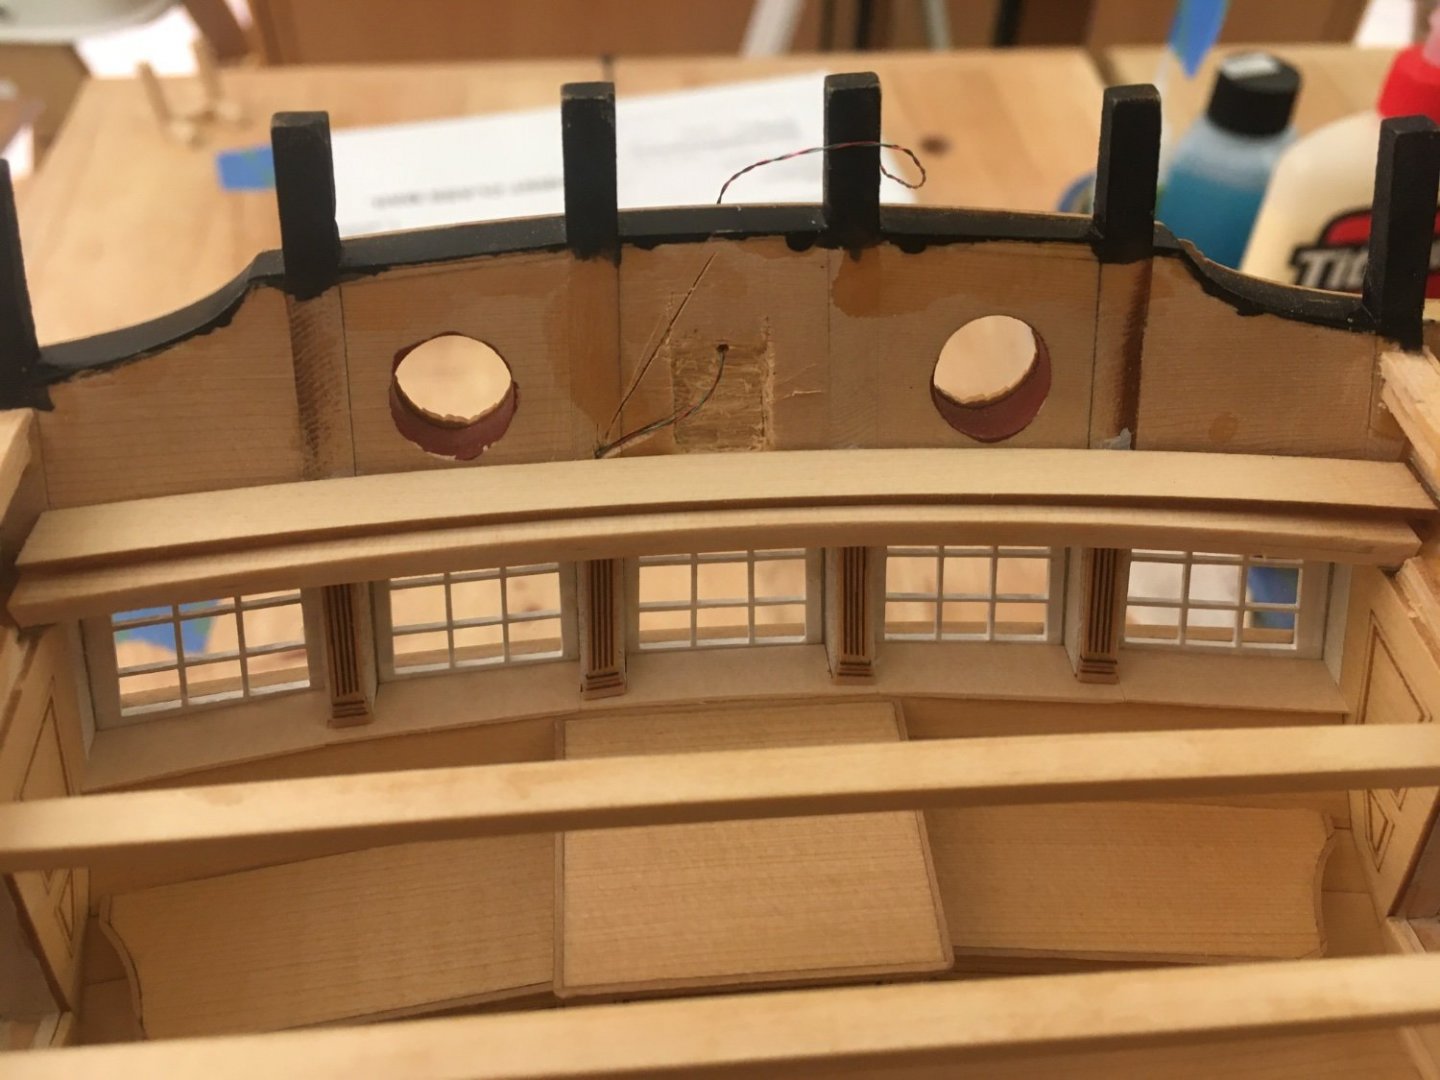
I snuck some time in to work on my Winnie the last few days, pulled a few late nights but I finally made some headway on chapter 7. I still Need to fine tune the aft deck beam and permanently set my lantern wiring before I can complete the transom. All the beams went together relatively easily, just lots of test fitting. I added some fluted columns to the transom frames, I’ve seen this before on some models and I’ve always liked it but I mainly did it to cover up my lantern wire run up the inner stbd frame and it worked out well. I stole Bens idea and used the laser etched mouldings that I had leftover for the tops and bottoms of the columns....still wish I did that on the outside... oh well. It was really fun to get back to work on Winnie again, I decided to build most of the stove for fun while I waited for beams to dry. Hopefully I can get some more completed in a couple weeks. JJ


-
Thanks Gabe. If you can get it to print the metal frame that would be awesome, I’d purchase a bunch from you Initially I tried to have shapeways print just the frame and they said it was too small so I just made it a solid. Can’t wait to see your progress. JJ
-
Joe, if I remember right the transom uprights are actually not as intimidating as they look. If you follow the plans and measure twice and cut once you should line up pretty well on the two outer frames, also the filler pieces in between for the windows are a significant help. Your fore and aft frames will give you your transom frame angles, this is found in the framing plan. if the frames are placed correctly they form the required curve pretty well, once the fillers are in place then the angle can be established by the framing that attaches to the bulkheads. I spent a lot of time on mine and was quite happy with the results, however I did find a small error but it did not affect my model very much in the end. Looking forward to your updates.
-
Those look outstanding Chuck! I’ve been really focusing on this part lately and how to design it, pouring over contemporary examples and drawings, those look spot on with everything I’ve seen. Simply excellent results there. Not even close to resembling a kit.
- 1,784 replies
-
- 3
-
-
- winchelsea
- Syren Ship Model Company
- (and 1 more)
-
She’s coming together nicely Dave. Your planking looks really good. Definitely worth the headaches! JJ
-
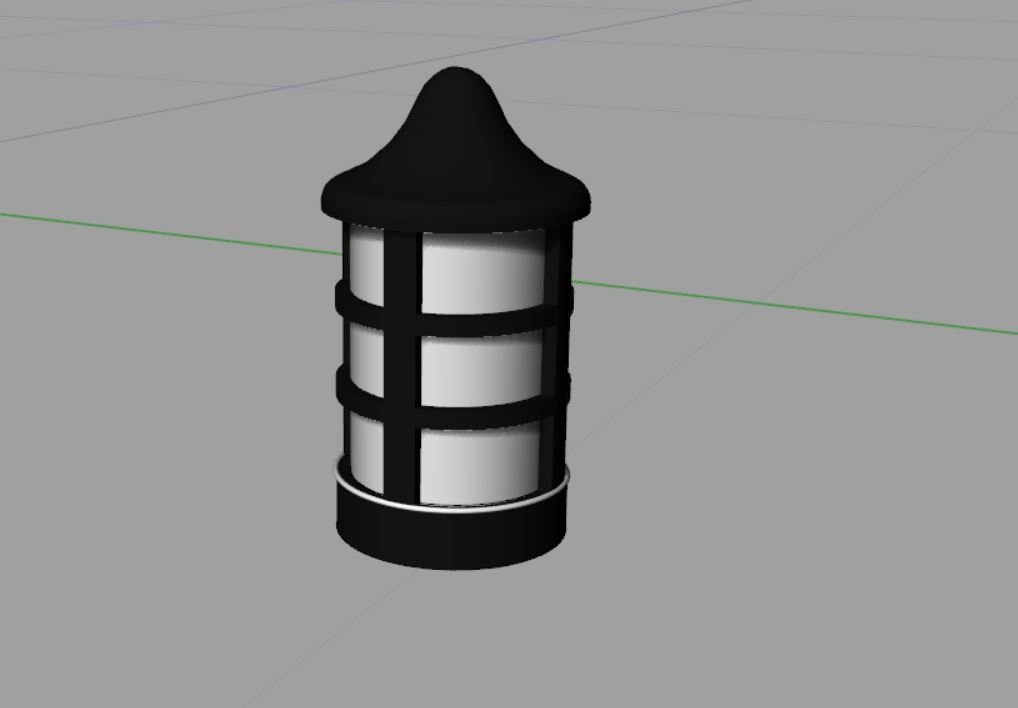
Thanks Chuck. I’ve seen so many variations of lamps that this one is somewhat of a mix of them all .
-
Beautiful modeling! Will be following with much interest!
-
I've designed a quick lamp model if anyone is interested. its close to 1:48 but can be scaled in any direction. My thought was to print it clear and paint the metal details on, drill a small hole and inset a micro LED. If anyone prints one id like to see how they turn out, I've yet to purchase a printer. lamp.stl
-
MONTAÑES by Amalio
scrubbyj427 replied to Amalio's topic in - Build logs for subjects built 1751 - 1800
Incredible work! -
Your Winnie looks great Don, the dull coat looks nice and subtle. Looks like you’re almost Finished.
-
Hope to see some progress soon Bob. Take care of yourself.
-
Definitely doesn’t work with safari....
-
Work of art! Will be almost impossible to distinguish this as a kit next to a scratch built model.
- 1,784 replies
-
- 4
-
-
- winchelsea
- Syren Ship Model Company
- (and 1 more)
-
Those look great Mike, what a great tool for that job, eliminates all the guess work and tricky eyeballing. Where did you get that? I may have to invest in one.
- 607 replies
-
- 1
-
-
- winchelsea
- Syren Ship Model Company
- (and 1 more)
-
That’s a great idea Chuck, I was studying a contemporary model last night and wondering how you planned to do this. That makes perfect sense.
- 1,784 replies
-
- 2
-
-
- winchelsea
- Syren Ship Model Company
- (and 1 more)
-
Looking really good. The windows were definitely a struggle, lots of test fitting, sanding and broken ones until I got it right.