-
Posts
6,919 -
Joined
-
Last visited
Content Type
Profiles
Forums
Gallery
Events
Posts posted by Kevin
-
-
-
-
1 hour ago, amateur said:
Now you're almost finished the SD14, you could also try a paper-titanic
the 1:400 card version of JSC: has far fewer parts than your current build

Or the 1:1200 paper version downloadable here: Free Card Models - Currell.net . Even less parts (but slightly more fiddly)
Jan
i doubt i will ever build anything smaller than 1/96 again, i will most likely pass on the 1/200 Titanic and go for the Linkspan Ferry next, if i ever get to do a aircraft carrier it will have to be the invincible class 1/72 1/96 from Sirmar or Fleetscale
- thibaultron, amateur, Canute and 2 others
-
 5
5
-
-
good evening everyone
Thank you for comments and likes
new week day 8 double bottom floors and tank top lonitudinals
having taken my time, this part of the build has gone quite well, i used to get differences in height where the tabs of the floor frames were over lapping the double bottom floor lonitudinals
next is the tank top longitudinals on which the deck sits on, ,ost of these are still to be prepped , before adding to the build
- thibaultron, mikegr, GrandpaPhil and 8 others
-
 11
11
-
- GrandpaPhil, Canute, Jim Lad and 6 others
-
 9
9
-
- thibaultron, mikegr, druxey and 8 others
-
 11
11
-
-
- hof00, Old Collingwood, druxey and 6 others
-
 9
9
-
Thank you everyone
40 minutes ago, popeye the sailor said:superbly done Kevin.........very sharp
 the leather work is awesome!
was an enjoyable build,
- popeye the sailor, Canute, Egilman and 4 others
-
 7
7
-
lol i forgot to do the door, yours looks very nice
-
3 hours ago, Old Collingwood said:
Kevin (just showing my ignorance with card building) would it help to strengthen the card during the build to brush over the parts/sections etc some watered down PVA - just wondered if that would strengthen the card?
OC.
good morning OC, after the floor bottoms go in, and then the tank tops, you end up with a very strong platform, obviously not strong enough to carry my weight when i fell on it, but that part was the least damaged
- thibaultron, mtaylor and Canute
-
 3
3
-
Just now, Jim Lad said:
The good thing about building this type of model is that there's always plenty of new work for us to see, even when you feel that you're making very slow progress.
John
i had thought if i should go to less regular posting, its not the most exciting thing to see daily
- mtaylor, Canute and thibaultron
-
 3
3
-
good evening everyone
Day 3 Double bottom longitudinal's
Thank you for the comments and likes and hello again to those that follow my maritime projects
not much to say about these,
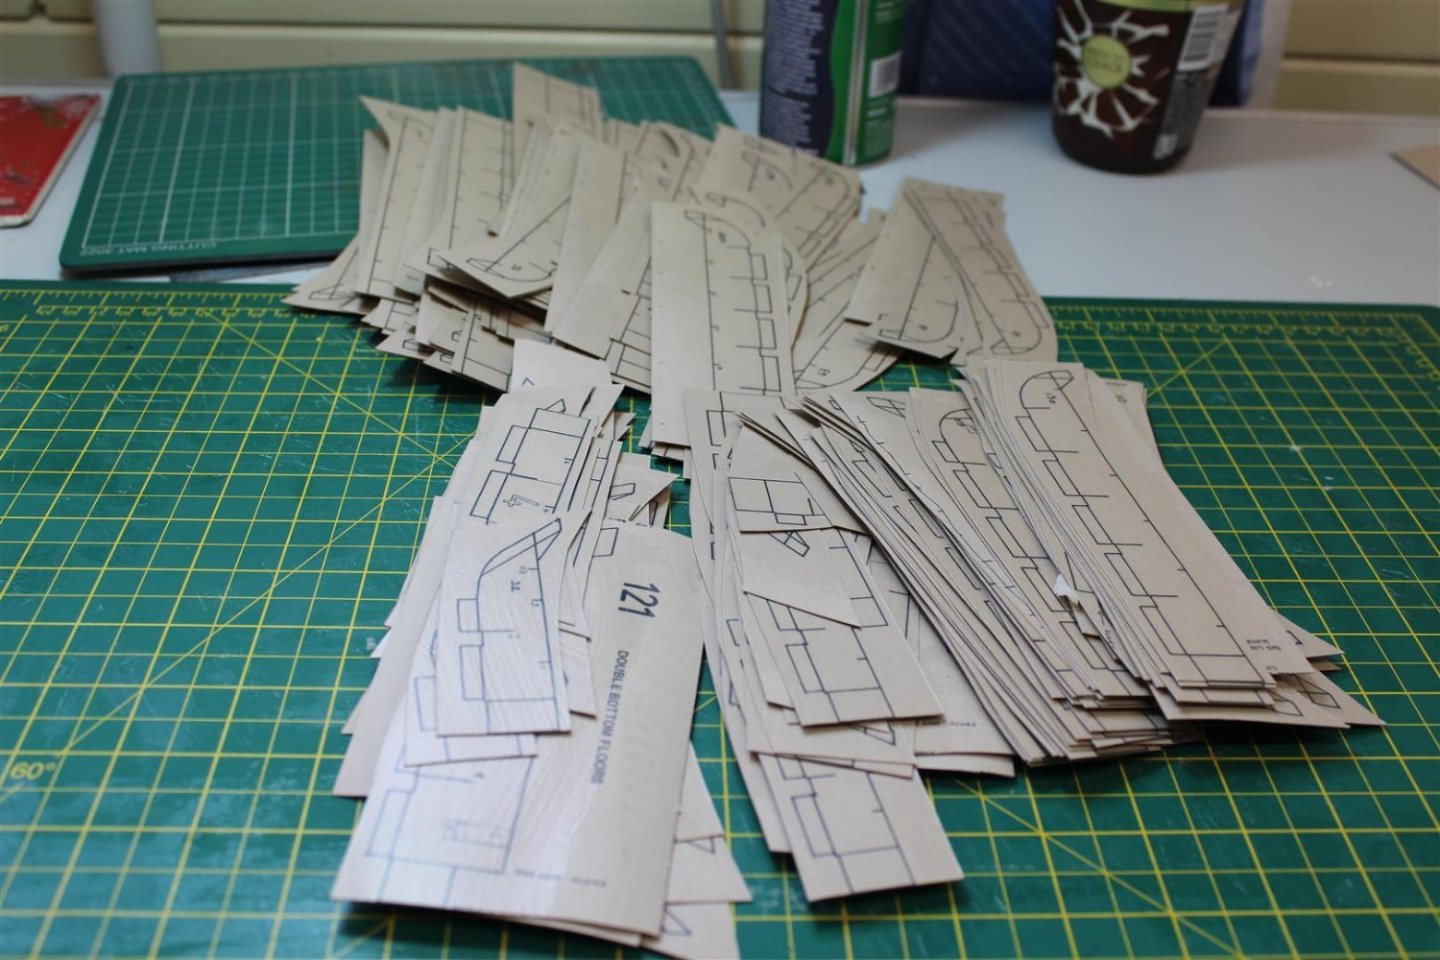
once removed they need to be scored to create a fold line, and the slots into which the double bottom floors fit into need to be removed so appox 1200 slots,
the fwd and after ends are done, midships will be complete tomorrow, and i have varnished one side of another load of sheets which ate the double bottom floors
-
-
good evening everyone, thank you for comments and likes,
in building this, these are mainly what i will be using
a decent wood glue, being tacky it holds the paper in place until dry
Modge Podge is a paper varnish, allows me to paint the card with out it soaking in
knife and straight edge
day two
Shell bottom plates
all three sections are now, and now have a coat of varnish on both sides
haha fooled you im actually building an SR71
next step is the longitudinal's
-
11 minutes ago, chris watton said:
You do like your large models, Kevin!
lol yes, plus i like to highlight subjects that are not seen every day,
- Canute, mtaylor, chris watton and 2 others
-
 5
5
-
good evening everyone
Welcome to my new build
there are several on here already, but i will have them deleted, after getting this up and running
the difference this time is instead of doing it in three section, i am going all out and have one large build, but still in a cutaway, with lighting
intentions are to keep the sections at the same rate of progress
nice clean mancave
this is the full set, to replace the stern section i fell on in Jan this year, in fact, i think it took me a month to get over that, but im over that now
build board
as the sections get made up this will be where it stays, i doubt i will be able to take it outside for some time
fwd, midships and stern sections
and a start has been made
whist in the early days i will make up the sections separately, and add them as soon as possible,
i have some corrogated plastic display boards
by drawing a cetre line i can keep the palets in line
the thinner strips are the centre line keelson, and allow me to ensure the space is right
- chris watton, mtaylor, yvesvidal and 6 others
-
 9
9
-
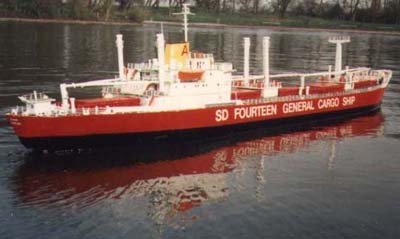
Sometimes known as the replacement for the famous "Liberty" ship, the 14,000 ton SD14 general cargo ships are found under many different names and flags in most of the world's ports and all of the high seas. The designation "SD14" denotes "Shelter Deck 14,000 tons". The shelter deck is the second or tween deck in the cargo spaces and, when the ship is loaded down to her plimsoll line, she displaces 14,000 tons.
By the mid 1960s, there remained some 700 Liberty and other war-built cargo ships still trading. Even the youngest were 20 years old and the question of a replacement was exercising the minds of ship owners and builders around the world. the emergence of bulk carriers and container ships pointed to the end of the "shelter Deck" design which had been used with little alteration since the turn of the century. Many felt that this design was no obsolete and that the future lay with containerisation.
It was, therefore, something of a surprise when ship builders all over the world unveiled their plans for the "liberty Ship Replacement", almost all of which offered a two-deck vessel of 14,000/15,000 tons deadweight. Doubtless this choice was influenced by the requirements of potential customers. Most of the war-built vessels were, by this time, being operated by Greek ship owners of limited resources to whom these new designs, for a type of vessel with which they were fully experienced and priced at about £1 million with cheap credit facilities, were very attractive.
A total of 30 designs were put forward as the "Liberty Ship Replacement" in the early months of 1966. Of these, the most successful was the SD14, developed by the Sunderland shipbuilders, Austin and Pickersgill. The first SD14 keel was laid on 8th. June 1967. Unusually, this was not at Austin and Pickersgill's own yard, but nearby at that of another Sunderland shipbuilder, Bartram's, who were building the ship under licence. The first ship, named Mimis N. Papalios, was launched on 1st. December 1967. She was also very nearly the first SD14 to be completed. However, Austin and Pickersgill managed to make up the leeway in their own building programme to hand over the first completed SD14, the Nicola, on 14th. February 1968, the Mimis N. Papalios following the next day.
Between 1968 and 1988, a total of 211 SD14s were completed and it is interesting to note that, by 1990, only 10 had been scrapped for commercial reasons, a further three going to the breaker's yard after marine accidents. Of the dozen vessels reported as sunk, at least two fell victim to missile attack during the Iran/Iraq conflict.
Like the original Liberty ships, which many thought would be scrapped as soon as the war was over, the SD14 was not ascribed a very long life by some early critics. Nevertheless, these ships are still in demand in the charter market, with average daily rates of $5,200 for a one-year time contract, and in the second hand market with prices ranging from $2.5m for an early seventies ship to $5.75m. for a newer example.
One guide to the success of the SD14 is to look at the movement of the 211 ships through the second-hand market. Most of the ships now sailing are with only their second owner, a few remaining with their original purchaser. The oldest SD14 in service is the Wave Crest, the vessel which, as the Mimis N. Papalios, missed by one day the distinction of being the first completed ship of her type.
In 1978, while attached to Manchester Docks, George Robinson, a retired Merchant Navy captain, hit on the idea of providing the port fire brigade with an easy-to-build model of the SD14. In this way, the trainee firemen could easily and quickly become familiar with the layout of the ship.
So, originated a 2-foot long, 1:70 scale model kit of the Forward section of the SD14. This first attempt met with such success that kits if the Midships and After sections followed in 1979, the complete model measuring an imposing 7 feet in length. Professional and international recognition followed in 1982 when the model won the "Shipwrights Model Competition" at the Guildhall in London.
Quite apart from sheer size, the kit is remarkable, for it is, in fact, put together in much the same way as the original was in Sunderland. Space here permits no more than a brief glimpse of what awaits the builder of this miniature leviathan.
The instructions, which, for the complete kit, run to about 60 pages, first explain that the model will be built by the dry dock method rather than on the slipway - the difference is clarified.
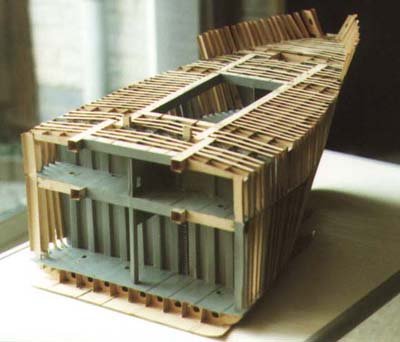
You then proceed to lay the shell bottom plates of the Forward section to form the double bottom, between the outer surface of the hull and the inner surface of the holds. On the original, the space in between in used for water ballast, necessary to keep the propellor submerged when there is no cargo and to maintain an even keel. This last expression, in such common and, I suspect , often unwitting, usage, is precisely defined.
The building progresses aft as the cargo holds are each constructed with transverse watertight bulkheads, hold pillars and centre line plates. There are even properly runged ladders on which to descend to the bowels of the vessel. In the After section, as well as a cargo hold, there is the engine room together with the propellor shaft tunnel and, by lifting up the after deck house, access is provided to the steering gear flat and the rudder stock.
In the bridge superstructure, containing the crew's accommodation, every cabin is accounted for. The crew's mess room, galley and smoke room are each separately delineated as are the linen locker, baggage room and officers' smoke room to mention but a few. The model also incorporates the correct ventilation trunk ways, the significance of which for cargo handling is explained.
In the course of construction, the instructions are supplemented by sections which explain the actual fabrication of the original, so that, as you work through the model, you learn about the SD14, how it was assembled and how it works.The operation of such components as MacGregor hatch covers, the keelson and camber in the original are fully expounded and you can then reproduce these to scale. Step-by-step diagrams illustrate the sequence of construction.
It is perhaps worth remembering that ships are machines, the largest ever built by man. So it is fascinating to see how this great machine works and to reproduce it in miniature at the same time. The correct nautical terms are used and explained, showing how each part of the ship functions and how the whole design draws on centuries of experience to produce the modern ocean-going vessel. If, like me, you have wondered what exactly is a "Tween Deck" and what is its purpose, you need wonder no more. All is revealed after which you can actually build one.
The kit is printed on 184 A3 sheets of top quality manilla card, there being approximately 4,500 pieces, and the modeller can choose to paint the model with an authentic colour scheme or one of his own choice. The three sections can be fixed together or left dismantled and the aft superstructure can be removed to give a glimpse of the various deck levels inside the hull. naturally, all the cargo hatches open to show the holds.
. The model can be made either for display or, with suitable waterproofing (see "Cutting Remarks" no. 3), can be sailed, there being space for R/C gear.
Although the original SD14 models were all sold out about 10 years ago, Marcle Models, under licence from George Robinson, reissues the SD14 kit. The complete kit, weighing over 17 lbs, is supplied in 6 cartons, complete with a tool kit and costs £280 including worldwide surface mail. The three sections, Forward, Midships and After, are each available separately at £105 each.
Should you decide to have a go, this, the "Non plus ultra of card (and perhaps any other type of) modelling, should keep you busy for about a year.
Christopher Cooke and Thomas Pleiner, with acknowledgements to George Robinson, John Lingwood and Ships Monthly. Article first appeared in "Cutting Remarks" No. 4, September 1992.
-
8 hours ago, Old Collingwood said:
That looks Superb Kevin - so nicely done.
OC.
7 hours ago, bruce d said:Kevin, looks good and would be right at home in a John Wayne western.
👍
5 hours ago, mtaylor said:Sweet looking coach, Kevin.
Thank you
- Canute, thibaultron, Egilman and 5 others
-
 8
8
-
-
the kit is ok, but like everything in our hobby, it could be tons better,
if it wasnt for the love of my ship building, i would do these as a pastime, or non live steam engines replicas
- BLACK VIKING, Jack12477, mtaylor and 6 others
-
 9
9
-
8 minutes ago, wefalck said:
What surprises me, is how fragile these coaches looked. OK, they had to keep weight down so as not to tire the horses too much, but somehow it is difficult to imagine these things going along mud-tracks.
agreed, even the wheels seam very thin, 6mm at this 1/10 scale,
-


SD 14 by Kevin - Marcle Models - 1/70 - CARD - Full build March 2022
in - Kit build logs for subjects built from 1901 - Present Day
Posted · Edited by Kevin
good evening everyone
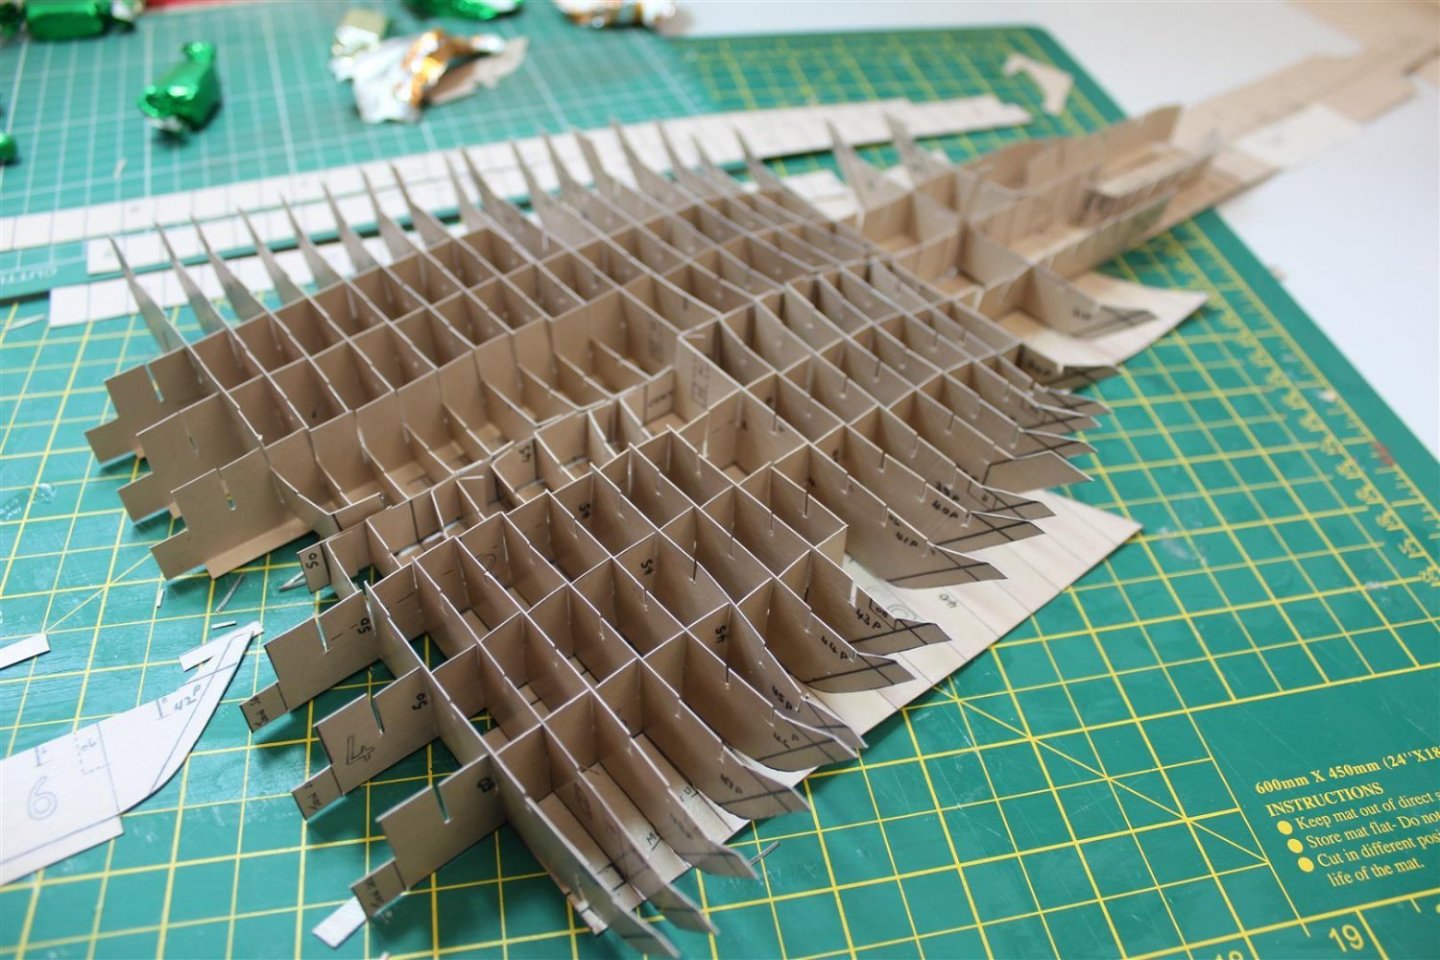
Day 9 Double bottom floors stern section frame 10- 50
knowing i was going to do the after section, i should have kept the sheets separate
rather than this
first fit showed no issues
state of play this evening