


Kevin
-
Posts
6,933 -
Joined
-
Last visited
Content Type
Profiles
Forums
Gallery
Events
Posts posted by Kevin
-
-
-
good evening everyone
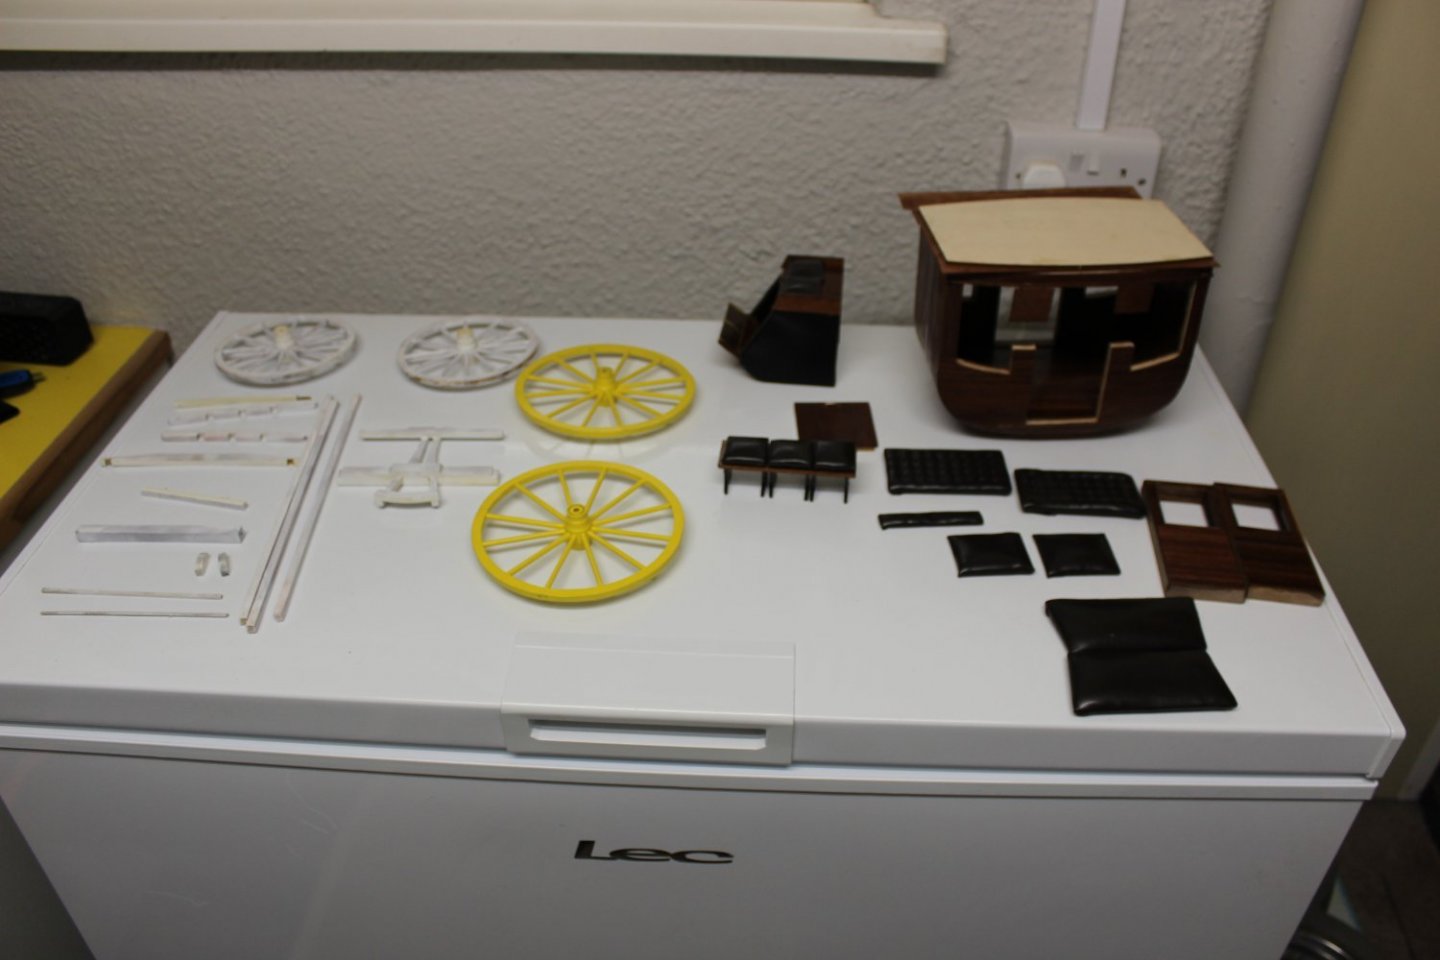
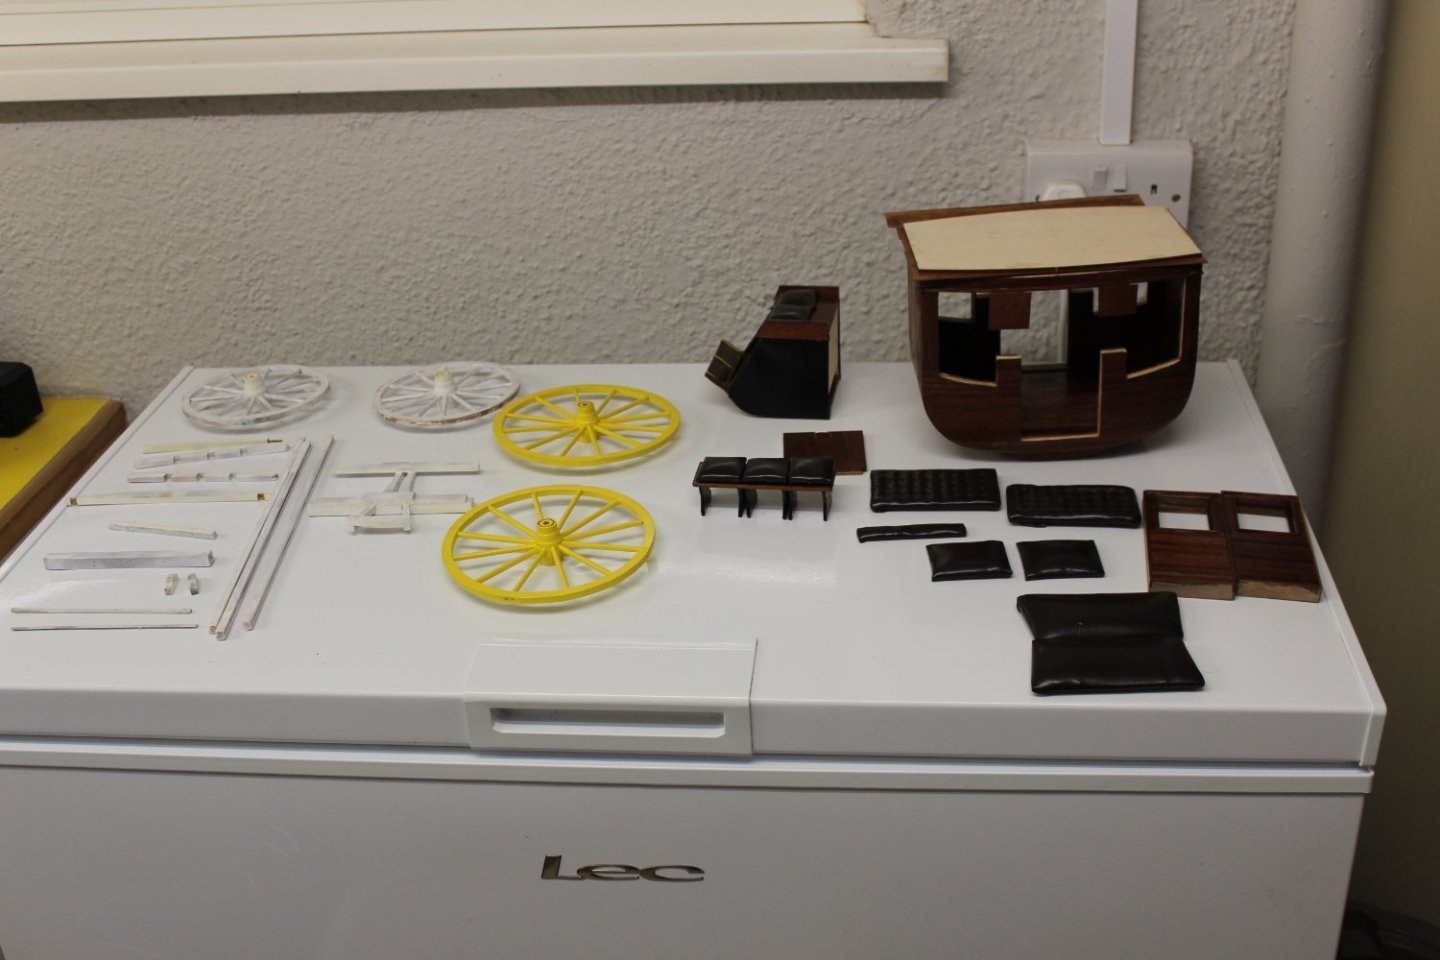
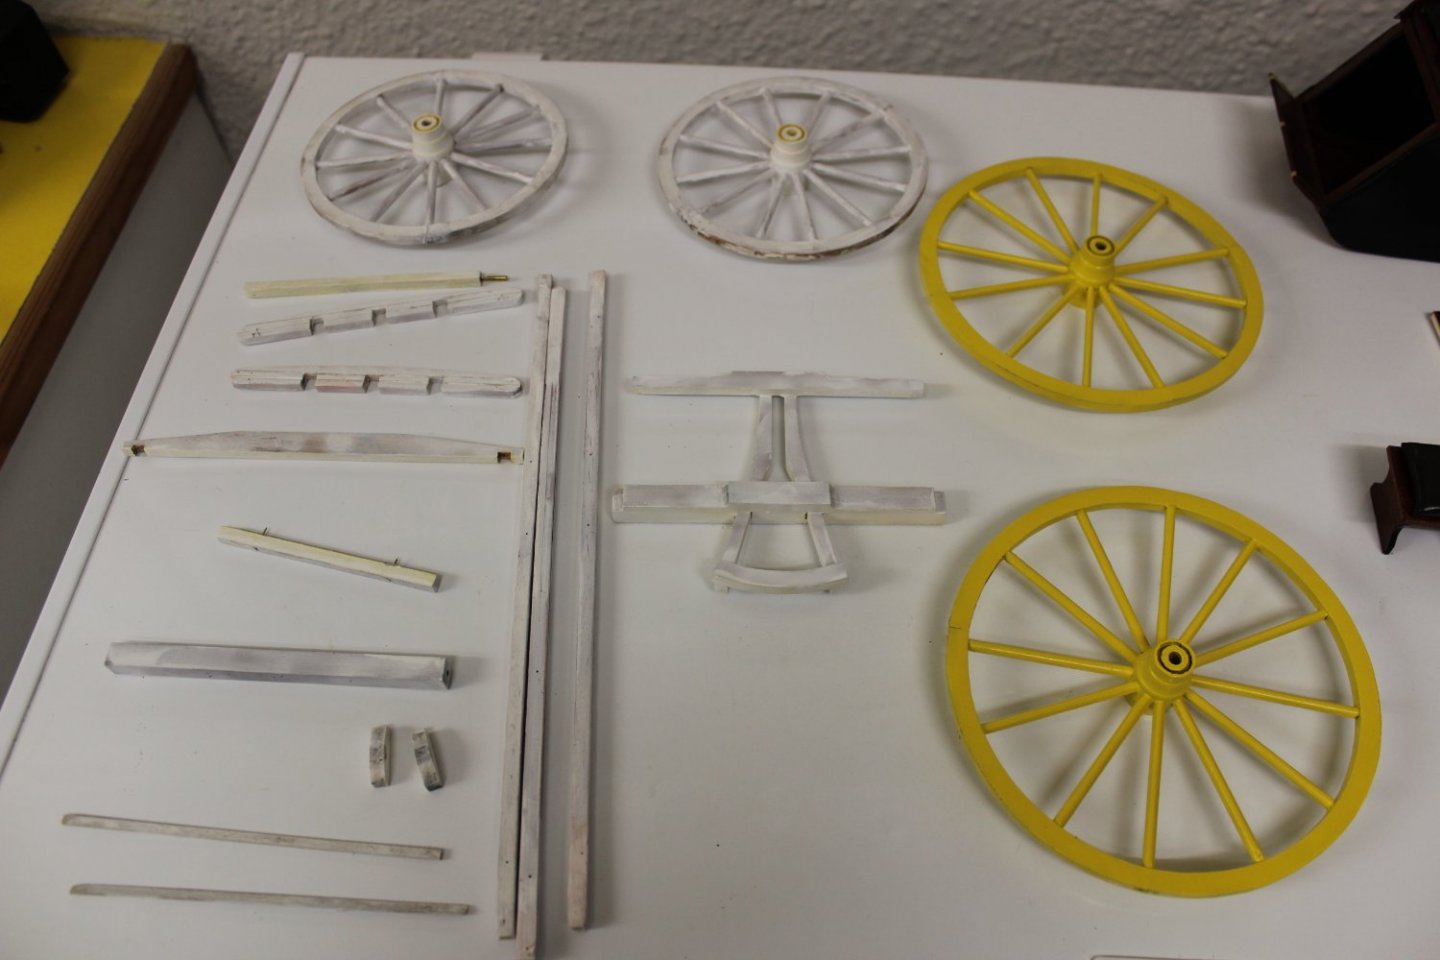
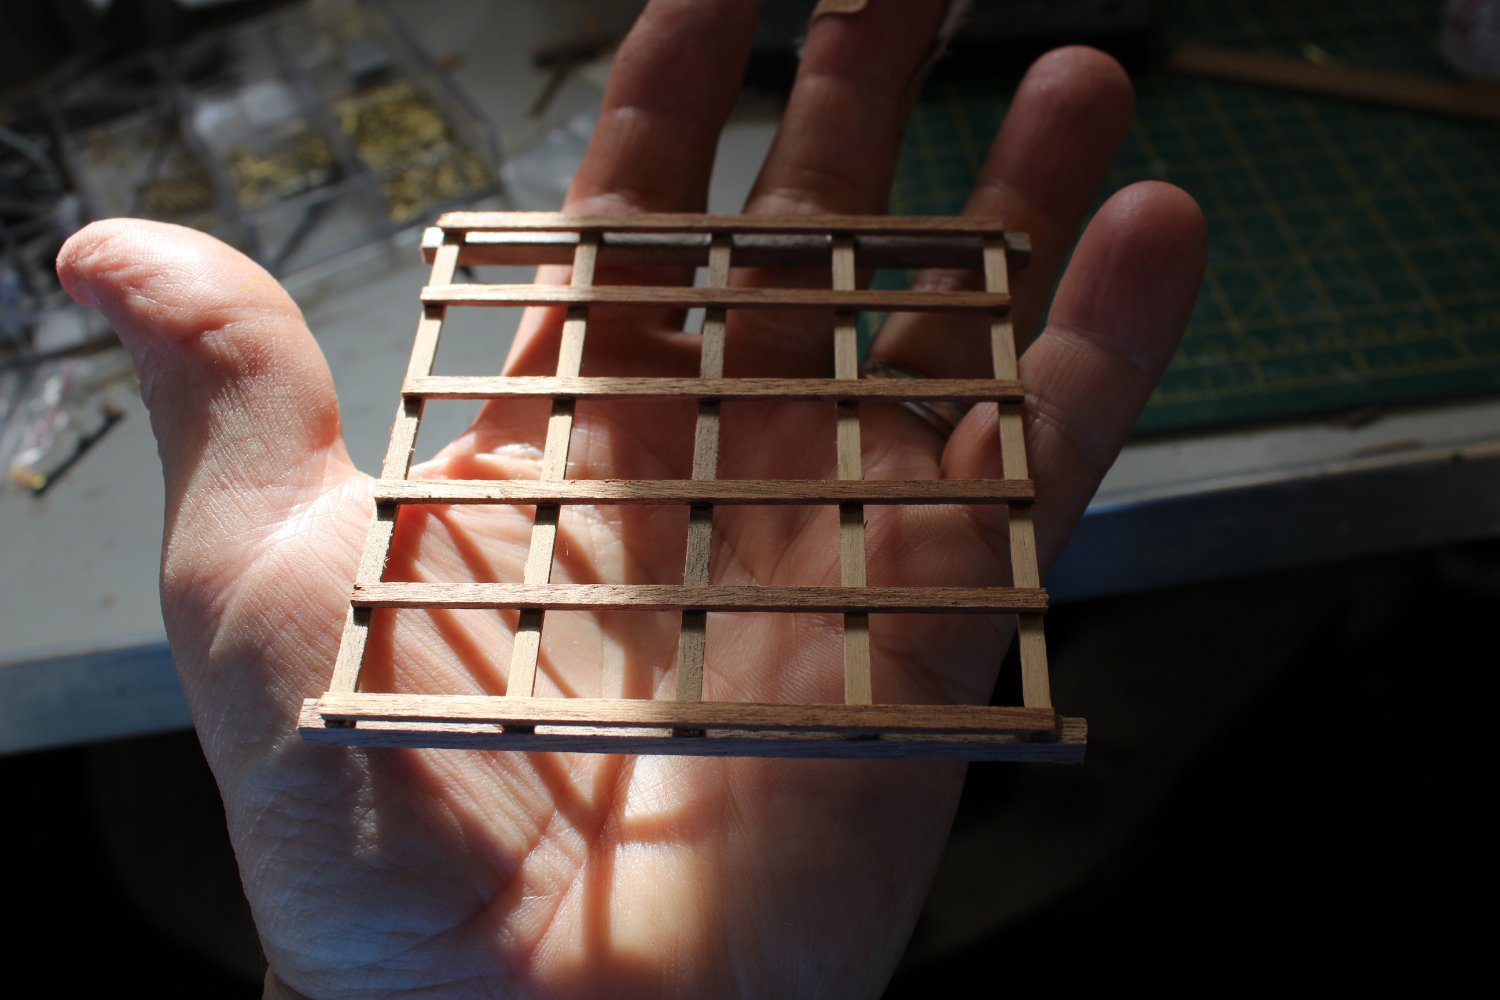
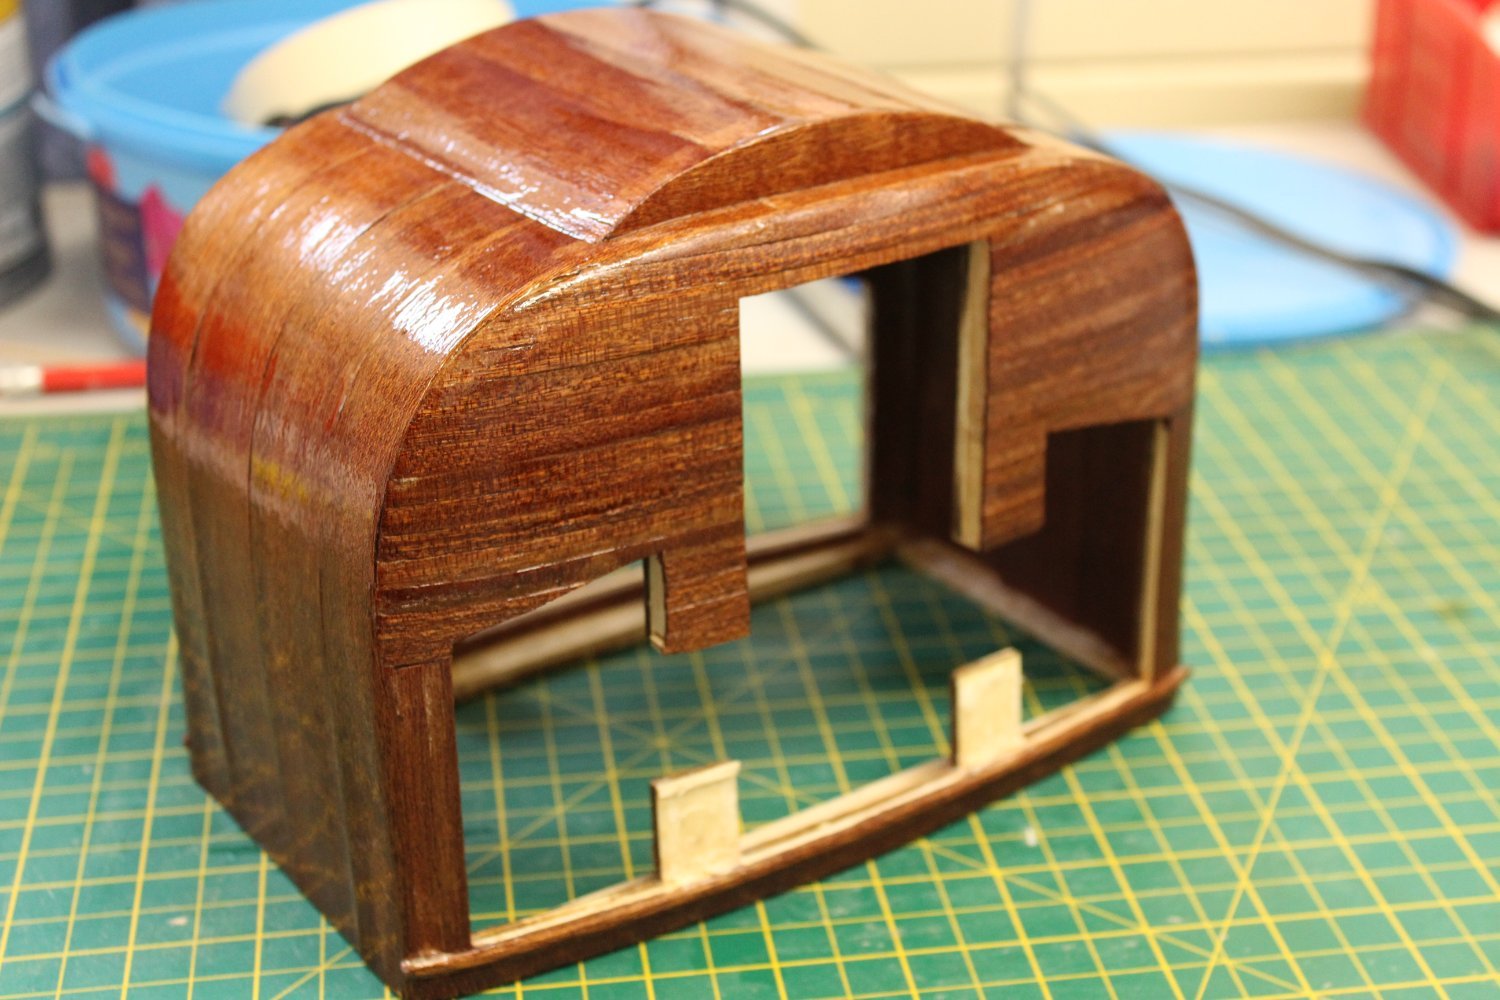
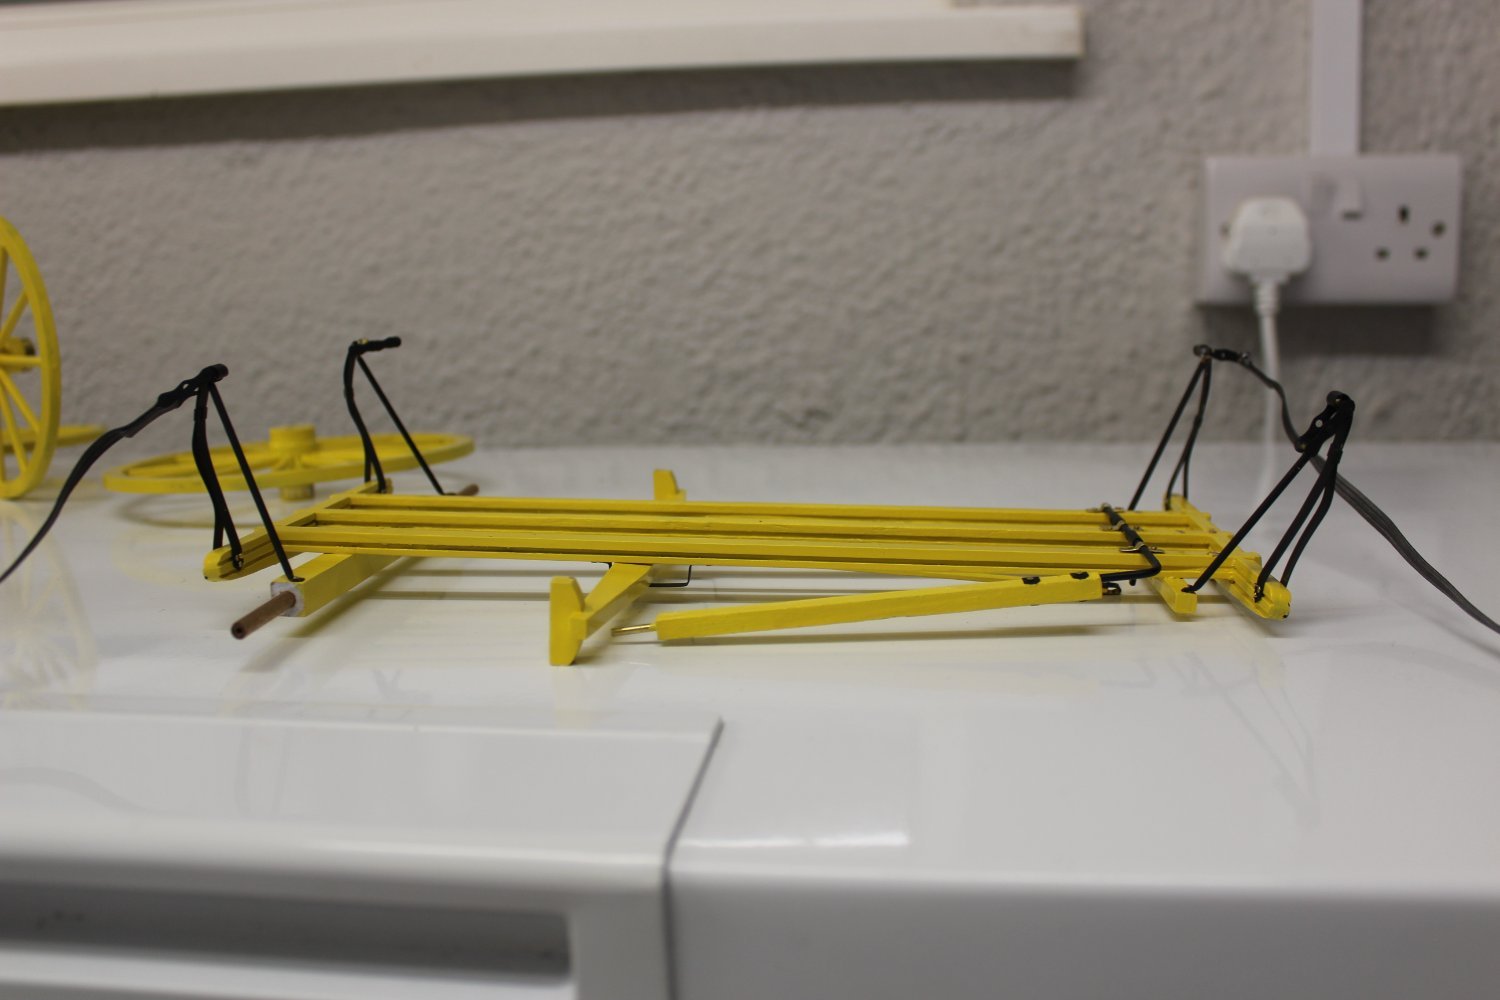
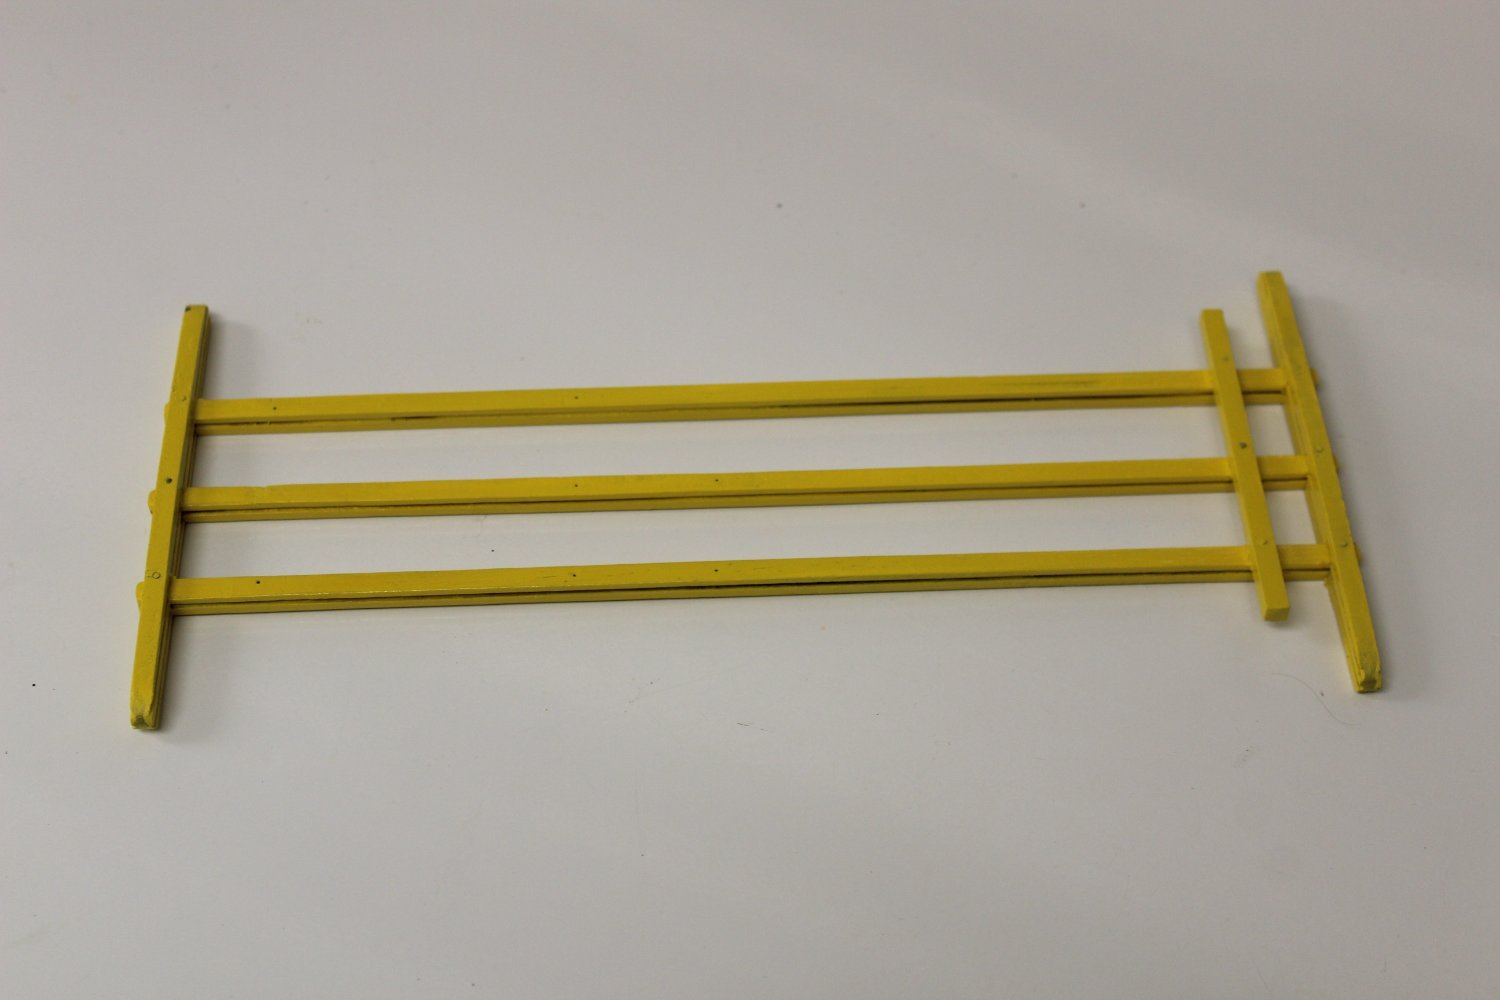
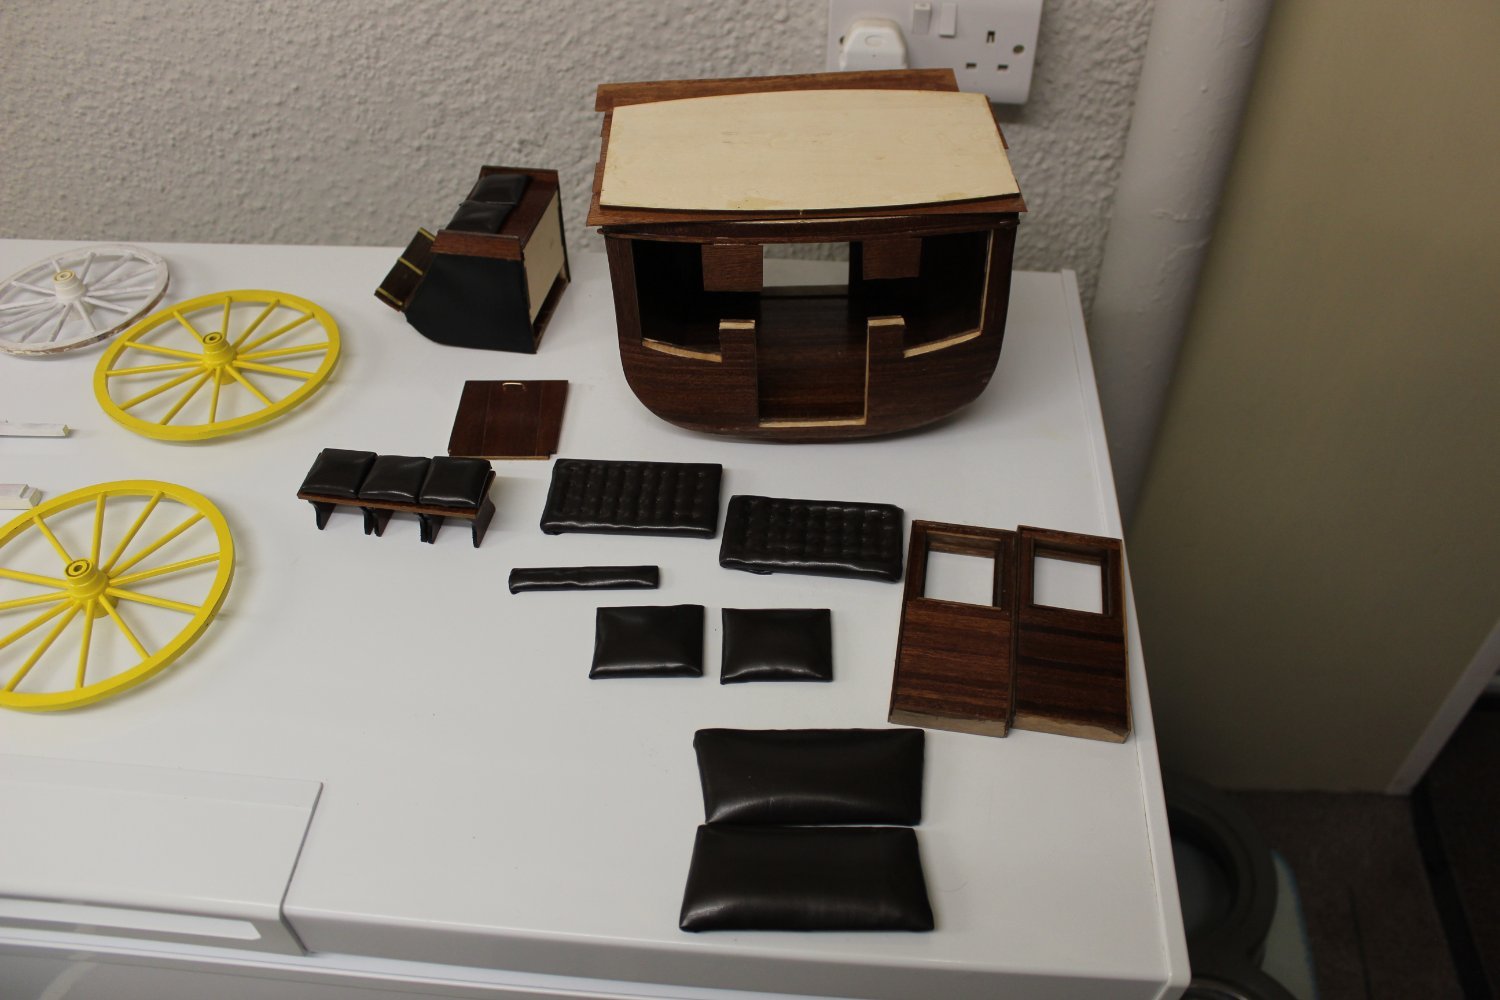
made up the supports to take the weight of the seats
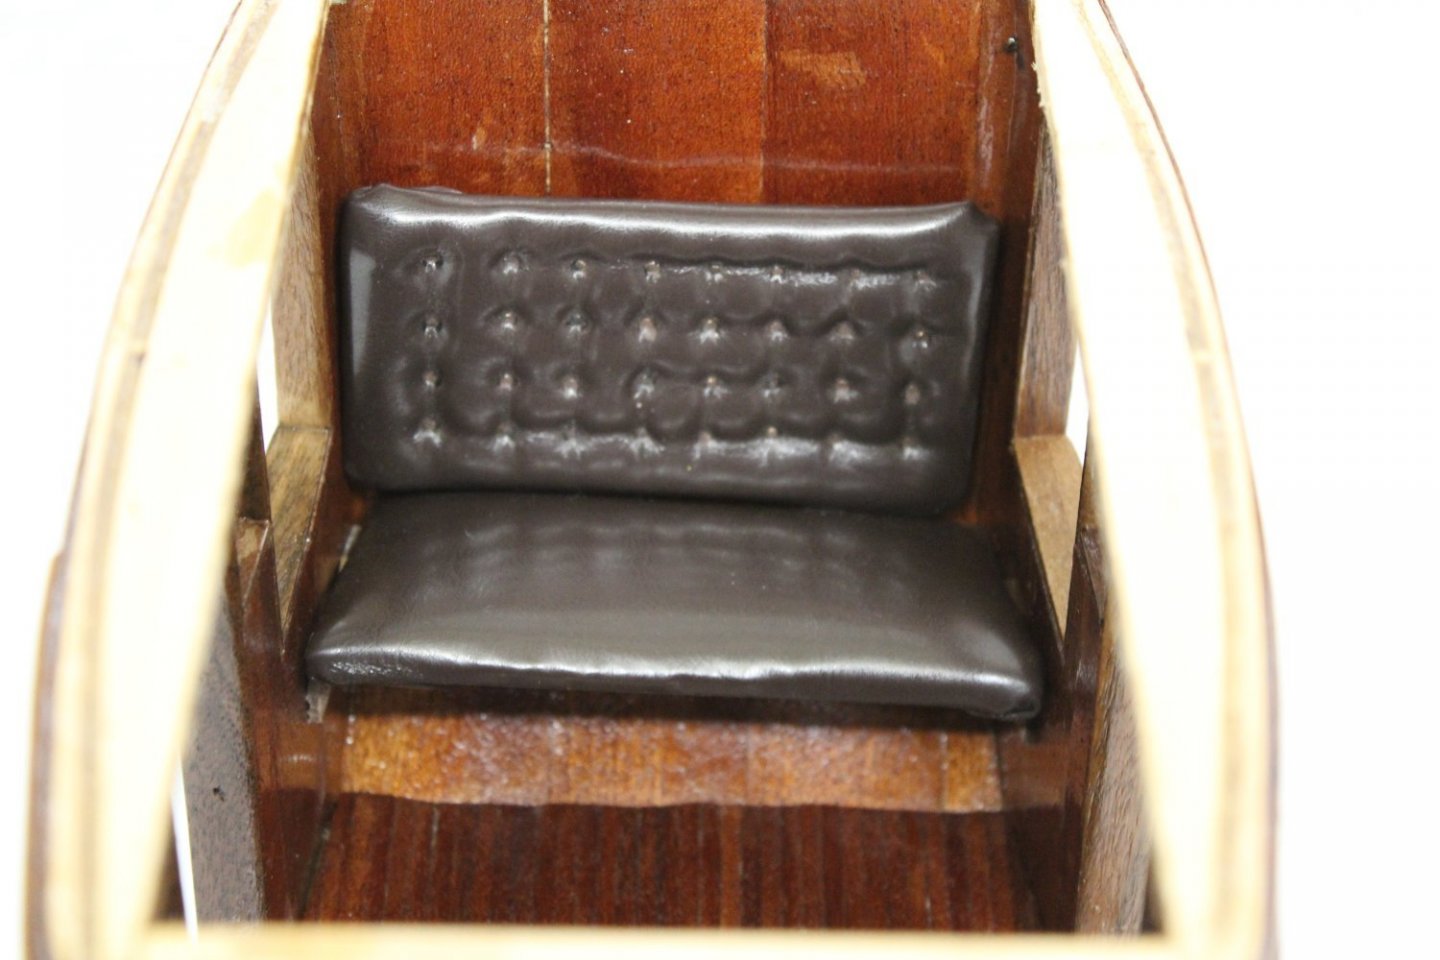
started the boot area (dont actually know whats its called) which wil all be covered over


- gjdale, Canute, thibaultron and 9 others
-
 12
12
-
my plans are to restart this project this week, all three sections at the same time, i just need to finish the stagecoach of first
- thibaultron, amateur, egkb and 3 others
-
6
-
15 minutes ago, Hashir said:
Hi
Please forgive my ignorance as I'm new in this. Brand new to be exact. But how strong is a cardboard ship going to be? It has a LOT of fine details that are so brilliant but wouldn't the cardboard compromise its life?
the way it has been designed, as per the real ship, it is quite strong, wrt to being card, i will protect it with modge podge, which is a varnish
many of this kits are given a outer protective layer and used on the water with RC
- mtaylor, egkb, thibaultron and 2 others
-
5
-
good evening everyone
thank you for comments and likes, i will get back to you
@popeye the sailor @Canute @Old Collingwood
the great fence repair has taken me away from the build for the last few days, sorted for now, the rest can wait for warmer days
the pretty strips are done both sides now and has all had another coat of varnish
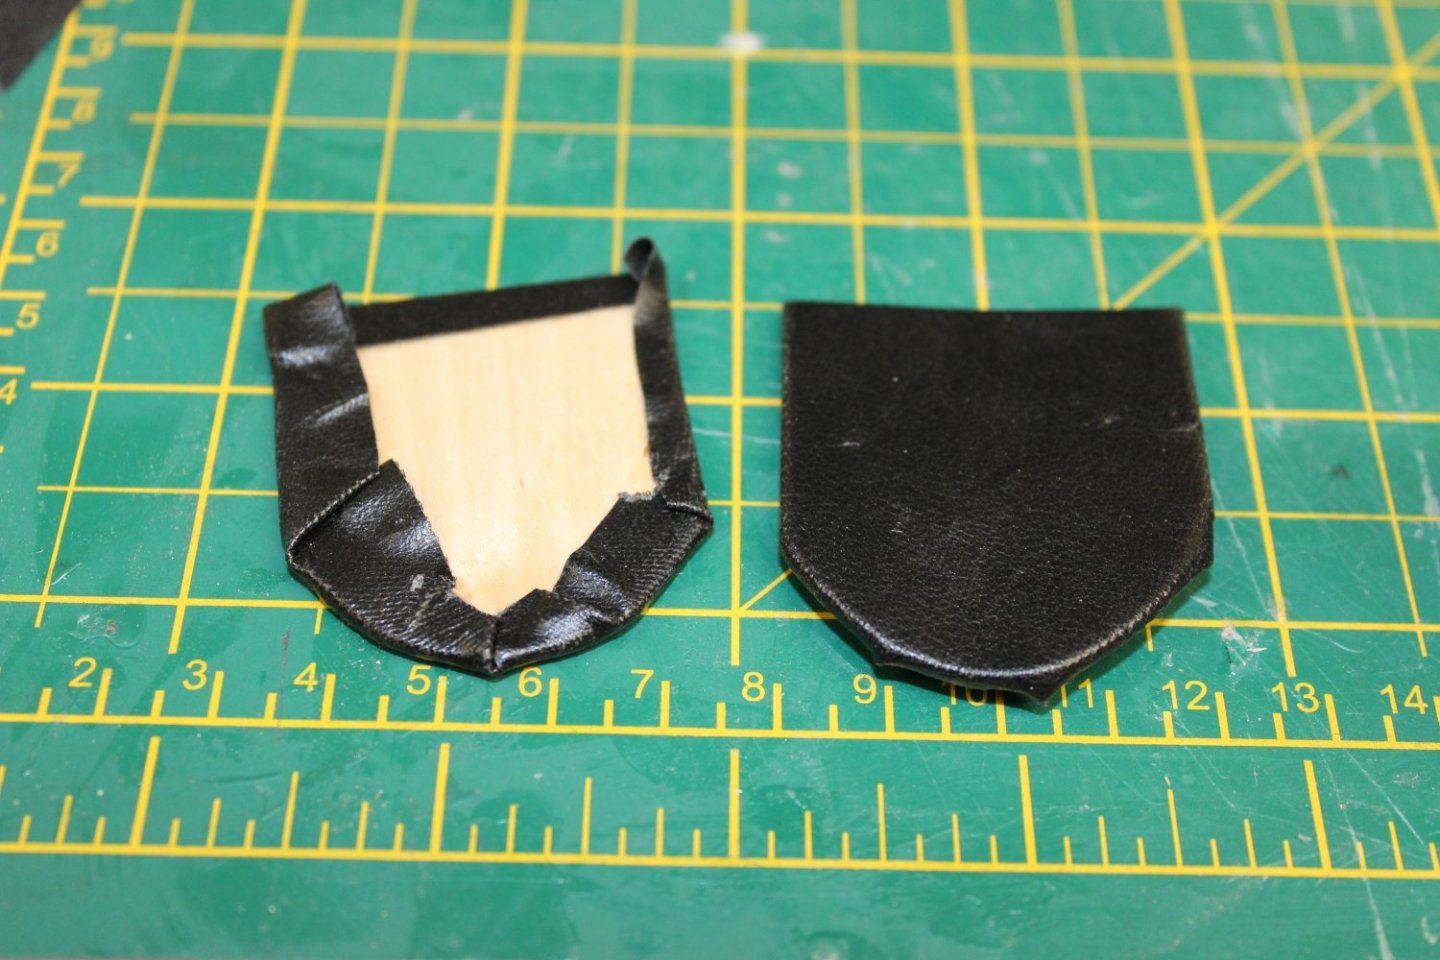
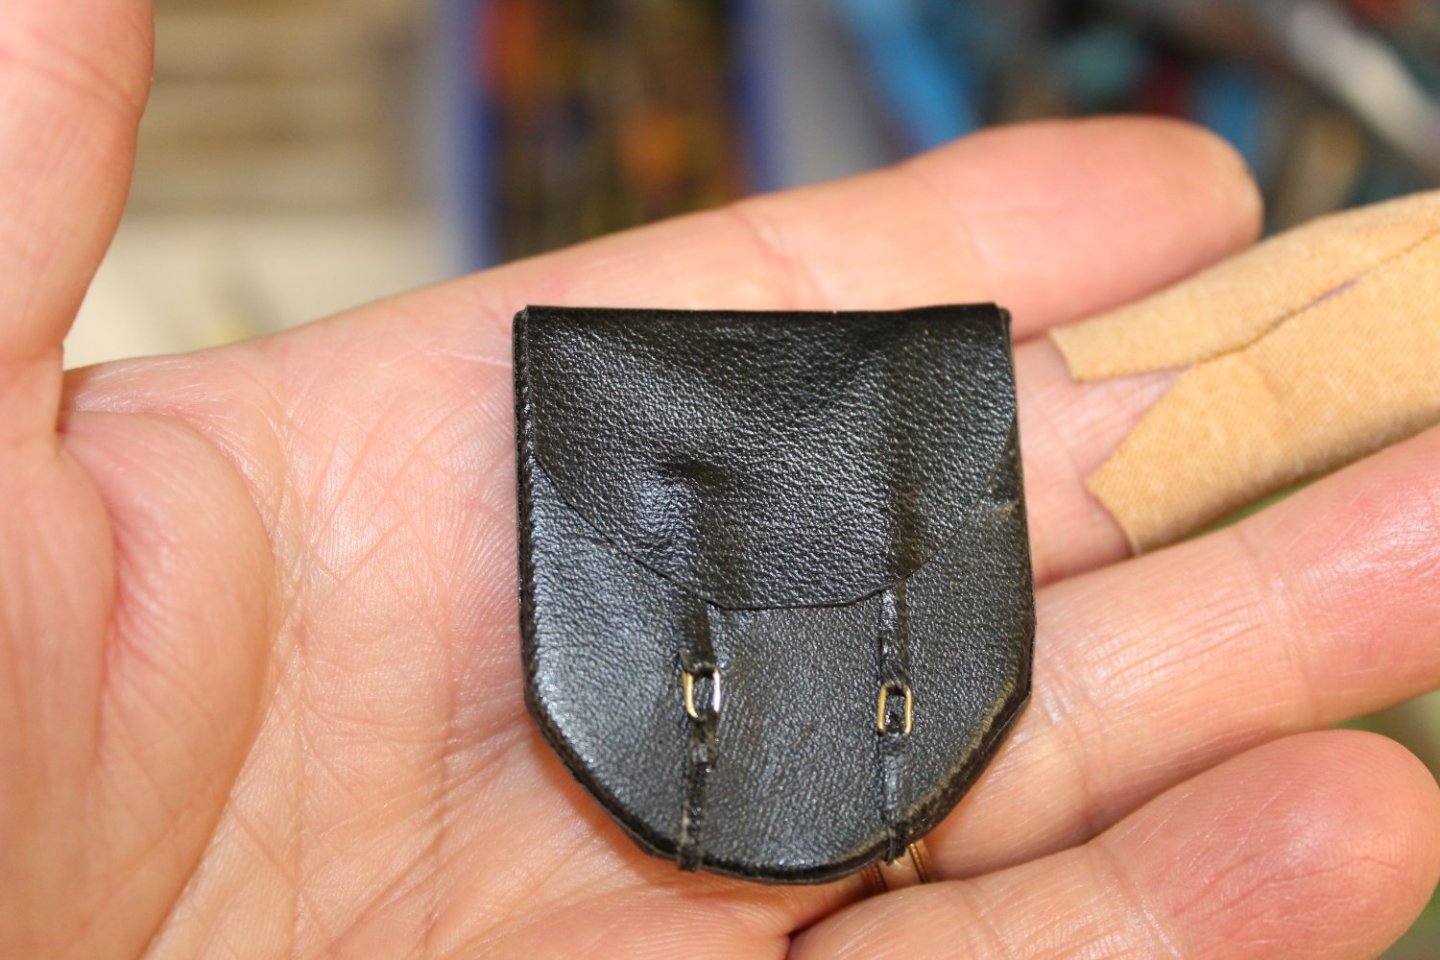
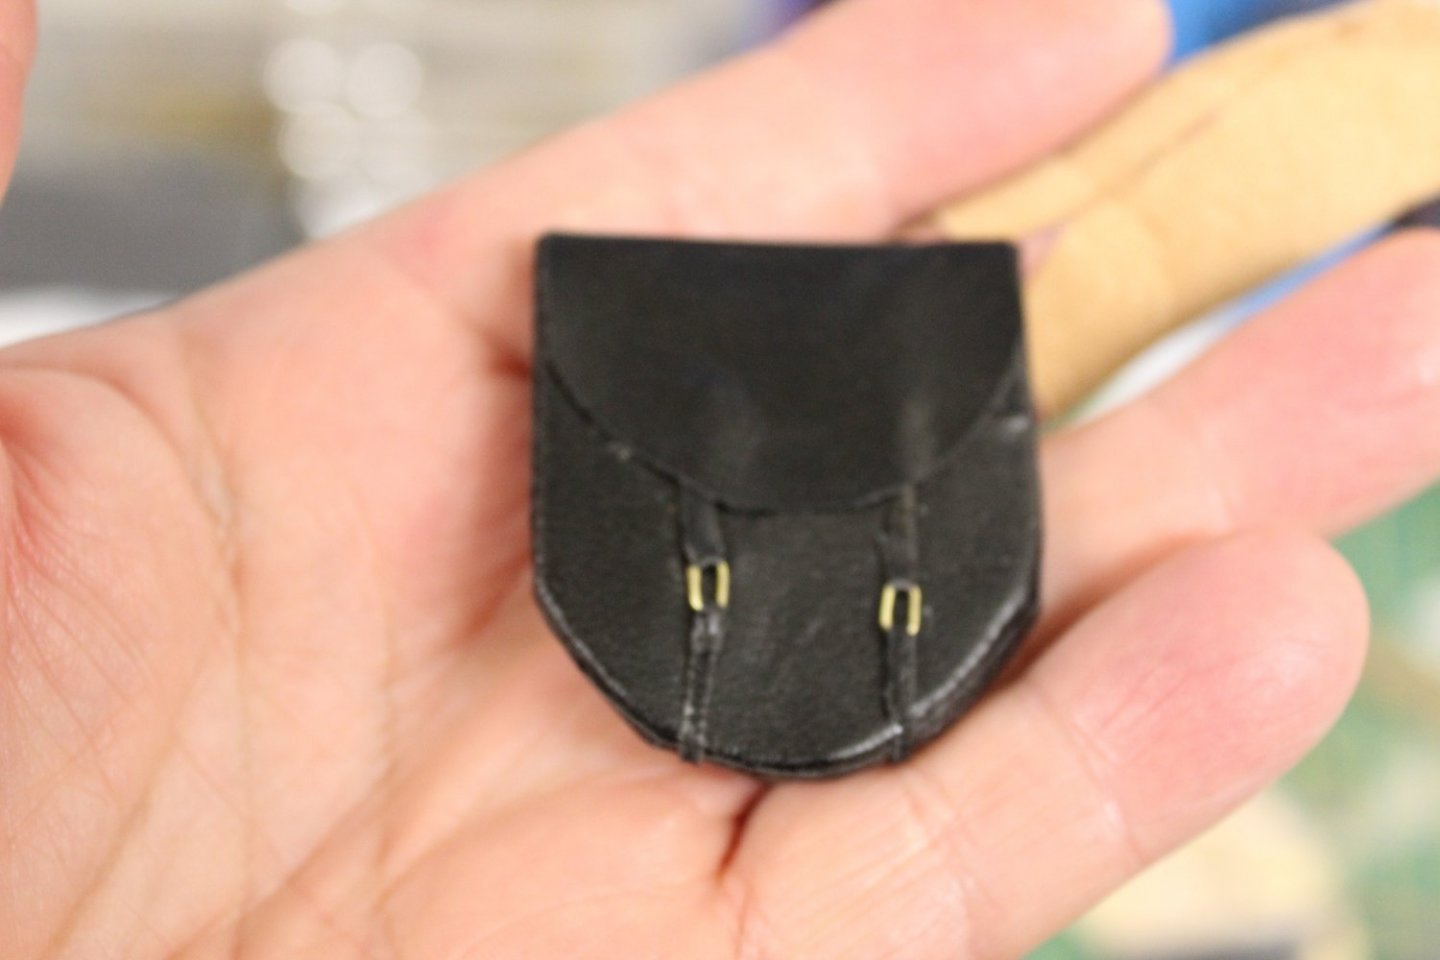
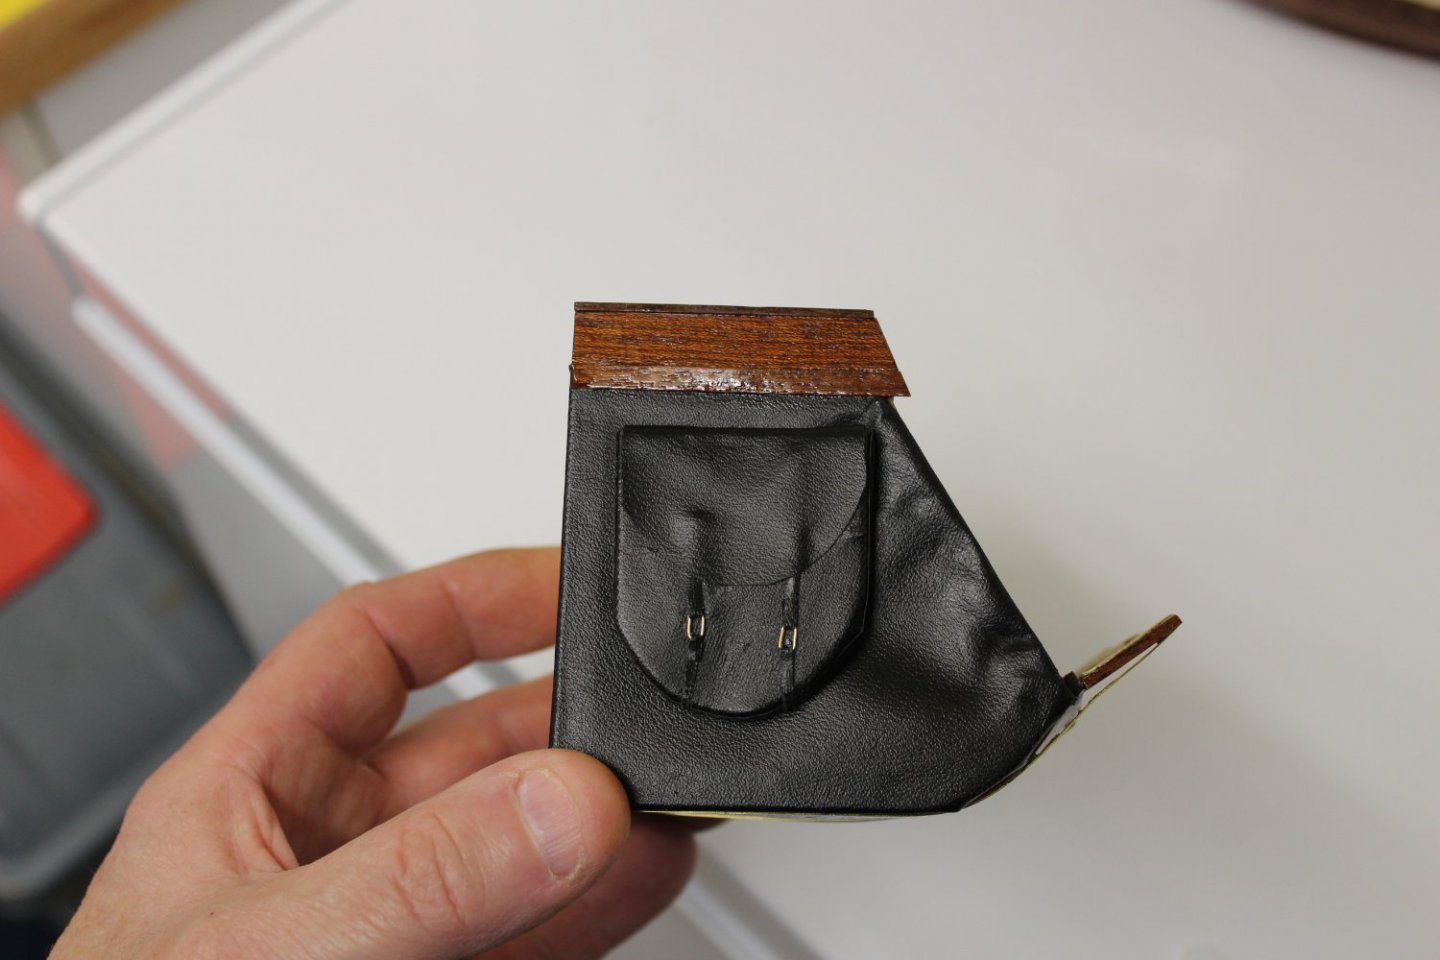
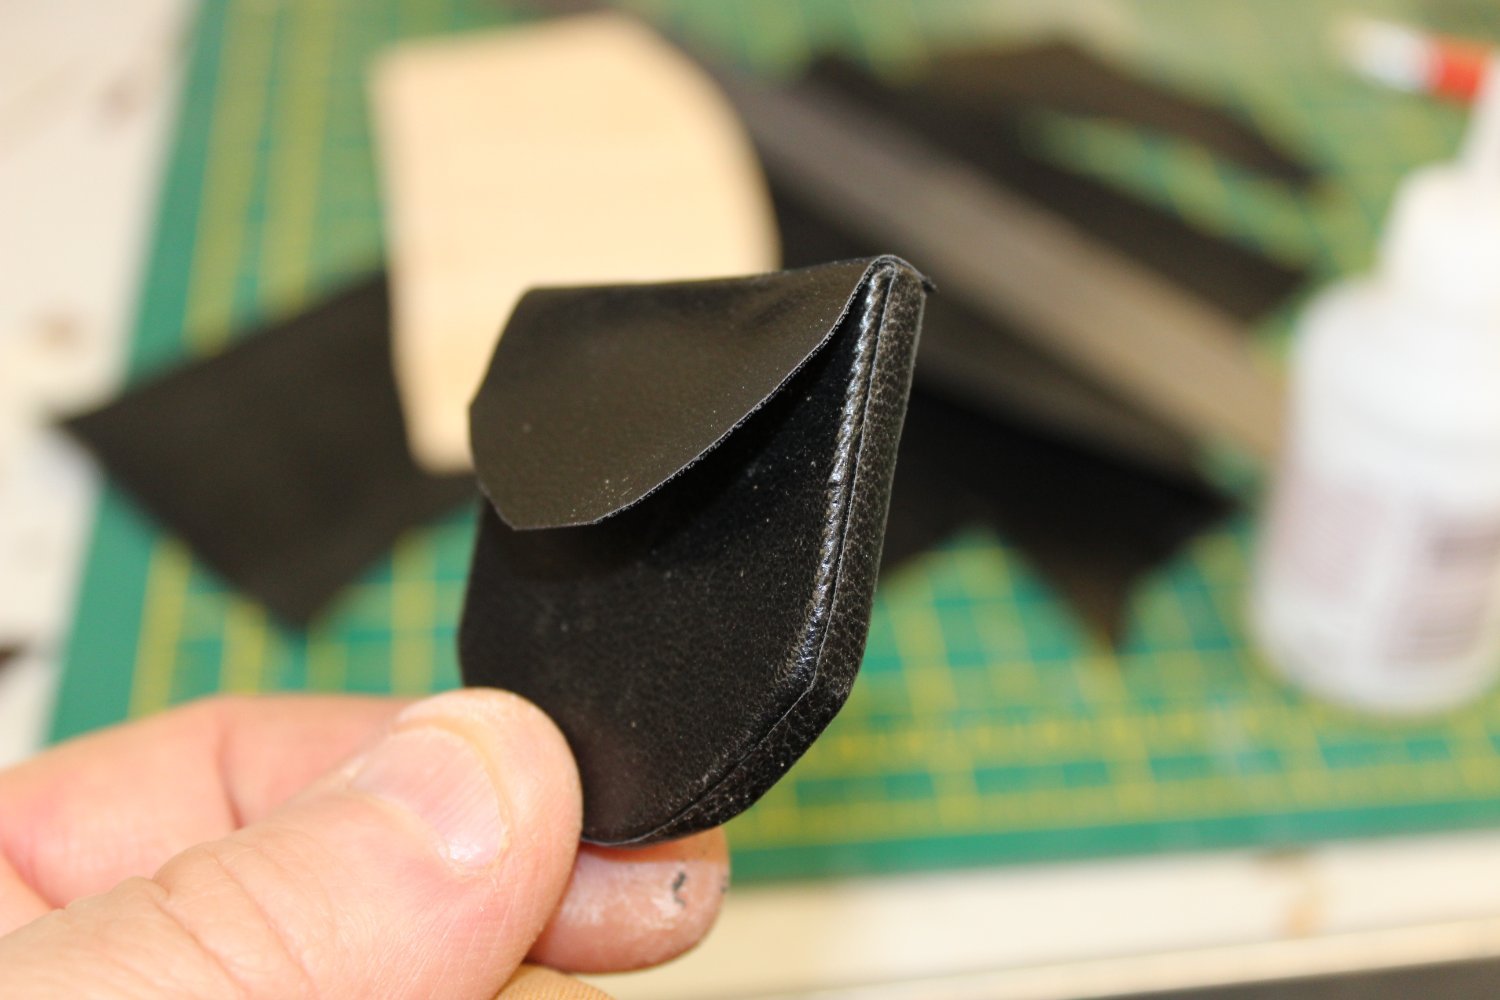
last night was spent making up one of the two mail pouches
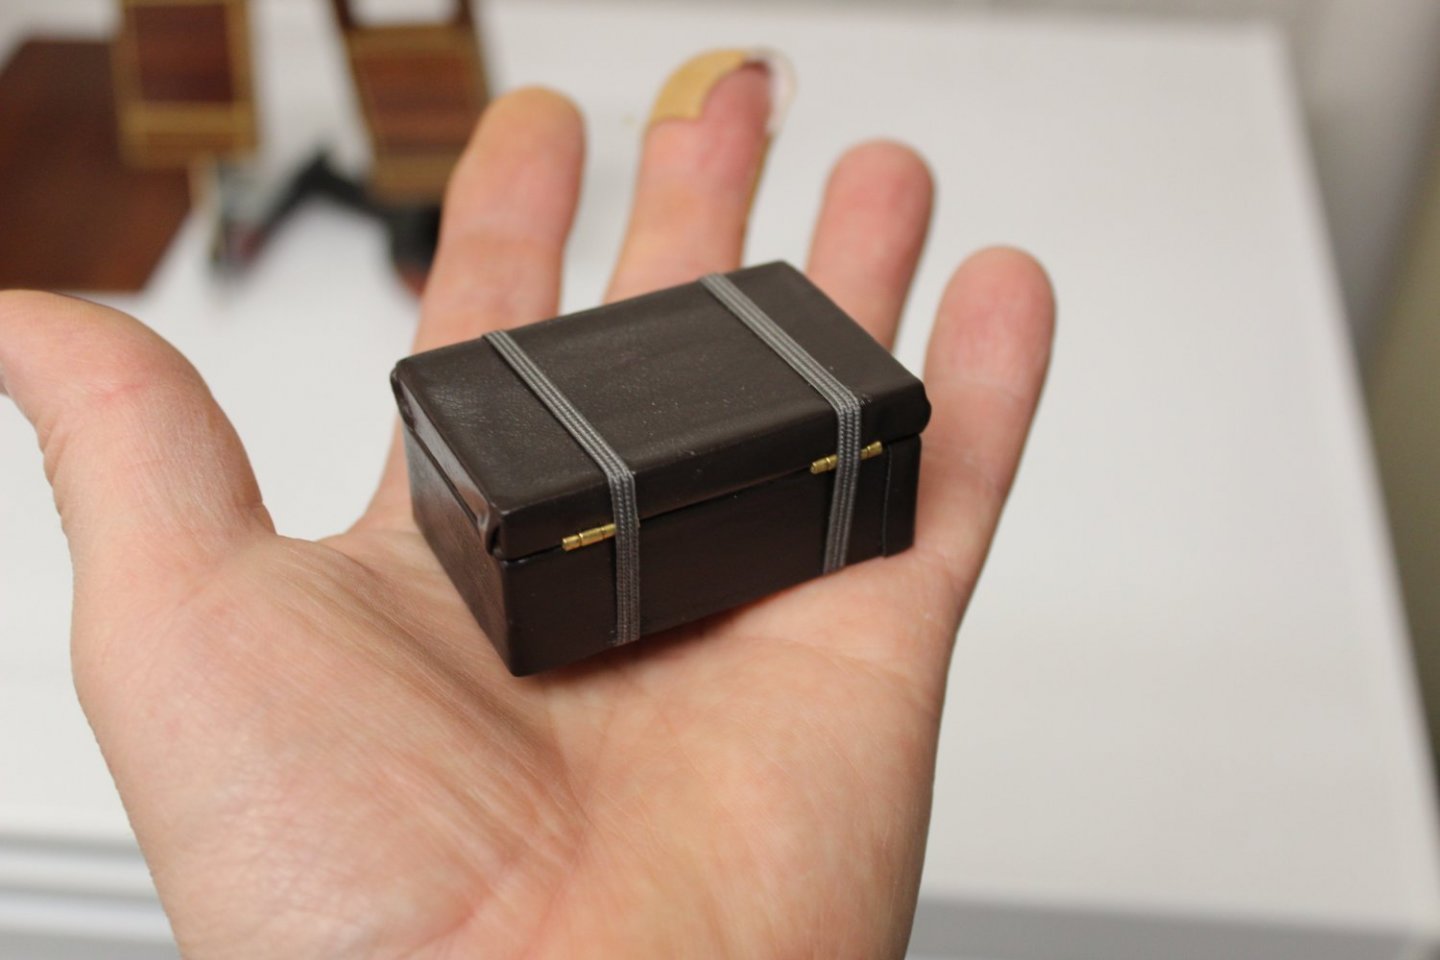
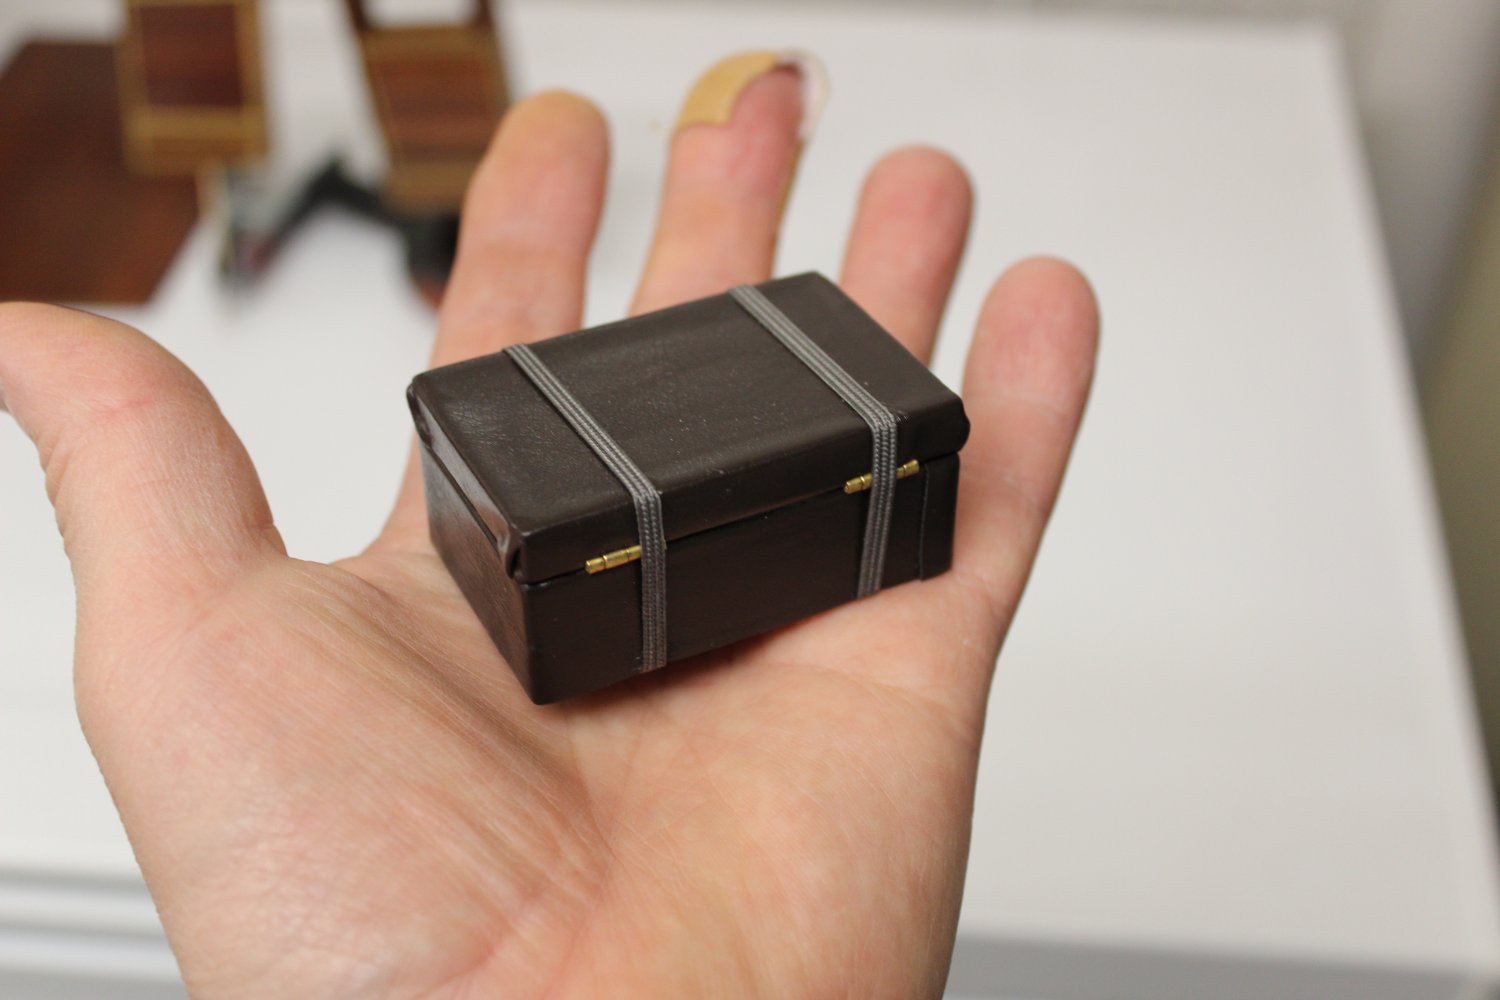
the previous night doing the trunk

-
-
found
- thibaultron, MEDDO, reklein and 1 other
-
4
-
welcome to MSW
Sorry for the loss of your dad
looking forward to seeing what you are building
here is a link to one of our female members @DORIS
- mtaylor, Ryland Craze and Keith Black
-
3
-
5 minutes ago, Old Collingwood said:
That is looking so nice Kevin, the wood detailing is really sharp - and the varnish makes it Pop.
OC.
Thank you OC, i was wondering where you were, you both ok?
-
-
-
thank you for the comments, i will look at the shoelace and leather ideas
mark i feel i would run into all sorts of problems and get very messy doing that, i had to cut a piece of wood of the dog yesterday and that was just with wood glue lol
-
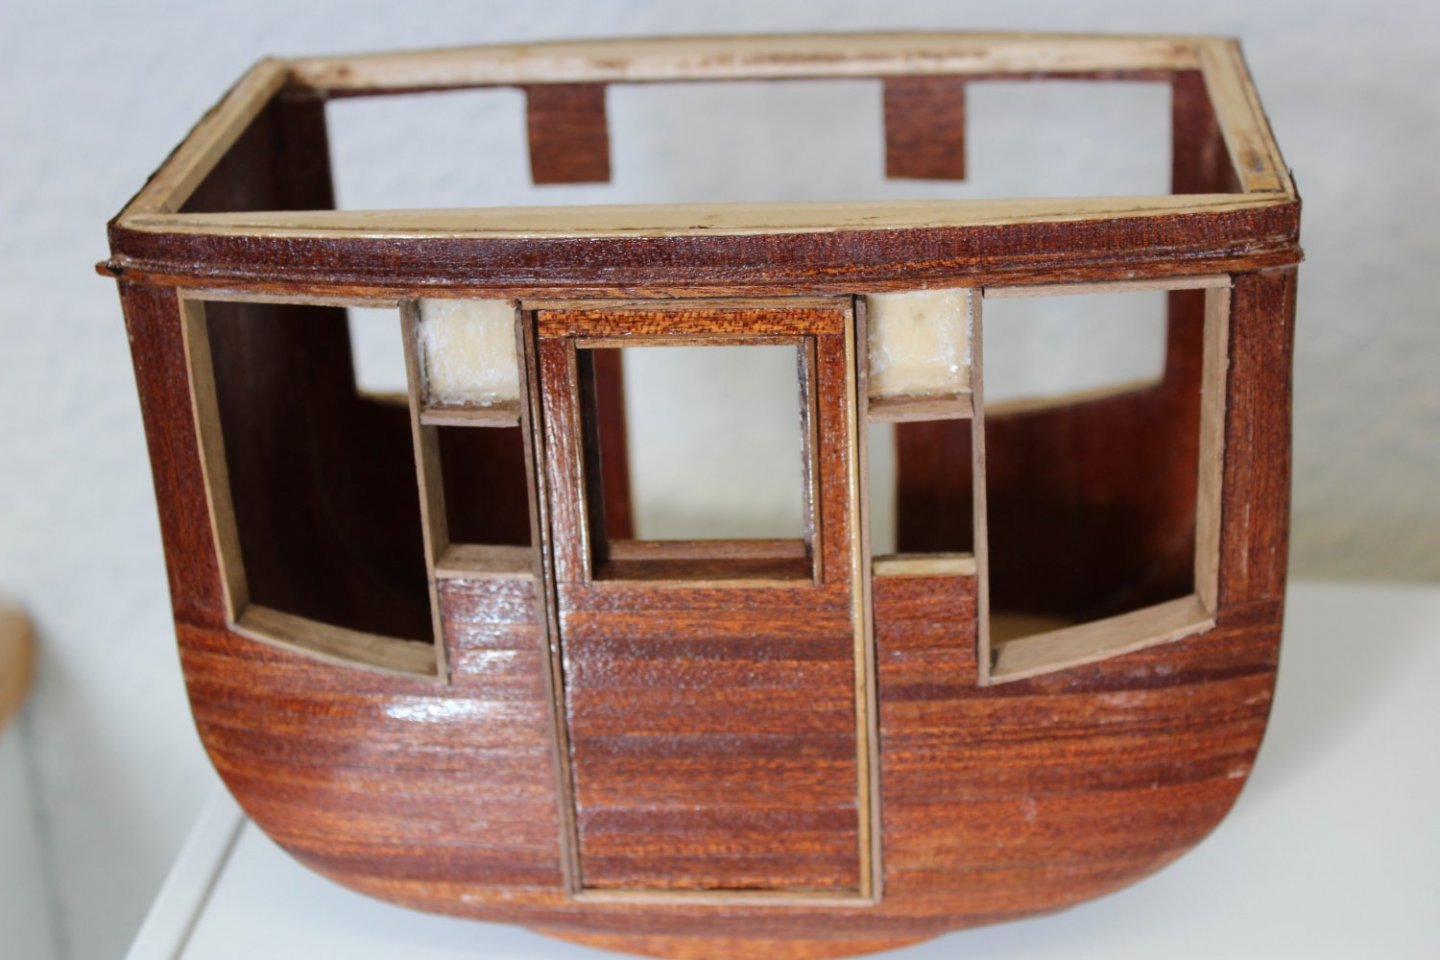
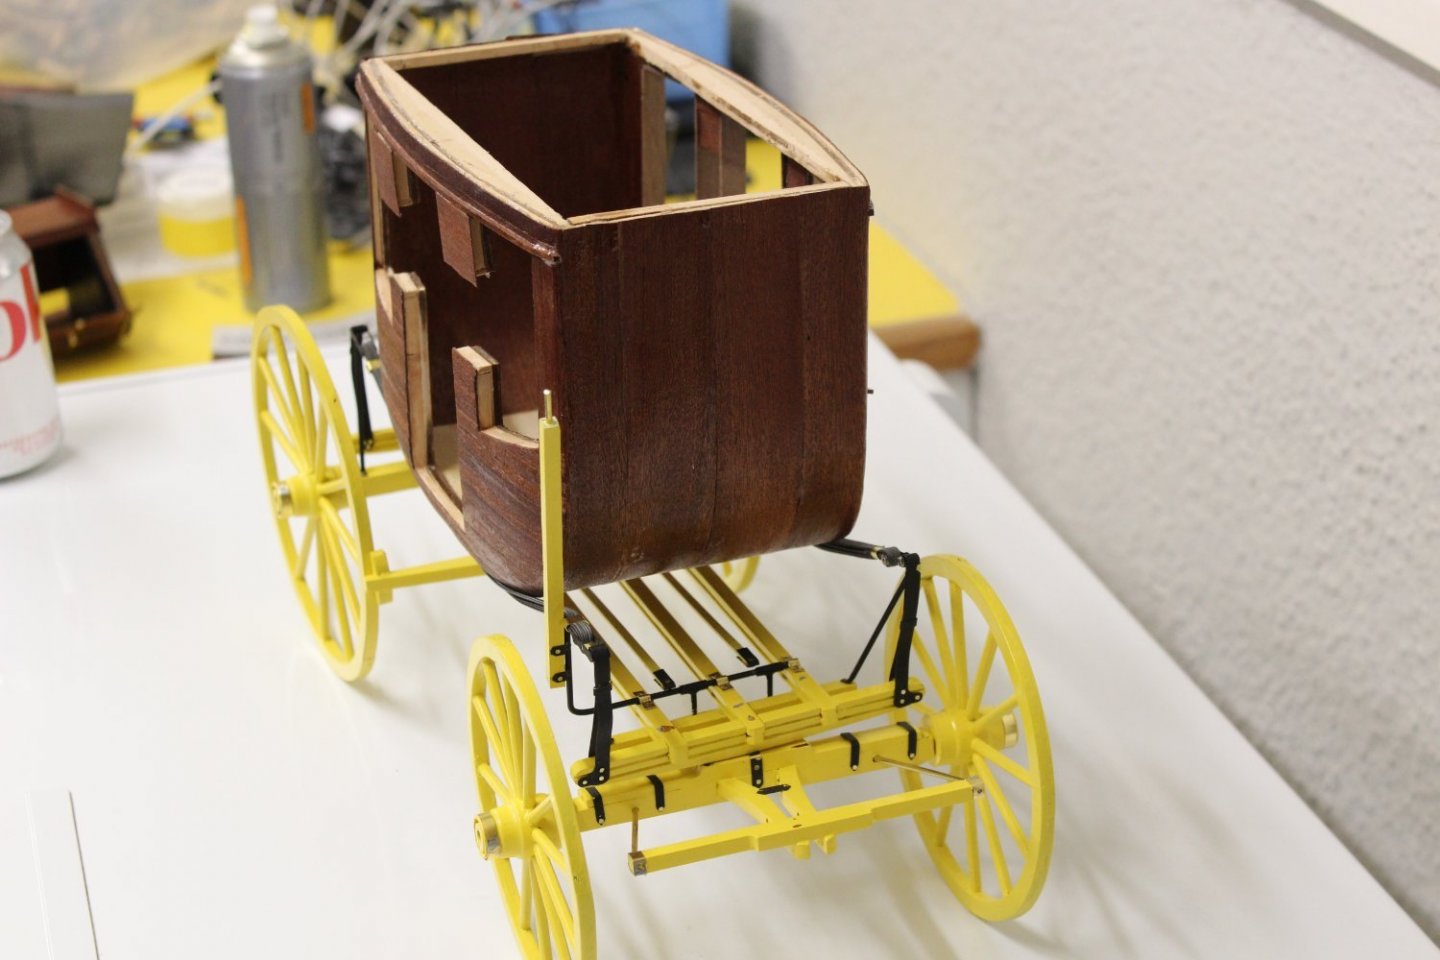
good evening everyone
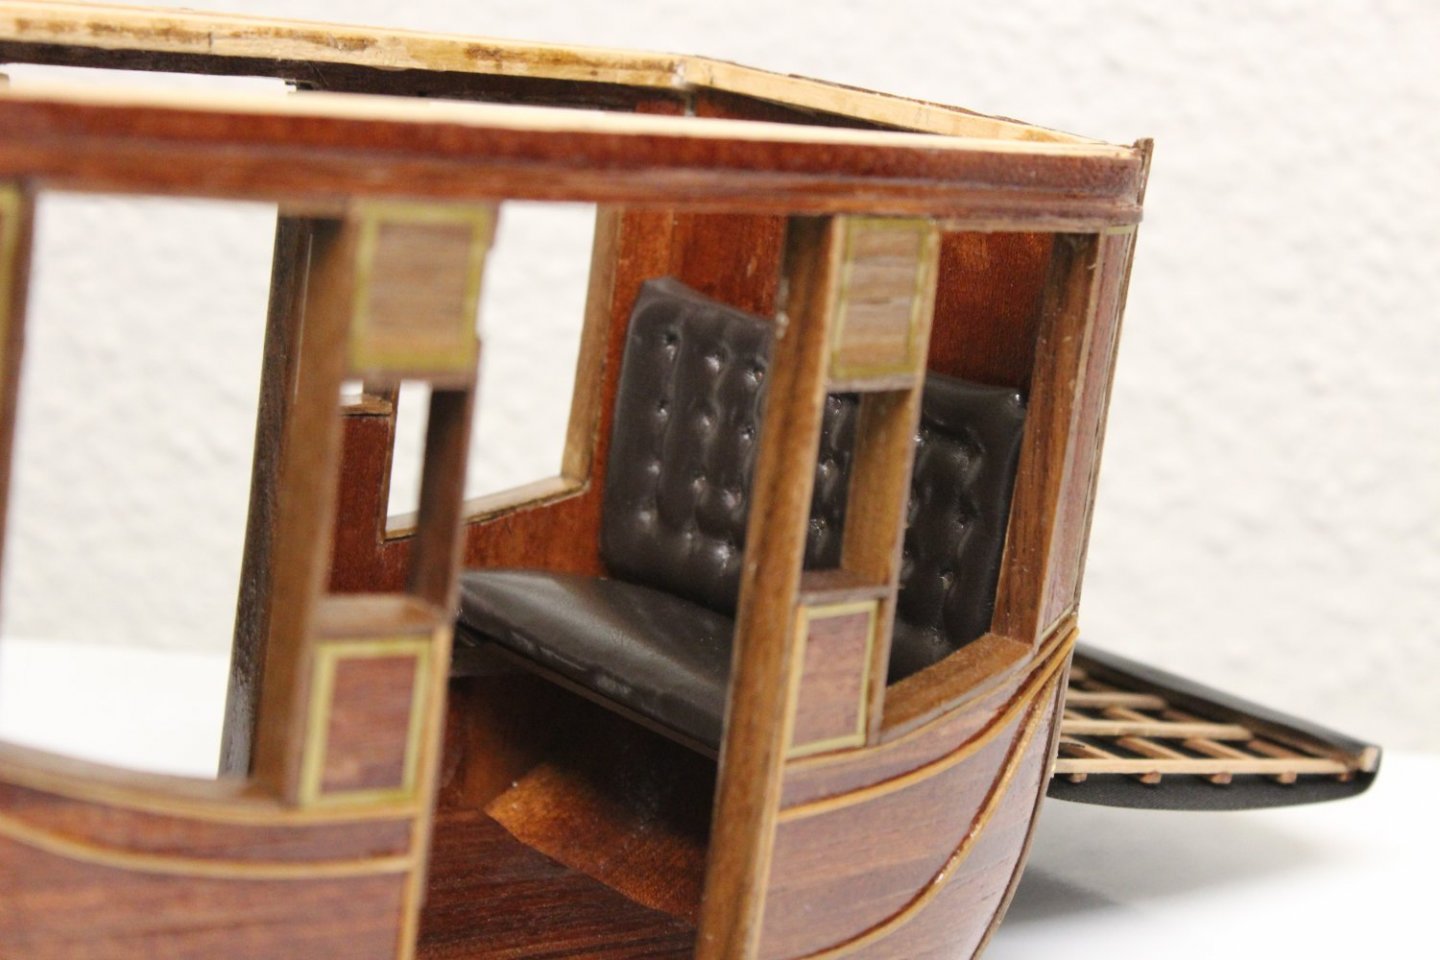
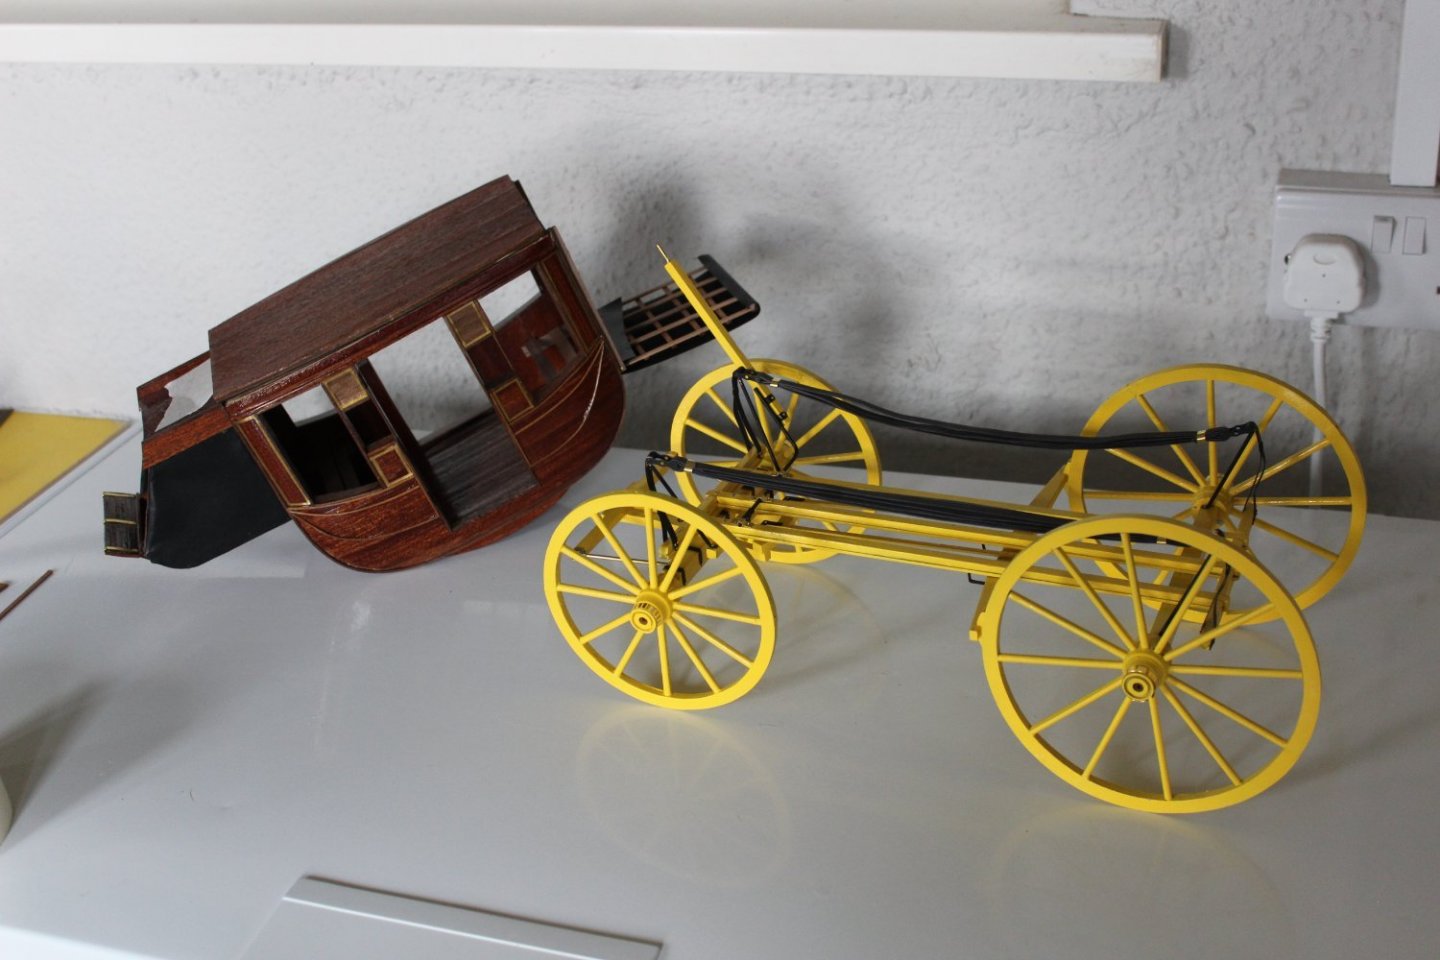
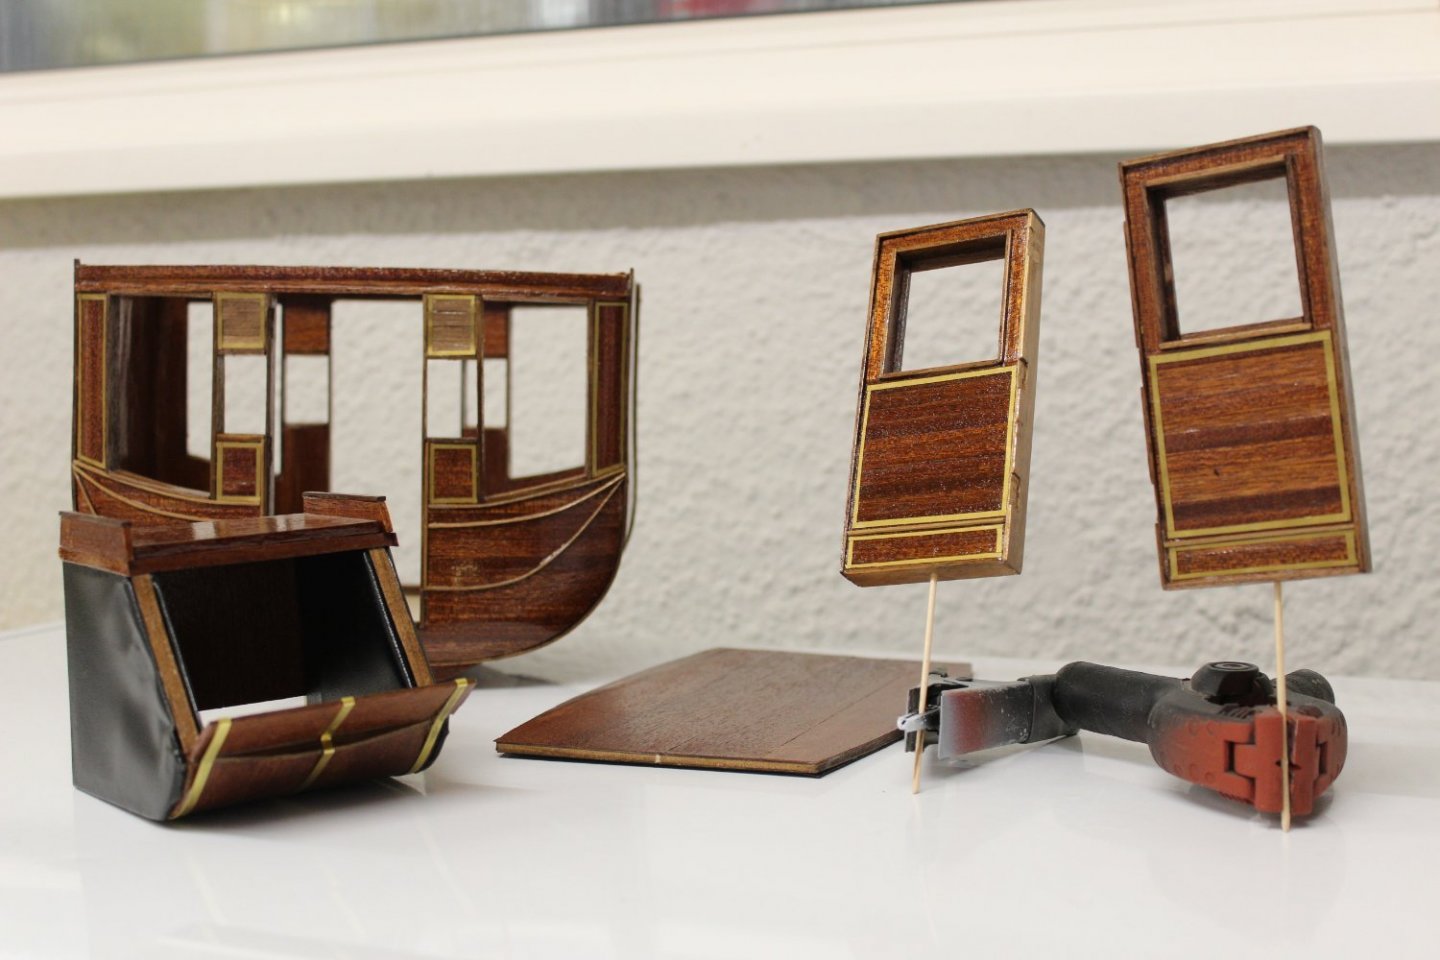
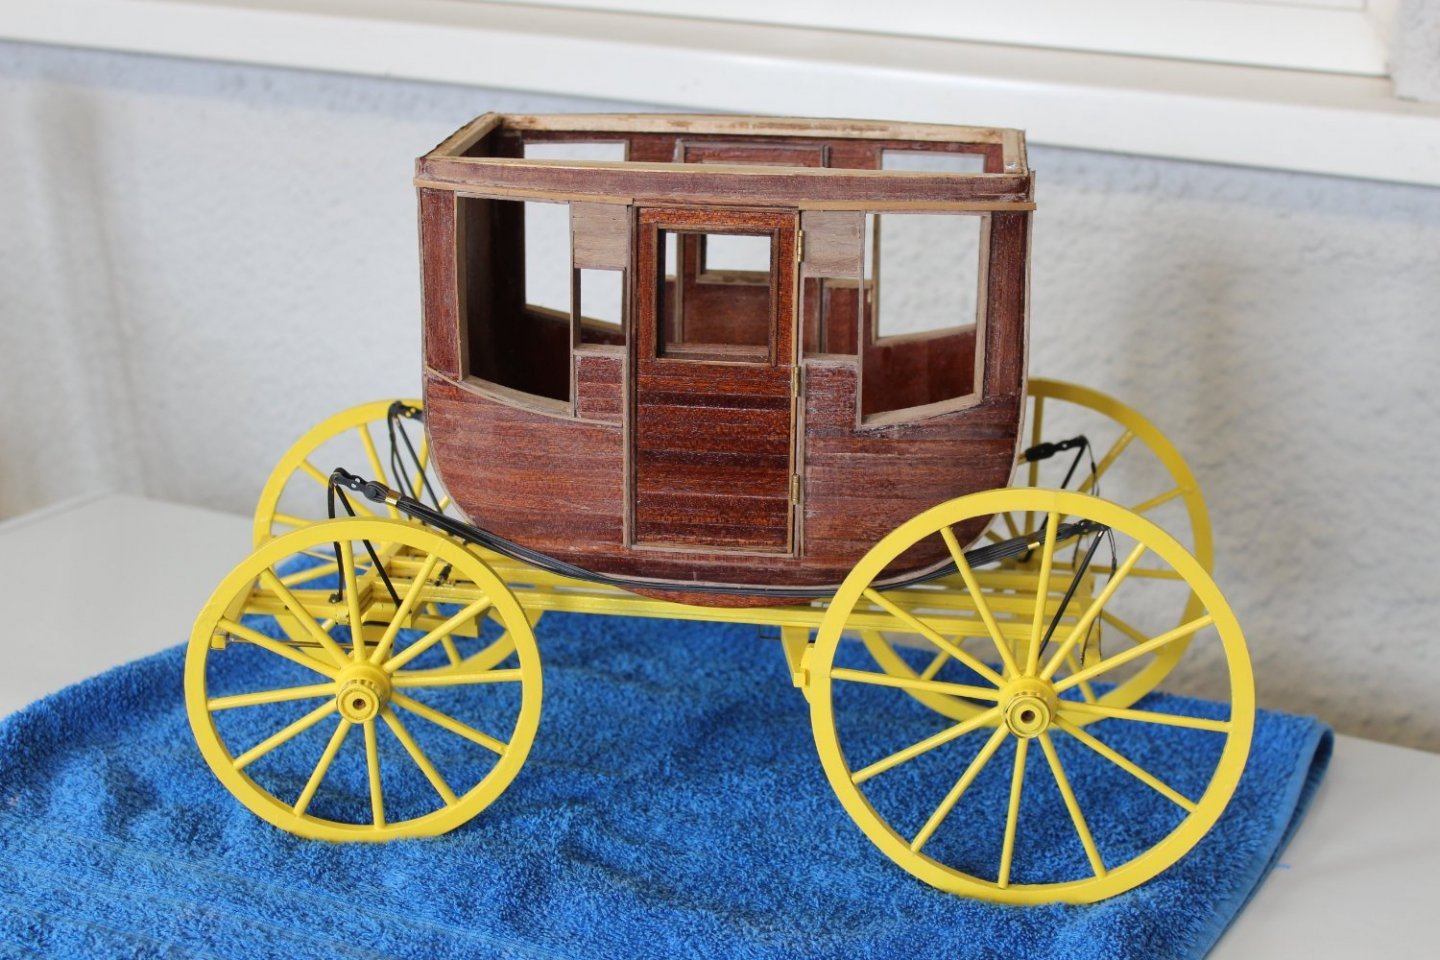
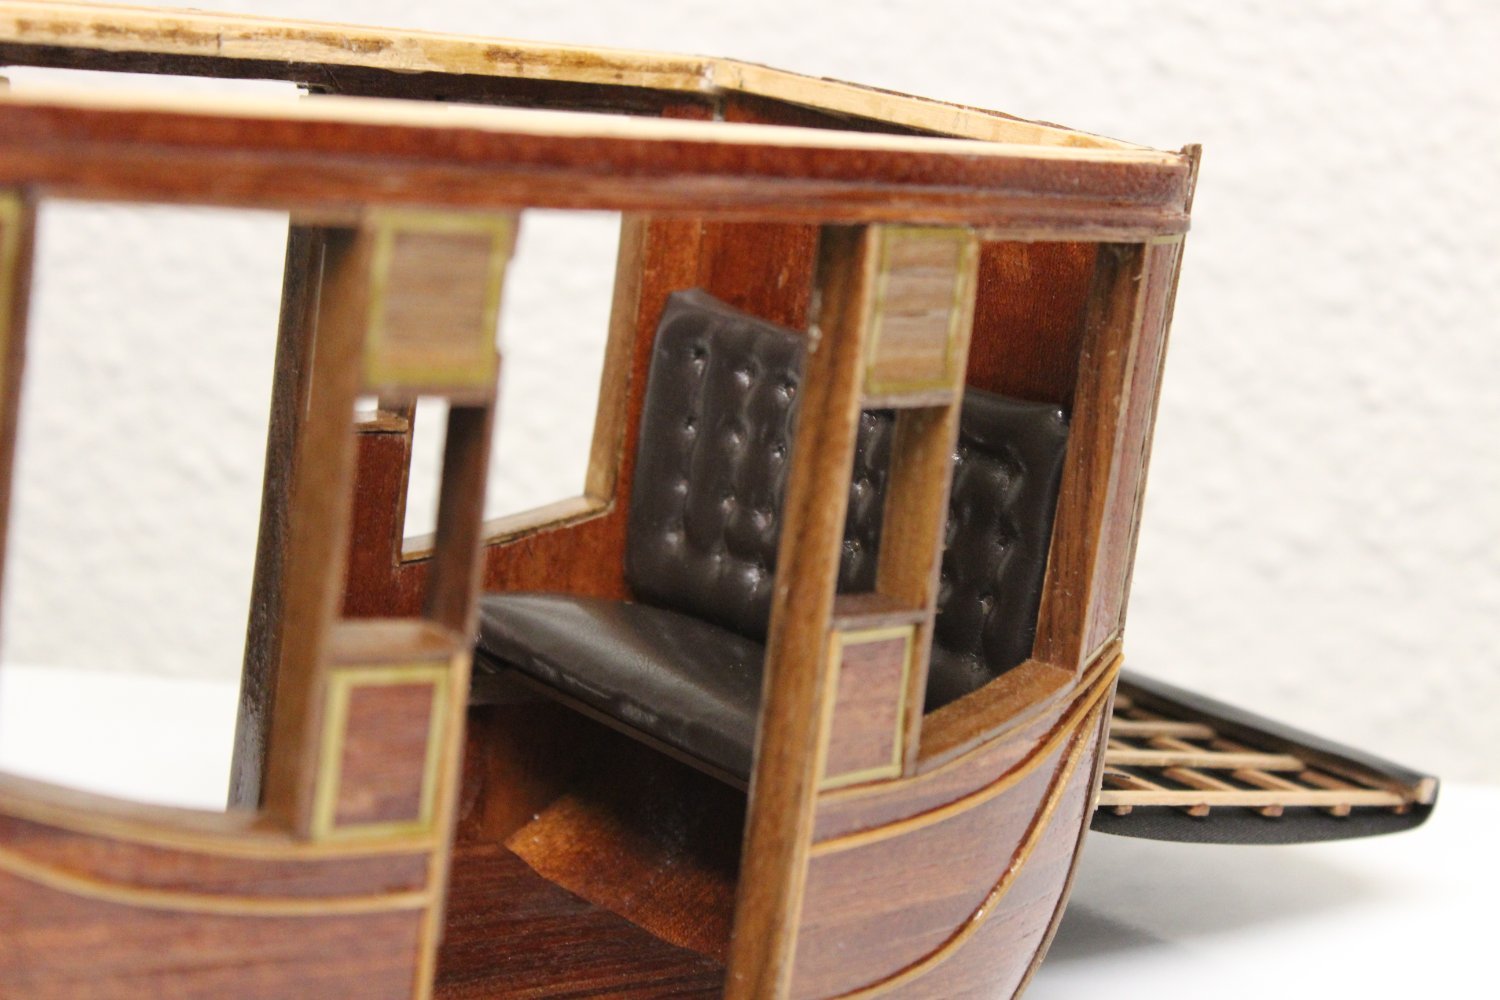
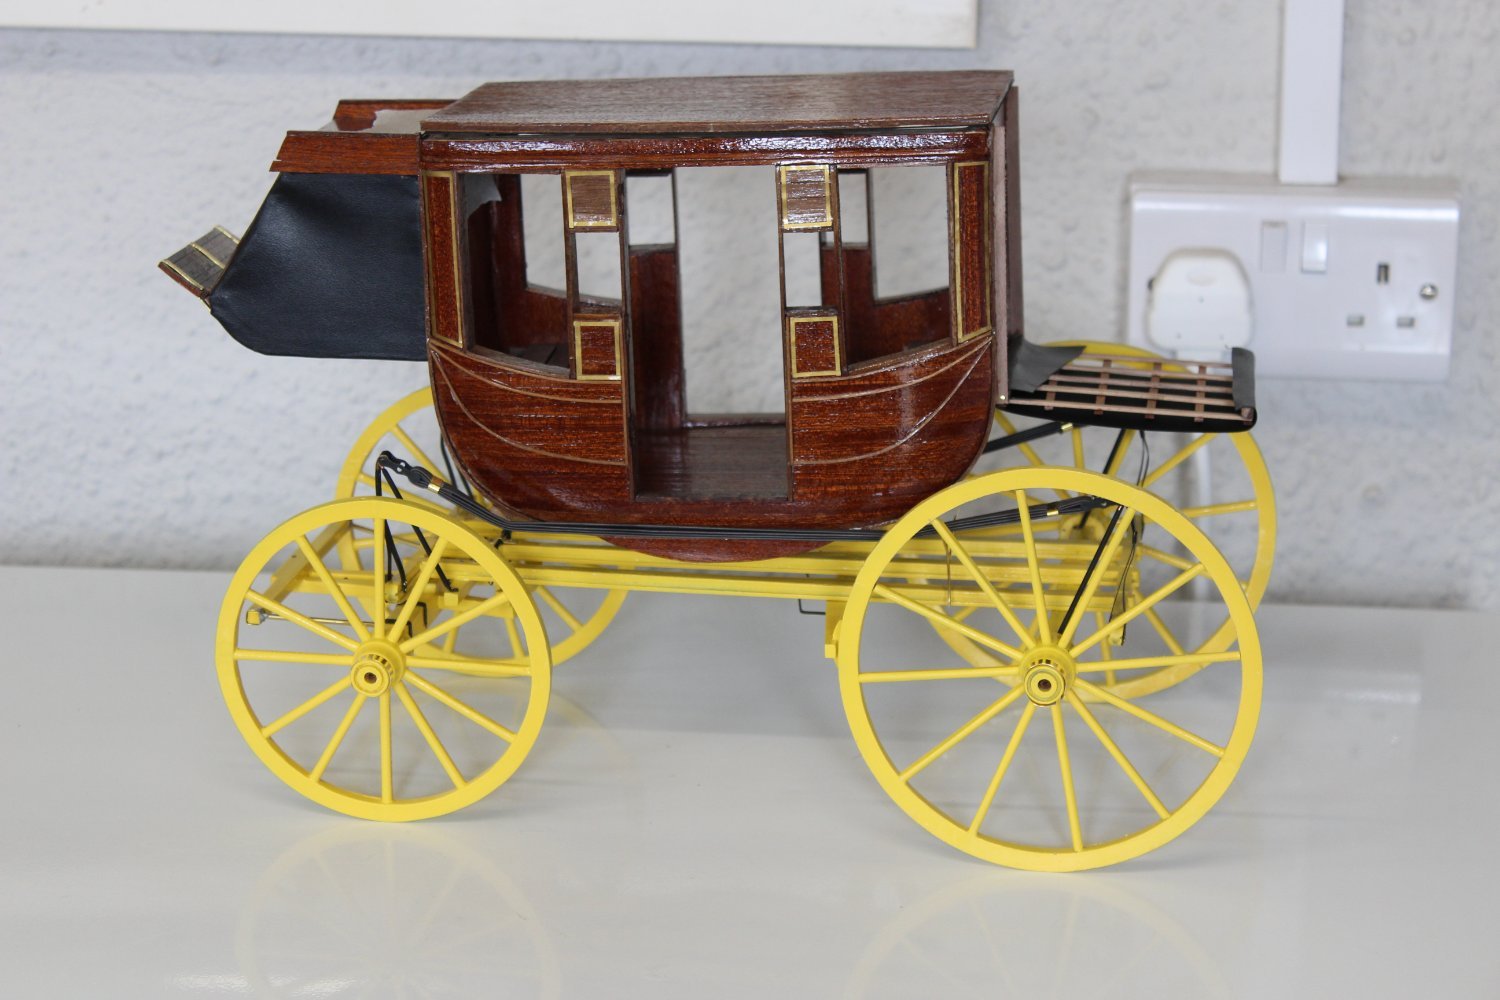
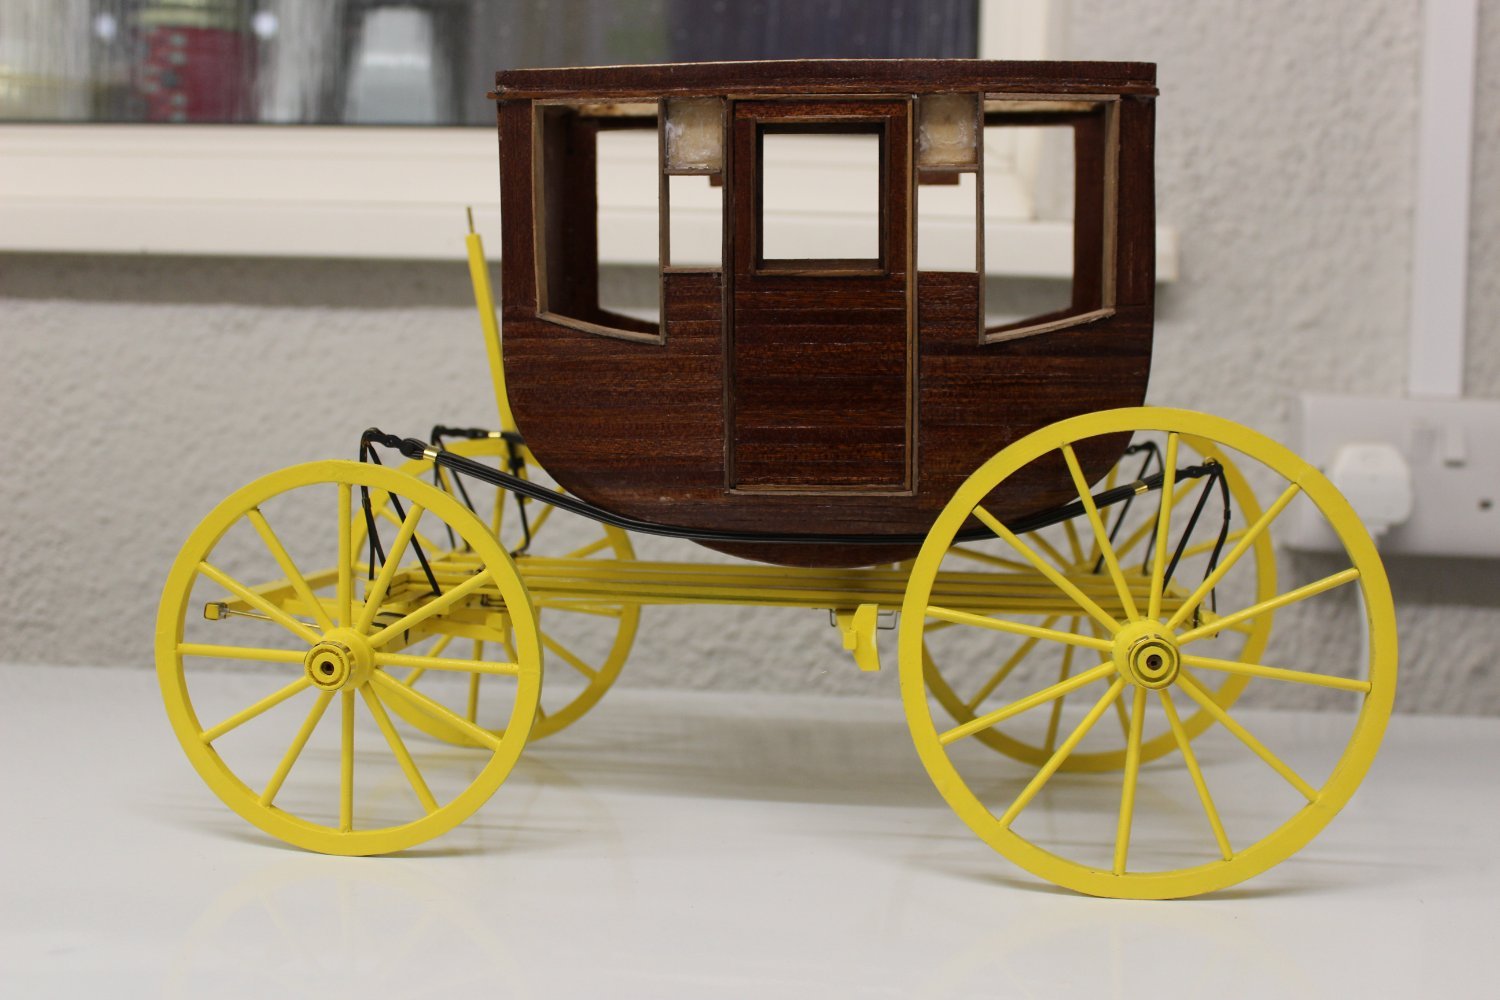
most of the main coach body work is done now, a few pretty strips still to be added
i may have to rethink the suspension straps, they are very springy and quite saggy
the door hinges are on well the rebates are done (they will not be opening)
i used a bit of tape to hold the drivers cab in position, the glue in the coach is to offset the front weight
nothing is fixed yet


-
2 hours ago, shipman said:
Hi. It was me that made the comment which created this welcome debate.
I didn't use it to try and condemn Michael.
But it was a genuine prompt to raise the question.
It's a topic that I've felt slightly uncomfortable with for some time.
These responses stir the mud a little and I thank others for their responses.
and I should have kept my moth shut, as I never contributed anything useful to the question
- JohnLea and michael mott
-
2
-
9 hours ago, michael mott said:
Asking a question about copyright in all honesty, And this answer from the person noted as the MSW social Media Moderator is a bit disappointing to say the least. I thought my question was quite clear. One is told not to post images that one does not have permission to post, so forgive this old man for not being as savvy about the internet protocols, and for wanting to do the right thing.
Michael
it was a bit tongue in cheek, considering, most of us do it all the time, but if yr disappointed with what i said, so be it
Sorry
- mtaylor and michael mott
-
1
-
 1
1
-
lol wish i understood the question
-
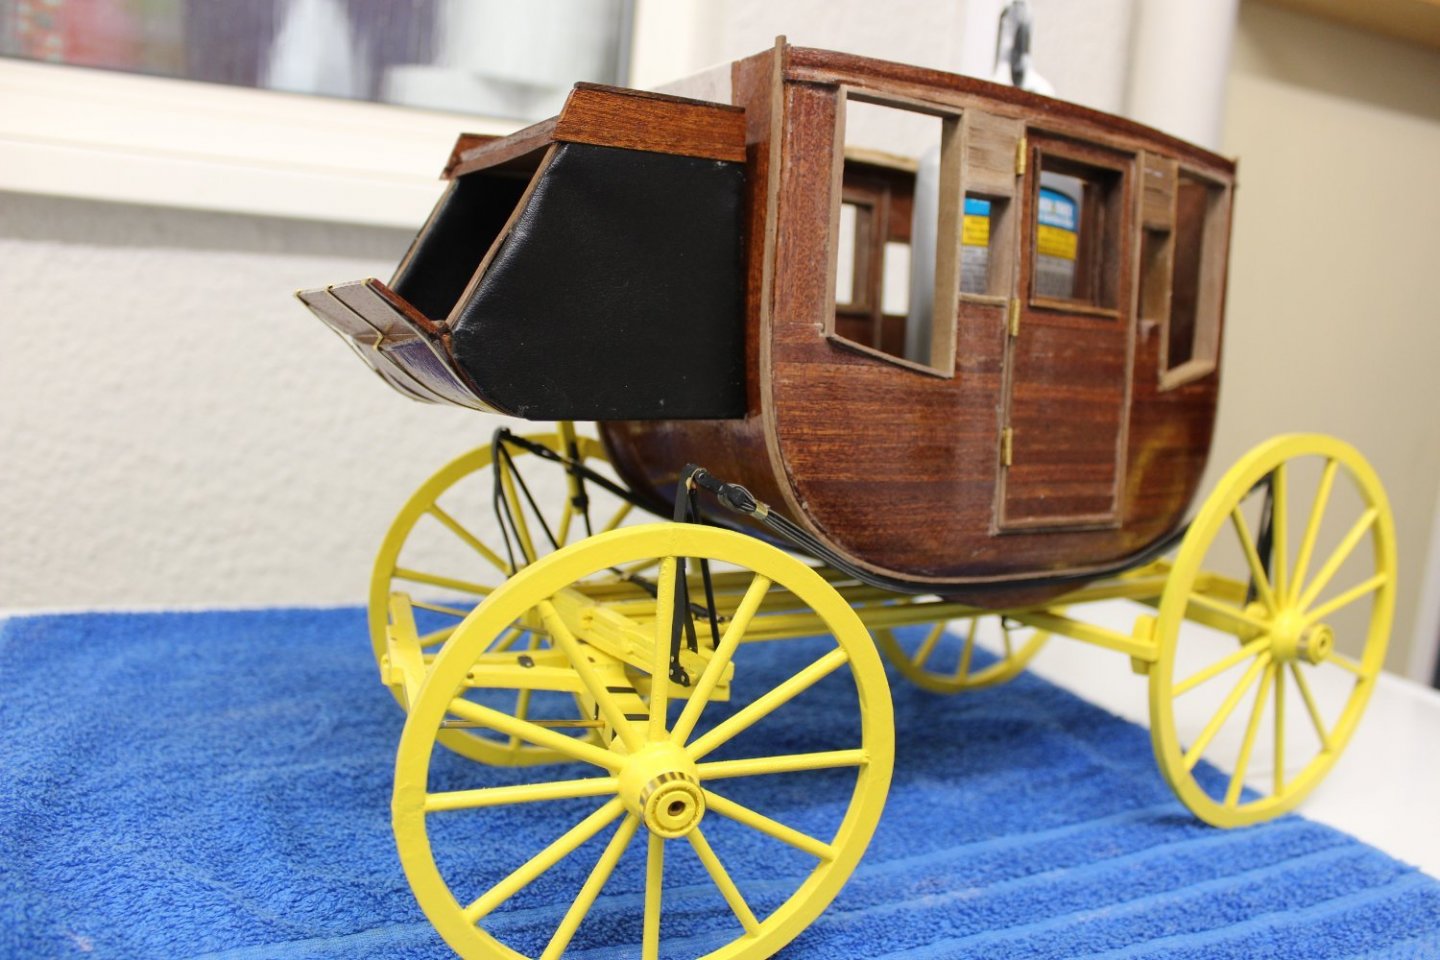
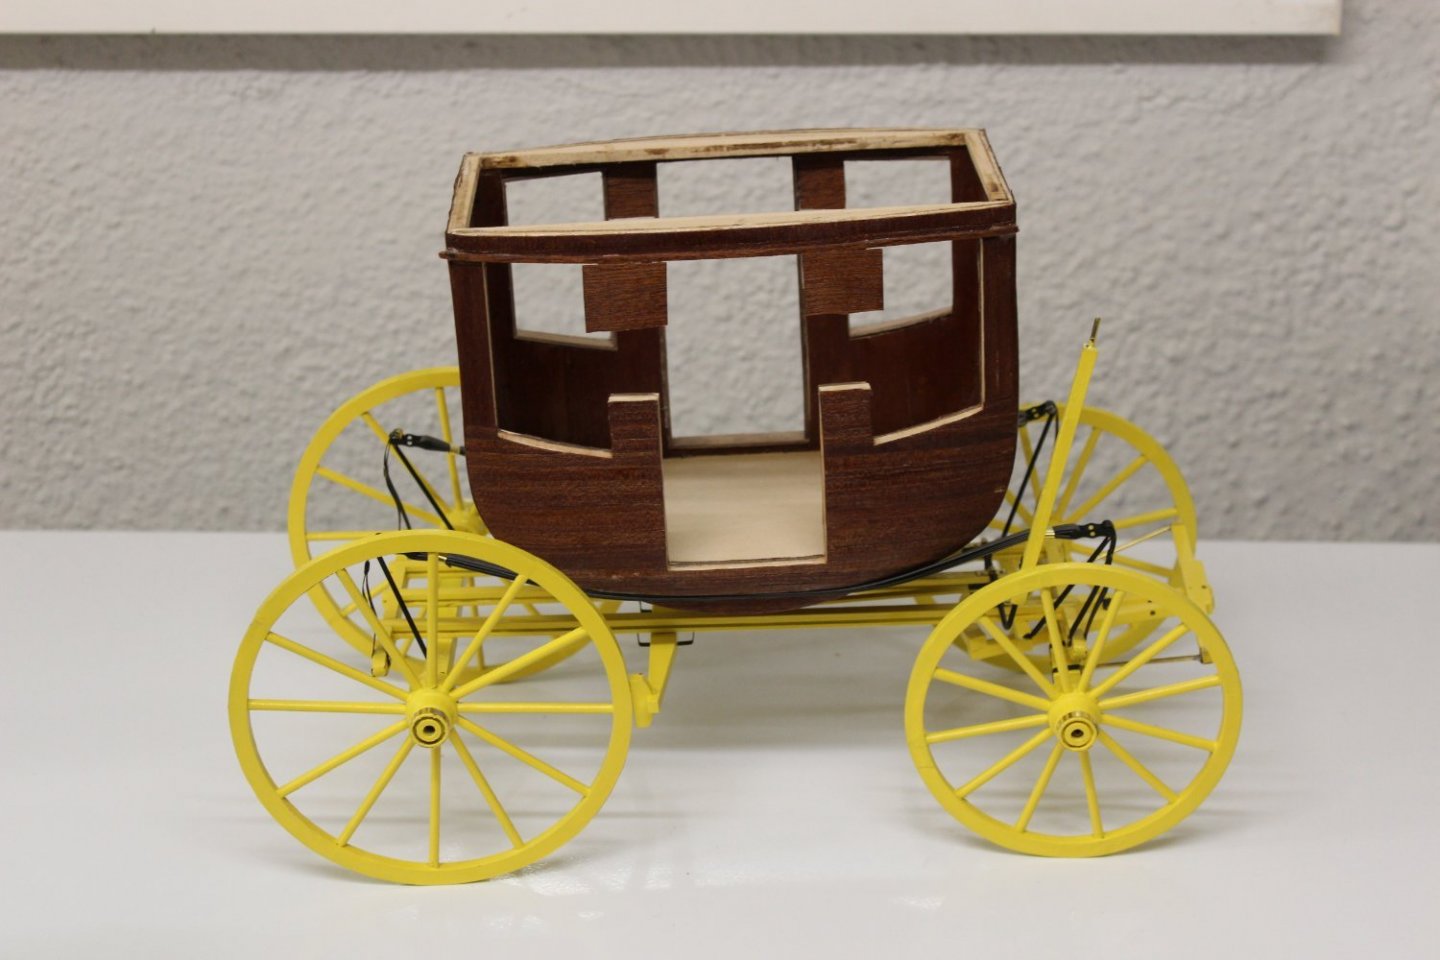
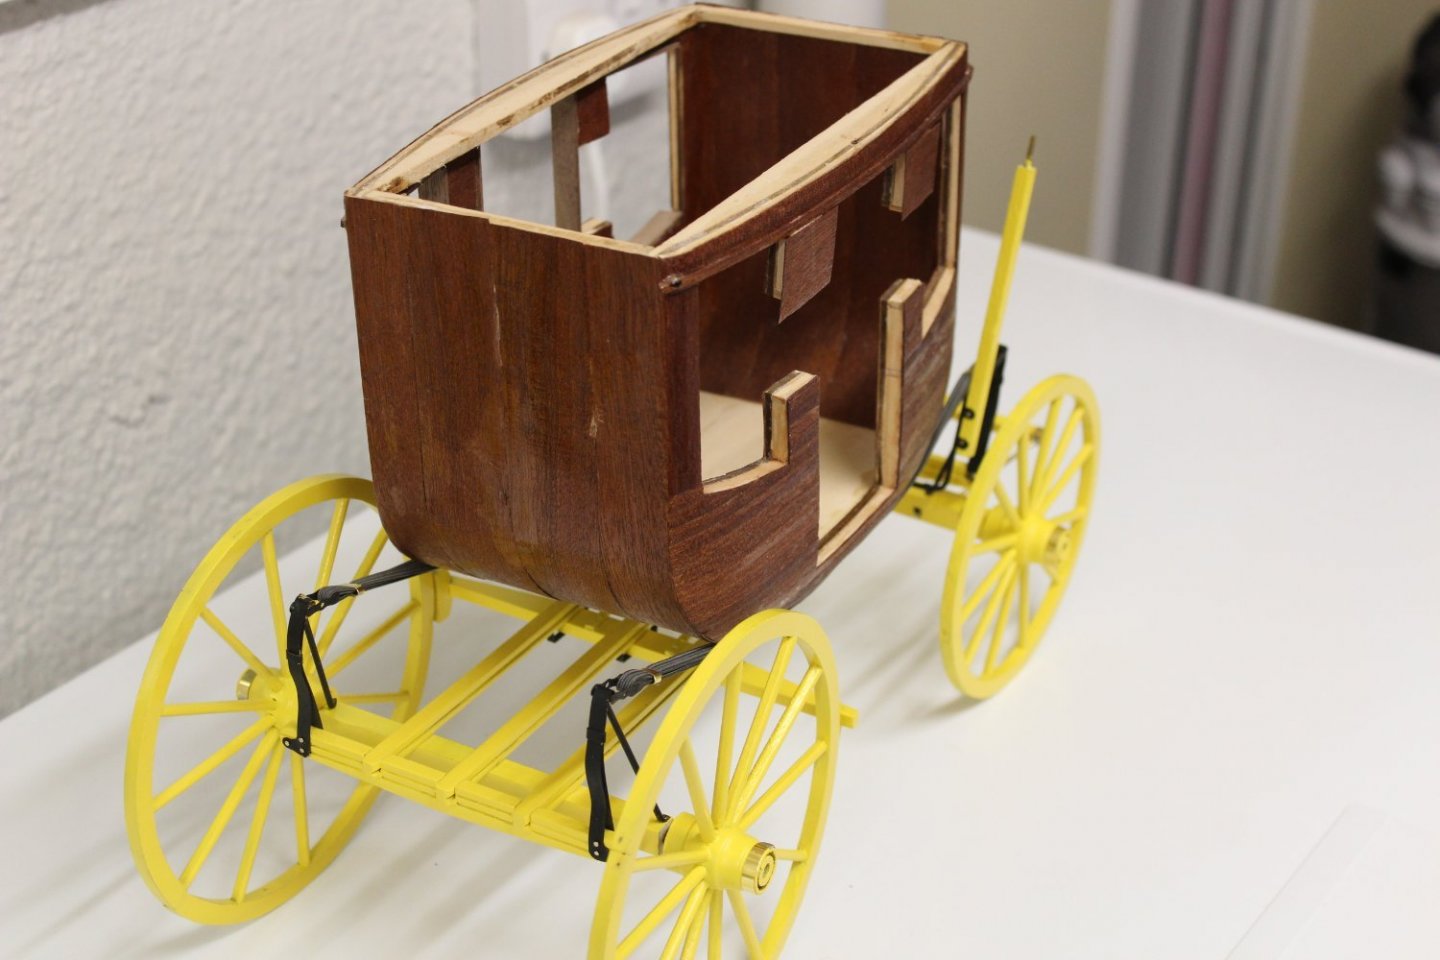
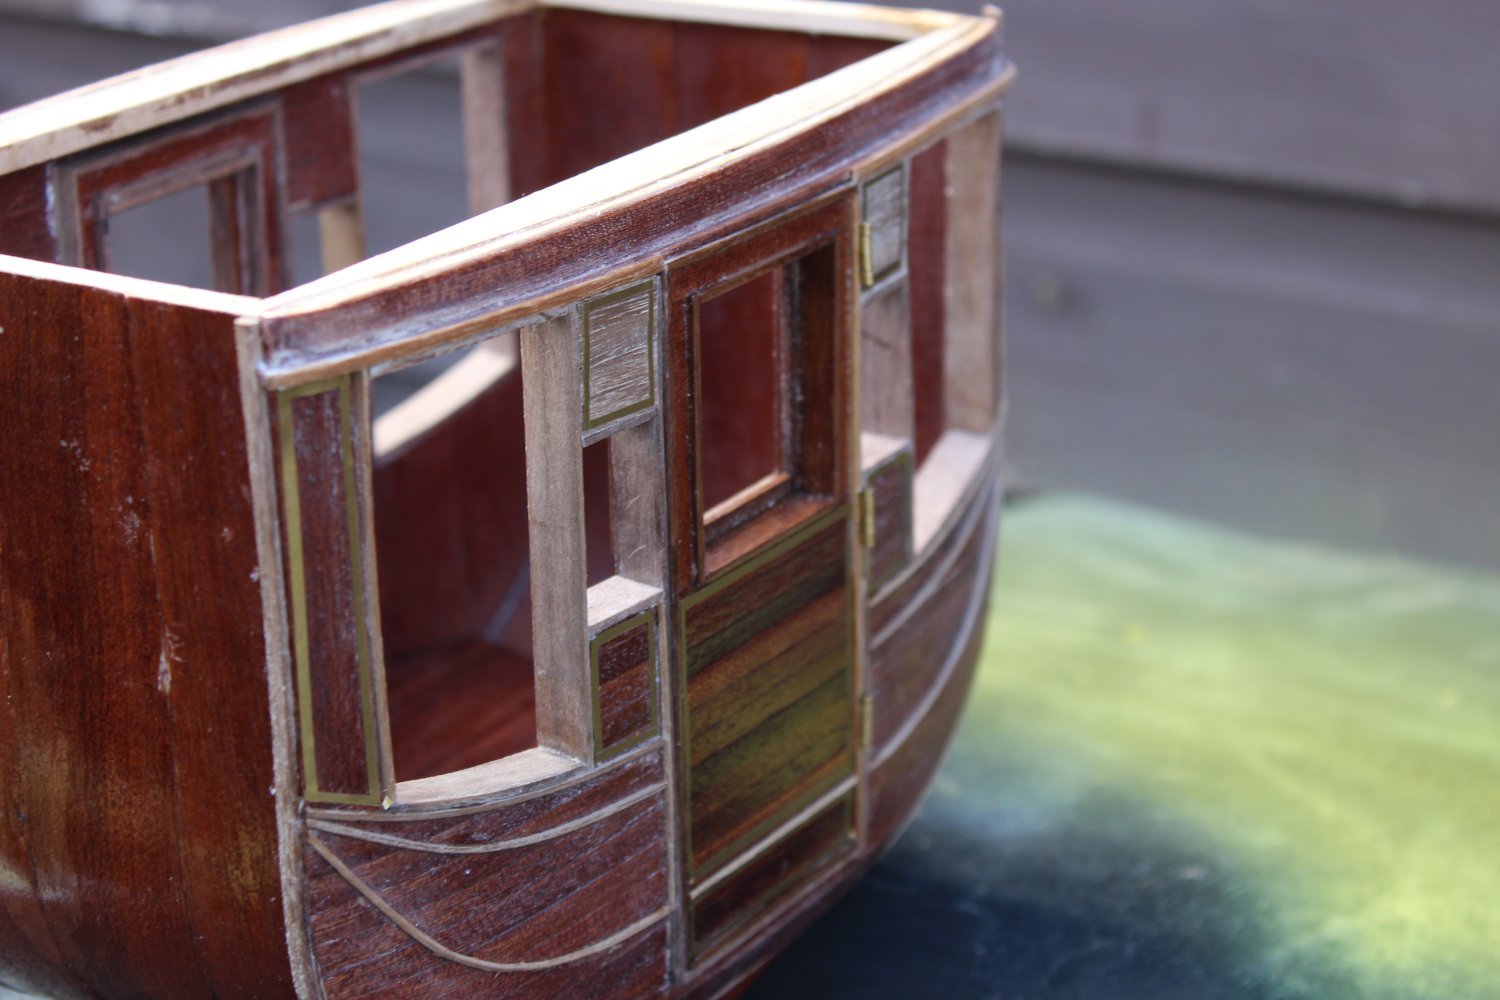
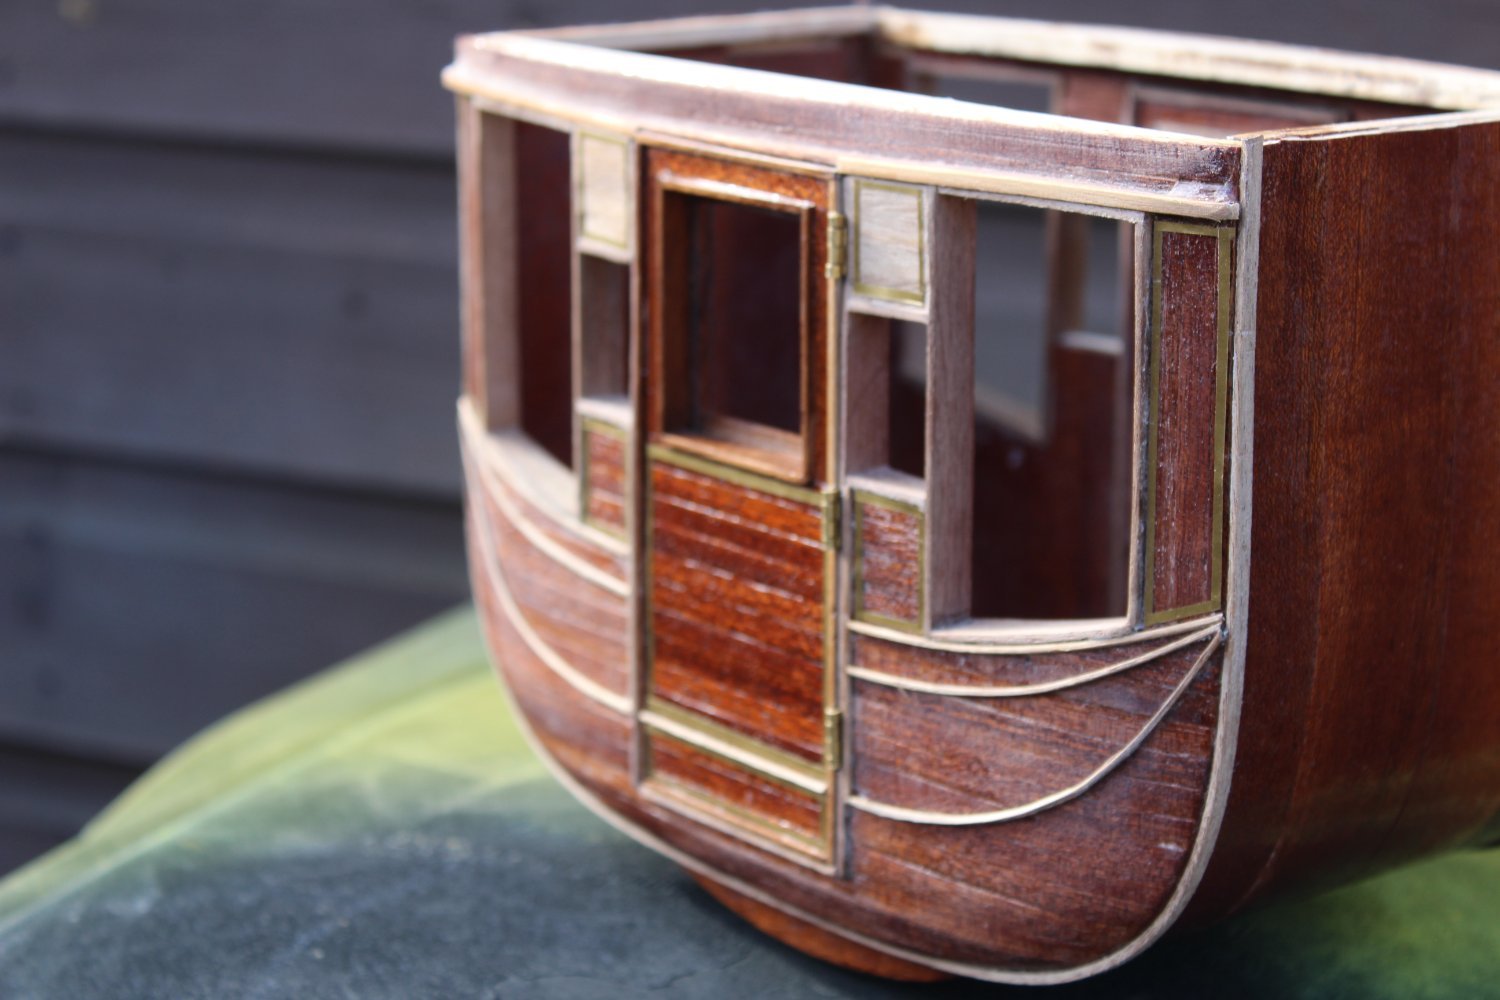
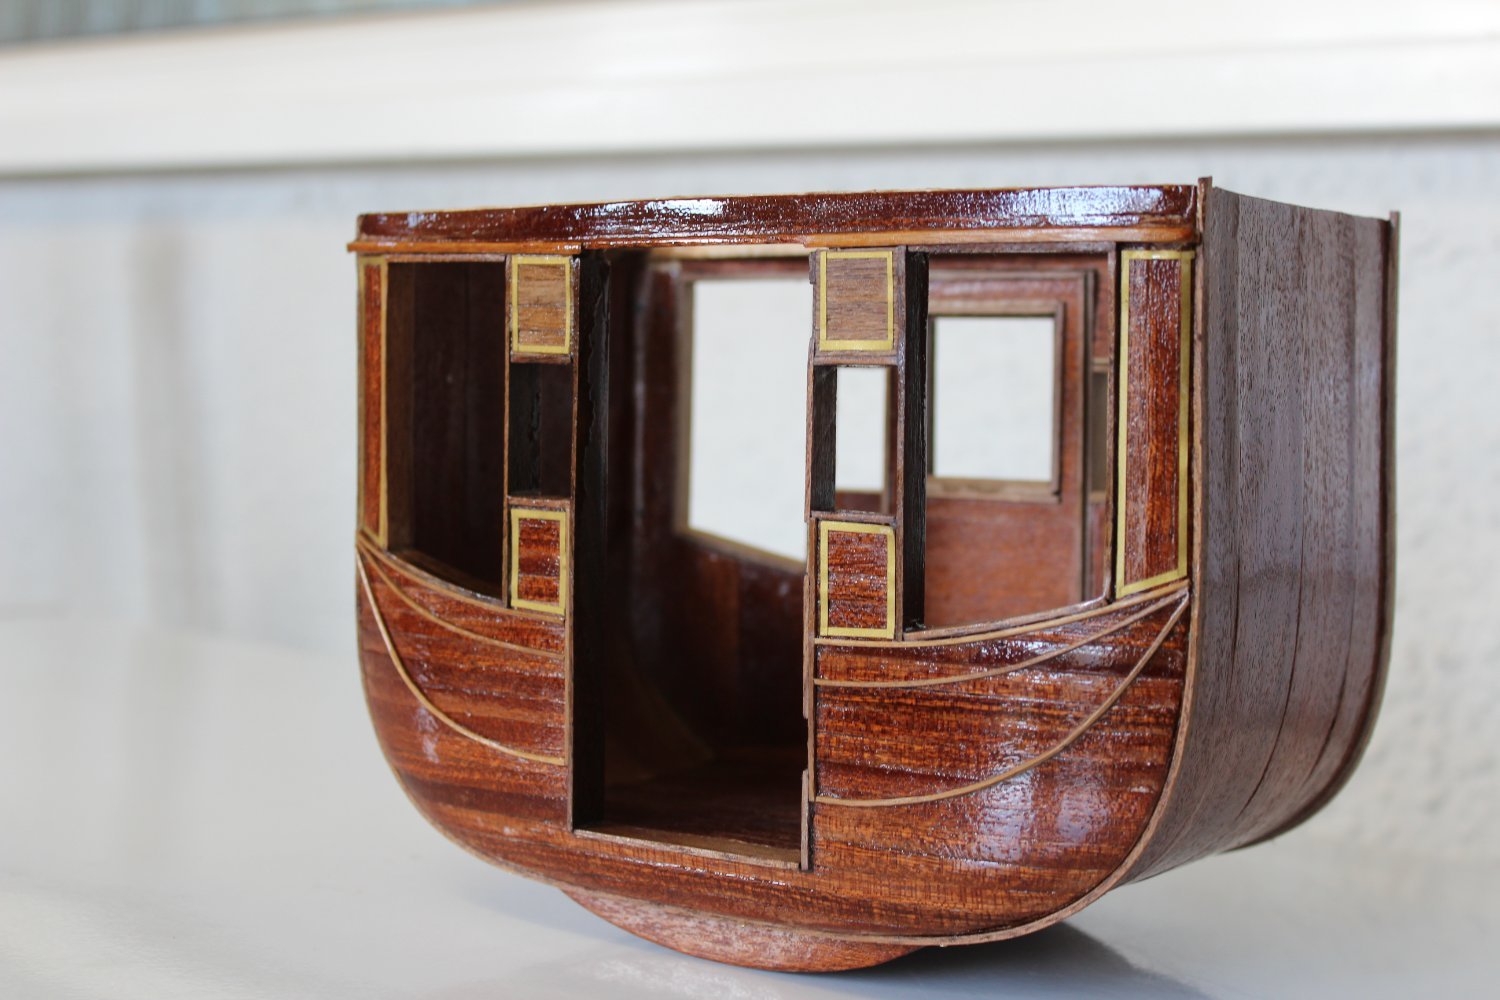
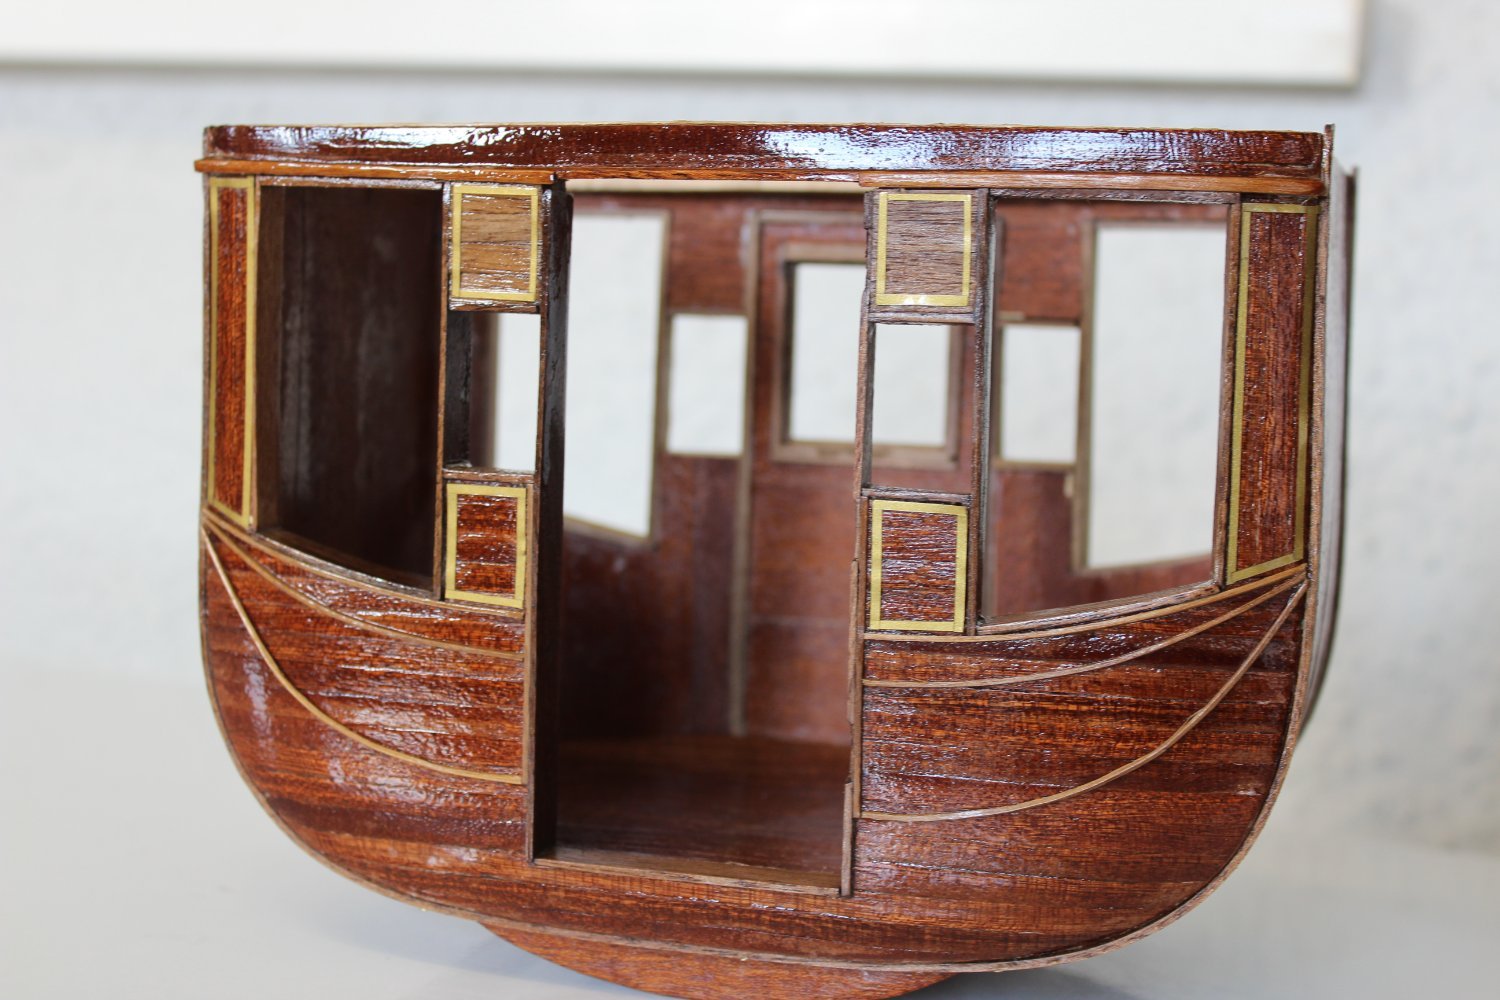
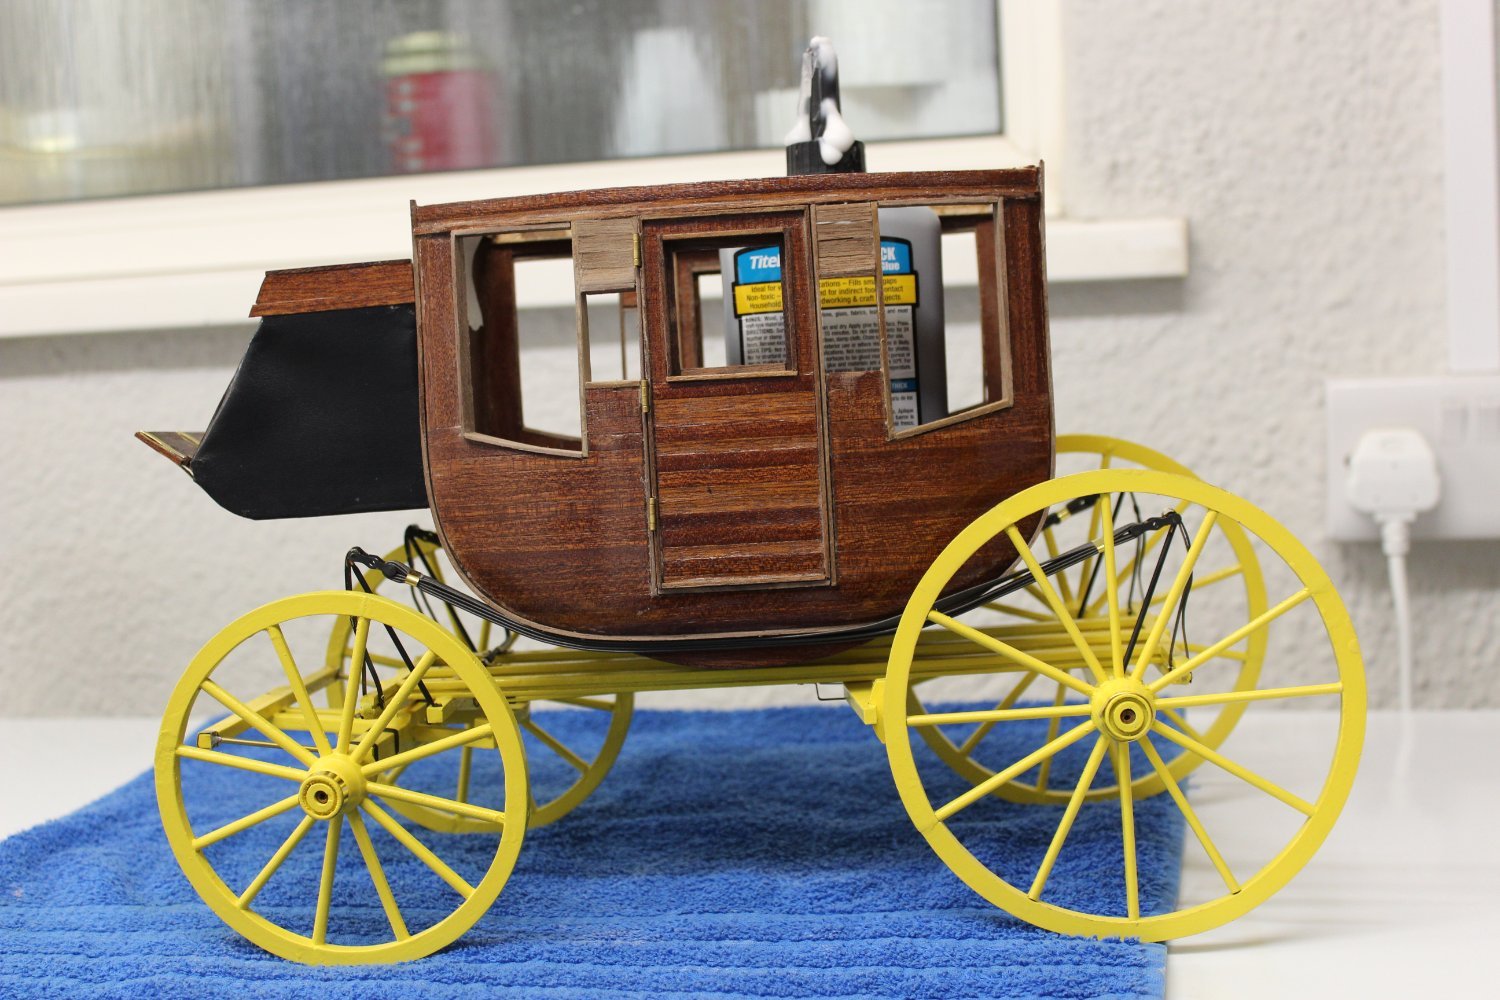
good evening everyone
thank you for comments and likes
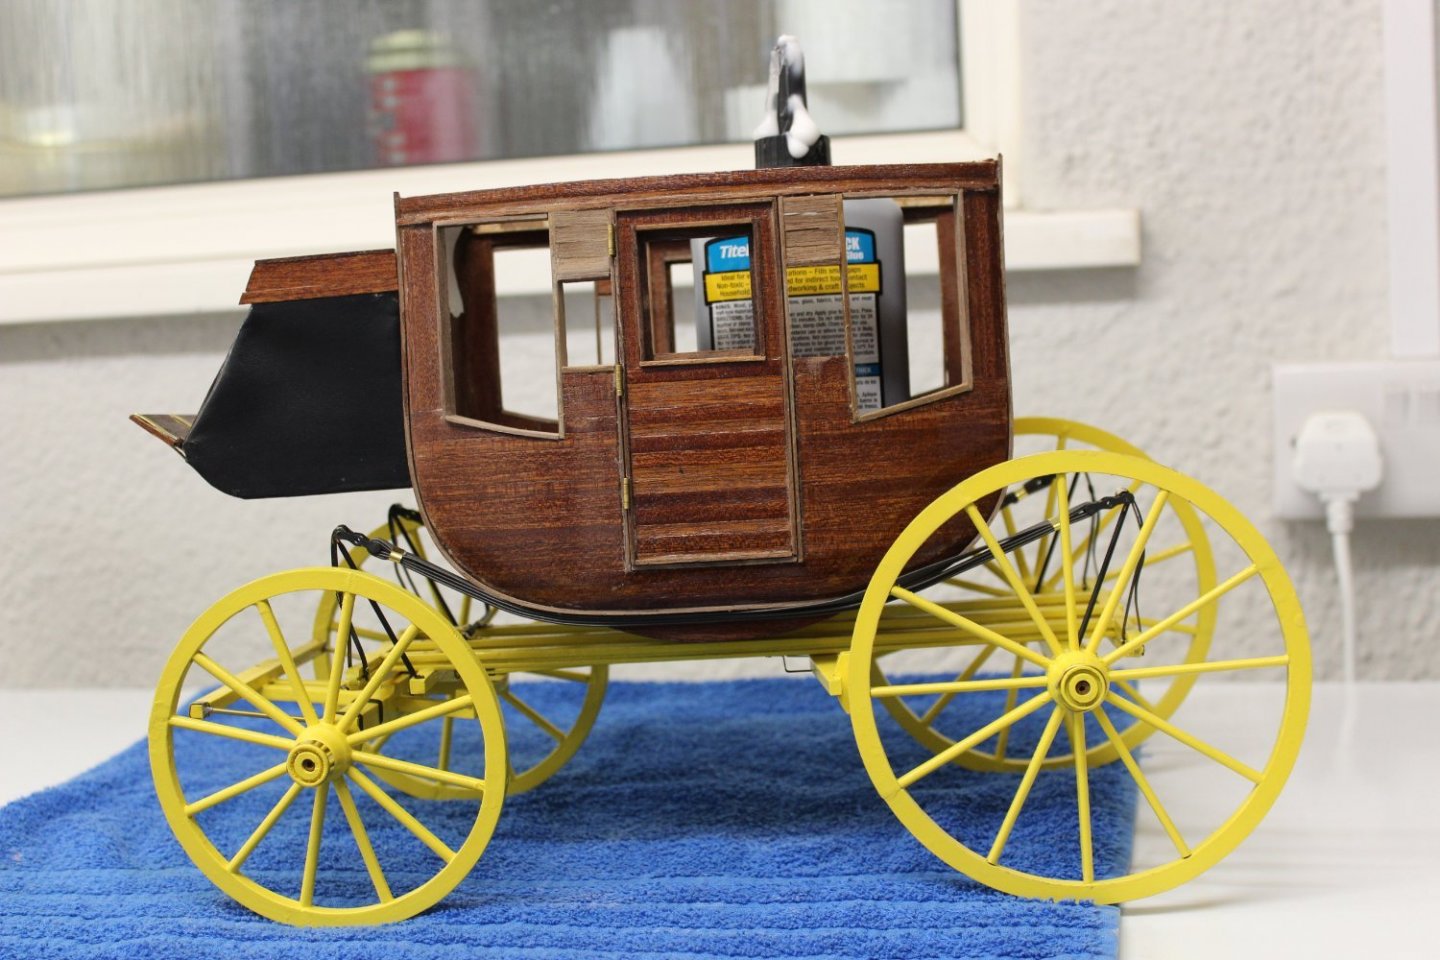
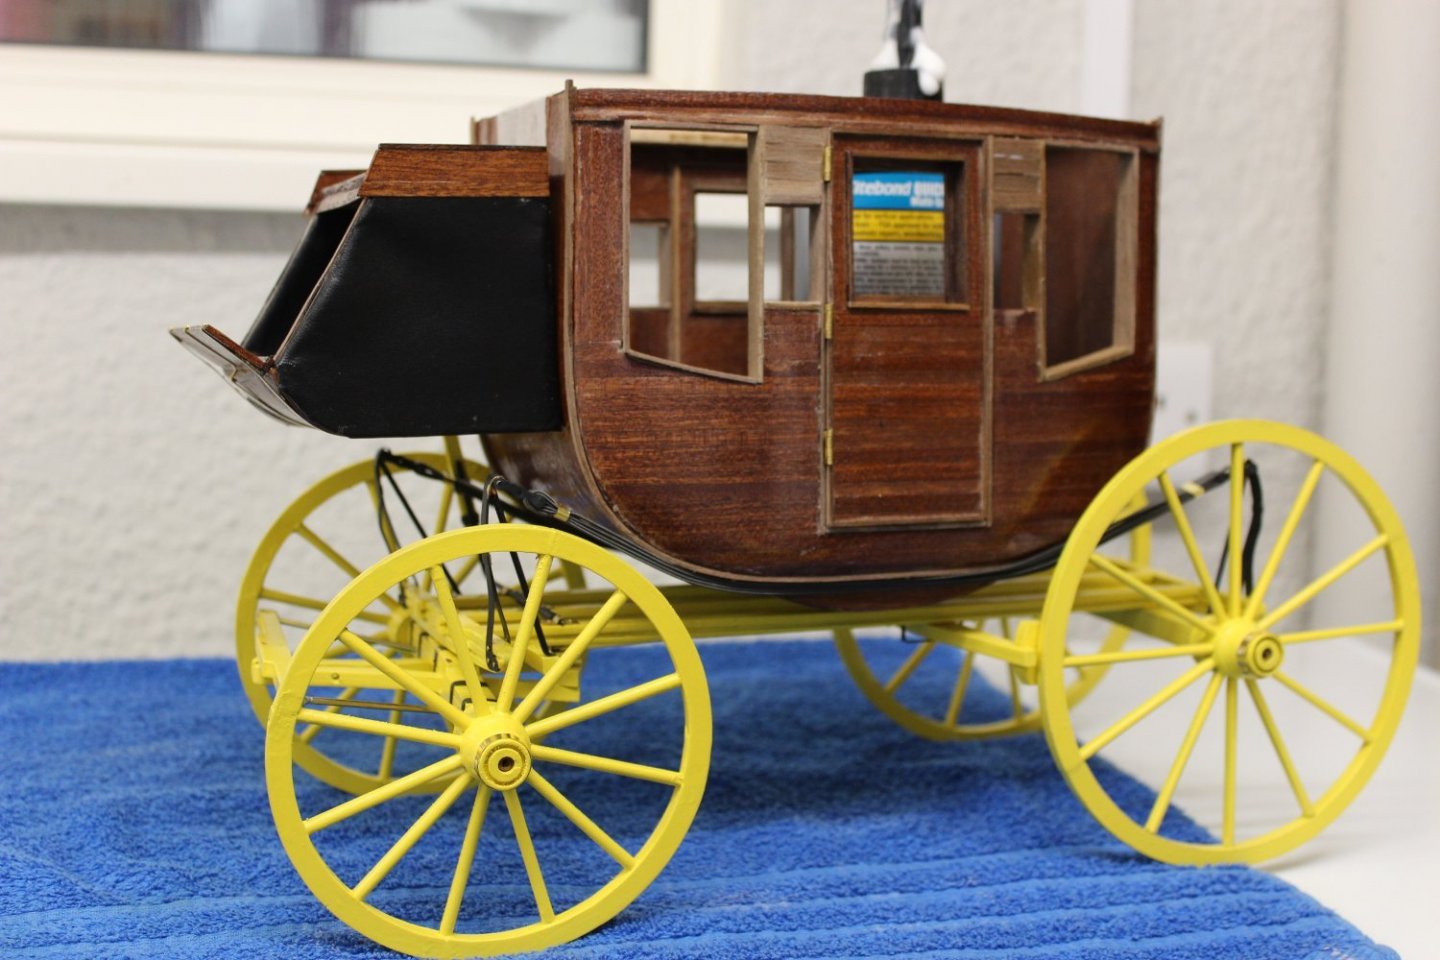
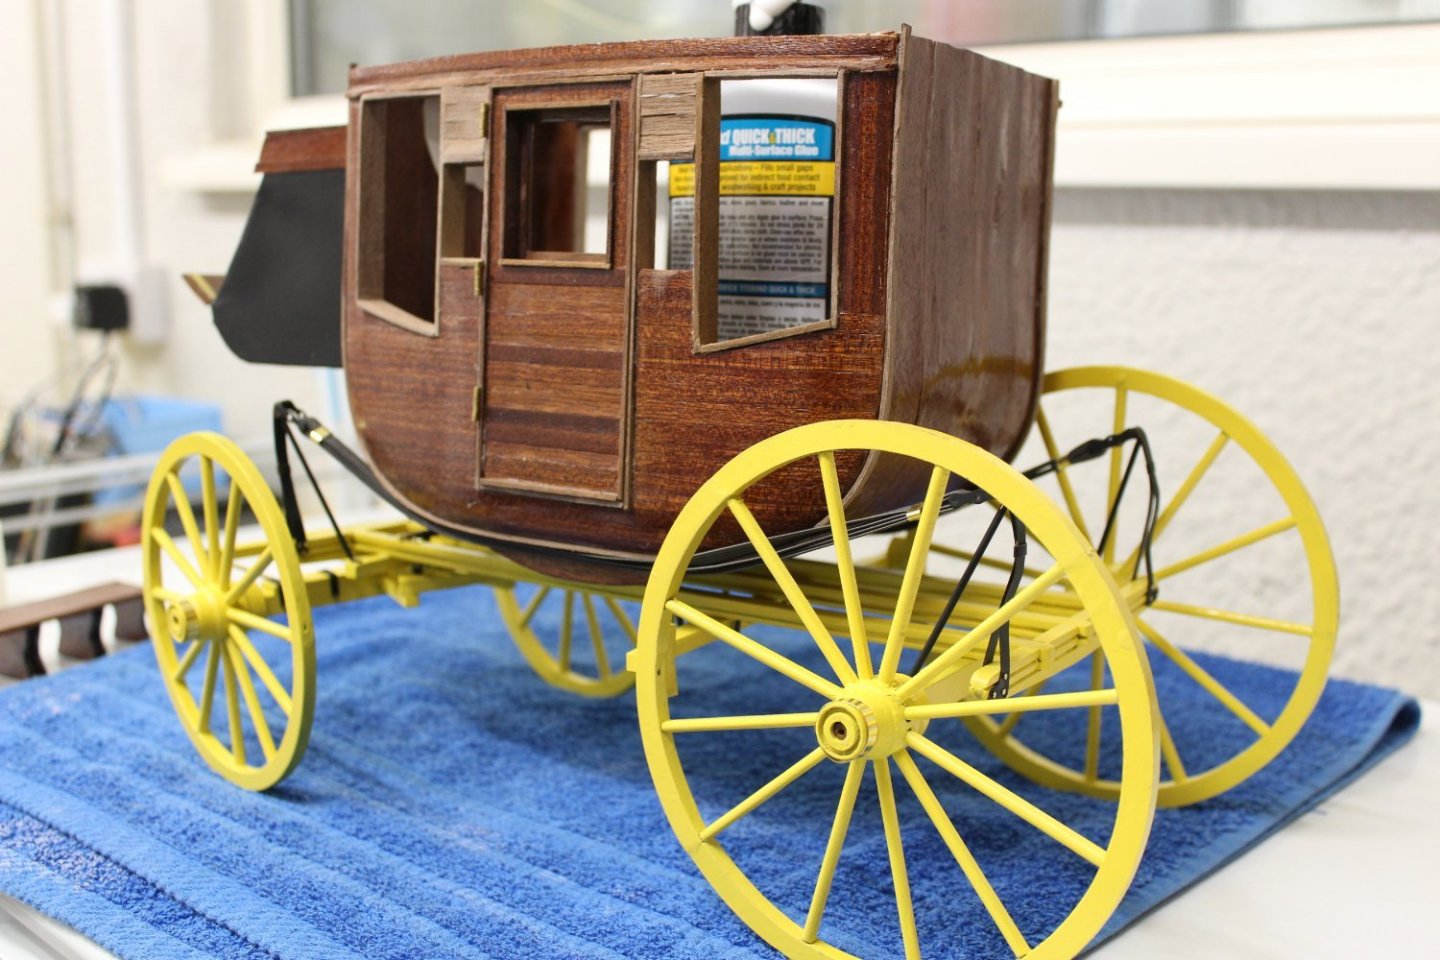
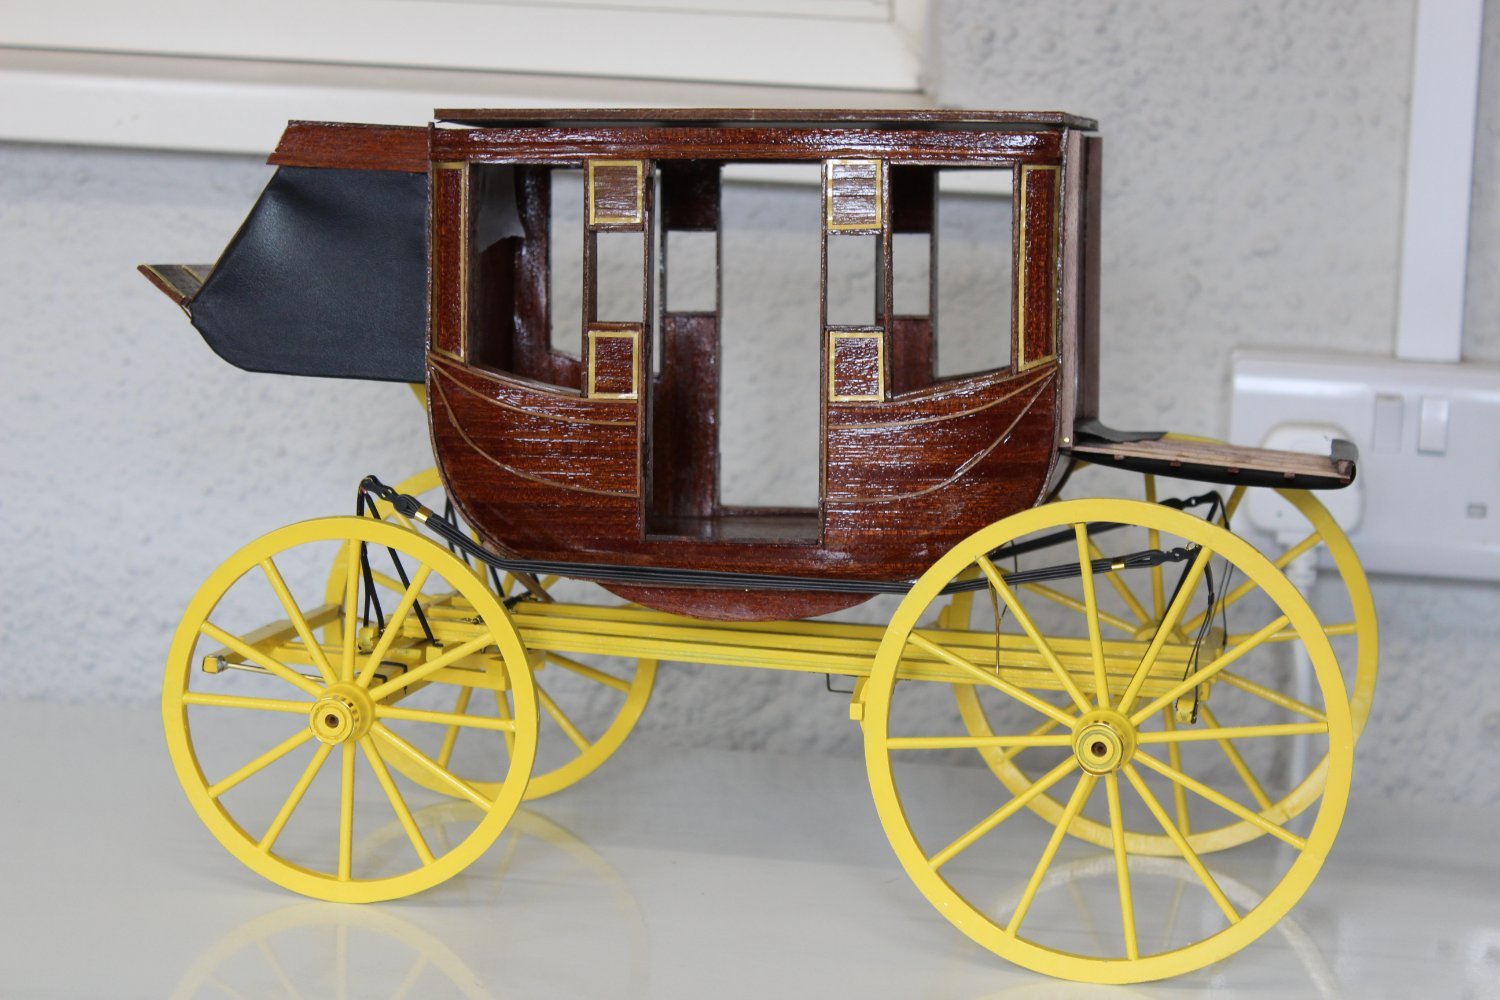
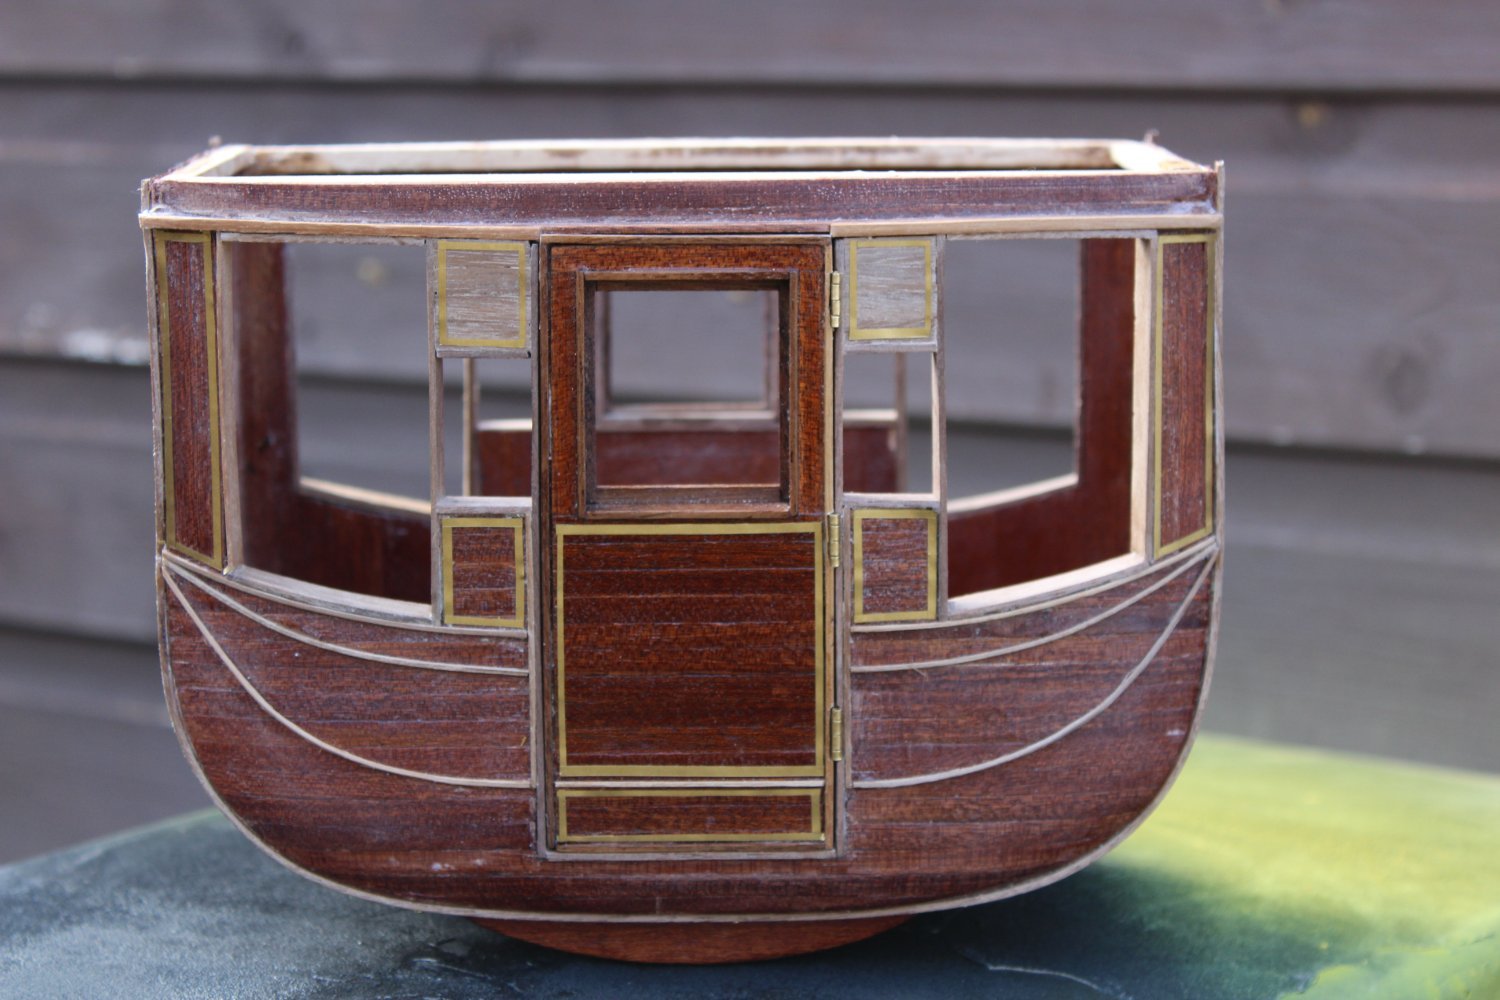
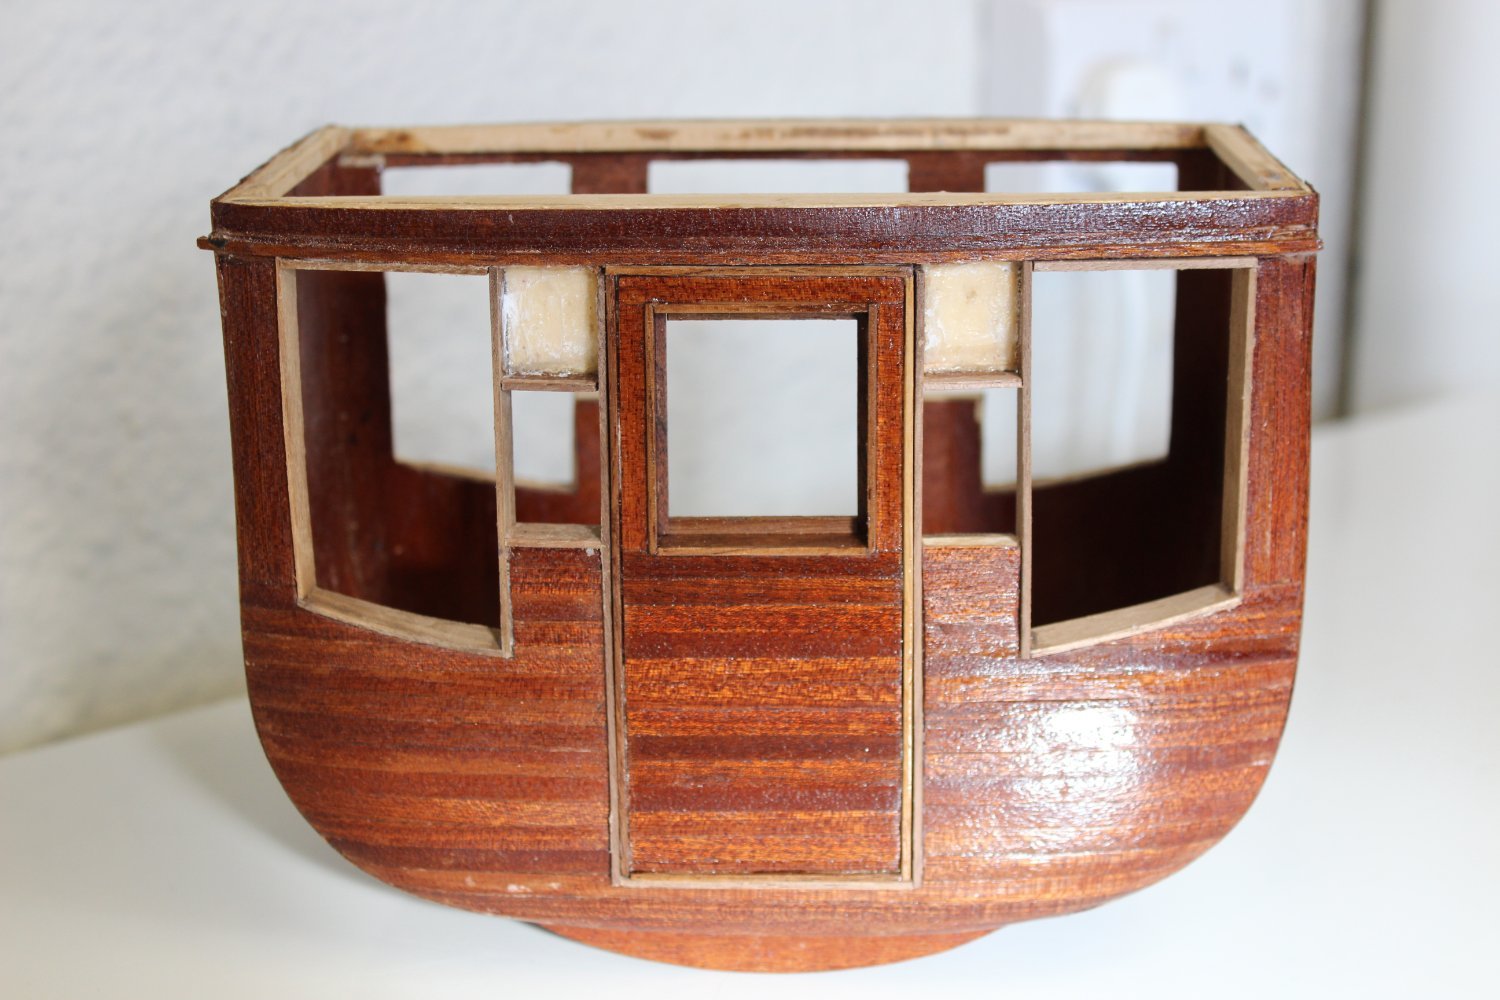
the coach looked awful (in my eyes, so i decided to do something about it
removed all door and widow frames and the top panelling between the windows, as that never looked right from day one,
fine grade sandpaper and took the upper coats of varnish off, washed down and then a varnish 50/50 white spirit wash applied
the door frames and windows are now fitted on one side


- Egilman, thibaultron, gjdale and 12 others
-
15
-
21 hours ago, Egilman said:
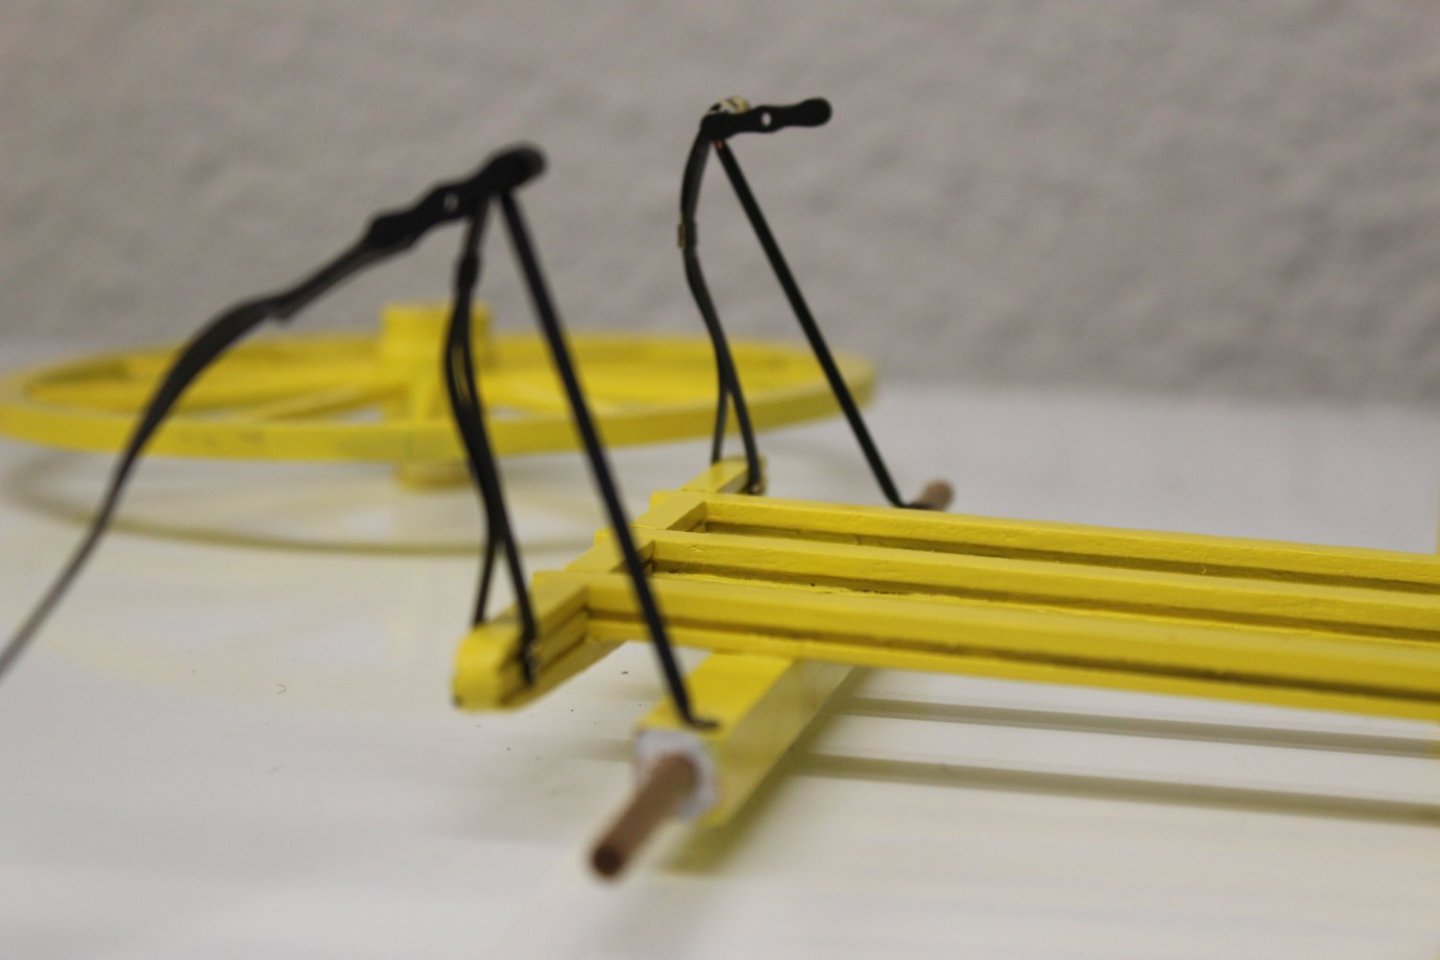
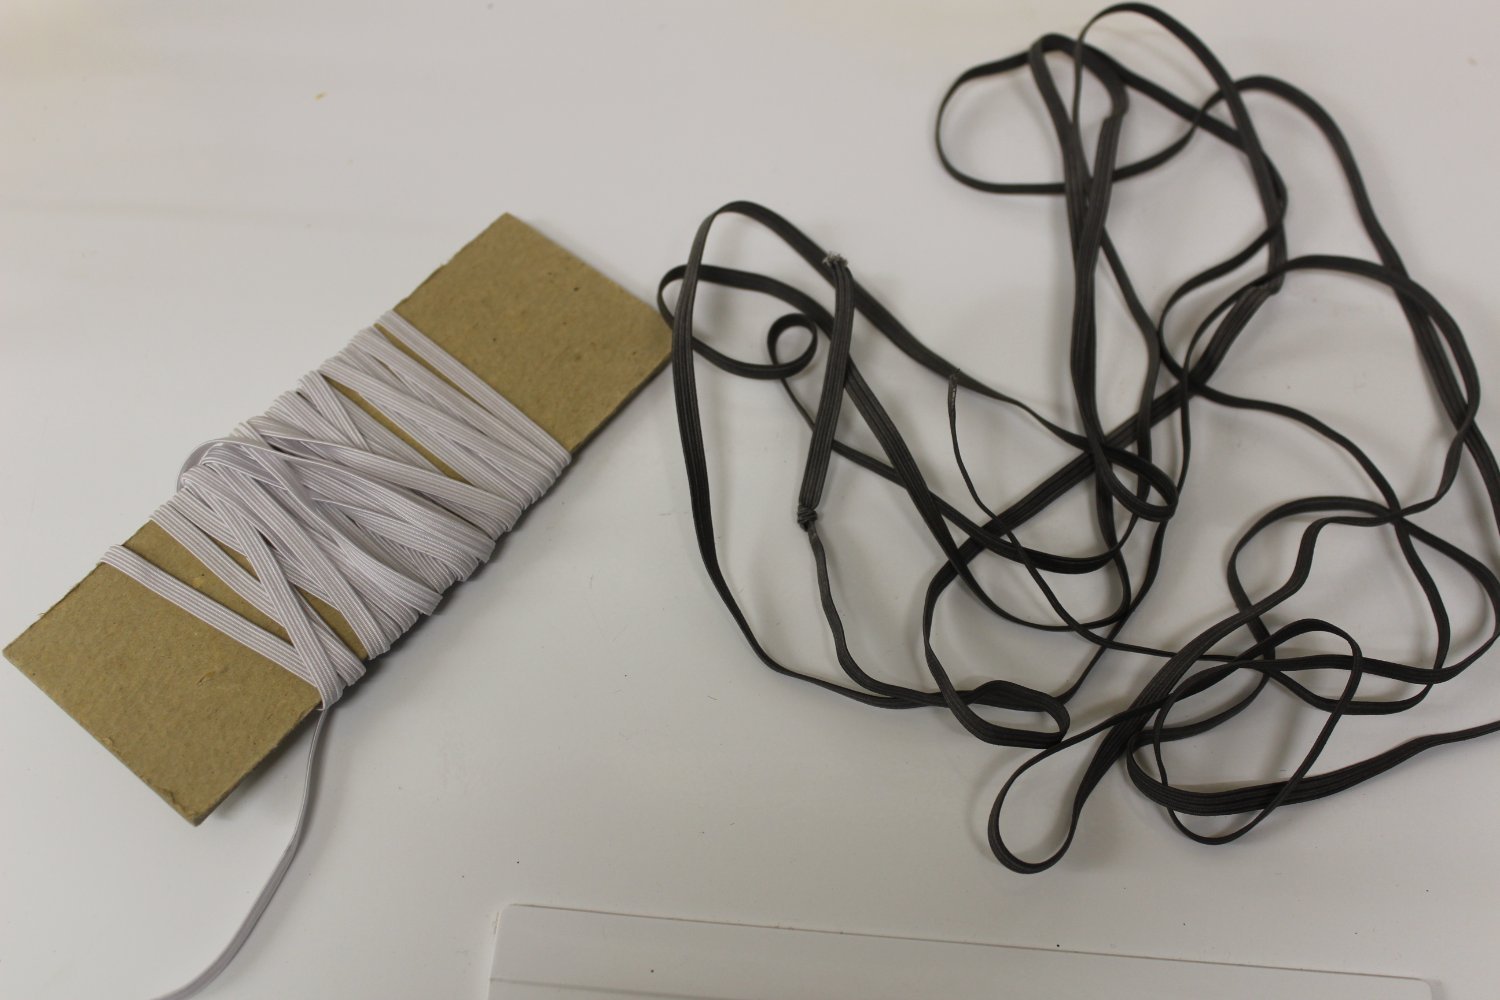
Just a question Kevin, I think your idea of using elastic for the leather suspension gives a very real action to the suspension... have you figured a way to deal with the rubber in those elastics when it dries out and breaks? My suggestion, while you are at this point, is to thread a thin brass wire or two through each elastic, so when the rubber dries out and breaks, the nylon covering and wire will hold them together and the dead rubber will serve as a filler to let them keep their shape?
I would hate to see all that beautiful work fail in a few years...
i had considered putting something under the coach to take the weight, but i like the wire idea
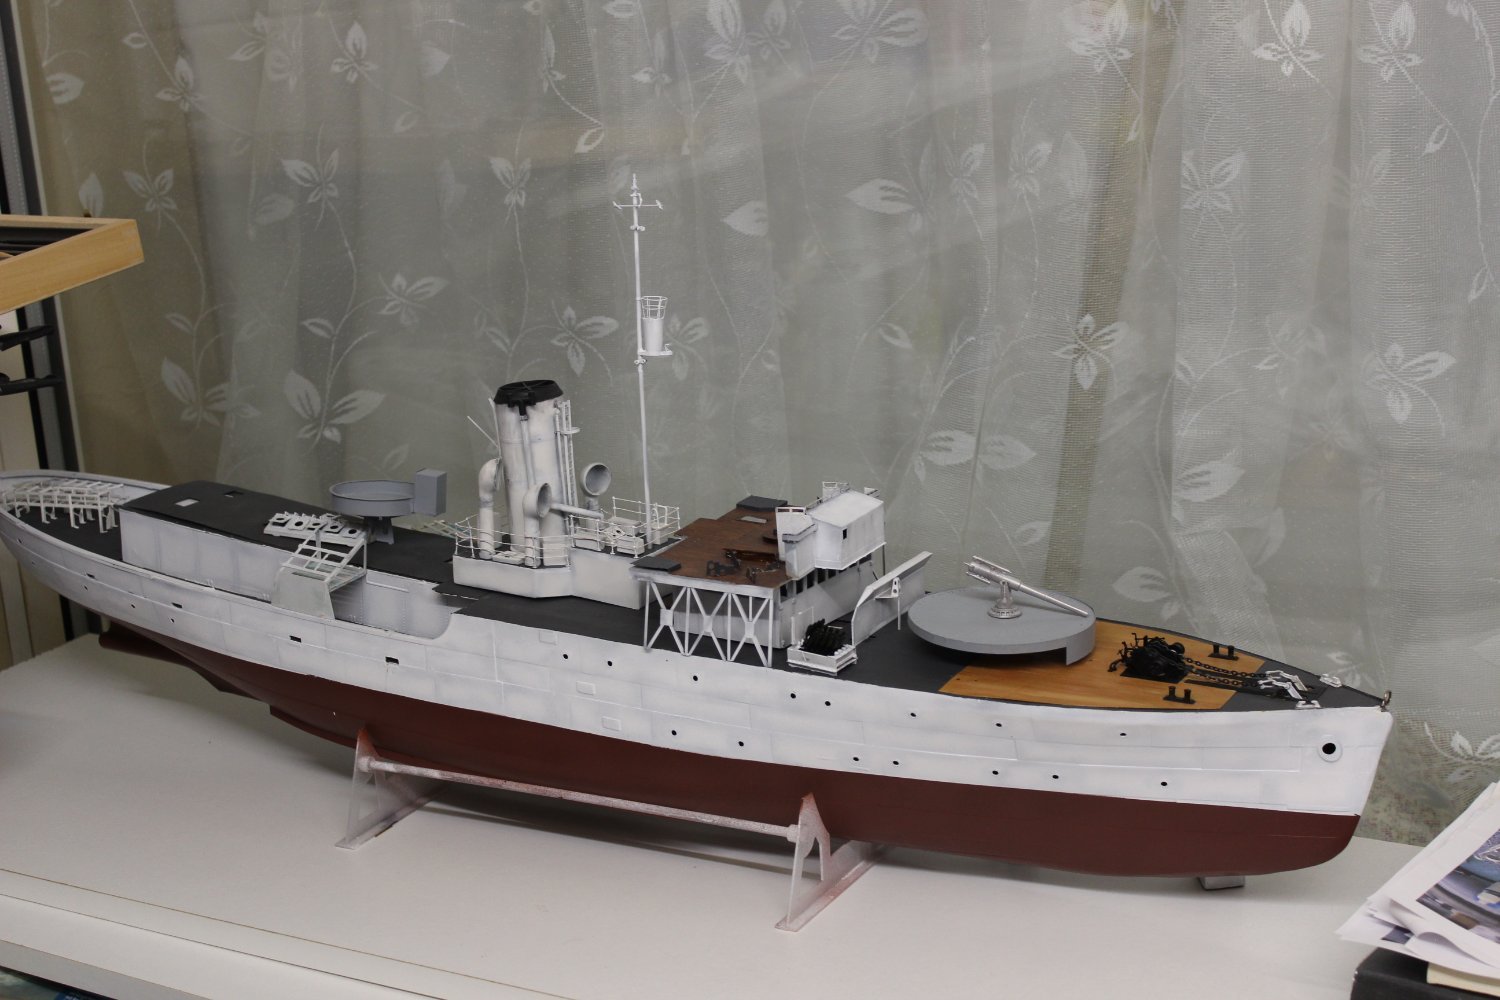
17 hours ago, popeye the sailor said:good to see your back working on the coach!
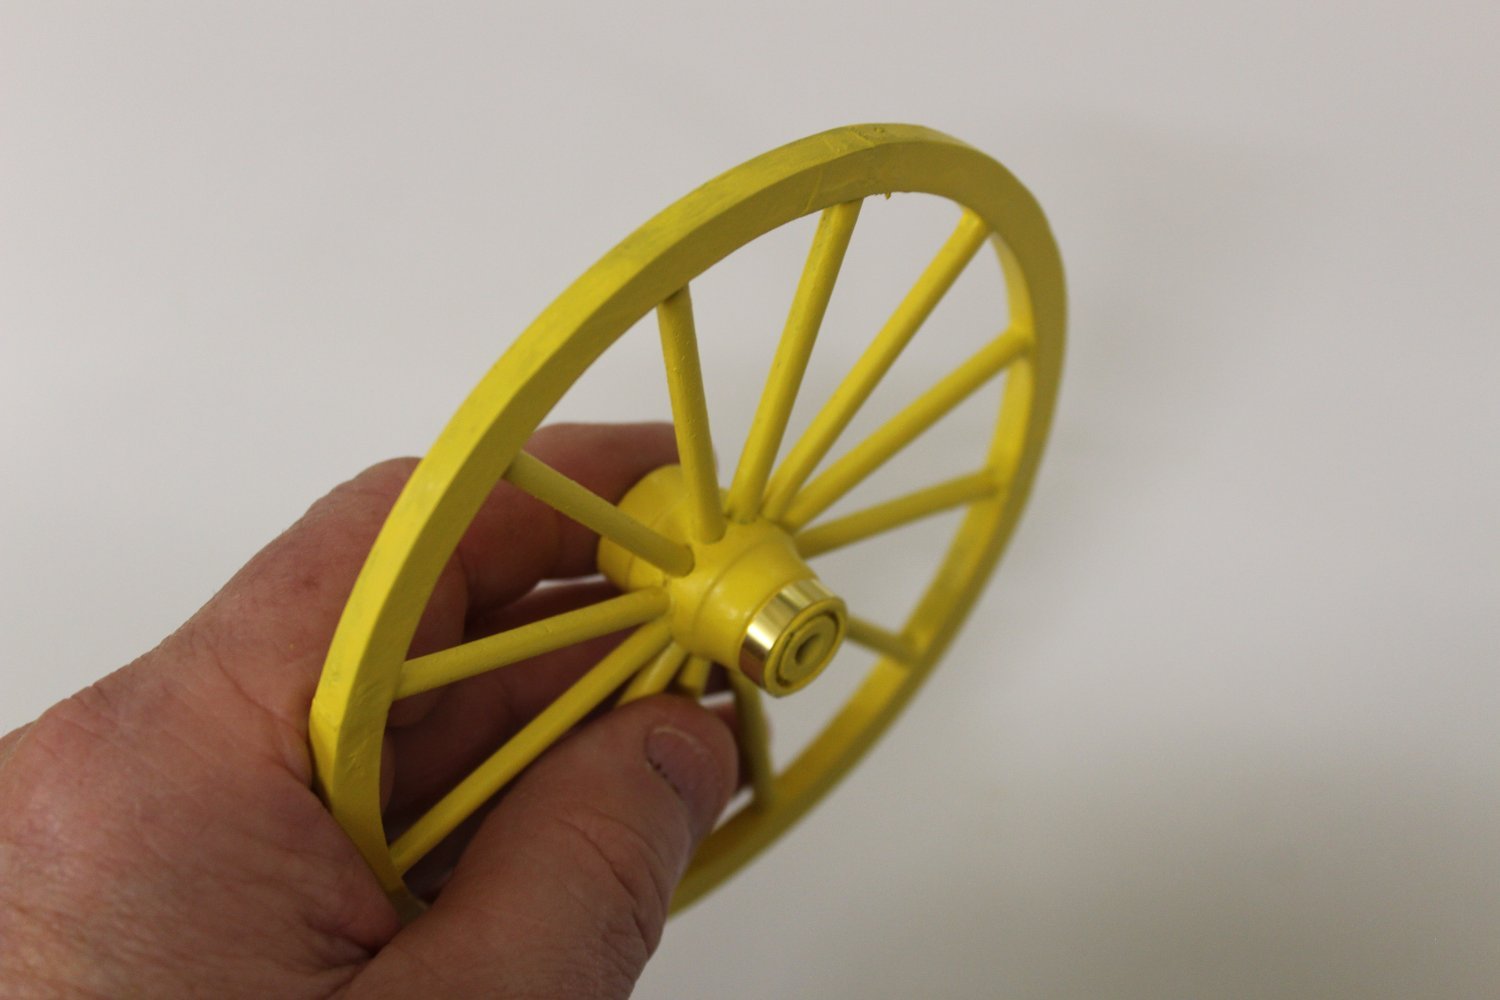
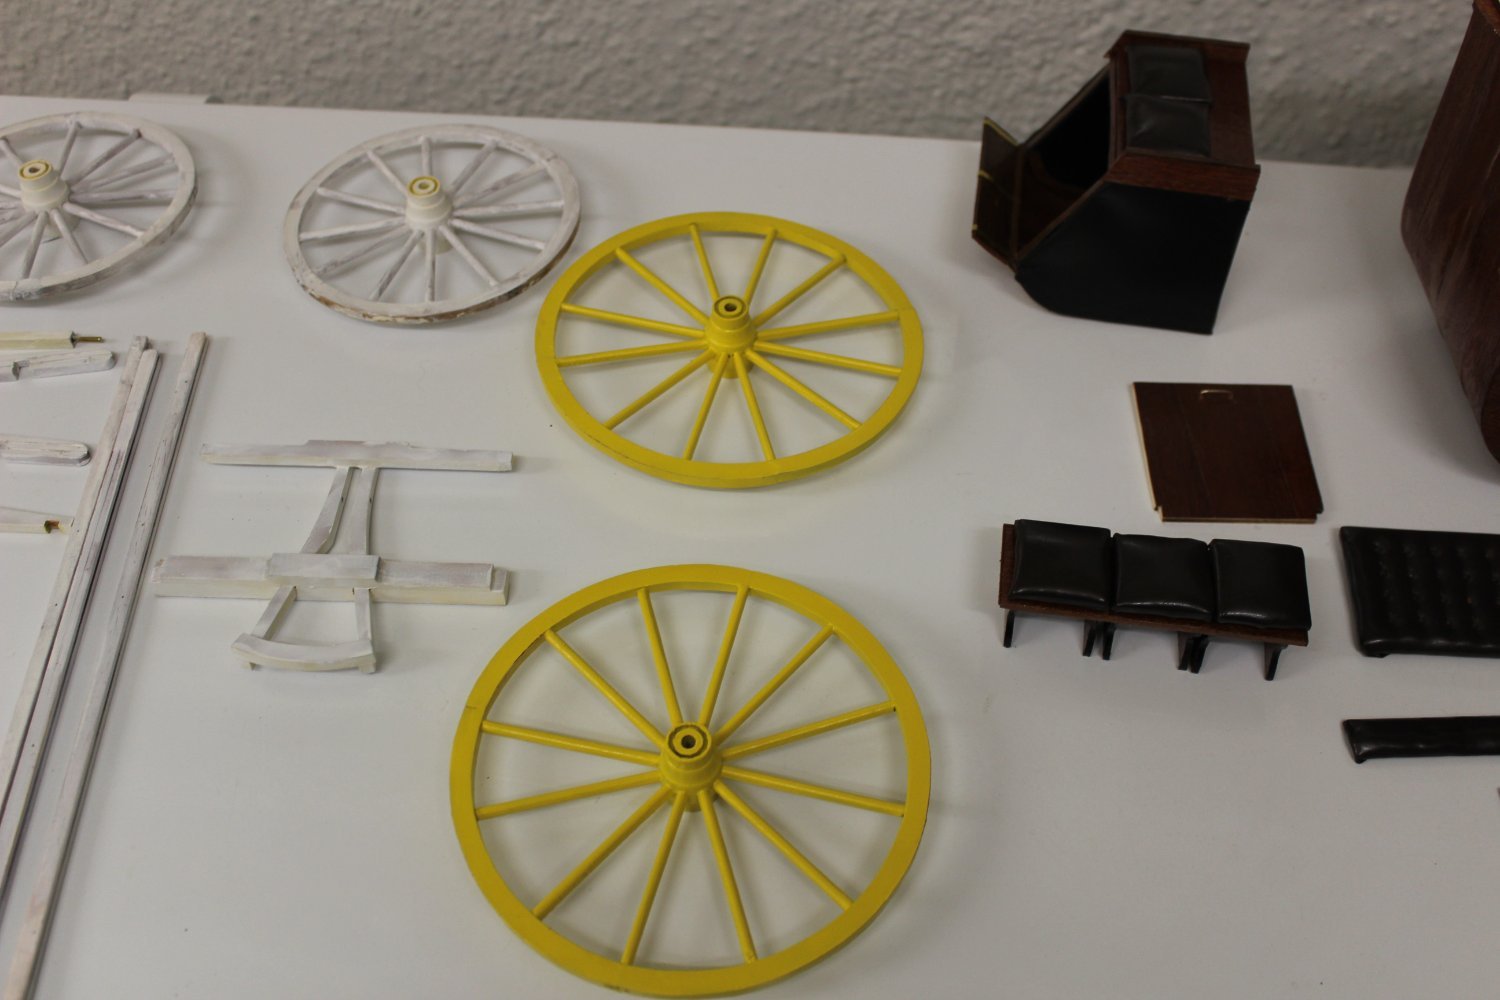
") the chassis and wheels look very good........a very cheerful color. so when the occupants are ticked off by the erratic ride.....just stop and tell 'em to look at the chassis
the chassis and wheels look very good........a very cheerful color. so when the occupants are ticked off by the erratic ride.....just stop and tell 'em to look at the chassis ") {look at the flowers Lizzie}!
{look at the flowers Lizzie}!
it might not be that dramatic.......what he's using is woven with fabric. it will tend to sag over time, but it will take longer to completely fail.
thanks popeye
-
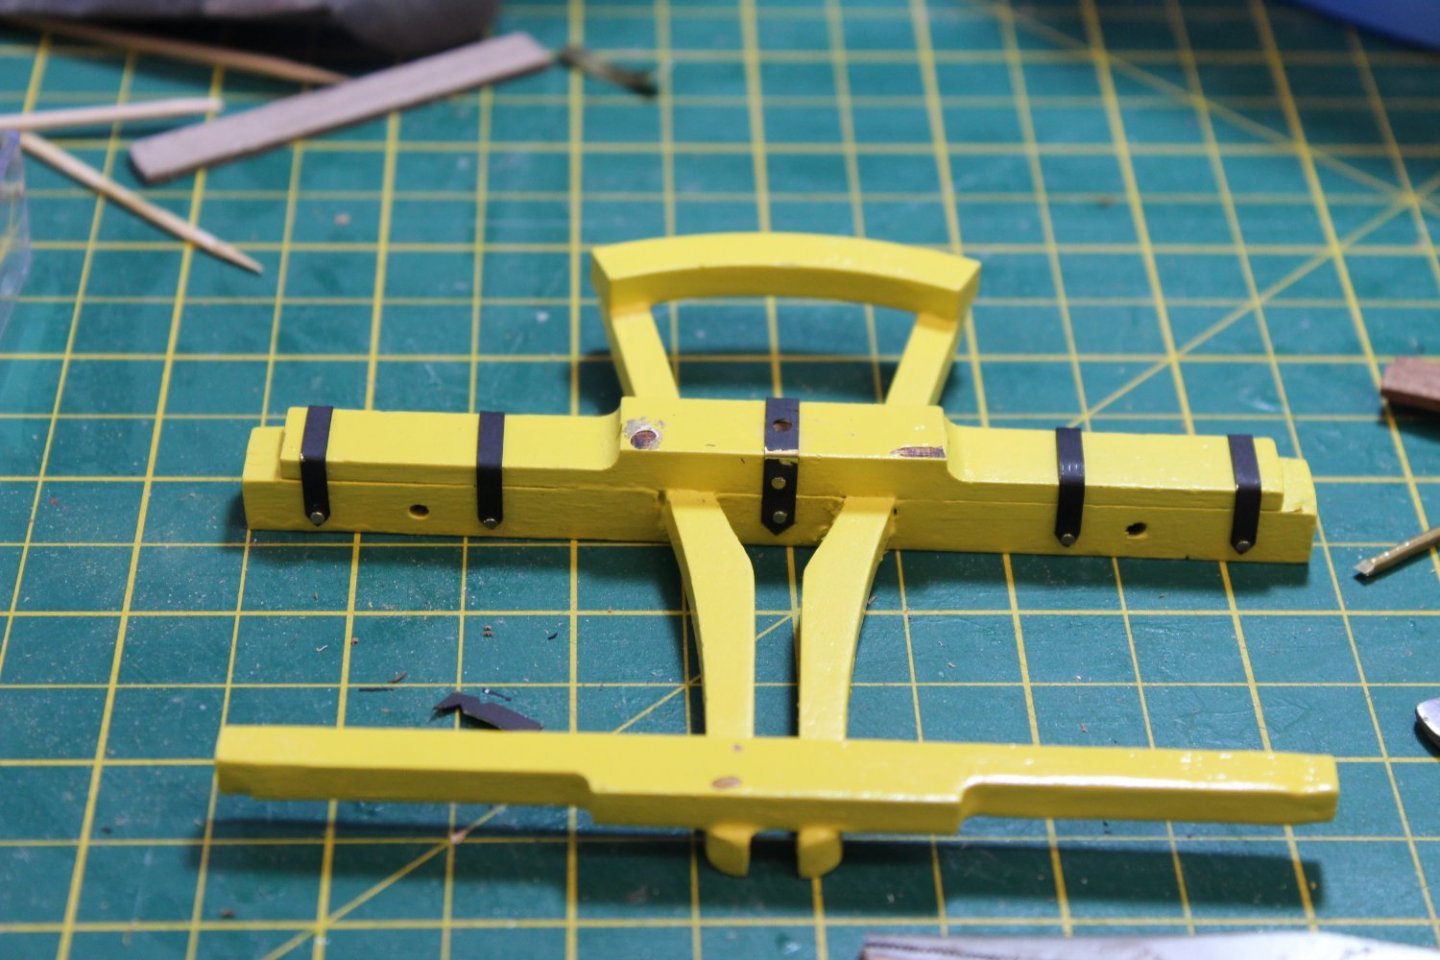
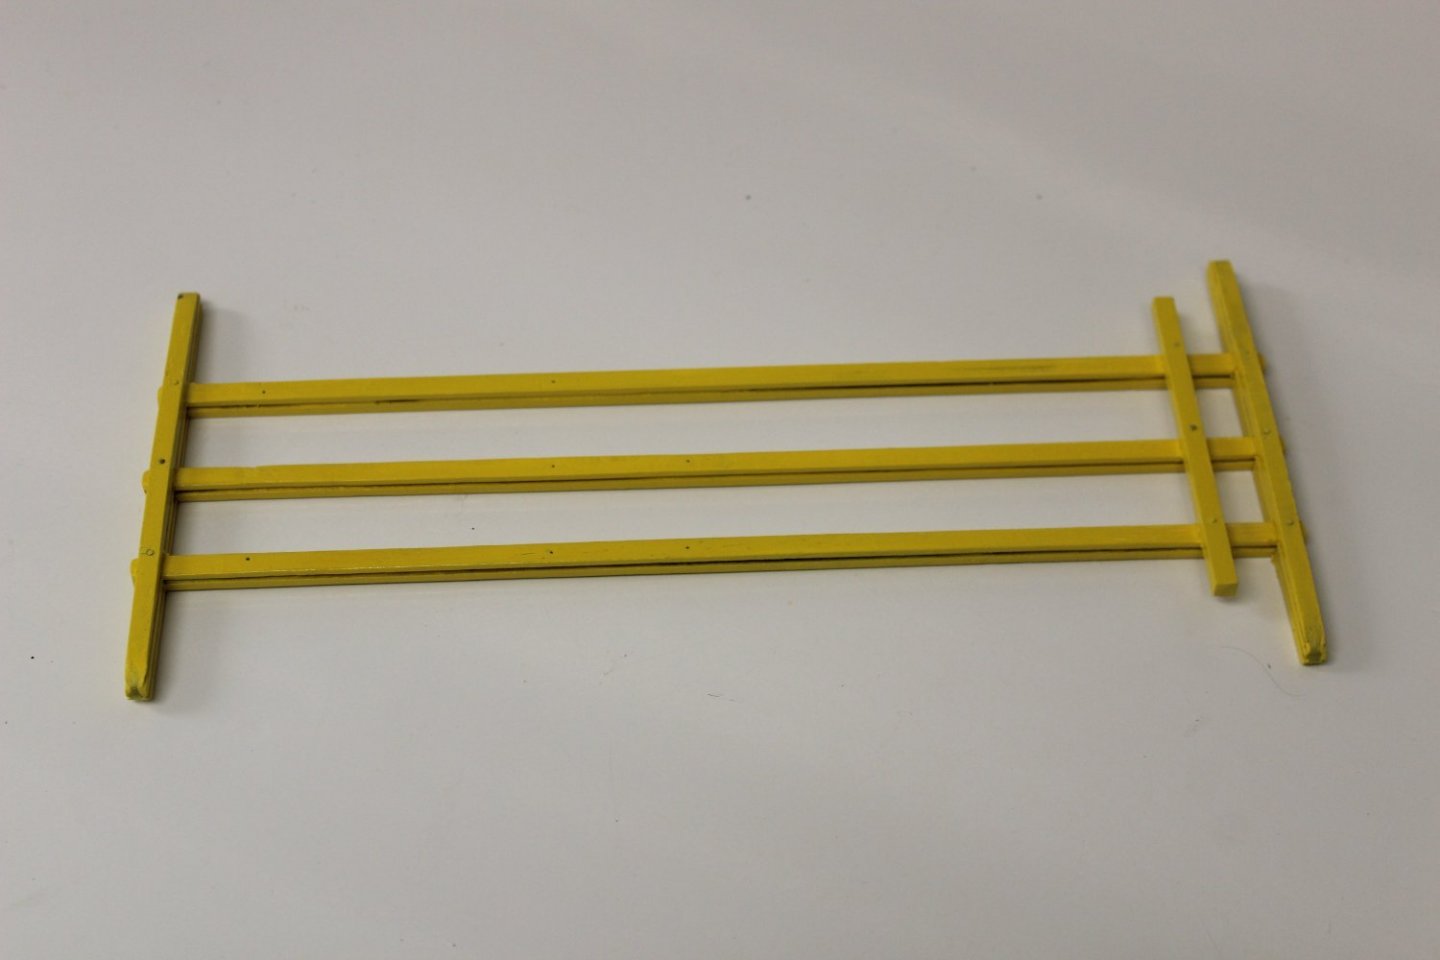
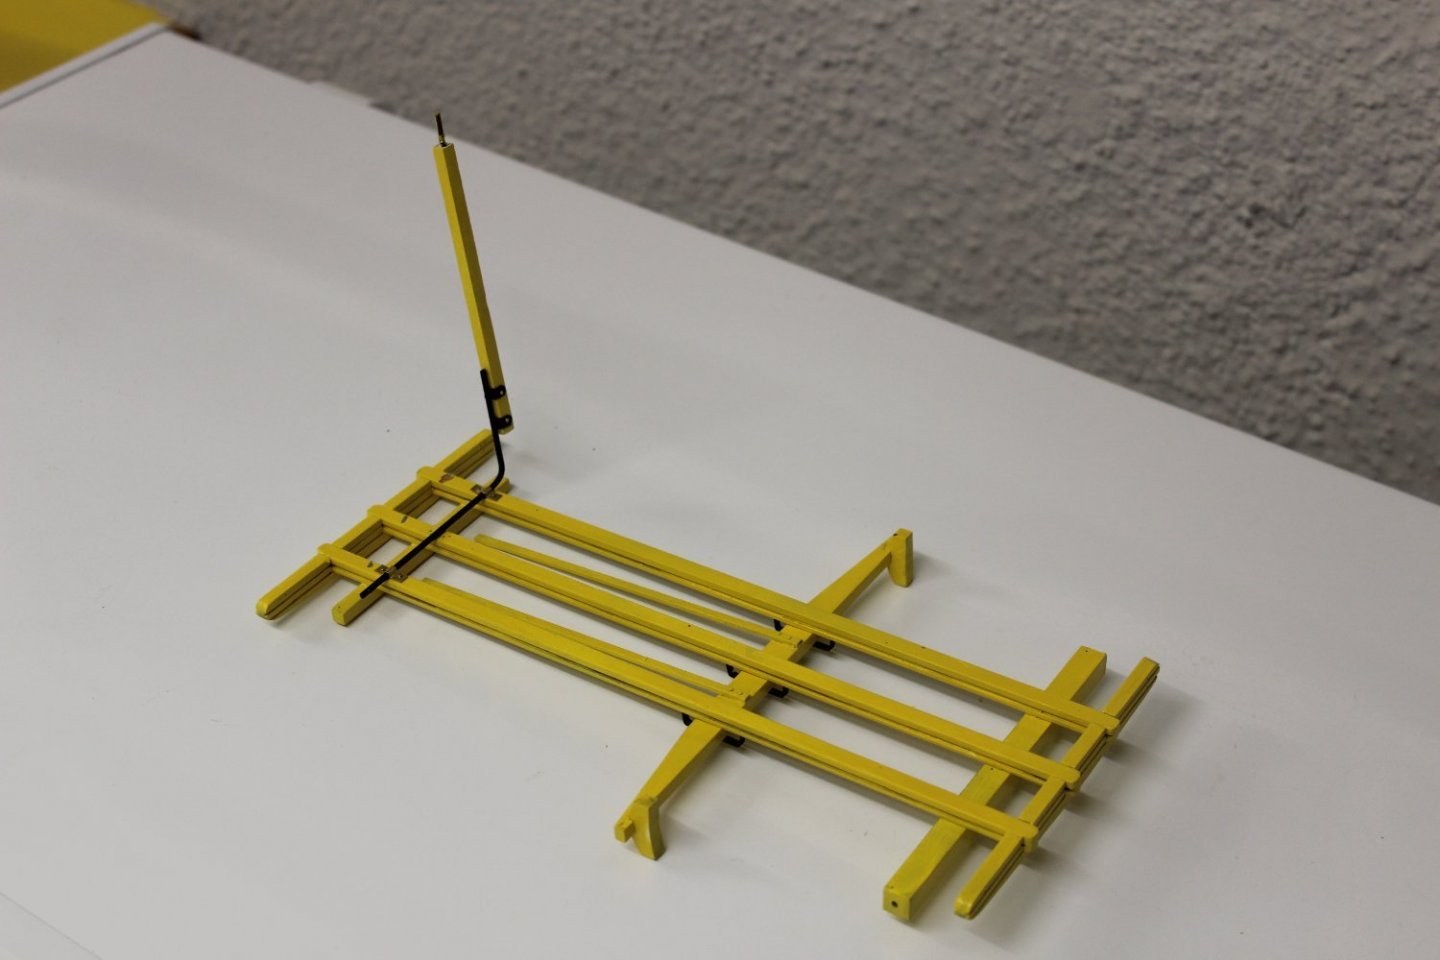
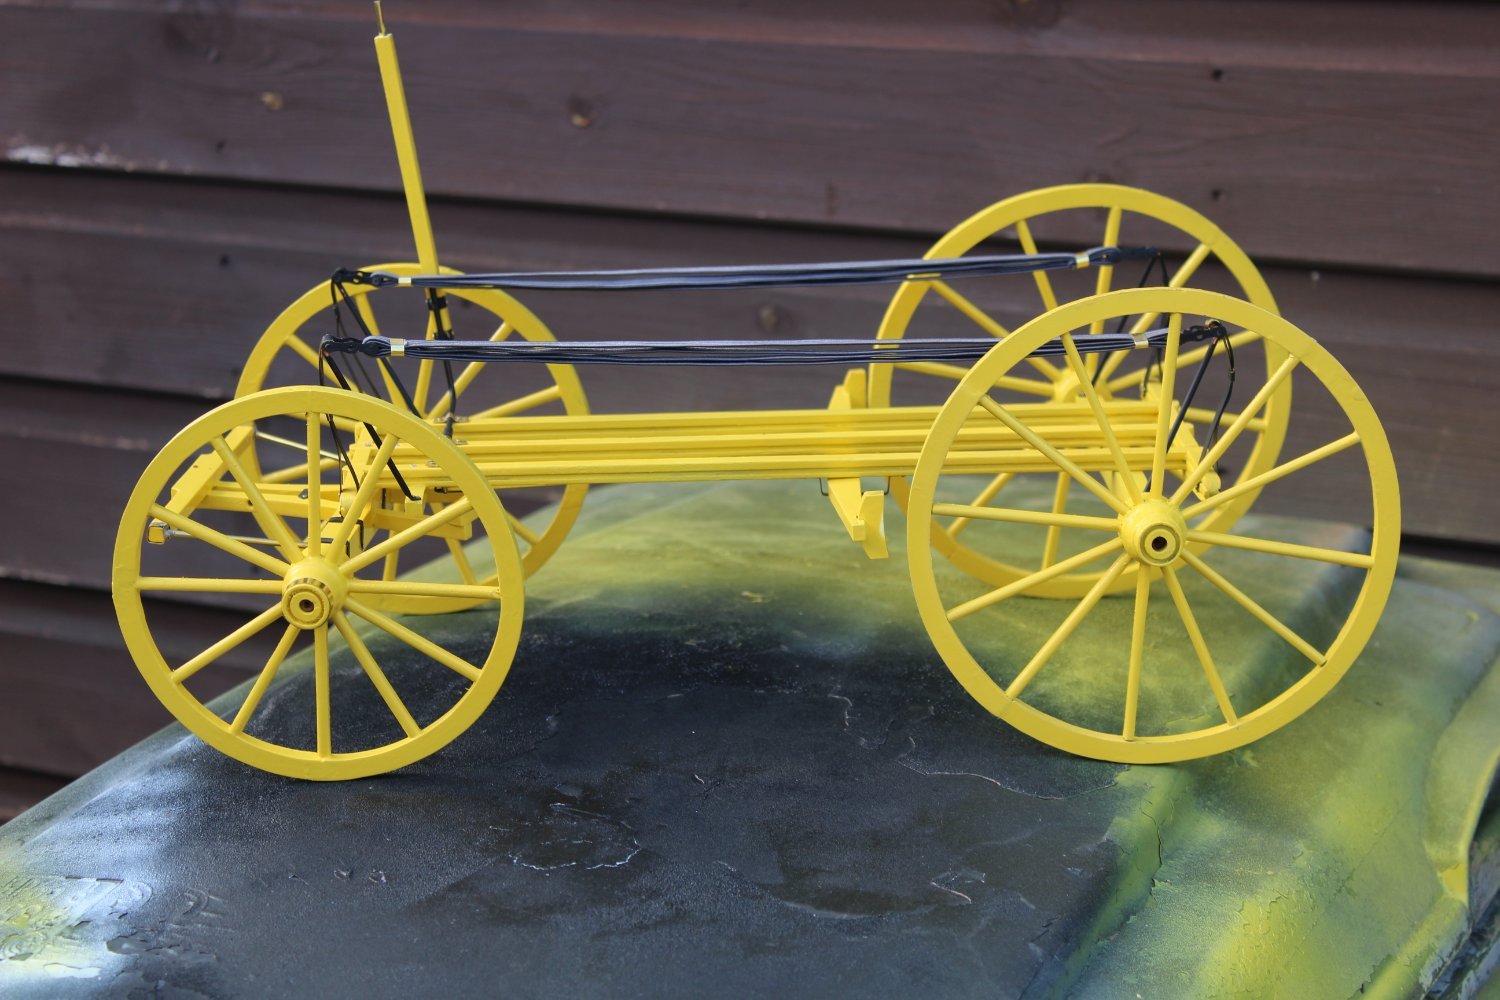
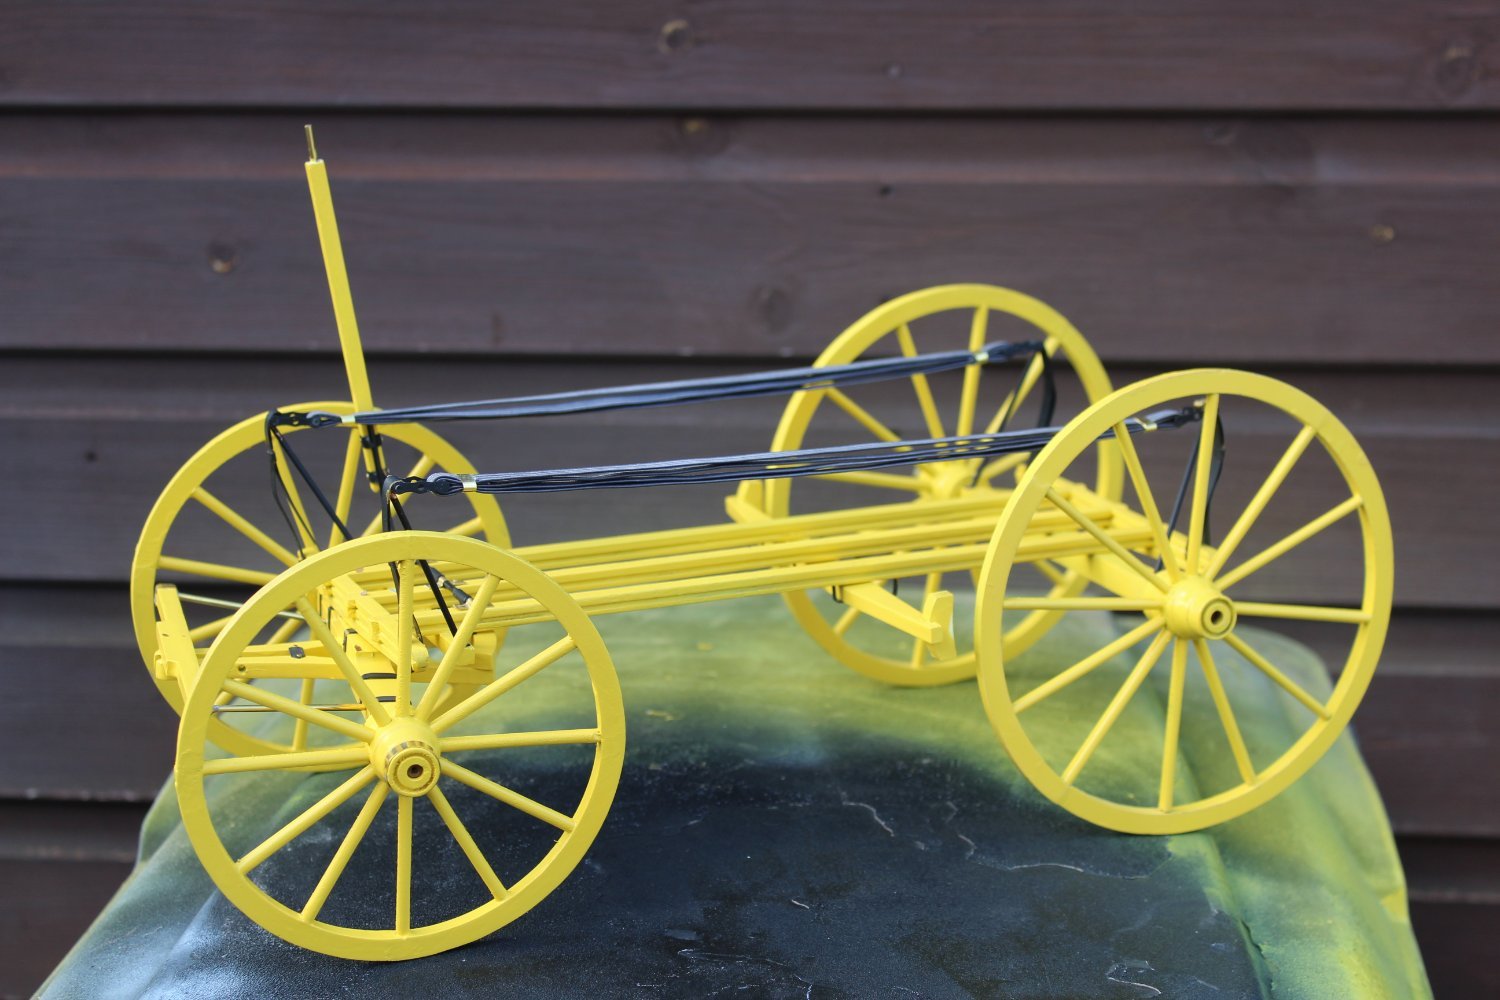
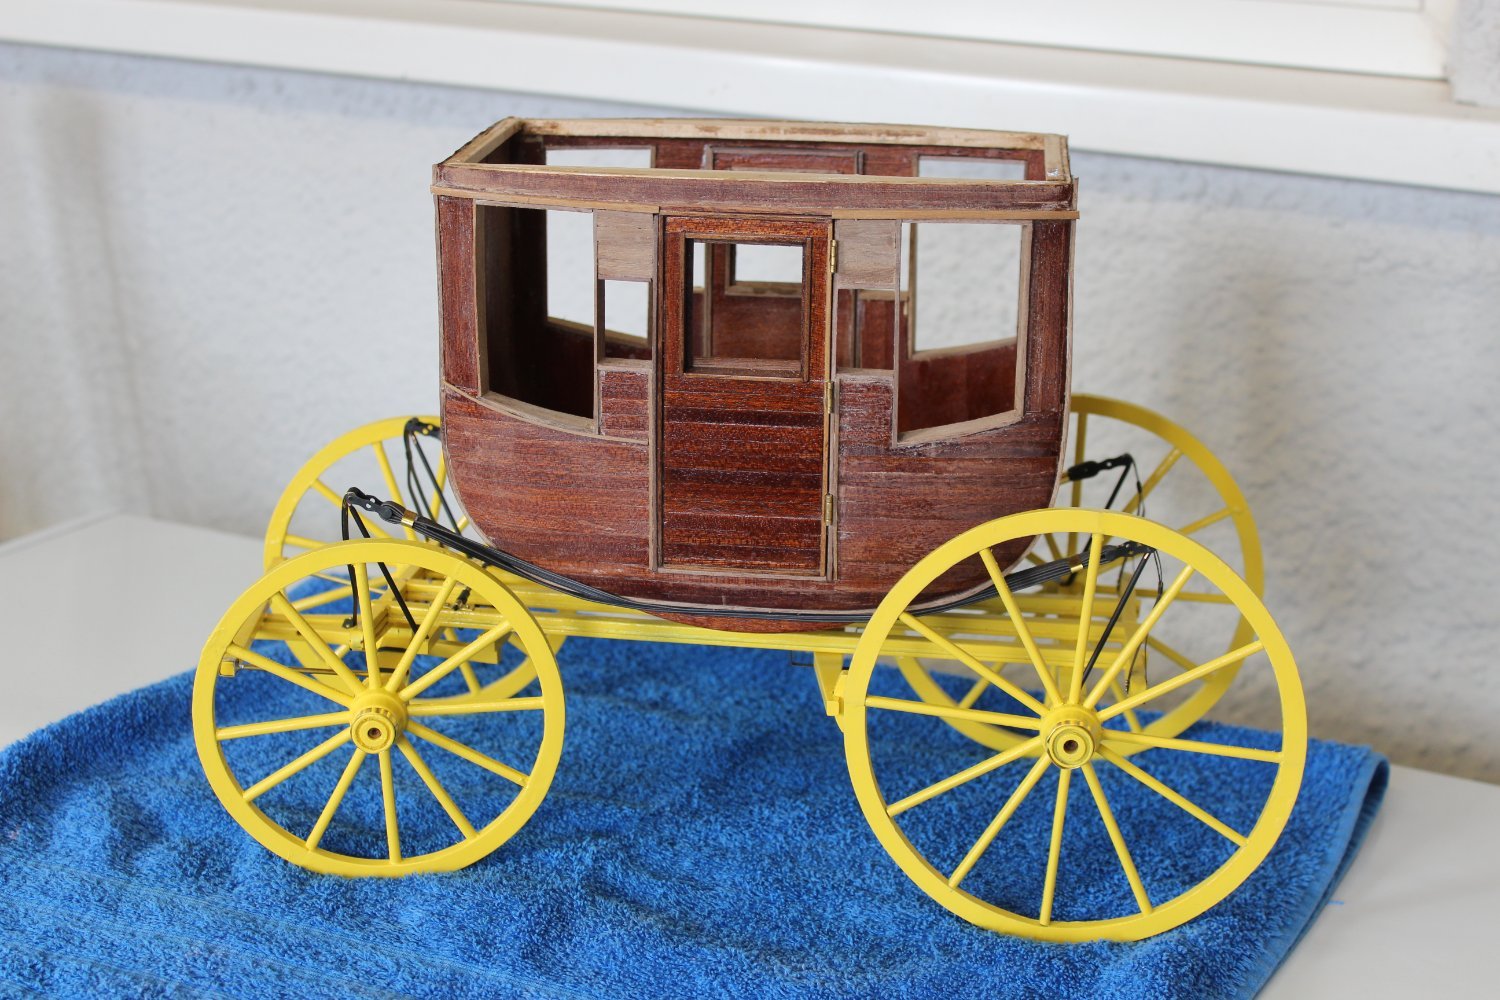
good evening everyone
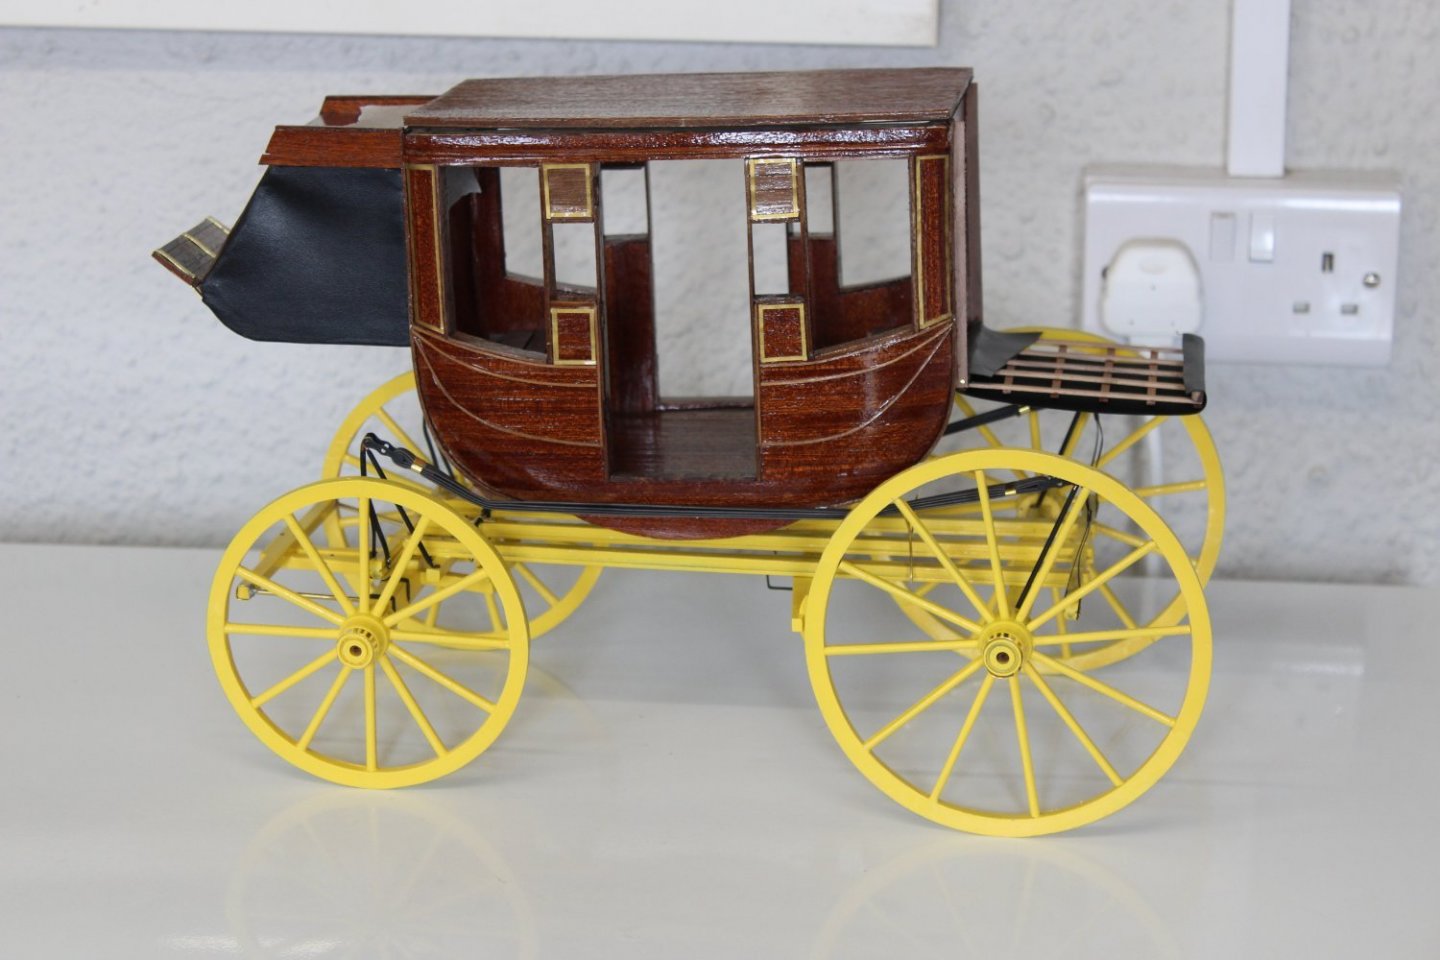
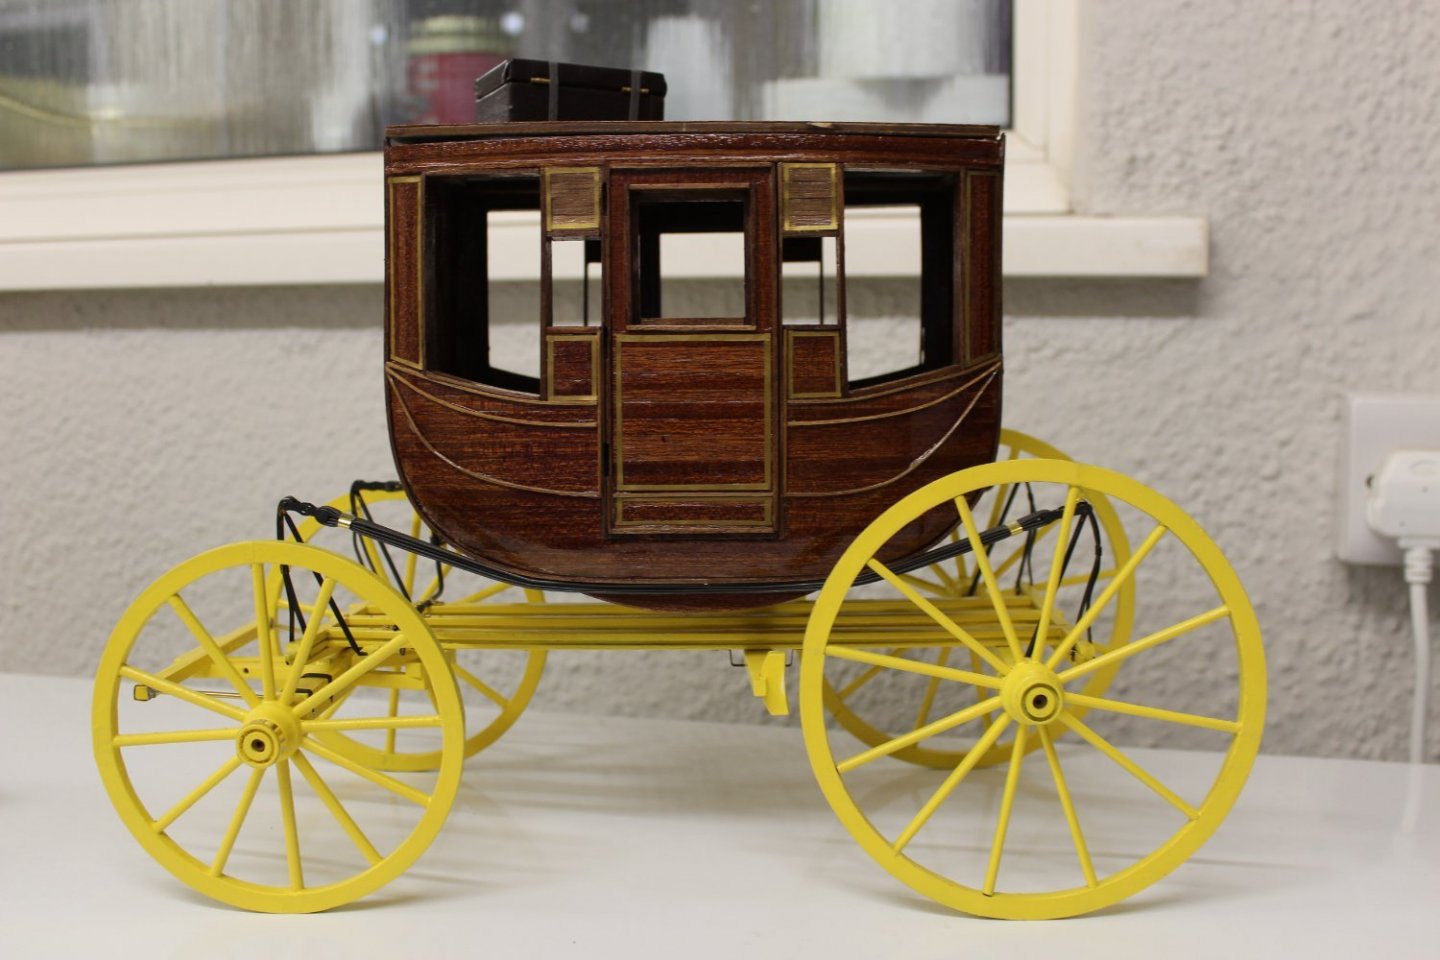
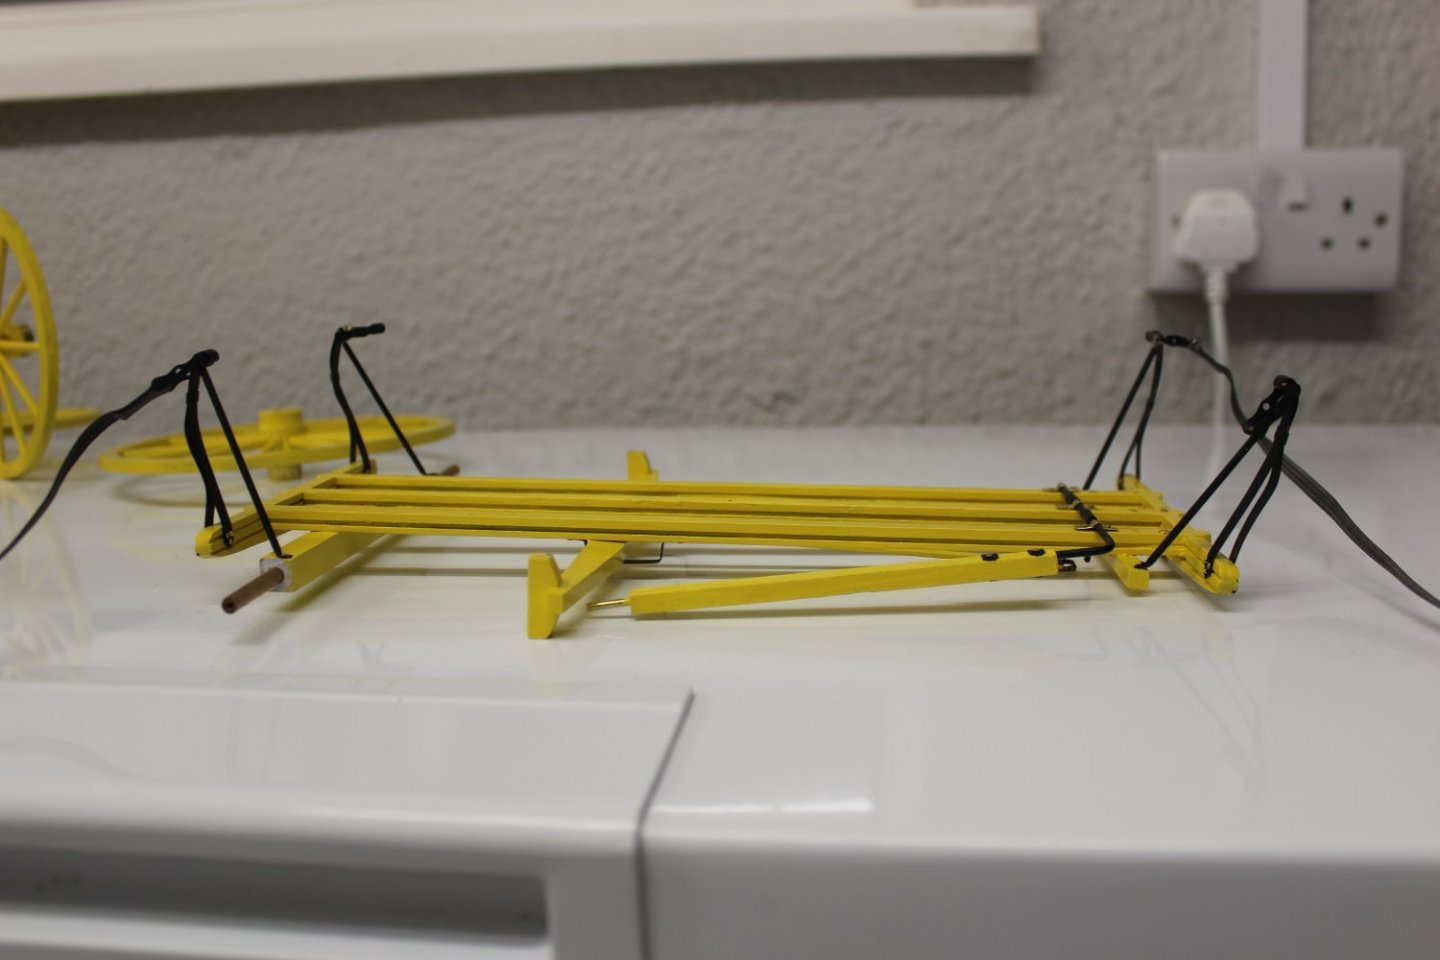
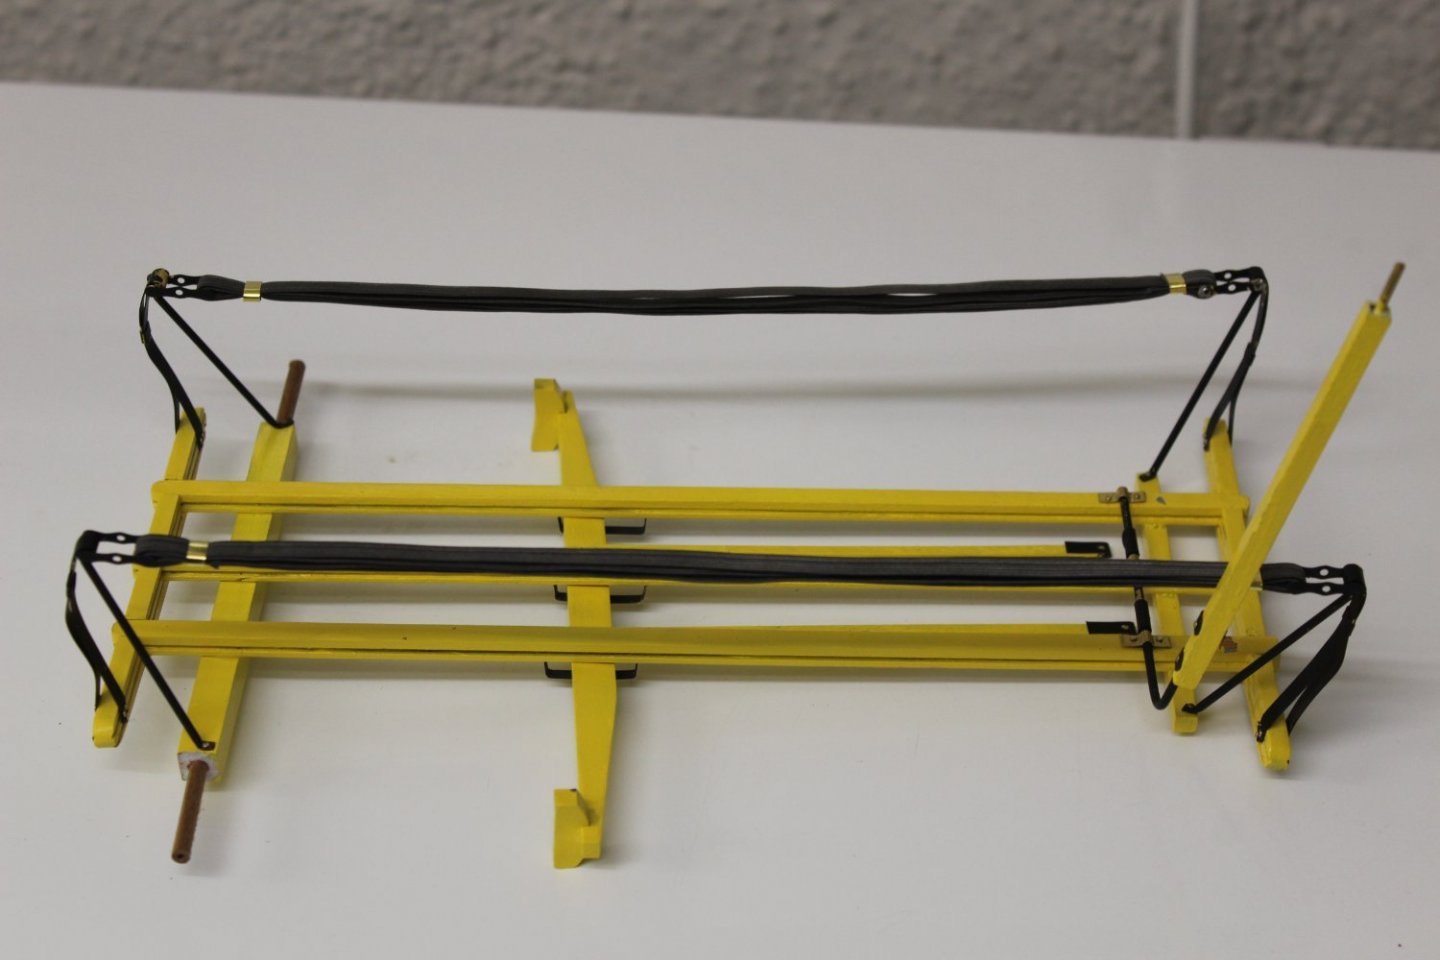
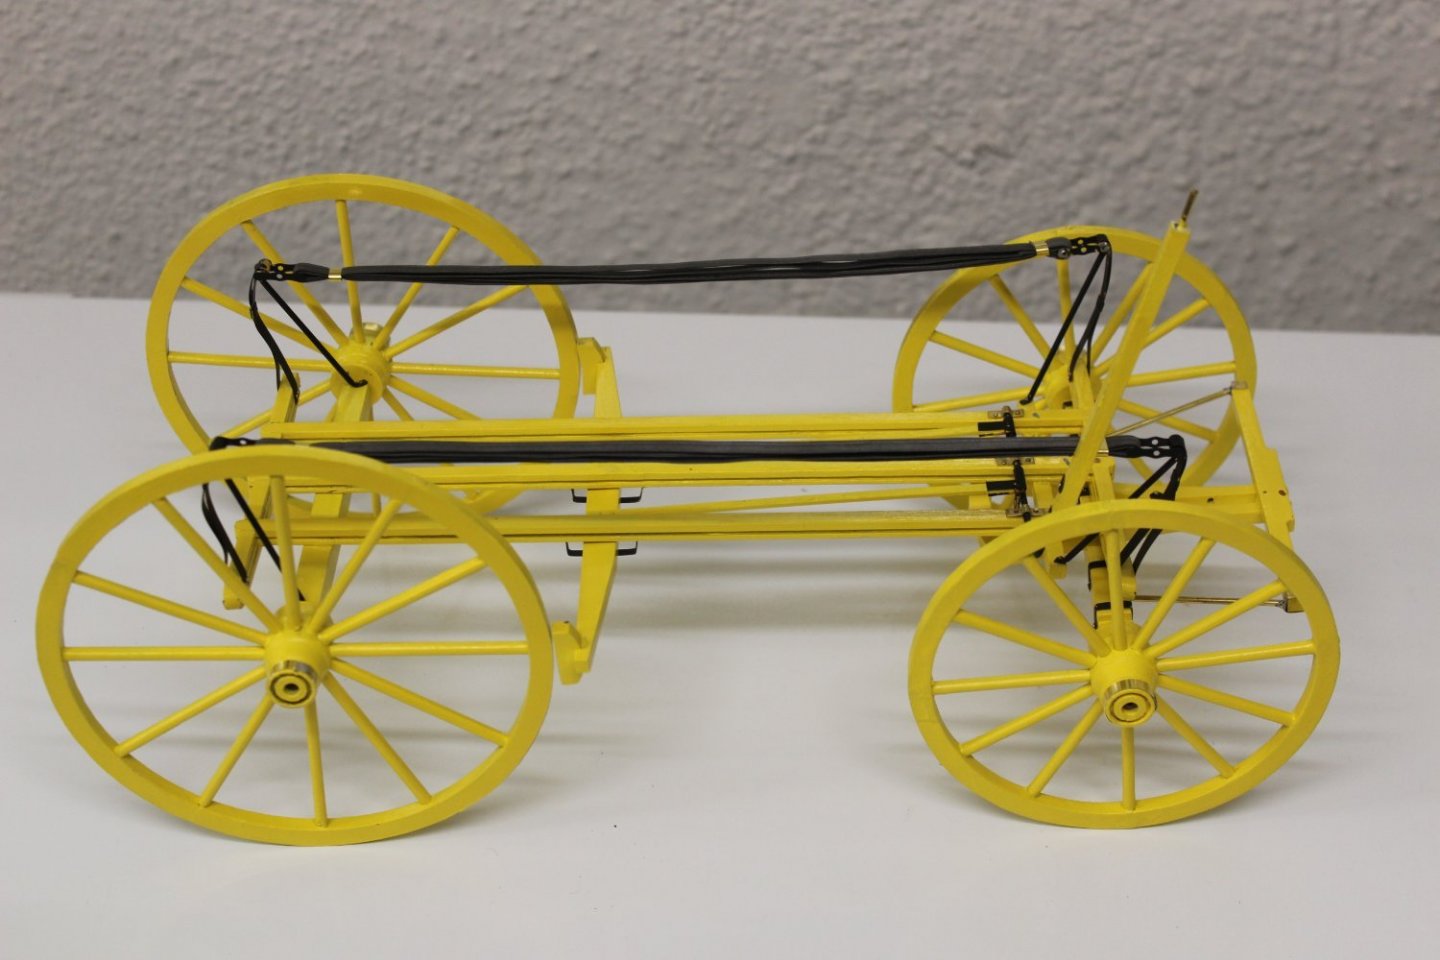
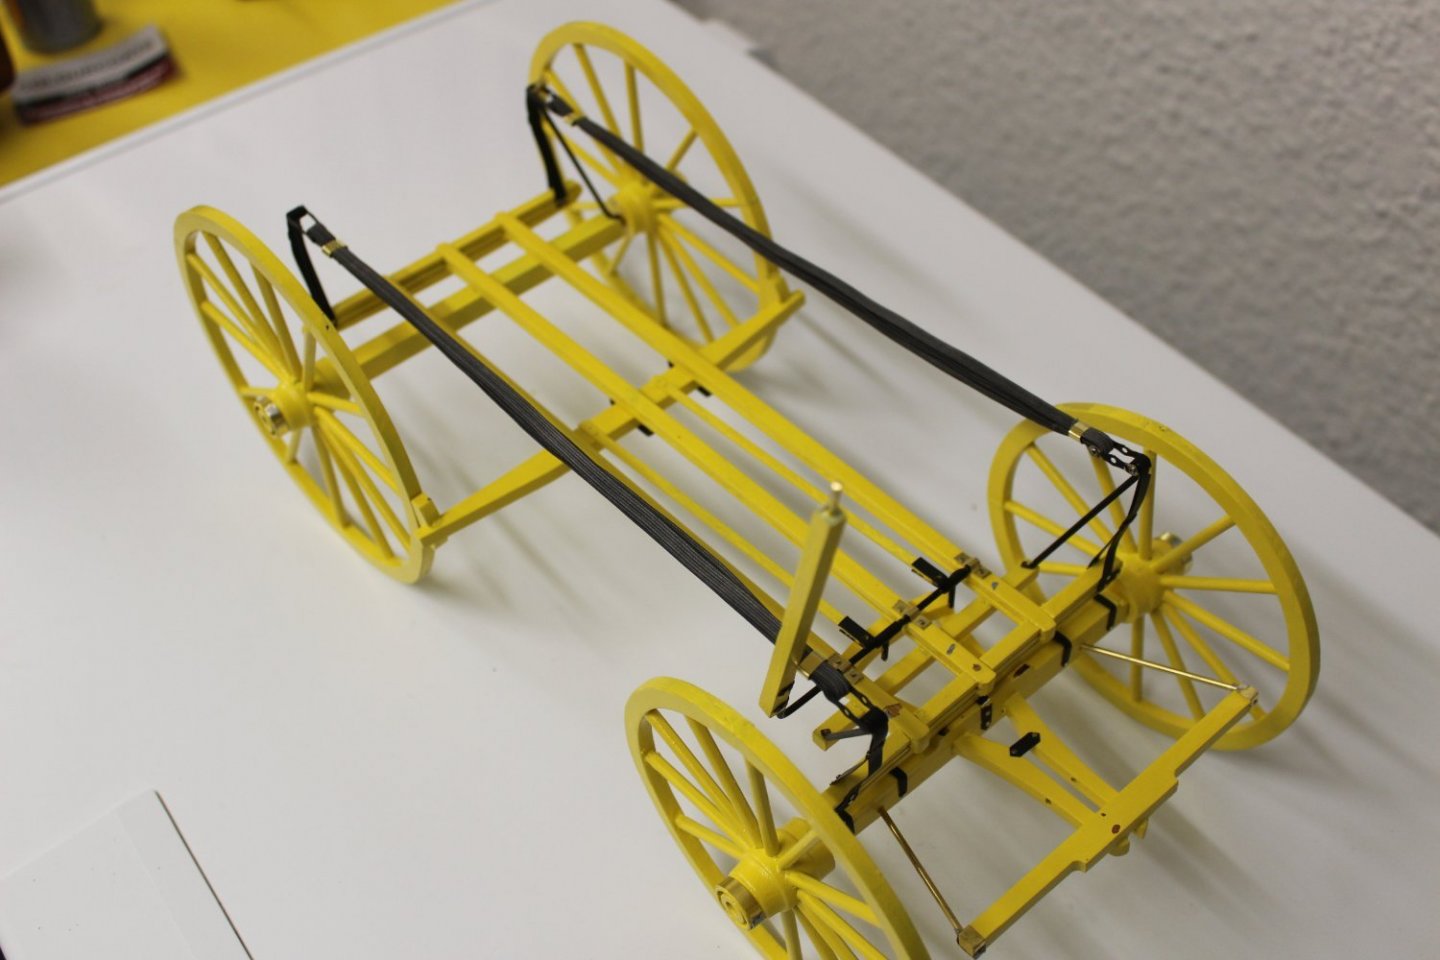
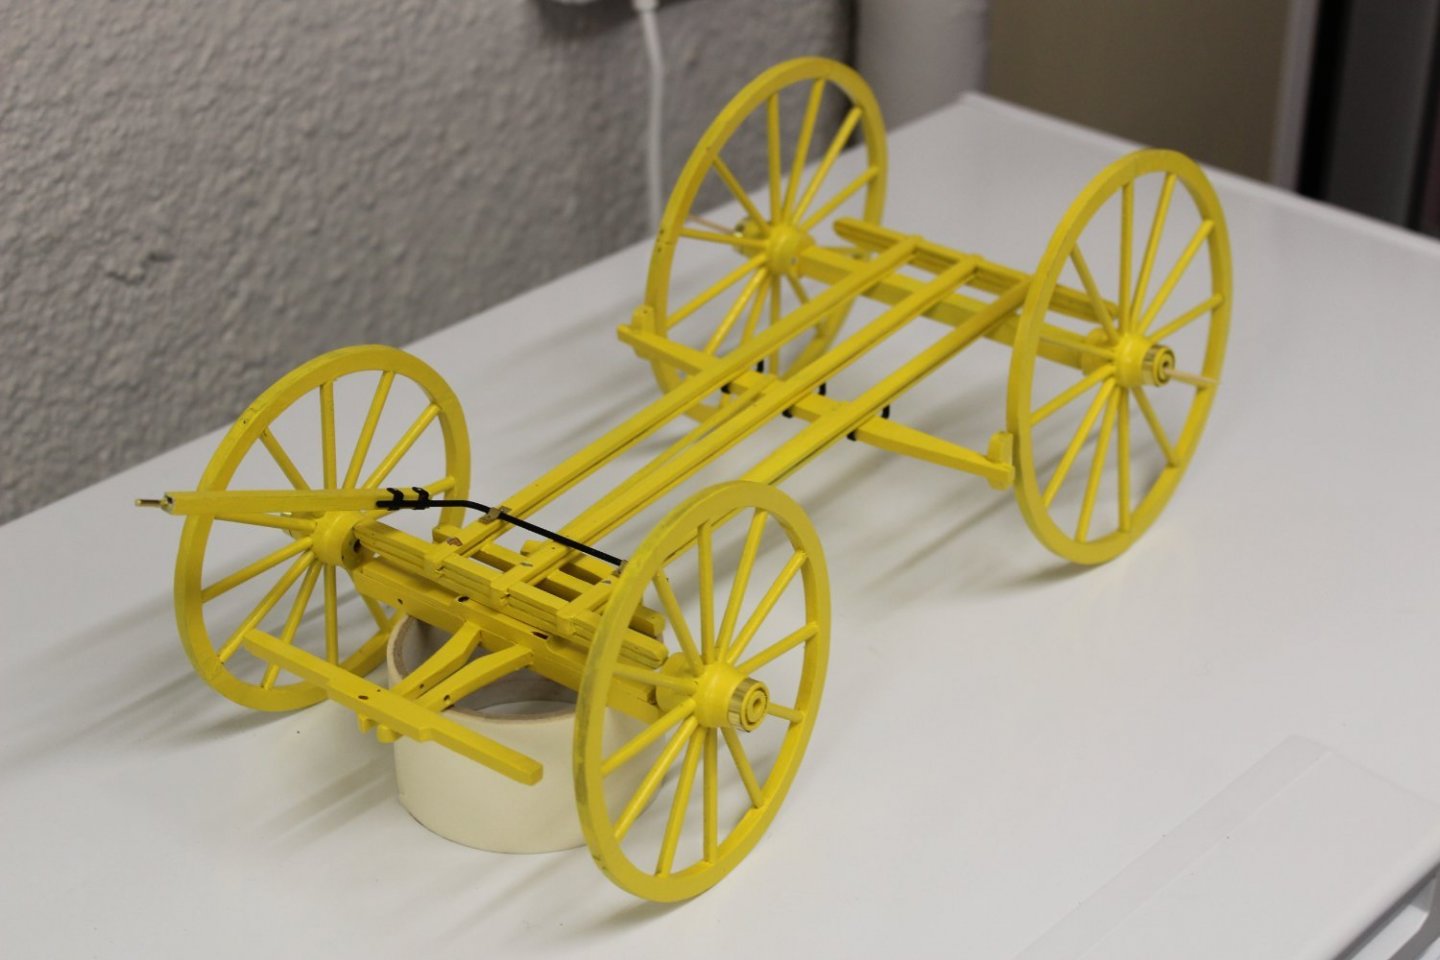
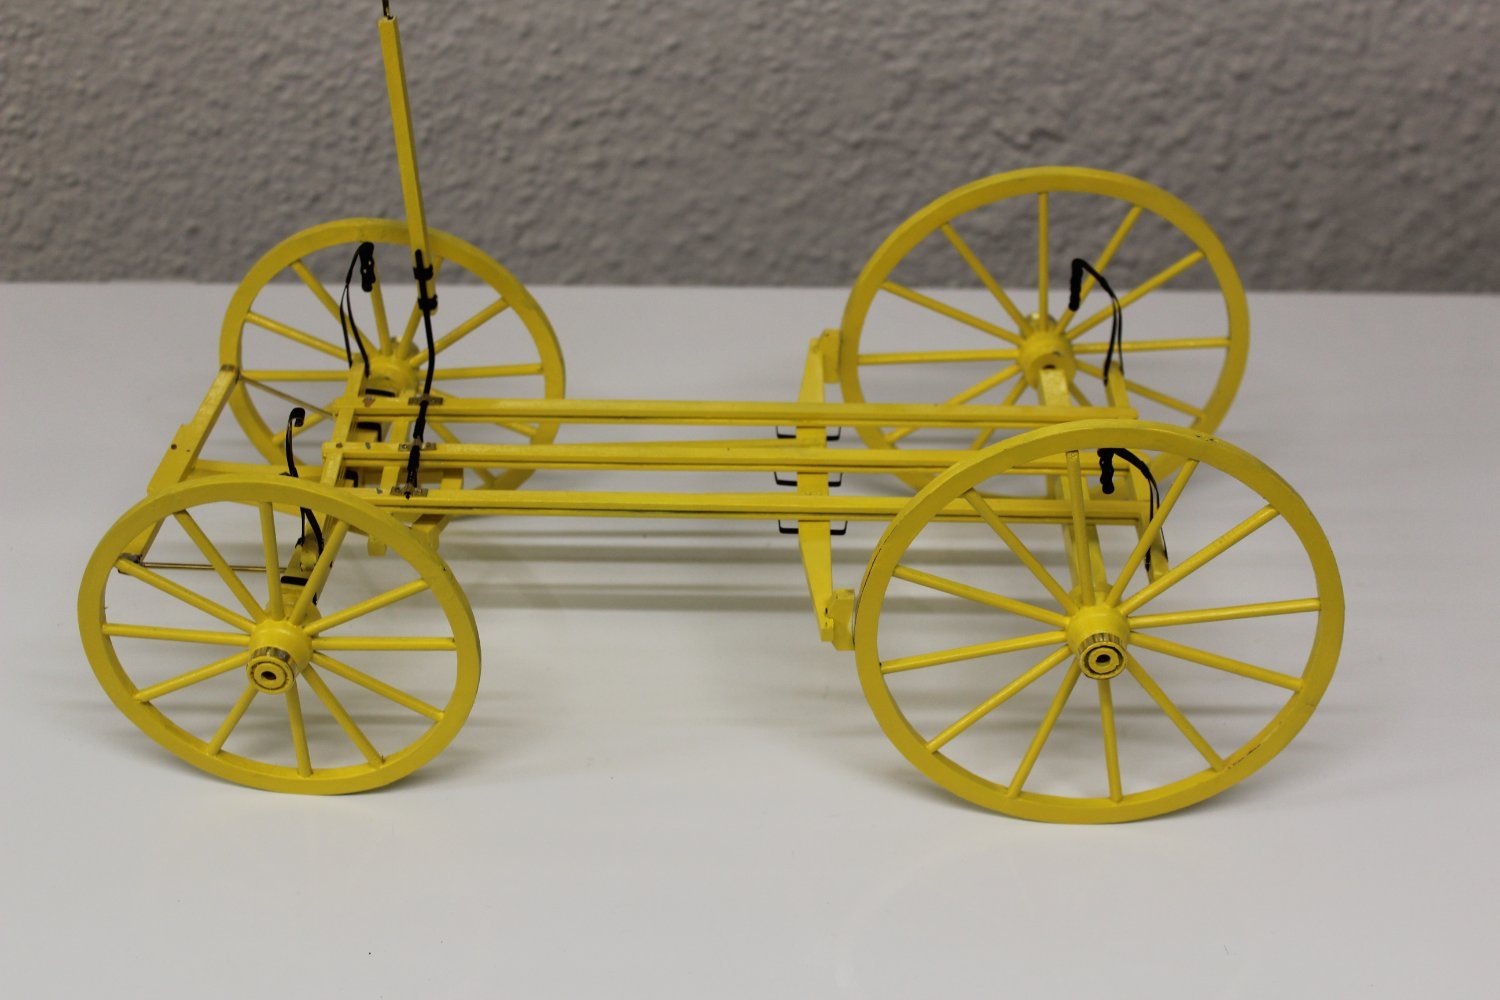
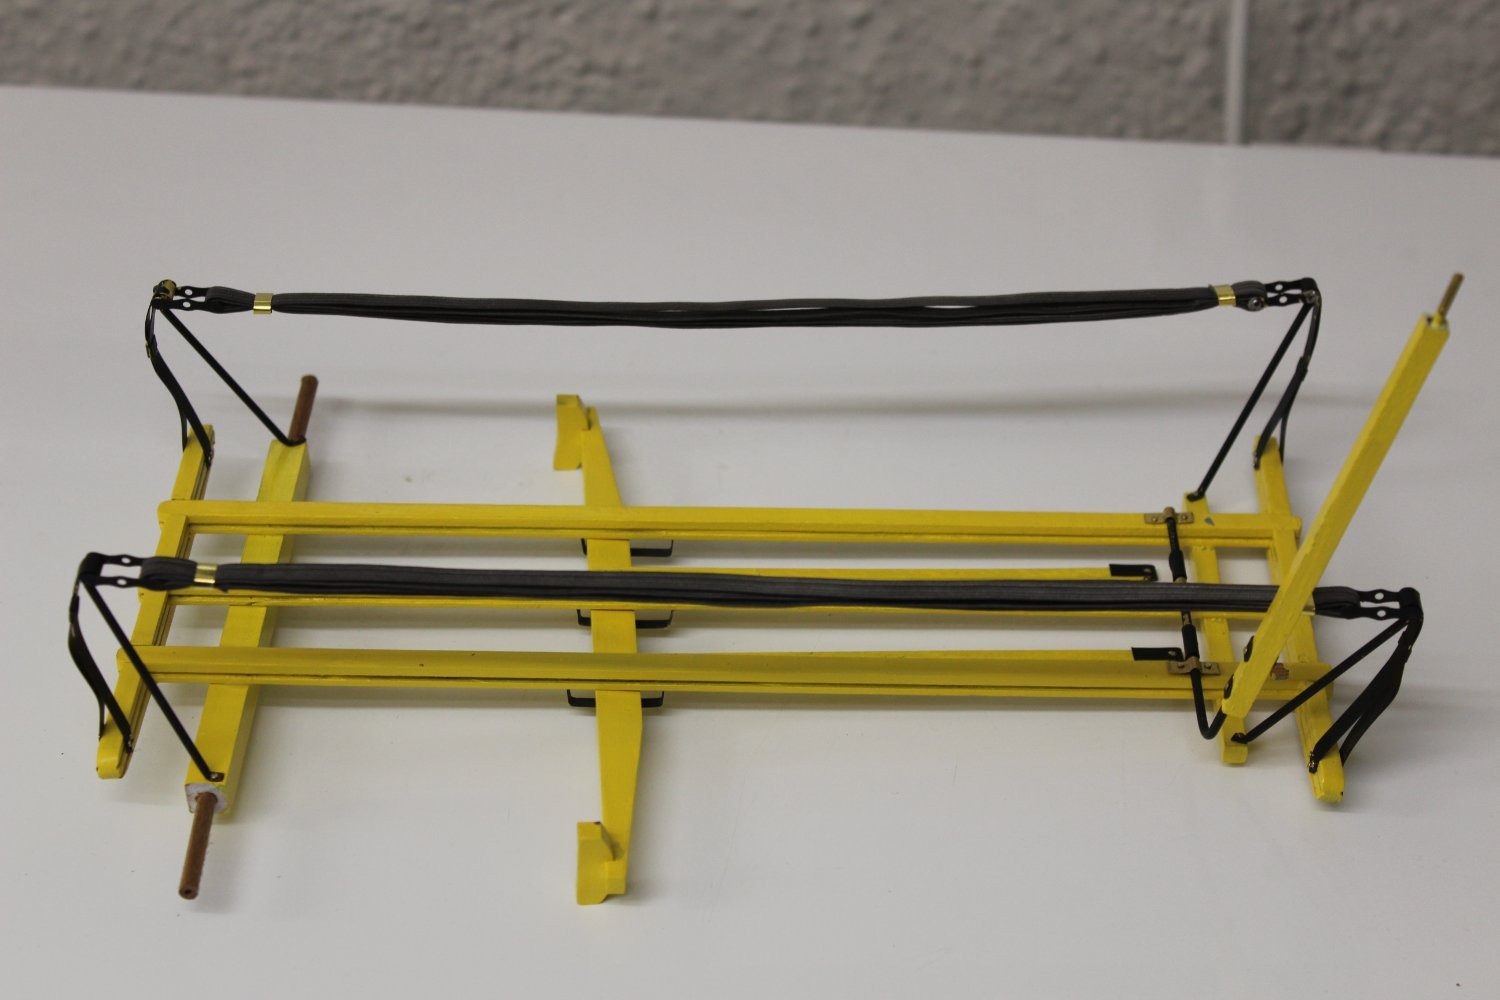
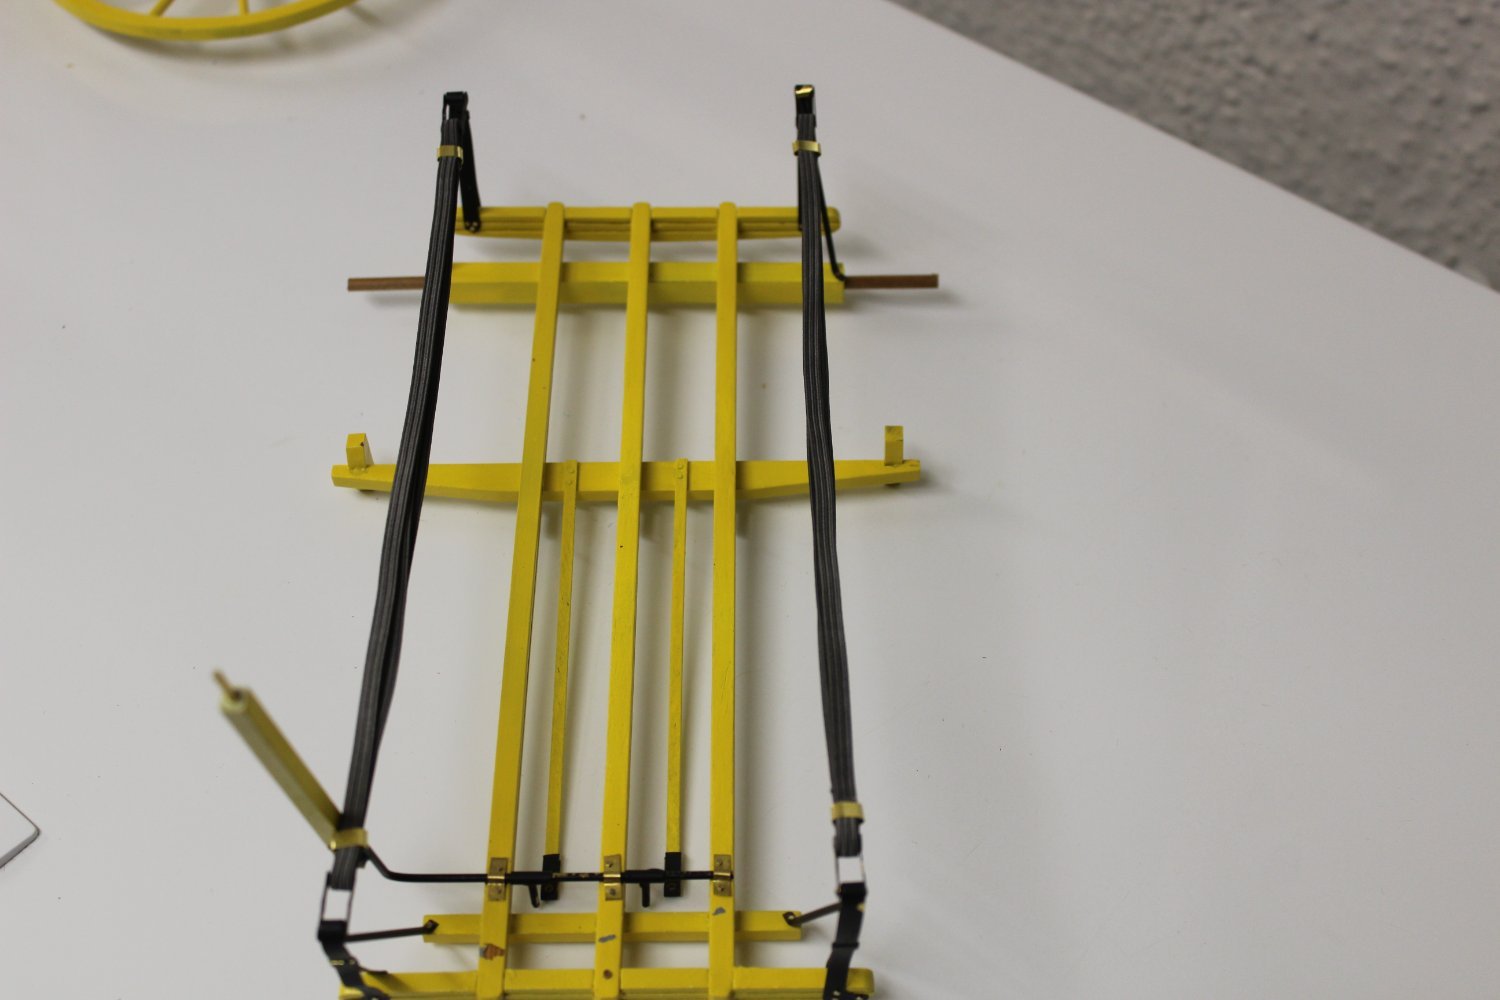
the chassis continues, a lot more banding has gone in, and whilst brass at present i may take it to black before completion
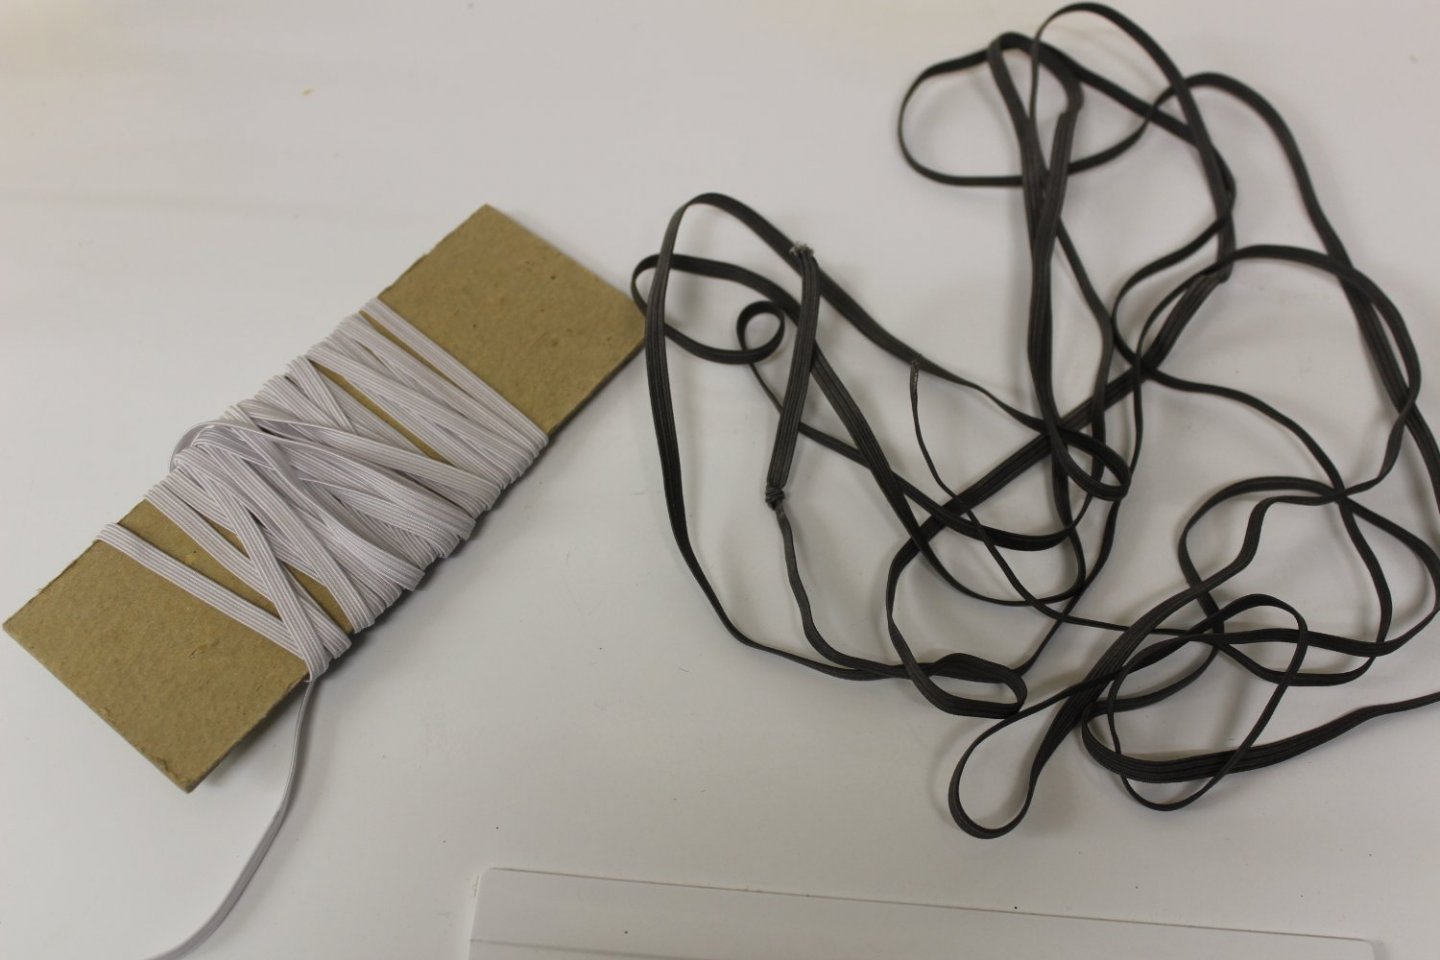
the suspension was put back on and then had a bit of fun with the through braces, which were made from leather straps, the kits asks you yo make them from wooden strips, i went my own way and used face mask elastic strapping, and clamped them in place with brass strips, the height above the chassis may be to high but no weight on there yet
the elastic was coloured using a Flory black wash


-
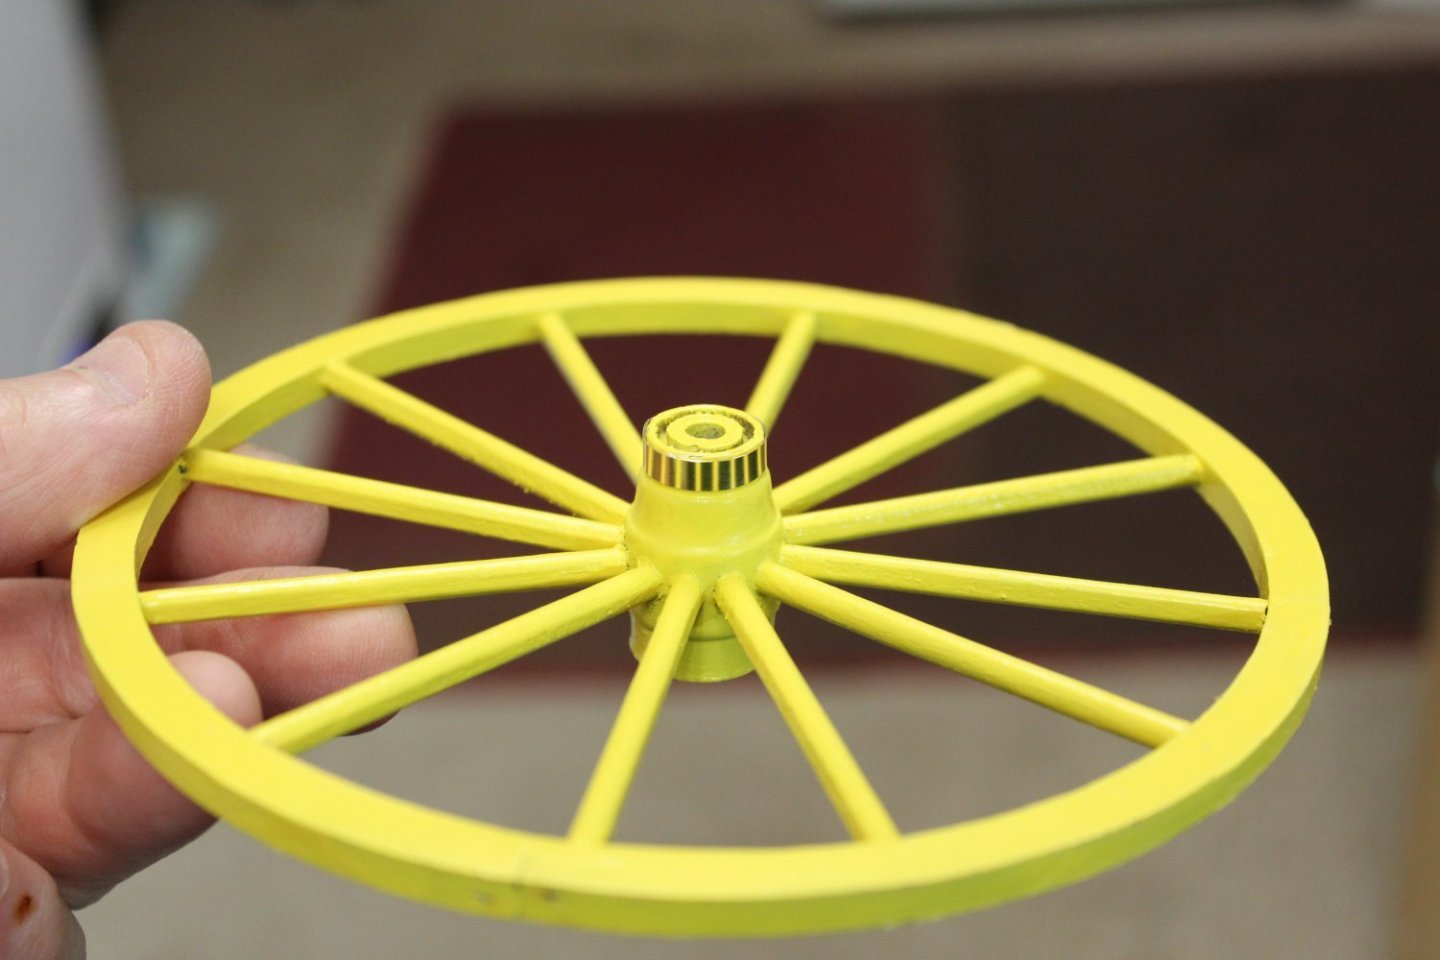
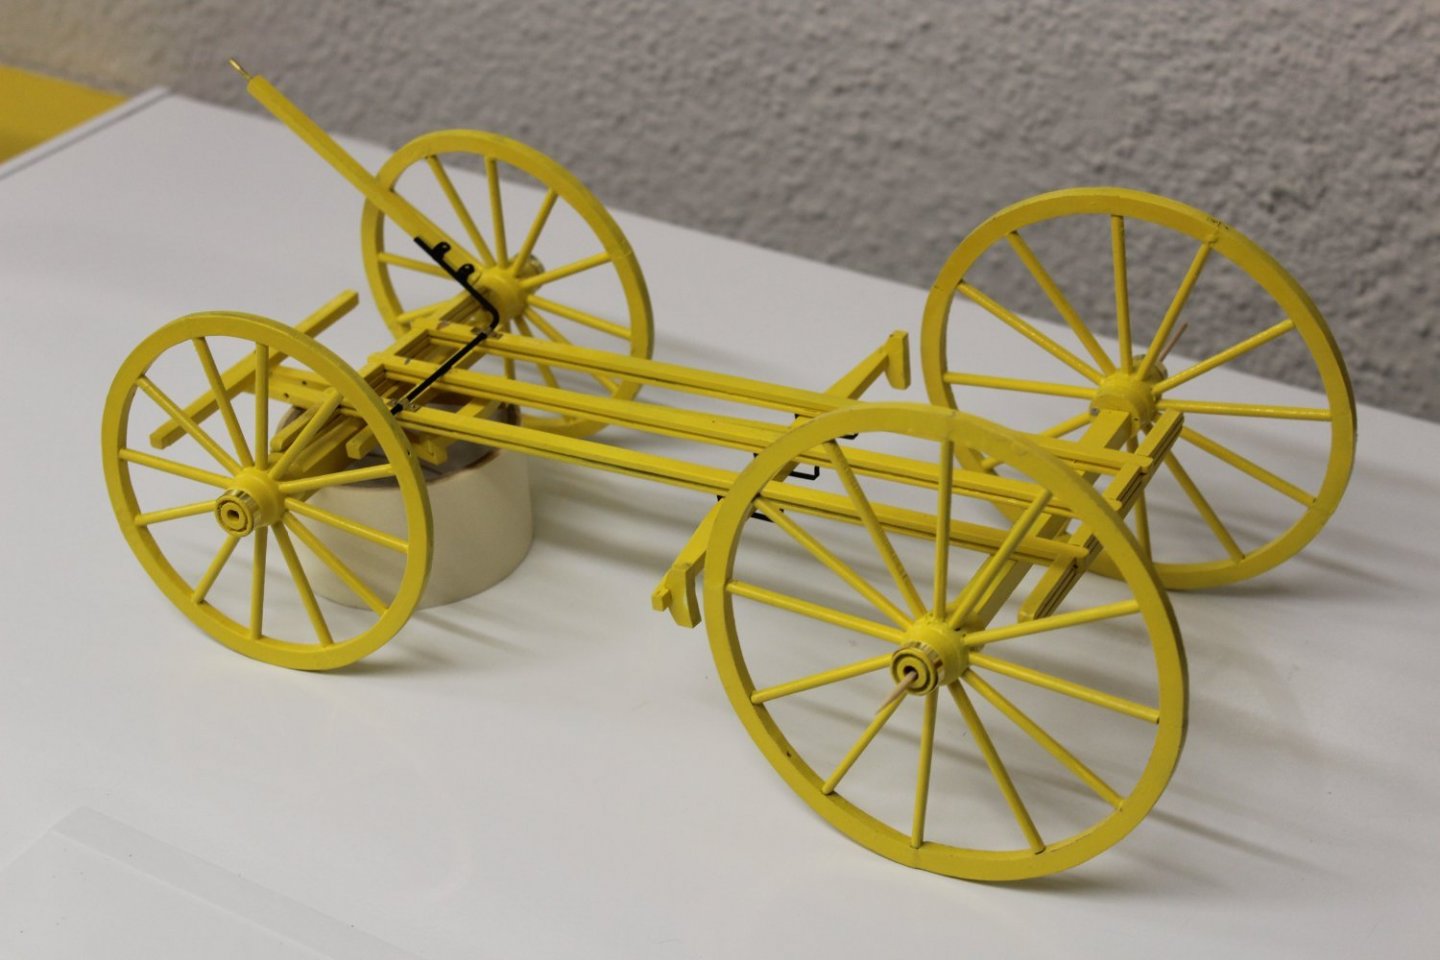
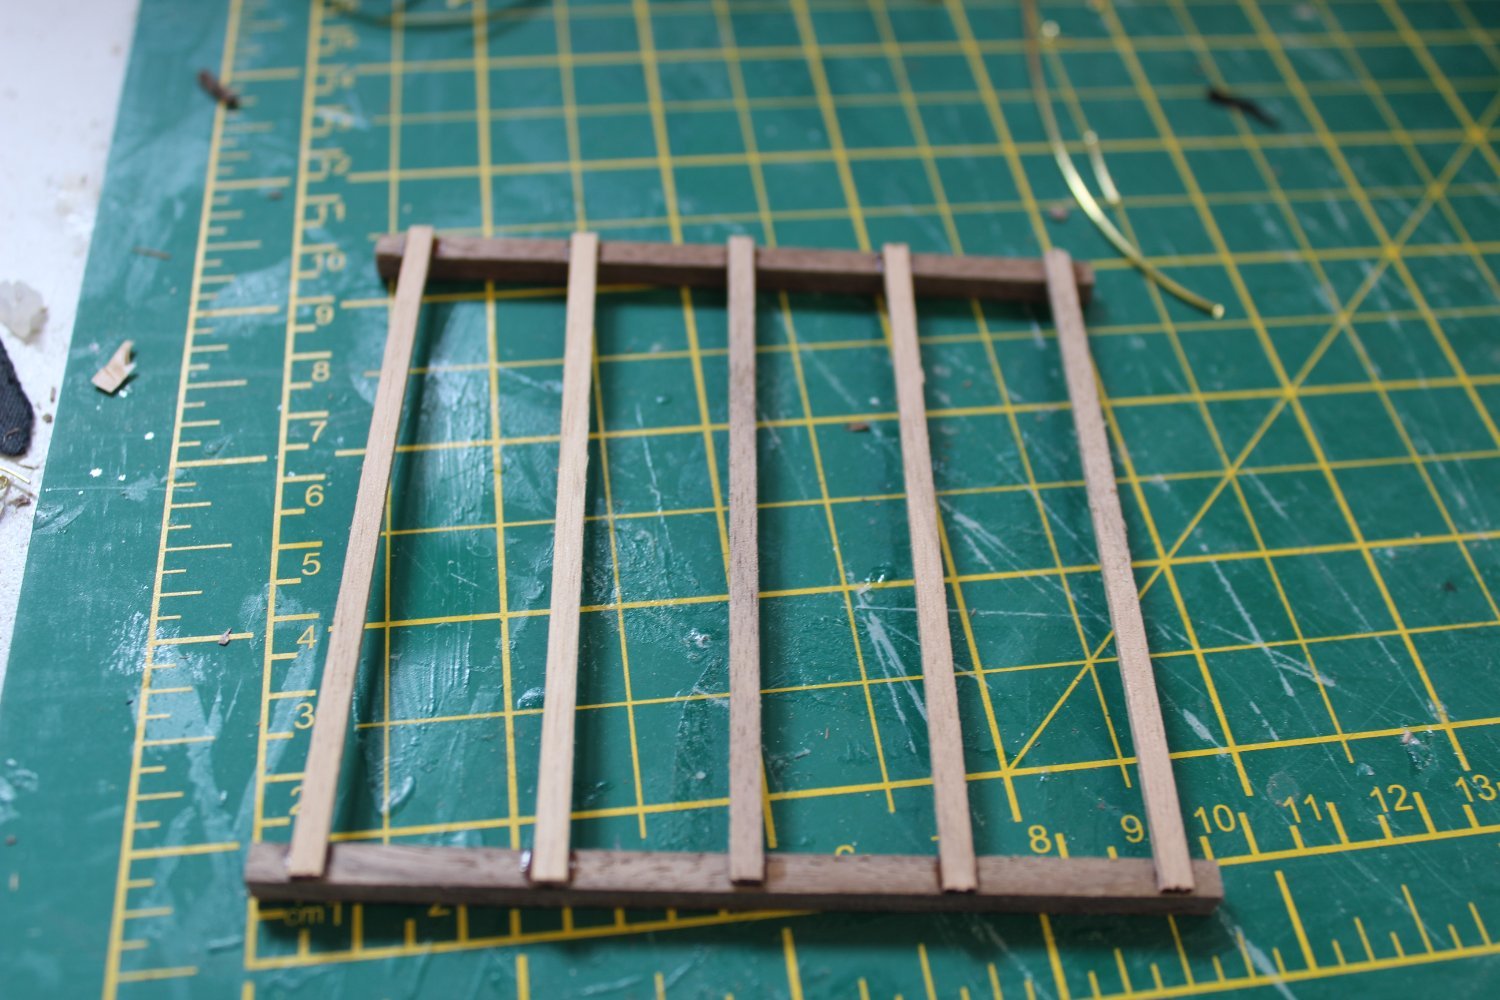
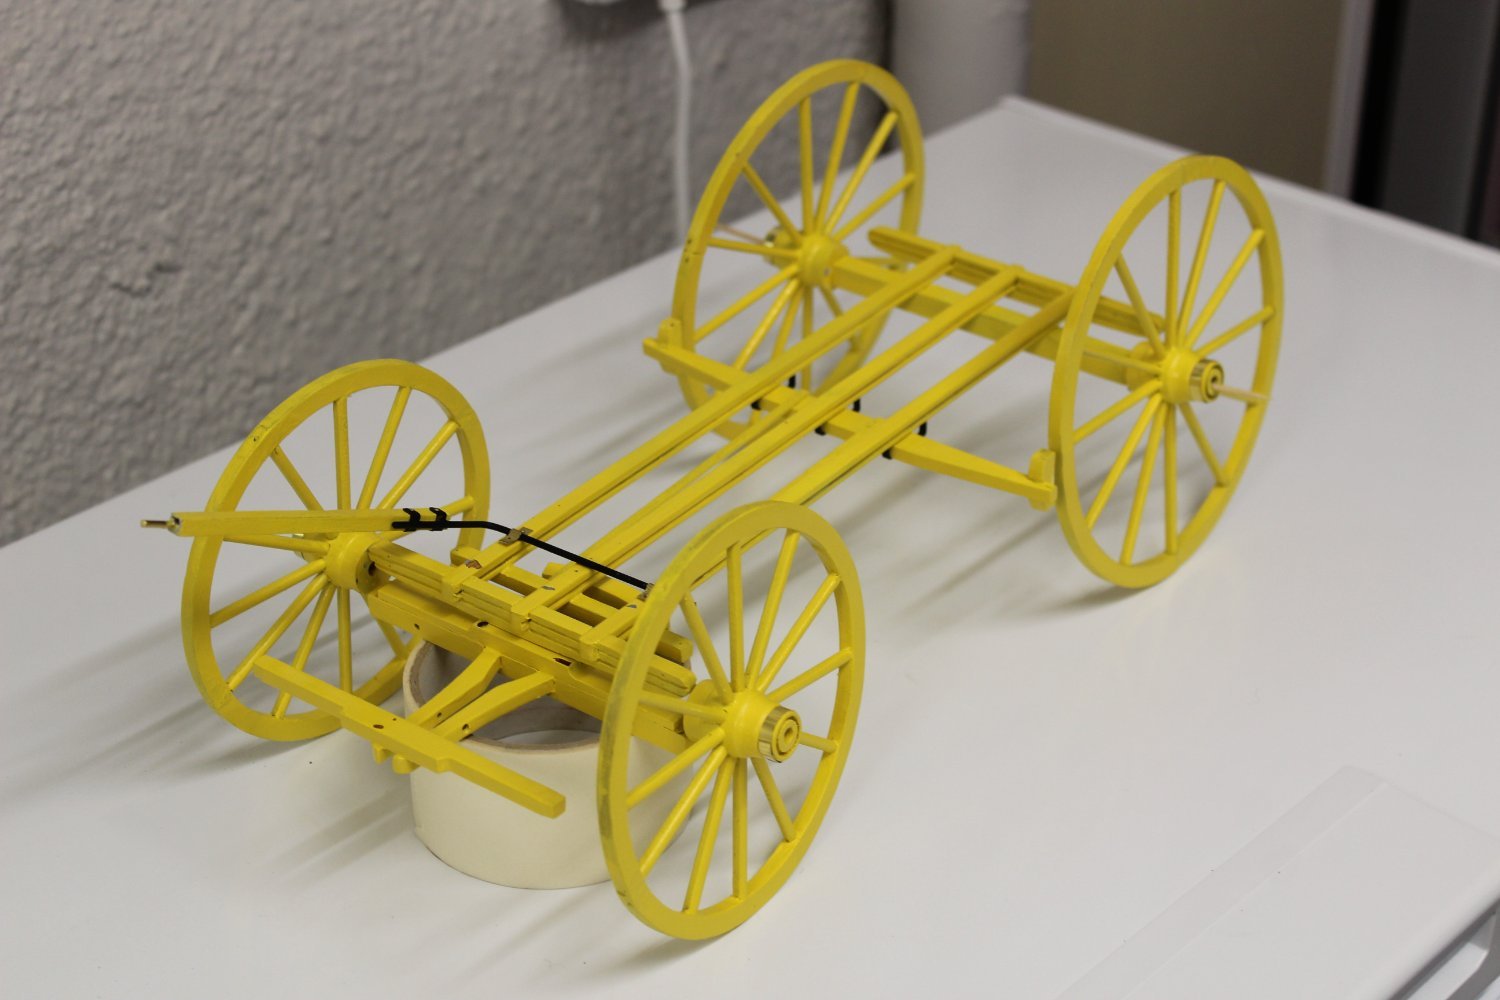
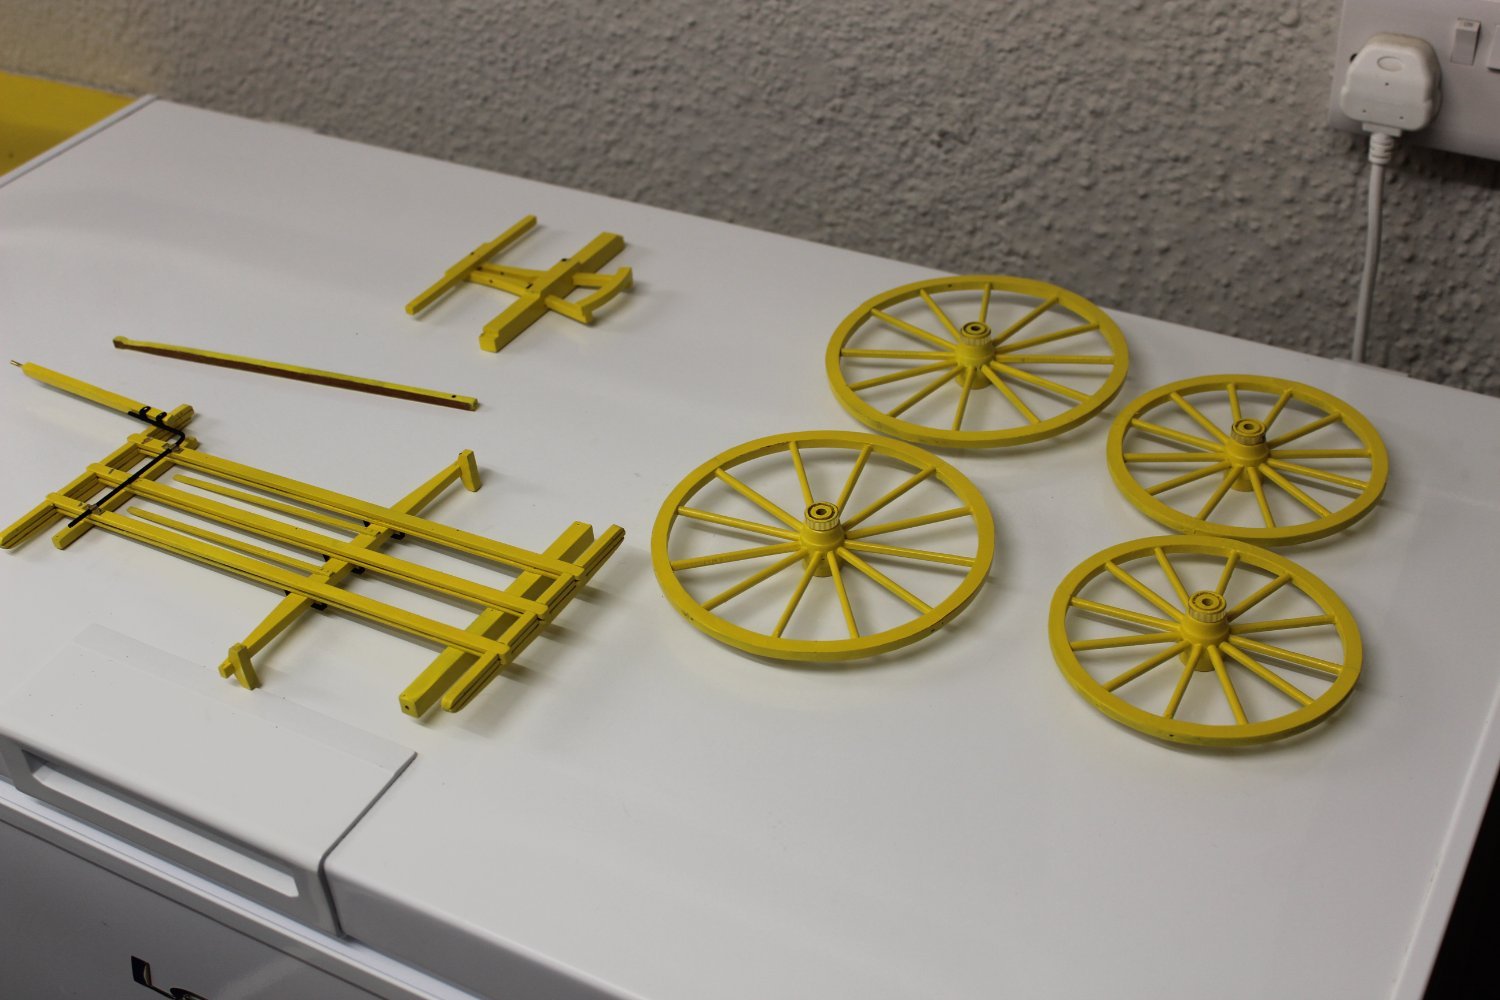
good evening everyone
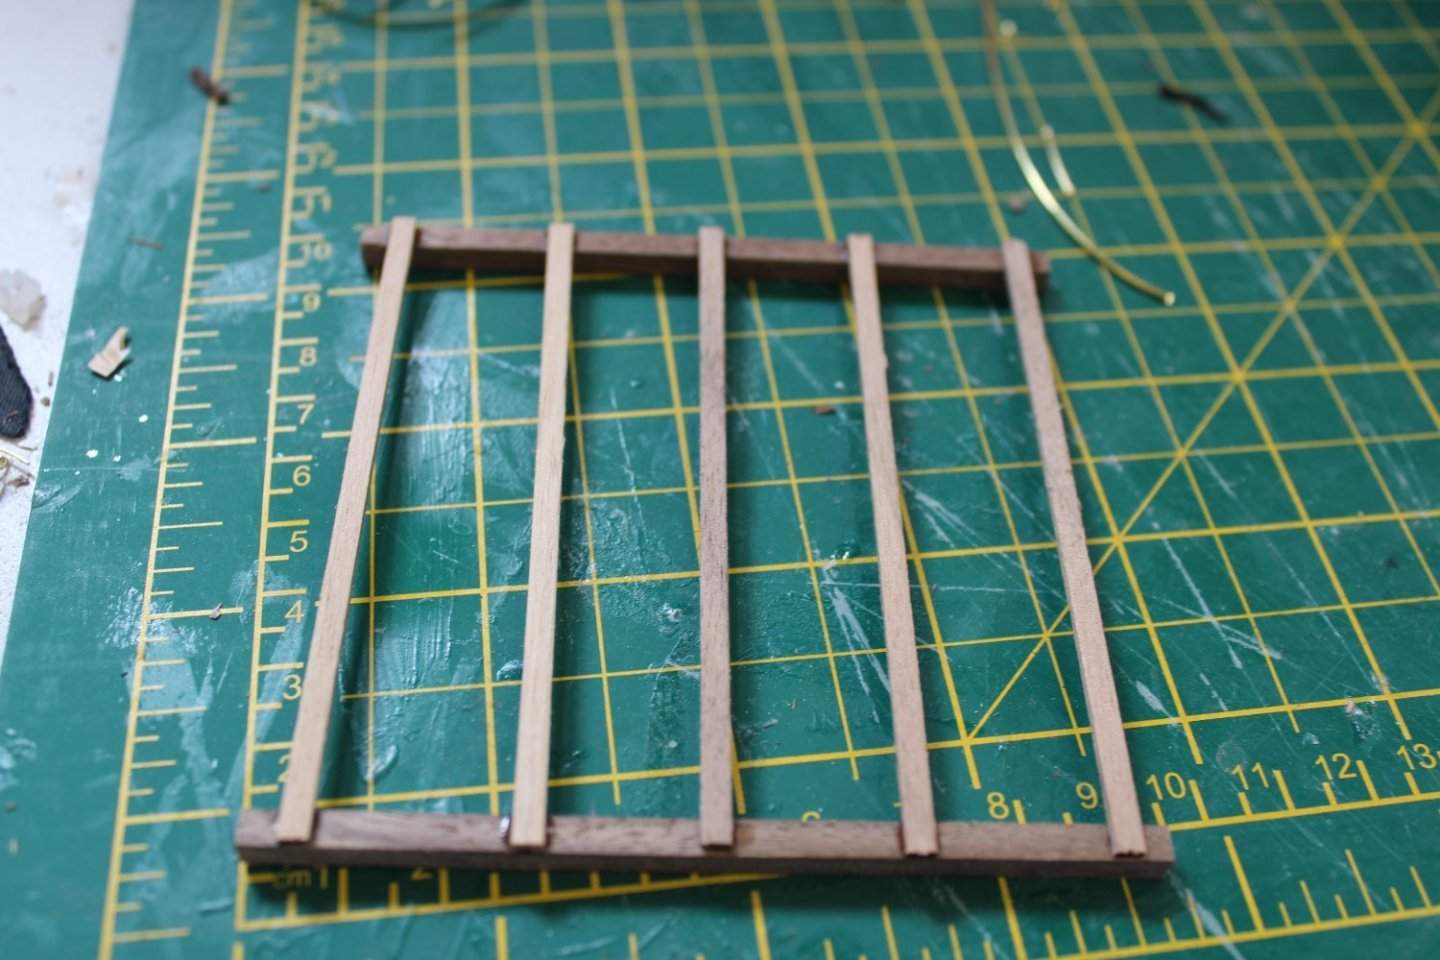
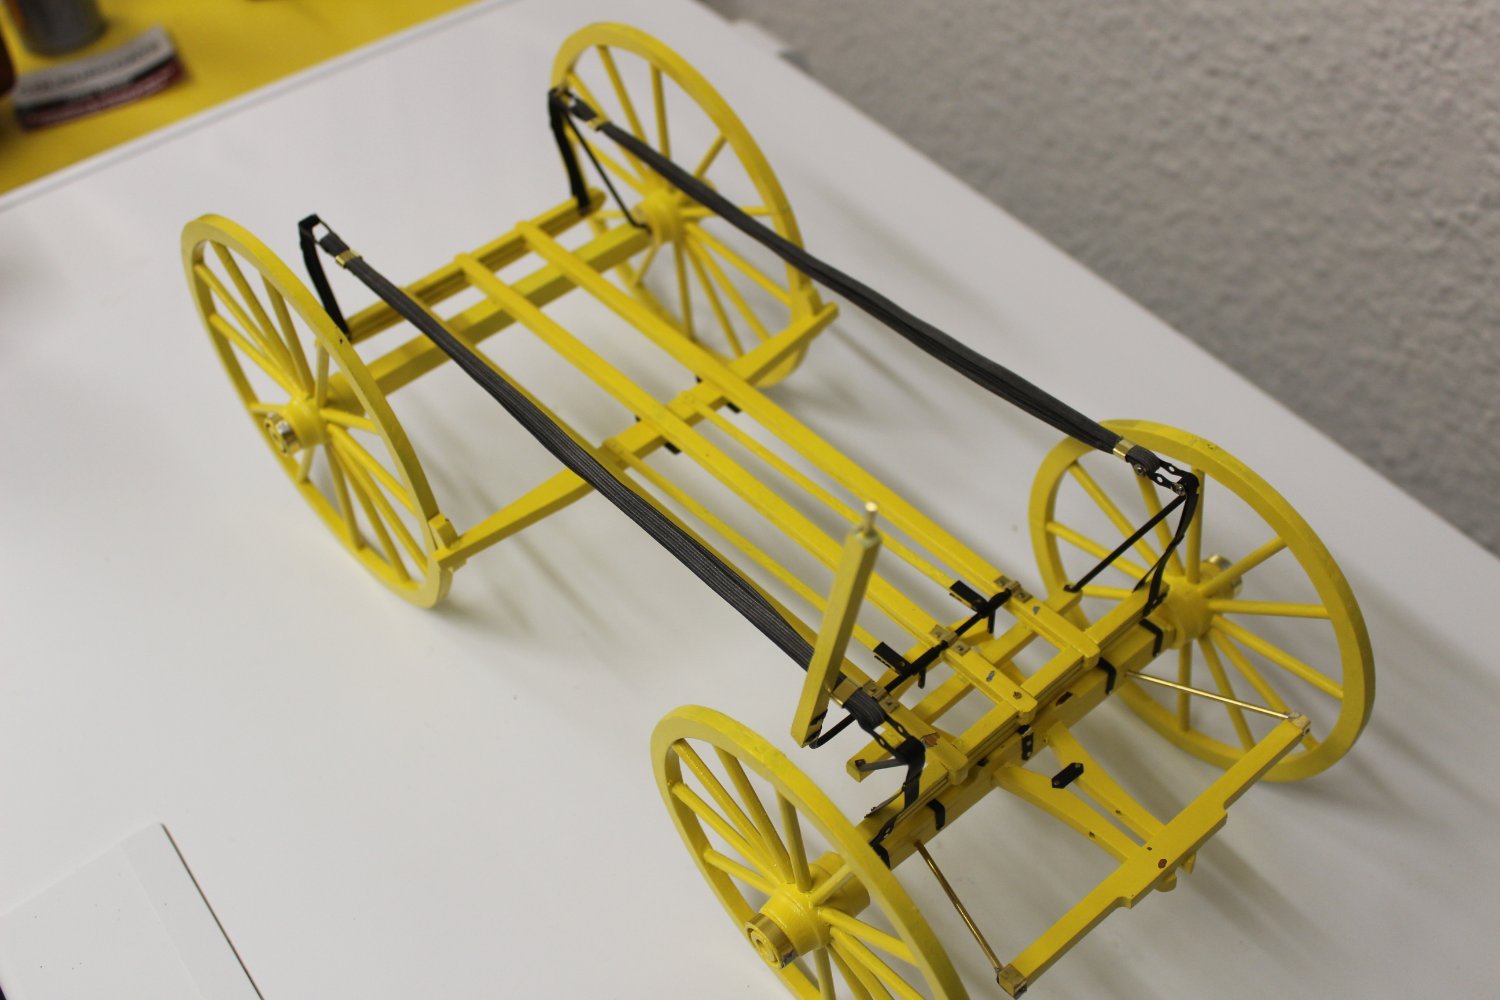
4 wheels on my wagon (well not quite on but complete), tonight i made the outer wheel bandings
the chassis which was stripped down yesterday, was primed and now has a new coat on, pin strips well complete it
at present i am rebuilding it, looks better than before, but even further removed from what it should look like


-
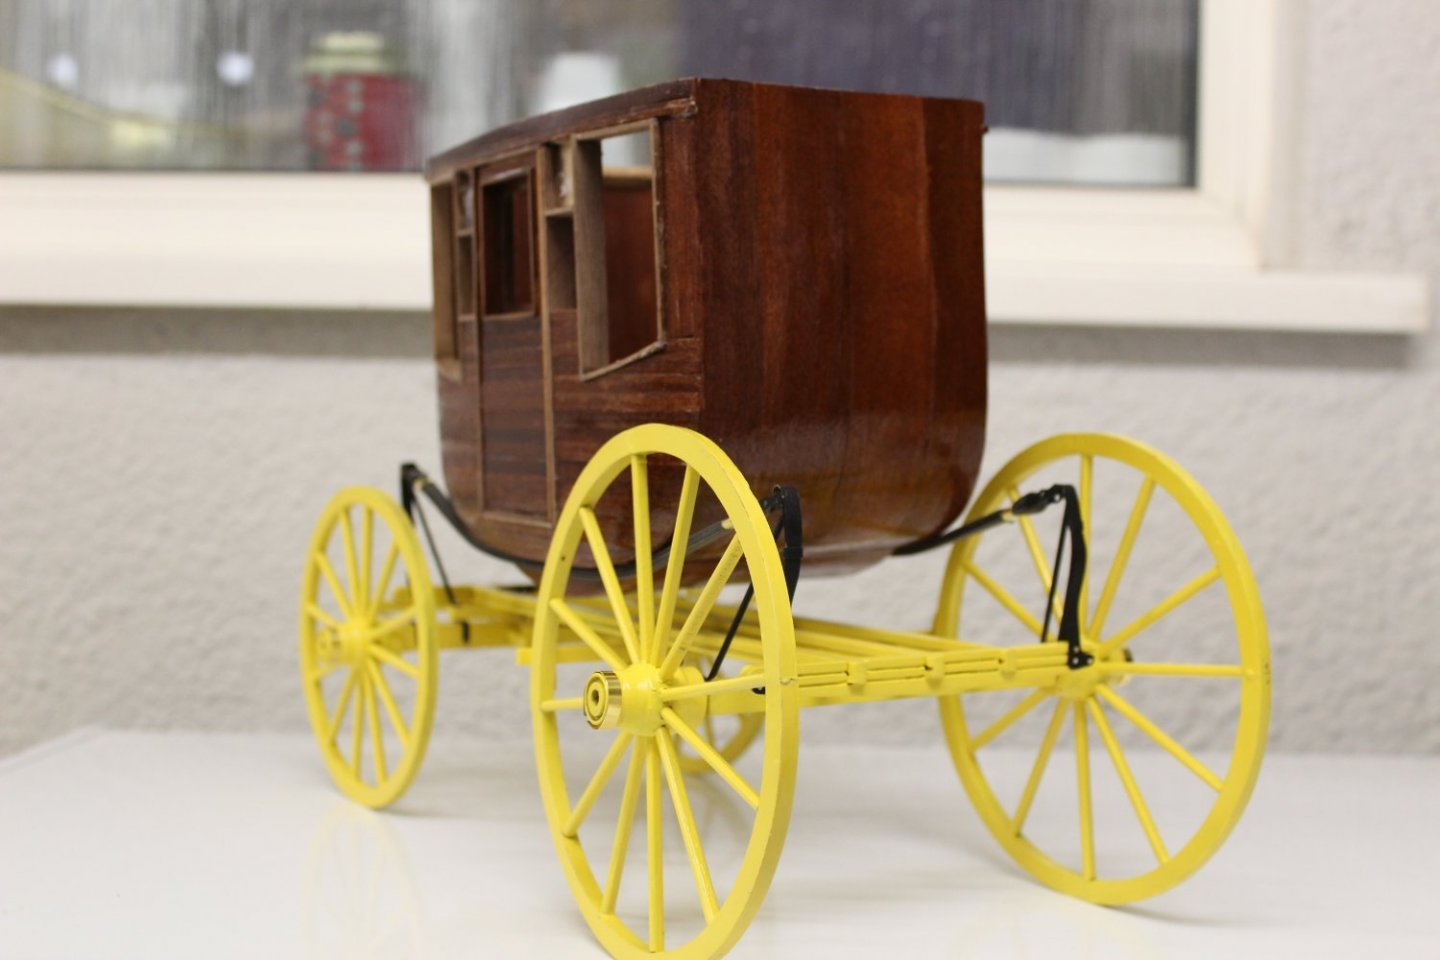
5 hours ago, Canute said:
Stagecoach looking good, Kevin
And the dollhouses look good, too, What scale are they? I have a buddy here who used to build upscale furniture for these houses in I think 1/12 scale. He used the furniture catalogs from a home named Winterthur, outside Philadelphia, PA. Built clocks, dining room sets; he's was prolific with the furniture.
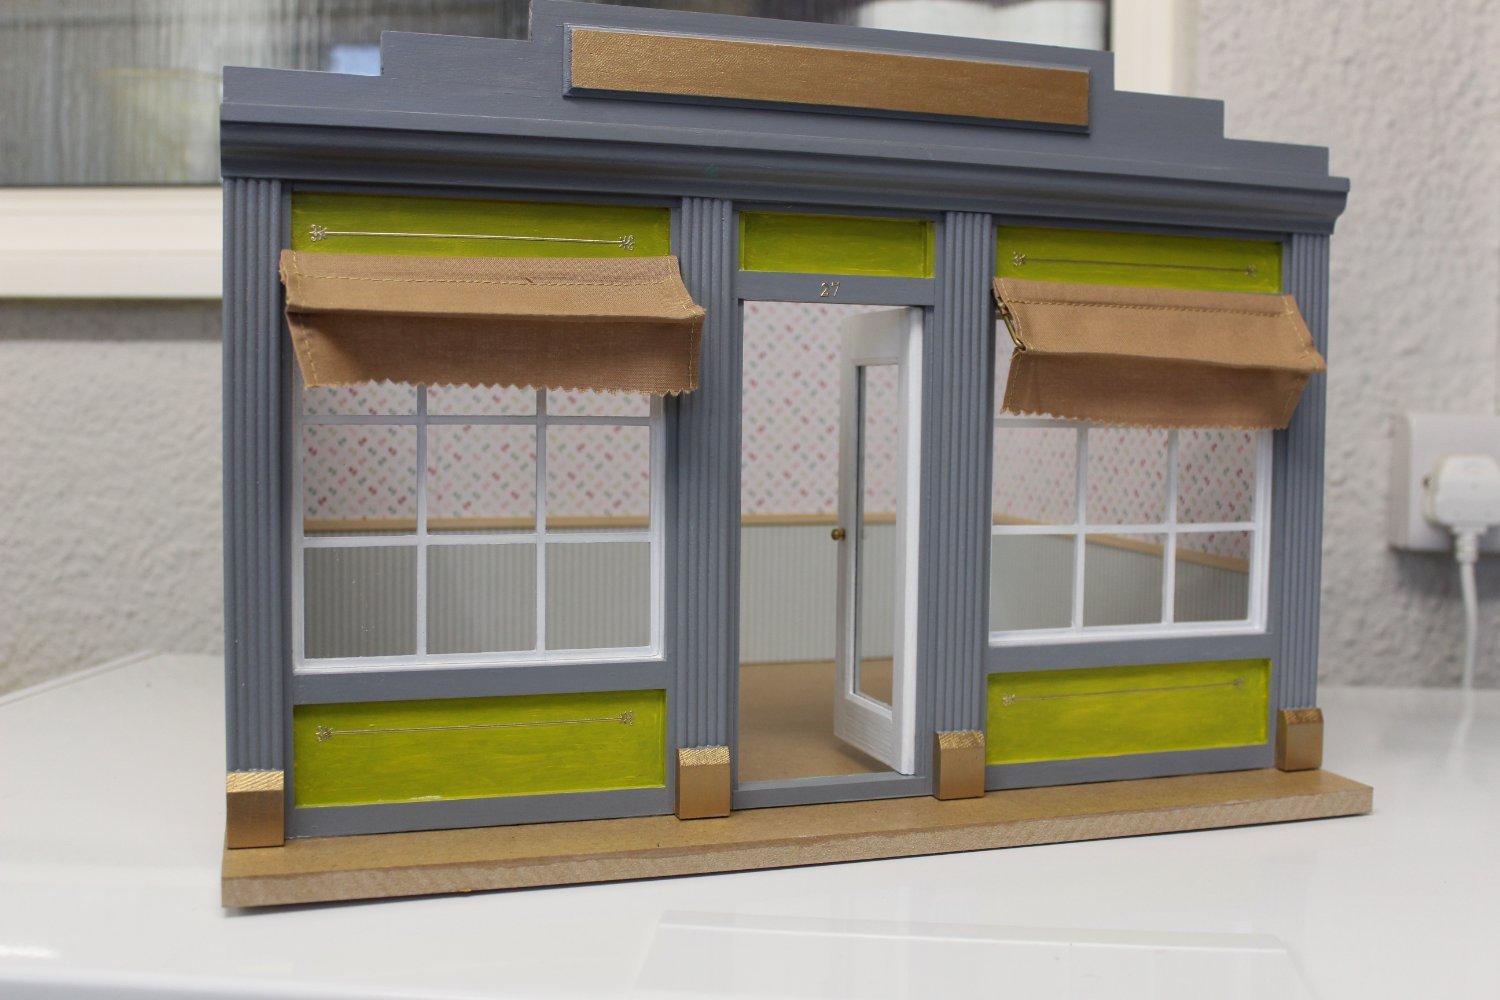
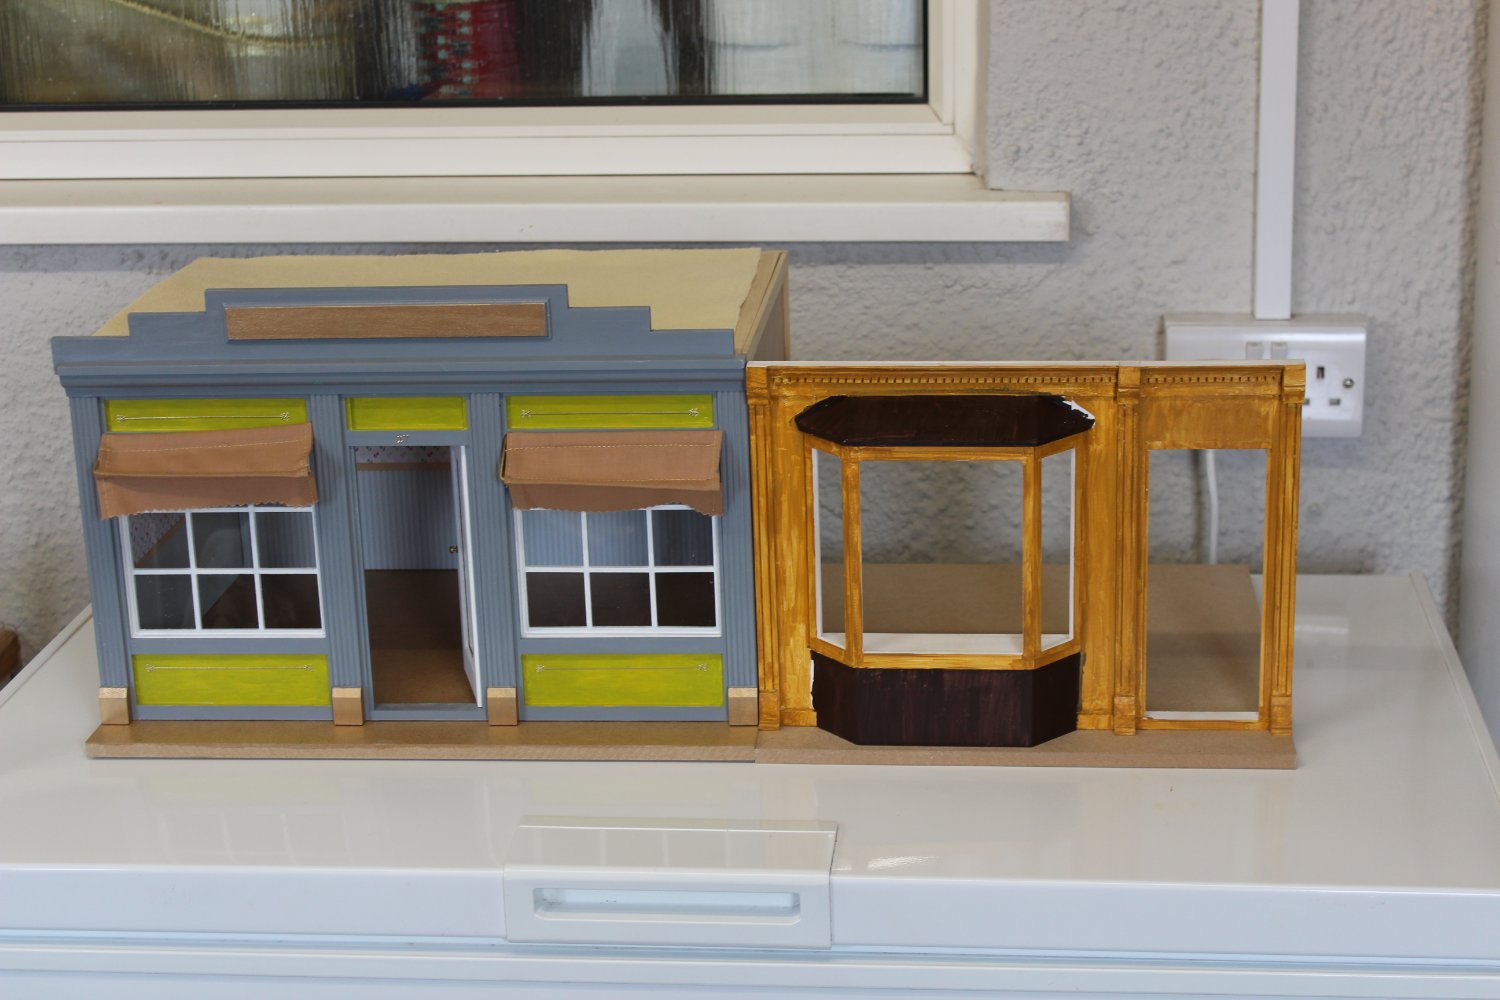
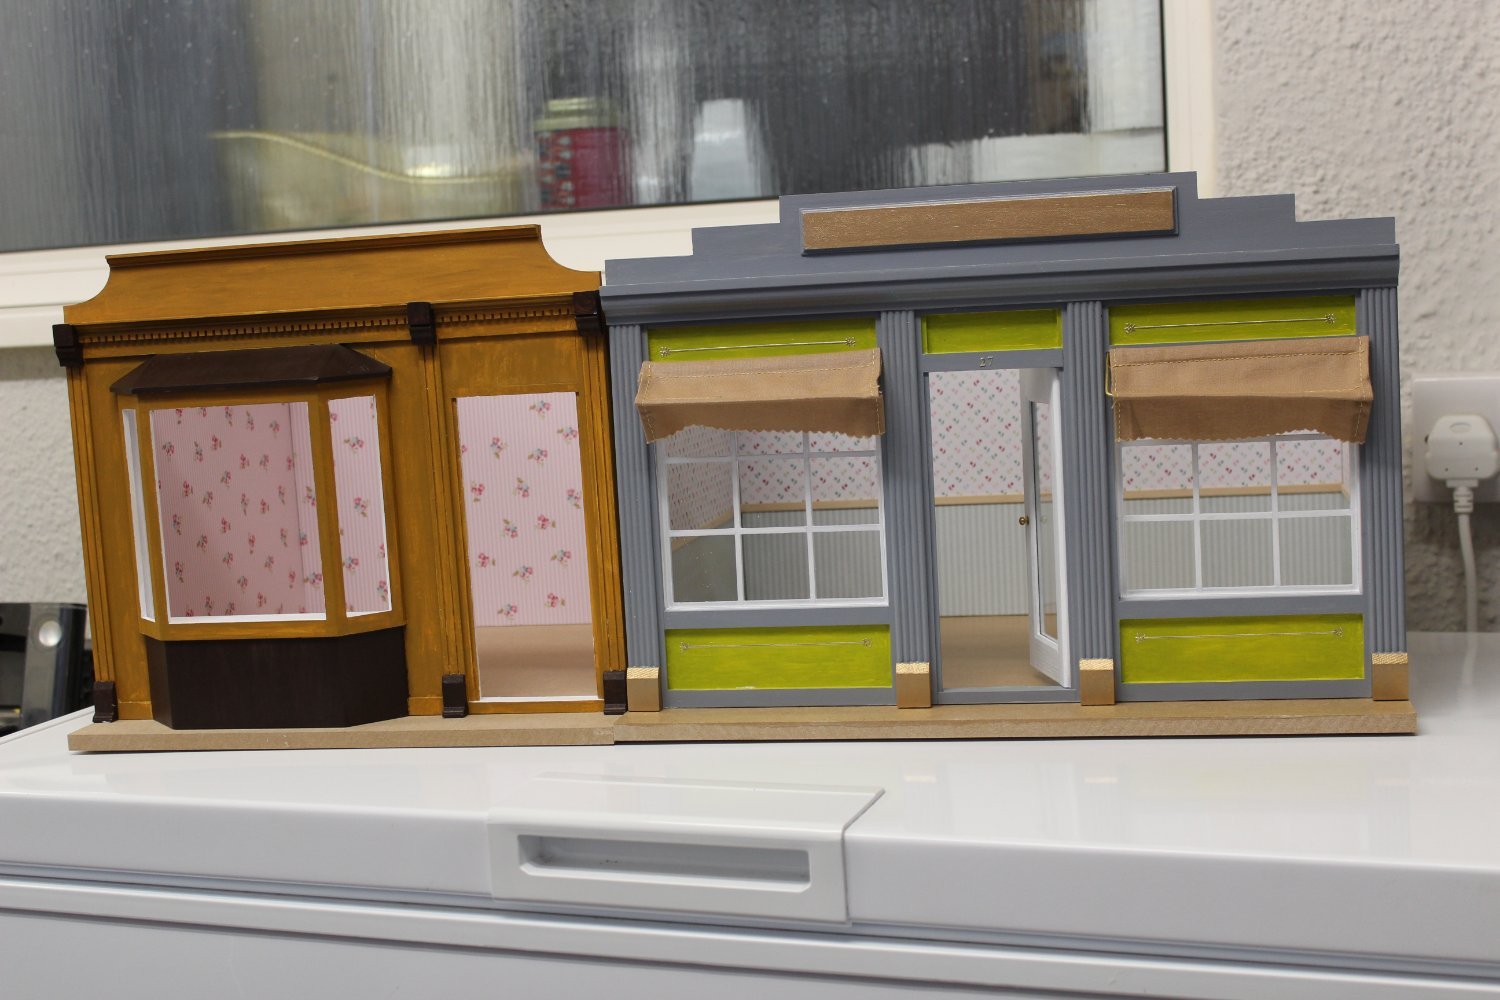
good morning, its all 1/12, i personally dont get involved in the internal side of things, i will build the kits up if asked and sort the electrics out,
- bruce d, Old Collingwood, Canute and 6 others
-
9
-
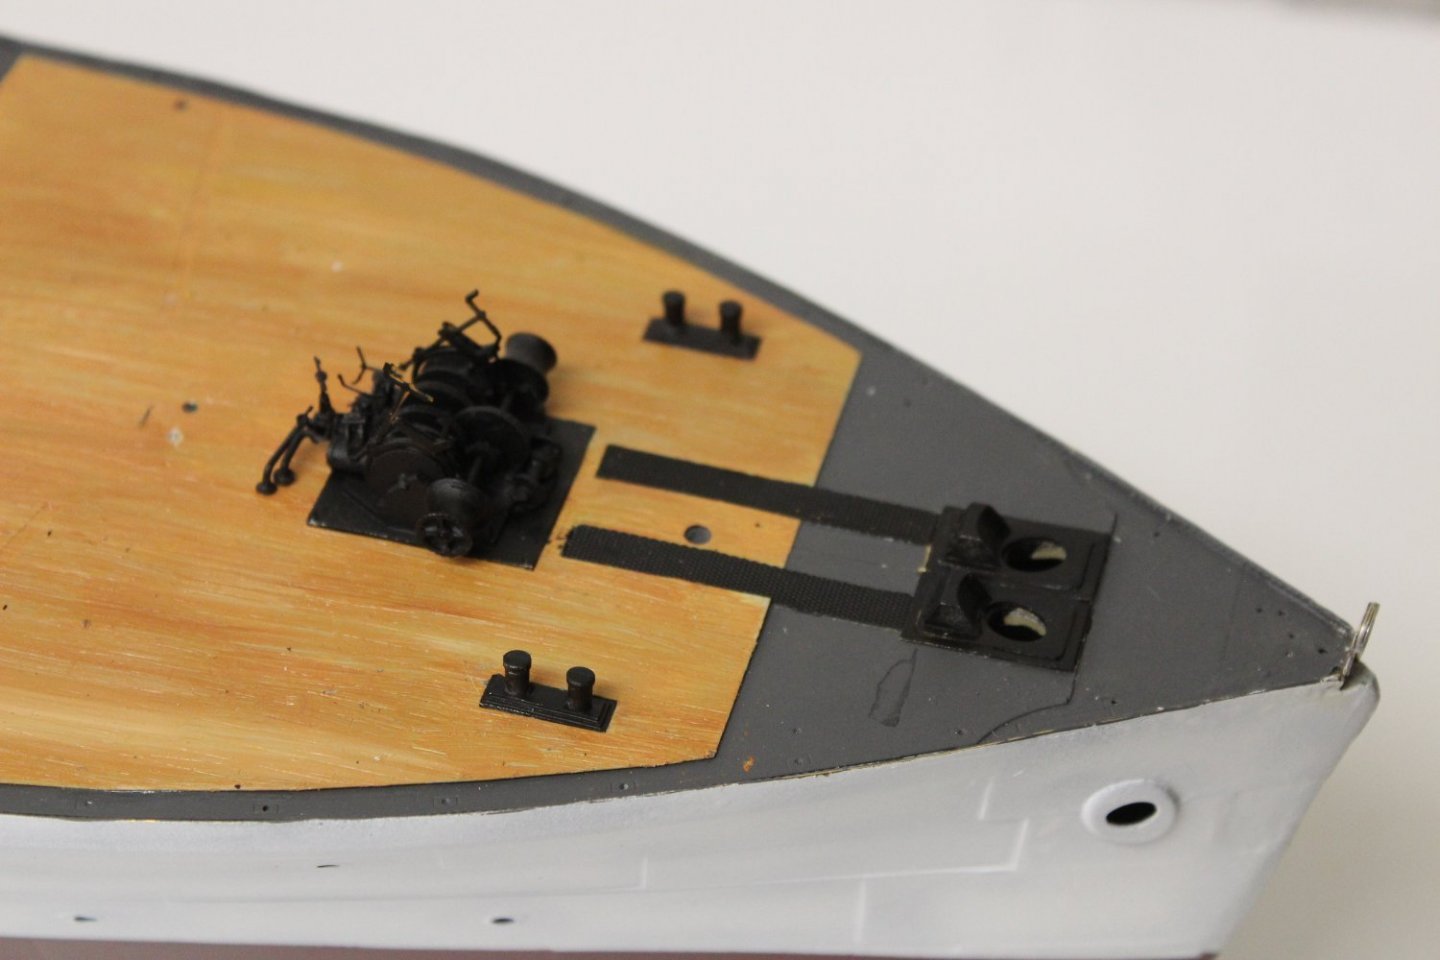
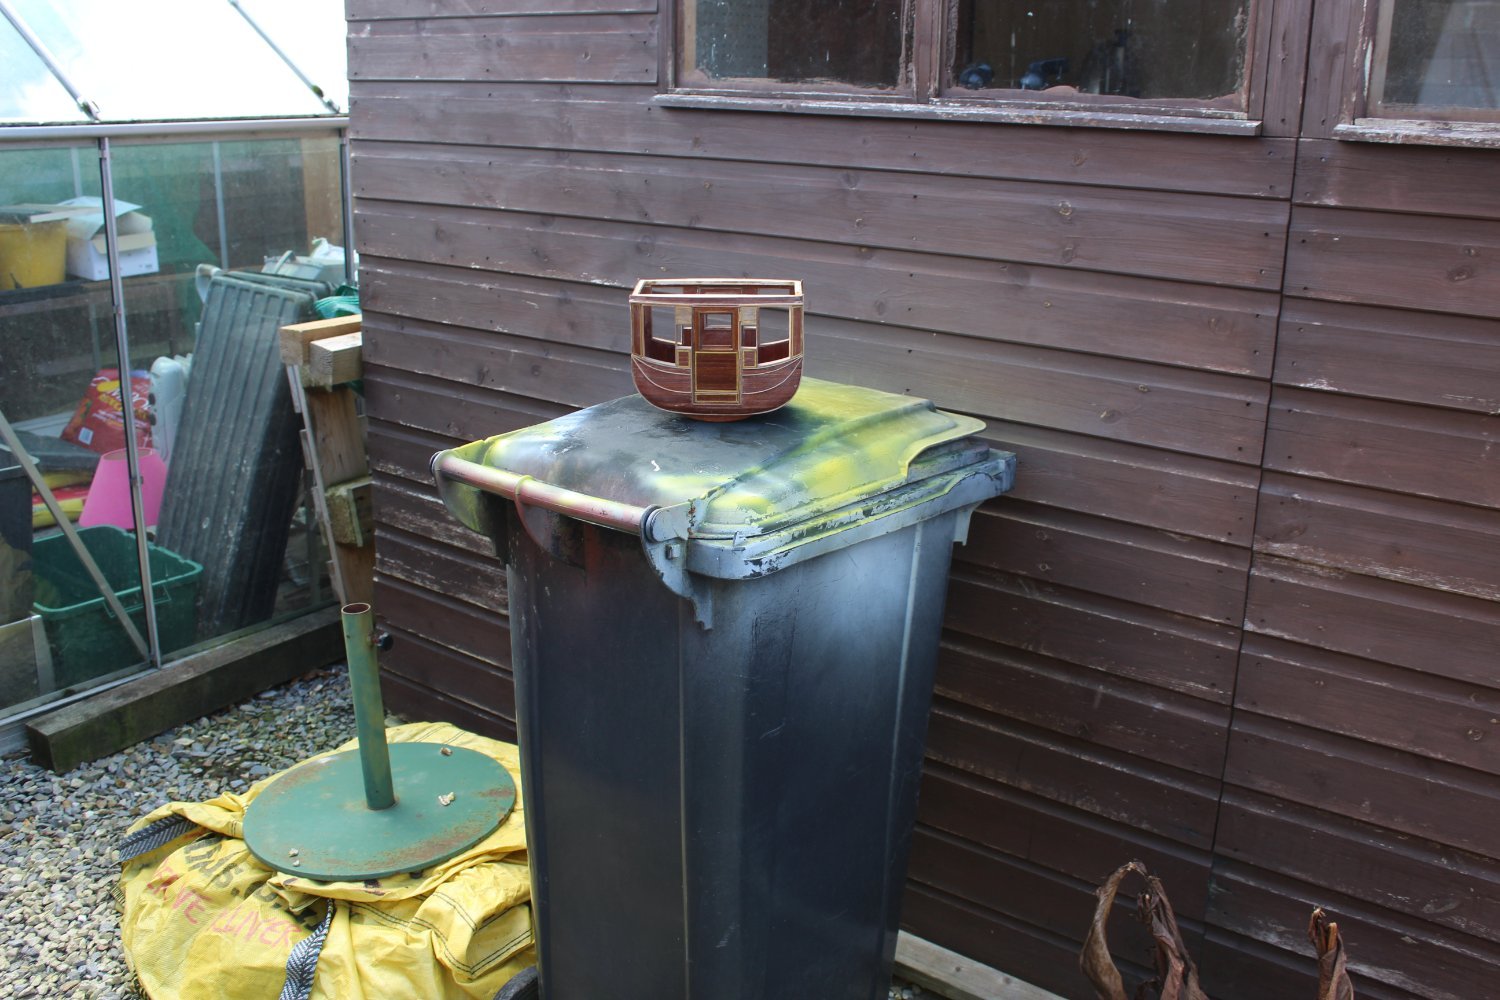
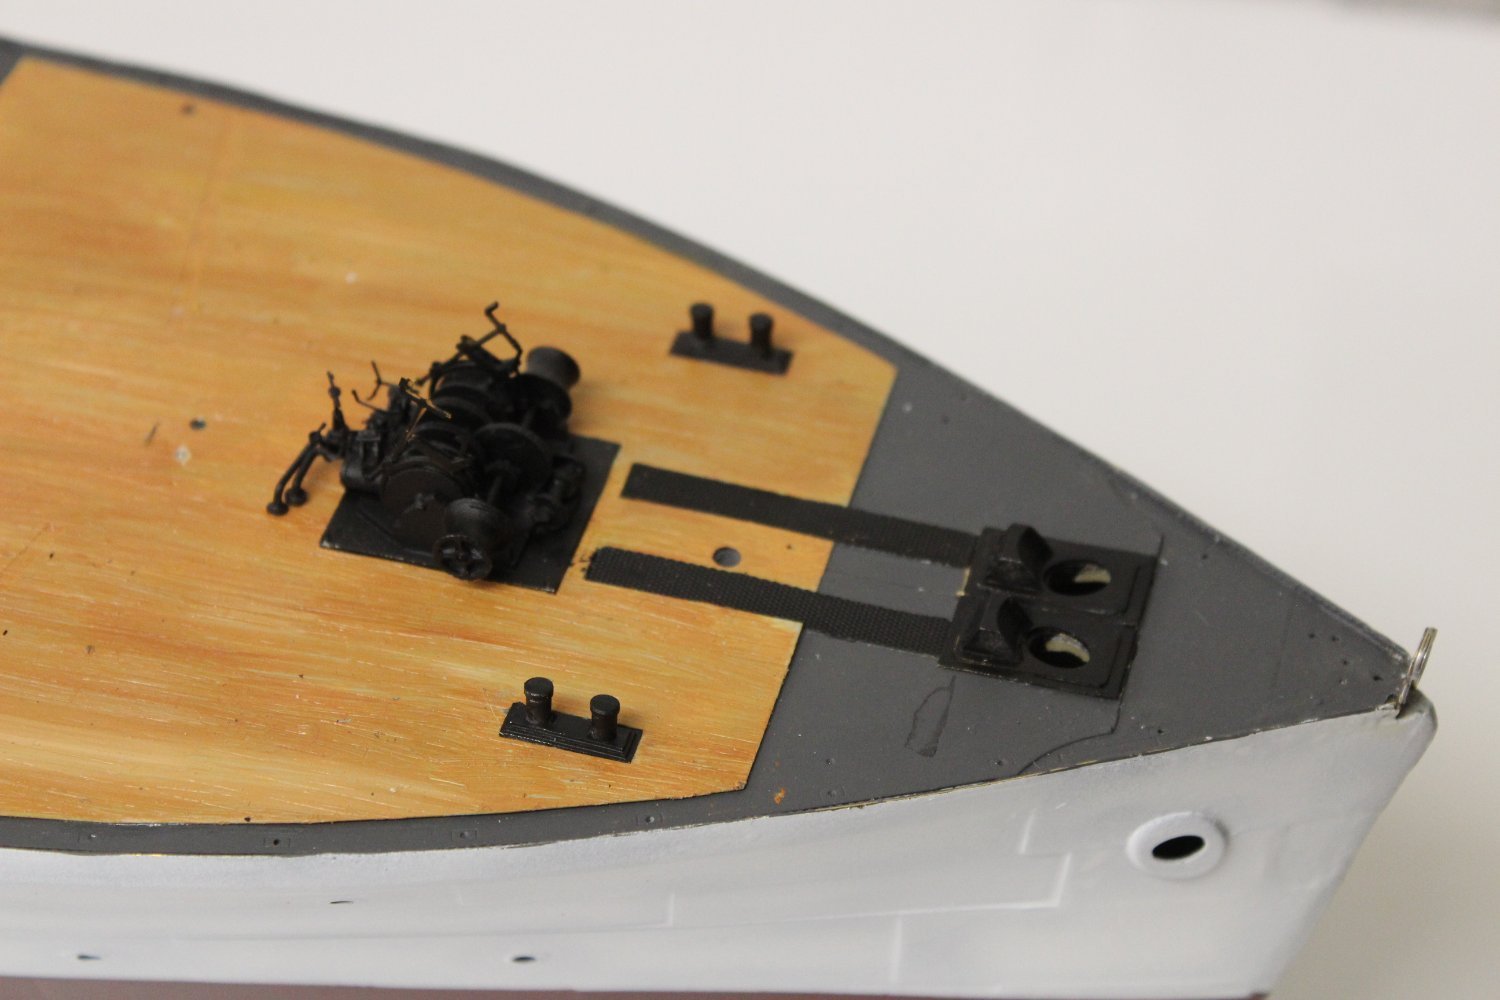
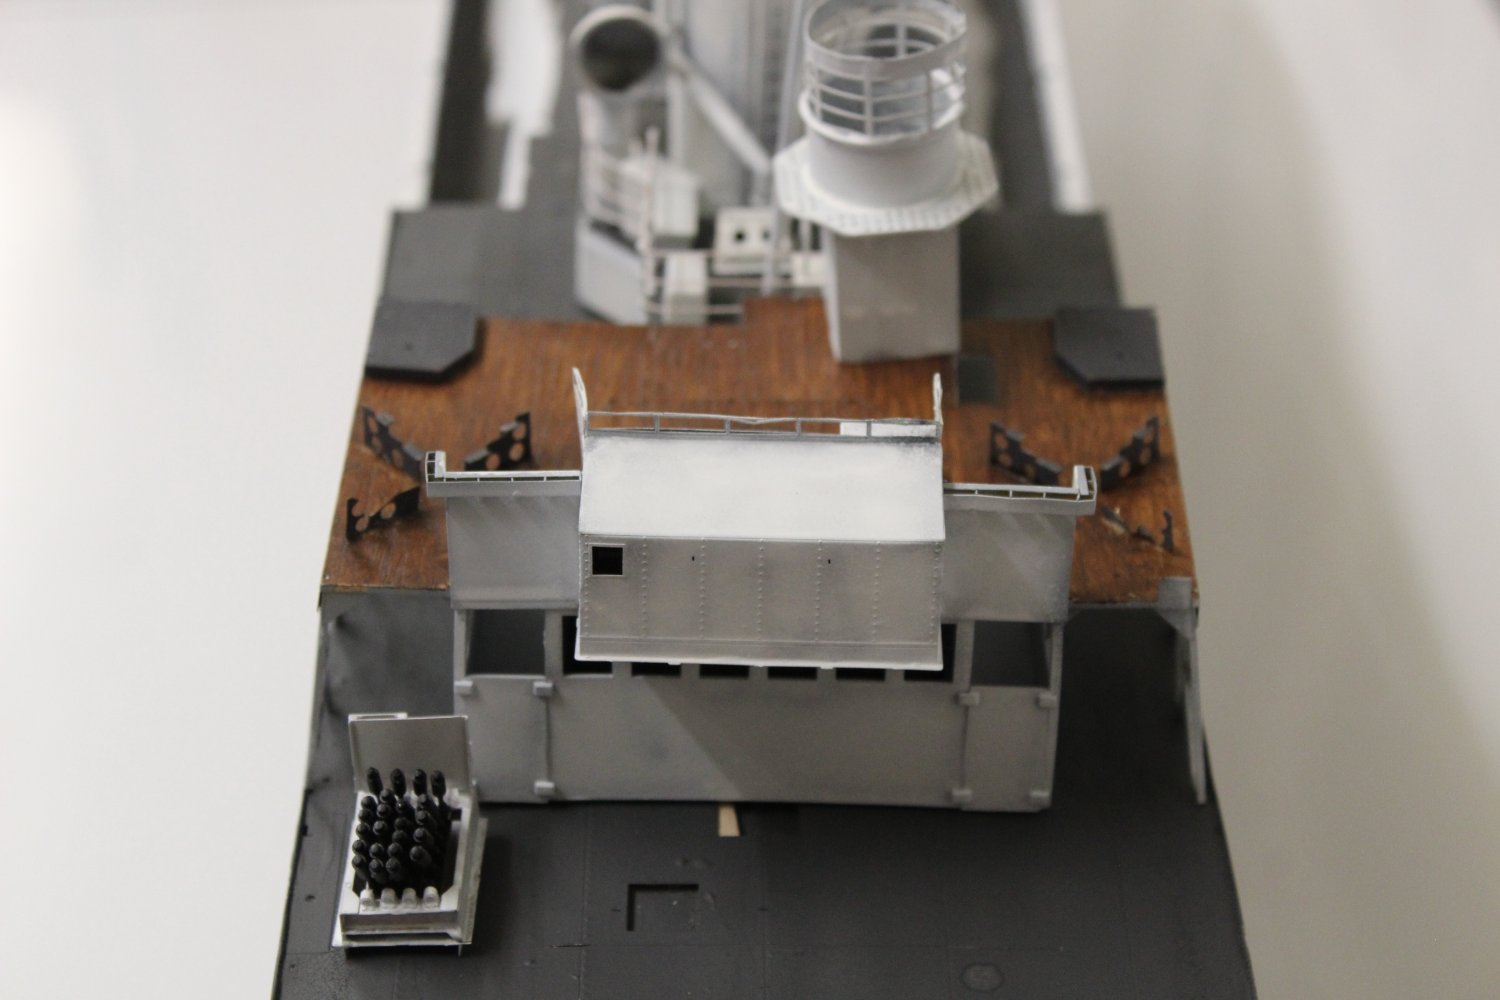
before putting it away again i managed to get some more work done of the forecastle, at present i don't know when she will come back


-
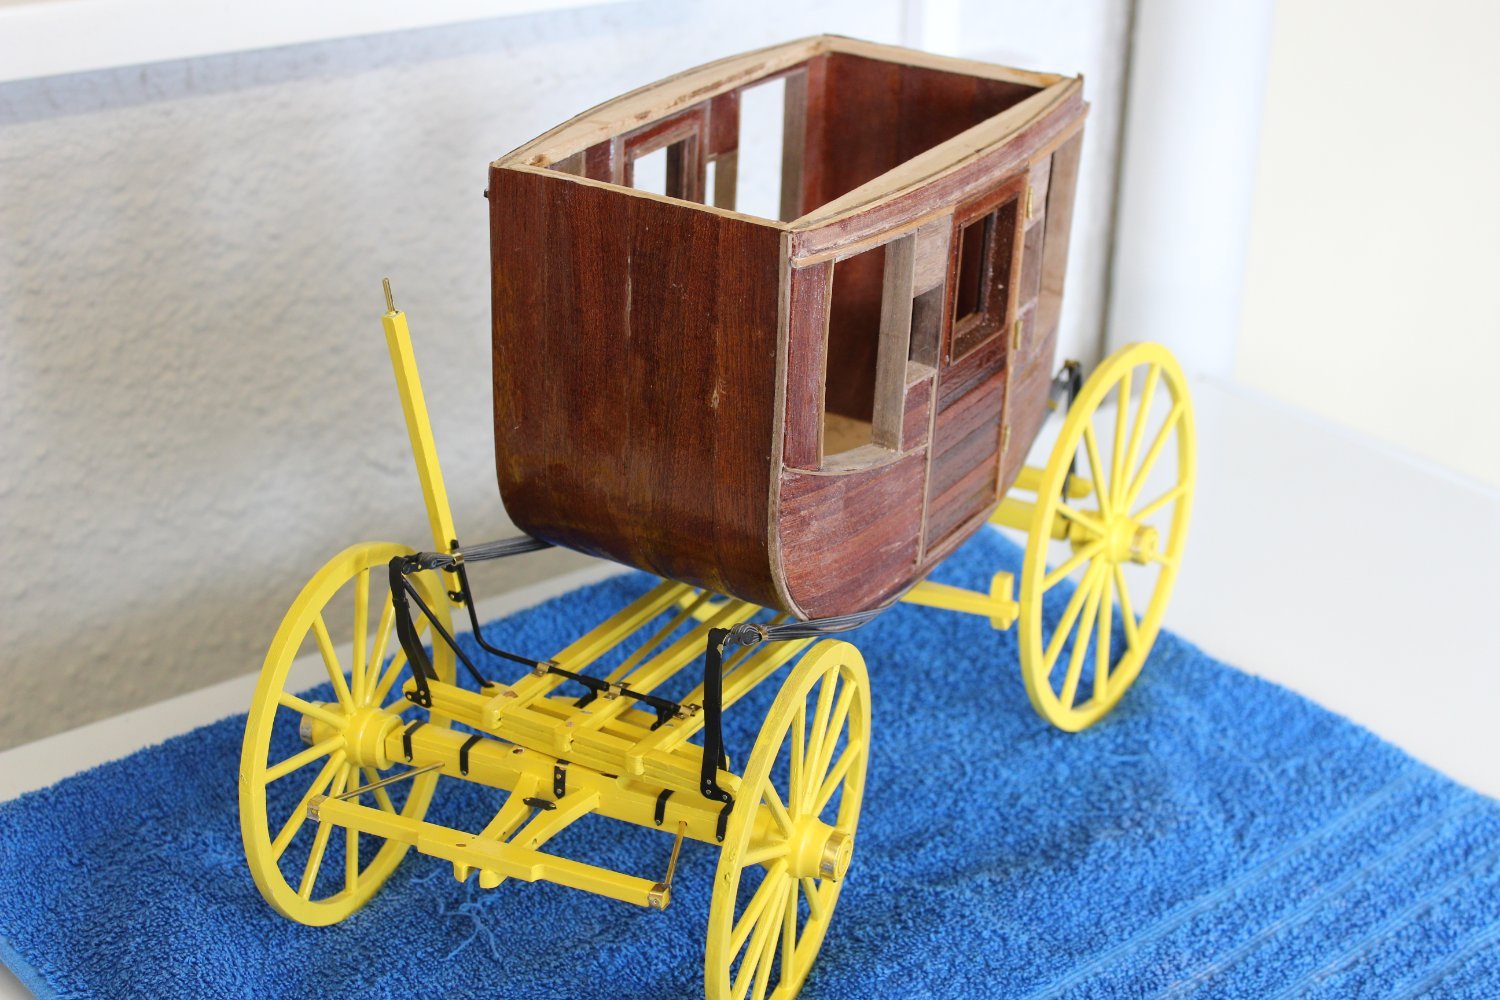
good evening everyone
i went back to the stagecoach this week, im finding it very hard to get into anything at present, last week it was building and painting a couple of dolls houses for the wife,
circumstances in Europe, loosing my main ship build in Jan and storm damage to my property last week have certainly played a big part


stagecoach
i stripped the frame work down again and re-primed it and bought a decent yellow rattle can rather than brushing on acyrilics


-
1 hour ago, Hsae said:
Glad to see you back on your Bluebell, Kevin!
Great work,
Hermann
PS: I hope you didn’t glue the wooden panels at the deck yet. You have to switch sides. 😉
lol i didnt notice, nothing glued yet
- mtaylor, Old Collingwood, Canute and 1 other
-
4


SD-14 by Kevin - Marcle Models - 1/70 - CARD - cargo ship forward section
in - Kit build logs for subjects built from 1901 - Present Day
Posted
perhaps one of the grown up could suggest a way ahead wrt previous started topics in relation to this build
do i delete them
or do i start a new topic and link the previous topics
rather than three sections this will be the 7 foot version in a cutaway format, an expected year to 18 month build