DavidG
-
Posts
217 -
Joined
-
Last visited
Content Type
Profiles
Forums
Gallery
Events
Everything posted by DavidG
-
 in addition to the good tips above, you may consider scratch building it from various strips, I would even consider styrene. There are no difficult shapes here, and the decorative trim can be made from brass wire or modified eyebolts. The panes can be built up from segments, glued to a transparent background, or maybe take some overscale kit gratings, and sand it thin.
 -
Then probably you could consider the minicraft 1/350 with the Tom modelworks photoetch detail. A great example shown at titanicmodel.net
-
probably the cheapest option to make it yourself with premade profiles and plexiglas: https://store.amatimodel.com/en/eberle-saws-for-modeling/product-profiles-for-show-cases-b256002.html https://occre.com/en/collections/peanas-modelismo-naval
-
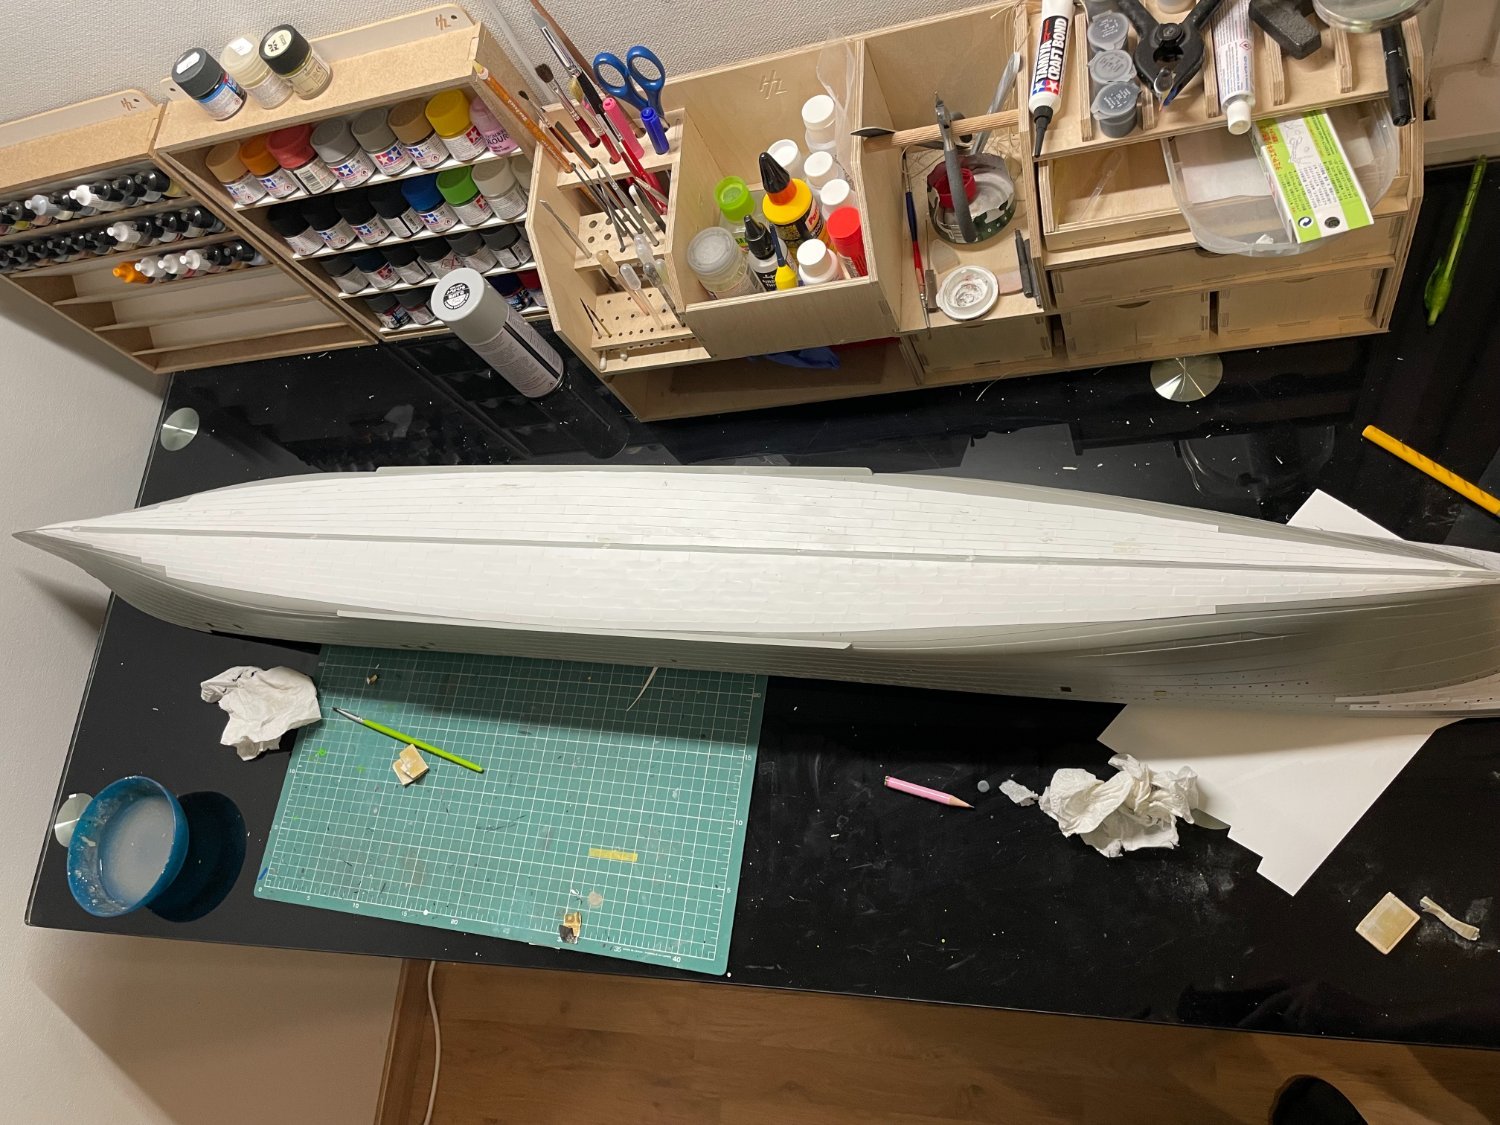
Hi Evan, good luck for your bottom plating. I did it on mine, it took me a month, but enjoyed the process, despite most of it will be hidden. There seems to be three sources for the layout; the mentioned planking expansion, a scaled underbody view and the Woody kit. Note, all 3 are different patterns. The styrene kit is probably the less hassle, and fits well to the kit hull, however quite expensive. I investigated the planking expansion drawing as well, but it requires to re-draw it from scratch to the hull, which I didn't feel ready to do. So ended up using the bottom template from facebook, which neither fits very well to the existing plating of the kit, but by omitting some plates, can be tweaked to an acceptable result. There are around 500 plates to cut individually. Here is how it looks: The kit has some partial plate detail in the bow area, where I had to adjust what to include and what not. But after a coat of primer (which I sprayed yesterday) it looks acceptable. I look forward to see your approach. best, David

-
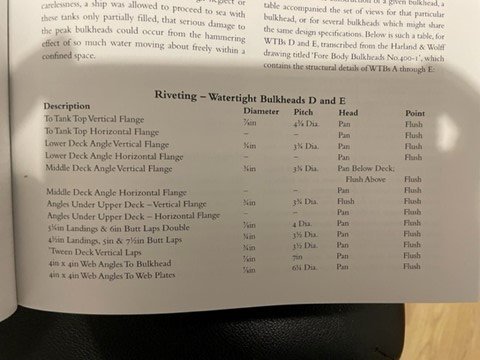
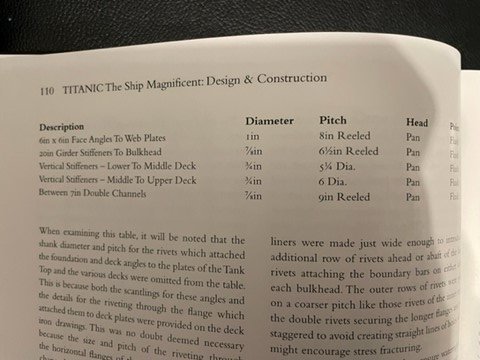
you are good to go with scale 1 inch rivets. they will be very small if done in scale. here are the reference sizes. good luck for the build.
-
You may have a look on Amati gun barrels, they have 27mm ones pretty cheap https://store.amatimodel.com/en/small-parts-and-accessories-for-model-making/product-metal-cannon-barrels-mm27-b416427.html
-
Plastic or Wood models? Your Favorite?
DavidG replied to Bill97's topic in Modeling tools and Workshop Equipment
Hi Bill97, having built an Occre model, I can say, they have the most important aspect well designed - hulls are in proper shape, precisely cut and come together well. The apparent cost benefit diminishes though when it comes to fitting out - if you want a properly scaled model (which I assume you do, as this is where plastic models shine) you will either scratch build a lot or buy upgrade parts. When you review the online manuals, look for chain plates, eyebolts, rigging thread, mast/yard fittings, gun barrels etc to have your judgement. I think both the AL and Caldercraft ones produce fine models, for my taste the AL one uses excessive amounts of plywood, but the Endeavour is a colorful ship so less of a concern. What you should consider though, it's hard to find a more difficult hull shape for a start than your choice. For this reason double planking is highly recommended. The AL kit is single planked by design, and of course nothing keeps you from double planking it should you wish, the included 2mm thick strips are on the difficult side to work with. For this reason I would vote for the Caldercraft model. Regarding the tools, you should not worry too much, kits can be built with basic tools. You can certainly use your airbrush, however wood is much more forgiving than plastic and brushes work usually just as good. Maybe you need something to turn your masts and yards - before owning a lathe, like many others I did it with a power drill. There are several tips on the forum how to do that. -
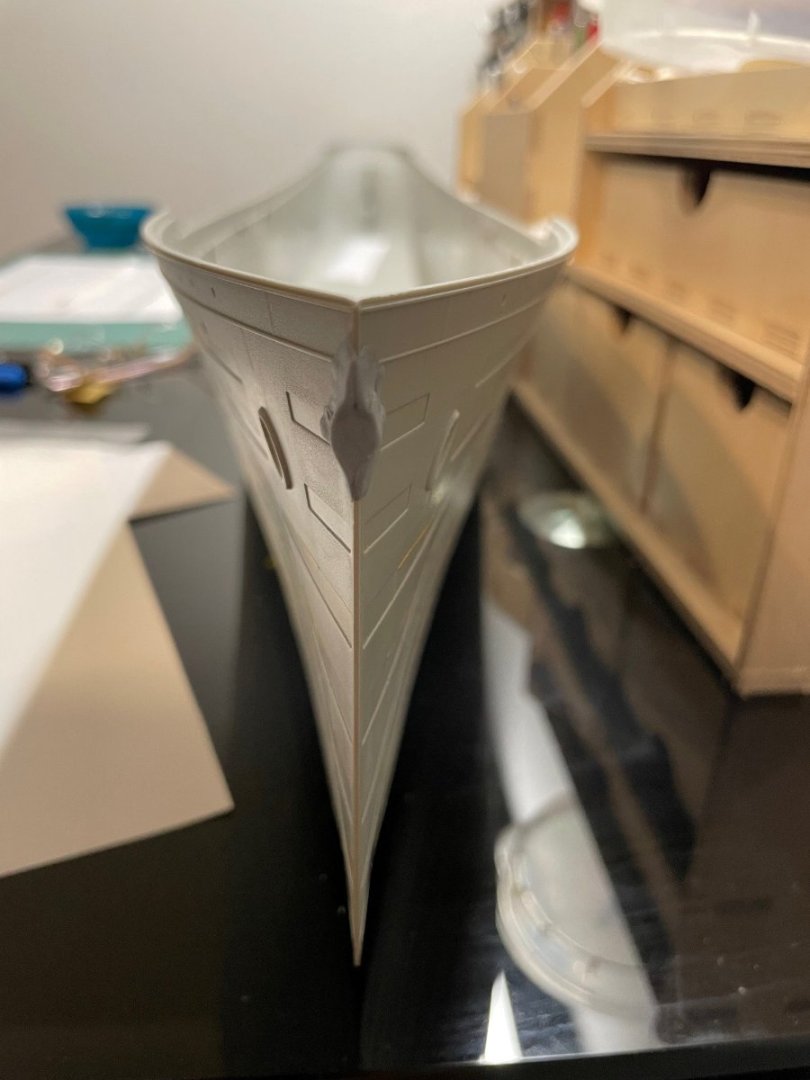
I had the same thoughts re the hawse pipe. I don't consider the option of buying printed parts, but as it is depicted on the kit just hurts my eye,. I plan to build it up with putty, and show it covered. Here is a rough mock-up using only blue-tac, but this is the way I'm going for. I'm doing bottom plating for a while now, and move to other parts when finished with this.
-
Hello Evan, thanks for setting up this log. As I started to work on this kit myself, I came across a lot of resources all over the internet - but it was still missing the 'traditional build log' format which I like to follow the most. You a put a lot of research to your model, which I'm sure will result a magnificent model. Looking to your reference picture of the stern post, the kit is pretty rough where the shaft exits the hull. Maybe some epoxy putty could help to build up the shaft, and make the tranisiton less direct - something I may try when the time comes. best, David
-
https://www.super-hobby.hu/products/DKM-U-Boat-Type-VIIC-U-552.html hope it helps
-
good luck for your build! would you mind to share, where did you source the LEDs on your second picture (the ones with the transparent covers, not the SMDs)? thank you
-
Your wooden kit progression - go big, or keep learning/practicing?
DavidG replied to Esap's topic in Wood ship model kits
an experienced modeler reaches better results in the fraction of time it takes for the less experienced one. there are lot of techniques involved in ship modelling we use - how to properly bend wood, cut straight corners, how to paint, copper a hull, turn spars, level the shrouds, tie ratlines, keep a logical building sequence, find proper sources for research, etc. If all these skills have to be developed on a large model, it may take too much time leading to loss of interest. It is also likely, the outcome will not reach the level of required perfection which is demotivating. When I built plastic models, I usually had some goal with the respective kit, like paint it using an airbrush. For the next one, do the decals right. Next one - prepare the gloss finish. Then use aftermarket parts, and so on. For wood ships, anyone taking a multi-year big project, should be reasonably confident with the basics of planking and understand how rigging works - the build process is long enough, even without learning basic skills. This gradual approach worked for me - first ship - a nice try. For the second, I built a reasonable out of the box model and understood what is involved. For third one, I enhanced the kit and properly researched the rigging part. The previous experience pays off, which makes progress, which is in turn, provides motivation. -
try to browse the scalemates database, there are several ocean liner kits out there, while I know very little of them. Passenger ships (Ships) | Scalemates
-
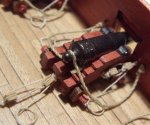
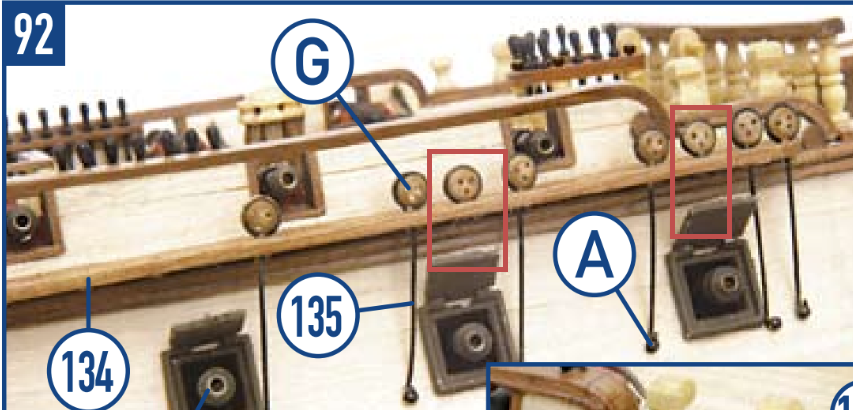
Ross, it is very nice and clean work you do with the Diana. I definitely agree with your plan to make the chain plates right - the kit design really falls short in this area. The omission of proper links by simple wire is easier to address by making your own or use aftermarket parts. The bigger problem is, the arrangement of the gun ports prevent setting the proper angle for them (they should follow the line of the respective shrouds and backstays). Occre bypasses this by the omission of the problematic links (see below). If you want to make this right, do some planning before second planking, temporarily fit the channels and dummy mast rods, check the run of the shroud lines and adjust for your liking. Apart from the chainplates, there are countless other possibilities to improve the accuracy of the model. My build log may show some ideas (like the chain plate issue in post #31), but I'm also happy to follow your log and share my experience.
-
great find, it was my first "proper" wooden ship build. the flexible strip will be used for railings around the mast tops and the head. it was a pleasure to build this kit, if I did it again, I would only replace the beech strips used for the inner bulwark frames, which were pretty brittle and difficult to cut clean. the part list is organized by the order of building, which I found a great feature. good luck for your build!
-
Diana by Kyak - OcCre - 1/85
DavidG replied to Kyak's topic in - Kit build logs for subjects built from 1751 - 1800
Kyak, your galleries look awesome. I was never satisfied with mine, and looking your pictures makes me want to take them apart and do again. -
Andrei Kudin demonstrates such device in his video below. It is without any technical specs, but at least showing what can be with basic tools
-
you can download it from the MK website: http://master-korabel.ru/index.php?act=item&id=429
-
nice work on an interesting subject for the gratings, any of your options may work, while I had success in the past sanding them, by placing sandpaper on the curved deck (with the help of masking tape if needs) then moving the workpiece over it until the required shape reached.
-
there is also a porthole set at https://scalewarship.com/titanic-portholes , which is - contrary to most of aftermarket items - quite affordable and seems to be a useful addition.
-
you might search for pictures of the Requin online. There are wonderful builds out there,. While that's a French ship, it might be help for you. one example is below: https://www.modelships.de/Le-Requin_II/dESC5146.jpg keep on the good work, best, David
- 208 replies
-
- 1
-

-
- kitbashing
- Woodcarving
- (and 4 more)
-
Vallejo cavalry brown has a similar shade, which is acrylic. Used by many modelers for anti-fouling on plastic models. there is also red oxide primer in tamiya spray can, however that one is lacquer based.
-
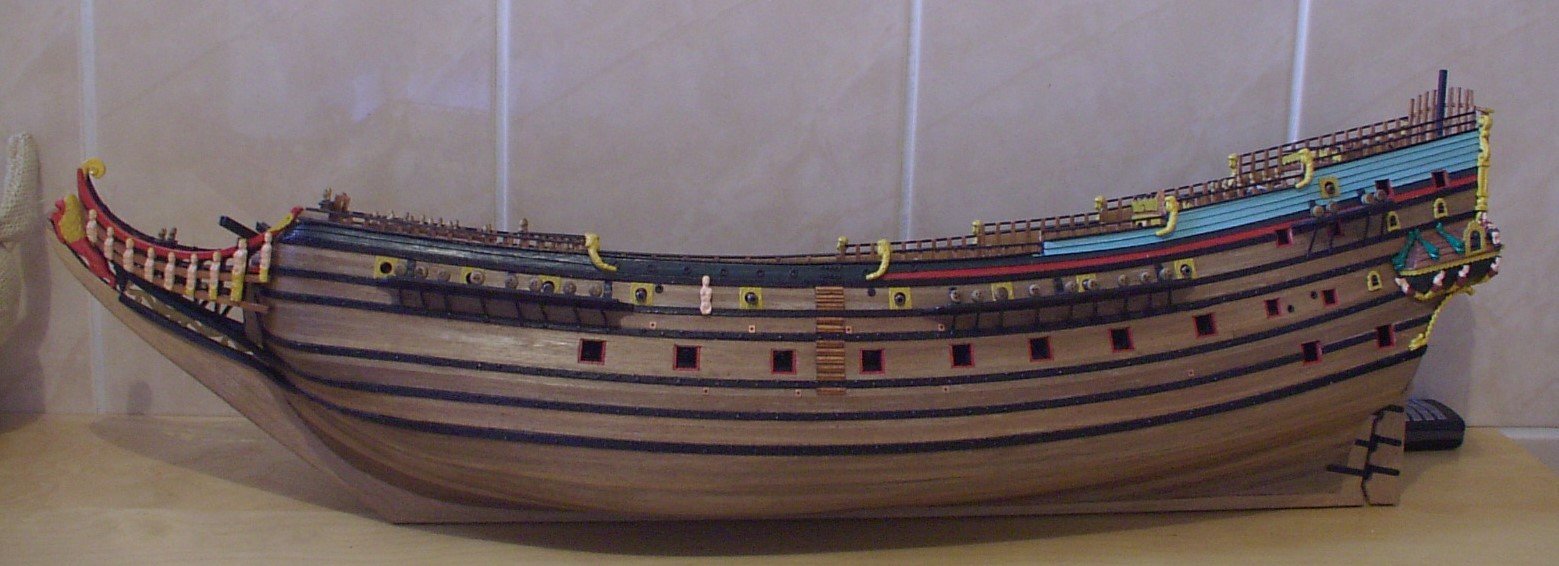
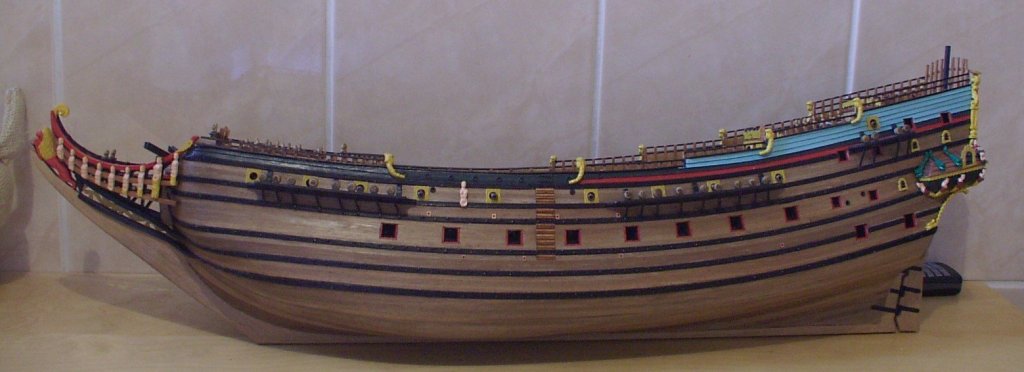
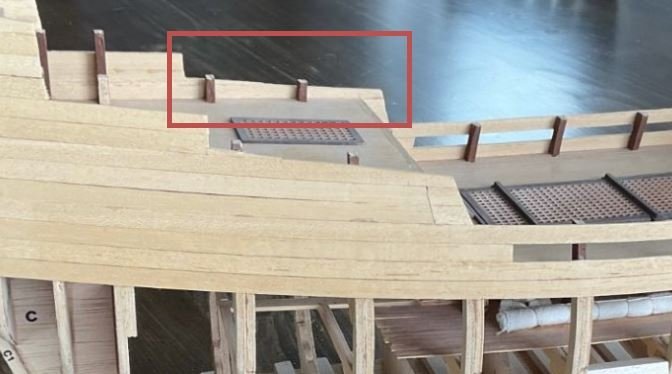
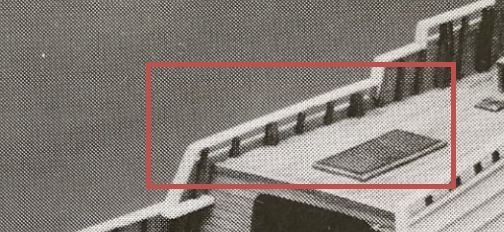
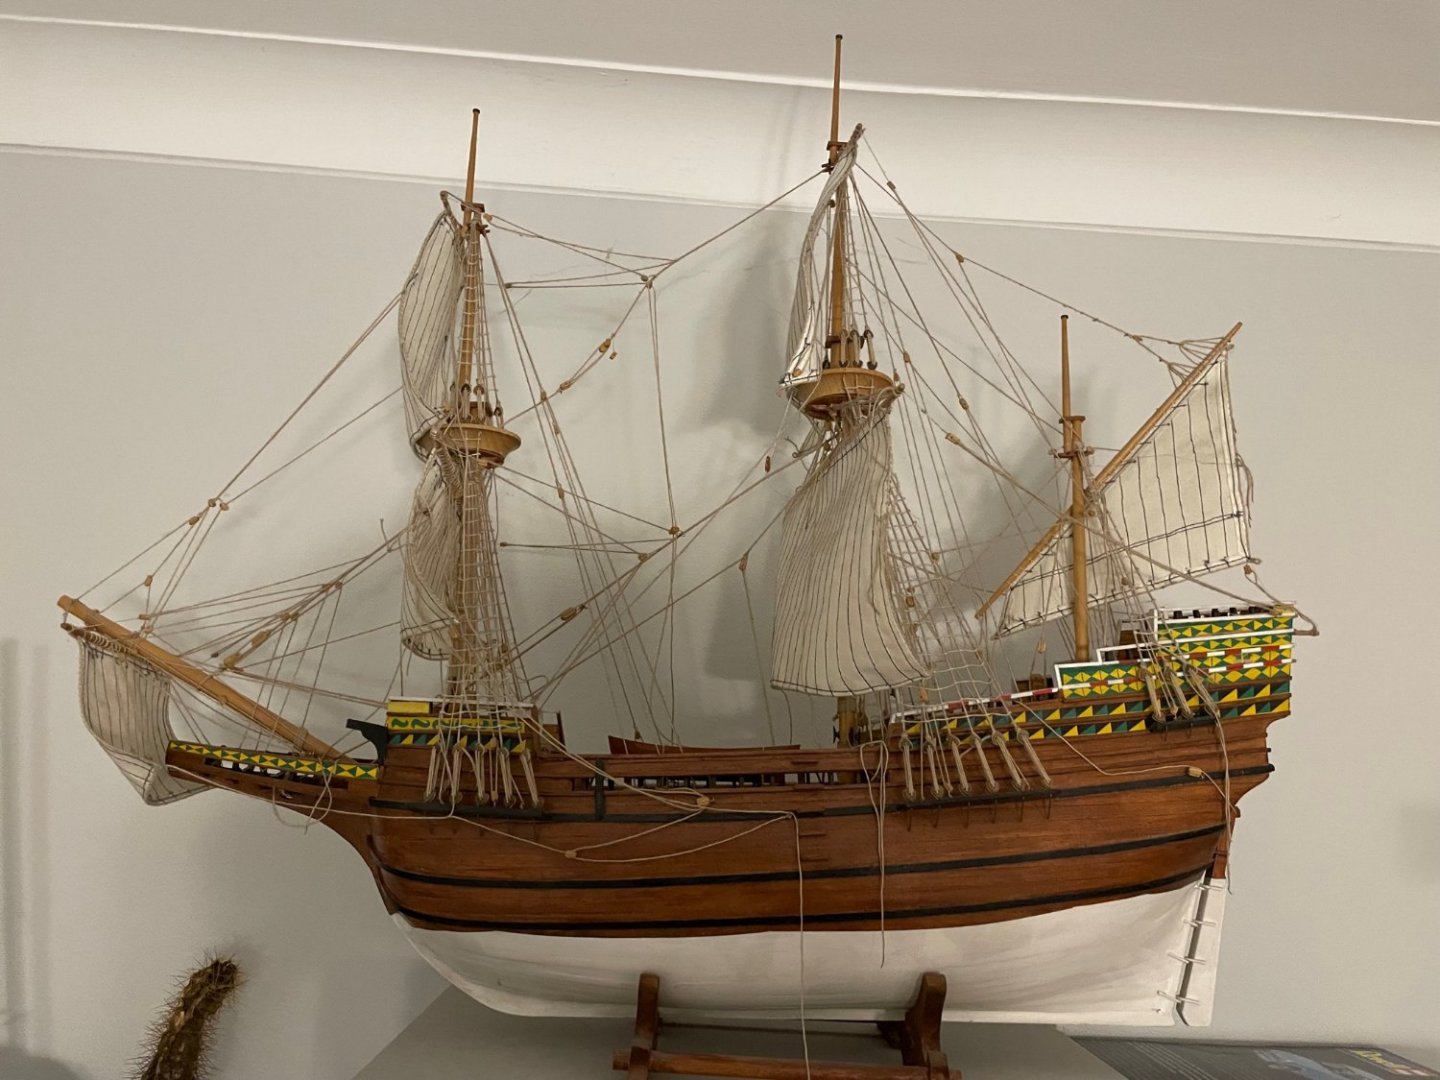
I see your model is an older version, with only partial laser cutting and built up bulkheads. I actually built this one ~20+ years ago, it was my first ever wooden ship. I fear I'm not much help on the rigging diagram as of now, but as a first build I was able to manage it through somehow. I'm sure you will as well. When you get to rigging stage, I'm happy to look into the model for specific parts. I still love the look of the ship, I find it well balanced between size, sails, rigging, ornaments etc. There are several plastic parts, but it is not difficult to replicate them in wood. Just like the bow area you mentioned. The task on hand is now to plank the hull. There are several good tutorials on the subject on this site. But let me have an observation on your build. On the prototype, the quarterdeck bulwarks run parallel to the deck: at the same time, the bulkheads in this area are short, and if they used as a guide for planking, as they appear to be, the rails will slope downwards. I made the same mistake on my build. The bulkhead tops should be extended, and the planking needs adjustments. I recommend to take the decal sheet comes with the kit with all the ornamentation, and use it (or it's copy) to check the fit. Then you can avoid the same error I made. I attach a picture of it. Look at the rails. The decals had to be cut. Please don't be too harsh with it:) it was my first ever try;) Actually I may rebuild it sometime with better skills and materials. good luck for your build.
-
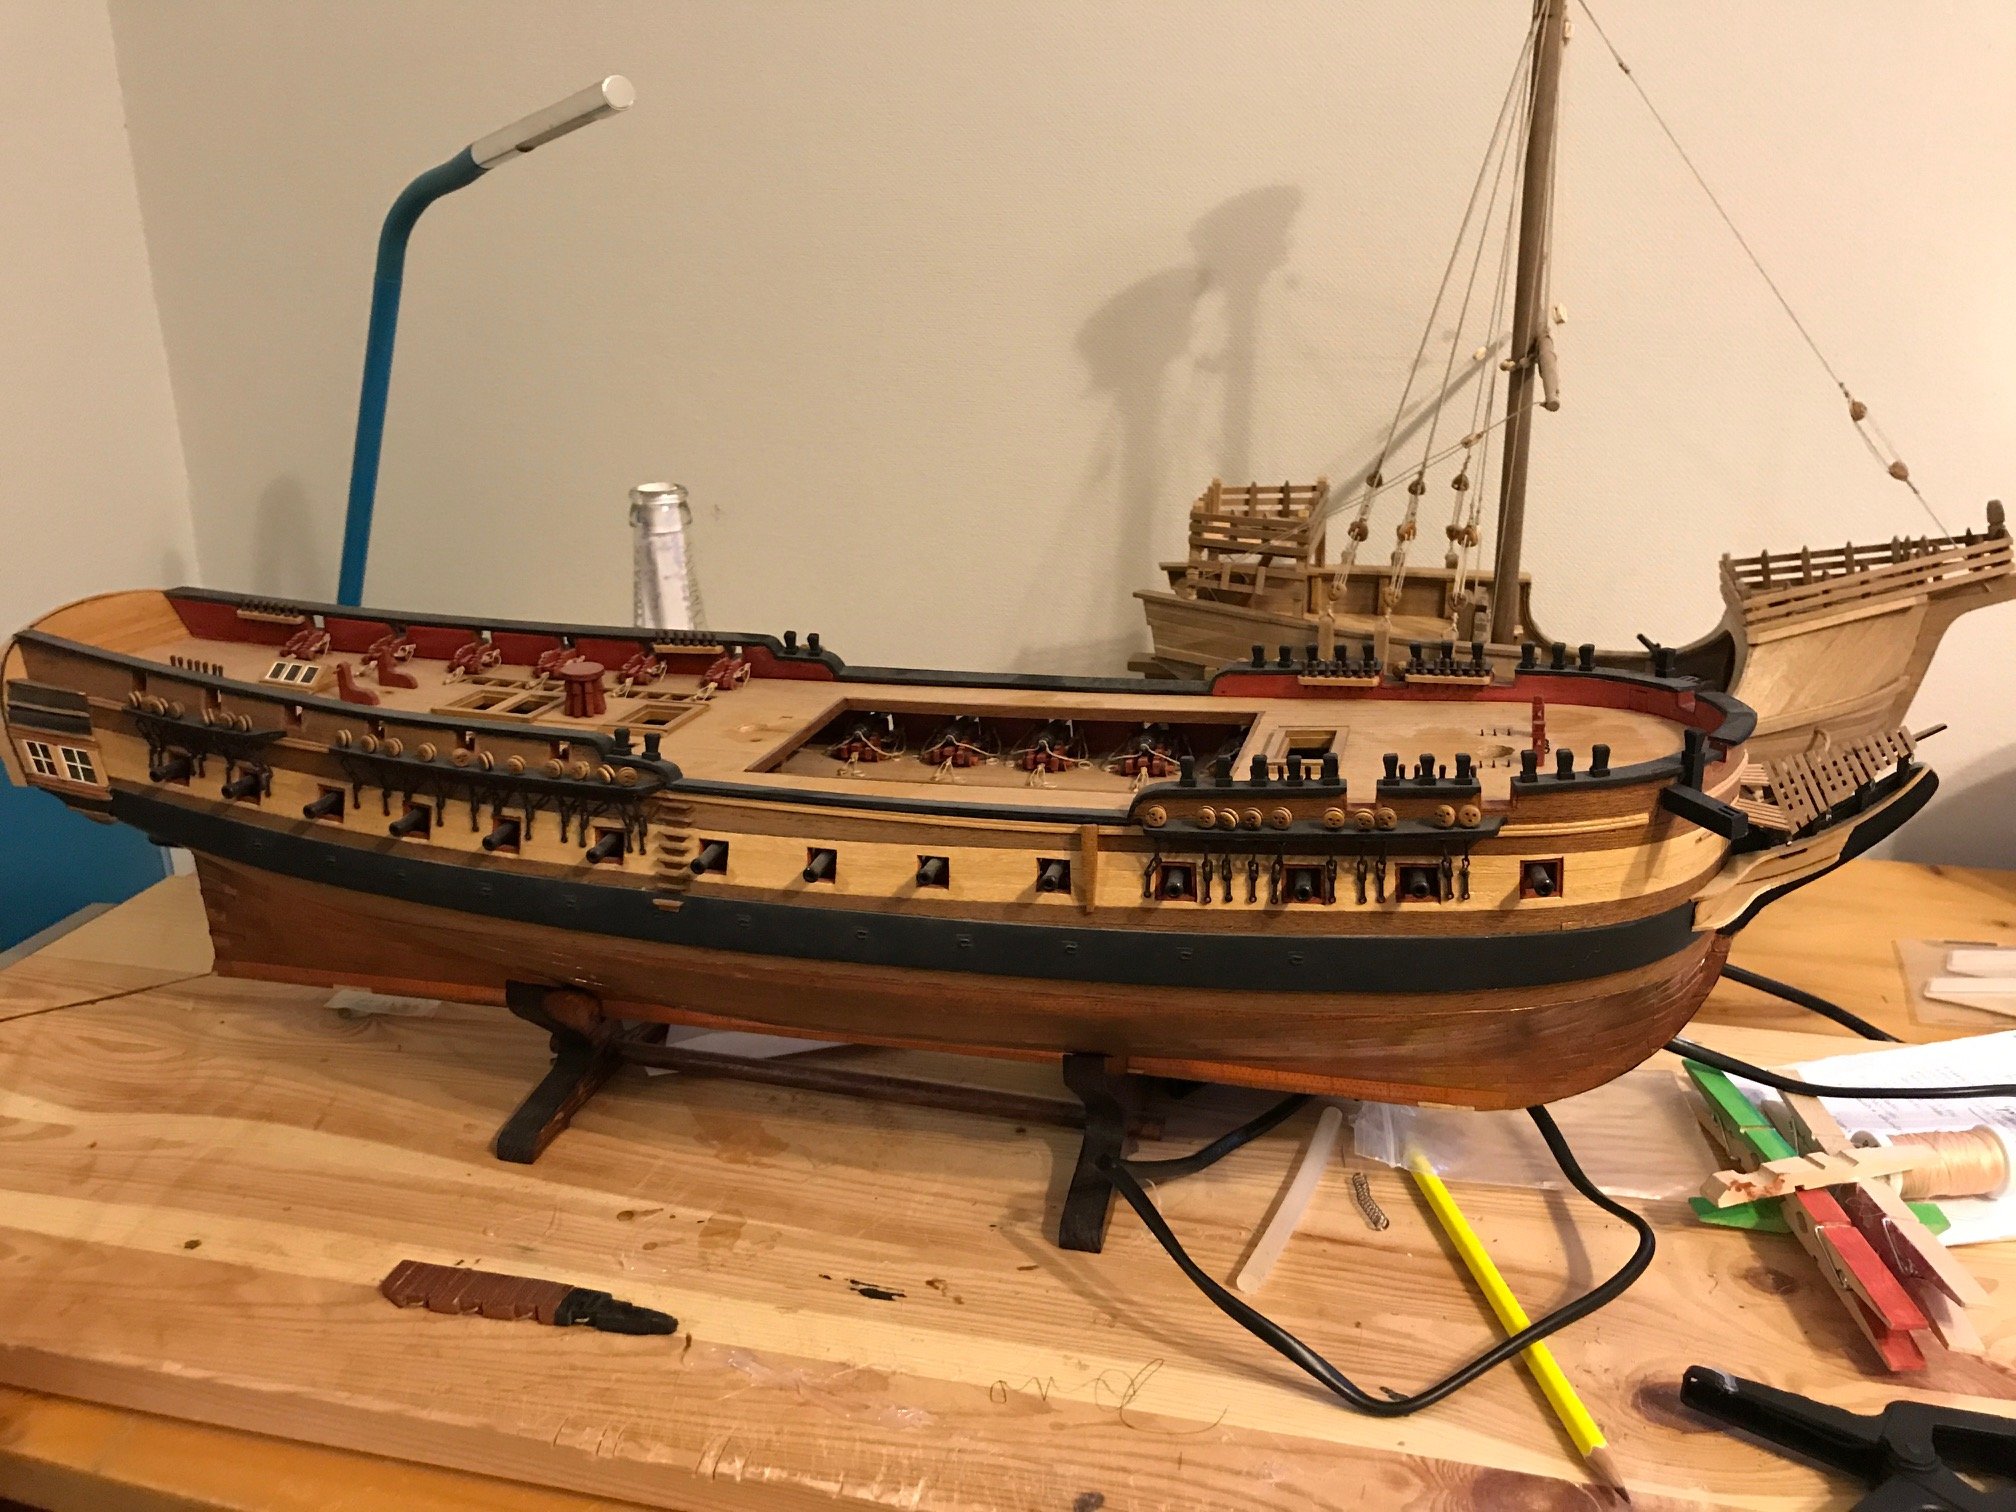
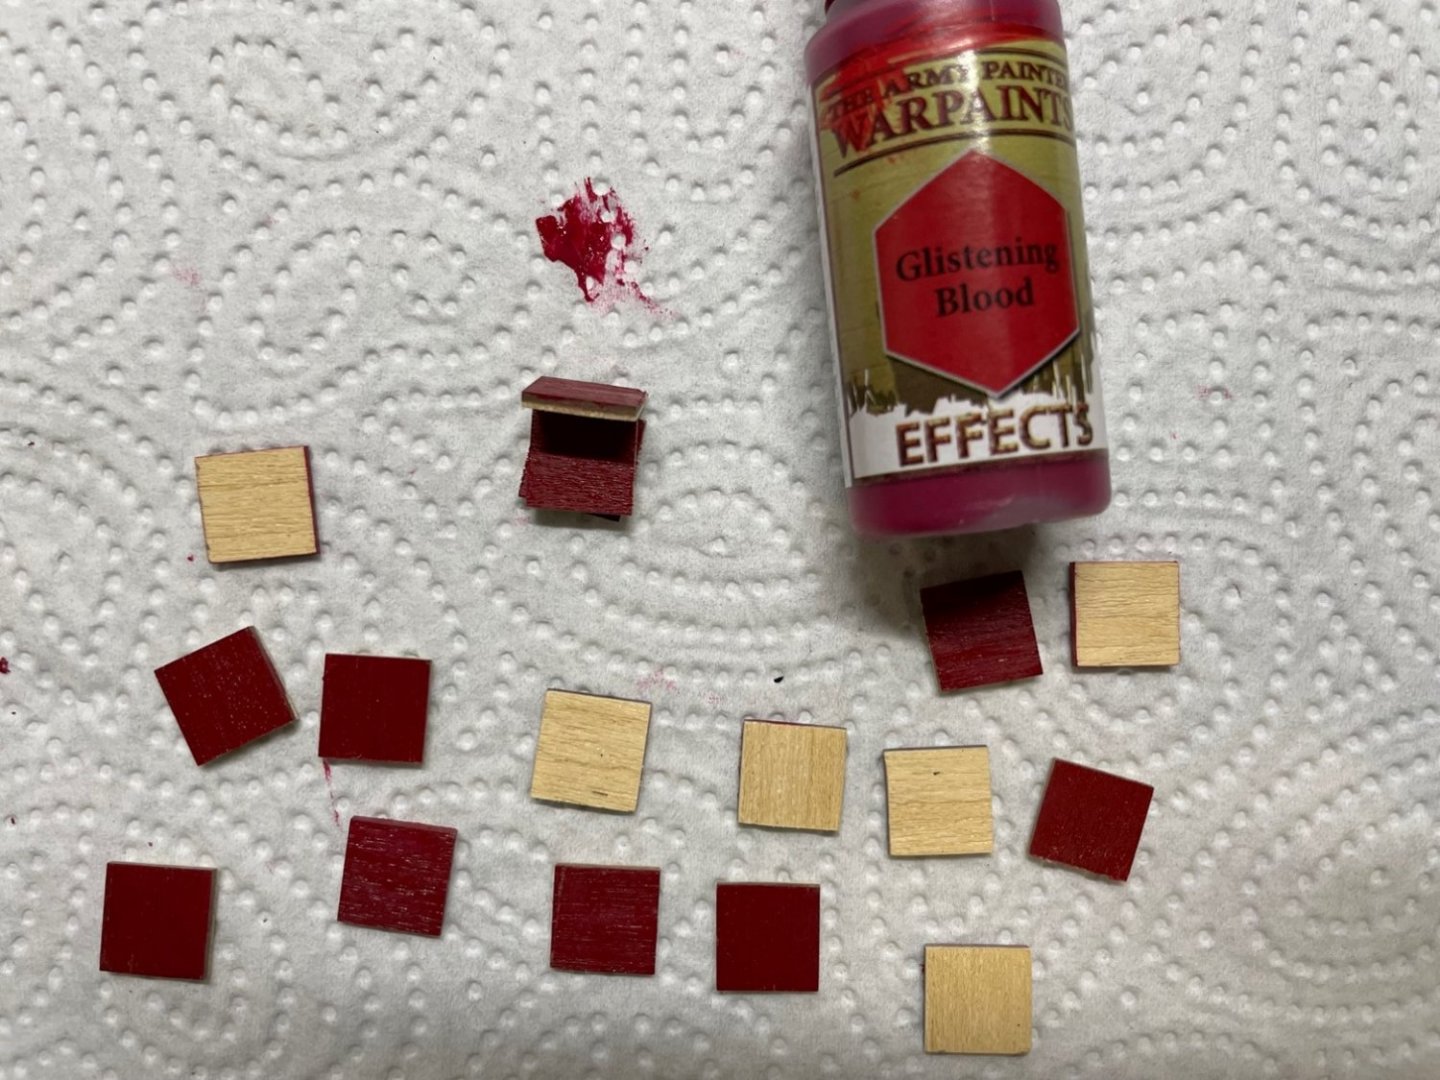
being a bit tired of the rigging, I wanted do something with wood, so decided to make the gunport doors. These will replace the metal ones of the kit. They are 11mm square, made of 2 layers, laid perpendicular. The outer part matches the kit planking, inner part is 1mm walnut strip. Inner face to be painted red. The problem is, there is already a lot of red on the ship (inner bulwarks, guns, etc) painted 10+ years ago, and the wood stain I used is no longer available. By testing different paints, I found one called "glistening blood" in a set I use for miniature painting, which matches the color quite well. On the paper, the color is quite realistic..
-
I might have my loose rigging lines tied off and 20 gunport doors made by the time you build this.. good luck
- 488 replies
-
- 2
-

-

-
- Indefatigable
- Vanguard Models
- (and 1 more)