
HOLIDAY DONATION DRIVE - SUPPORT MSW - DO YOUR PART TO KEEP THIS GREAT FORUM GOING! (Only 51 donations so far out of 49,000 members - C'mon guys!)
×

jhearl
-
Posts
355 -
Joined
-
Last visited
Content Type
Profiles
Forums
Gallery
Events
Everything posted by jhearl
-
Art - I just made a comment in your build log just to keep it all together. Cheers - John
-
 You're right - I apparently followed the written instructions when I put in the reinforcing blocks. After 15 years and the increasing effects of "old timers" syndrome, my memory isn't what it used to be but I found a picture that shows that to be the case. I assume I ignored the plan drawings. In fact, if you want to be even more confused, look at the full-size drawing on Sheet 3, which shows the blocks centered between the frames. Ya pays yer money and takes yer choice. I don't recall having any problems when I drilled the holes for the masts in any case. I imagine I picked the mast locations off of that full-size drawing. I don't see any reason why I wouldn't have. So I'd suggest you do the same. That way, you can tell if the blocks will be in the right location. Hope that helps. John
- 22 replies
-
- 1
-

-
- bluenose ii
- artesania latina
- (and 1 more)
-
MS Katy of Norfolk kit issues and parts replacement
jhearl replied to kearnold's topic in Wood ship model kits
Given the nature of your questions, it would appear that ship modeling is new to you. Perhaps it would be wise to shelve Katy for now and start with a more modern kit with better instructions until you gain some experience? Once you've built a few models, you'll have a much better idea of how to approach making and/or sourcing the parts you need. If you're determined to press ahead with Katy, Bluejacket, Model Shipways, and Ages of Sail are all good sources for fittings. Cheers - John- 14 replies
-
- 2
-
-
- schooner
- katy of norfolk
- (and 4 more)
-
Art - My articles are here - http://modelboatyard.com/bluenose2_articles.html and are free to download. Maybe you'll find them useful. I just realized I wrote those 15 years ago! How time flies. Cheers - John
- 22 replies
-
- 2
-
-
- bluenose ii
- artesania latina
- (and 1 more)
-
Perhaps you're thinking of some of the jigs used in this amazing build?
-
Vaddoc - I confess I'm having a bit of trouble understanding your question. It sounds as if you are attempting to design your own boat rather than working from a set of existing plans. If that's the case, I am not qualified to advise you. However, if you're working from plans, then the information you need should be in those plans. I am guessing that by a curved centerline, you mean that it follows the line of the sheer as opposed to curving from side to side. Of course, the centerline will be straight from bow to stern when looked at from above (in the half-breadth plan), but may be curved up and down (often higher at bow and stern than at midships) when viewed from the side (sheer plan). In real construction, deck beams are typically notched to fit over the sheer clamp or deck clamp (depending on which the boat has). Since the clamp follows the line of the sheer, that means the tops of the deck beams will be parallel to the line of the sheer. Therefore, fairing of the deck beams would not be necessary. Depending on the level of details in the plan, the amount of crown may be specified, such as 6 inches in 10 feet. That has not been the case for the models of small boats I've built, but there is often a cross-sectional view provided showing a deck beam so you can see and measure what the crown is. There is an excellent book on small boat building by Howard I. Chapelle called Boatbuilding. I believe it is out of print, but it's usually easy to obtain a used copy in good condition. It is specifically geared to small sailboats although, of course, it's meant for full-size boats, not models. But it's a very good reference. That book will likely provide you with more and better answers than I can, but I hope this helps to some degree. Note too, that everything I've said above are broad generalizations, not hard and fast rules. Any given designer or boat builder may follow his own set of practices. Cheers - John
-
Do a Google search on stainless steel fishing wire. It's usually 7 strands. It's sold in various test strengths, but the stronger the wire, the thicker it is. Doubtless you can find local shops that sell tackle for salt water fishing in your area. Cheers - John
-
When I built my buyboat model last year, I too was faced with the challenge of making turnbuckles. I took a slightly different approach. Let me mention right up front that the scale of my boat is 1:24 so this may be more difficult at your scale but perhaps it's worth consideration. As seen in the pic below. I used some 1/16" brass tubing cut to short lengths. I soldered pieces of square brass solid rod to each side of the tubing. I did not attempt to tap threads in the tubing - as you've discovered, small, left-hand taps and dies are expensive or unavailable. I did thread both rods using a right-hand die. Even at my larger scale, it's pretty much impossible to tell which direction the threads run but you can tell they are threaded at least. I simply epoxied the rods into the turnbuckle bodies. Cheers - John

- 878 replies
-
- 13
-
-
Although I would make this from brass myself, there's no reason you couldn't make it from wood if you want to paint it black. You can use a full-size electric drill held in a stand or clamped in a vise as a makeshift lathe and shape that tapered part with files or sanding sticks. The straight part of the stack can be made from pieces of dowel. You can drill a hole in the end of the dowel at the top of the stack so it looks more like a pipe. This should be a pretty simple project. Cheers - John
- 31 replies
-
- 2
-
-
- ventilator
- flue
- (and 4 more)
-
I think you guys have misunderstood the question - he is asking about two different scroll saws - not table saws. I'm not a fan of scroll saws myself and have never used either of these, so I can't offer a very helpful answer. That said, looking at the two online, briefly, I personally would go for the Proxxon. It seems to be more feature-rich than the Dremel and I know Proxxon makes good tools. I shouldn't think finding blades would be that difficult but since the OPs location is unknown, that's only a guess. Cheers - John
-
Um - those wouldn't be "photobuckets" would they? (Sorry - couldn't resist.)
- 174 replies
-
- 2
-
-
- gaeta falcata
- marisstella
- (and 1 more)
-
You might find the photos on this page of interest: http://mua.apps.uri.edu/in_the_field/skipjack.html Cheers - John
-
Sherline model 4400DRO Lathe
jhearl replied to J T Lombard's topic in Modeling tools and Workshop Equipment
I thought of one more thing you might want to consider about the DRO option. I don't have room in my shop to leave the lathe out on a workbench all the time. I have to store it away between uses. There are a lot of wires and things associated with the DRO that would add to the difficulty of moving it around a lot. So if you're considering the DRO option, you'll likely be happier if you don't ever have to move the lathe. Cheers - John -
Sherline model 4400DRO Lathe
jhearl replied to J T Lombard's topic in Modeling tools and Workshop Equipment
I see no one has responded so far. I don't have the DRO version of the lathe so I can't comment on the usefulness of DRO. I do have it on my mill and am very glad I do but there haven't been many times where I wished I had it on the lathe, although I can see how it could be useful - especially for repetitive tasks. As for accessories, I think it's a matter of what you can afford and what you want to do. I think it's cheaper to buy a package deal up front than it is to add all the same accessories individually later. I got a B package with mine and some of the things I've used and some I haven't. I didn't feel like I'd need the thread cutting attachment that comes with the C package and so far, haven't missed it. I've often thought about buying the compound slide though and likely will one of these days. I also added a 4-jaw, self centering chuck. I have not had occasion or need to use the steady rest, faceplate, or lathe dog so far and I've had my lathe for about 3 years now. One other accessory you might want to consider is a quick-change tool post. I know Sherline makes one, but I think it's too expensive. You can find one for half the price at Little Machine Shop that looks good - http://littlemachineshop.com/products/product_view.php?ProductID=4039 I bought one made by another company (A2Z) but they have since gone out of business. It would be much more tedious to use the lathe without that tool post. I often change tools frequently while working on a single part. One other accessory you might consider getting is the WW collet set (1160). If you're working with small-diameter wood stock, a collet can hold it well without causing indentation marks the way a 3-jaw chuck can. The drawback to collets, though, is that the diameter of the stock must be very close to the internal diameter of the collet so their usefulness can be limited. I use my 3-jaw chuck 99% of the time. But if, for instance, you were turning a bunch of wooden belaying pins, the collet would be very nice to have. If you only turn metal or wood where the indentations won't matter, then I think the 3-jaw chuck is just fine. I bought my lathe and mill from Discount Campus. They have better pricing than Sherline Direct and they are an authorized reseller. I've bought accessories from them as well and have no complaints. Hope that helps - John -
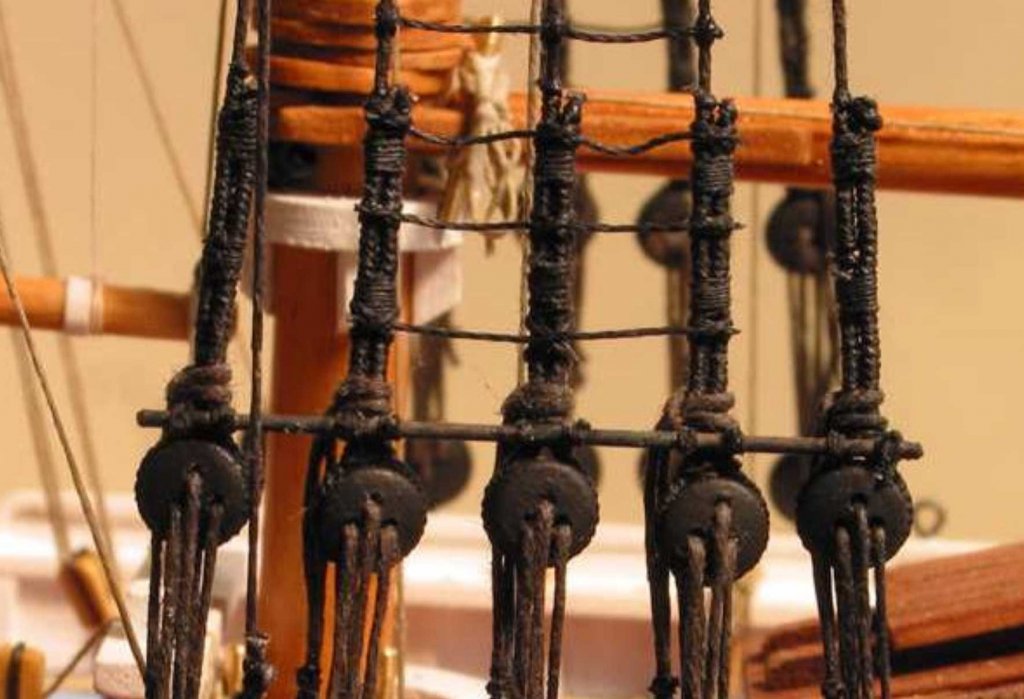
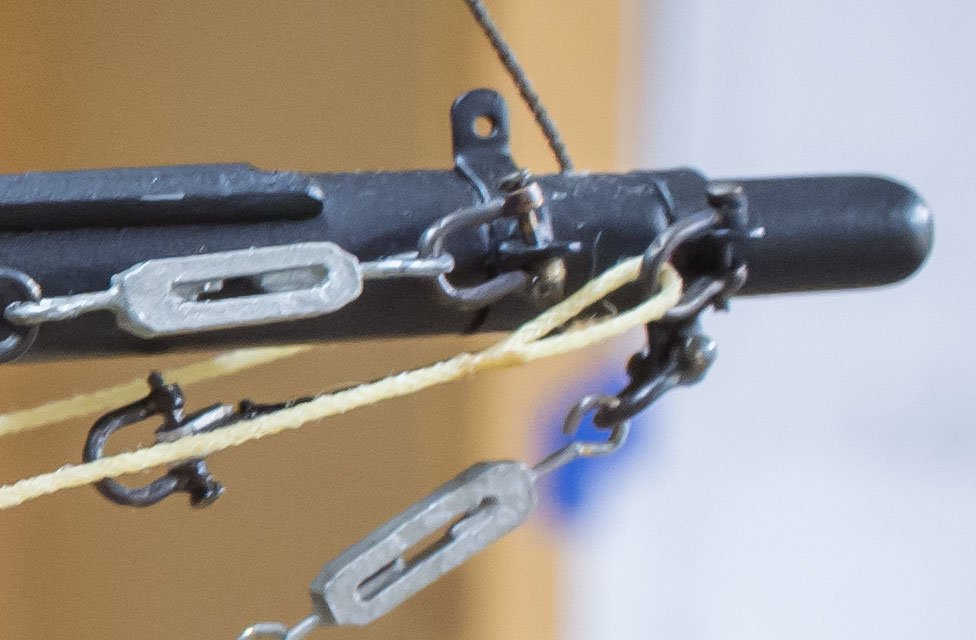
You can use much the same technique with served shrouds as you do with those that aren't served. Start with a longer-than needed piece of shroud line. Put it on your serving machine and serve only the center part that will go over the mast. Then, put the shroud on the mast and temporarily make the loop (hold it with an alligator clip). Then, using your deadeye jig to hold the deadeyes the right distance apart (note - your jig needs to hold two deadeyes at once), wrap the free ends of both shroud lines around the upper deadeyes. You can then mark where you want your serving to begin and end. Then put the shroud back on the serving machine and serve the ends between the marks. Then you put the shroud back on the mast, seize the loop at the masthead and then seize the loops at the deadeyes. Note that the serving at the deadeyes come well above them as shown in the picture below. There should be two seizings as well. In your picture, the served part of the shroud is cut way too short. Cheers - John
-
One thing to be aware of with POF is that there are different methods for making frames. The Hahn method is somewhat simplified and less historically accurate compared to the way the Echo cross section frames are built. (Neither is simple!) So that may color your decision. I started Hannah as my first POF model many years ago but never finished it. Not because it was too hard - I just lost interest altogether. I purchased my plans from Mr. Hahn back then and used his book along with advise from a fellow modeler. It was difficult, but not overwhelmingly so. I documented my experience on my website in case you're interested - http://modelboatyard.com/hannah.html Cheers - John
-
Doug - Thanks for pointing that out. They definitely seem to be typos in that case. E and W are right next to each other on the keyboard. I'll correct the practicum today in case someone else winds up downloading them. Sorry for any confusion I caused. Cheers - John
-
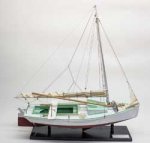
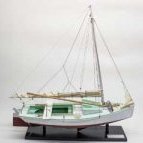
Those turnbuckles came with the kit - Model Shipways Glad Tidings.
-
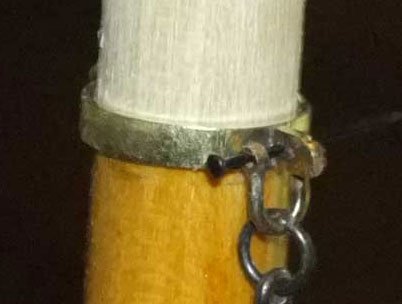
Perhaps I can help to clear up your confusion on the use of the term "wye." I checked the practicum and I only used that term once on page 4 of part 7 where I wrote: You may want to consider making a simplified sheet horse band (also called a main sheet wye) for the main sheet on the main boom. Jenson shows that fitting as a sheet horse band on page 37 in the illustration of the Main Sail Sheets. In The American Fishing Schooners by Howard I. Chapelle, there is a drawing on page 541 and on 542 of the same fitting, which he labels as the Main Sheet wye. Of course, BN2 is a Canadian vessel, so it's possible that term was not used there. I don't have information with regards to that. When it comes to bands with eyes elsewhere I wrote: As you are making up your spars, you’ll want to add the necessary bands and eyebolts to which blocks for rigging will be added. One might easily conclude that I meant there should be eyebolts on bands, but what I didn't say as clearly as possible is that there are bands with eyes and in other places, eyebolts. For example, there are eyebolts at the top of each mast to which blocks are attached for the gaff peak halyards. There are no bands with those eyebolts. Note, too that I used a simplified form of bands with eyes by simply making eyes from wire and inserting them into the bands (made from paper strips) rather than making the style that would require soldering as you did. I felt that the simplified method would be much easier for the novice modeler. I can offer a suggestion for making soldered mast bands with eyes. You can find the diameter of the spar where you want your band to go by wrapping a piece of paper around the spar and marking the spot where the overlap occurs. You can then transfer that dimension to your brass strip, cut it to length, and bend it into a circle. It's best to make that cut with a jeweler's saw because you're going to want to solder that joint and the two ends need to be flat and square so they will join together perfectly. Then, you can make "ears" out of another piece of the same strip brass. Make them longer than necessary so you can file a pin on one end that will fit into a hole you drill in the mast band. You can leave the other end square until you have soldered everything. You can also wait to drill a hole in the "ear" as well. Once you have everything cut, insert the ears into the band, put small bits of paste silver solder on each joint including where the band comes together, and hit it all with your torch. Of course, you will have to devise some way to hold all the pieces in place while you solder. I use a soldering board that I can stick pins into. Also, if you leave the ears quite long, you can bend the end away from the band to a 90 degree angle and that will keep it straight as it's lying on the soldering board. After soldering, you can cut the ears to length, round off the ends, and drill holes in them to make your eyes. I don't have any photos that would illustrate the steps I've outlined, but below are a couple of photo of some bands done in this way. Hope this is useful. Cheers - John
-
One author I like a lot is James L. Nelson. He has a couple of series starting with The Guardship. The action in that book takes place in and around Tidewater Virginia during the colonial period, so a bit different than the English novels. By Force of Arms, the first book in a different series takes place in New England, again during the Revolutionary War period. Light reading, but for me, real page turners. Cheers - John
-
Recommendations For A Good Milling Machine
jhearl replied to Thistle17's topic in Modeling tools and Workshop Equipment
I also vote for Sherline. I had one of the little Proxxon mills and almost never used it. For me, it was too small and too limited. Since getting the Sherline mill, I have used it much more than I ever expected to. I would advise getting the DRO option. It's much easier to use than trying to count turns on the handwheels. Definitely get the rotary table (#3700). I used it just a while back to make a ship's wheel. The tilting angle table (#3750) is very useful too. I'd recommend getting one of the mill packages because you'll need all that stuff anyway and it will be cheaper. A 5400 DRO package and the two accessories I mentioned will put you well over your budget however. Adding CNC would be considerably more. I bought my mill (and lathe) through Discount Campus. They have better prices than Sherline Direct. http://www.discountcampus.com/store/sherlineonline.htm Cheers - John -
You might want to look into getting a pocket-sized automatic center punch. They are about the size and shape of a mechanical pencil and are spring loaded, so you set the point of the punch on the brass, then push down until it "pops" to make a mark (indentation) in the brass. Then you can drill and your bit won't wander. Far easier than trying to figure out a way to hold the brass while you hit a punch with a hammer. Avoid the larger automatic punches meant for heavier material. They have much stronger springs and will make too large an indentation. Cheers - John
-
Tools You Can't Live Without
jhearl replied to Justin P.'s topic in Modeling tools and Workshop Equipment
If you go to a hardware store, you can find locknuts with plastic inserts that you can use to replace the ones on the headband. The locknuts will not loosen up once you put them on. Just be sure you know what size thread you need before you go to the store. Cheers - John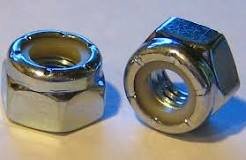
-
I have been using DMC Cordonnet thread for years now. It comes in ecru, which works well for un-tarred rope and it can be easily dyed after the rope is made if you want a dark brown. It is a cotton thread but has no fuzz and is considerably less expensive than linen. It comes in sizes 20-100 (100 is smallest). Here's one online US source that appears to carry all sizes: https://www.tattingcorner.com/threads-12/dmc-cordonnet-67/ (I've never ordered from them and have no affiliation with them in any way - just one source I found on the web.) Sometimes, even the 100 is too large, so I use Gutermann cotton sewing thread for the smallest lines. Sometimes, you have to just use thread itself without twisting it into rope for really tiny lines. I'm not sure what kind of rope machine you have, but on mine, I can use multiple threads (such as 6 or 9) to get even thicker rope if three 20s aren't big enough, for example. When I got started making rope, I made up a sample length with each thread size so I would know what I needed in the future for a particular size finished rope. Cheers - John
-
Do I Use Primer?
jhearl replied to CKNavy's topic in Painting, finishing and weathering products and techniques
One advantage to a primer over a clear sanding sealer is that it will show up any defects that need to be repaired before painting the final coats. I always find something that needs to be fixed. On hulls, I usually use something like Rustoleum or Krylon in a rattle can from the hardware store. Of course, it has to be sanded before applying finish coats. Cheers - John

