


AON
-
Posts
2,596 -
Joined
-
Last visited
Content Type
Profiles
Forums
Gallery
Events
Posts posted by AON
-
-
-
-
-
I noticed there is a problem.
I was staring at it but couldn't see the forest (it) for the trees (frames?).
After studying TFFM Vol 1 and 3 this weekend it became obvious.
I hadn't been chamfering my chocks/joints in the cant frames to account for the angle and sanding.
Too much of the chock was exposed and would be sanded away when fairing the inside surfaces of the frames.
In volume 1 of TFFM David simplifies the joints (square end butt joint) in the cant frames.
In volume 3 of TFFM Greg simplifies the joint (half step simulating the chock but cut back to the proper chamfered depth) in the cant frames.
So what I've put back on I have yet again taken off.
I believe I'll get it this next (last?) time!
"Seems there is always time to do it over".

-
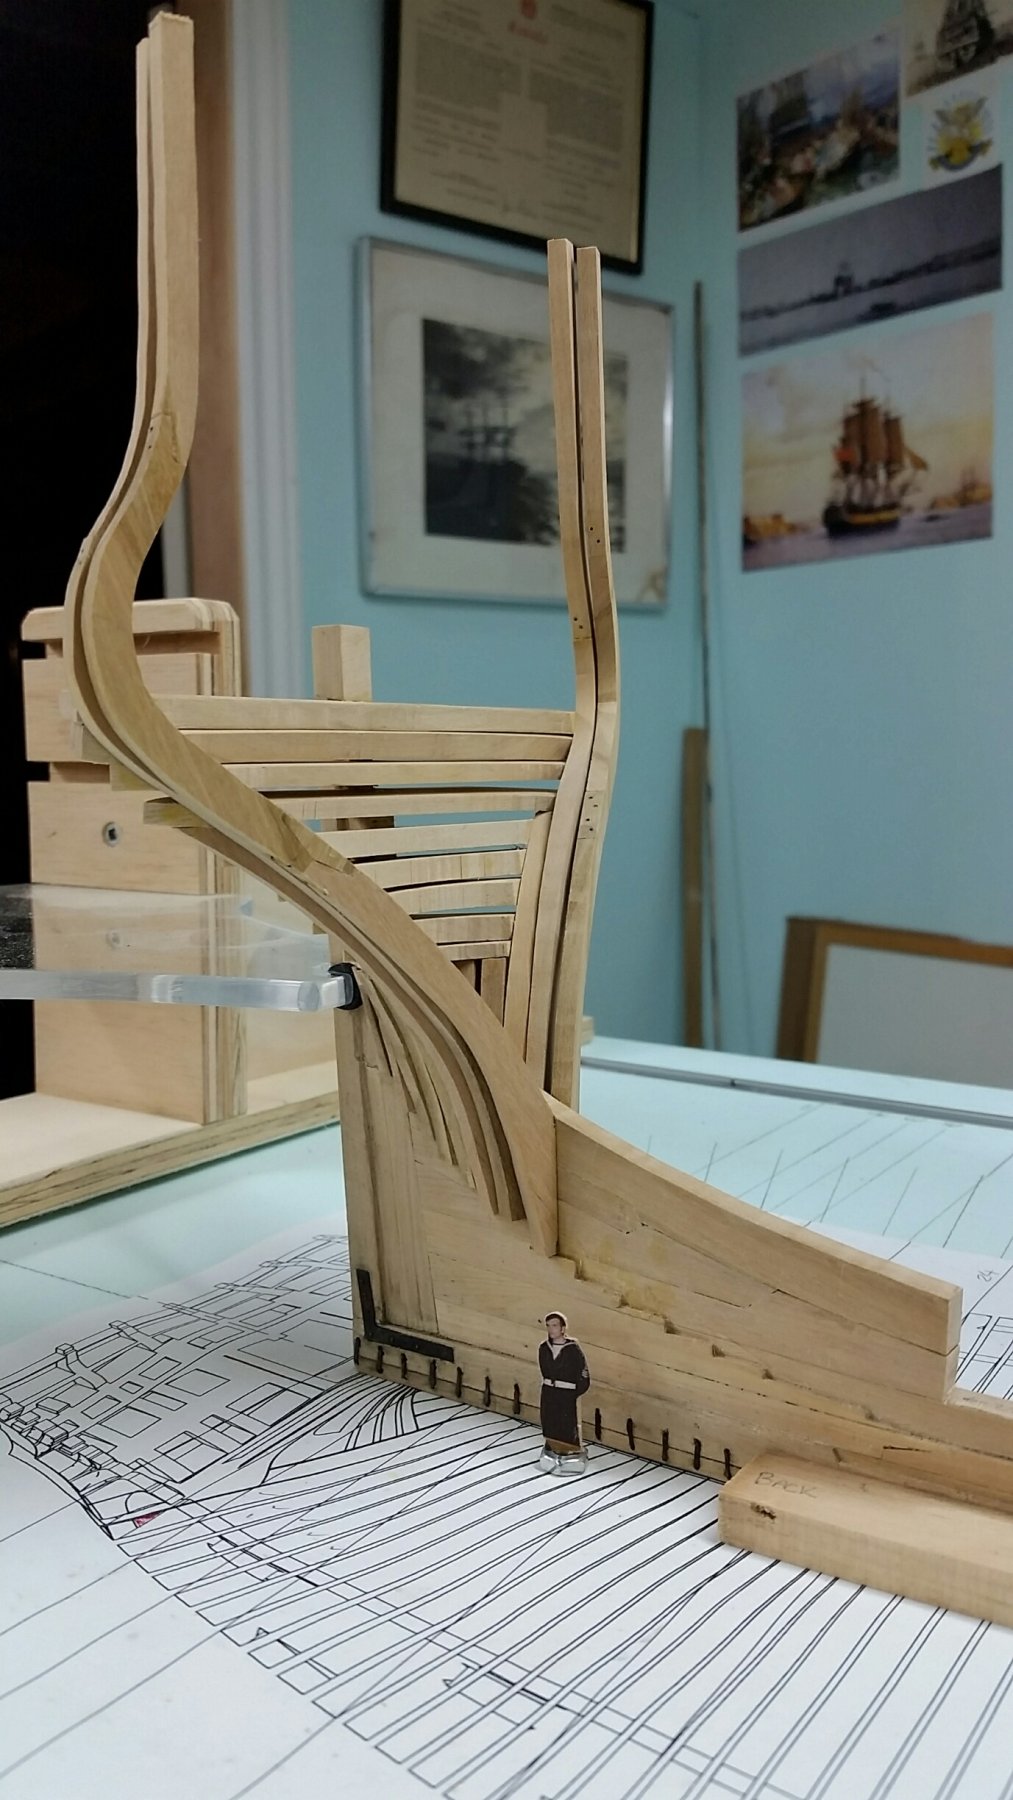
So let me introduce myself
CPO and Bosun (Bos'n or Boatswain), 141 Royal Canadian Sea Cadet Corps Bellerophon of Welland, Ontario (1972).
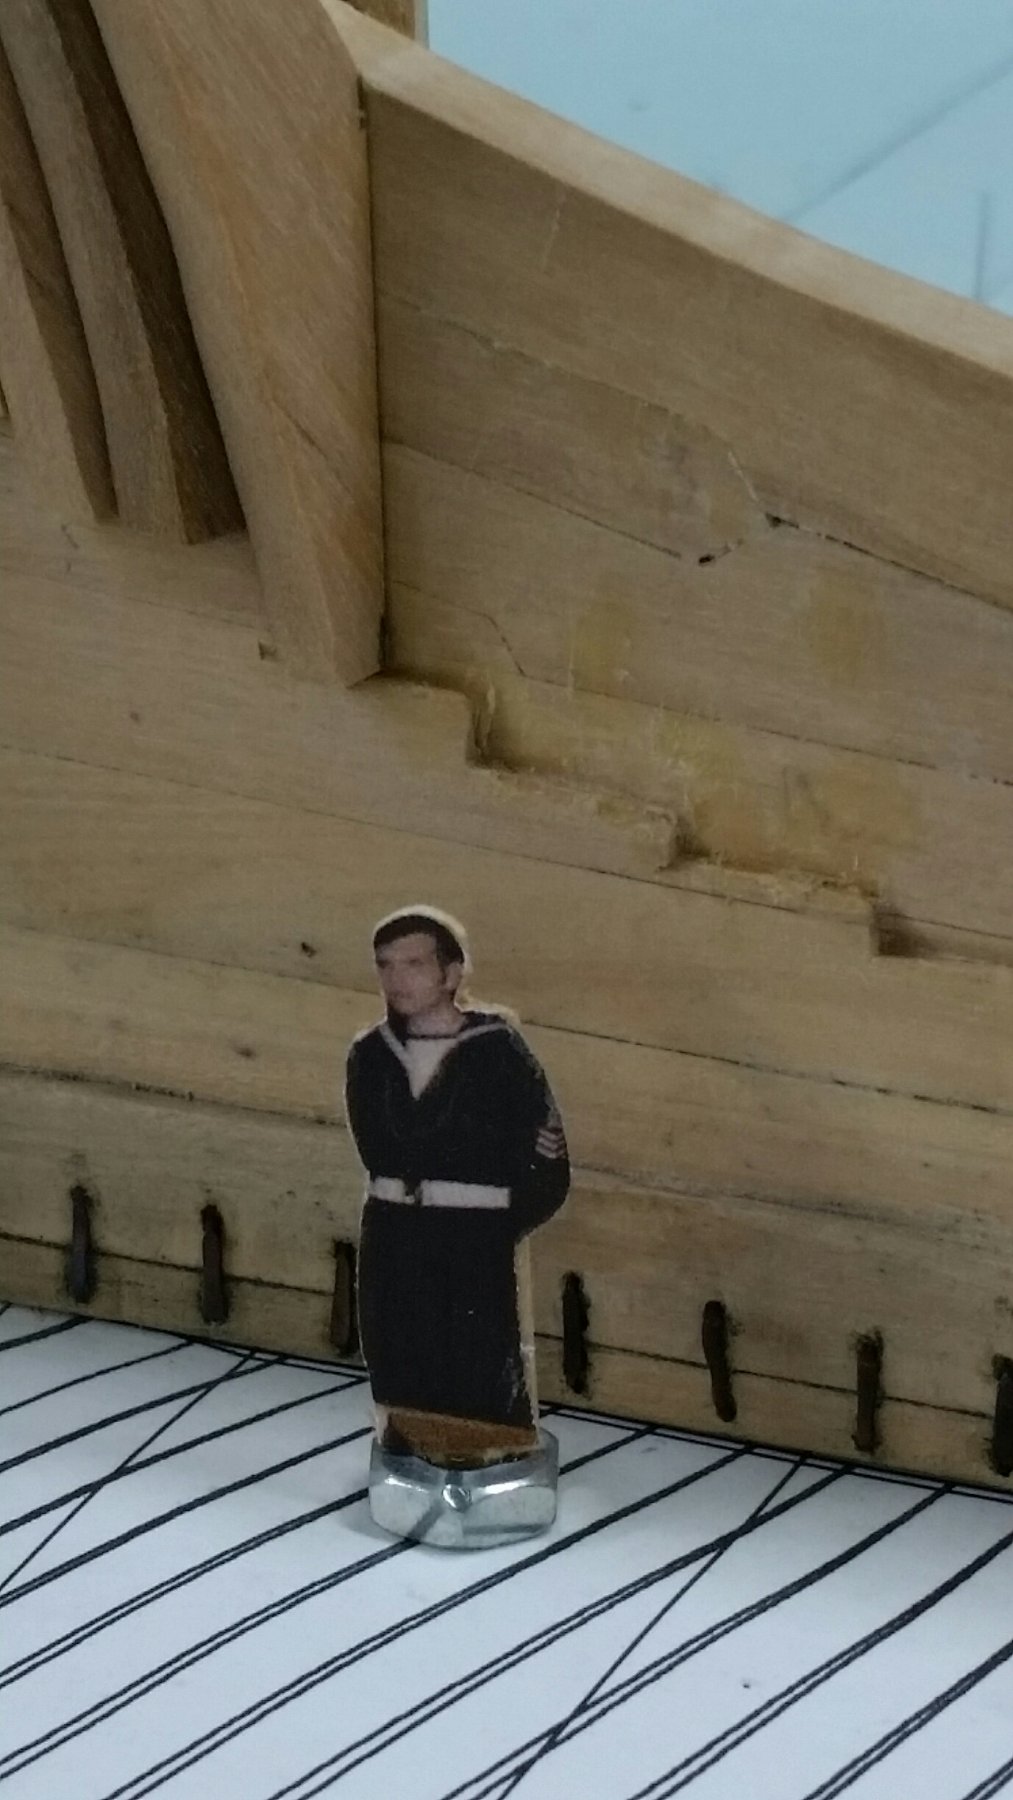
I shrunk my self to 5'-6" from my present 5'-10-1/2"
(glued to a thin piece of wood and that glued to a tiny hex nut to keep me upright)
I'll be adding my father (Able Seaman RCNVR 1939-1945) and my grandfather (Able Seaman NRNR 1914-1918) to the crew.
If I find one of my wife (Navy League Wrenette Corps Patrician of Welland) in uniform she will be signed aboard also... women allowed.
The only criteria for family to join is they must be in naval uniform.
I won't likely post again until I get back to at least where I was before I tore frames off.
take care till then.


-
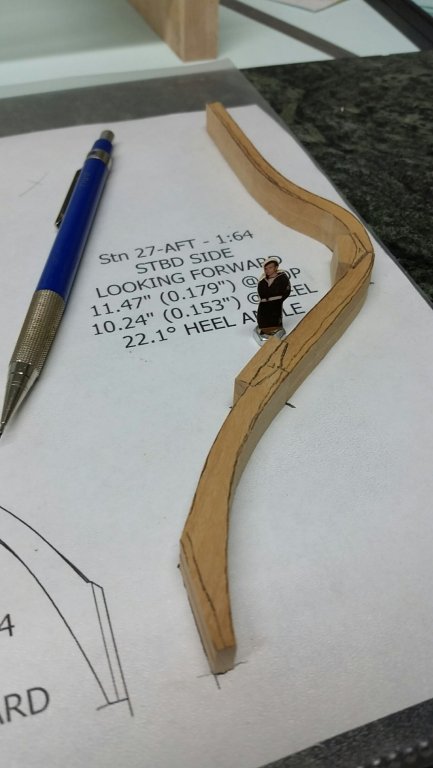
As of late I've been using a 0.5mm (0.02") mechanical pencil... it doesn't require sharpening just refilling.
I should however erase the pencil tracing (transferring the pattern to the wood with carbon paper) on the paper pattern when I assemble the wood pieces over it.!
As an aside, I have noticed some people inserting scale cut out cartoon people into their builds to effectively demonstrate the scale.
I will be inserting a much younger me into my next build stage photo.
So if you find yourself wondering... yes it is me, not some total stranger lurking about my ship.
-
Thank you for the message. You should be aware that I haven't any great skill level and I appreciate I've jumped into the deep end of this pool but find this forum to be my life jacket.
Making some progress.
I find the wood glue does not adhere to the plastic sheet (picture below). It did to the glass, so this is quite a bonus!
I have (as you'll see below, one set of full frames installed, I installed one half of the next set this morning and hope to get the other half up tonight.
I've cut out the next set and need to fine tune the chocks before I glue the pieces together.


-
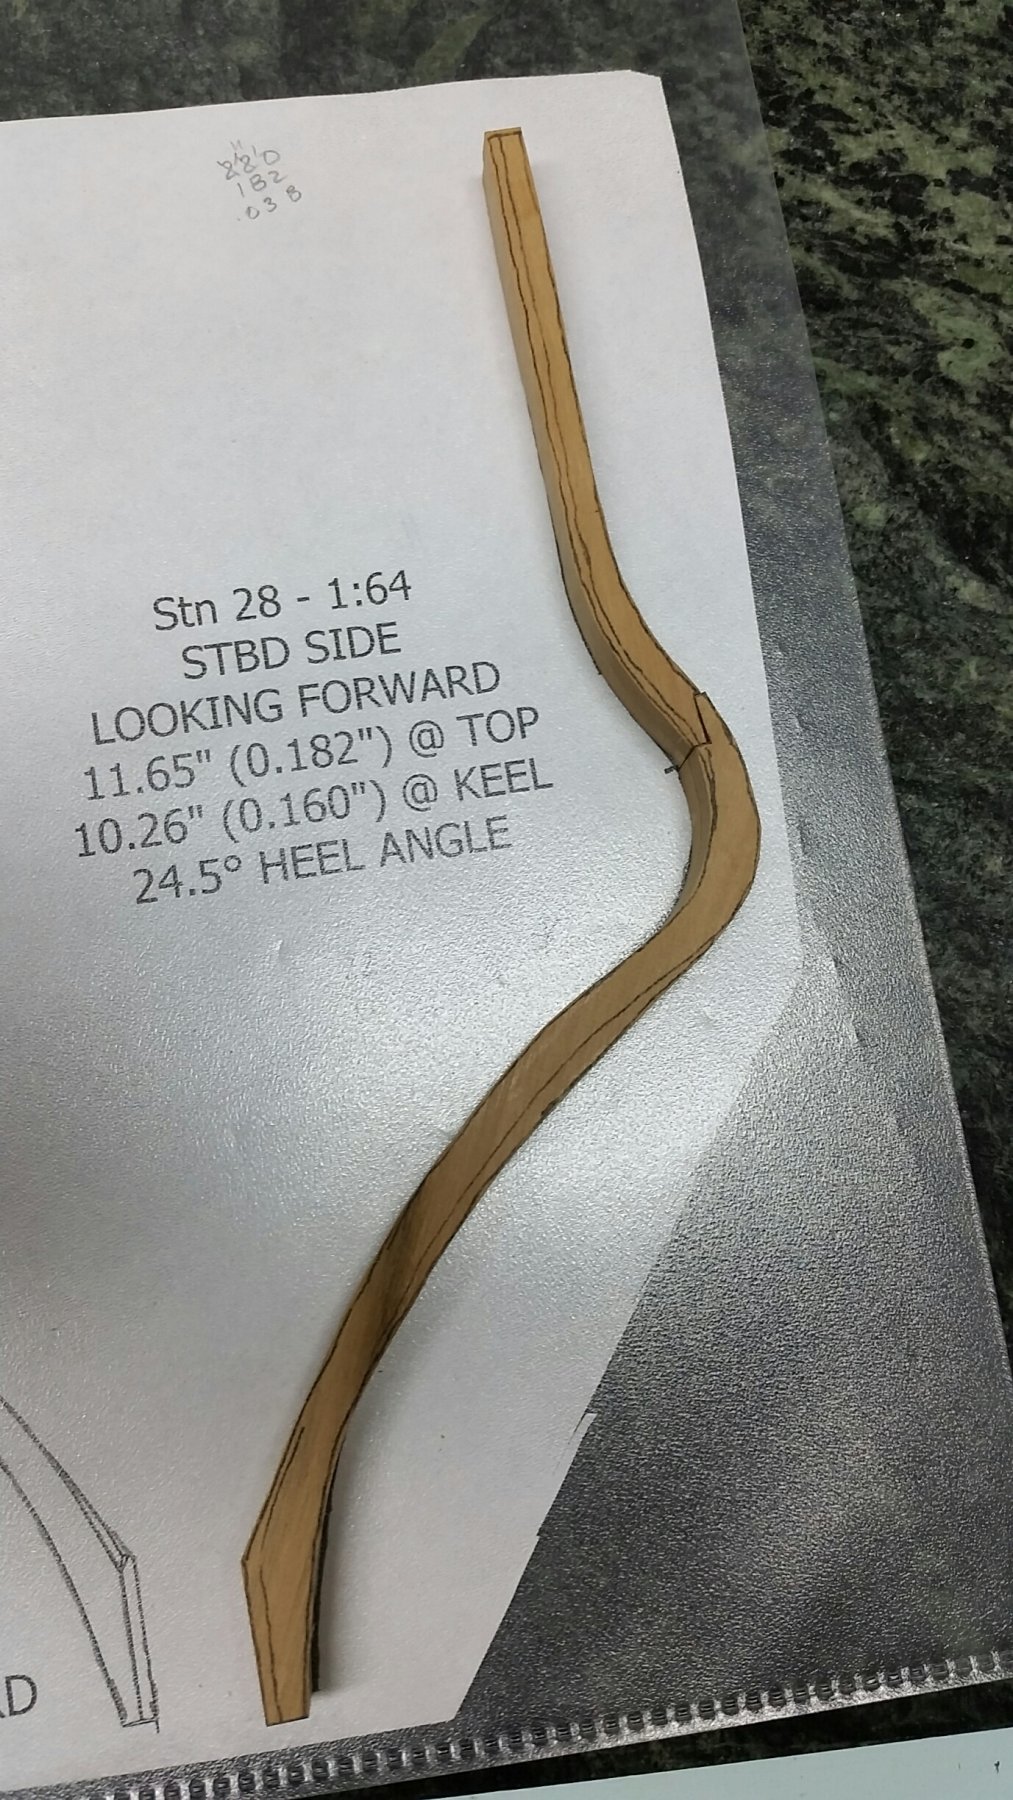
That is why I put a width (x) and a height (y) dimension on the one frame (of a dozen) on the large sheet.
I put my scale against the print and verify it is correct from the commercial printer before I pay them.
I was taught (in the engineering office) to never scale off a print.
Back in the day it was because "blue prints" stretched due to the wetness of the process.
We've tested dry prints and depending on the humidity in the paper and the heat of the machine the paper distorts so we still do not measure off a print.
Then there is the problem with margins or borders.
I believe two dimensions or scales (X+Y directions) need to on the print to verify the scale of the printed paper.
If others (Druxey) never had this problem... then it must be me (?)
-
-
My (large sheet) prints were made commercially.
I could set every individual frame up on an 8-1/2 x 11 sheet.
I will have issues with my printer printing to scale... it seems to have a mind of it's own.
If I add a dimension and put a ruler to it after printed it is rarely what I asked for.
I'd have to play with it.
When I had the large sheets printed commercially I added X and Y dimensions on the print of one frame on each so I could double check them and they were all perfect.
-
I use a small pointed applicator... the left over after the brush on a micro-brush is wasted. it gives it a new life. (reuse, recycle)
You've seen the E+ sheet size (larger than 24" x 36") hanging in the corner of my room. I cut the pattern out of it. I do not print a small A or B size sheet (letter or ledger). It could get expensive if my templates are ruined. At present I have two full sets and have only been using/reusing the one. The other is untouched.
-
You are obviously much less messy with your glue application than I. I am trying to reduce the number of prints I need as I remake pieces over and over and over...
I am getting quite proficient at do overs.
- Canute, Stuntflyer and mtaylor
-
 3
3
-
-
Summer is over and time to get back to my build. I had added a few more frames but I had a number of issues...
1. My top deadwood piece was forgotten and when I put it on I hadn't made it to the chiselled out thickness so I've been notching my frames to fit... I compromised.
2. My stem/stern posts were not held snuggly and as I added frames the assembly shifted. I added felt pads to snug things up last week and noticed my frames were outboard of proper alignment by as much as 3/16 inches = 12" to scale... both sides!
3. I've been assembling my frames on a pane of glass with my template below and last week someone mentioned distortion though the glass.
I've torn all frames out back to the transom and I've removed two braces below the transom pieces.
I've chiselled the top deadwood to proper thickness.
The posts are held snuggly.
I've installed all braces and will be starting over making new frames.
I've retired the glass pane and will try slipping my template into one of those transparent plastic page protectors and build on top of that.
I'll post again when I get back to where I was.
Hope everyone this side of the line had a wonderful summer and got outside.
-
Derek,
I believe that after a full day at the office errors in the shop are unavoidable.
Going slow and being extra diligent hasn't worked for me.
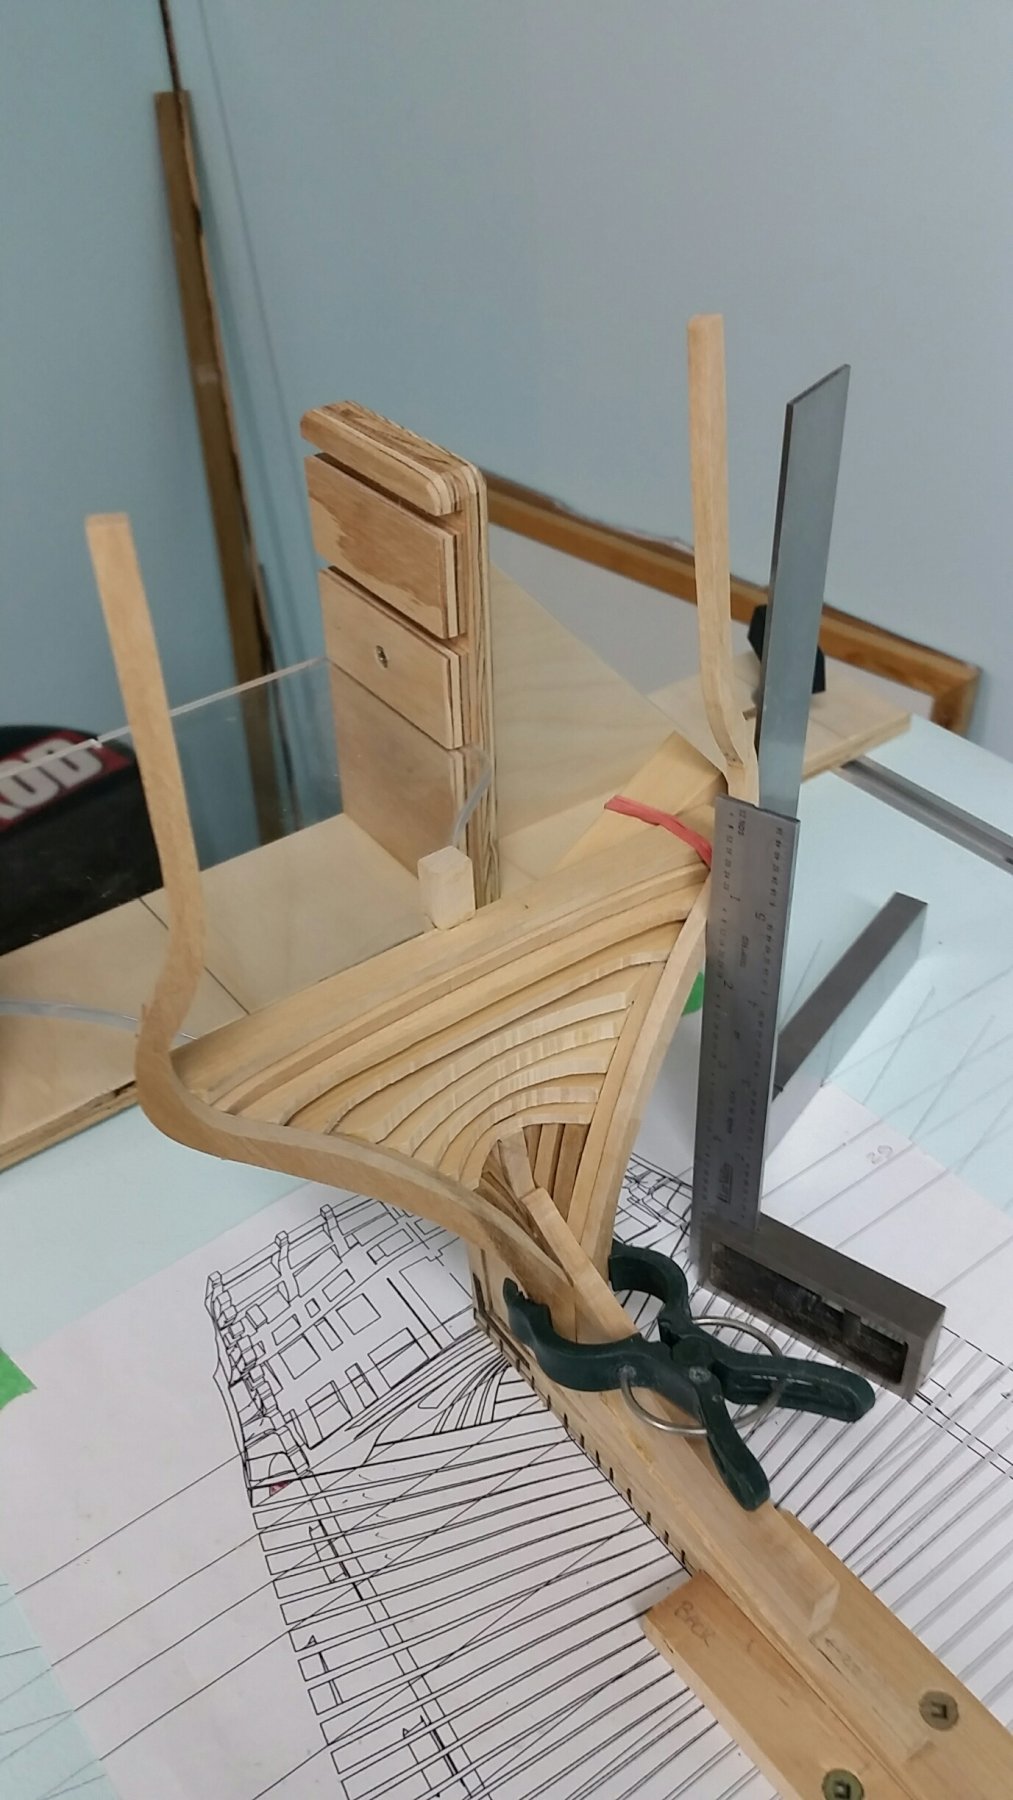
You need a table with adjustable height. It has been a god send for me.
I also find my tilting model section very useful in reaching inside of and under the outside of the aft bent frames.
You'll have to drop by one weekend to see what I'm talking about.
That is an invitation to see, chat, have a coffee, tea or something with a bit more spirit!
Bring the admiral along... mine will be here.
You missed an opportunity yesterday afternoon at the Marine Modellers of Niagara meeting... it was at my home.
You should have developed a cough and left work early.
Alan
-
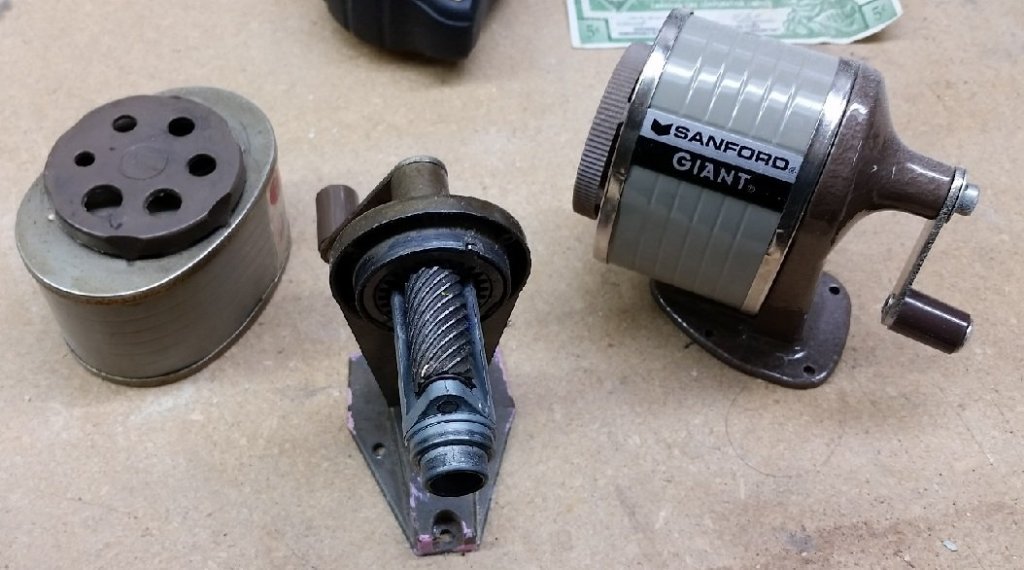
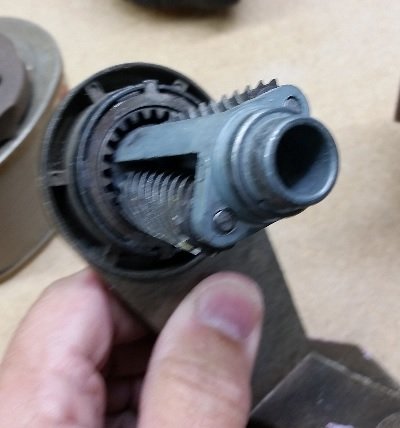
I acquired two old pencil sharpeners and while looking them over I suddenly saw a ropewalk conversion project in my future.
Seems all it needs is an addition to the hub end to connect the three lines.
This will not be for some time but thought I'd share the idea and would appreciate any comments.
-
-
I purchased a copy of this book in 1972 when I was on working at the boatshed at HMCS Quadra. I believe it was $40 which was a lot of money back then.
We used it that summer to create ornamental paddles with parachute cord and a slew of fancy knots.
I am sad to say someone valued it more than I (a few years later) as it "walked away".
- mtaylor and thibaultron
-
2
-
-
-
-
I was told or read some time ago that artists of the time made their sketches on site with quite a bit of detail missing and finished the paintings back in their lofts adding details as they deemed fit or recalled.
Of course paintings now are done similarly with one difference. The artists take dozens of digital photos to help them remember the details.
-
I just posted on the wrong forum... and deleted it.
will try again.
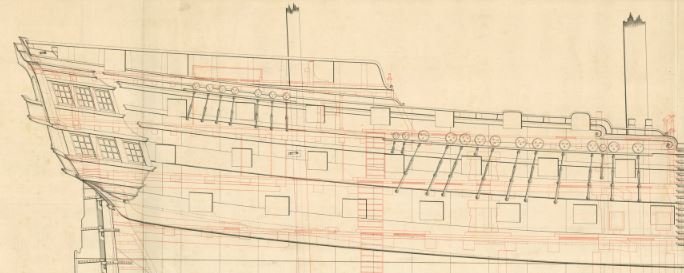
There is no way of know exactly how she looked as built.
I've looked at sketches and paintings, even as a prison hulk, and the detail is not there.
(edit: I should mention that sometimes the details disagree)
If you should find something please send me a copy or link to it.
The Elephant and Goliath were built in the same time frame as the Bellerophon.
I intend to build her with the railings as without them it seems incomplete and less graceful.
- TonyM, Bill Morrison, mtaylor and 1 other
-
4
-
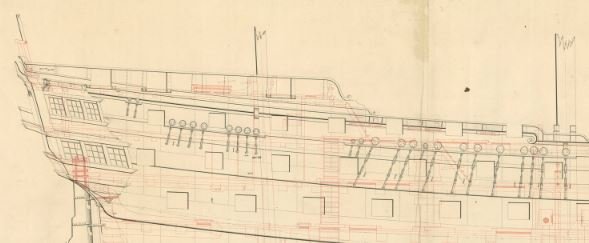
Good morning Peter
following are both the Elephant and the Goliath that were built at the same time as the Bellerophon.
One has the railing over the gunports, albeit different from you post.
The other is open.
Both are somewhat different from your posts.
These are from the NMM.
- flyer, hamilton, Landlubber Mike and 3 others
-
6


HMS Bellona 1760 by SJSoane - Scale 1:64 - English 74-gun - as designed
in - Build logs for subjects built 1751 - 1800
Posted
I PM'd you some info.
look at page 35
Wing Transom Knees: WING TRANSOM KNEES(130) ---- To have two wing tranfom (transom) knees fided (sided) 12 inches, the fore and aft to be 16 feet 0 inches long; the athwartfhips (athwarthships) to be 6 feet 0 inches long, to fcarph (scarph) with hook and butt(78, 81, 104) upon the upper strake of spirkitting(131) and bolted with 5 bolts 1-1/4 inches diameter in the thwartfhips (thwartships) arm, and with 8 bolts in the fore and aft arm, and with 2 bolts of 7/8 of an inch in the lip of the scarph.