Search the Community
Showing results for tags 'Plastic'.
-
 I'm new to MSW and ship building. I have done a lot of modeling over the years. And I have found out that ship building is the 'meat and potatoes', if you will, of modeling. I have lost a lot of my earlier photos of the cannon being built and the hull construction. I followed pete coleman example and others to get ideas for details. Books are needed to build these ship models if you want to even try to be accurate. I'll be submitting a lot of my photos. Many of which will be rather boring but I want to preserve them somewhere other than Facebook. All comments and tips are welcome!
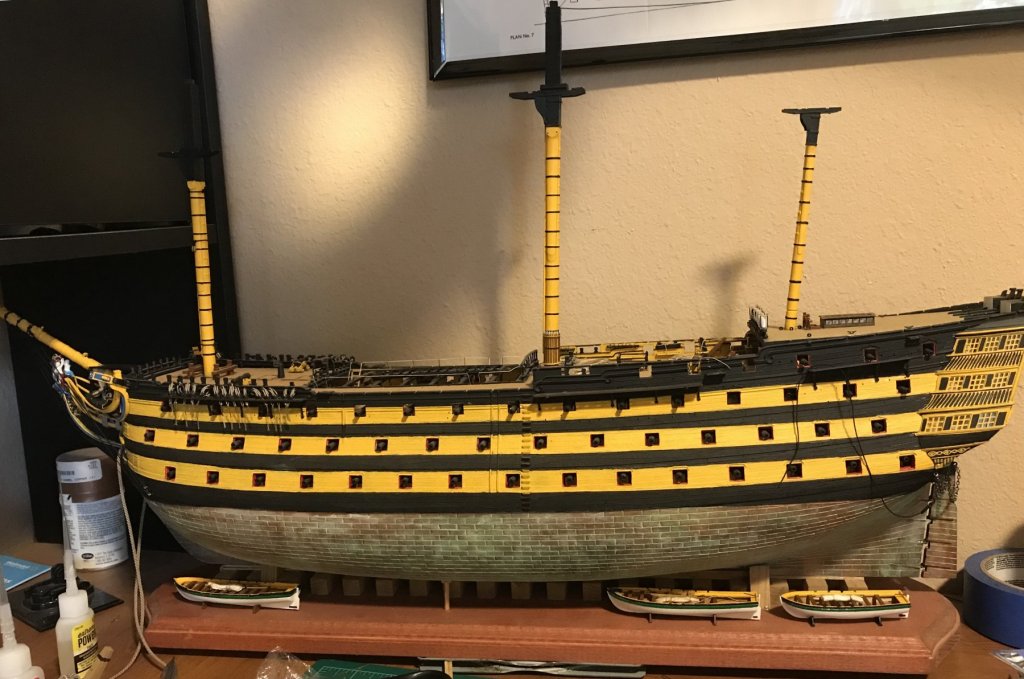
- 153 replies
-
- 10
-

-
 I bought this kit online a few weeks ago, and I’m ready to start building it now. This is the biggest kit that I’ve done so far, and it was relatively expensive, so I want to get it right. I would like to try to add some chipping effects on the hull, and I have some chipping fluid from AK interactive, but I’m not sure about what colour to do the base coat in. Any help or advice would be greatly appreciated, and I’ll add some pictures once I have something worth taking a picture of.
 -
 The plastic kit is H-330 1972 New box, bought off of Ebay. I washed it with Dawn dish soap and rinsed it in warm water. Debating on whether to glue the some part together before spraying Surface Primer L Gray, or, spray on the spruce first.
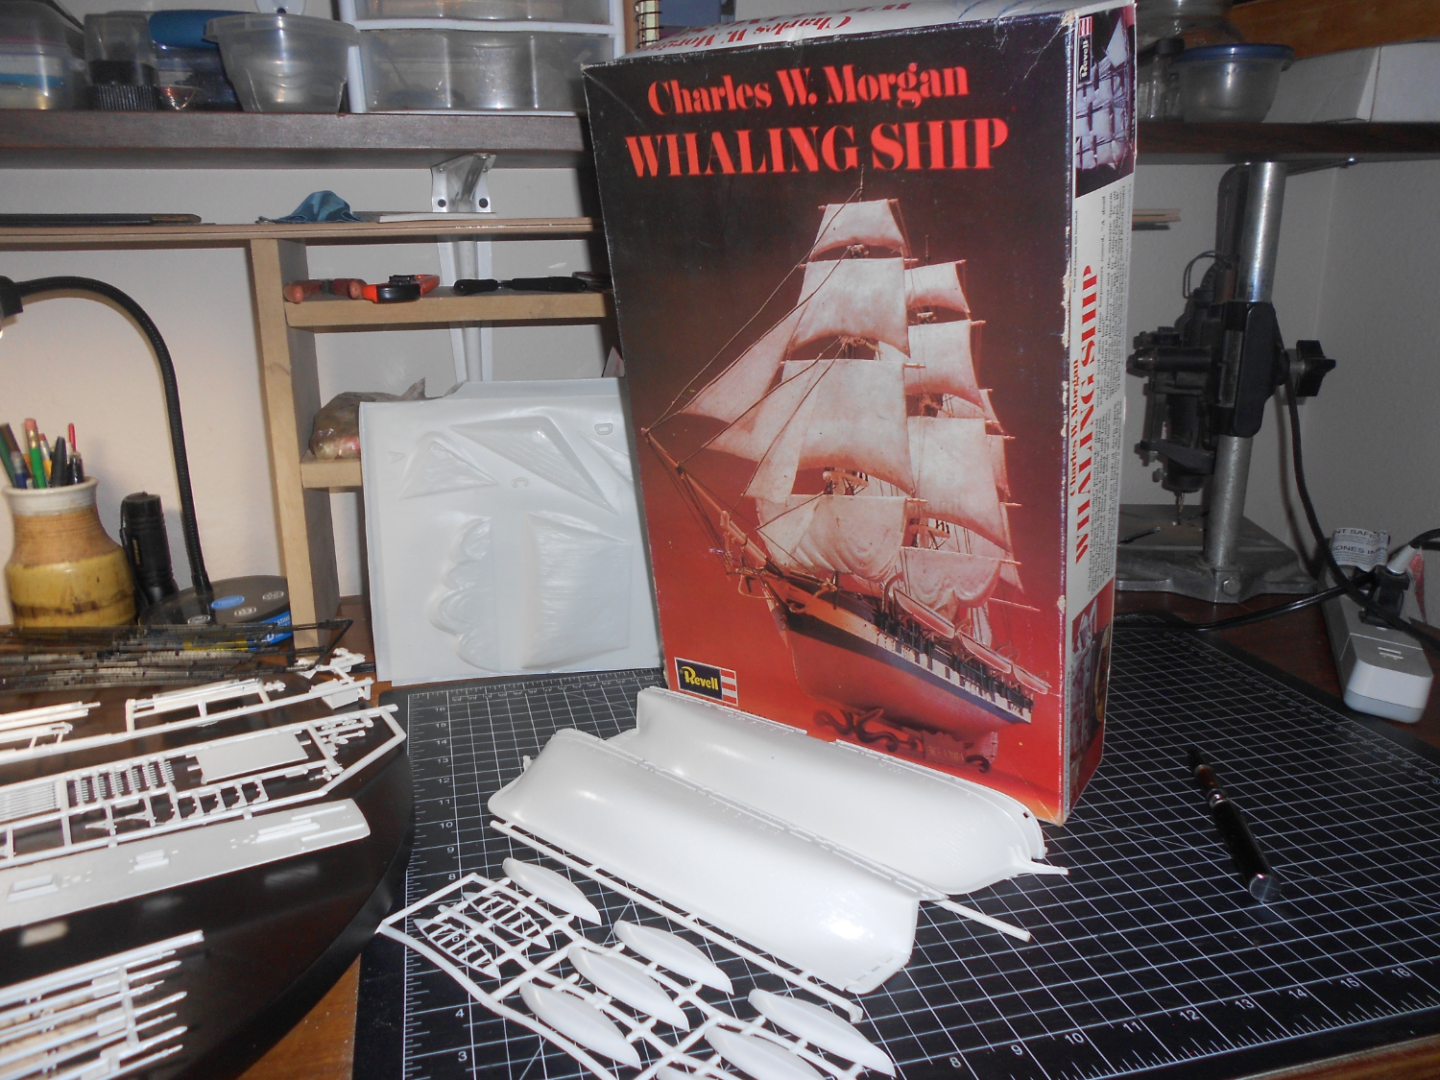

- 8 replies
-
- 4
-
-
- Charles W Morgan
- Revell
- (and 1 more)
-
 Some time ago I received the Le Superbe kit in 1:150 scale from Heller. Since shipbuilding modeling has always intrigued me a lot, I decided to take a shot and assemble this model as best I could. While I have some experience with plastic models, I've never built a sailing ship, so I don't plan on doing a lot of modifications. This will be a very long report, assuming I have enough persistence to complete the build. As someone who lives a busy life and always in a hurry, I try to build slowly and carefully, getting as much enjoyment as possible from the process itself. Since I only build when the family is already asleep, I have a lot of quiet 🙂 However, this also causes a difficulty: I can't afford to tinker with the model as often as I would like. The man who writes the instructions for Heller should probably change profession, although just deciphering the diagrams is fun in itself. So far I'm terrified of the rigging stage, but I'm trying to solve one problem at a time. Wish me luck and persistence. I also thank you in advance for all your advice and tips. Regards, Piotr
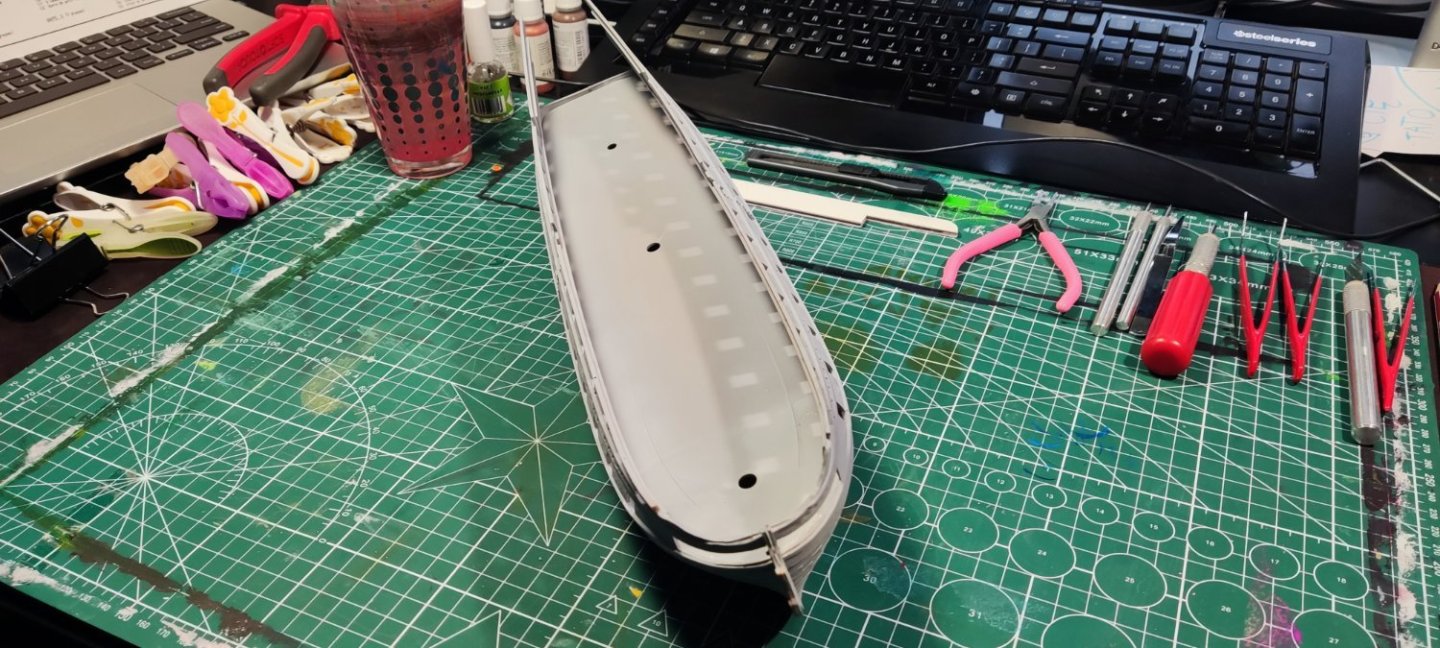


- 26 replies
-
- 2
-
-
- Le Superbe
- Heller
- (and 1 more)
-
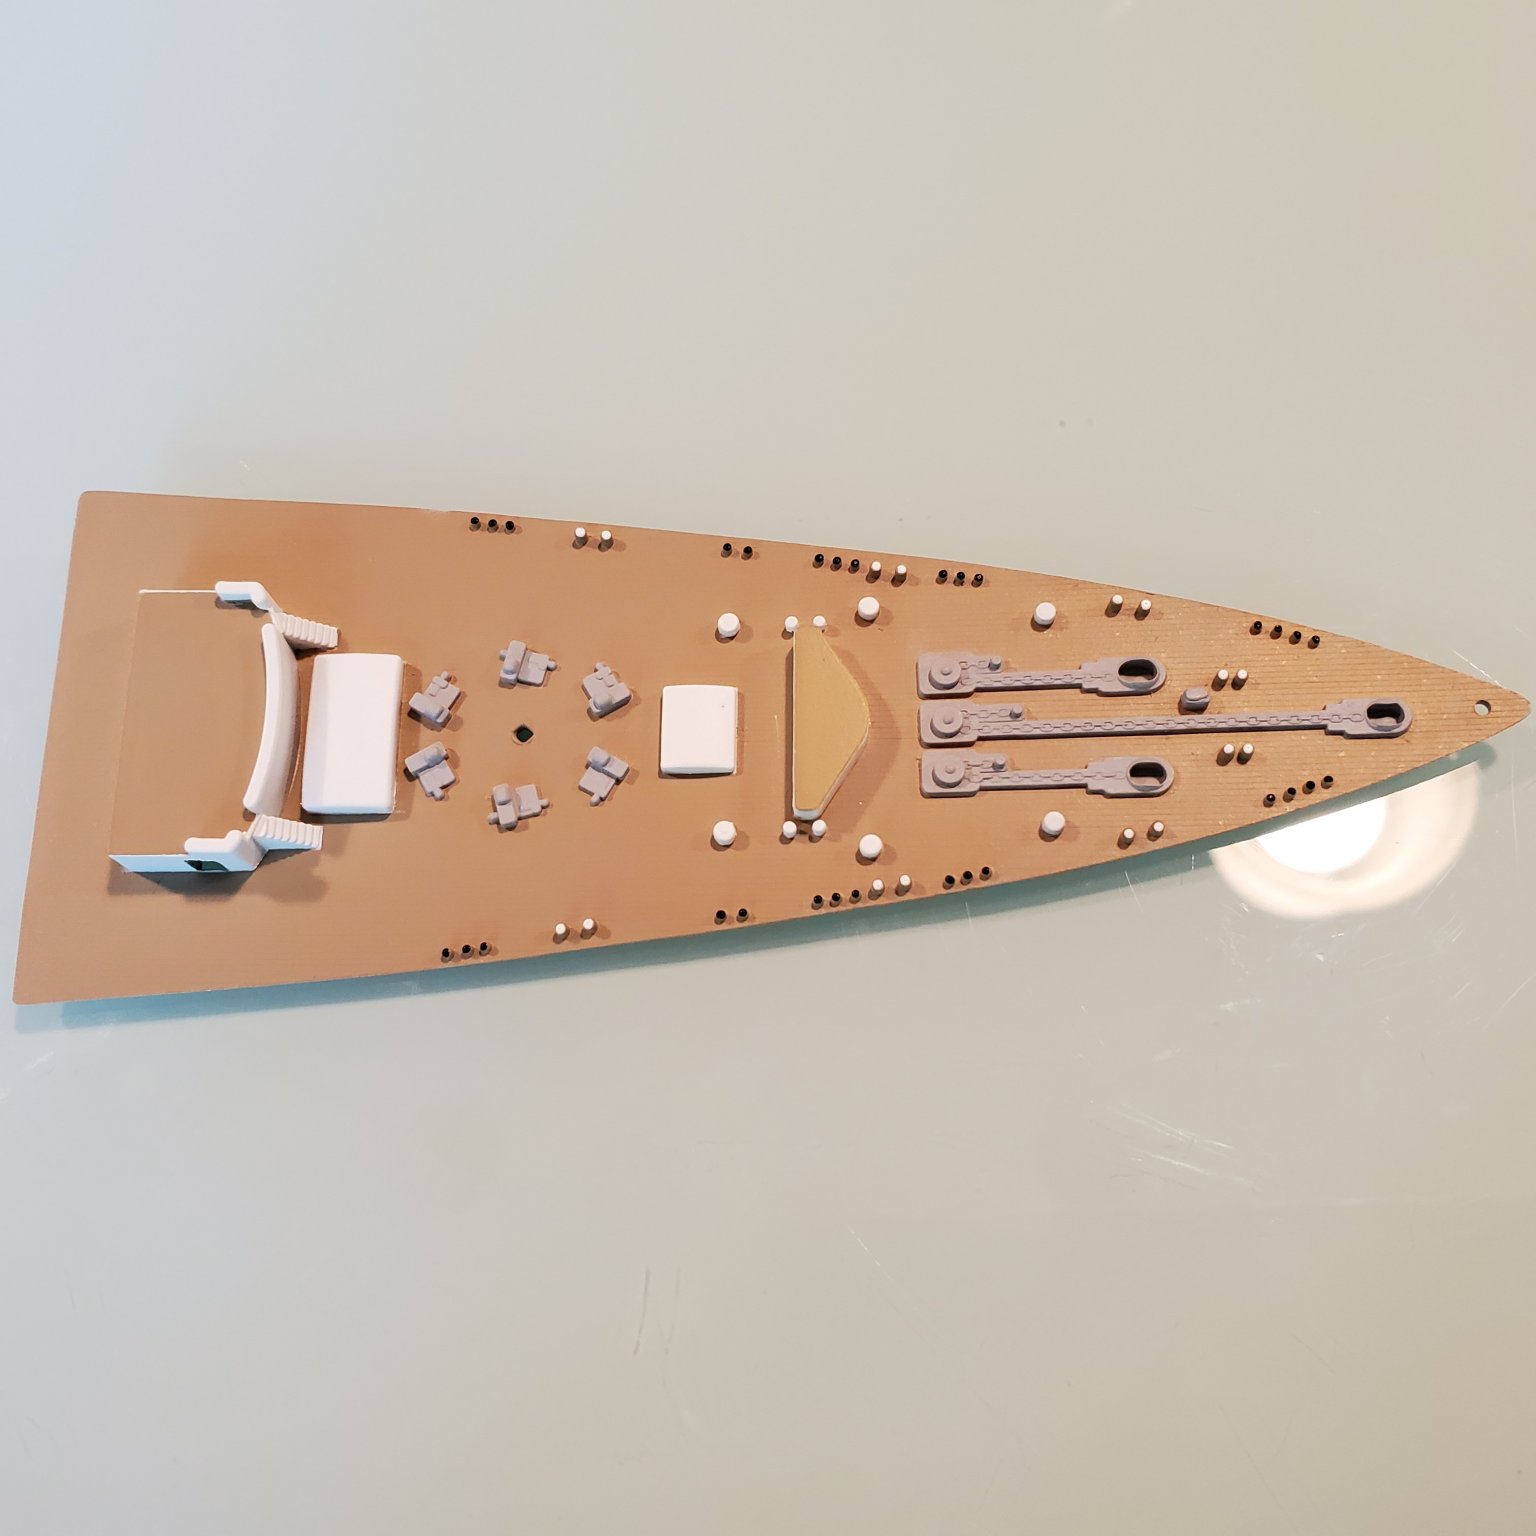
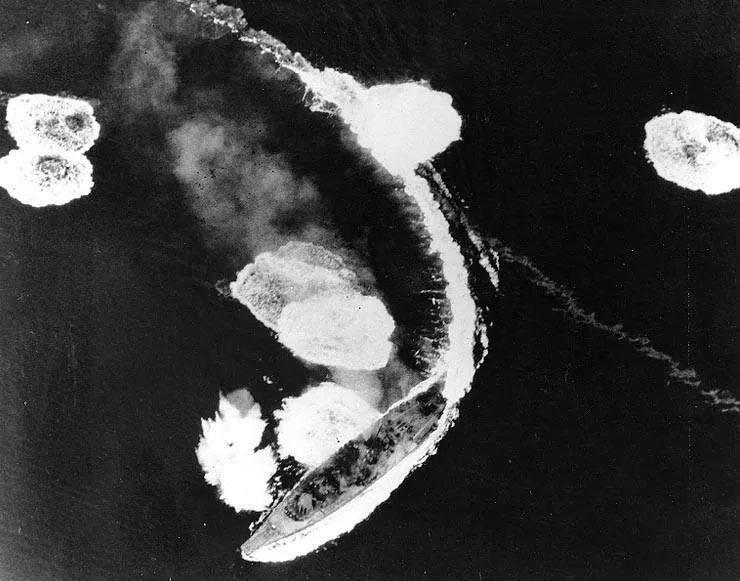
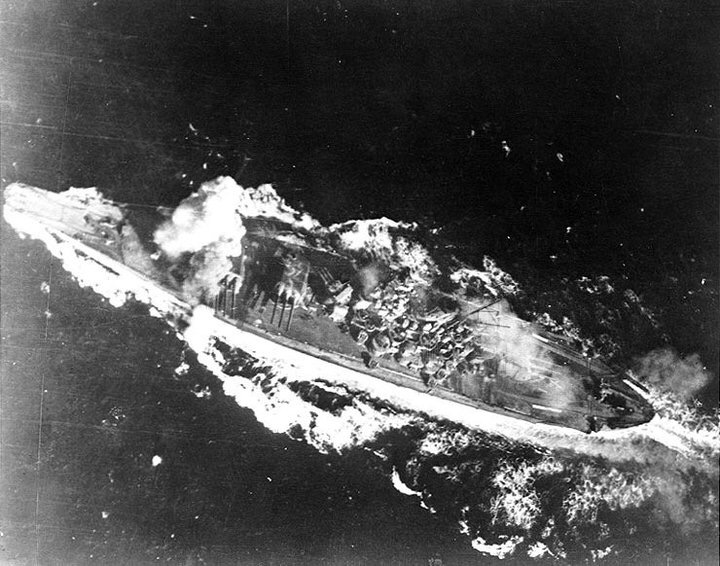
 Next in my set of major WW II Combatants. Started with Bismarck, then Yamato. After Enterprise is done, it'll be capped off with USS Missouri. Dobbed in a pair of Subs for good measure. All in 1:200. Except for the Amati Bismarck they are all plastic because that's the only available kits in 1:200 scale. Looked through all the build logs for another 1:200 CV-6 and found none. I'll skip unboxing as I did find videos on Youtube from Midwest Model Shop and the first three are excellent "unboxing" descriptions. Episodes 4 and 5 start the building process, and will continue. I selected the KA-Models detail set with full wooden deck over the Pontos set because it seems to be more aligned with my skill set. According to the Midwest video, the Pontos set has a lot more PE, is finer scale brass, and does not have 3-D printed small caliber guns. After struggling with the PE from Fujimi for the Yamato (very fine brass and gobs of little bitty pieces), I am going with the KA set. I am not going to chase absolute accuracy or any particular date, but am just going to build it as it comes in the kit. I am also going to please myself by painting it a traditional peacetime gray and use the natural wood decks because I like the looks best. If I were a better modeler, I would chase those ideals, but I'm not. To start, I've attached the hanger deck to the hull at the outset. I've learned that getting a good hull to deck join with minimal need for filling gaps requires some brute strength pressing hull sides in and the deck pieces down. I'm doing that before I put anything else on the hull and deck. In looking over the instructions from Trumpeter, I could not see any reason why I shouldn't do this. If one does appear later, I'll be sure to mention it so that future builders can benefit from my experience--one of the main reasons for a build log, I think. Unlike the Amati Bismarck, which has a detailed step-by-step set of instructions, the Trumpeter instructions show which pieces fit where, but there is no "assembly" instructions, per se. Photos show how I have used masking tape to do an initial fabrication before gluing. More hand-pressing together is needed as the joints are glued. After a day of curing, I'll remove the tape and put solvent glue down the previously-covered joints. A note about solvent glue. I show "The Same Stuff" from Micro-Mark and a bottle of "Plastruct" Even though the Plastruct is about the only solvent that works on ABS plastic, it does a very good job on Styrene as well. It is actually a stronger solvent than the MM stuff and better for the hull/deck join in my opinion. It's too hot for small pieces, though.
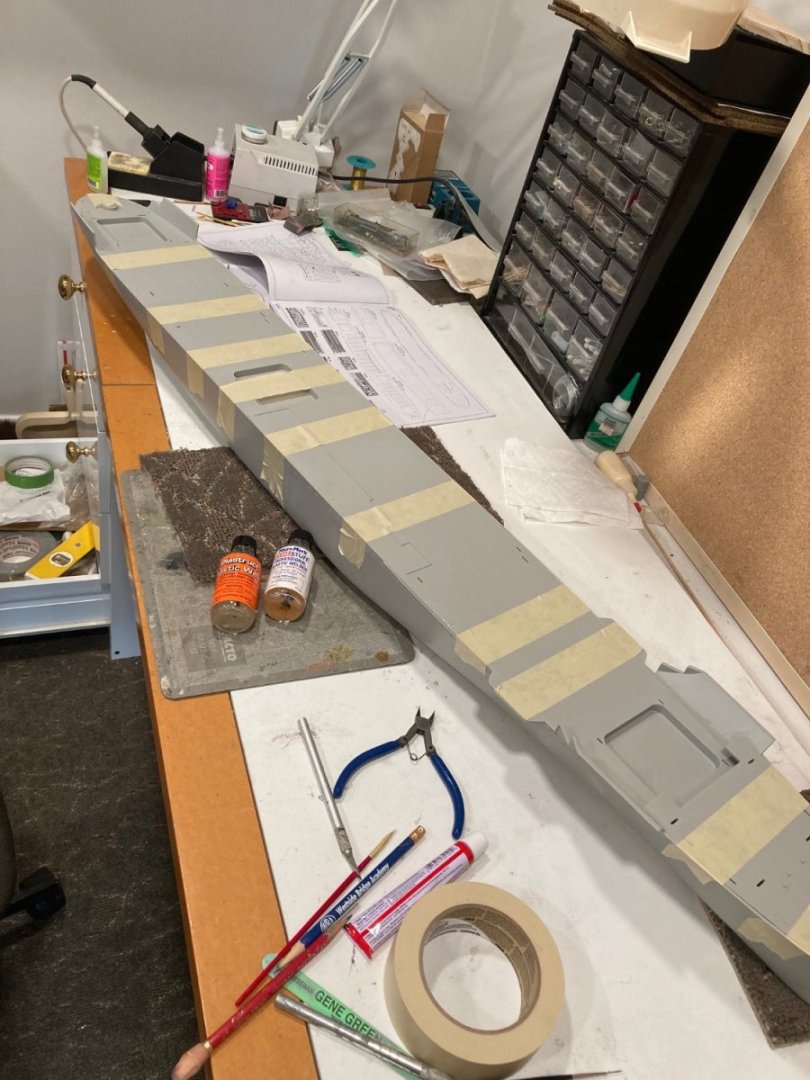
- 145 replies
-
- 11
-
-
- Enterprise
- Trumpeter
- (and 1 more)
-
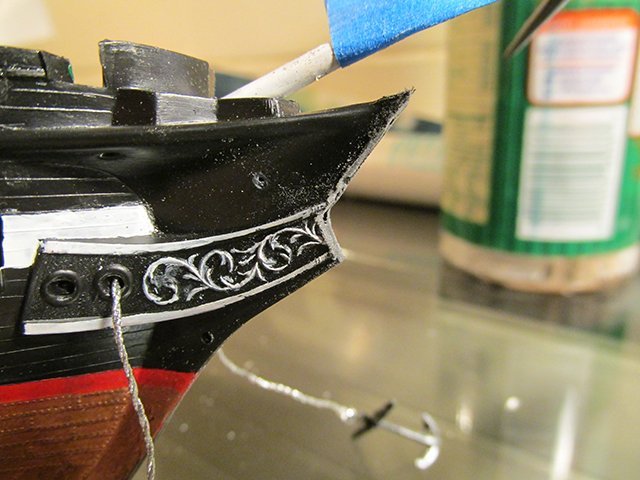
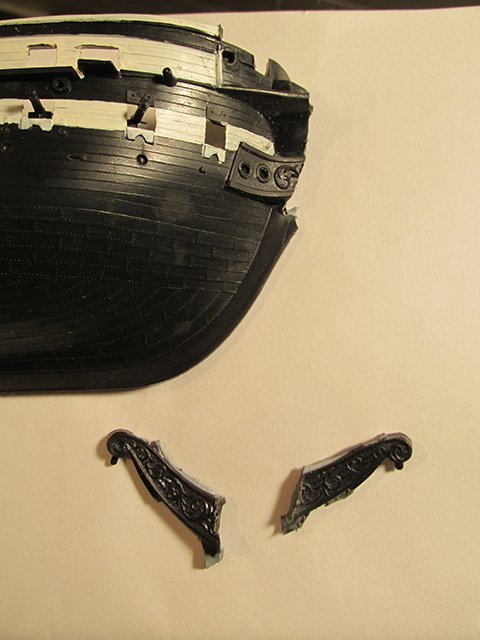
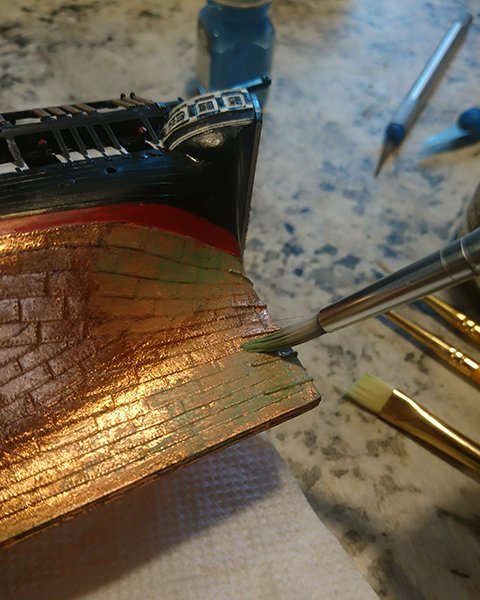
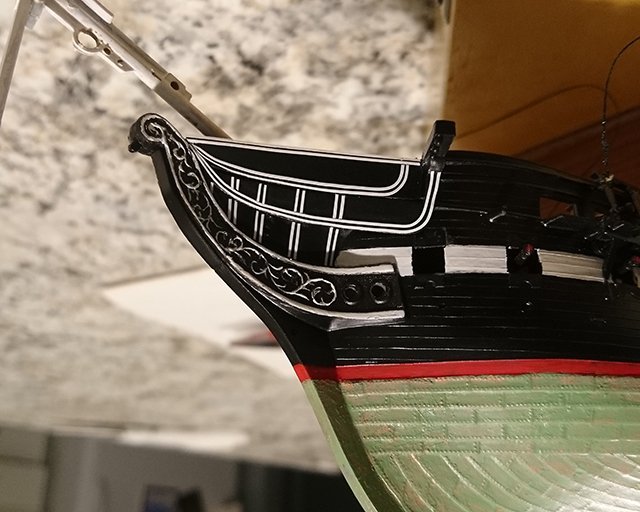
 Hello, everyone! I've been quietly reading these forums for some time and finally decided to chime in with my own build. Others' build logs have been a huge source of information and encouragement for me during the build process, so I hope this log can be of some benefit to others. I worked on this kit for a week or so about nine years ago, and only picked it up again this year. It's my first model kit I've built as an adult and first ship of any kind (Although as a teenager, I painted the hull of the larger 1:96 kit from Revell, then immediately gave up). I also started with zero knowledge of ships, so this whole thing is a learning experience. Much of the work I've done recently has aimed to undo or improve mistakes I made when I first started. One of my biggest mistakes was choosing to modify anything at all, as this slowed the process and made me feel daunted at various points. As a beginner, I regret spending so much time tweaking this kit instead of progressing through multiple kits over the years. Still, I'll mostly focus on modifications here because that's what I've most closely documented. These first photos are from 2015, so some of this is more retrospective. My earliest record is of hastily assembling the hull and deck and painting various details. I tried replicating the paint of the real ship, which lead me to notice differences in the bow and other details. I couldn't figure out why the model had a figurehead, which lead me to research that interesting history. At this point, I should mention that I had two of these kits to work with. Both were purchased at Goodwill totaling less than $5, so I recklessly decided to sacrifice one in an effort to make the bow section more closely resemble the real ship in its current state. Even though I had already installed the boomkins and metallic anchor thread, I ripped everything apart and temporarily ruined both kits. I cut off part of the stem from the donor ship far enough down so that it would extend to roughly the correct height when reshaped and attached to the working model. A bit of jump, but here's the result. I tried filling the gaps with Tamiya putty but you can still see the seam where the two pieces meet and the decorative relief doesn't match up. The other white details were made using thin strips of masking tape for curves and covered with acrylic sealant. The whole endeavor still misses the mark for accuracy, but it makes the bow more recognizable in profile, which I count as a success. At some point, I also lined the hull with real copper leaf but didn't like the look of it and painted over it with green. I think this was because most of my reference photos showed the ship in dry dock.
- 2 replies
-
- 1
-
-
- revell
- constitution
- (and 1 more)
-
 Not my first kit, but first in 40 years! I started building this model that long ago, but 2 kids, and life interfered. I always told myself, "Tomorrow, tomorrow". Well. tomorrow has arrived. Now, if I can live long enough, I WILL finish her. These pictures are a start. Funny, I was having trouble taking good pics with my old camera(a Sony dslr), but picked up an older Nikon Coolpix, and man, what a difference! This is one beautiful camera. Only one problem. It shows warts and all. Looking at the pictures, I see every little flaw. Lots of paint touch-ups to do. I know I am not up to the standards of some (read any) of you, but I will give it my best!


- 1 reply
-
- 6
-
-
- Soleil Royal
- Heller
- (and 1 more)
-
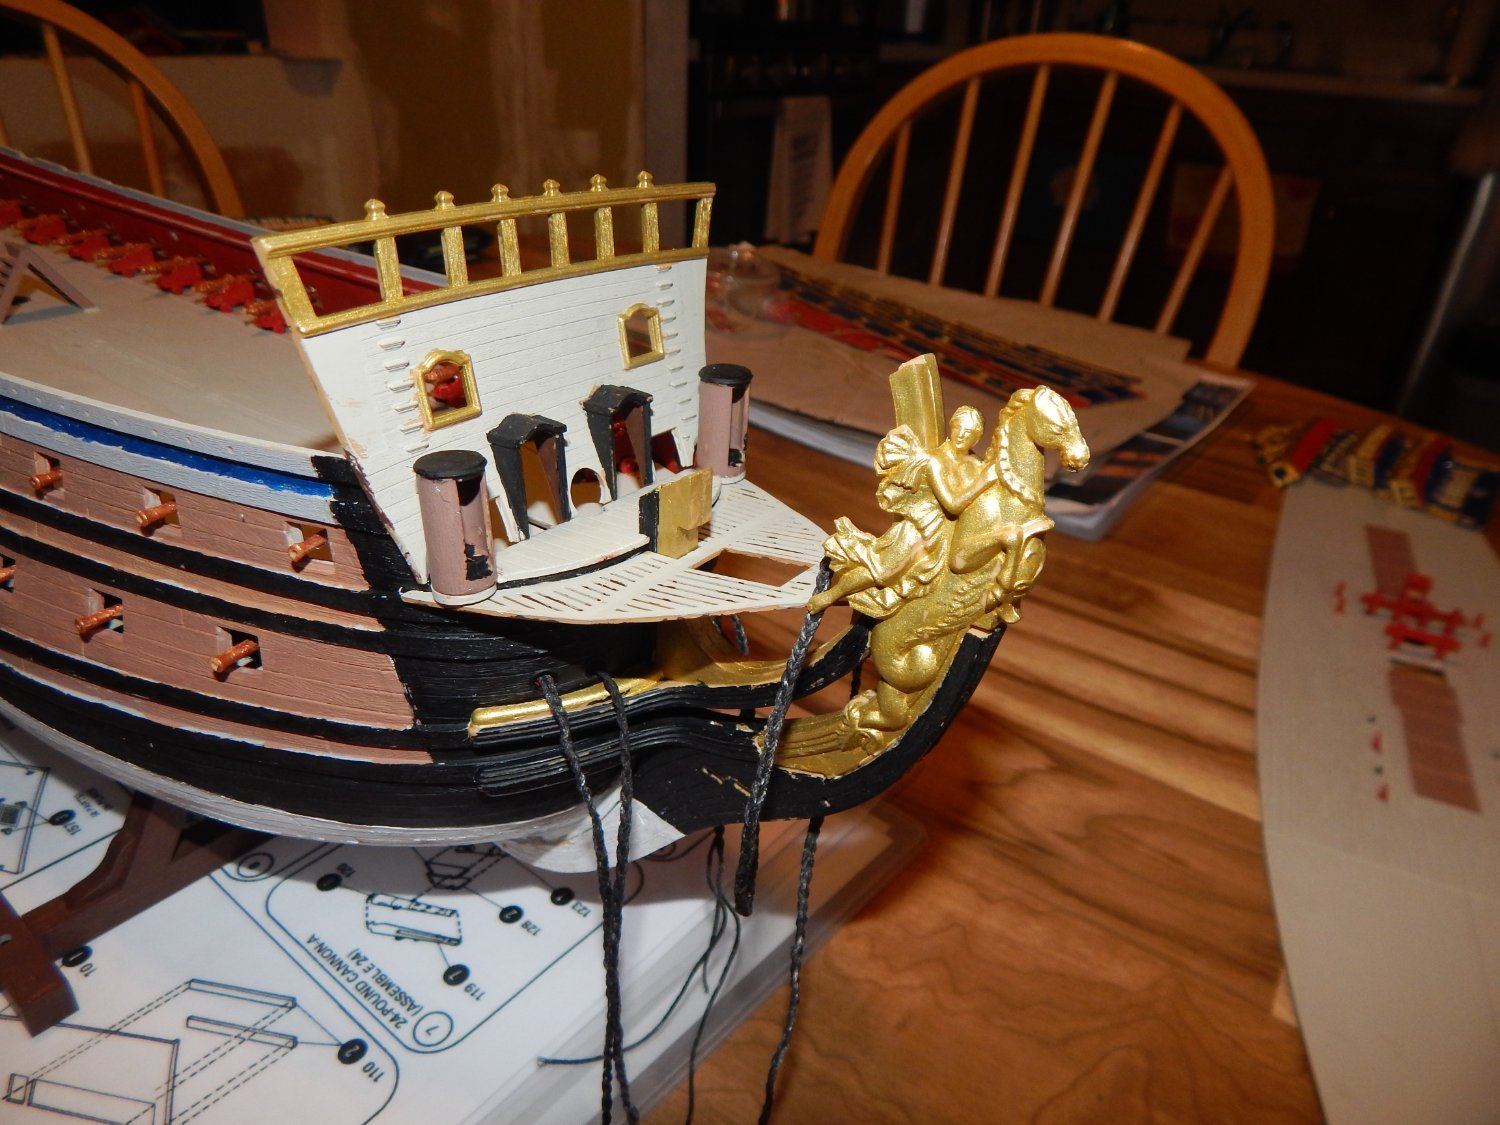
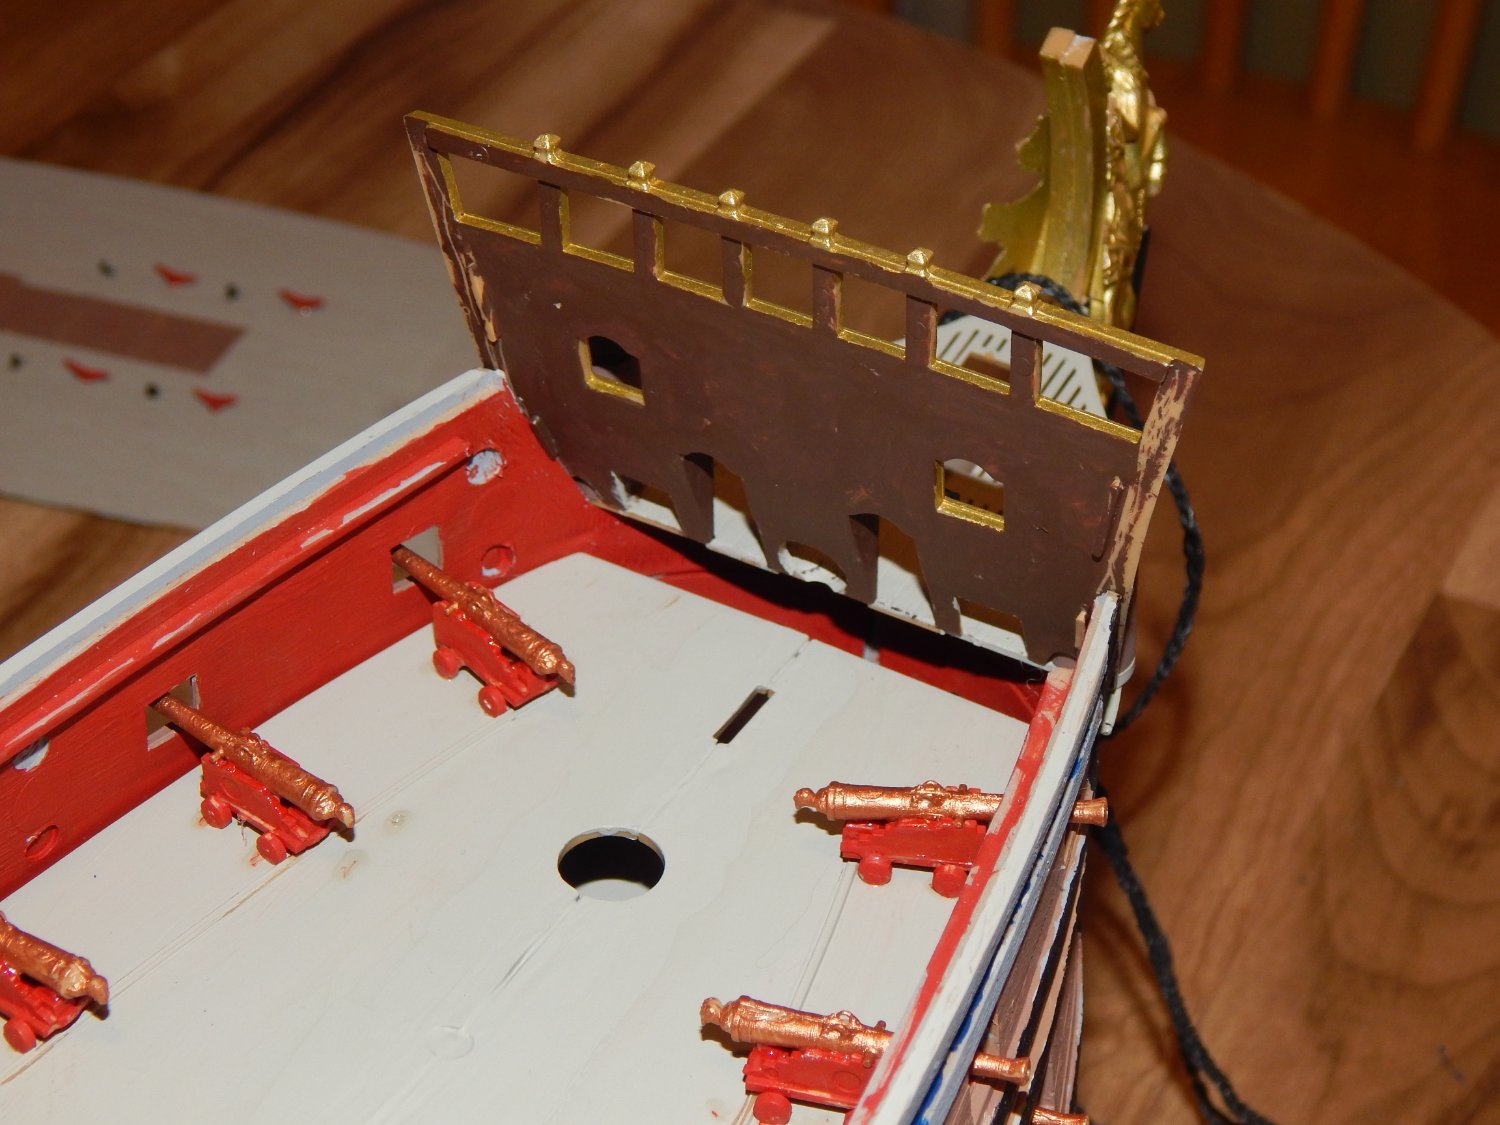
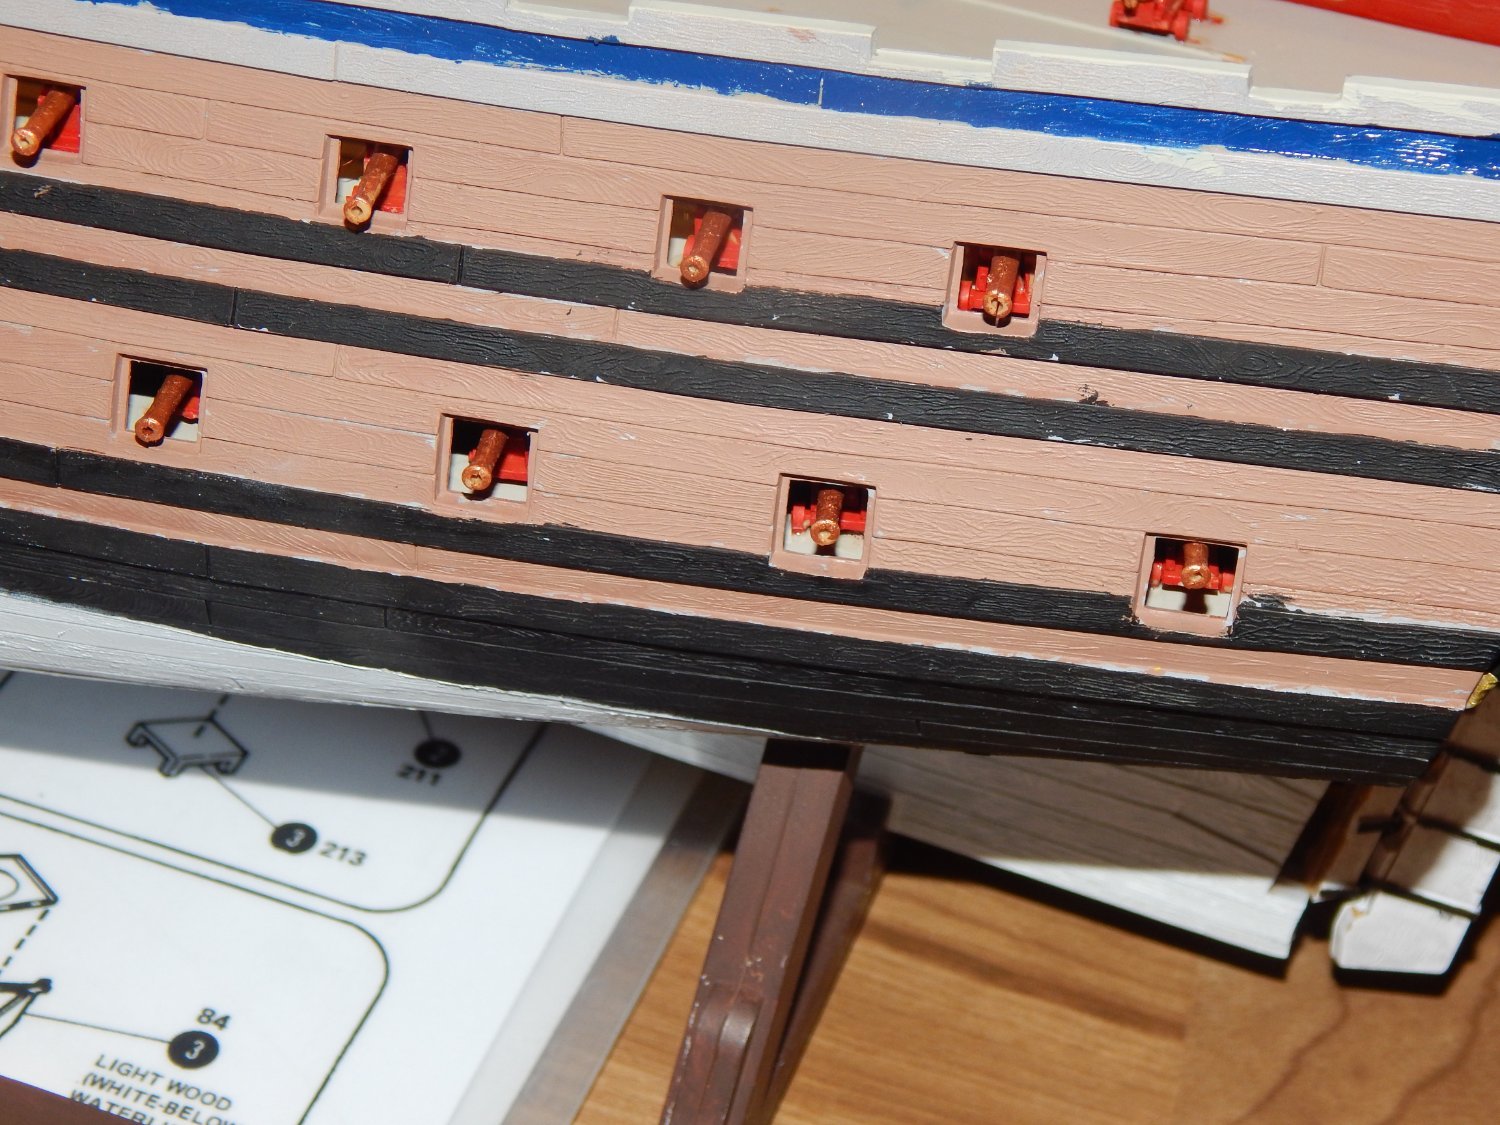
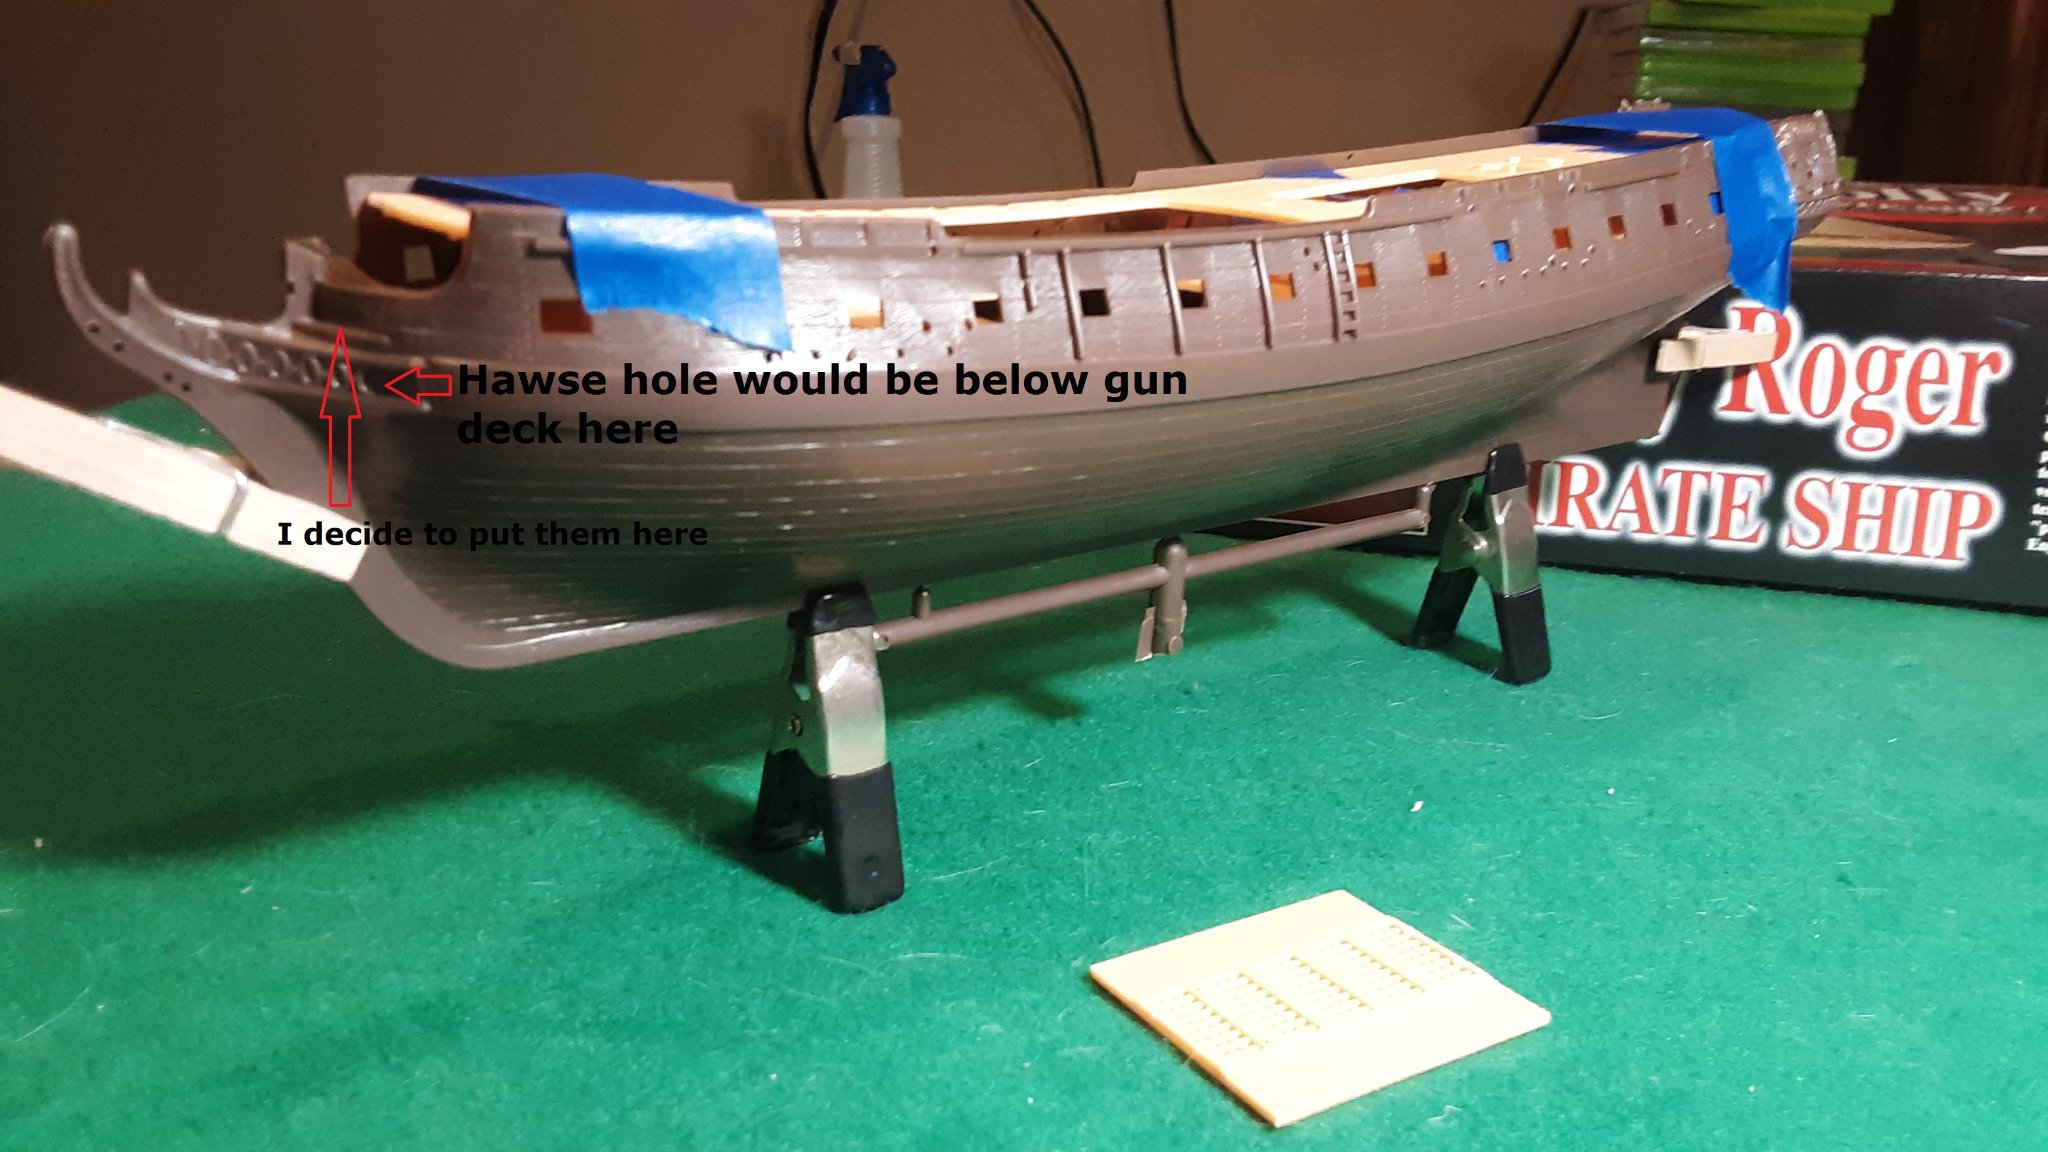
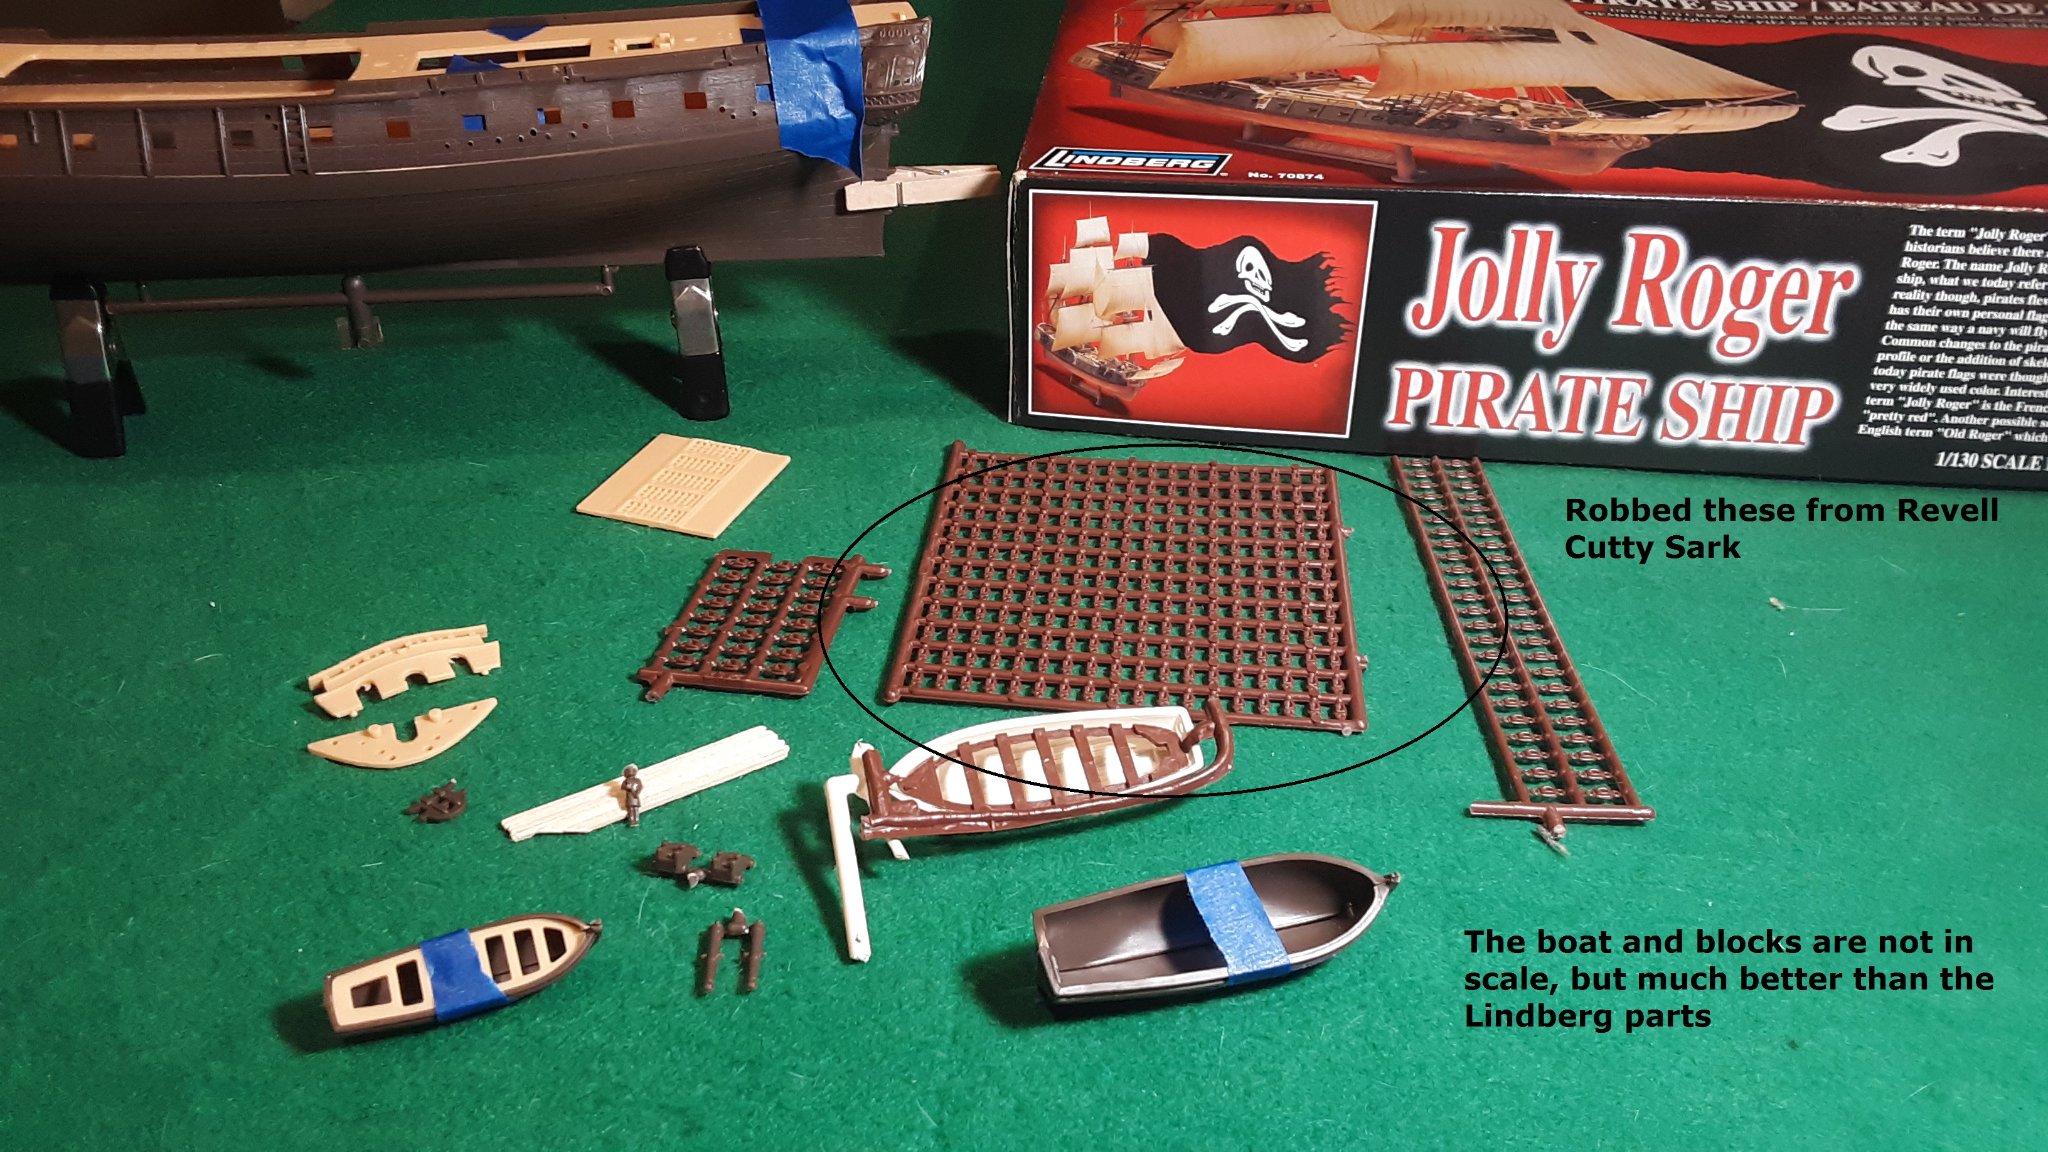
 Well I am going to try 'Start a model and finish it'. I got the Lindberg 'Jolly Roger' at Hobby Lobby with a coupon for $17. I will make some changes to the kit, add details to the gun deck, improve the masts and spars, make my own sails, and decide on which color scheme use. Improvements: add birth deck under ladders add hawse holes add gun deck capstans add officers quarters add galley stove Hope to make some progress soon Ziggy


-
 Hello everyone: This log will go back in time a bit, like a lot of my projects this one started roughly twenty years ago. During the early 2000's this tug, the Malaspina Straits, was listed for sale on a used vessel website. With the posting were a few photos of the tug out of the water along with a few drawings. At the time I was quite into 3D modelling and thought that this would be a fun project to make a few renderings of. One thing led to another and the project never did get off of the ground and the files were tucked away. Fast forward to sometime around 2017 and it was suggested that we build a pond at the local museum; the model ship bug bit, at this same time I was realizing that HO scale model trains, while neat, just won't fit my current living arrangements. The ship bug really bit when the missus and I purchased a property with a small pond, and a pond needs a boat so the search was on for a prototype. While organizing some files I stumbled upon the old drawings and photos saved some twenty years prior. A little looking online showed that she was again for sale and a few queries put me onto the naval architect. After making a call to see about getting a set of drawings the architect noted that this was a common request and asked that I mail a cheque to them, but make it out to another independent society that is rebuilding a steam tug, the SS Master. The Master is British Columbia's last surviving wooden hulled steam tug, once I learned that the "fee" for the drawings was going to help with this restoration I couldn't get the cheque book fast enough. Check out the SS Master here: SS Master The Malaspina Straits was launched in 1964 and was one of a group of three ships, the Rasario Straits and the third escapes me at the moment, all built for Straits Towing Ltd. of Vancouver, BC. Considered a hot rod of a tug it was primarily designed for moving chip barges up and down the West Coast of British Columbia. The tug moved around to various owners over the years and was refit a few times, the model that I am building will be per the original drawings. I've never seen the tug myself so can't post any photos of it but here is a link to a page with a bit more detail: Malaspina Straits - Nauticapedia.ca As far as model ships go, I've never built one, at least from scratch however I have turned heaps of styrene into other buildings, trucks and various model railway related things. As I was more familiar with modelling in styrene and as this model will be used in the water styrene felt like a better fit than wood, it may be, it may not be, time will tell. Just after the ugliness of Covid descended upon the world the model got under way, a few 4' by 8' sheets of styrene were purchased from a local supplier and bits started to be cut out...
- 7 replies
-
- 4
-
-
- Malaspina Straits
- plastic
- (and 1 more)
-
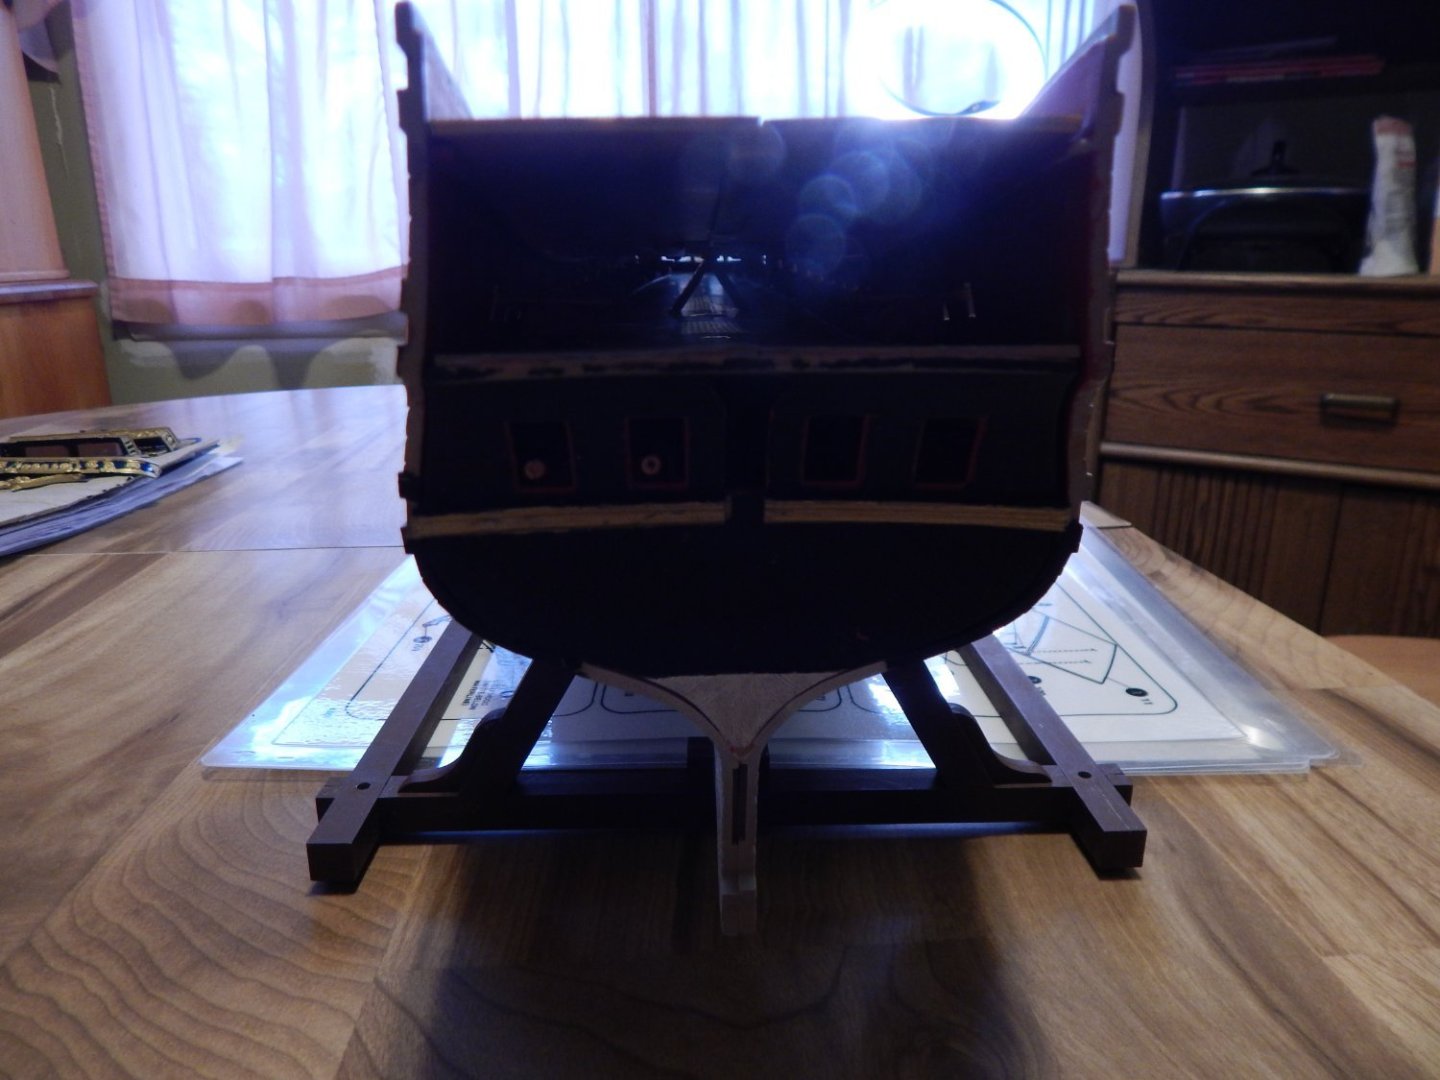
 I have started on the hull of course and the first thing was to drill out the portals along the sides of the hull.The next step was to examine for ladders up and down the hull these were necessary for duties and maintenance to the hull.I found while doing the IJN Heavy Cruiser Chikuma that these ladder's add alot of detail to the hull giving it that 3D look.The problem is I have no 1/200 scale ladders but my 1/350 matched to the width that Trump put on the sides I am figuring they equal to about 18" width good enough for a man to work it took me 1 hr for the first set the longest set the rest with experience will be replicated quicker.The ones that Trumpter had embossed on the sides of the hull were so faint one would never of noticed them.I feel I am getting a bit long winded here all about ladders an portals but the IJN loved these ladders they could have 5/8 sets on the capital ships each side the Scharnhorst has three in the stern both sides which most ships have something there.This build I figure may take a year or better depending on time and the attention span.I leave now with a simple pic of the ship when the hull gets it's primer coat I will post a pick..
- 33 replies
-
- 8
-
-
- Scharnhorst
- Trumpeter
- (and 1 more)
-
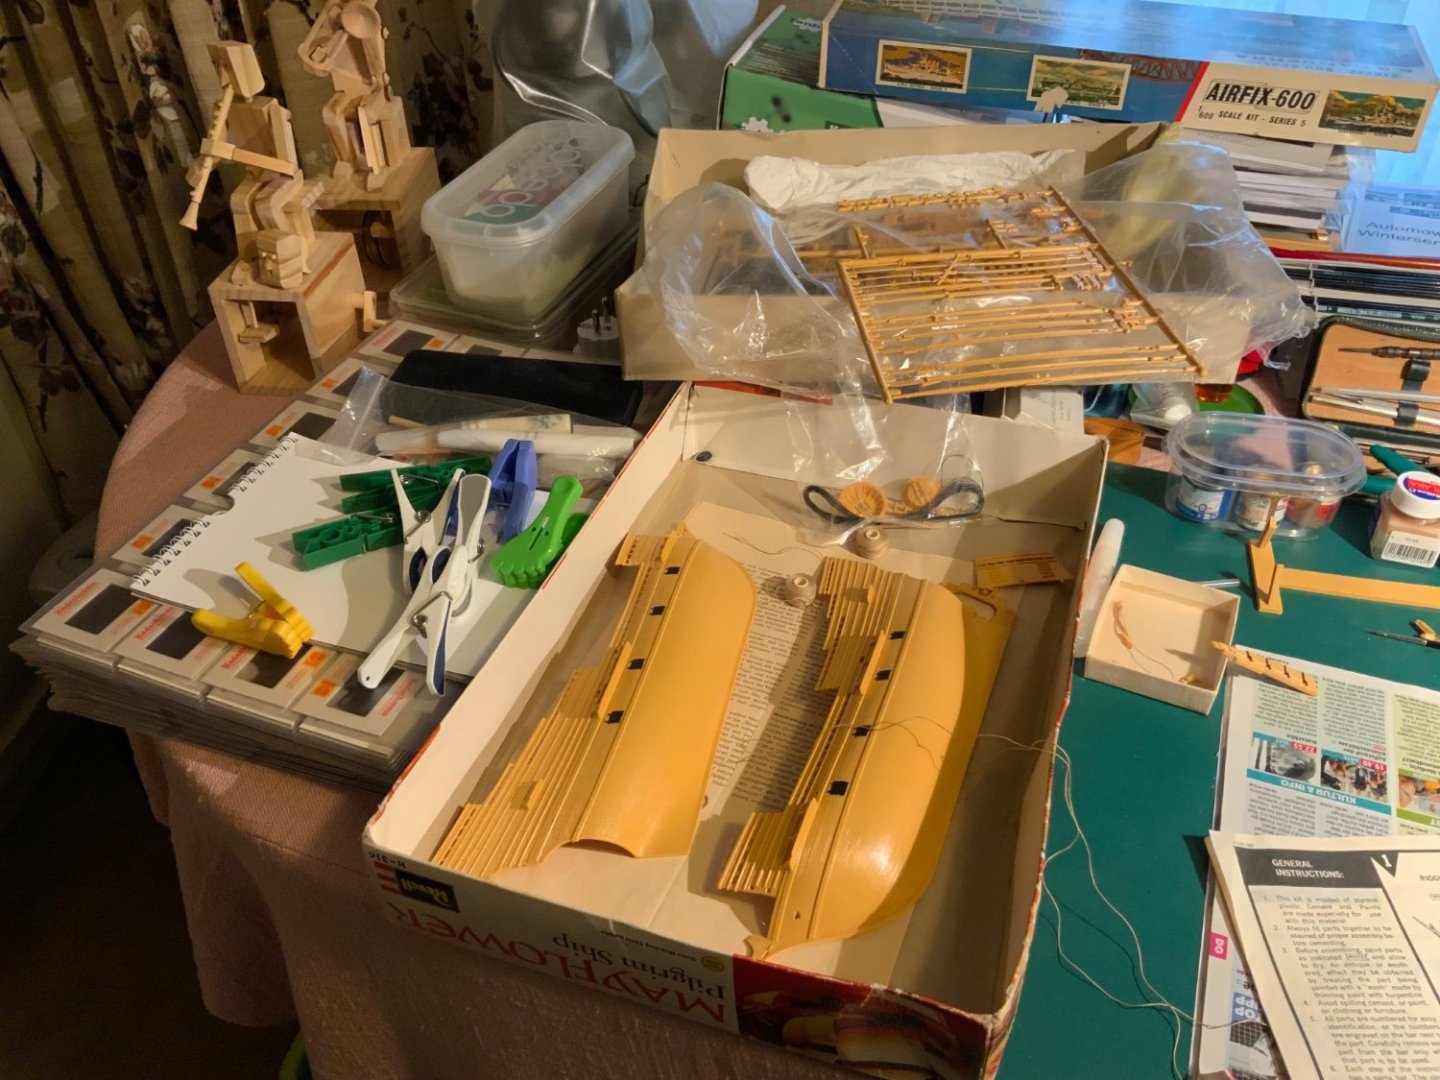
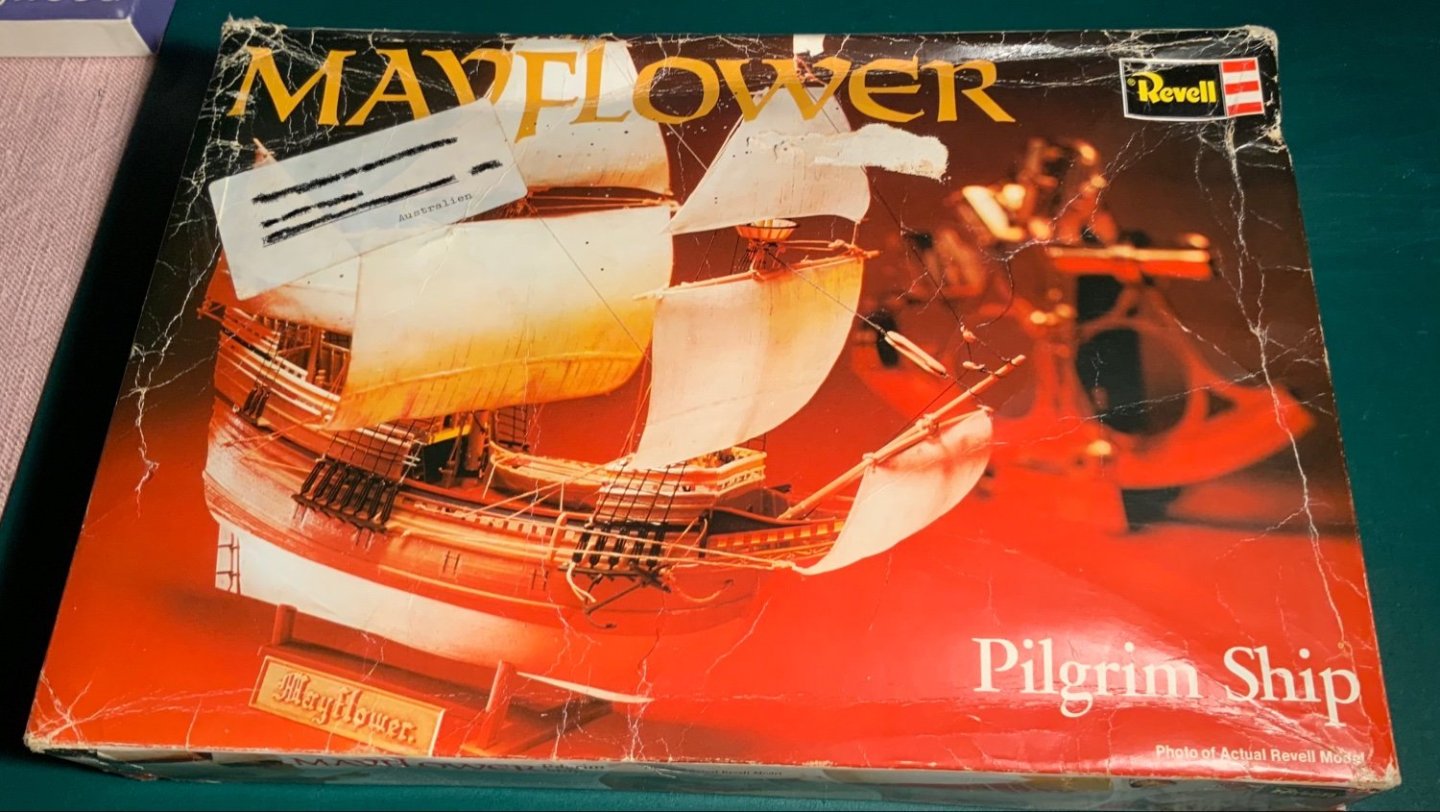
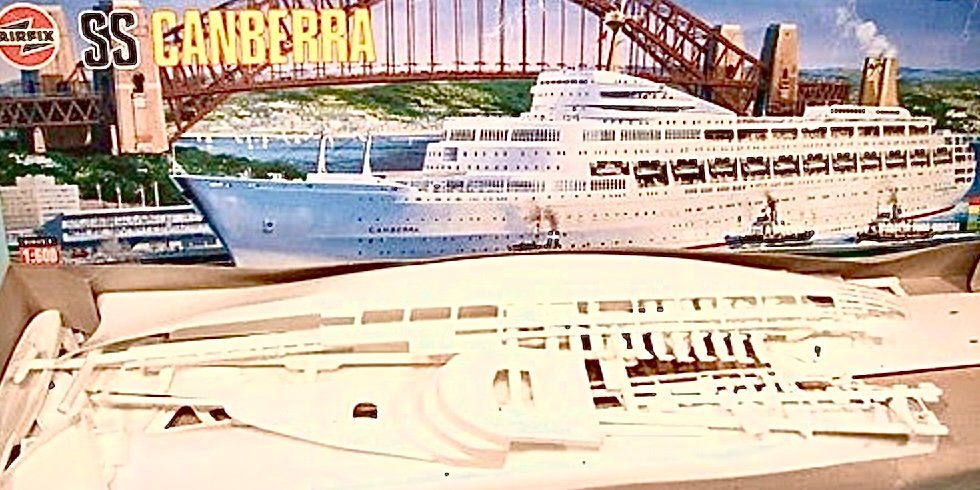
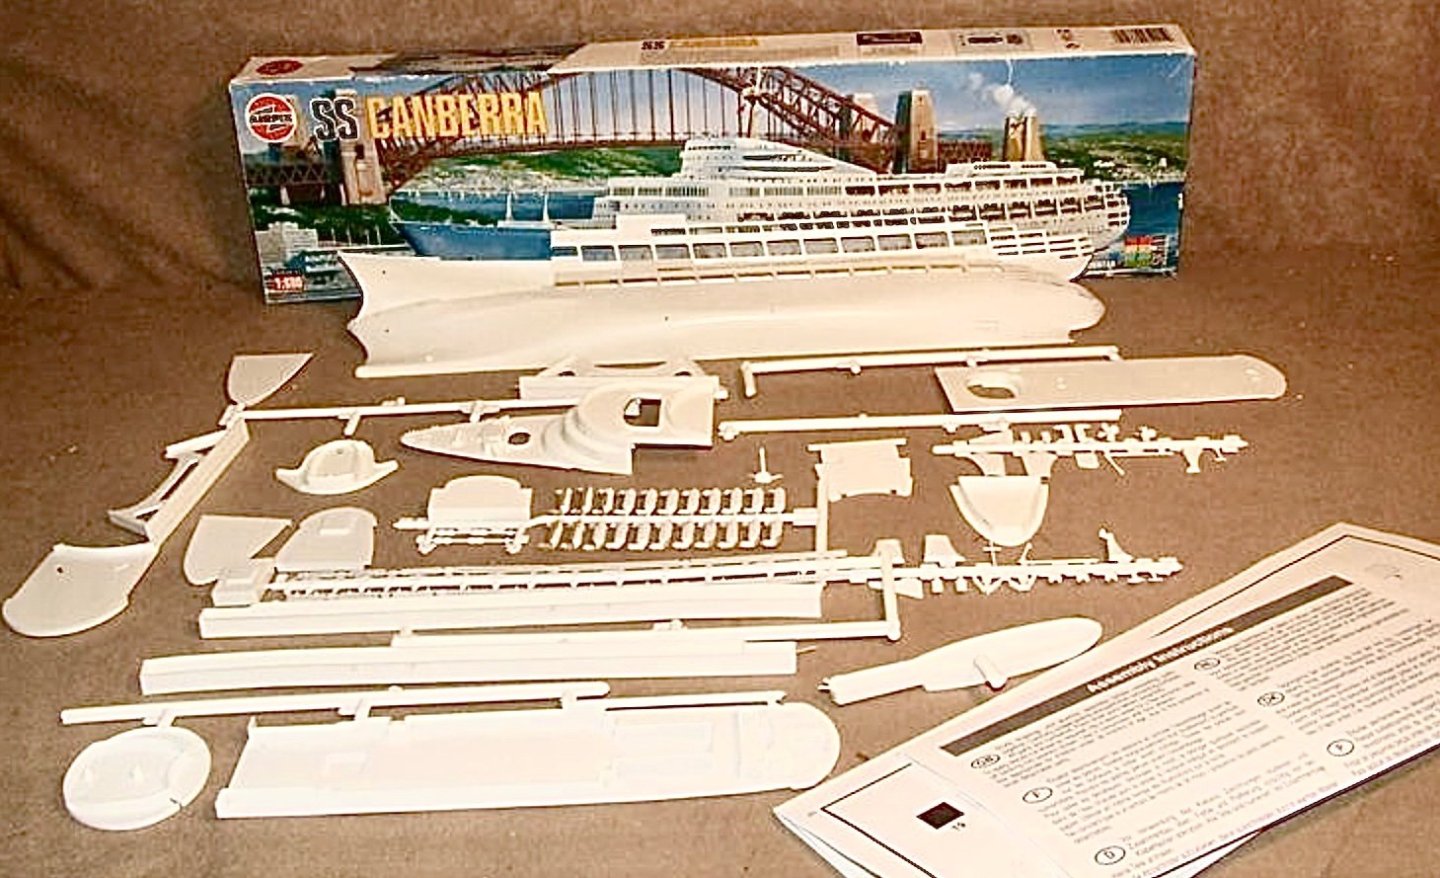
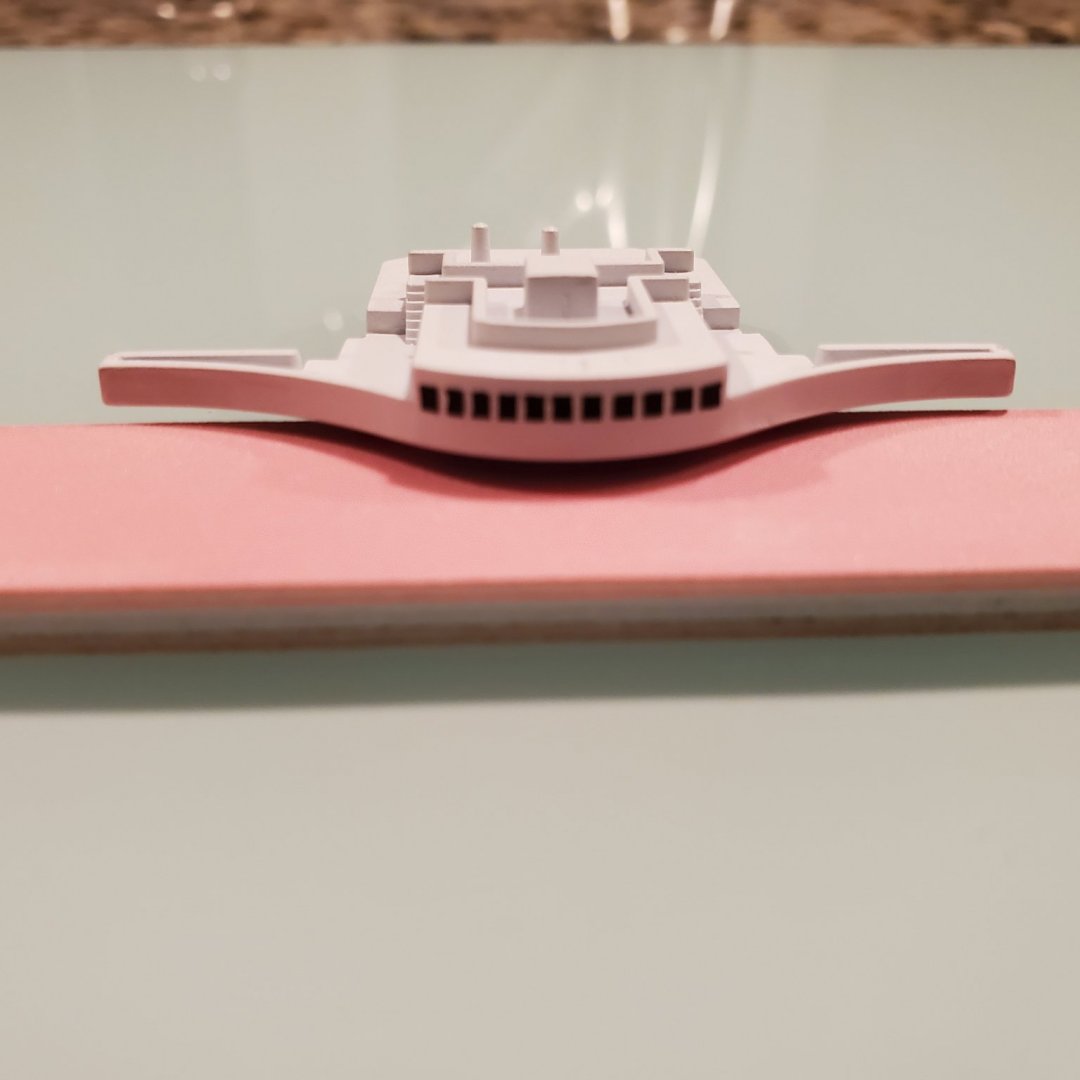
 Here I go again! Having finished the ‘Mayflower’ with some difficulty I needed some more occupational therapy! In January of 1972 we found ourselves on the SS Canberra. My family and I were sailing from Southampton to Sydney. Our eldest son was eight years old at the time and to remind him of the boat we bought an Airfix model kit of the Canberra which we thought that he might build at a later date. Time went by and the Canberra kit joined the ‘Mayflower’ and went into ‘storage’ with the ‘Mayflower’ for the next 50 years. They travelled from Brisbane to Wellington to Germany with us and now, with my grown up son’s permission, I’m starting to try to build the SS Canberra! This build log will describe my problems and solutions (if any) with the build. As others have already commented, the kit was not very well made so features in the polystyrene are not often clear and pieces do not seem to fit too well sometimes. This time the first step that I took was, after washing the parts, to spray everything with a white undercoat! I soon found that the major difficulties with the build were going to be with the painting of the individual parts and applying the transfers (decals). As I found with the ‘Mayflower’ my hands were not too steady and I did have some problems masking and painting some small parts. The windows were a nightmare (see later).
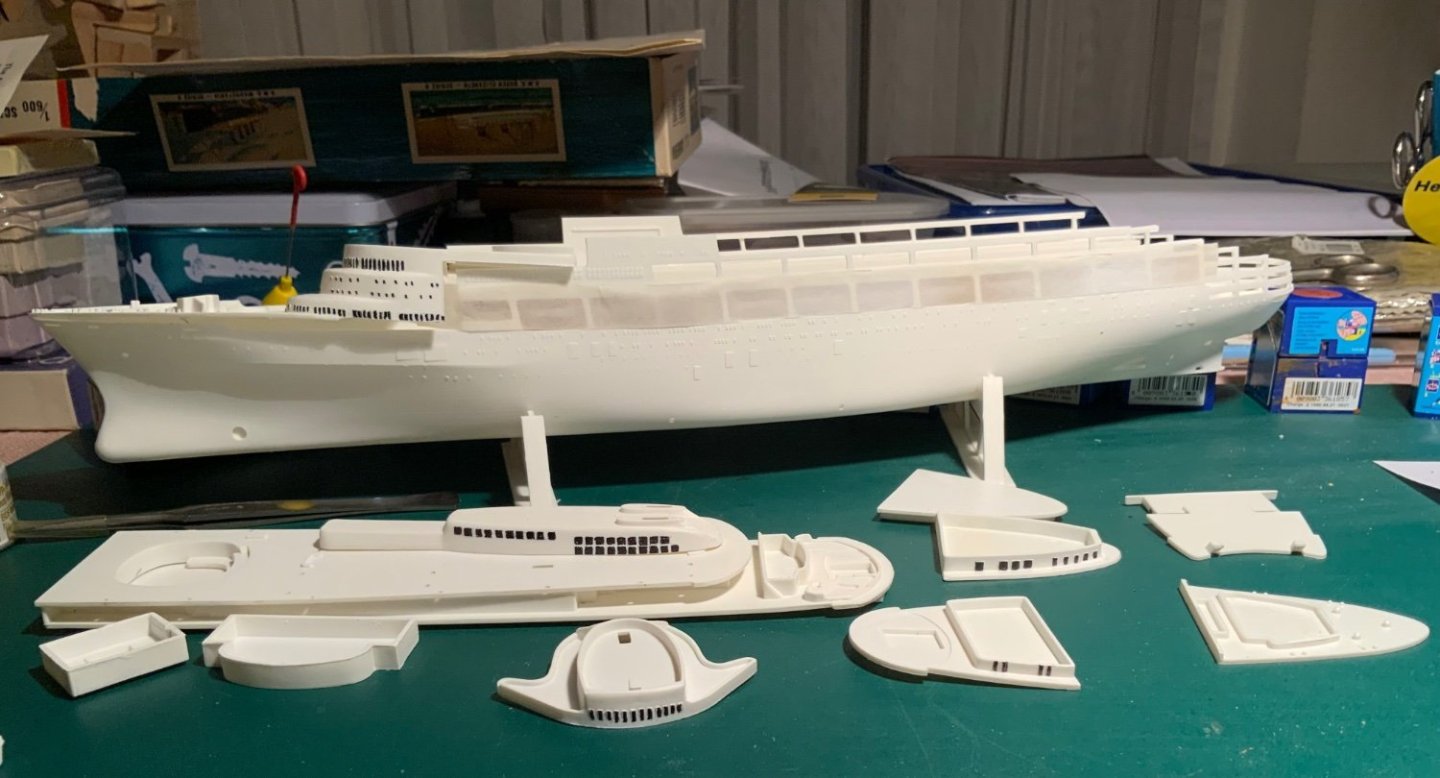
-
 Hi All! Been awhile since I've shared any modeling on this forum. Figured I'd change that with the new tool kit from I Love Kit (Trumpeter). It's the USS Curtis Wilbur in 1/200 scale. It's an Arleigh Burke class guided missile destroyer. The kit is based apparently on the destroyer during the mid to late nineties. There is no aftermarket available (that I could find) for the kit yet, so I most likely will be modeling her as I Love Kit (Trumpeter) intended. This is a placeholder until I can get some shots of the kit sprues once I unbox it. At first glance though, this looks like a very solid attempt by I Love Kit (Trumpeter). I hope you like what you see in upcoming posts in this topic! Patrick
- 52 replies
-
- 8
-
-
- Curtis Wilbur
- I Love Kit
- (and 1 more)
-
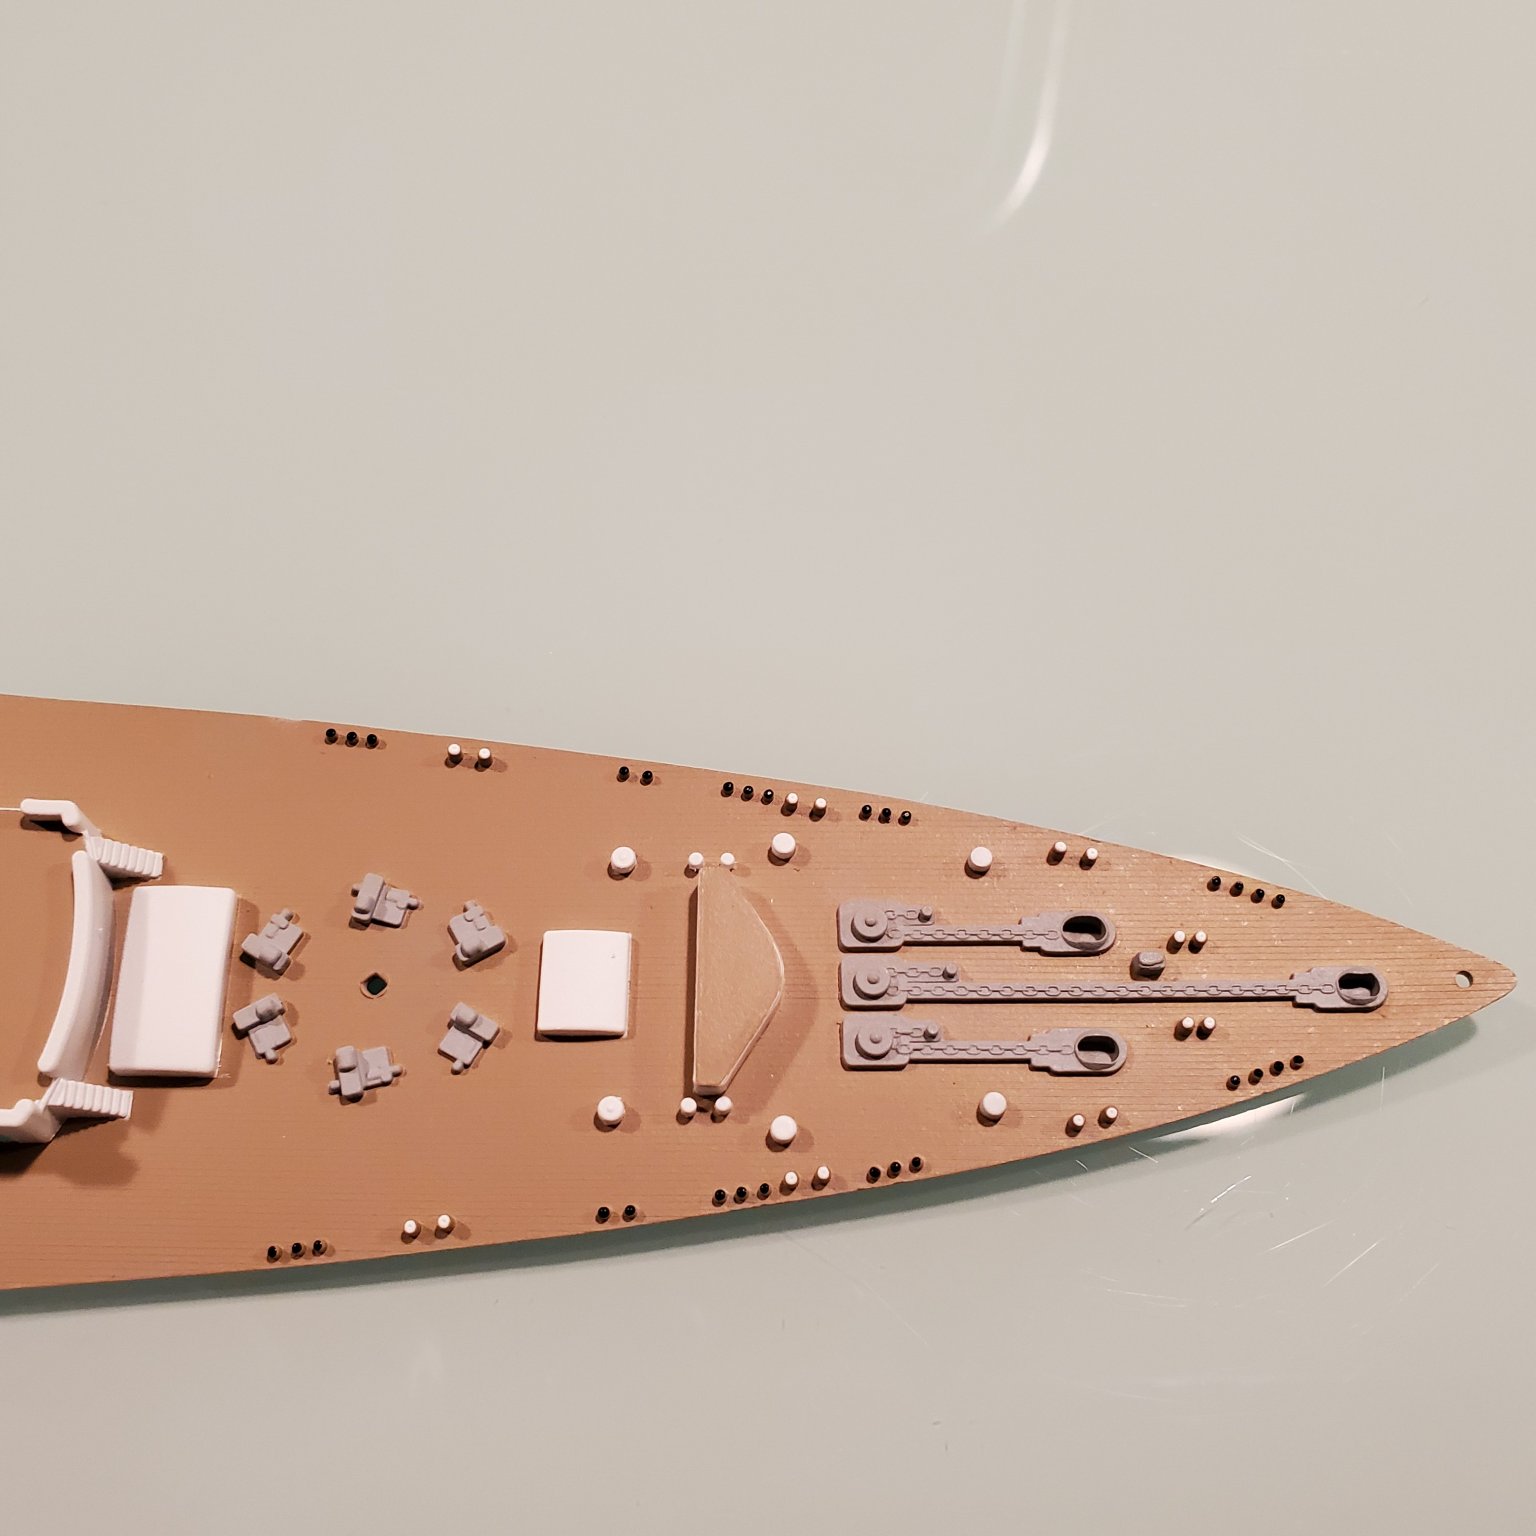
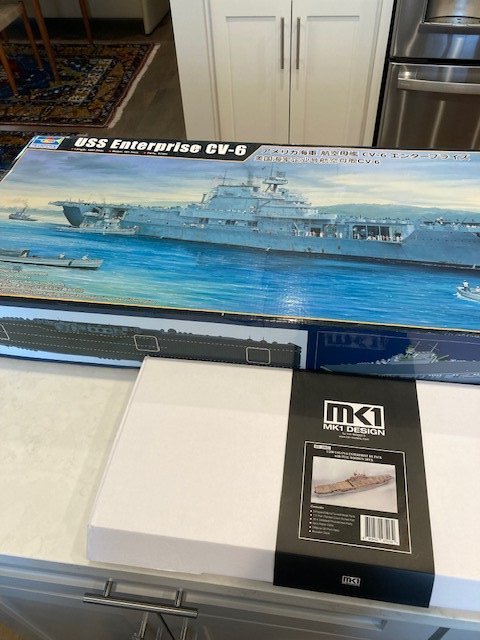
 Many years ago, a good friend in Maryland gave me this 1:350 Trumpeter USS Essex along with a ton of photo etch and a reference book. I intended to build the model long before now but life has its way of changing our plans. Well, now seems to be the time, so I will give this baby a start and see what I can do. I have added a Pontos detail set to augment the photo etch I already have and have the Anatomy of a Ship, The Aircraft Carrier Intrepid, on its way from Amazon. Here are some photos of what I'm starting with.
- 135 replies
-
- 16
-
-
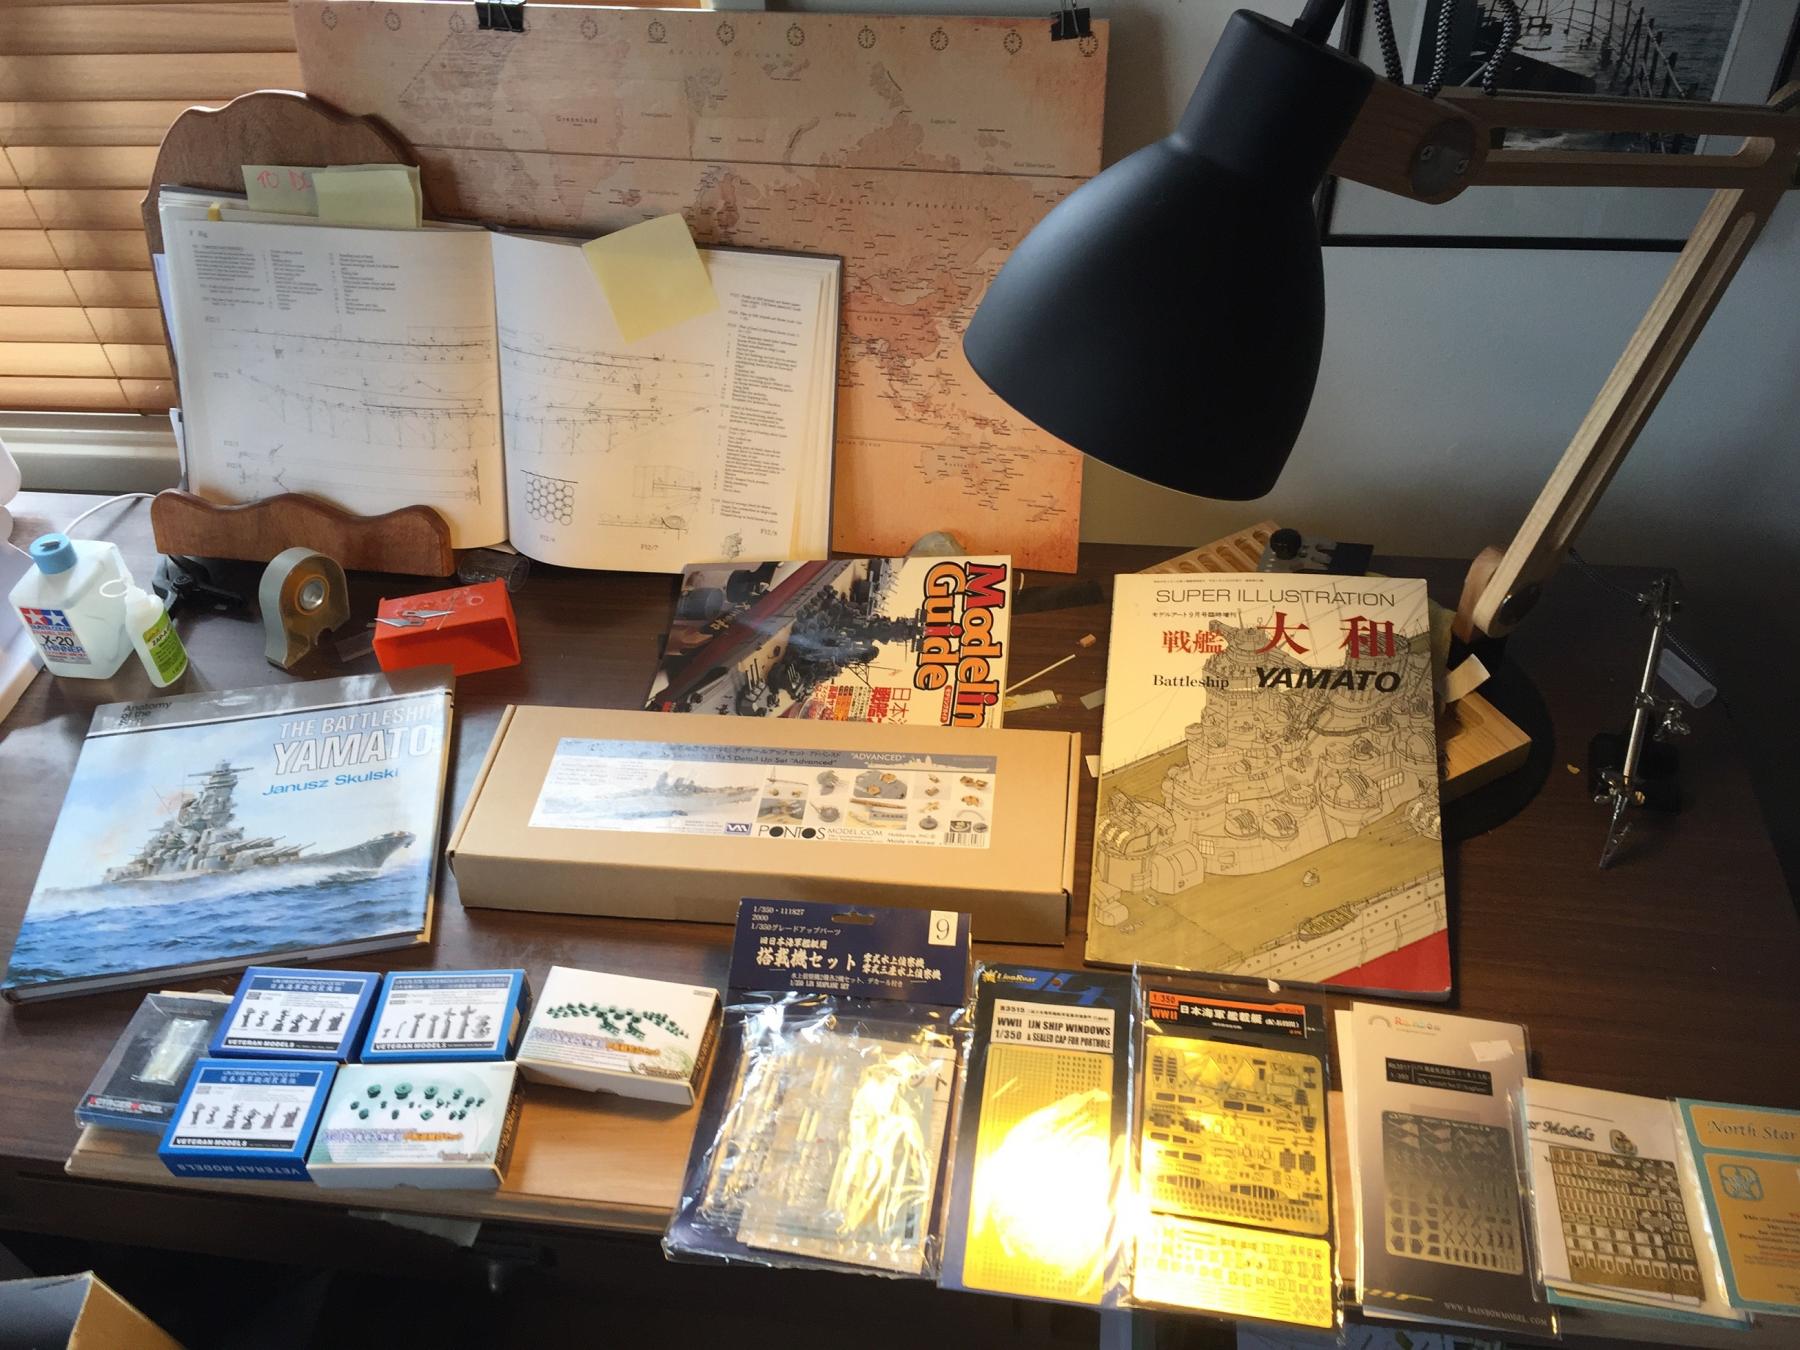
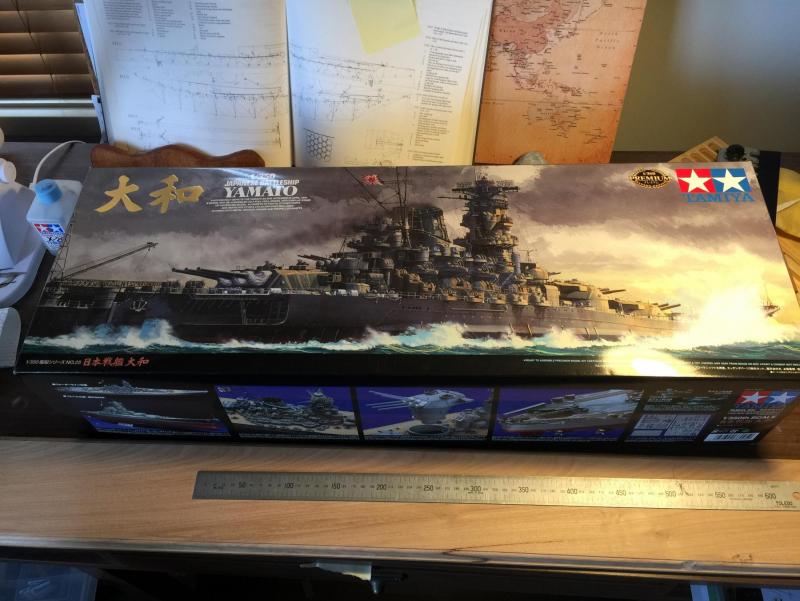
 OK, I'll make a start on my next build log. The 1/350 Tamiya (new tool) Yamato with Pontos upgrade set and numerous other bits and pieces. Those of you that have watched some of my other builds have obviously figured out I like the aftermarket stuff. That being said the kit is enormous, compared to my last build. I also got a cheap old took kit off ebay for painting practice when I get around to buying an airbrush.


- 743 replies
-
- 30
-
-
 1. Constitution - Superfrigate of the many Faces - A tribute to the Basses Years ago I got this nice book by William Bass and his wife in which they describe their findings and their reconstruction of US Frigate Constitutions "Second Phase" as they called it. The years after launch and Quasi War with France - and before the War 1812 - the times of Preble and the Barbary War. Since I saw this beautiful book which was published privatly and therefor did not get the audience it deserves, I did fall in love with this beautiful ship! The Basses based their reconstruction mainly on Felice Corné´s paintings done in 1803 (Side view) 1805 (?) and 1807 (Battle of Tripolis). This one for shure you all know very well. Its - as far as we know by today - the very first visual description of Old Ironsides - done by Felice Corné in Summer 1803 most likely. The Basses did brief investigations even on which viewing angle the artist must have had for his sketches and they could prove that Corné did do really intensive studies of his object. But isn´t the ship a beauty here? Ochre gun strike, no bulkward on foredeck, single dolphin striker, open galion and - that impressive Hercules. Nevertheless, as we will see later: this interpretation causes headaches (at least in my little brain). Here now one of the Tripolis Paintings: Source: https://www.mainememory.net/artifact/6155 You can increase the image if you click on the picture on the Maine Historical Societies Homepage (link). Look at that beautiful lines, the two yellow stripes above the gun deck - and note the position of the channels on the lower of those lines: and here the beautiful Stern of the ship in its early phase: She was a beauty in ochre and black, some white, yellow and maybe a bit gold? .. and a thrilling sight with all that guns! In my eyes the ships earlier appearance is of much more grace and elegance than in her later designs. Fortunatly the real ship is getting closer and closer to that design again with the restorations since Tyrone Martin started that process. But maybe the most beautiful sight she must have been as she was planned: with complete open bulkwards - just as Humphrey intented her to be: Nevertheless: my plan is to rework and pimp the beautiful Revell kit which is ment to show her 1812-15 configuration - but which has some "errors" in it and which does not totally fit to her 1803 appearance. And this 1803-4 appearance - before leaving to the Mediterean Sea - that is my goal. I imagine by now a situation in which the ship is about to be fitted out for sea - maybe some weeks before the above shown departure of the ship takes place. Still with only long guns on the quarder deck... This build will be the very first for me since about 35 years. I was doing a Cutty Sark 1/144 (without proper rigging and bad painting) and a very nice Spanish Men of War in 1/72 - this time with Revell instructed but fully rigging (boy was I proud !) .. So I need to re-learn during the build all the needed techniques. Oh, I was mistaken: I started some years ago the build of the Revell Charles W. Morgan - but the "rush hour of life" did stop that efforts. Now, in times of Corona and possible loss of job I believe I need a time out for some hours a week from crazy daily hectic .. and "if not now, then when?" shall I start with this beauty. I hope you join me in my efforts and I am open for any advice and hint. Thanks for watching me.
- 6 replies
-
- 5
-
-
- constitution
- revell
- (and 1 more)
-
 Part 2: Digging In This is a photo of my completed Golden Hinde. You should remember this if you've been a long-time viewer of my build logs. As I was building this model, I ended up noticing multiple historical inaccuracies. For one thing, the Golden Hinde might not have even looked like this. In Wikipedia's records, it was armed with 22 guns of different types. This ship is armed with 12 guns. In fact, the Golden Hinde was probably not even a race-built ship as is depicted here. For a 1965 kit, it holds up to scrutiny however. That being said, calling it the Golden Hinde might be a fallacy. There is also the issue of the belaying pins. Baker told me as I was well underway with the running rigging that English ships didn't start incorporating belaying pins until over a century after the Golden Hinde sailed. Plus, let's face it- with the skill and knowledge I have today, I could do a lot better on this kit. For one thing, the entirety of the shroud assemblies could be scratch-built. Secondly, the majority of the rigging and sails do not hold up to my current skillset, and the anchors and flags are the same way. I would like to significantly improve the paintwork as well. While the paint job is relatively good looking even now, I have better paints and brushes than I had then. I also have better tools and fittings. That leads me to my plan, and this build log. I will not touch the original Golden Hinde. However, I will order the Heller version of this kit and do that. I am planning on doing all my normal work on the ship, while paying special attention to the paint, sails, and rigging. I plan on making silkspan sails, putting decals on the sails, staining the rigging (something Kirill told me I should do) as well as making general improvements. This is still just a plan, and I haven't even ordered the kit yet. However, it would be nice to have some company while I work on what is hopefully going to be my best model yet. I plan on portraying this ship as a small galleon of the English fleet that went up against the Spanish Armada in 1588, and yes it is named after someone I know, but for official records, the name Queen Elizabeth comes from the English tradition of naming ships after the reigning monarch at the time. There were two ships in the Elizabethan Navy bearing her name (The Elizabeth Jonas and the Elizabeth Bonaventure) so this name is historically plausible. For now, this is a research log.
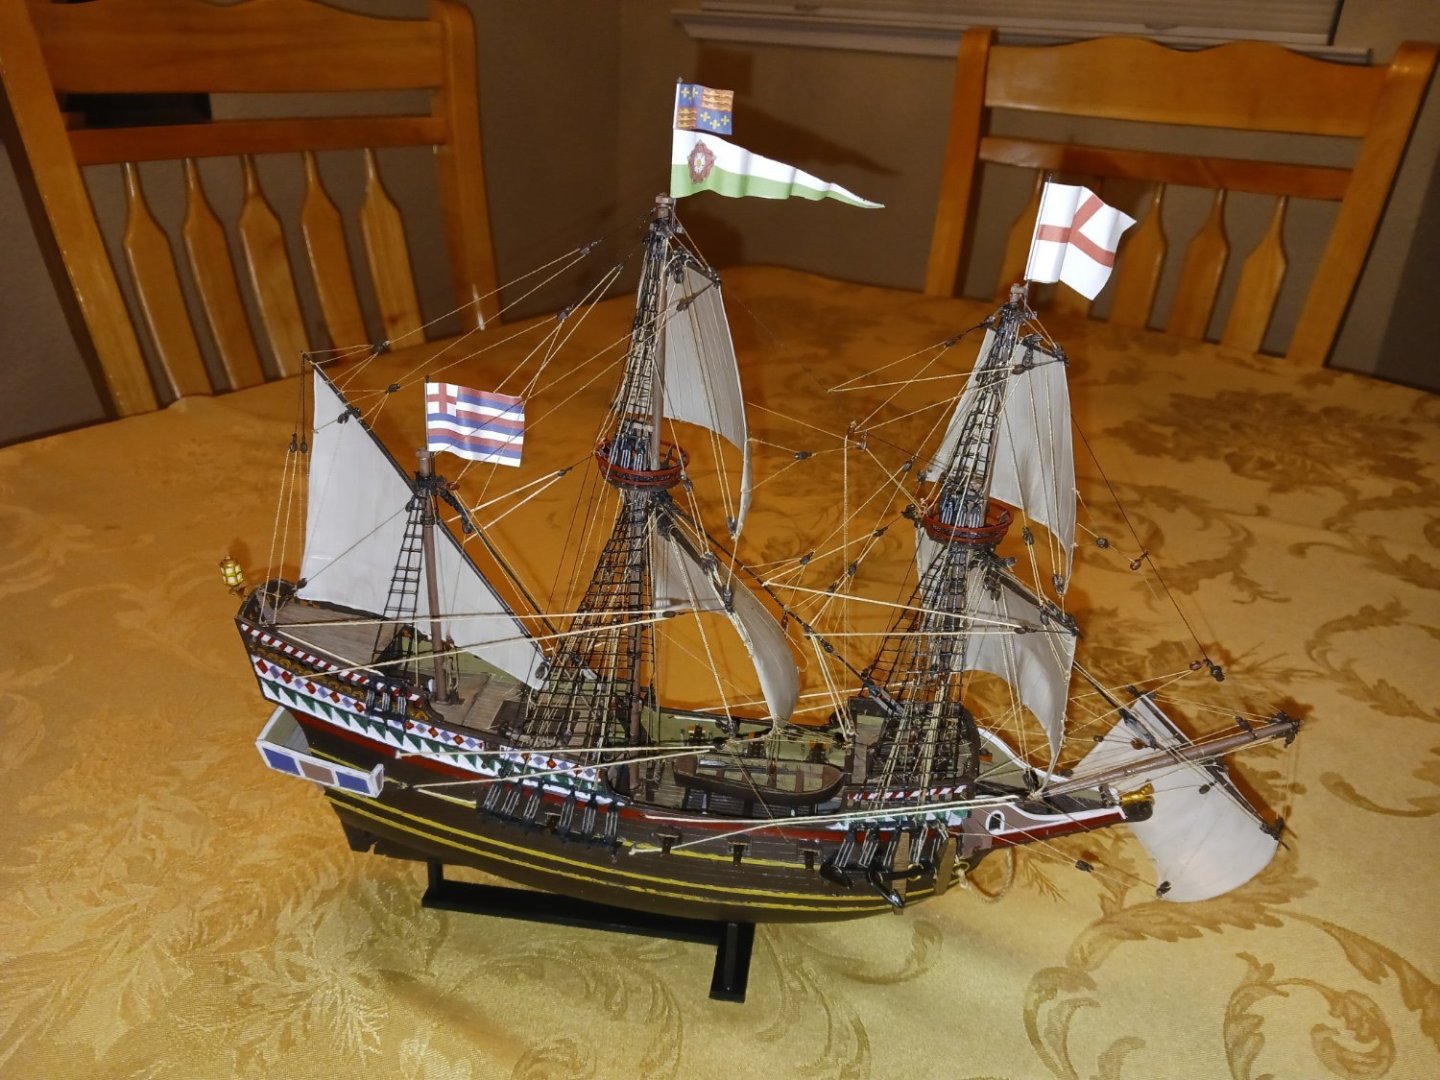
-
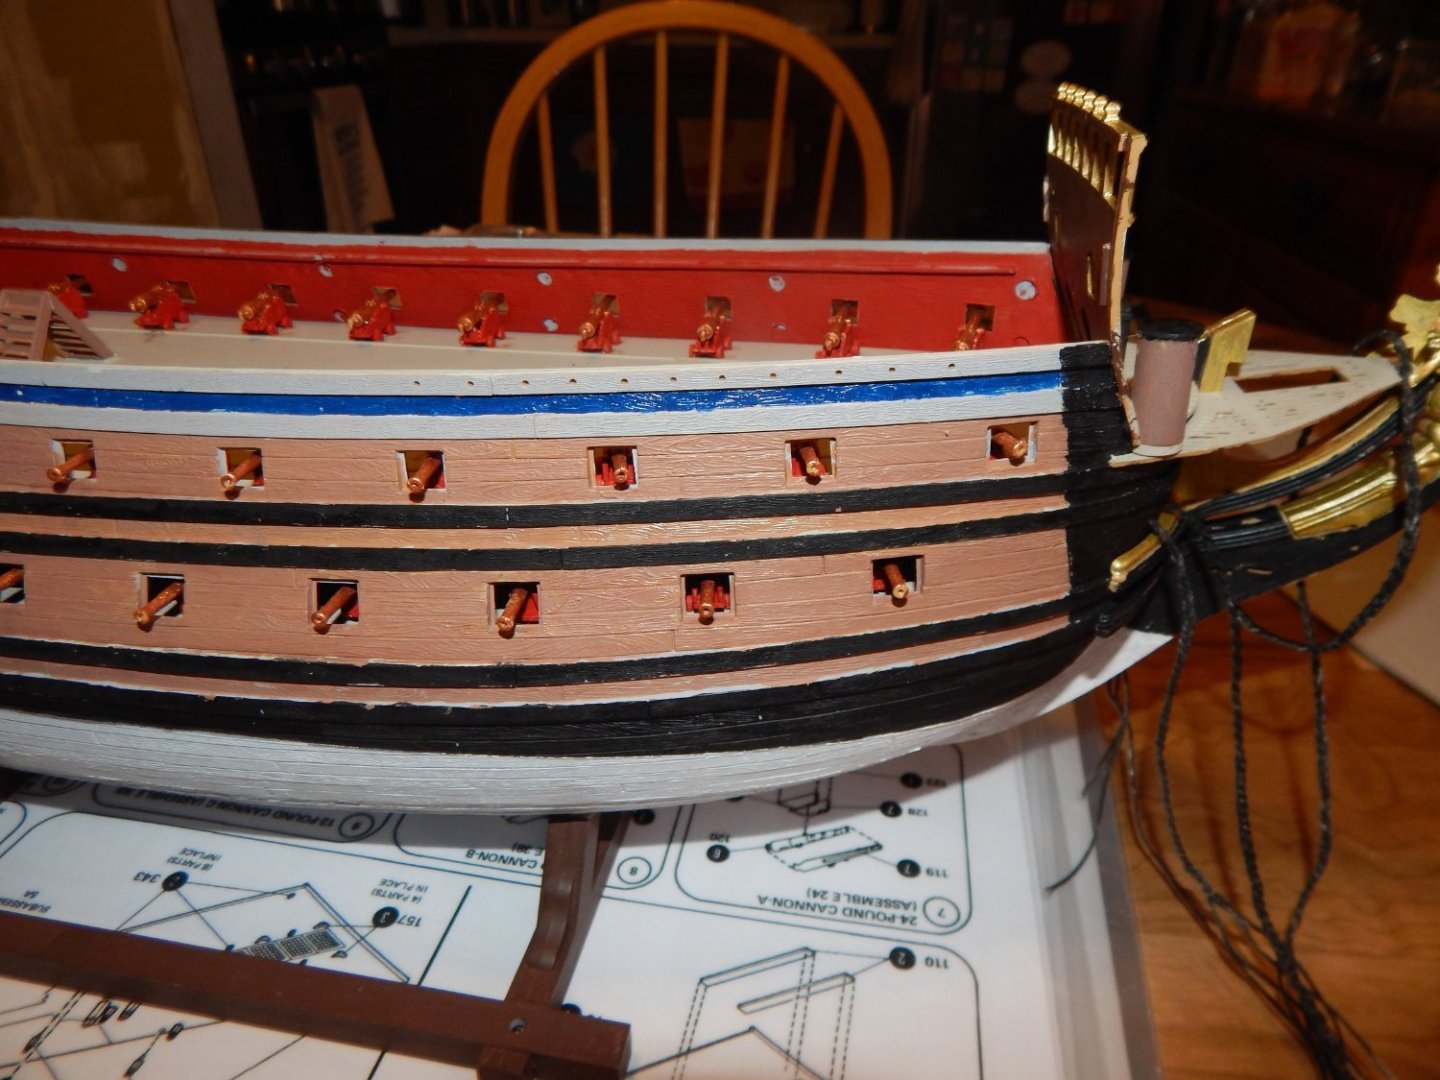
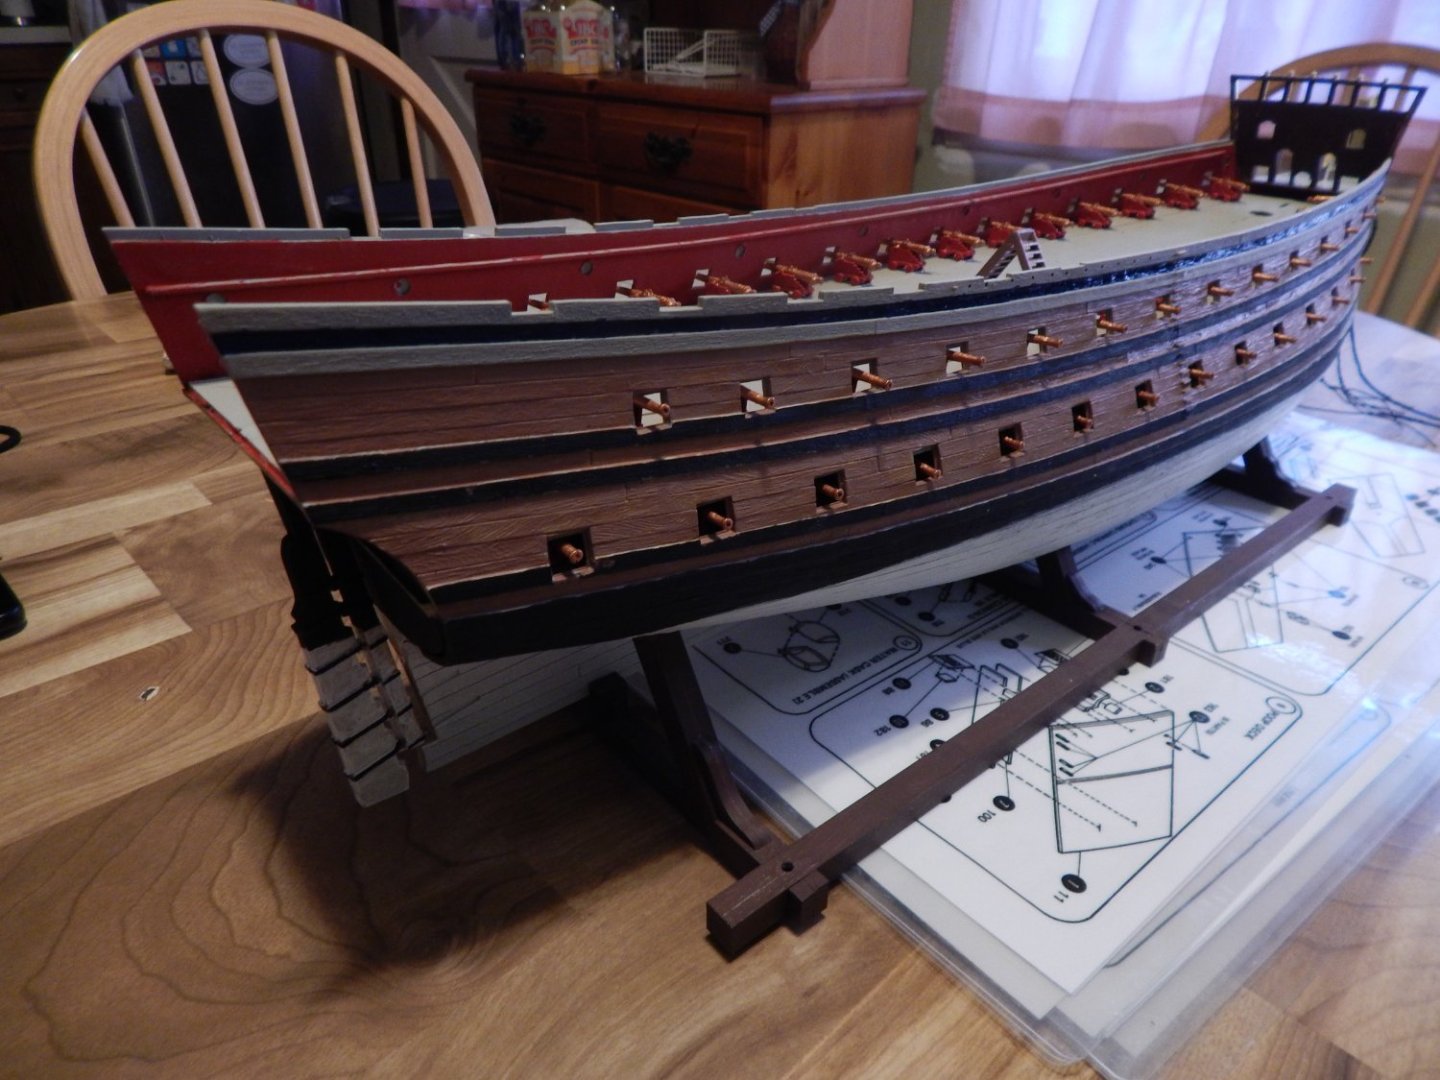
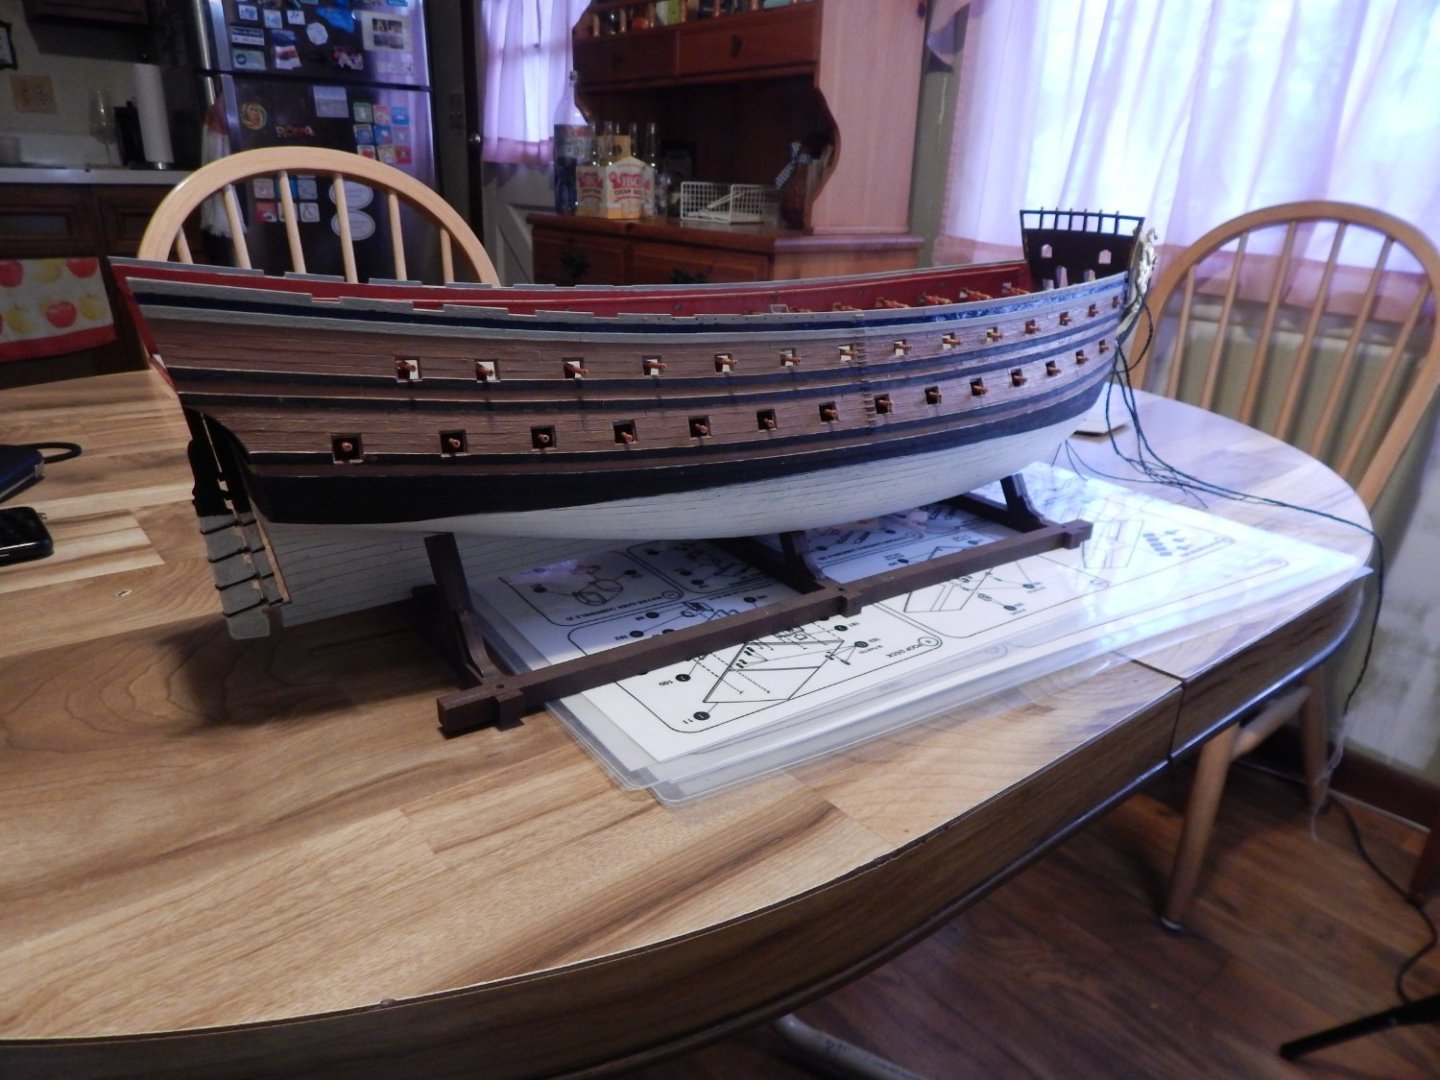
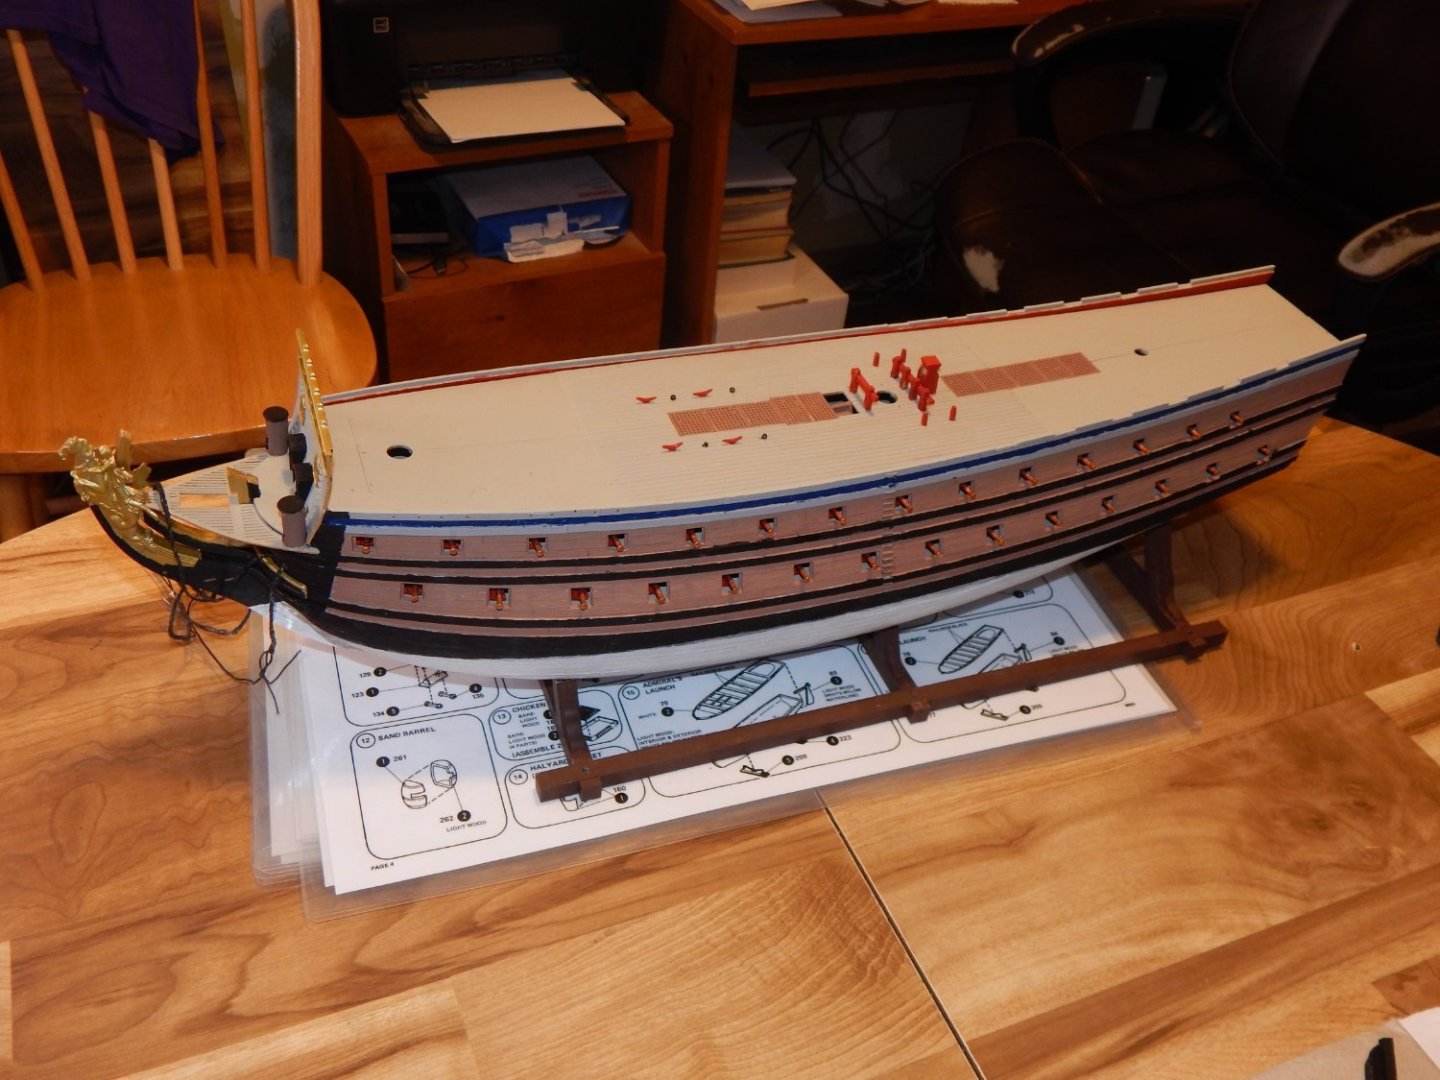
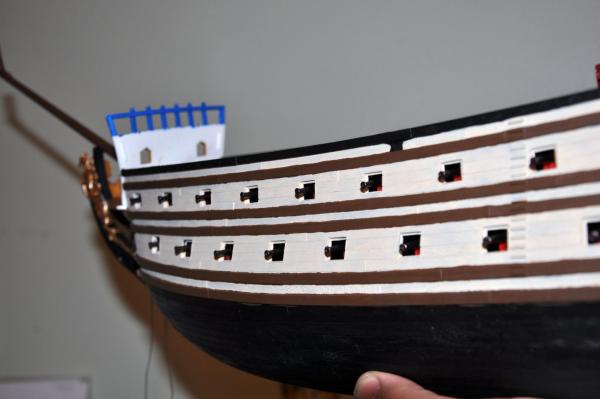
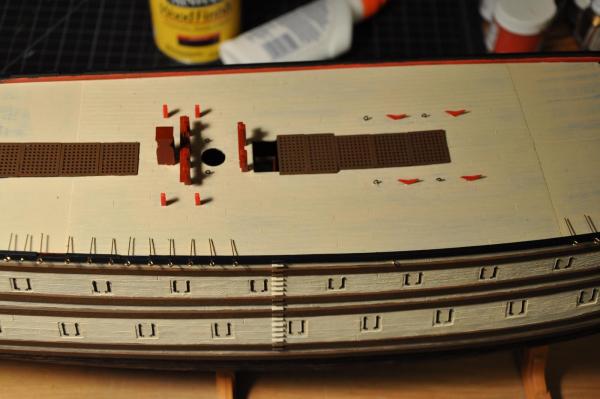
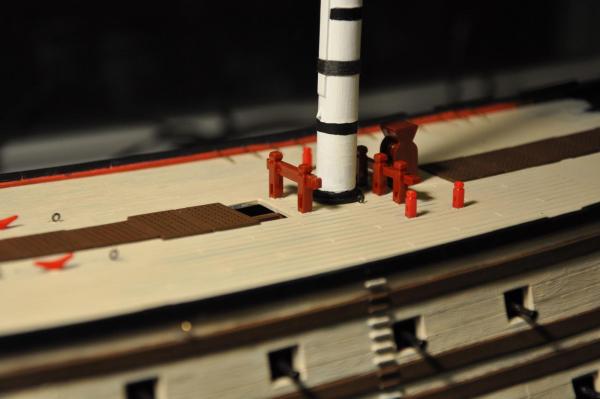
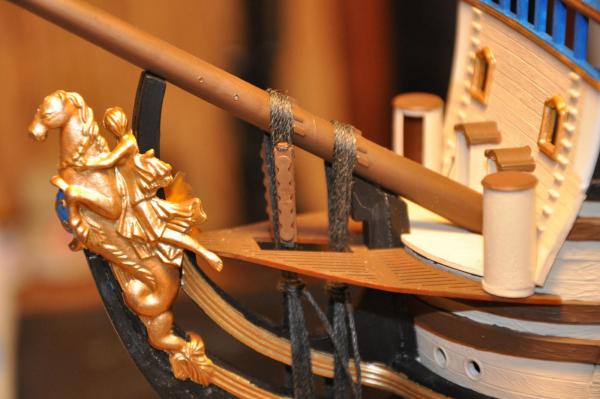
 I've finally found the time to reconstruct my build log after the great crash of 2013 Some of the pictures are lost so the log does not start at the beginning. This is my first serious foray into ship modeling. I say first serious attempt because 30+ years ago I built a Revell USS Constitution. But I was still in High School and not very concerned with accuracy or craftsmanship. I just wanted to finish the kit and display it. This kit of Soleil Royal was given to me as a gift way back then and I am just getting around to continuing building it. I am very much looking forward to a build that I can be proud of. Even though I know that my skills are not up to par with some of you I am trying to incorporate as much research and accuracy as I can muster in a plastic kit. Here are some of the pictures of what has been done. I'll try to summarize what I've done so far to catch everyone up. I decided to display the ship with all gunports closed to starboard and opened on the port side. Eventually I plan on setting just the fighting sails (topsails, mizzen, and perhaps the spritsail topsail) with the courses clewed up. I did not like the look of the eyebolts supplied with the kit so I replaced them with brass. The holes for them were drilled and the eyebolts pass completely through the upper wale. The ends will be trimmed and bent over to lay alongside the inner bulkhead. The ends will lay inside the gap between the hull and the upper bulwarks, in an area that needs to be filled anyway. Doing the eyebolts this way should also prevent any pullout cause by strain from rigging. I am leaving the lower hull unpainted for now until a proper cradle/base is finished. I don't want to ruin the paint job. It will be painted a dirty white to represent white stuff. I also drilled a hole through the bottom of the keel, roughly amidships, and fastened a threaded nut inside the hull over it prior to fitting the decks. This will take a bolt from the base to fasten the model down to it. I don't know how other people secure their models to the display bases so I just improvised with what I had on hand. The head grating in the bow has been noted by others to be a problem with this kit. It has no supporting structure to it and seems to be just floating there. I do not know how this would have looked with respect to ornamentations and design, so I have not decided what to do with this area yet. [/size] The decks went in easily. The kit has a series of stanchions along the centerline of the first battery deck to support the 2nd battery deck. There are none for between the 2nd and 3rd battery. As a result there is a lot of flex in the 3rd battery deck. Since there will be quite a bit of rigging fastened here that will produce an upward strain on the deck I added some extra support. I trimmed some sprue to length to make stanchions for the centerline to hold the deck up. And I added a boot (coat?) to the base of the mainmast to hold the deck down. The mast coat was fashioned from sheet styrene and quarter round molding. The masts are dry fit at this point. I do not think I will cement them to the step. I'm going to let the rigging hold them in. I added some shims beneath the hatch gratings to raise the gratings above the deck level to give the appearance of a coaming. All of the eyebolts for the decks were replaced with brass. .
- 196 replies
-
- 7
-
-
- plastic
- soleil royal
- (and 2 more)
-
 OK my MSW friends. I am going to need a kick to get me started on my Heller 1/100 HMS Victory. I know it is going to be a long and enjoyable process so I have to eventually get started. I got the kit a good while ago but have only removed the plastic wrapper and peeked inside. Meanwhile I continue working on a previous build but see the box containing that beauty setting there in my peripheral vision. I have spent countless hours reading the build log of other Victory builders. That may be part of my reason for delay. Each time I have my mind set on how I want to proceed once I start I see an idea or technique someone has used and think “Wow that is what I want to do!” So I guess my concern is doing something a certain way then later seeing a better way and being disappointed. My initial internal debate is the process used to paint the hull, especially the stern? I think by far the design of the stern and the paint scheme is so distinctive on the Victory. You see it you know it is the Victory! So beautiful! If you are now building, or did in the past, what was your method to apply the black and yellow ochre.
 -
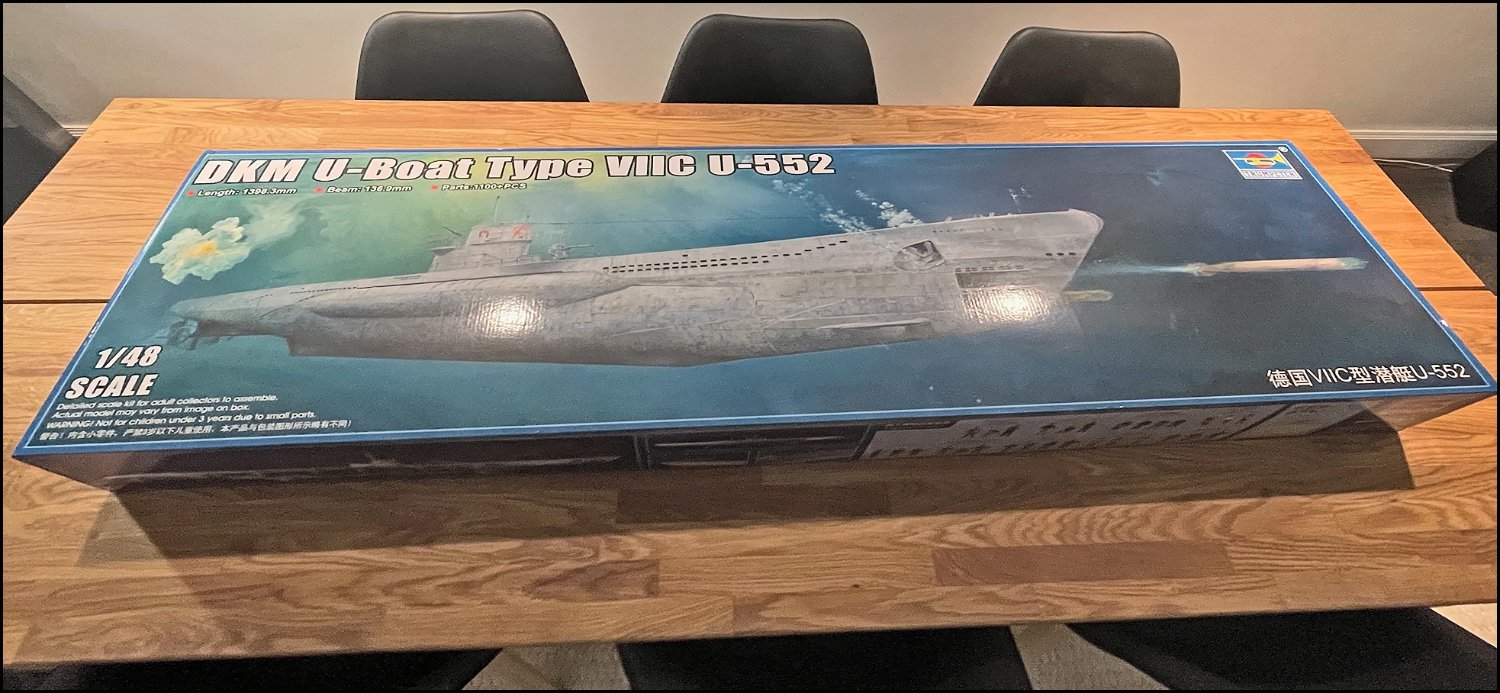
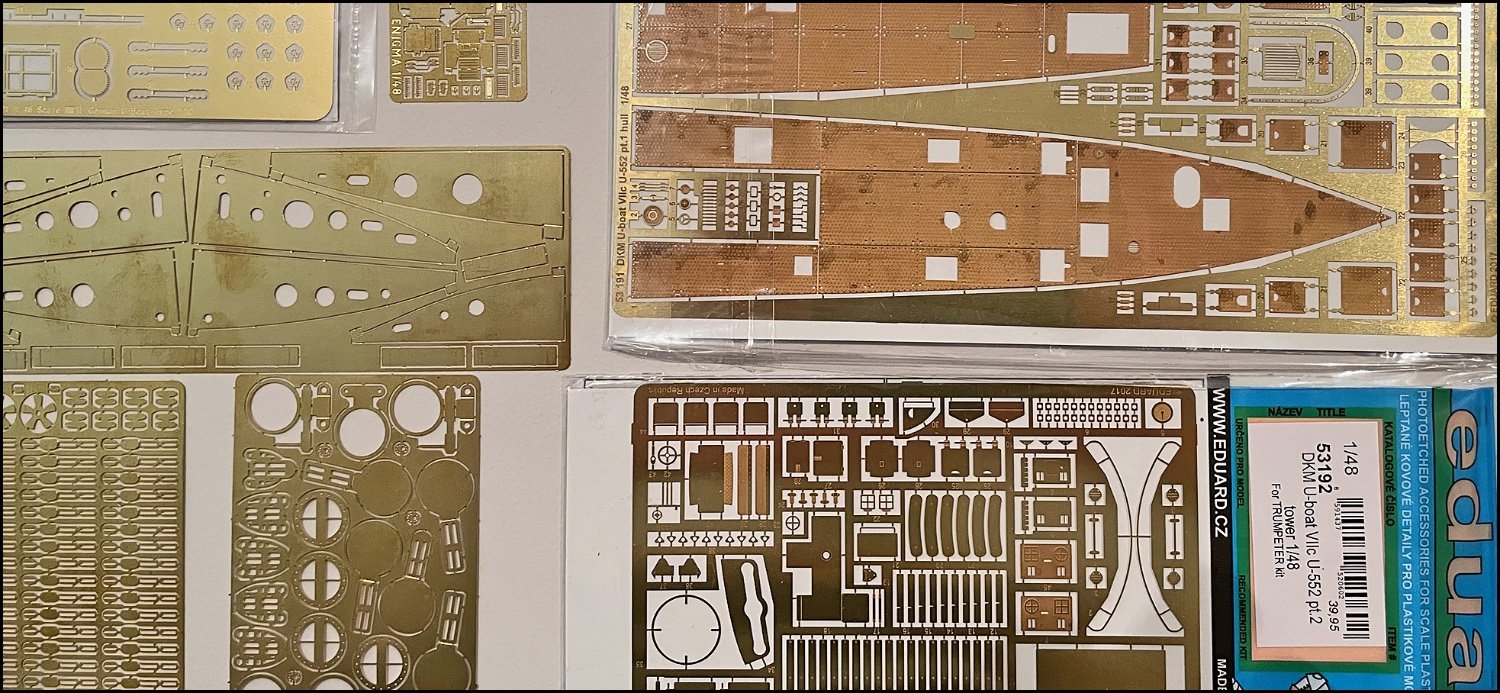
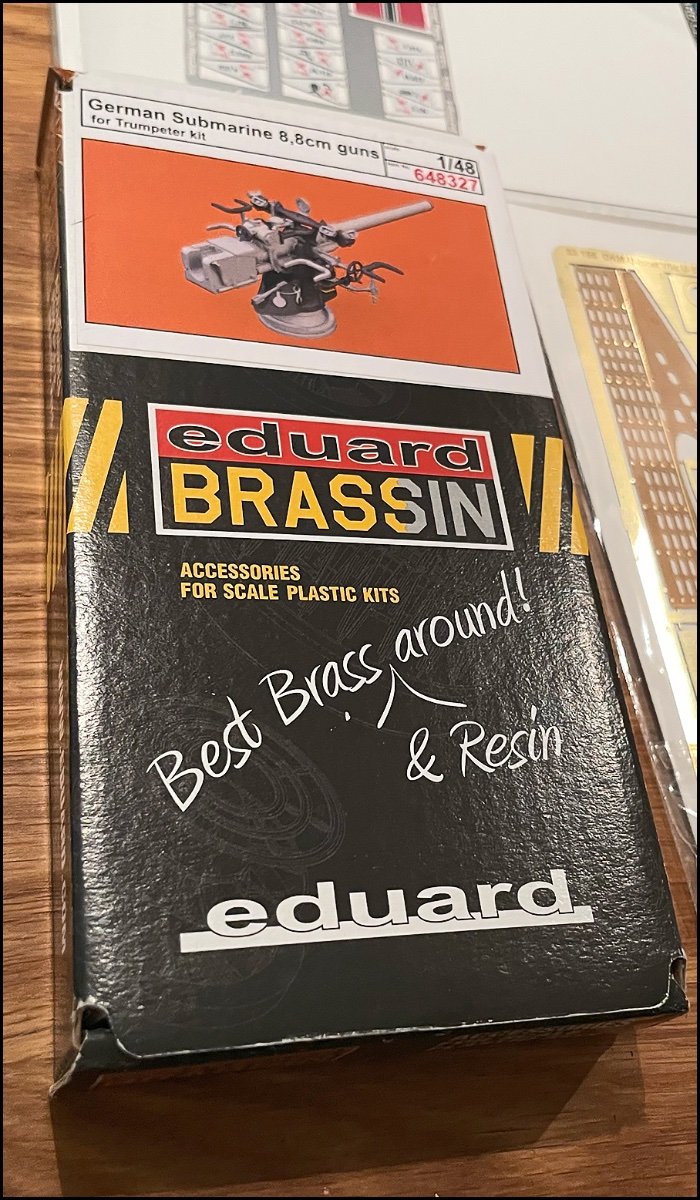
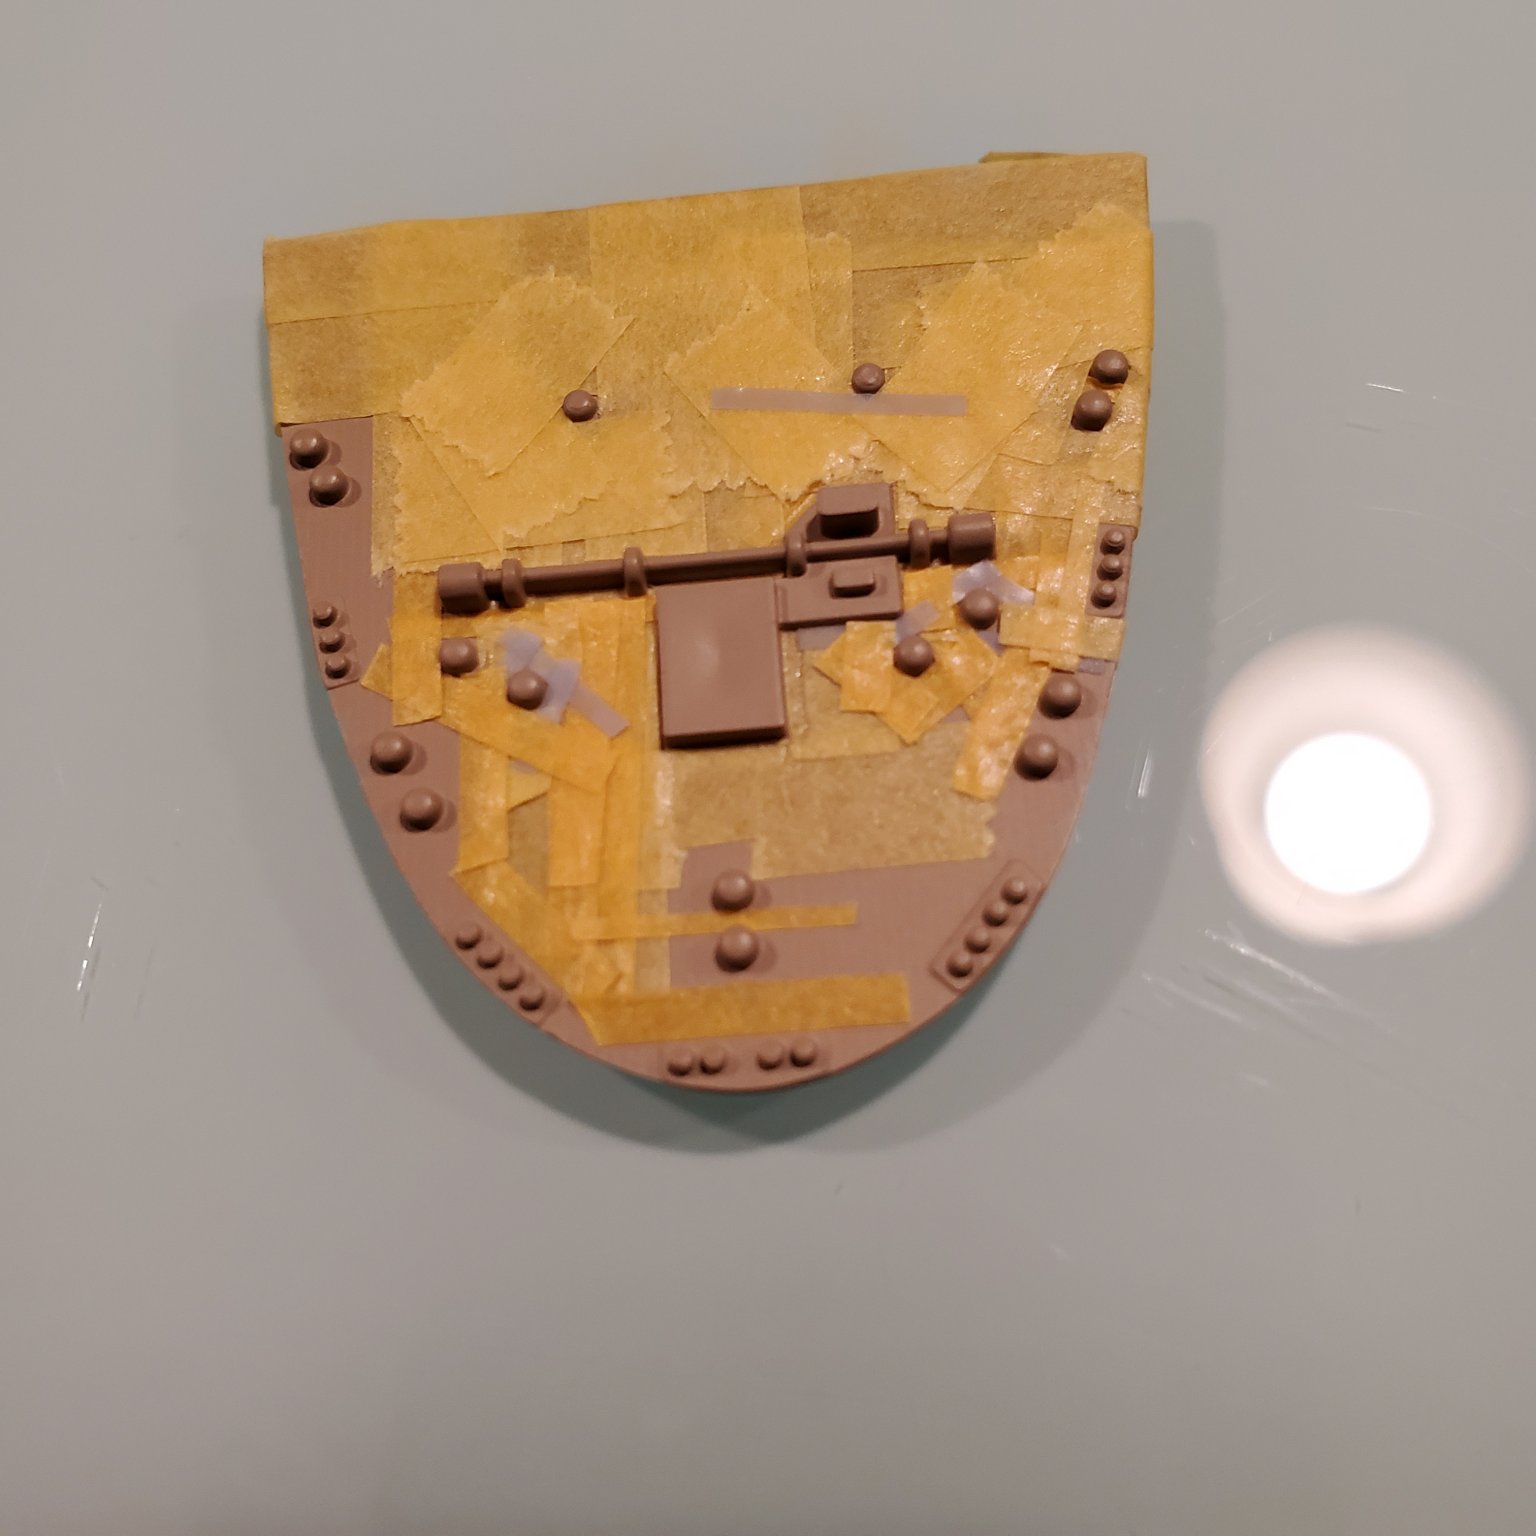
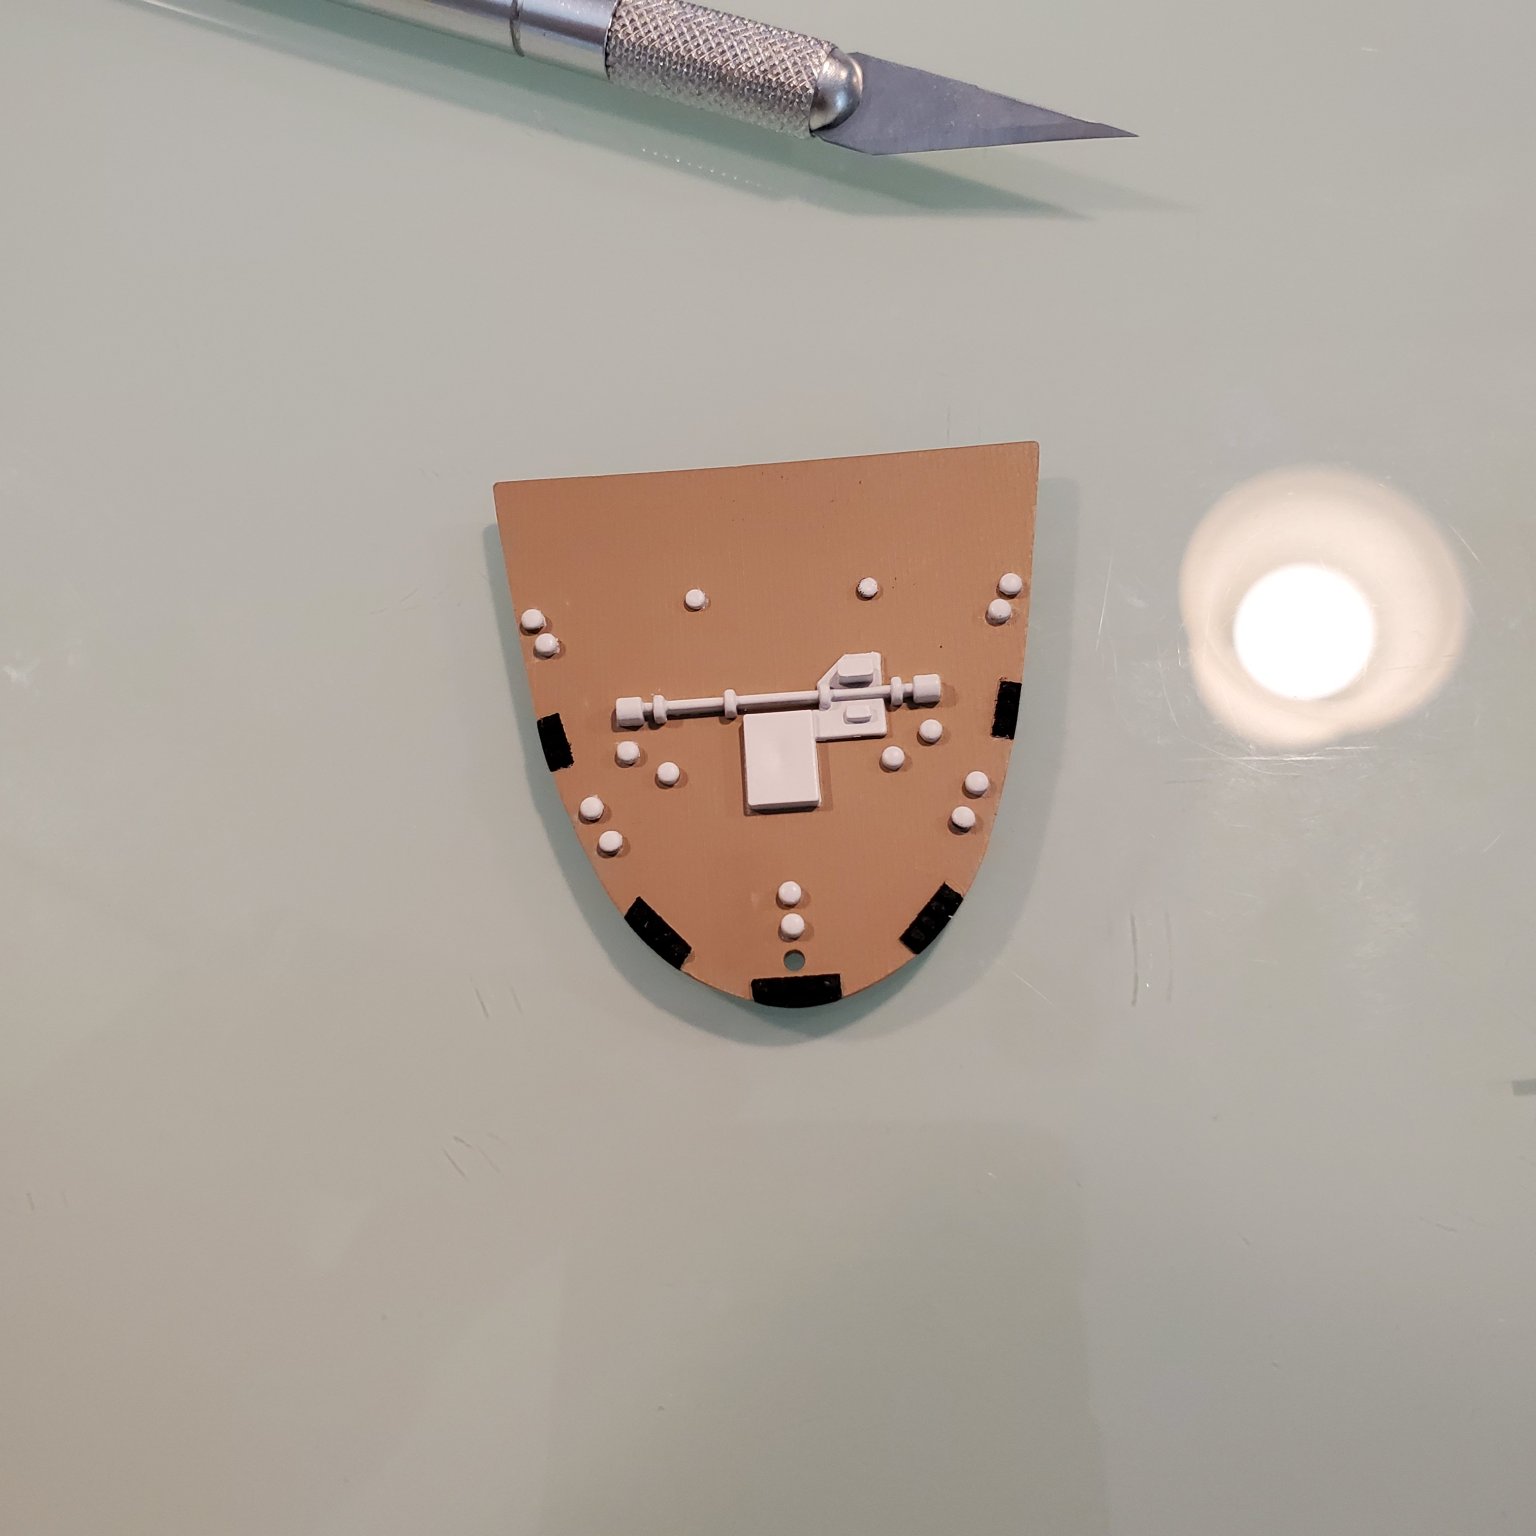
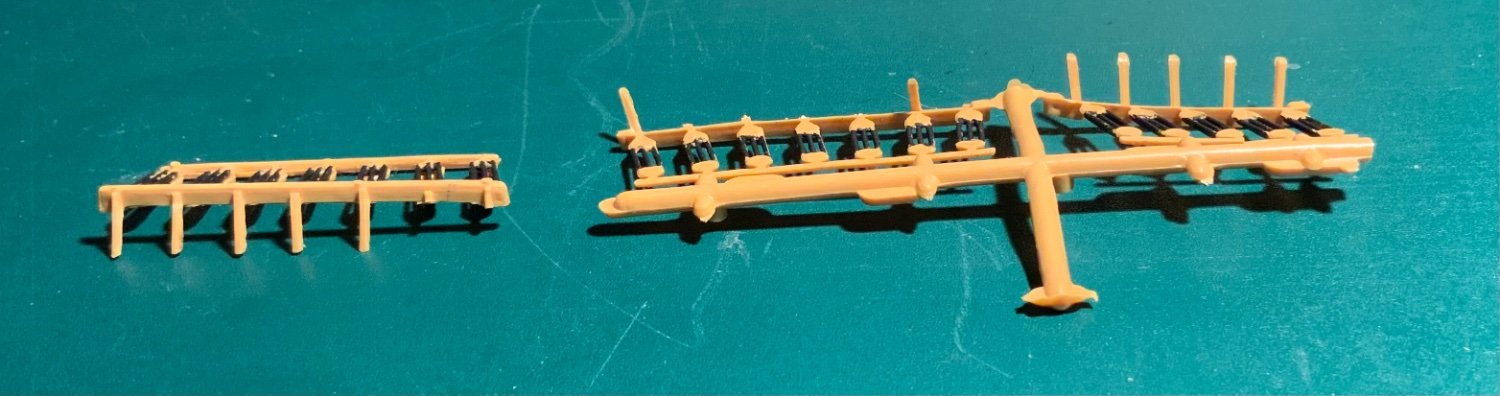
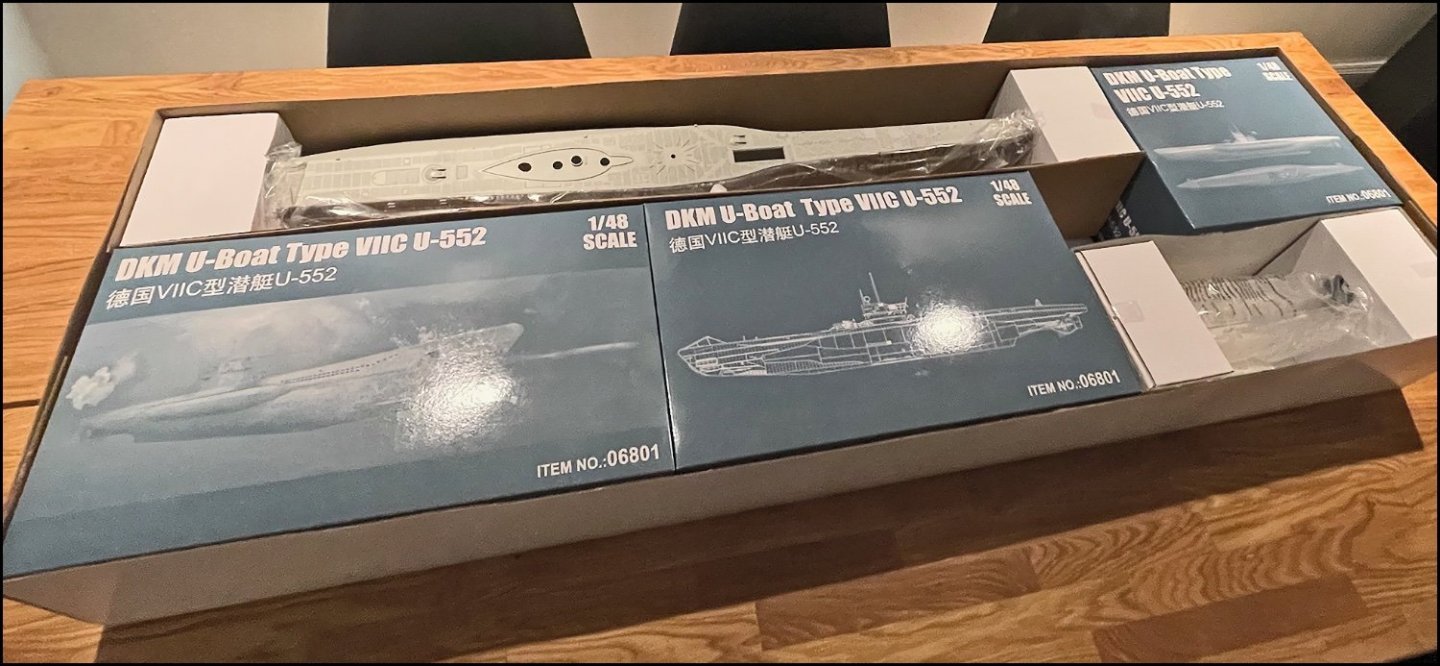
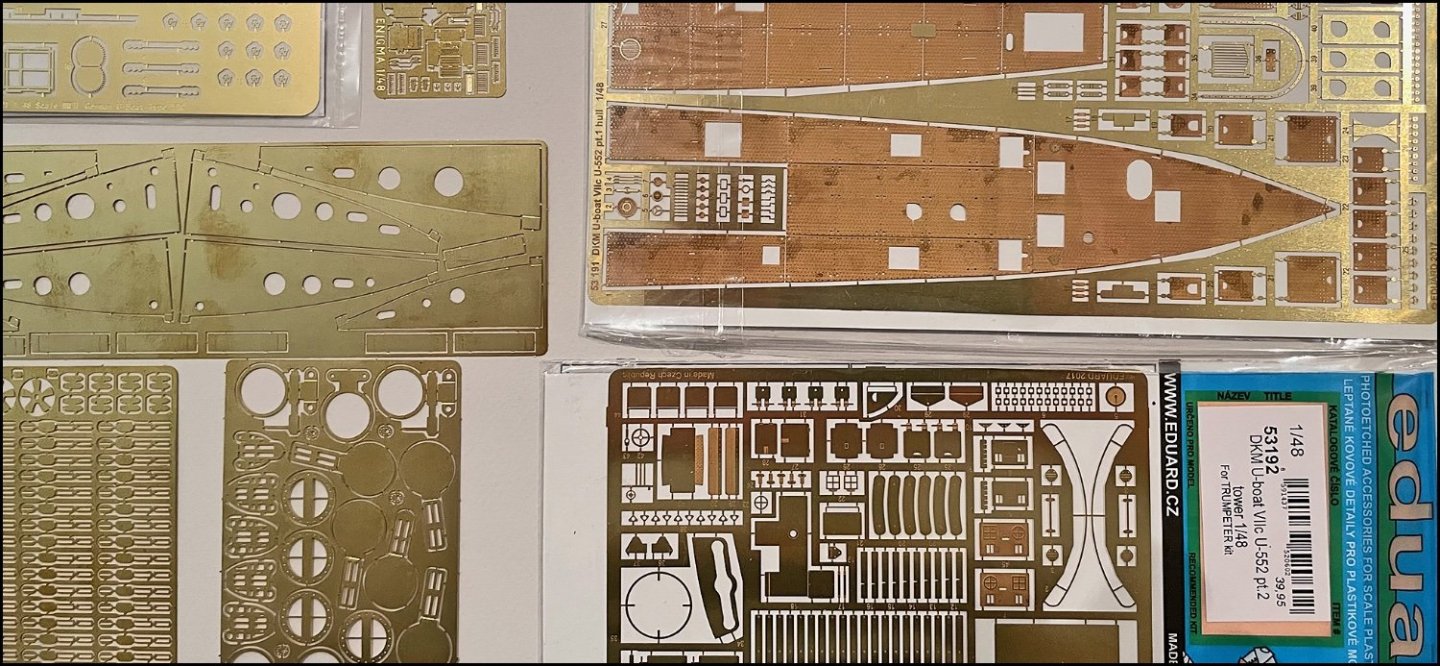
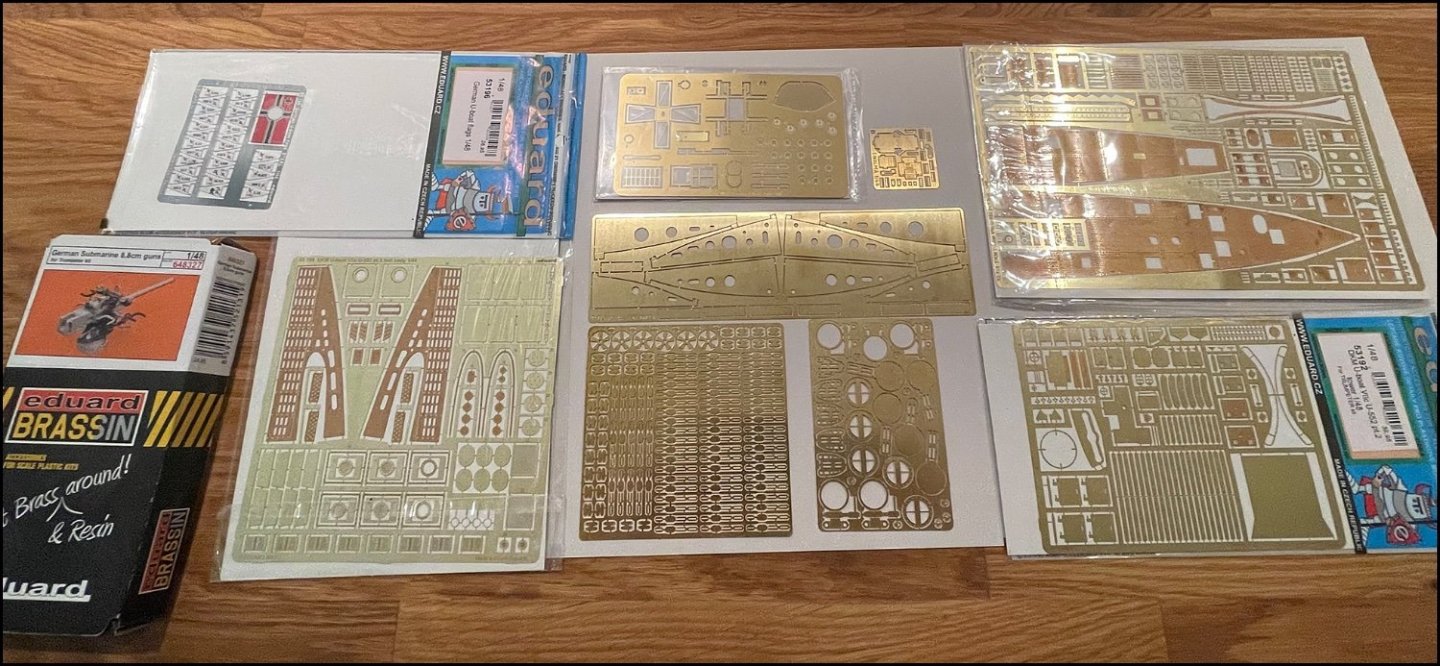
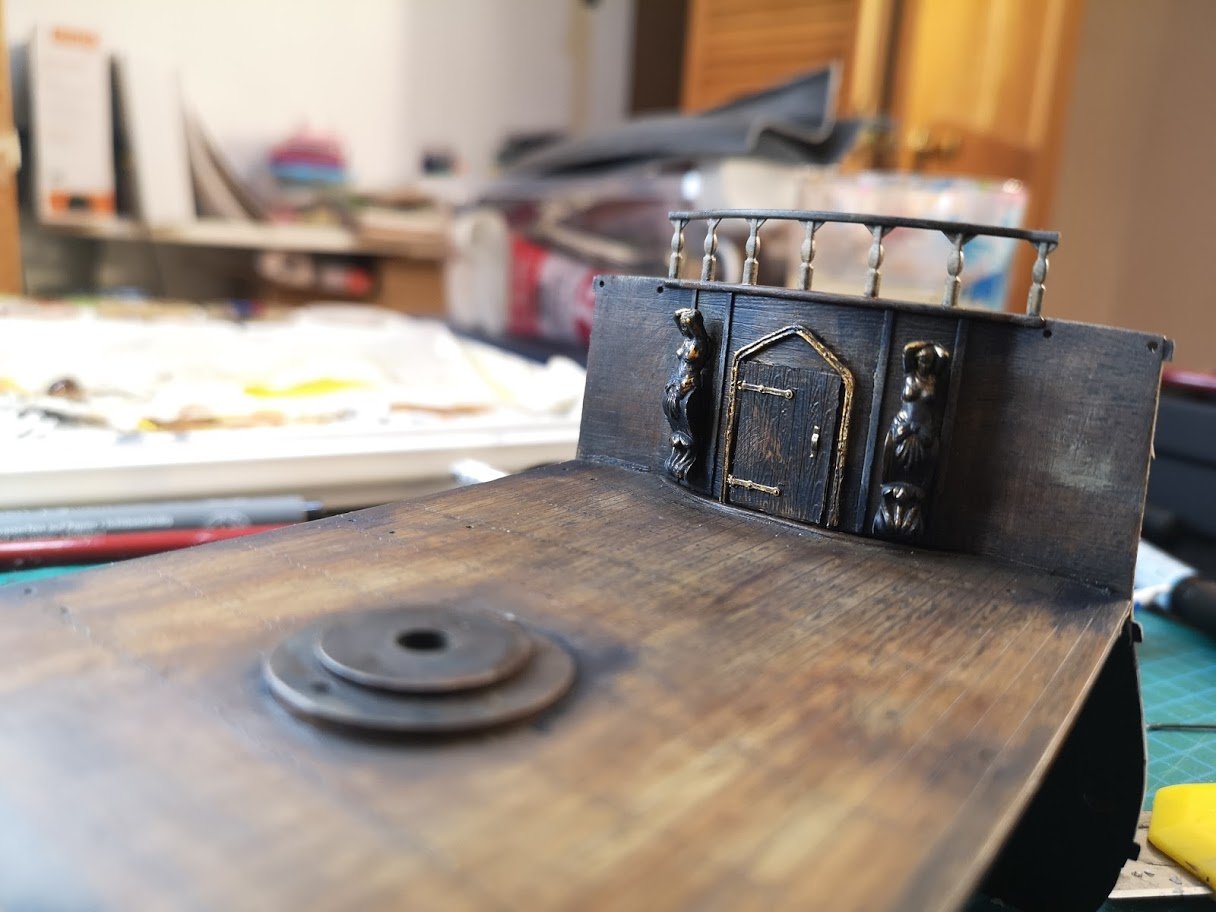
 My U-552 build! I bought this U-Boat model already December. After that I have collected paints, supplies and extra parts for the model. …and of course looked at other building blogs and took tips on them for my own project. Thanks for them. The plan was to start build when I get my “new hobby corner" ready. It's still in the middle of it, but I'm starting to make a model little by little … A few "Open Box" pictures at first. Orginal Box My plan was to order all the photo etched parts from RC Sub, but their stock was sold out just then. So I order parts from Bid Ed (Eduard). I also ordered detailed 3d-printed dec-cannon made by Eduard. Of course after that, Rc Subs was parts I wanted order. So I also ordered more photo-etched parts from them, but not the biggest set …. Left to right: Big Ed's U-Boat flags - Trumpeter original photo etched parts - RcSub Enigma - Big Ed's hull - Eduard cannon - Big Ed's hull body - 3 parts from RcSubs and Big Ed's tower

- 63 replies
-
- 11
-
-
 20th February 2020 I started this build almost exactly 7 years ago (February 2013) but parked it after perhaps 2 or 3 months for a variety of reasons. Every once in a while I’d half-heartedly take another look but, with no end of other calls on my time – a house renovation, a large garden, a family – it was always easier to justify further procrastination. I finally got going again this January 2020 and am enjoying it immensely this time. One of the reasons I parked it, to be honest, was demoralisation - I hadn’t really appreciated what building a 1:100 Victory would entail and there are some very tedious, repetitive tasks from the outset. I think I was probably expecting it to be something like building planes as a child just with more and different parts. Also, the poor Heller instructions had me scouring the web straight away and landing on Pete Coleman’s site, which was both a blessing and a bane. For those who didn’t ever see it, it was like this site, full of examples of truly extraordinary skill and craftsmanship. The trouble was, having seen what I should do, I couldn’t possibly just whack this together straight out of the box, as intended, and that meant hours and hours on small modifications lay ahead. However, it was always parked, not abandoned! I should say from the outset that this is my first go at high quality model-making. Other than helping my progeny with the odd bit of model-based homework I haven’t touched a model kit in perhaps 45 years. I chose the Victory for sentimental reasons, inspired by the books of Patrick O'Brian, not realising that this is probably the Everest of plastic sailing ship models. In fact the intention was that this would be the only kit I’d ever build, it was a project for one wet and miserable winter rather than a hobby. Who knows, that may change by the time I’ve finished the Victory (assuming I ever do). So, the object of this build log is two-fold; it’s partly to share my learning with anyone else in the same position, novice’s taking on this huge challenge; and partly to seek advice, as I go along, from the many experienced, expert modellers on this forum. It may help if I say what I’m aiming for. I’m not too bothered about true historical or nautical accuracy, just want a really nice looking ship at the end of the day. I’m unlikely to spend much if any time adding features below decks that can’t be seen, but I am making the ‘usual’ modifications like hull thickening, the admirals’ entry and altered side steps. It almost goes without saying that I’m constantly looking at the fantastic work of Dafi, Foxy, Bishophobbies and a few others, though I’m expecting my results to be more modest. That's enough of the intro - in a moment I'll start adding build content.
 -
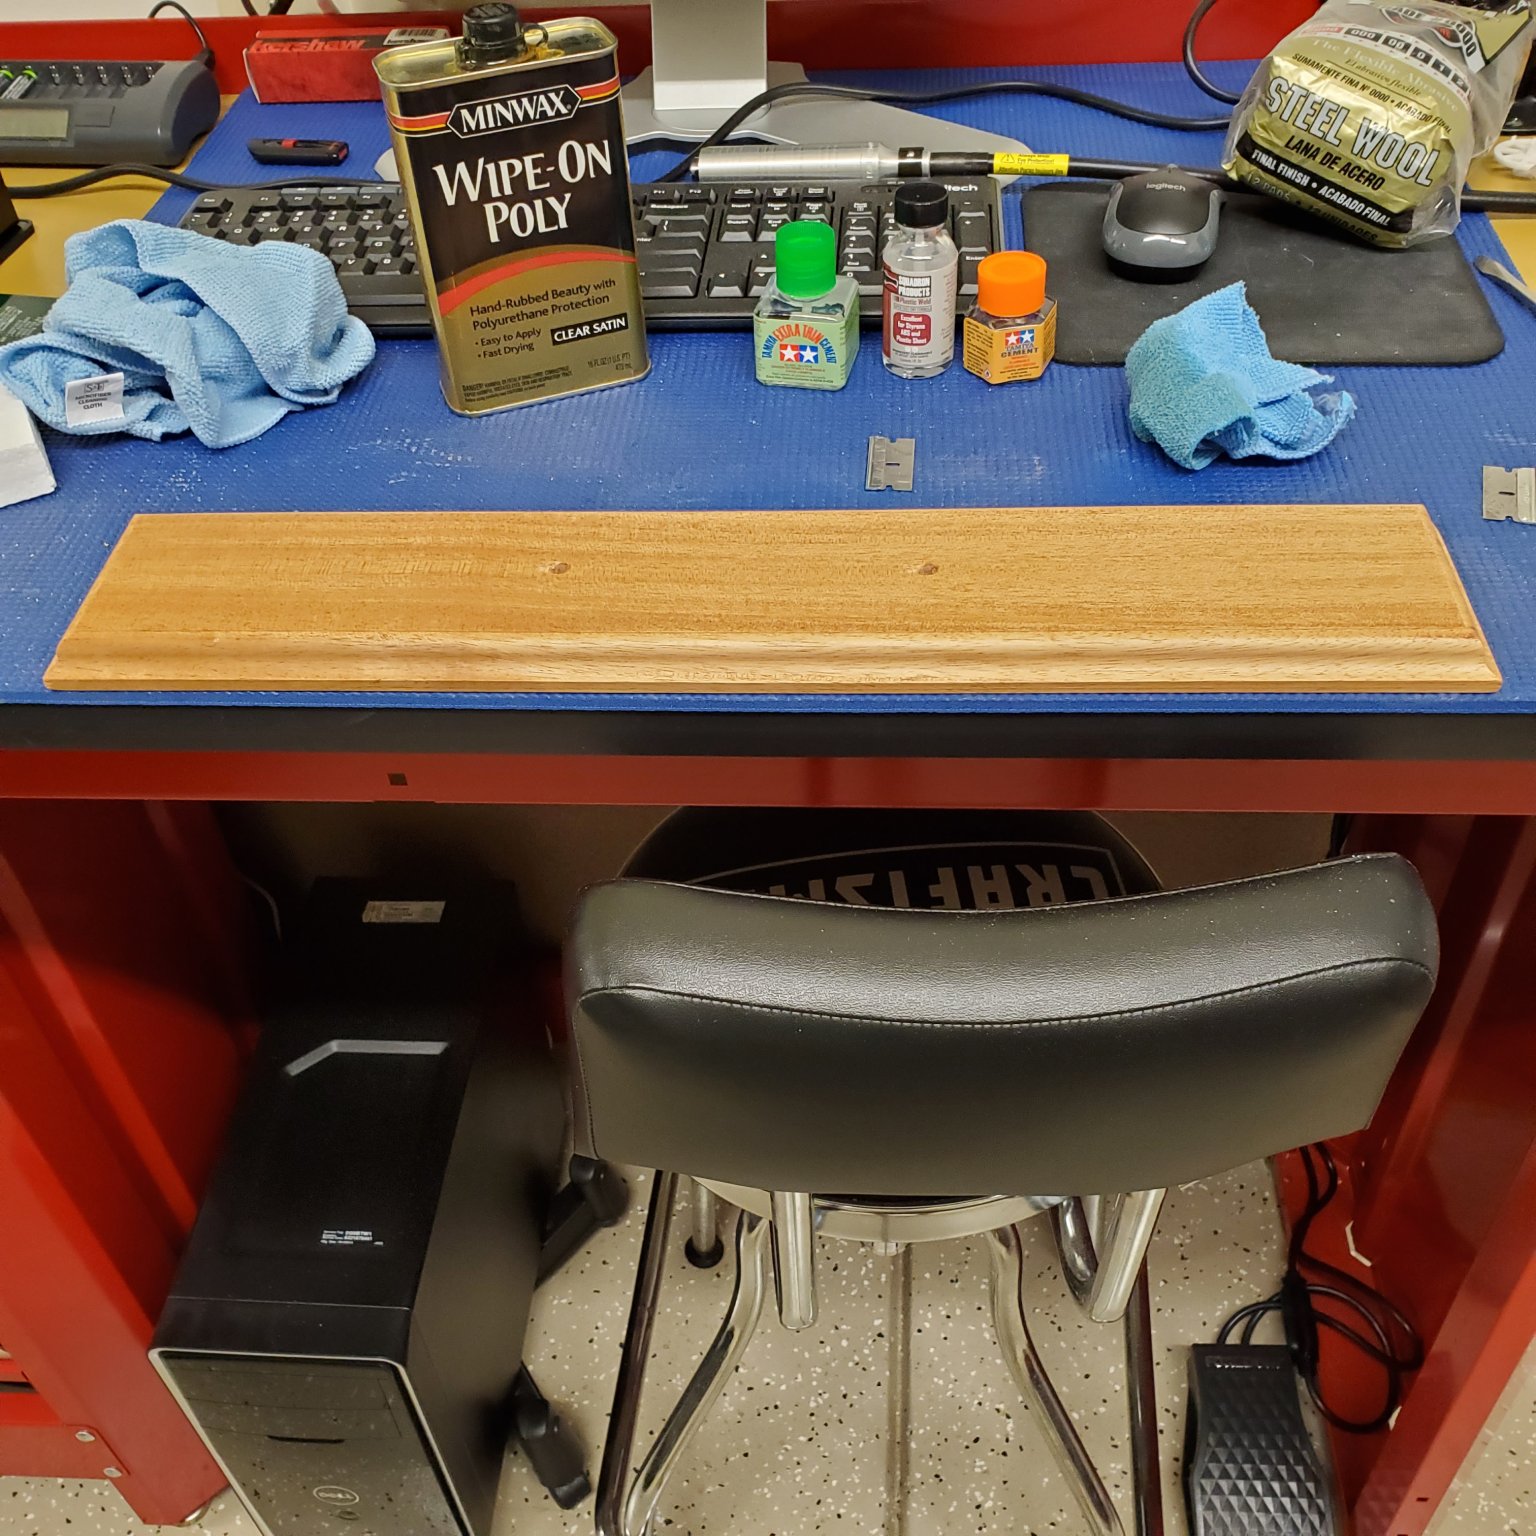
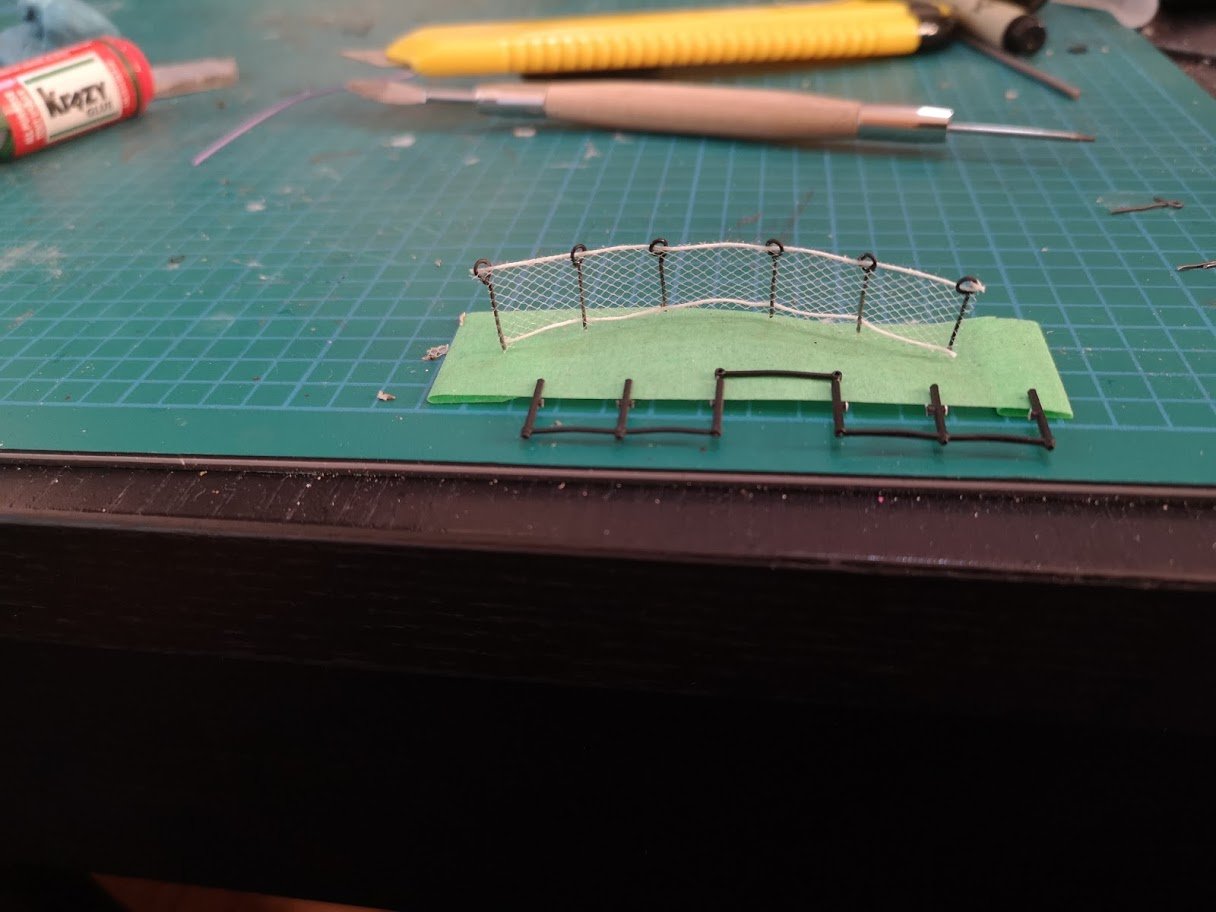
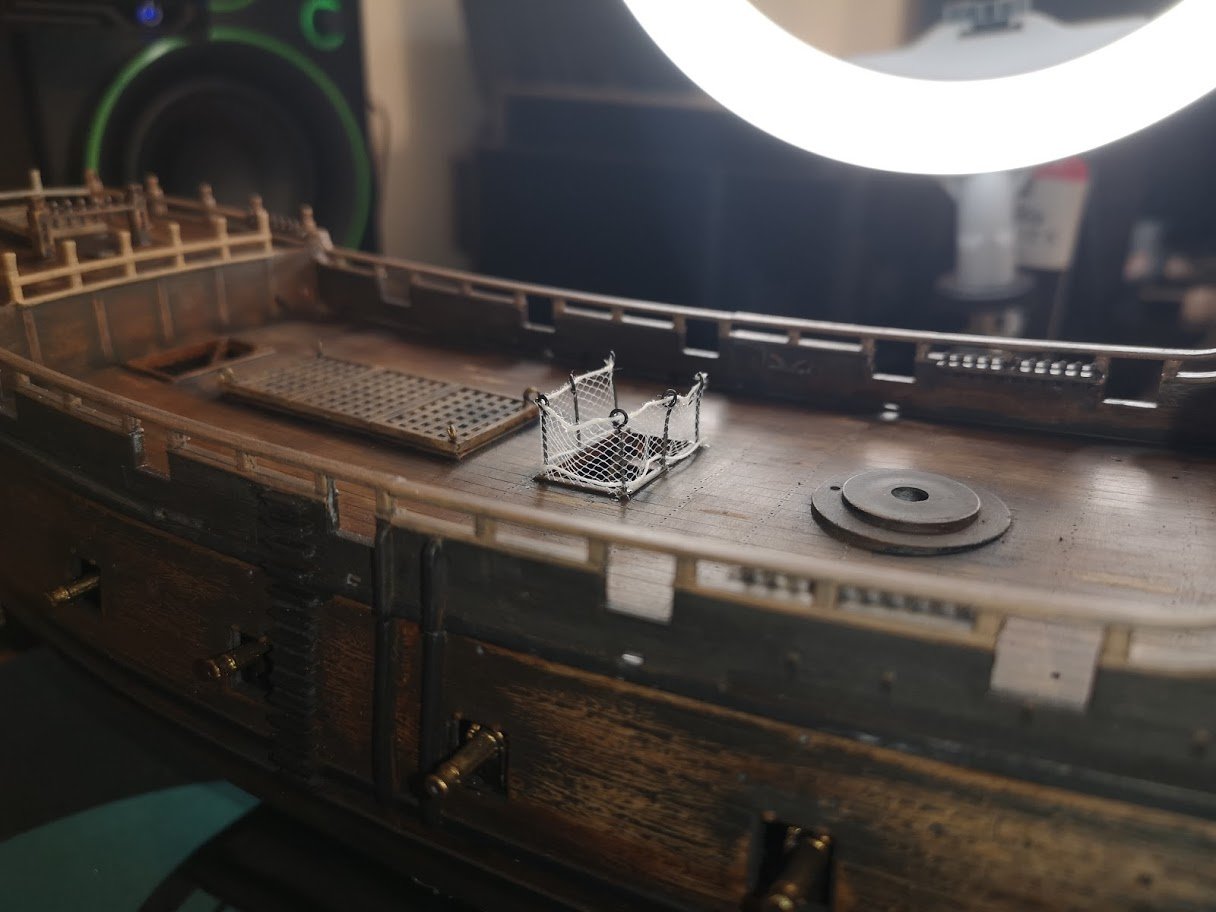
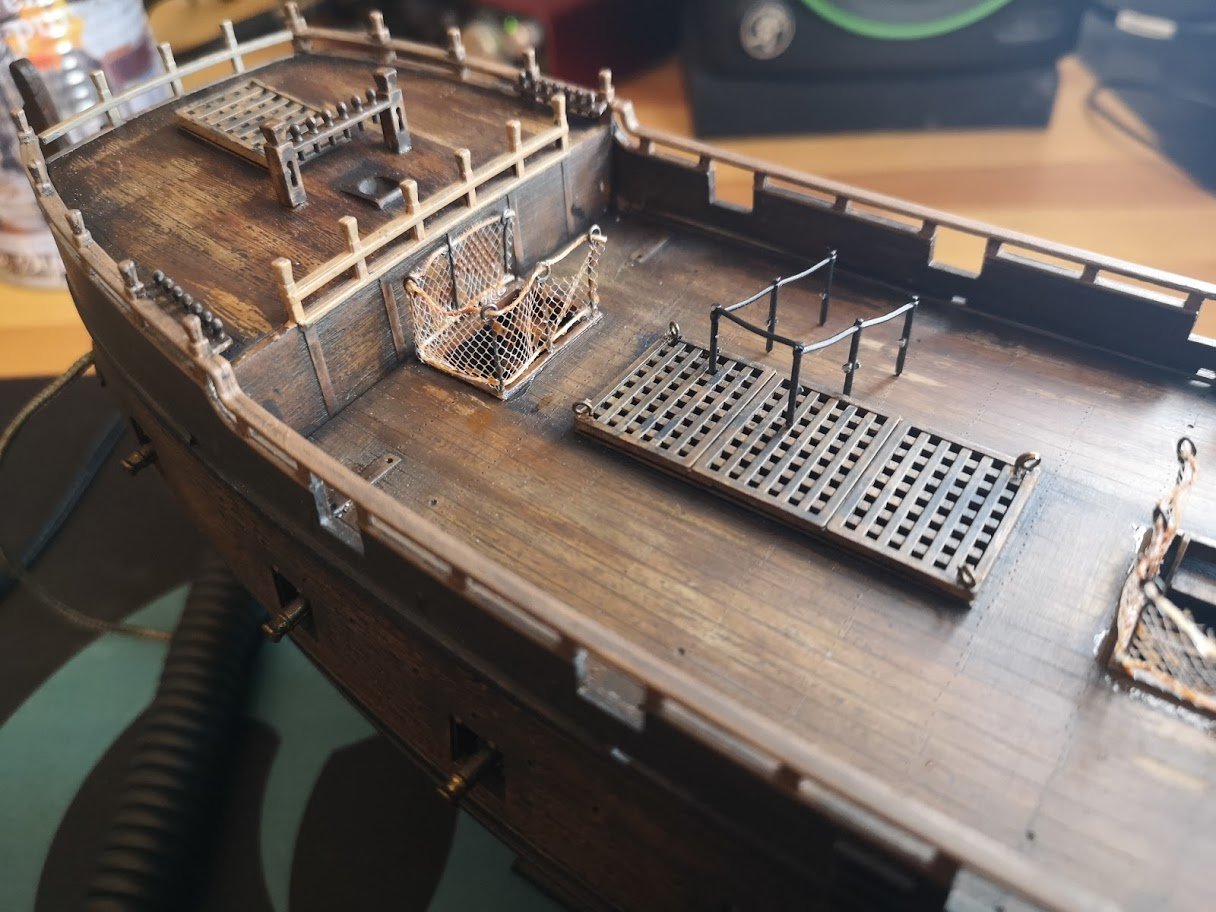
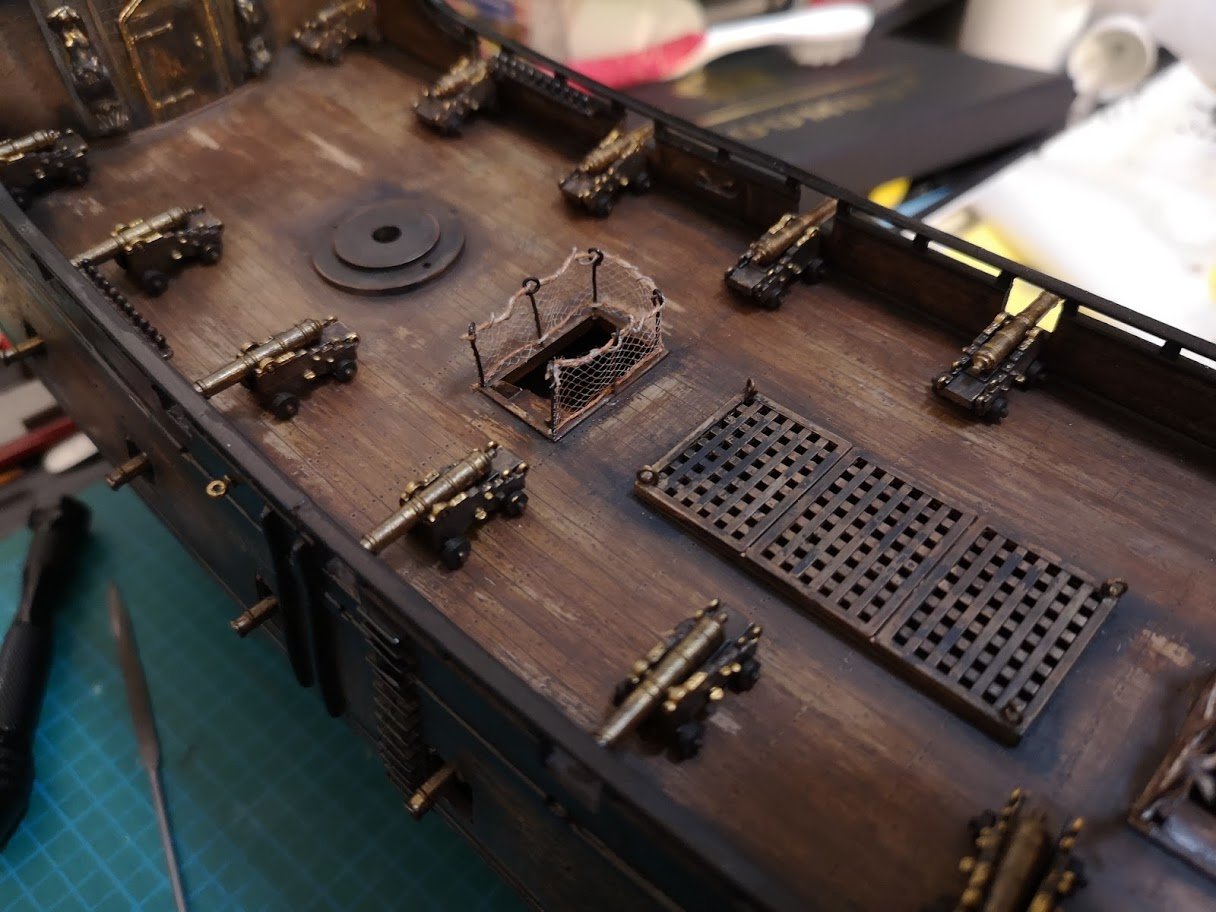
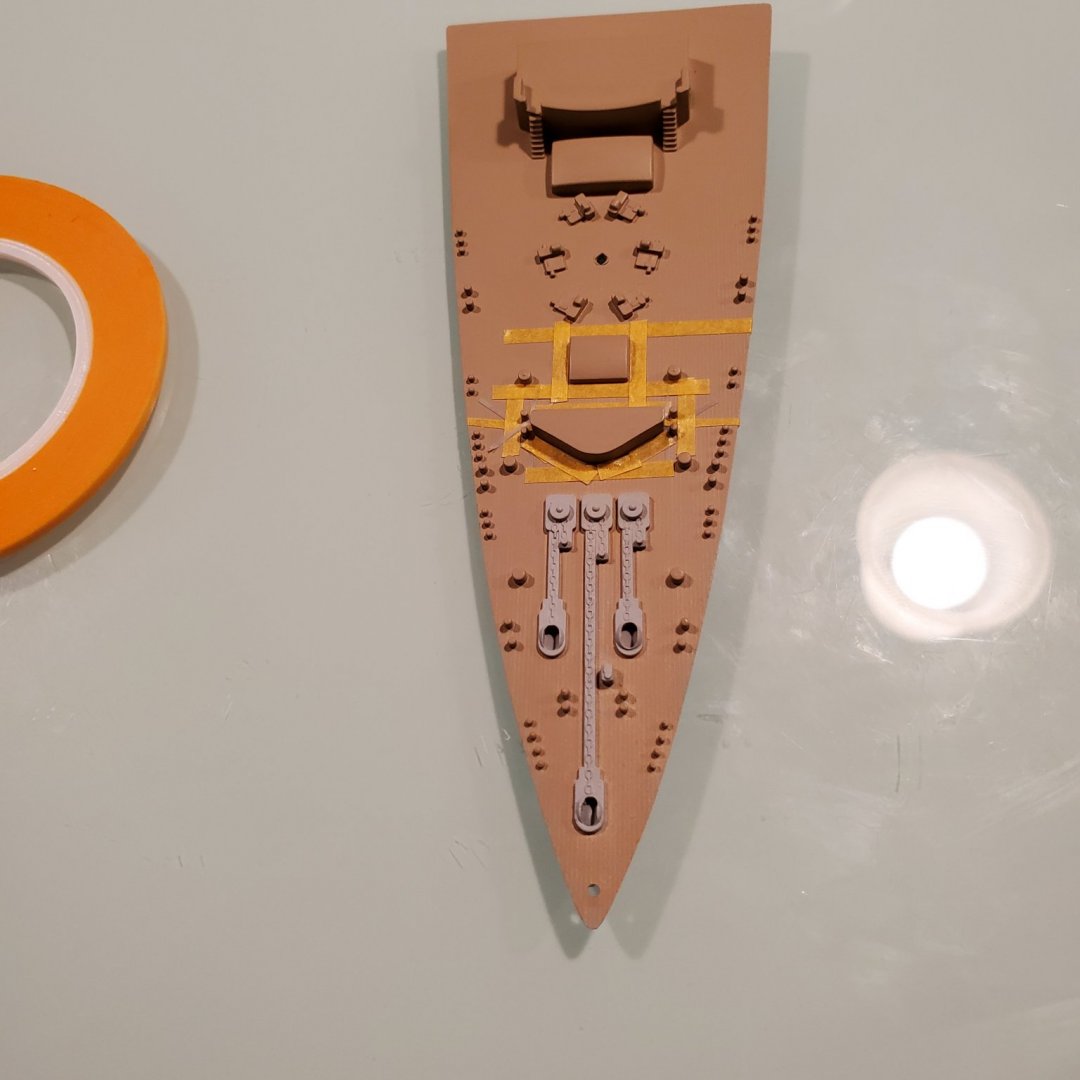
 As I move into retirement (and the peasants rejoiced) I had wanted to spend some time focusing on rigging. Well, I was given this Heller Victory with the hull pretty much done. The backstory was the gentleman had passed away and this was picked up in an estate sale for next to nothing. His work was superior and once I saw the hull I decided this was a good subject for my goal. There was the inevitable broken components but that was largely confined to the royal masts and (of course) the jibboom. The accompanying box of parts was incomplete but I have another 1.5 of these in the stash (bit of a story there). I would have done some things differently (like the deck isn't painted) but for what I was going to use if for and for actual looks that was fine. I have a friend that already has asked to have it upon completion for his library at home, which is perfect. I have dissected the plans and have defined each and every line so am over that hump. I did notice some differences to actual practice. I have a set of the plans that Longridge uses in his book (thank you Uncle Leo) and have defaulted to that presentation where practical. For example the foremast stays did not include the Breast Backstay so I am adding that. Not going crazy or over the top but where it makes sense will make those changes (for example, will use the supplied plastic blocks). I looked through my stash of 'rigging' line and have chosen to use 6 types. The Heller supplied line is white and didn't want to dye. So this morning after getting the remnants of the broken pieces removed and things prepped, went ahead and primed the necessary replacements. I am using Vallejo acrylics. It will be interesting to see how close I can get to the existing yellow shade. I should be working on this at least 2 days a week at a minimum. My first task is to scratch some open and closed hearts for the fore and main mast stays. These seem pretty iconic and need to be there but aren't included in the kit. Stay Building My Friends, Mark
.JPG.79990ac9a03ccb5863611932cf047da2.JPG)
.JPG.d202681a6ef3aee1ec9fa793cfe4a452.JPG)
.JPG.082ebe4de74ac127de97aca00a15e0c5.JPG)
.JPG.1935c3259708a5afe50dd95635322ff2.JPG)
.JPG.569333ad8409a308ff435f633ba2b67a.JPG)
.JPG.5c6fb467d3cc582a9de7ef92c1c78d54.JPG)
-
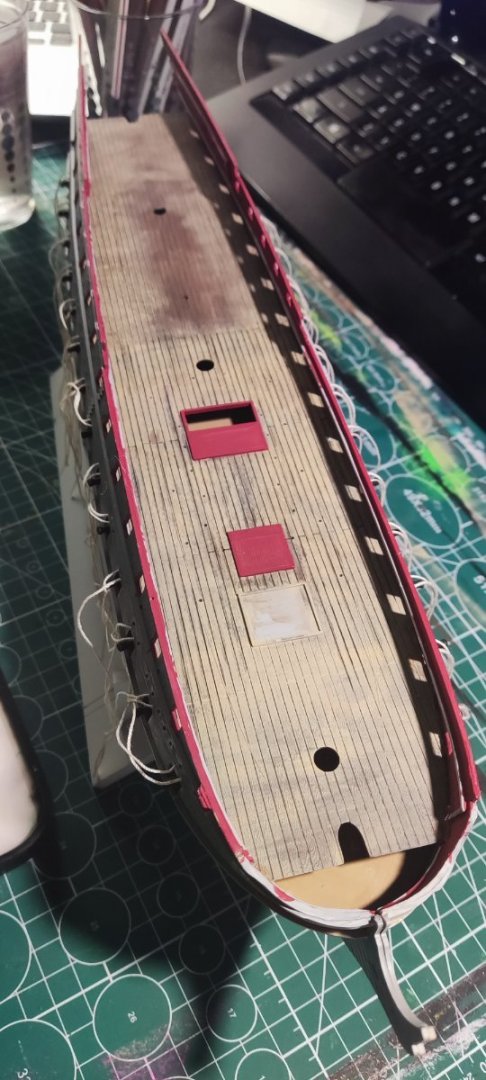
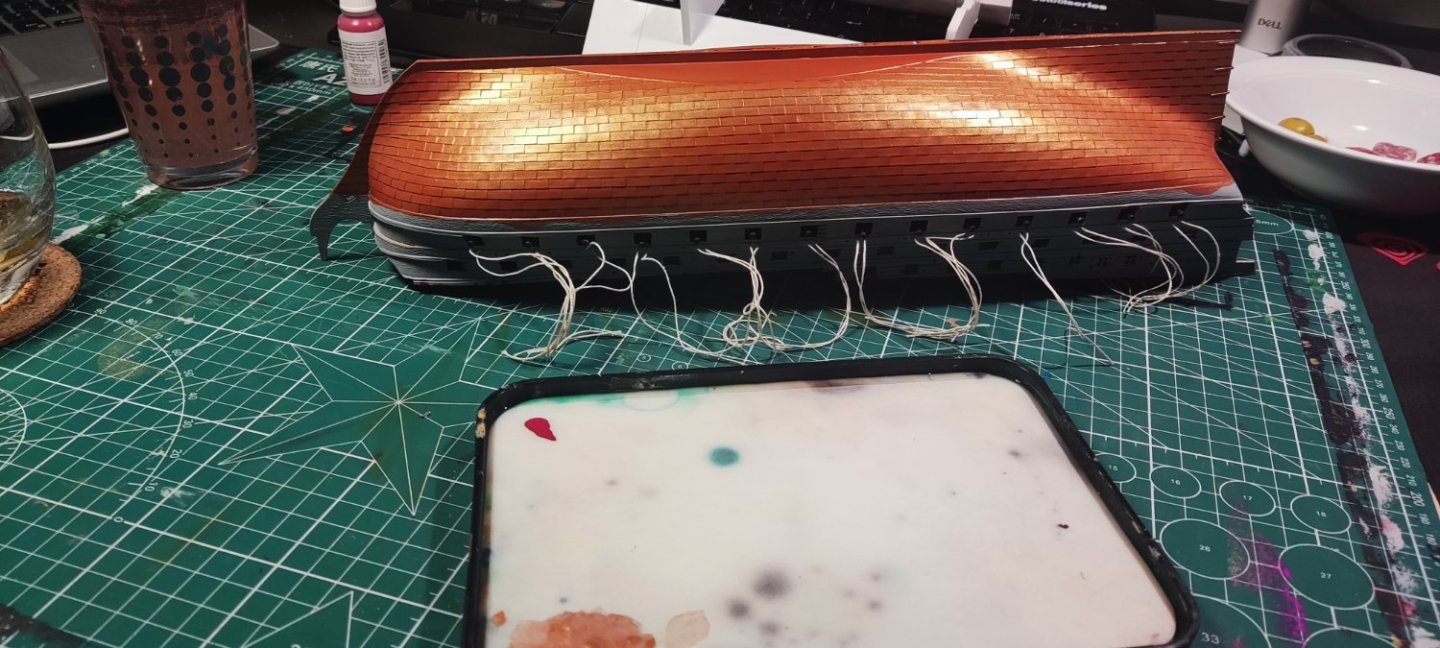
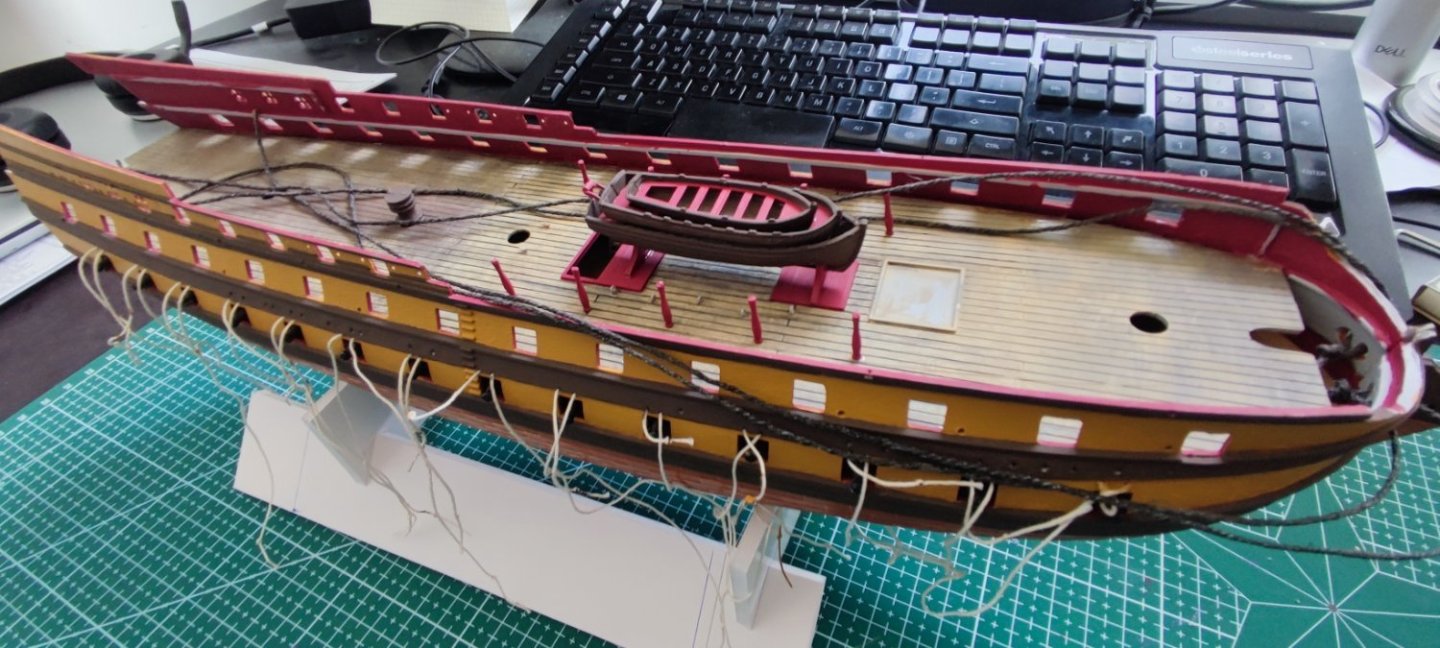
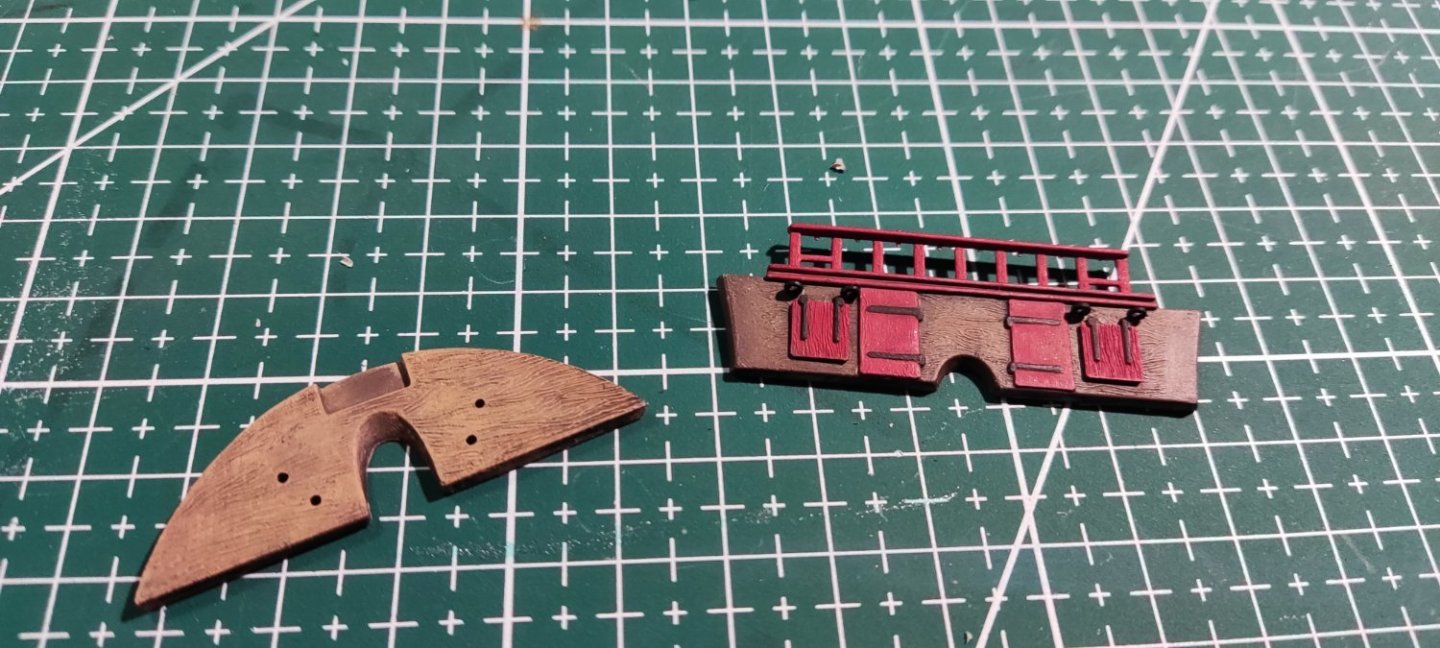
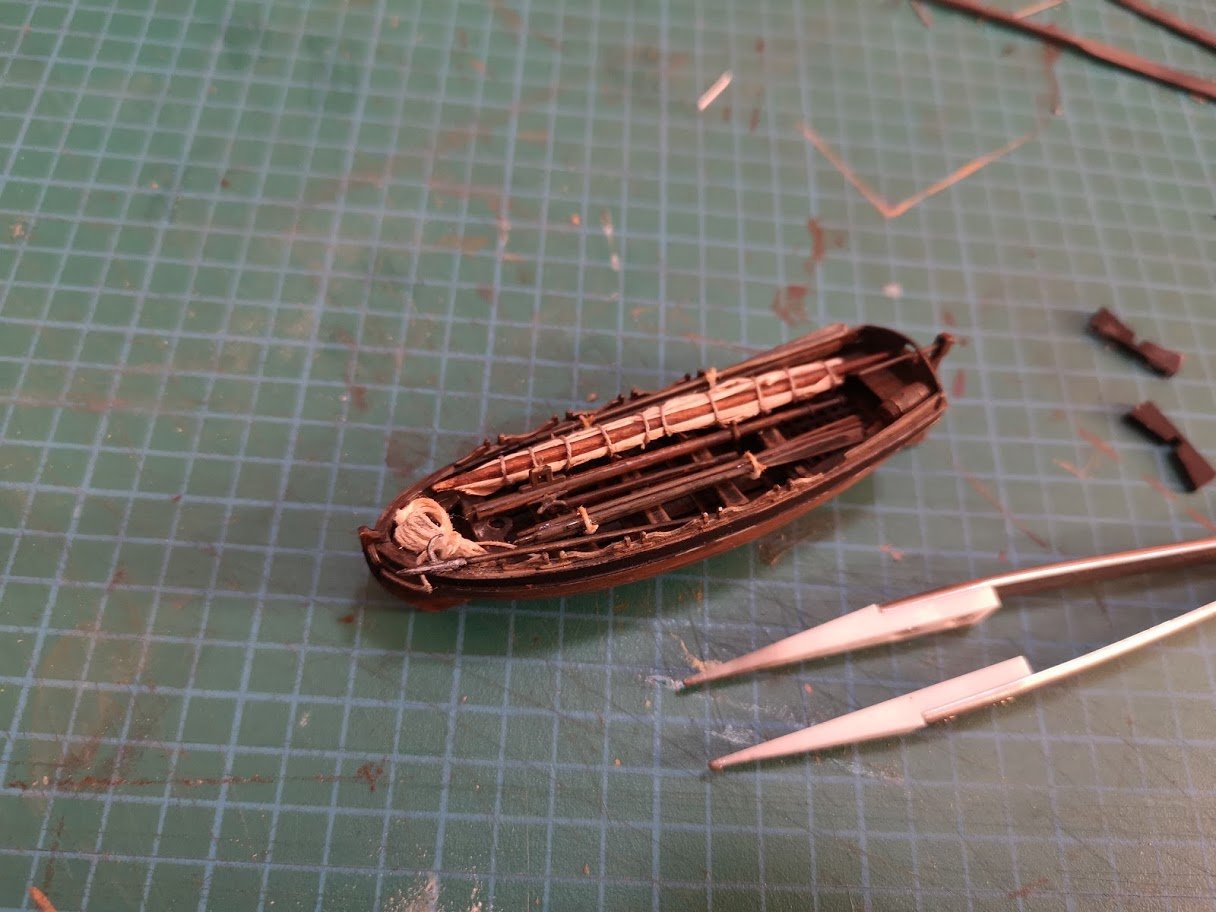
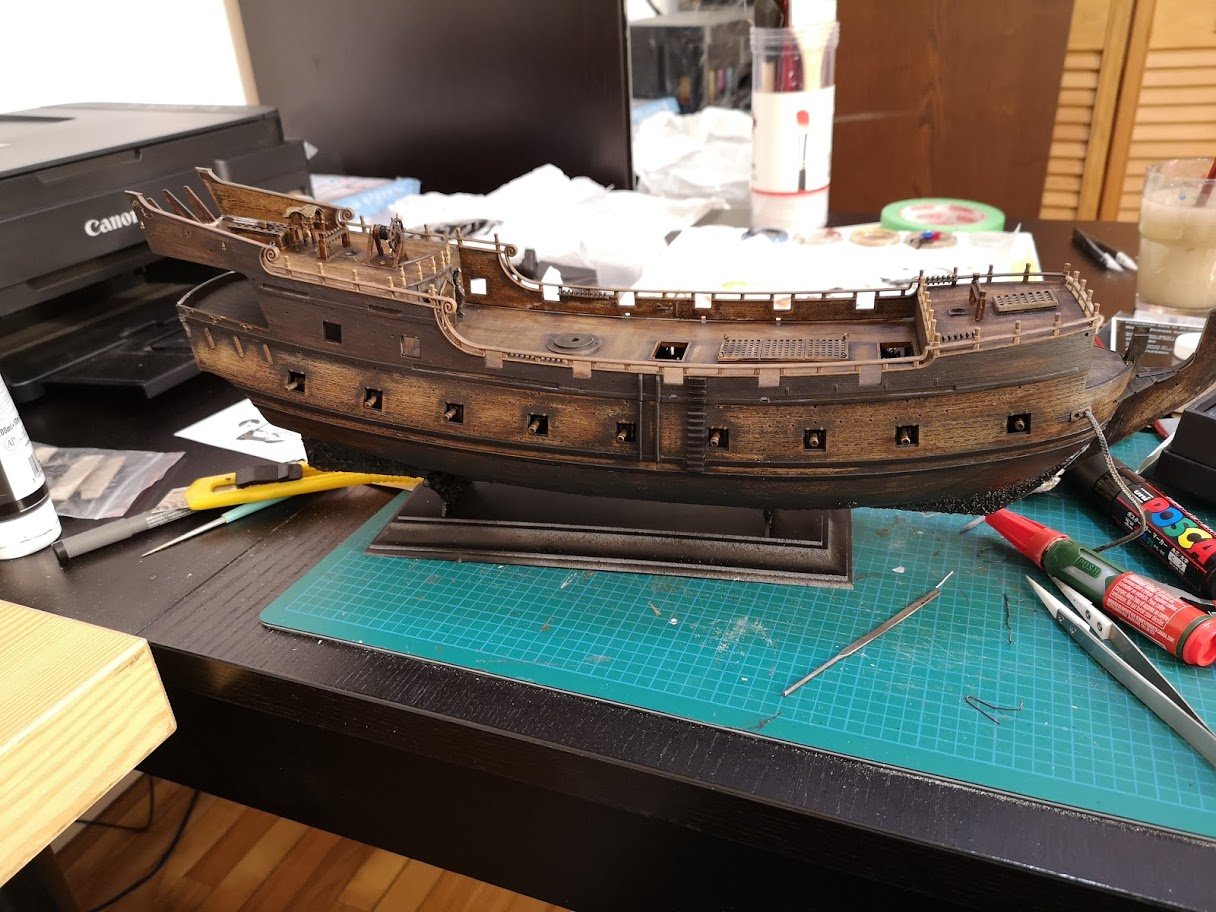
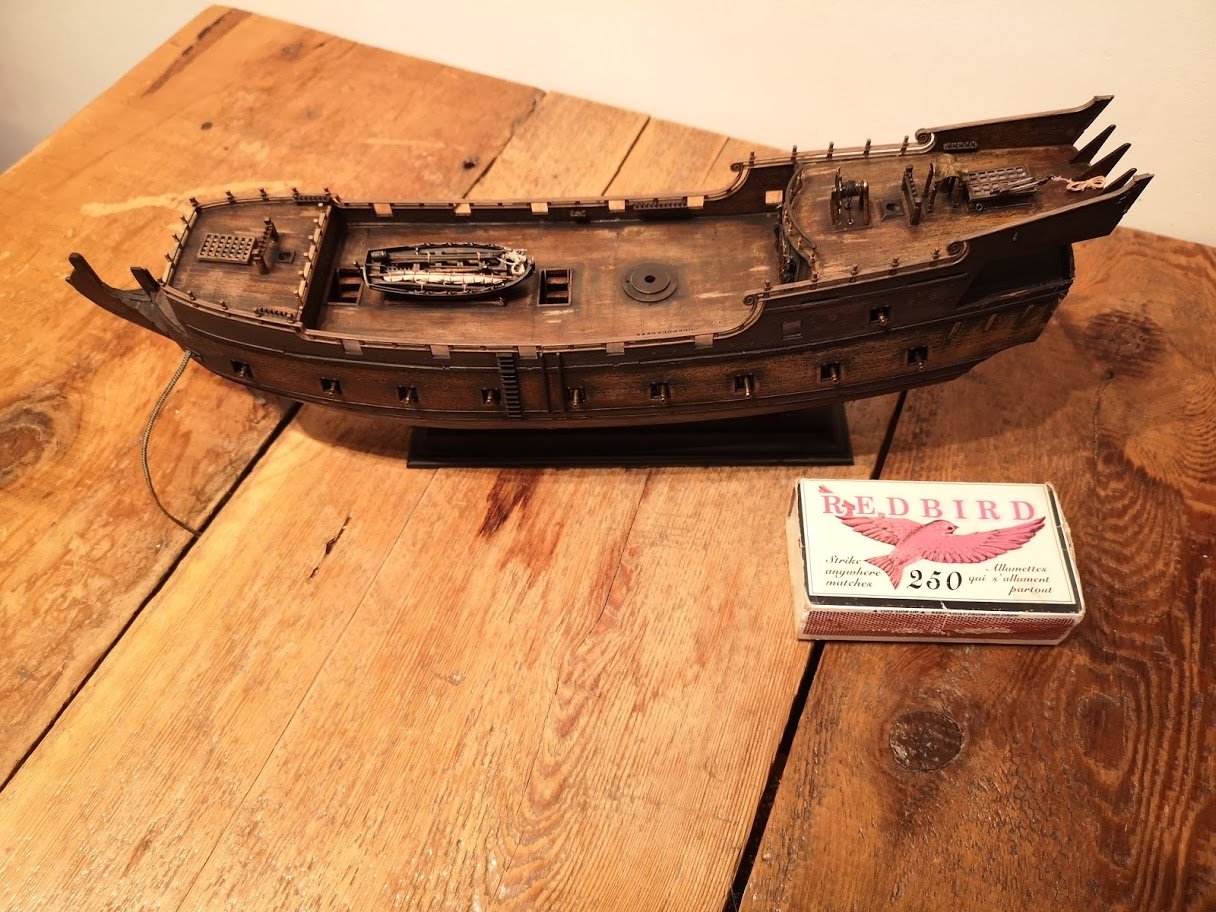
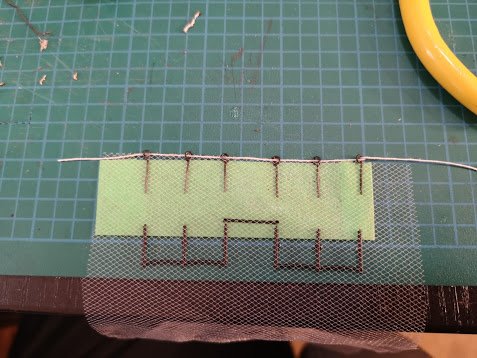
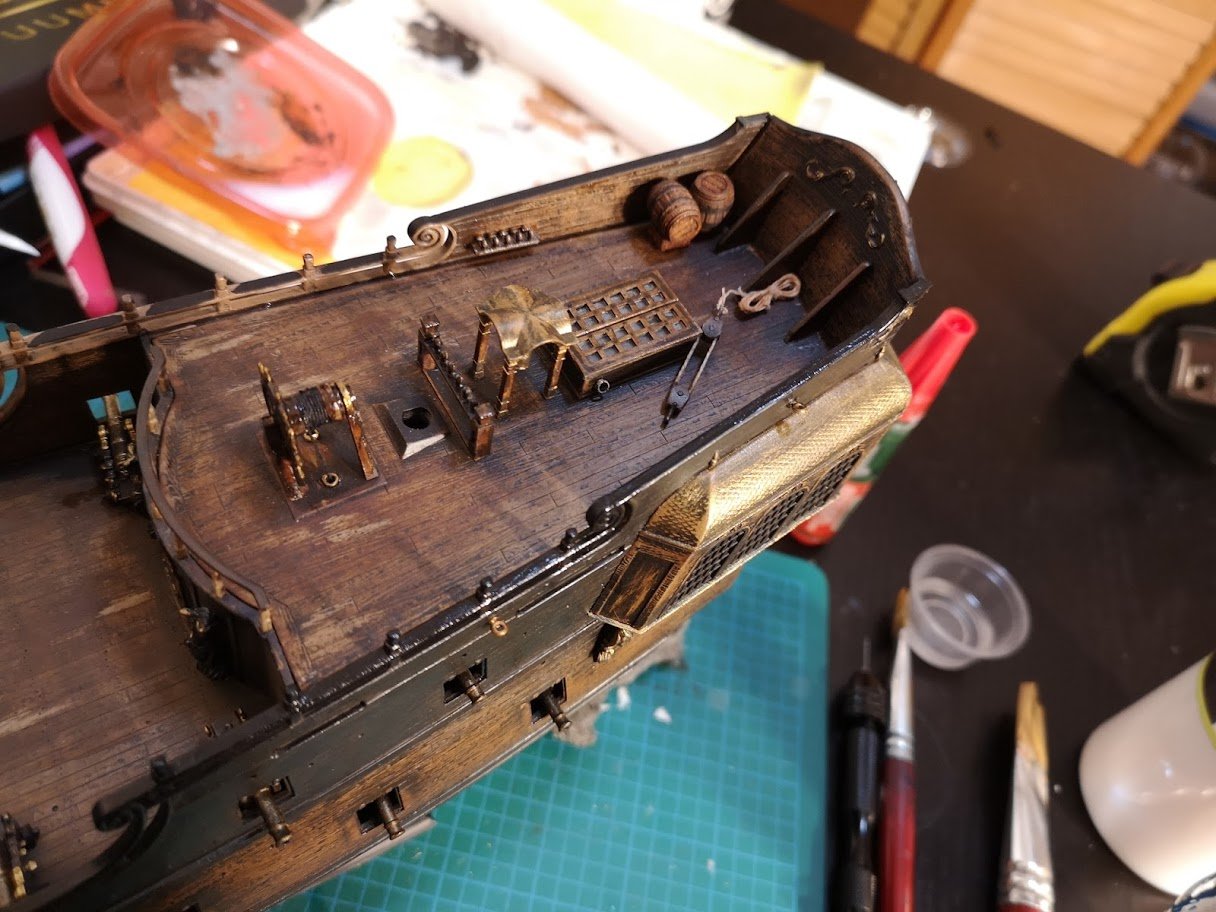
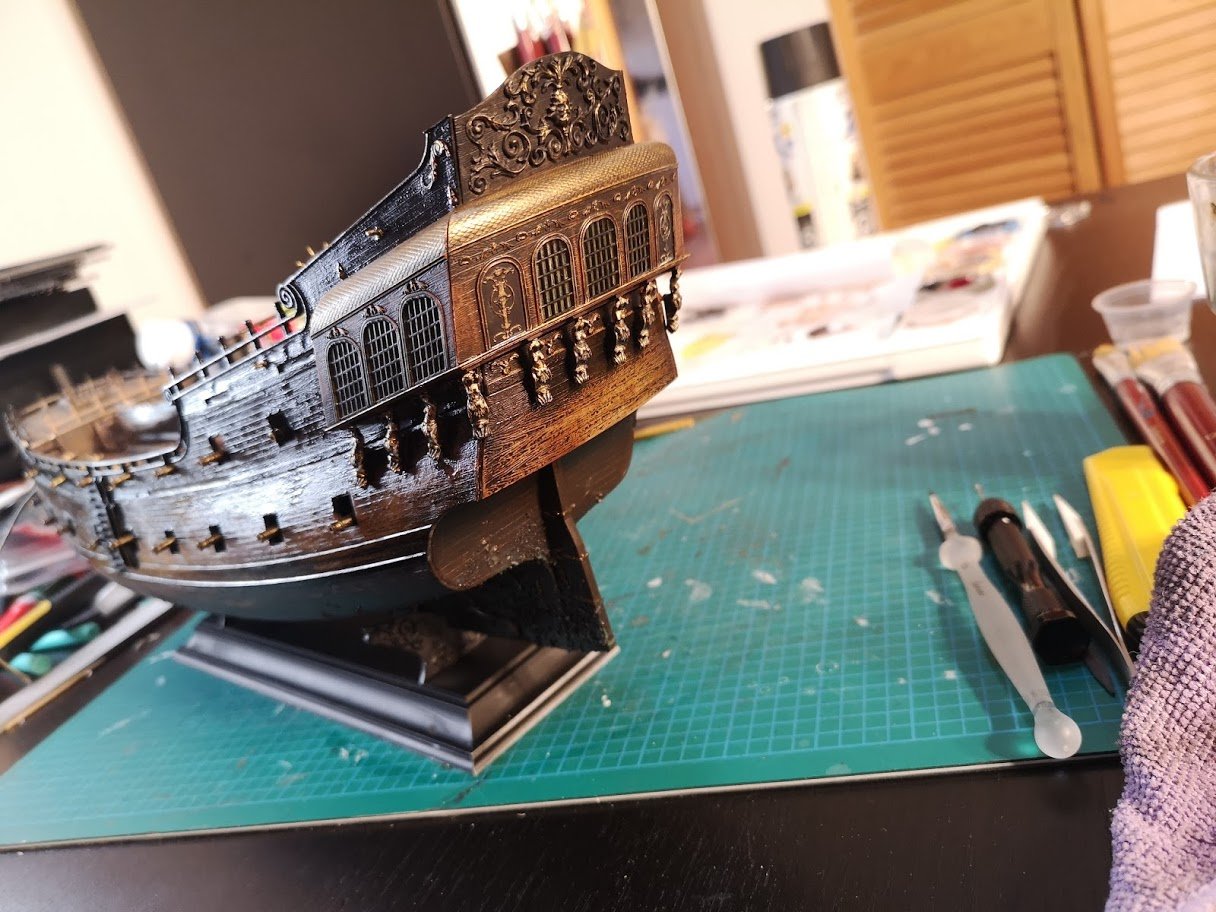
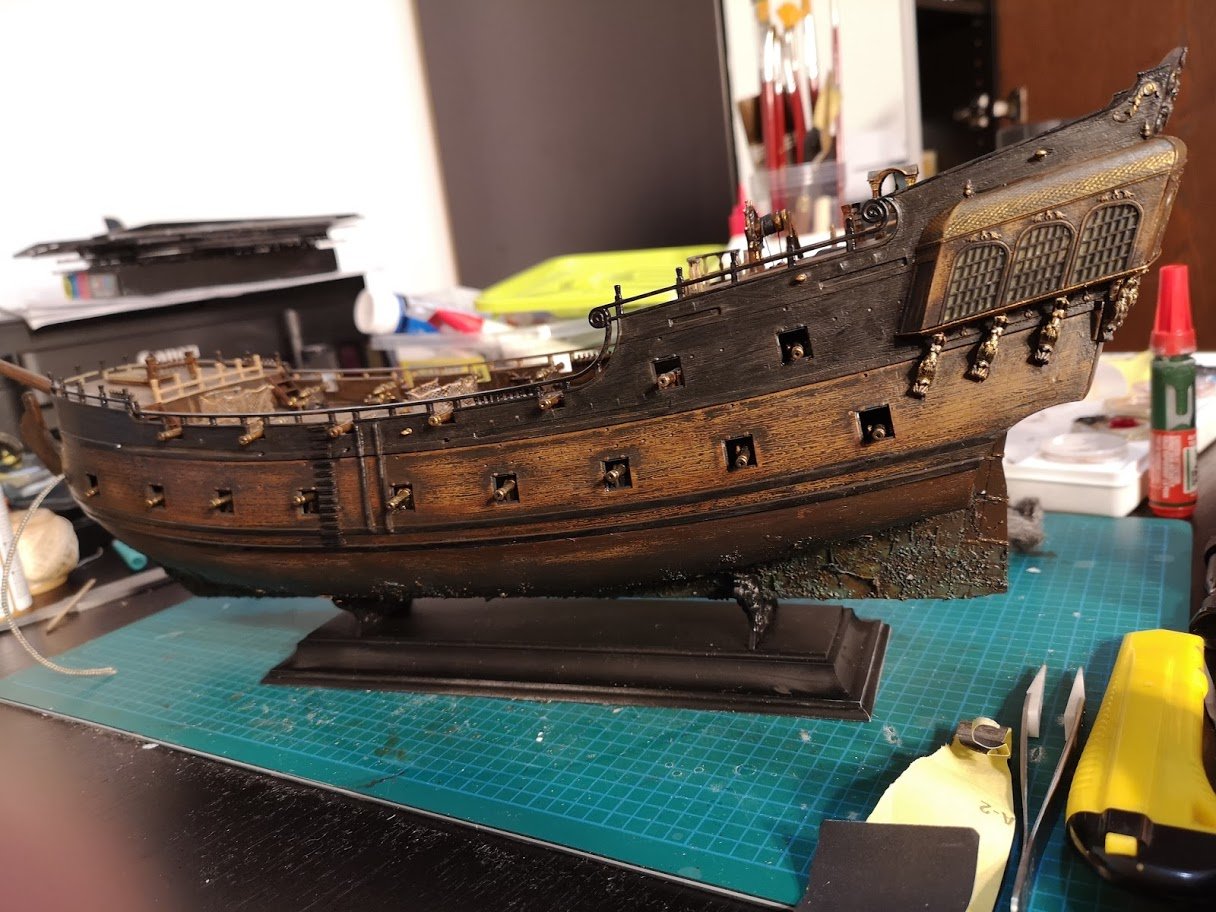
 Hi everyone , new newbie here As i mentioned in my introduction , i am pretty new to the hobby , the only model i did was an AT-ST from starwars a year ago . I really fell in love with tallship during the confinement and wanted to give it a try . Most videos , and ressources i checked were about wooden ship , and , i know myself , i would give up at planking , also i don't have the proper space and tool for that . So i decided to start slow and take a plastic model . So far so good , i am liking it , and who know one day i may find the courage to get into wooden build So i am a bit advanced in the project , that is when i realize i may need advice and help in the futur . Anyway , here is a retrospective on my build so far ( sorry for the lack of ship vocabulary , i am learning little by little) 1: my first thing was to take the statues from the base and stick those on the side of the captain door , to get a bit closer to the original look ( and also because the vanilla model was boring) also doing a frame to the door with some metal wire 2: was to get some algua/seashells on the hull , i know most ship builder like clean versions , but i do enjoy when it feels it has been used , i don't know it's like there is story telling in the model 3: almost died of boredom with those canons , god that is boring T_T , but the result is satisfying Also i didn't wanted to go full black , i like to play with texture and paint , color variations etc , so i went with wood texture . I had to sand the hull and deck as the texture overall was too strong for my liking. 4: Sanding the ..erhh wheel axis {?} to replace the plastic rope by a real one , also piercing some holes to let the rope goes down . Adding some small metal rings here and there to get a more "detailed" feel 5: Replacing the plastic folded sail of the ..erh..small boat by a custom one . adding some ropes too. 6: trying to bring a contrast in the colors with a darker upper part . 7: i was like a kid here *_* start to looks like a ship indeed 7: i wanted to remove the handrails that goes down into the hull by something custom ( a bit proud of this) new vs original , not perfect but i did fixed it later ( also i added some metal hoops on the grid thingy where the lifeboat will be attached later) Final 8: added some 3d printed barrels ( that a kind friend printed for me ) 9: mounted the upper deck canons captain quarters And that is where i am at . I have been at it for 3 weeks i think , after work at night ( when kiddo i asleep) so i am pretty satisfied with the overall velocity . Do you guys happen to know the name of this rope thing on the bowsprit so i can look up how it's made/rigged, couldn't find any info on how it's called . Not sure if it's a 8 figure or else. That was a long post Thanks


- 27 replies
-
- 5
-
-
- Black Pearl
- Zvezda
- (and 2 more)
-
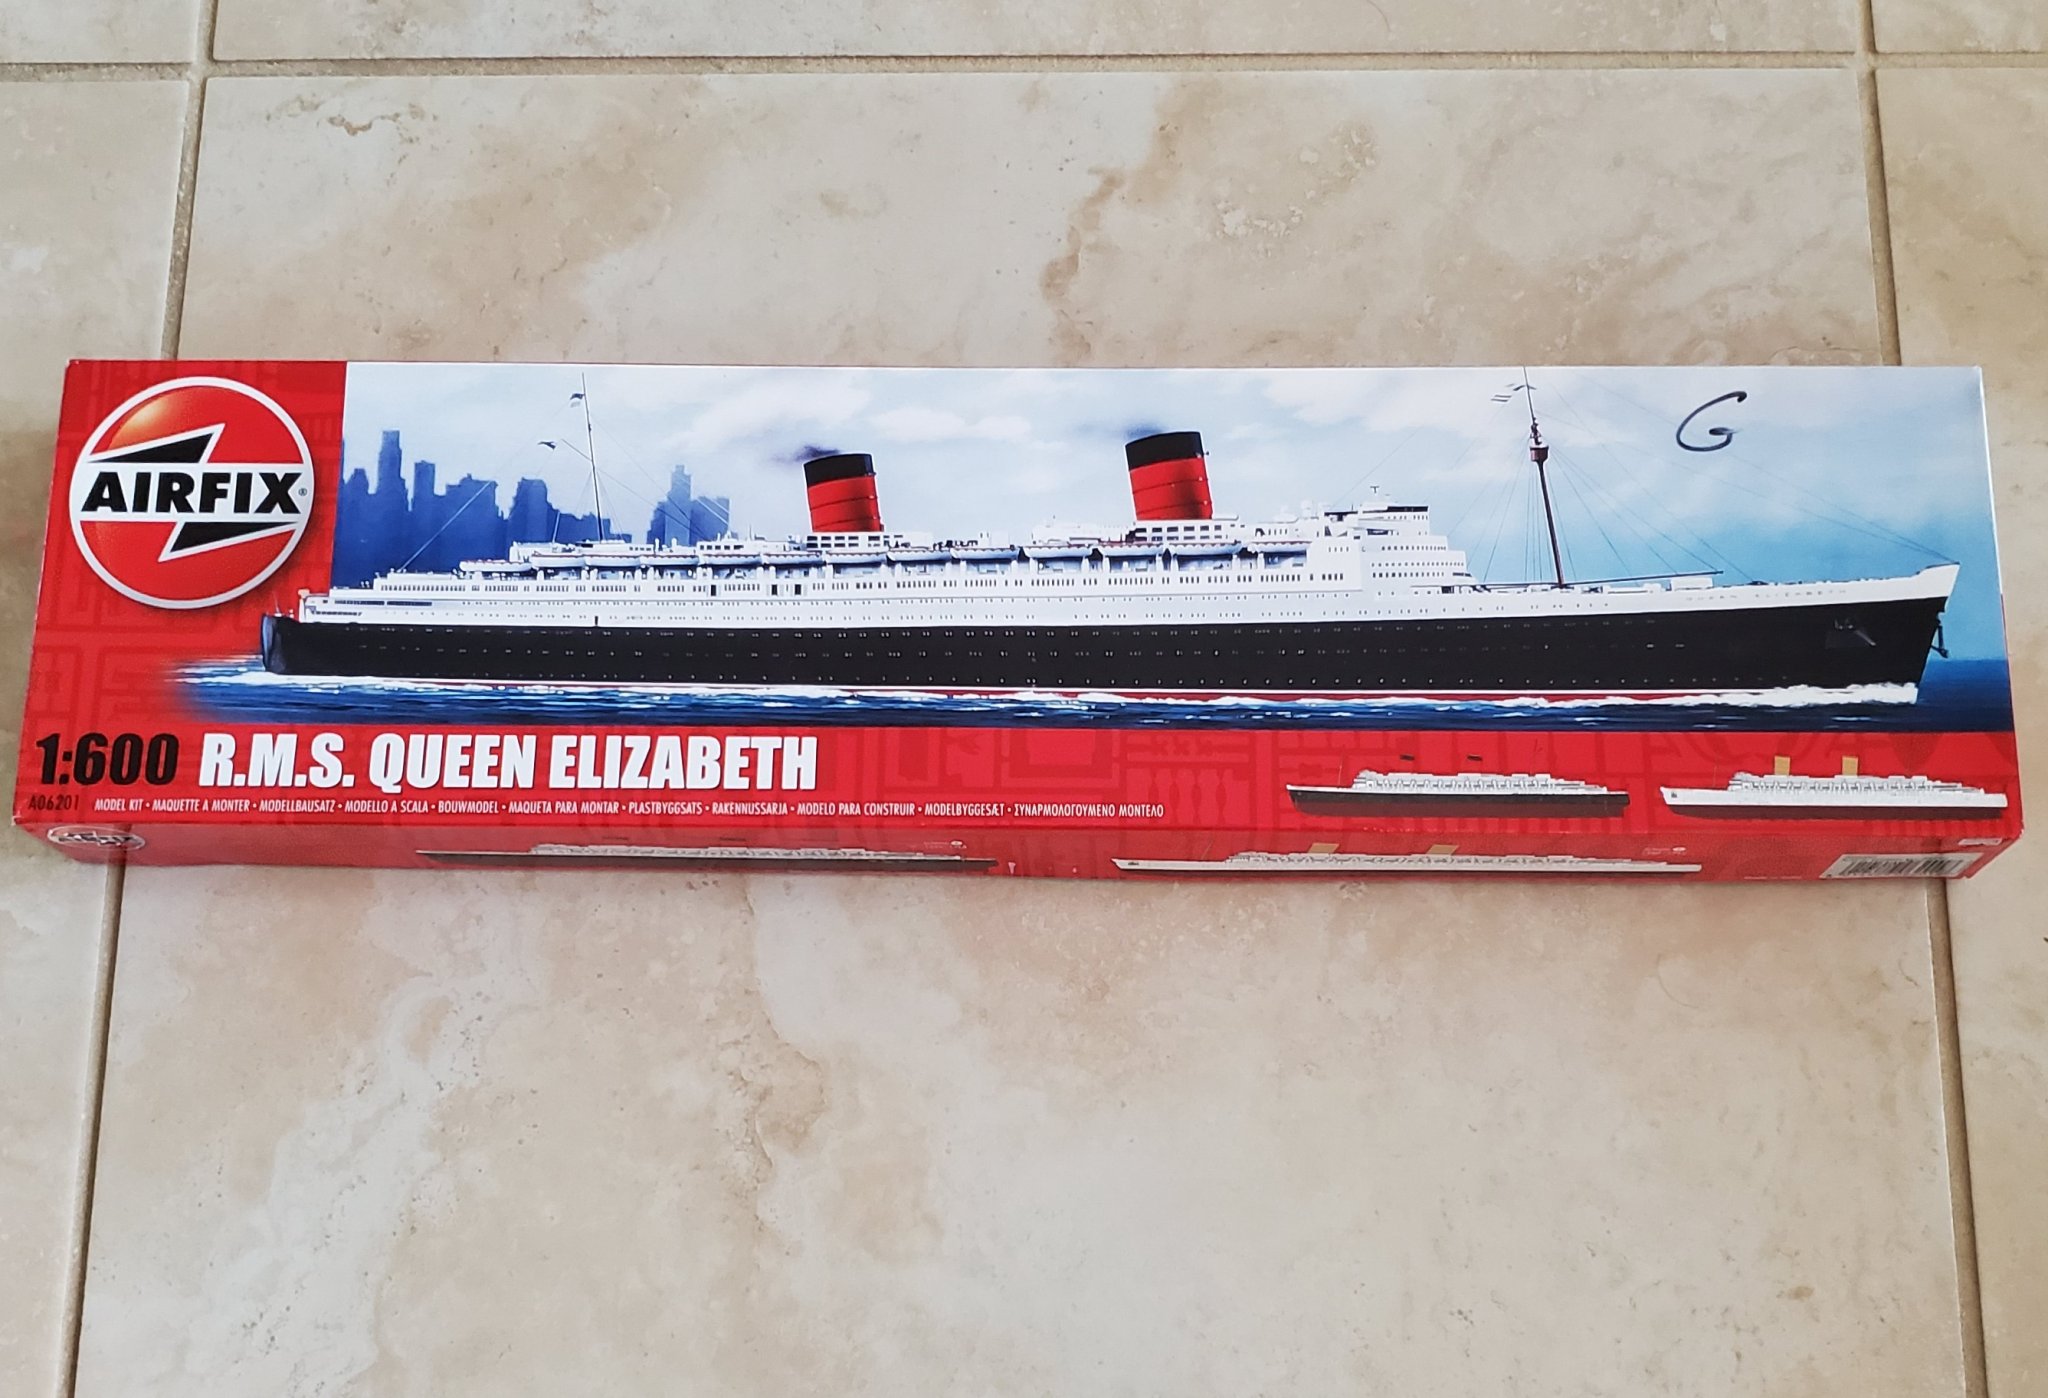
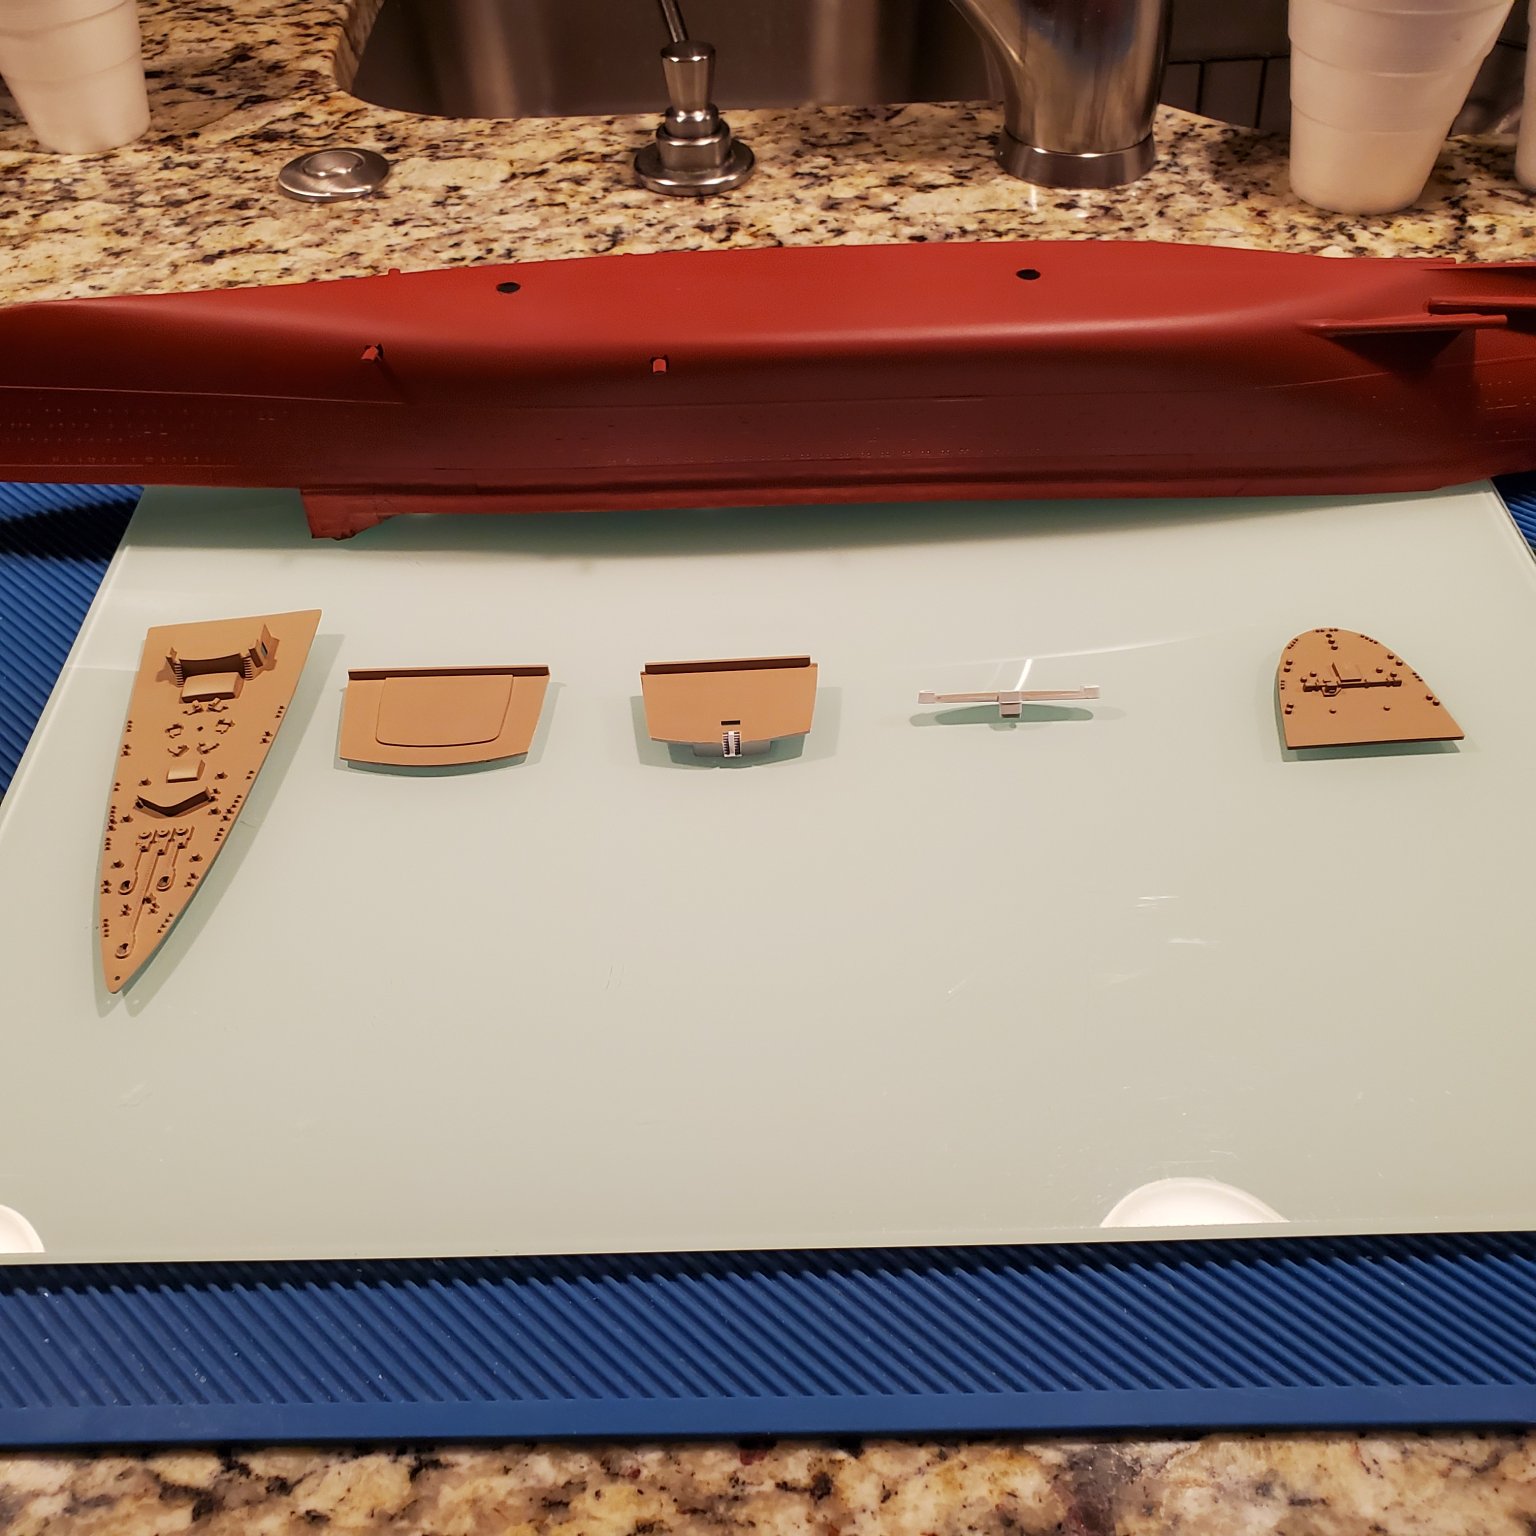
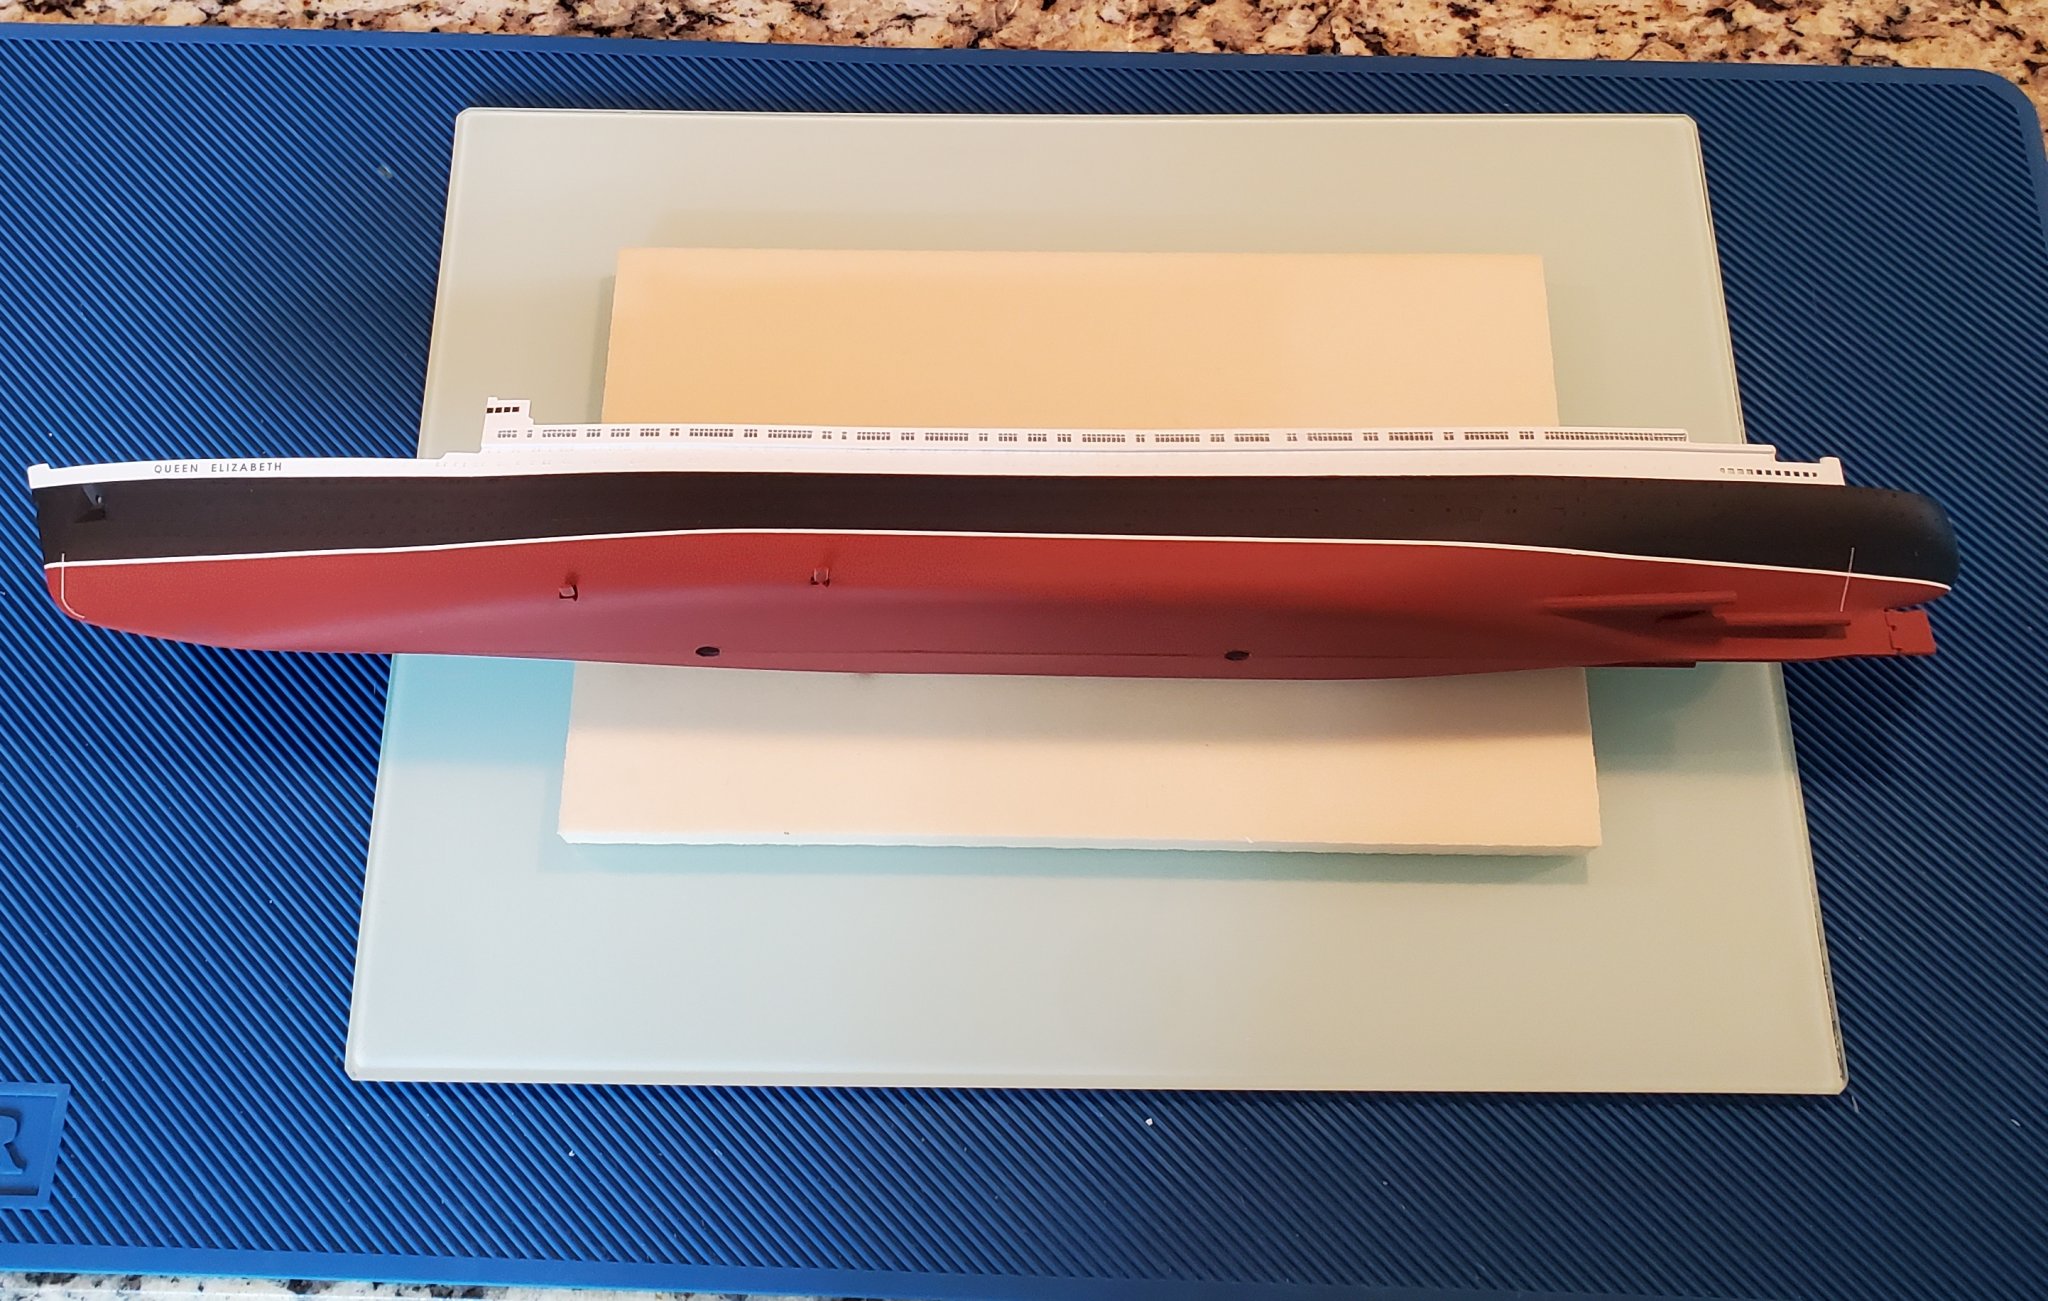
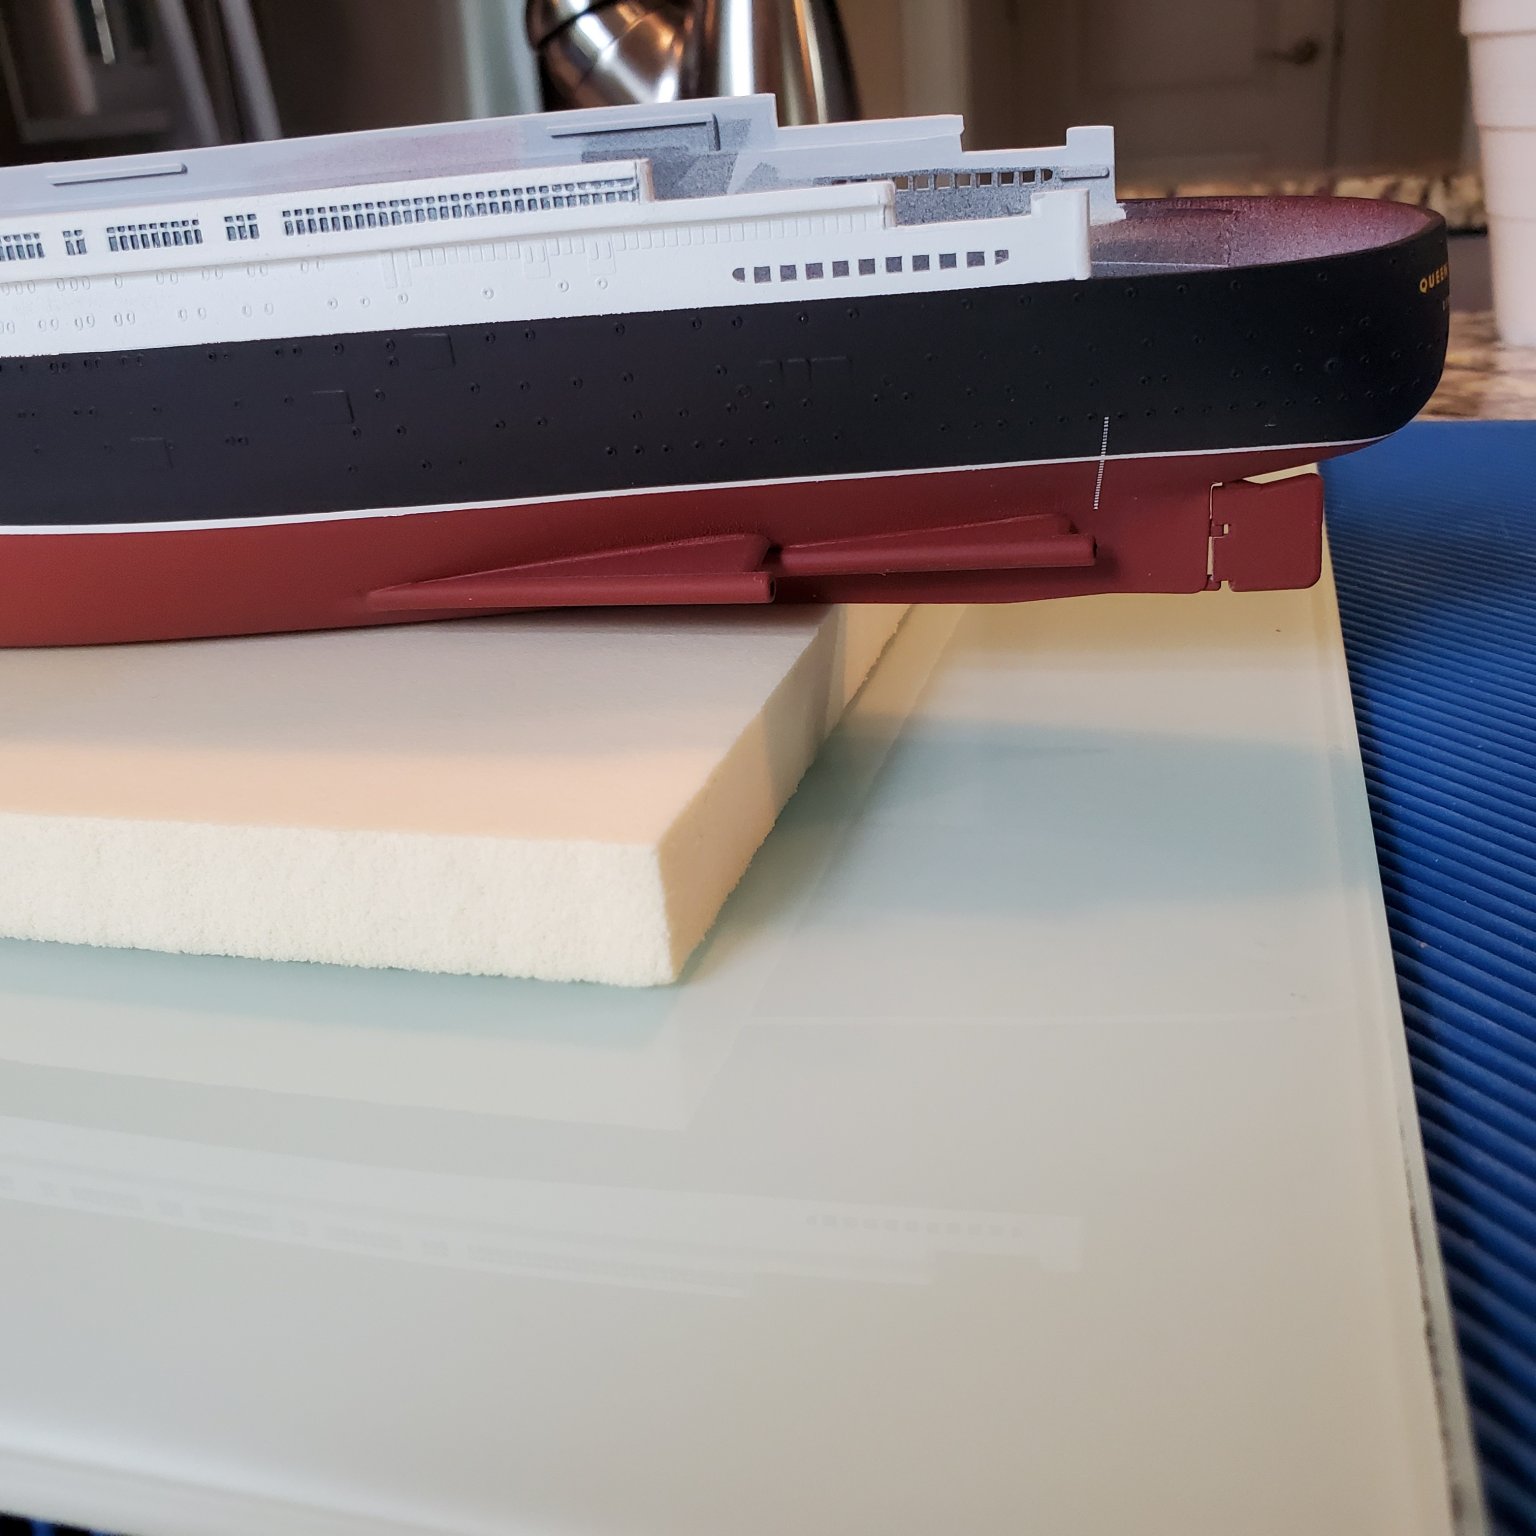
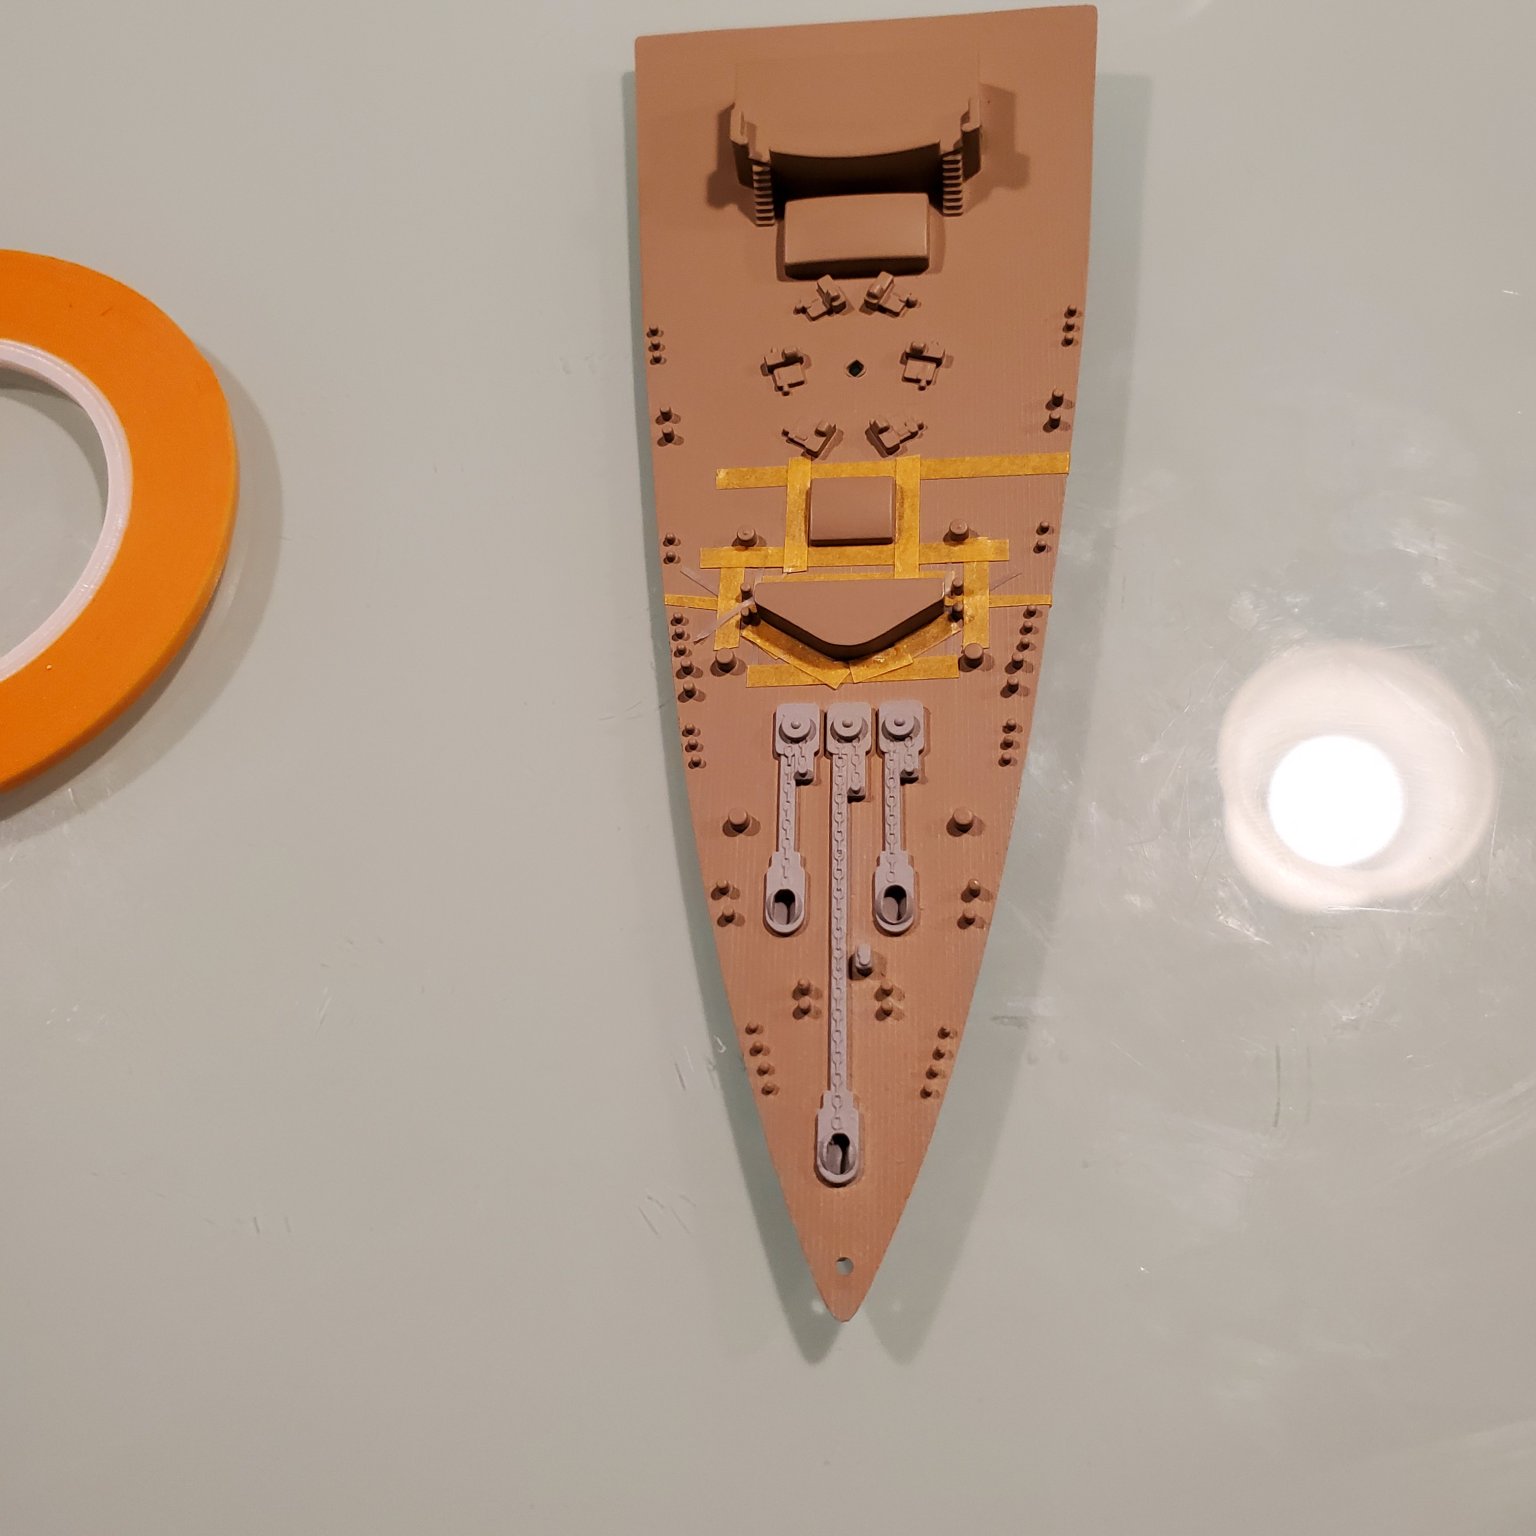
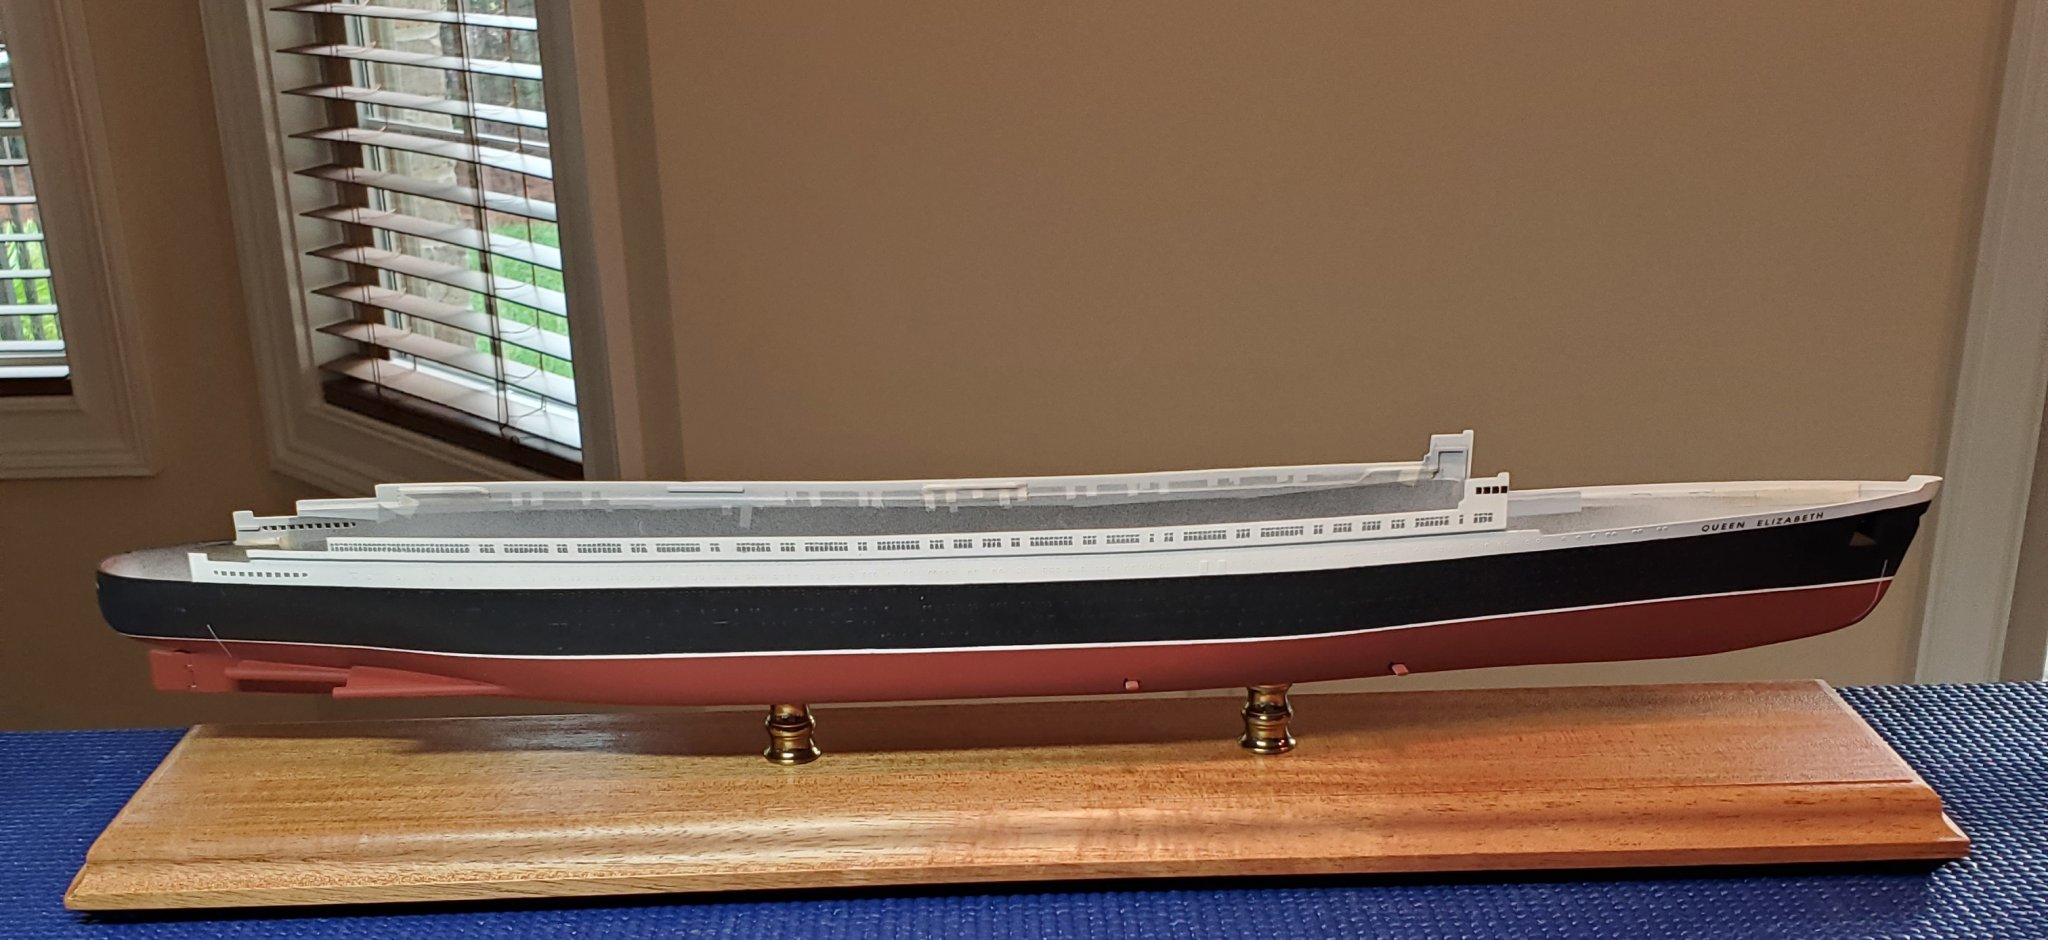
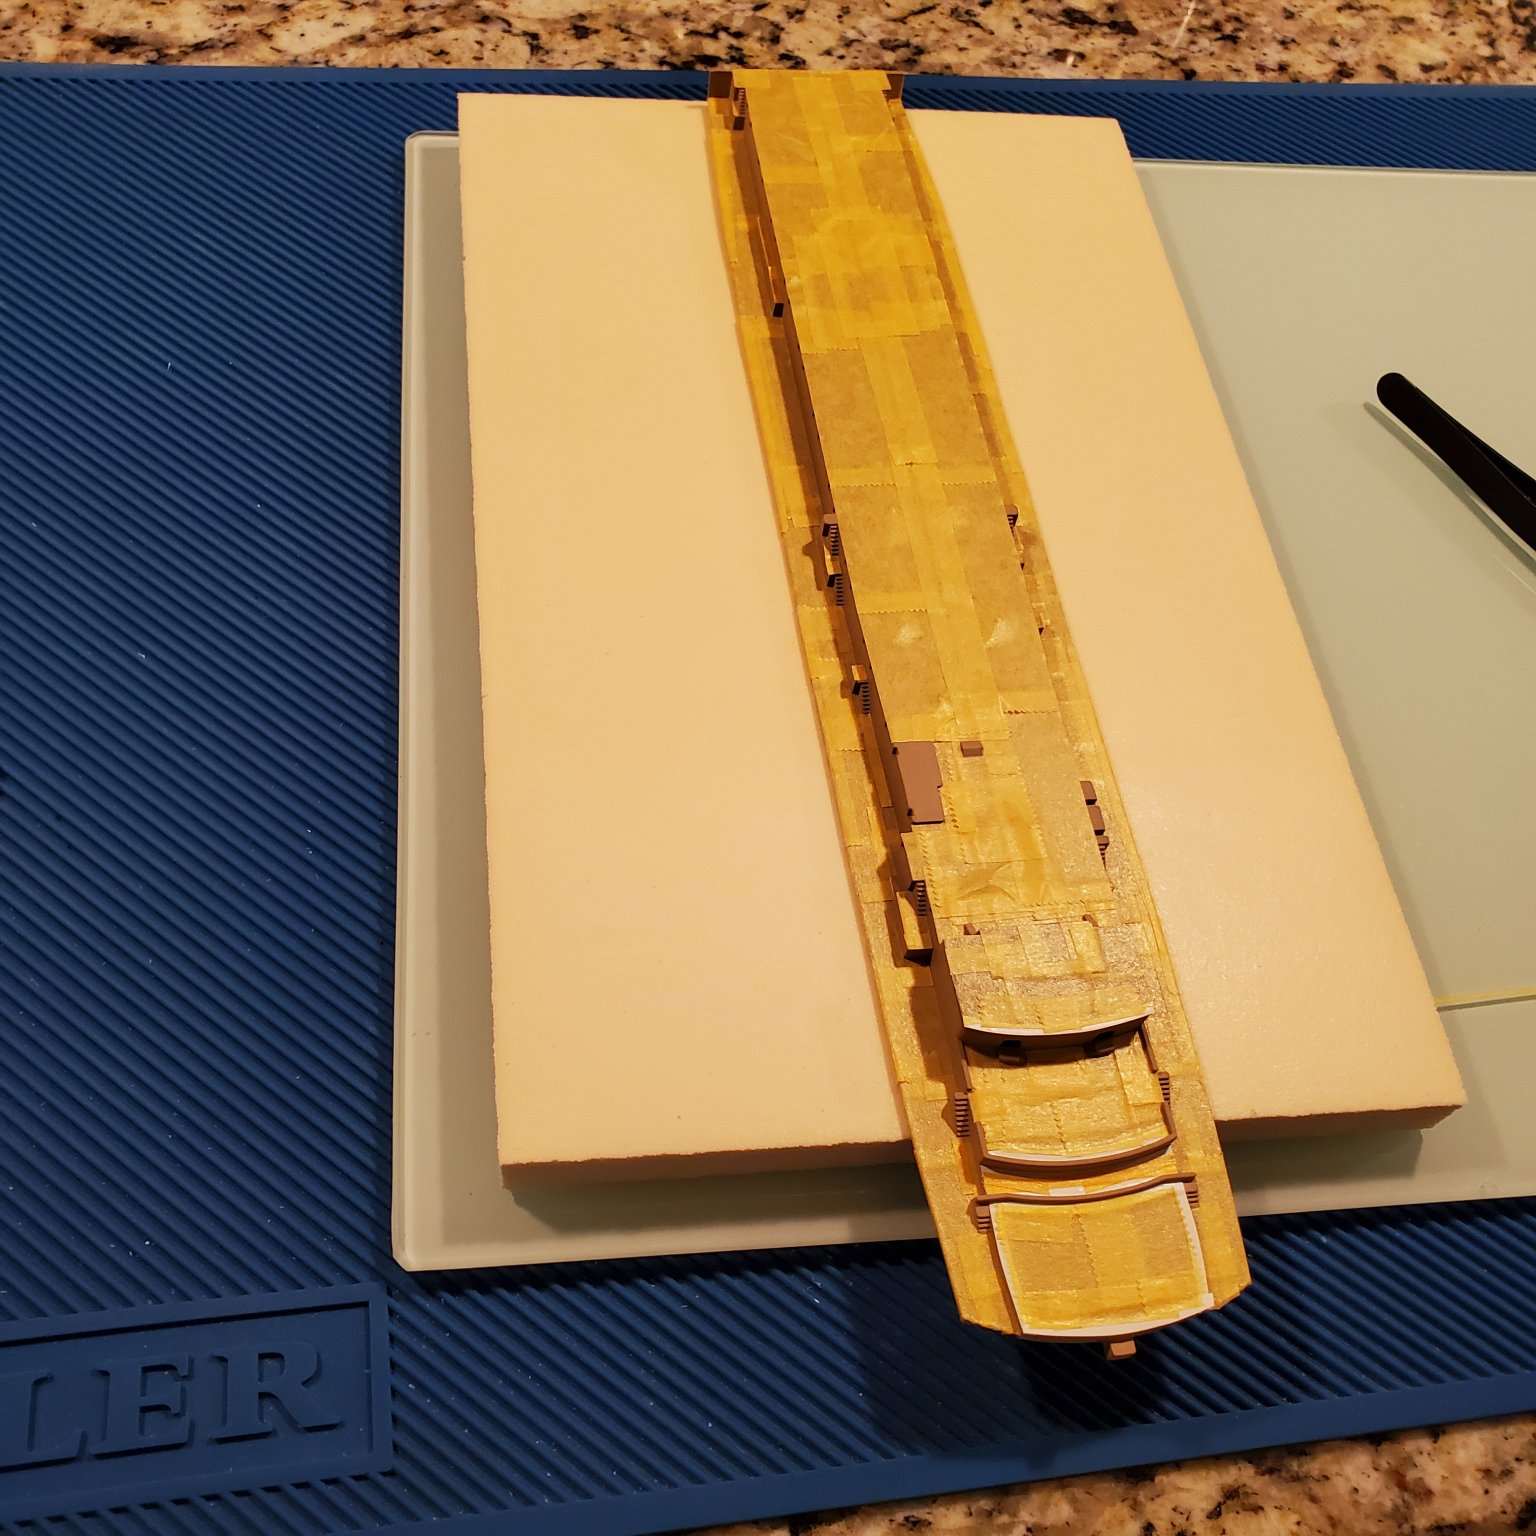
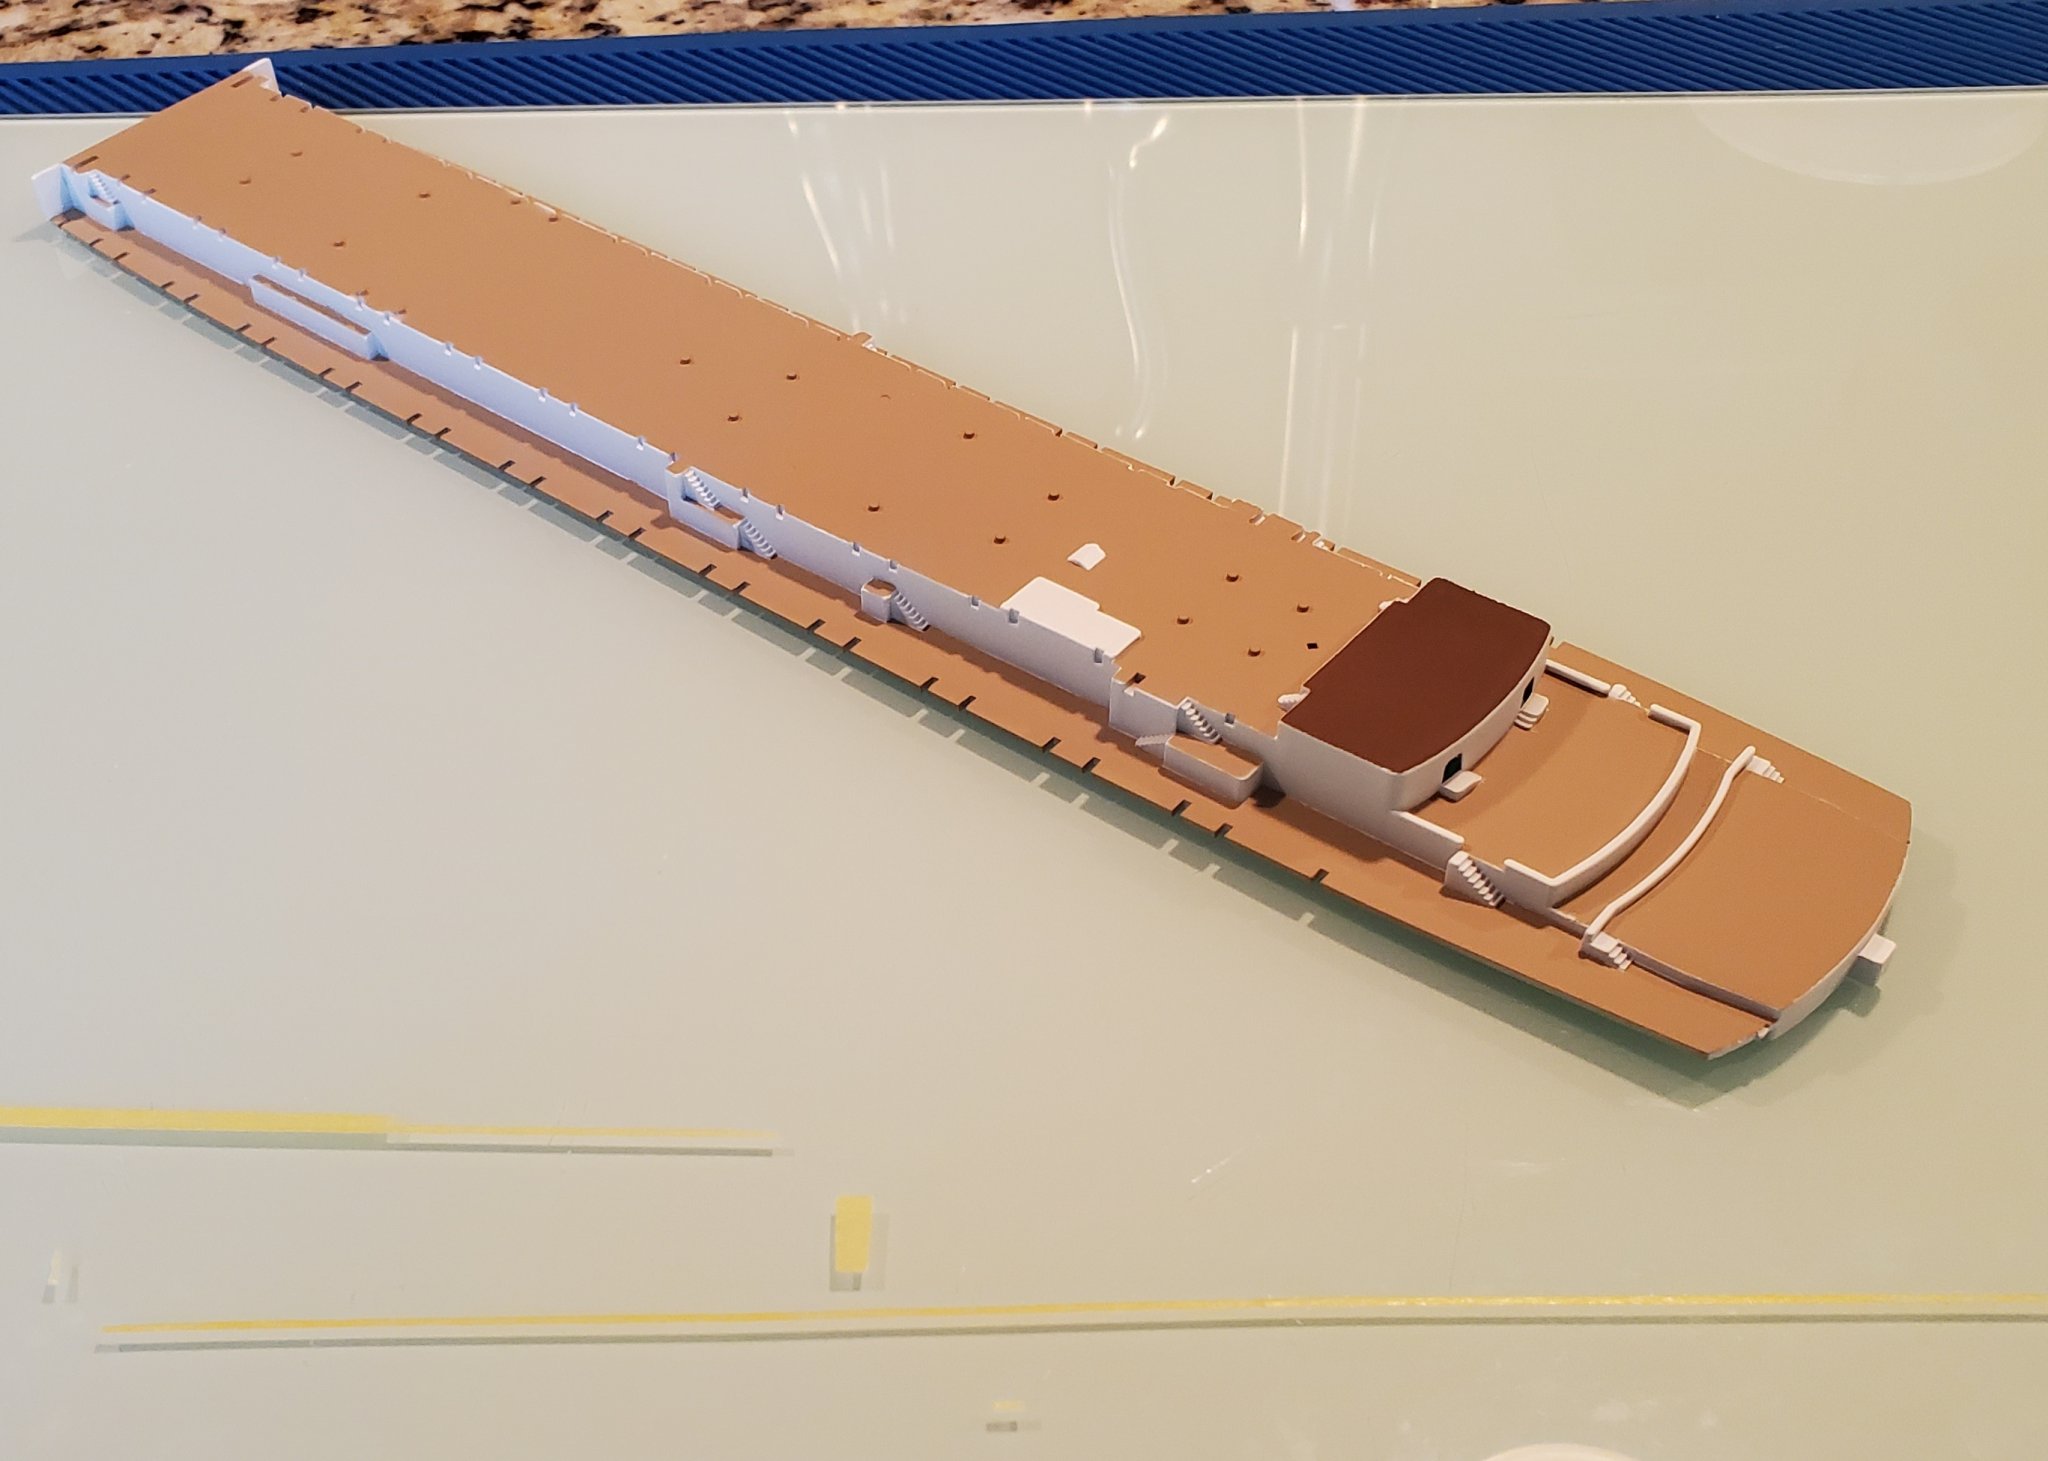
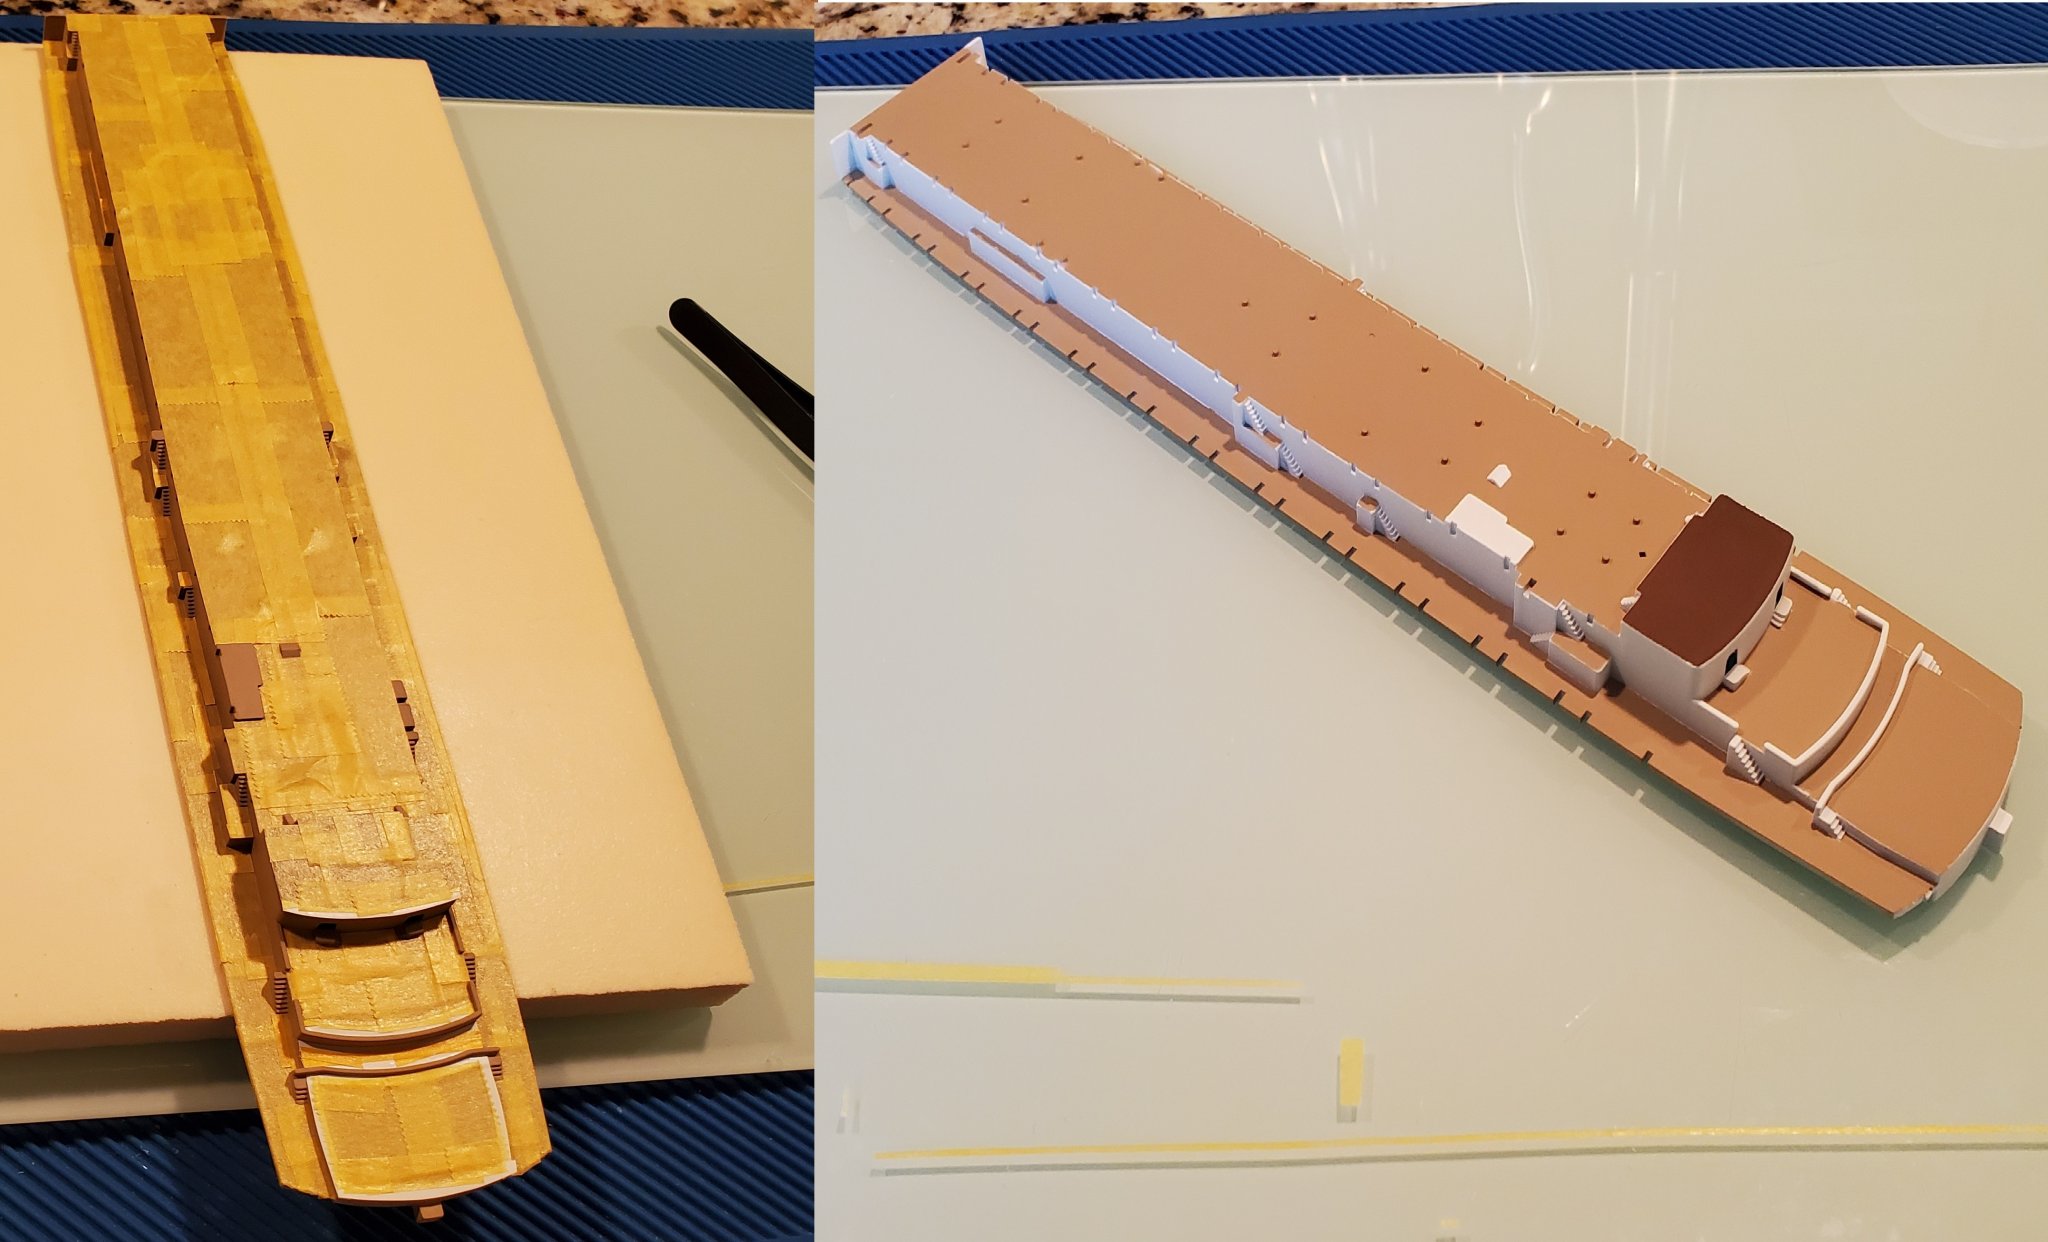
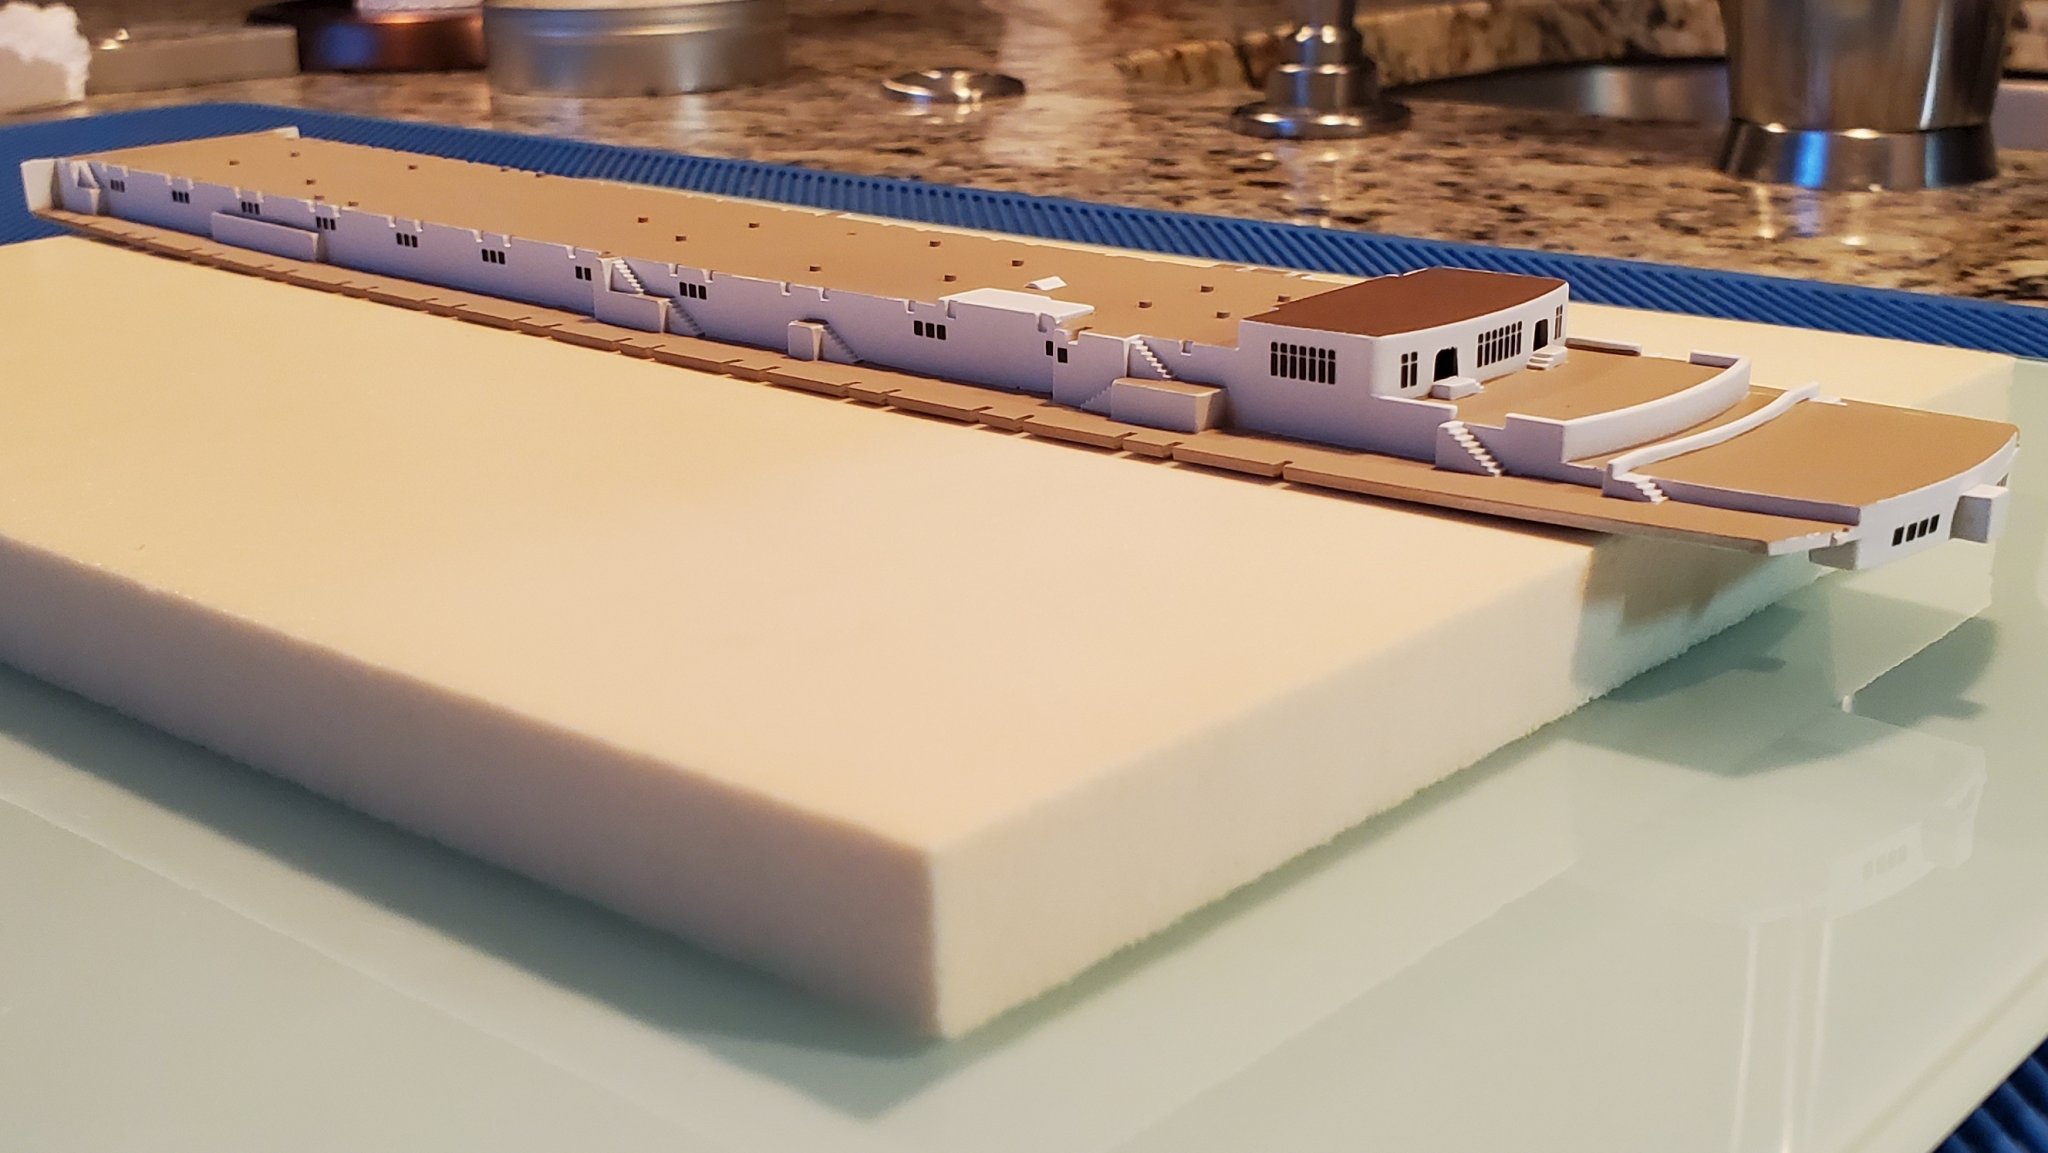
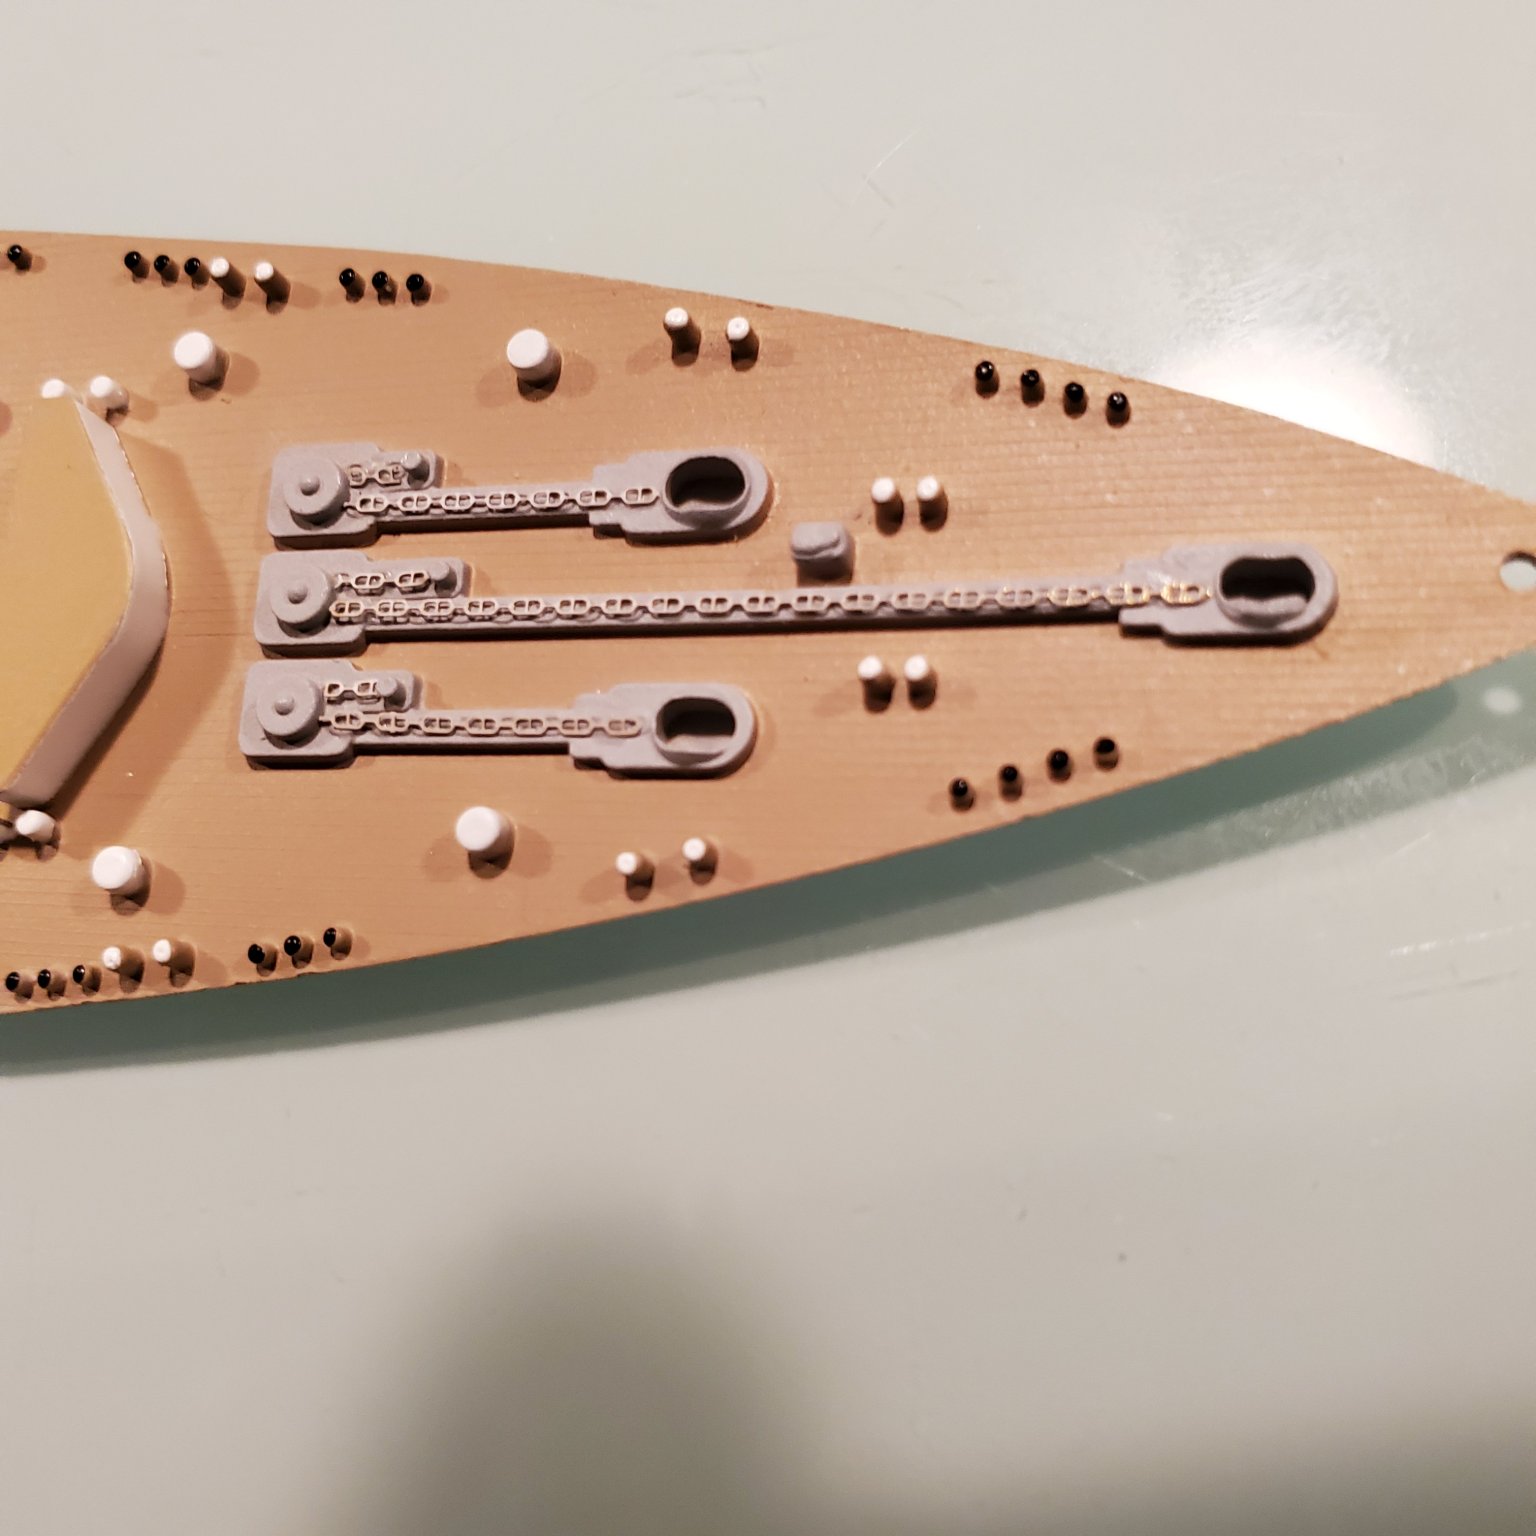
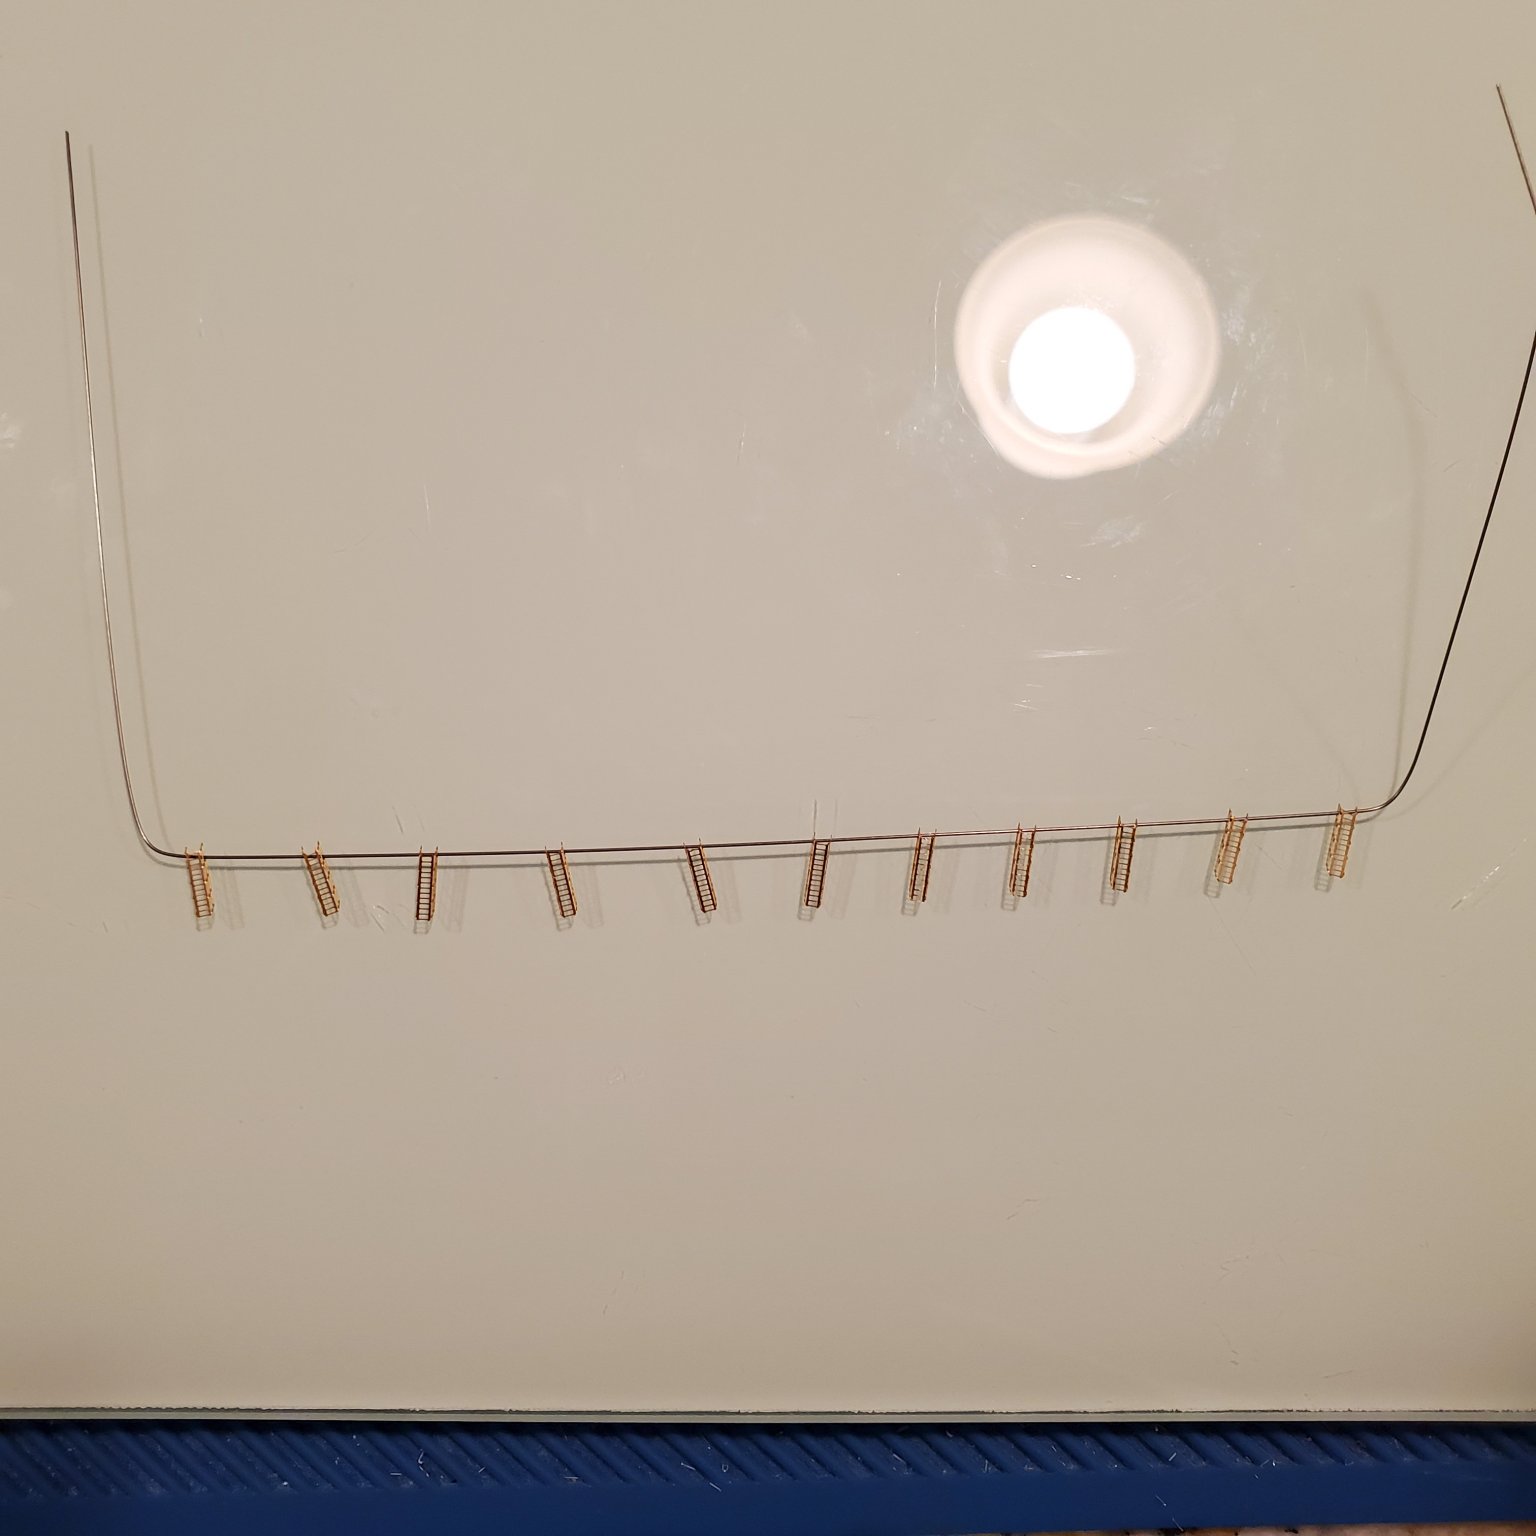
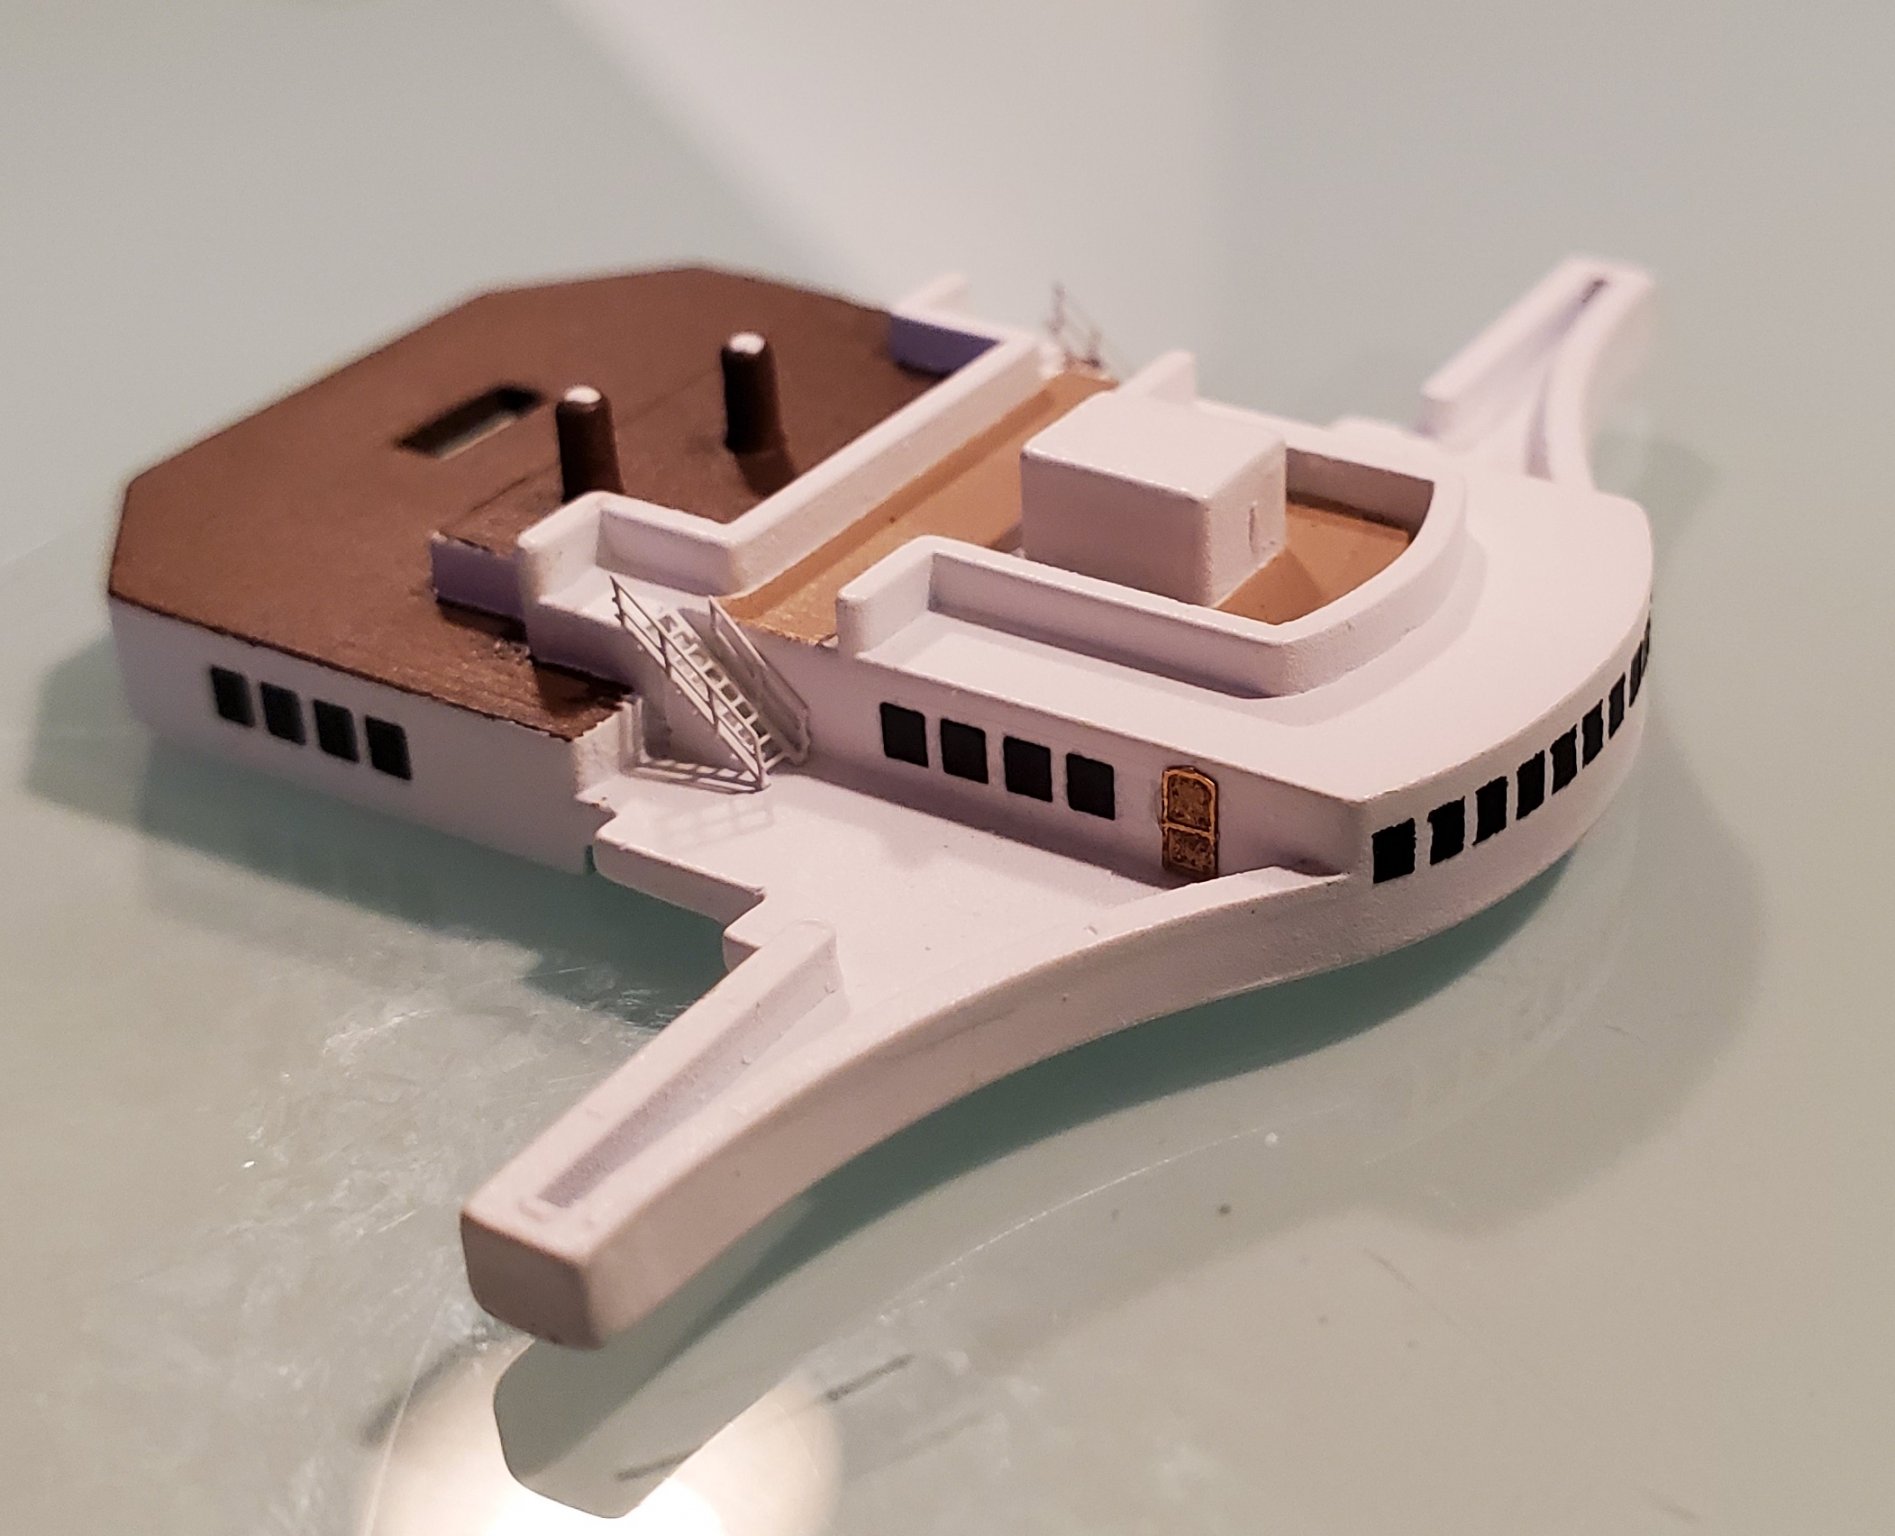
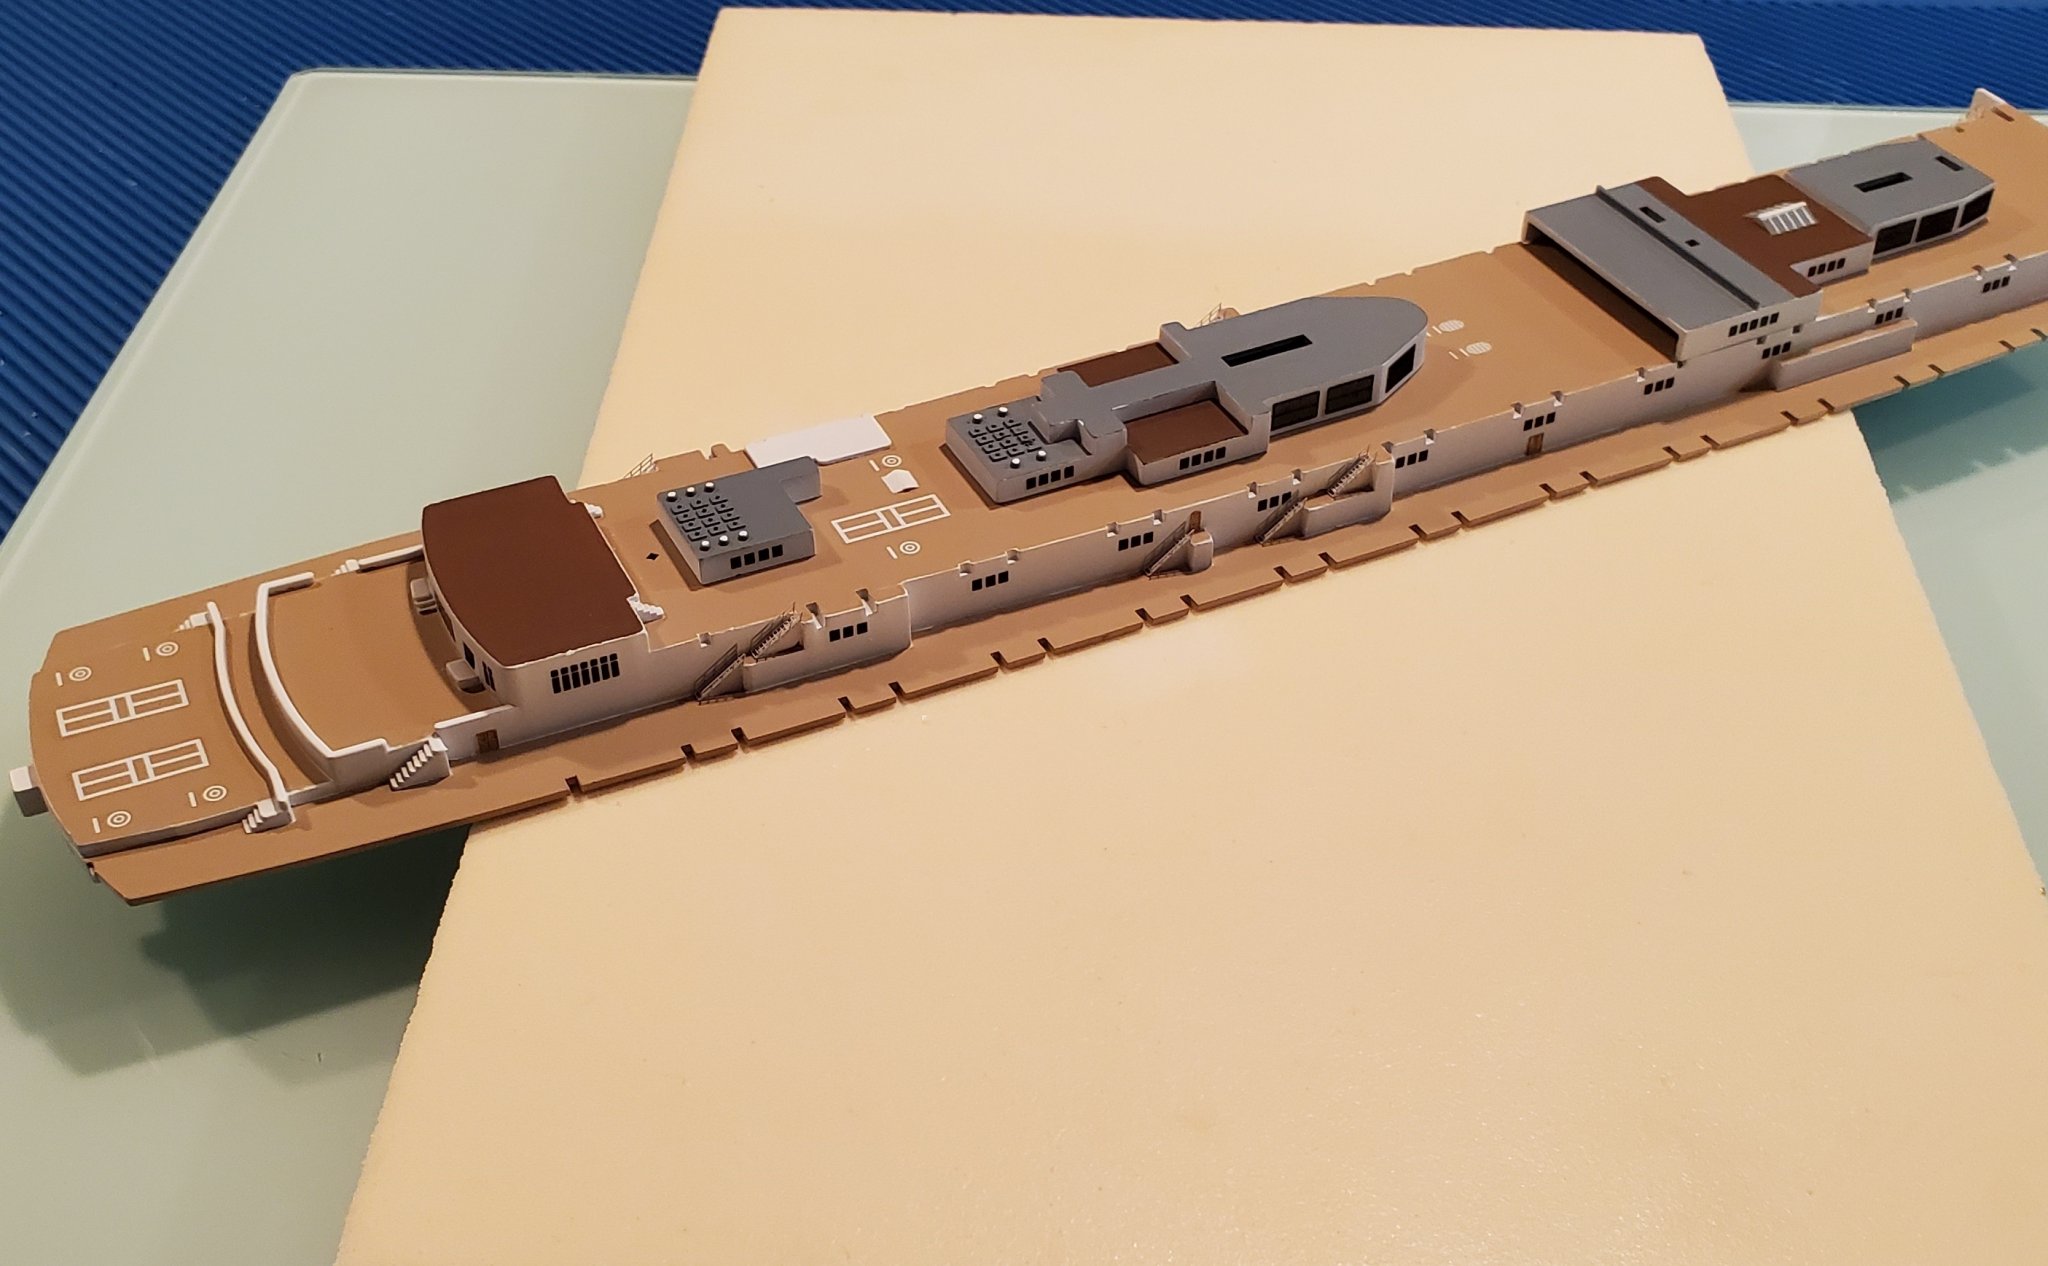
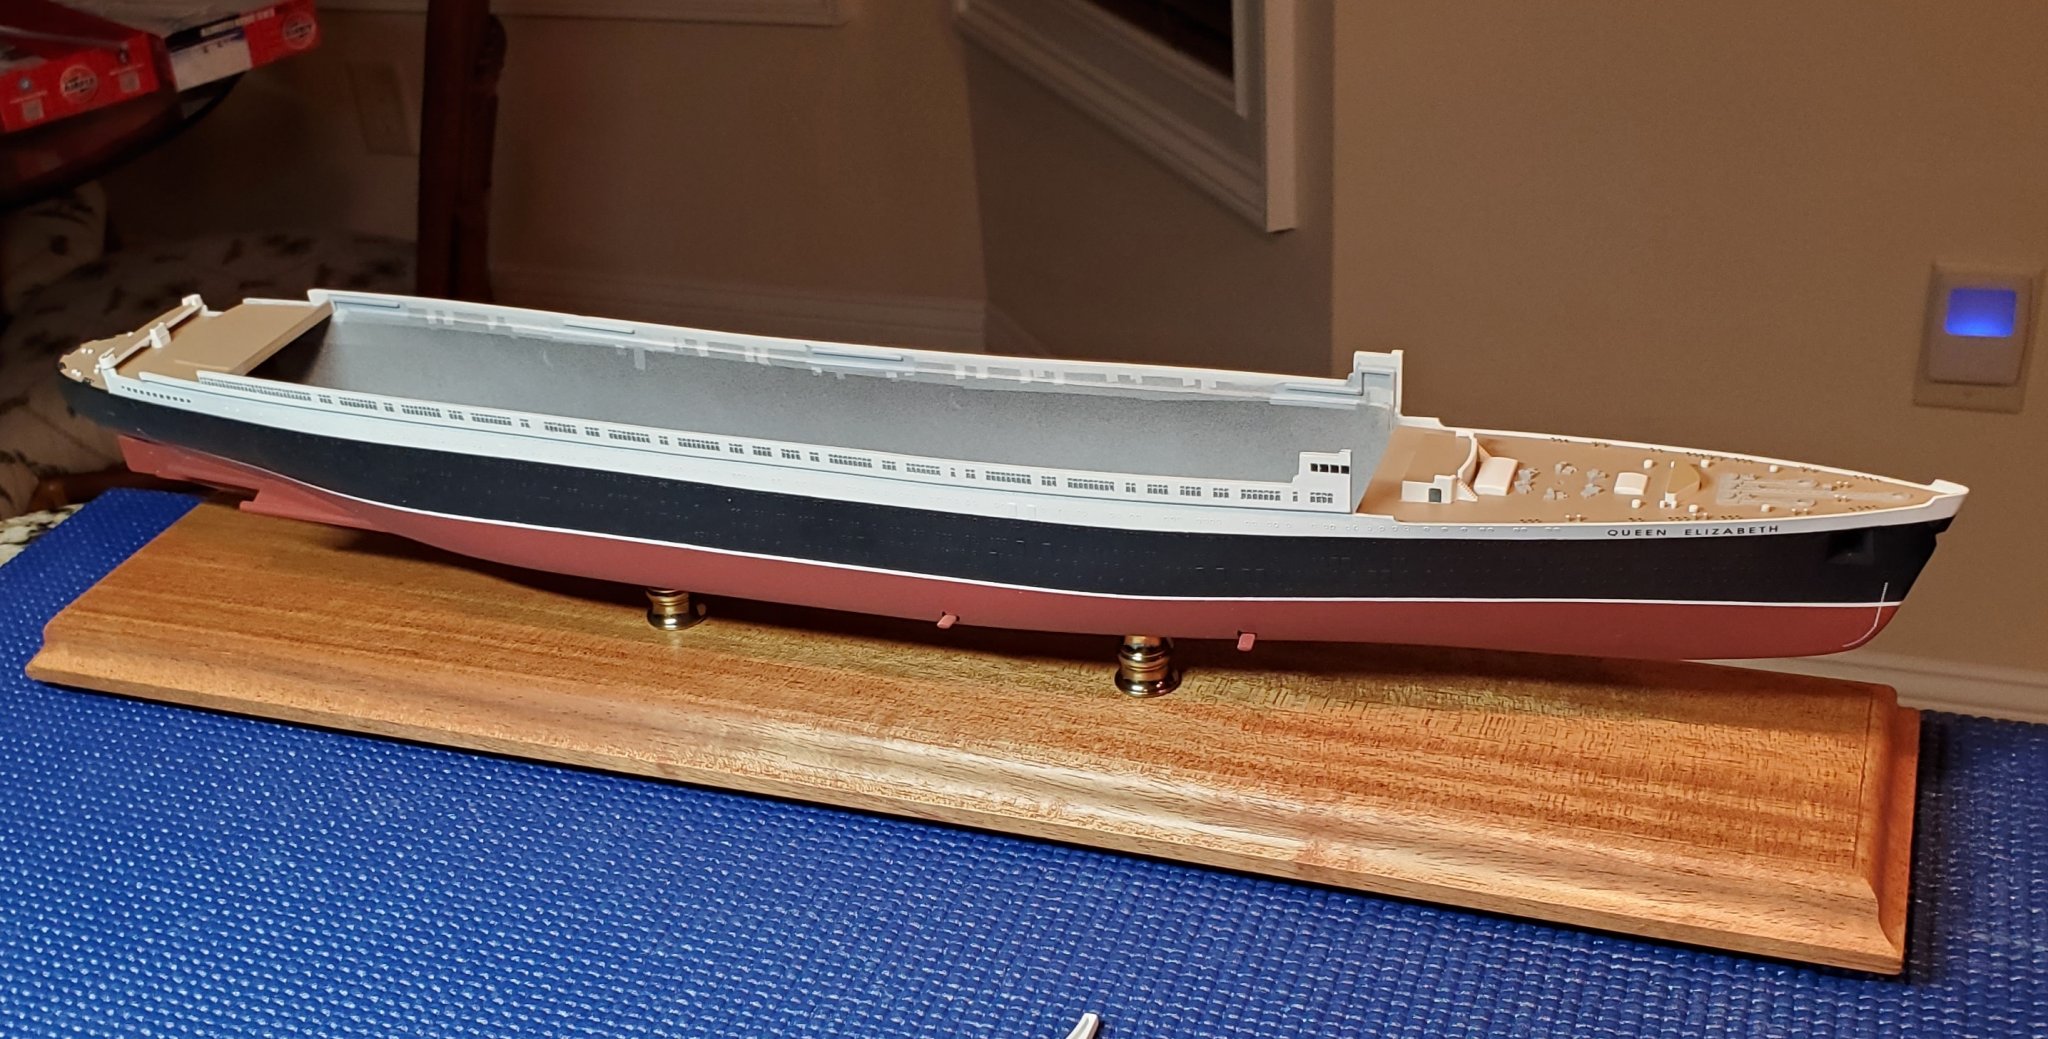
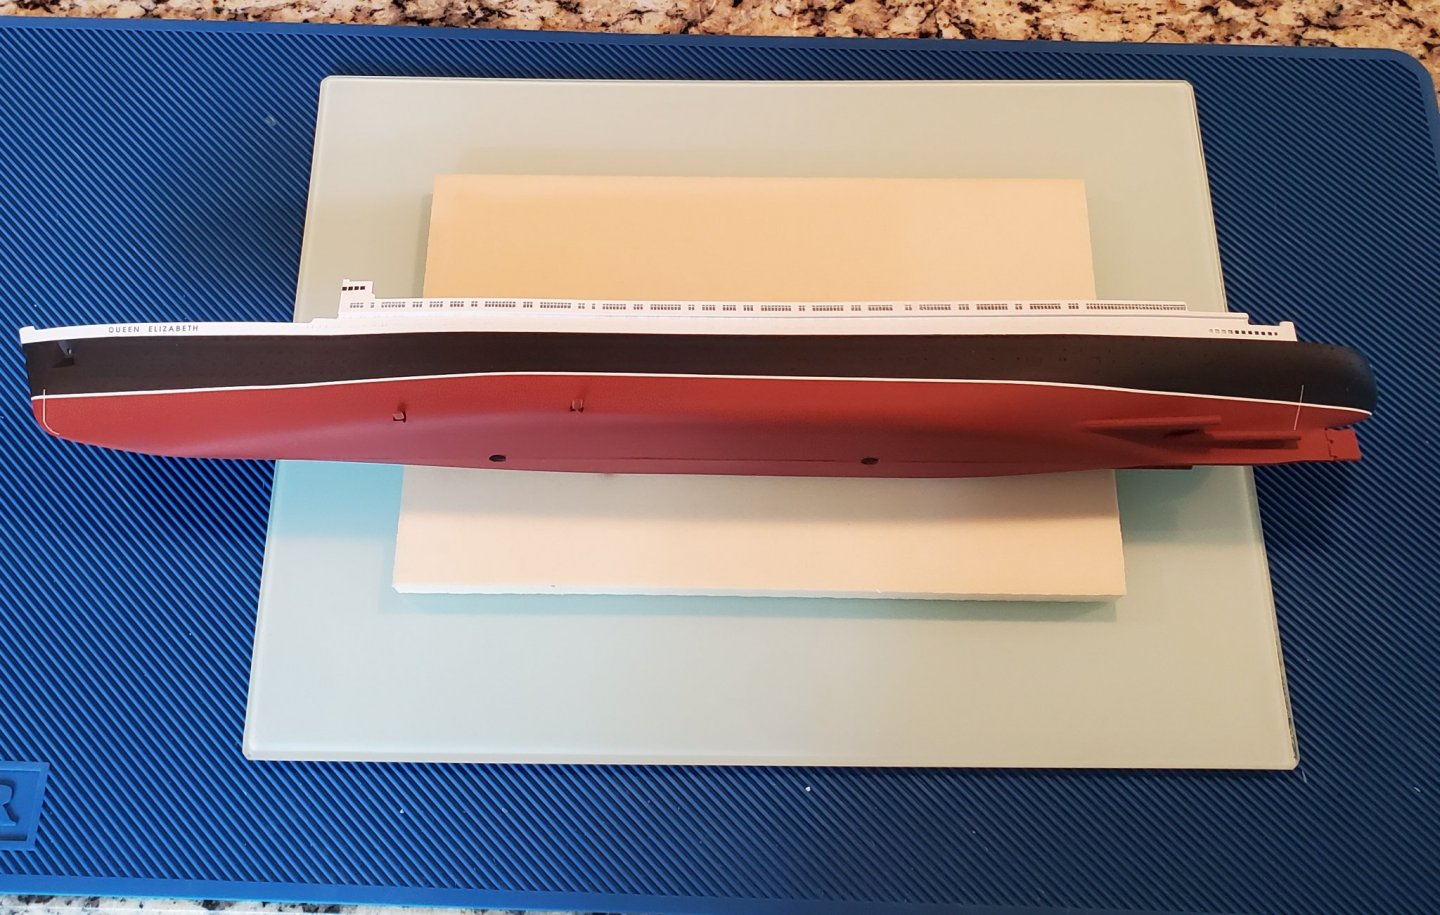
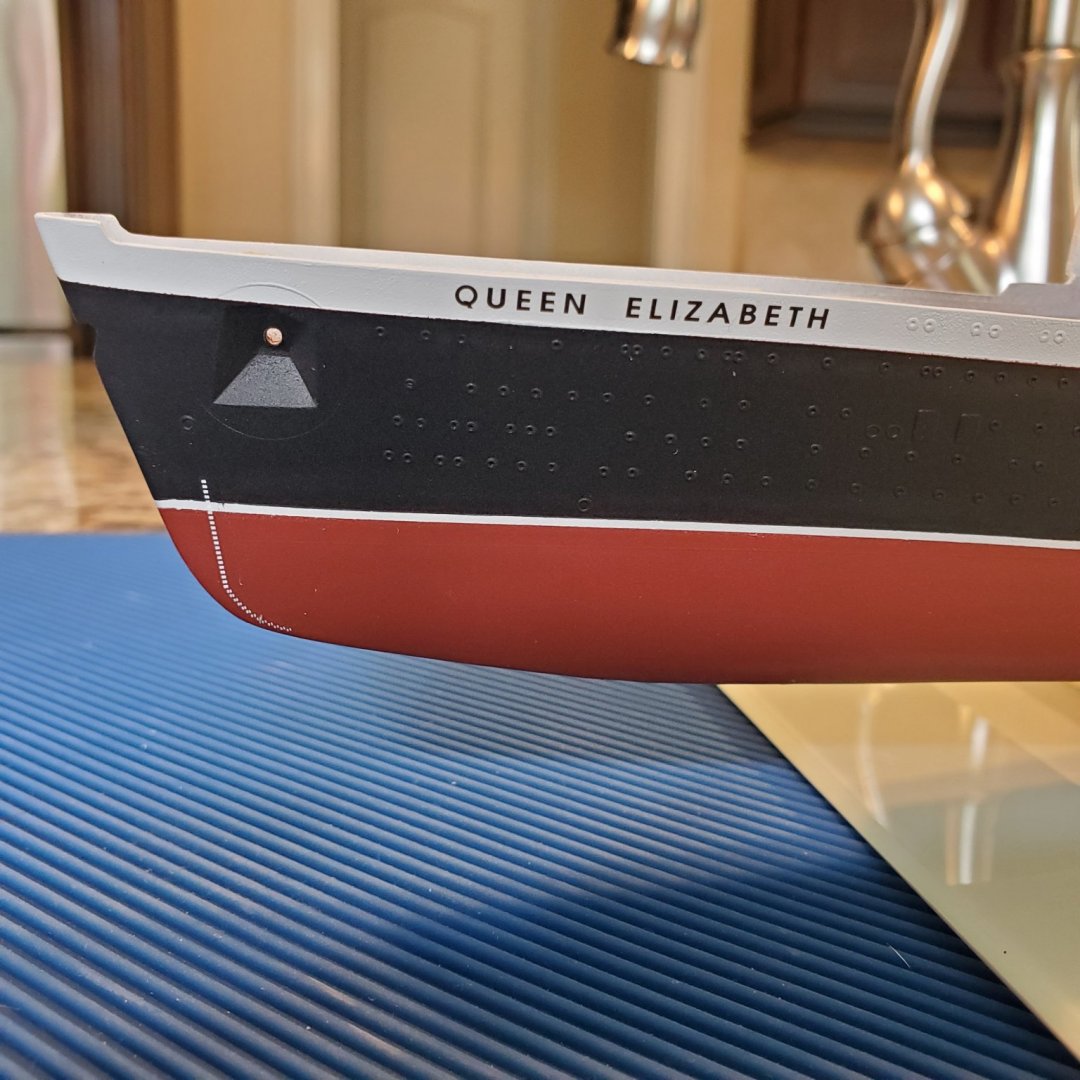
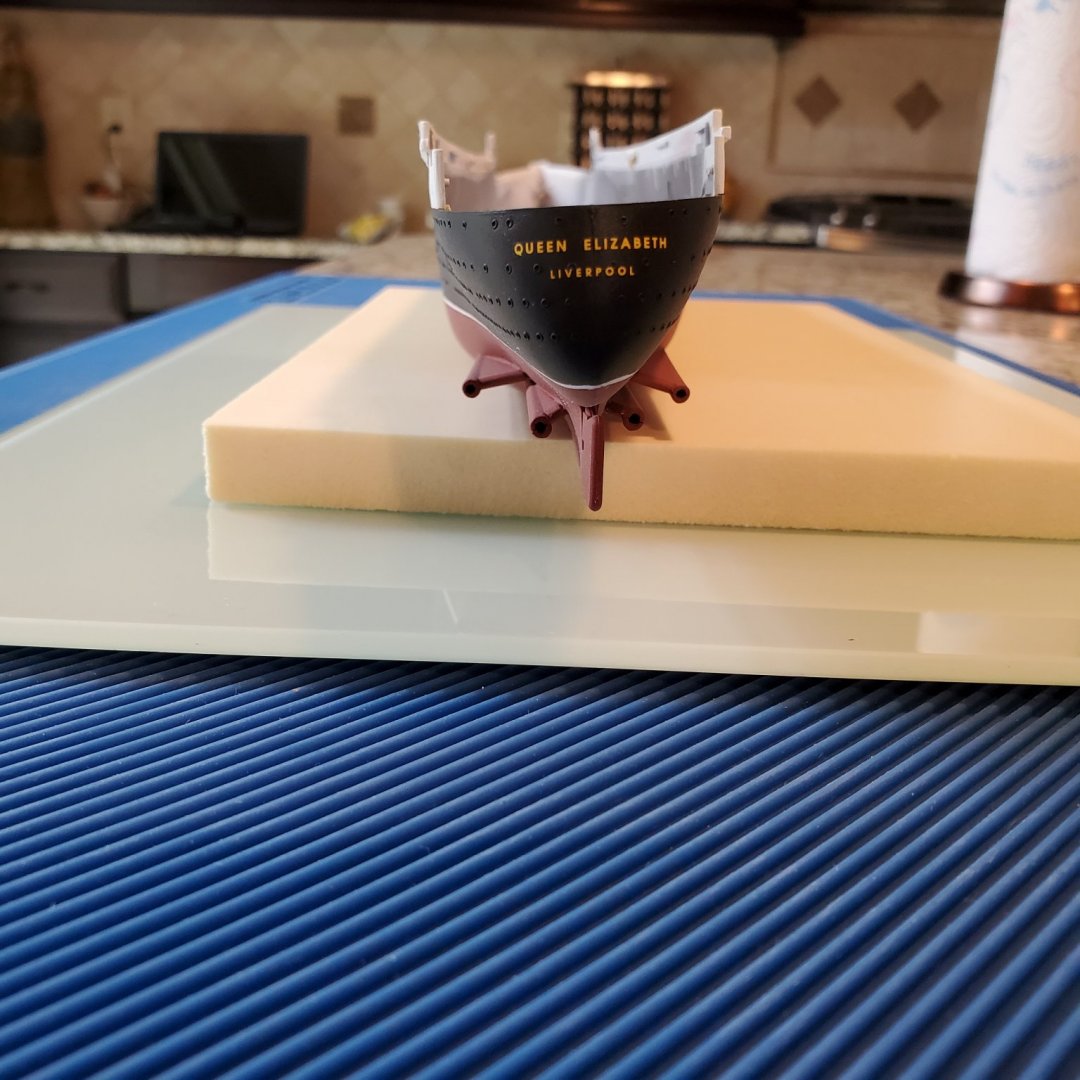
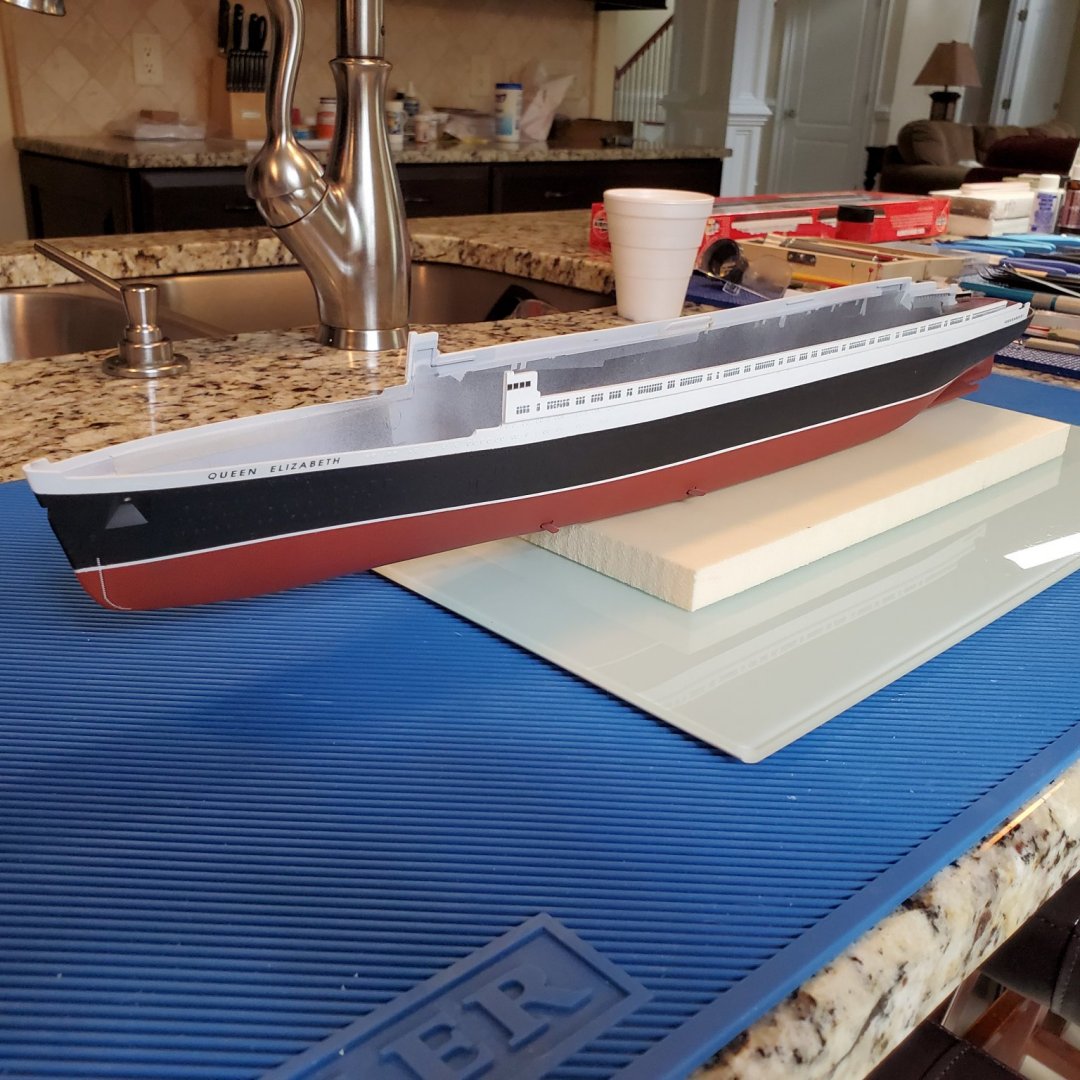
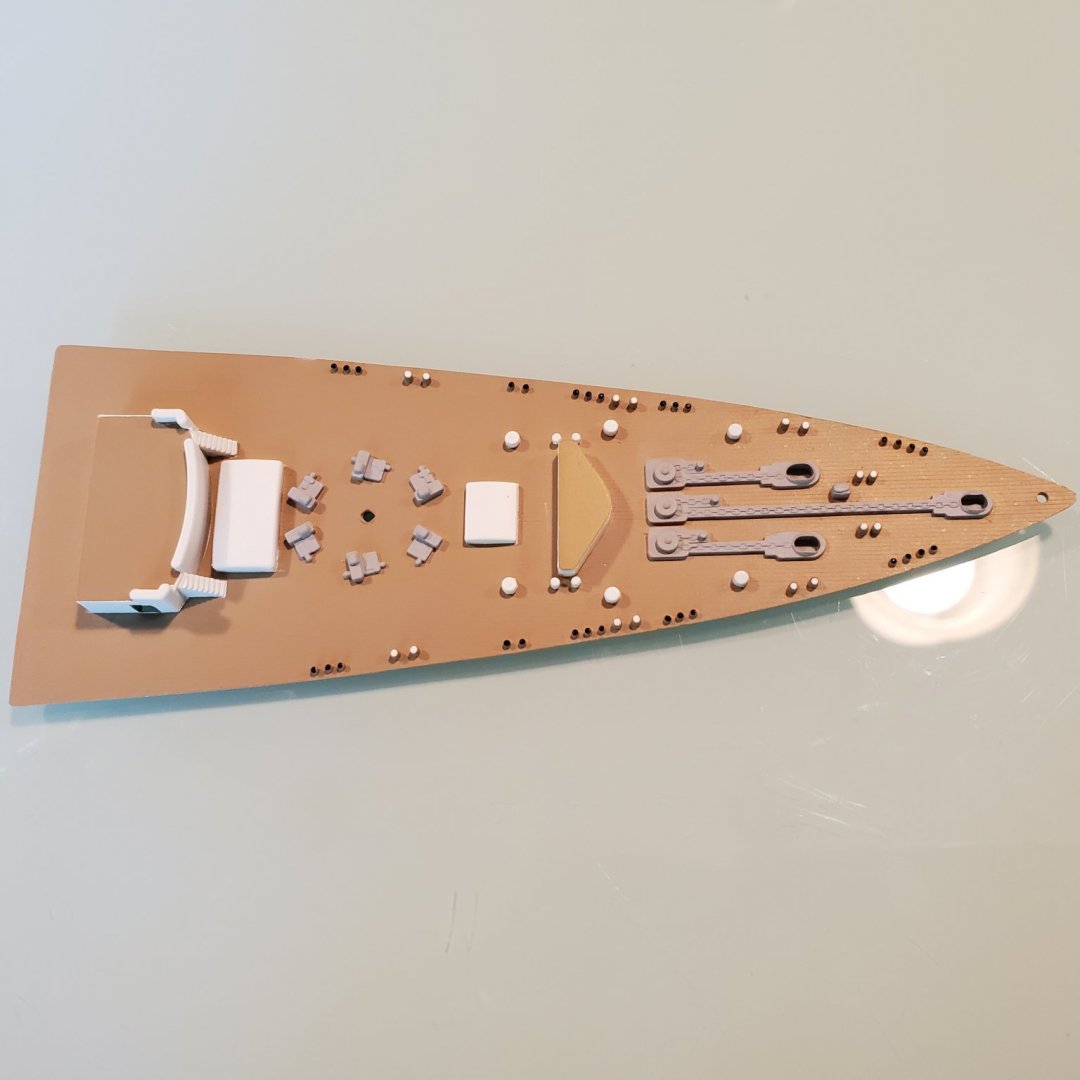
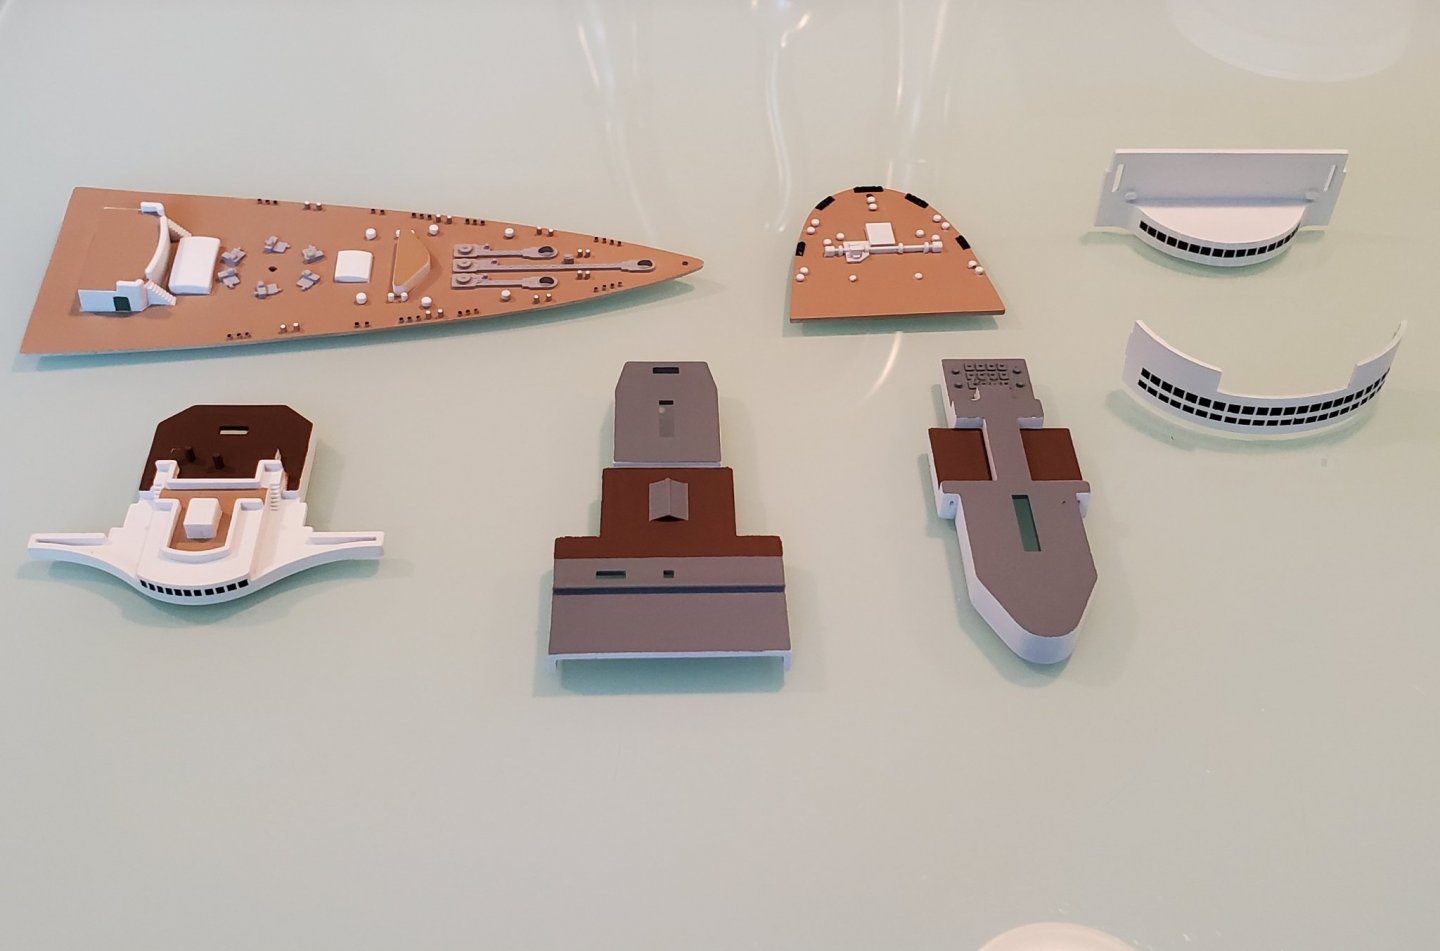
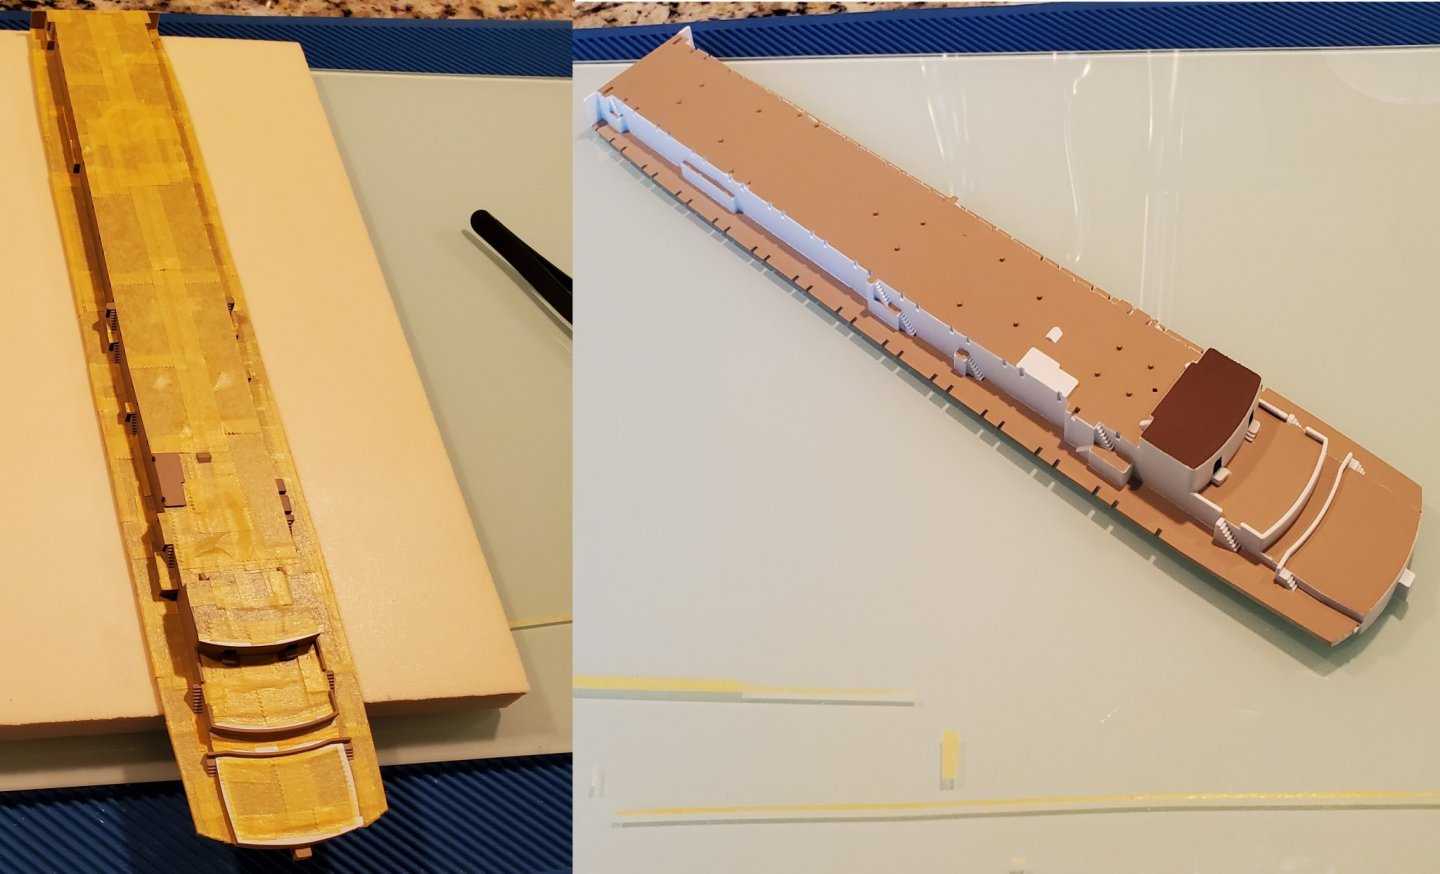
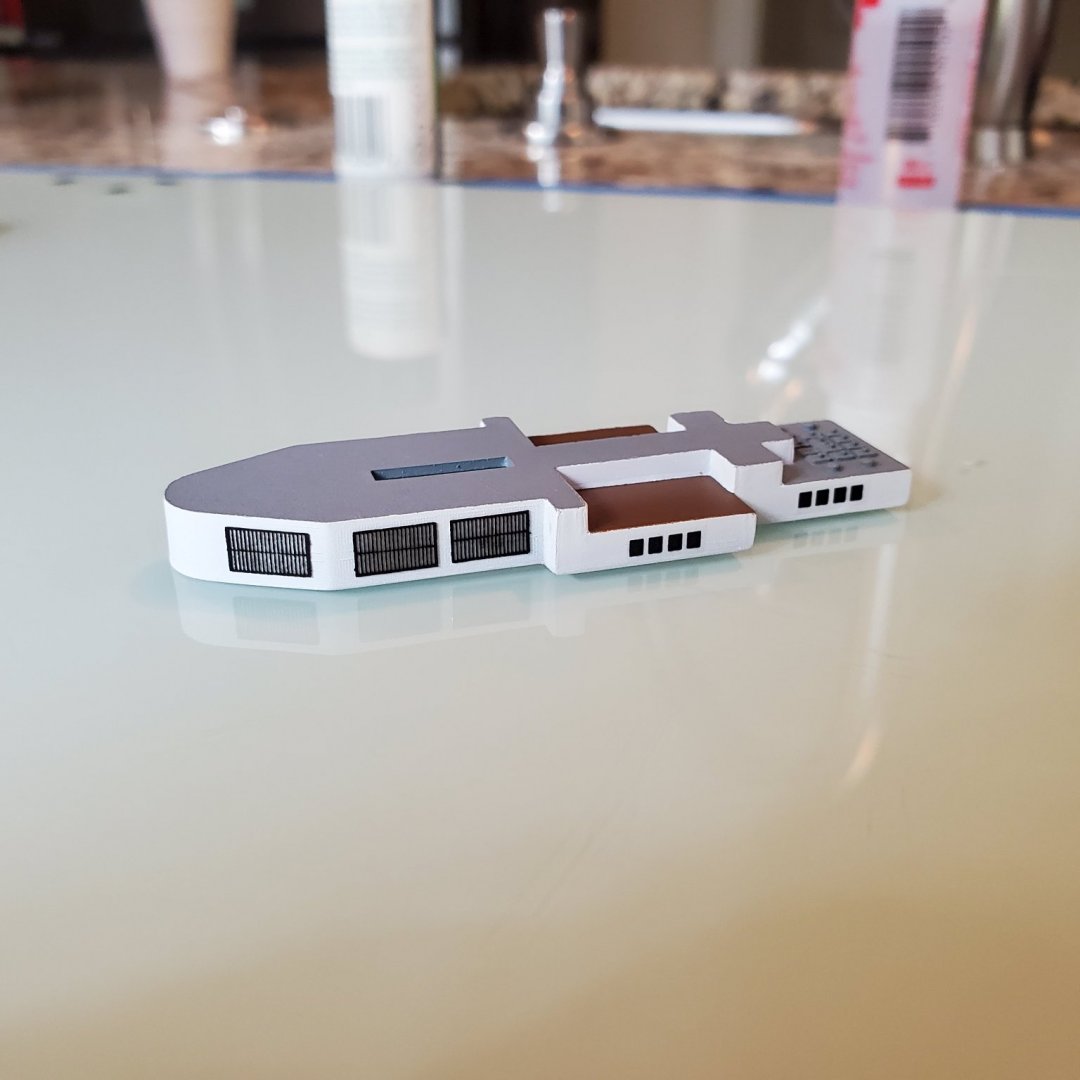
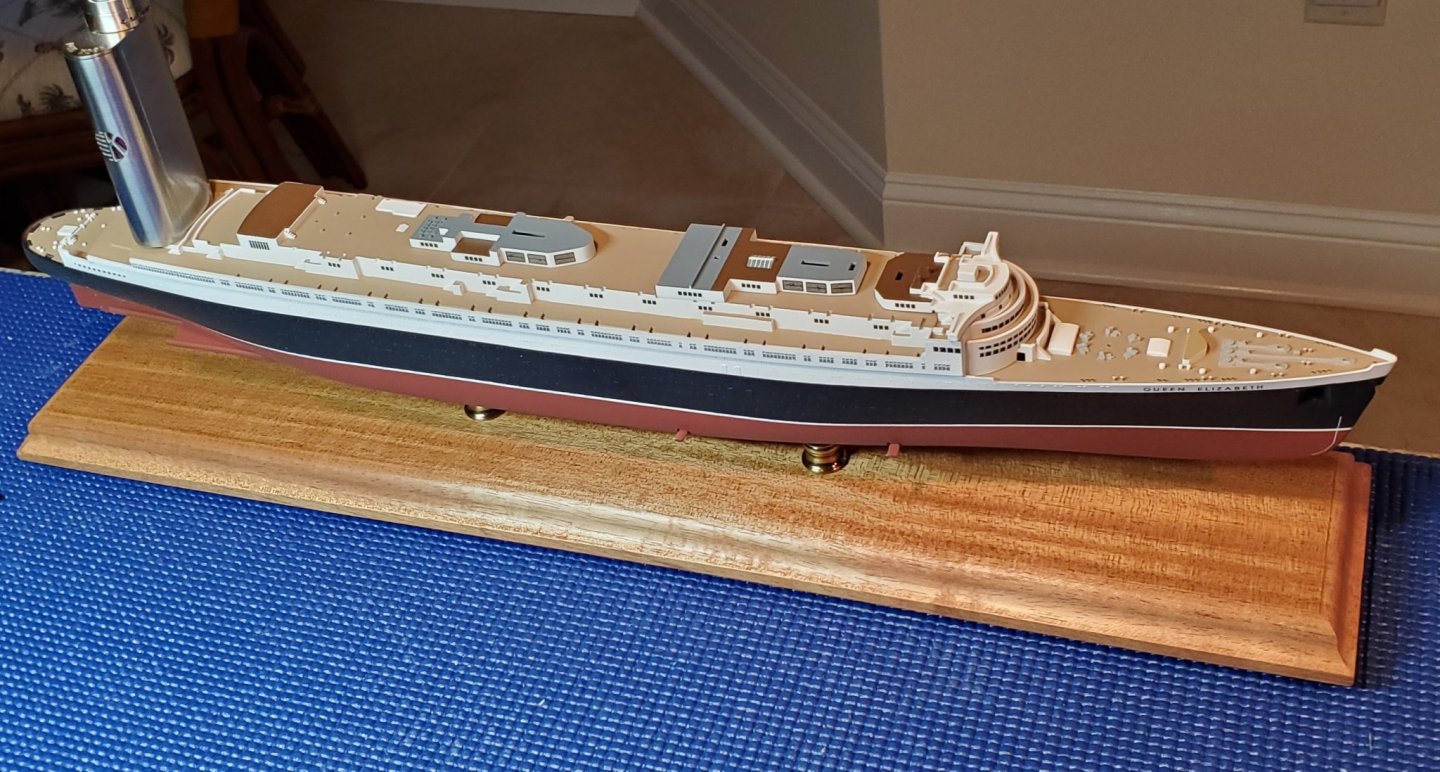
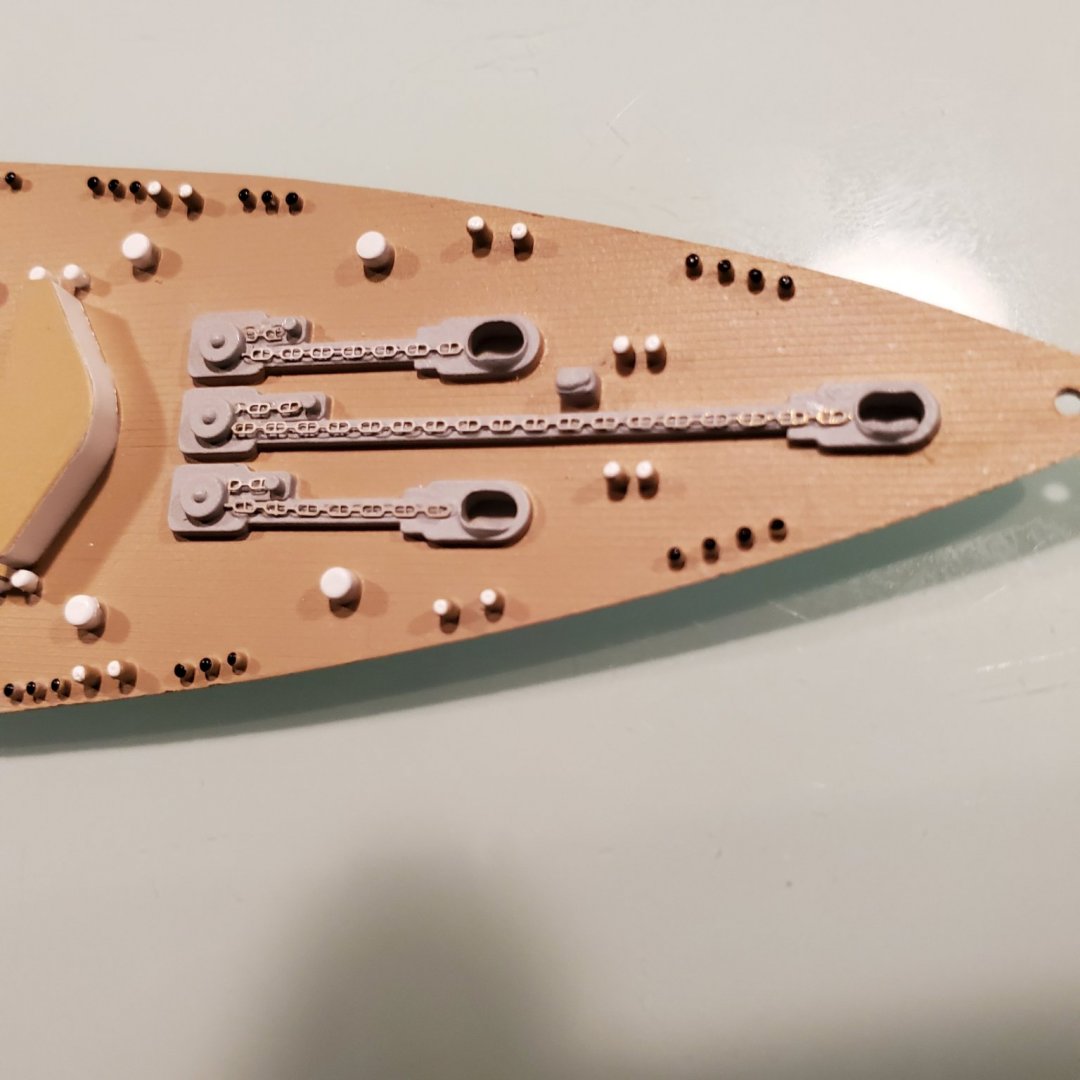
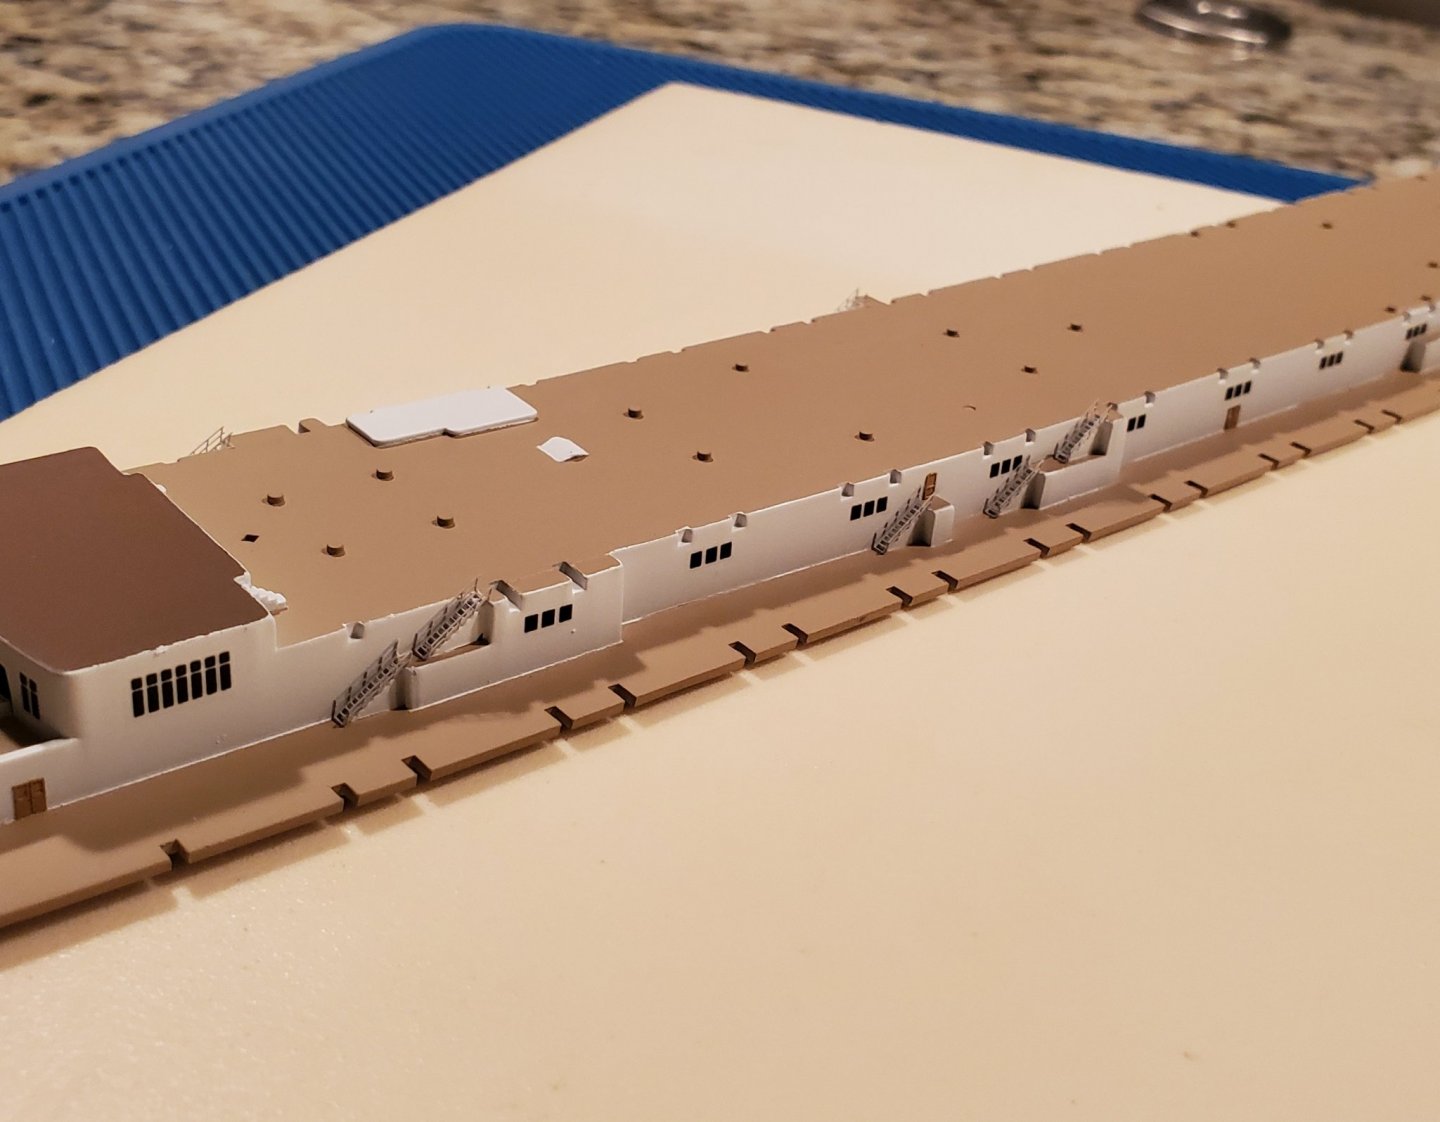
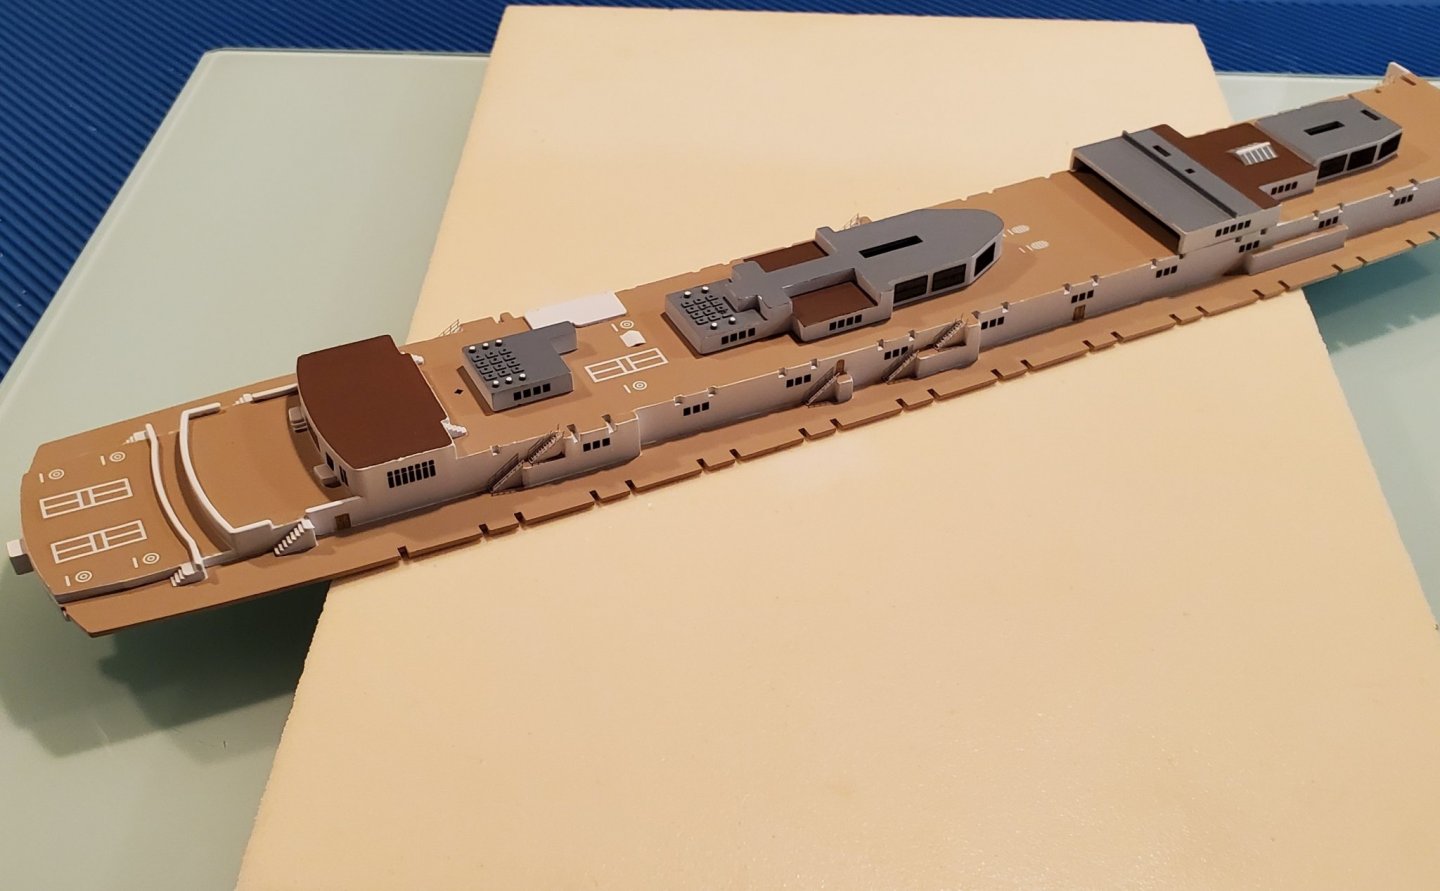
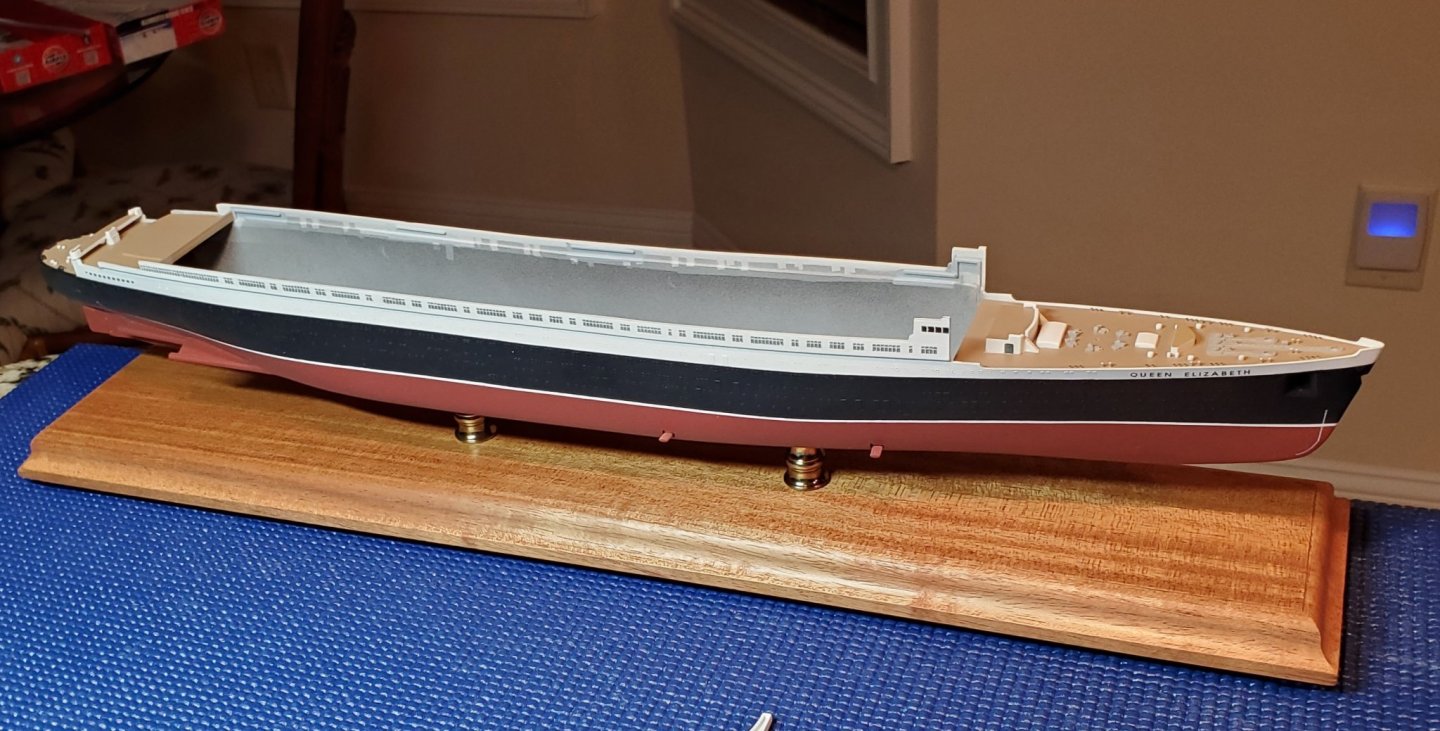
 I have a 1/350 Lusitania on hold waiting for parts so I decided to try out a 1/600 scale ship. I didn't think I would enjoy the smaller size but it's growing on me. I just added some PE and decals to the decks tonight. I am going to finish up all the inclined ladders/stairs with PE and add PE railings . I started gluing on a few decks and am test fitting on the superstructure. I used some left over 1/350 PE grills for the vents and printed up some basic window decals. I masked and painted the bridge windows and then decided decals were much easier and look about the same.


- 28 replies
-
- 6
-
-
- airfix
- queen elizabeth
- (and 2 more)
-
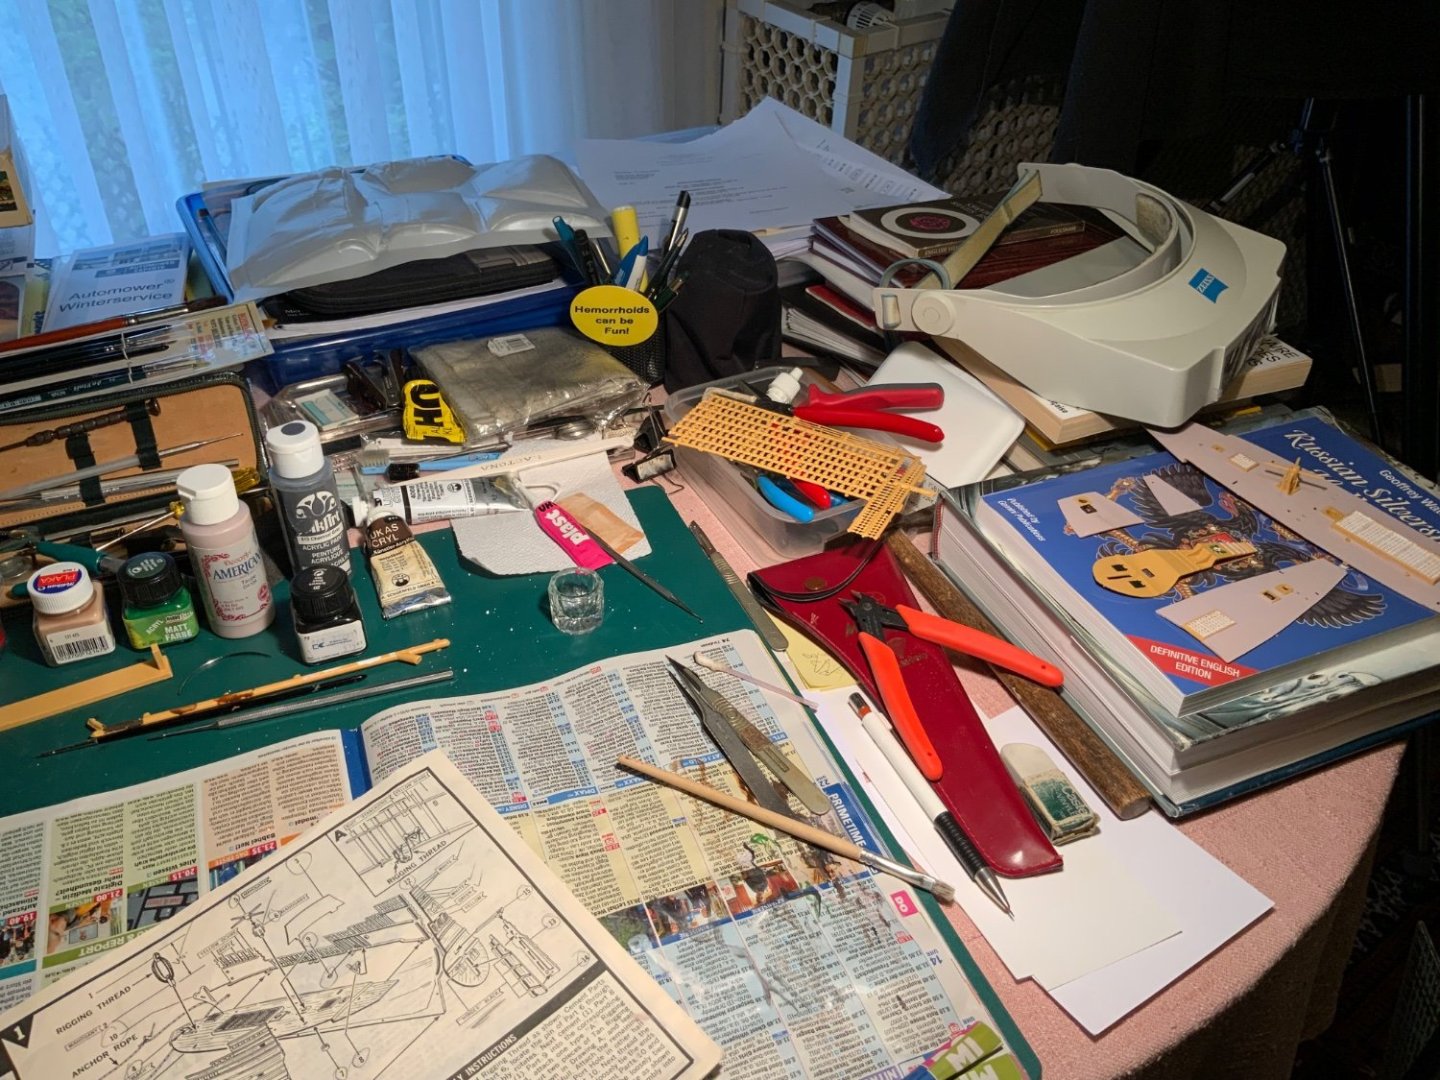
I am 89 years old and have never built a boat before! I used to make plastic kit planes when I was a boy. In the very early 70s I was given a damaged Revell kit by mother in law who worked with an insurance company. The kit was returned as part of an insurance claim. The box was stored and resurrected this year. I took one look at it and put it away! It looked far too complicated and difficult to make! I was encouraged to try to make it as an occupational therapy project by my daughter! Only Revell pieces were used except for four hooks that I made from wire. The pictures and comments that follow document my build. I had some fine forceps and a few old dental instruments that I was given many years ago. Some pieces were damaged, the ‘sails’’ were broken and some pieces were missing.