Search the Community
Showing results for tags 'caldercraft'.
-
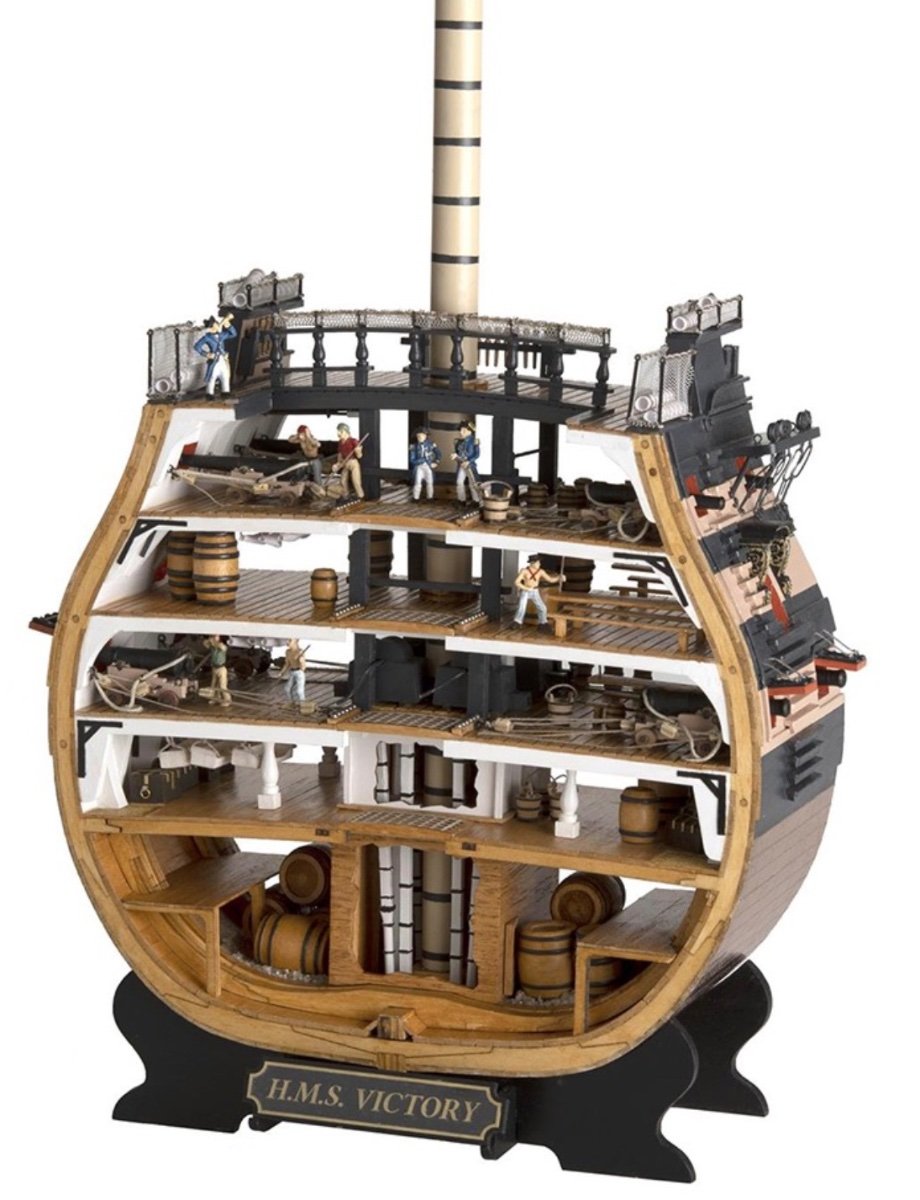
 Hi fellow builders, After 2 years of trying to build the HMS Victory, using the Caldercraft kit I think it's time to show some of my efforts on this forum. I live in Utrecht, The Netherlands, and I regard this as a 10-year project. Building is the fun part, time is of no essence as the fun is much less when the model is finished (speaking for myself). I chose the HMS Victory for several reasons: - The Caldergraft kit is essentially historically correct, although some research is still necessary. - The kit is technically very good, most parts fit without much adjustment - The "original" 1805 Travalgar version of the ship can still be visited in Portmouth and plenty of photo's circulate on the internet, therefore building a historically "correct" model is easier than of many other ships. - Many books can be found on the subject like Longridge, McKay and others. over time I collected a (very) small library on the subject. - There are some build logs of the Victory on the internet of excellent builders, notably Gil Middleton. In some instances my choices differ from theirs, but I will explain my choices as much as possible. In the weeks to follow I wil show the progress so far, which is as far as the 30 cannons on the Upper Gun Deck. Some basic facts about the HMS Victory: The HMS Victory was (and is) the flagship of the English Navy which defeated the combined French-Spanish fleet during the Battle of Trafalgar. Admiral Lord Nelson was mortally wounded during battle by a French sniper, but England won the battle. The HMS Victory is the 5th ship with this name and the largest by far. The ship was ordered in 1758. It is a First Rate Ship with more than 100 cannons. The design of the ship was completely devoted to firepower In 1805 (Trafalgar) ther were: - on the Lower Gun Deck: 30 cannons for 32-pound balls - on the Middle Gun Deck: 28 cannons for 24-pound balls - on the Upper Gun Deck: 30 cannons for 12-pound balls - on the Quarterdeck: 12 cannons for 12-pound balls - on the Forecastle: 2 cannons voor 12-pound balls and 2 carronades for 68-ponds balls(!!) The total length of the ship is about 70 meter, water displacement more than 2000 tons and almost 5500 square meter of sail can be carried. Some other numbers: 40km rope in the rigging, 1400 blocks, 300 tons of "potable" water, 50 tons of coals, 20 tons of wood, 50 tons of beer, etc. Index First and second planking Wales Gunports Coppering Upper gun deck, cannons and fittings Quarter Deck Forecastle Bow Poop Deck Stern Fascia Quarter Galleries Hull details First an impression of the progress so far. I will try not to bore you with every individual bulkhead and plank. Details will be provided on request (of course).
 -
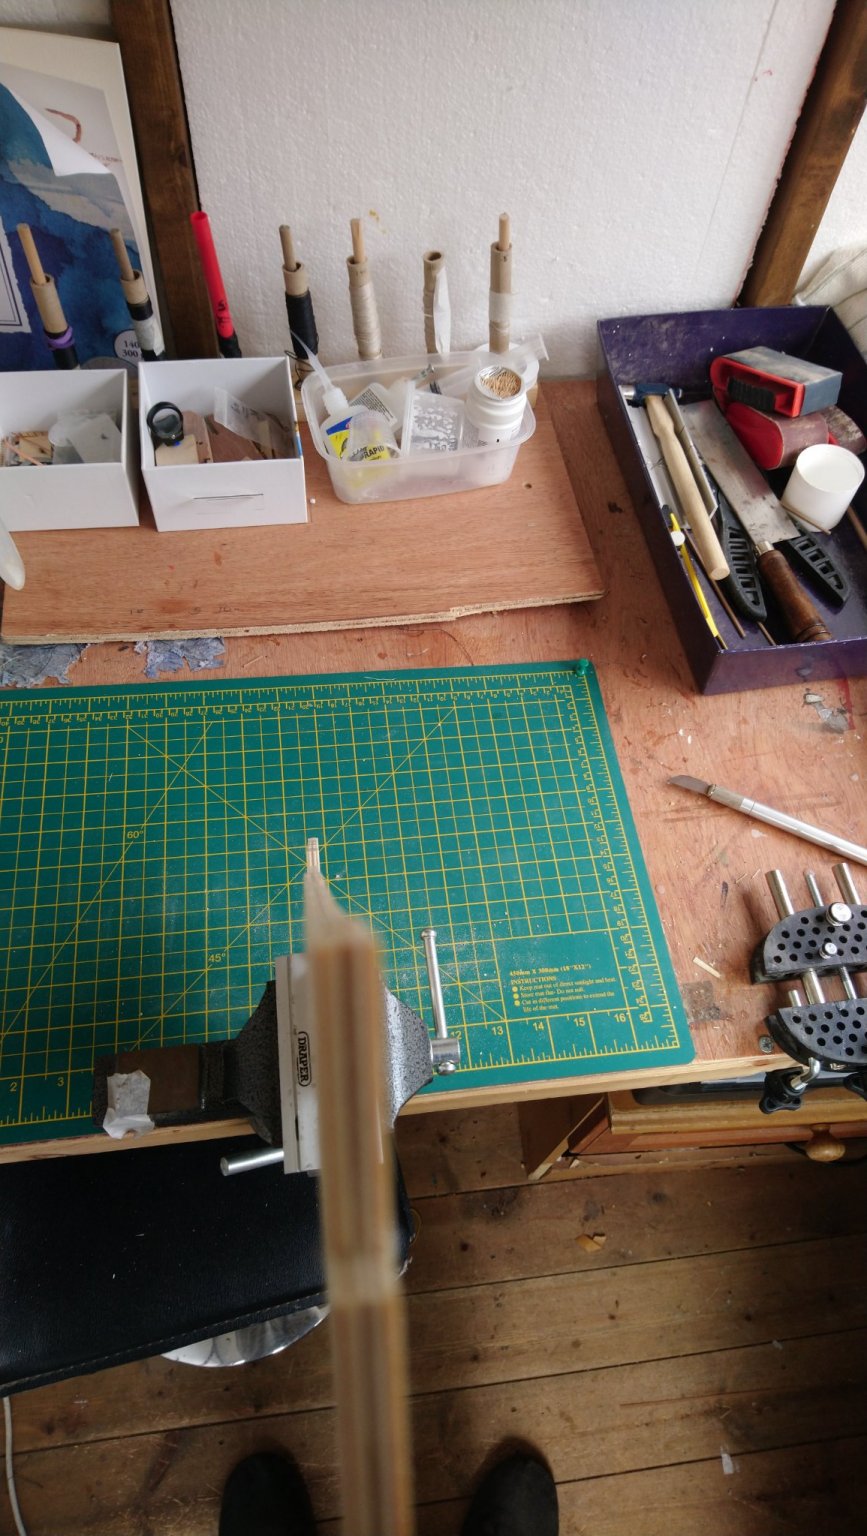
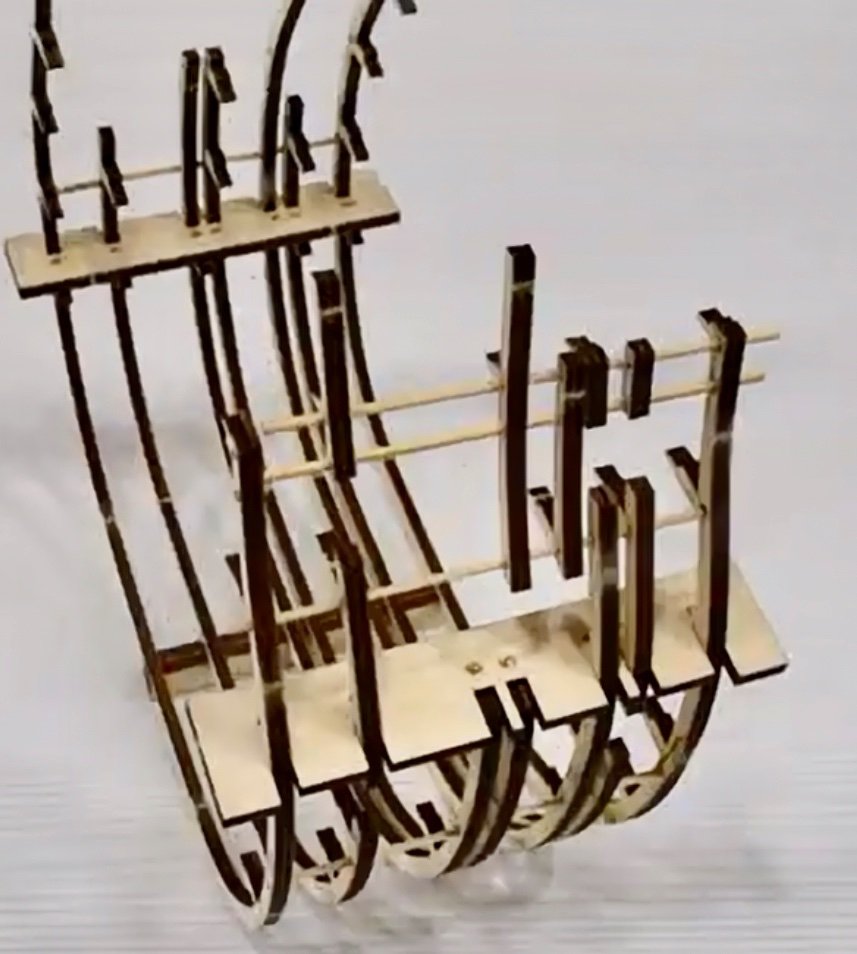
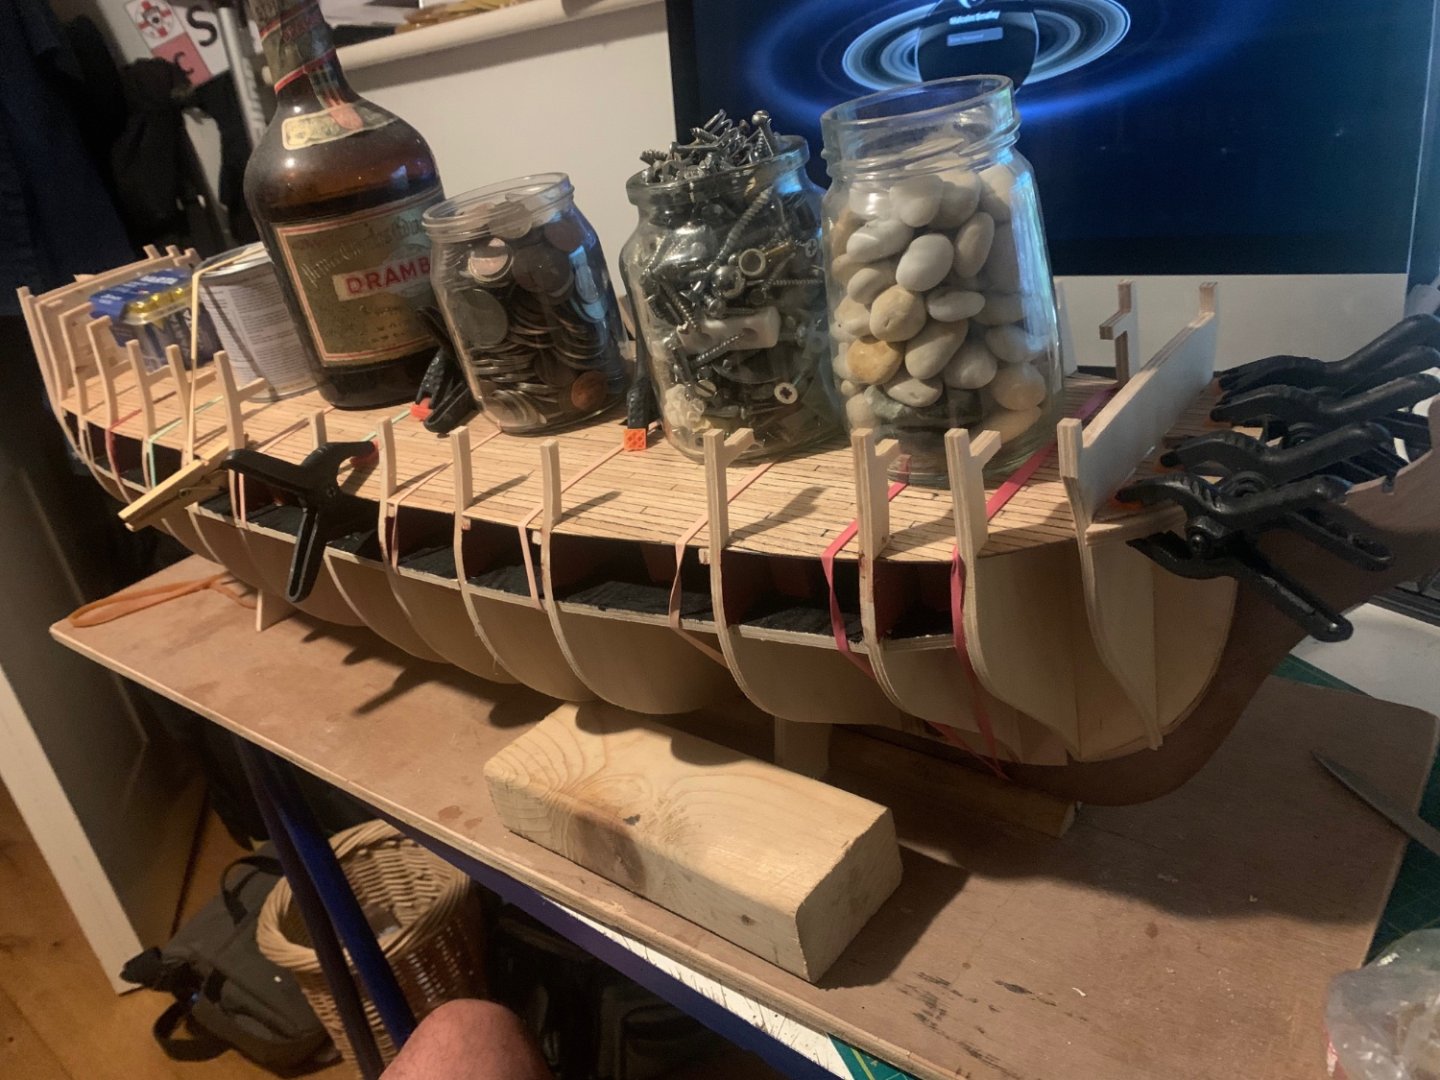
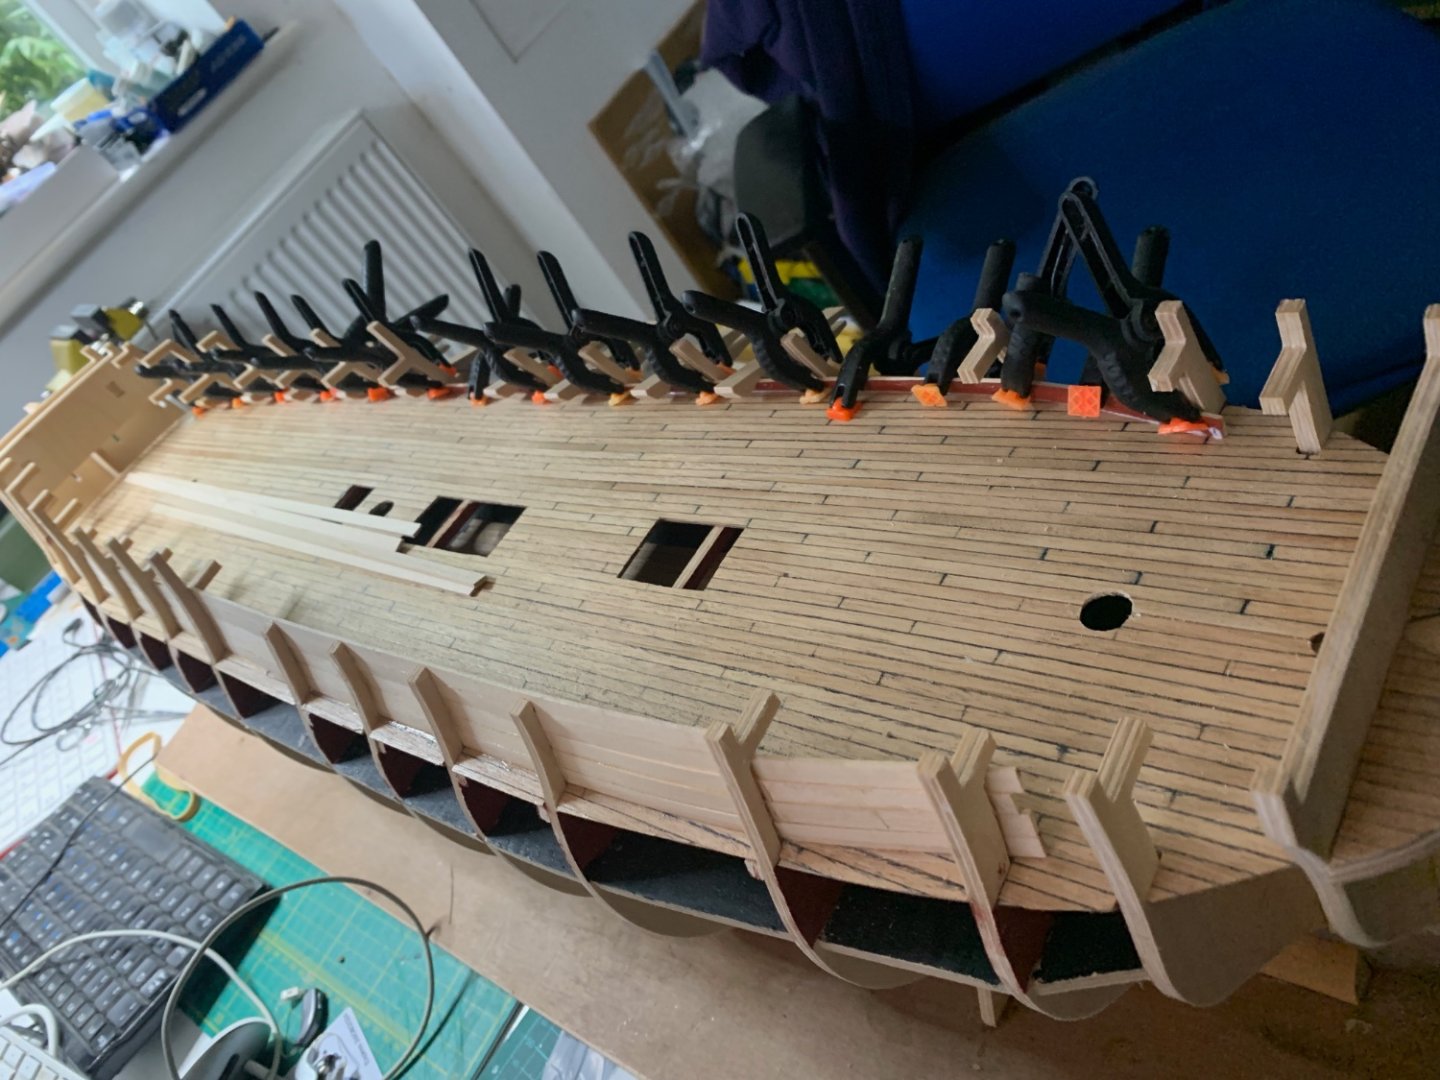
 At the time of commencing this build log (November 2023) I have already been working on Part 1 of the project since 2015, which amounted to researching the ship herself and what Victory really looked like at Trafalgar. Now I know people will point to the Victory herself in Portsmouth and say that’s what she looked like, after all they have been restoring her off and on for a century so you would think they (NMRN) of all people would know, but actually no, it isn’t what she looked like. It may be that is how they label her, and that it has been the objective of her restoration since the 1920’s, and has been ongoing ever since. It was clear to me back in 2015 that the present Victory did not look like some of the strictly contemporary images I had recently been viewing, this is described in the attachments, and of course you will need to read the work for the background and results. You will see I use the term ‘strictly contemporary’ throughout the paper, and this is important, it both highlights and describes primary sources of works of evidential value from 1801 to 1806. Art Works and other records of Victory first produced at a later date, of which there are many, especially after 1814/16 when the ship was radically altered, are voluminous whilst passingly informative, do not carry the same provenance when considering her Trafalgar guise. Unfortunately, a substantive body of the Nelsonic art works, including images of the Victory, grew in preponderance in the 19th Century, and these works continue to dominate the visual record. Accordingly, there is a lot of myth that surrounds Victory, much of this grew up in the century after Trafalgar, especially with the Victorians recasting Nelson, Trafalgar and HMS Victory to reflect the values of their time. Much of this ‘doe-eyed romanticism’ hung over into the early 20th Century and made its way into the restored Victory and Nelsonic cannon of the time. The accompanying volume to this build-log looks back to the records before this dreamy rose-tinted time, but I also draw on the modern research that can be validated. I deliberately caveat my references to modern studies, as even some of today’s authors, including some of the biggest of names in maritime history, are not beyond repeating the hyperbole and mistakes of their Victorian antecedents. Neither are they beyond repeating the ‘findings’ of others, which upon examination of the historic archive do not hold up to scrutiny. I have labelled the result of my research ‘Nelson’s Victory Revealed’, my intention is to release that work in PDF format in conjunction with this build log. Included in this first part is the first instalment, principally the contents, introduction and review of the background research materials. I’ve also enclosed numerically the final 2 parts, the Bibliography and End Notes as they will be needed throughout for cross reference purposes (parts 12 & 13). There is a separate dedicated thread for the Research under ‘Discussions for ships plans and Project Research ….. etc.’, I’ll also post these over there as well. So, after enough waffle, on to ‘Part 2’, of the project - the build! Whilst I would have liked to have built the Victory in 1:64 scale utilising the prospective Amati Victory as a basis with the ability to detail all decks, it is not available at this time, and I am keen to make a start so waiting isn’t an option. So, I have purchased the Caldercraft 1:72 version from Jotika. I had considered scratch building, but I am being realistic about my abilities. I have scratch built HMS Trincomalee in 1:64 plank on bulkhead, or rather more correctly, part built – I’ve completed fitting out the Gundeck, but a First Rate is an entirely different proposition. I had though initially about opening up the Caldercraft Middle Gun Deck and detailing it, however, it just happens that Artesania Latina have also just released a 1:72 scale Main Mast Cross-section, timing couldn’t be better. I’m going to build this in tandem with the Caldercraft kit, or more accurately slightly ahead of it. This will allow me to detail items such as the double height chain pumps, Riders to all decks, pump well and multiple shot lockers, and multiple gun patterns. In terms of reference material, well there is that small volume I’ve already mentioned, and I have also collected in pursuit of my research a substantial volume of reference material, all of which is listed in the Bibliography. Then there are also in 1:48 scale all available Victory draughts and plans from the NMM, together with those of the Boyne. In addition, I have Bugler’s 1:48 plans and a set of John McKay’s drawings in 1:64 – so no shortage conflicting materials to draw from! Then there are the prints I have also obtained from the NMM, including both Turner and Stanfield’s Trafalgar works, as well as those of EW Cooke and Pocock. Some of these are now framed and adorn the library by kind permission of the Admiral, I’ll get around to posting a few photo’s of these. I claim they are for inspiration, but truth is sat in front of an open fire next to a decanter of Talisker Whisky there is collectively more of a soporific effect (cue Master and Commander on the iPad and miss the end of the film again 😊). I will also need to capture some side profiles early for the later fabrication of the many fenders, and the head chutes. At some time there is the stern and quarter gallery shapes to confront and reconfigure, but this will be an iterative process as these can only be done when the hull is at a stage that the quarter gallery patterns can be fitted and shaped., which in turn help establish the stern shape. The kit will be augmented with an authentic mix of Blomefield and Armstrong-Frederick guns – spoiler alert, Victory did not carry a uniform pattern of guns throughout at Trafalgar, like much of the British Fleet there was a fair bit of mix and match. Also, forget 104 guns, there were 96 + 2 Carronades, speaking of which, there will be some bashing of carronades to get something akin to the prevailing pattern in the early 1790’s when Victory’s were probably cast, rather than the poorly formed replicas we see aboard the ship today. The Upper Deck will get its steam trunking, sick berth, and internal galley chimney. There will be more supplements to the kit as the build progresses. Painting will be in the new colours as I’m a believer in the science and the research undertaken to establish these, particularly when combined with the Rase Mark analysis on the ship. There will be some tonal adjustments to the palette to account for the optics at scale. She will also get the pattern extending around the stem, NO black gunport lids – that is wrong, and lower white masts with the hoops painted out and white underside fighting tops as were worn at Trafalgar. I’m not going to do an un-boxing, there are enough of these around already. What I do need to sort is either a building board or cradle of some form, but I think I’ll address that when I’ve got the skeleton assembled and have more of a feel for handling the model in the space available. Below is a photo of progress to date, first up were modifications to the stem. The kit provided stem reflects the present Victory, but is both too short and low for 1805. This necessitated some amputation and the insertion of a filler piece to throw the head further forward and upwards. There was some additional shaping and profiling with the horizontal bow filler pieces to obtain the necessary profile, which itself was thinned down from the stempost forwards and from where the third cheek down to where it is affixed to the keel. A sacrificial profile or template for the placement of the bearding line at the bow was added at this point, this follows the correct profile and will require further refinement as the work progresses. I also took the time to replace the kit keel which as supplied is a uniform 5mm x 10mm. Based on the Bugler midship section it needs to be 7mm x 11.5mm plus a false keel strip. In addition, it needs reducing in width at each end tapering down from 63mm out to fair-in with the stern and stem posts. Elements of the keel were pre-rabbeted to match the bearding lines. All of this will be covered in copper plates anyway. A new stern post was fabricated using the kit version as a template, instead of a uniform 5mm the correct width at the top is 8.5mm tapering down to match the keel. This will be fitted after planking. Brass rod is used throughout to strengthen the joints of these pieces, much of which is capped over with pear strip. I have also blasted the dummy gunport liners and cabin spaces with some rattle can paints, these areas won’t be seen directly, but I felt some appropriate colouration wouldn’t hurt. For those who haven’t seen the AL cross section yet I’ve attached two images below, one shows the frame they are using to build up the cross section, and the other is of their finished product. That’s it for now. Gary Nelson's Victory Revealed Pt. 1 Background Materials.pdf Nelson's Victory Revealed Pt. 13 References Endnotes.pdf Nelson's Victory Revealed Pt. 12 Bibliography.pdf
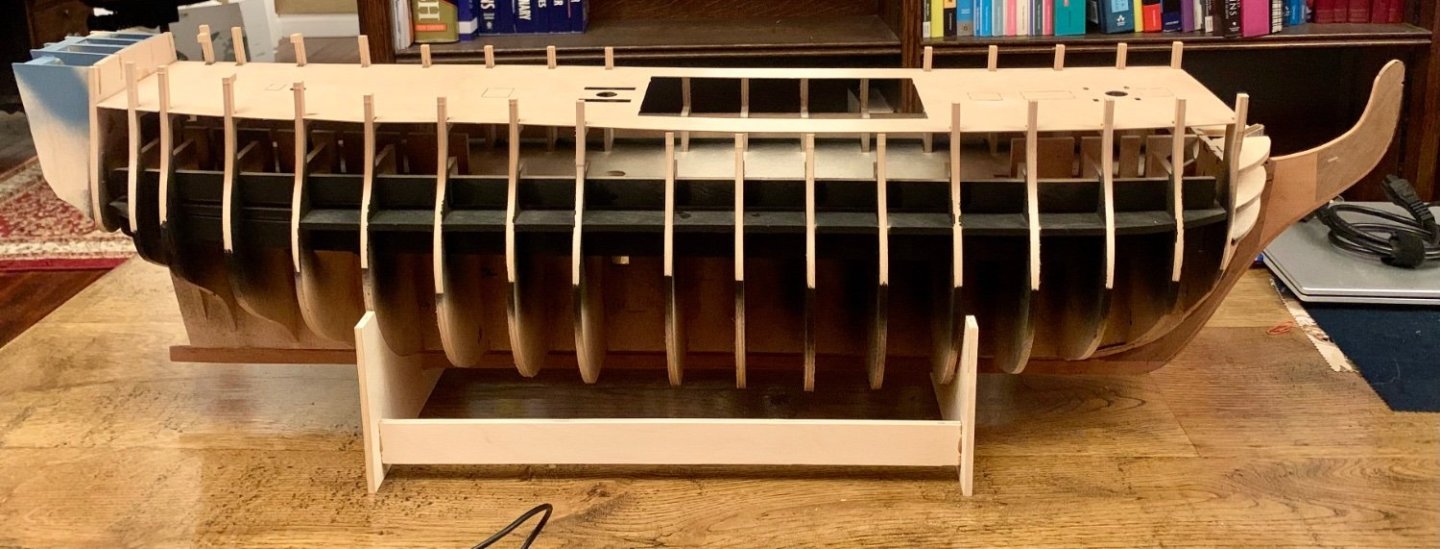
- 2 replies
-
- 7
-

-
- HMS Victory
- Caldercraft
- (and 1 more)
-
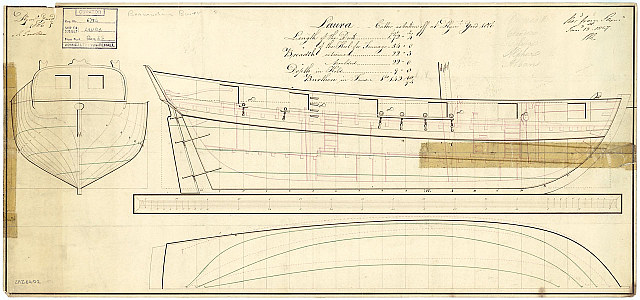
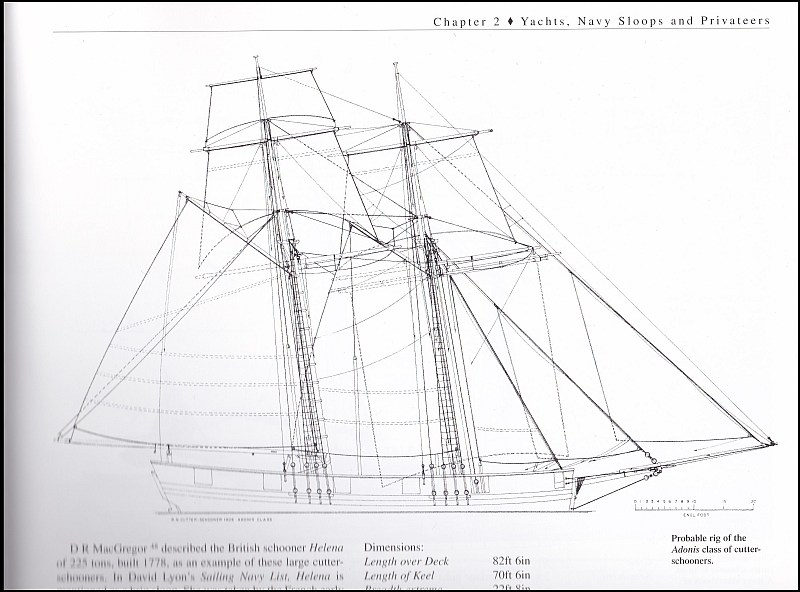
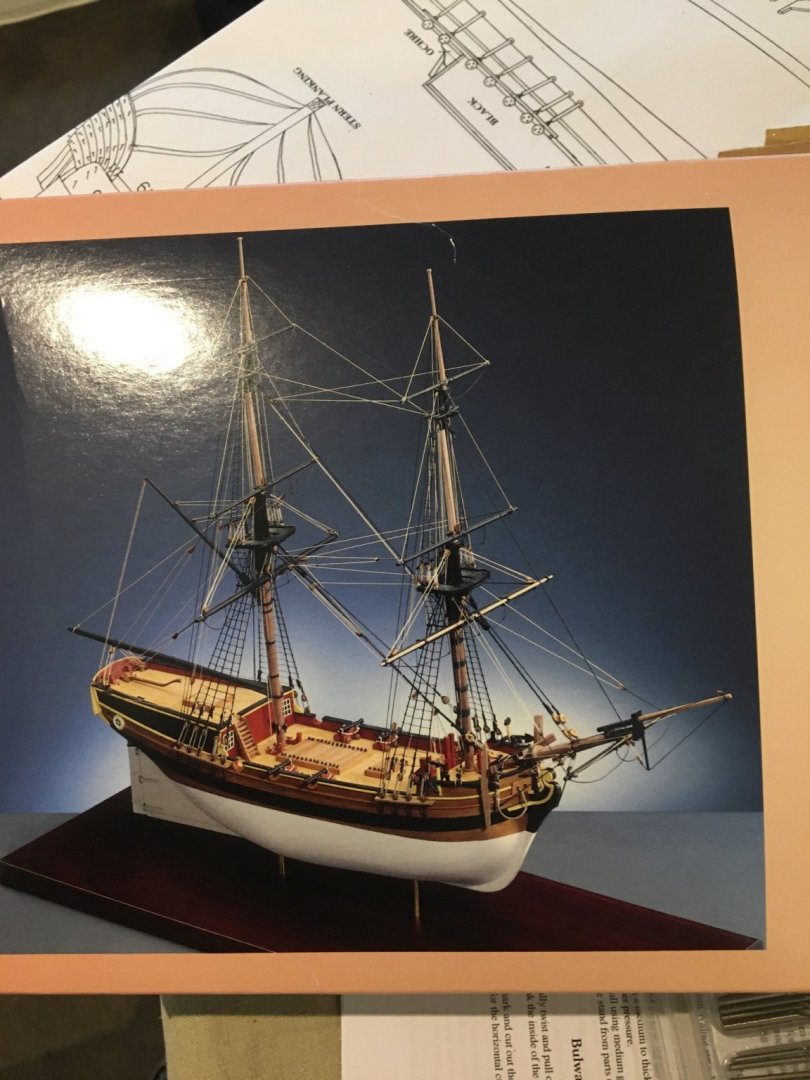
 Build Log HMS Pickle The Caldercraft kit has arrived and seems of the same good quality as I could expect from Granado. However, before I start, I made a bit of research and will add a few corrections. I like Pickle as an example of those elegant schooners and for her role after Trafalgar. But – I find that the kit’s Pickle looks somewhat strange in some respects: The bow seems too bluff for the period The overall proportions of hull length, mast distance and mast height seems wrong The stern looks ugly and the taffrail is completely different from other schooners of the period. According to some correspondence with CC (I lost the copies, sloppy me) the kit is built according to plans found in the Bermudas which show an unnamed vessel of about the same size and specifications as Pickle built around 1800. It is however not confirmed to be Pickle. The plans are held back as somebody seemingly wants to write eventually a book about Pickle. They also referred to a contemporary sketch showing Pickle with seven gun ports per side and a rig according to the kit but with a vertical foremast which configuration was not adopted. To me the kit Pickles hull looks much more old fashioned and ungraceful than other contemporary schooners. As I have no access to the original plans used for the kit I will make some corrections based on different sources: Plan of the Royal Maritime Museum in Greenwich (RMG) of the Adonis – class cutter Laura Although the 12 Adonis – class vessels were ordered as cutters they were built as (or converted to) schooners. Their hull size is very similar to Pickle and the armament was with 10 instead of 8 12-pounder carronades although there were only 6 gun ports per side. They were built in the Bermudas in 1806 I bought a copy of that plan from RMG. It’s not only a plan full of information but a fascinating object of art. Sketches of the Adonis – class schooners in ‘The Global Schooner’ (TGS) Karl Heinz Marquarts book is a treasure of information about schooners and contains some small plans of the Adonis – class. Pictures of different plans from the collections of RMG J2147 sail J8265 unnamed 18-gun two-masted brig
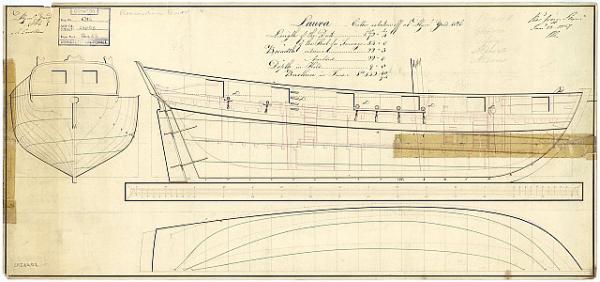
- 293 replies
-
- 4
-
-
- pickle
- caldercraft
- (and 1 more)
-
 Hi All After some gentle persuasion on another thread, here's my build log for the Mary Rose. From what I can see this is the first build log for this kit which is fortunate for me as you've got nothing to compare me against.🙂 This will be a build as it comes out of the box and will hopefully somewhat follow the plans but some allowances will have to be made for my lack of ability. As long as it looks sort of like the photo on the box at the end and I've had a lot of fun along the way then I'll be happy. The kit itself is pretty good and is standard Caldercraft fair in that the wood varies from pretty good for the most part but poor in some instances especially the Tanganijka provided for the deck planking. Instructions are brief but the plans are excellent I started this back in December 2020 and have been working through the planking so not a great deal to see so far. Not sure how some members seem to get through the planking really quickly as it seems to take me forever. I'm not a master shipwright like a lot of members so my log will be pretty much limited to progress rather than a master class in how to's and techniques, however I will point out any issues that I come across so that any other builders of this model will be forewarned. Oh yeah, I'm not a master photographer either.....now that expectations are set, feel free to follow along
- 50 replies
-
- 13
-
-
- mary rose
- caldercraft
- (and 1 more)
-
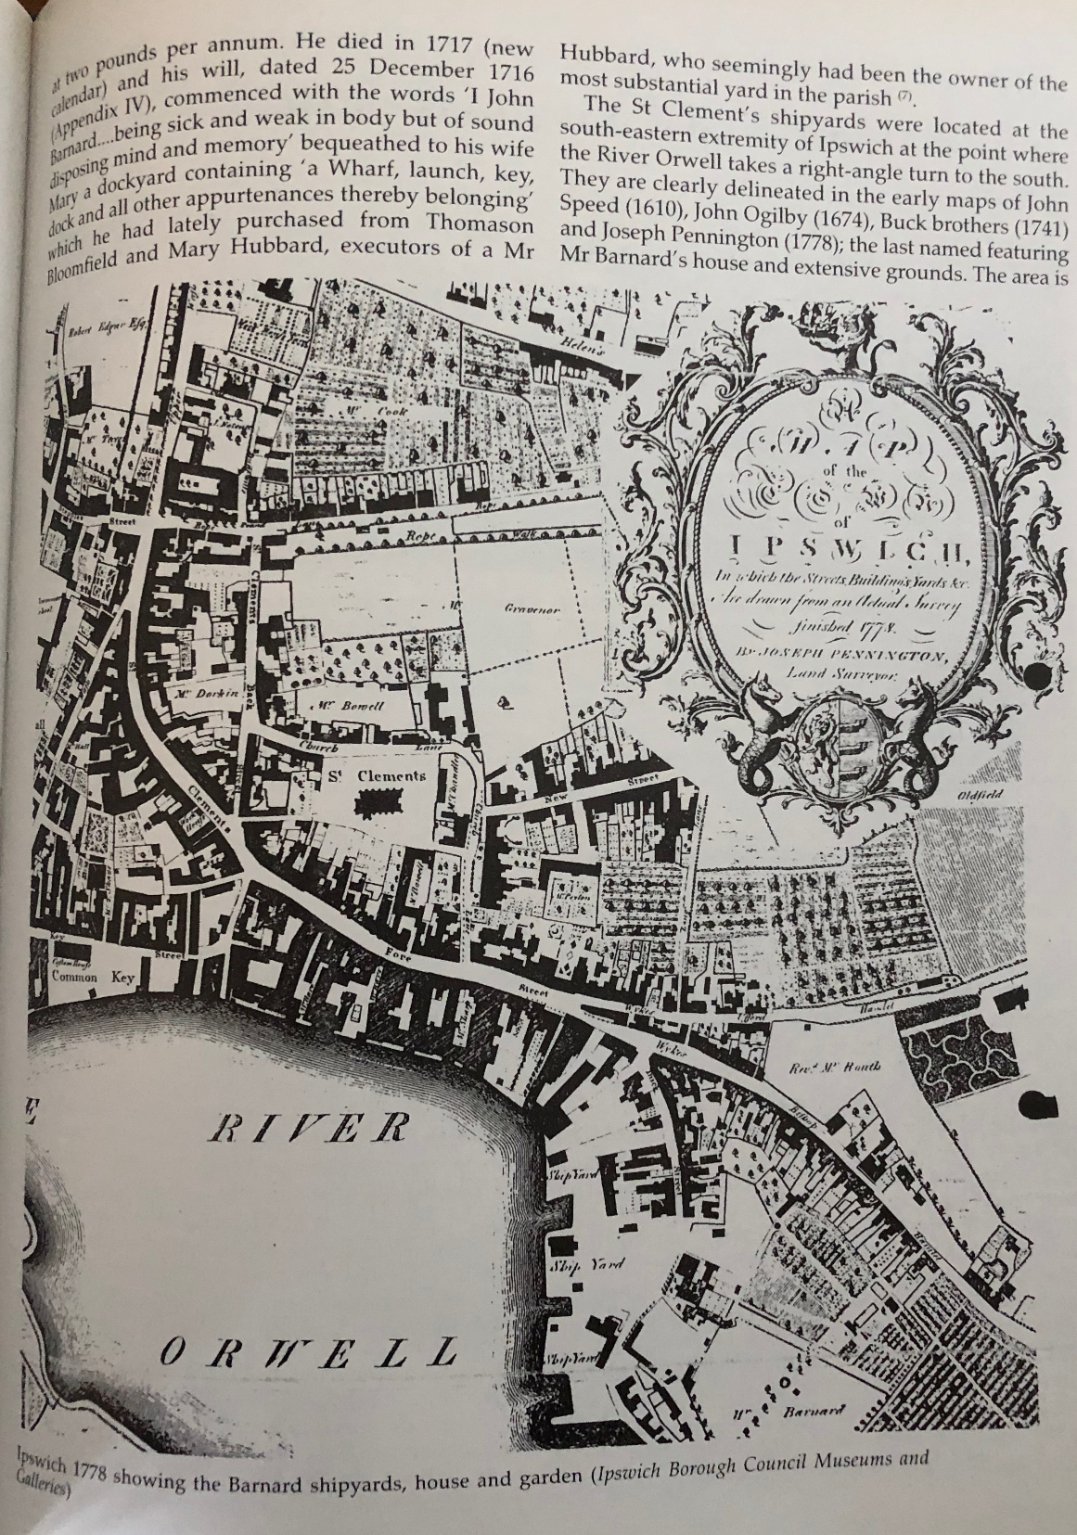
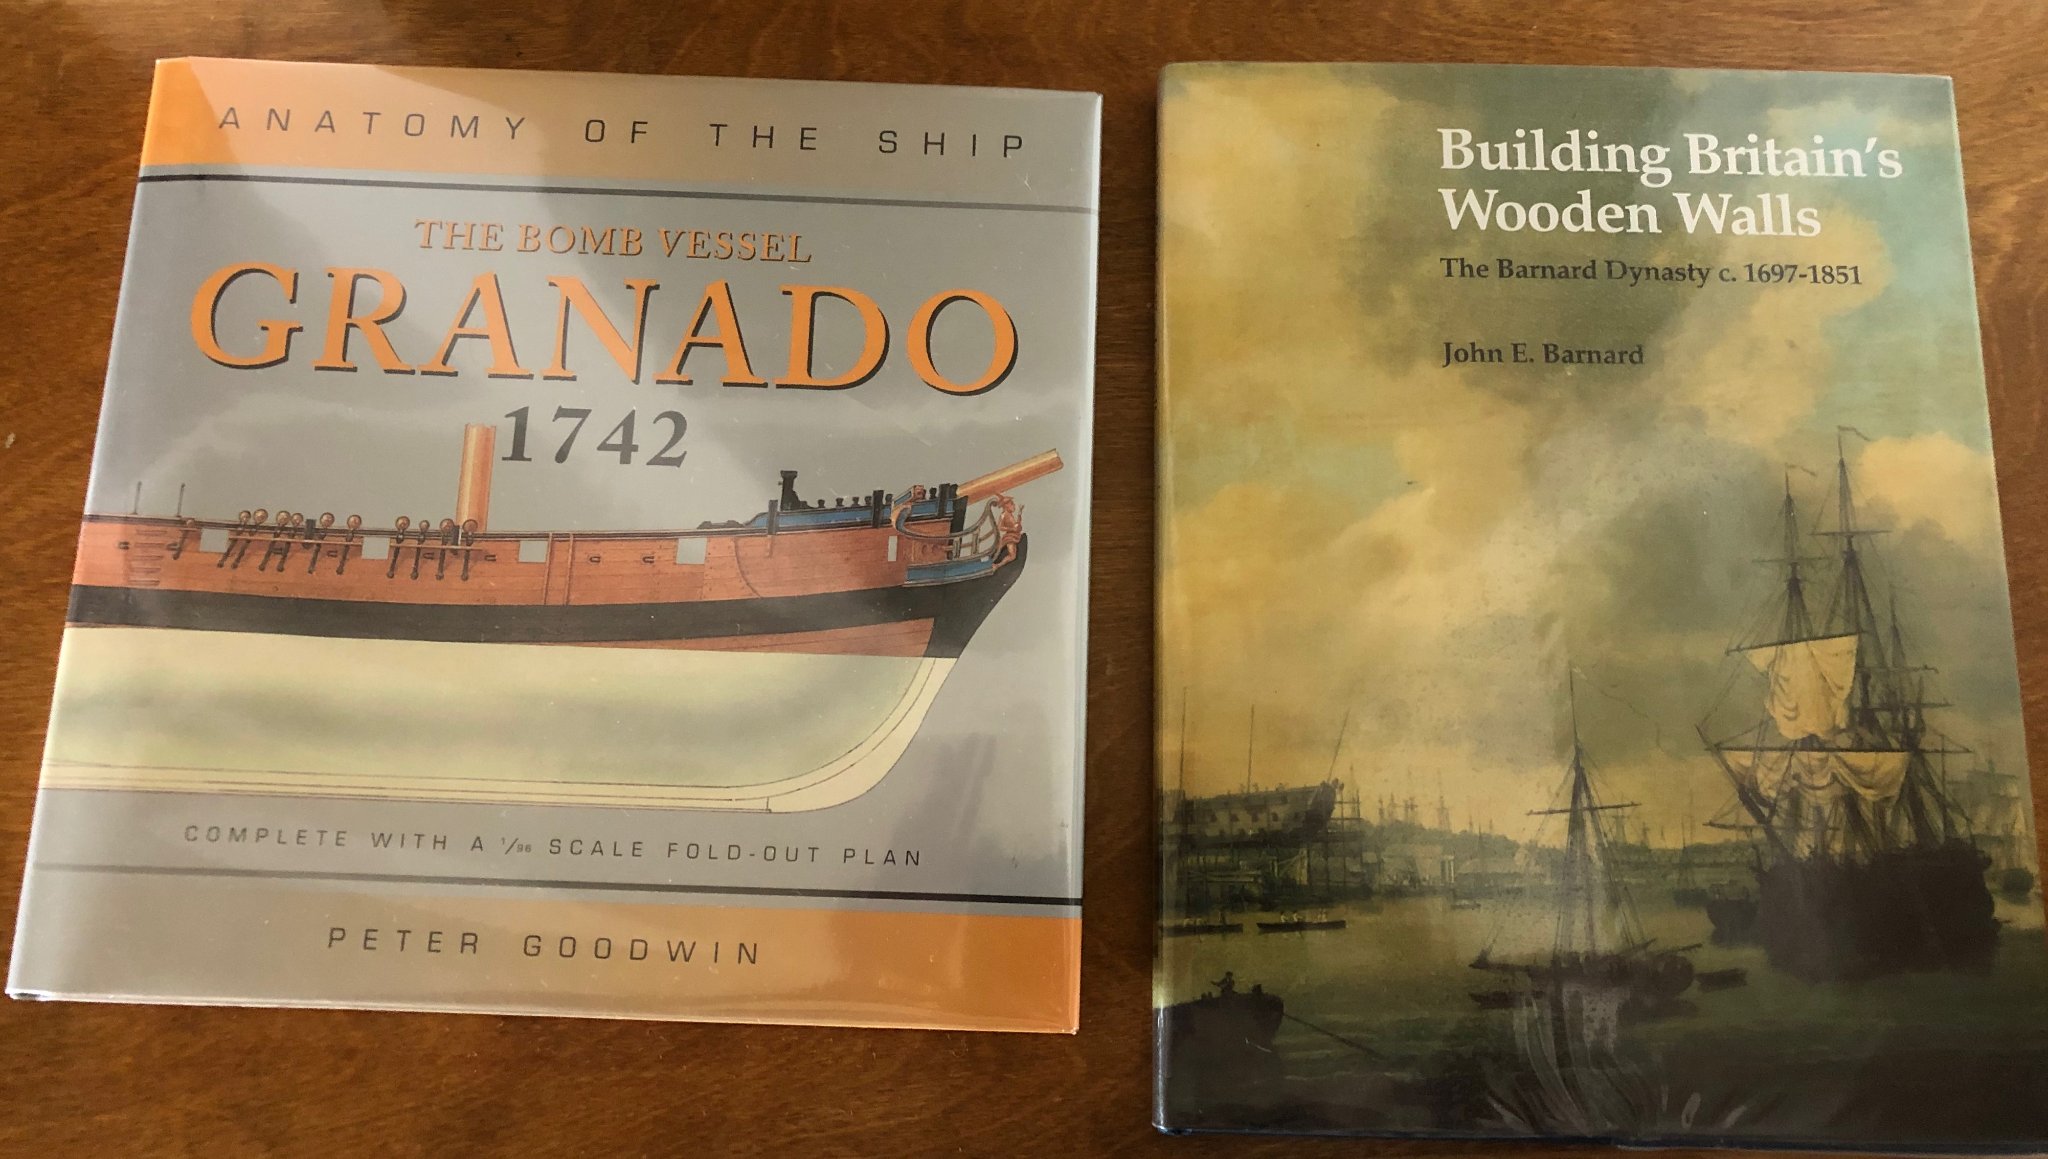
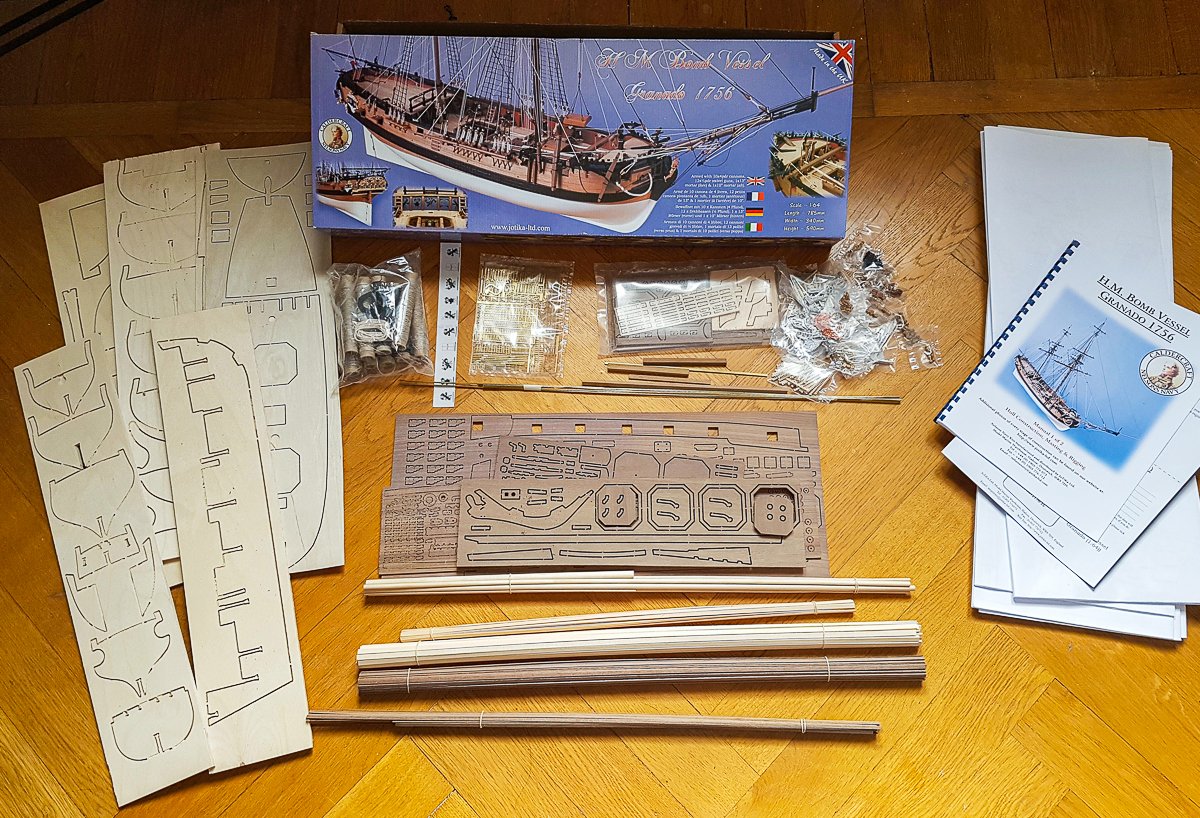
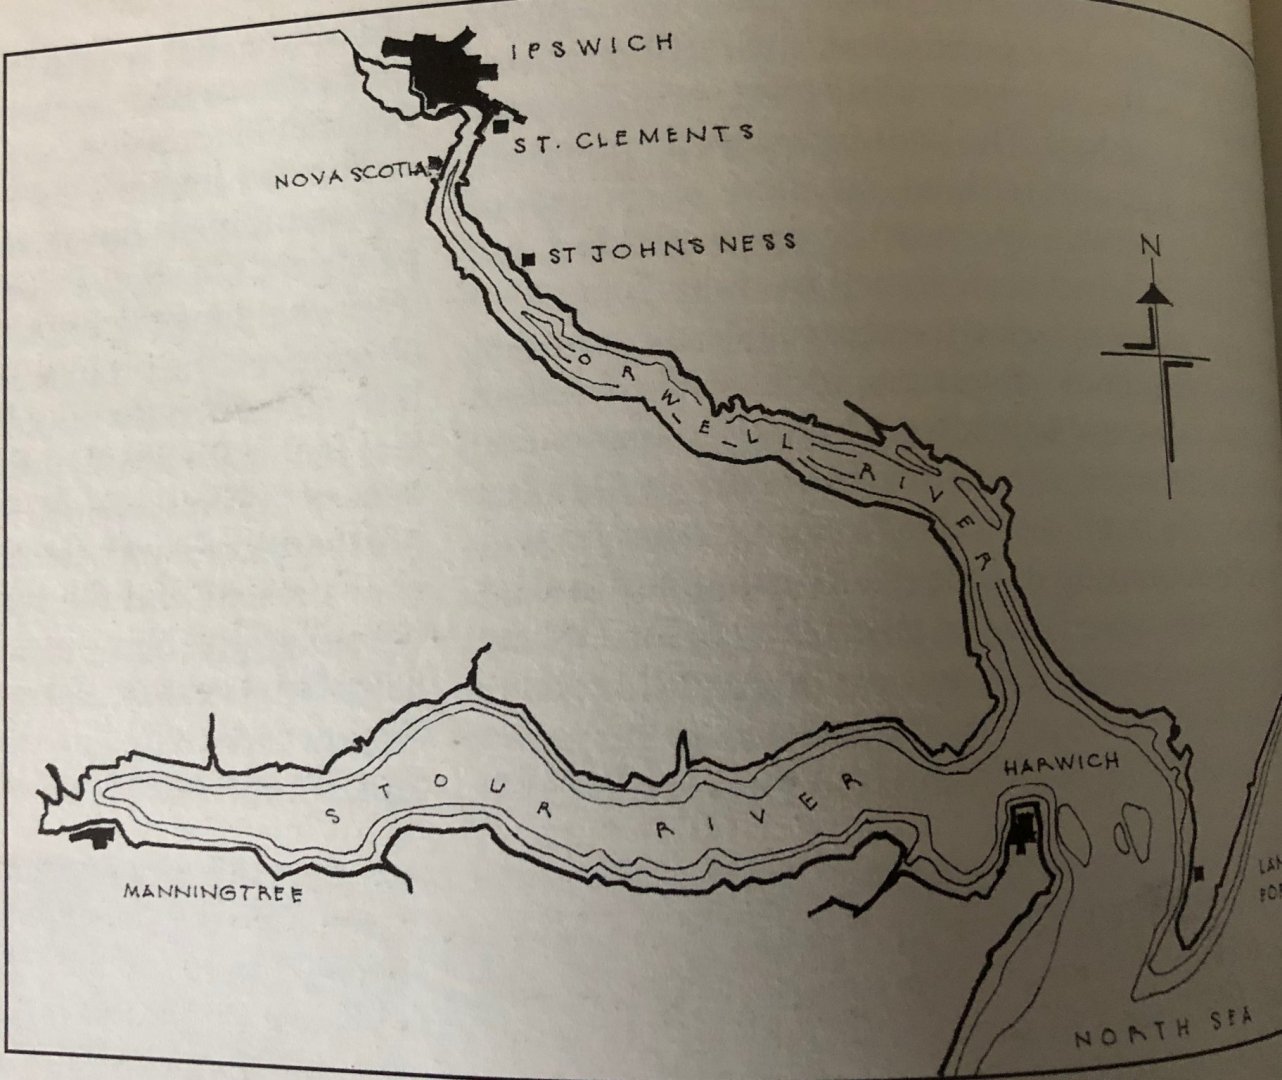
 Well, with the continued encouragement of Vane, I have decided to break the ice and start a build log for my efforts on the HMS Granado. I have ordered the AOTS reference and my wife was super kind and found a nice reference book on the builder.... Granado was ordered to be constructed on September 14th, 1741 and the keel was laid on November 18th, 1741. The construction of the ship occurred at St Clements on the River Orwell near Ipswich. The Granado's design was unusual in that she was to be used as either a sloop or a bomb vessel, being constructed with a conventional square stern. Launched on June 22nd, 1742, Granado was initially taken to Harwich, and fitted out and put in commission as a sloop. It was not until 1756 that Granado was fitted for the first time as a bomb vessel from an Admiralty Order on July 26th 1756. However, between the launch of Granado and her fitting as a bomb vessel, a number of changes had been made as compared to the original Admiralty plans, the most noticeable of these were as follows: 1. Two extra 4pdr carriage guns were added (Admiralty order of June 20th 1745) bringing the total 4pdr carriage guns to 10. 2. Two bow chaser gun ports were added allowing accommodation of the extra guns either under the forecastle as bow chasers or at the fifth gunports. 3. The mortars as shown in the Admiralty plans are two 13 inch mortars however when fitted as a bomb vessel this was actually changed to 1 x 13inch and 1 x 10inch mortar. This is confirmed by the provisions list on March 30th 1757 which details 50 large and 50 small shells. It was during its period as a bomb vessel that Granado was involved in her most active role. On January 22nd, 1759, Granado and the squadron under command of Commodore John Moore anchored off Basse Terre. By January 24th troops had occupied the forts of Basse Terre and Fort Royal, and the town had been devastated by fire caused by the carcasses discharged from the bomb vessels. On February 7th, the fleet moved to attack Fort Louis at the entrance to Cul de Sac Bay. The attack began the following day and by February 15 the bombardment ceased with the capture of the Fort. Granado remained as a bomb vessel until the Admiralty Order to fit her as a sloop on March 20th 1760. Granado was again converted to a bomb vessel in August 1761 and she remained as such until she was sold on August 30th 1763 for £575. During this period Granado was involved in the action of capturing Morro Castle and El Morro in the West Indies and the capitulation of Havana on August 13th 1762. .


-
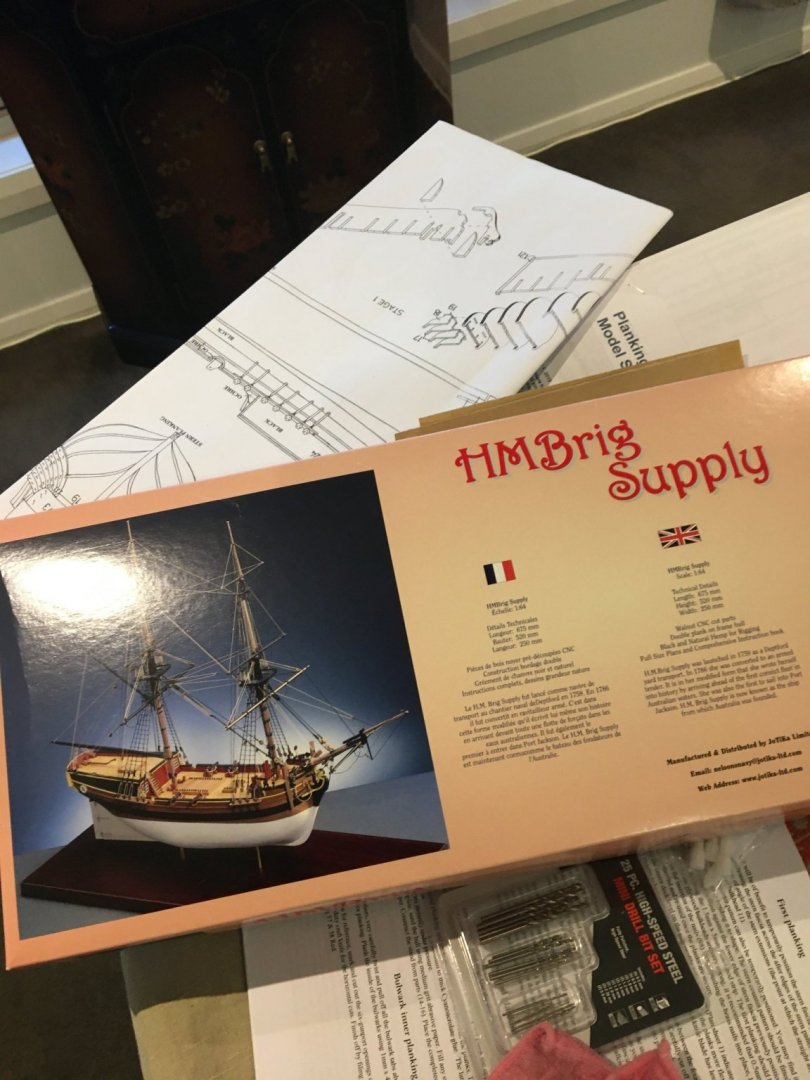
 I needed to keep my mind occupied during the long covid lockdown in the Melbourne area from June to October 2020 so I thought model ship building would be good. I built a few balsawood and tissue paper model aircraft when I was a kid (a long time ago) but nothing since so thought a kit would be best and looked for one suitable for a novice. The Jotika website stated "The kit of H.M. Brig Supply has been designed with the Novice builder in mind" so this looked OK. I also like the history of the Supply, linking Britain with Australia, as I also migrated from Britain to Australia later in life. Knowing what I now know, having progressed well into the build and struggled numerous times, I would not describe the Supply as suitable for a novice and thank goodness I didn't start with a more advanced kit. I ordered from Cornwall Model Boats and the kit took about 3 weeks to arrive, which considering the logistics during covid was pretty good, and started in late July 2020. I hesitated to start a build log as I was not sure if I could complete the build but as it progressed and each difficulty overcome, step by step, I slowly became more confident of finishing the job. I also realised after completing the hull that I would need some help when it came to the rigging. Anyway here goes with some photos of the early stages.


- 53 replies
-
- 6
-
-
- Supply
- Caldercraft
- (and 1 more)
-
 hi guys and gals, after many many to many years of following i have decided to post a build log. i bought this kit in 2006 along with the snake and diana. i finished the diana last fall and started the victory in march after completing the duke william. to date i have lower gundeck, dummy barrel strips, stem, keelson and frames attached to the keel. i am working on beveling bow and stern frames. as soon as i figure out how to post some pictures i will and once i do please feel free to comment on any and everything you wish. thanks, mort
- 60 replies
-
- 7
-
-
- victory
- caldercraft
- (and 1 more)
-
 I finished my Endeavour Longboat a couple of weeks ago and procrastinated over what to build next. I decided on the HM Brig Supply by Caldercraft wanting a more detailed kit with better instructions, preferably with 2 or less masts, definitely preferably with cannons and ideally something historically significant to Australia. After a couple of weeks of nervous anticipation the big brown box arrived from Cornwall Model Boats today. I quickly opened it to have a look and firstly was blown away by how much bigger everything was than on the longboat kit. However, I was disappointed in the instructions which amounted to 4.5 photocopied pages. I had previously looked at the multi-volume instructions available on the Jokati website and had assumed all the Caldercraft kits had the same detailed instructions. Lesson learnt! However the full size plans are awesome. Thankfully this is my second model and not the first or I reckon I might have packed it away never to see the light of day again. But with the experience from the longboat and the awesome resources on this site I am sure I get it done. That's it for now, I will do an inventory check tomorrow and then plan to start building on the weekend.
 -
 Hello all, And yes, another Victory build! Welcome all. My apologies to Amati, but I couldn't wait any longer for their Victory. So I ordered the Caldercraft / Jotika instead as a present to myself on the occasion on my upcoming 40th work anniversary in August. And boy, she is big and heavy. A box filled with 15 kilo's (33 lb) of all kinds of goodies.
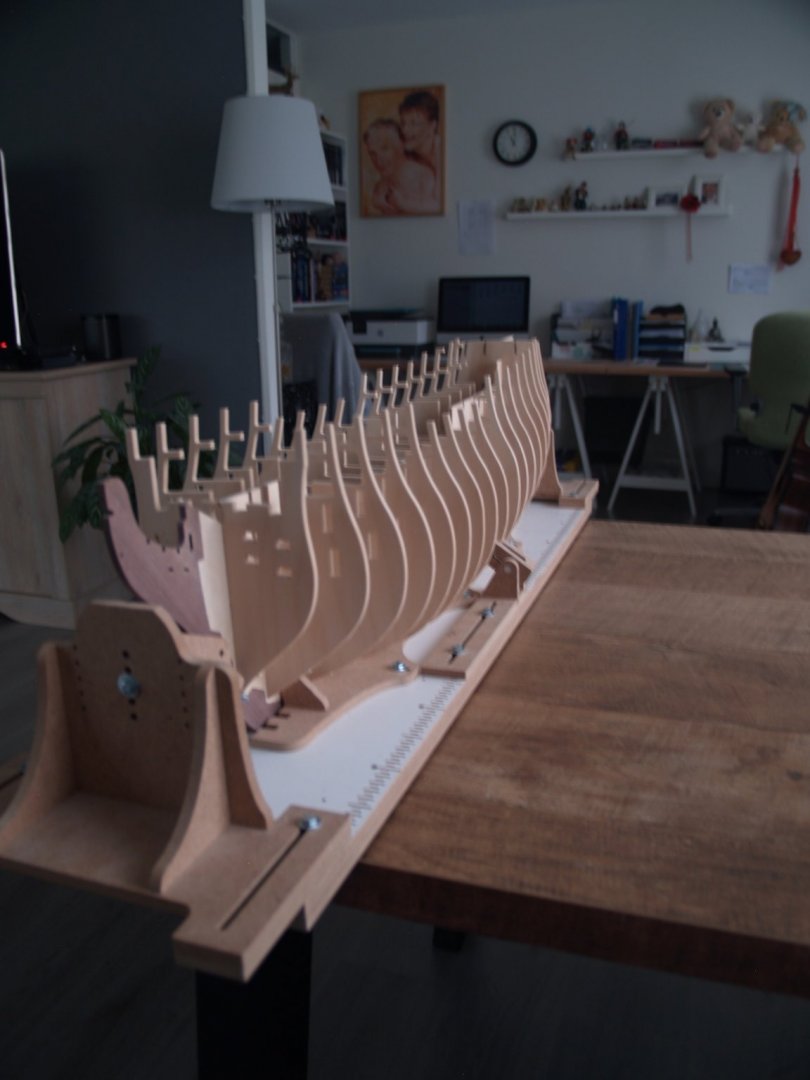


-
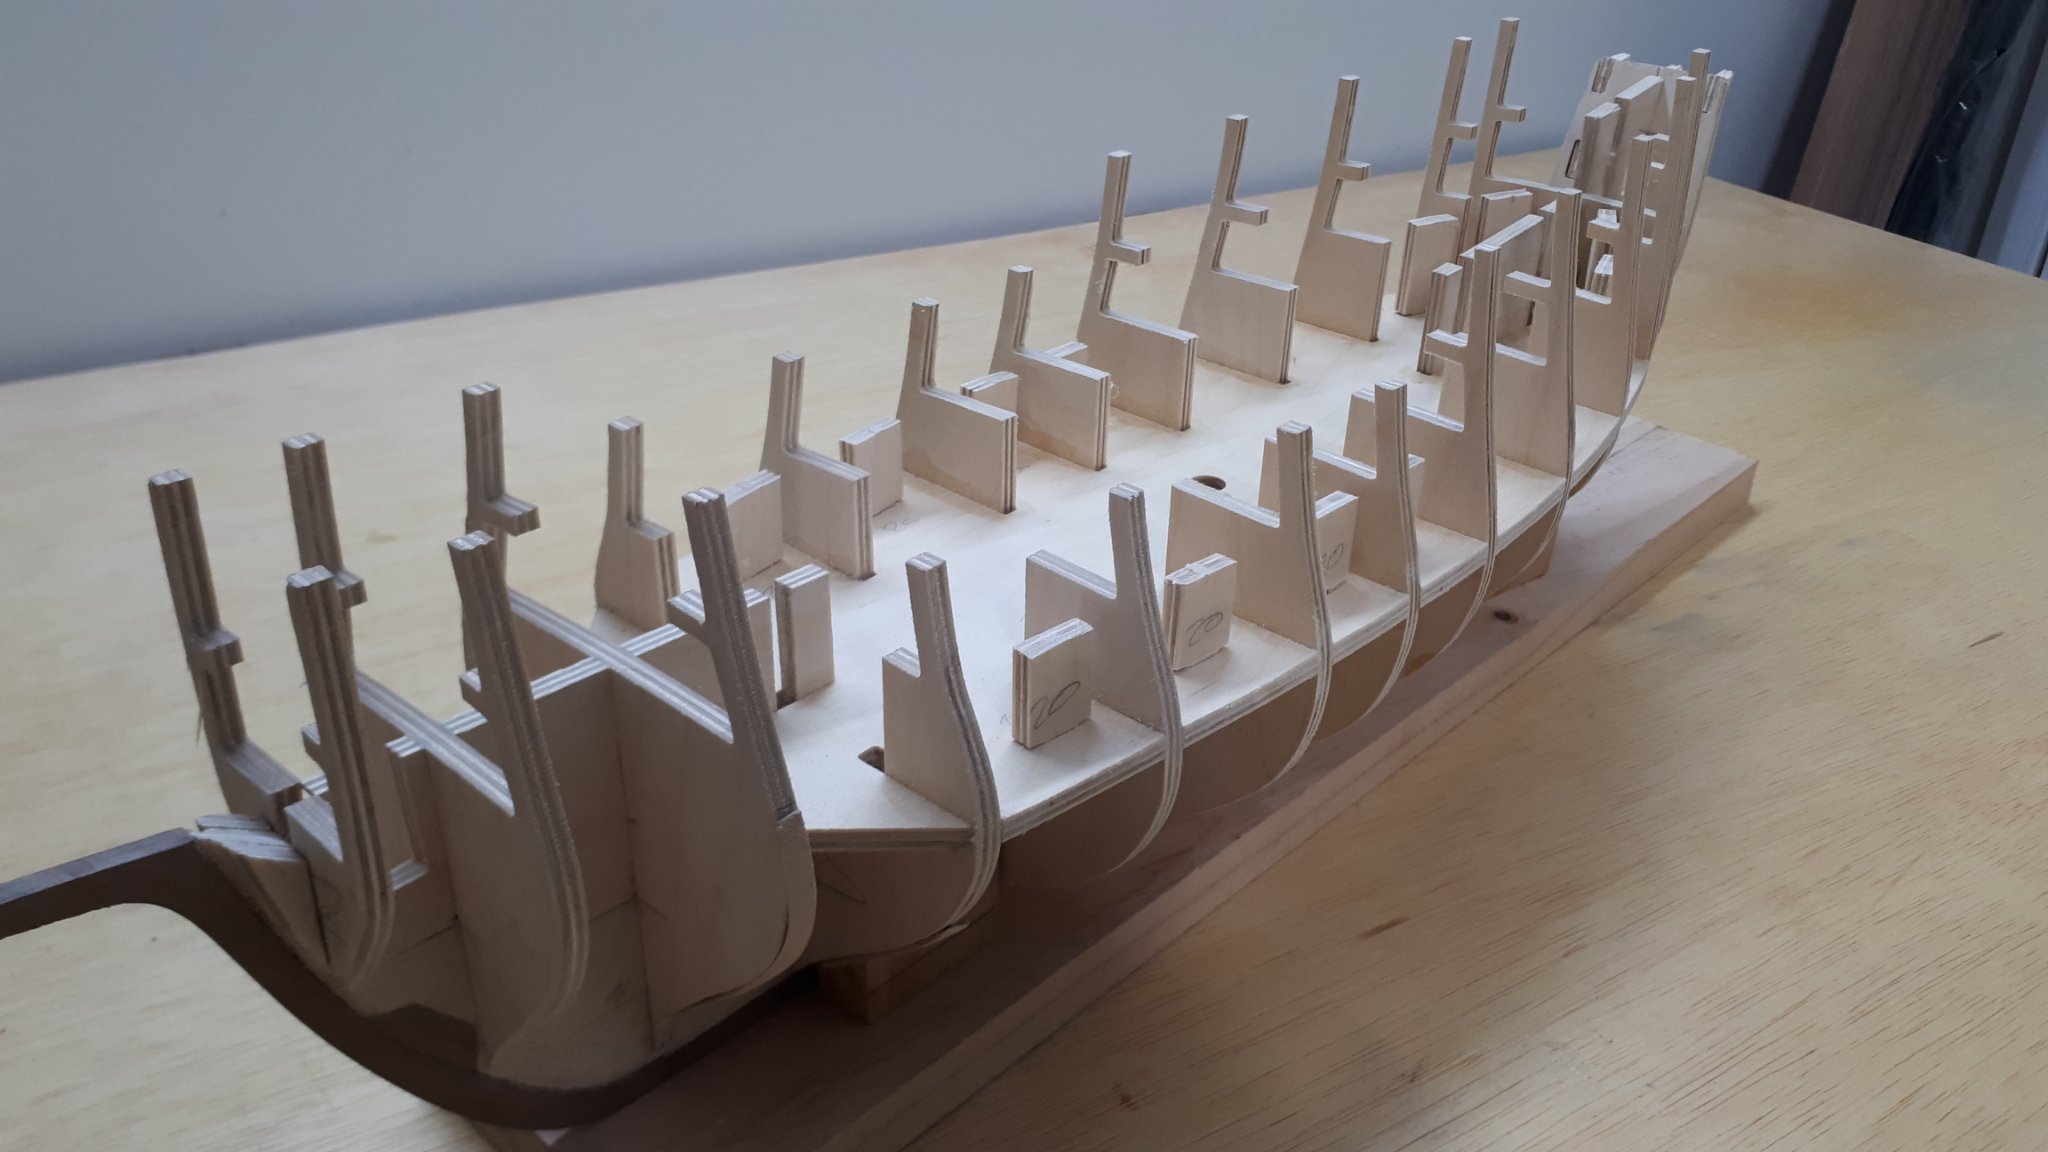
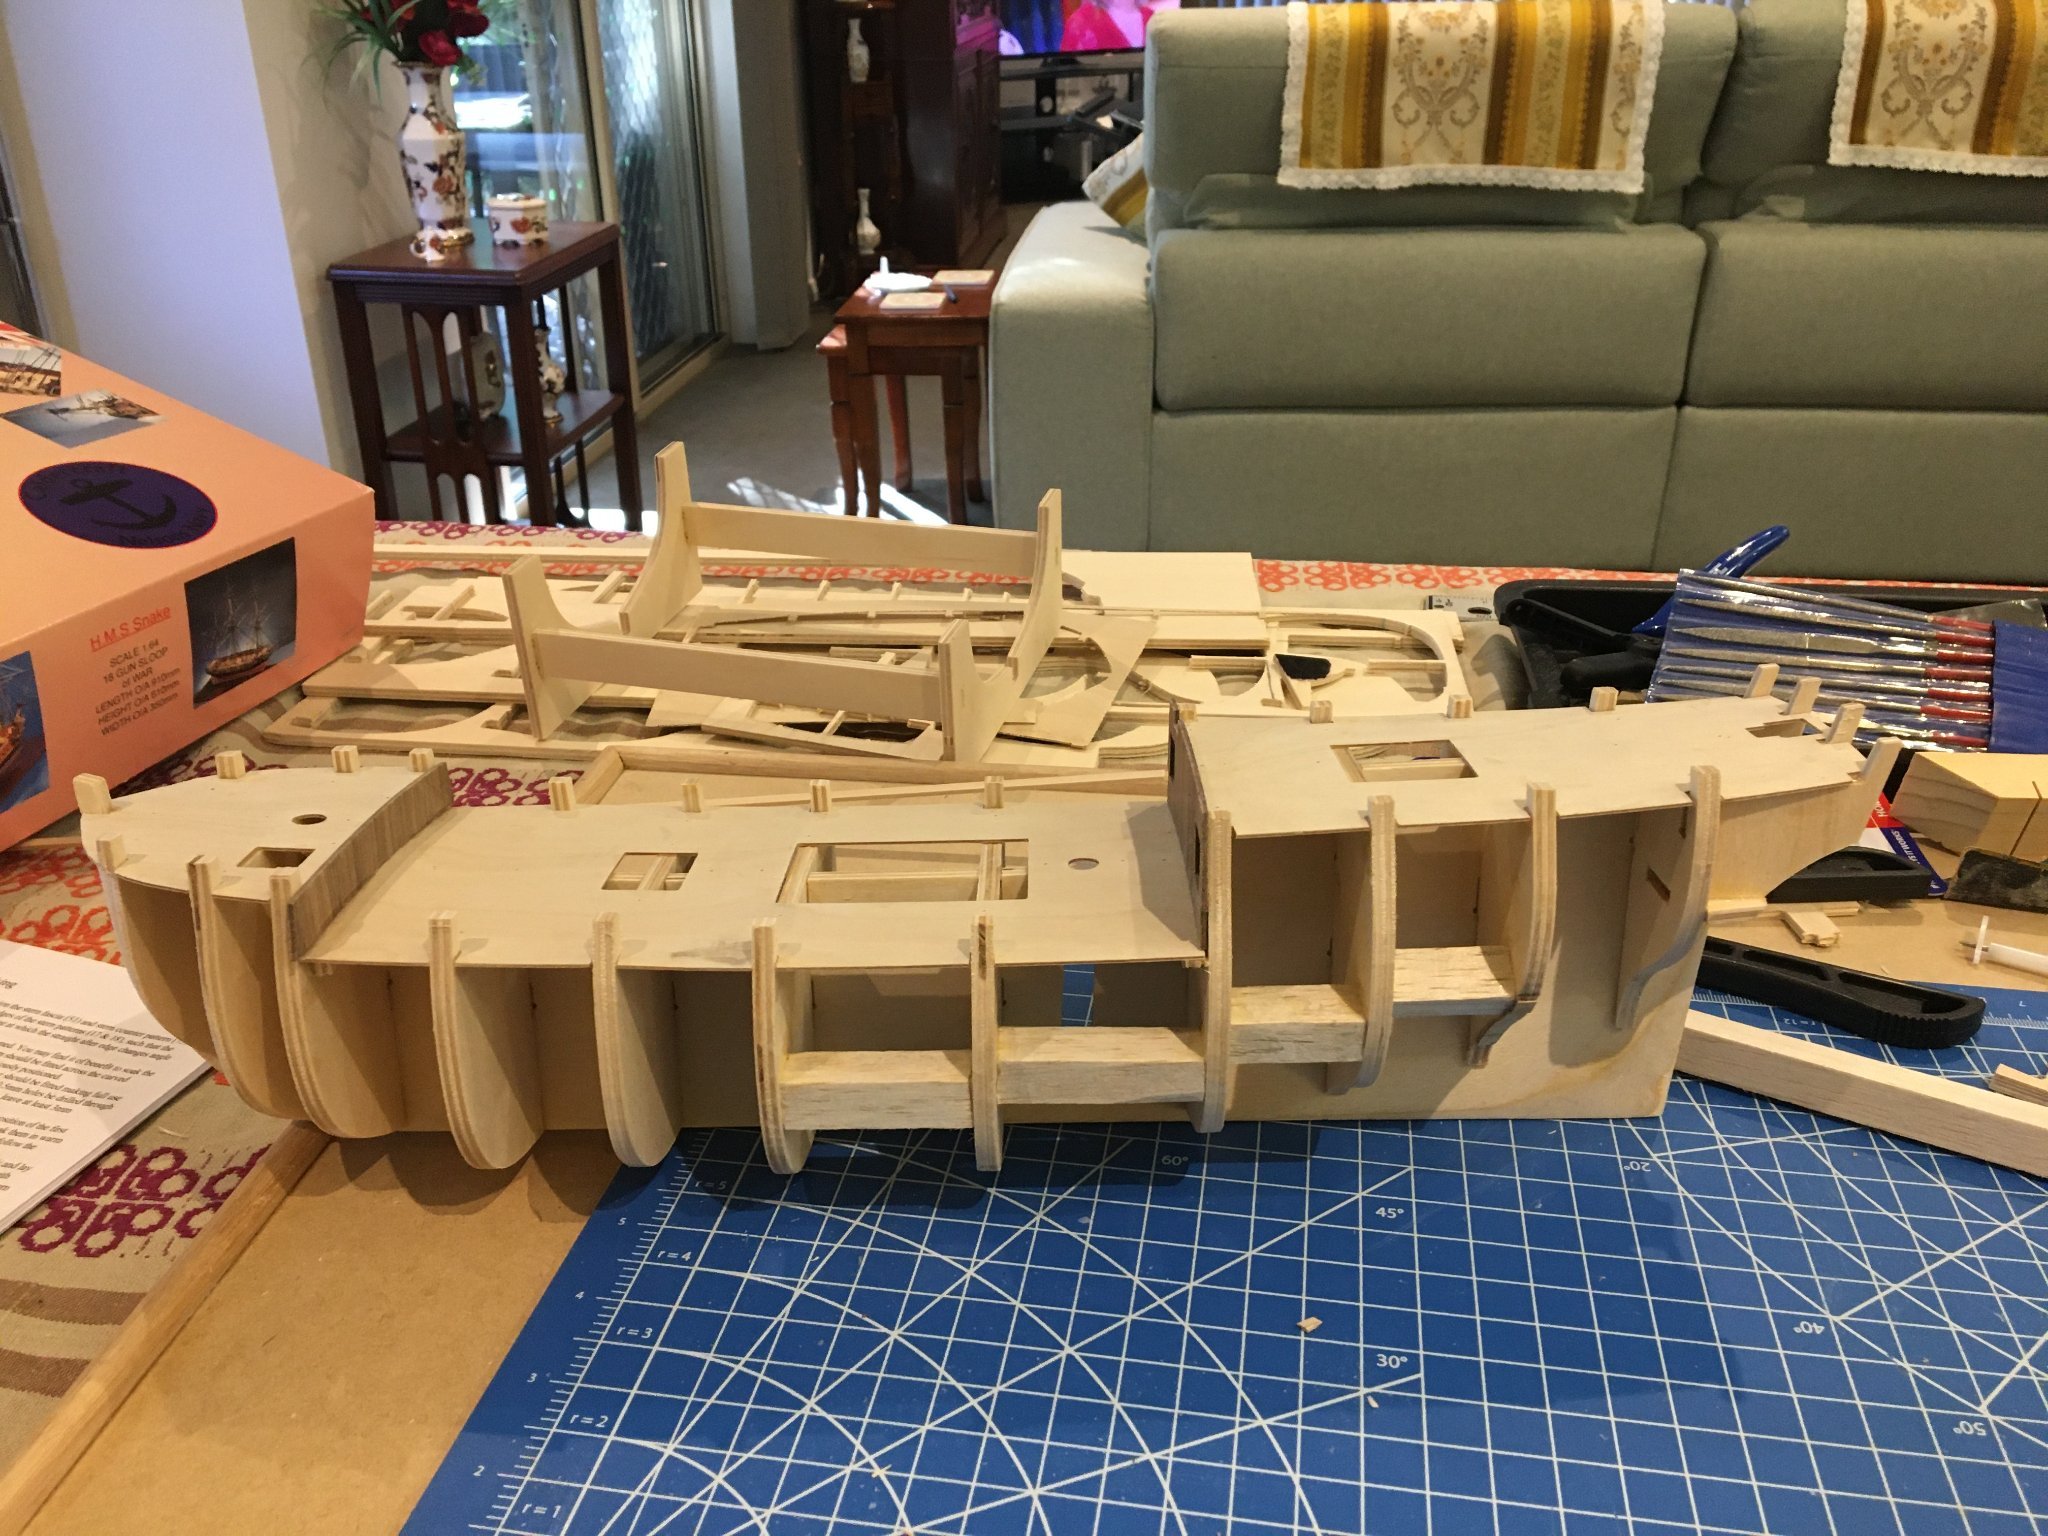
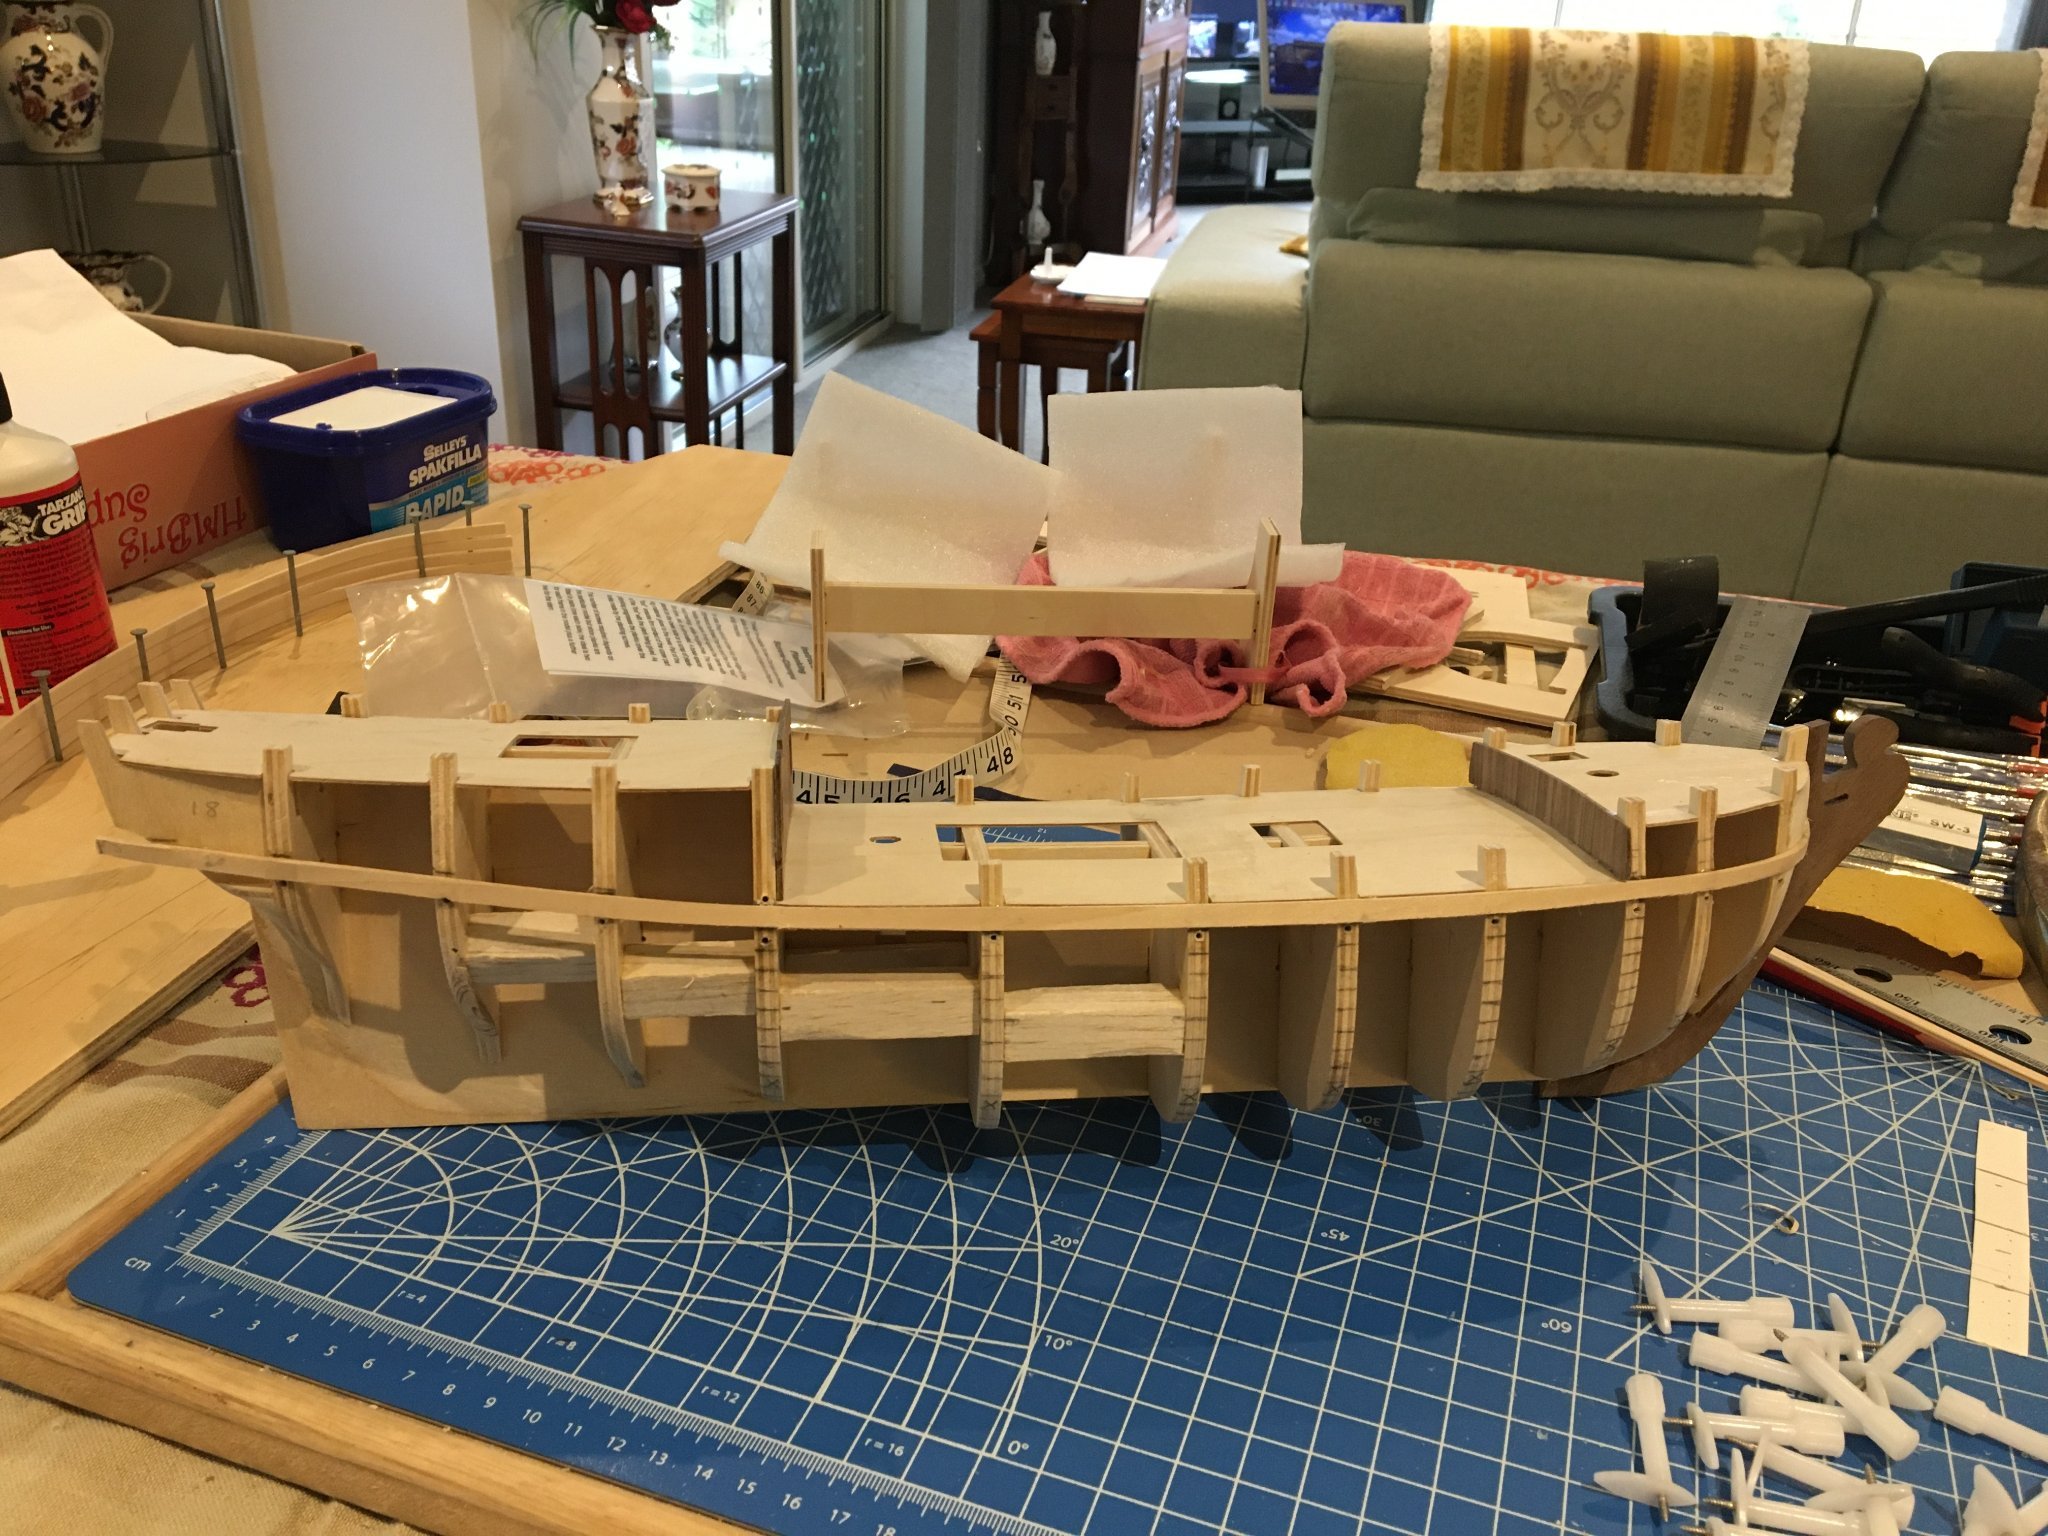
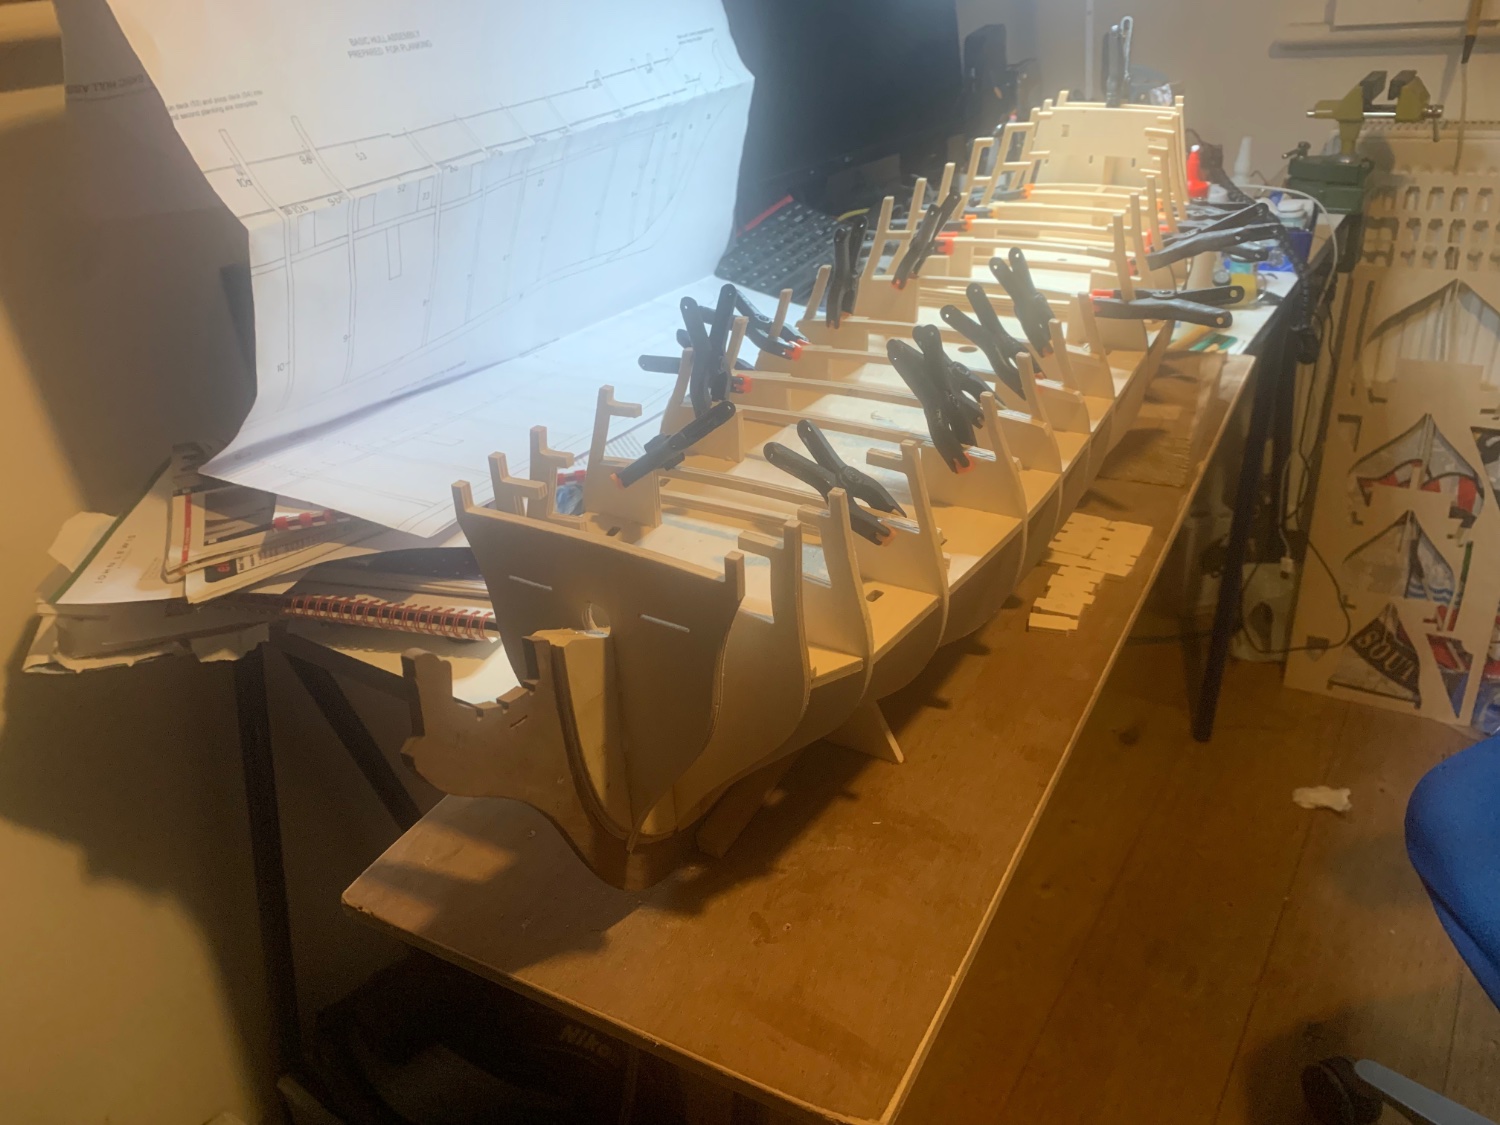
 I had much less of a break after finishing the Alert than I had thought -- got the itch to start this kit, which I have been looking forward to. It's my first Caldercraft kit and I'm interested in the comparison with Amati and Vanguard -- my gold standards up to now. There are a number of build logs on this kit by builders with much better skills than mine, so I don't know how much added value I can provide, but I find these logs fun to share, and what I'll try to focus on (as in this post) are construction details and issues, and how I addressed them. So I've skipped the "what's in the box" opener, because what's in the box is what you'd expect. There are three manuals: one for the hull -- with pictures, one for rigging, and a third for parts -- which is great, as you don't have to wrestle multiple plan sheets up on the wall to figure out the wood panel and other cut sheet parts. I also bought some white posterboard to provide a better backdrop on my workbench for my pictures. I have finished the first phase of the frame: keel, bulkheads and lowest deck. This kit uses 5mm plywood for all of that -- in all of my other kits these parts have been MDF, and based on my experience with MDF where all the parts slide together easily without sanding, I found working with the plywood a challenge. NONE of the slots in the keel, bulkheads, or deck fit without some more-than-trivial widening. Regular sanding would take forever, and I tried a couple of times to use rotary tool sanding disks, but they get chewed up fast. So I found some 3mm rotary burrs on Amazon, and that did the trick. But with 18 bulkheads and 16 double-sided deck slots, it comes out to 68 slots to widen. Got it done, and everything fit together as you can see. This is a heavy ship because of the plywood and its size. I'm looking forward to digging into it. Regards, David
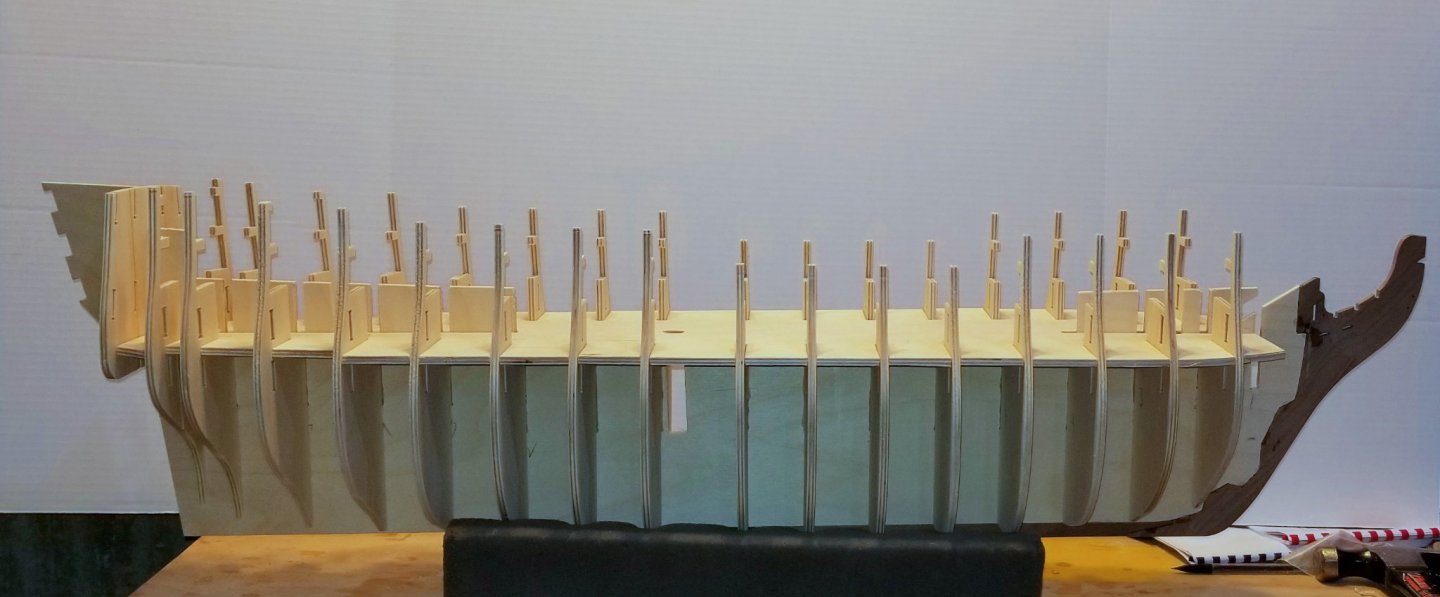
- 218 replies
-
- 11
-
-
- Victory
- Caldercraft
- (and 1 more)
-
 This is my first post to try and recreate my old build log from before the great crash of 2013. I'll do my best to find what I have from the old log and will resurrect what I can. Unfortunately, if this can be believed, my PC had a hard drive failure around the same time so I'm still int he process of trying to recover what I am able(I hadn't been too studious keeping photos assuming that once posted they would be safe and backed up - never assume!). My commiserations to all the others out there who have lost so much work, it really is a big loss, I hope that we can collectively get the knowledge capital back up to where it once was.
- 800 replies
-
- 1
-
-
- snake
- caldercraft
- (and 1 more)
-
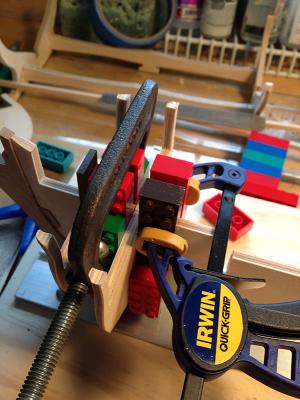
 I was looking for something a bit different for my next build, and most assuredly did not want to copper, having done so on my last three builds, so after much thought I have settled on the Caldercraft Granado. There are some nice builds of her going on her on MSW which have given me some great ideas and nice inspiration. The kit is very nice right out of the box, with decent looking wood, nice fittings and excellent plans and instructions. I have yet to decide how far I'm going to go with changes and alterations wood wise, but I have some time to decide on that. So...let's get started! She's upright on her building board with rabbet and bearding line cut and the first few bulkheads installed. I'm glad we saved (my now teenaged sons') Legos! Nothing too exciting yet...
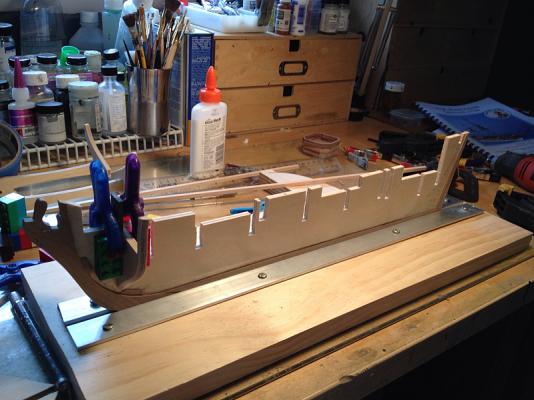
- 302 replies
-
- 9
-
-
- granado
- caldercraft
- (and 1 more)
-
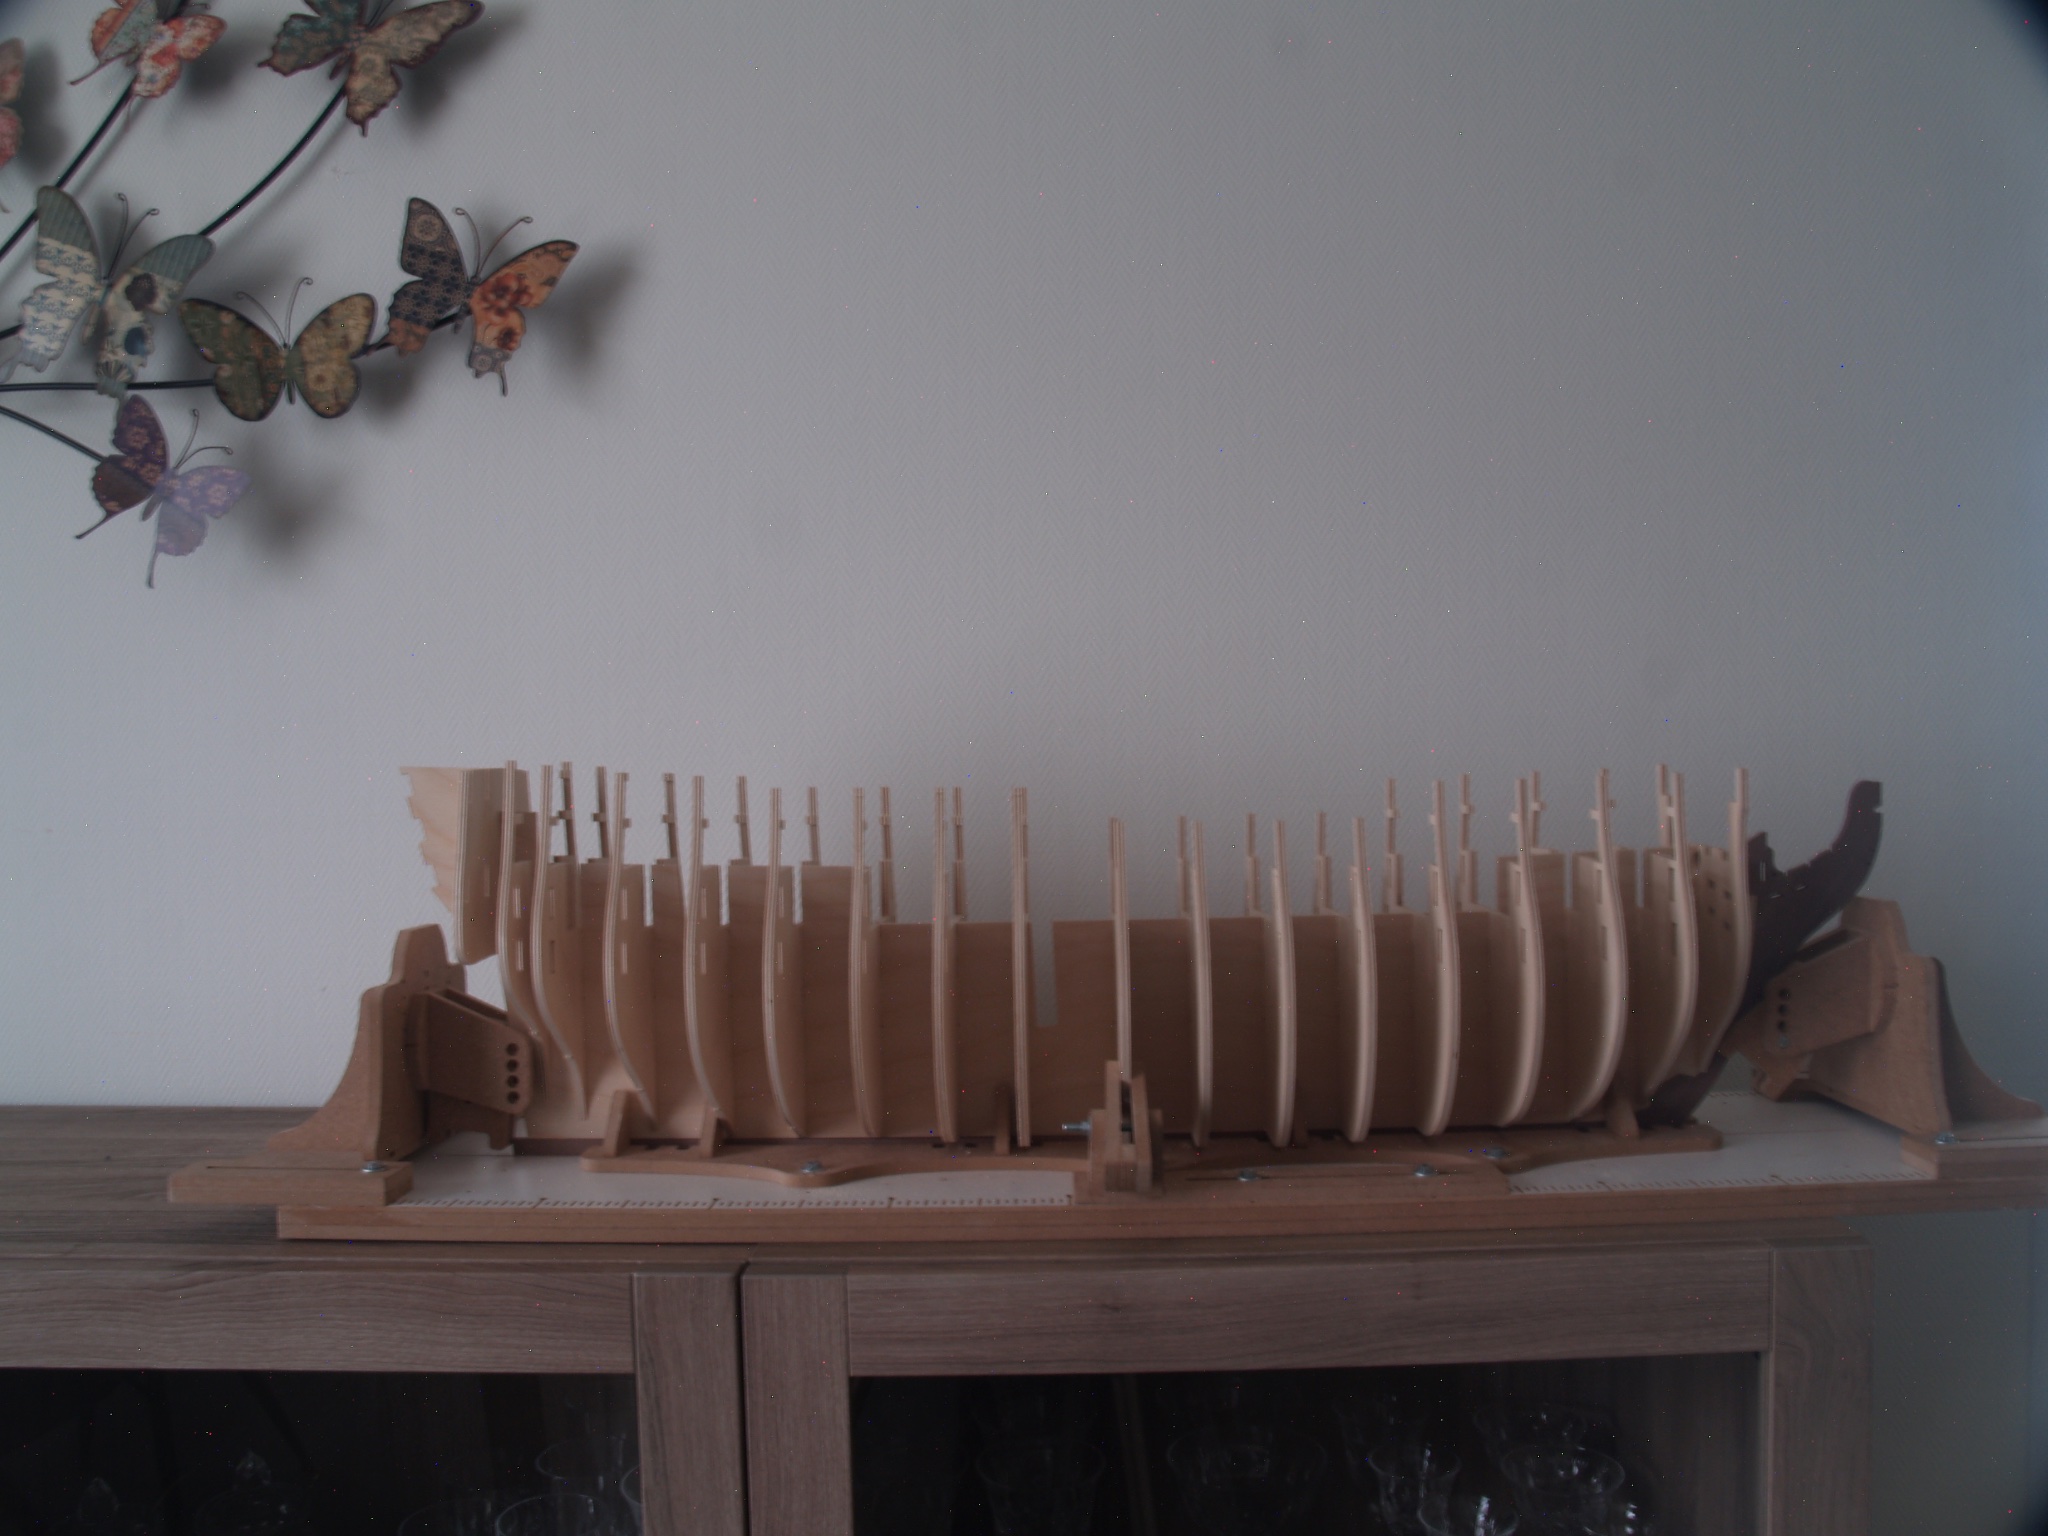
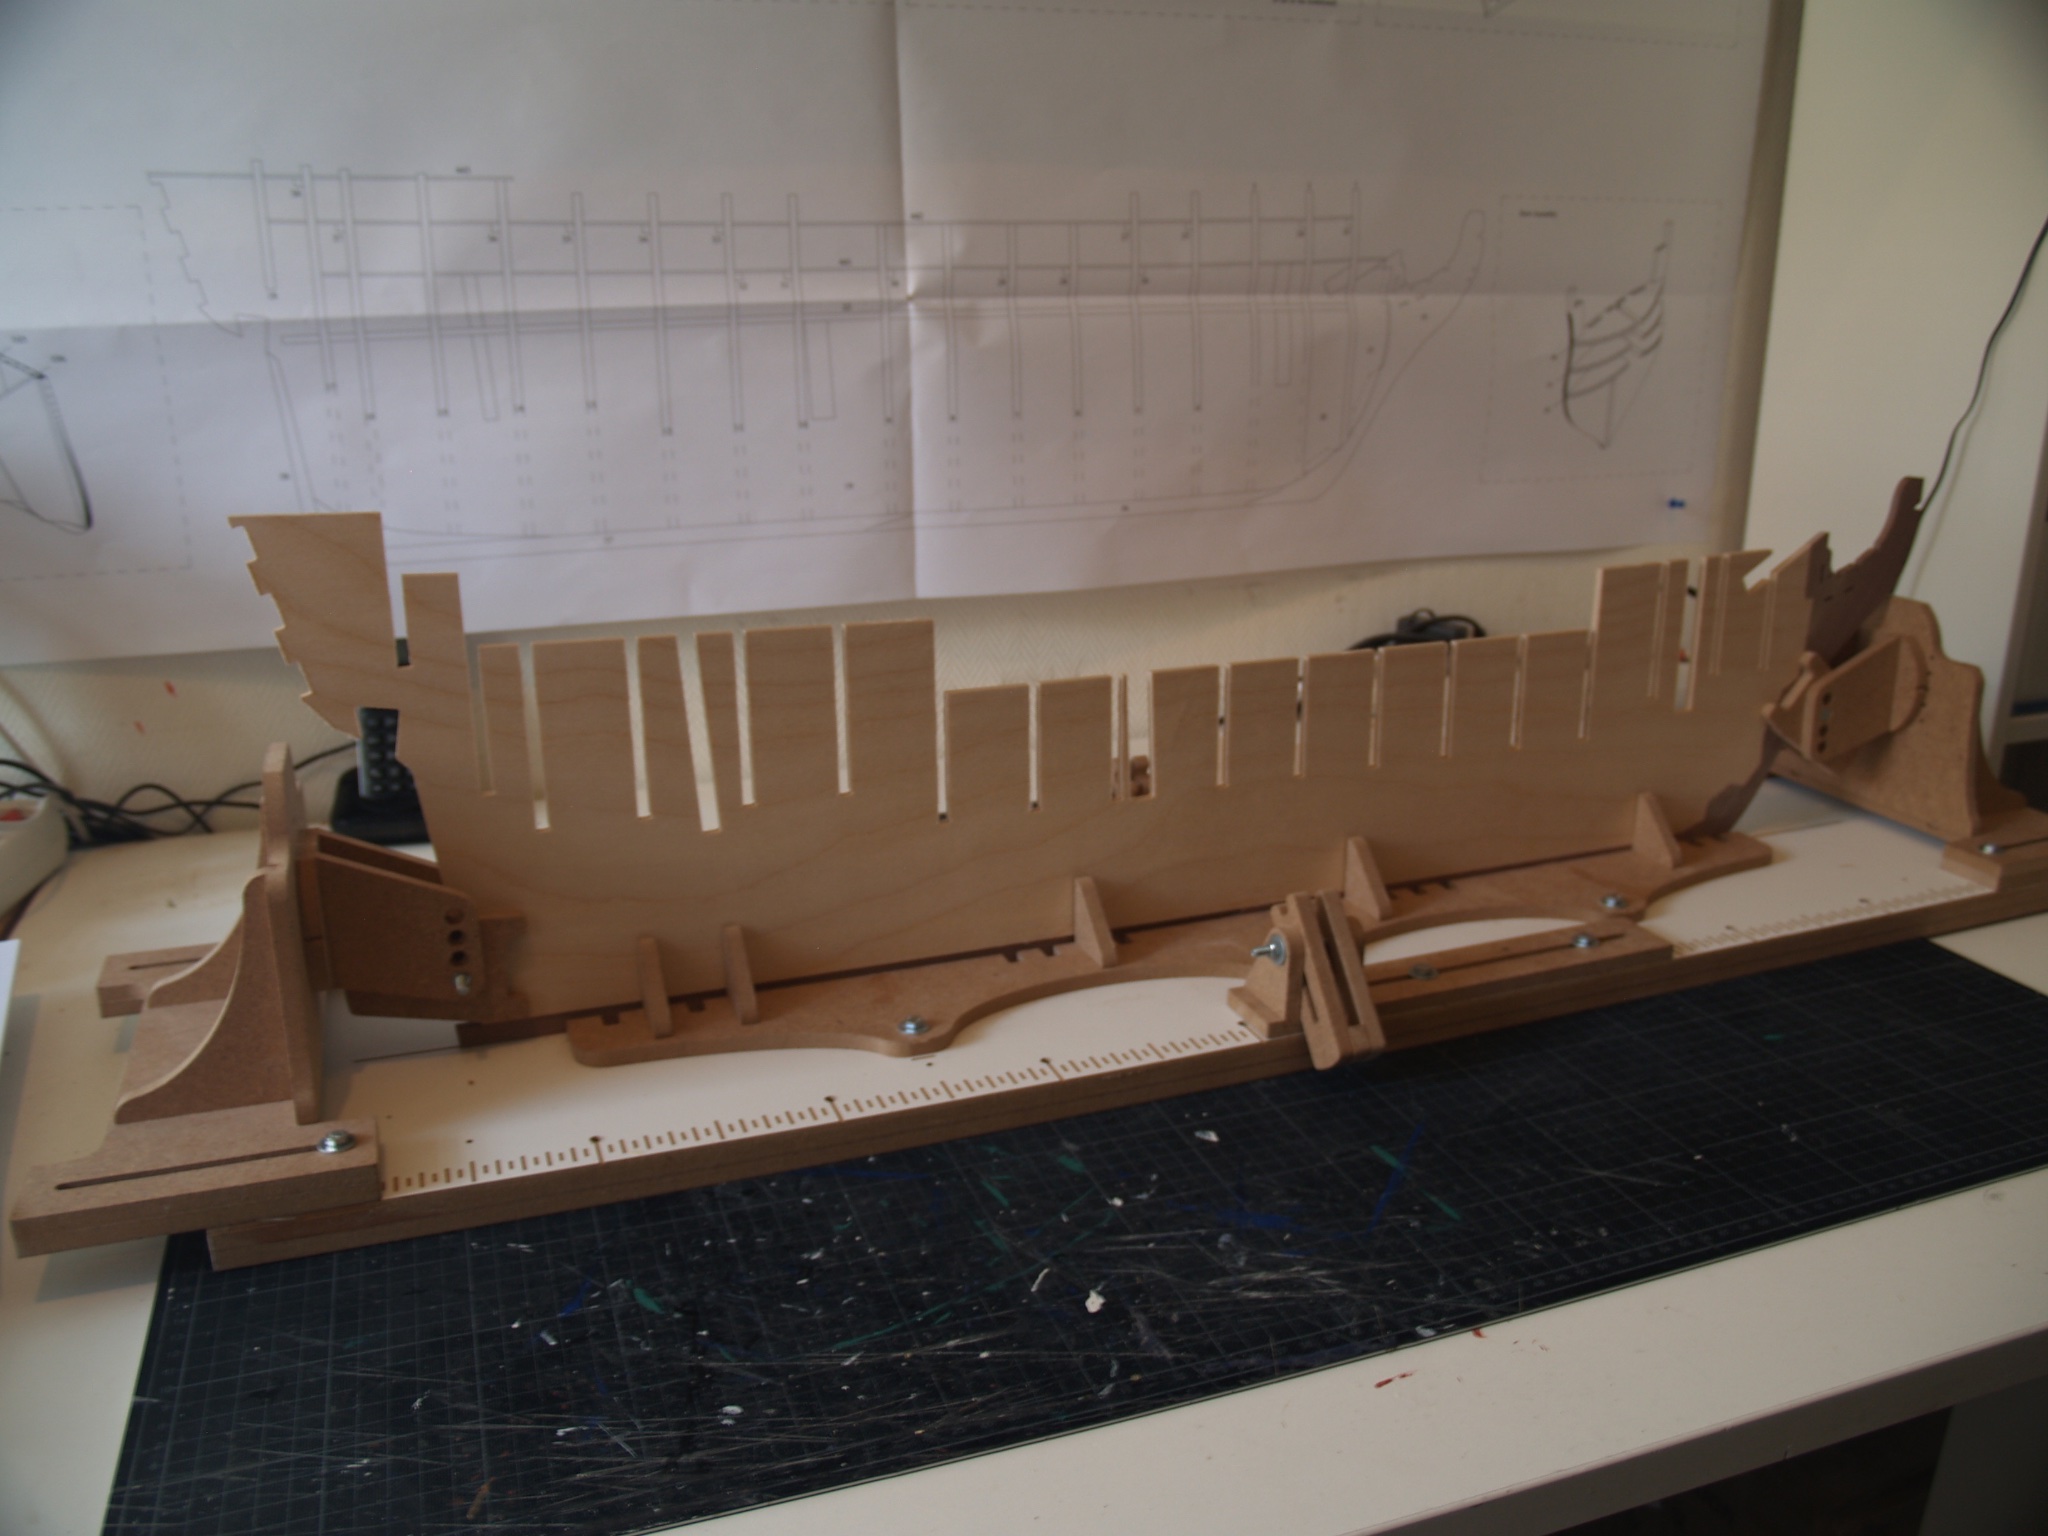
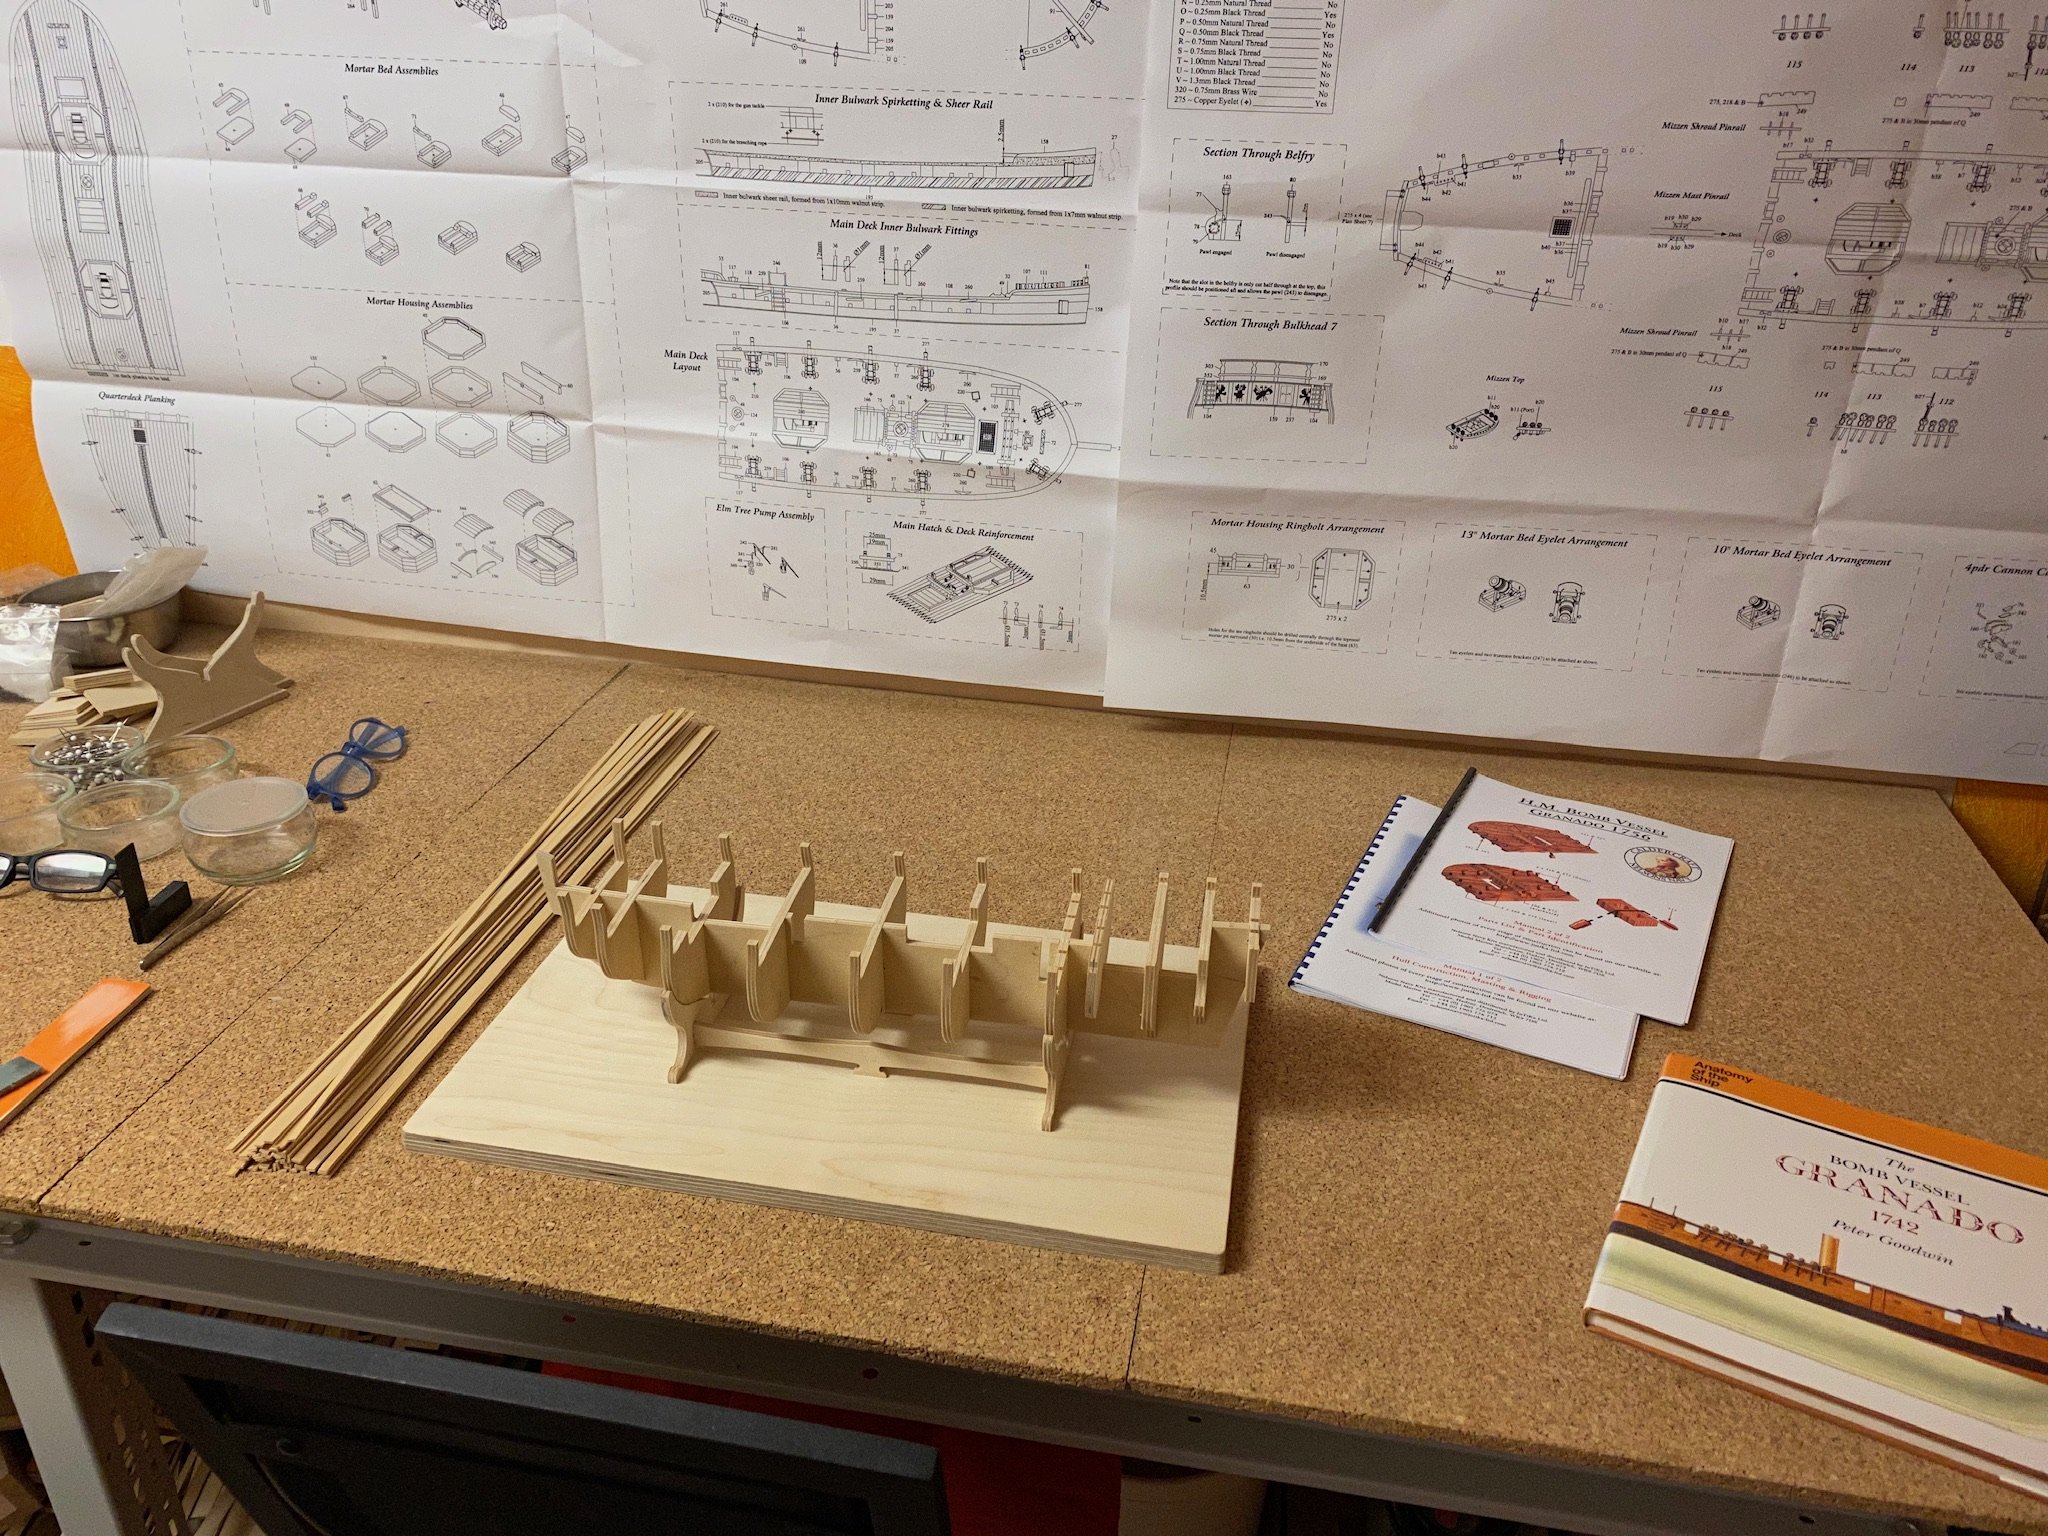
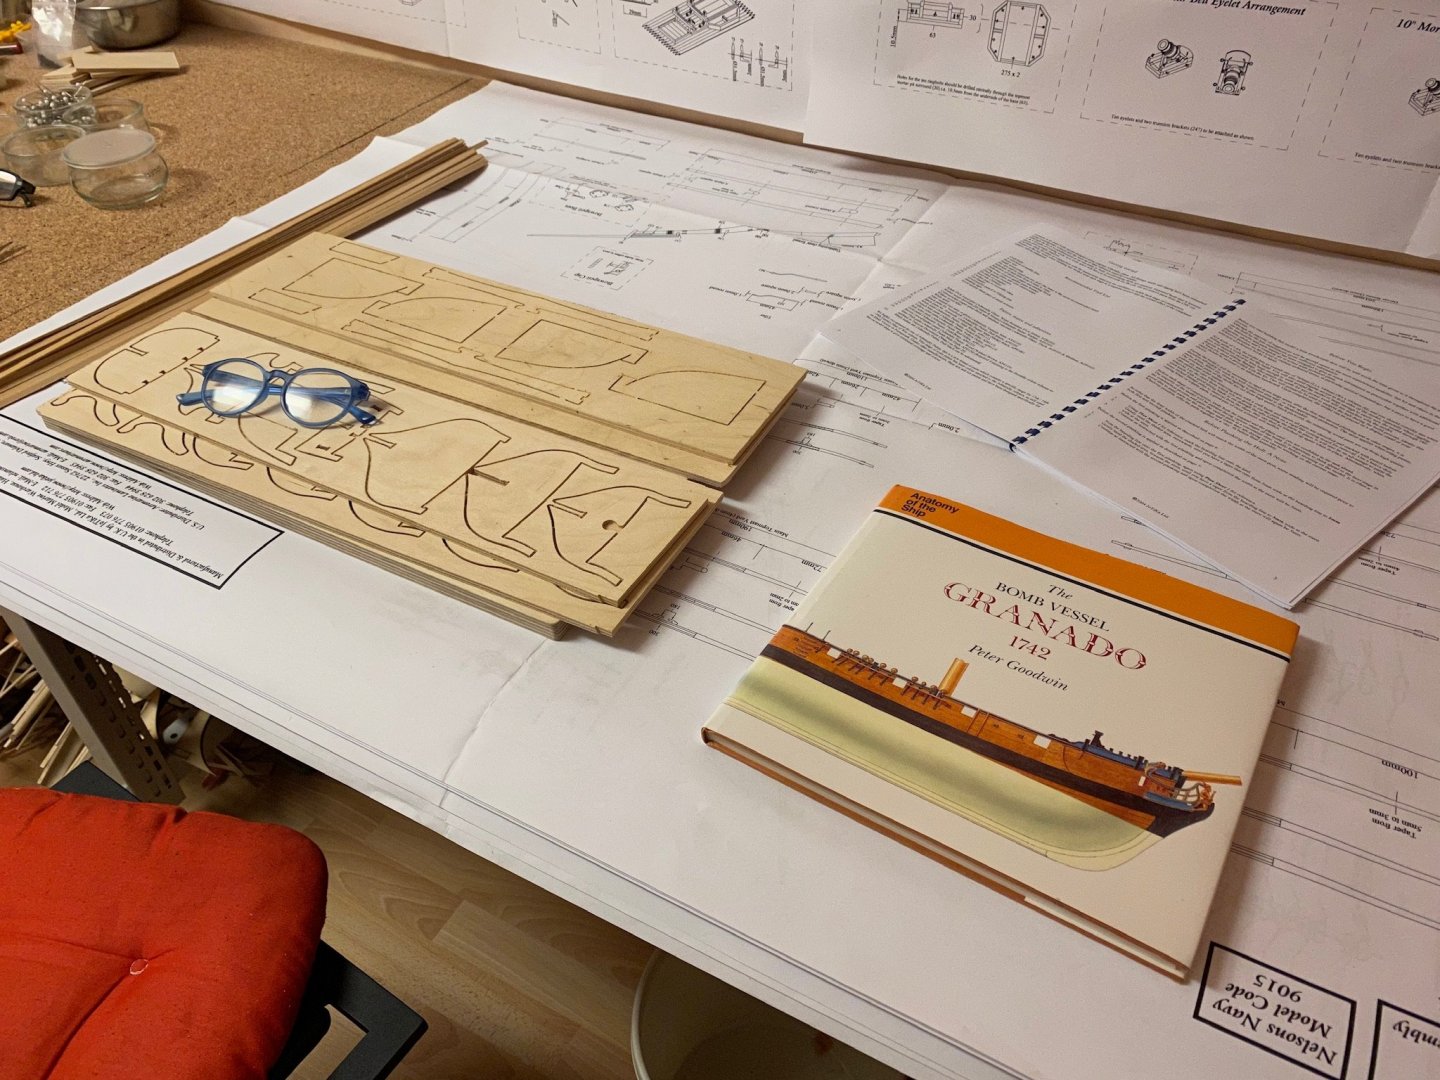
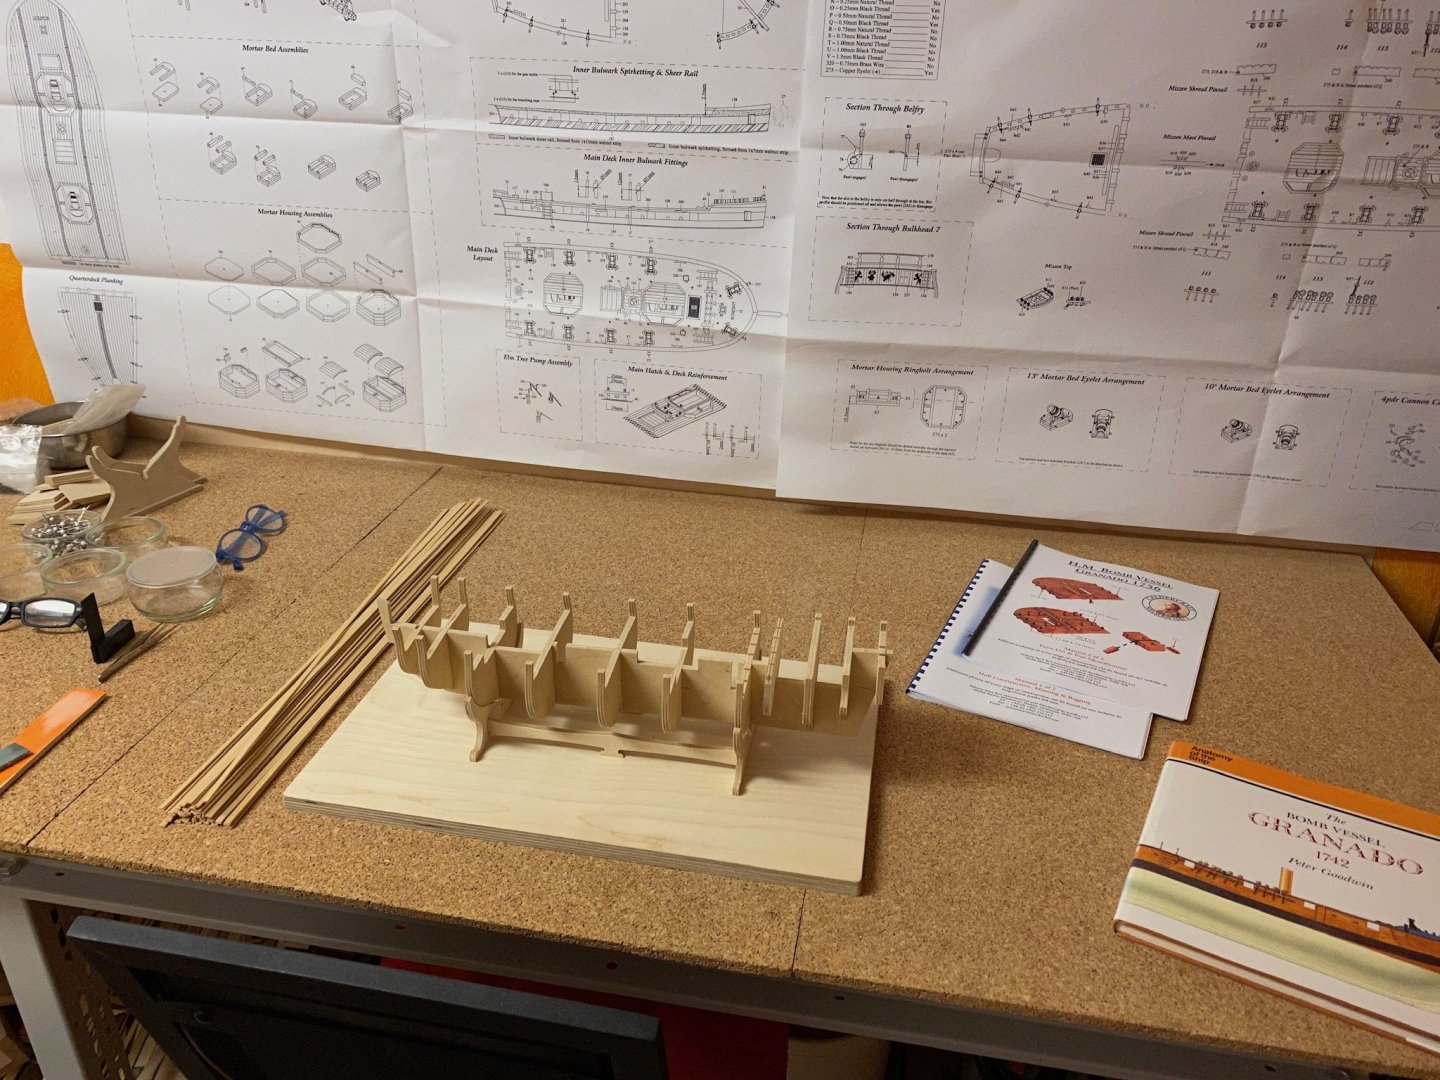
 Hello everyone, this is my forth kit build and my second build-log. I bought this kit on eBay for a very reasonable price some years ago because this model is one of some that forced me into the hobby and I hoped to develope enough skill someday to build it. So let’s give it a try. I wanted to build the Cheerful next but after building the Sherbourne and the AVS I got a little tired about modeling another single-masted ship. So returning to 1/64 scale - seems tiny in comparison to quarter-scale. The kit itself seems to be of good quality - except for the supplied walnut stripes that look awful. So I may replace that wood. I was also able to get an old copy of the AOTS book related to the Granado that might prove very useful for reference. First thing I did was to build the supplied rack to put the model on during the construction. Then I carefully released all the bulkheads to dry-fit on the keel.

-
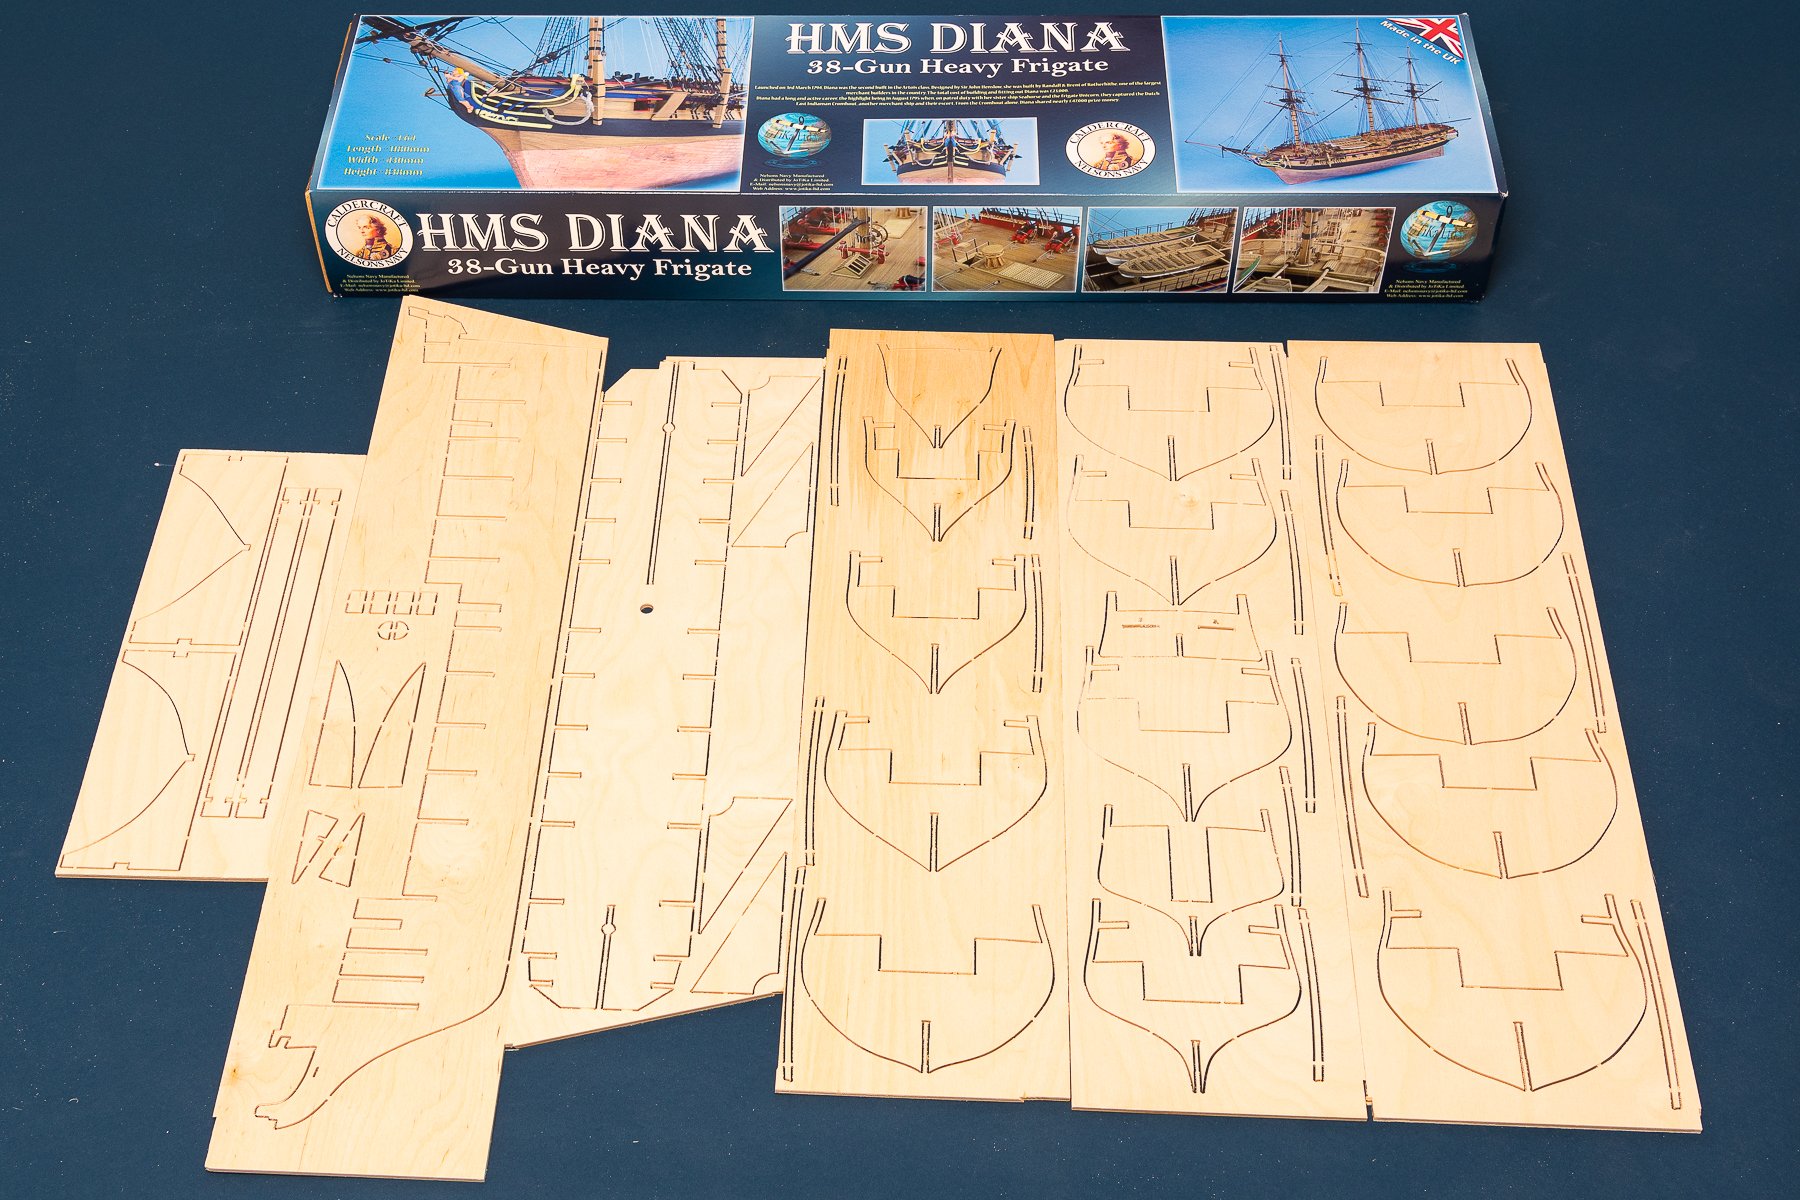
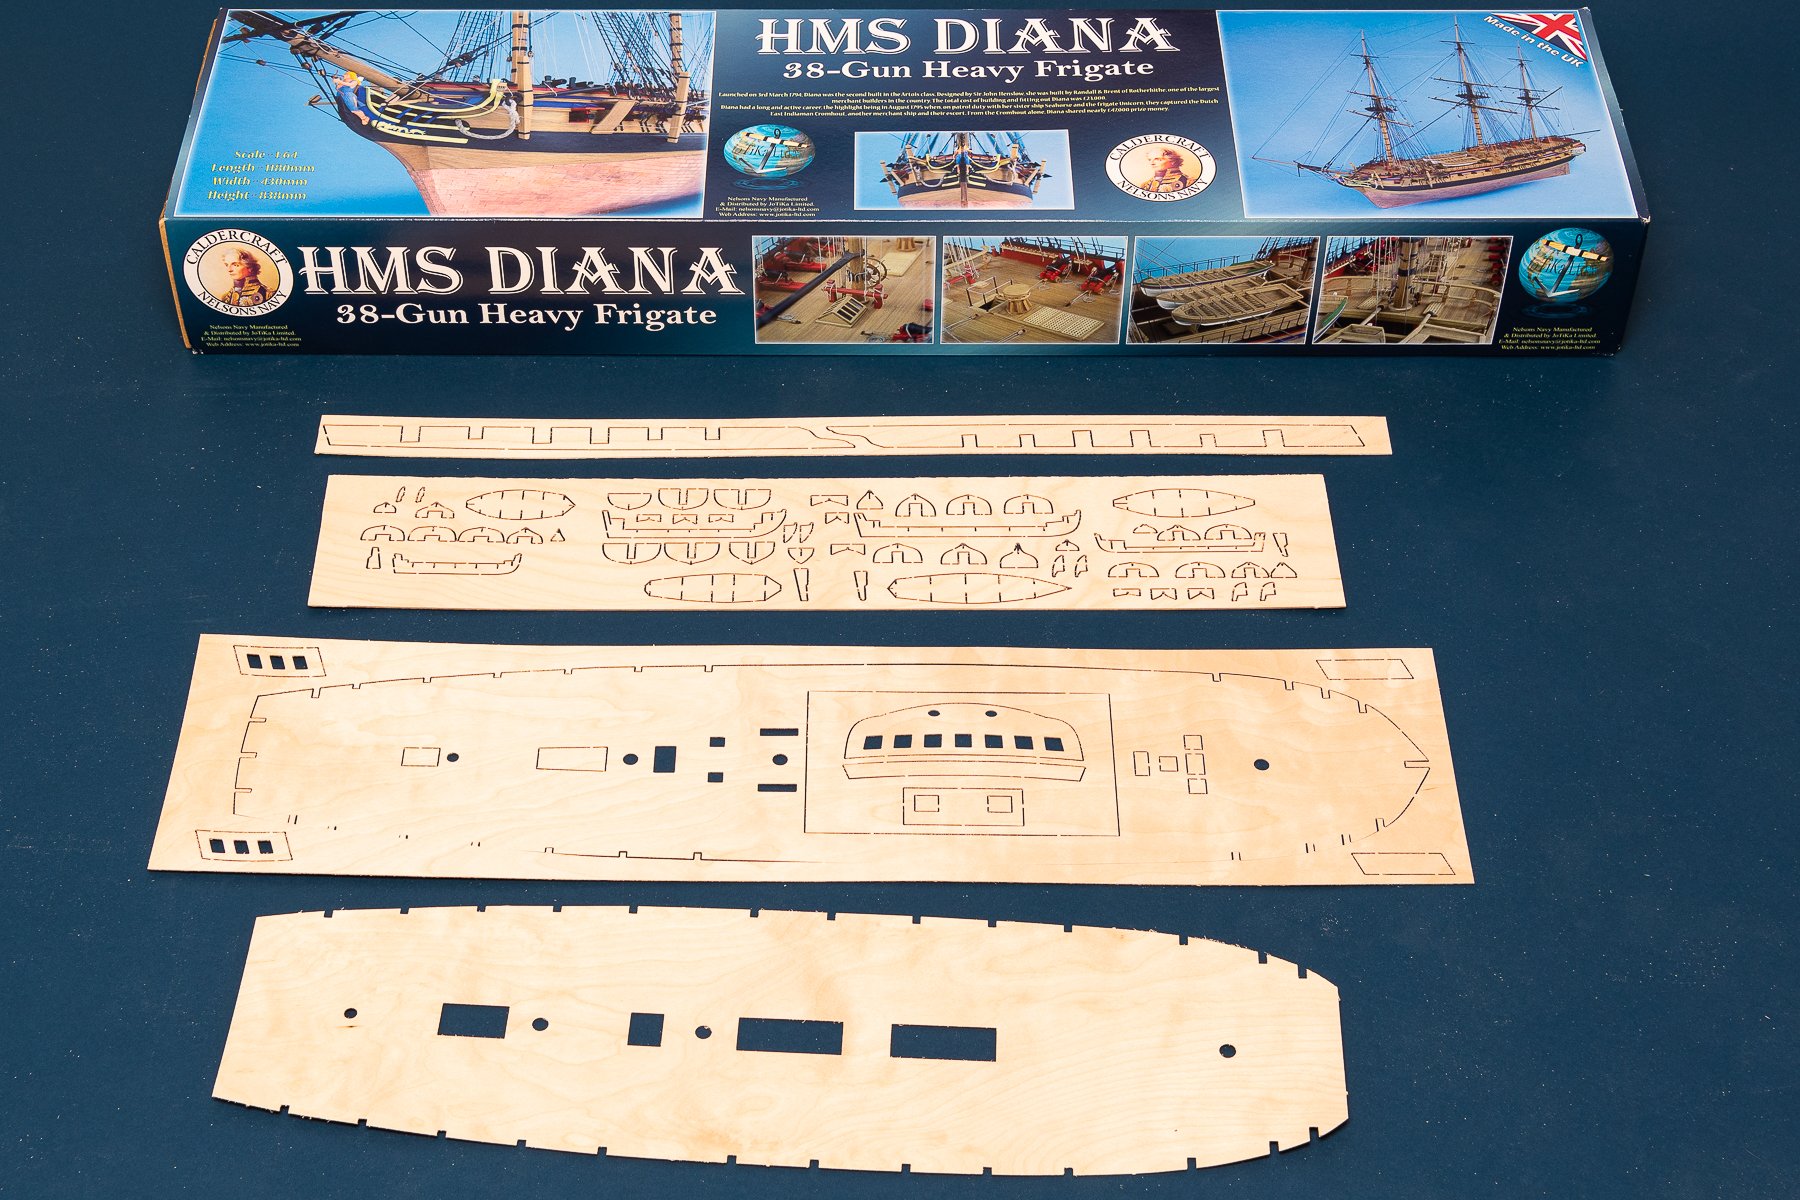
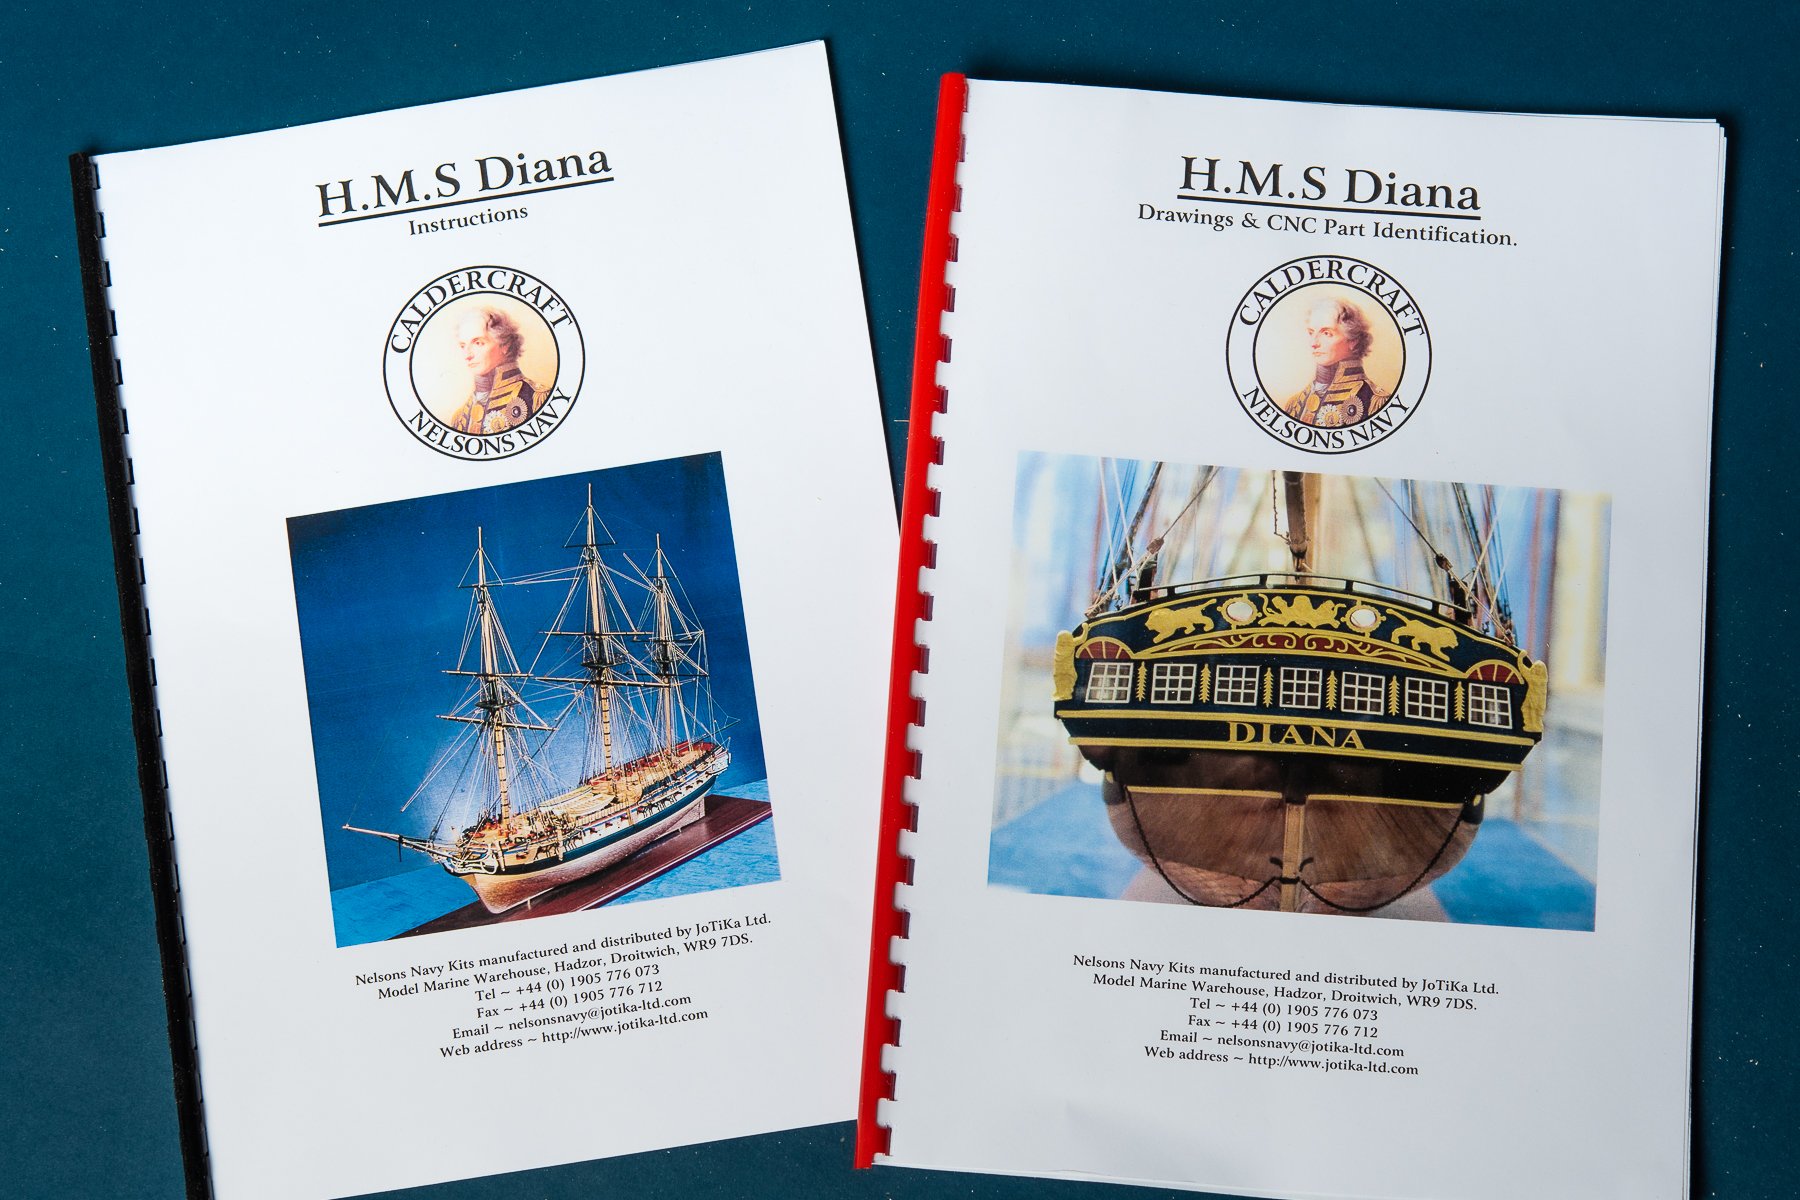
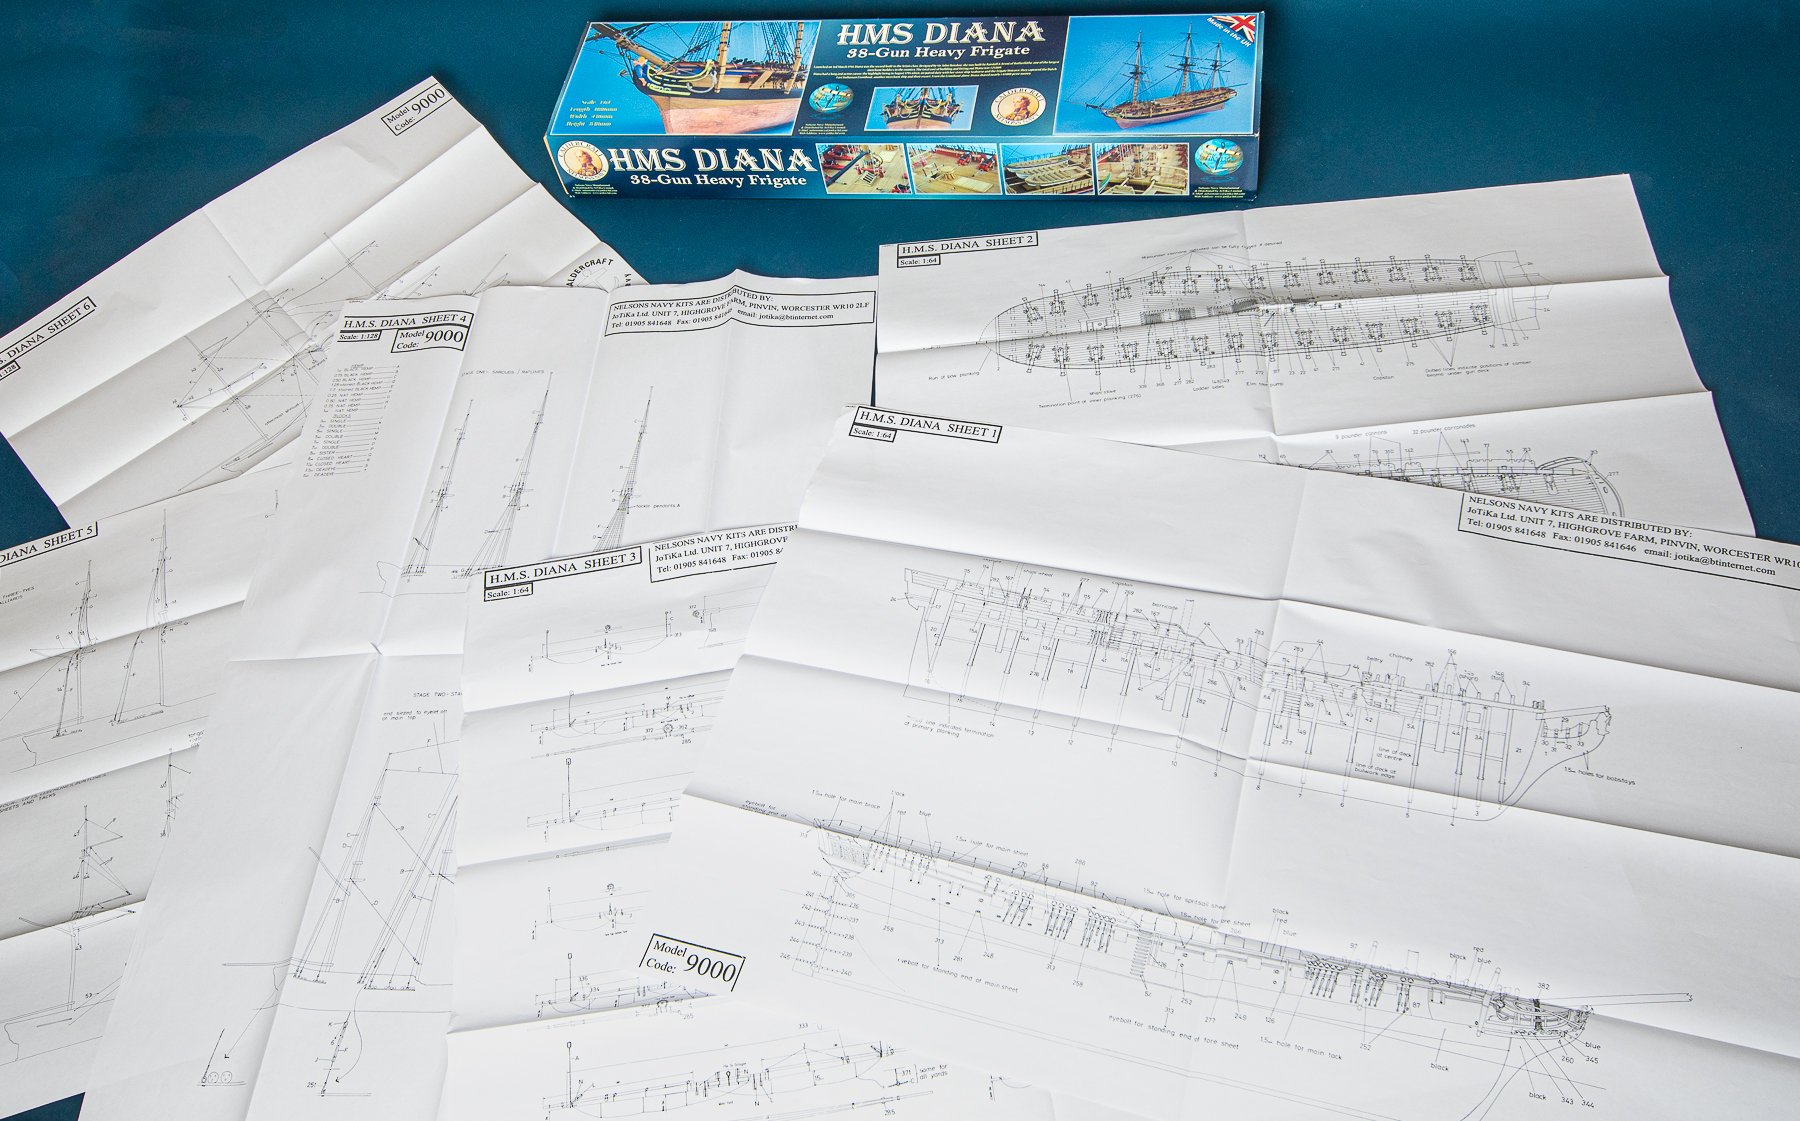
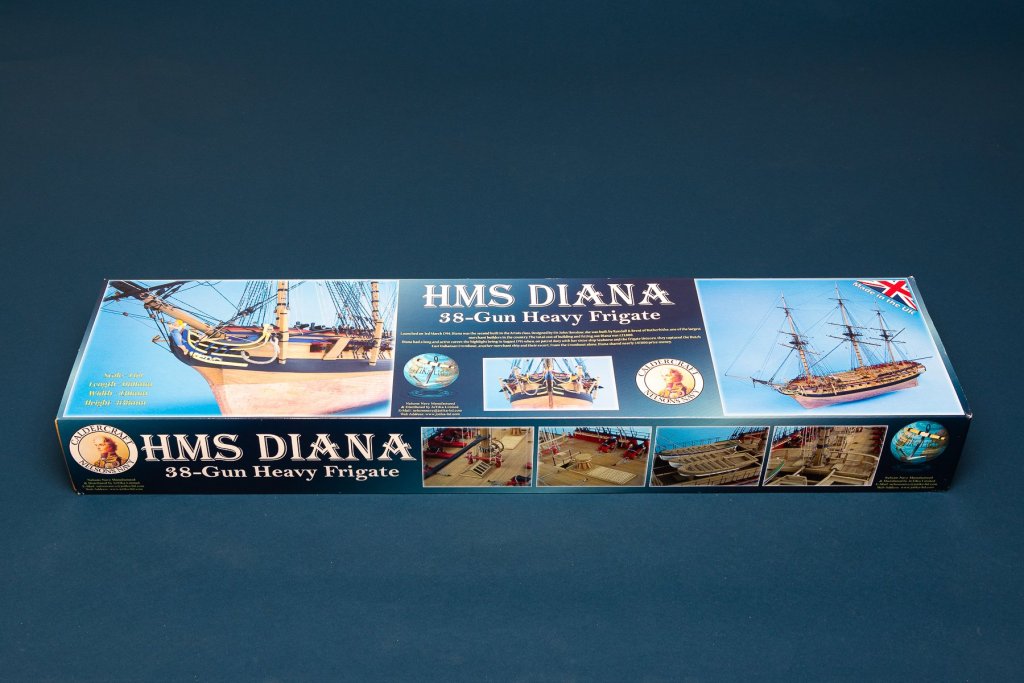
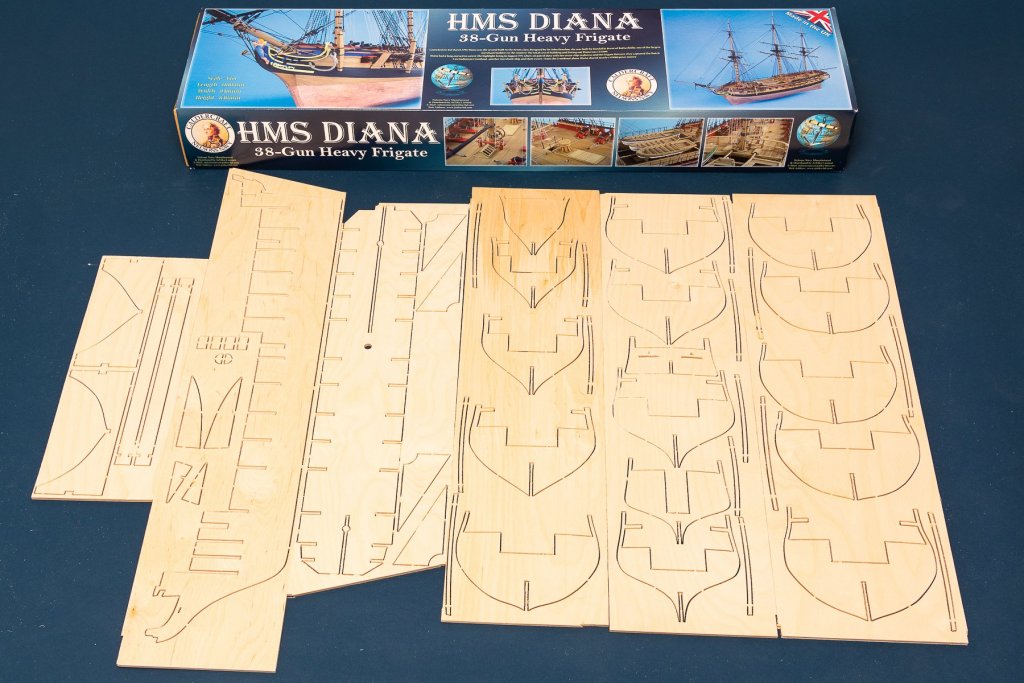
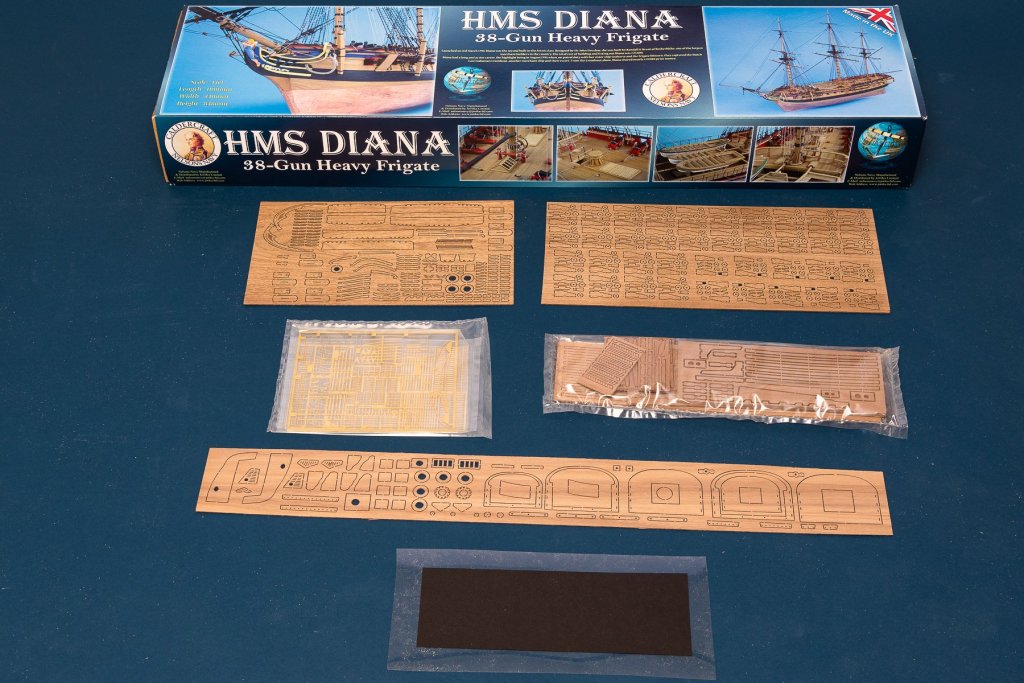
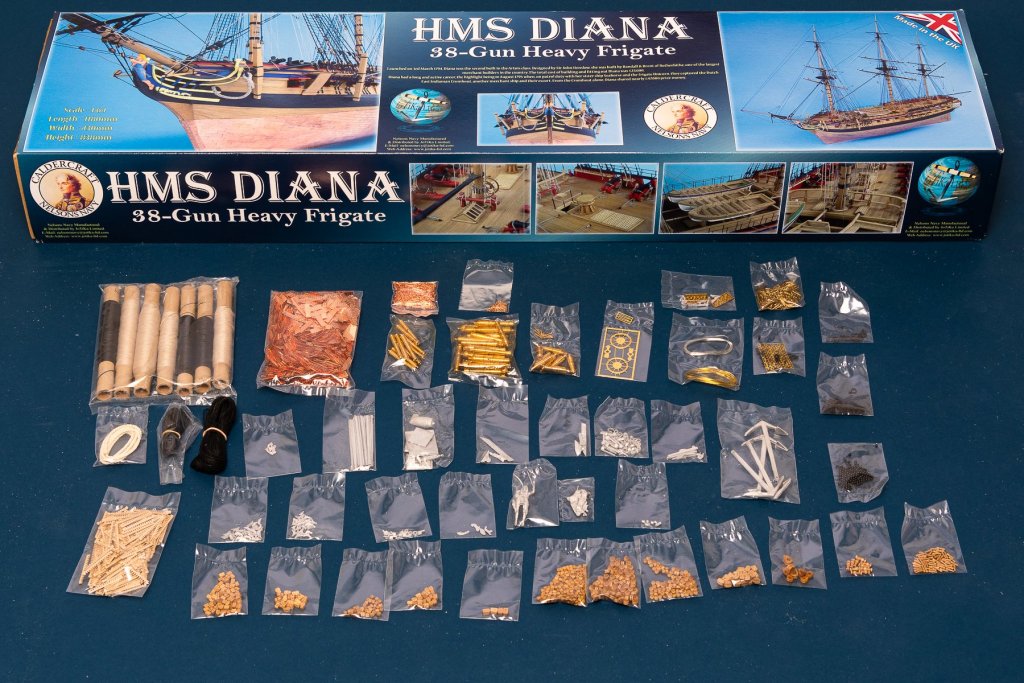
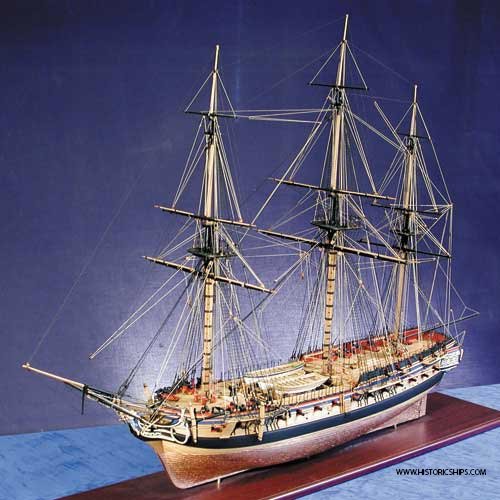
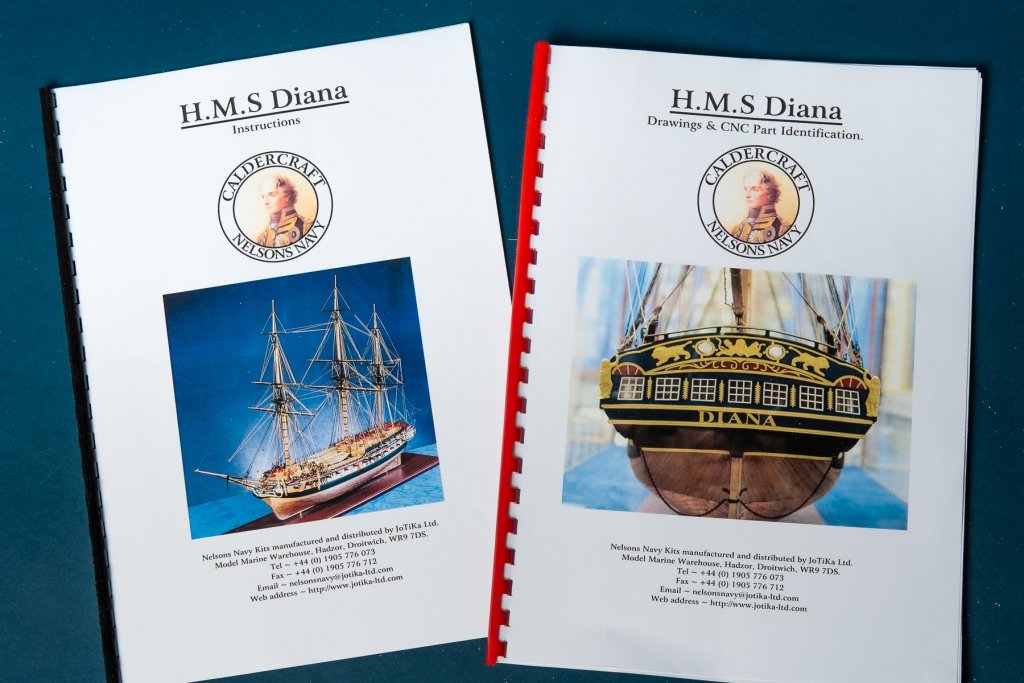
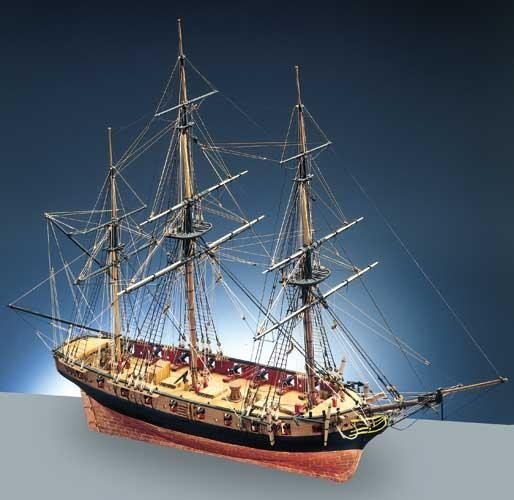
 HMS Diana – 4th build In spite of reason, I decided to order my dream kit mainly because I know that Brexit is around the corner and perhaps after it will be more difficult/expensive to deal with my supplier in UK. Hopefully I wont start building it for a while, since I really need to finish my other kits. But at least, I have it and decided to make the start of a buildlog. I have always thought this is one of the most beautiful ships from the Nelson era and I really like my other Caldercraft kits, especially in 1:64. Its really huge so it will take years to complete. History According to Wikipedia, HMS Diana was a 38-gun Artois-class fifth rate frigate of the Royal Navy. She was launched in 1794 and had 8 sister ships (Artois, Jason, etc). Diana participated in an attack on a French frigate squadron anchored at Saint-Vaast-la-Hougue at the Action of 15 November 1810, which ultimately led to the destruction of the Elisa. Boats from Diana went in and set fire to the beached Eliza despite heavy fire from shore batteries and three nearby armed brigs; the British suffered no casualties. On 7 March 1815 Diana was sold to the Dutch navy for £36,796. On 27 August 1816 she was one of six Dutch frigates that participated in the bombardment of Algiers. Diana was destroyed in a fire on 16 January 1839 while in dry-dock at Willemsoord, Den Helder. The kit The first impression of the box is just that it is huge. The box is just way bigger than all of the other kits i have bought. As I understand, this was the first kit Caldercraft made in the Nelson Navy series so some of its design my be outdated and plans are not at all as good as their newer kits. It takes alot of time just to go through the parts and they seemed to be very high quality of basically everything. There has been some critic of the walnut provided in these kits but maybe Caldercraft have listen because its perfect in this box. A huge box! Everything in it.... The frames This small boat kits will probably take some time to do... Walnut details… here I discovered that even though it is stated that it is a 38-gun frigate… it also got an additional 8 carronades! All these parts came in the white small box. The manuals are not that detailed… And I think I have more plans for my Granado… even though its less than half the size. Wish me luck, I am going to need it!
_-_bottom_left.jpg.bb54168e9e9b63b4c47e4eeb4ffc886d.jpg)


-
 Hello all Now is the time to start my second build log since I have finished the Americas Cup Endeavour. I am more interested in warships of the age of sails so it feels natural to build Sherbourne as a second kit. The ship is not so big but still has all features of a period ship. The main purpose of this build is to learn as many skills as possible so I can not tell how the finished model will look like. I will scratch and replace many parts in the kit just to learn how to do it. The model will be of darker but better walnut than supplied in the kit. I bought it in a local hobby shop here in Helsingborg and I think it is Amati's replacement wood. As sources for the build I will use AOTS Alert, Rigging period for and after craft and other books that I find fits. I will also pick ideas from Chucks cutter Cheerful and of course from the very nice Sherbournes by Gregor, Dirk, Tony and Kester. I hope you don't mind I follow some of your ideas . Ps, Some of the pictures are to small. You will see the full photos if you click (open) on them.
 -
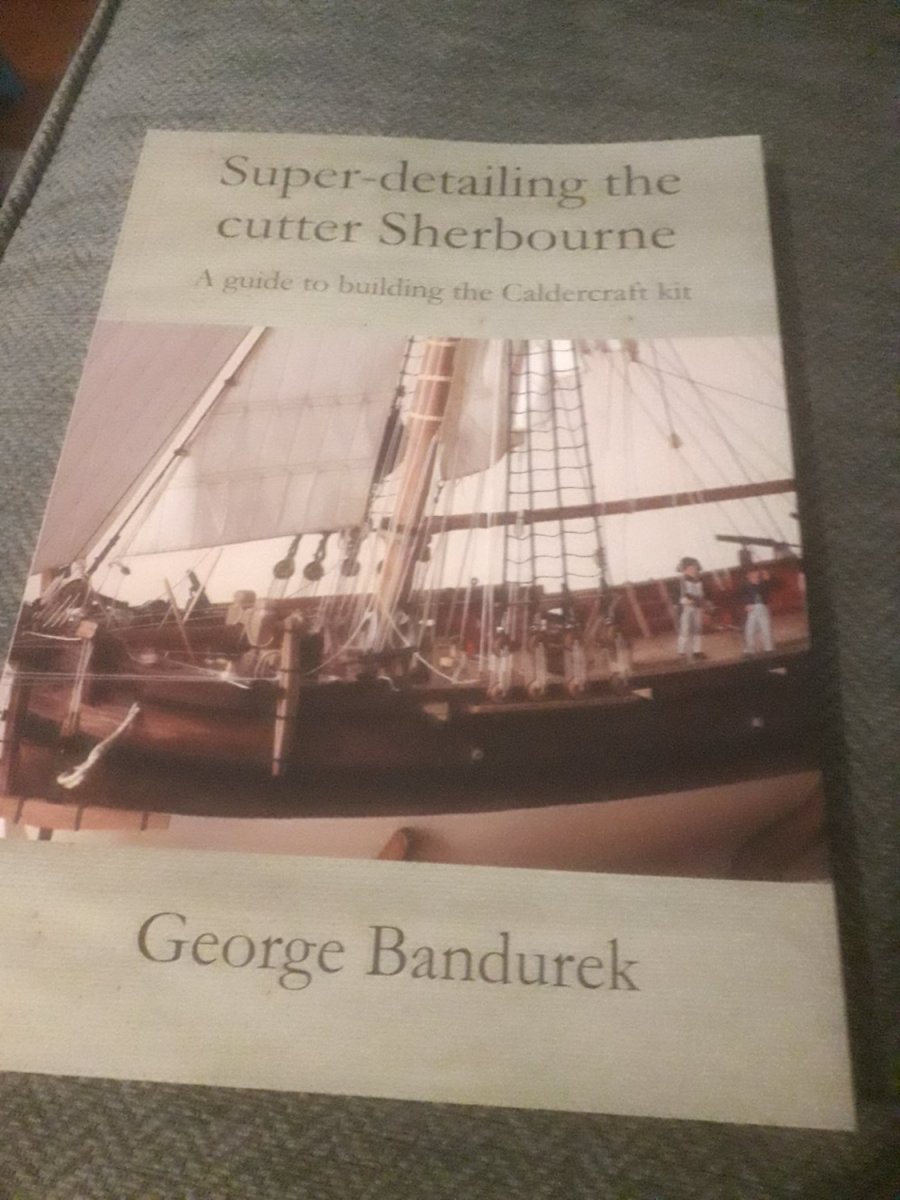
 I found this book via MSW: It is privately printed (2011) which explains the wonderfully uncommercial title. It is however a very well written and generally useful book for anyone who is trying to move on from an out-of-the-box kit build. It can of course be used as an enhanced set of instructions for the Sherbourne; but it is equally valid as a good read with lots of nice photos and a source of useful tips for any ship modeller. There is an associated website with some downloads from the book: https://www.grbsolutions.co.uk and a contact email which is how I got hold of my copy.
- 2 replies
-
- 8
-

-
-
- caldercraft
- Sherbourne
- (and 1 more)
-
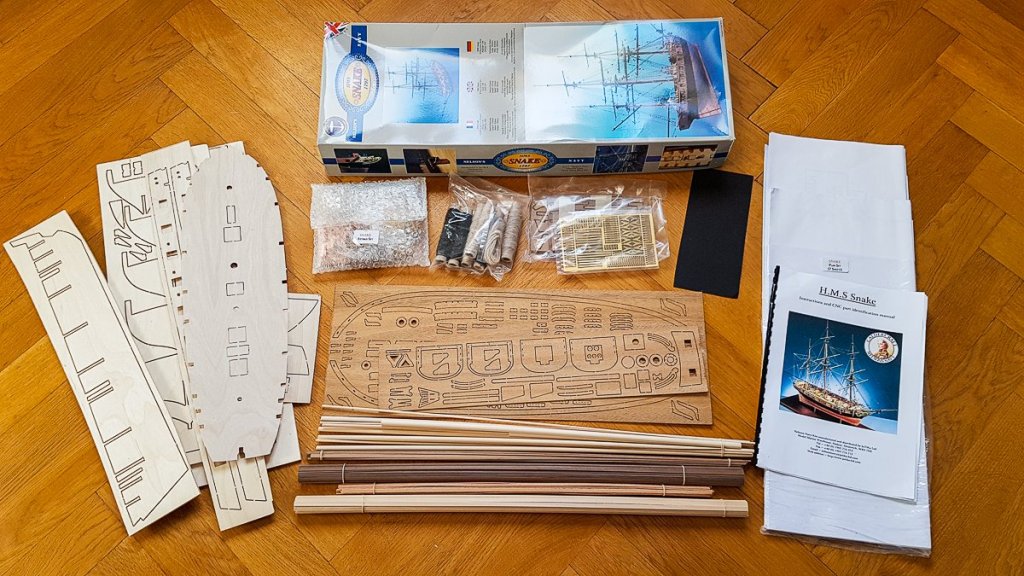
HMS Snake - 2nd build After picking up my modelship building hobby again (after many years of dorment) I decided to buy my second kit to have something to alternate with when doing the rigging on my first build Corel's HMS Victory in 1:98. It took a while to go through various brands and to decide which one to invest in. My first choice of doing the Victory was kind of naive and a typical newbie mistake. Dont get me wrong, I really love it and it has turned out ok. But I never finished it and modelling is learning by doing and everyone should start more easy is my recommendation. After discovering Caldercrafts Nelson Navy series it become a choice between several ships I found very beautiful. First I was tempted to go for the Diana or even the Agememnon but eventually i decided not to do the same as before and doing something too advanced. In the end it become a choice between the two mast HMS Cruiser or the slightly more advanced HMS Snake. I settled for the latter. It is basically the same model but the Snake is some kind of "special edition" of the Crusier with 3 masts and carronades. History According to Wikipedia, HMS Snake was launched in 1797 as the only member of her class of 18-gun brig-sloops. She captured or destroyed two French privateers and one Danish privateer. She also captured numerous small merchantmen, but spent time escorting convoys to and from the West Indies. She was sold in 1816. The Snake was the sole vessel of her class. This class was very business like with a flush deck and nine cannons or carronades each side, they were very fast and seaworthy. As originally built Snake had a full ordinance of 32 pounder carronades. Carronades replaced the carriage guns because at close quarters the short range carronades proved devastating to their opponents. Class dimensions were: length 100’; breadth 30’6”; displacement 382 tons with a crew of 121. Her designer was Sir William Rule. He produced two designs, one for a ship-sloop (Snake), and one for a brig-sloop (Cruizer) that differed only in their rigging. His designs were in competition with those of John Henslow, who produced the ship-sloop Echo and the brig-sloop Busy. Rule's brig-sloop design won. The Admiralty ultimately ordered 106 Cruizer-class brig-sloops. In 1811, the Navy converted Snake to a brig-sloop, making her indistinguishable from the Cruizer-class brig-sloops. The kit I order it from Cornwall model boats who shipped it quickly to Sweden. My first impression of the kit is really Good. Lots of details and pre fabricated wooden pieces. Caldercraft seem to have quite alot of different design solutions than Corel. The plans where more detailed but at te same time they come in huge size making them abit difficult to handle in my small kitchen "workshop". Two things on the negative side. The box was full of sawdust, perhaps not a major issue but it kind of gave a non quality impression. The second issue was that some of the Wood especially the walnut was not great. Very rough and edgy. A couple of the sticks were basically 50% of the material they should had been. This comes as a surprise considering that Caldercraft seem to be at the high end of kit manufactureers. The rest of the material seem to be fine.


-
 A brief introduction to this kit --- Unpacked and contents checked. All complete and in very good order. Ply sheets perfectly flat and undamaged, All strip wood is of finest quality and straight as a die. Fittings and brass sheets perfect. Eight big sheets of plans. Full size plans are important. With my eyes measuring from reduced plans then scaling up or down is hard work. Ordered necessary paint pots with kit plus, balsa sheets for stem and stern blocking. Bought a building board from my local hardware shop. Already have wood glue and cyano in stock from my last build. Tanganyika strip supplied instead of lime so no extras to buy. Have a copy of Marquardt's AOTS book and, James Lees Masting and Rigging in stock also several logs (of excellent quality) on this forum Noticed from other logs on this forum that there may be a problem with the width of the mizzen channels but have found enough 2mm walnut sheet in my spares box to cover this. So all ready to go. First is to build the jig, then assemble the false keel and bulkheads and the false decking. Working as a draughtsman for 53 years, 20 of these using AutoCad I much prefer drawings rather than pictures so am really looking forward to working on this kit. Photo's to follow. Best regards, Sam.
 -
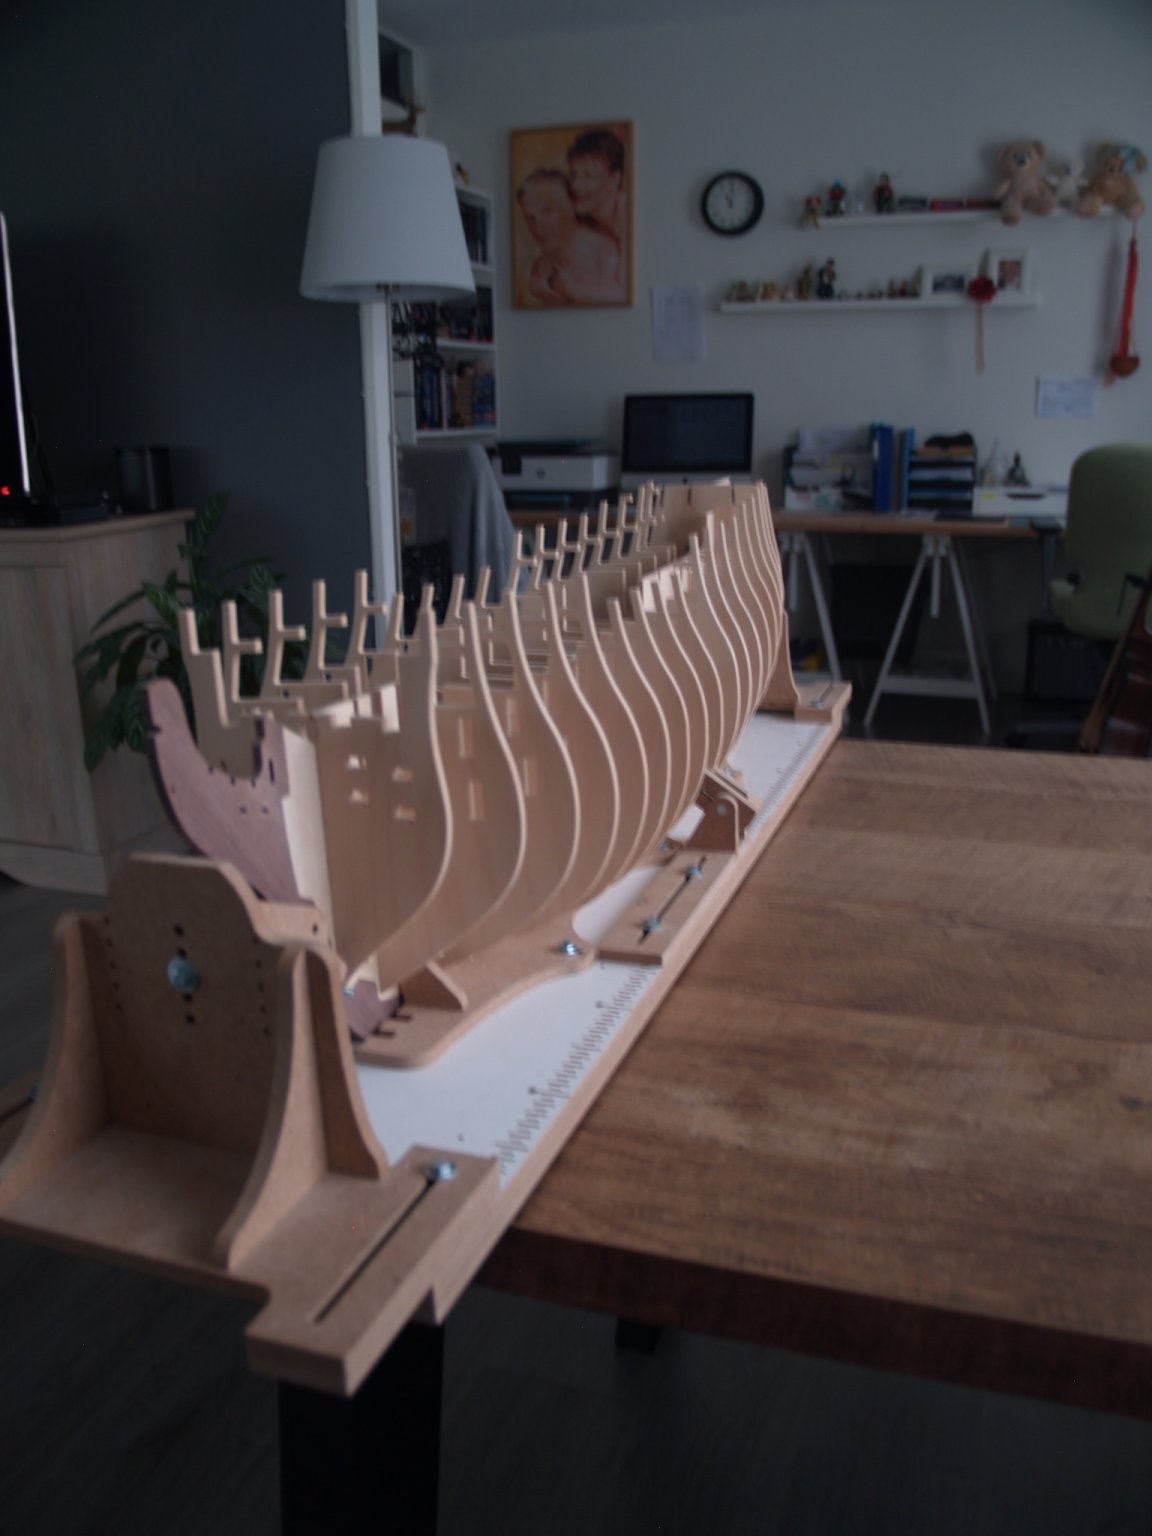
 After much thought I eventually decided to go for this ship. Mainly due to local interest . I was not planning on starting building until october when the nights start drawing in but could not resist the temptation on getting my hands on the kit and seeing what she would be like. I was quite surprised to see for such a hefty price compared to my first period build the Bounty by Amati there were no sails or flags within the kit. Fortunately I am not planning fitting the sails anyway but might of changed my mind later on. Upon opening the box and checking the contents I was a bit disappointed to find that all of the 5mm plywood boards are bent/warped to varying degrees. The main piece being the false keel the others which housed the bulkheads. I decided to remove these pieces from their boards so to determine the extent of the warping. I am happy to say when laying the bulkheads on a flat surface they seem to be ok . Unfortunately no so with the false keel. Here is a couple of photos with the extent of the warping, so let me know what you guys think. I have read a few different threads regarding how to put this right but first I thought I would contact Caldercraft and see if I can get the false keel replaced together with a couple of parts which are missing. Strange as it may seem this parts belong to a walnut board and a brass sheet which have other pieces as well. When I mean missing leaving holes, I mean I can,t find them but have numbered all the parts as per the drawing. I am now awaiting the reply from Caldercraft and hopefully they live up to their reputation and its not too long until I hear from them. Although I wasn,t thinking of starting the model until october perhaps I would be better of assembly the hull to the point of fitting the wales to ensure that the replacement keel doesn't warp before October. I also have lots of questions before I start in earnest. Best regards Dave
-
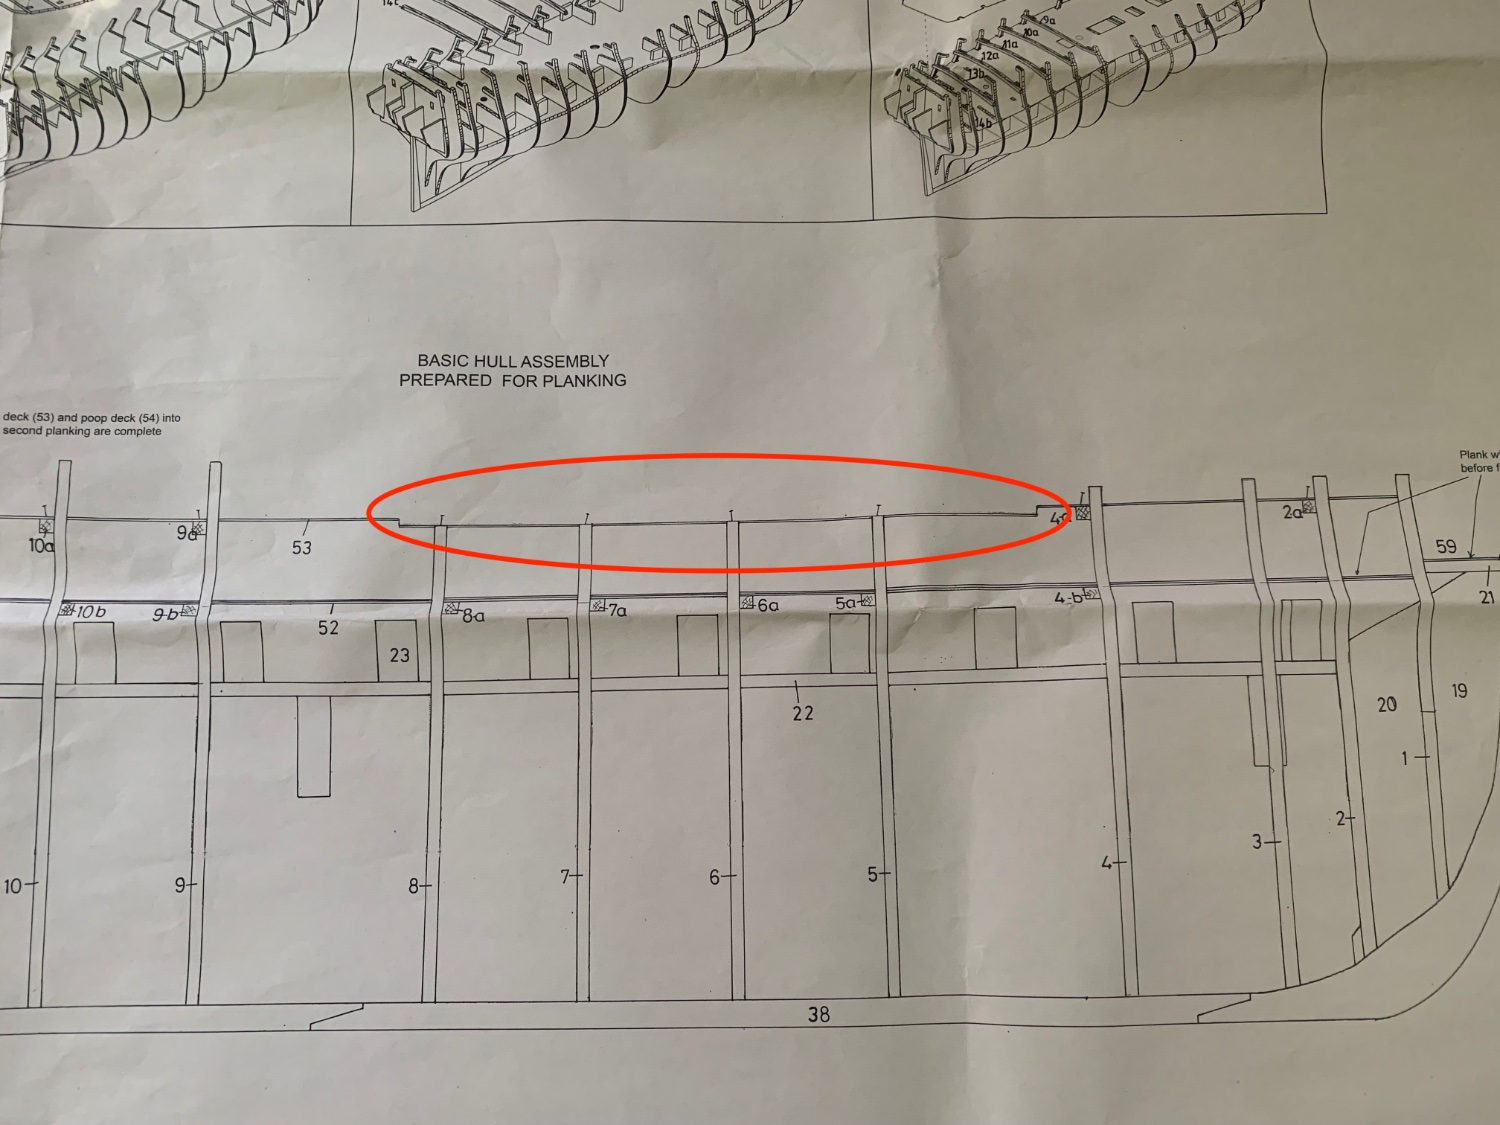
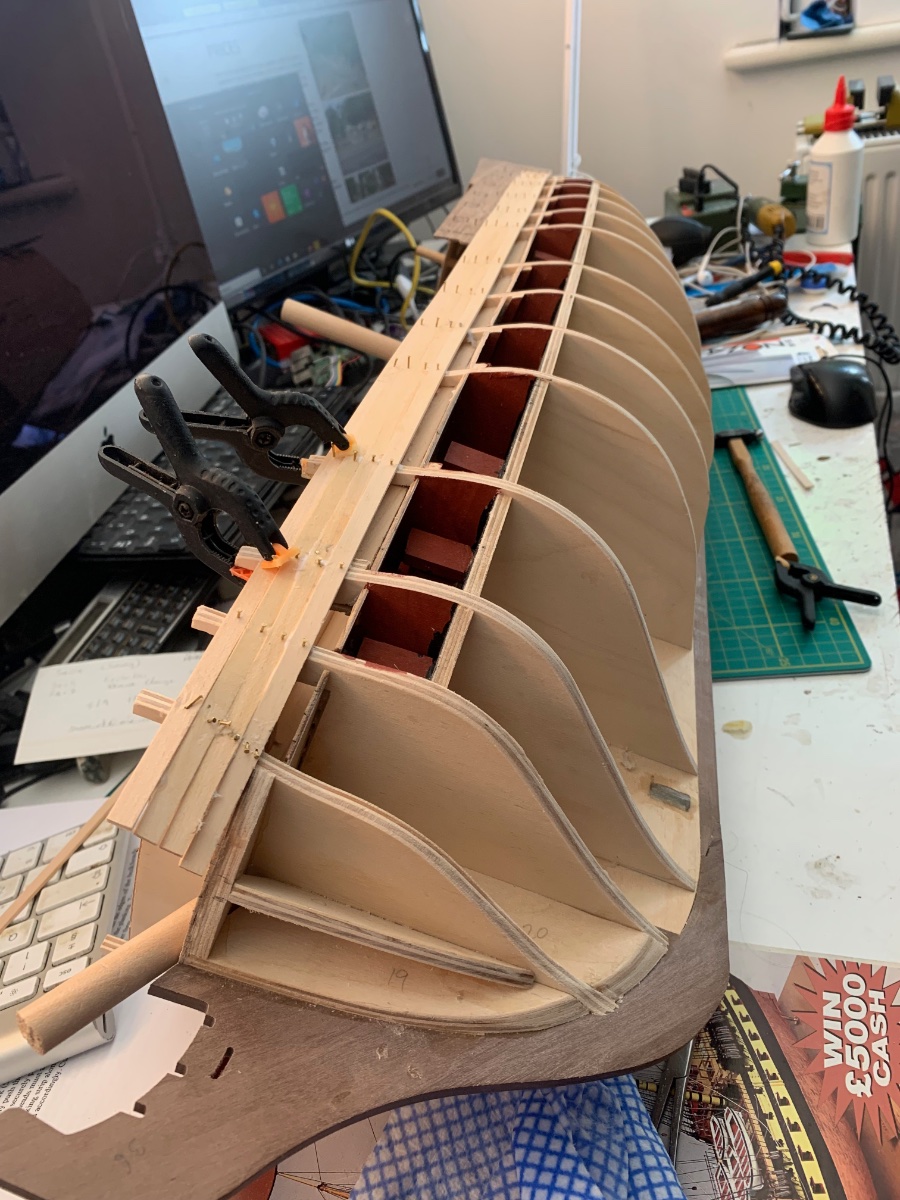
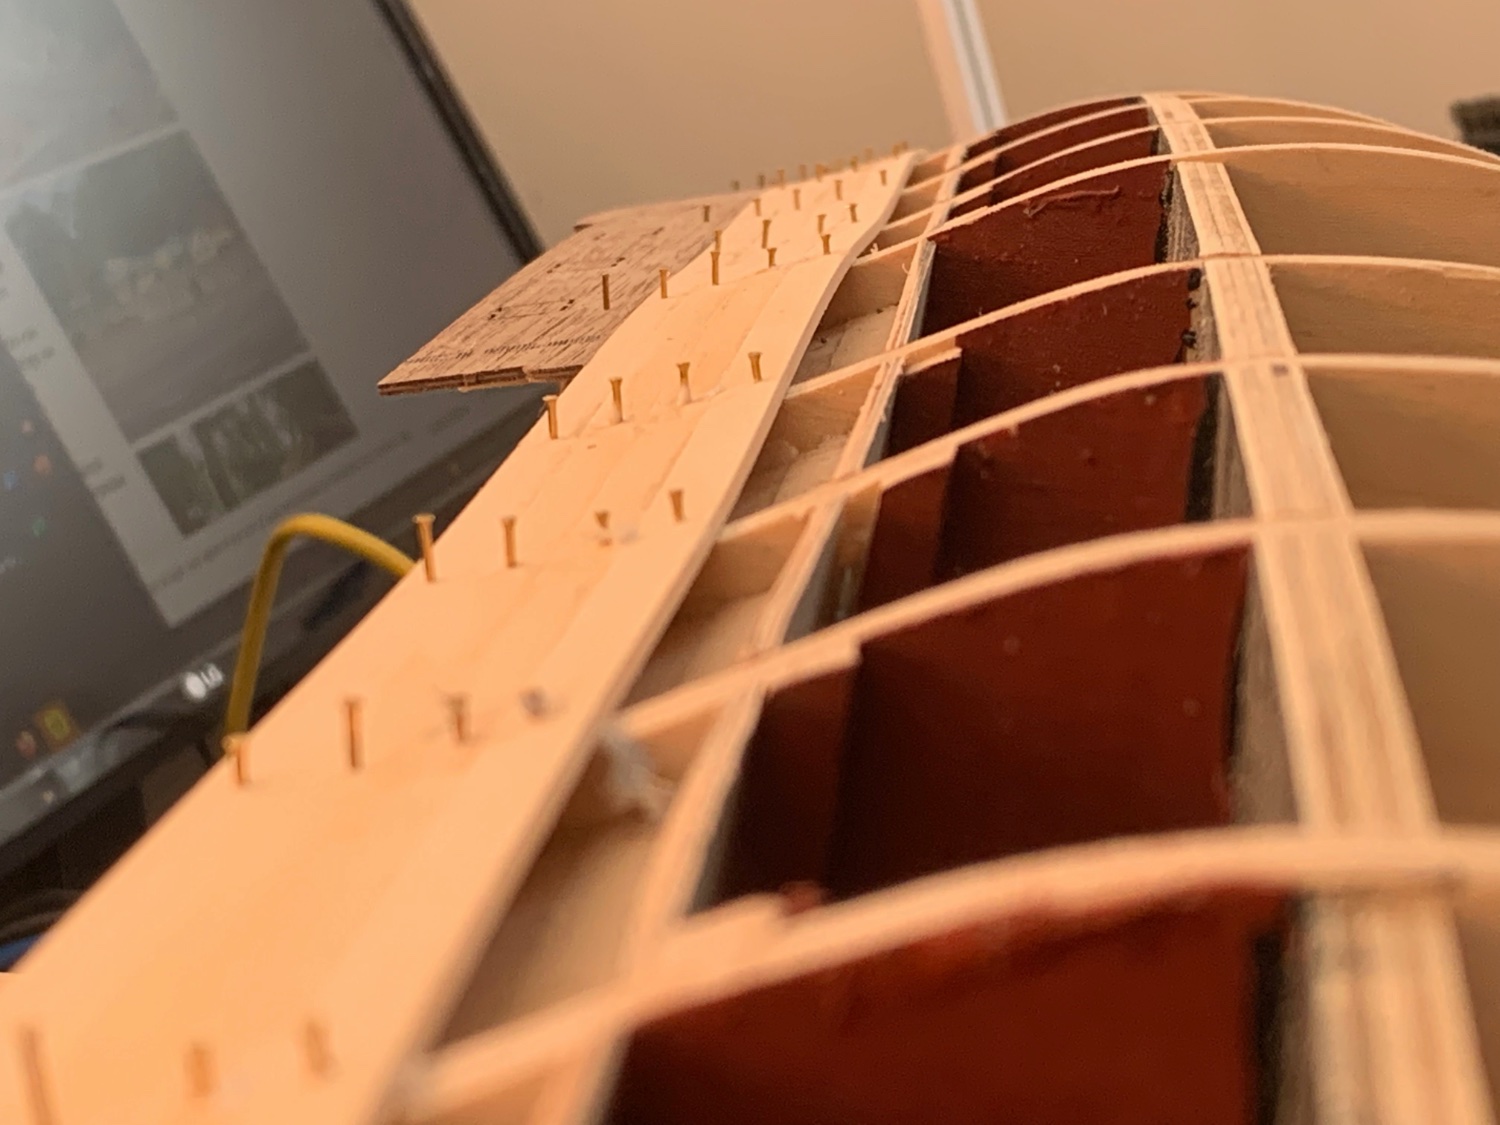
 Agamemnon is my third build over a period in excess of 20 years. To be honest I'm been a bit shy in posting anything up to now as I'm in awe of the quality of many of the builds that I've seen in these pages. But I've also gleaned a lot of valuable and essential information from other contributors and feel its time to fully join the community. I think its also a great resource to help with those, all too regular conundrums and confusions we come across. So here goes !! So a bit of history - I have been interested in building 'Aggy' since I came across the September 2001 edition of Model Boats (UK) which had a great review. Prior to this I'd always had an interest in models and particularly this naval period and have a fine collection of 1:1200 Napoleonic Naval war-games models (Langton Miniatures) but I saw this article, read it a dozen times and wanted to build in wood. However, I was sensible enough (back then) to realise that Aggy was not an ideal 1st build. So I ordered HMS Jalouse as an introduction. Loved it. It took me about 20 year to complete mind - sat for many years half rigged until I finally found time after the kids had grown up to compete it (I nicknamed it HMS Lockdown!! - there were some benefits.) After completion I was keen to embark on another build. I still had the 2001 magazines. Still not sure I would have the stamina for HMS Agamemnon I embarked on HMS Pickle as an experiment. A huge shout out to MSW contributors here particularly @flyer 's build log. 15 months later and I'm looking for the next build....Luckily a big box was already under my bed. 21 years after seeing that mag it was time..... So I'm about a month in. Frames built. Gun deck installed. Inner planking in place. And today I started the 1st planking. All fairly straightforward so far. But a couple of points of note. I thought long and hard about Treenails and decided not to model them. There is a thread somewhere on this forum discussing this which I'll link to if anyone is interested. But basically decided that on visible decks a lot of effort was made to cover Treenails - less so on functional gun decks. So having visible Treenails was not necessarily accurate, even though they look nice!. I have not yet fitted the stern post and took the opportunity to taper the ply at the stern to allow the planks to run smoother to the transition with the stern post and rudder. This is something that is called out in the instructions for Pickle - 'Bearding' and worked very well. Inner wall planking where it terminates at bulkhead 3 seemed wrong. Its not clear whether this butts up to BH3 or lies inside BH3. I did it inside but realised that this would make for a peculiarly shaped gun port when this was cut later. Being a lot thicker at the bow end. So I added a filler piece to BH3 and reran the planking to this so it now runs parallel to the line of the deck and future outer planking. I also added an extra 45 degree bulkhead in the bows as I think this will aid the shaping of the 1st planking in that area. I was slightly confused by the plans for the upper deck - they seem to show a step down between BHs 4 and 8 but no mention anywhere else about cutting the deck. Looking at other build logs @Sjors @TrunkMonkey seem to lay flat so I think an error in the plans or an earlier version. Although the magazine article also lays this flat. Finally, today I started on the 1st planking for the 1st 5 planks and am noticing a slight wave in the planking. See pics. I think the phots exaggerate it and its actually a fraction of a millimetre so can be sorted in the filling & sanding phase. Also I've only done the port side so far so will need to see if the same is true on the Starboard. It may be the bulkheads themselves were not exactly aligned. So end of first post. Hopefully first of many with every expectation of months & years of build ahead. Some pics below with apologies for my cramped & messy workspace!! Malcolm
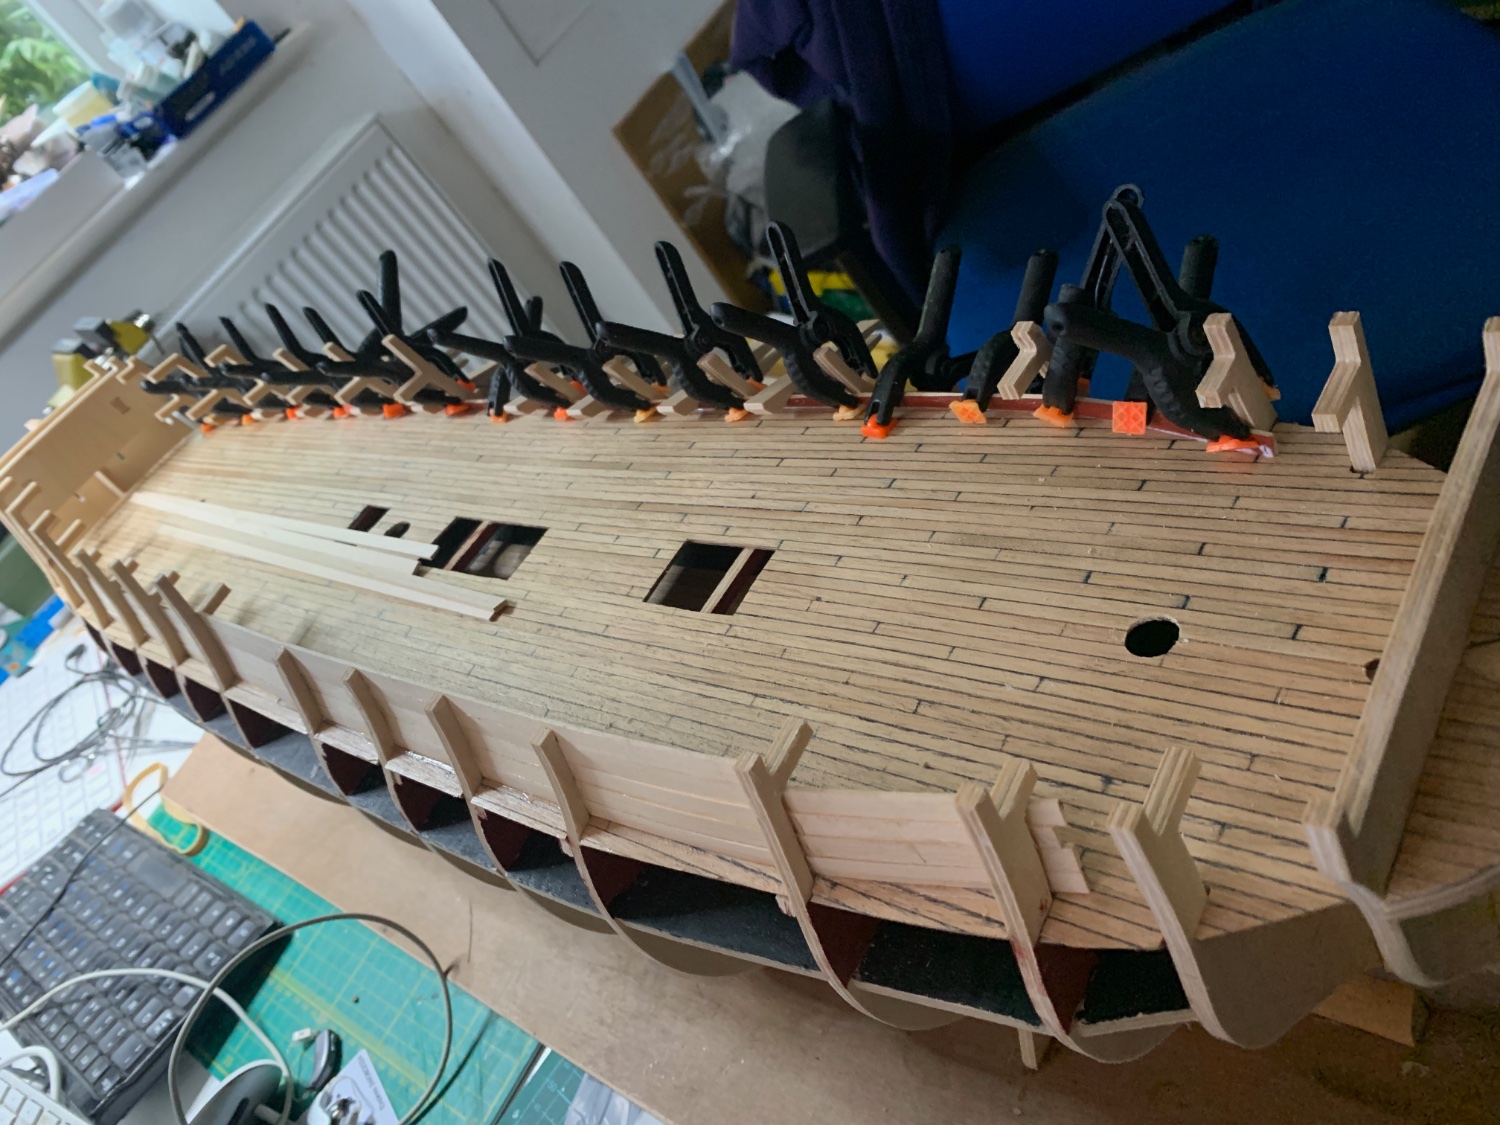
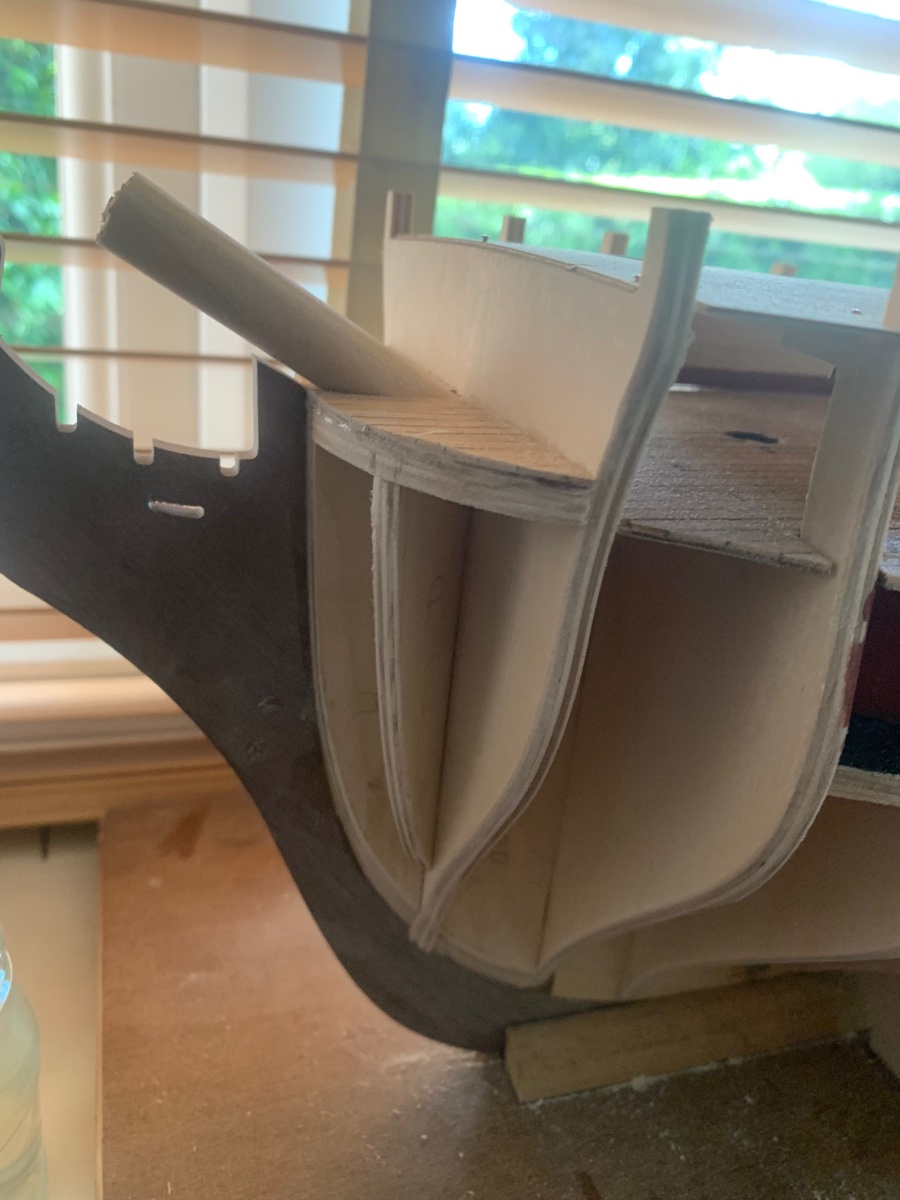
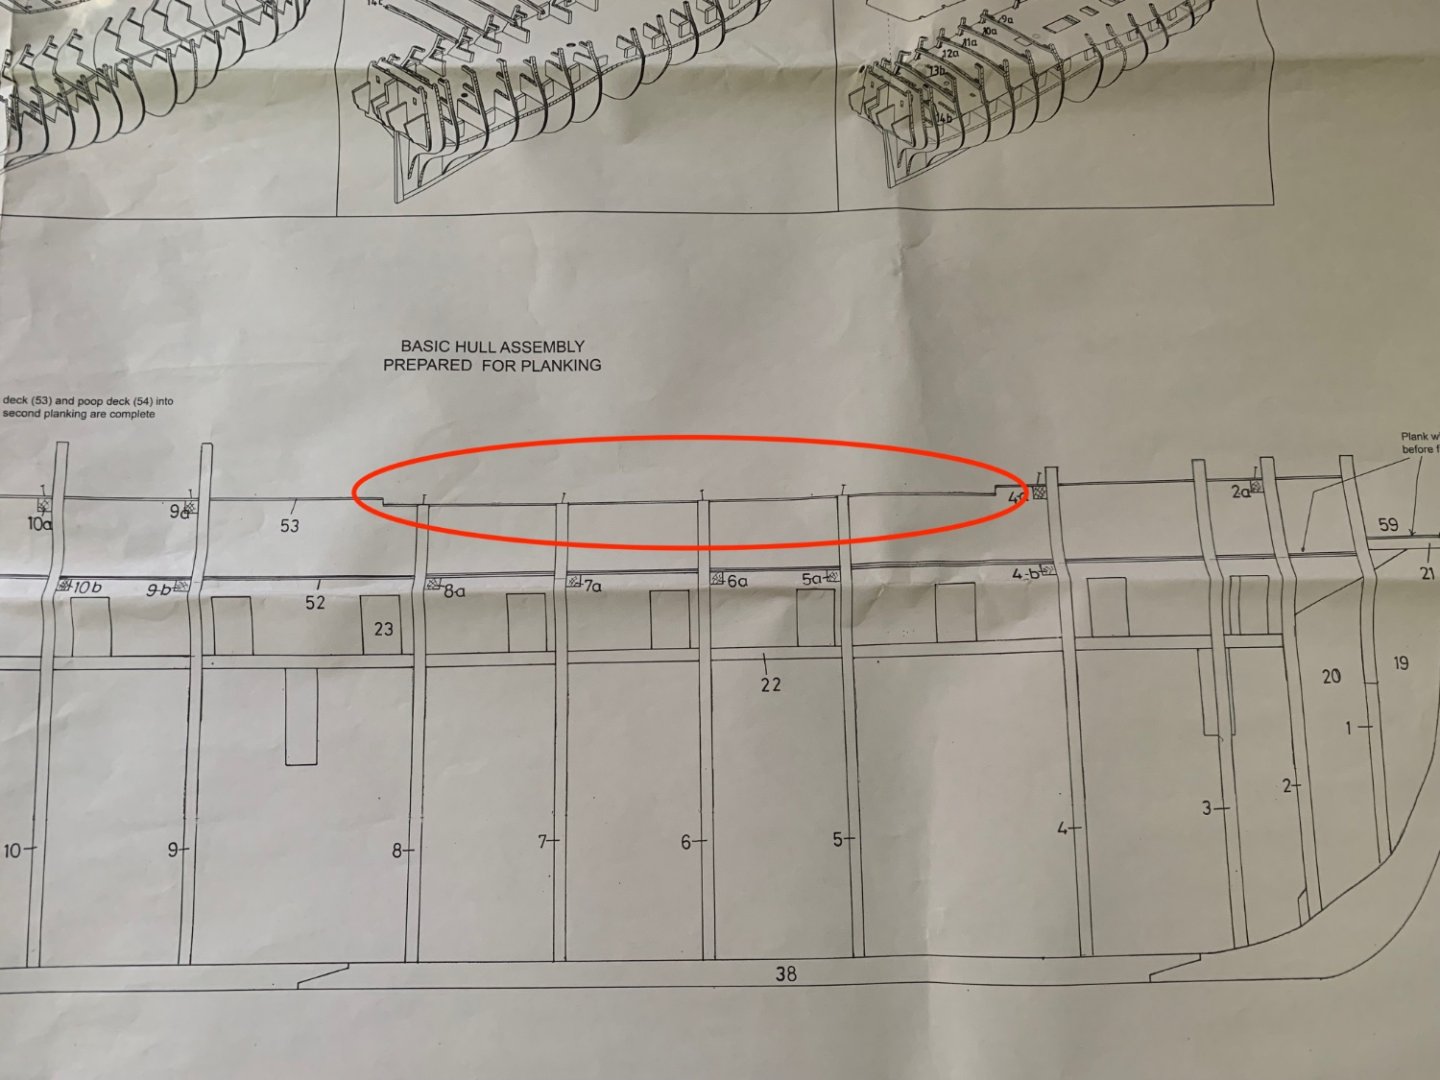
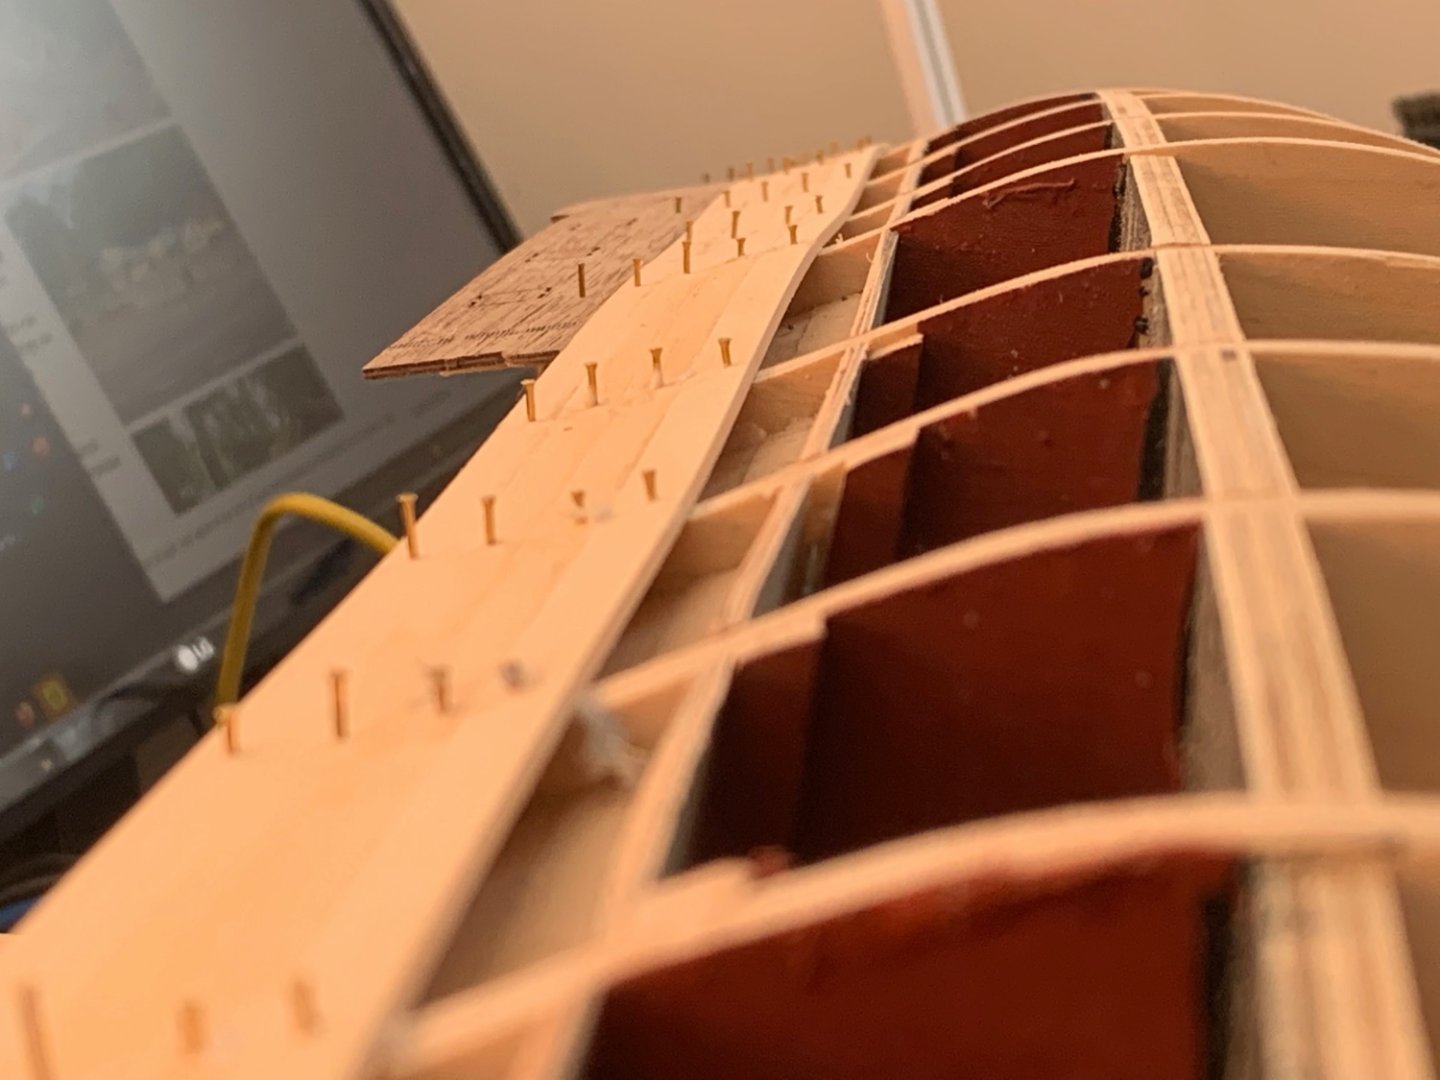
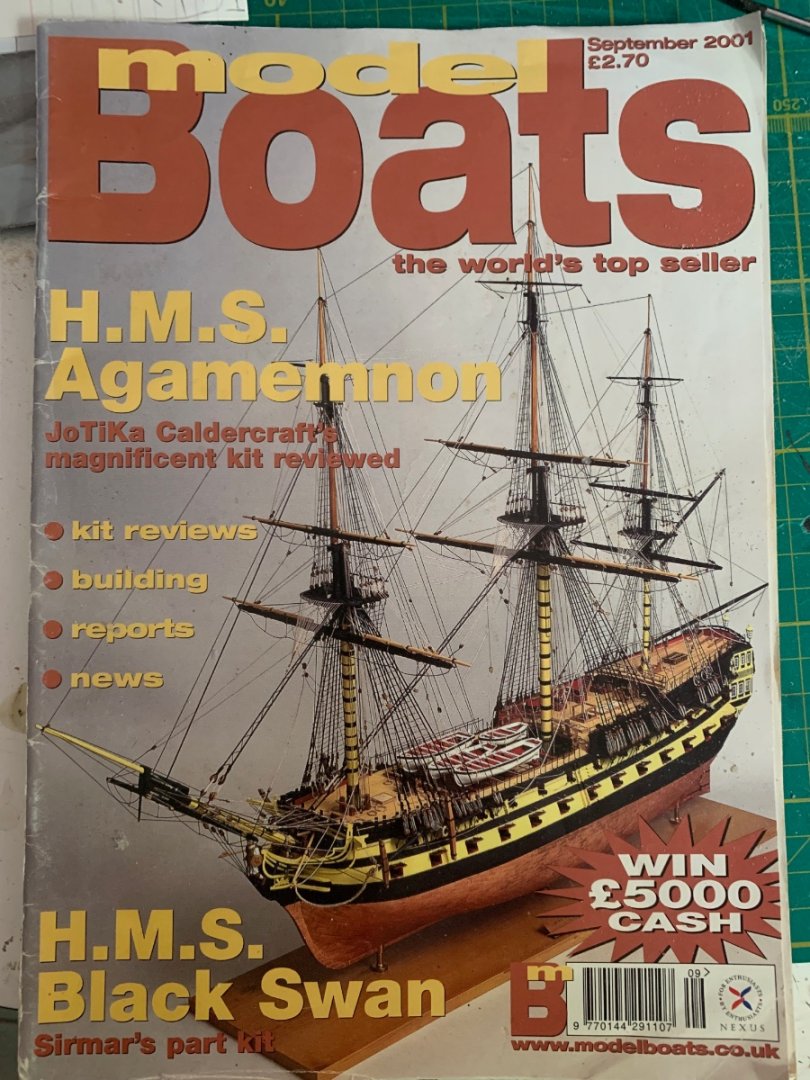


-
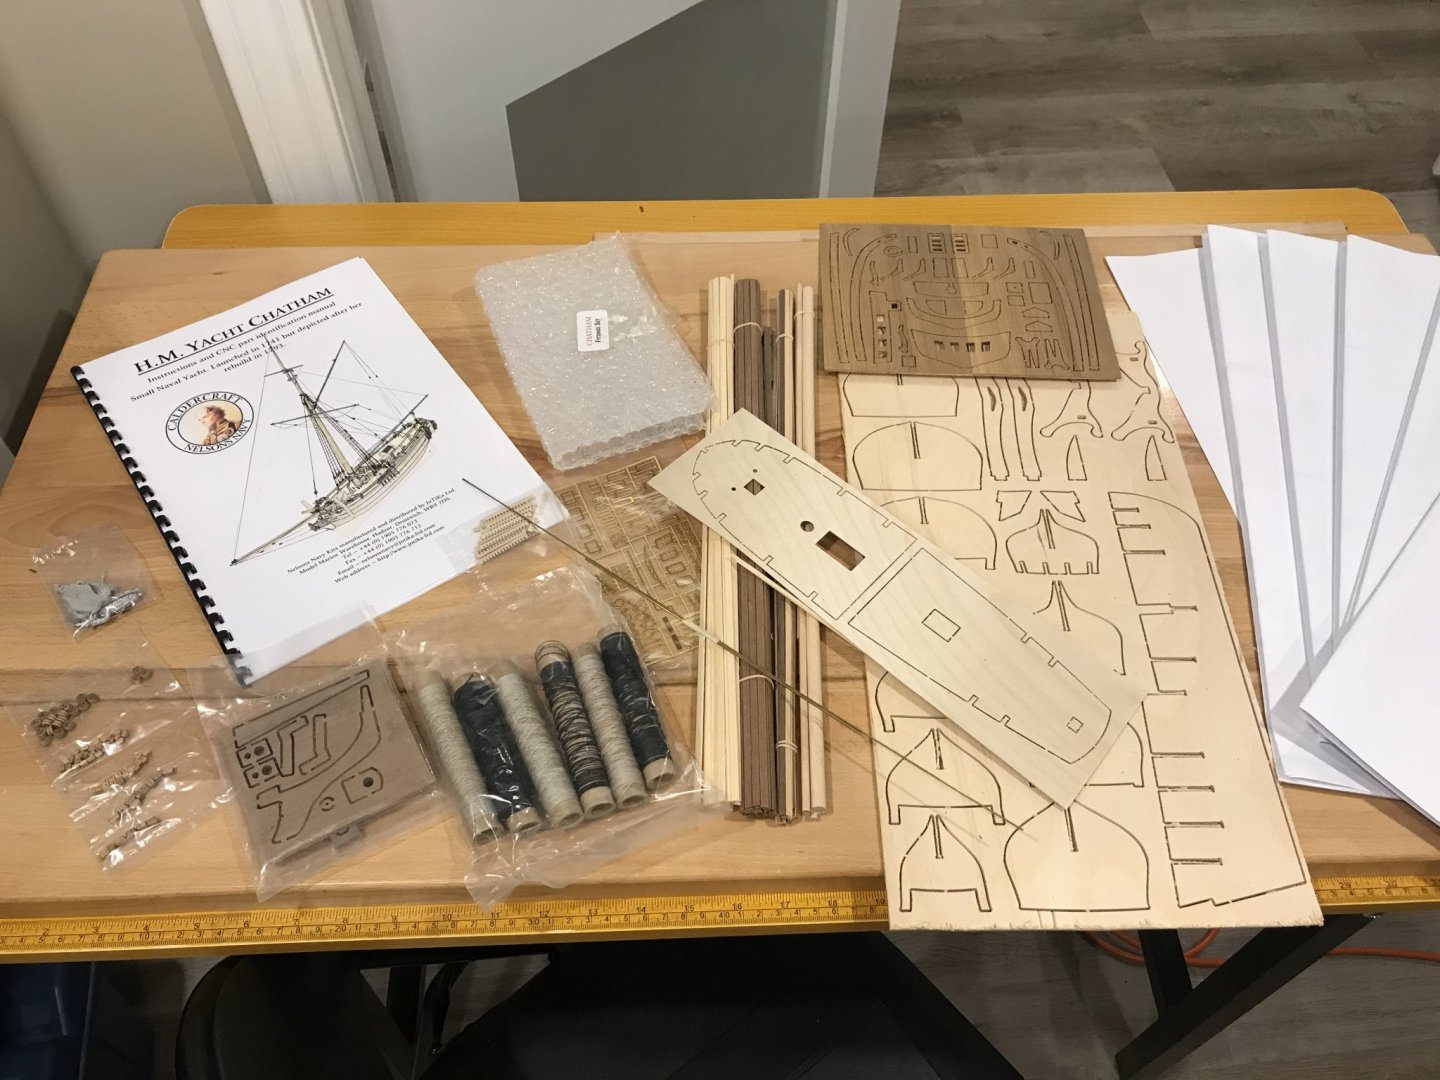
 Hi everyone, I’ve been semi-active on the site for a while now but this is actually my first build log. I’ve previously completed one prior build, Endeavour’s Longboat. Onward as they say. I’ve selected Chatham Yacht as a level up in complexity. I’m attaching some initial kit photos for reference. Scott
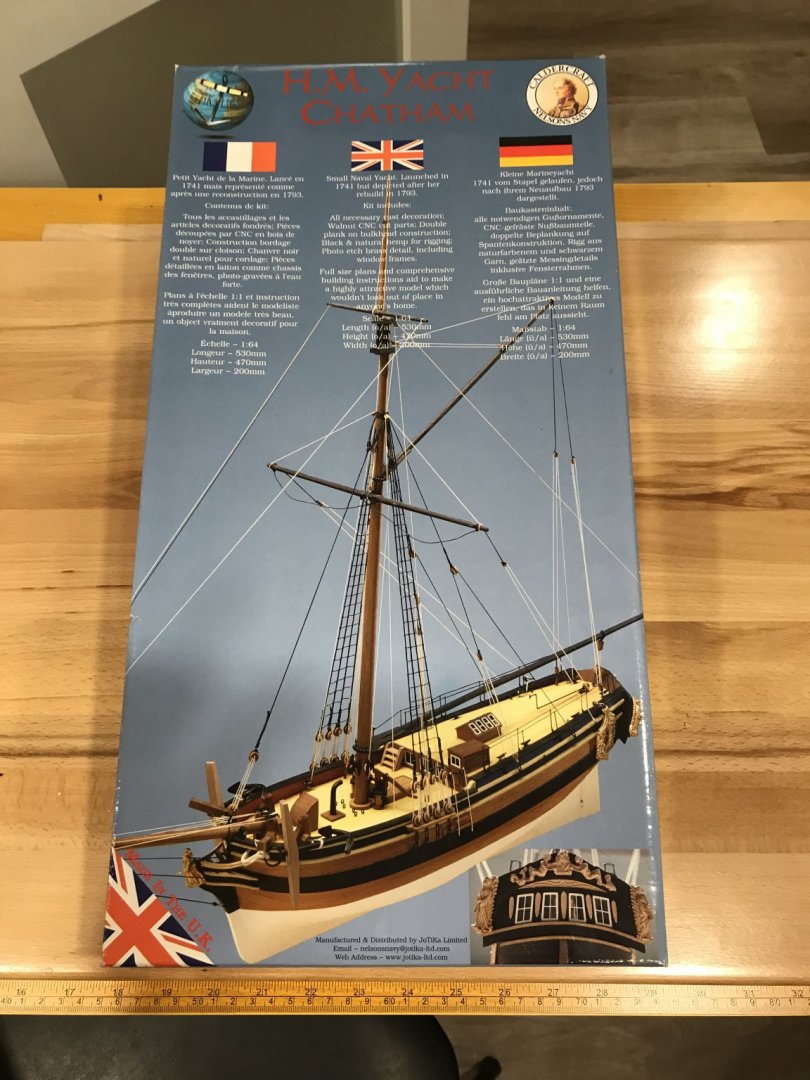
-
 I've made several ship models in the last 10 years. My best work was on the HM Bark Endeavour by Caldercraft, but the model that gets the most compliments is my Anteo Harbour tug. I've been wanting to build another tug for a while and settled on the Marie Felling by Caldercraft. They offer a couple of other tug kits but they are nearly impossible to find at the moment, so I settled on the Marie Felling. This is a BIG model, 43.5" long. It has a Glass Reinforced Plastic (GRP) hull and superstructure and is clearly made for RC. I just build for the fun of building, and will build this as a static model. Here's a photo of the GRP hull next to my Anteo. MSW has no build logs for Caldercraft tugs or the like, so I hope that this will give the readers some information about this. There are three good build logs on https://www.rcgroups.com, all of RC equipped models of course. Here are links if you're interested. Marie Felling by Longbike Marie Felling by Rmay Marie Felling by Kaskazi
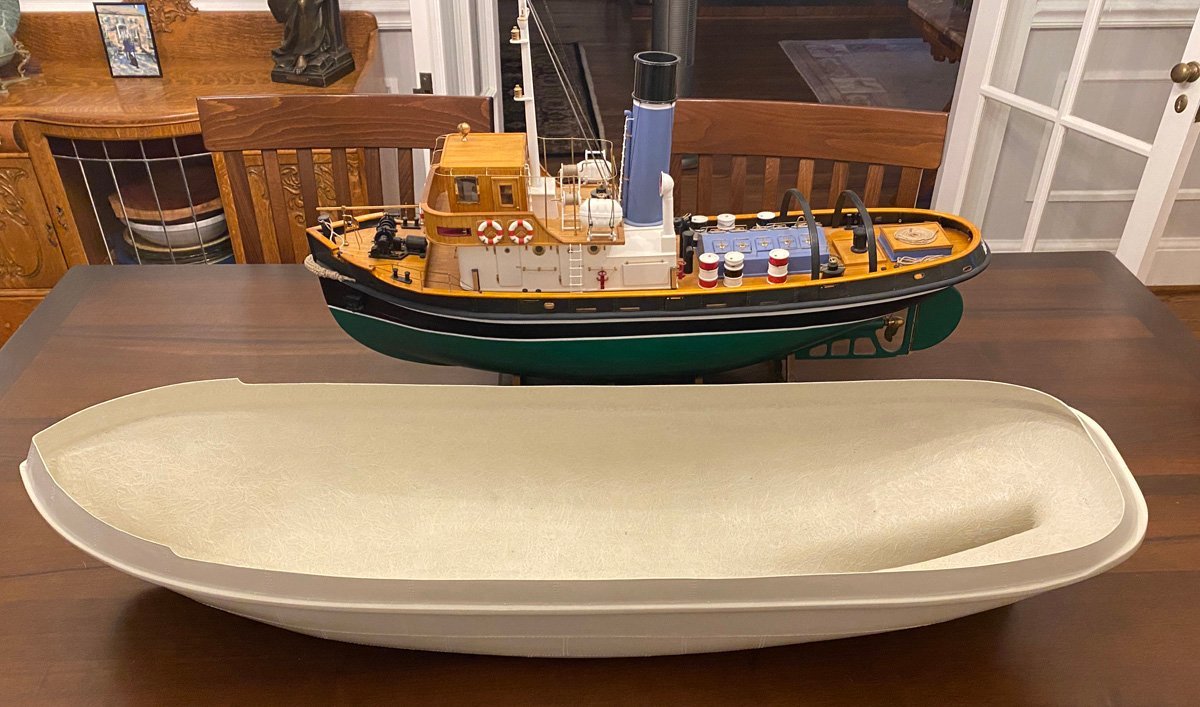
- 50 replies
-
- 8
-
-
- Marie Felling
- tug
- (and 3 more)
-
 And so it begins. This is my second build, having caught the bug earlier this year. That makes me a novice, and I plan to show other novices the process of climbing the learning curve. Many have been here before me, and you can find build logs of their work. Those I have found are by @Beef Wellington, @Stone, @Vane, @mispeltyoof, @Davemc, @jim_smits, @peteri and @BenD. Should I be worried that none of them is finished?
- 109 replies
-
- 1
-
-
- snake
- caldercraft
- (and 1 more)
-
HMS Snake was launched in 1797 as the only member of her class of brig-sloops. She captured or destroyed two French privateers and one Danish privateer. She also captured numerous small merchantmen, but spent time escorting convoys to and from the West Indies. She was sold in 1816. Scale: 1:64 Length: 910 mm Width: 350 mm Height: 910 mm And now the build begins.
- 53 replies
-
- 6
-
-
- brig-sloop
- Caldercraft
- (and 2 more)
-
HM Bomb Vessel Granado - 3rd build My third build I am actually doing in slight parallell mode to my HMS Snake. Both vessels are similar in size and so far it has been quite easy to do something on the first model and then the same to the other. I hope I havent taken on too much since I am also rigging my HMS Victory from Corel. I think the Granado is a really beautiful model with nice lines and also a rather unique look with the huge bomb throwers in the center of the ship. This will be a great addition to my other builds. History According to JoTiKa, 12 bomb vessels, including Granado (the sixth), were built at the outbreak of the War of Jenkins's Ear in 1739. Granado was ordered on September 14th 1741 and the keel was laid on November 18th 1741. Although it is uncertain who designed the Granado, it is commonly attributed to Thomas Slade, the naval Surveyor who oversaw the construction of the ship at Ipswich. Thomas Slade also went on to design famous ships such as H.M.S. Victory. Granado was unusual in that she was designed to be used as either a sloop or a bomb vessel, being constructed with a conventional square stern. Launched on June 22nd 1742, Granado was taken to Harwich, fitted out and put in commission as a sloop.An Admiralty Order on July 15th 1745 was issued 'to fit her (Granado) as a bomb' but this order was reversed on July 17th 1745 and Granado remained as a sloop. It was not until 1756 that Granado was fitted for the first time as a bomb vessel from an Admiralty Order on July 26th 1756. Between the launch of Granado on June 22nd 1742 and her fitting as a bomb vessel July 26th 1756 a number of changes had been made to Granado's configuration as compared to the original Admiralty plans the most noticeable of these are as follows: 1. Two extra 4pdr carriage guns were added (Admiralty order of June 20th 1745) bringing the total 4pdr carriage guns to 10. 2. Two bow chaser gun ports were added allowing accommodation of the extra guns either under the forecastle as bow chasers or at the fifth gunports. 3. The mortars as shown in the Admiralty plans are two 13 inch mortars however when fitted as a bomb vessel this was actually changed to 1 x 13inch and 1 x 10inch mortar. This is confirmed by the provisions list on March 30th 1757 which details 50 large and 50 small shells. Granado remained as a bomb vessel until the Admiralty Order to fit her as a sloop on March 20th 1760. It was during this period as a bomb vessel that Granado was involved in her most active role. On January 22nd 1759 Granado and the squadron under command of Commodore John Moore anchored off Basse Terre. The following morning the citadel and batteries of Basse Terre were bombarded. By January 24th troops had occupied the forts of Basse Terre and Fort Royal, the town had been devastated by fire caused by the carcasses discharged from the bomb vessels. On February 7th, the fleet moved to attack Fort Louis at the entrance to Cul de Sac Bay. The attack began the following day and by February 15 the bombardment ceased with the capture of the Fort. Granado was again converted to a bomb vessel in August 1761 and she remained as such until she was sold on August 30th 1763 for £575. During this period Granado was involved in the action of capturing Morro Castle and El Morro in the West Indies and the capitulation of Havana on August 13th 1762. The kit This kit is one of the newer from Caldercraft and that is very noticable. The plans and instructions are extremily good and way more describing than the HMS Snake. This kit is also has much more parts in it and seams to be much more detailly made. Its a much more complex build and probably not suitable as a first model. The wood was better in this kit however I think Caldercraft makes a bit of false advertisement when they only provide walnut for the second planking while all of the photos they have on this ship is made of a much brighter wood (probably boxwood).

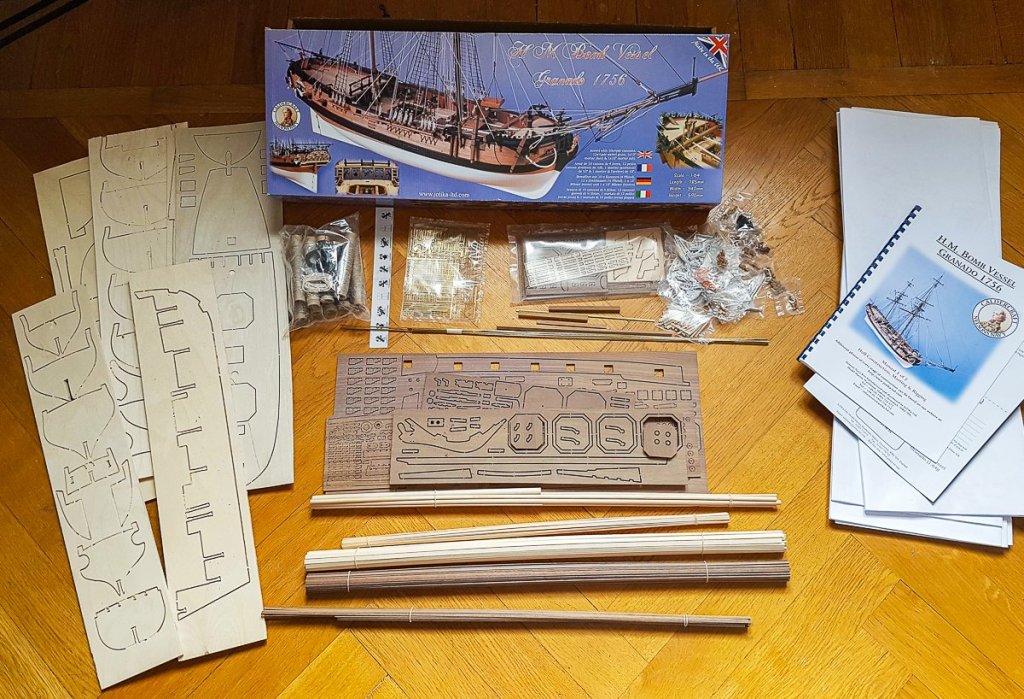
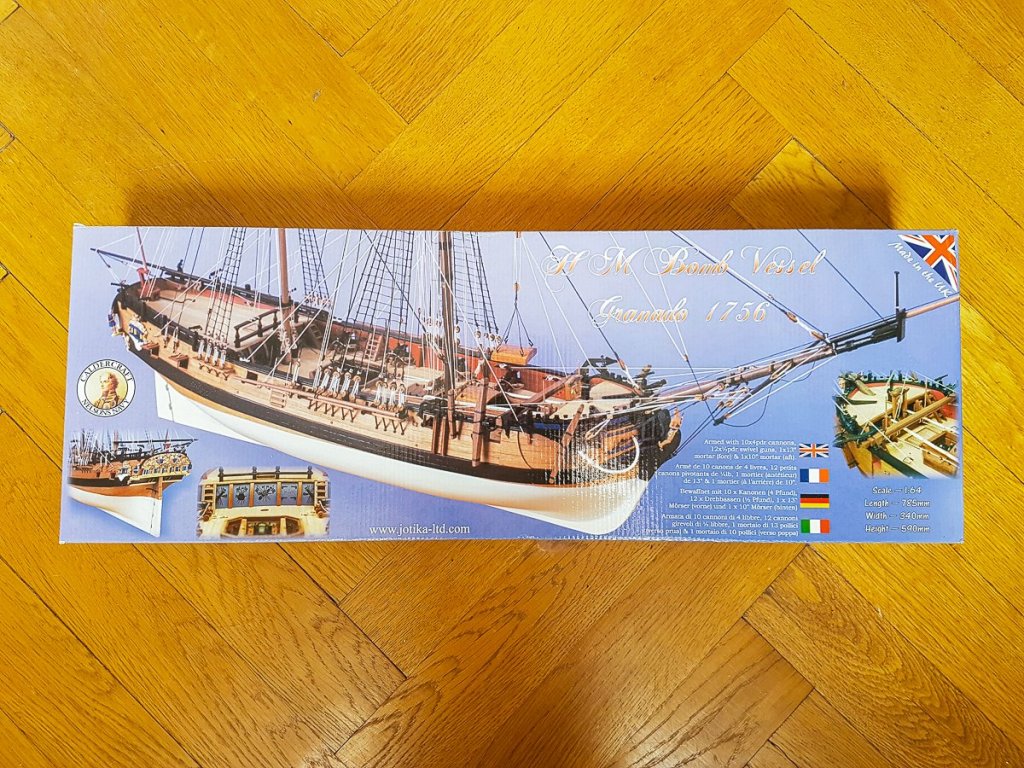
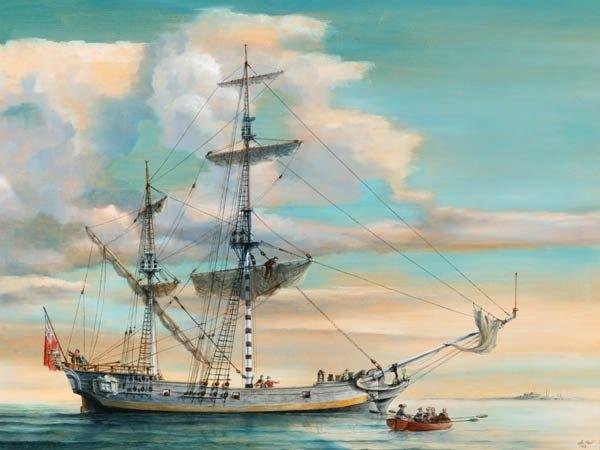
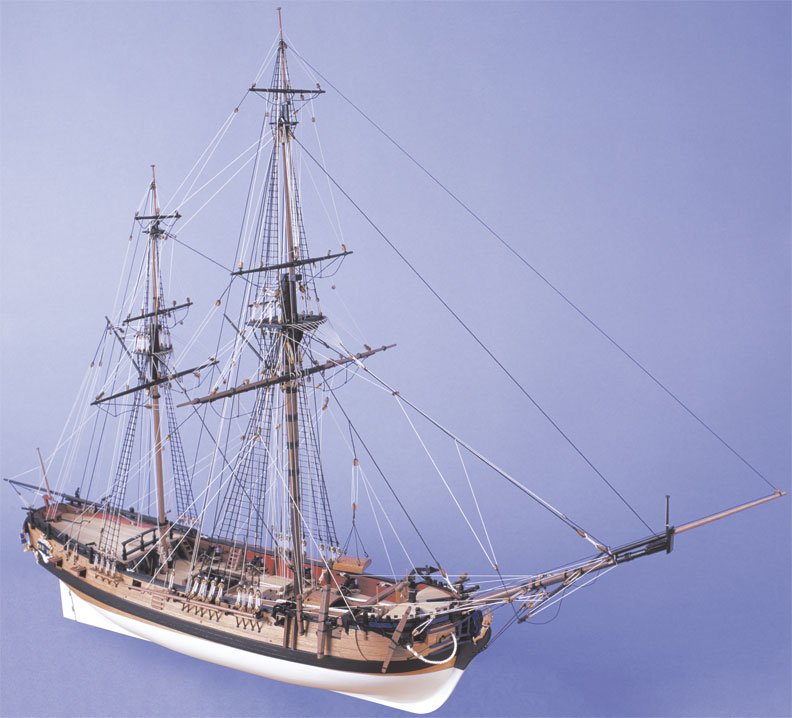
- 101 replies
-
- 5
-
-
- caldercraft
- granado
- (and 1 more)