James H
-
Posts
5,529 -
Joined
-
Last visited
Content Type
Profiles
Forums
Gallery
Events
Everything posted by James H
-
 I hope you enjoy this as much as I did with the prototype. Certainly watching this.
- 222 replies
-
- 2
-

-
- First Build
- Lady Isabella
- (and 2 more)
-
There was a problem with the non-MDF sheets and the quality of them. Amati are currently sorting this out and I expect the replacements to be with me in a few weeks. That should hopefully coincide with my current project ending too. I know what you mean though. Looking forward to getting back the behemoth!
-
I don’t really know. I suppose I’ll find out when I start it 🤣
-
Yes, just tuck those ropes in and drip a little thinned white glue in there to set them.
- 49 replies
-
- 4
-
-
- Lady Eleanor
- Vanguard Models
- (and 1 more)
-
I agree. Defo love to see someone take up this offer and complete with a build log.
-
Come on.....open a build log for Zulu. I know a few here would love to see it. As for Flirt, exactly the same. Share your journey and let us see how you progress. If you've ever any questions, I'm sure you'll get lots of help here and both I and Chris can nail down any specifics with these builds.
- 100 replies
-
- 3
-
-
- zulu
- vanguard models
- (and 2 more)
-
I usually put smalls dots all the way along and then ease the plank into place a couple of inches at a time and then hold it for 5-10 seconds before moving along. No tape, nails, nothing needed. Also no accelerator. The CA gel stays viable for the duration without needing to add spots at intervals. Glad you like the build log and I hope the manual I did is easy enough to follow. Oh, and
- 100 replies
-
- 2
-
-
- zulu
- vanguard models
- (and 2 more)
-
I'd be paranoid about not getting all those metal parts exactly the same. Well done if you managed that!
-
Really looking forward to this one, and I plan to start this around the end of October, when my current project is complete.
-
Outstanding, and I'm learning a whole lot of new tricks for when I progress with Victory
- 126 replies
-
- 1
-
-
- victory models
- amati
- (and 2 more)
-
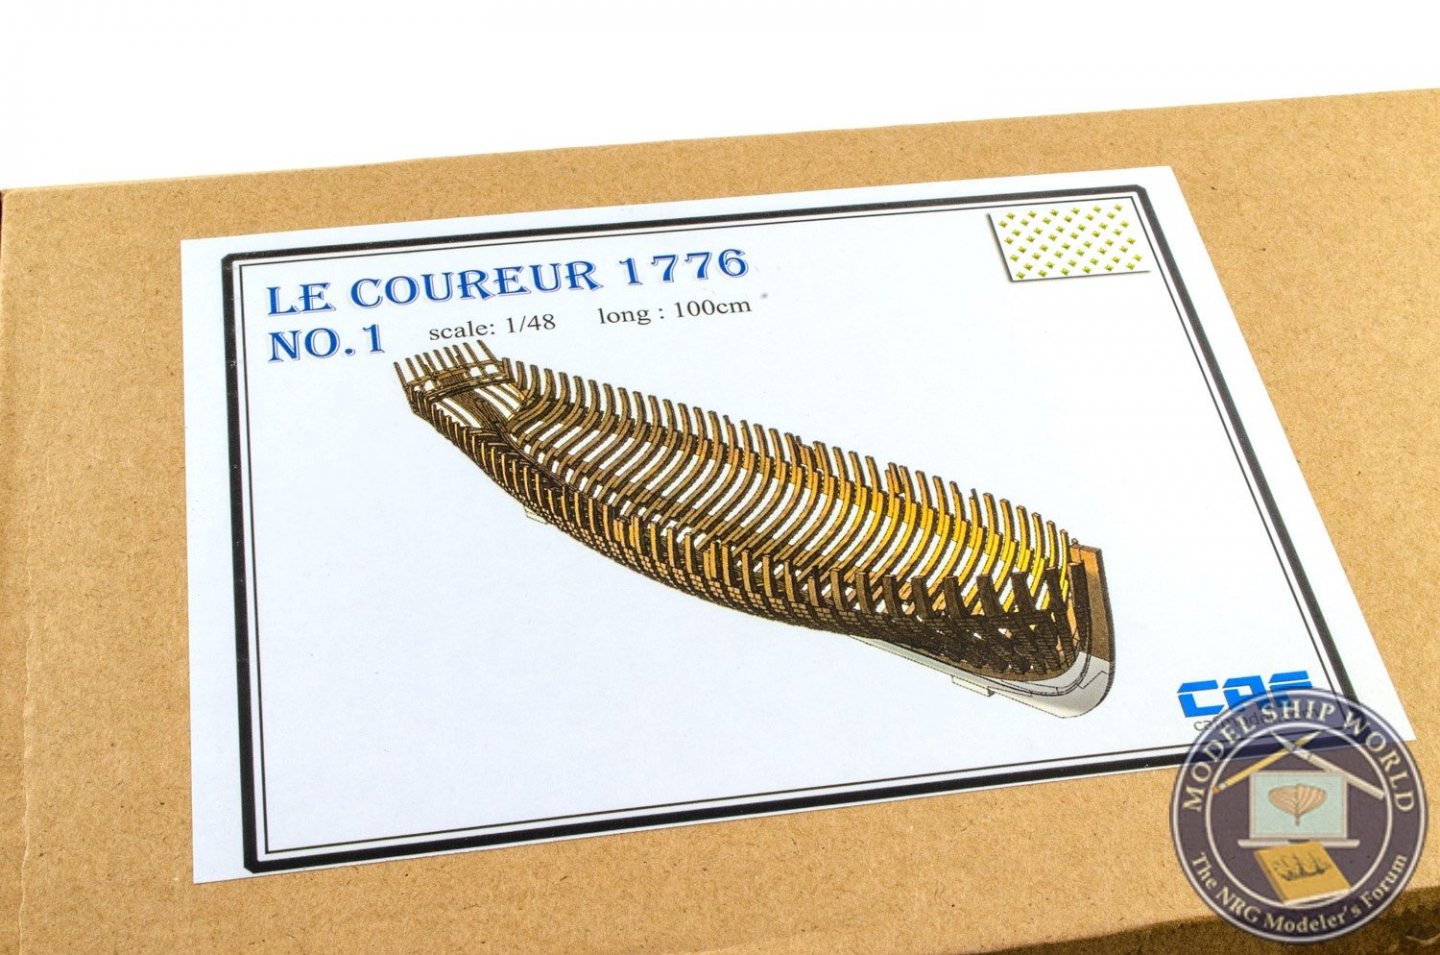
ancre Coureur by cafmodel - 1/48
James H replied to cafmodel's topic in - Build logs for subjects built 1751 - 1800
That looks like a real labour of love, but the effect is beautiful. -
I had those parts missing in my kit, but Tom is sending them straight over.
-
Nice work on the keel. If you look at the second manual, it appears the cradle is modified to take the built hull, so I expect the larger parts won't plug into the base, although I need to read about that yet.
-
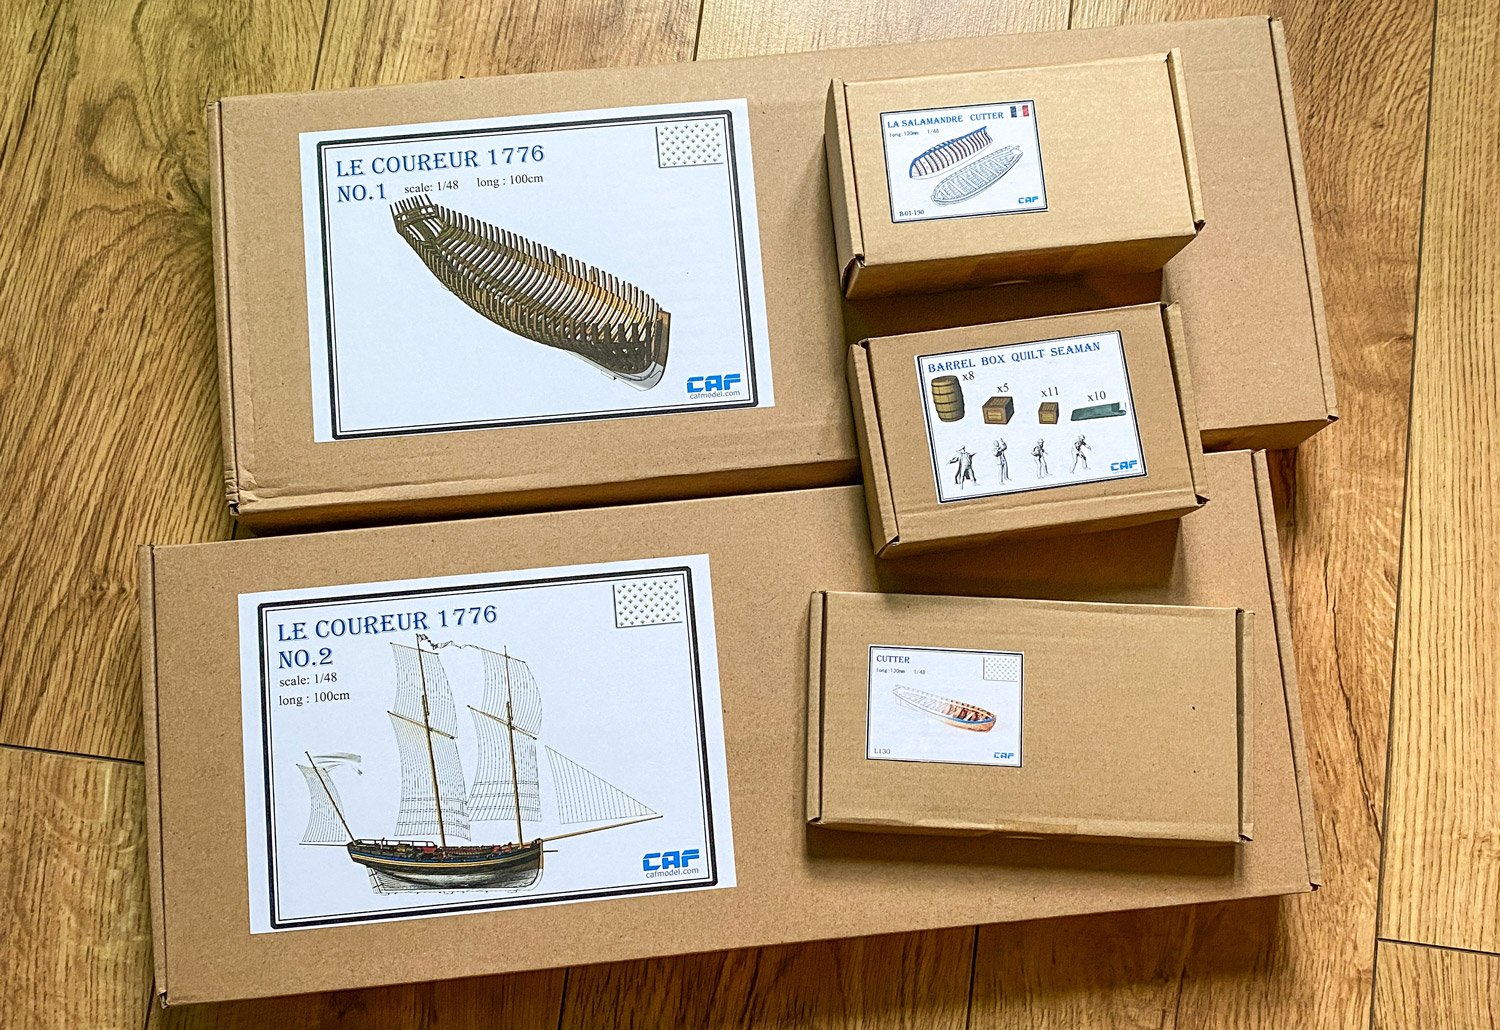
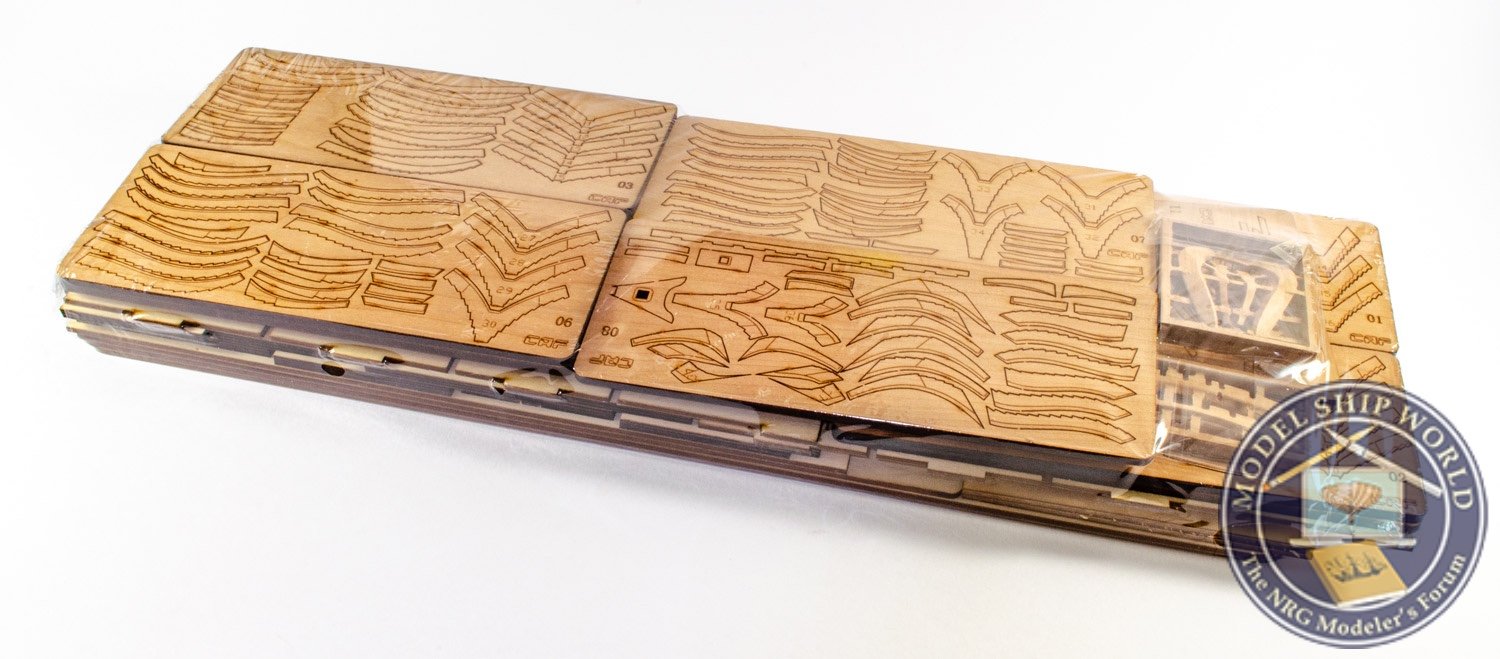
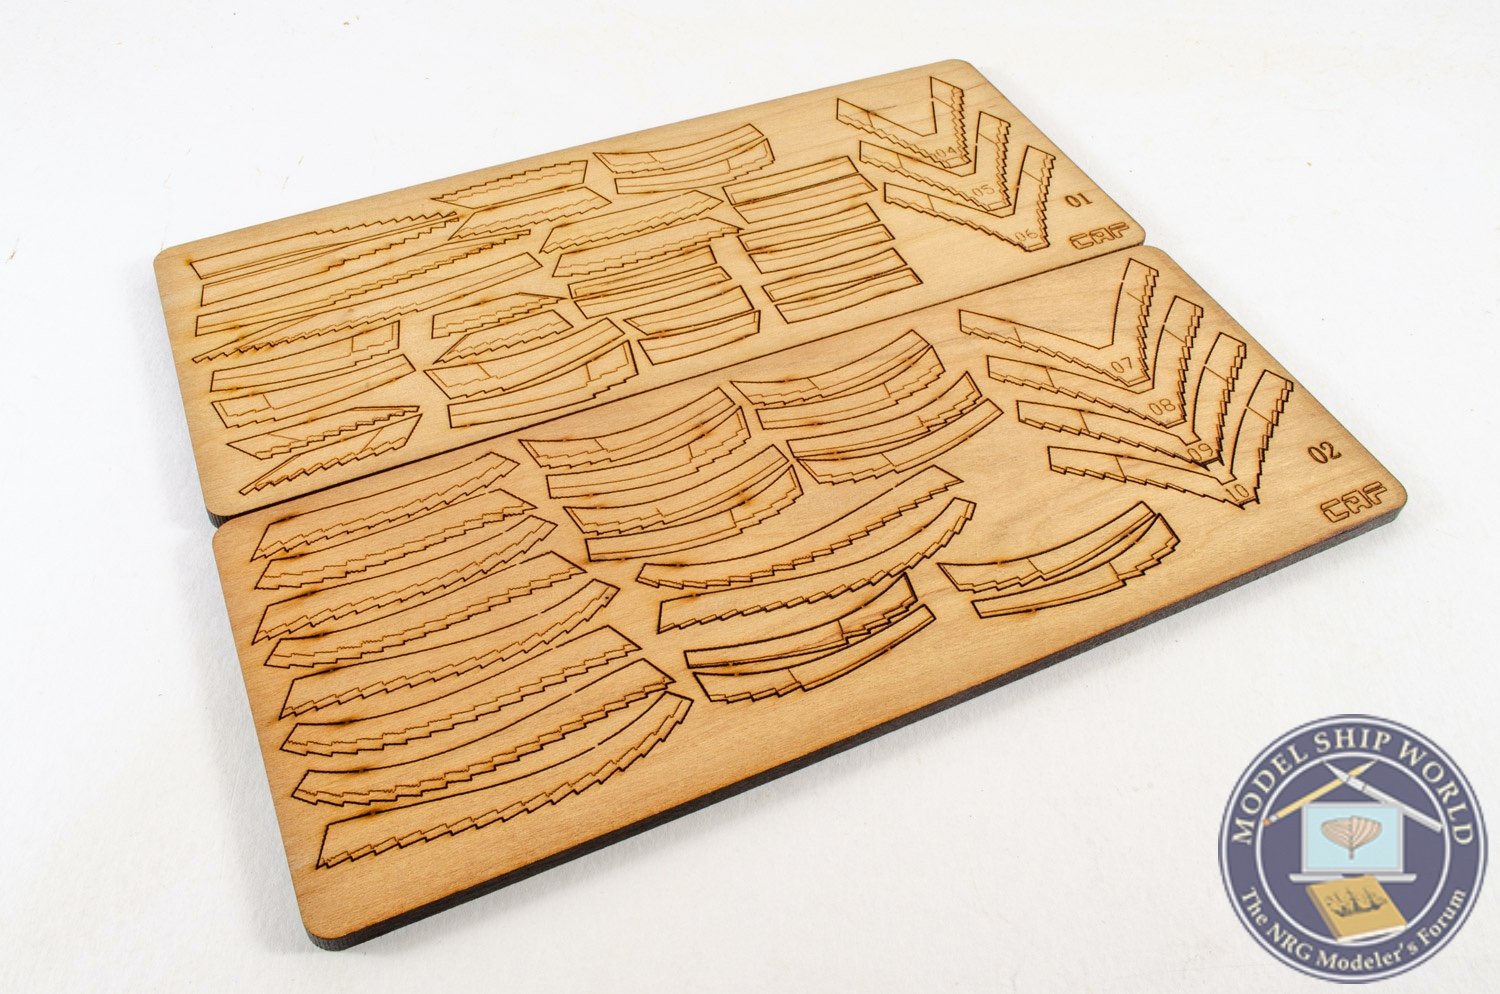
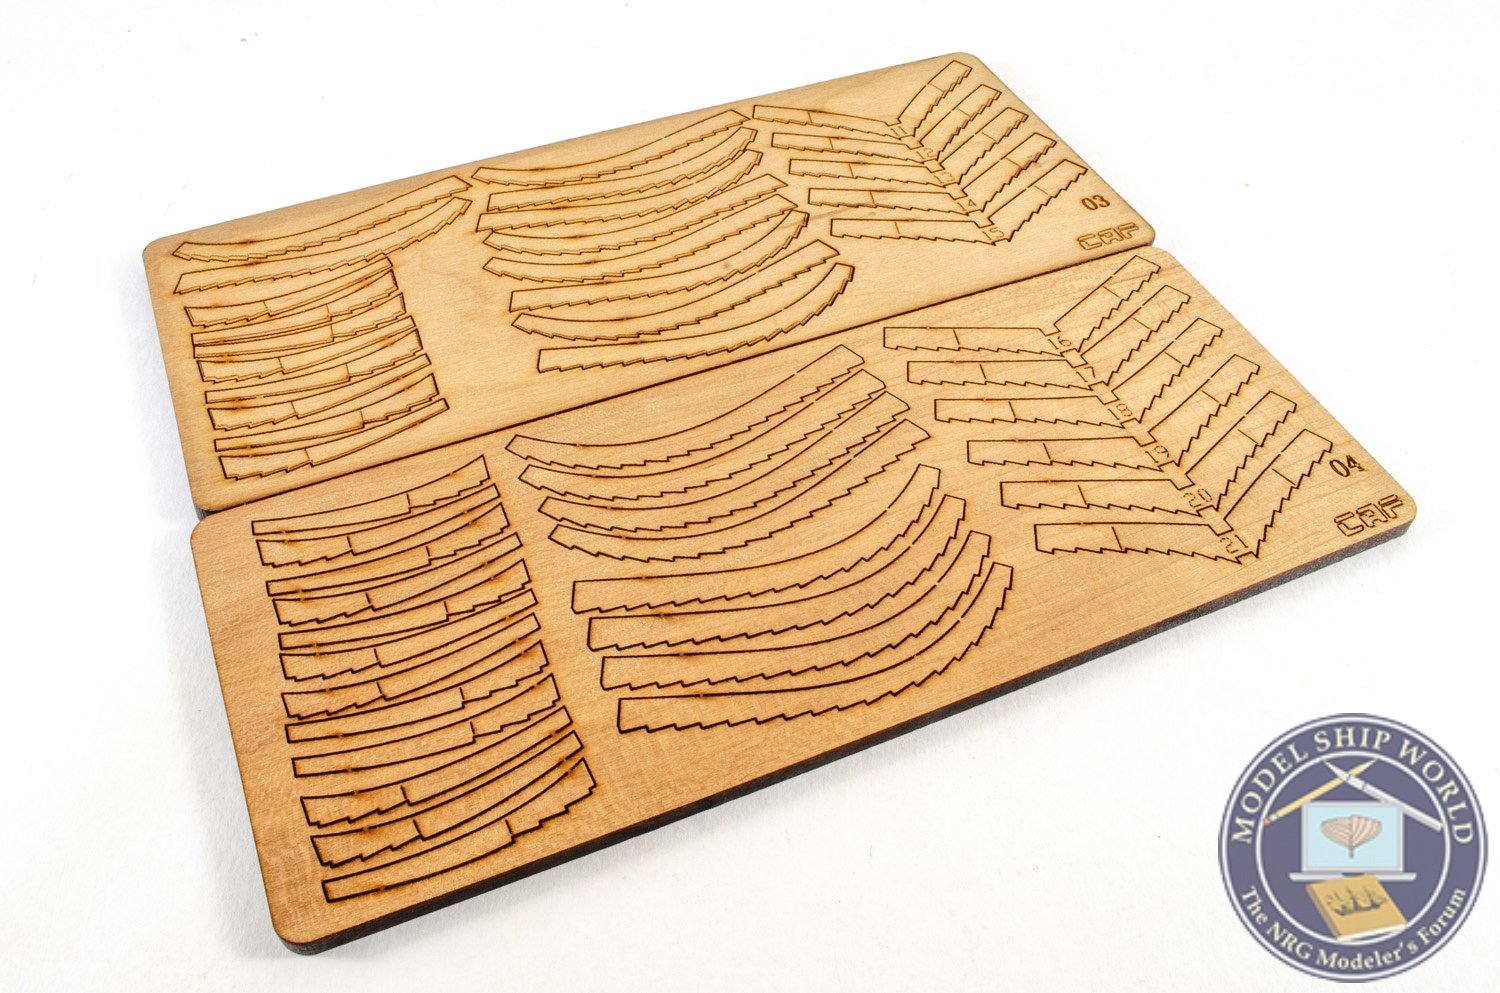
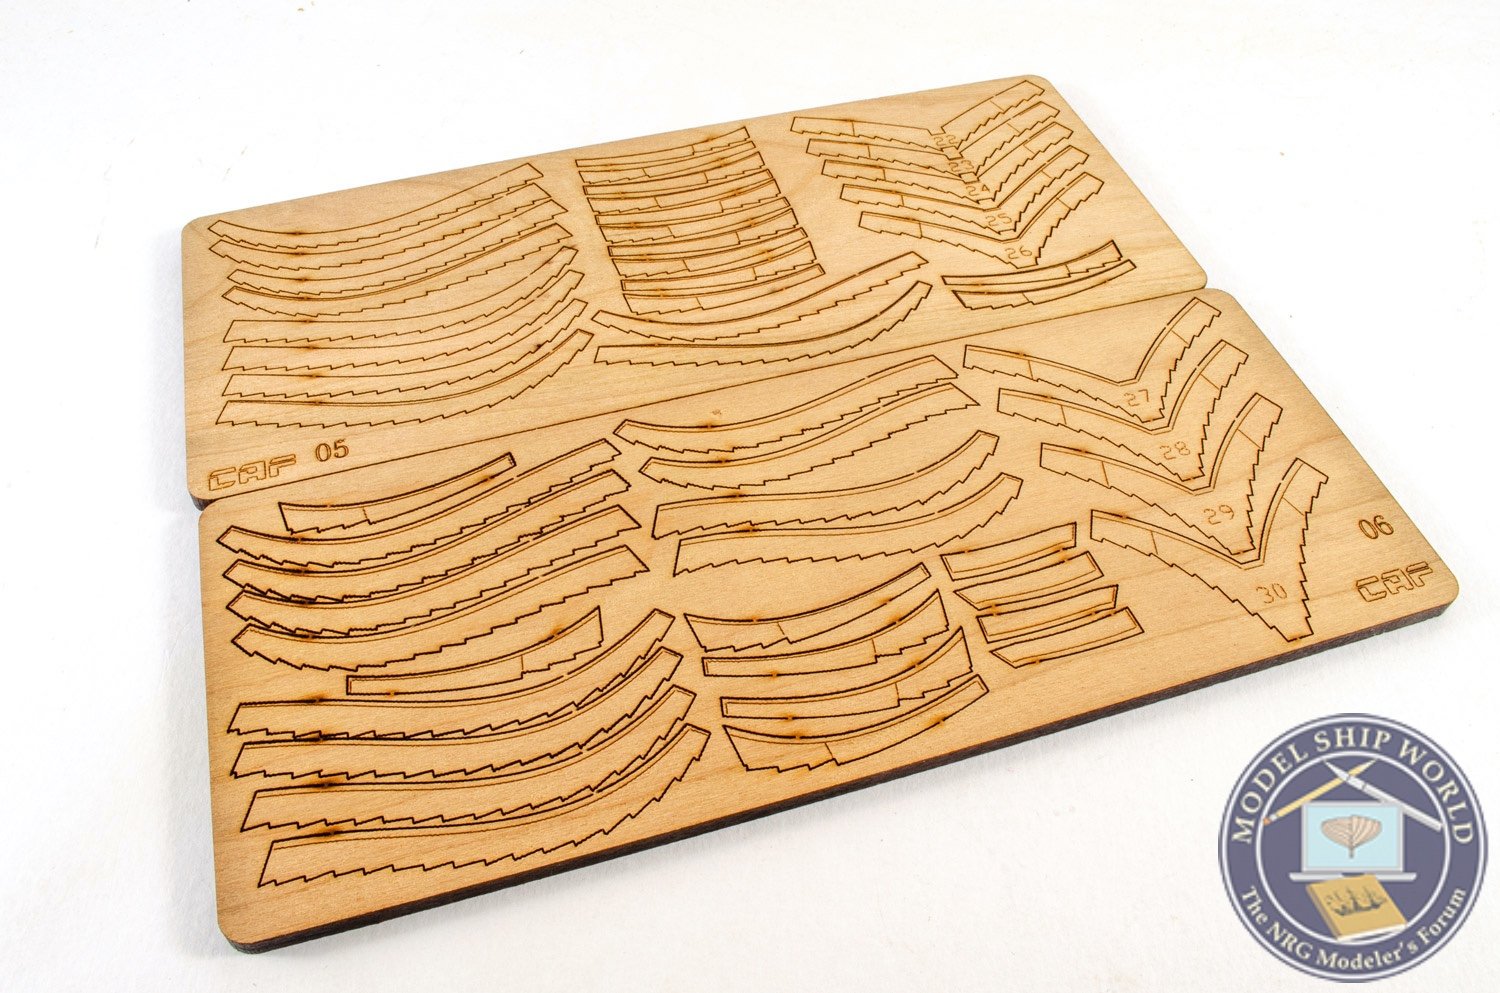
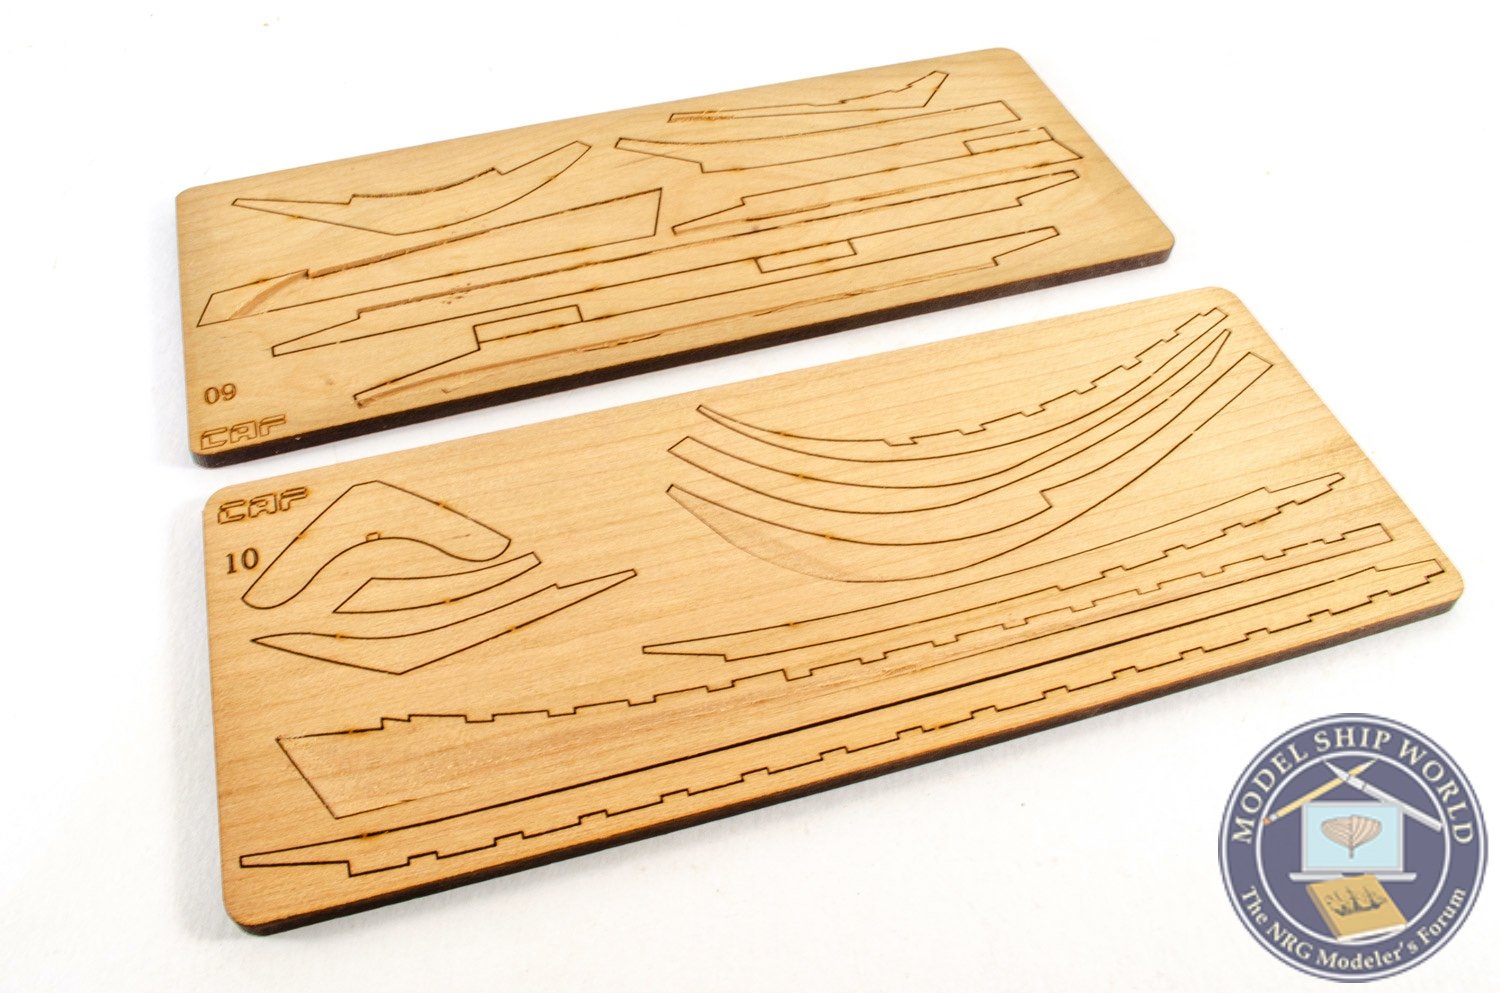
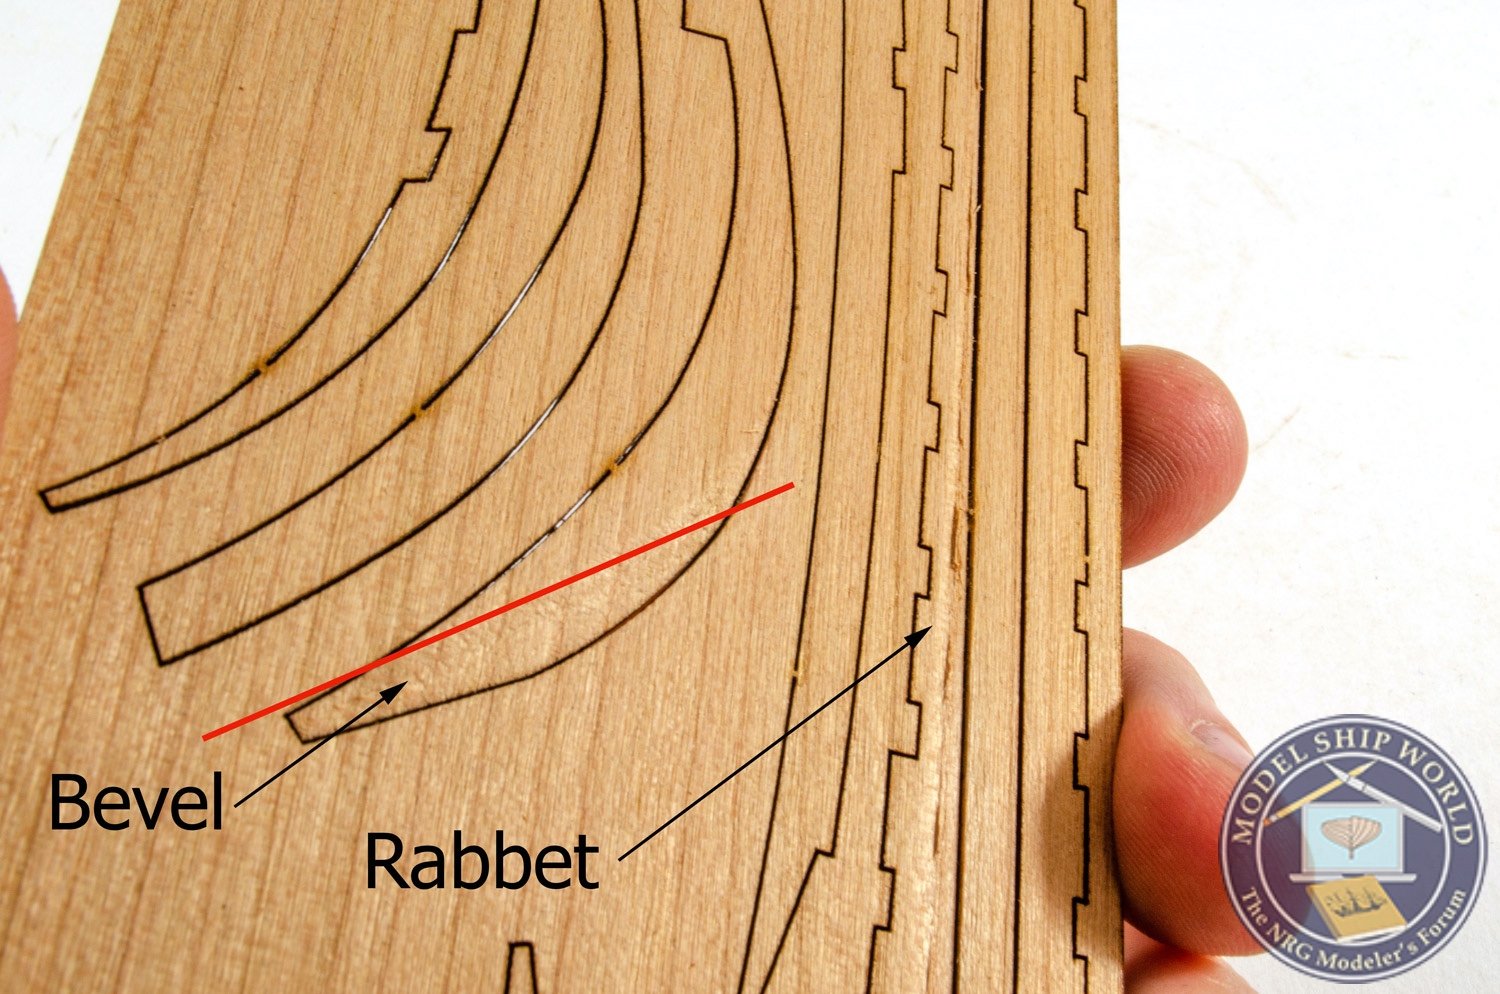
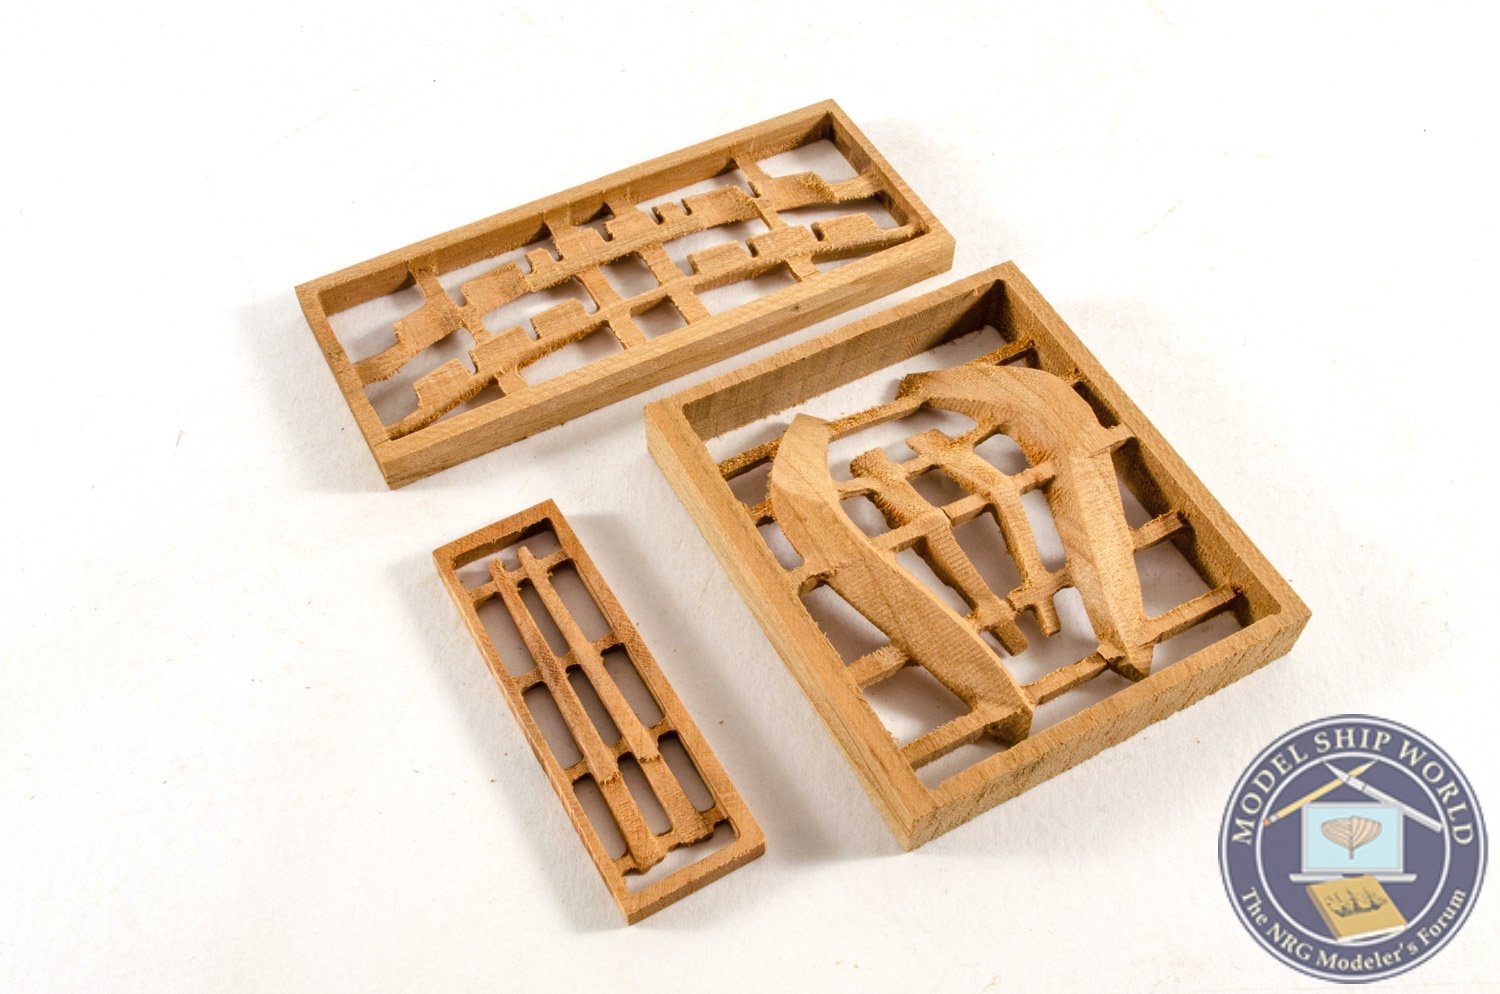
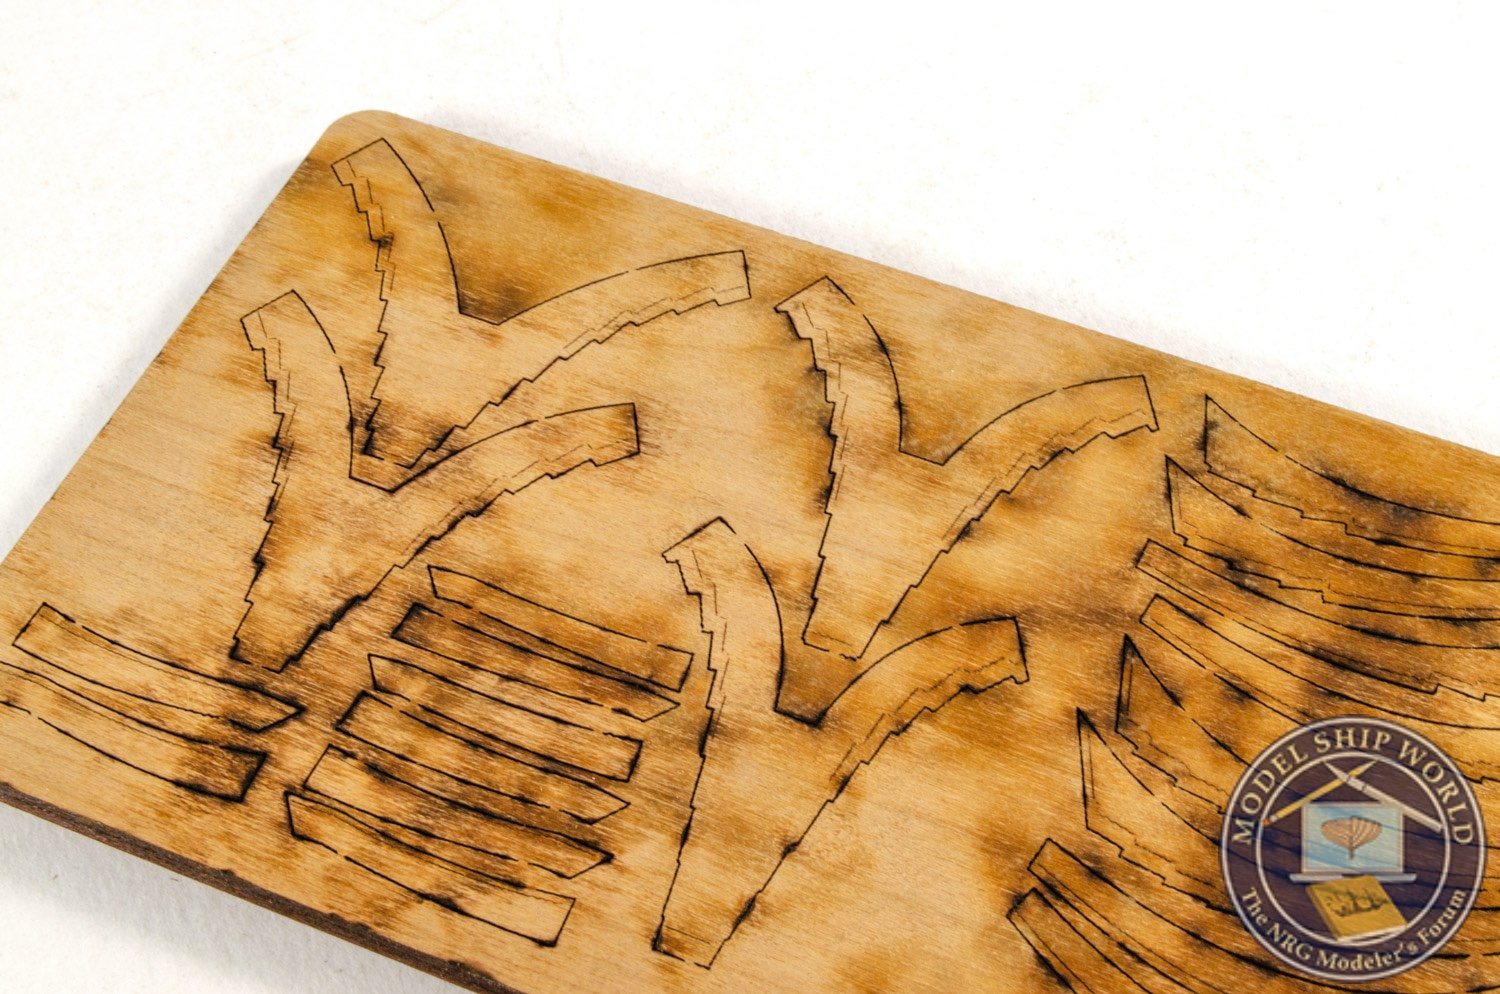
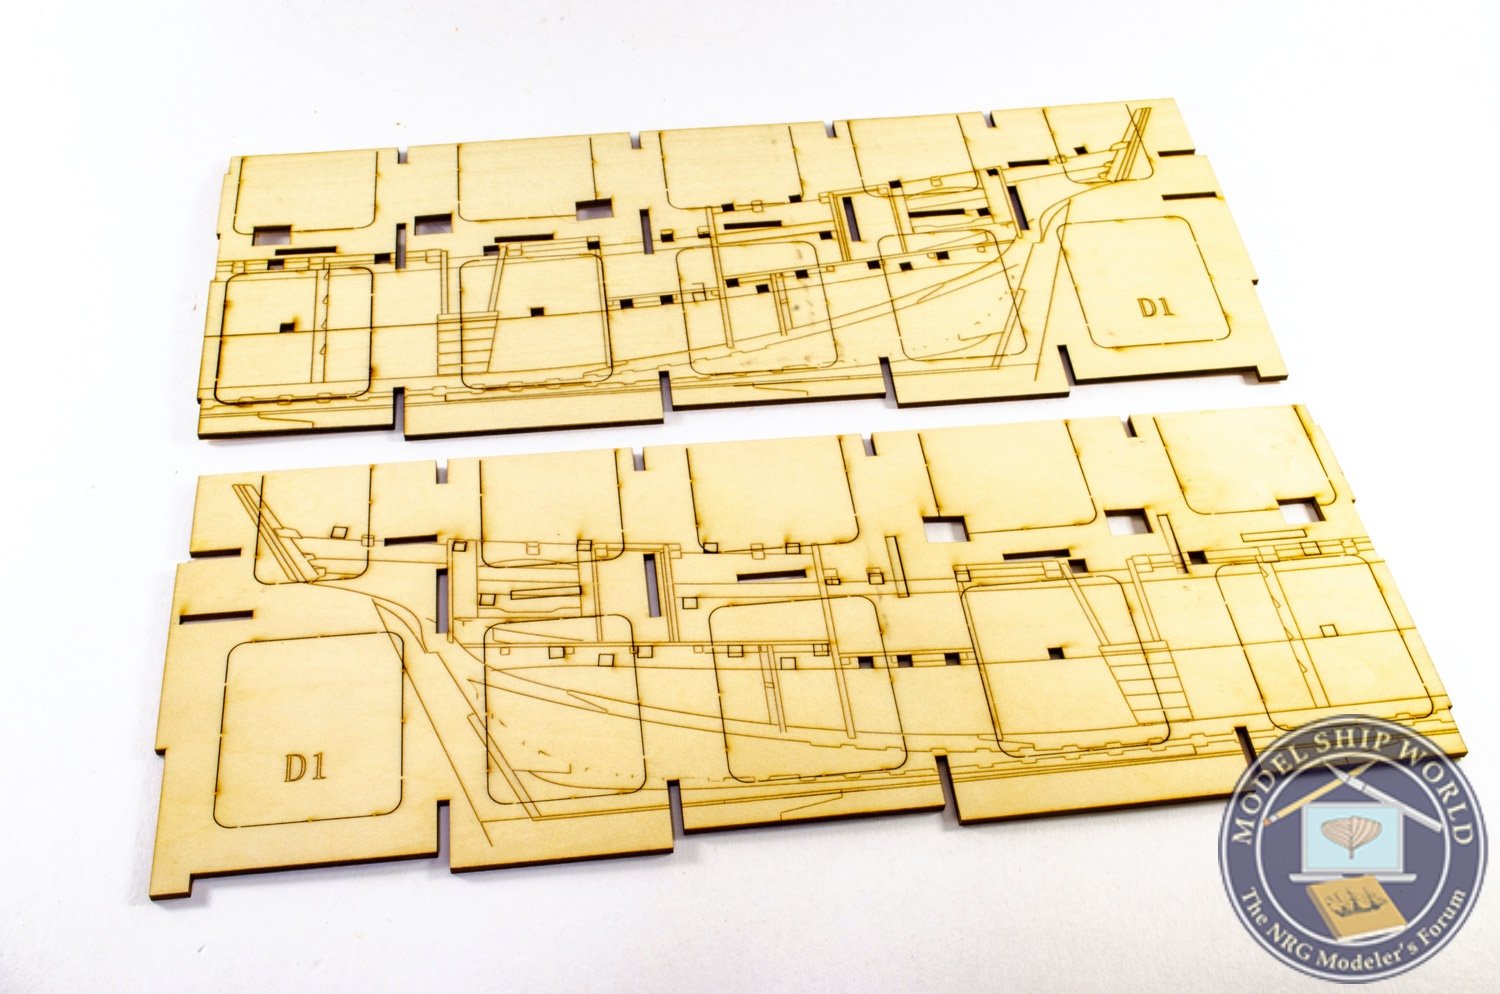
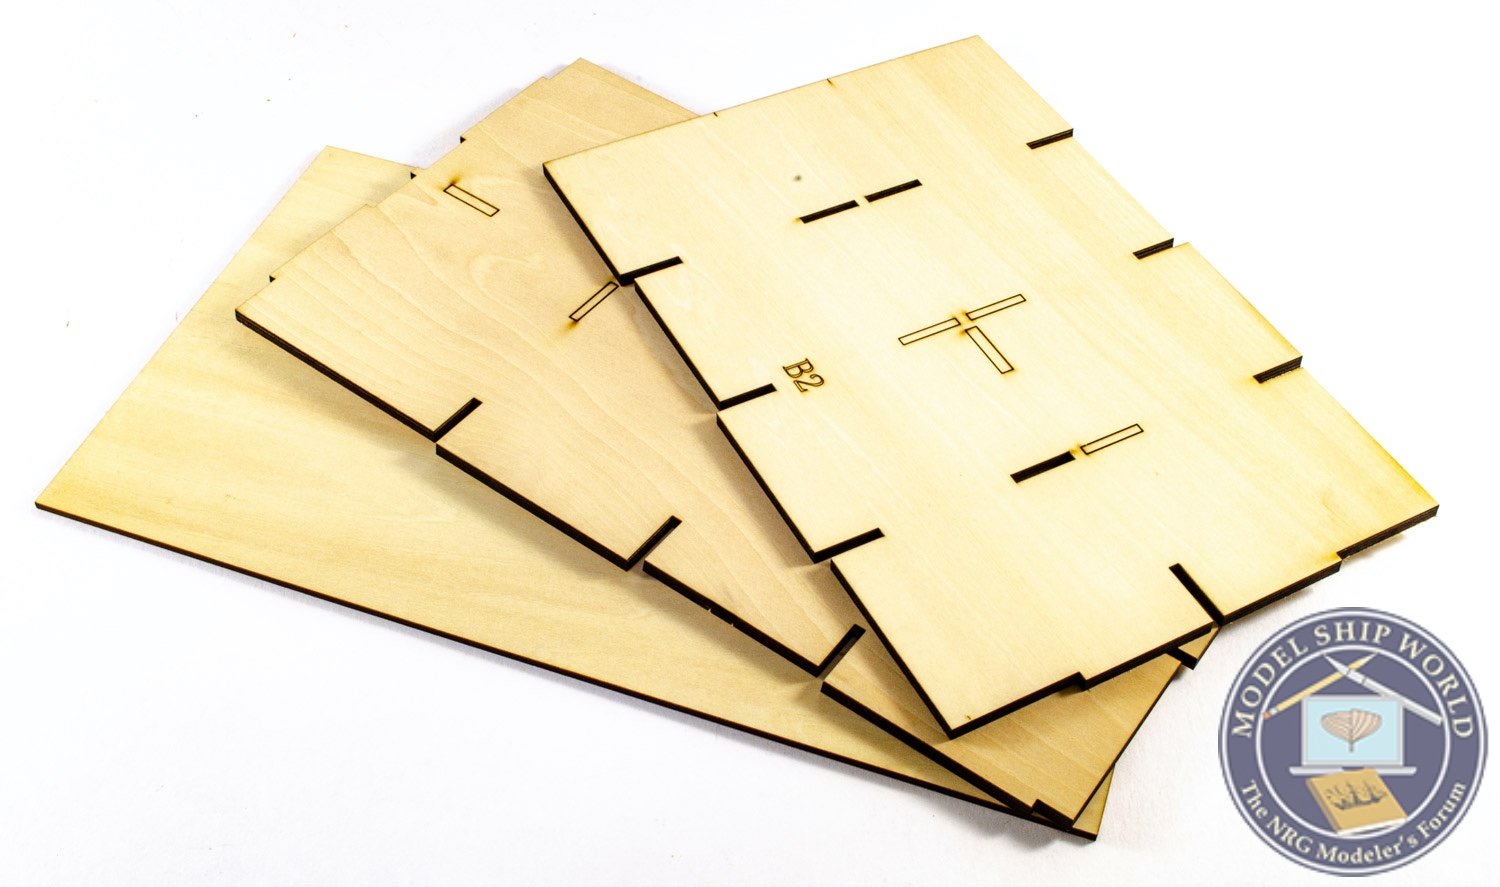
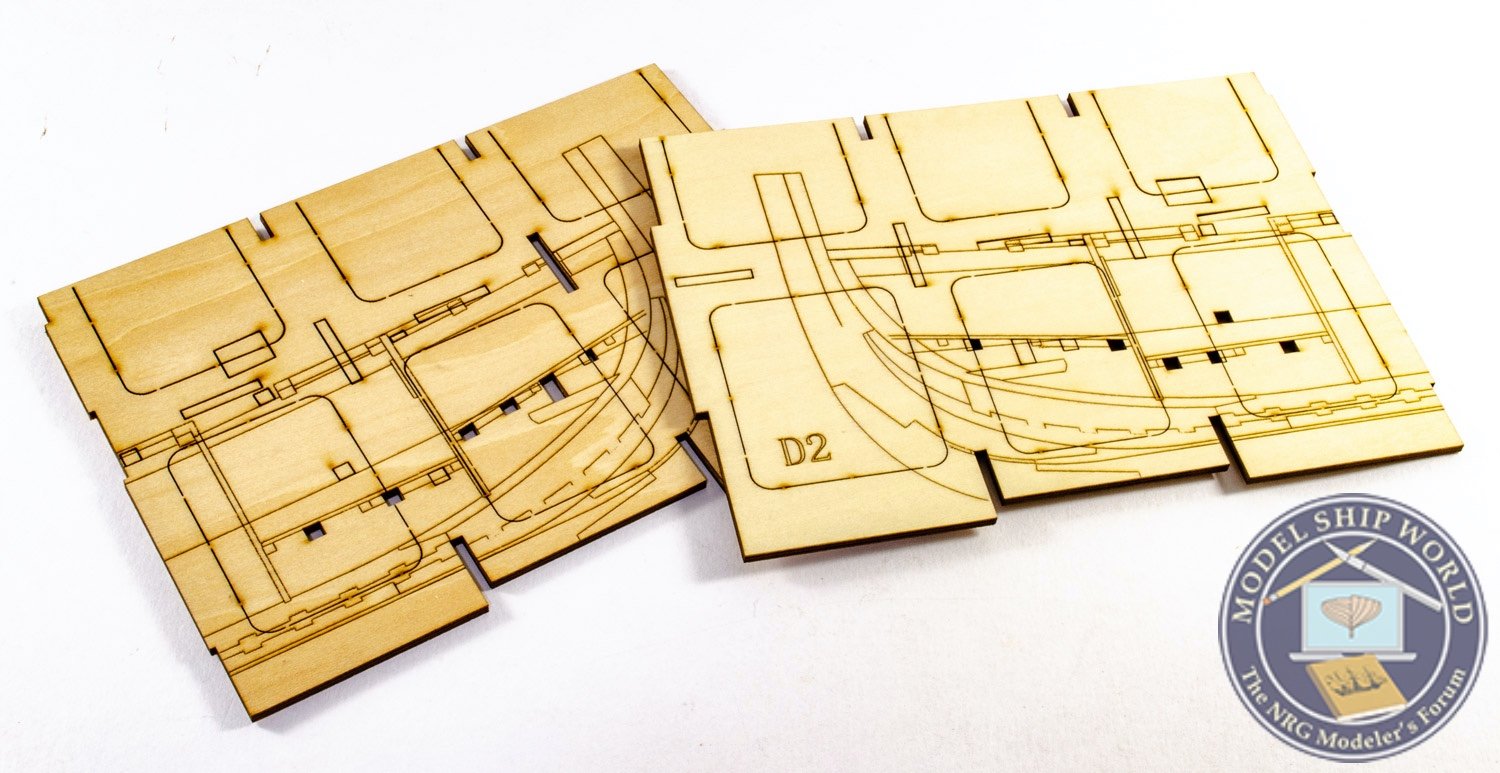
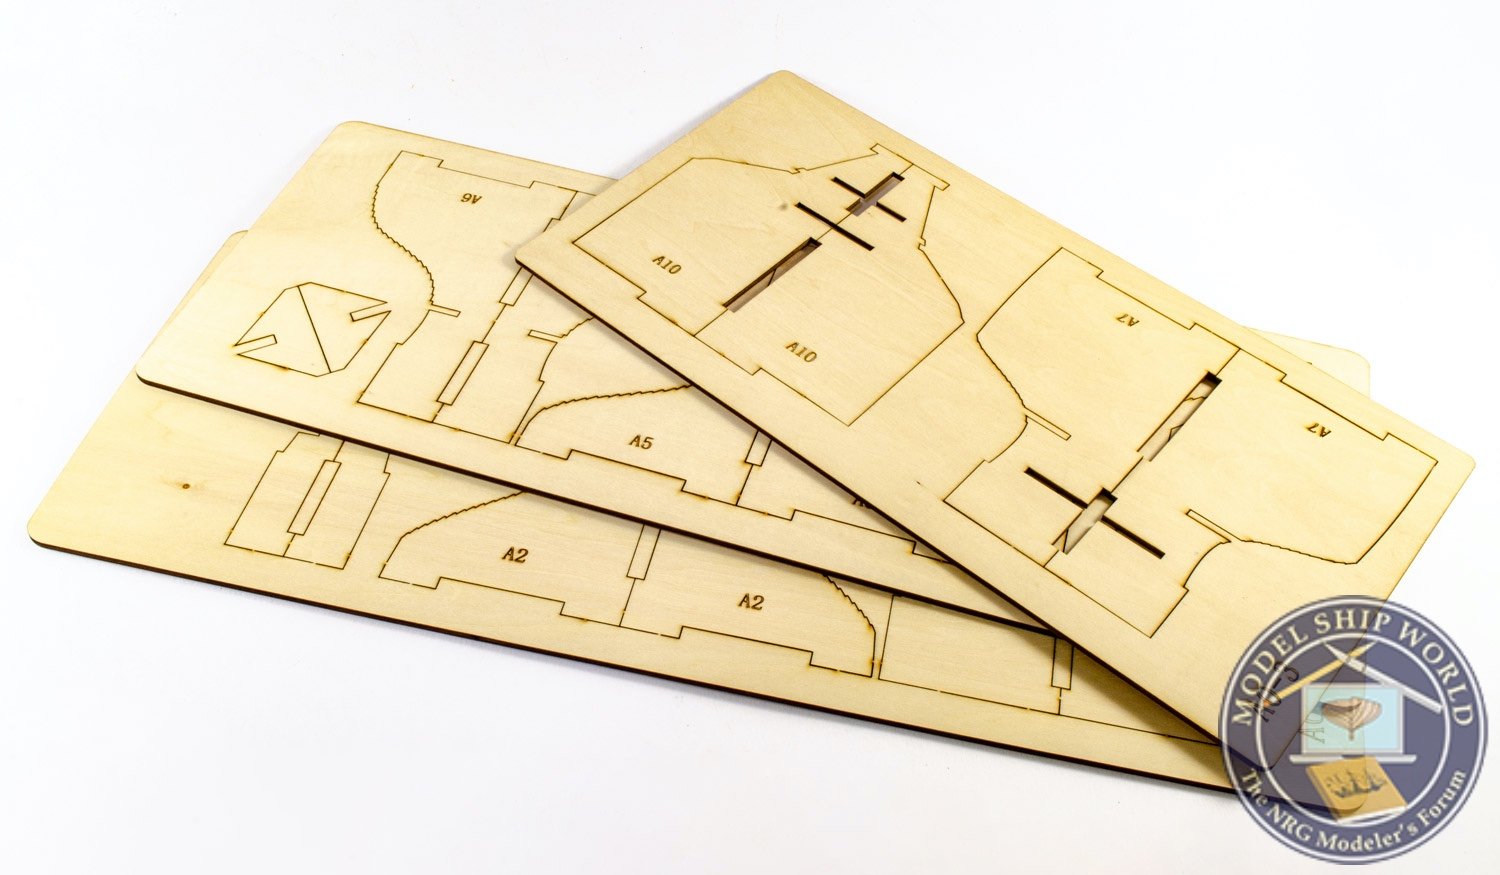
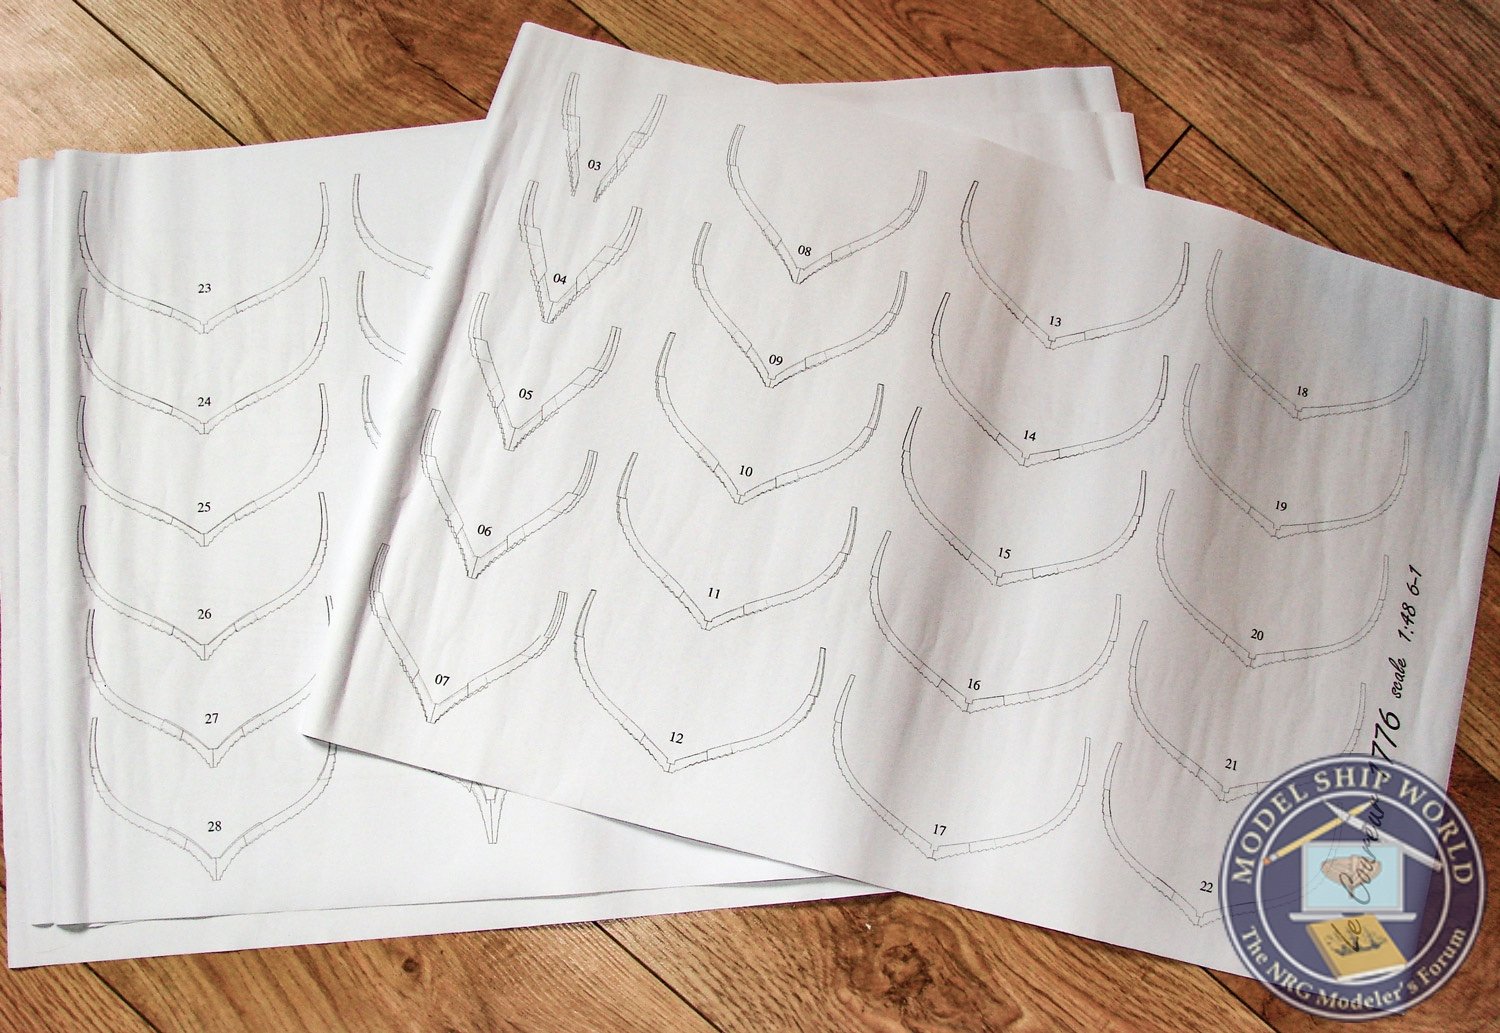
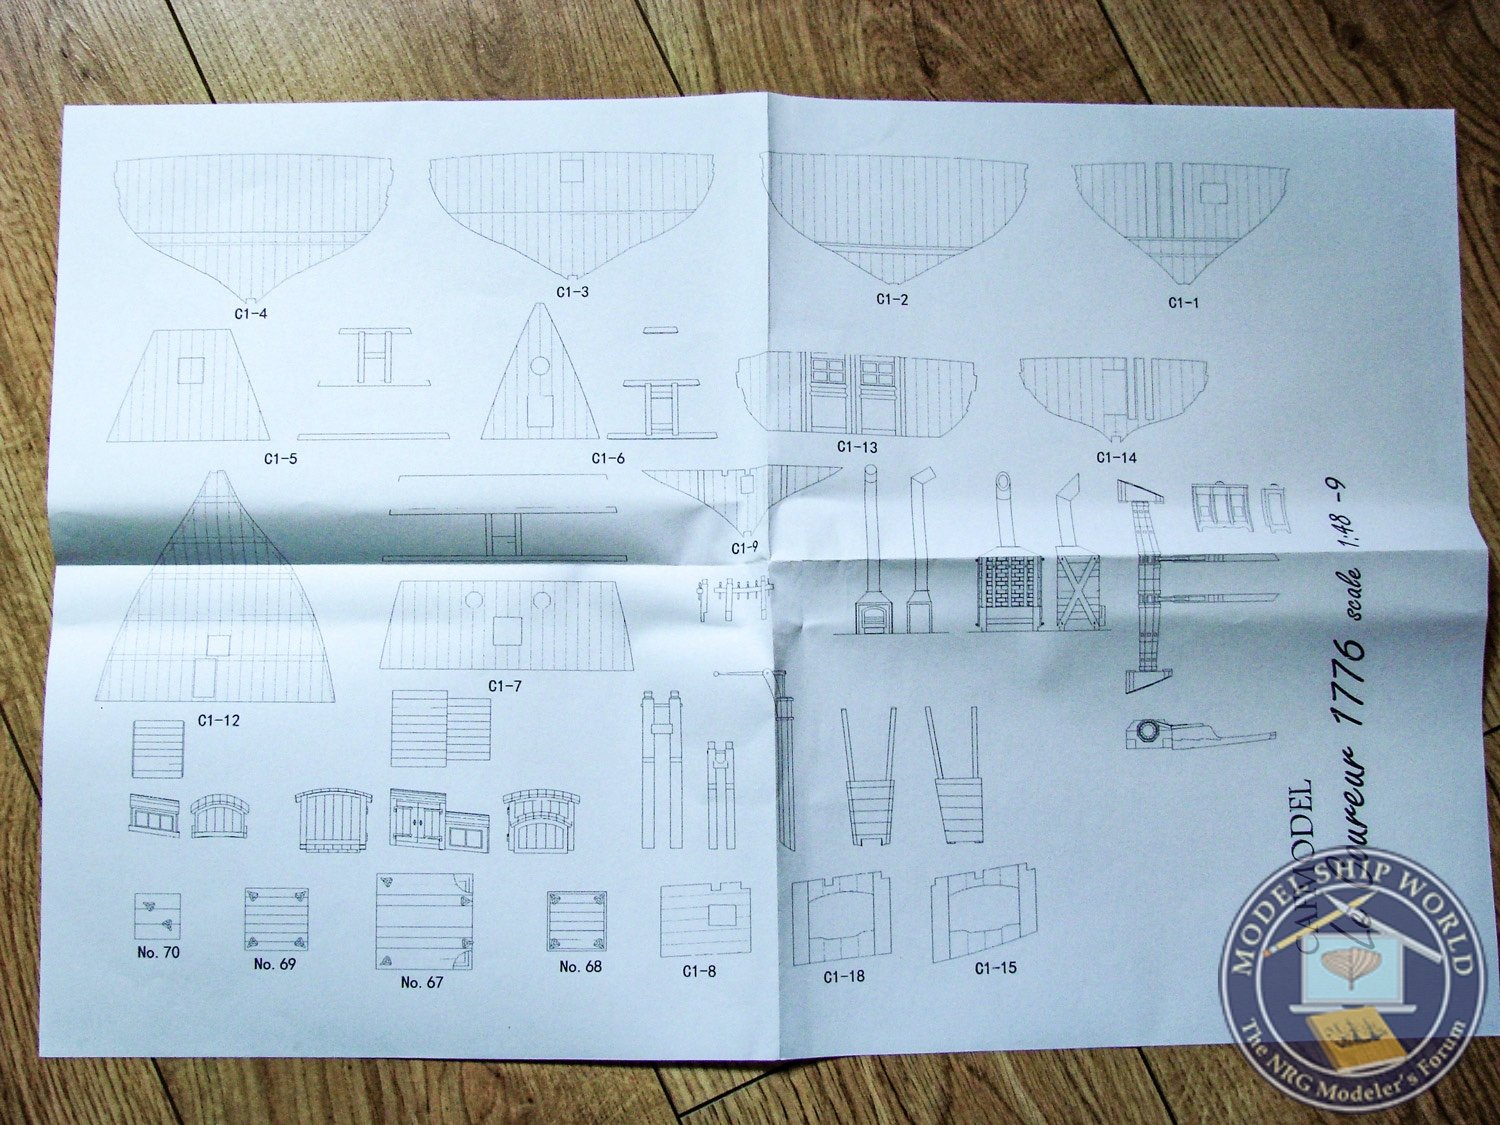
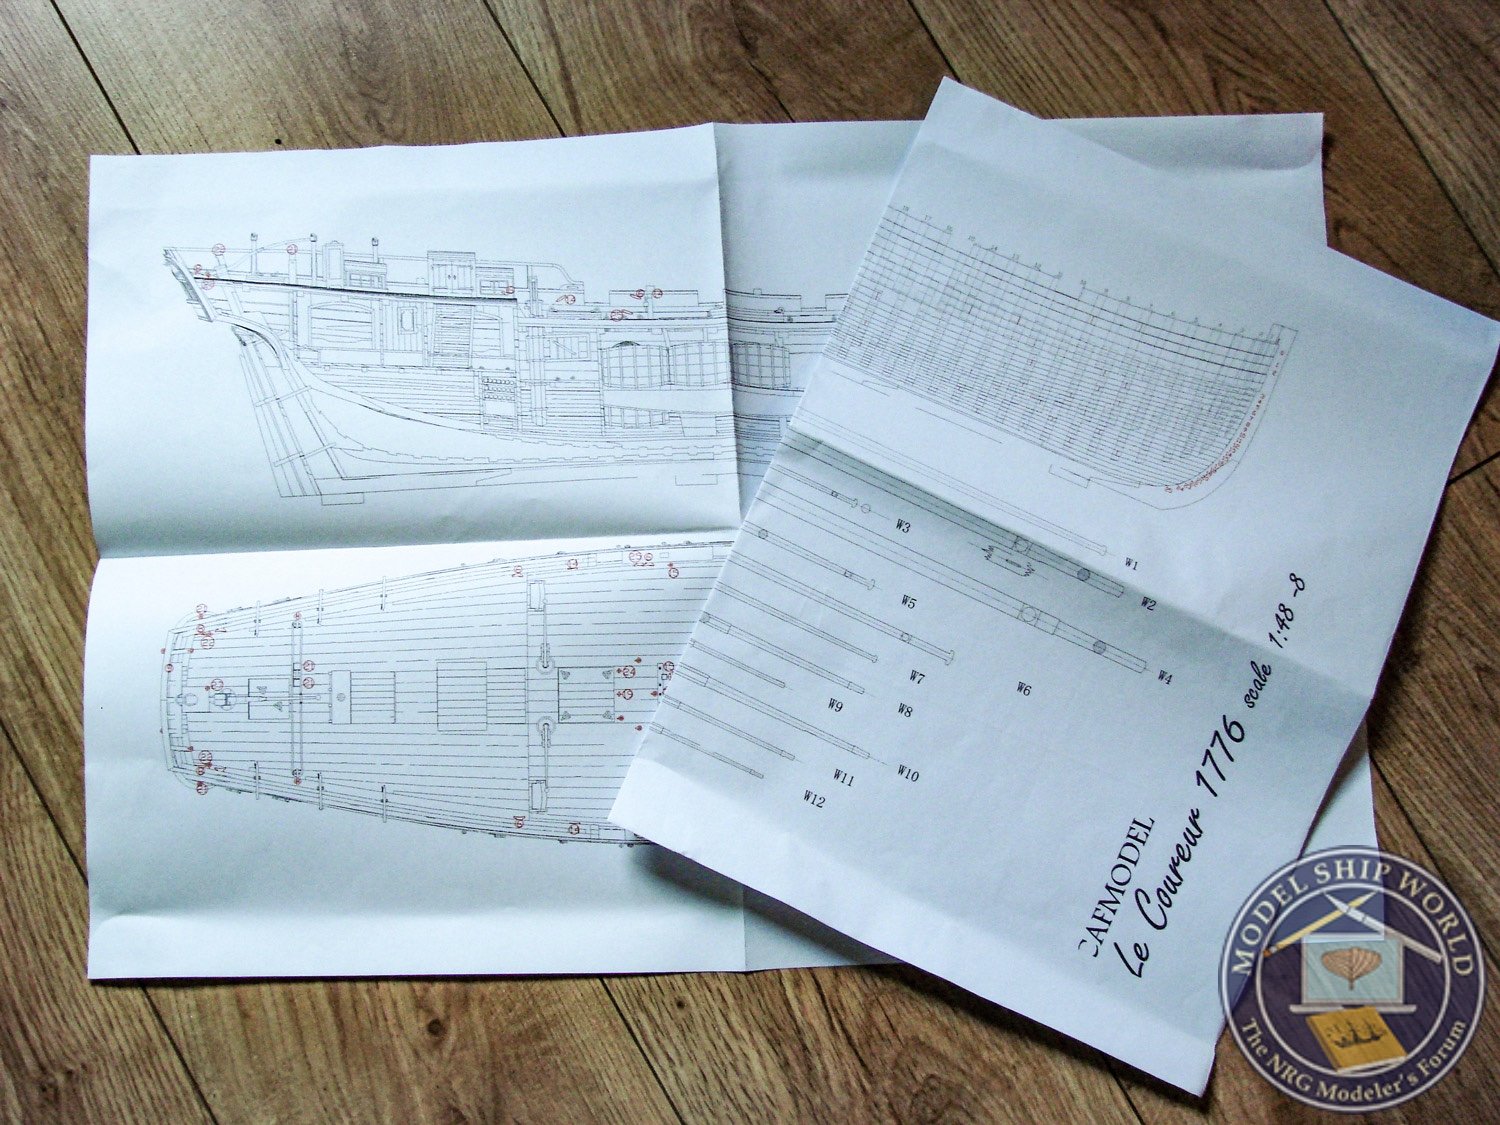
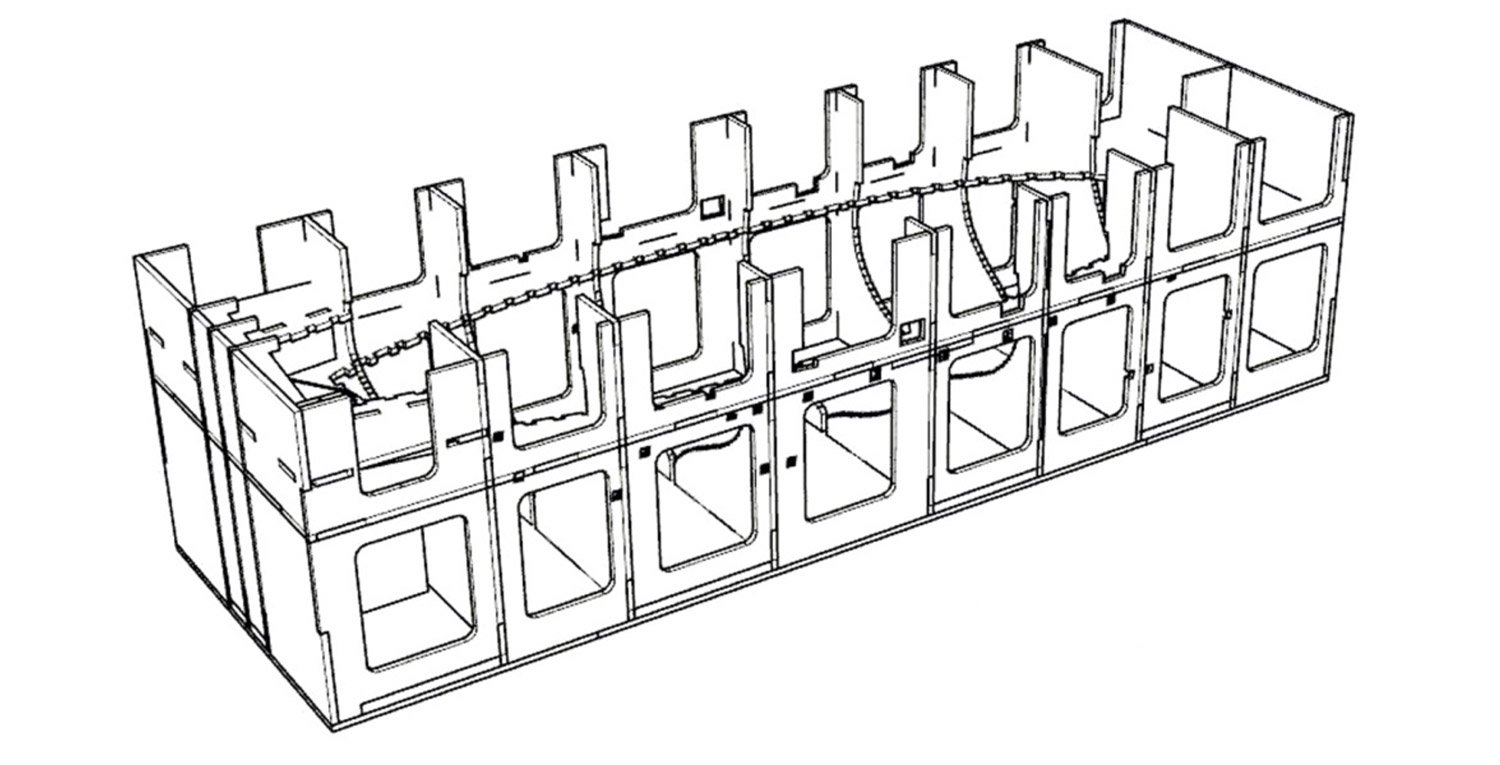
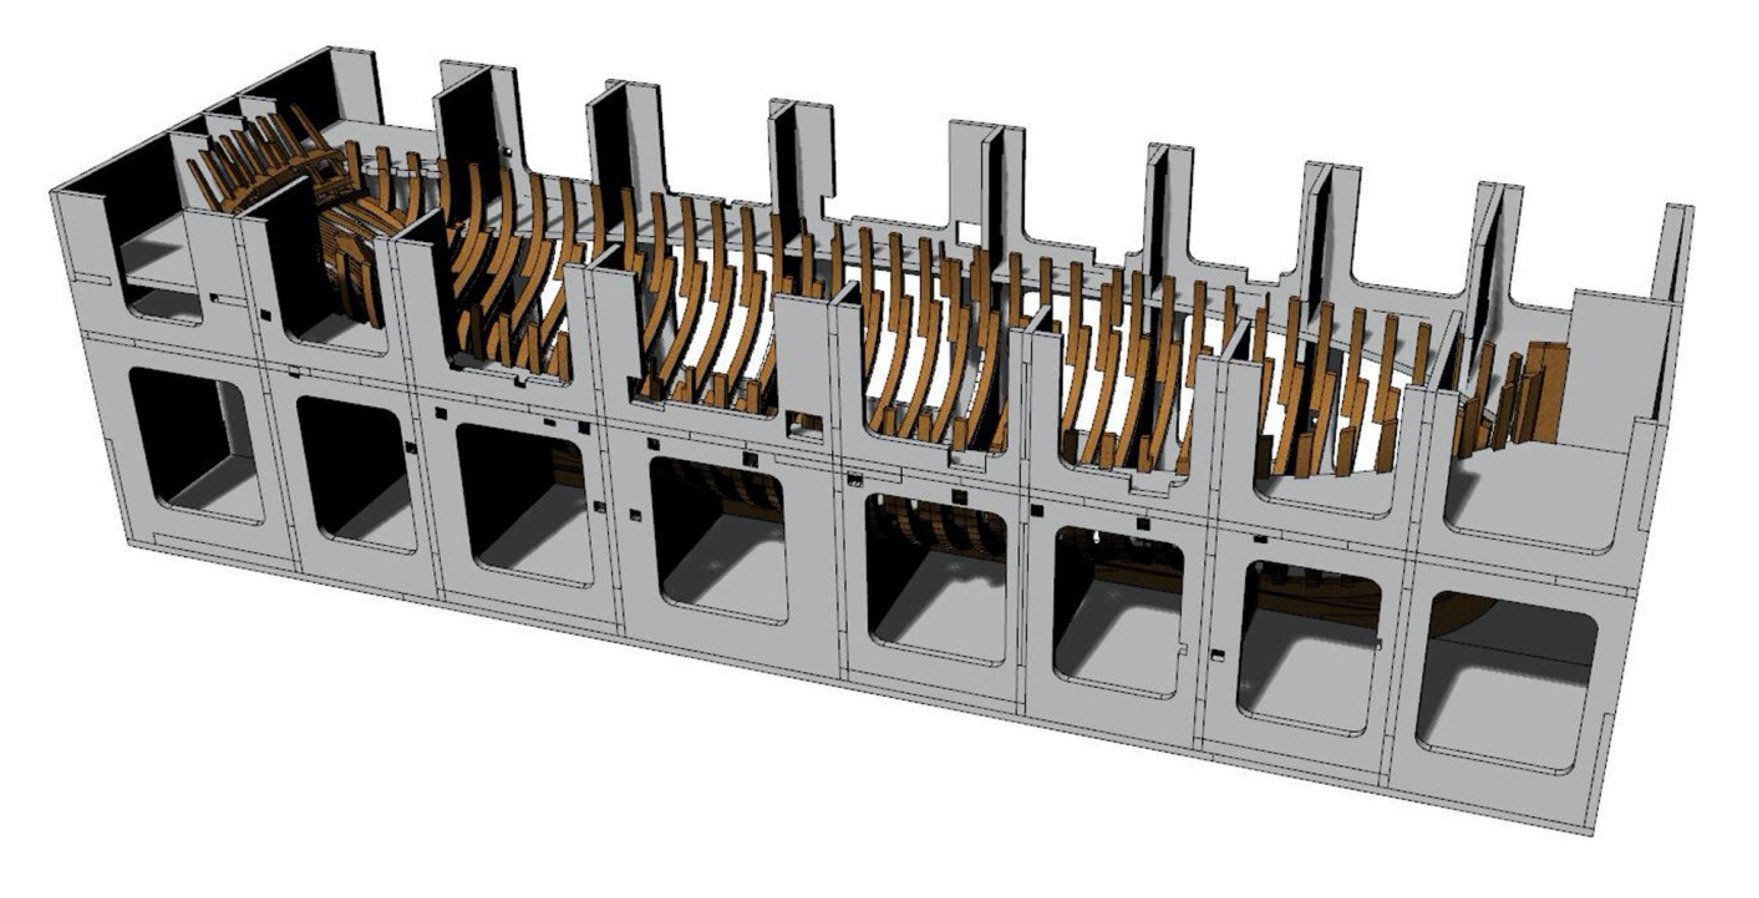
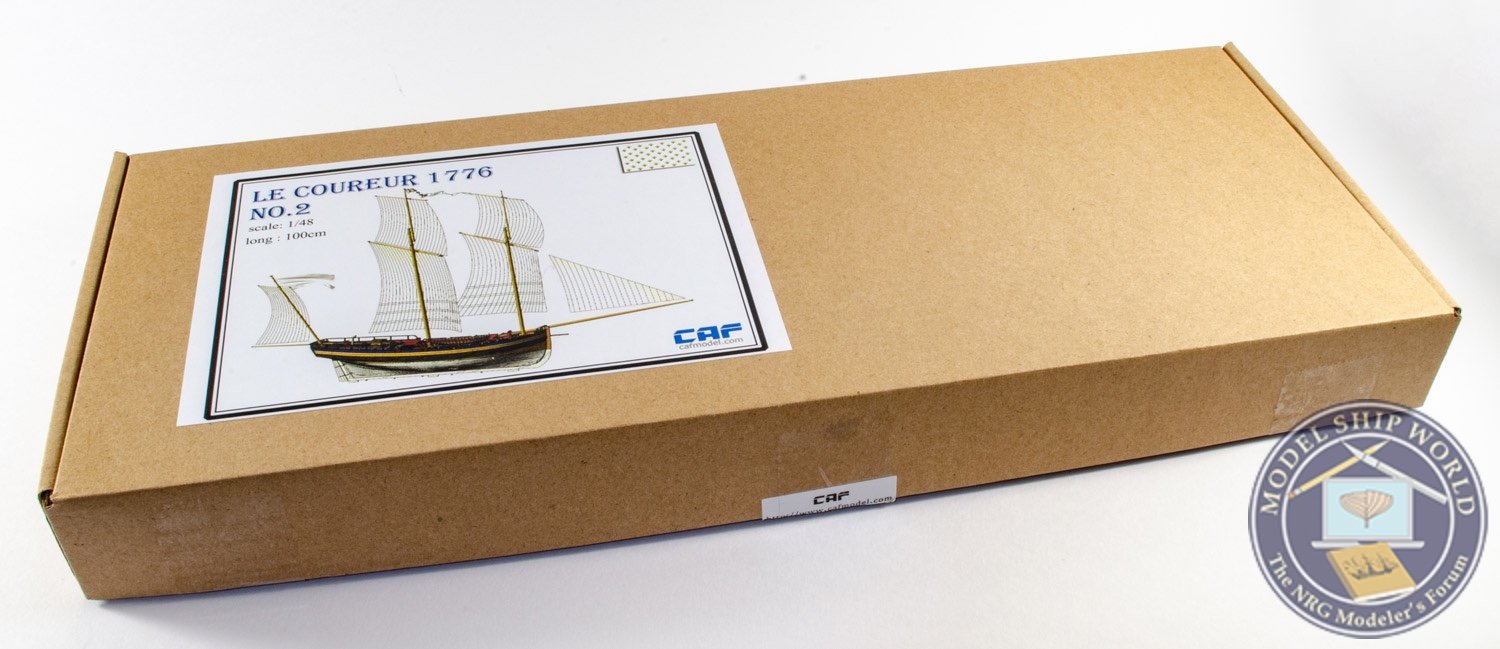
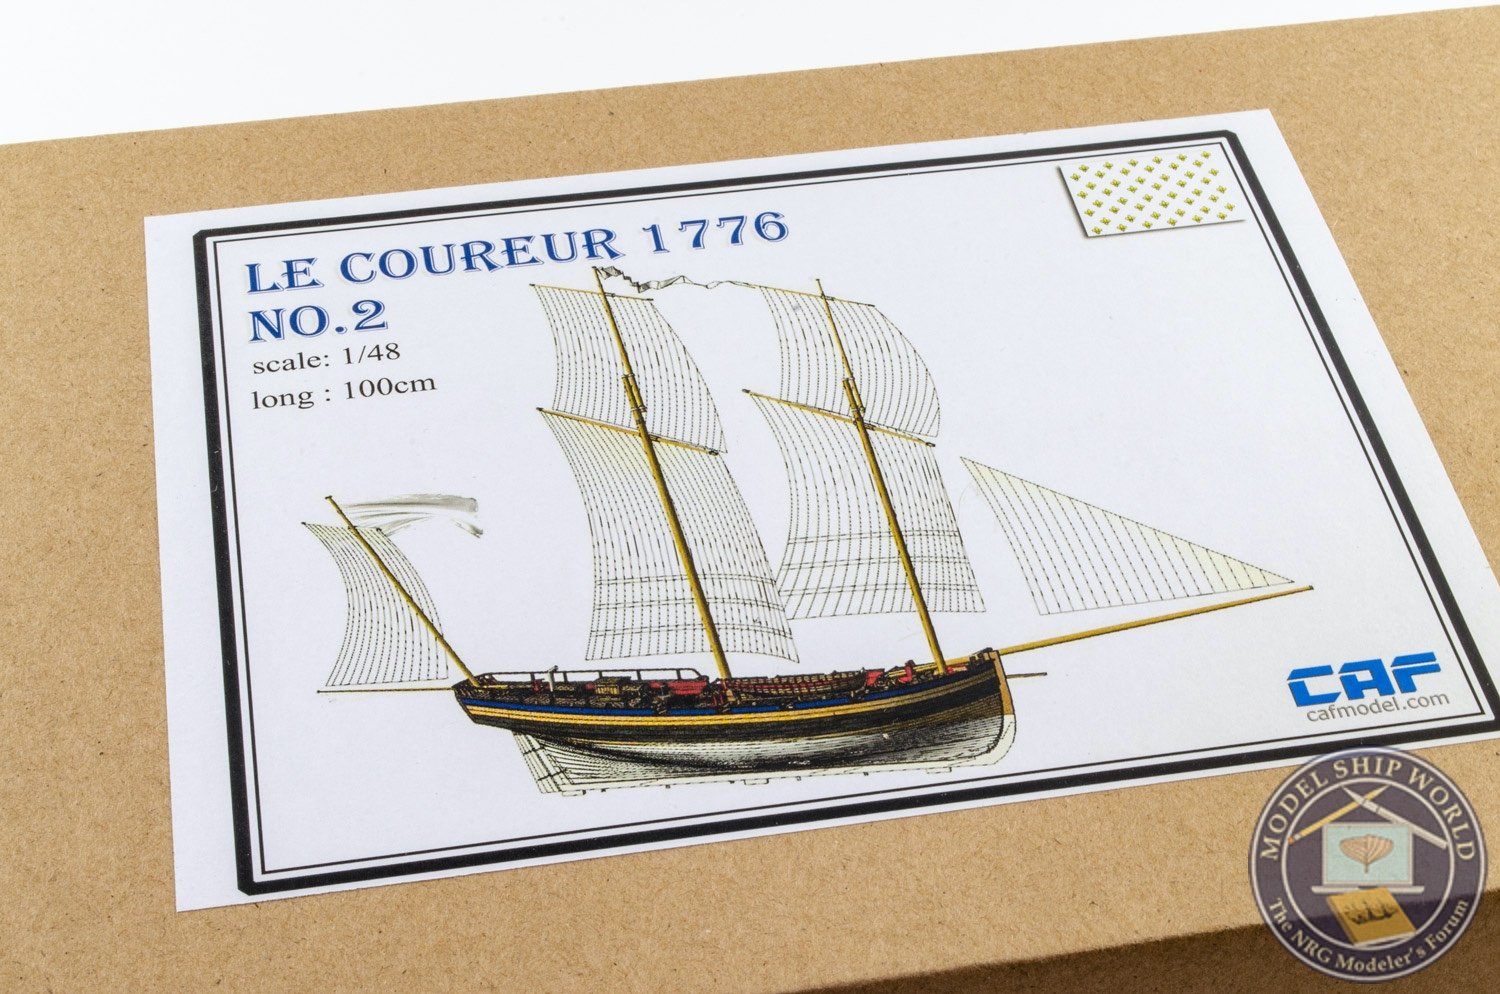
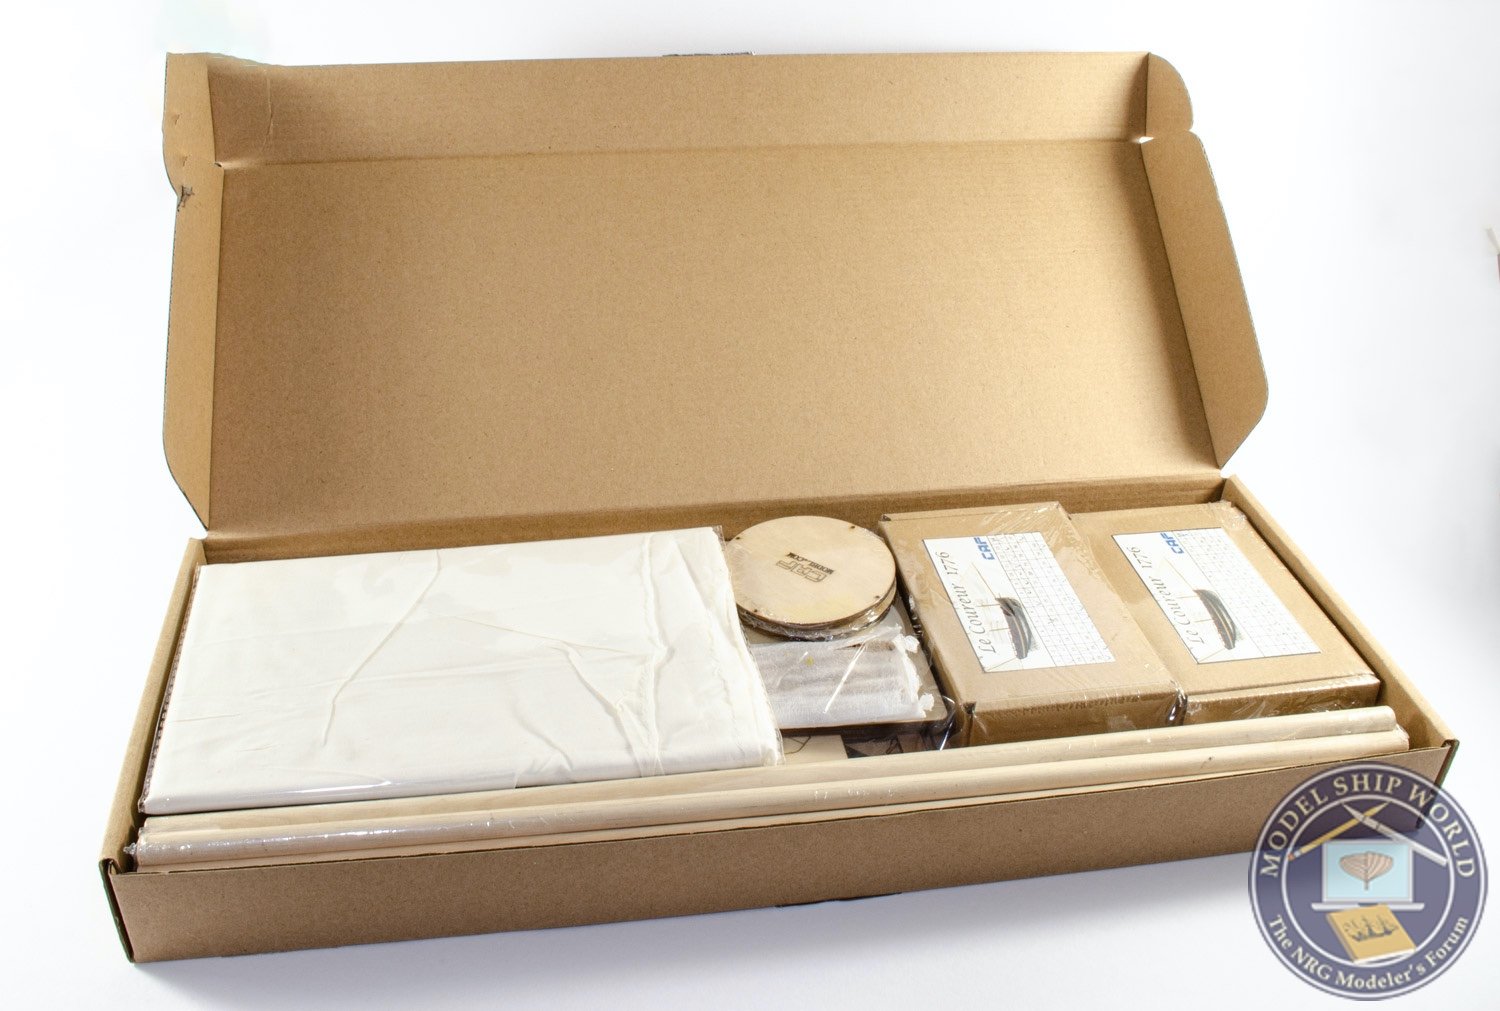
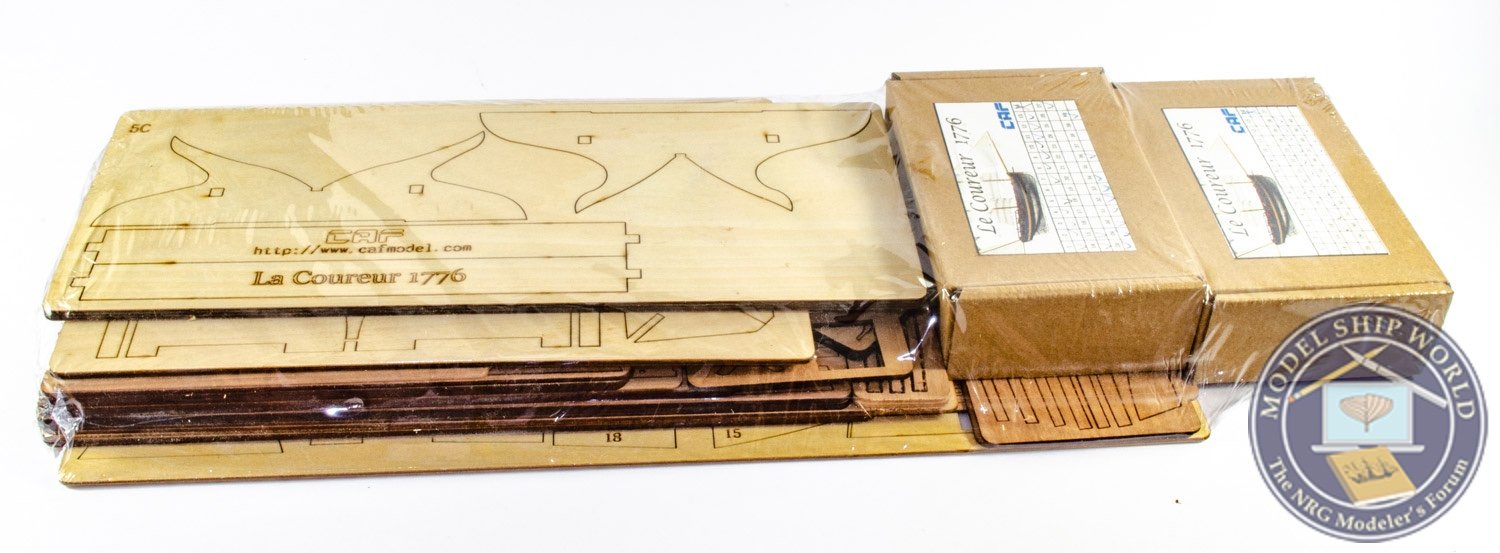
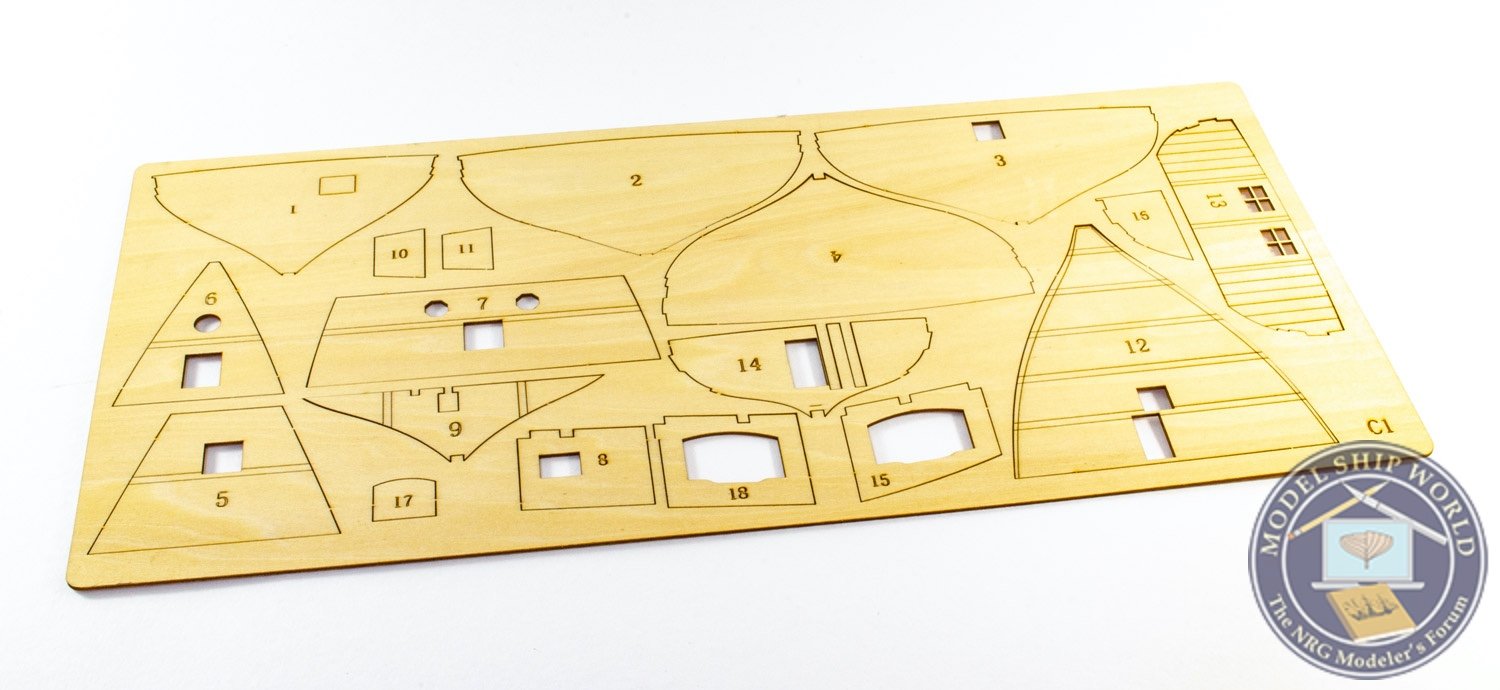
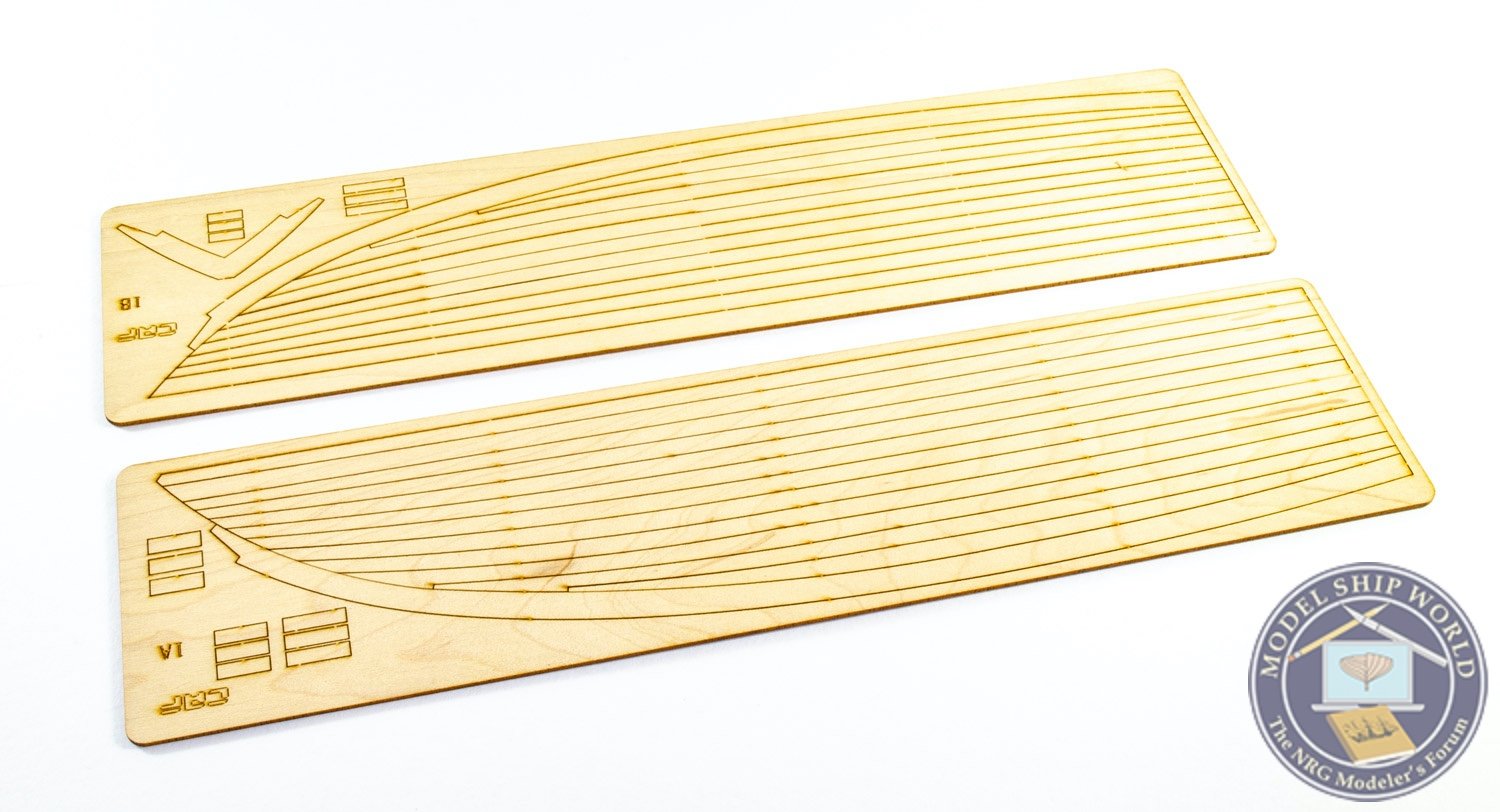
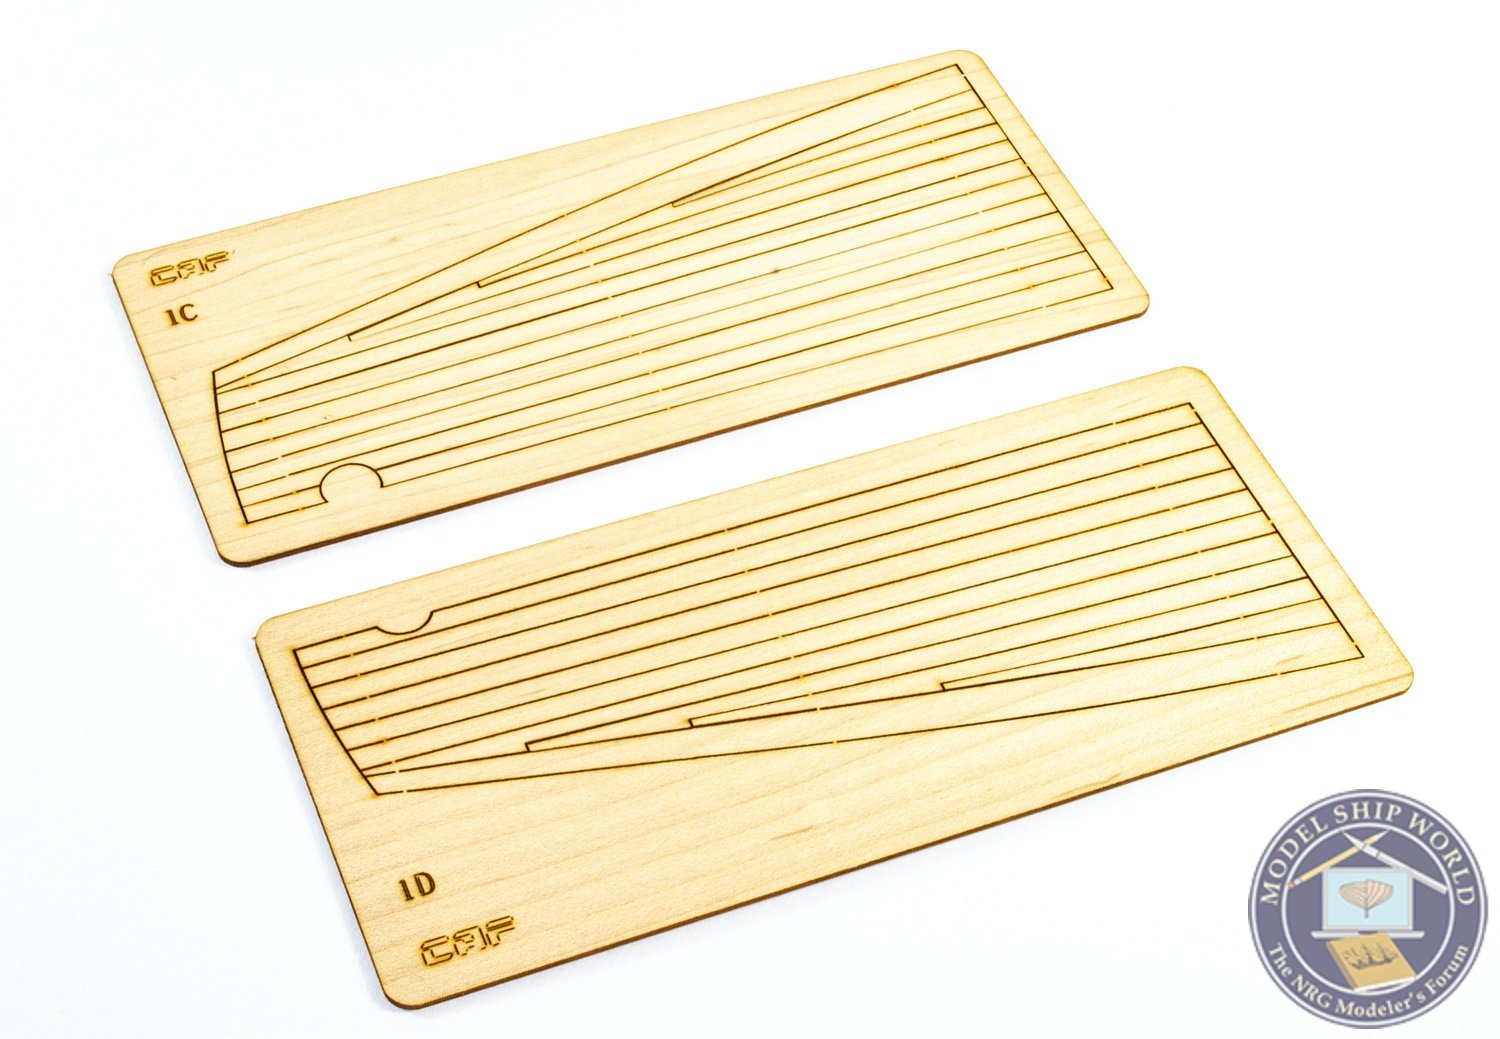
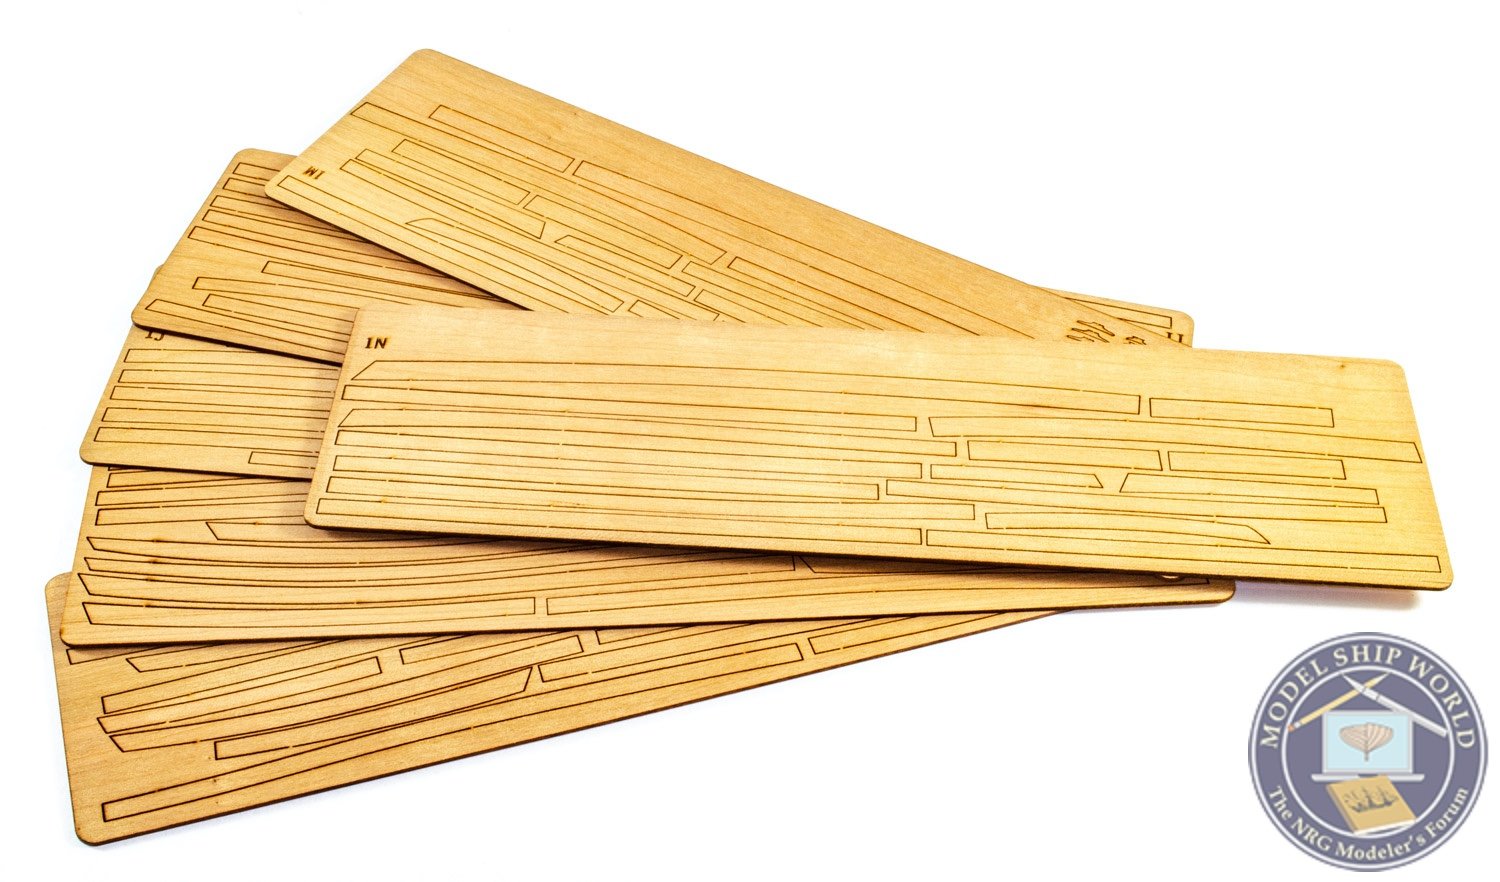
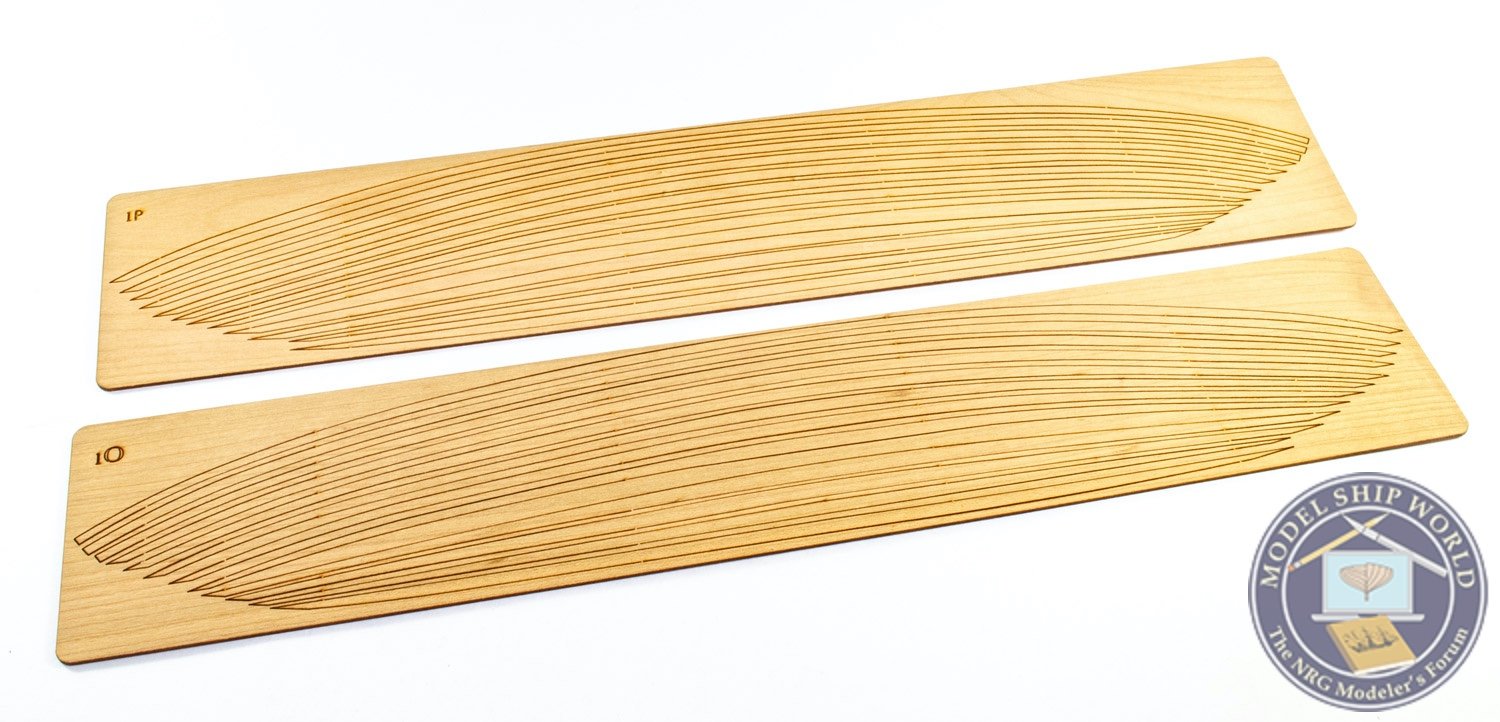
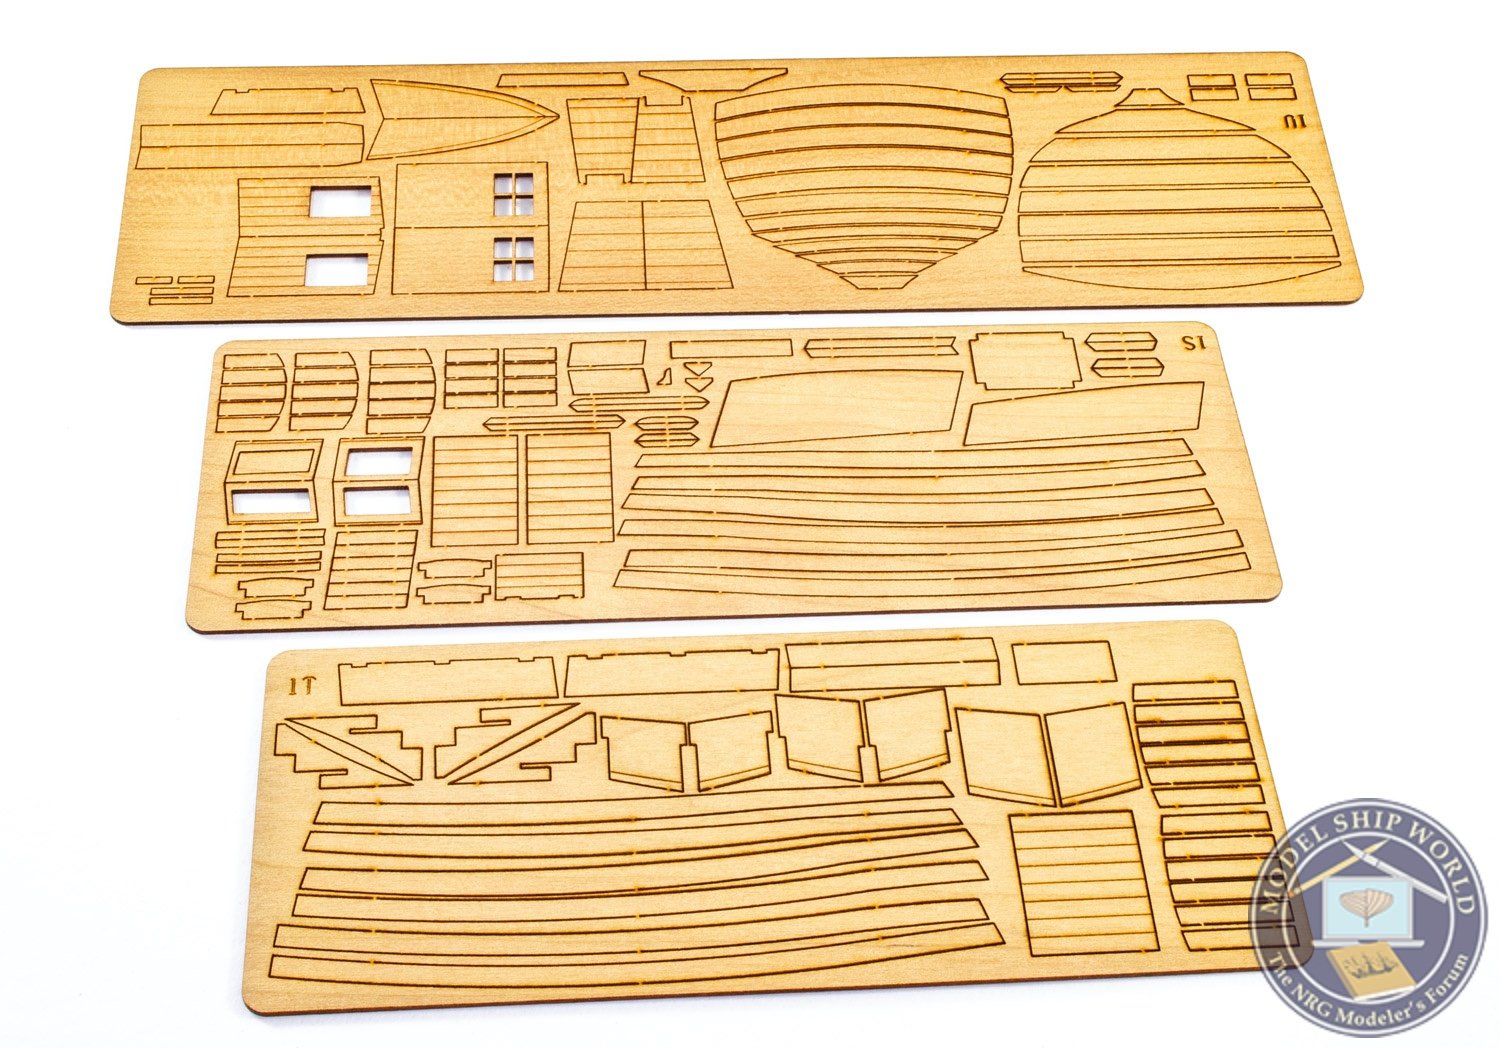
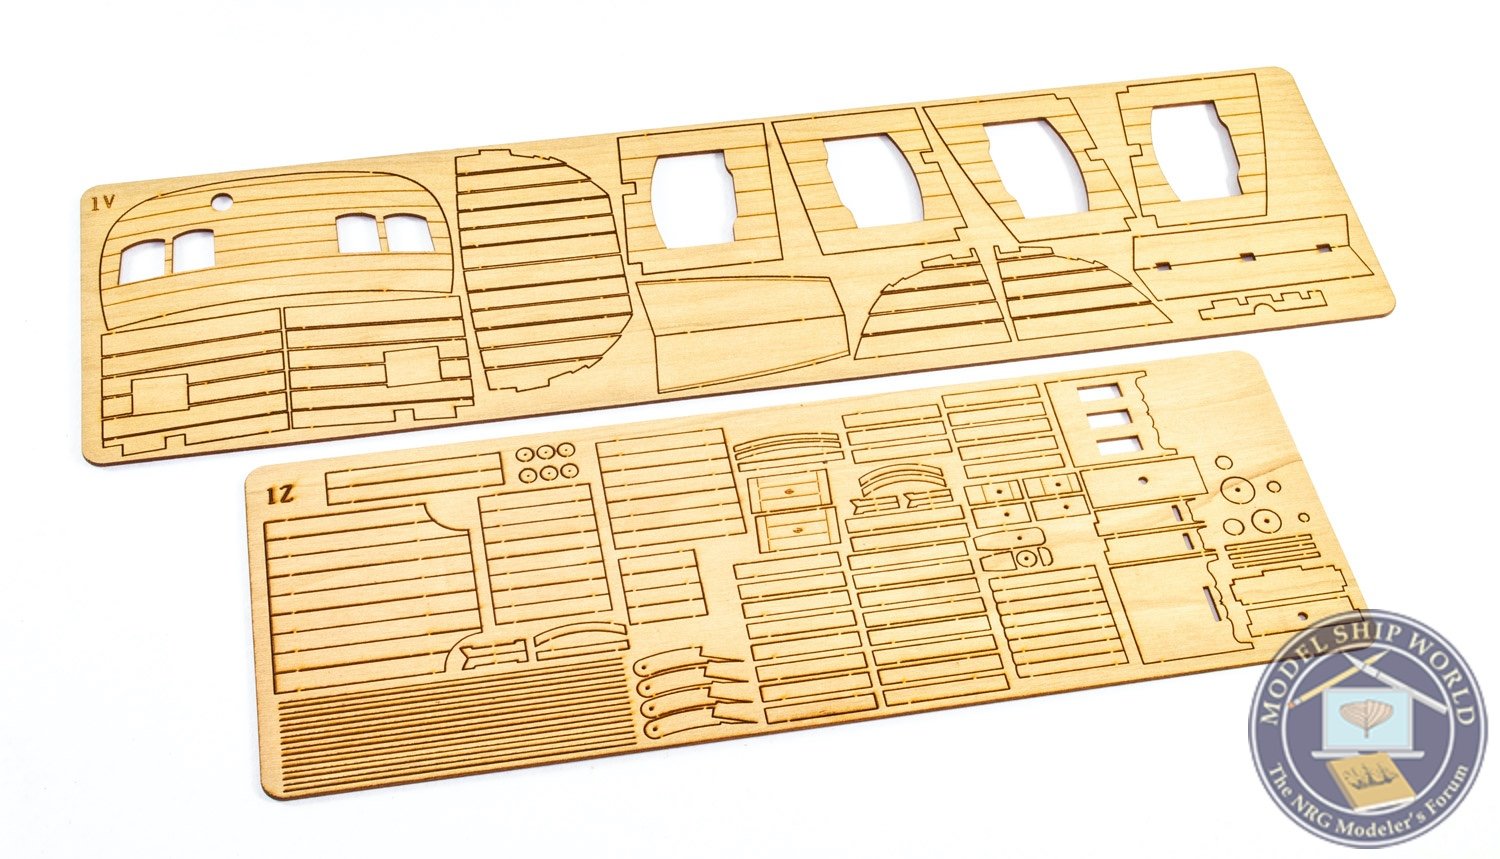
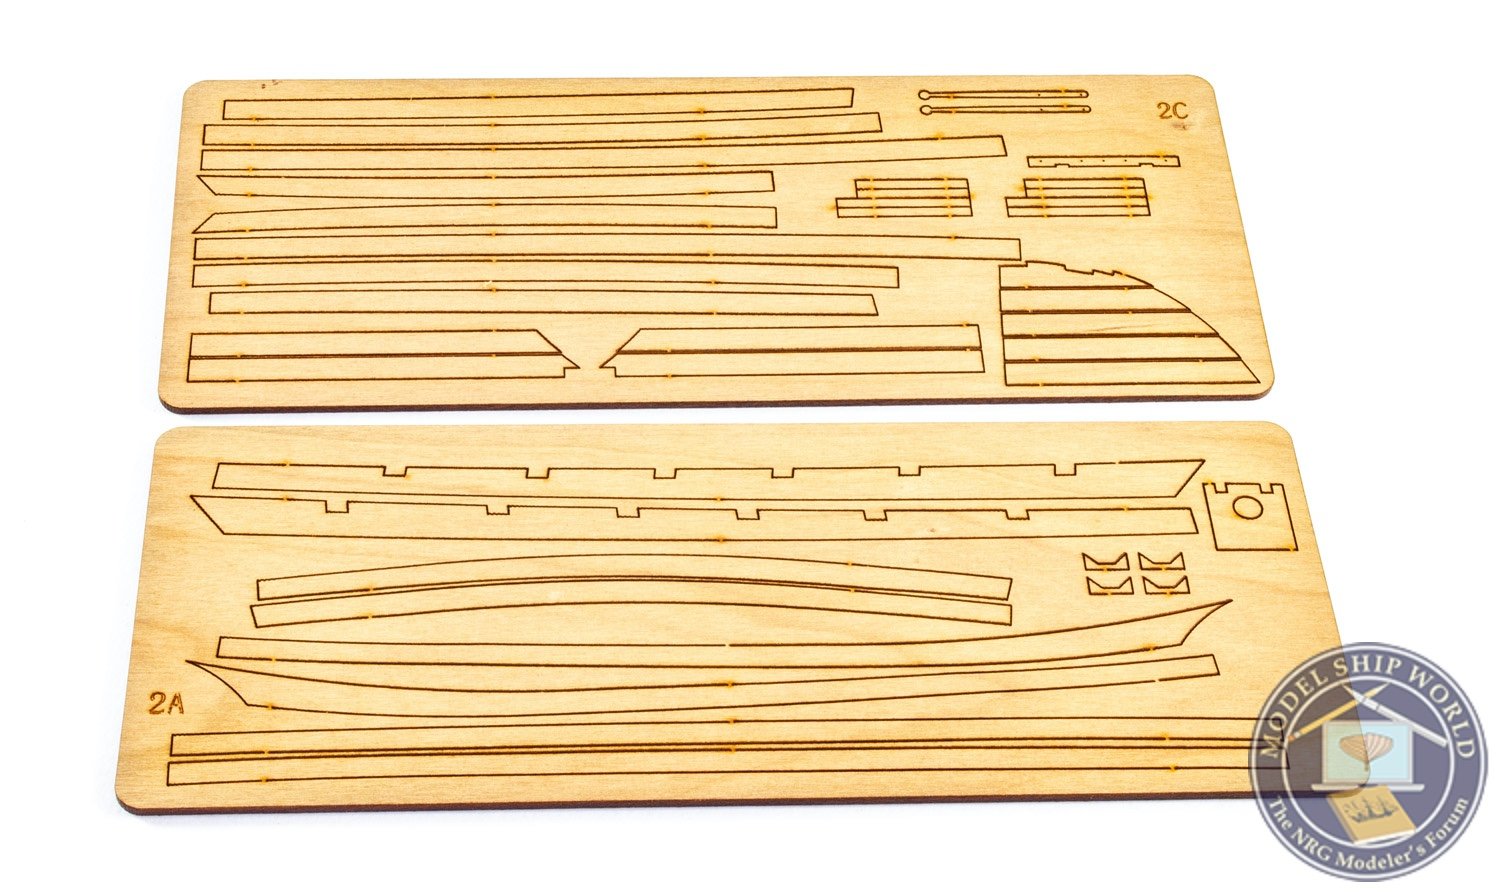
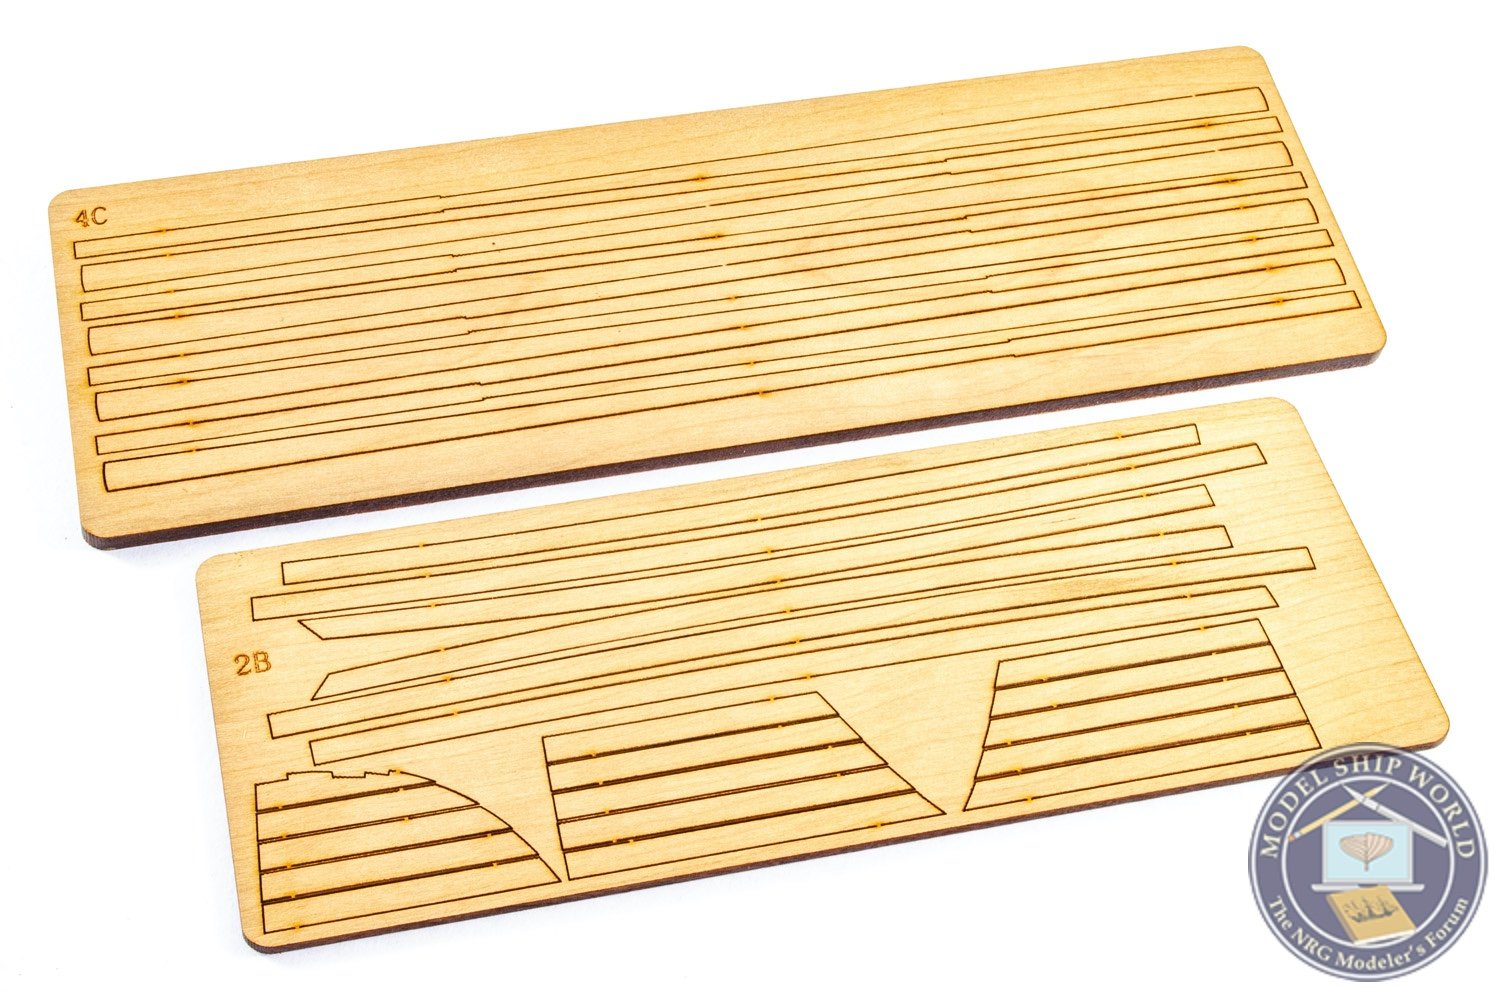
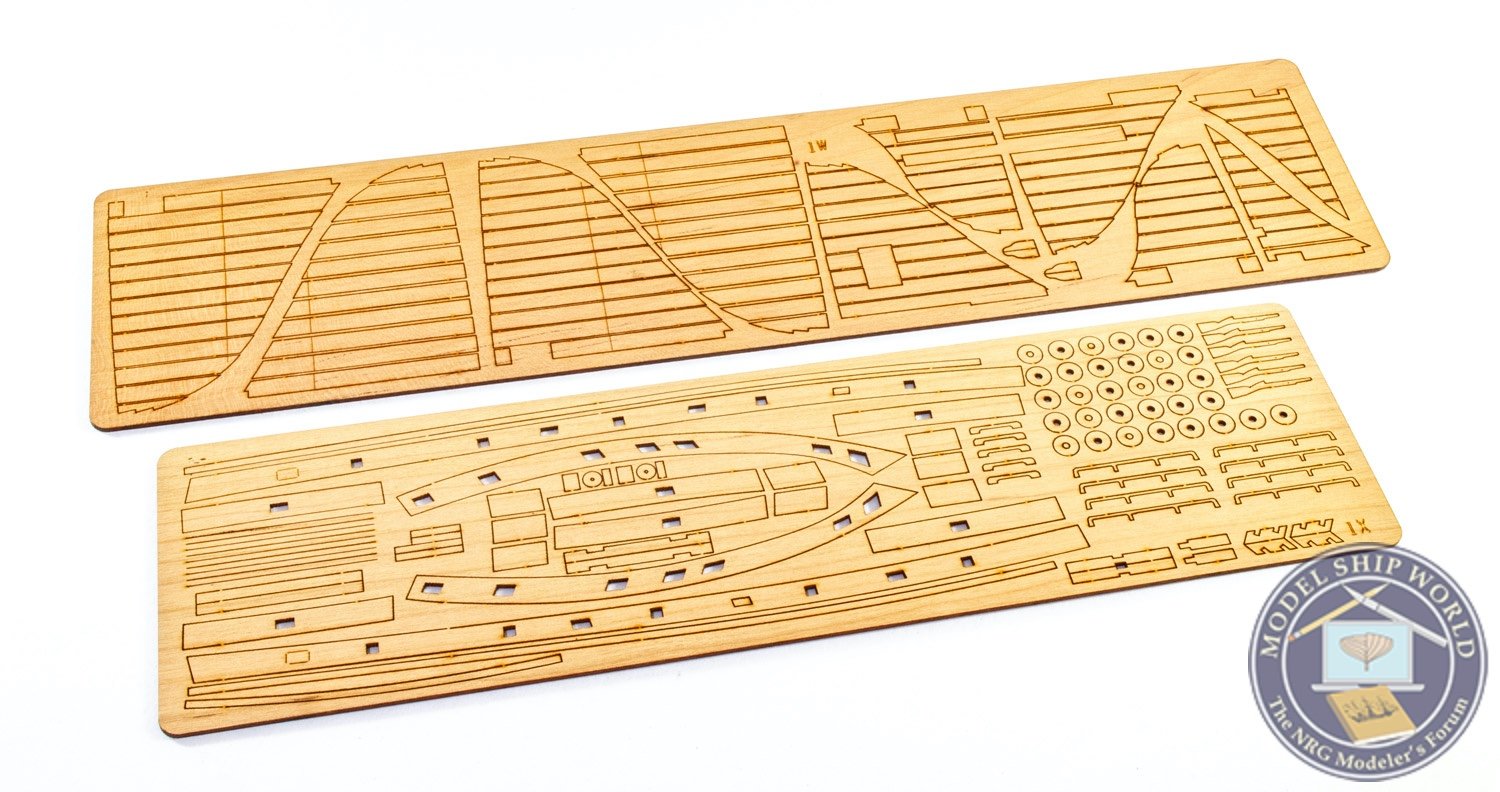
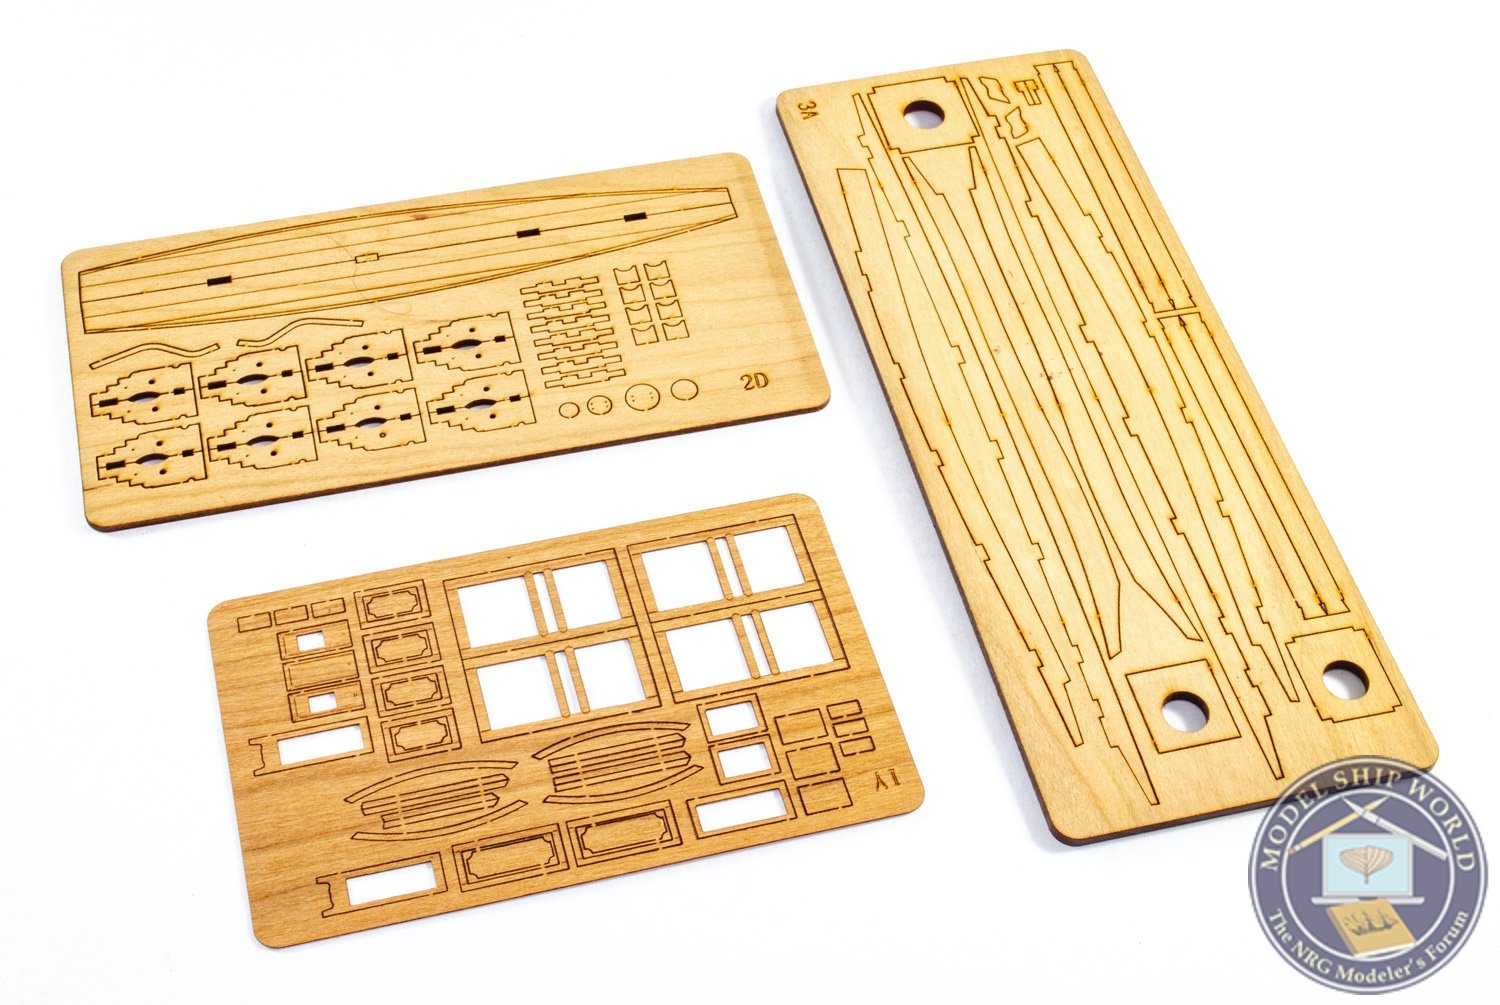
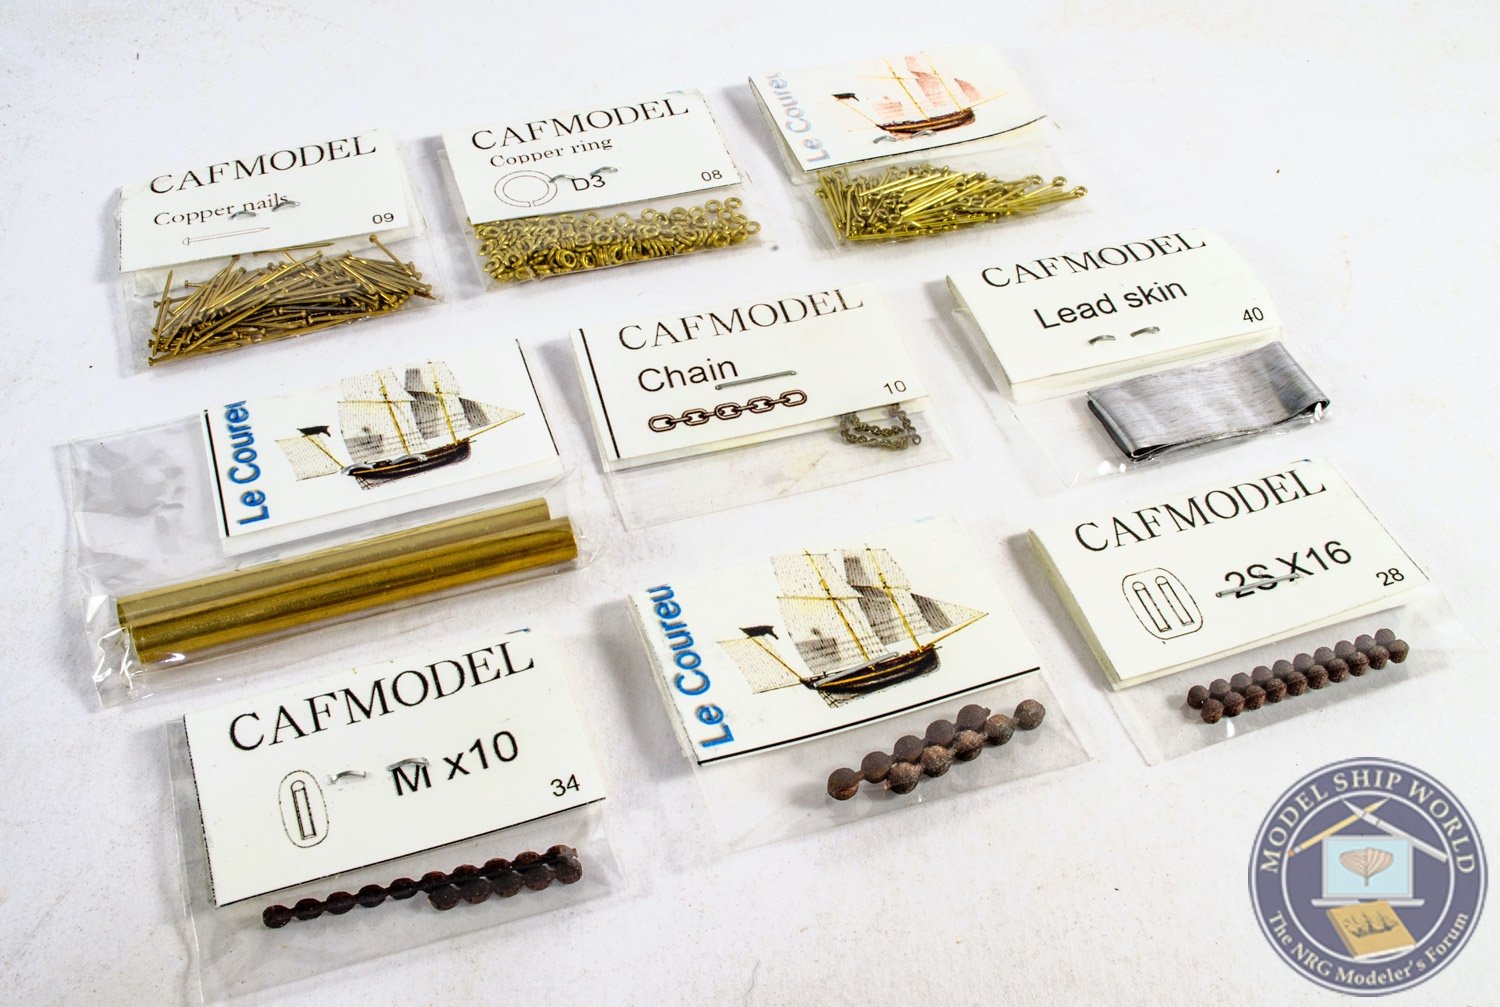
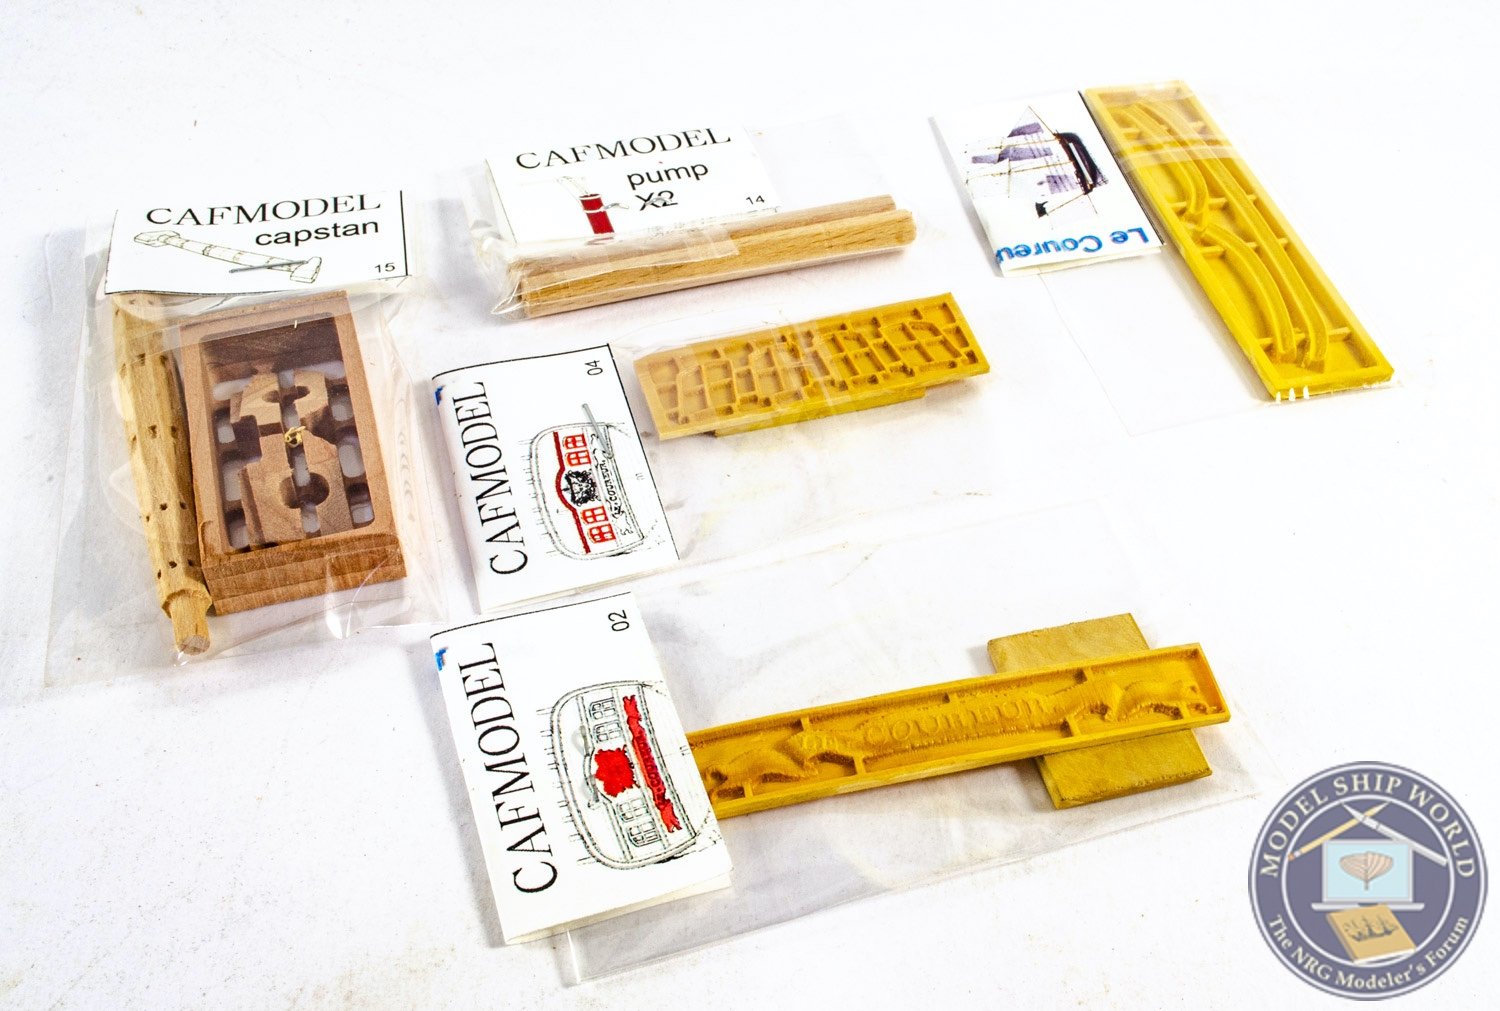
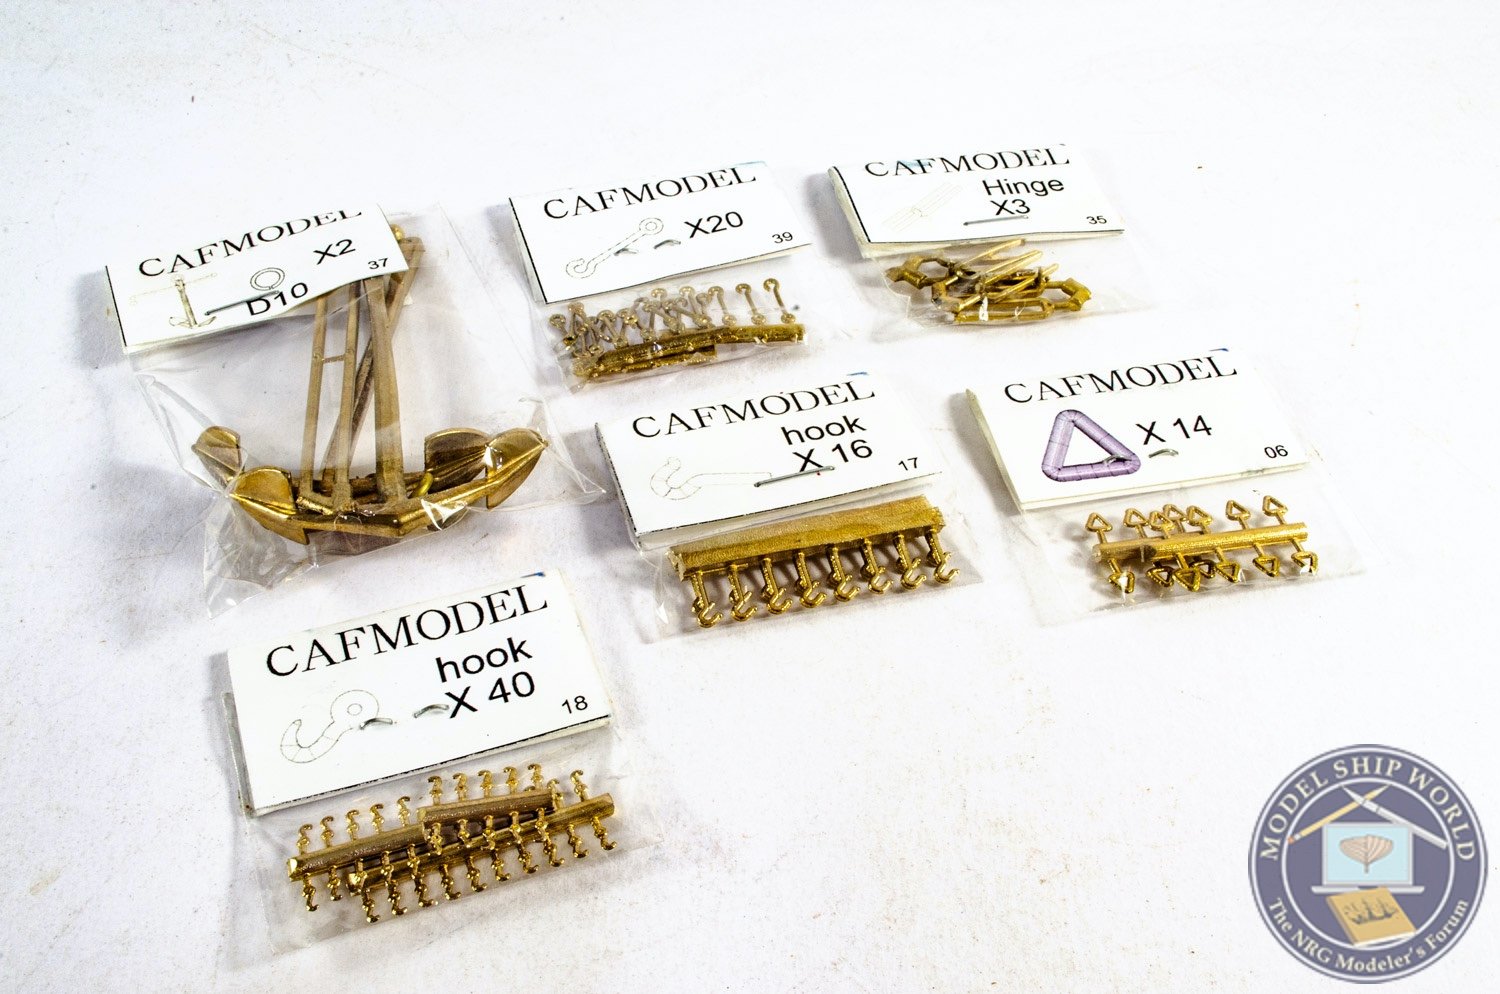
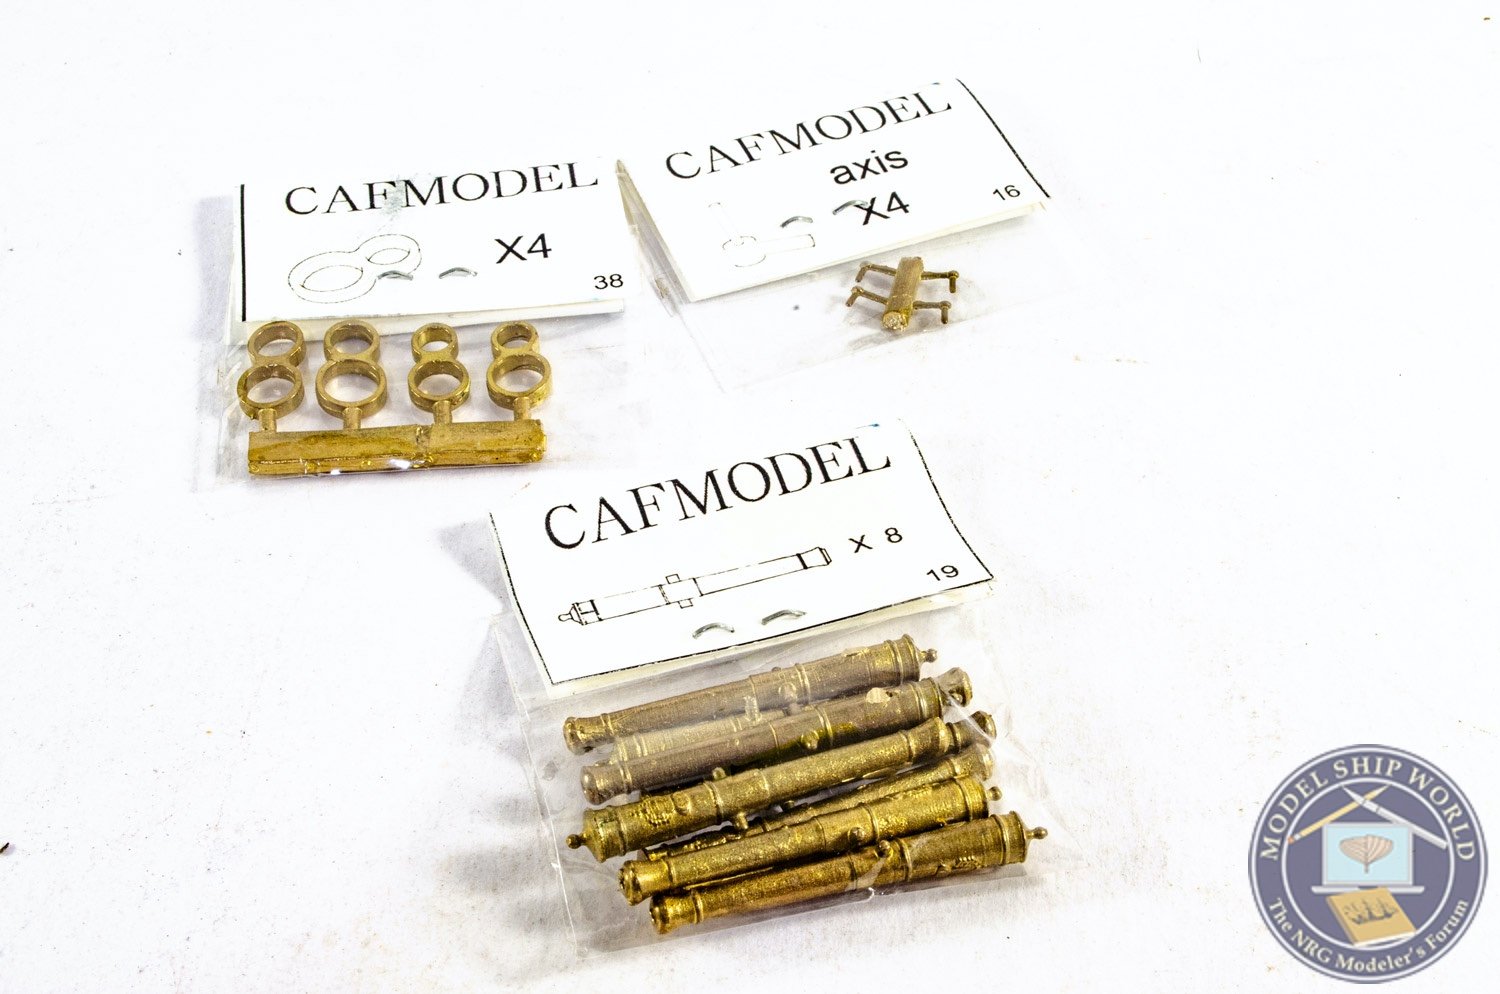
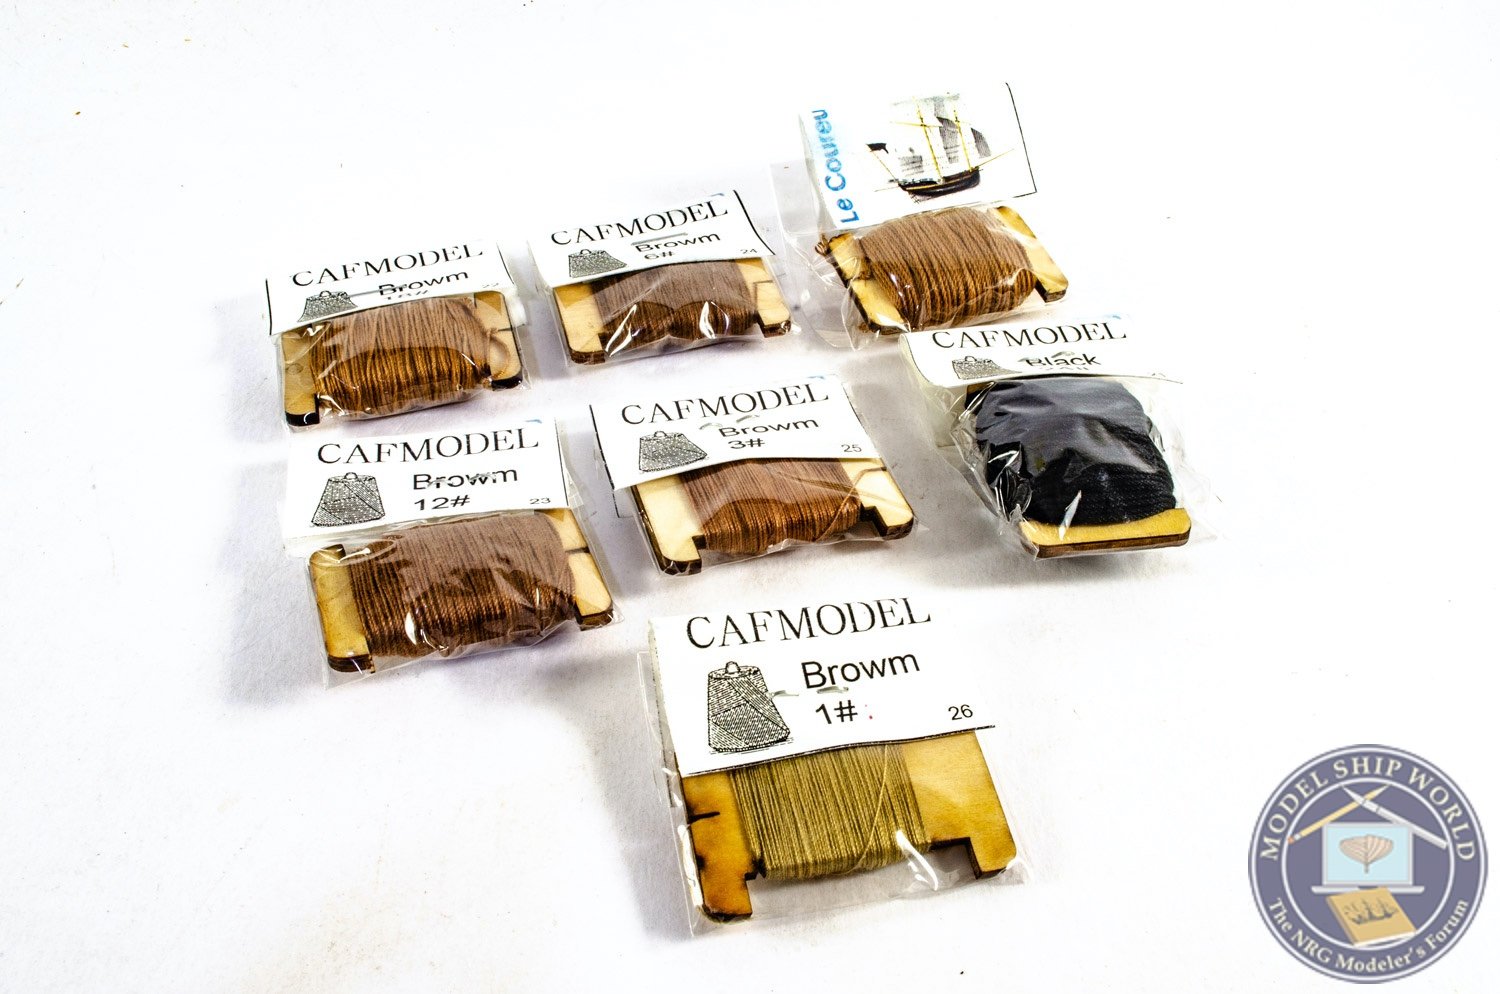
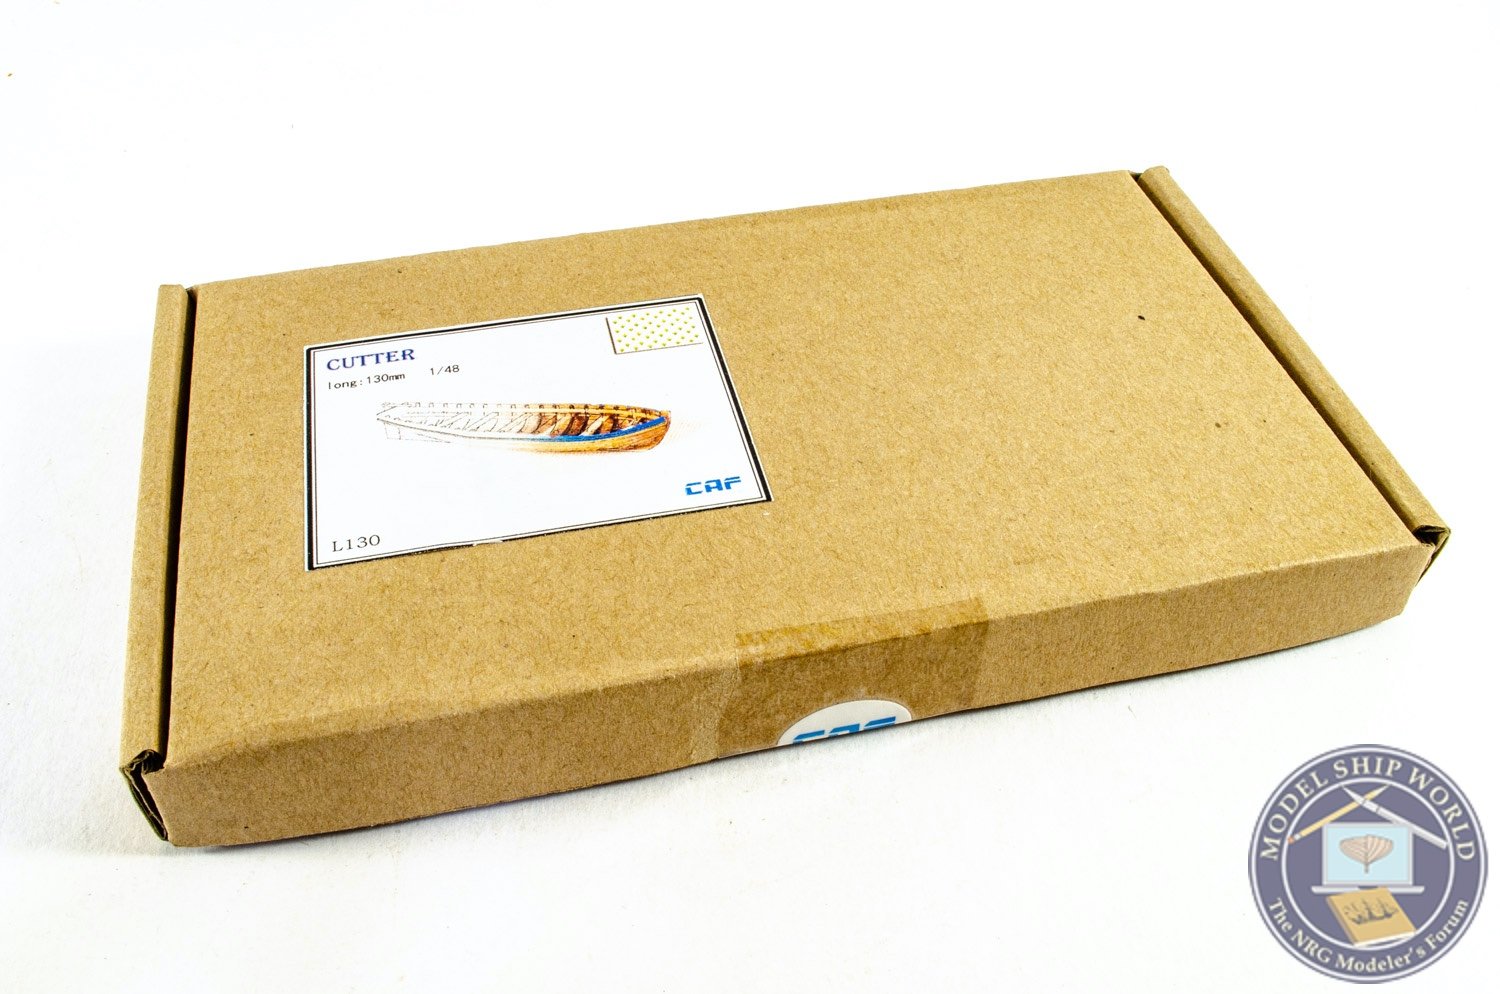
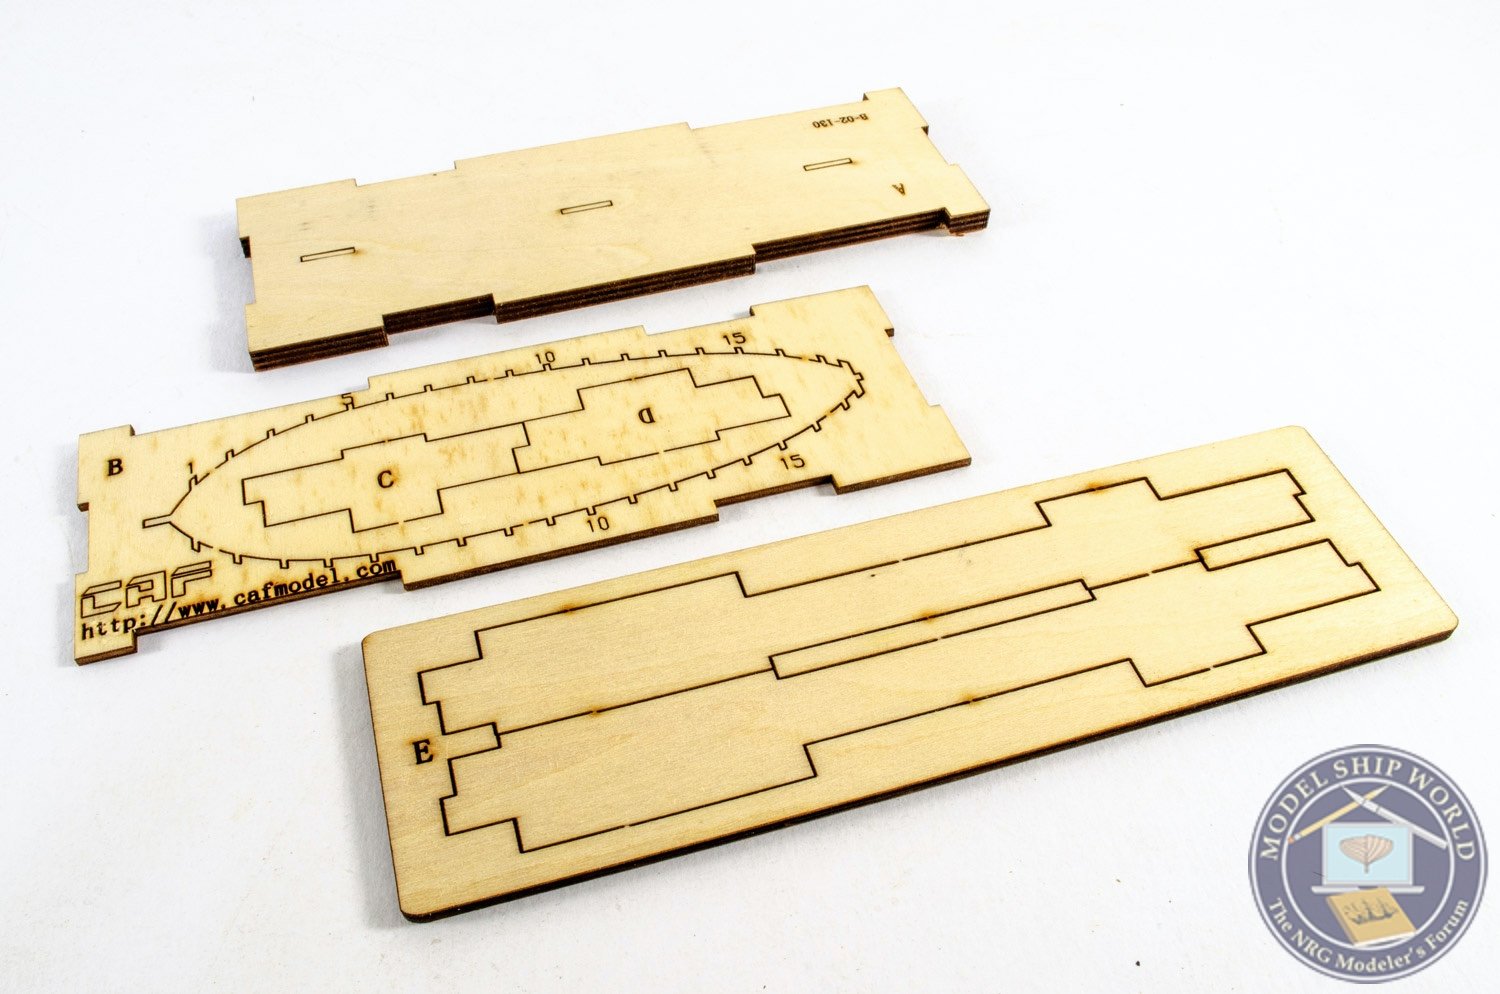
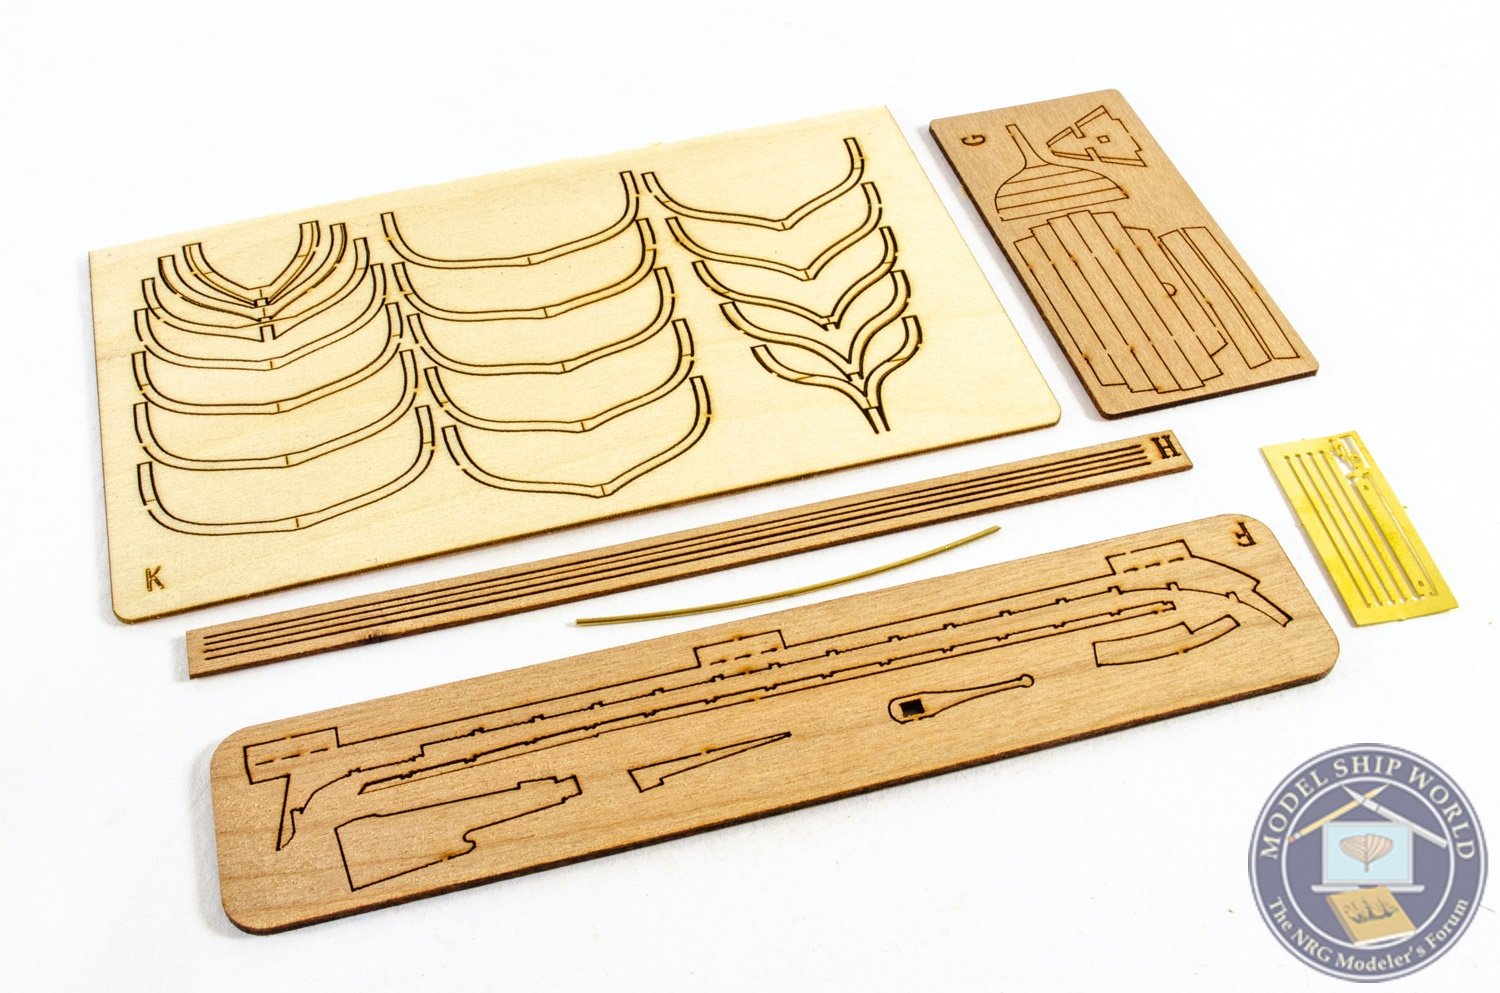
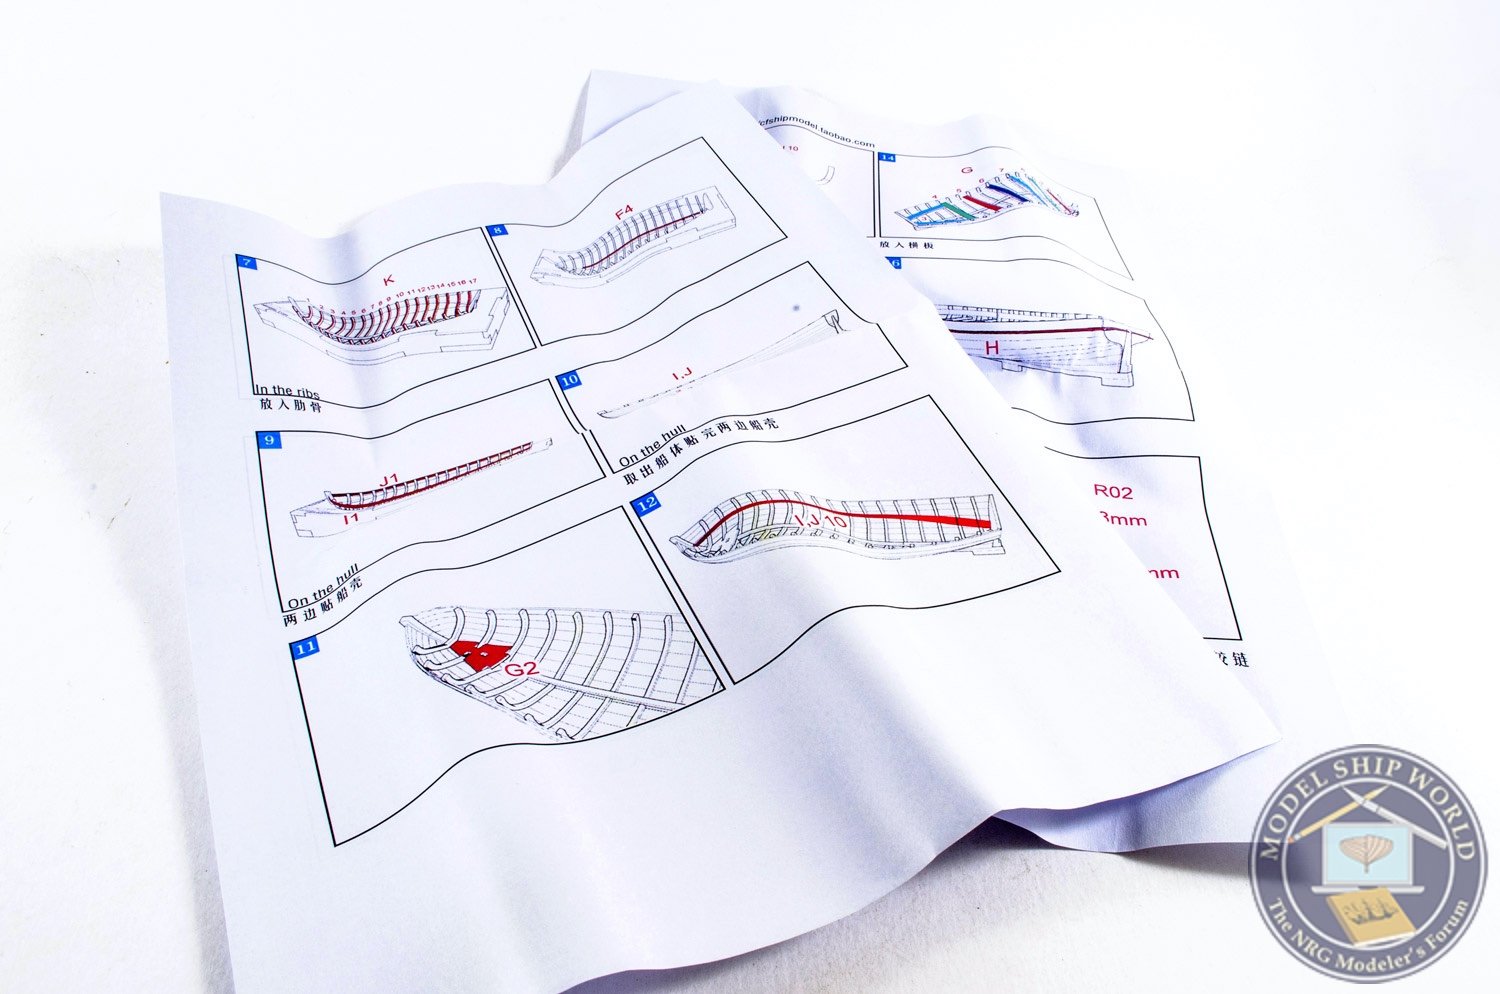
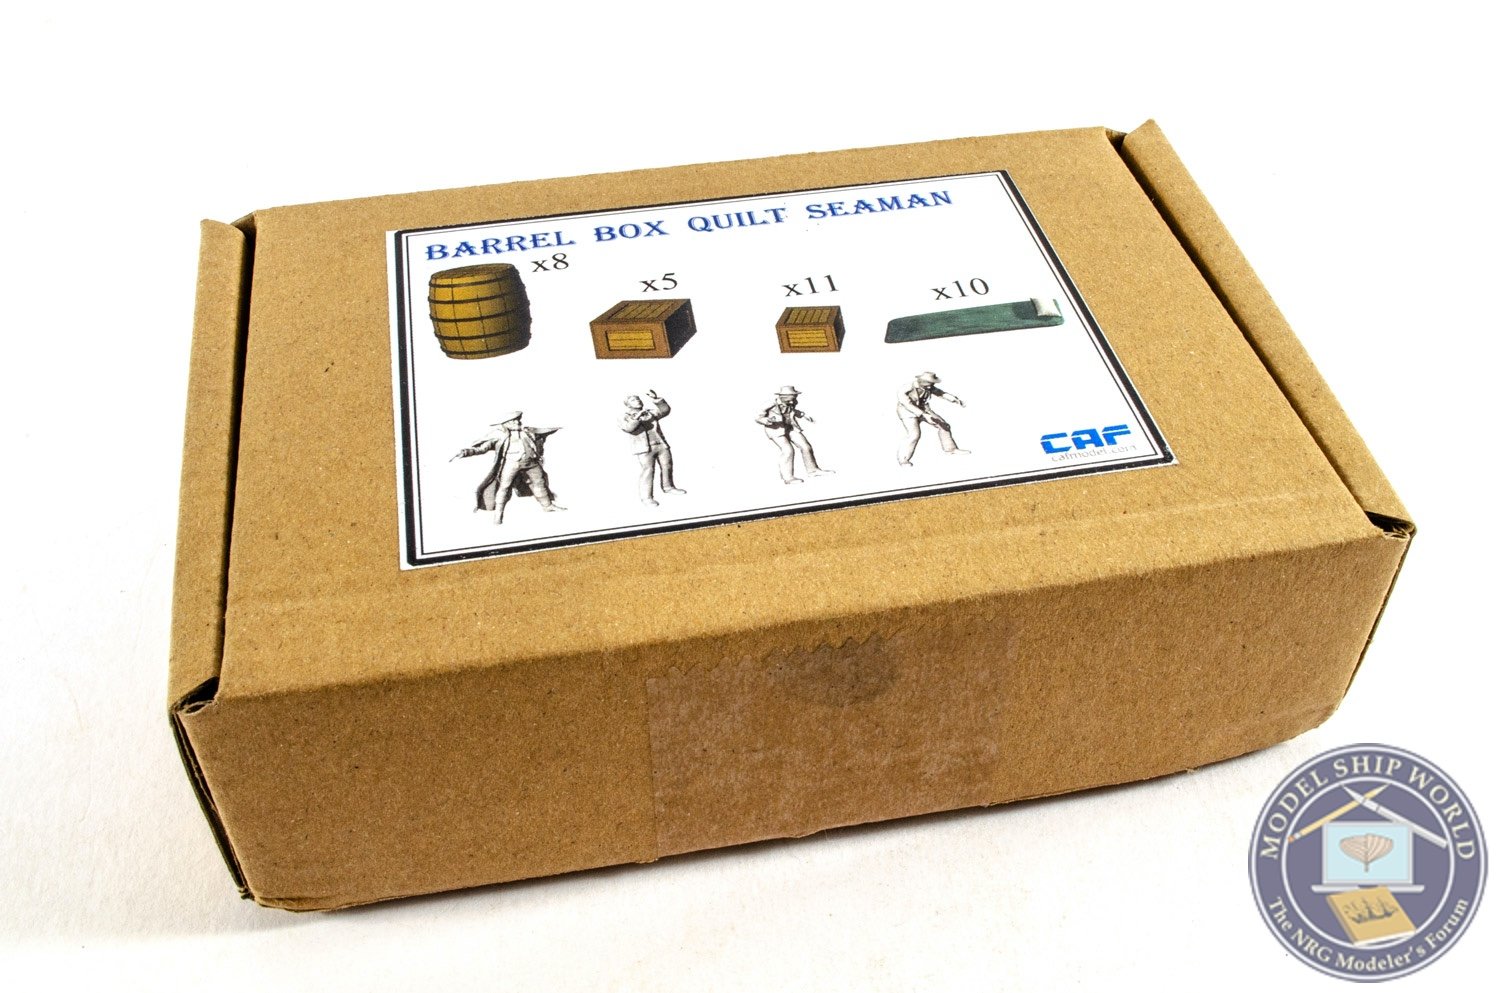
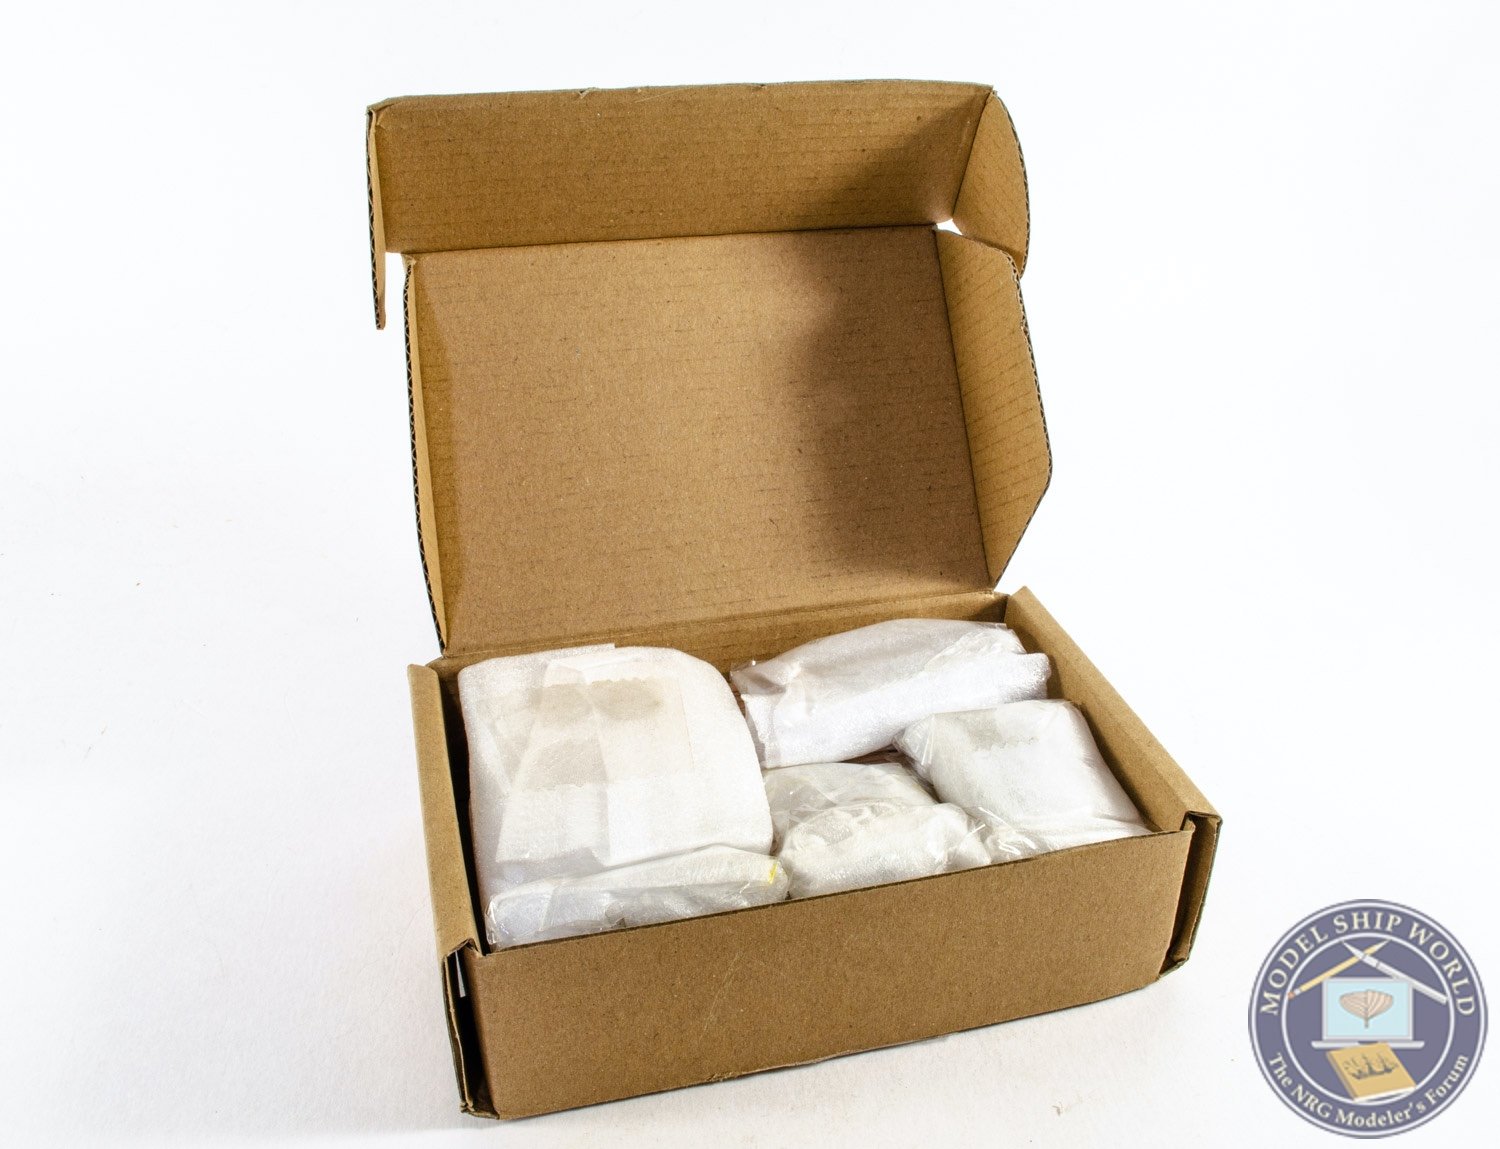
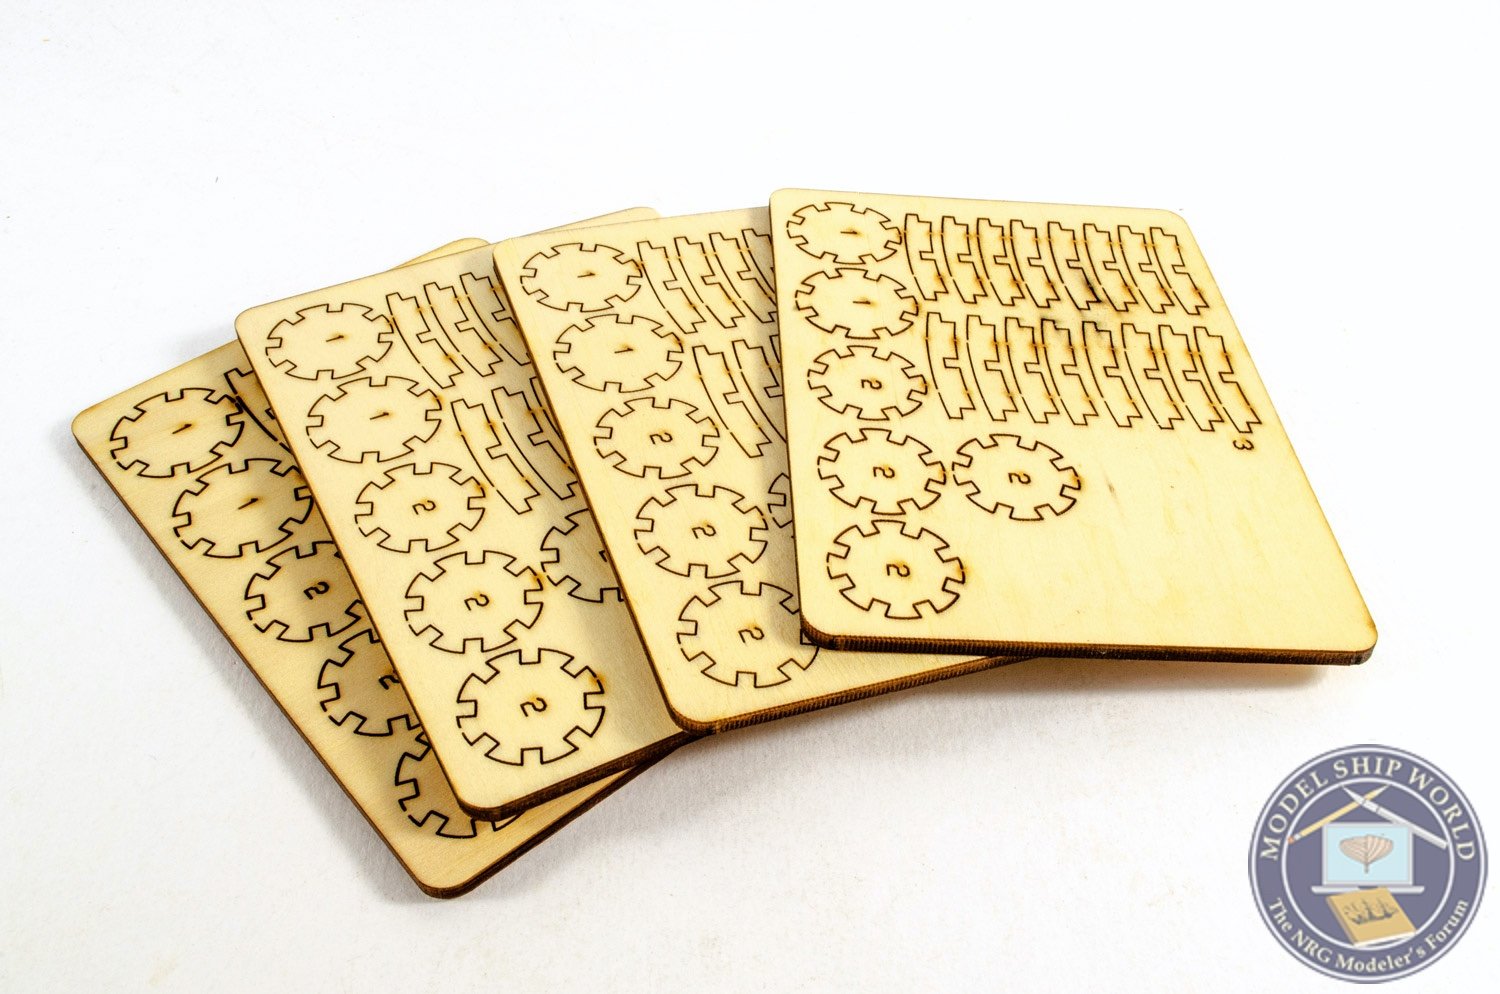
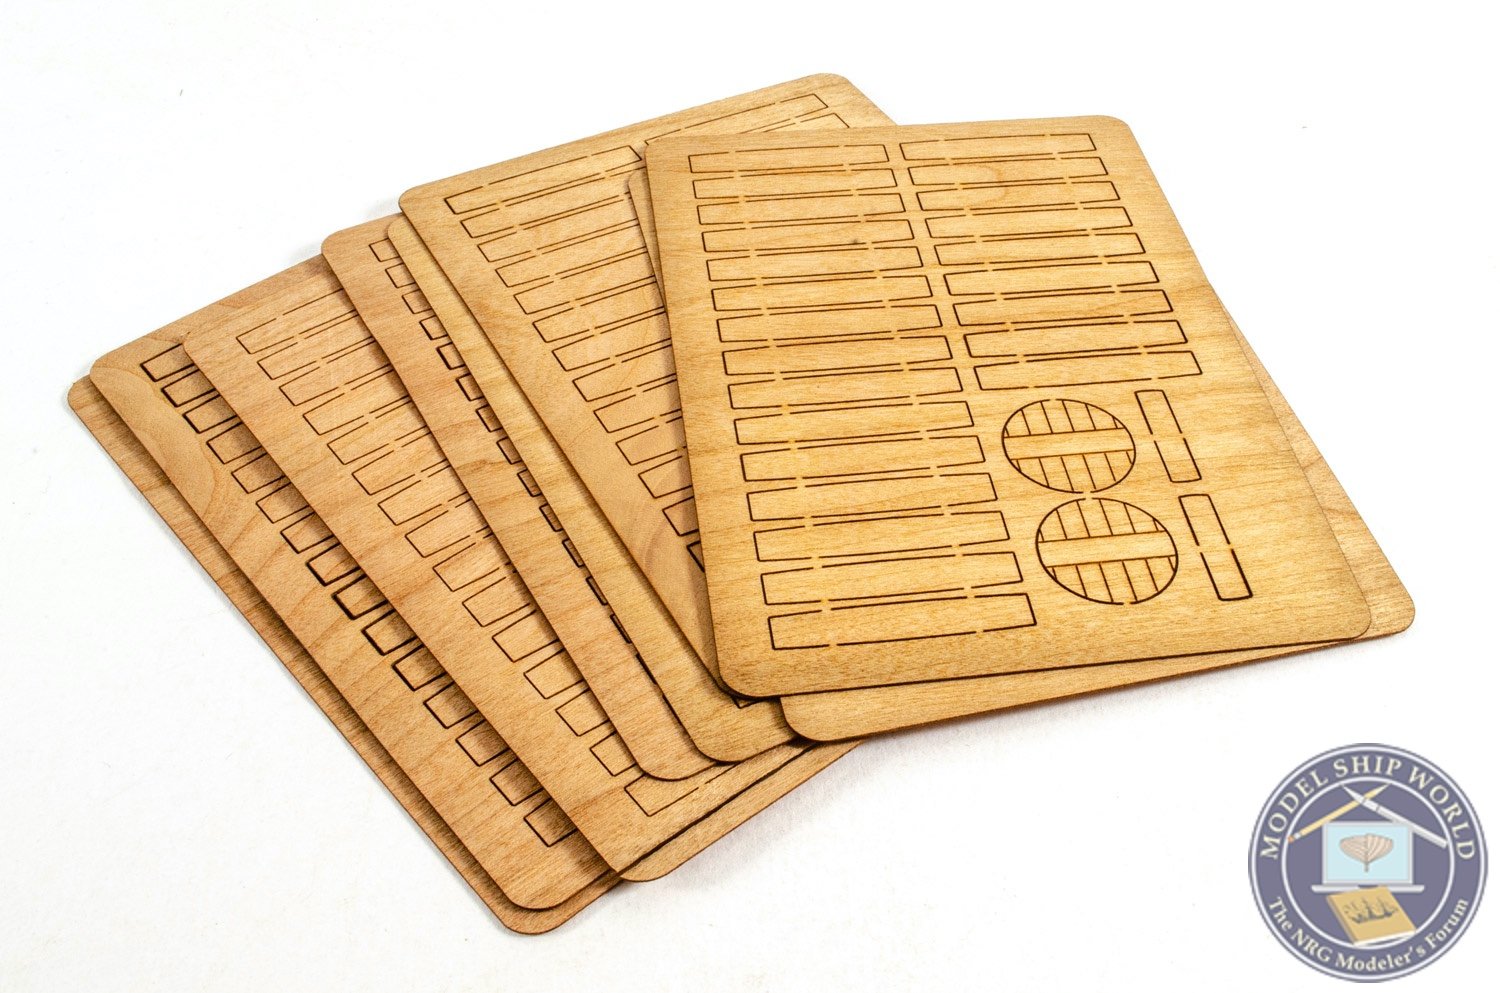
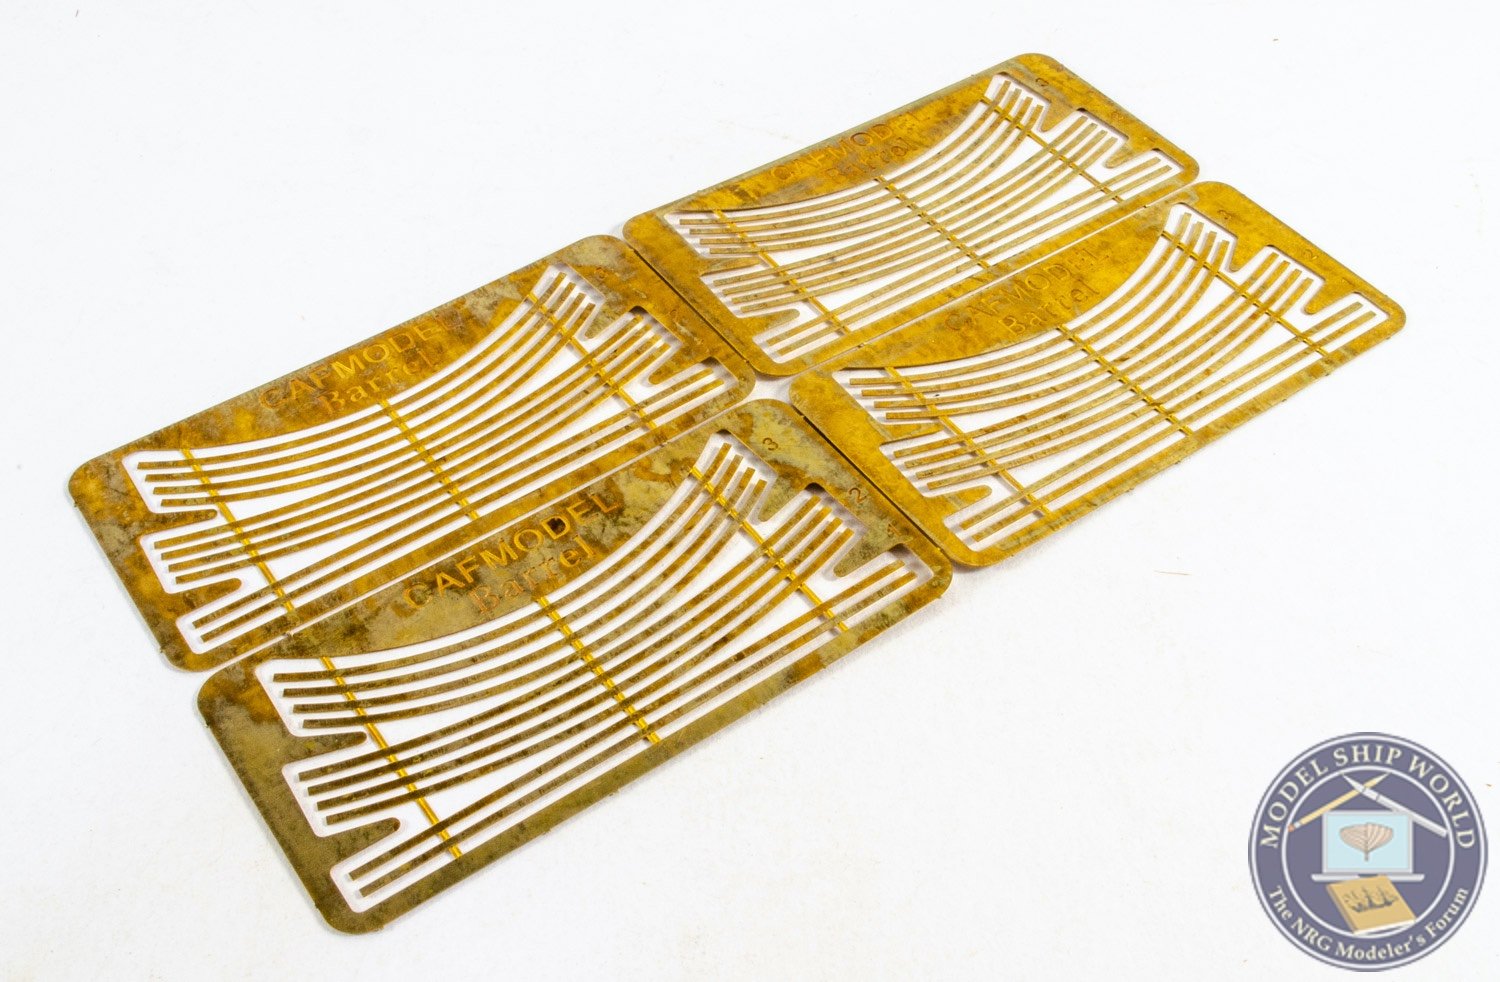
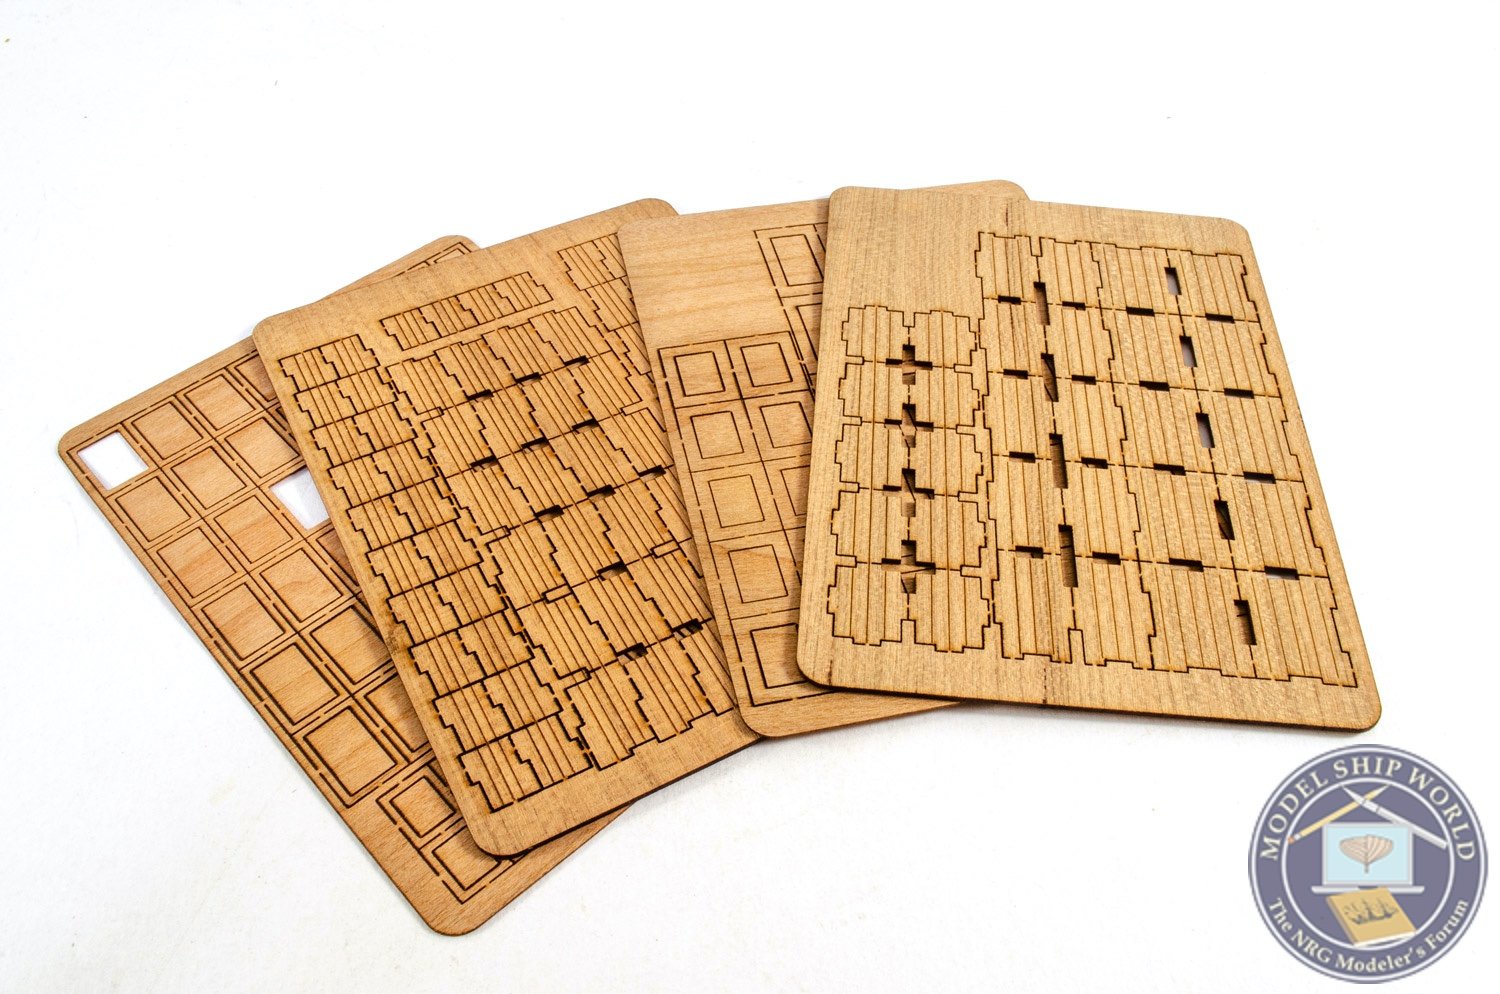
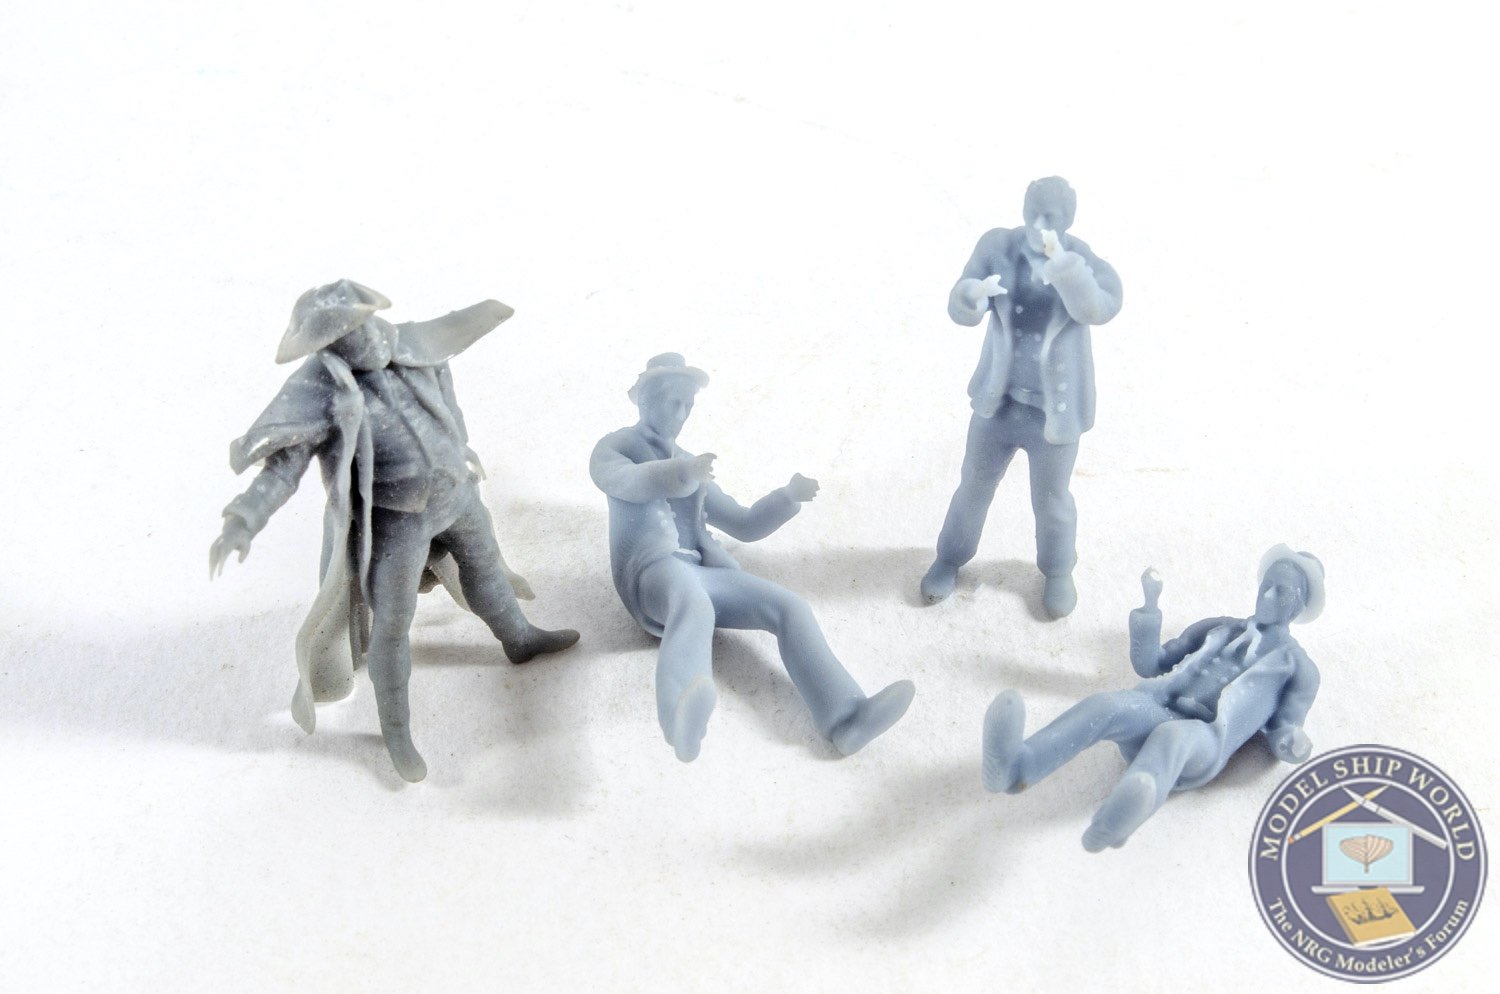
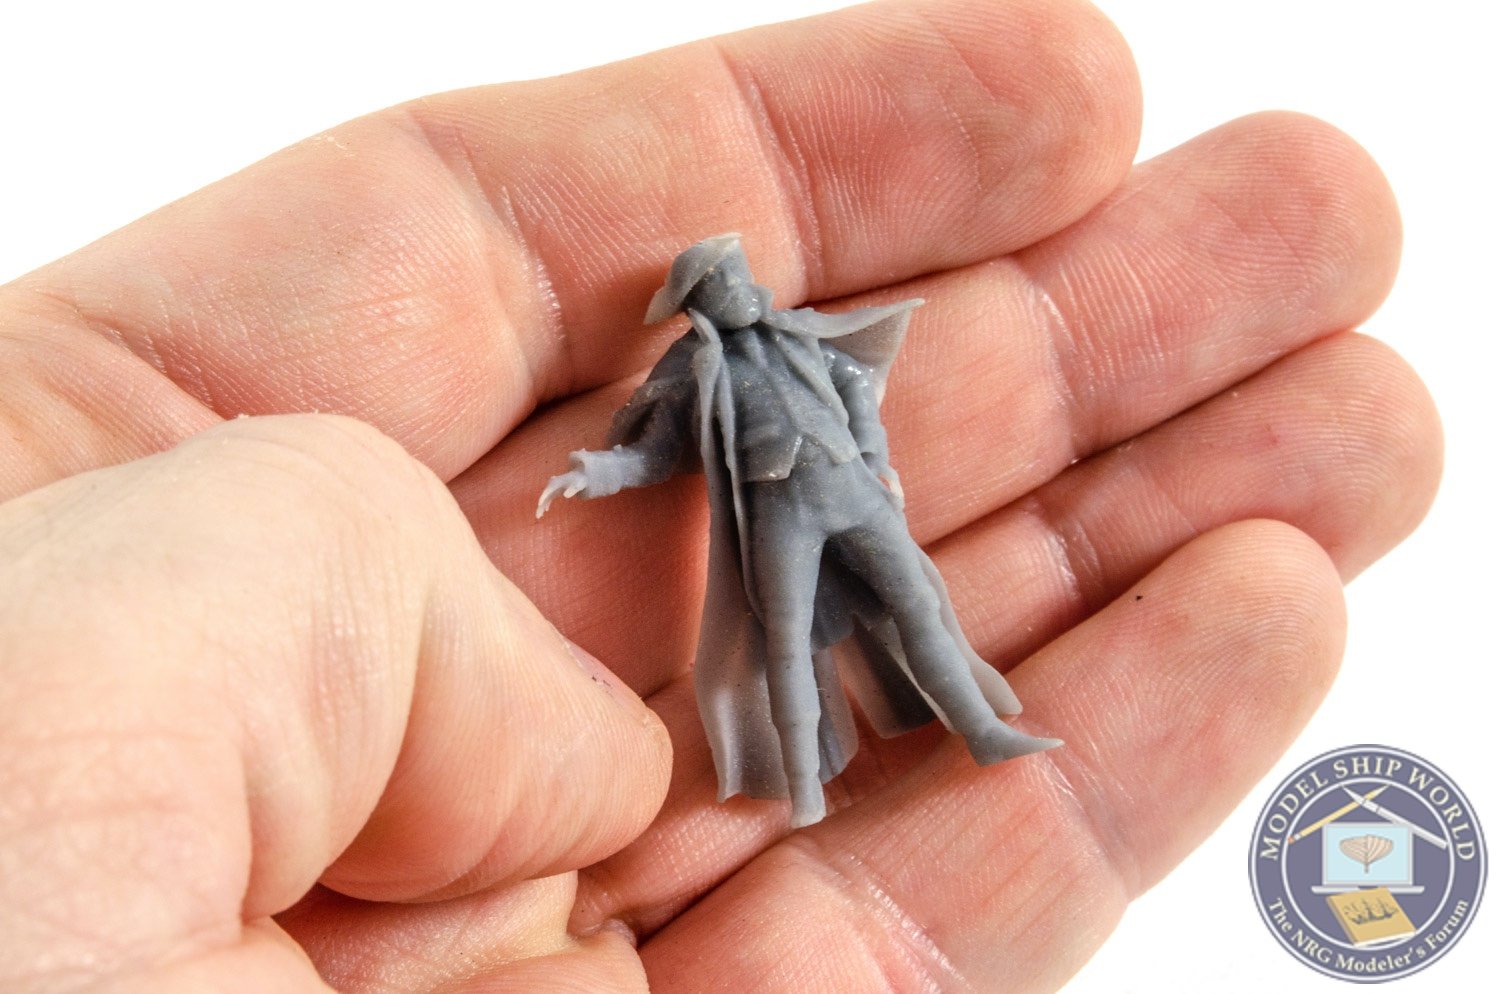
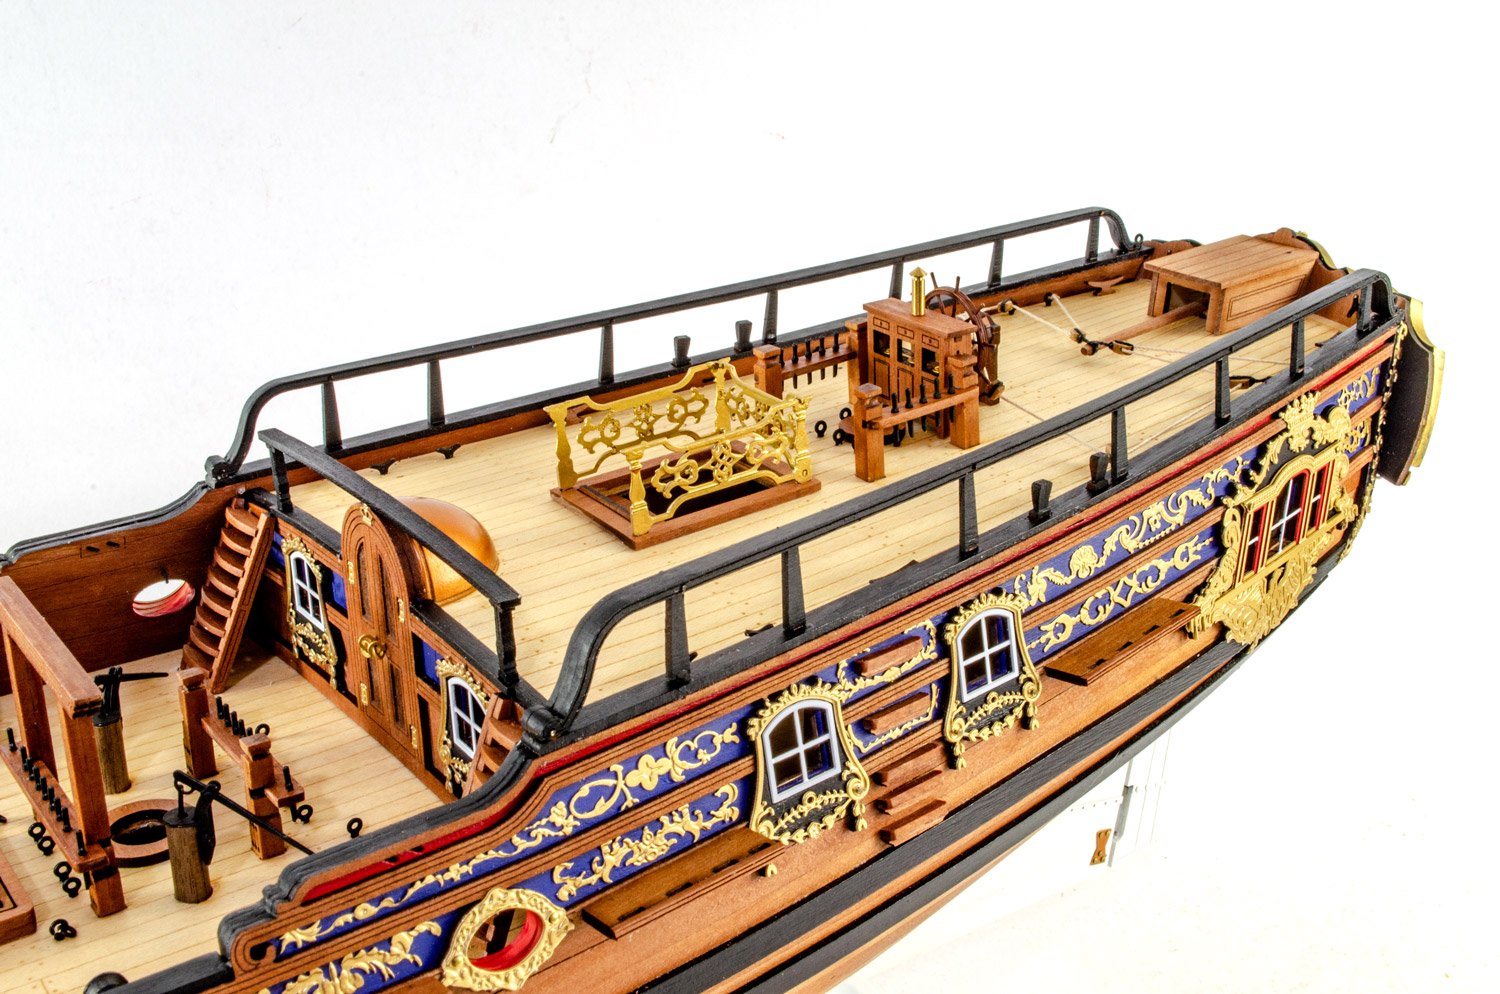
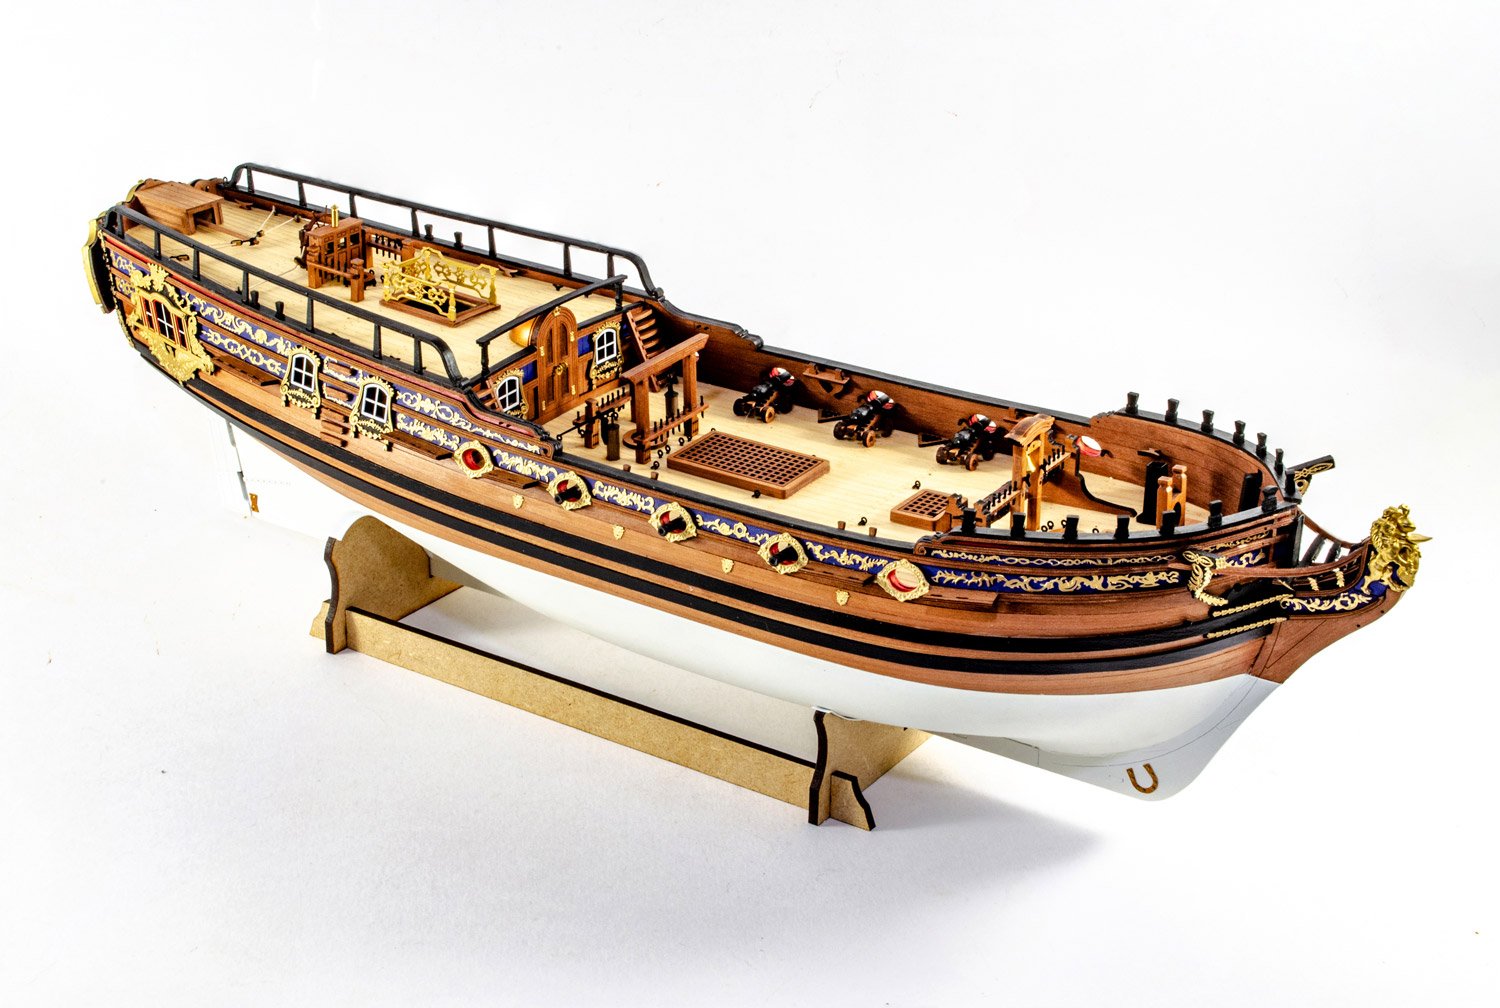
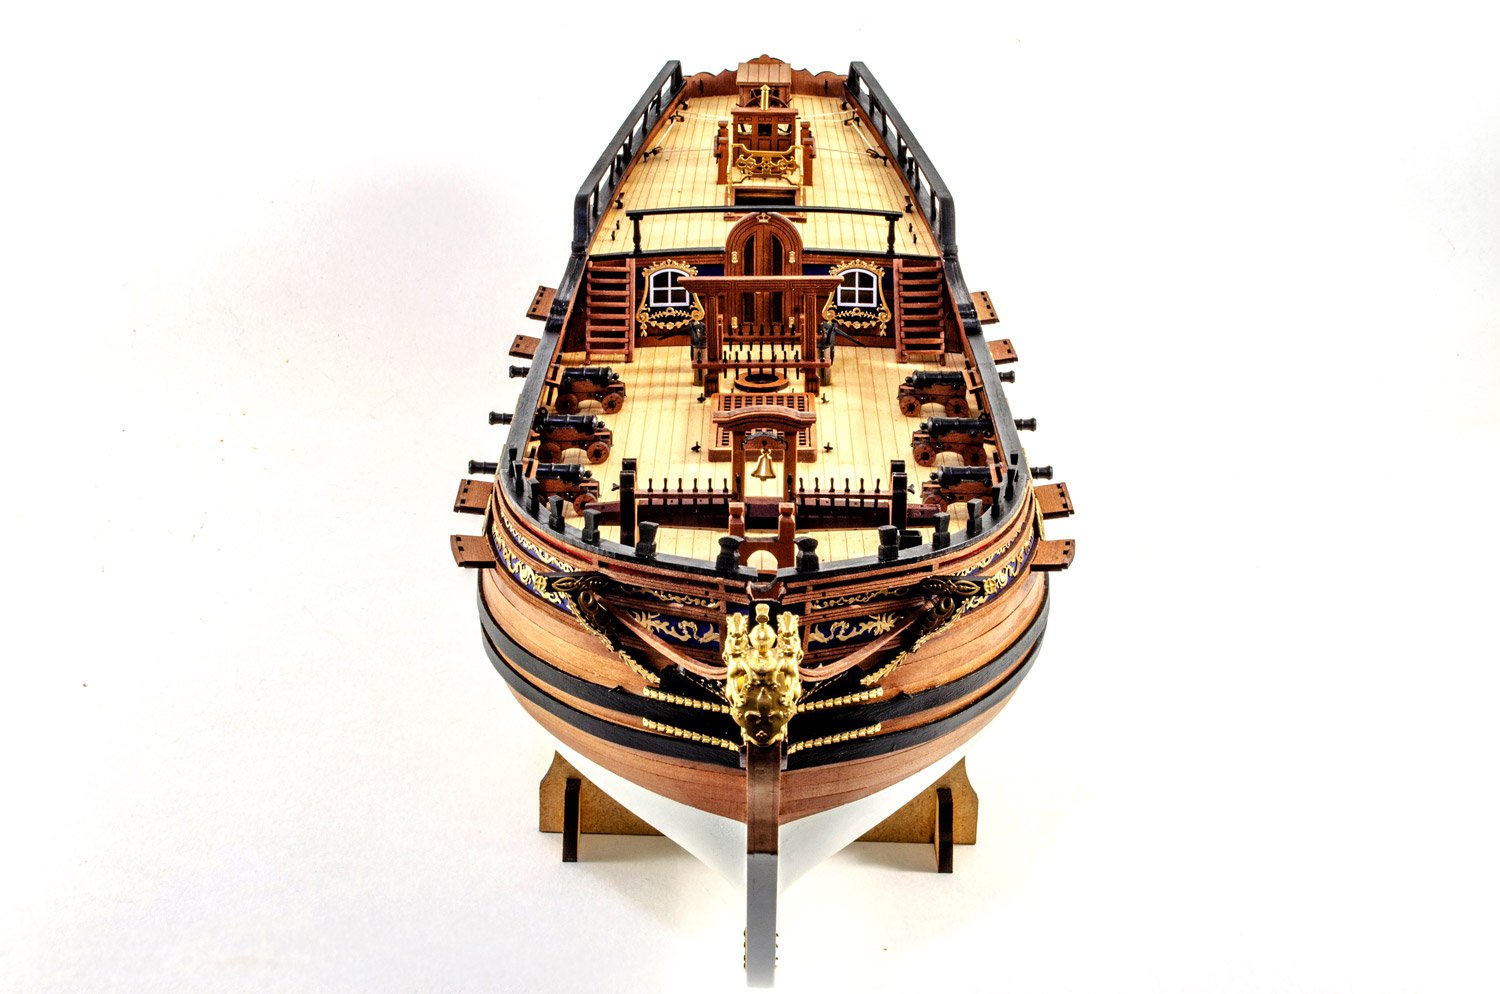
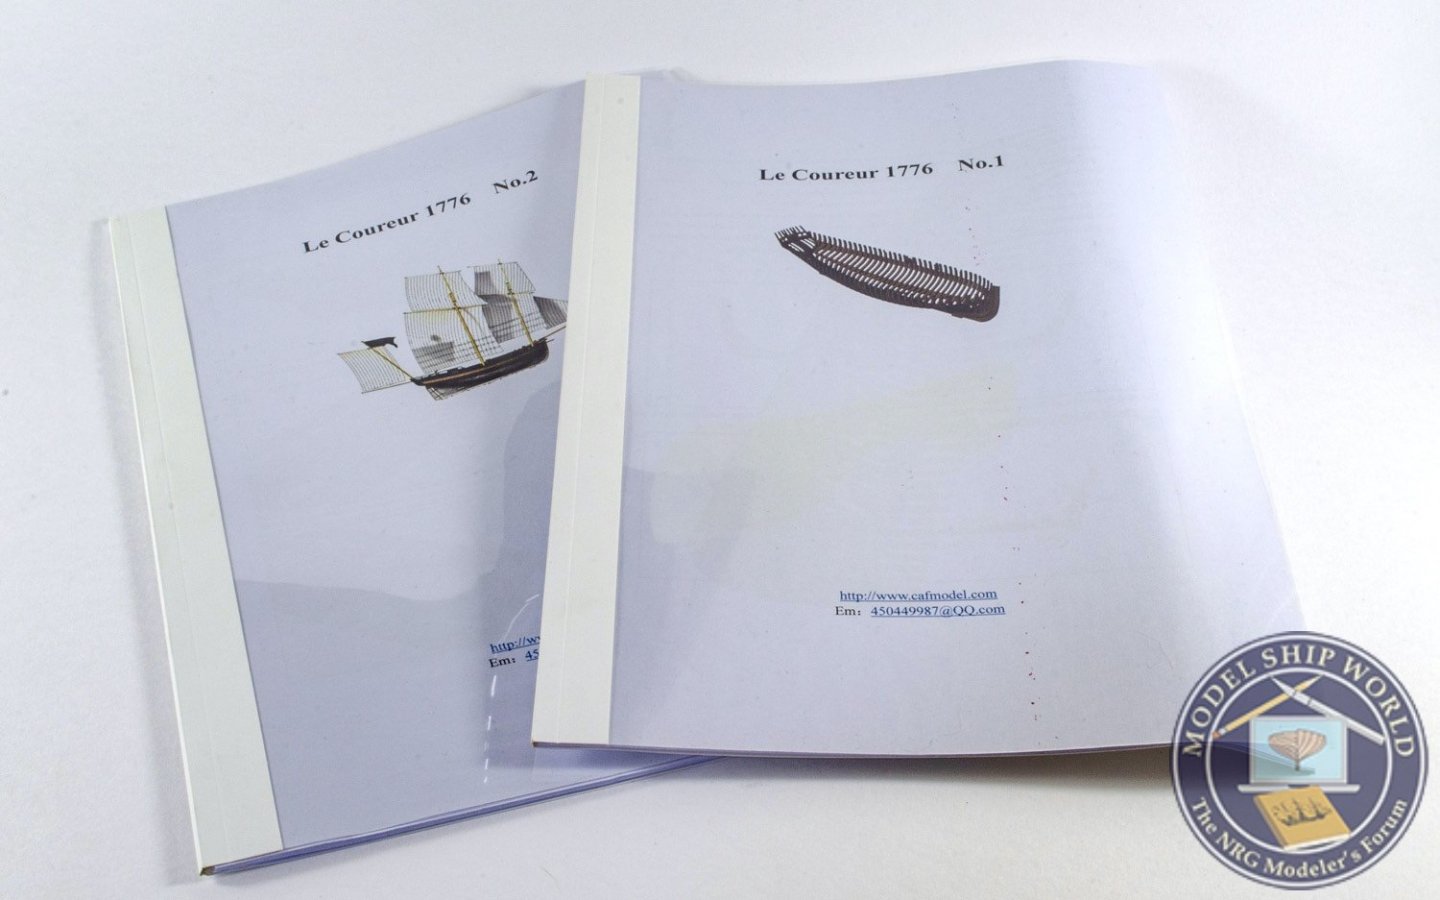
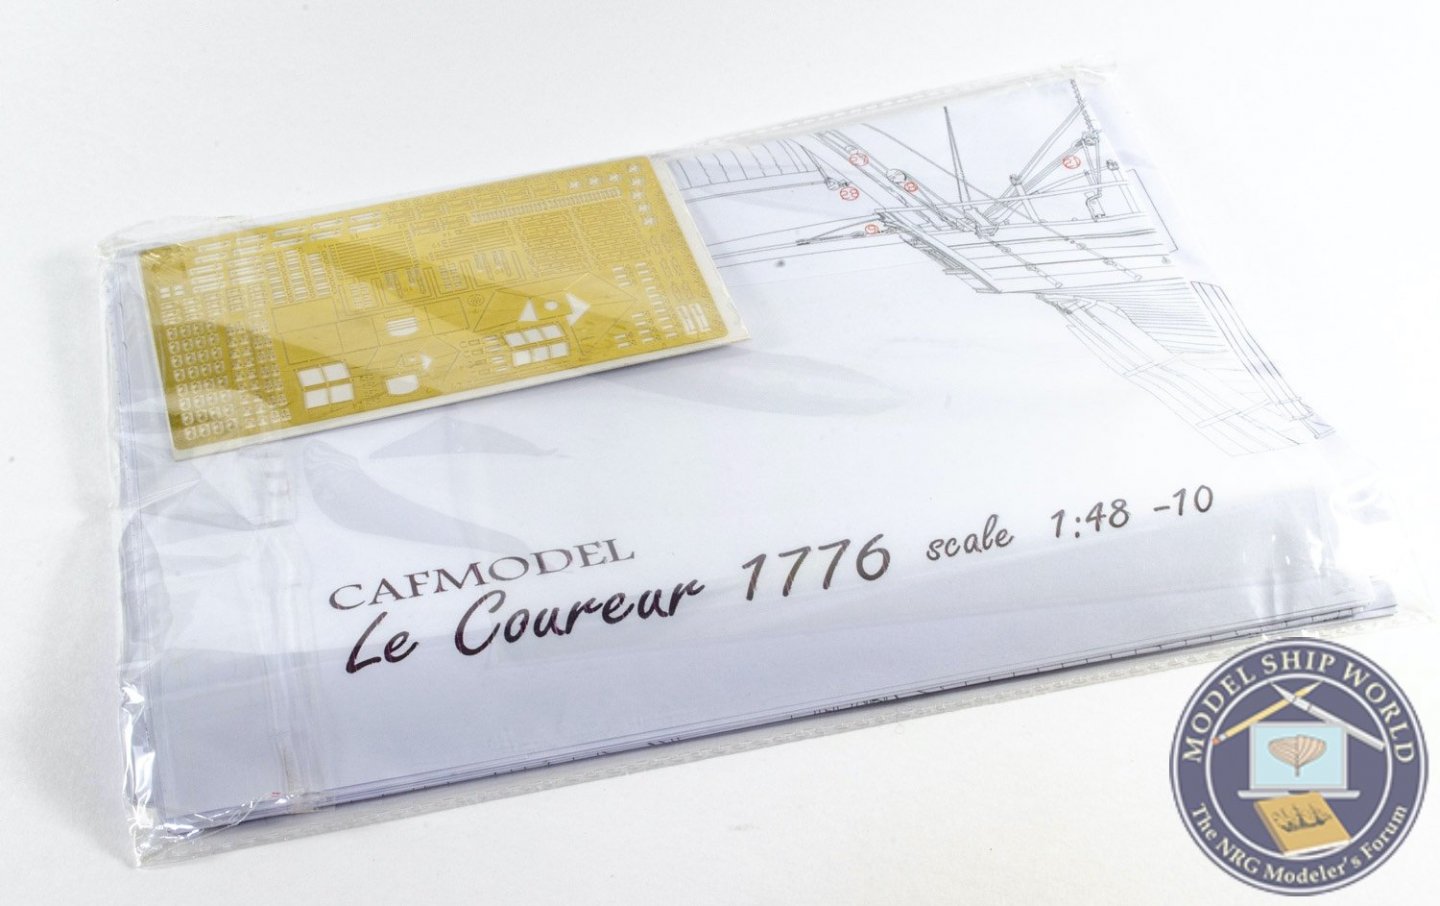
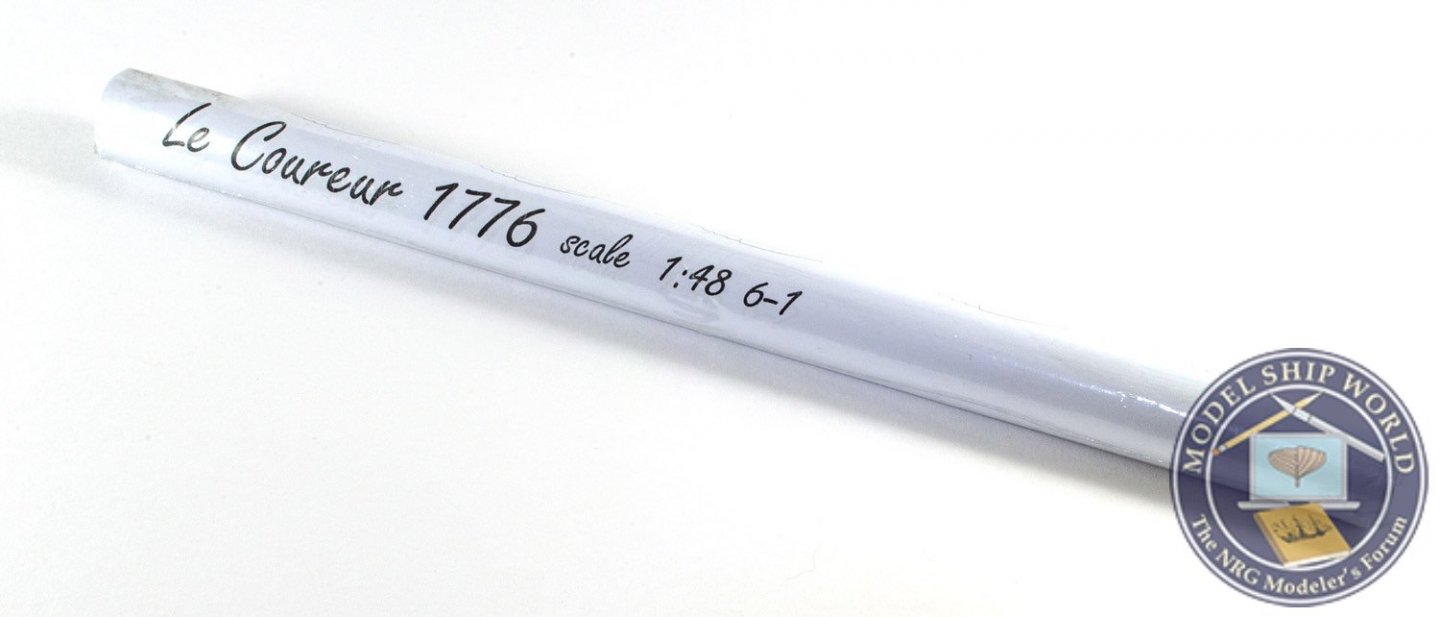
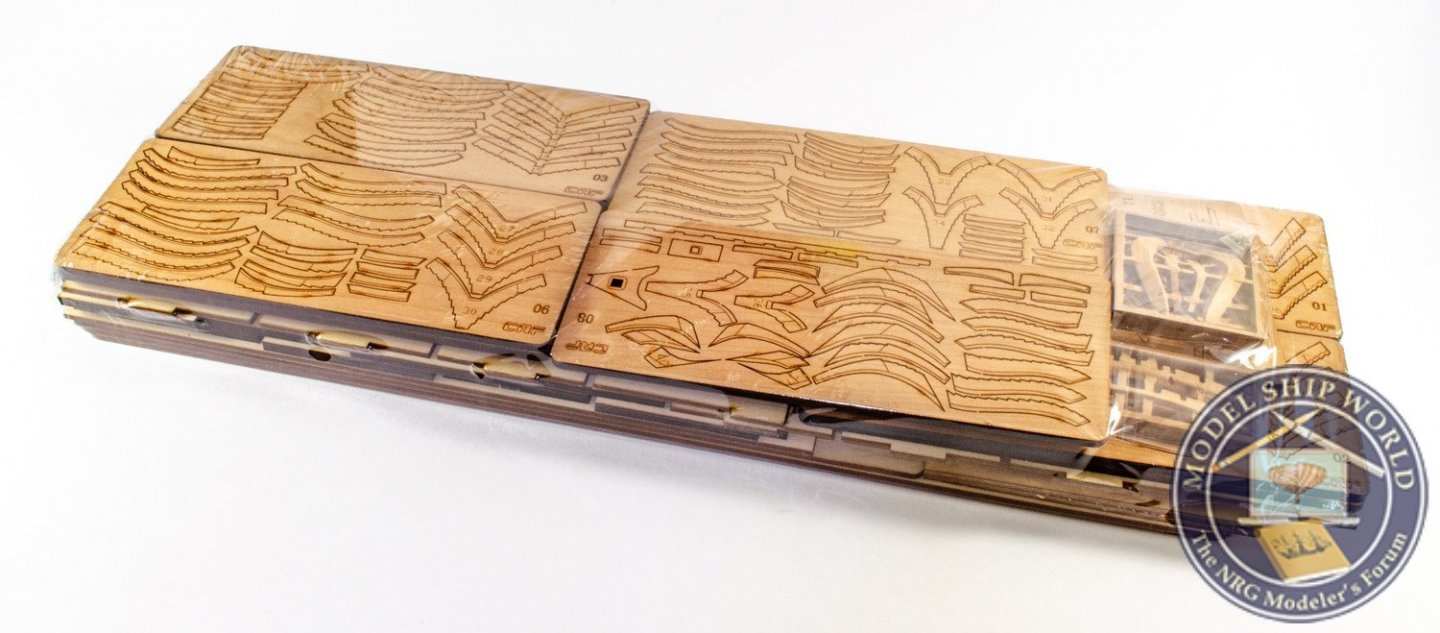
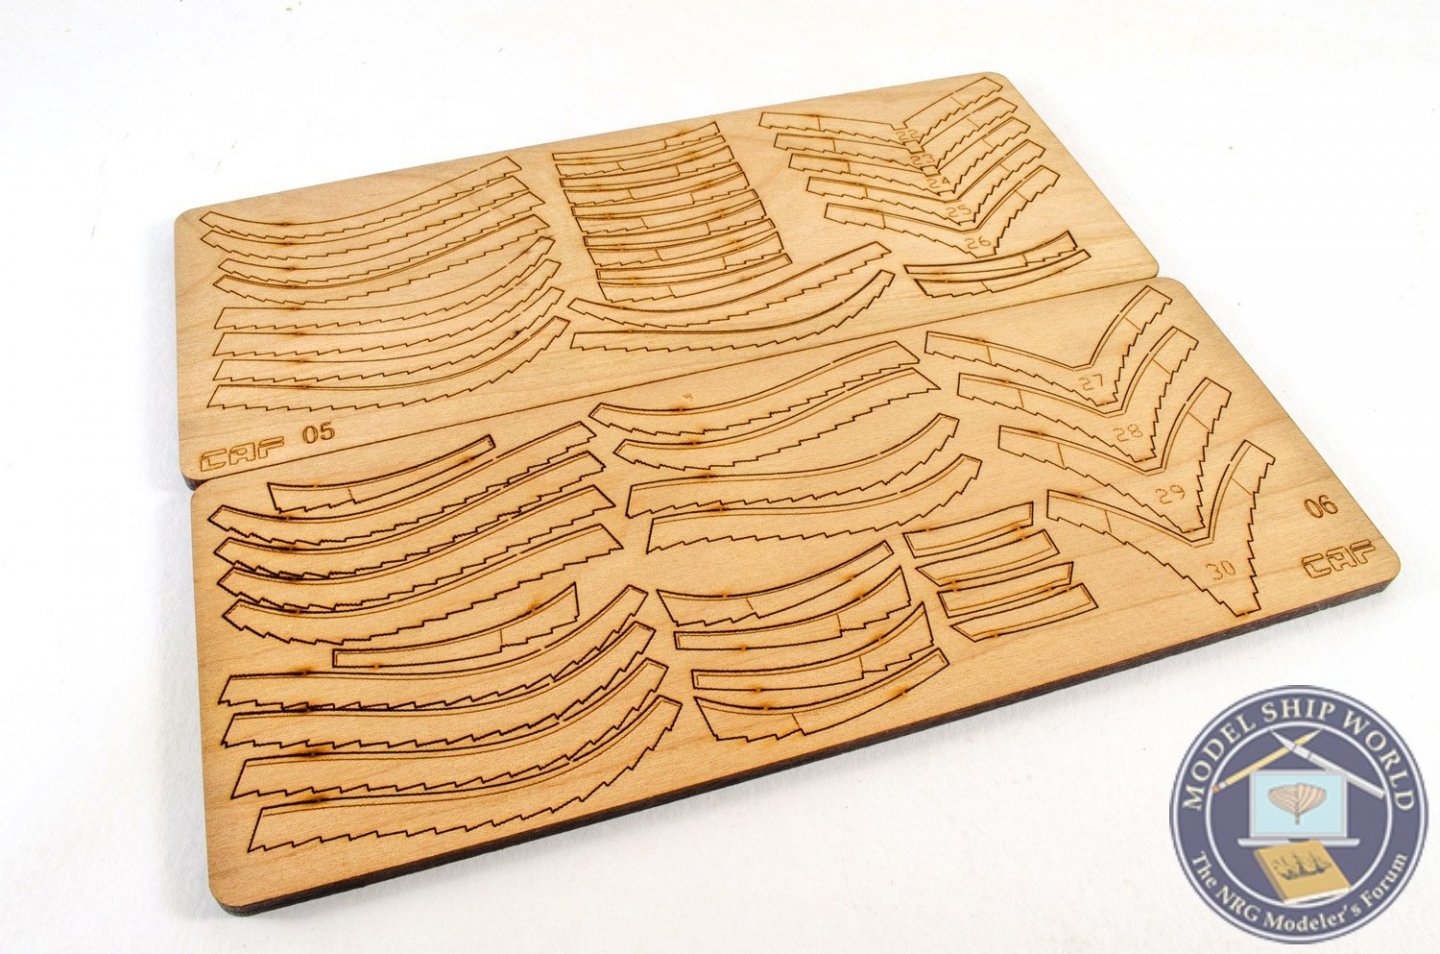
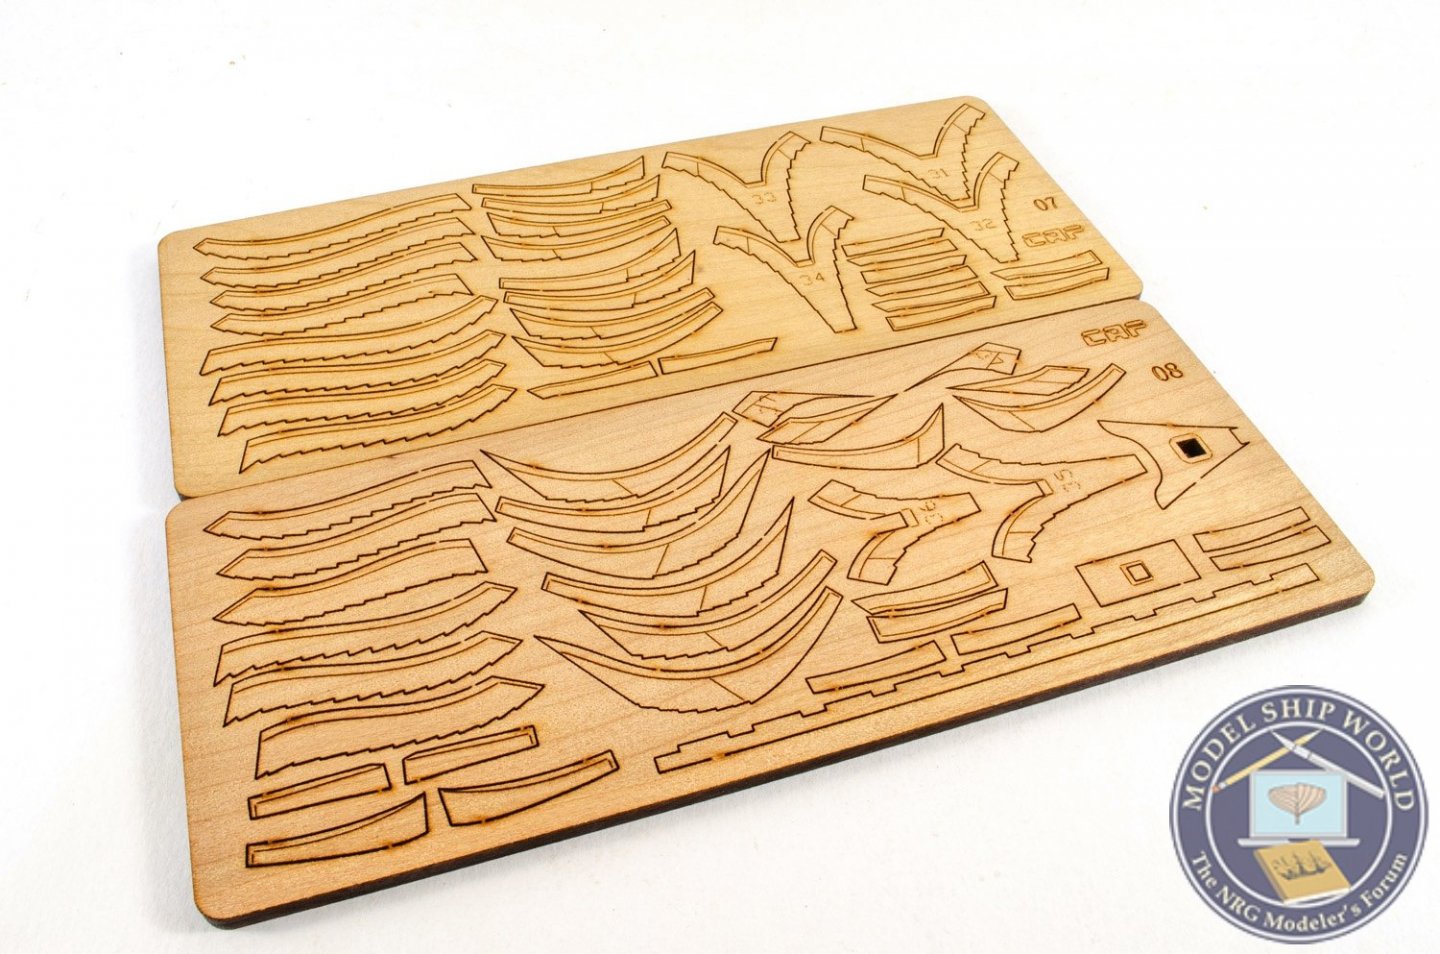
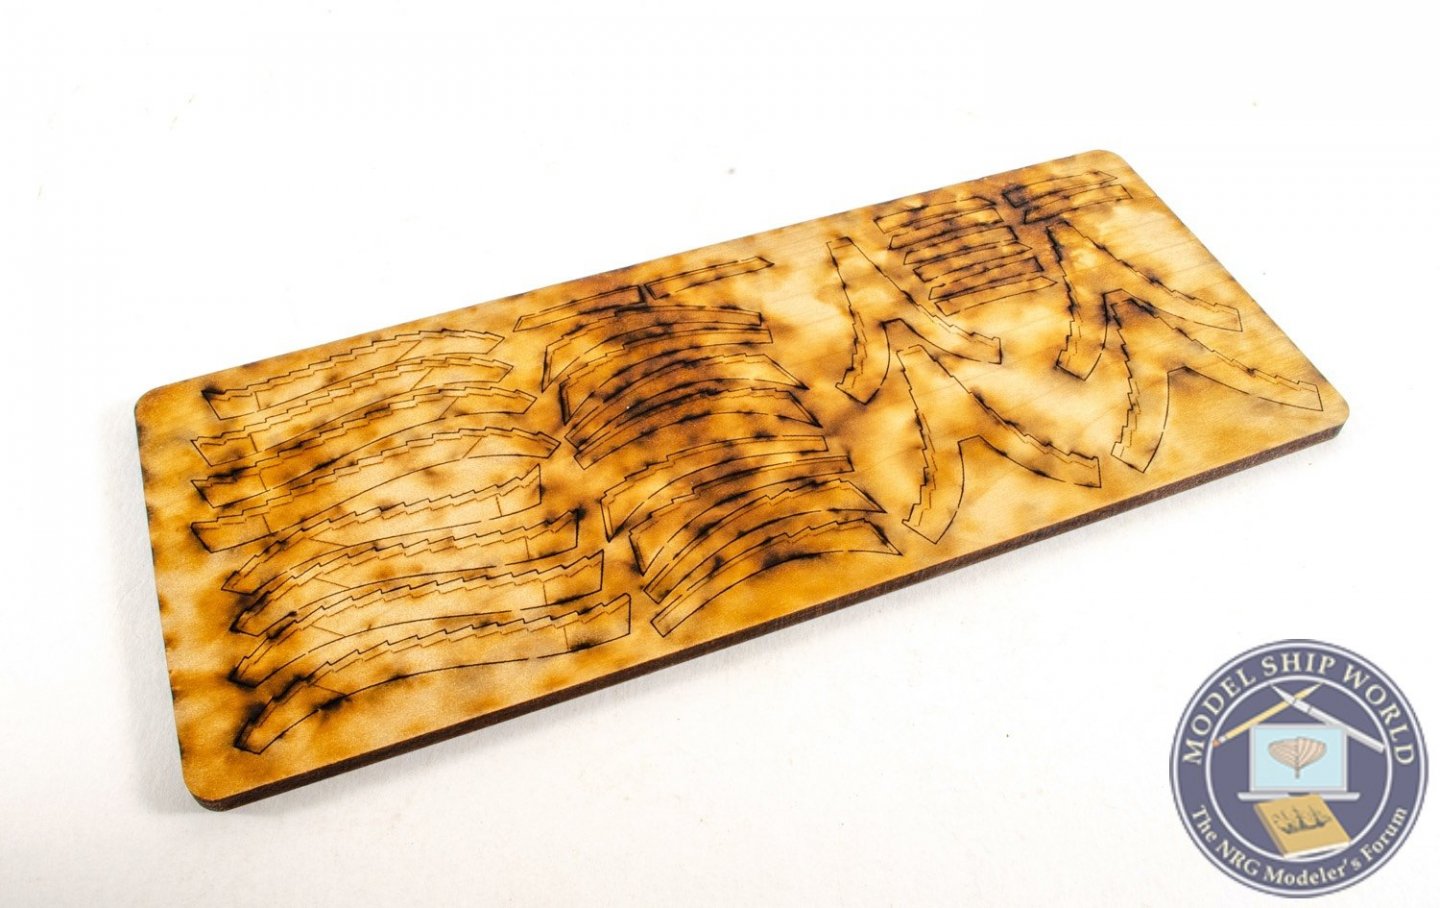
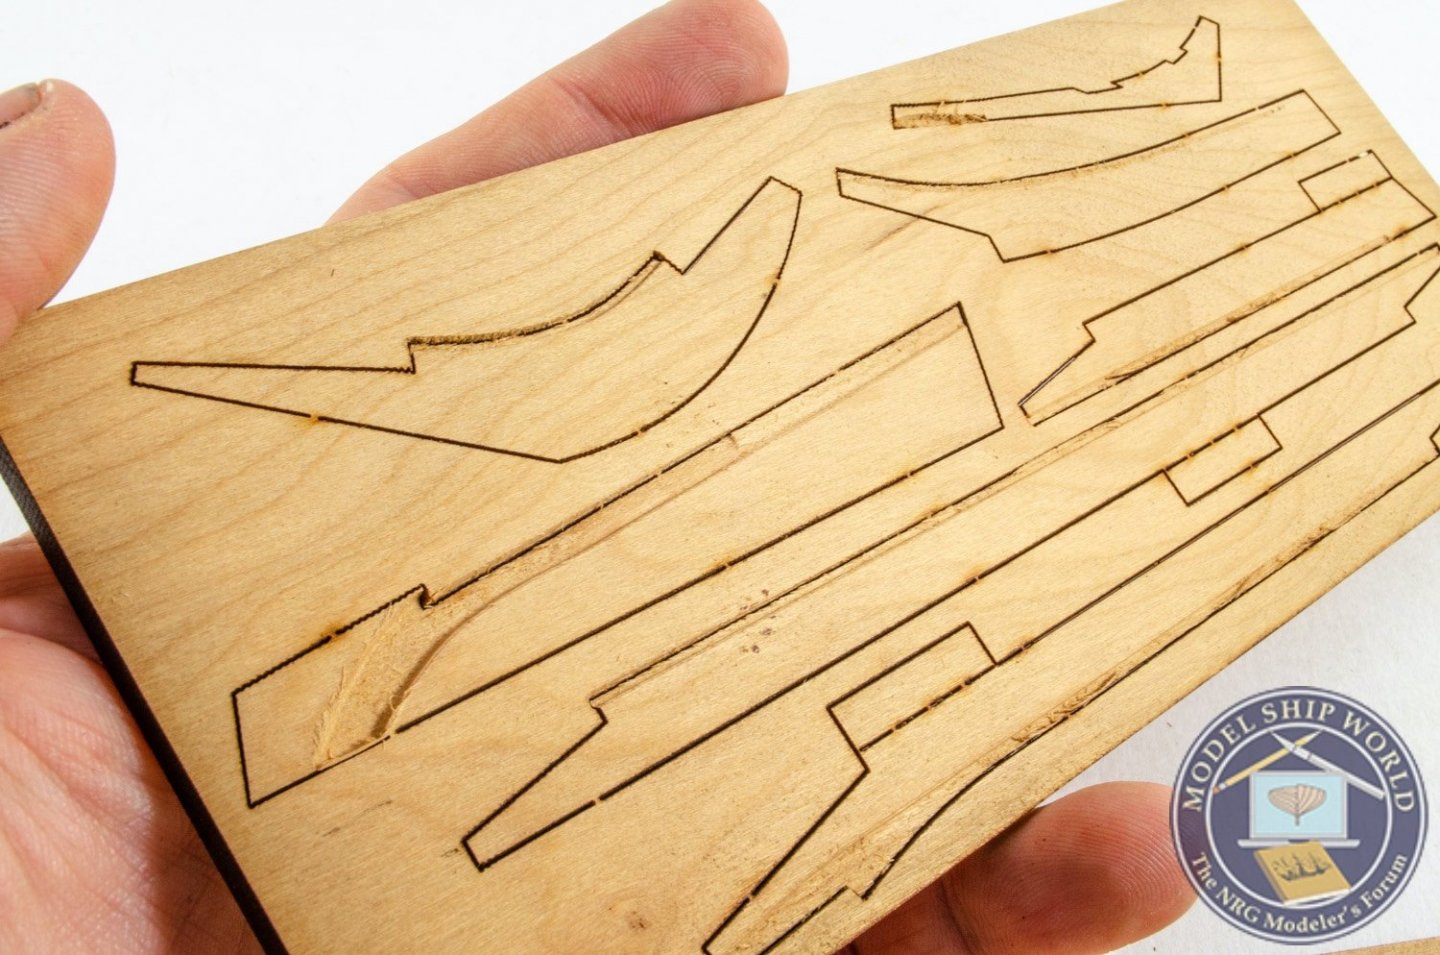
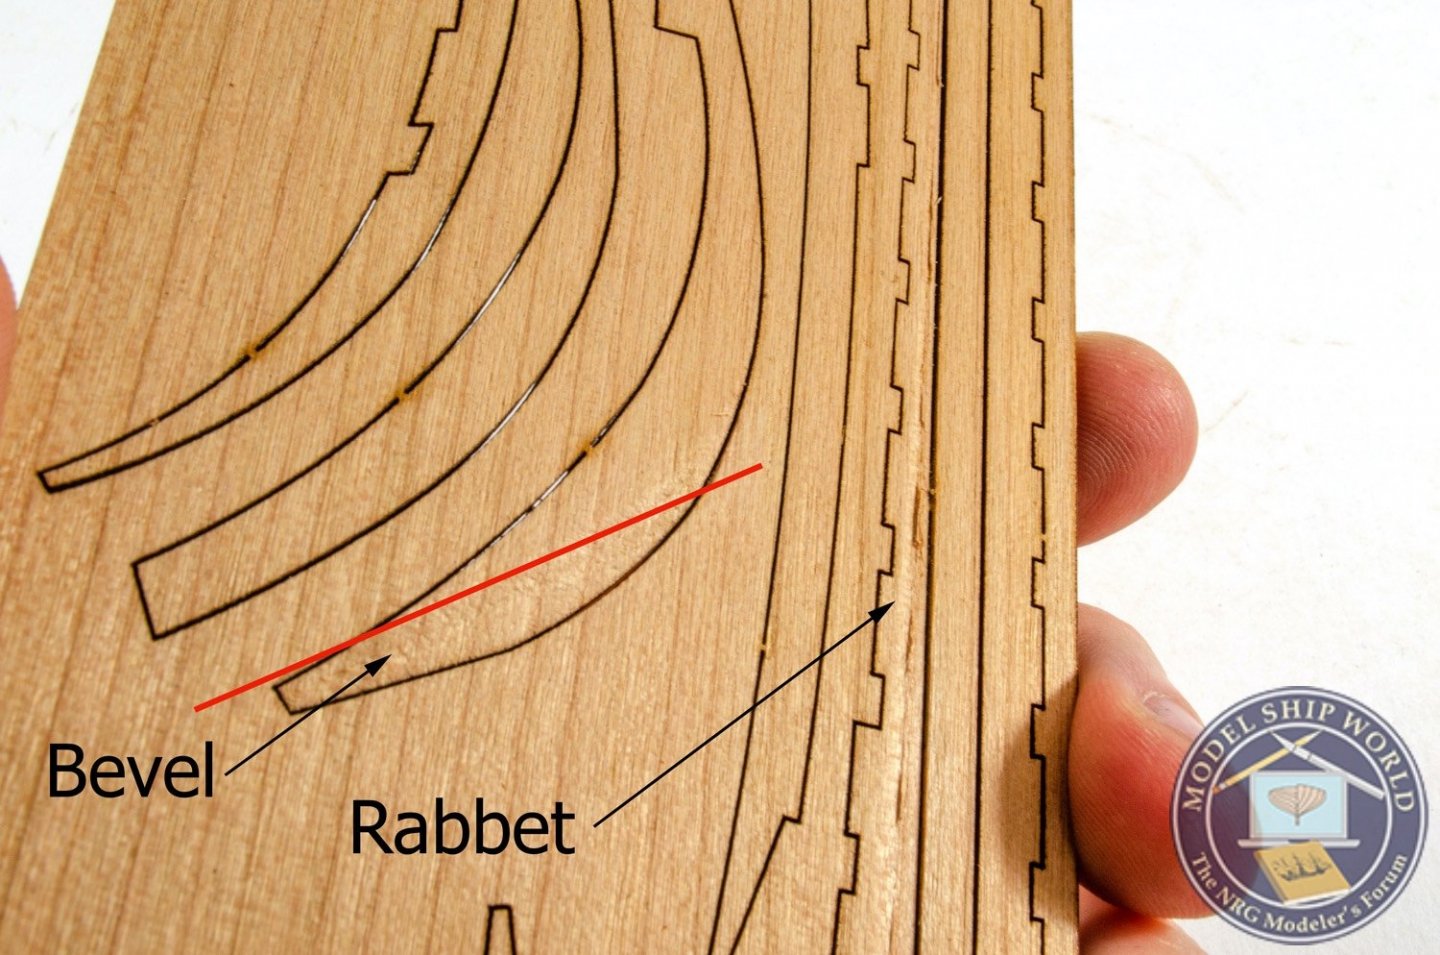
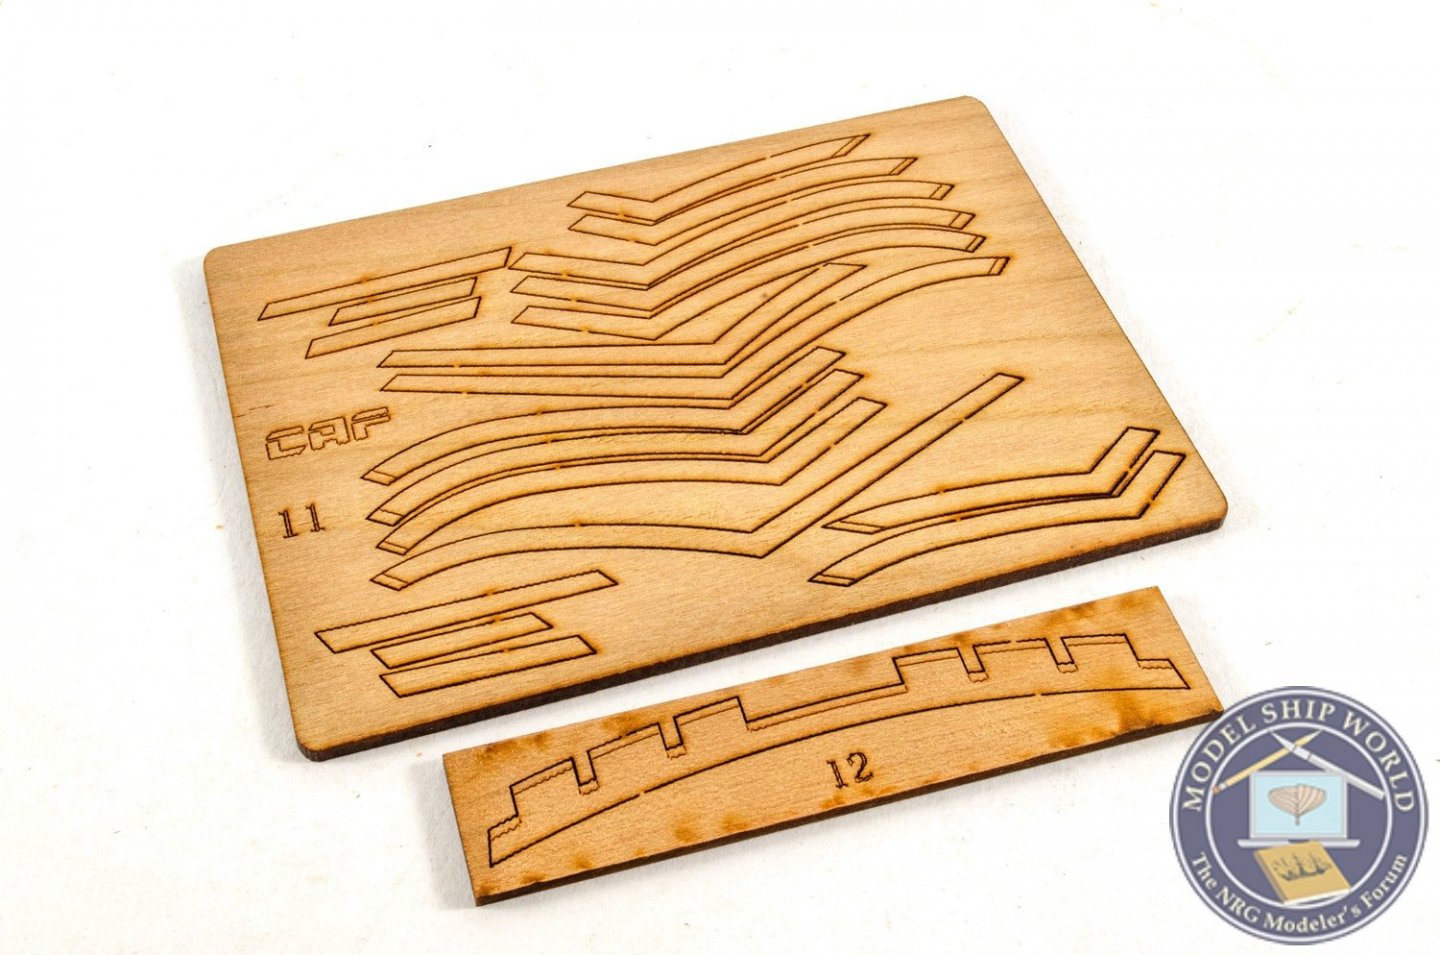
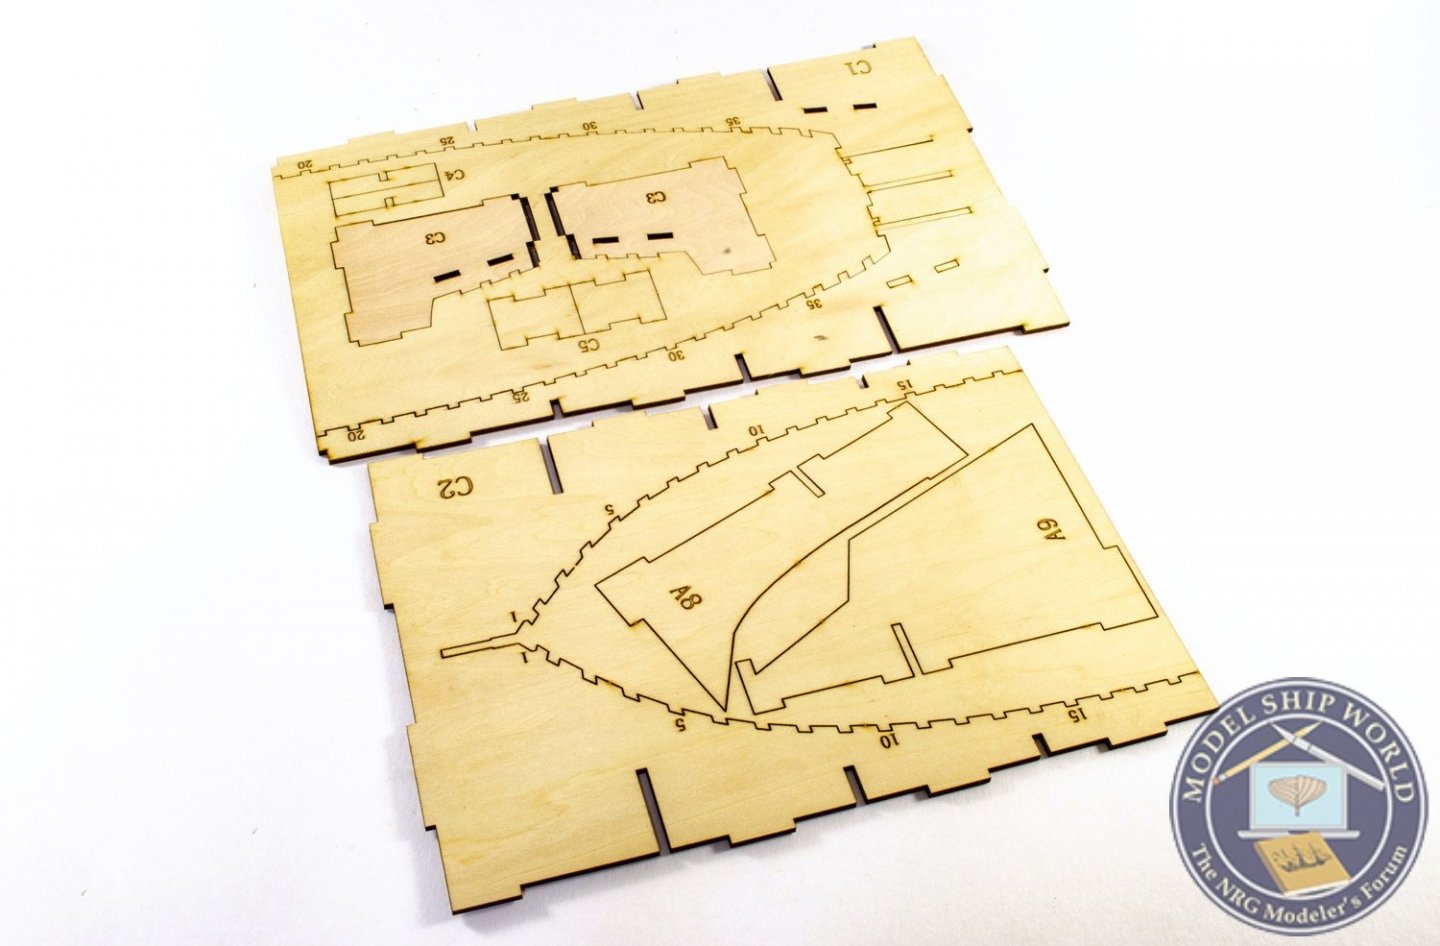
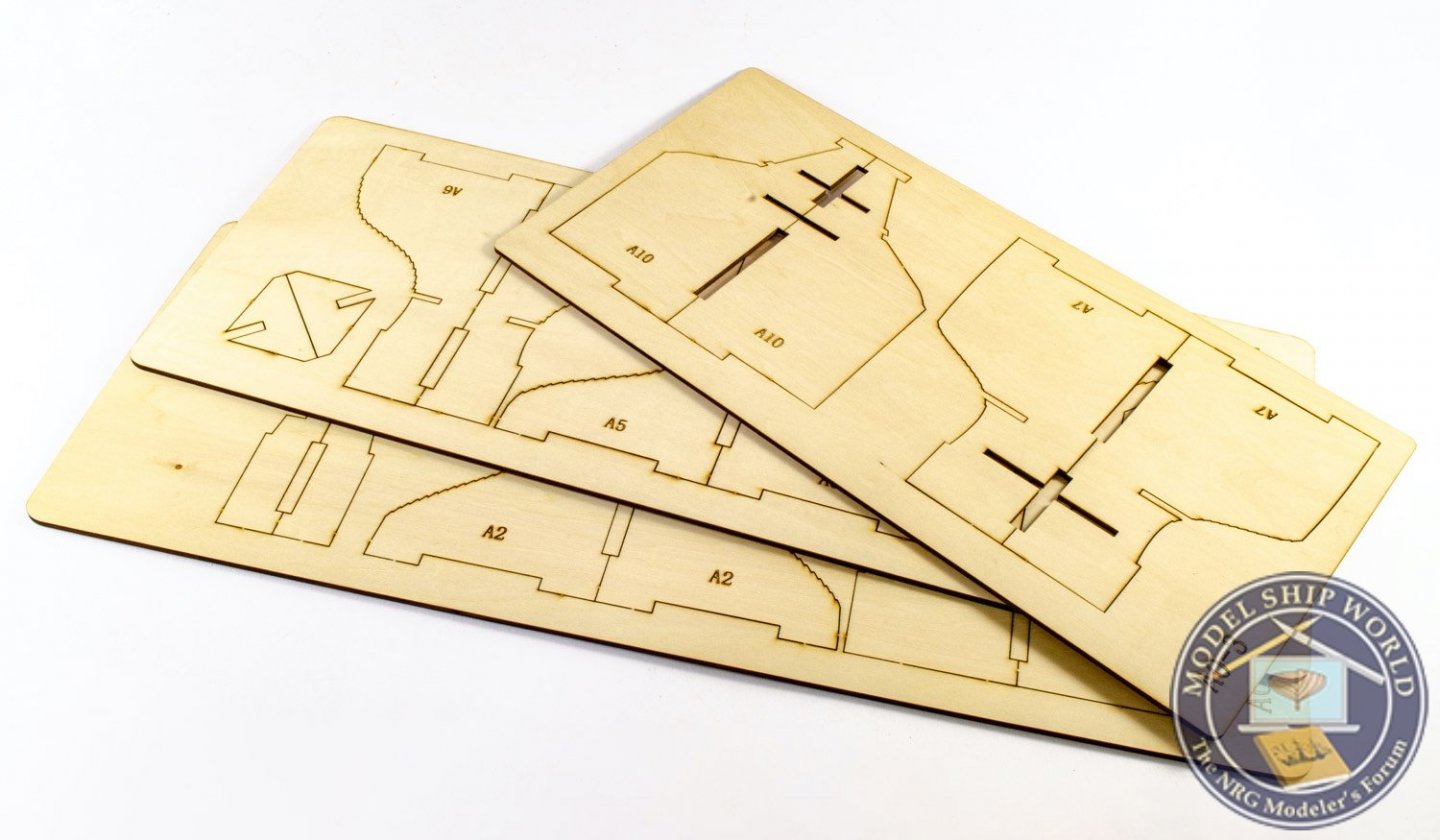
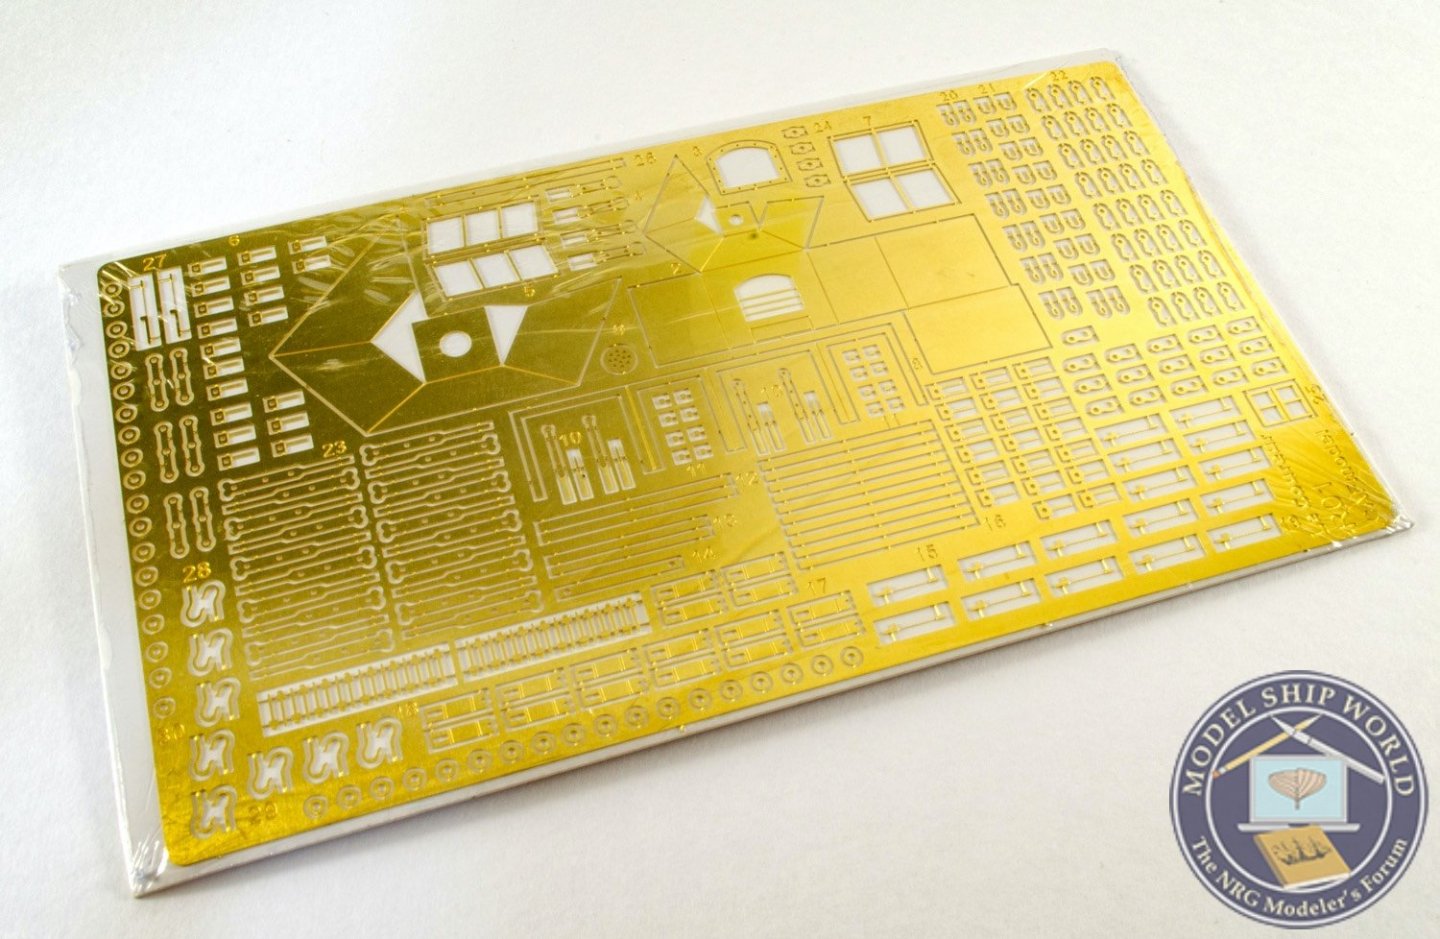
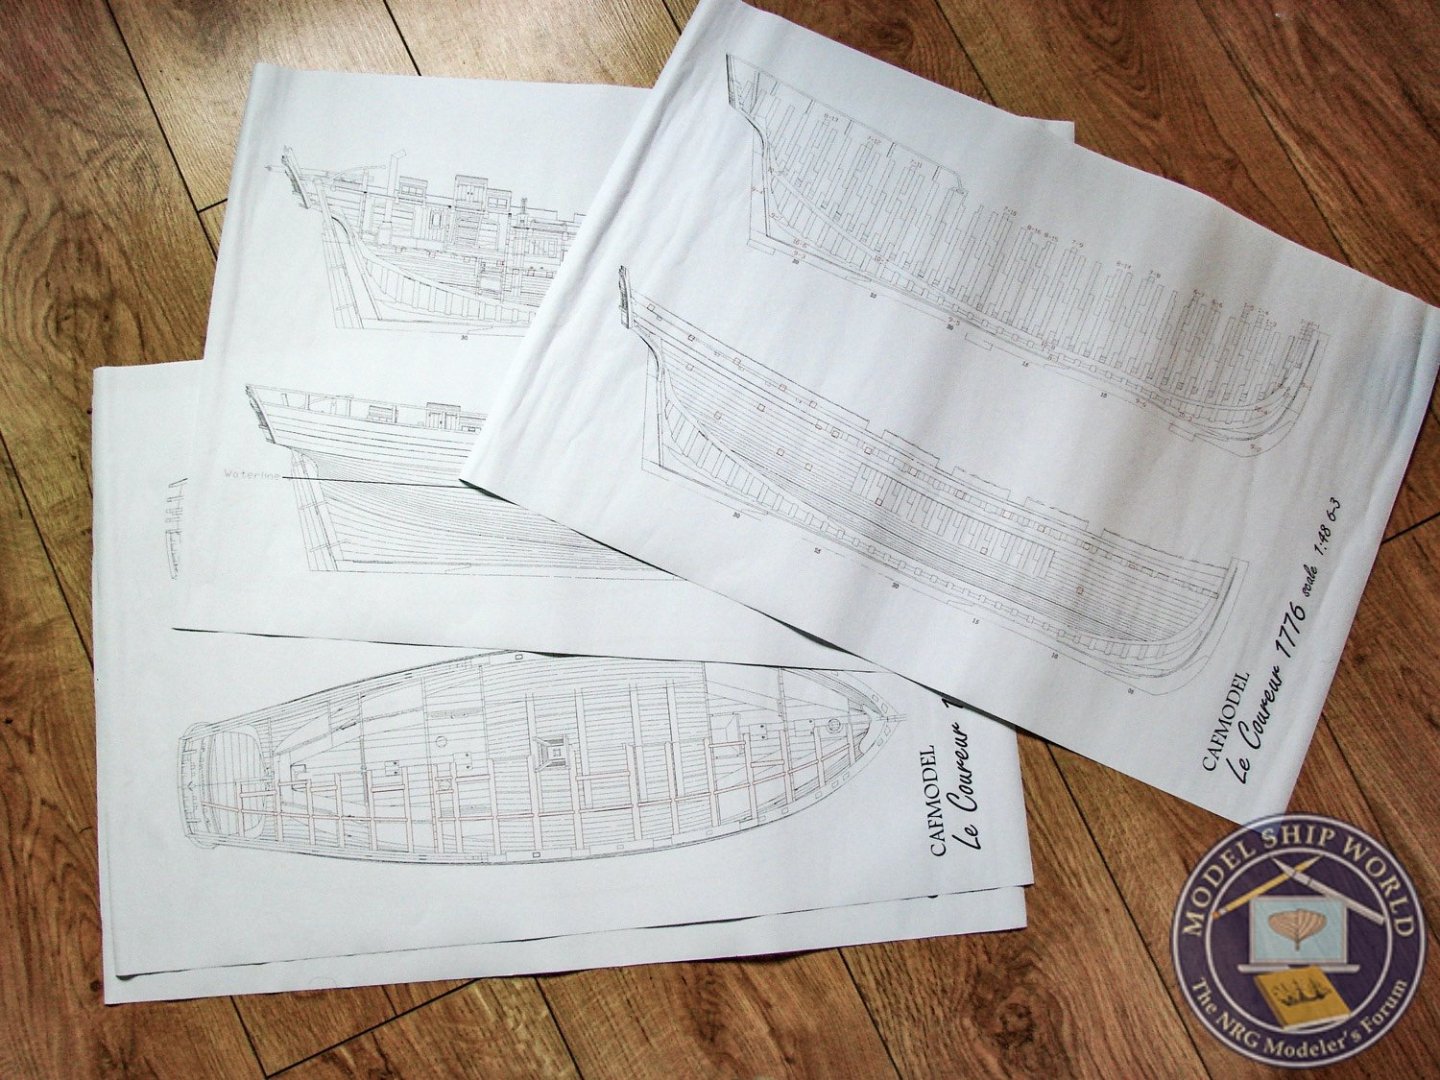
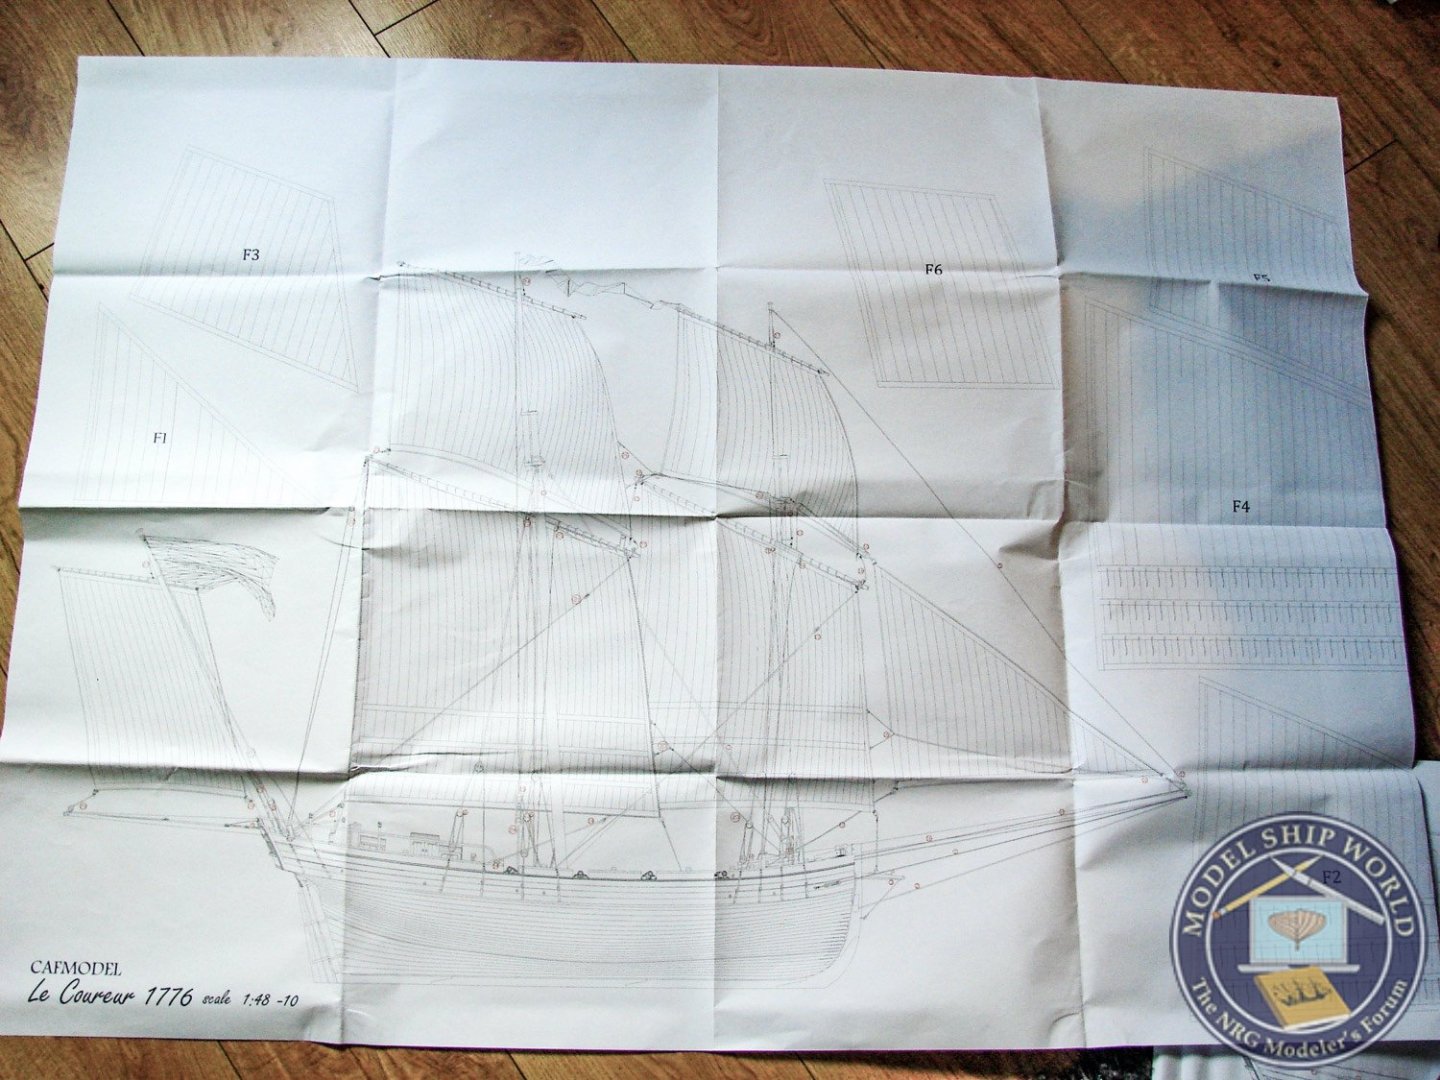
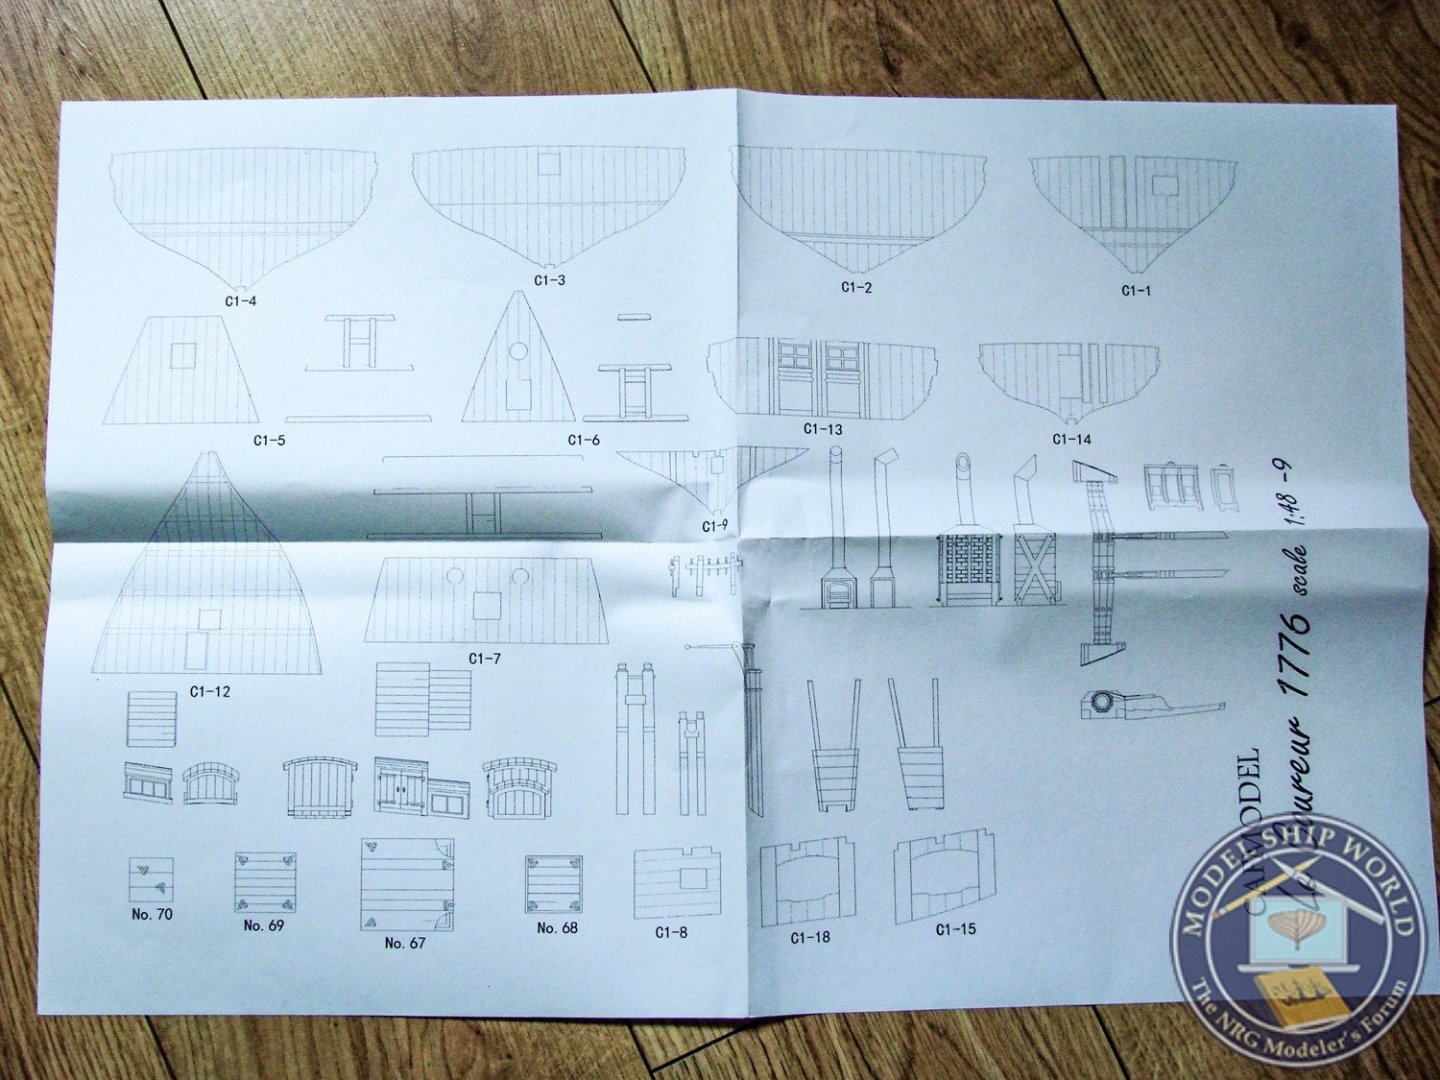
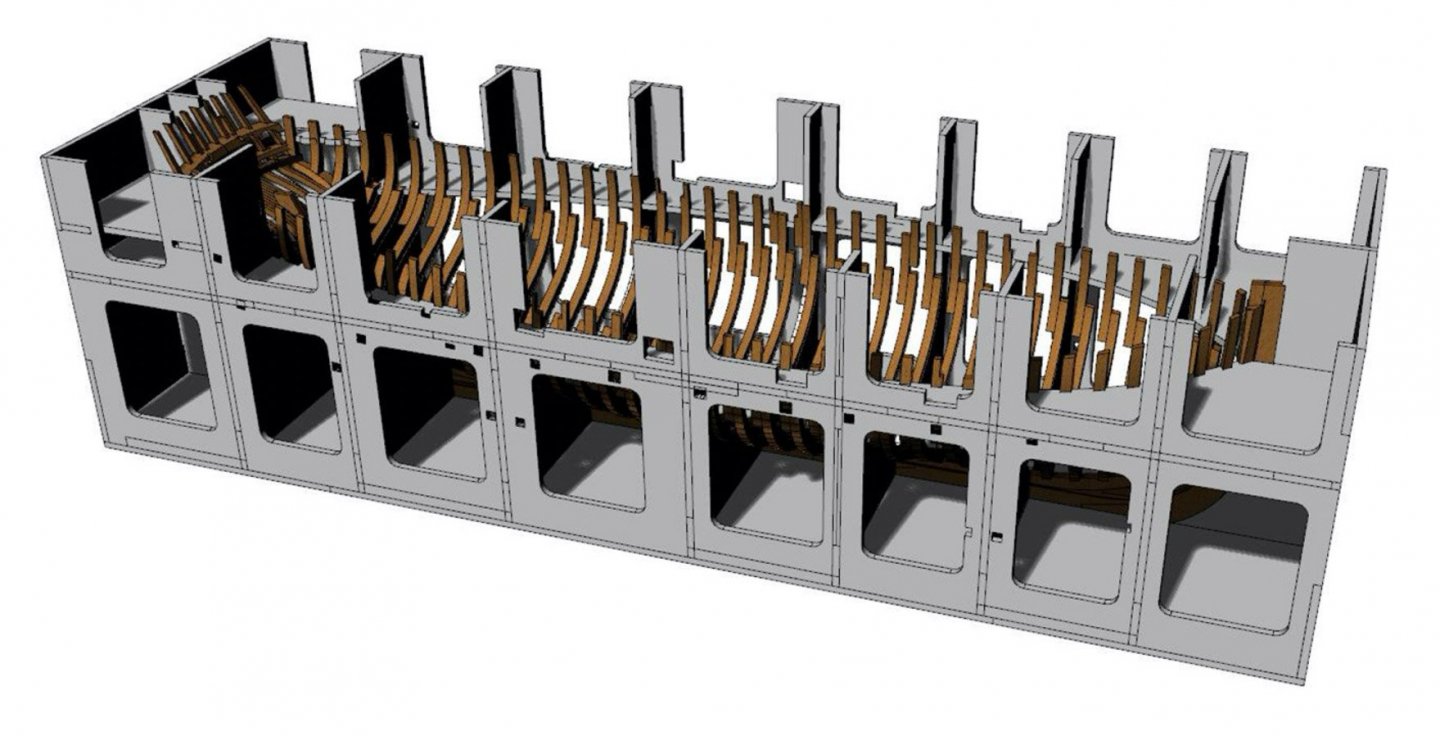
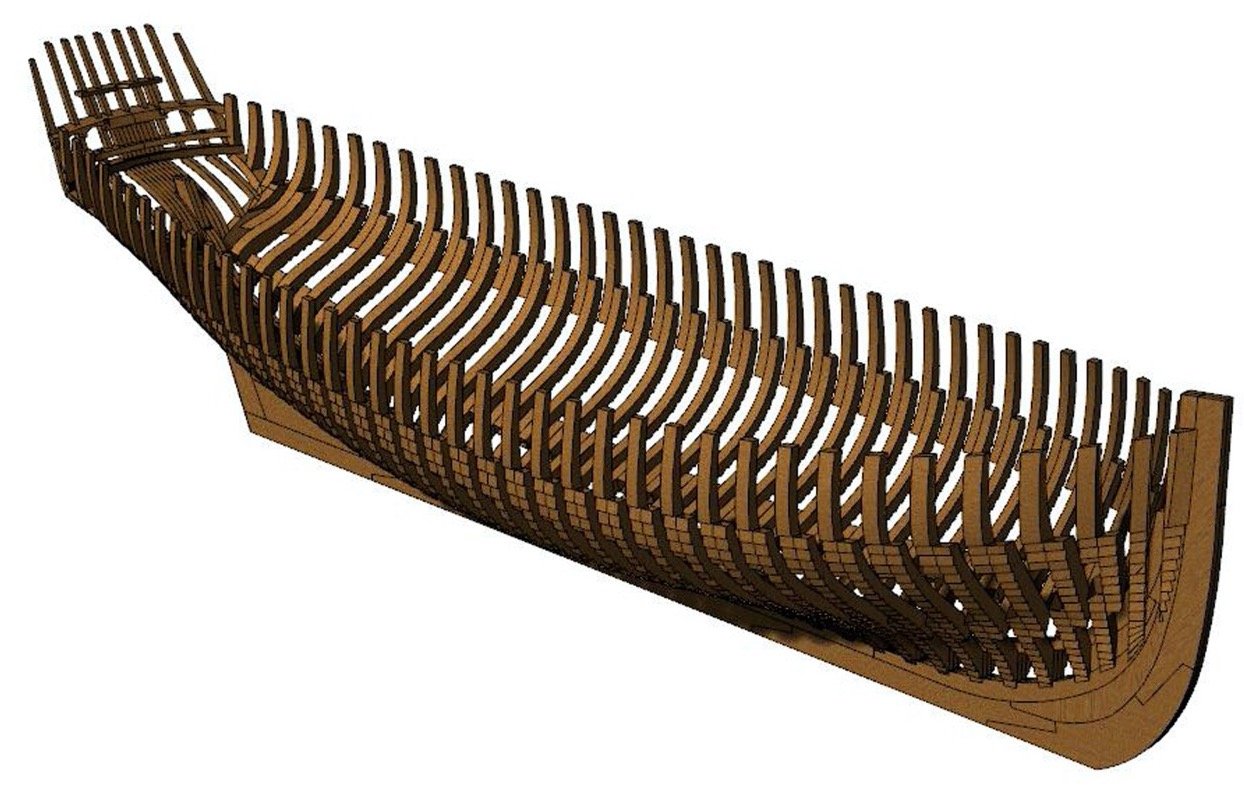
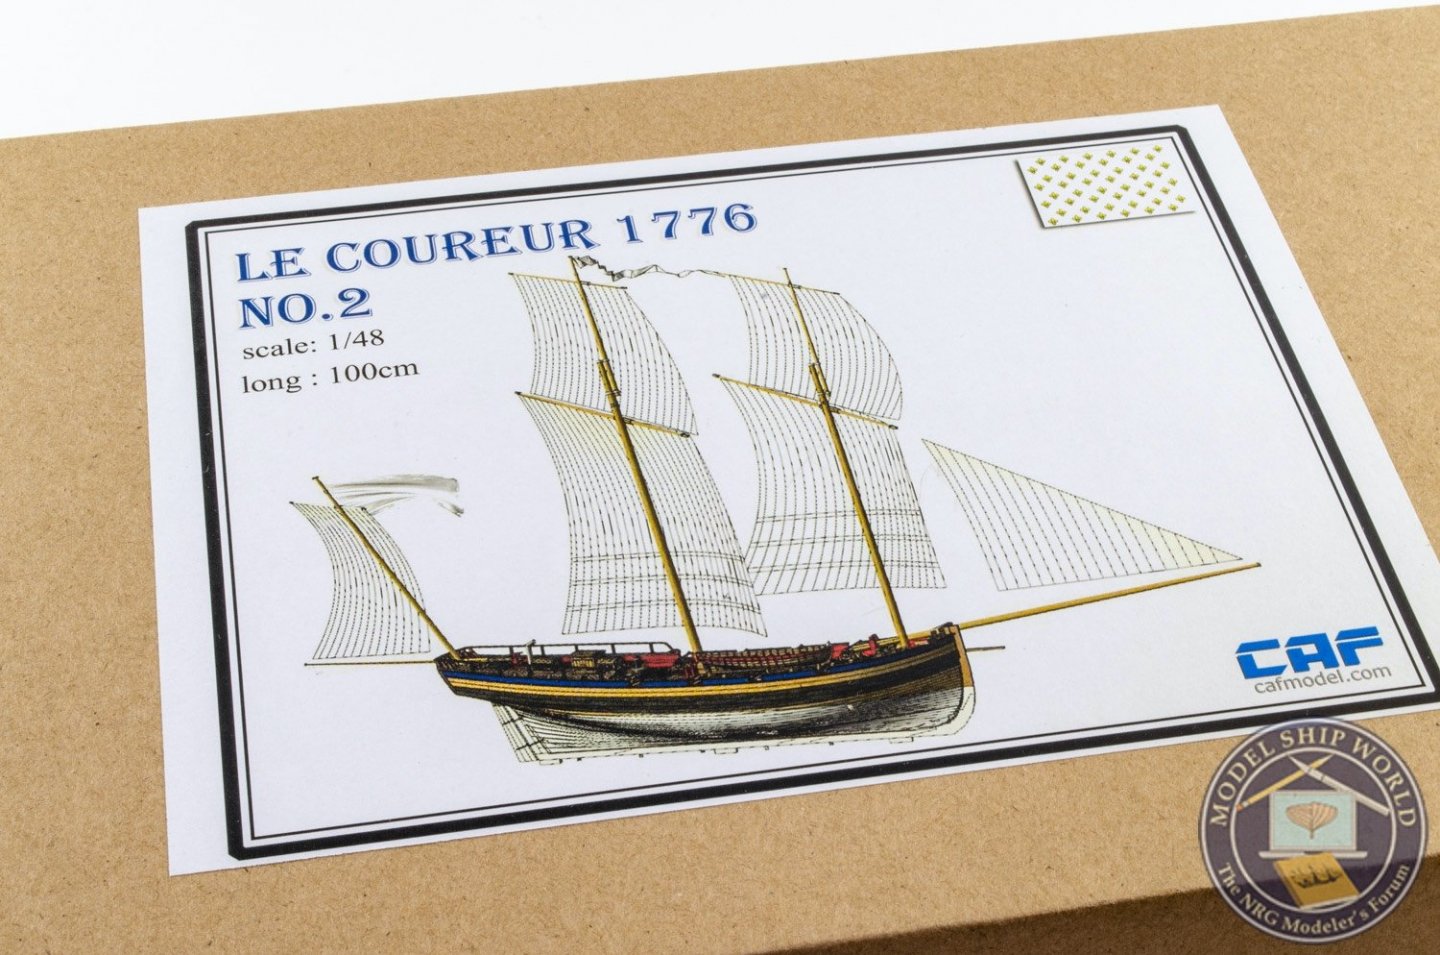
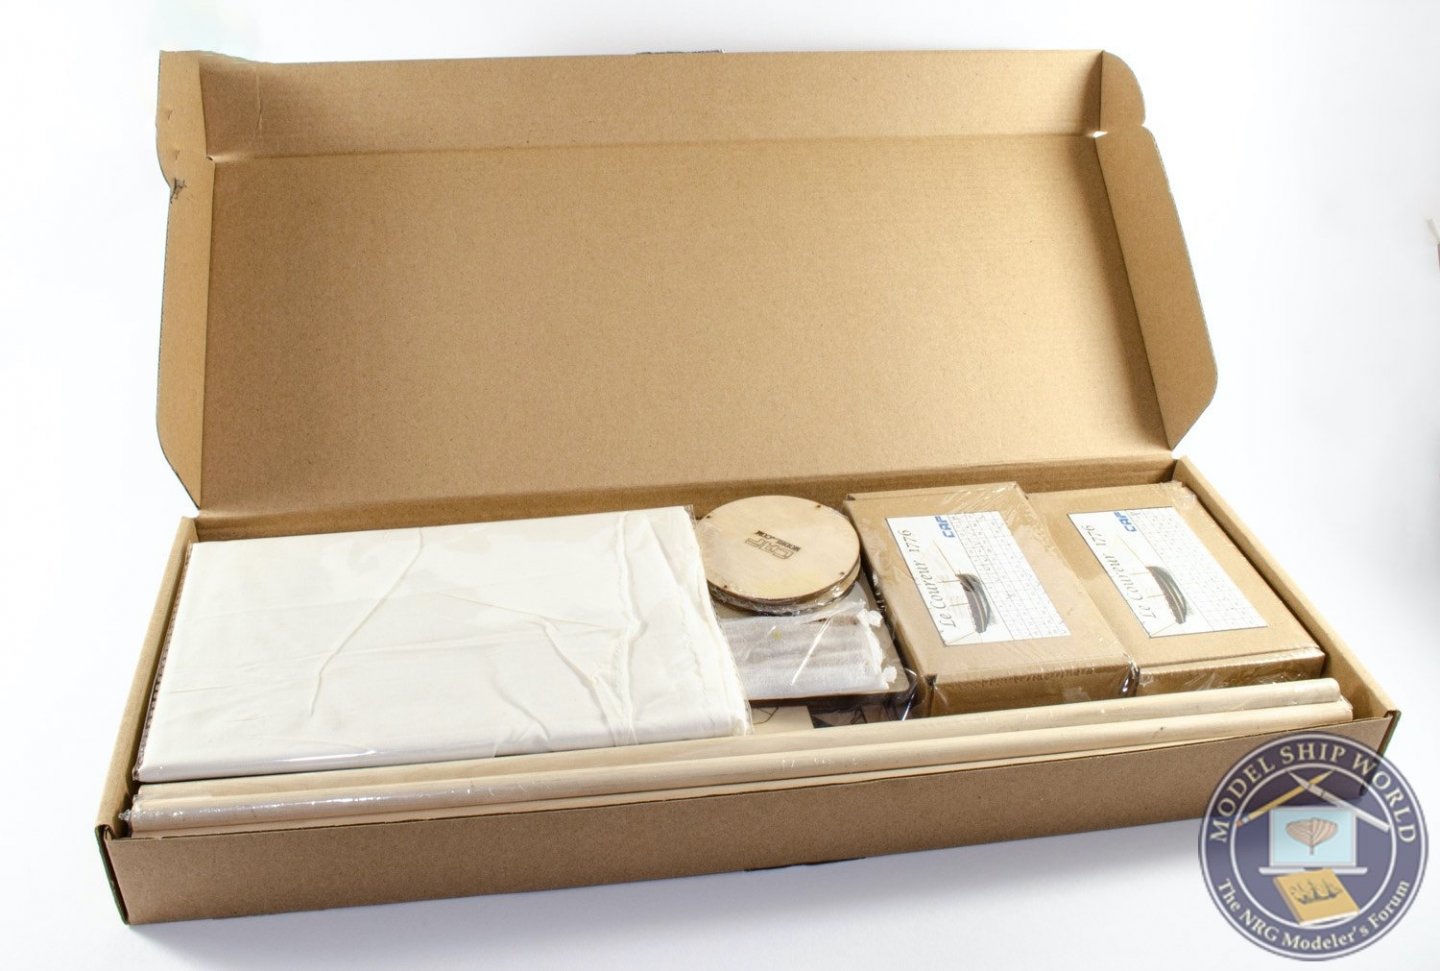
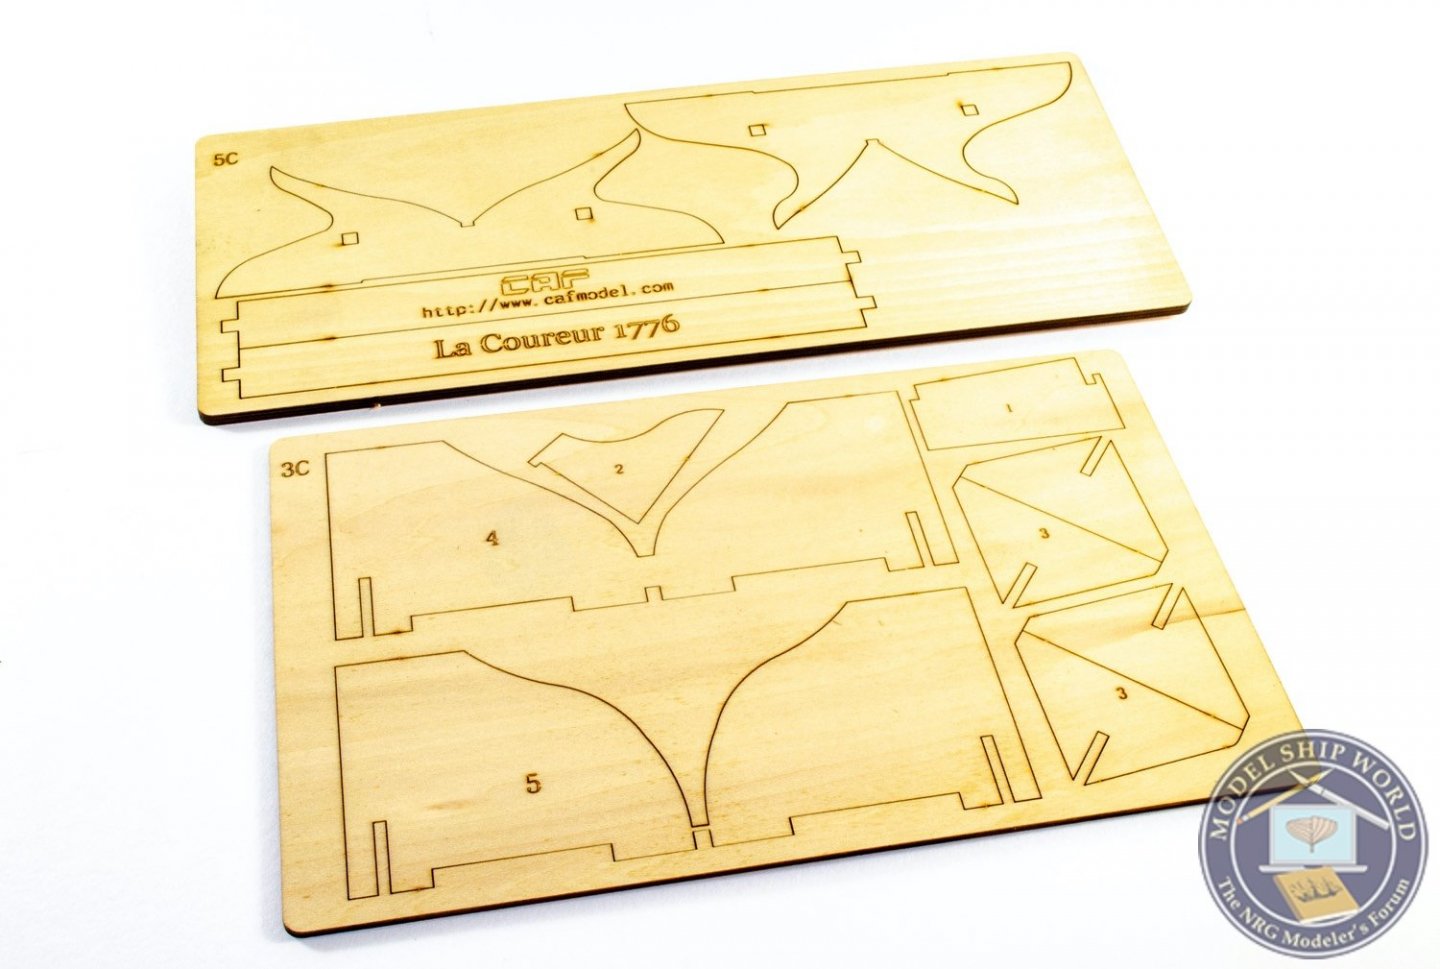
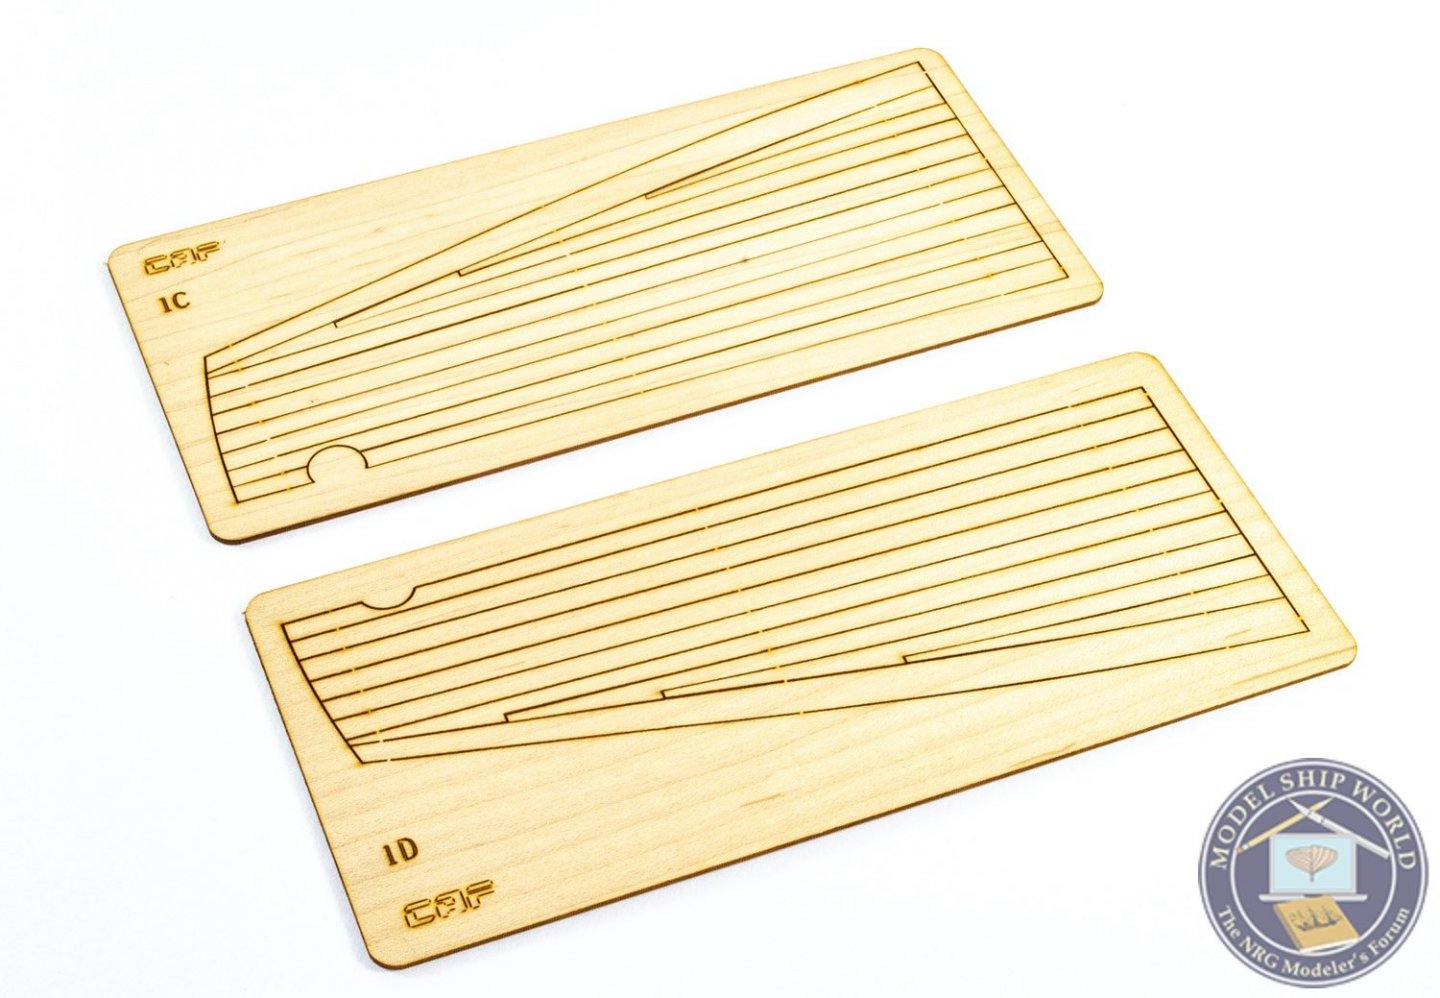
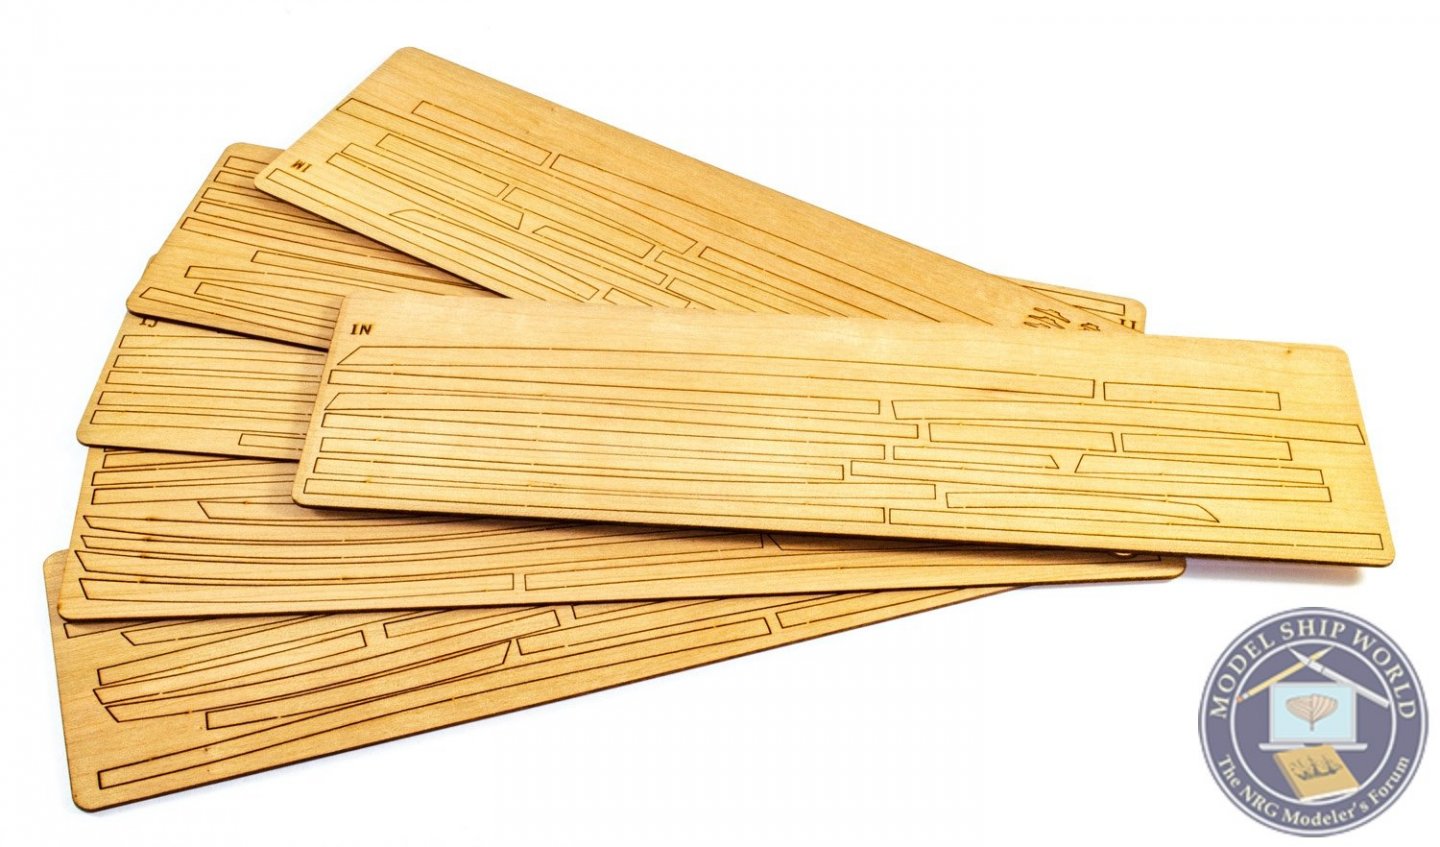
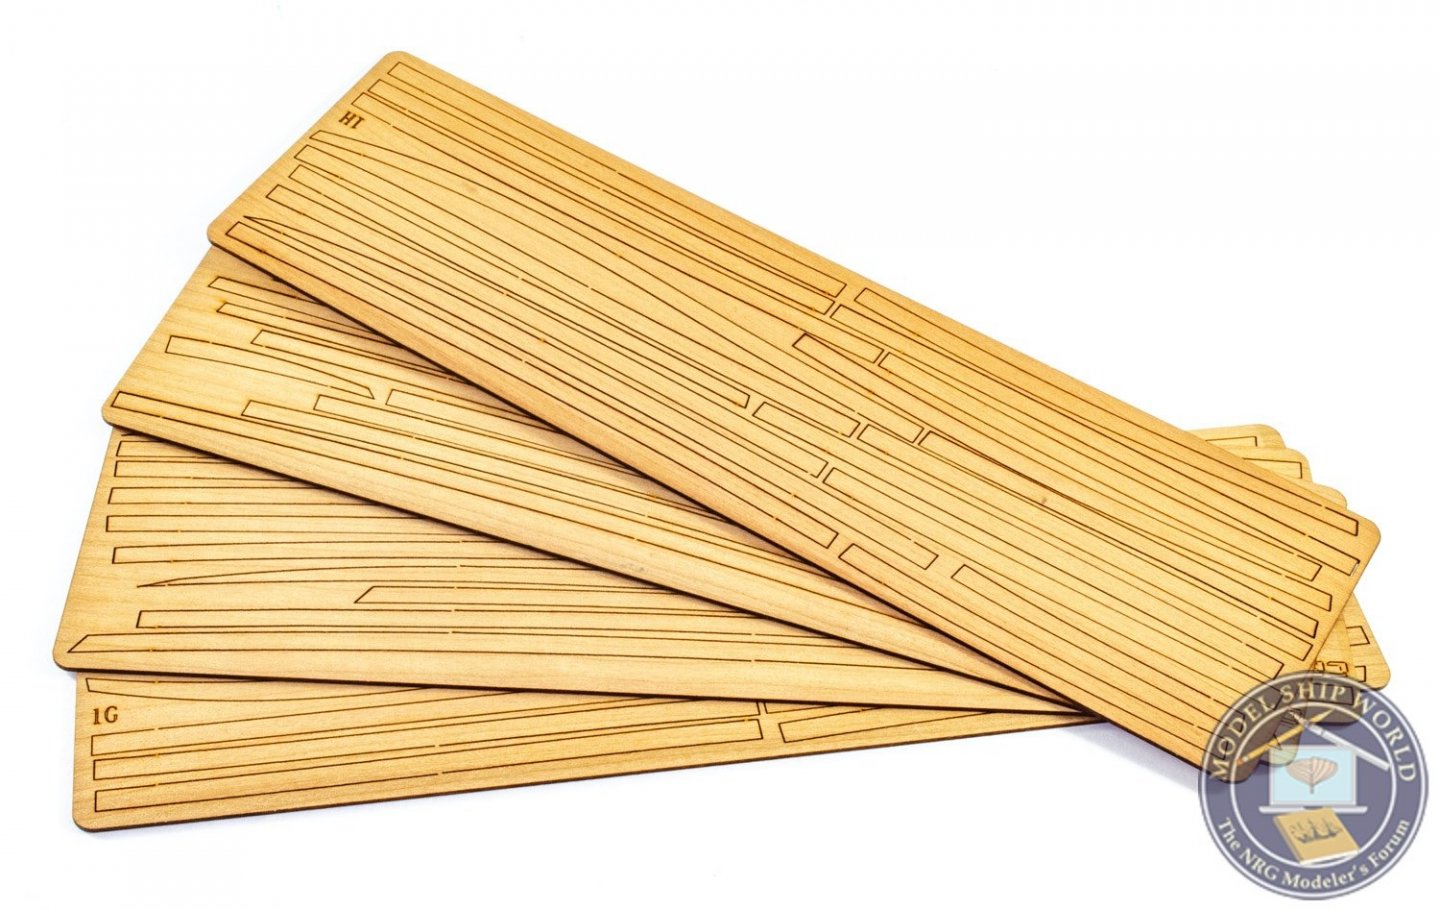
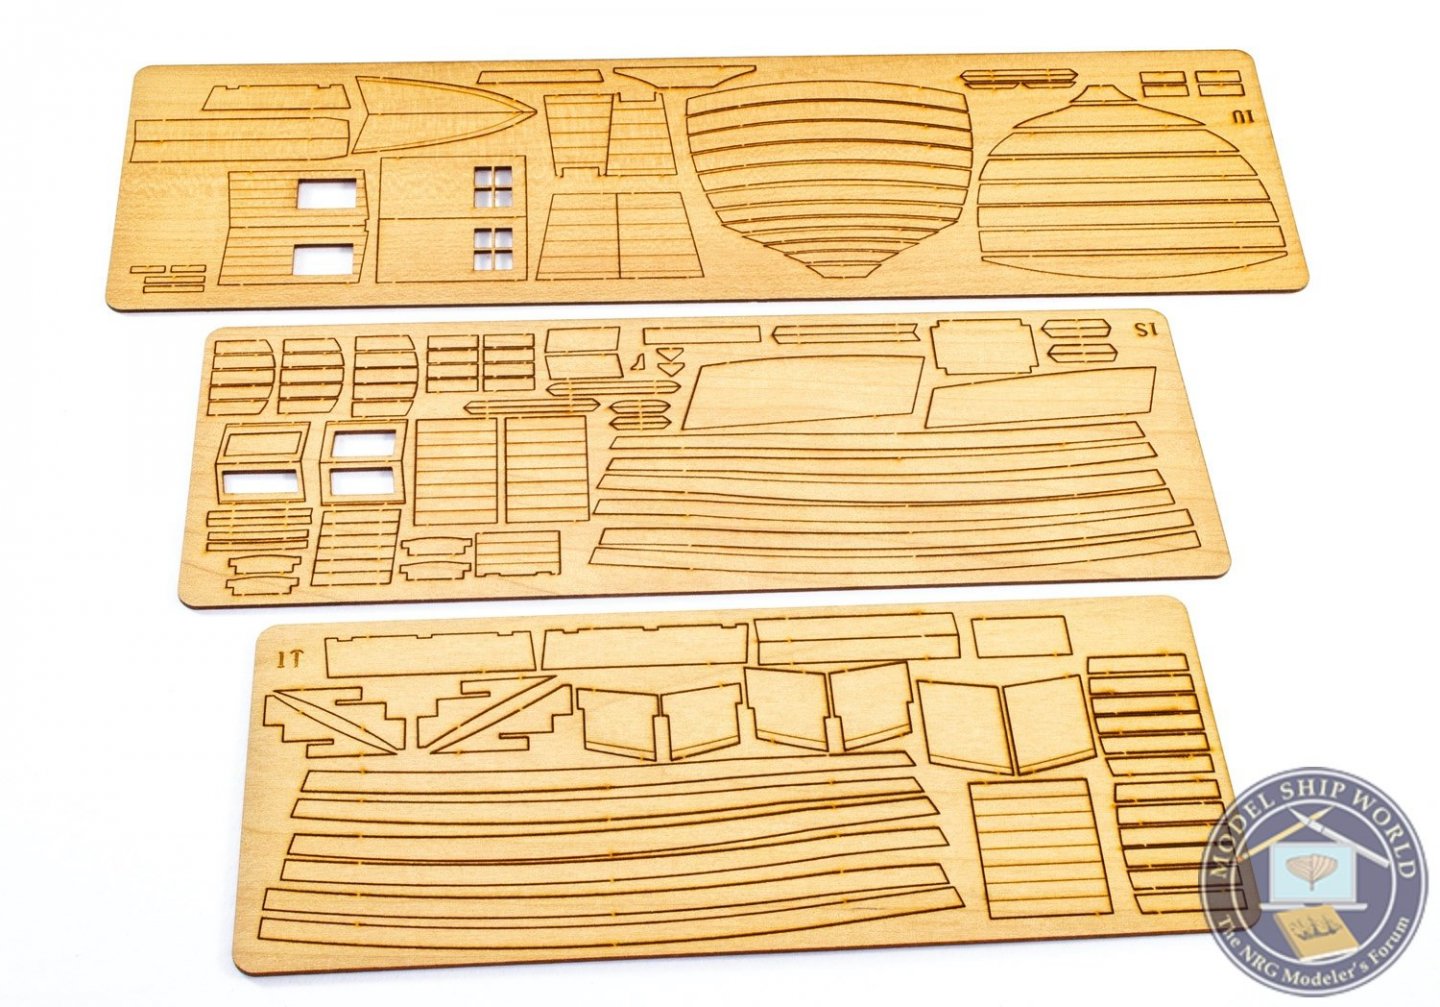
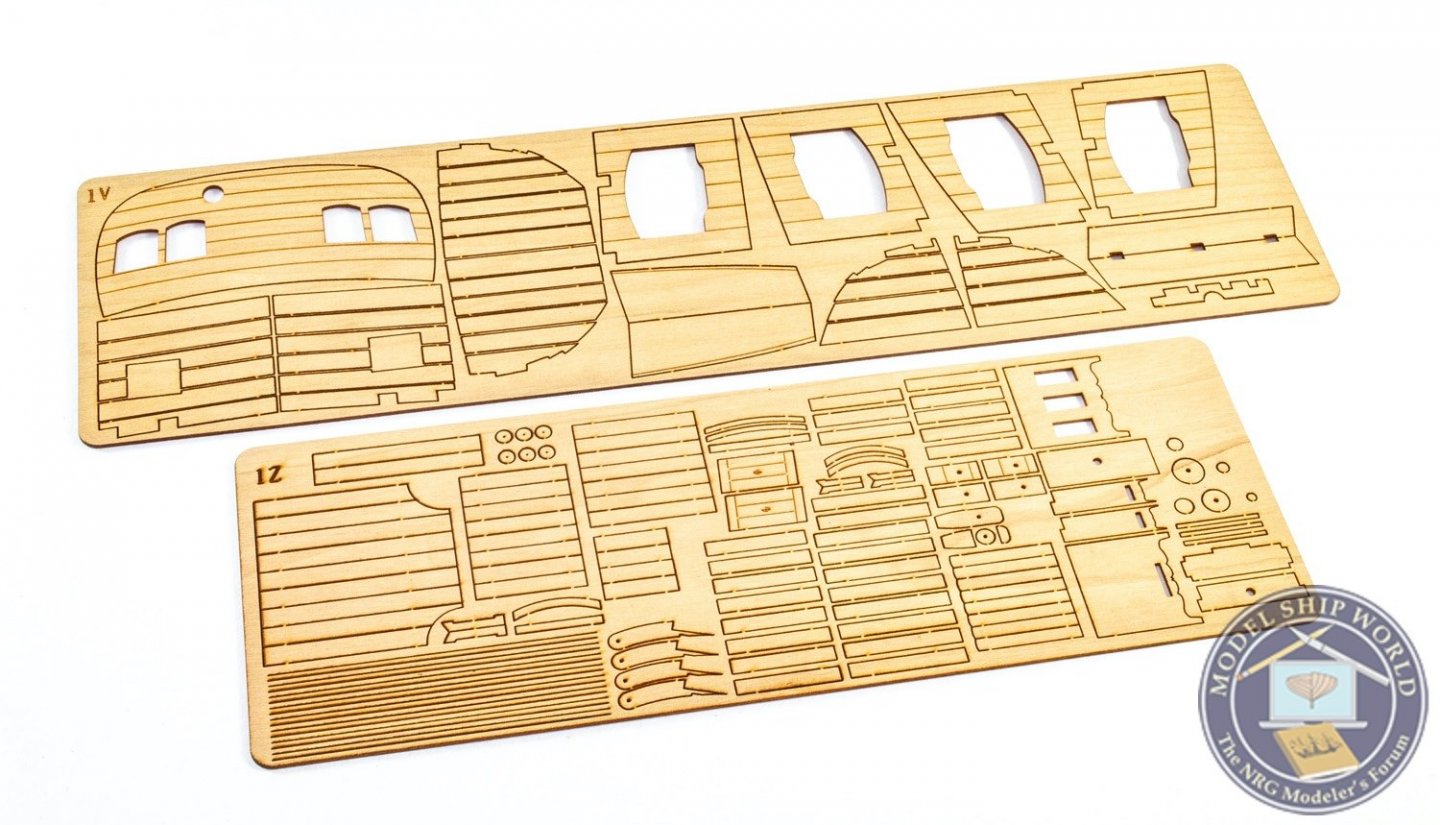
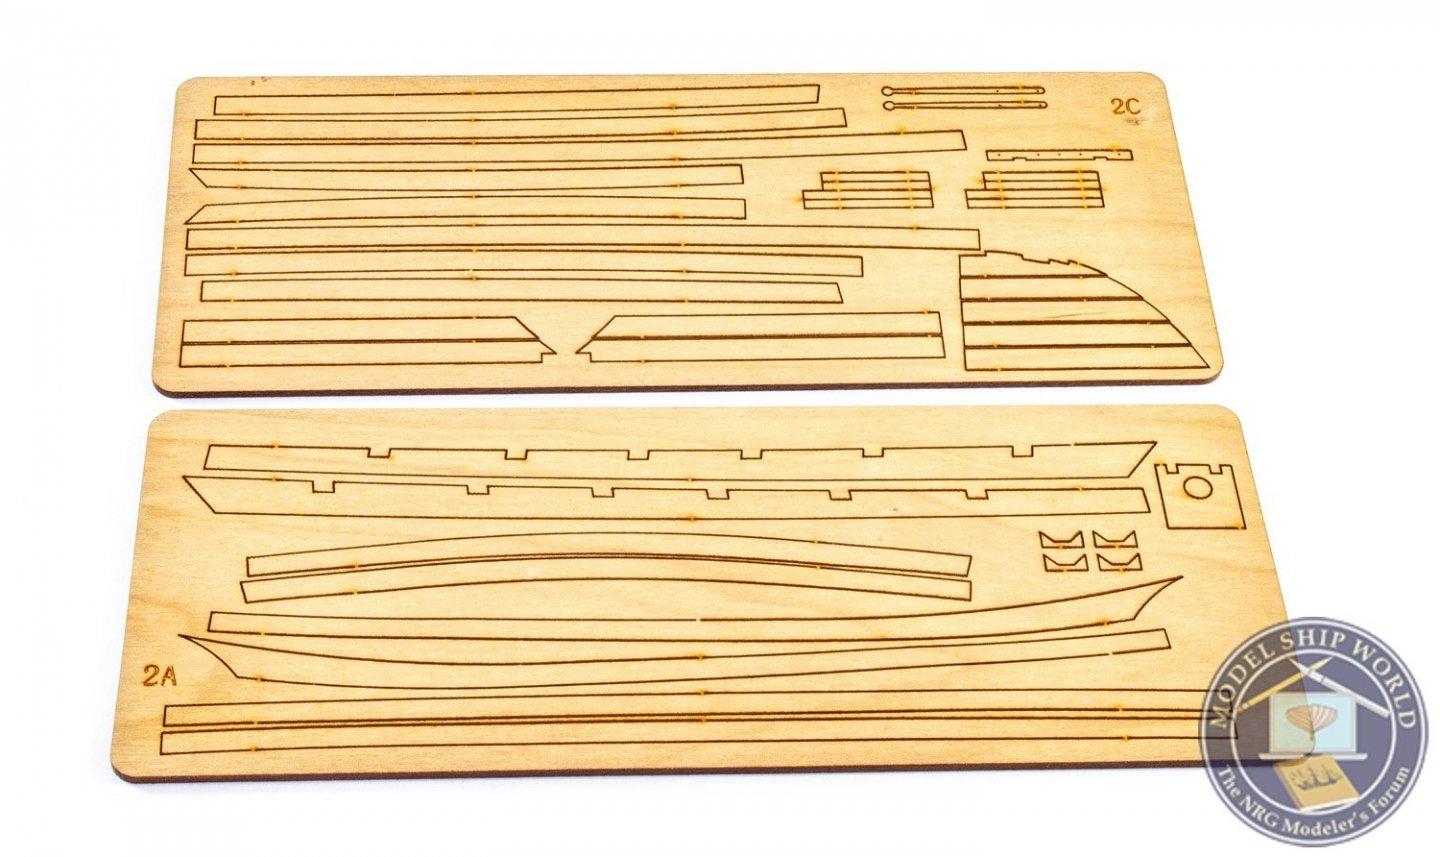
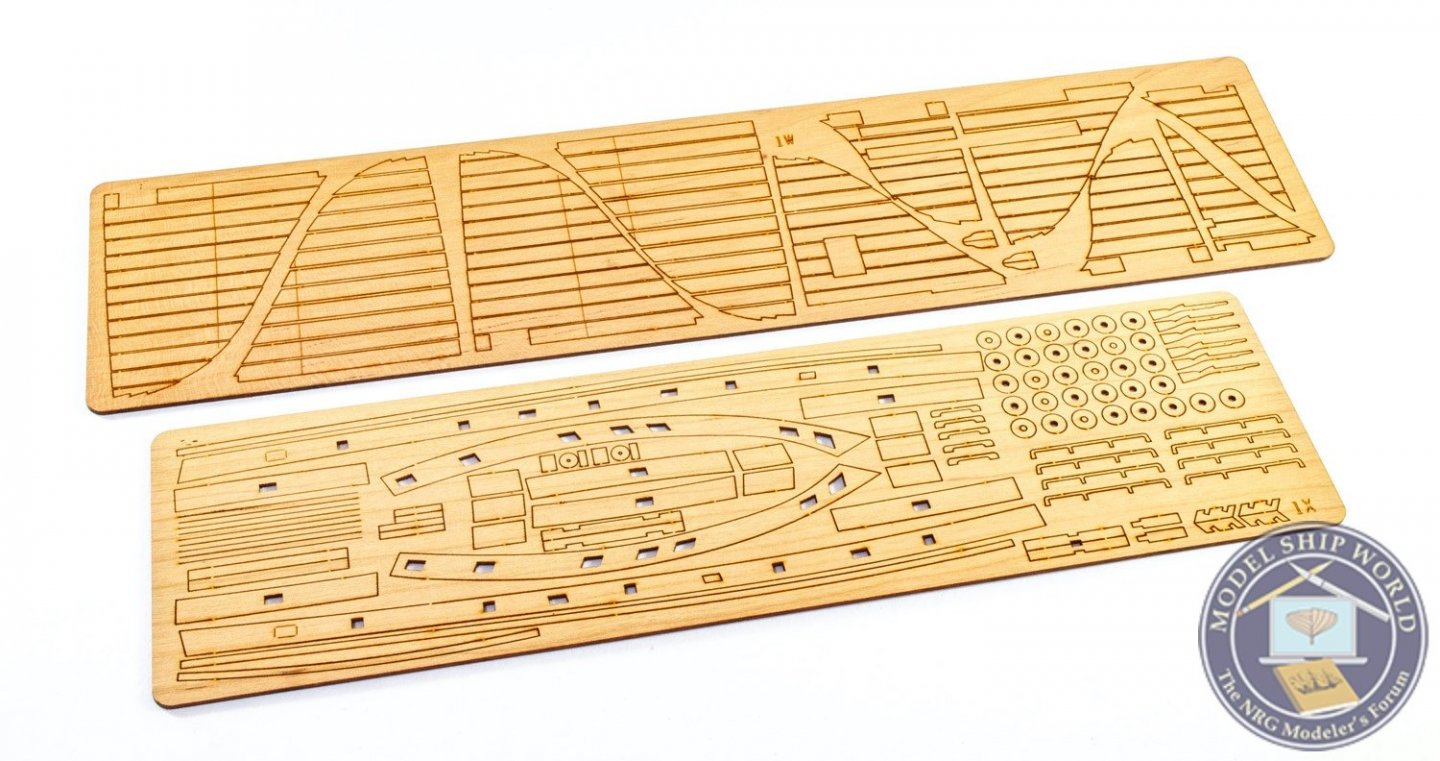
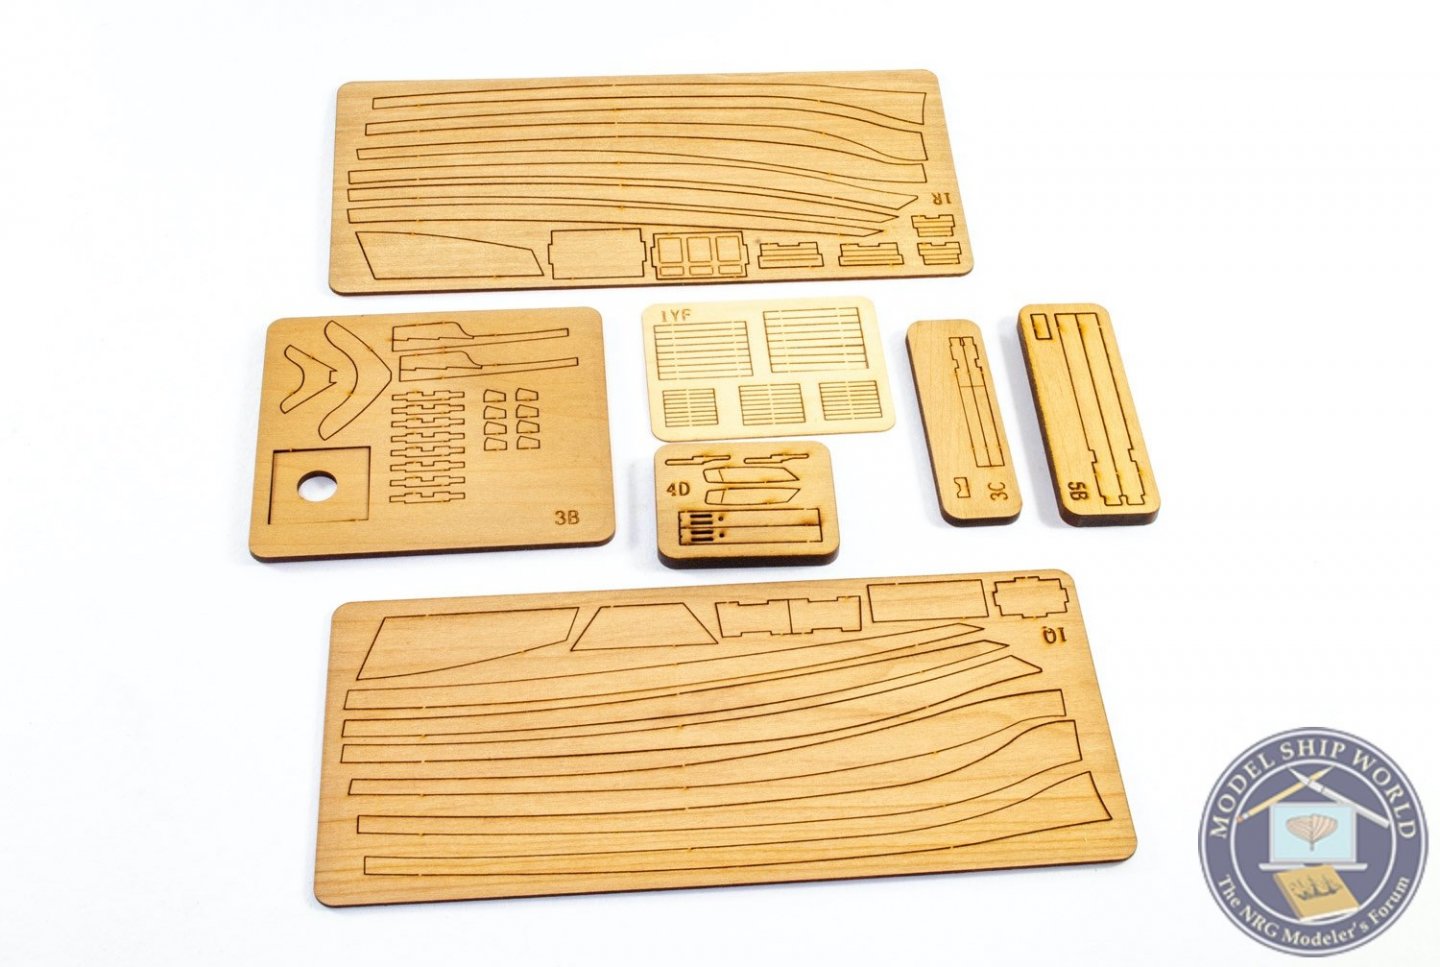
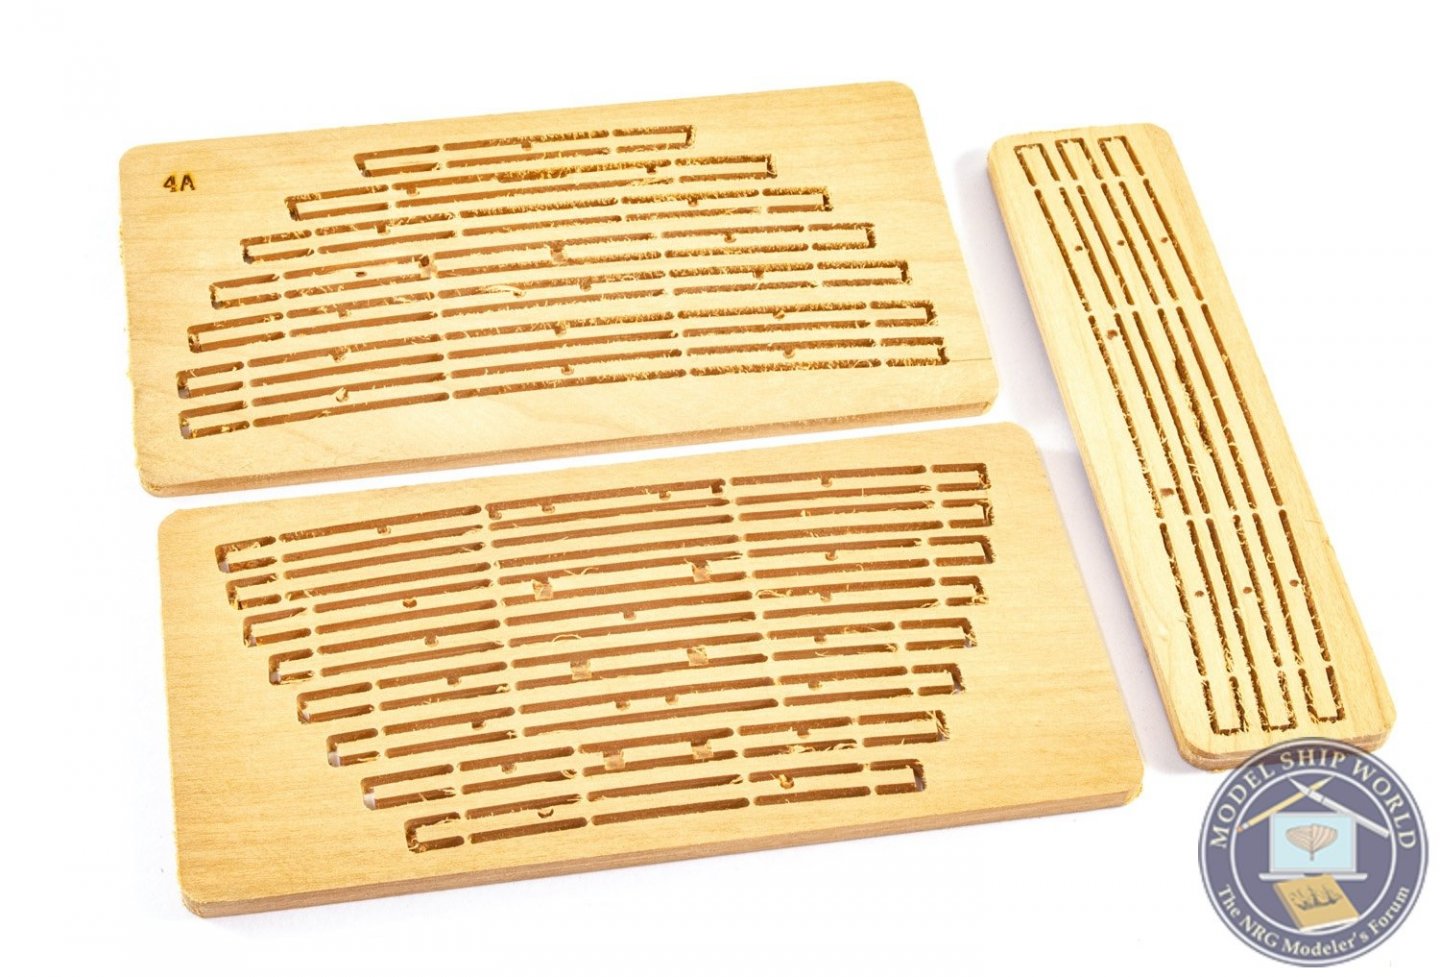
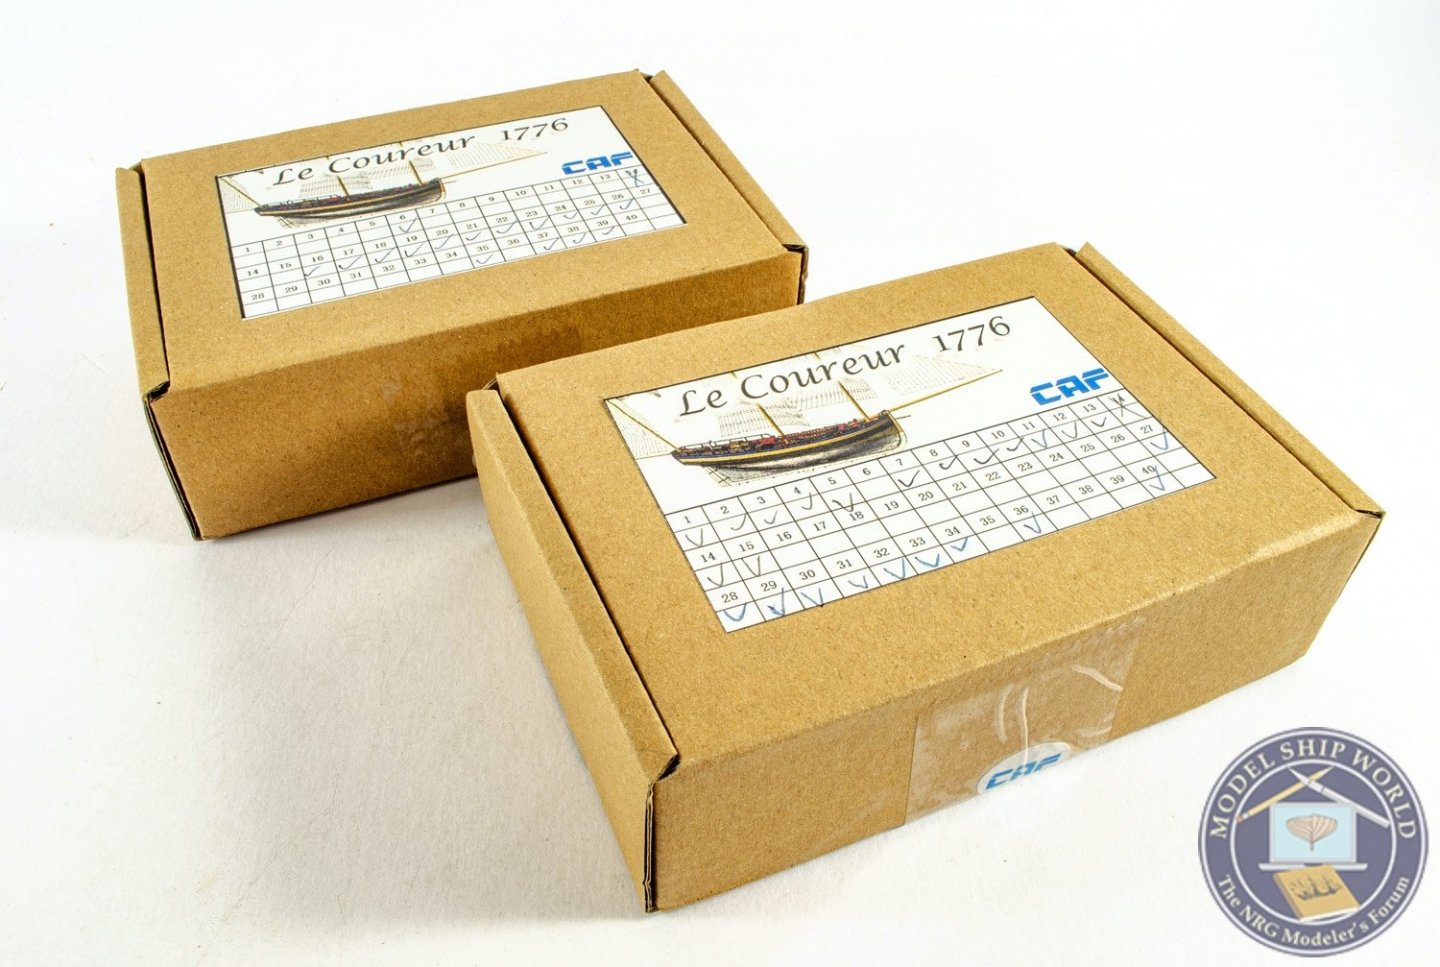
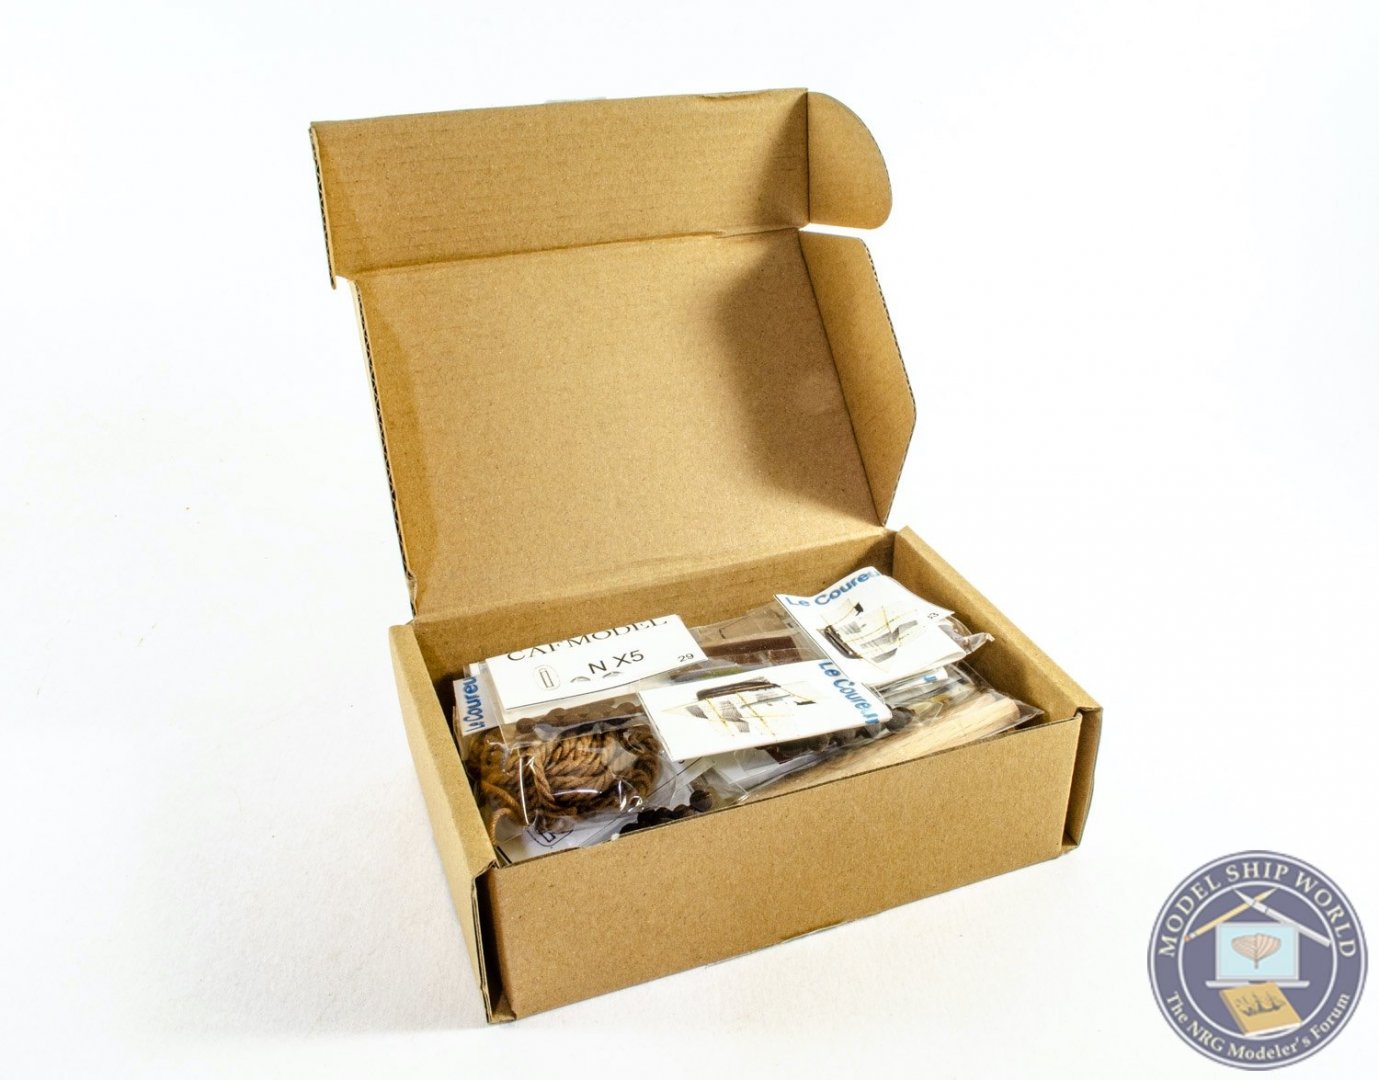
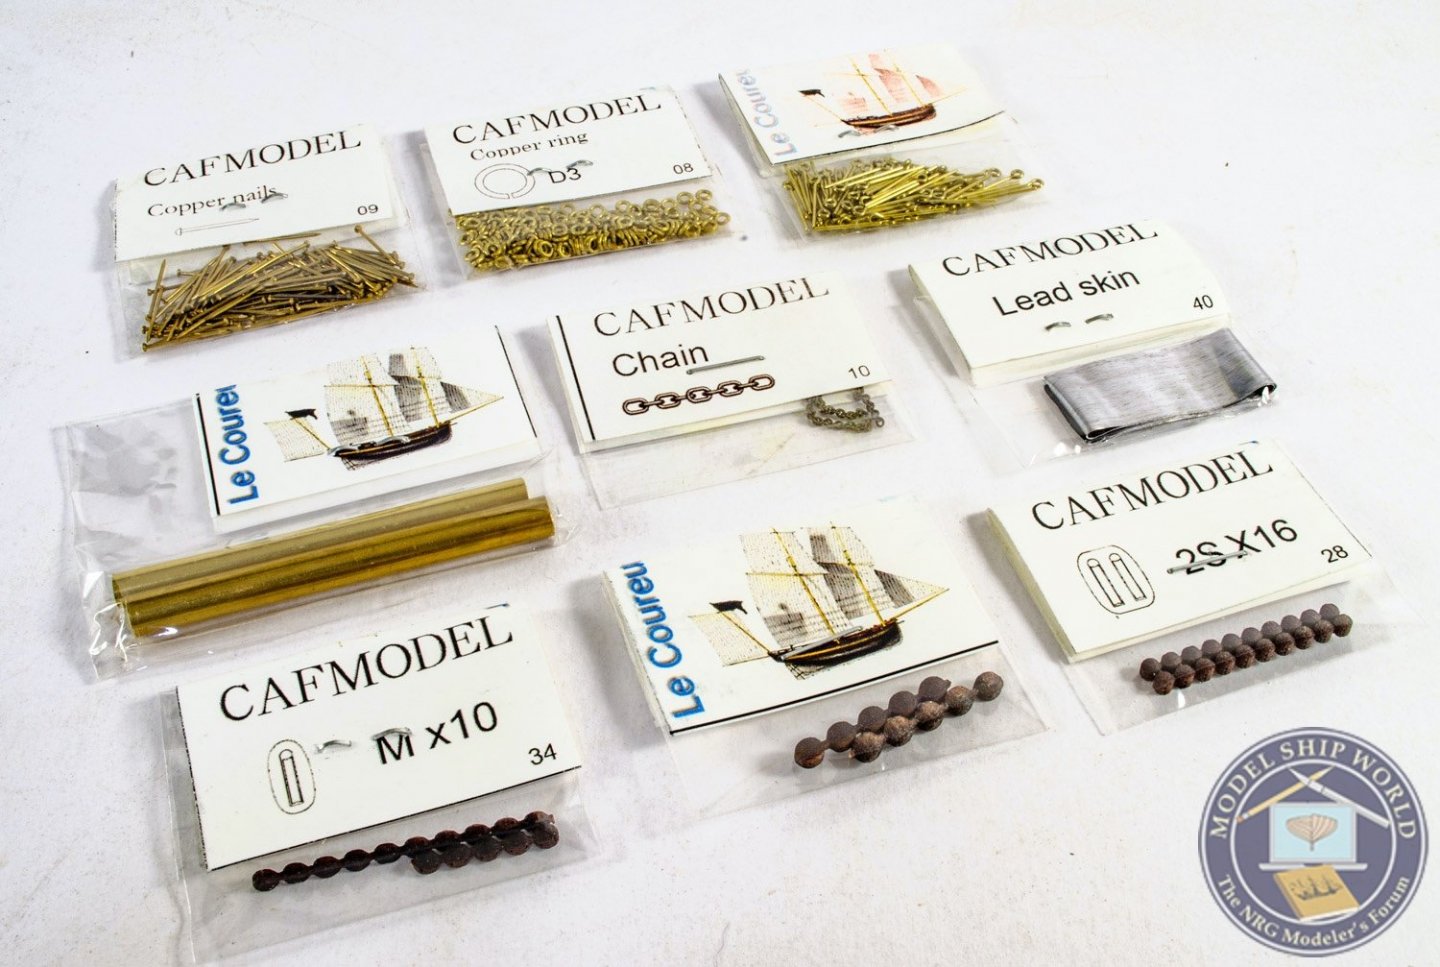
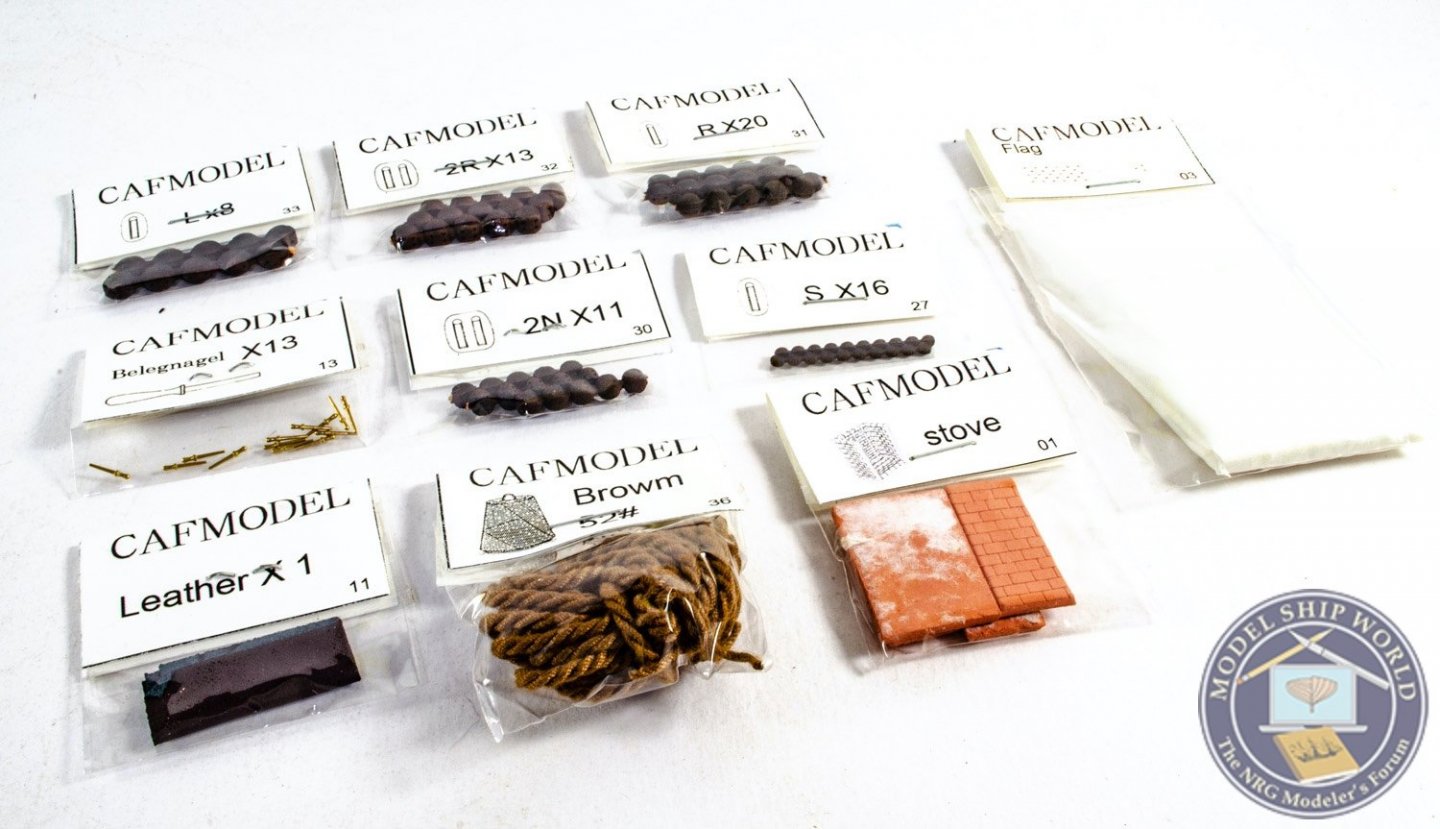
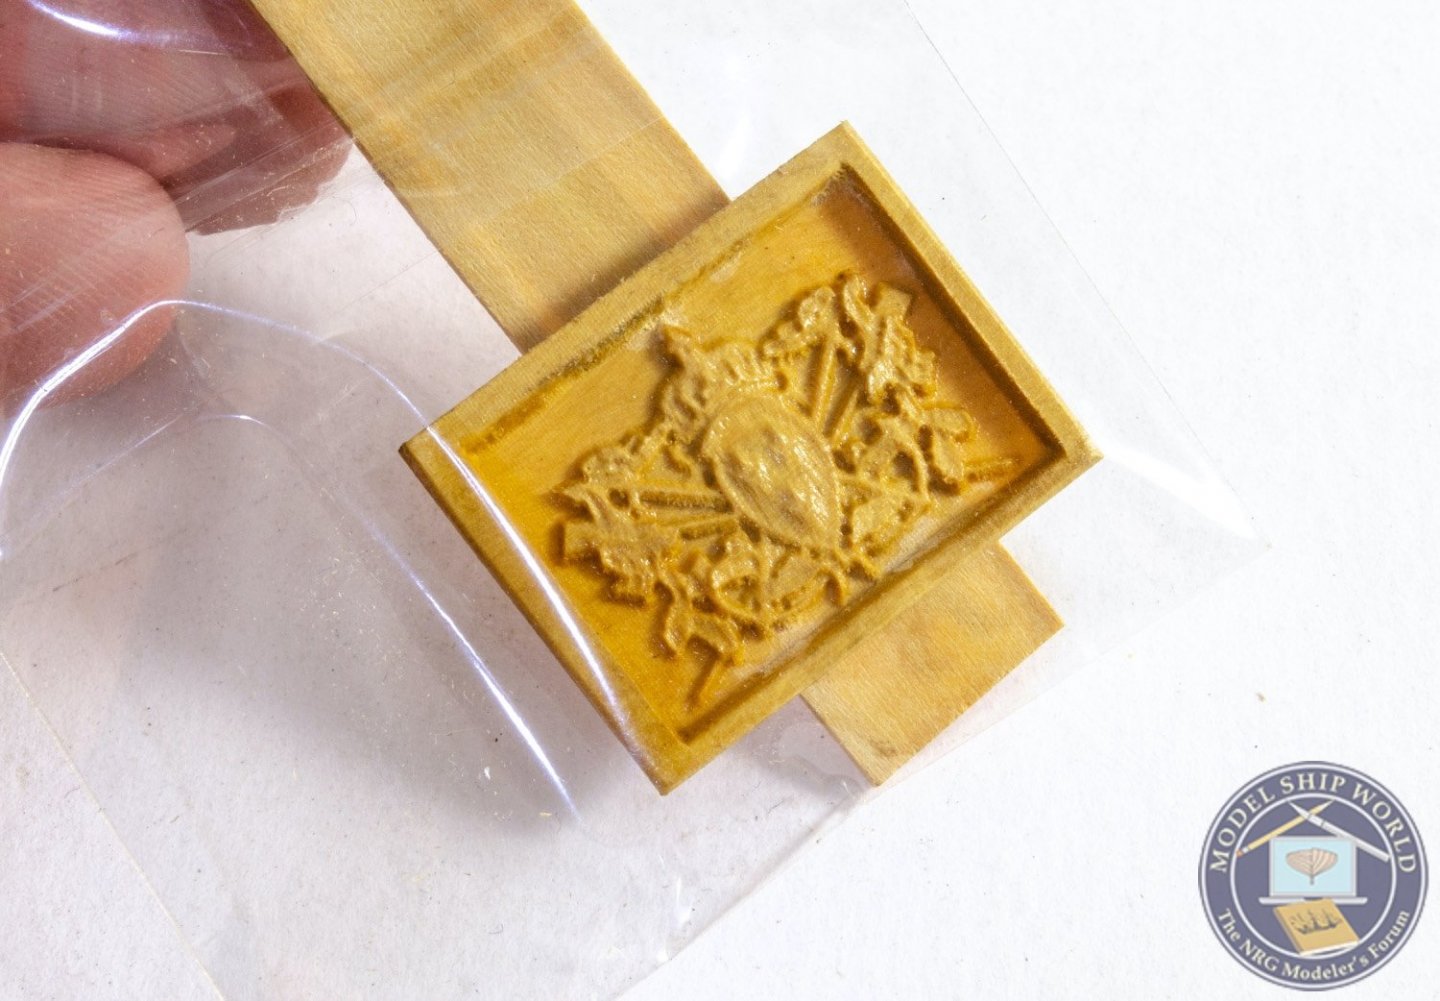
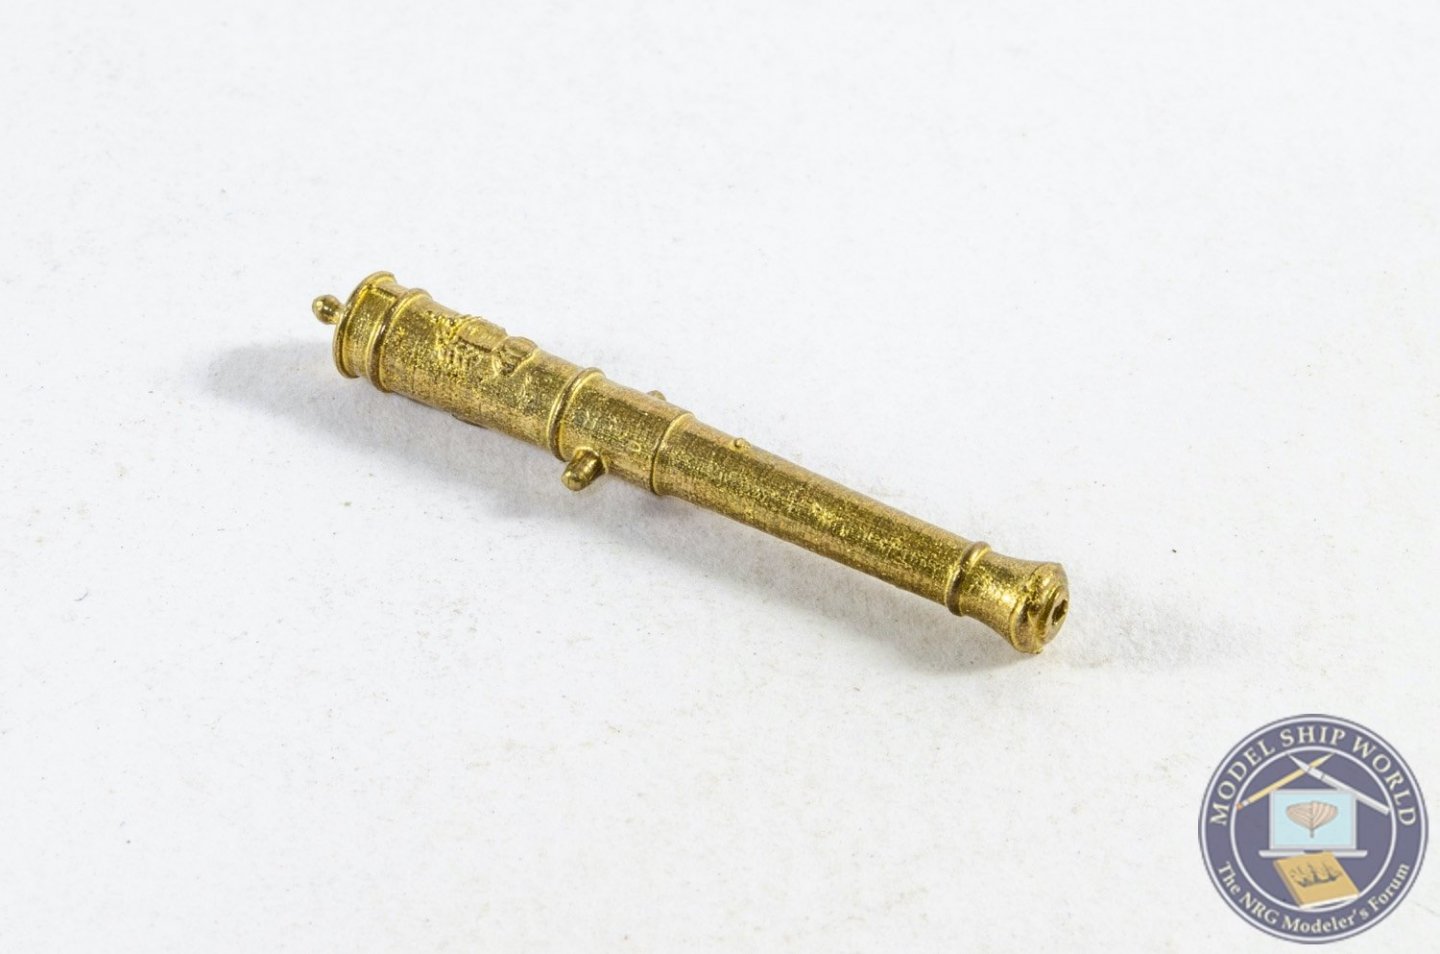
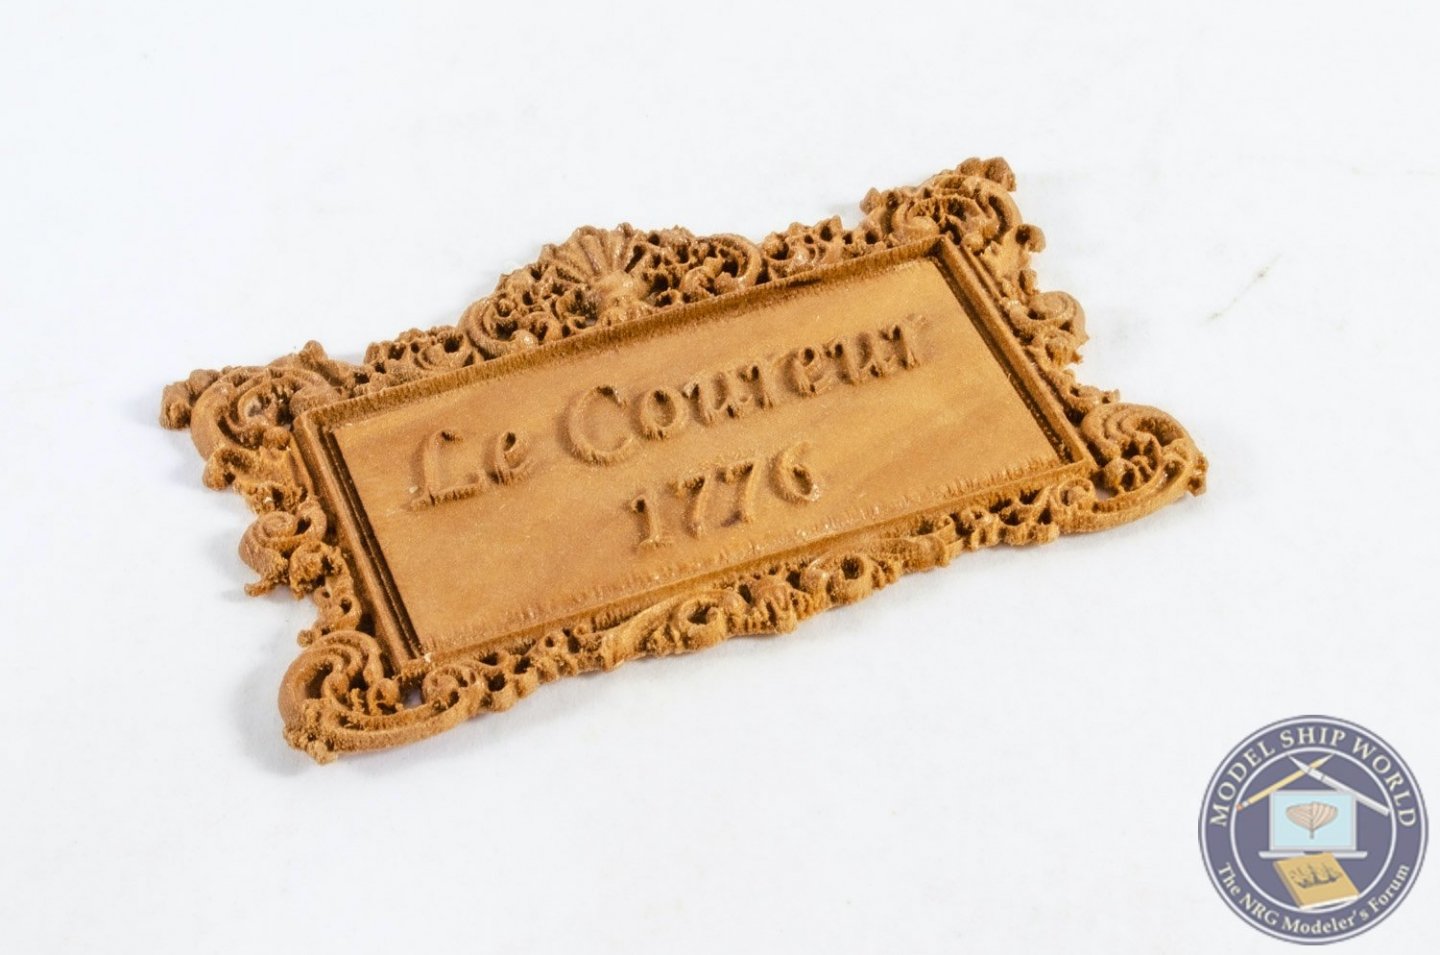
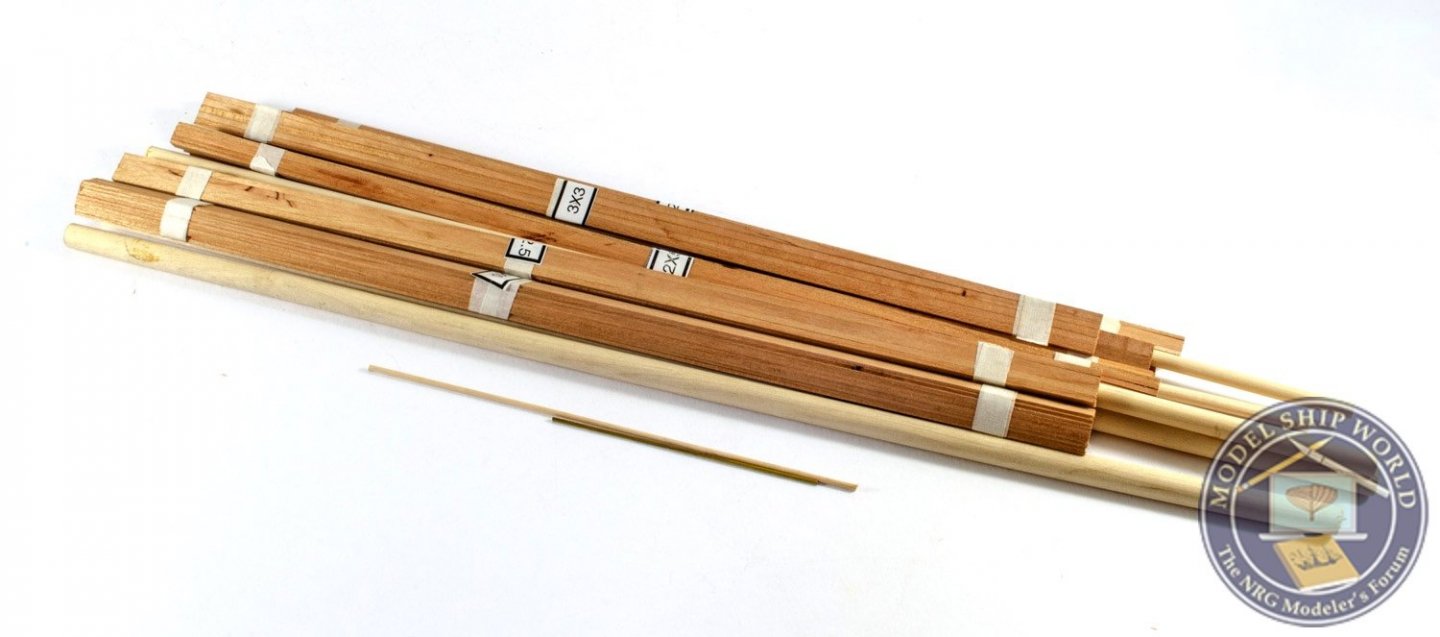
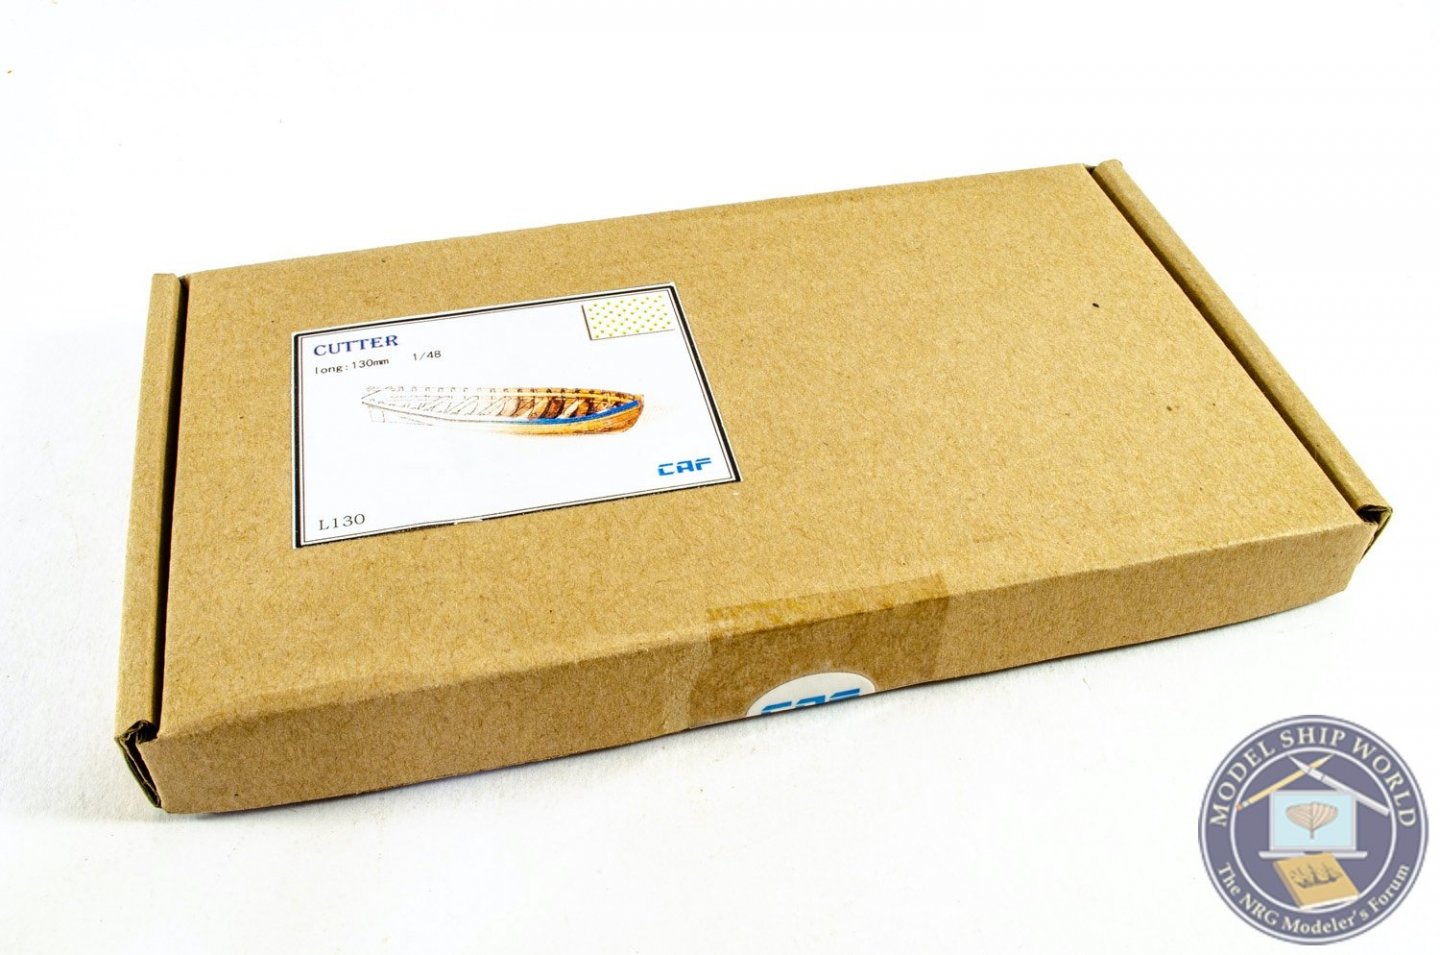
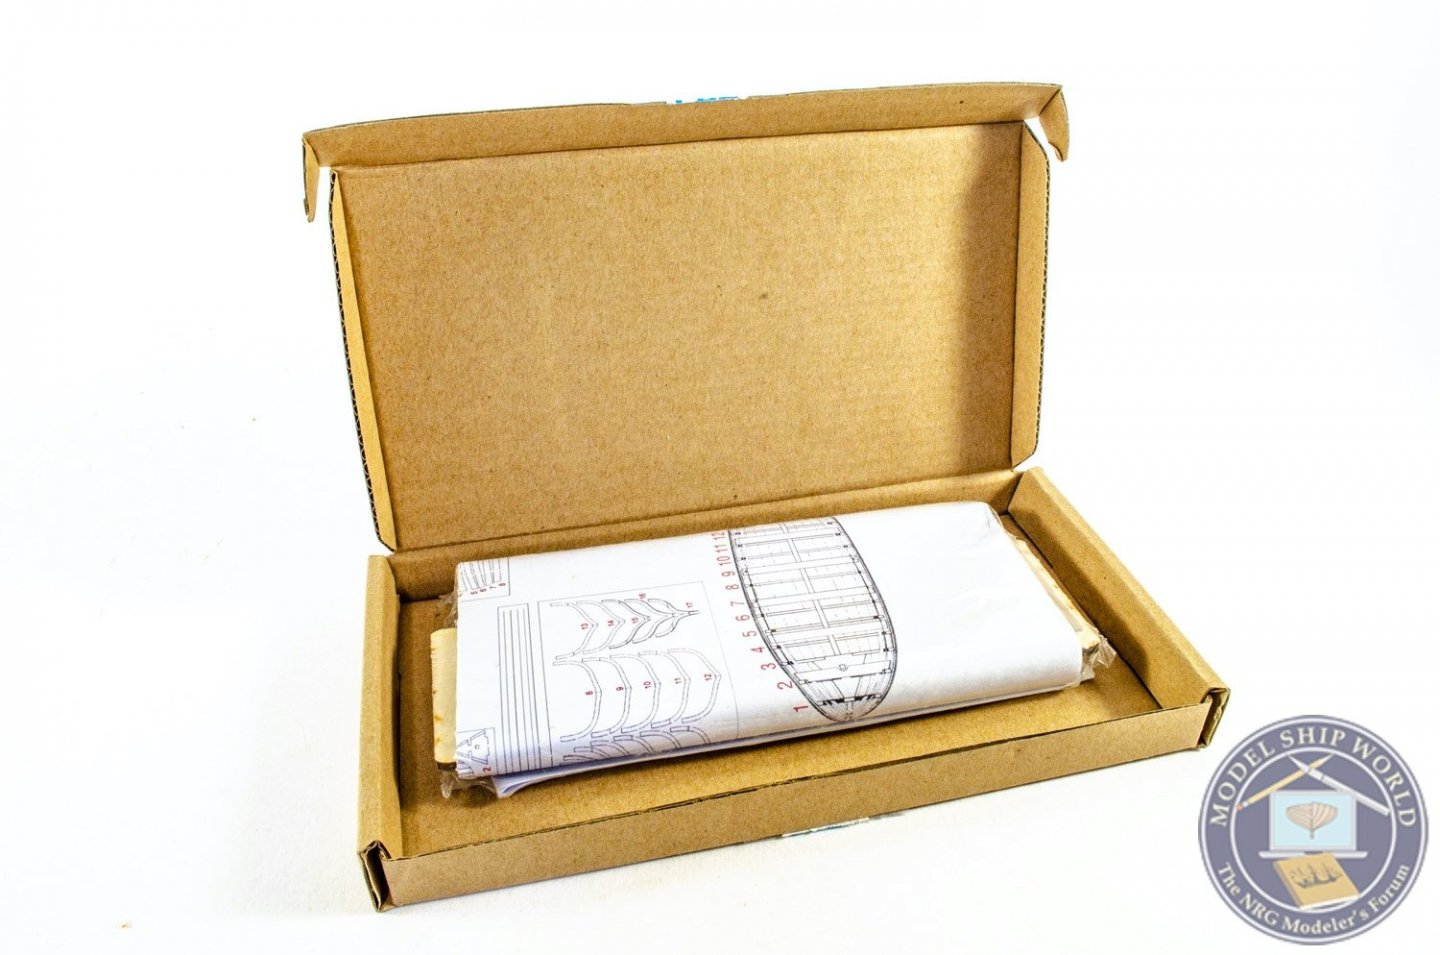
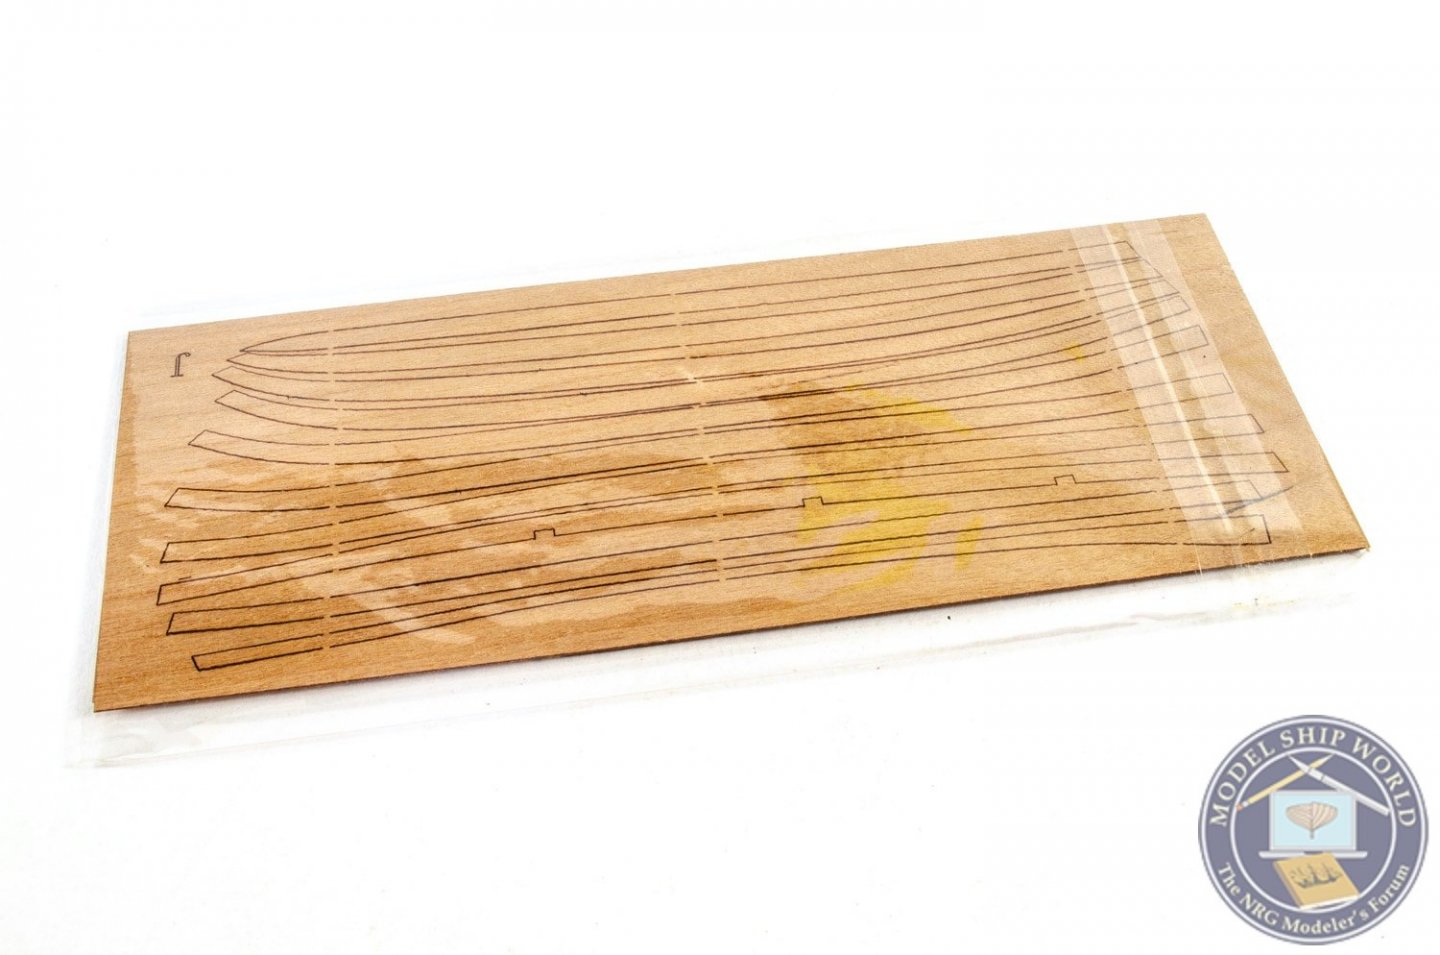
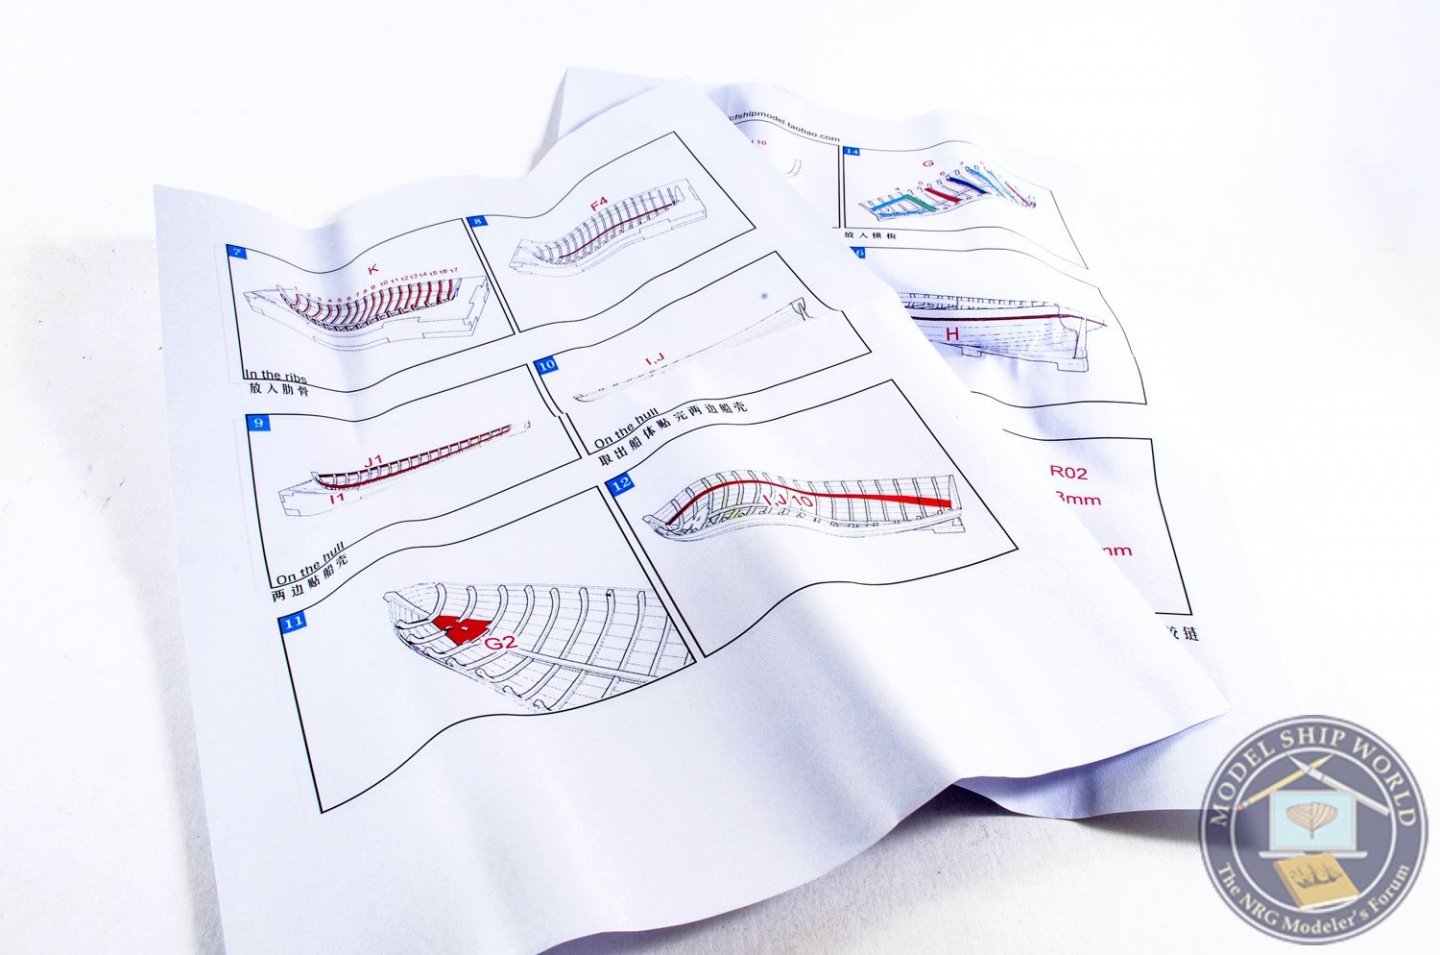
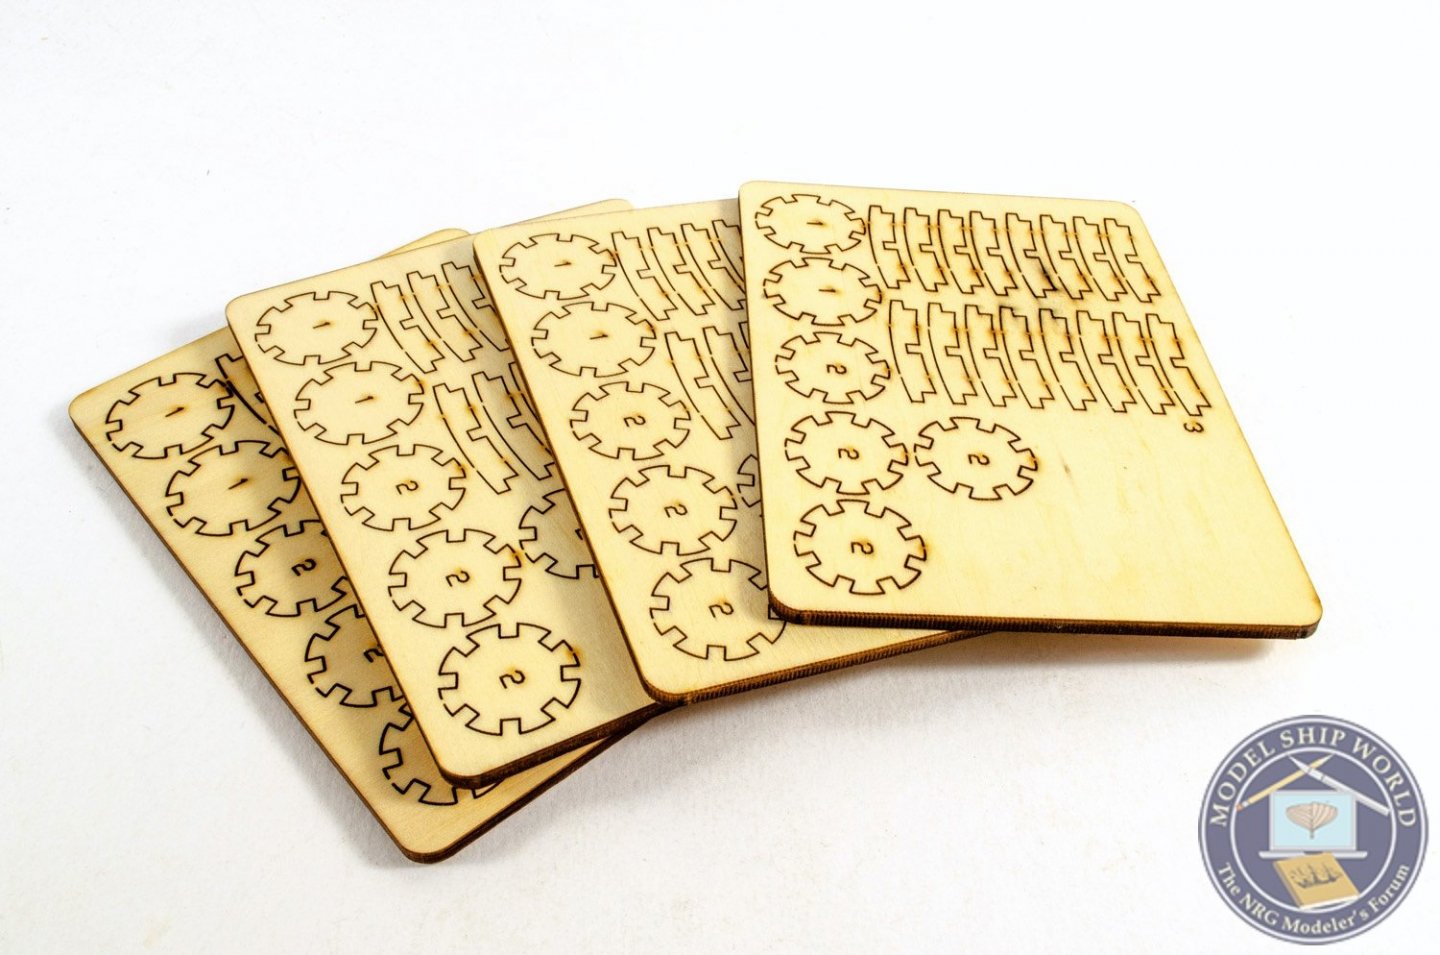
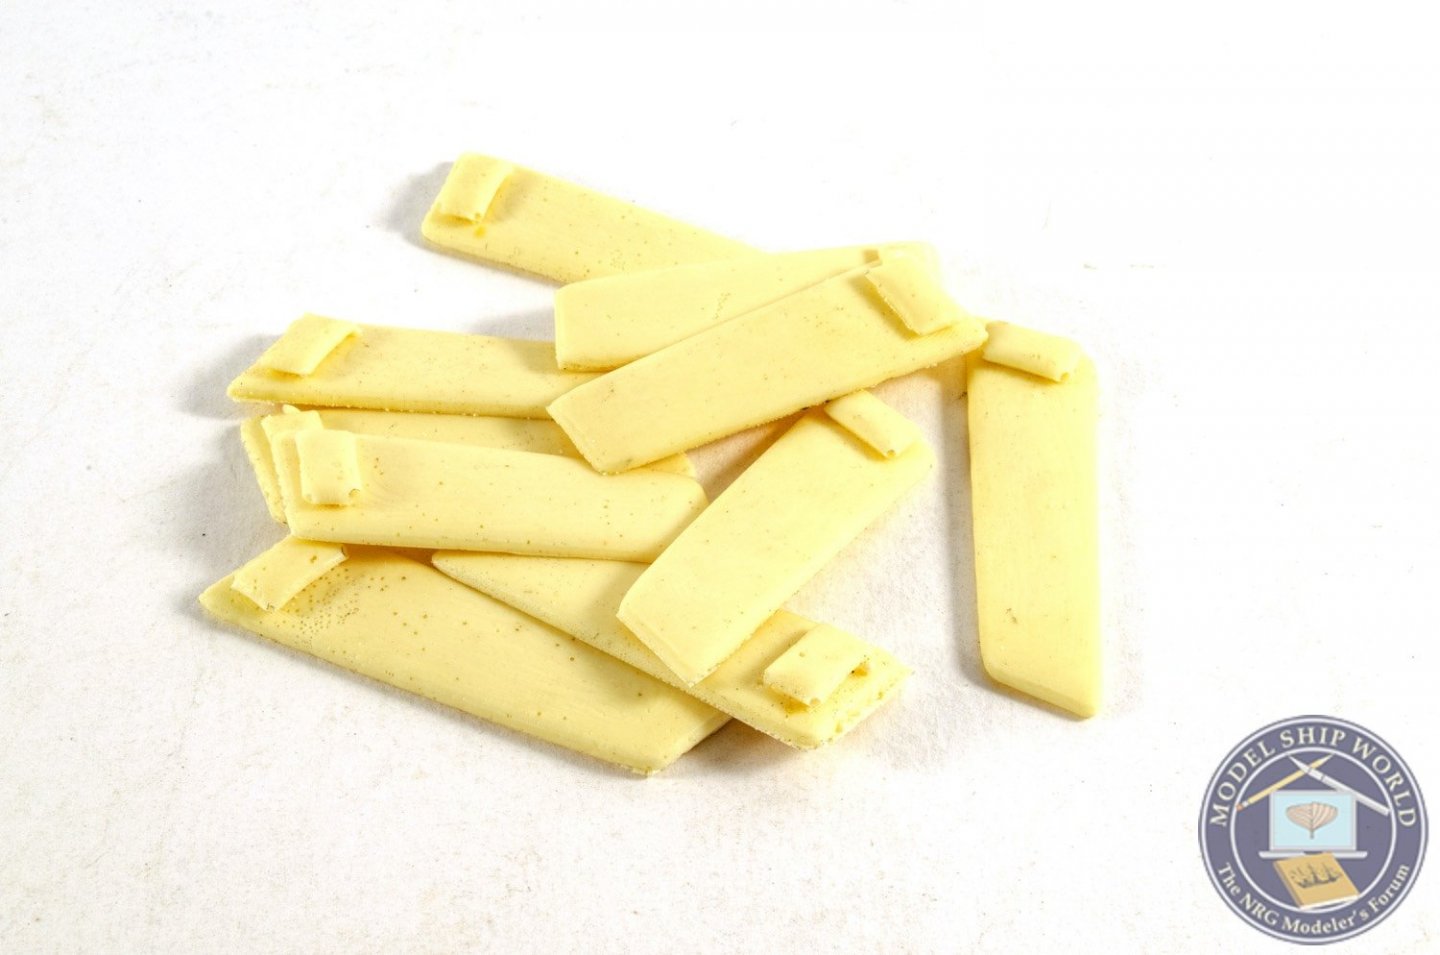
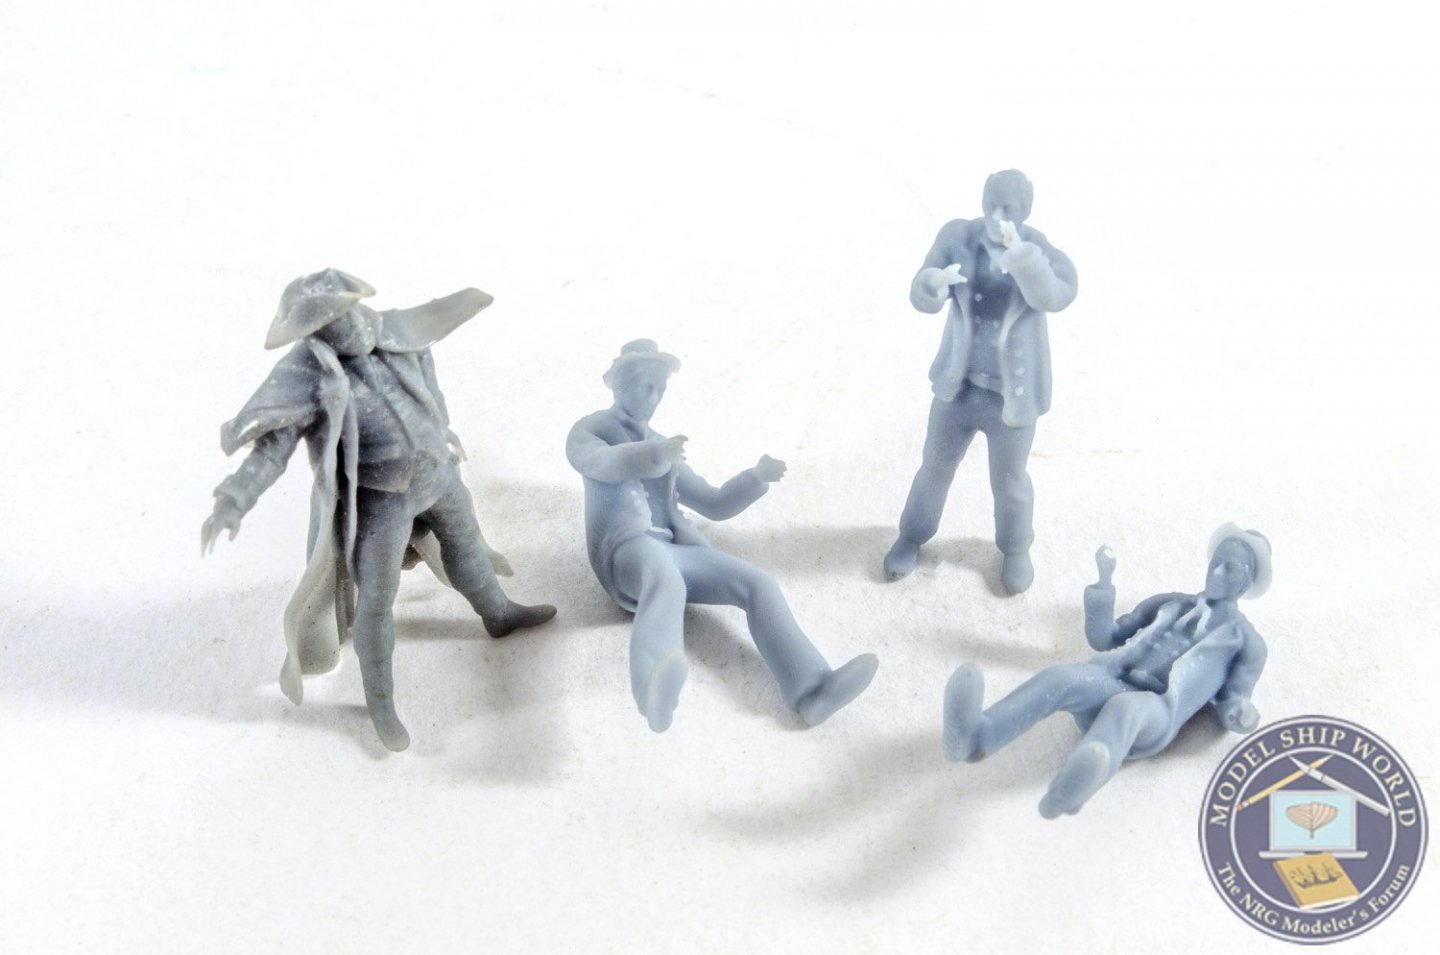
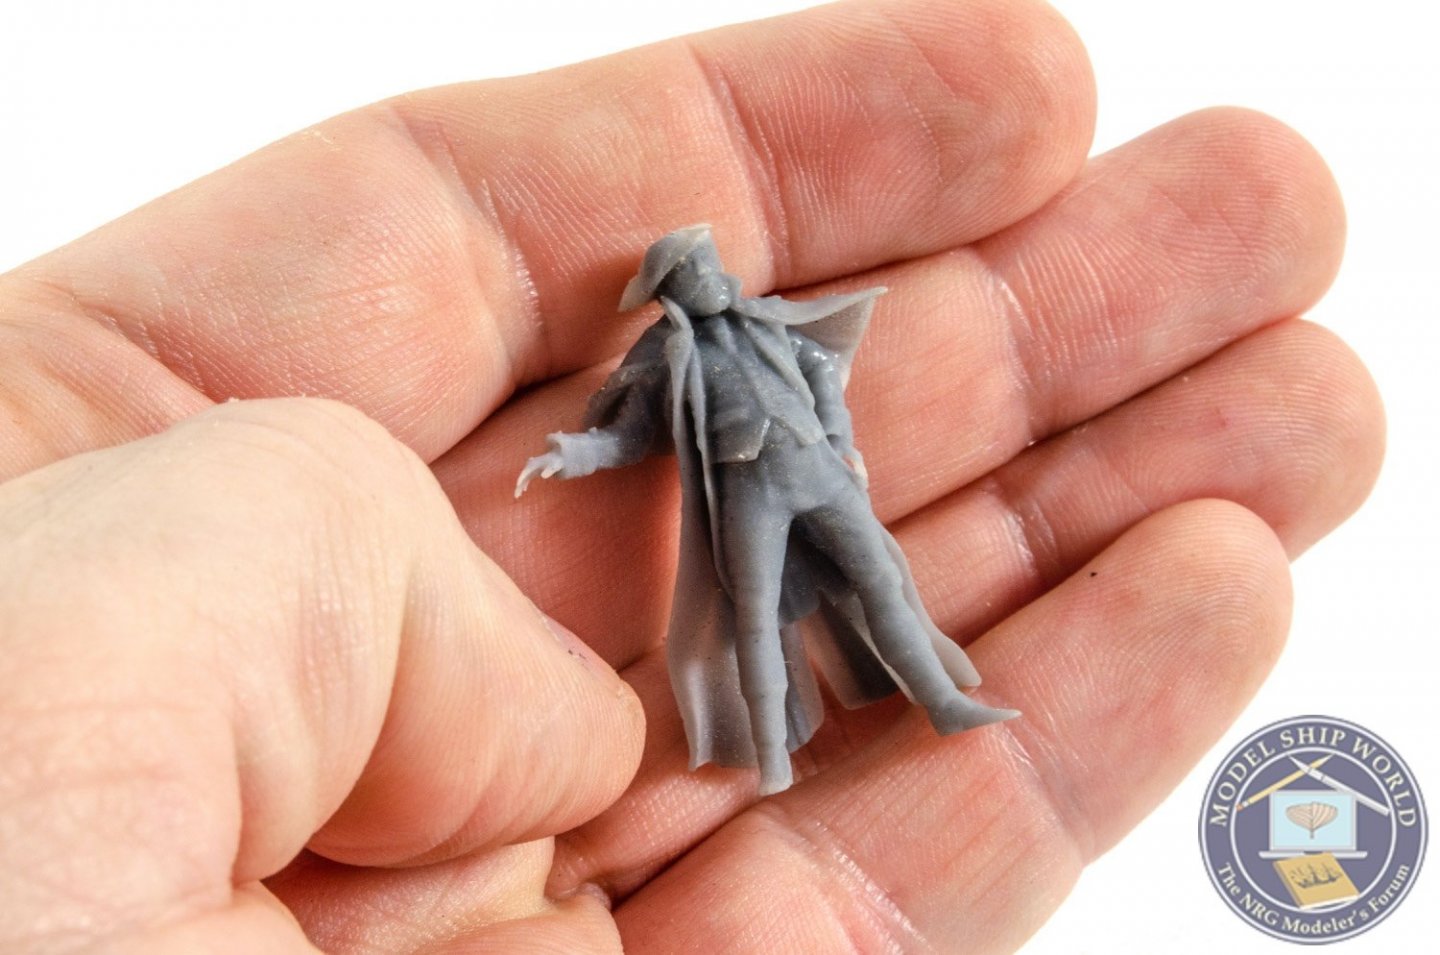
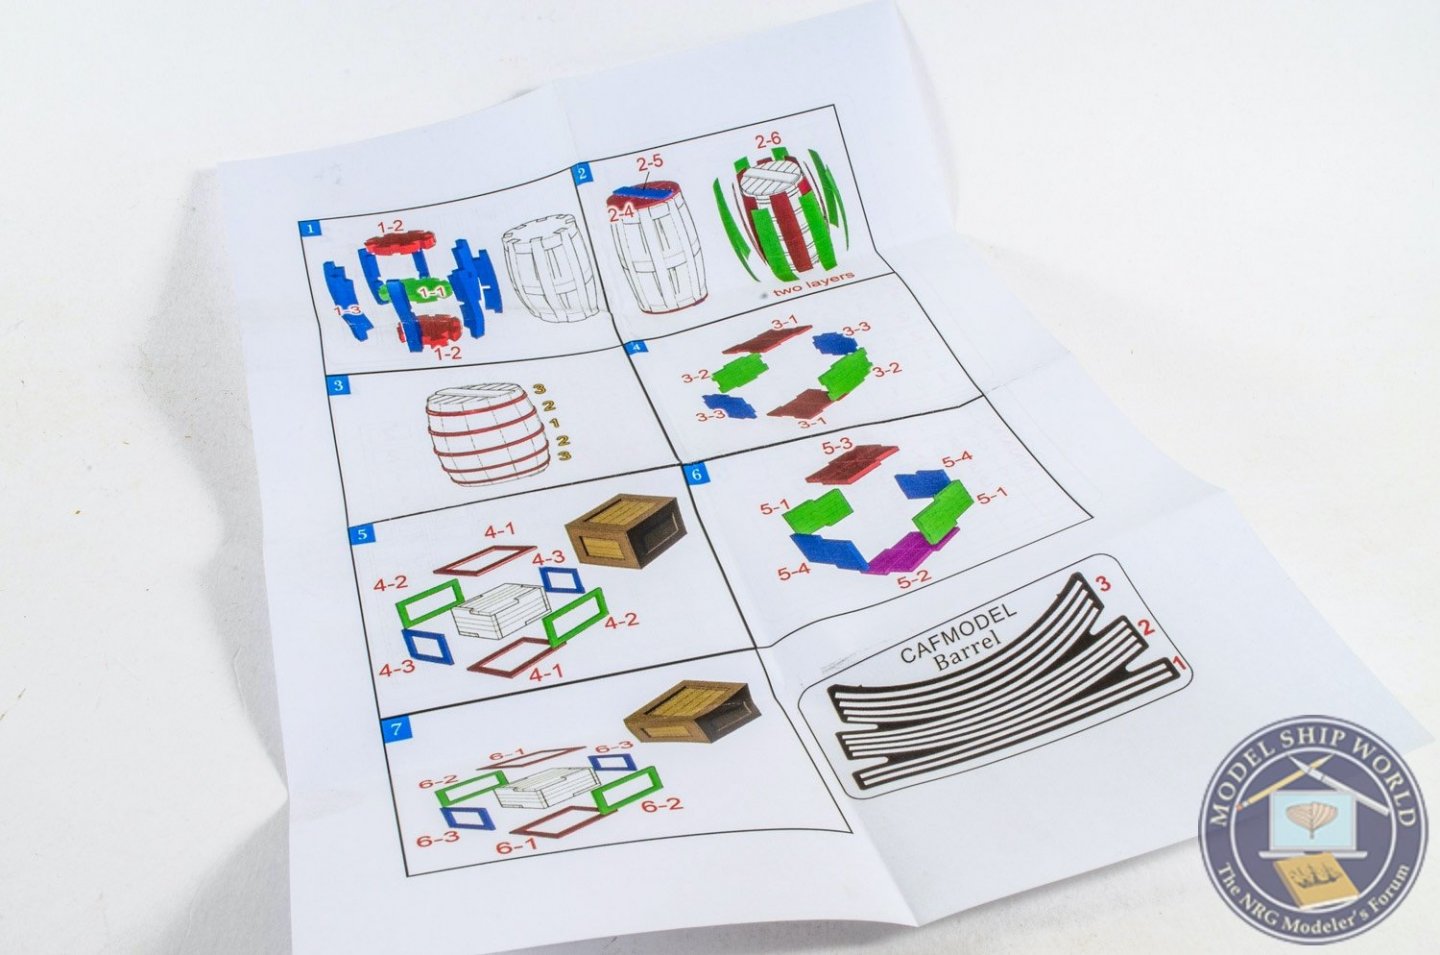
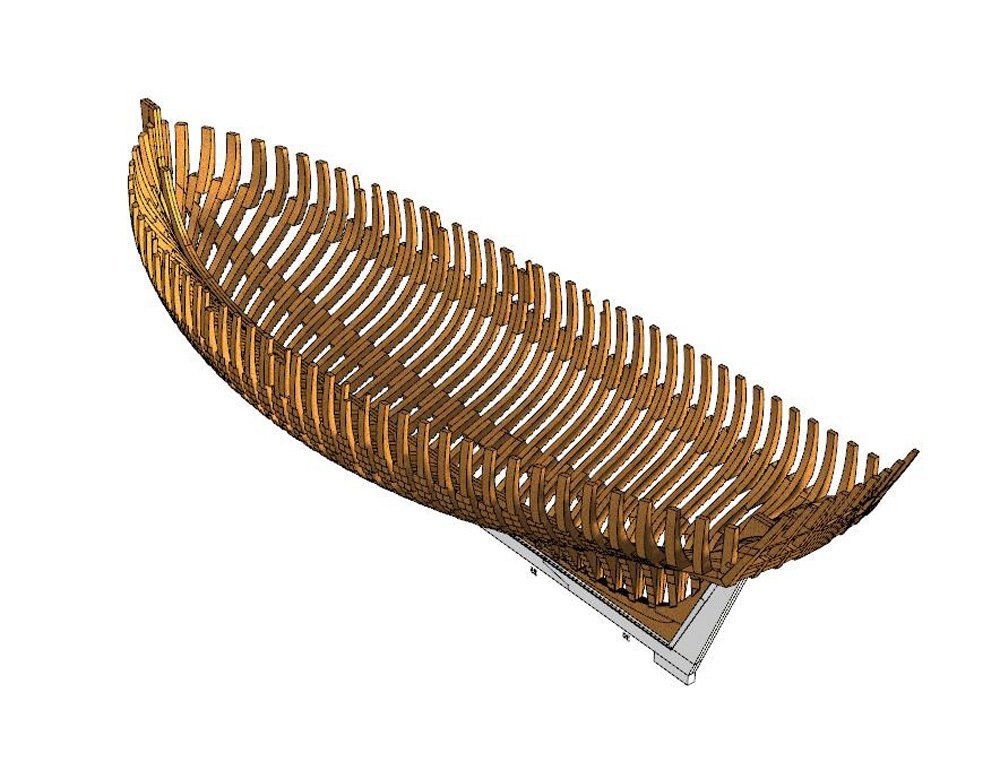
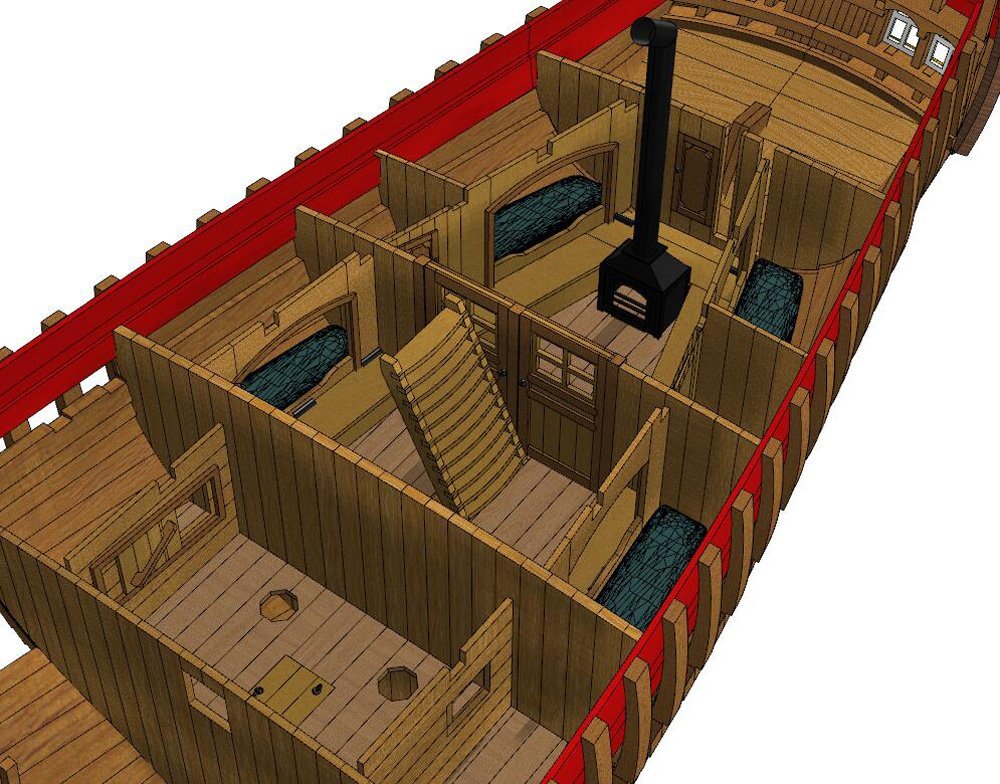
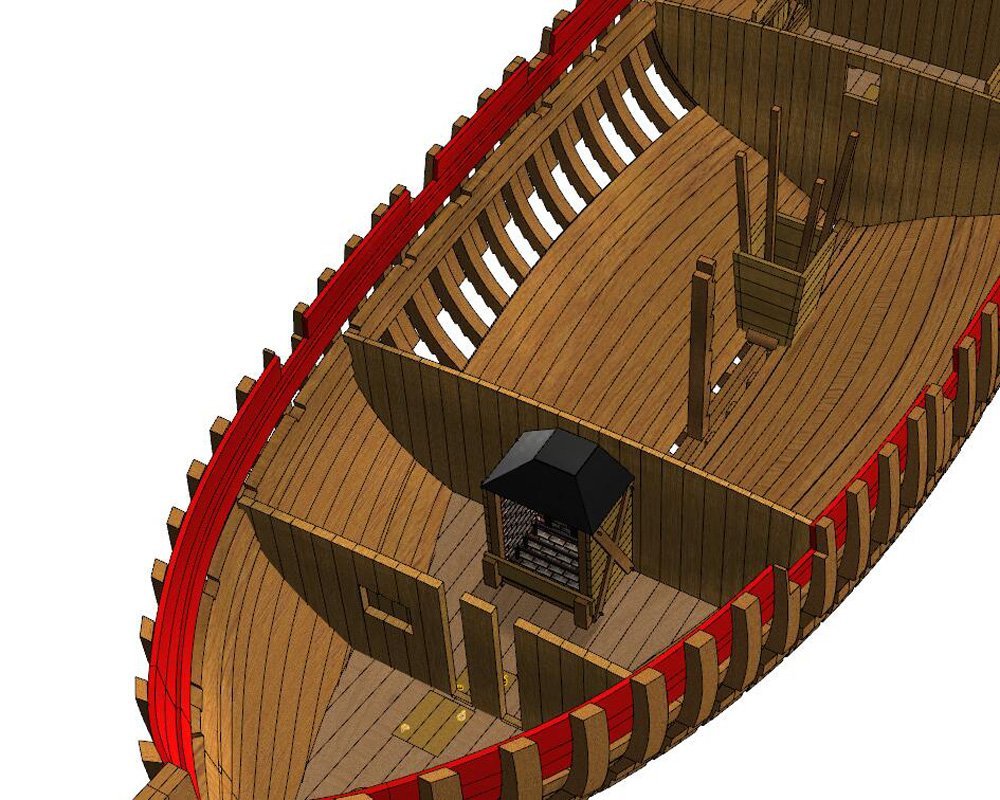
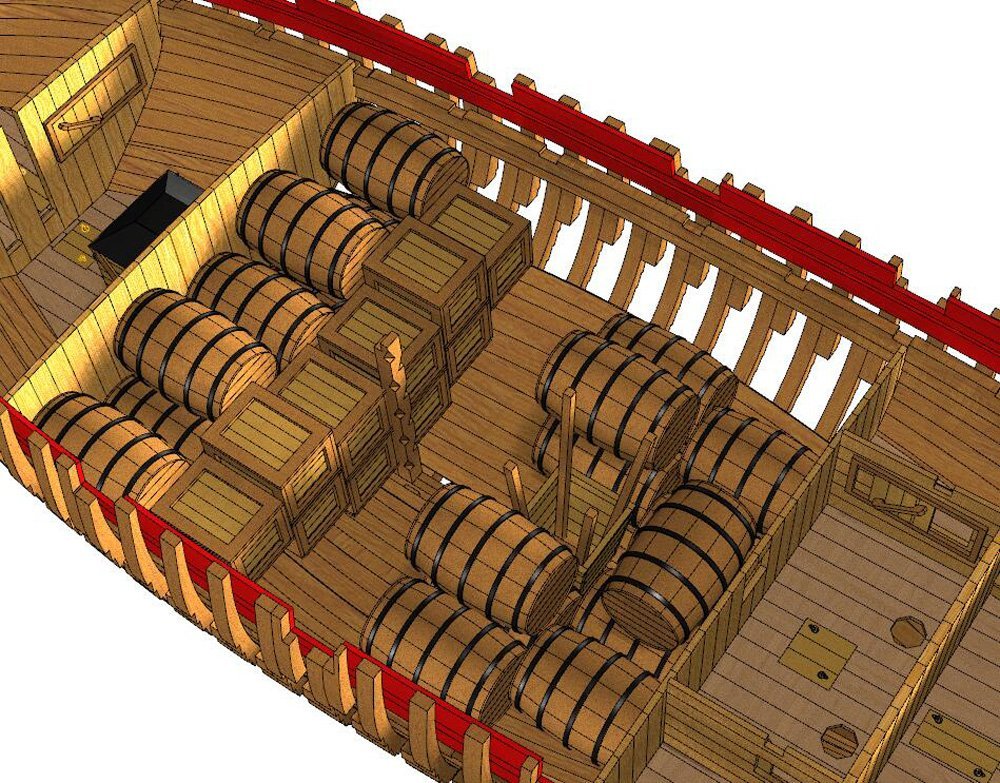
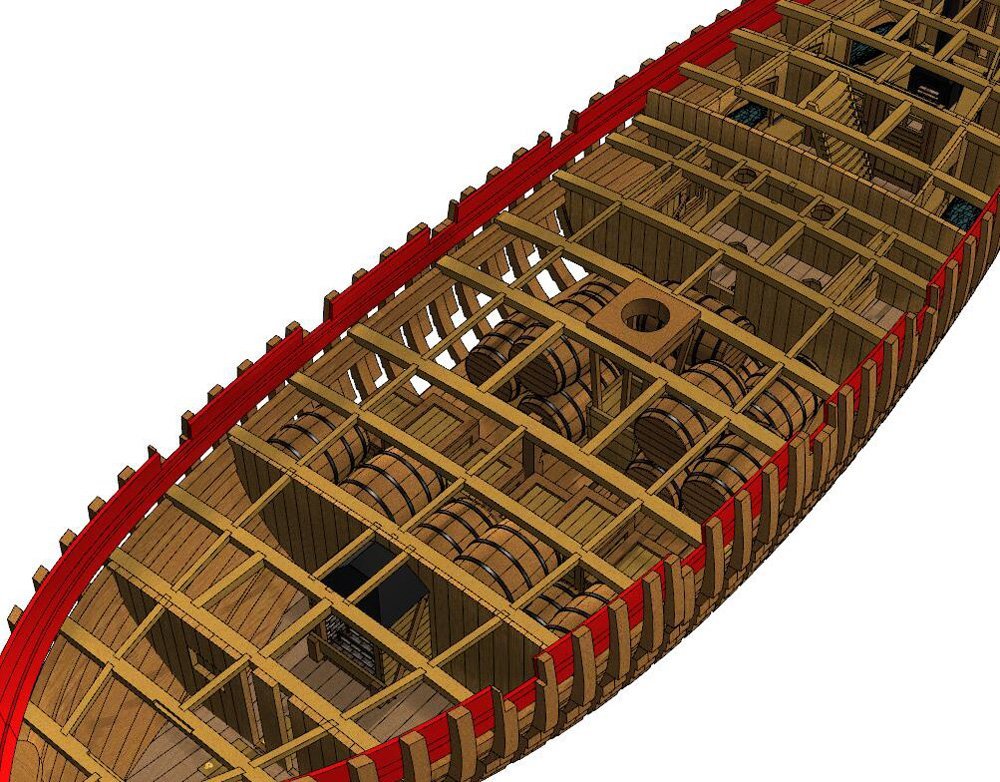
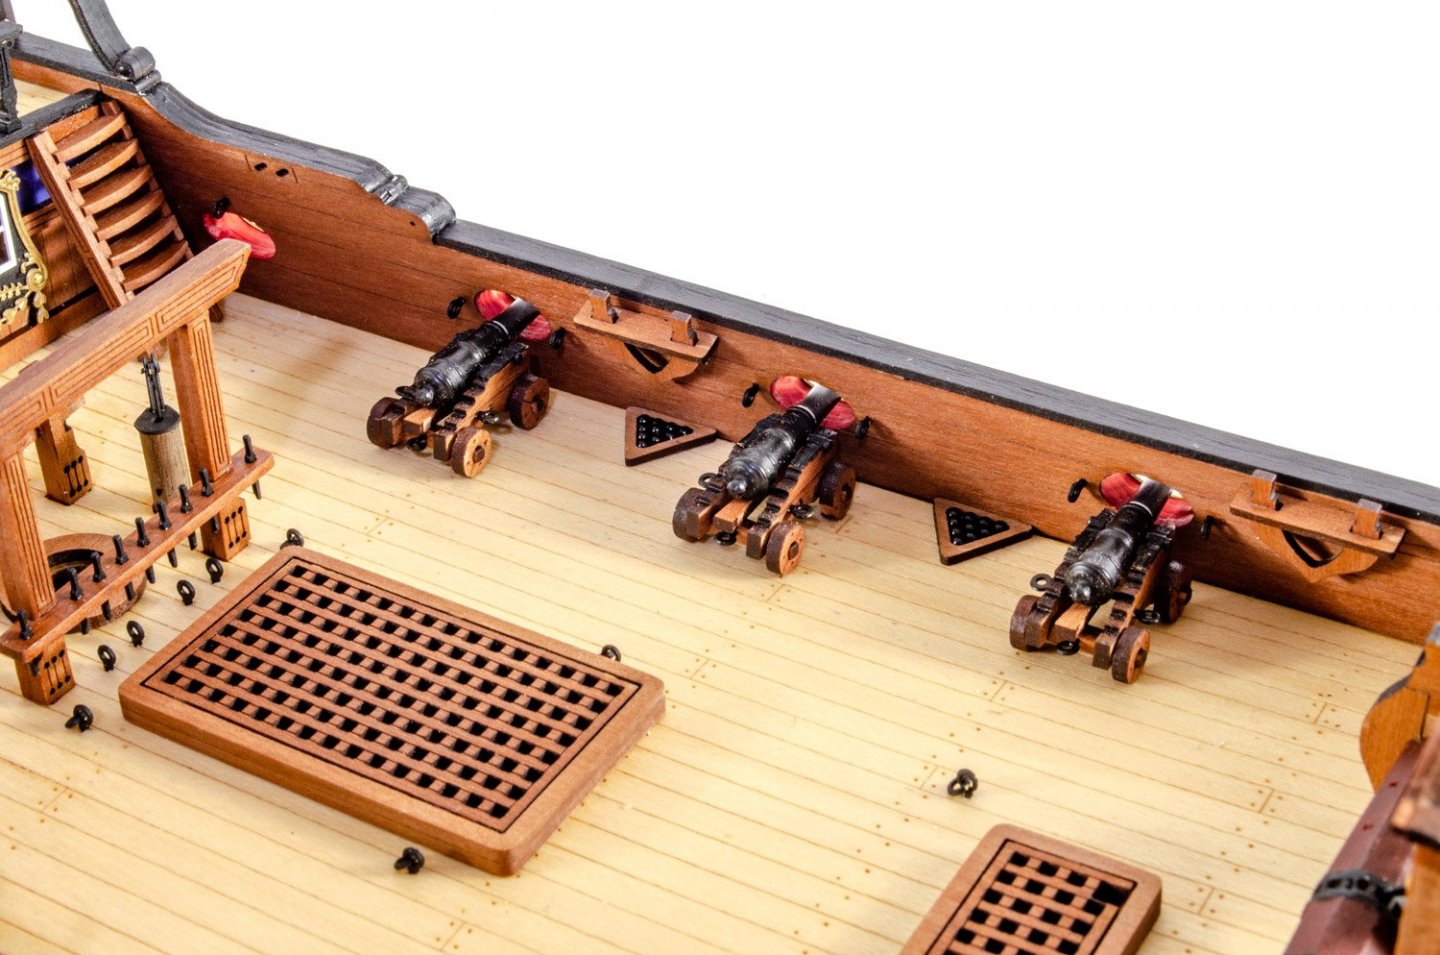
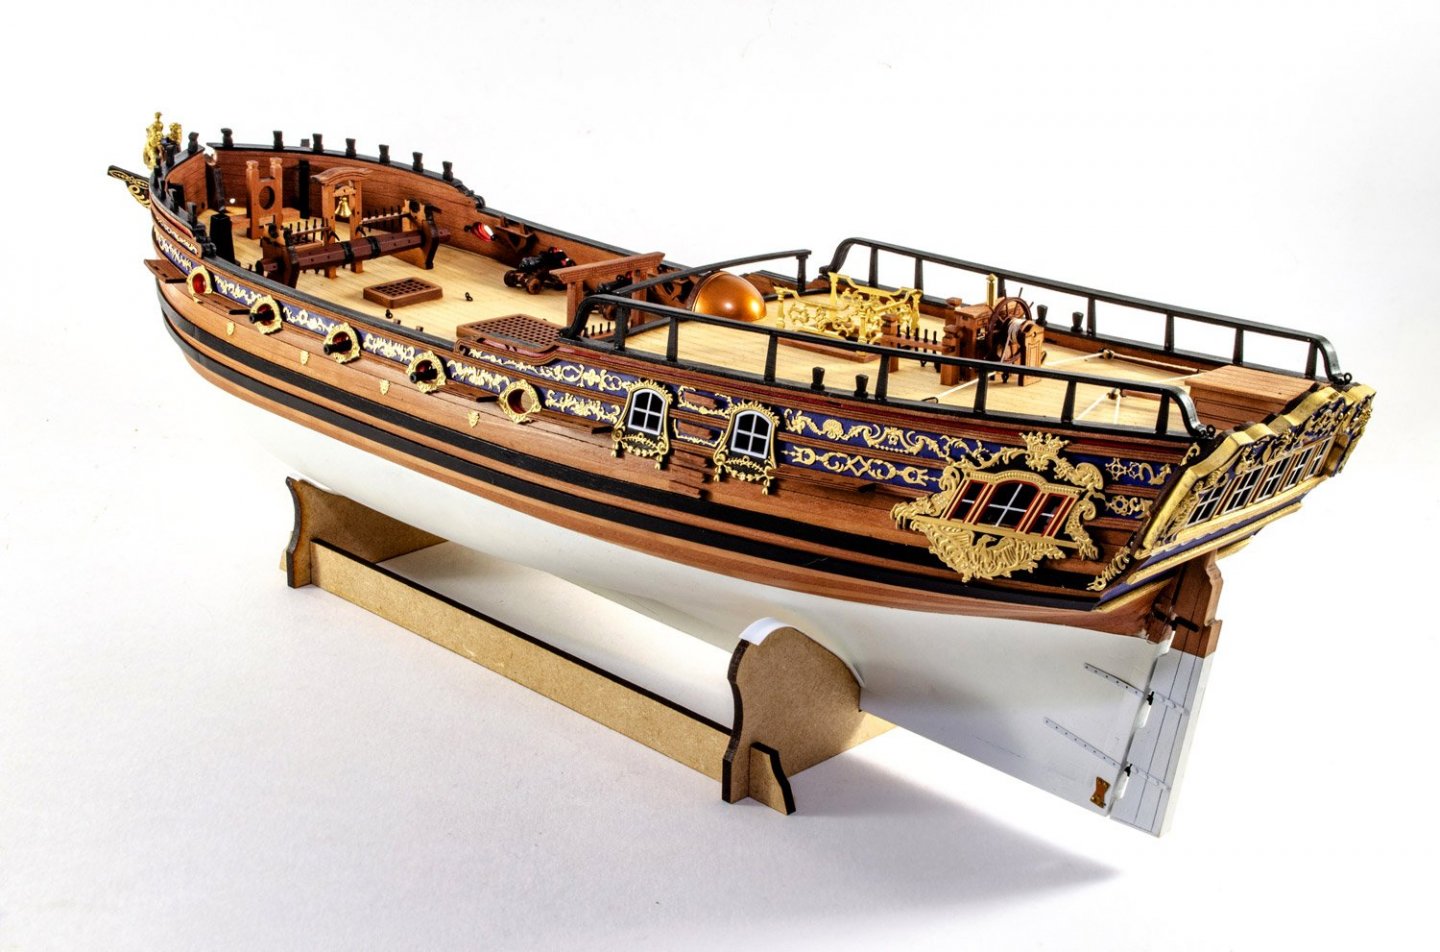
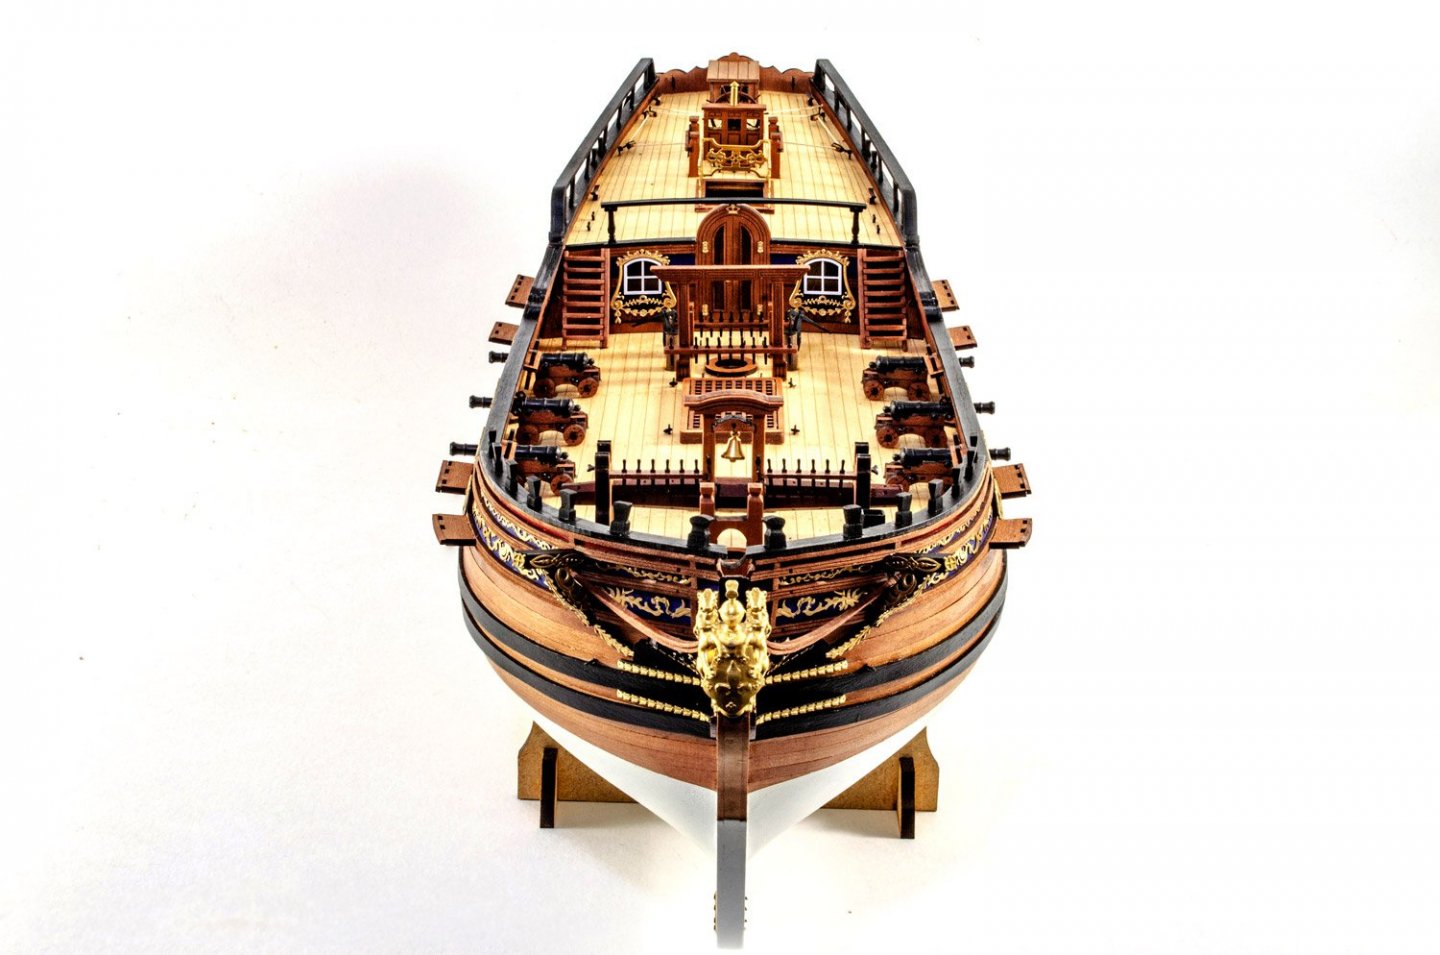
1:48 Le Coureur 1776 CAF Model Catalogue # SSL07 Available directly from CAF Model for $342USD plus shipping Le Coureur (1778) was a French lugger that Jacques and Daniel Denys built at Dunkirk and launched on 8 May 1776. HMS Alert, under the command of Lieutenant William George Fairfax, engaged and captured her on 17 June 1778, in advance of the declaration of war. In the engagement, Coureur, under the command of Enseigne de Rosily, had five men killed and seven wounded out of her crew of 50. Alert had four men wounded, two mortally. The British took Coureur into the Royal Navy under her existing name, as HMS Coureur. She was under the command of Lieutenant Christopher Major on 21 June 1780 when two American privateers, the Fortune and the Griffin, captured her outside Bonavista Bay after an action that cost her three men killed and four wounded. The Americans put Major and 30 of his men aboard Griffin, which fell prey the next day to HMS Fairy. Wikipedia The kit Le Coureur is split into two kits, Parts 1 & 2. To make things a little easier to understand here, this article will look at the contents of each individual box. Each box is a shallow, corrugated affair with a lid flap and folding edge with tabs that lock everything closed. Each box is also very full of material, so much so that when removing items to review, I had the devil’s own work in trying to get it all back in there! Still, that’s certainly nothing to complain about. Instruction manuals are nicely printed and in clear plastic sleeves, and the plans and photo-etch are also nicely packaged. All parts are also sheathed in a sealed plastic covering to stop anything moving about in transit. In the main photo, please ignore the inclusion of the Salamandre cutter. This is separate and will be reviewed soon. Pack 1 There are items within Pack 1 which pertain to Pack 2, such as side view plans with the interior, photo-etch etc. but for the sake of this article, we’ll look at them here as this is where they were found. Pack 1 is essentially a kit which produces the building cradle and the hull framing/keel etc. That’s it. So, you won’t find any embellishments, cannon or other fittings in here. What you do get are numerous ply frames that build the cradle, complete with a side plan engraved on one side, plus twelve panels of laser-cut cherry parts. This looks very easy to build and of course provides all positive locations for the keel, frames and stern timbers. CAF recommend the cradle base parts are screwed down onto a plat surface. I’ll use some high quality blockboard when my time comes, as this was excellent for the flying models I used to build, many moons ago. The latter are produced with rounded edges, and I think this is because they needed to be able to flip the parts over to add the engraving to the opposite side, plus some CNC machining……yes, CNC on laser-cut sheets! I know it’s the first time I’ve ever encountered it. As far as the engravings go, these frame parts really do require it as they mark out the bevel for this clinker-planked hull. That’s why some sheets have the engraving on the reverse too. One thing you will see on the reverse is some heat scorching. This varies from sheet to sheet, but the one I show here is the worst of them. These parts will need to first be bevelled to the engraved lines before removing the char as we don’t want to lose the engravings by simply sanding the whole sheet first. There doesn’t appear to be any loss of surface material with this, so it should clean up just fine.Each panel of parts is clearly numbered, and the part numbers are referenced with a map of the panels that’s provided in the manual for Pack 1. So, you will have a part on panel 2, for example, shown as 02-8-a for part 8a. Very simple. All frames are constructed on the series of drawings which are supplied on the rolled-up sheets. As these frames are built from parts on top of parts, the drawings also show where the overlaying frame elements sit, and you’ll need a metal setsquare to confirm things before you commit to glue. All parts will also need to be bevelled before any frame construction. Some parts panels, as mentioned, also have some CNC machining. This is to create things like the rabbet on the keel, and the bevel for deadwood bearding line. The machining itself will need to be cleaned up to smooth it out, but the majority of the material is already removed for you, so just the cosmetics will be required. Taking of CNC machining, CAF also supply some stern parts which are fully machine-shaped. These just need cutting from the blocks they are a part of, and then cleaning up. As these are naturally verry complex shapes, it’s nice to see these prefabricated for the modeller. Also in this pack, but for use with Pack 2 are two photo-etch frets, produced in brass. The larger one contains everything you would imagine you need, such as hinges, stove parts etc. An acetate sheet is included for glazing the stern windows. Pack 2 This box is identical in size to that for Pack 1, and again, contains that much material that you’ll actually struggle to put it all back properly! All items, including fittings boxes, are wrapped in a single covering of clear film. Included here are three sheets of ply, four sheets of maple (deck), and over 35 sheets of cherry wood. Ply parts are included to modify the building jig as your model progresses, and also for a display stand, although I would be sorely tempted to use the parts as templates and build a display cradle from a more suitable material. The decks are supplied as individual planks, laser cut into the maple sheets, and in the layout order in which you will install them. That’s a nice touch. I expect the laser char between them could be a good caulk representation, but I’d need to test that first. When it comes to planking, CAF supply the materials to complete the whole hull interior and exterior. The exterior is clinker, and all planks are provided as laser-cut parts over a good many of the included sheets. The instructions clearly show how this much be approached. The tricky internal planks are a godsend, especially with the taper that’s required, so the inclusion of those is also very welcome. CAF’s approach to other planked areas also follows that of the decks, where a specific area is laser cut in the order of application. It’s a no-brainer! Other parts, where applicable, are also engraved with bevel lines. Not all parts are laser cut. Three parts panels are CNC cut. These also include machined notches, and they appear to be deck beams. There are TWO fittings boxes with Le Coureur, and they are brimming with parts. The first I look at contains pins, rings, chains, lead sheeting, rigging blocks, leather, cord, clay stove parts, and a myriad of machined wooden items. First of all, the rigging blocks are machined from a dark timber and are supplied in chains that you need to cut up and clean the block ends. The machined wooden parts include the capstan and hawse, stern windows and stern embellishments. Some of the latter looks a little rough when photographed, but actually looks perfectly fine to the eye. Some very fine sanding sticks could be used to tickle anything you aren’t too happy with. To remove these fragile parts, you need to grind the backs of them over some medium abrasive paper, and they will be released. The second parts box contains numerous metal fittings. I’m not sure if these are brass or bronze, but the casting is excellent. The cannon emblems are very nice, but I was unable to get a clear pic on the bare metal. Other metal parts include anchors, hooks, triangular eyelets, hinges etc. Also in this box are various spools of rigging cord, and these also look very good quality. I was lucky enough to receive the Le Coureur nameplate, carved in pear wood, as part of their initial free gift promotion. This isn’t now included, but is available from CAF for $15. Brass wire is supplied on a wooden spool. A bundle of strip wood and dowel is included and is of high quality. Lengths are identified for size. Sail cloth is also included, but you will need to make these yourself using the plans as reference. Manuals The manuals are very good, with English that is certainly easy enough to understand (having been proof-read and corrected by our very own Kerry Jang), and especially in context with the illustrations which have coloured elements to show what’s happening. The Pack 1’s 15-page manual focuses solely on the construction of the building cradle, preparation and assembly of the frames, and of course the basic building of the hull. Hull construction ends with the fitting of the keelson, and with the skeleton still within the building cradle. The manual supplied with Pack 2 is a thicker publication, with 50 pages. Here we see the external planking, interior of the hull being fitted out with interior planking, interior bulkheads for the various compartments, floor, cabinets, sleeping berths, stove etc. The hull is indeed fully detailed within. This model is also fully masted and rigged and this is all shown in superb detail, rope by rope, rigging block by rigging block. As with the previous manual, you will need to cross identify each part with the parts map in the back of this manual. Numerous sheets of plans are supplied either rolled up or folded, and in full size. The largest, showing rigging and masting, is printed in A0 size, so you'll need a large place to hang this up! Drawings are superbly done, and to my eye, look easy to understand, but then again, I am used to studying technical and engineering drawings. Cutter This type of cutter was very typical for the time, hence the reason for its inclusion with this kit. CAF have packed this into its own little box, and it presents a project in itself. As with the main hull, this is built up using a box jig into which seventeen individual frames sit on the keel, followed by the keelson. My only criticism of this is the use of ply for the frames. I feel these should’ve been made in cherry or preferable pear. All planks are laser cut into a thin veneer and need to be handled carefully. When built up, this should look a very attractive little addition to Le Coureur. Accessories This kit includes a small box containing barrels, crates, small crates, beds and also four crew. The barrel staves are produced in thin veneer, and photo-etch for the hoops. The crates are of simple construction and the parts look great with their laser engraving. Four resin crew figures are supplied too. Conclusion This is the first time I’ve seen a CAF kit ‘in the timber’, so to speak, and I very much like this release. Production quality is high and I think it sells for a very reasonable price for the amount of work and time you will invest in the build. CAF have tried to make the dark art (for some of us!) of POF, as simple as they can with engraving lines for bevelled frame parts, machined chamfers and also pre-cut planks. Still, this will be no walk in the park if you’ve never attempted such a project before, but CAF has done as much as possible to hold your metaphorical hand throughout the build. There is some clean-up required on the rear of some panels, to remove scorching, but this won’t be too difficult, and the inclusion of those machined stern timbers is a very nice touch. Kit fittings such as stove and cannon are also nicely cast and made, and the wooden barrel and crate set add an extra degree of life to the already nicely furnished hull interior. Of course, there’s those resin crew and beds too. In all, this is a very attractive and comprehensive kit of a very worthy subject. One beauty of this POF kit is that the frames have a natural spacing which means you can still the interior if you decide to leave a number of planks off the model. Head over to CAF Model and place your order. Looking forward to seeing some build logs of this on MSW. My sincere thanks to Tom at CAF Model for the kit reviewed here. To purchase, click the link at the top of the article.


- 25 replies
-
- 28
-
-
It's a shame we don't see this kit tackled more often as it's definitely one of my favourites from Panart. How did the bare bones go together? No probs?
-
We'll be publishing our review this week also. Really looking forward to seeing what you do with this kit as I'll be starting as soon as my Duchess of Kingston is complete.
-
Maybe I missed something, but how are you making those planks look so weathered? I really like that appearance.
-
Remember, this is the same hull as Speedy, so you can check those build logs out too.
-
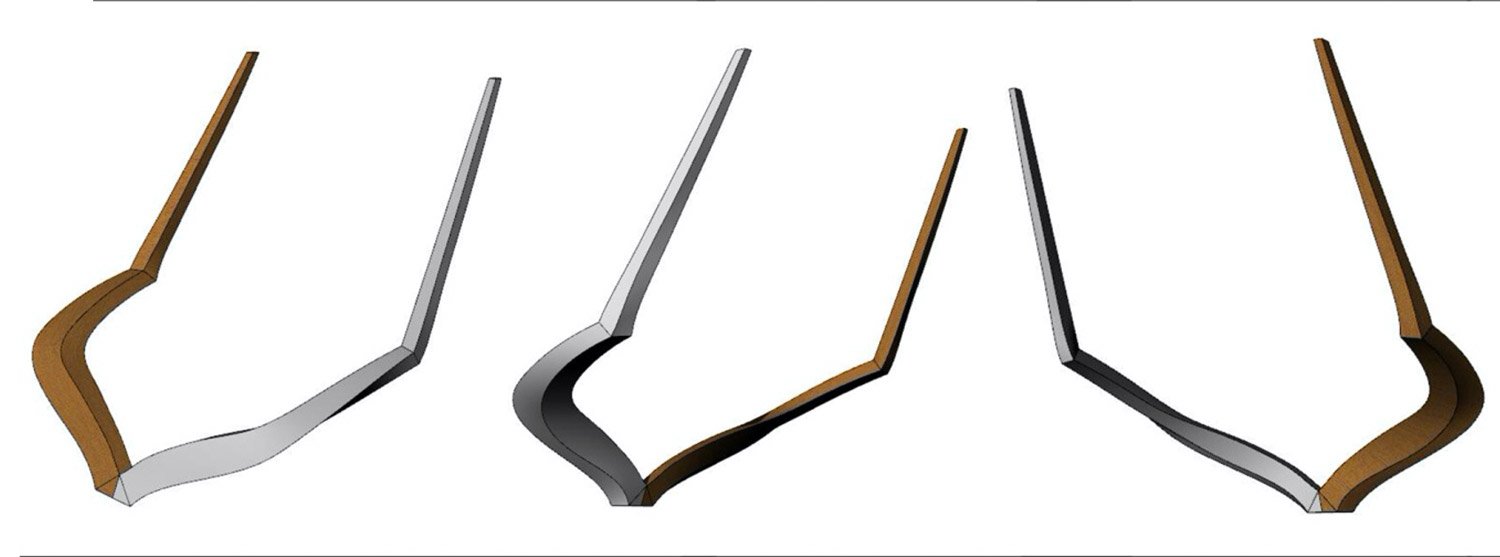
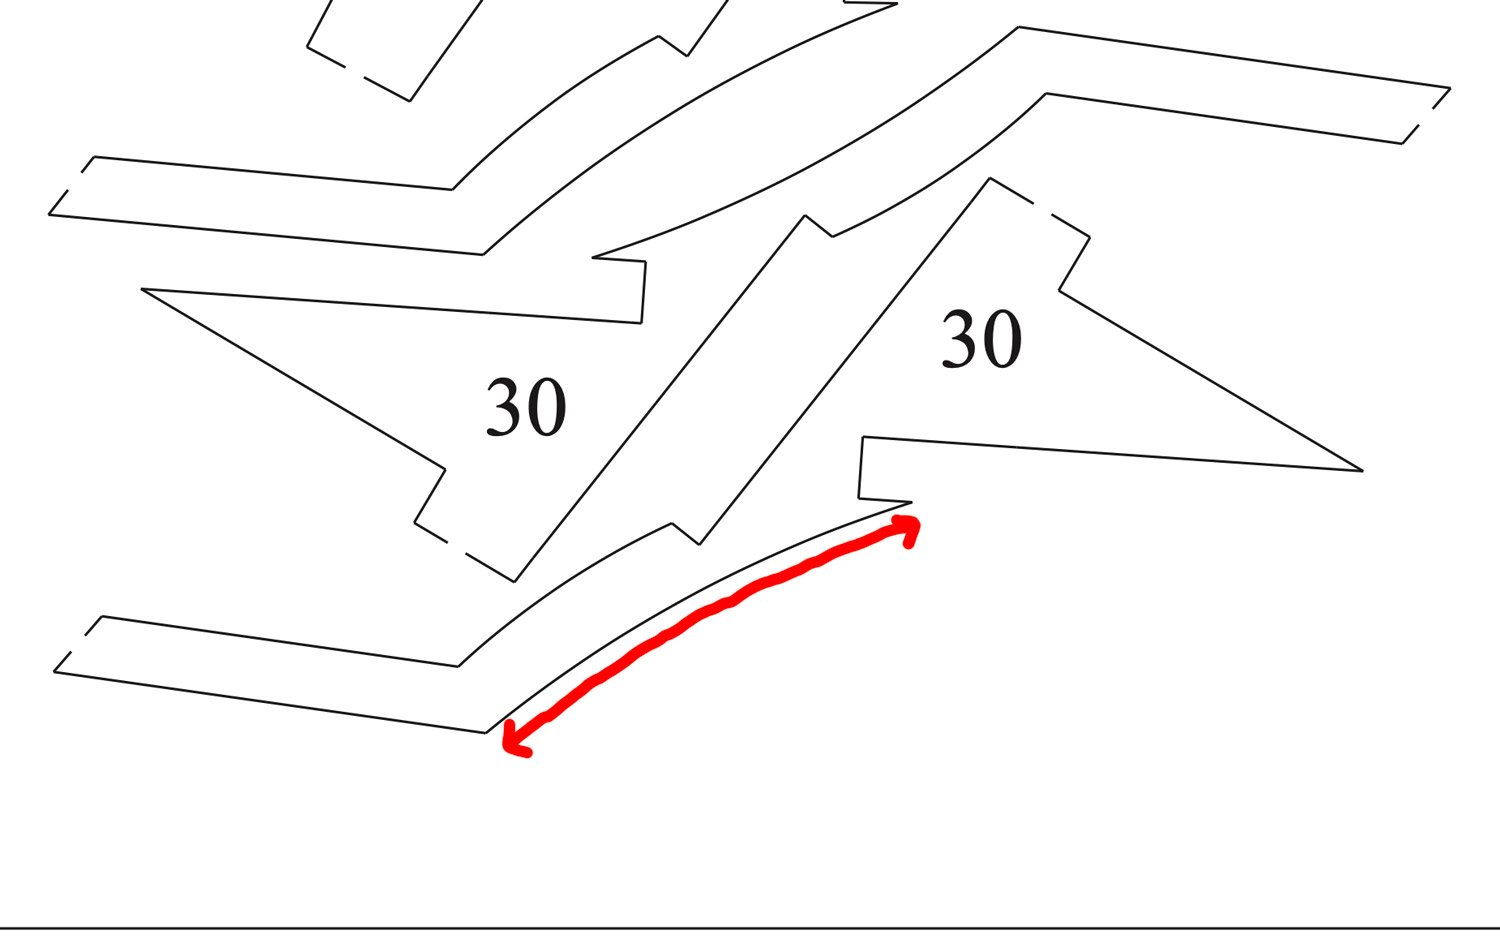
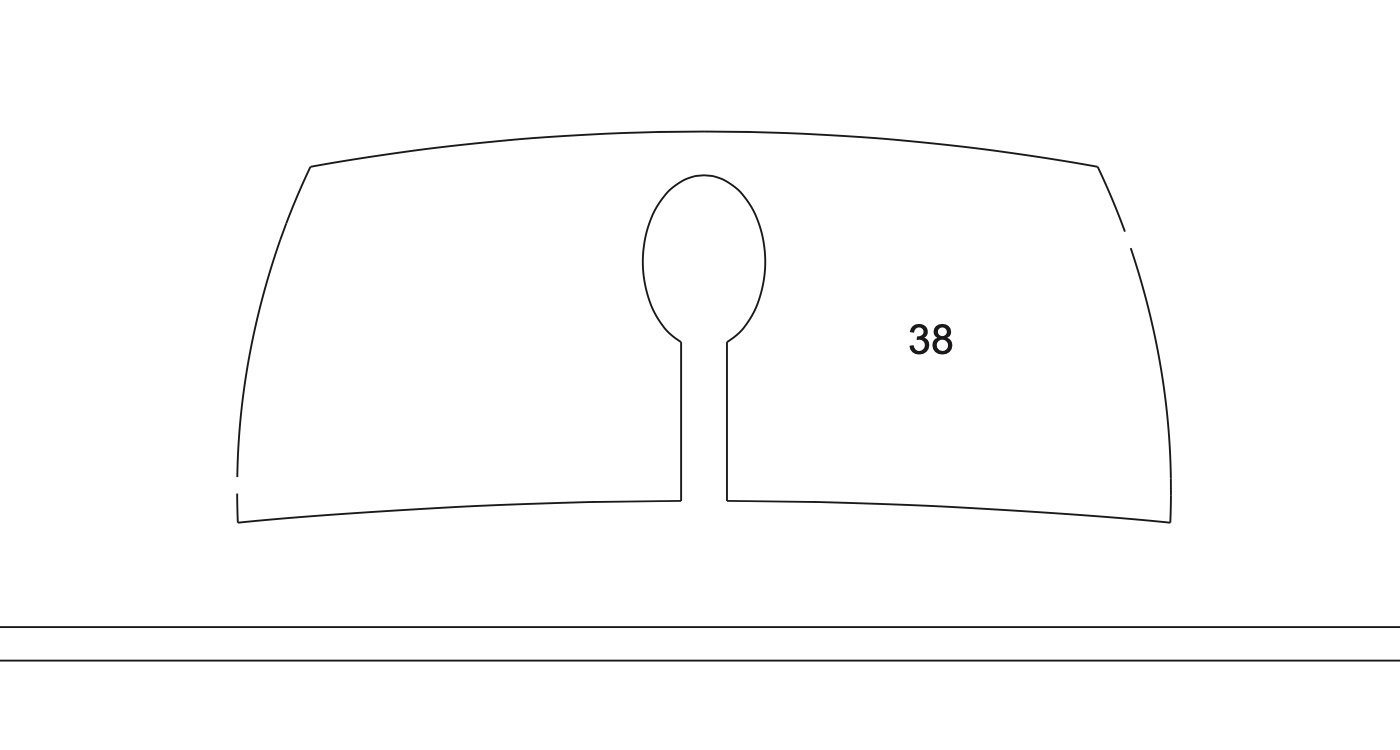
Ok, it looks like you haven't curved the stern counter No. 38, and then clamped/pinned it to the curve on the underside of there stern frames No.30, No.31 These images are from the kit manual and plans: All I can suggest you do is to now ignore that lack of curve and make too replacement parts for the Stern Counters, and make them match the shape of the stern on your own model. EDIT: Looking at position of wales at your stern, there wouldn't be space to add those Stern Counter timbers, so I would just ignore them.


- 164 replies
-
- 5
-
-
- vanguard models
- flirt
- (and 1 more)
-
Can you show me a photo of the stern? It looks like you just need to trim those black wales to the curve of the stern counter. That part is definitely curved:
- 164 replies
-
- 2
-
-
- vanguard models
- flirt
- (and 1 more)
-
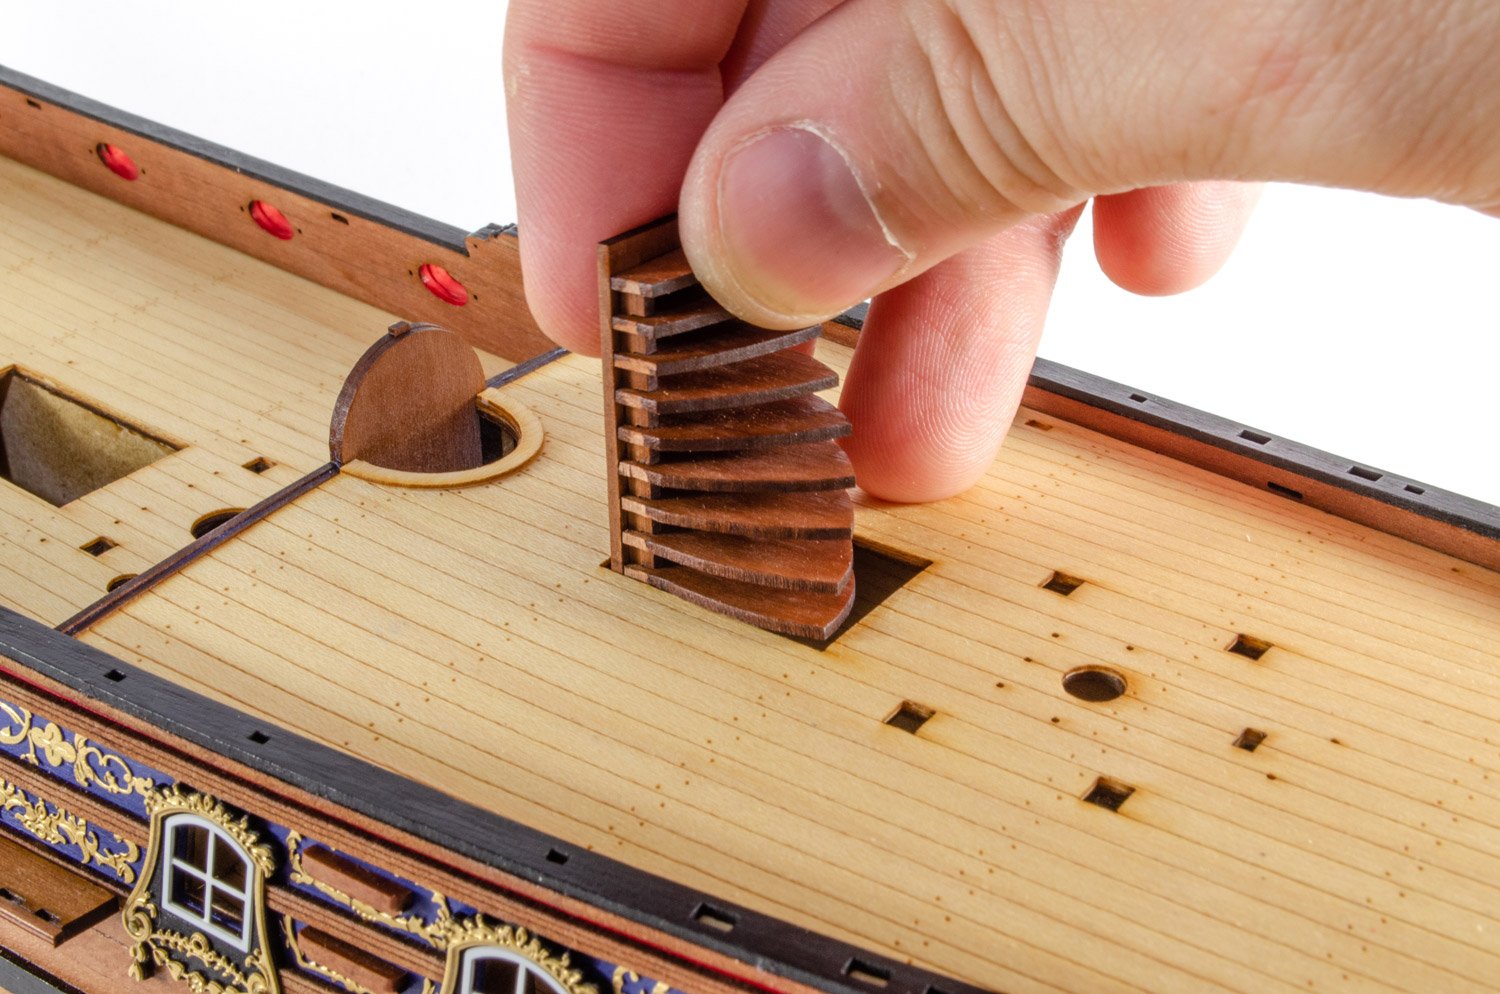
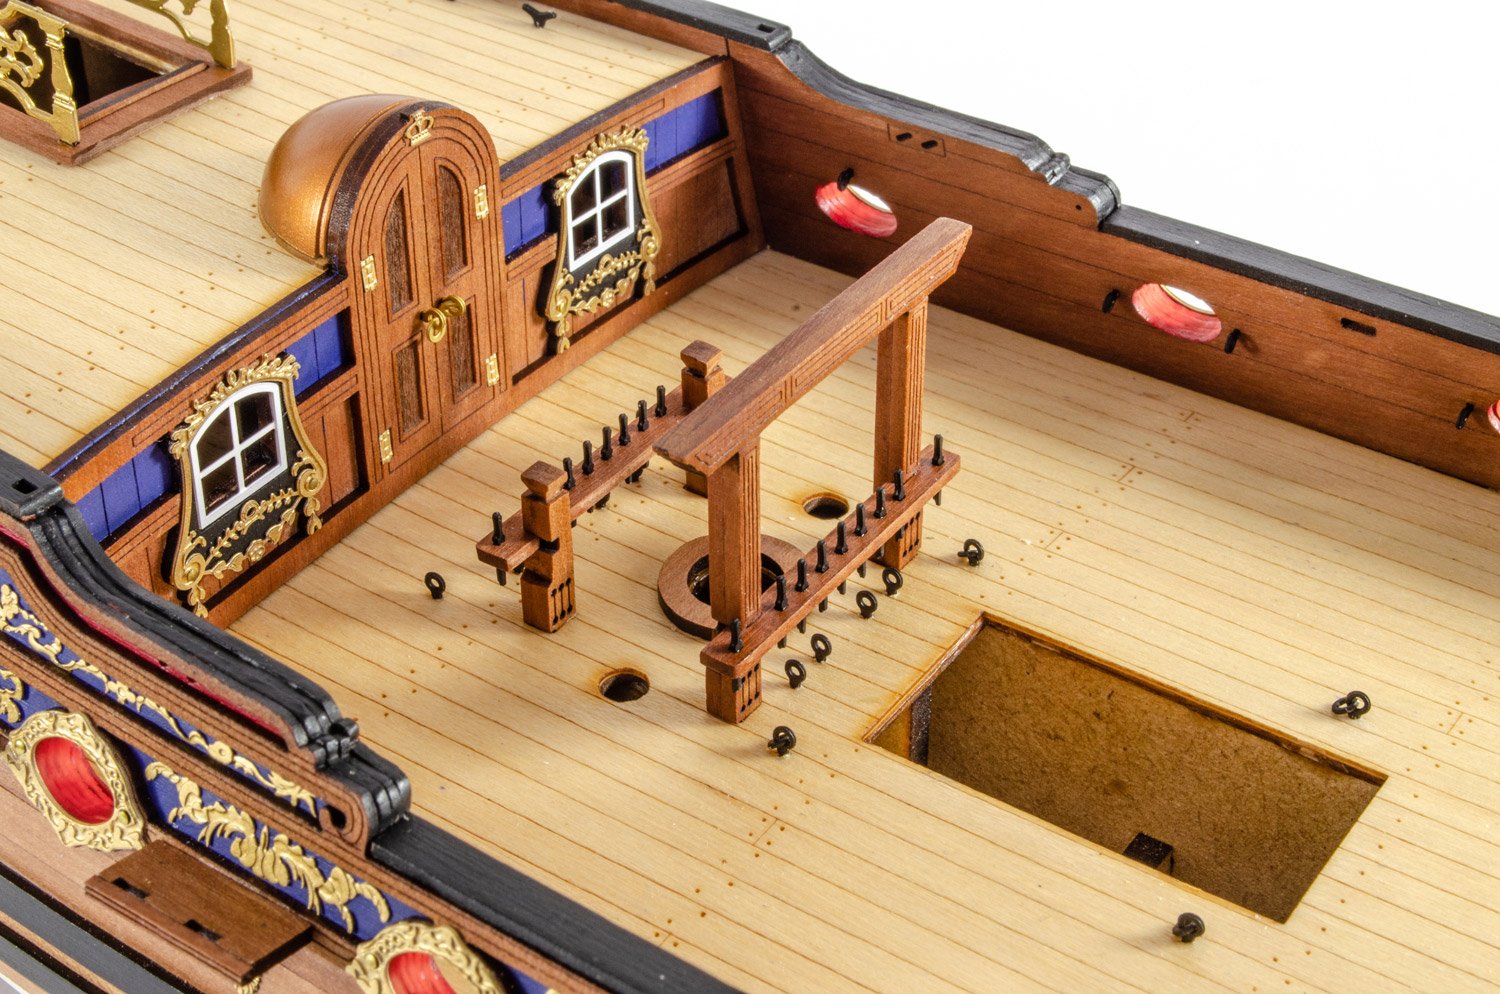
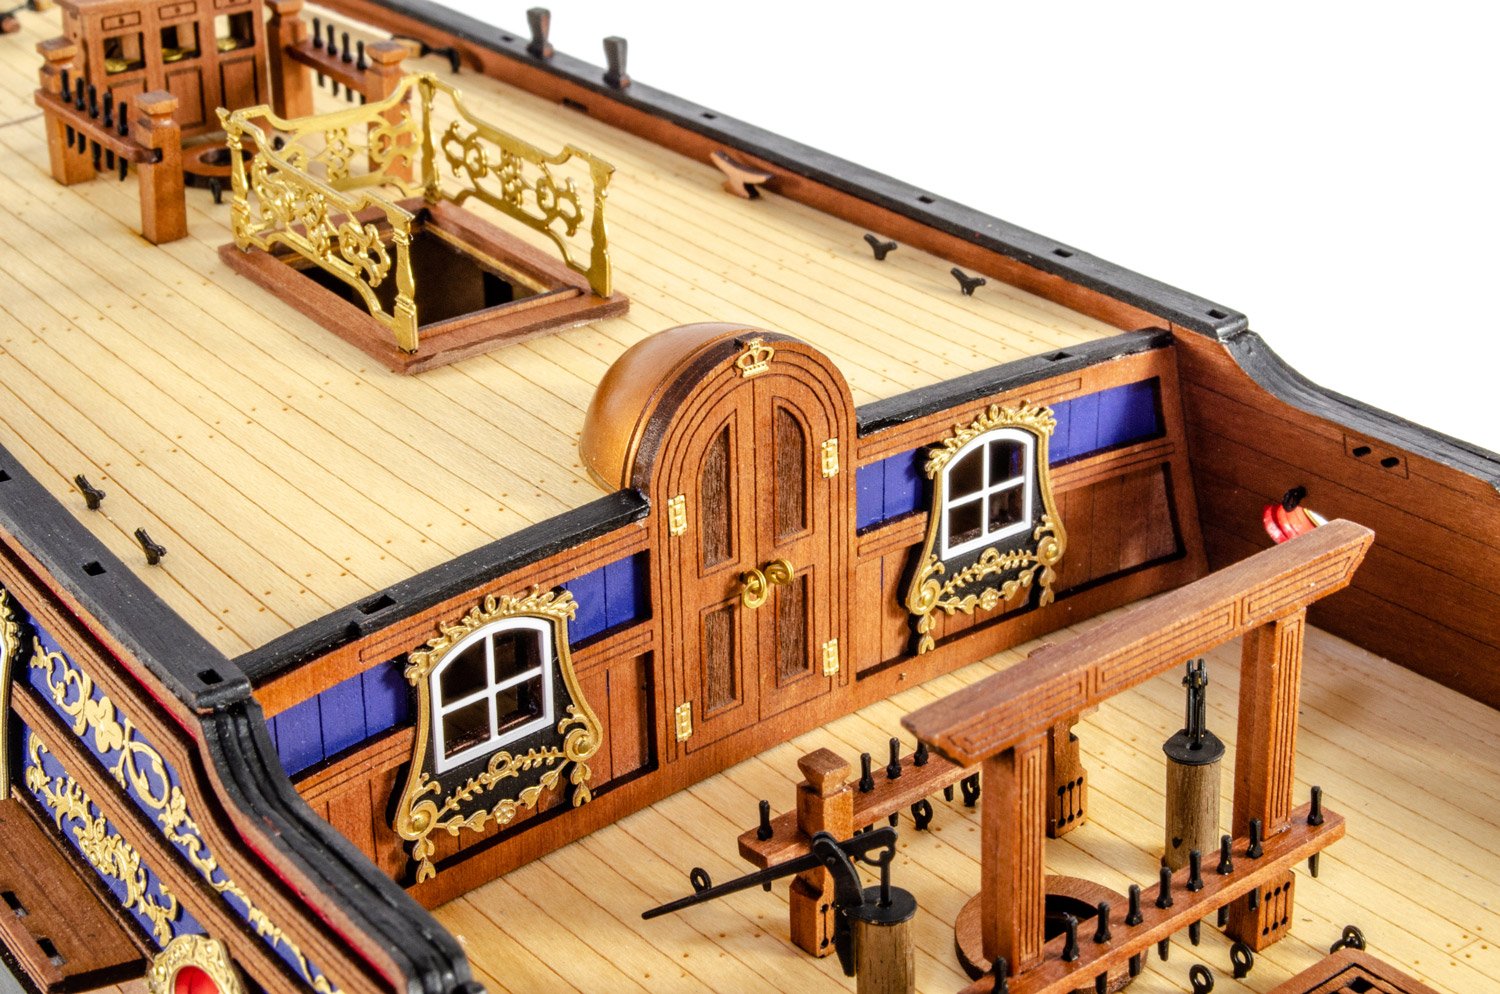
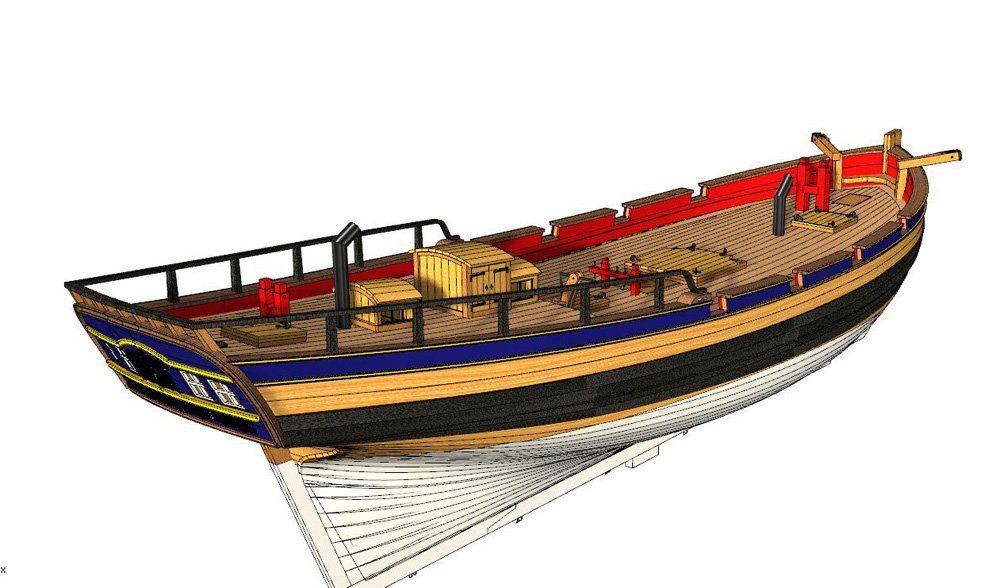
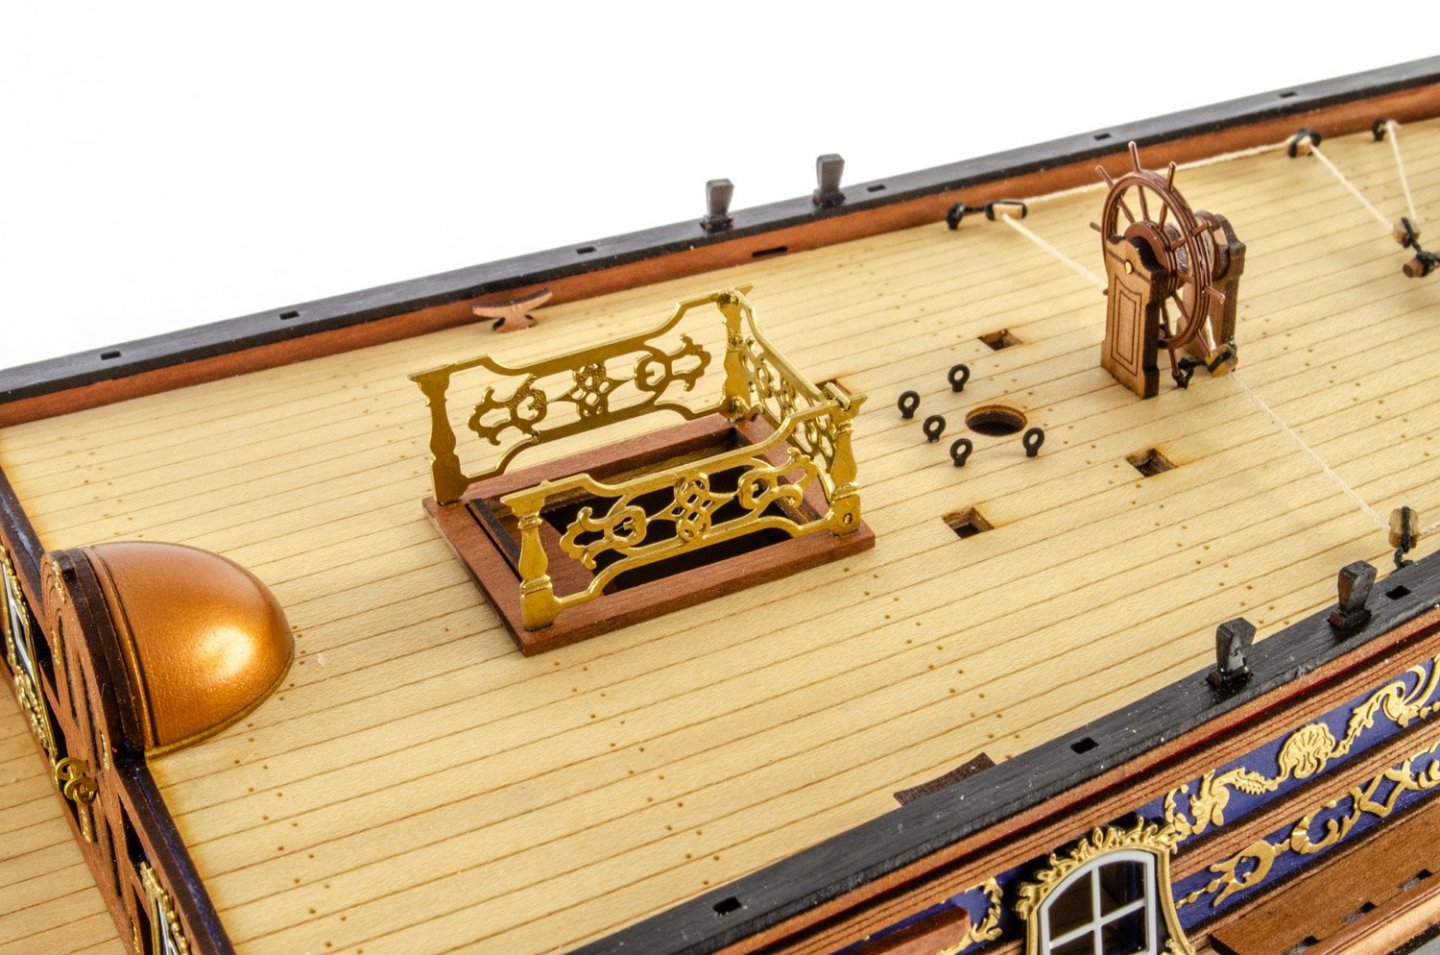
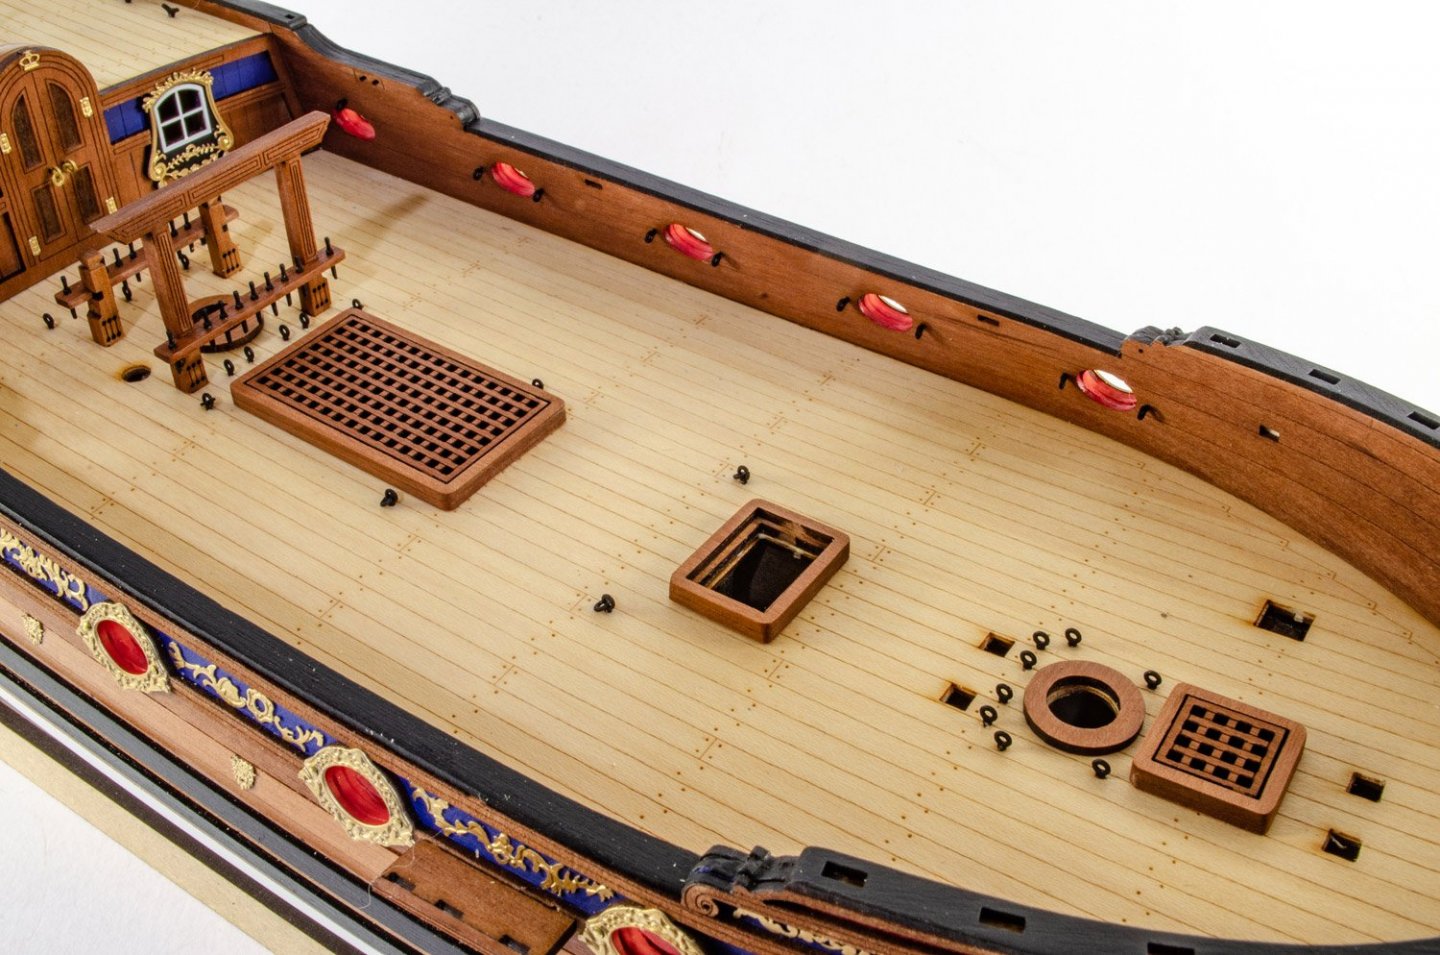
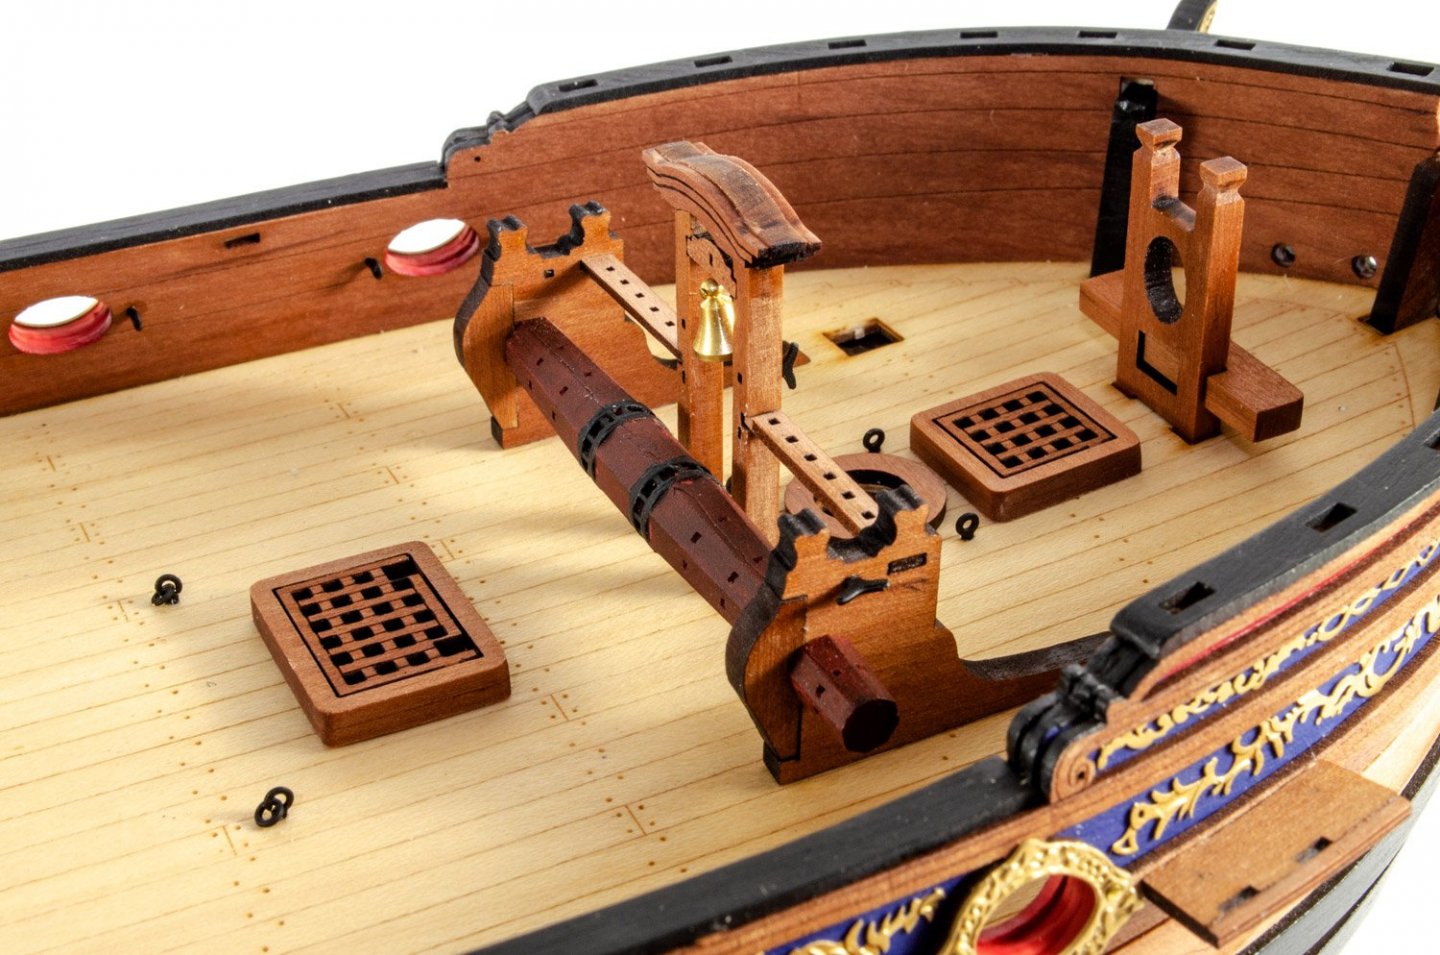
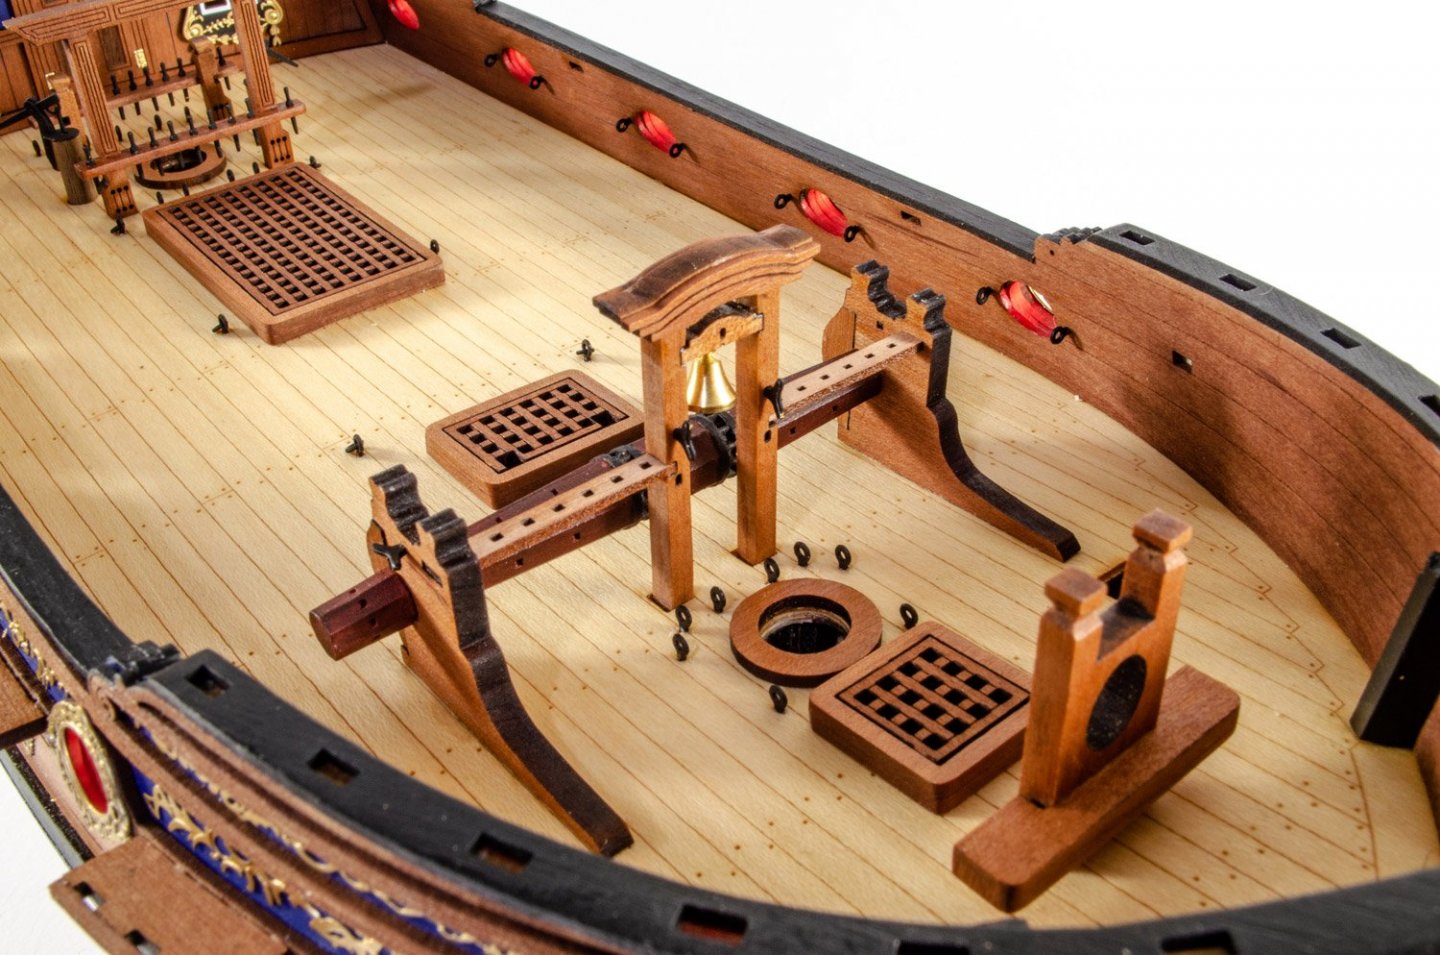
A fairly quick update here as you've seen many of the fittings being built. The hull is now complete, up to the chainplates/deadeyes being fitted. I'll do that tomorrow. Here's a few photos to show you where I'm at. Onto masts in a day or two!


- 117 replies
-
- 27
-
-
- vanguard models
- yacht
- (and 2 more)