James H
-
Posts
6,135 -
Joined
-
Last visited
Content Type
Profiles
Forums
Gallery
Events
Everything posted by James H
-
 I don't want to hijack this log at all, but this is in the manual I wrote:
- 382 replies
-
- 2
-

-
- Vanguard Models
- Duchess of Kingston
- (and 1 more)
-
Definitely. There is a metal rotary circle cutter but the blades are very fine and not suited for stuff like cutting those abrasive paper sheets.
-
Moved to correct forum area.
-
It happens. Look at the part numbers on these early stages. If low numbered, you can guarantee they are needed very early on.
- 382 replies
-
- 3
-

-
-
- Vanguard Models
- Duchess of Kingston
- (and 1 more)
-
Whilst it's a straightforward model to build, the design complexity really calls for all those instruction stages to be followed, and many in the sequence suggested too. That was a nice save in getting those parts in before you planked that hull later.
- 382 replies
-
- 4
-
-
-
- Vanguard Models
- Duchess of Kingston
- (and 1 more)
-
Not on this one as Tom wants to use it for an English language instruction manual/leaflet. Still, it actually looks very pretty in bare timber.
-
That longitudinal pattern should fit snugly, but you need to tease it down all of those slots a bit at a time or it won't seat properly. There are a lot of slots you need to make sure won't snag those parts. This was why I thought it a good reason to dry fit a lot of this and then paint glue into the joints when assembled.
- 382 replies
-
- 5
-
-
-
- Vanguard Models
- Duchess of Kingston
- (and 1 more)
-
I was wondering where you'd gone 🔭 Hope things are back on an even keep soon and wed can see this one progress.
-
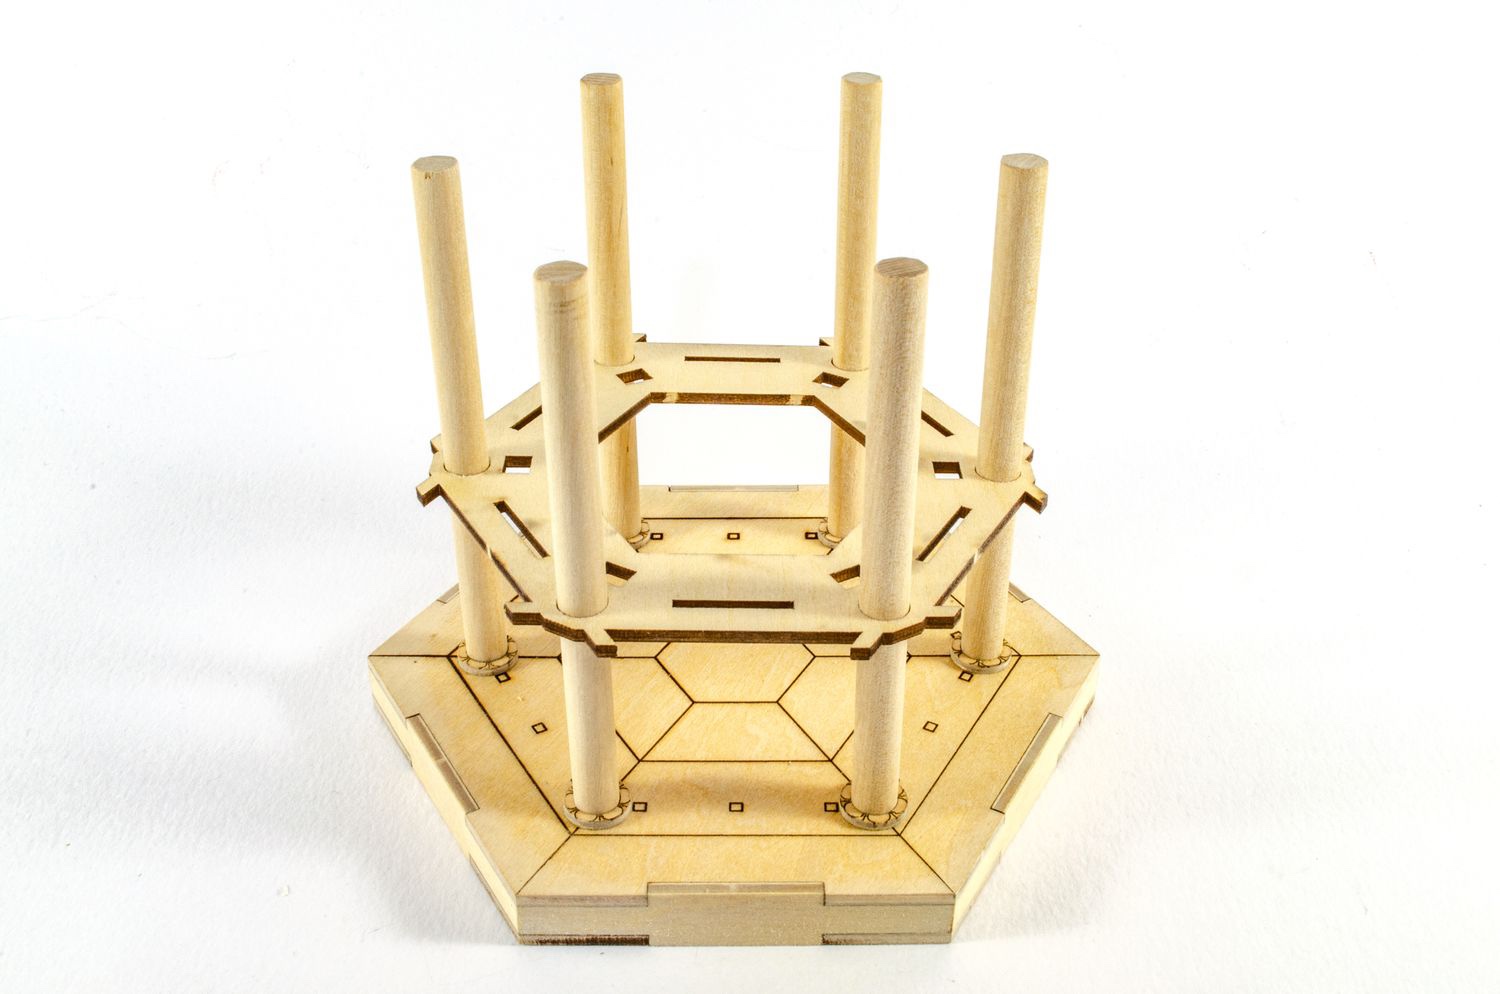
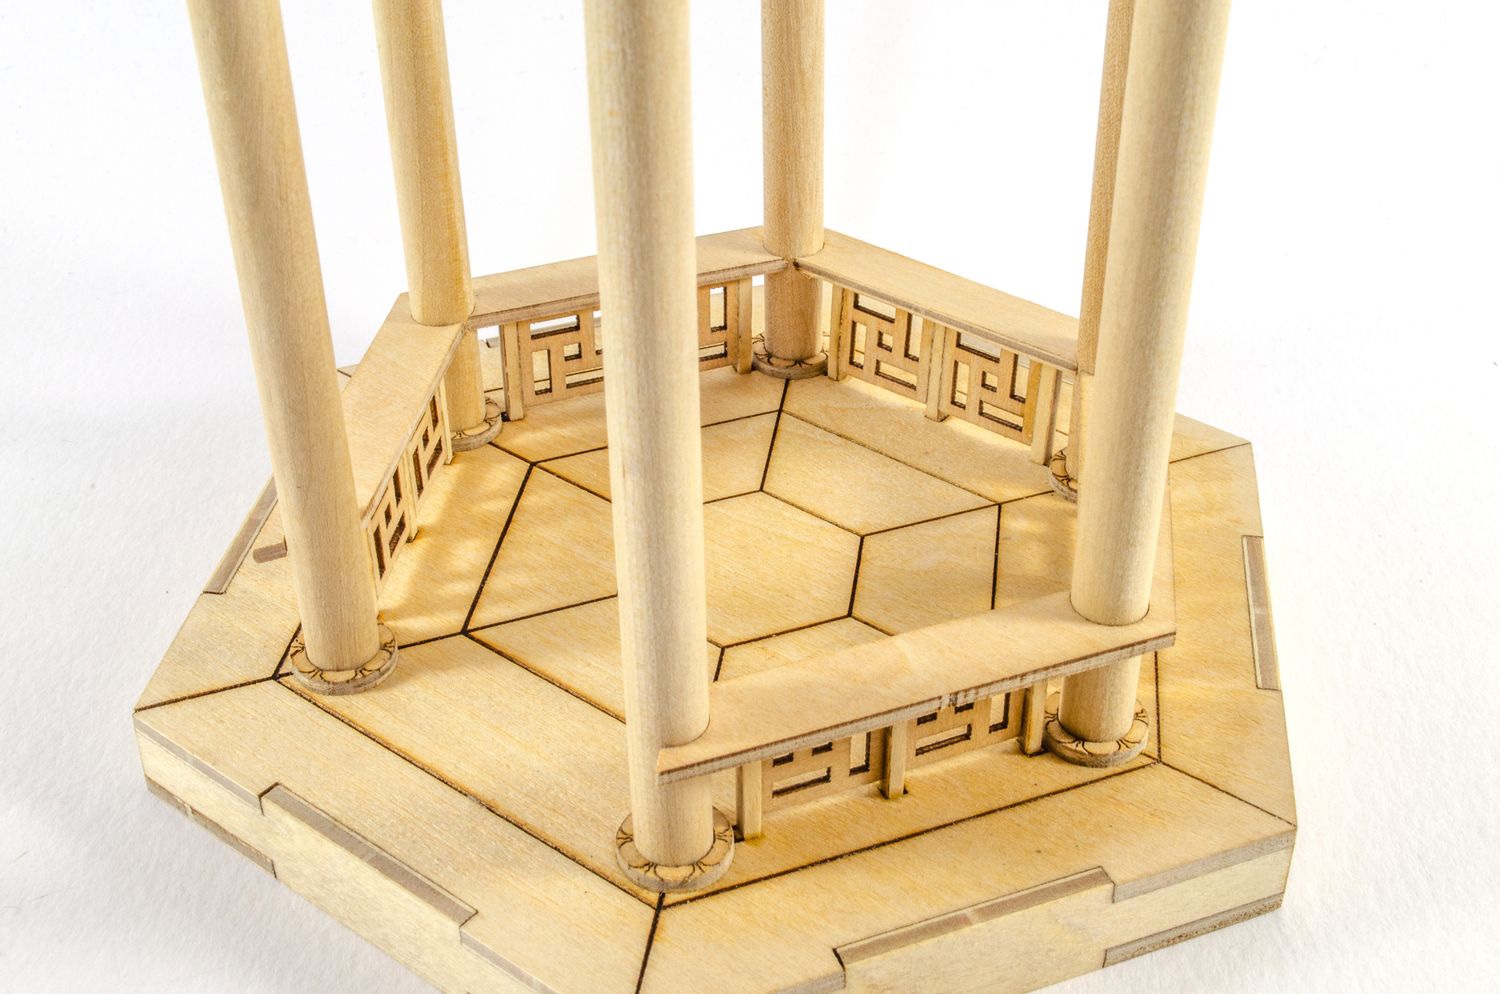
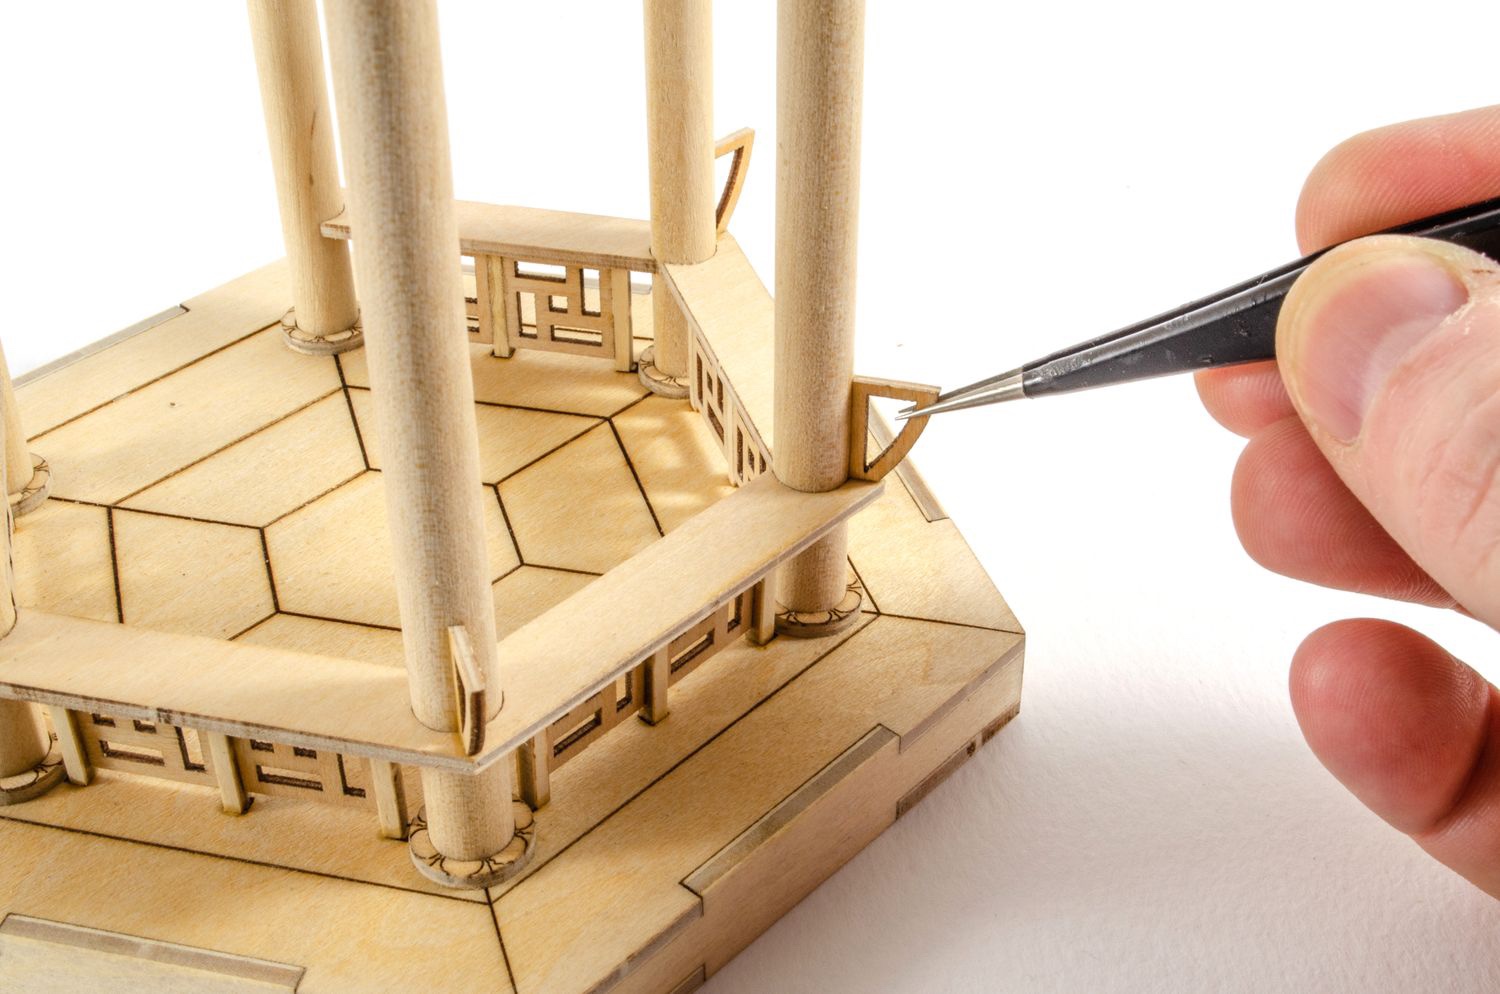
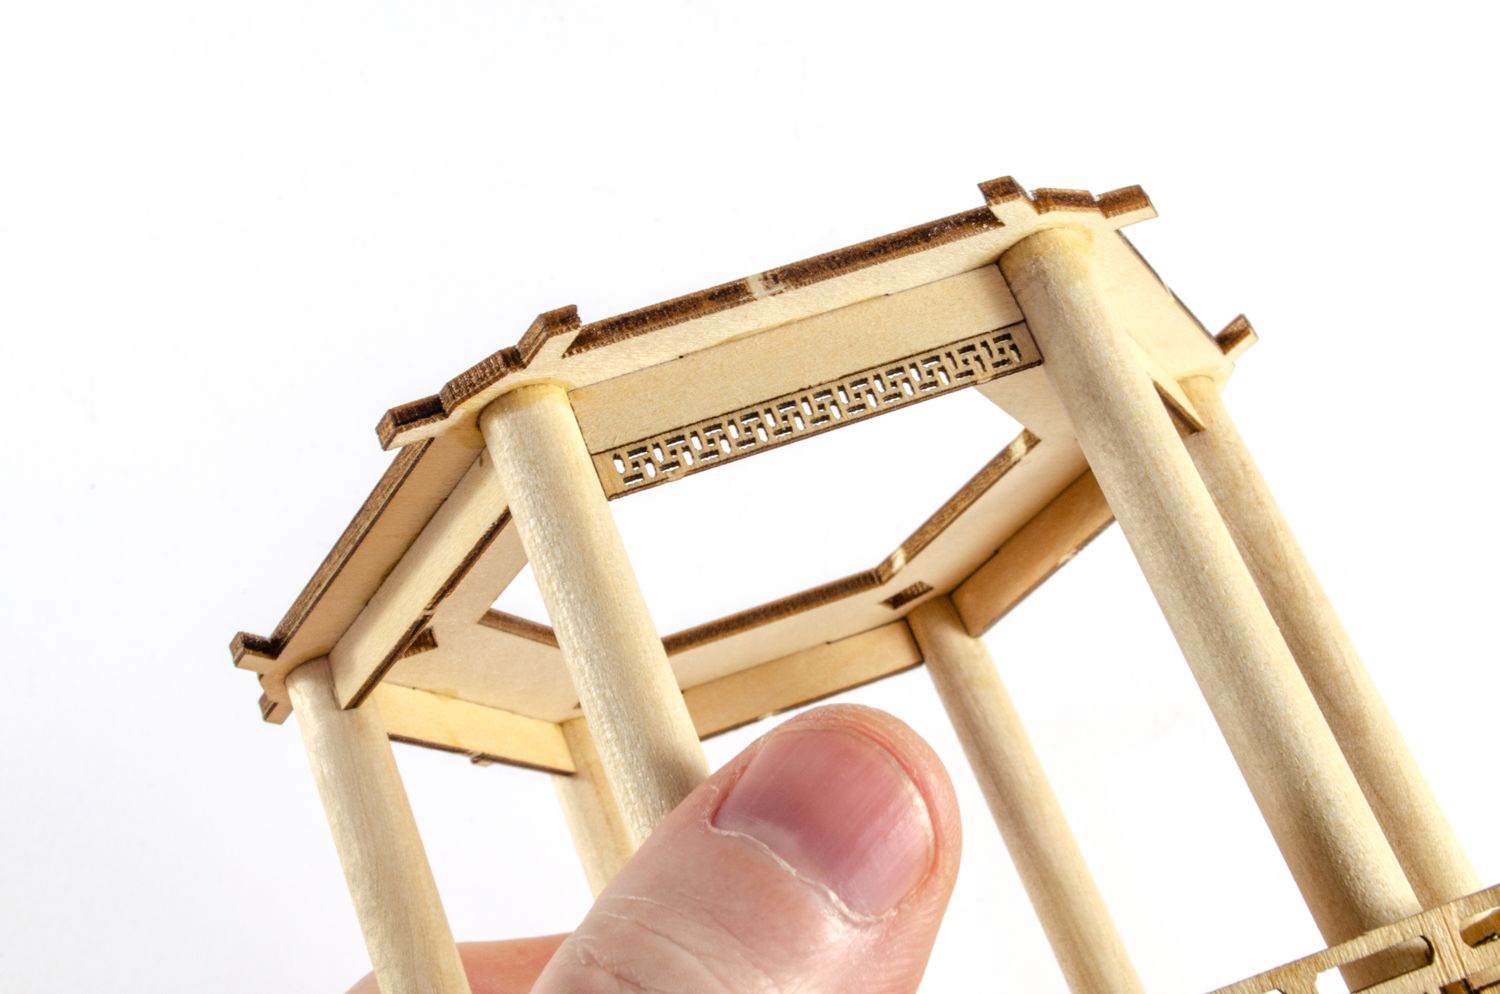
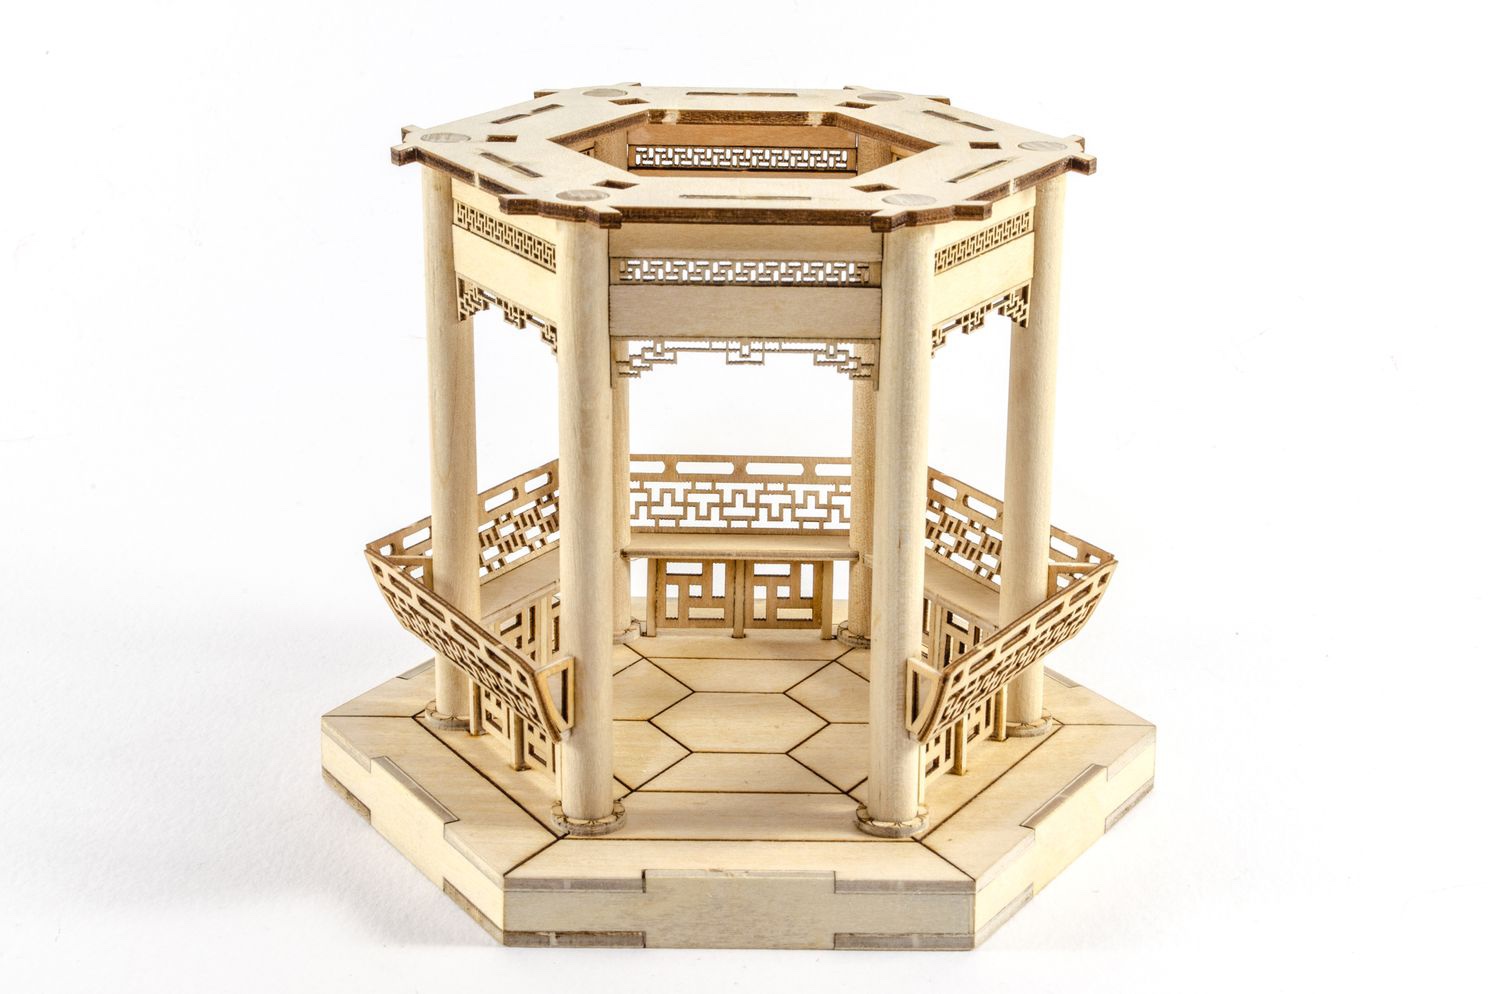
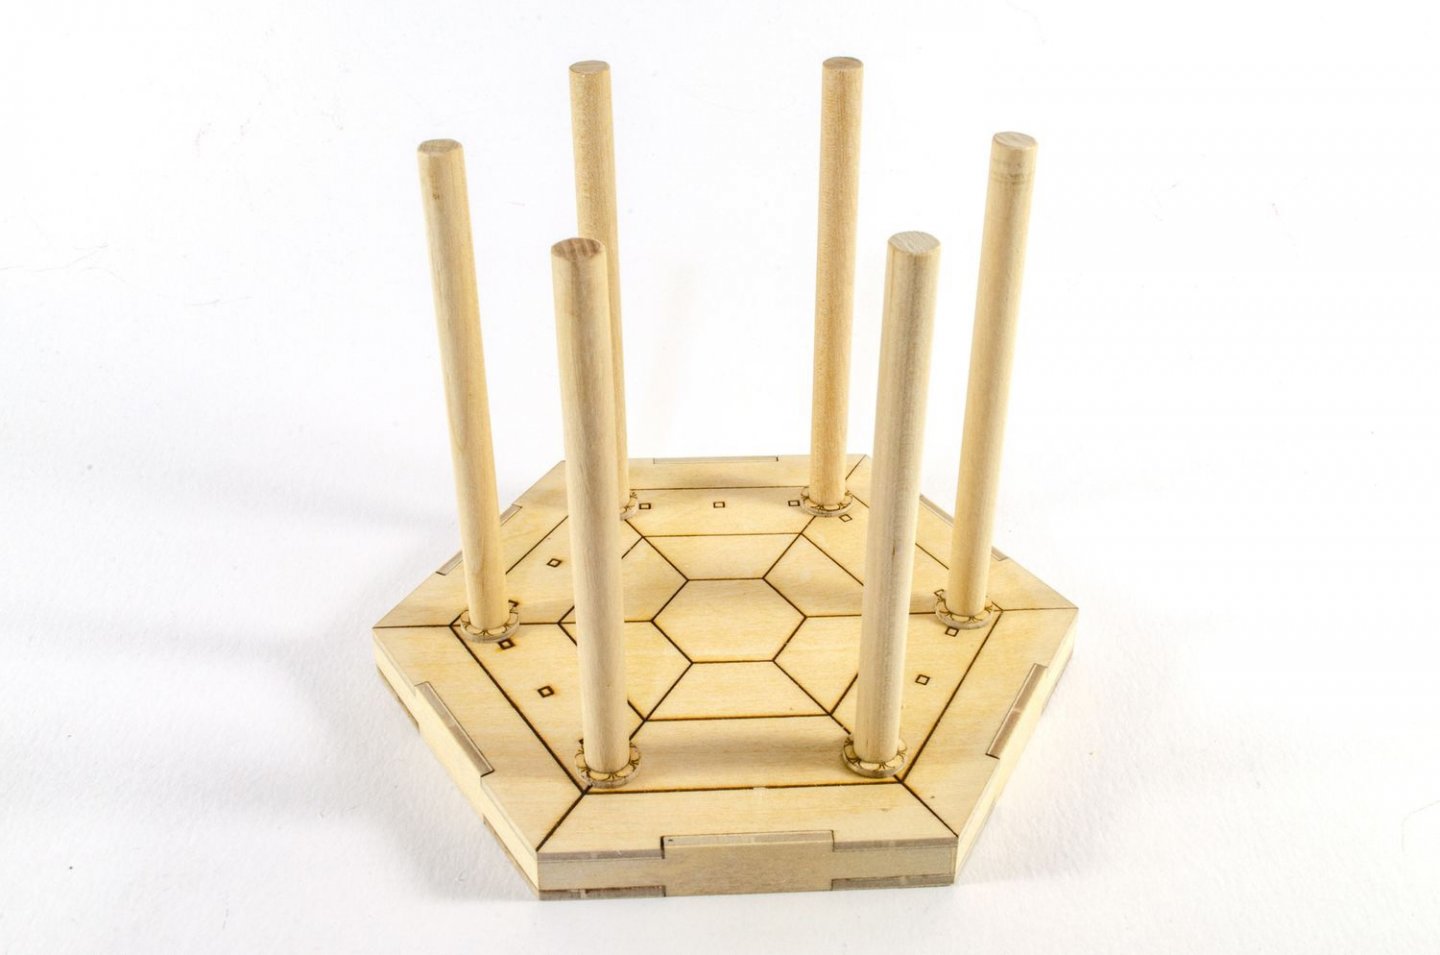
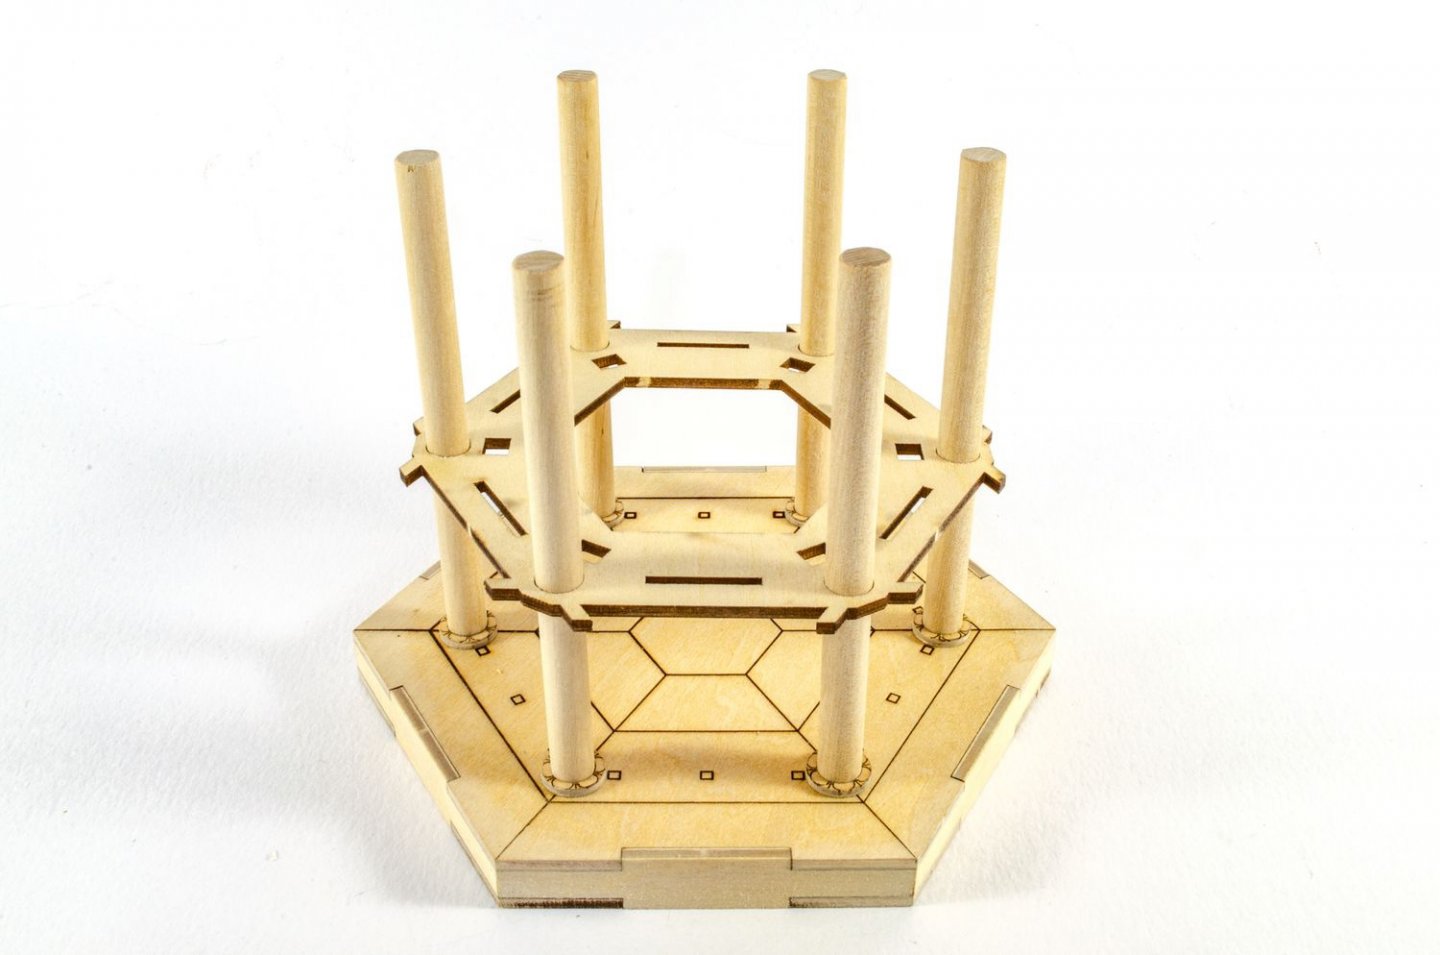
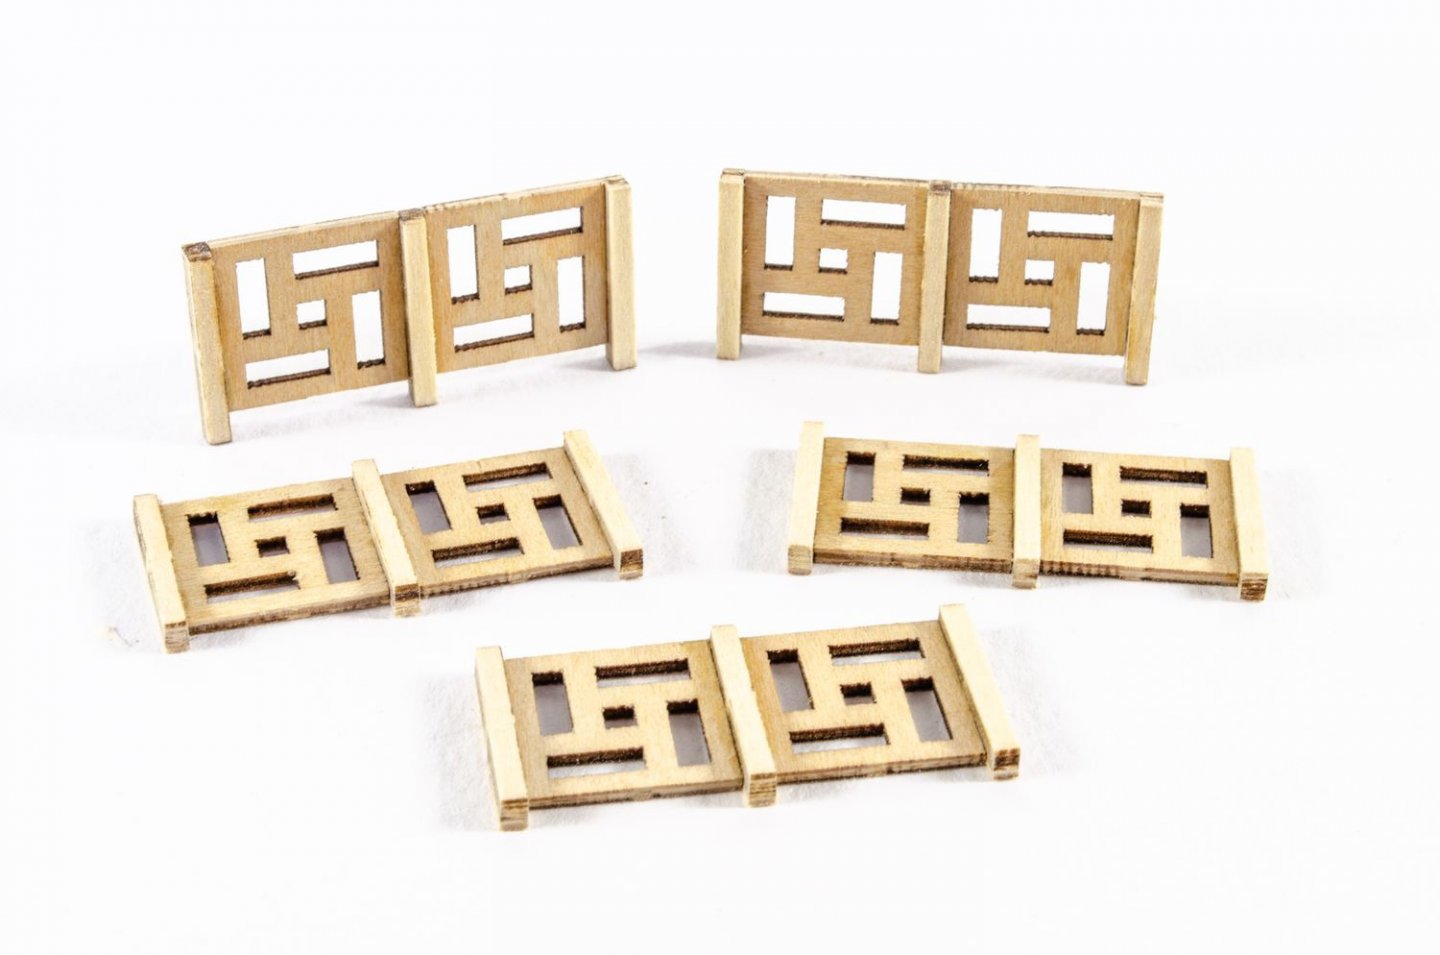
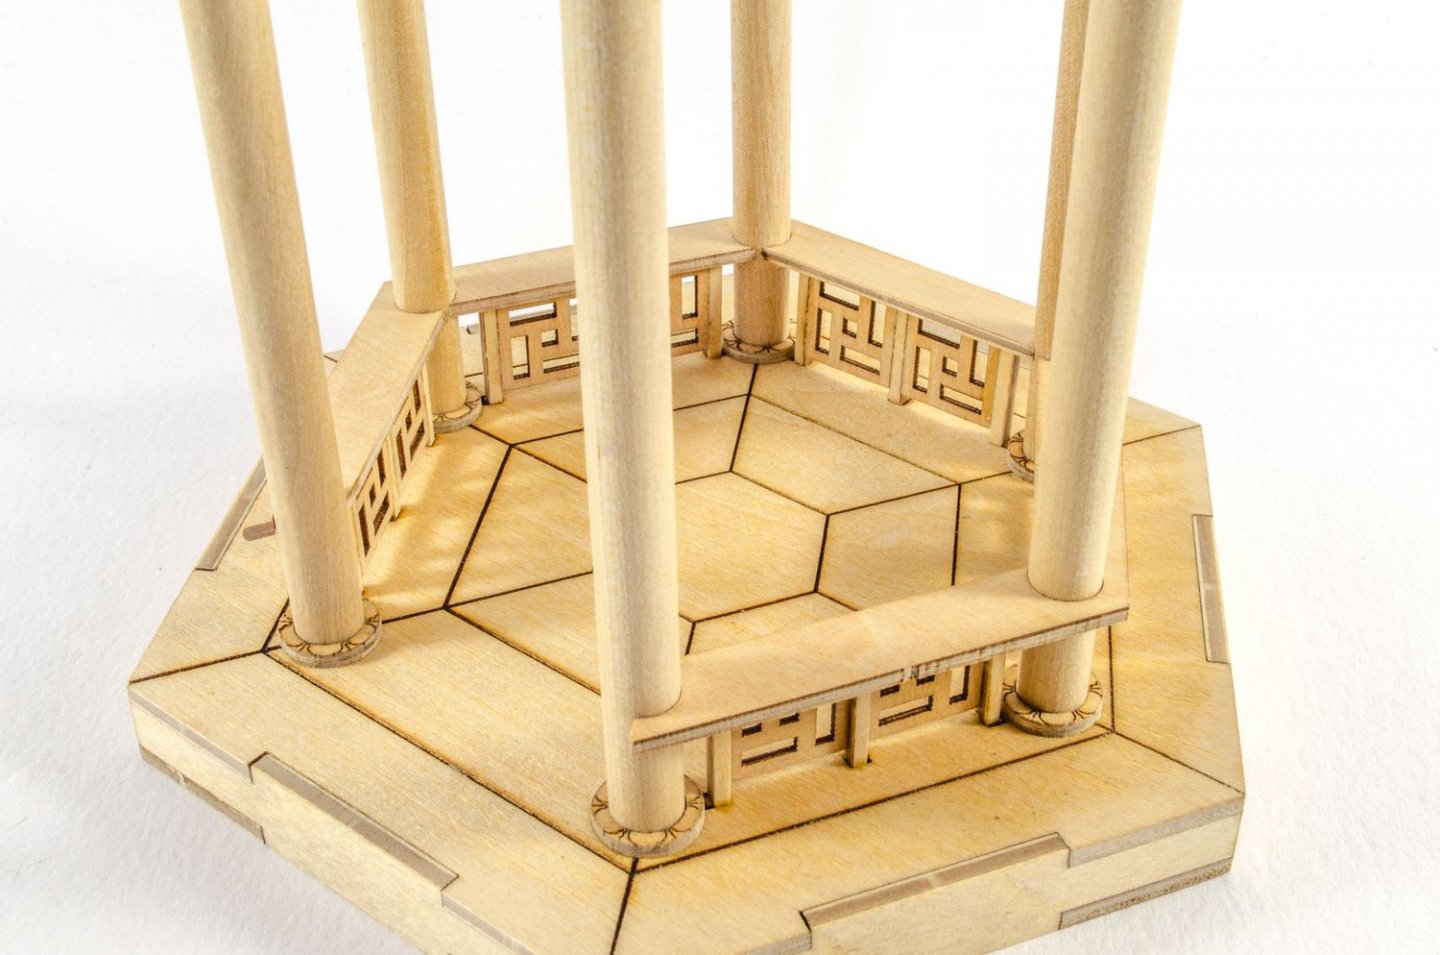
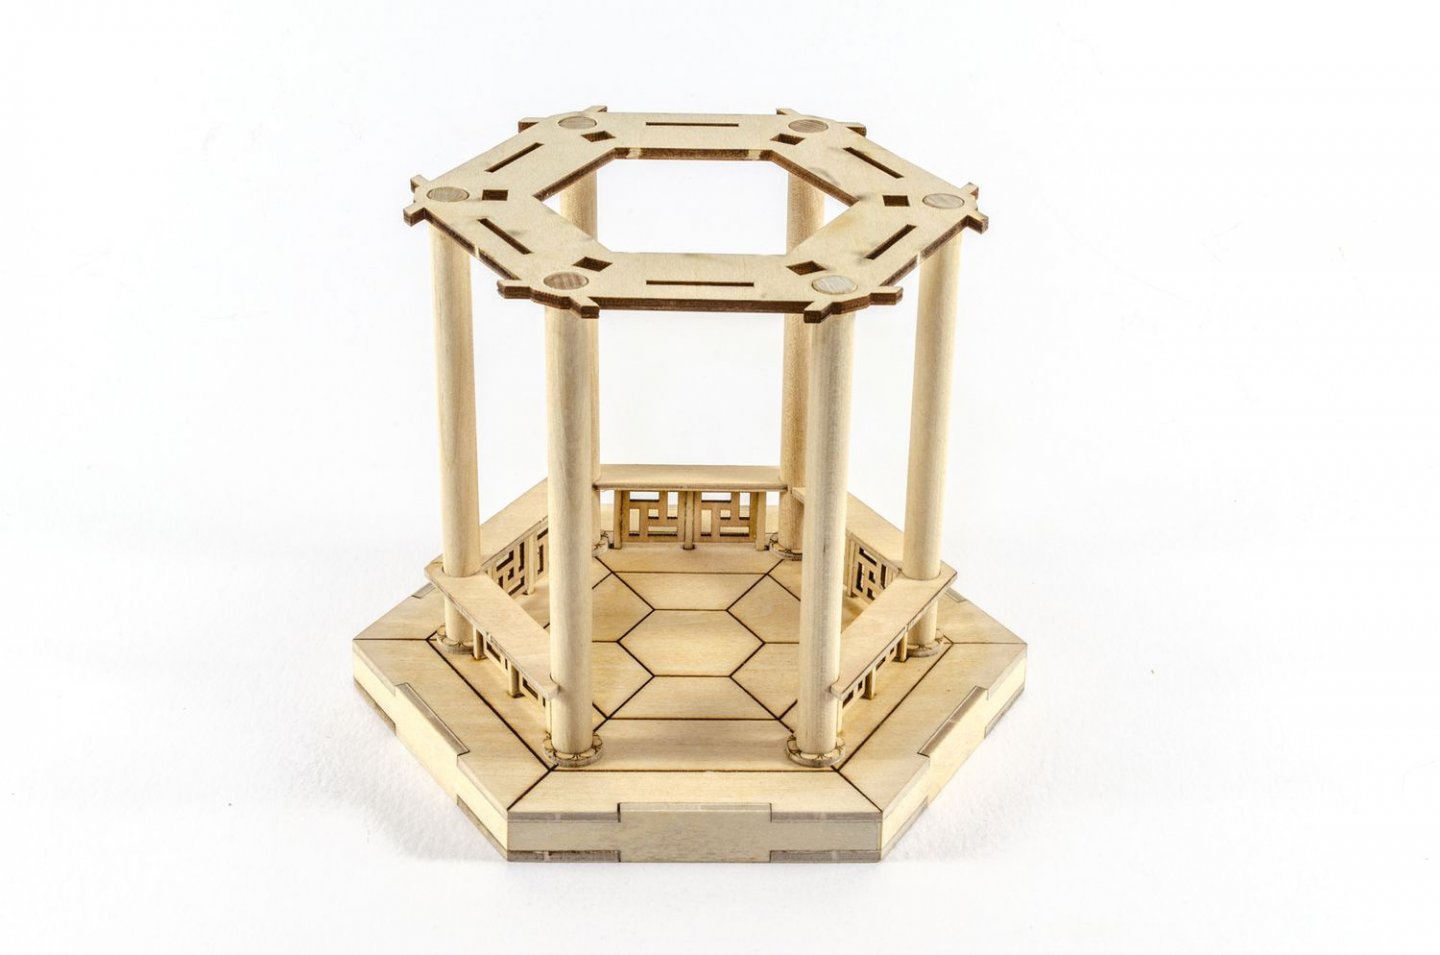
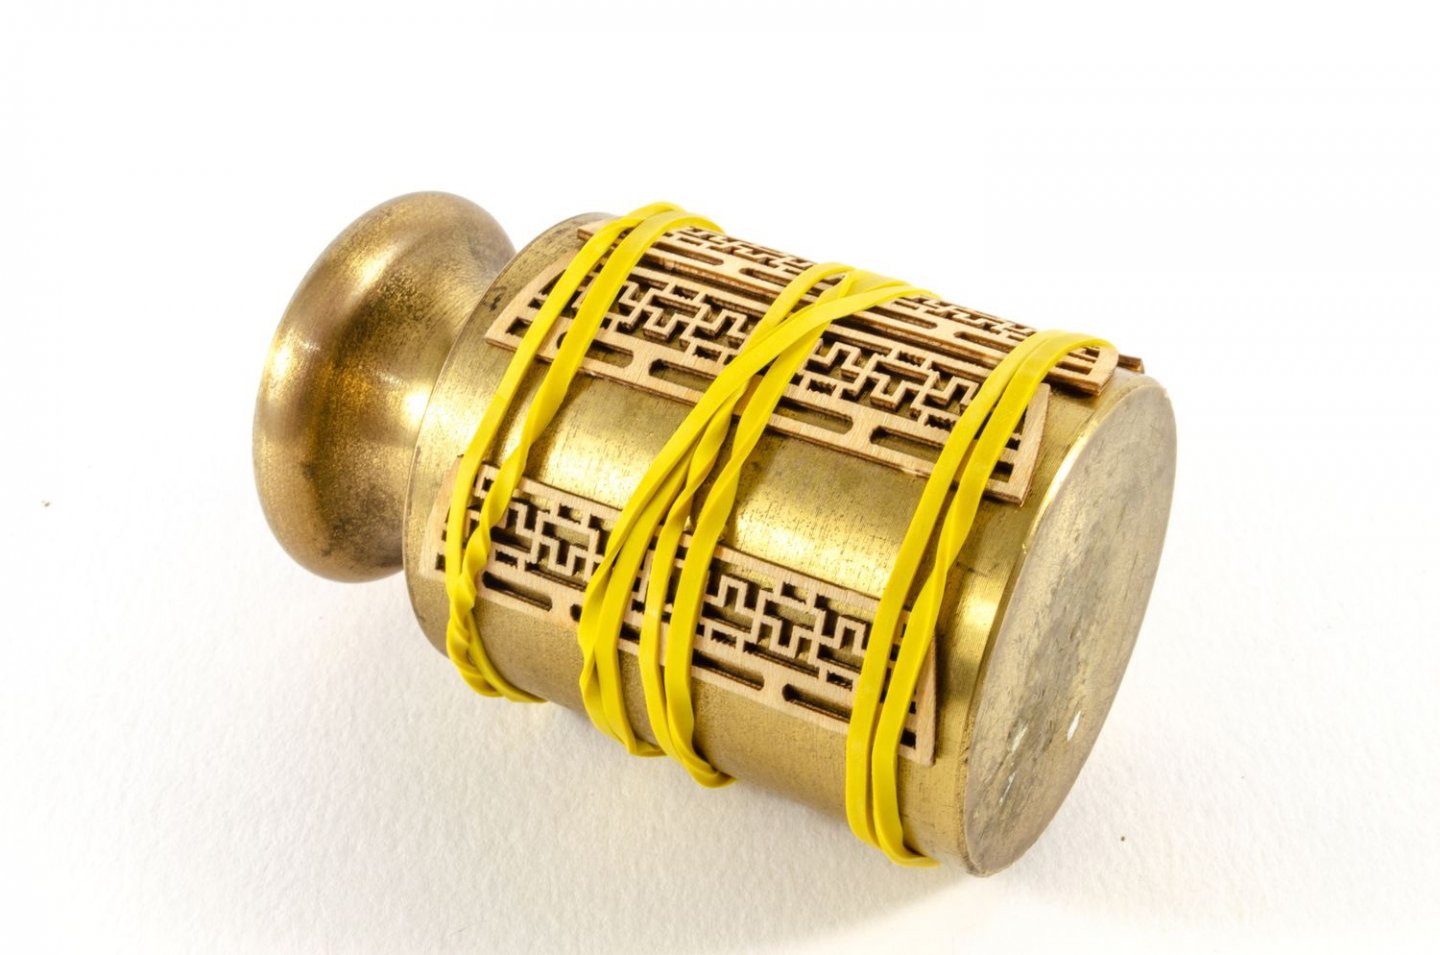
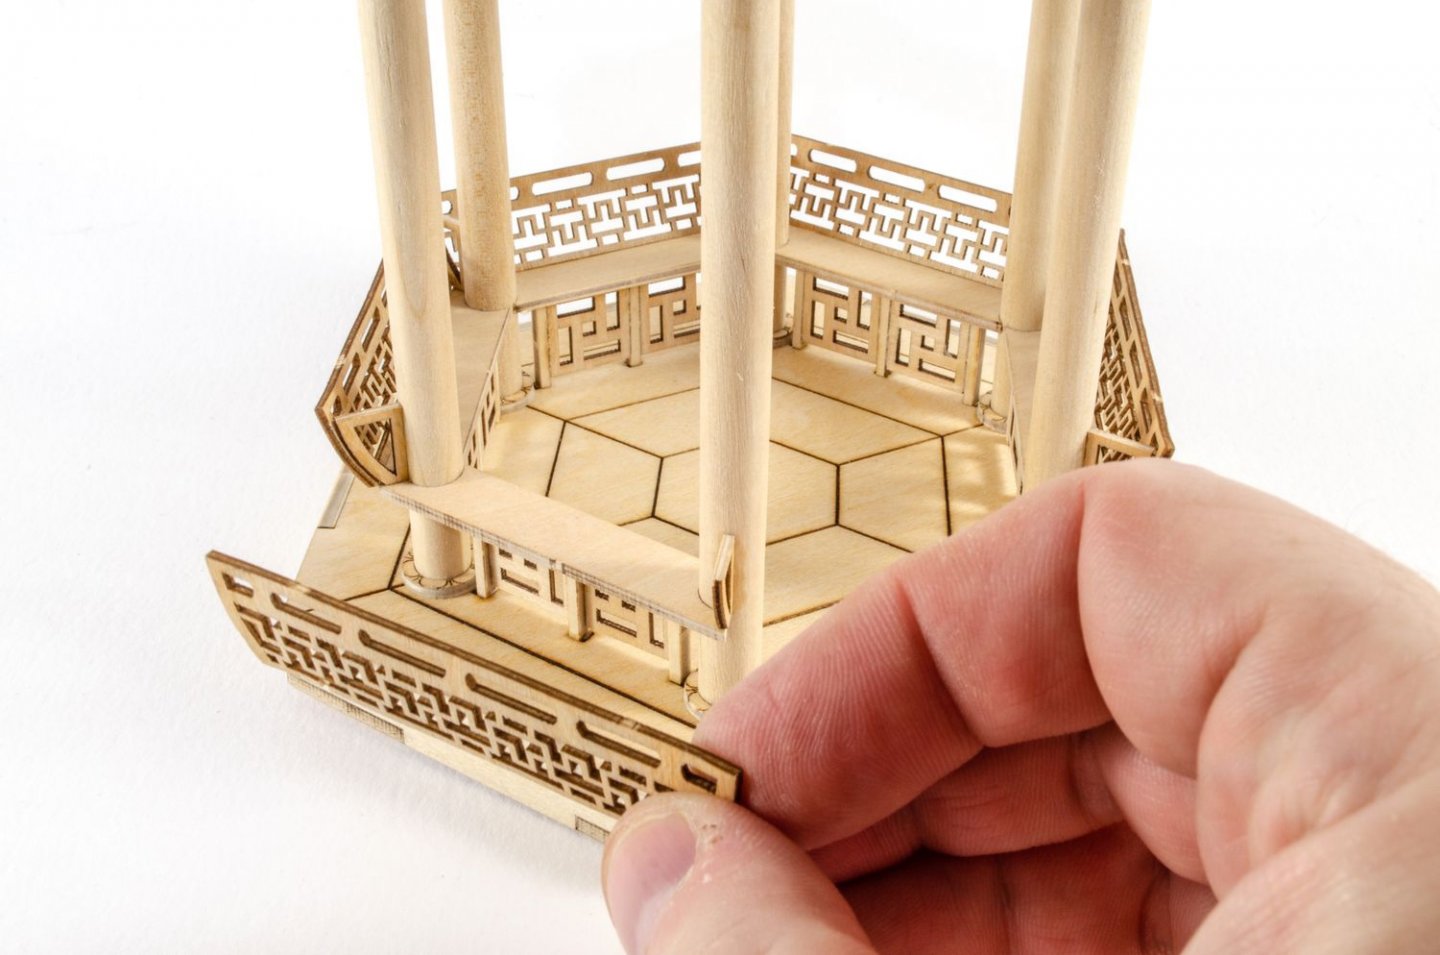
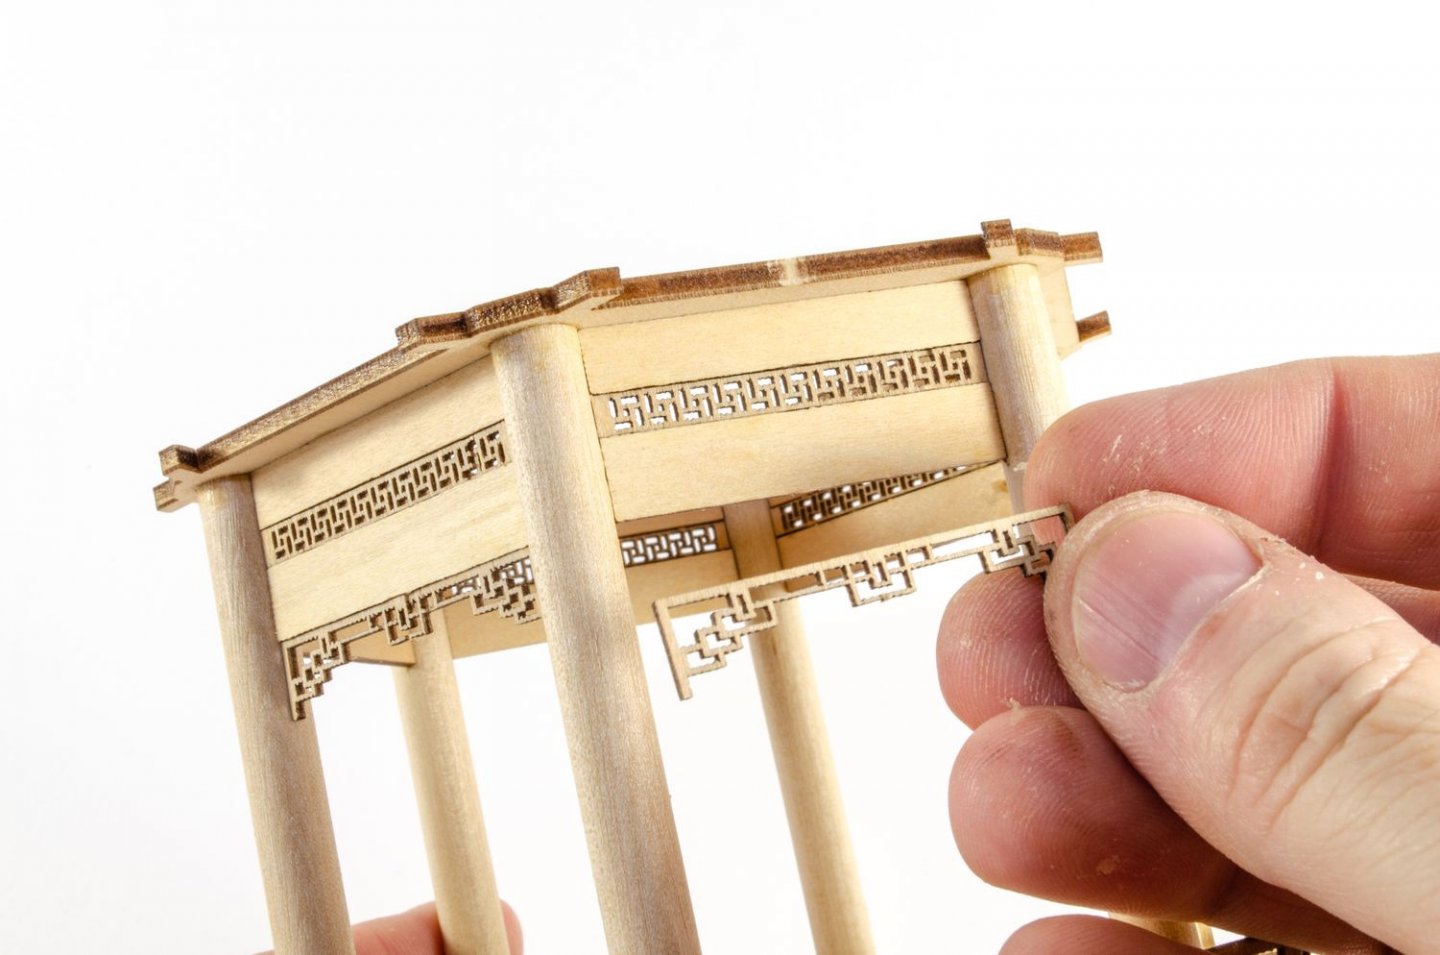
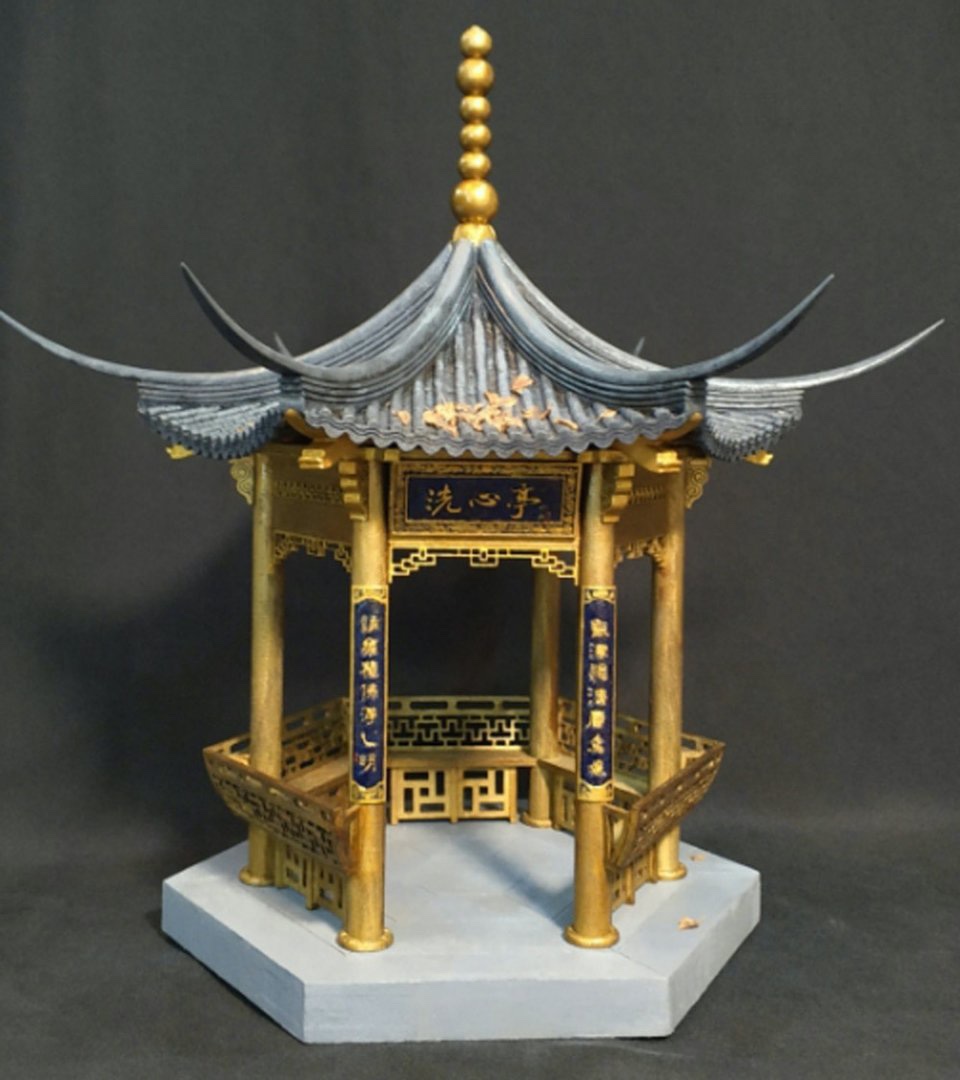
I've not been idle this last week. In between finishing build work on a Tiger Moth for a mag article, I've been cleaning my man cave and getting things back into order. What time I've had left, I've put into some extra work on this. As I said, Tom will use this for his manual, and that's why I've not used any paint. The next step was to glue the column bases into position, followed by the columns themselves. To ensure I got those columns vertical and evenly spaced whilst setting, I slid the pavilion upper former into position. Small pots of paint (same size) were used to make sure that part was even all around until the columns dried. It was then removed. Next come the 5 sets of walls. It's important that you get all these so the pattern is the same on the outside or it will just look odd. If these look familiar, remember that the symbol was a Buddhist one long before it was misused in the 20th century. Those walls are now glued into position using the etched markings on the floor, and the benching part slid down the columns. At this point, I glued that upper former into position at the top of the columns as it provided that extra rigidity. These parts here are the frames onto which the seat backs will mount. The seat backs were soaked in hot water for 30 mins and then wrapped around a 2kg weight and bound tight. This was left overnight on a radiator. The seat backs were now carefully glued into position. Time to pretty up the top area of the pavilion. Several panels, both decorative and plain are now glued into position. The next stage is the roof, but that will take a week or so until I can get onto it as I need to finalise my magazine project. This pavilion is a real nice kit and a wonderful diversion whilst still sticking with timber modelling.


-
Something real satisfying in adding those walnut strakes. Looking real nice. I'd still paint that upper area all black instead of using a third colour though, but that's me. Will look nice with a registration number added too.
- 222 replies
-
- 2
-
-
- First Build
- Lady Isabella
- (and 2 more)
-
To protect the painted hull against any char on the cradle, I glued a few strips of thin styrene over those contact areas.
- 382 replies
-
- 5
-
-
-
- Vanguard Models
- Duchess of Kingston
- (and 1 more)
-
Just remember that there is a lot of soaking to do on key parts and pear expansion is a LOT. It really is a good idea to leave those parts overnight (at least 12hrs) as you can still have a reasonable amount of expansion present in the last hrs before use.
- 382 replies
-
- 2
-
-
-
- Vanguard Models
- Duchess of Kingston
- (and 1 more)
-
It's like reliving my build over again, and you're doing a lovely job of her. As soon as those strakes go on and a little paint, it'll be transformed.
- 222 replies
-
- 2
-
-
- First Build
- Lady Isabella
- (and 2 more)
-
I was going to say 'precision clamp' is generally an oxymoron in this hobby, but I'm definitely wrong here! Beautiful work.
-
Skipton is a lovely place and I'm not 'too far' away. For clamps, I don't think you can beat these: https://www.amazon.co.uk/gp/product/B06XFRCRLH/ref=ppx_yo_dt_b_search_asin_title?ie=UTF8&psc=1 Hope to see that build log here real soon. Oh, and...
-
I hope you'll be able to return to this build soon.
-
I added the rig blocks to the masts as on the plans, and the deadeyes to the channels only. All shrouds were added after fitting the masts, and it was quite easy. There's nothing stopping you adding the seized lines to the masts before you fully assemble and add the cap blocks. You could just tie them back while you fit the masts. I didn't tie them hard around the mast. There was a little play to allow me to spin them round the mast and thread them through the correct side of the crosstrees/mast top.
- 117 replies
-
- 2
-
-
-
- vanguard models
- yacht
- (and 2 more)
-
I"m also keeping this one unpainted as the timber looks real nice as it is. The laser char on the roof tiles should really set itself off against the pale ply.
-
I always build the complete mast and then install. Being able to handle it separately means I can eyeball and measure things to make sure all sections are in alignment.
- 117 replies
-
- 2
-
-
-
- vanguard models
- yacht
- (and 2 more)
-
That turned out exceptionally well Those little unused 'triangles' are yard cleats. Not used (from memory) on this model.
- 49 replies
-
- 1
-
-
- Lady Eleanor
- Vanguard Models
- (and 1 more)
-
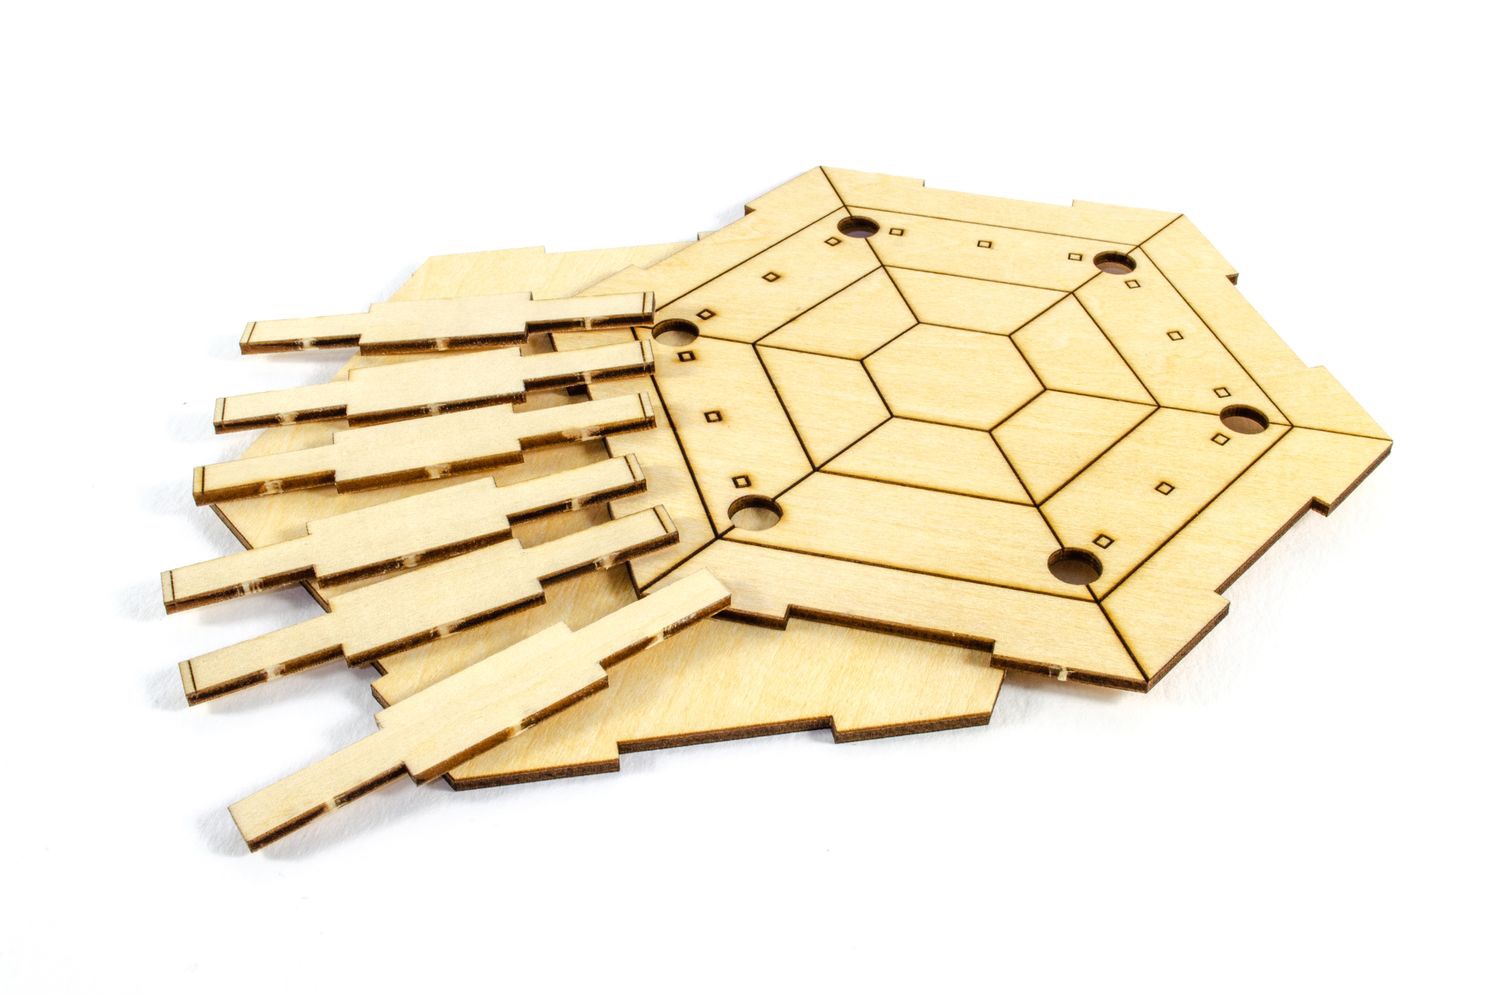
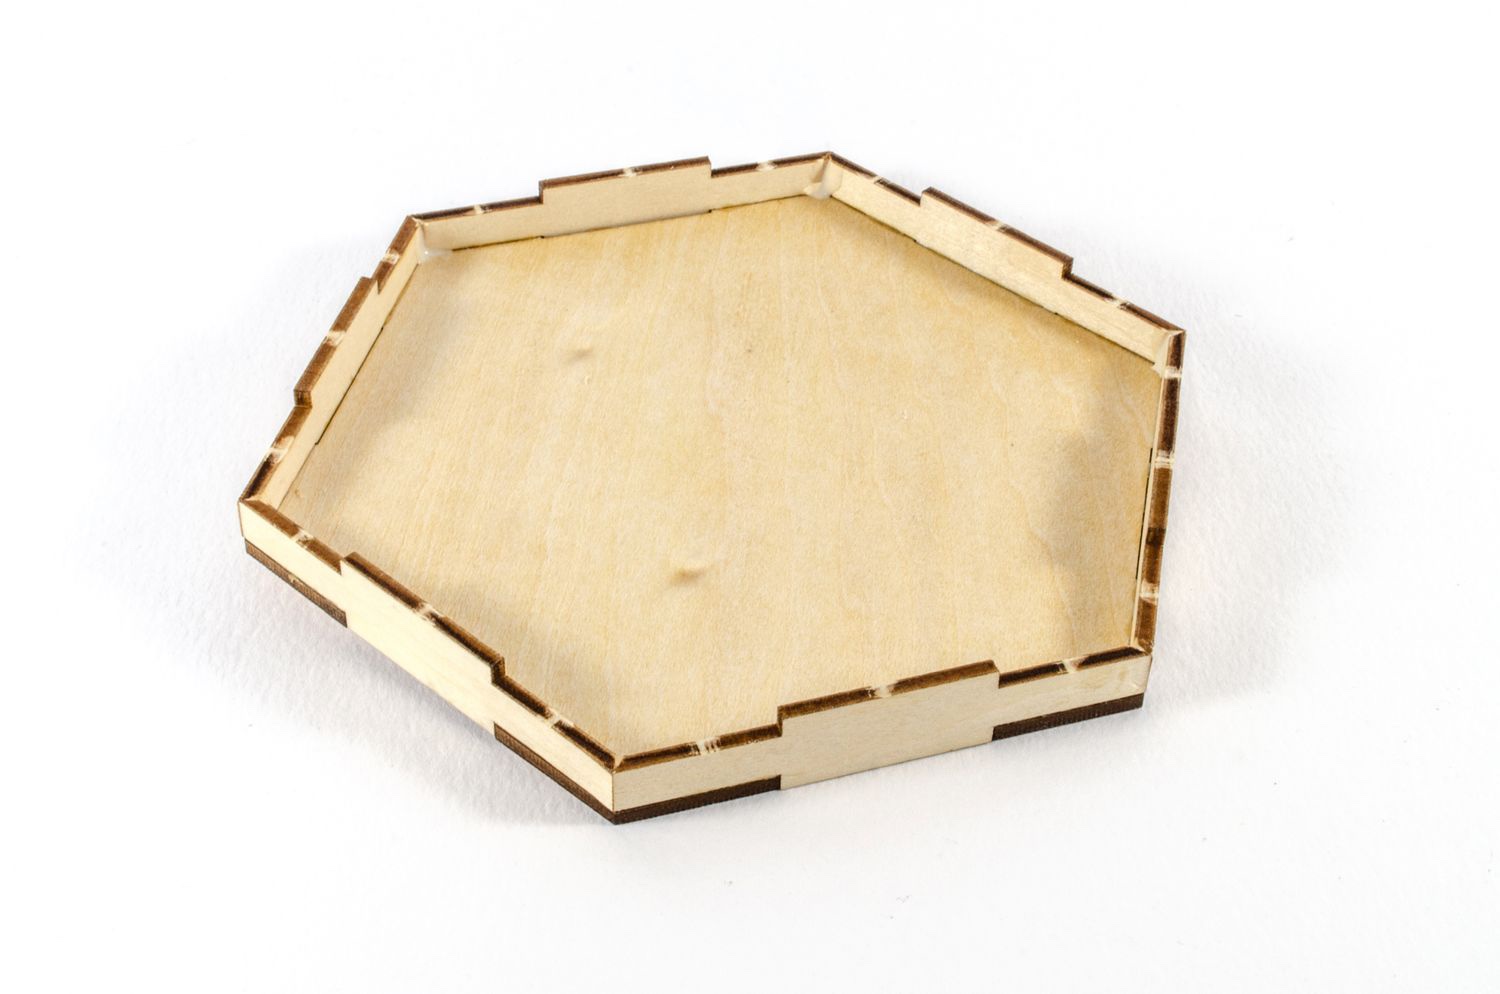
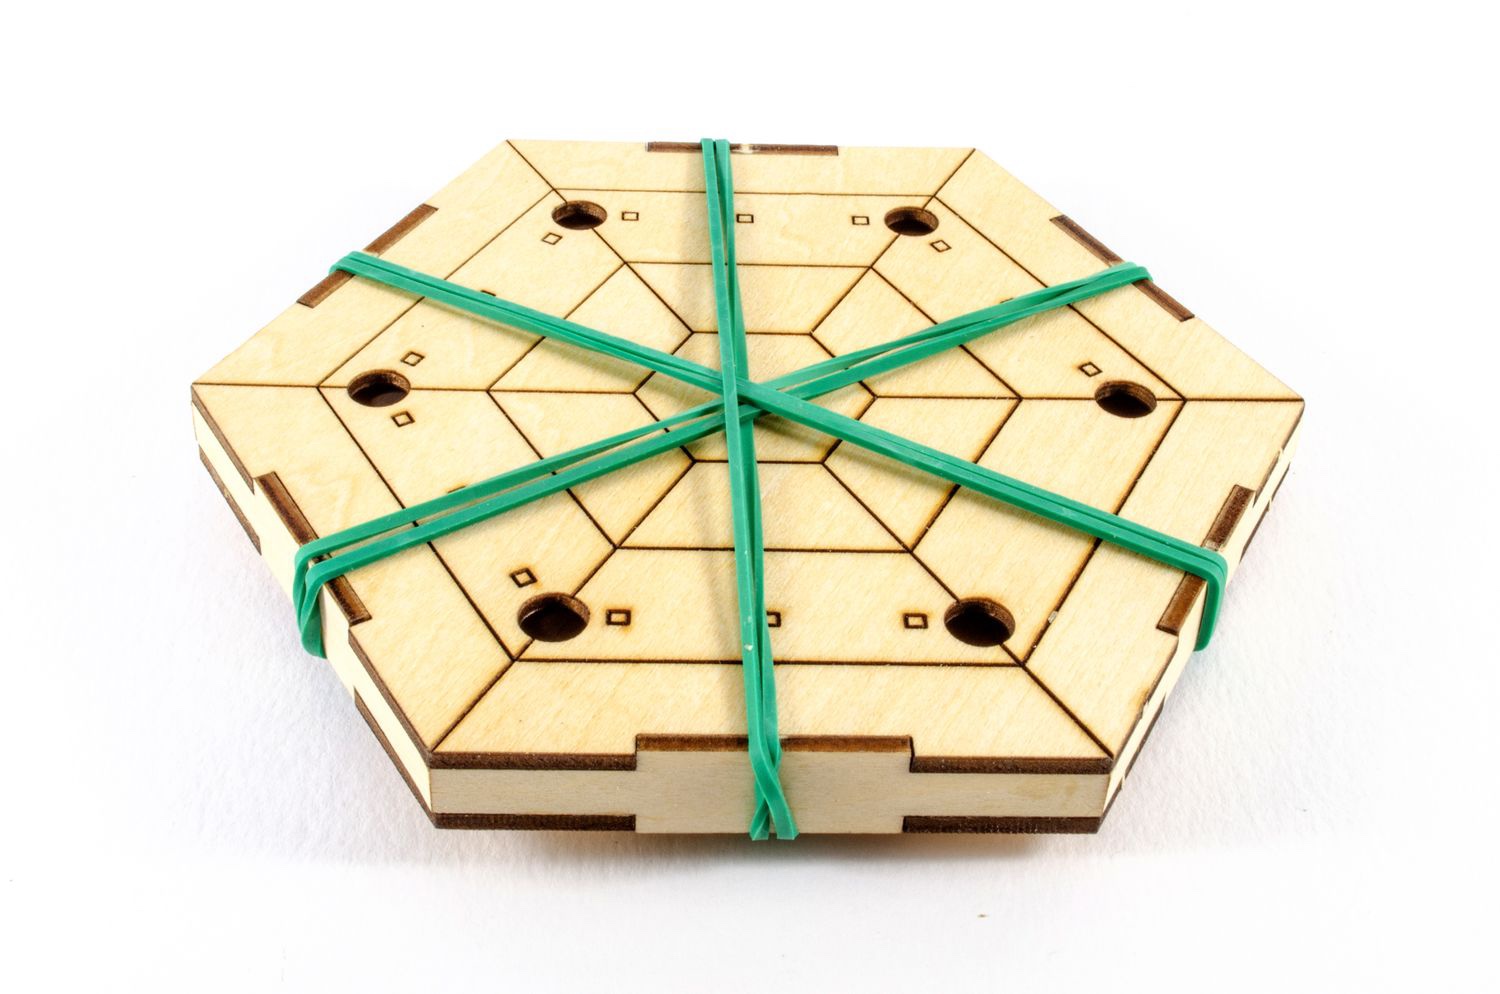
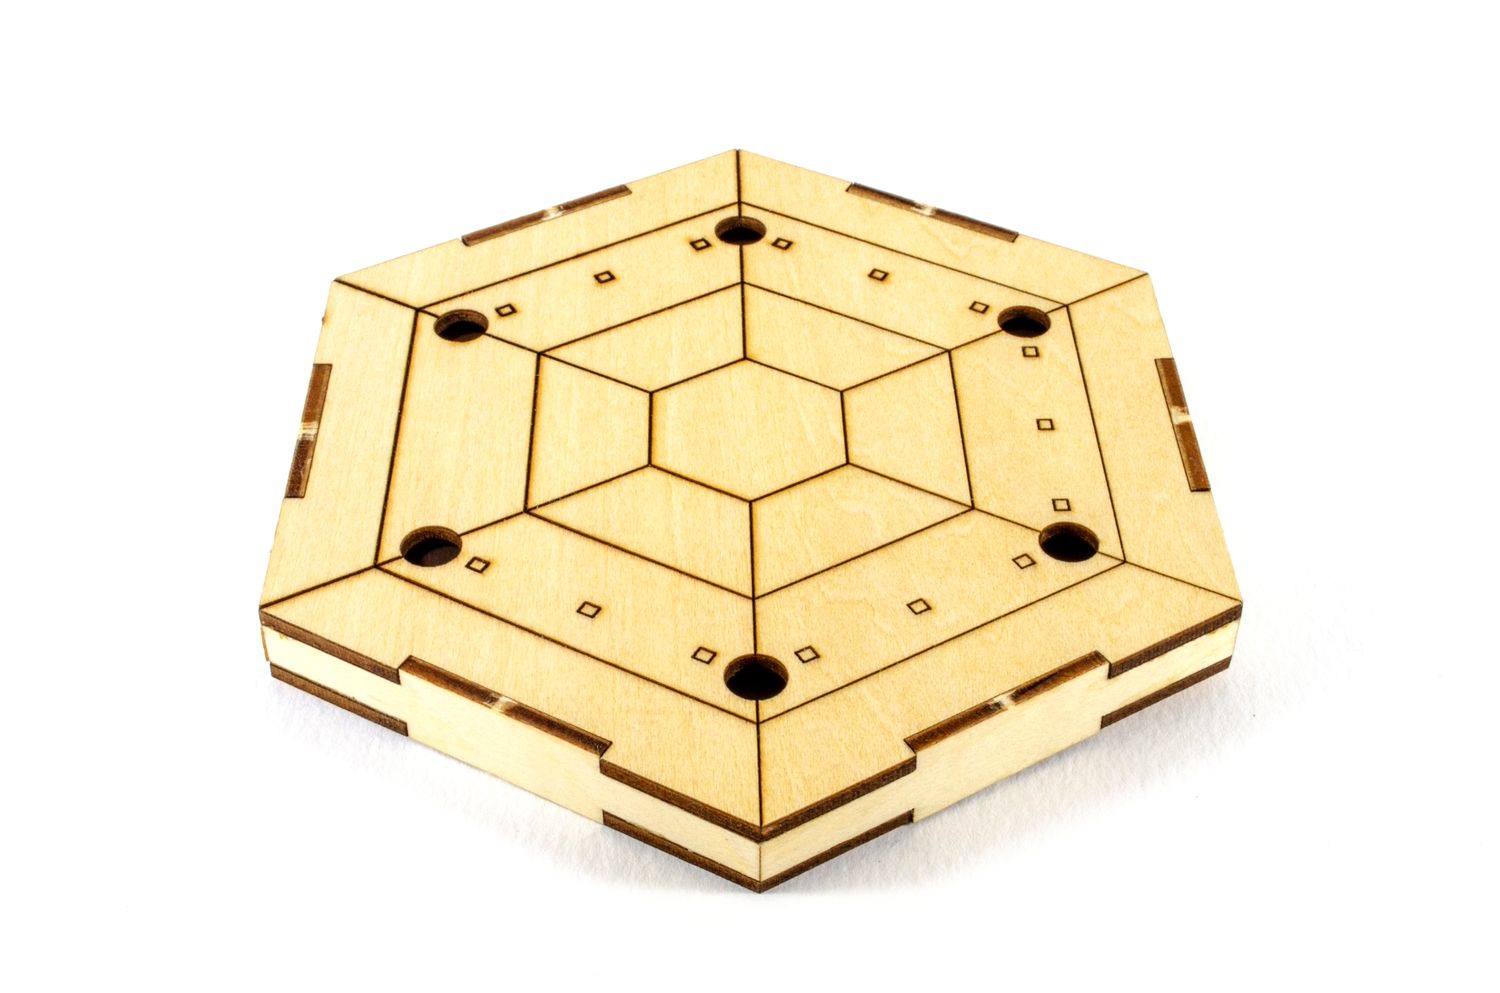
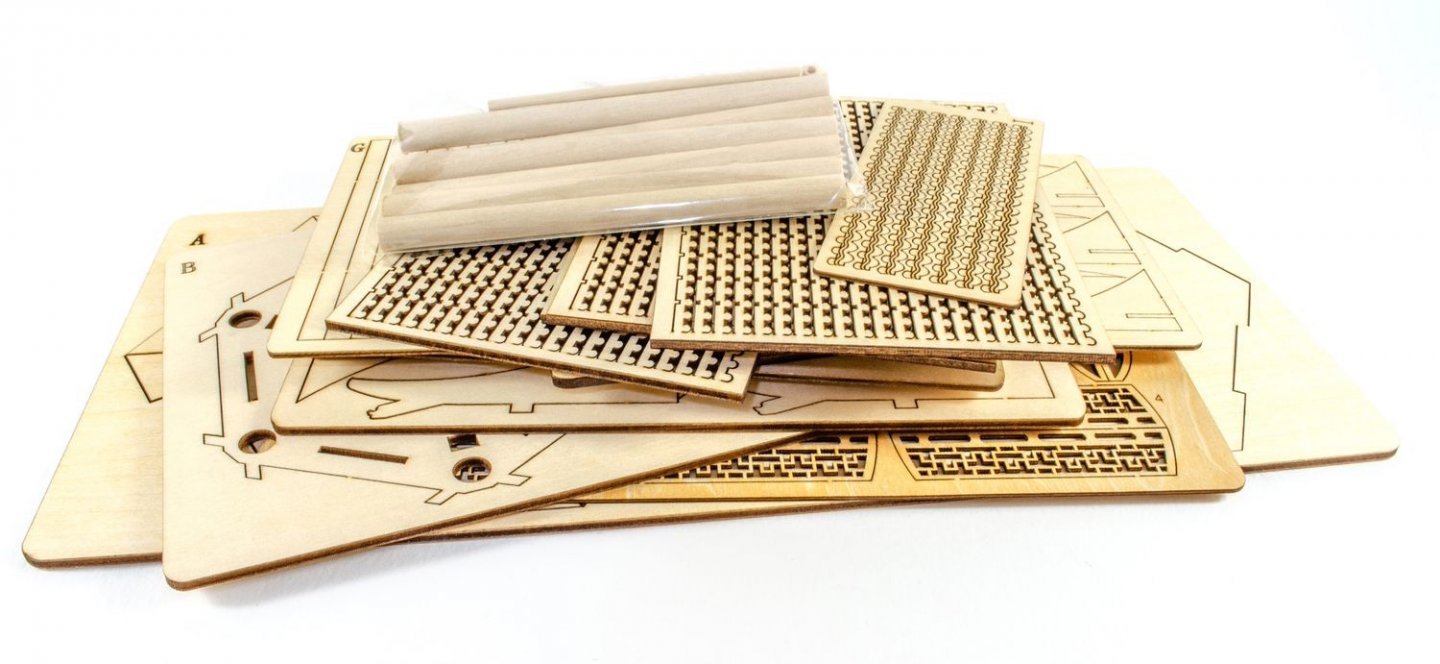
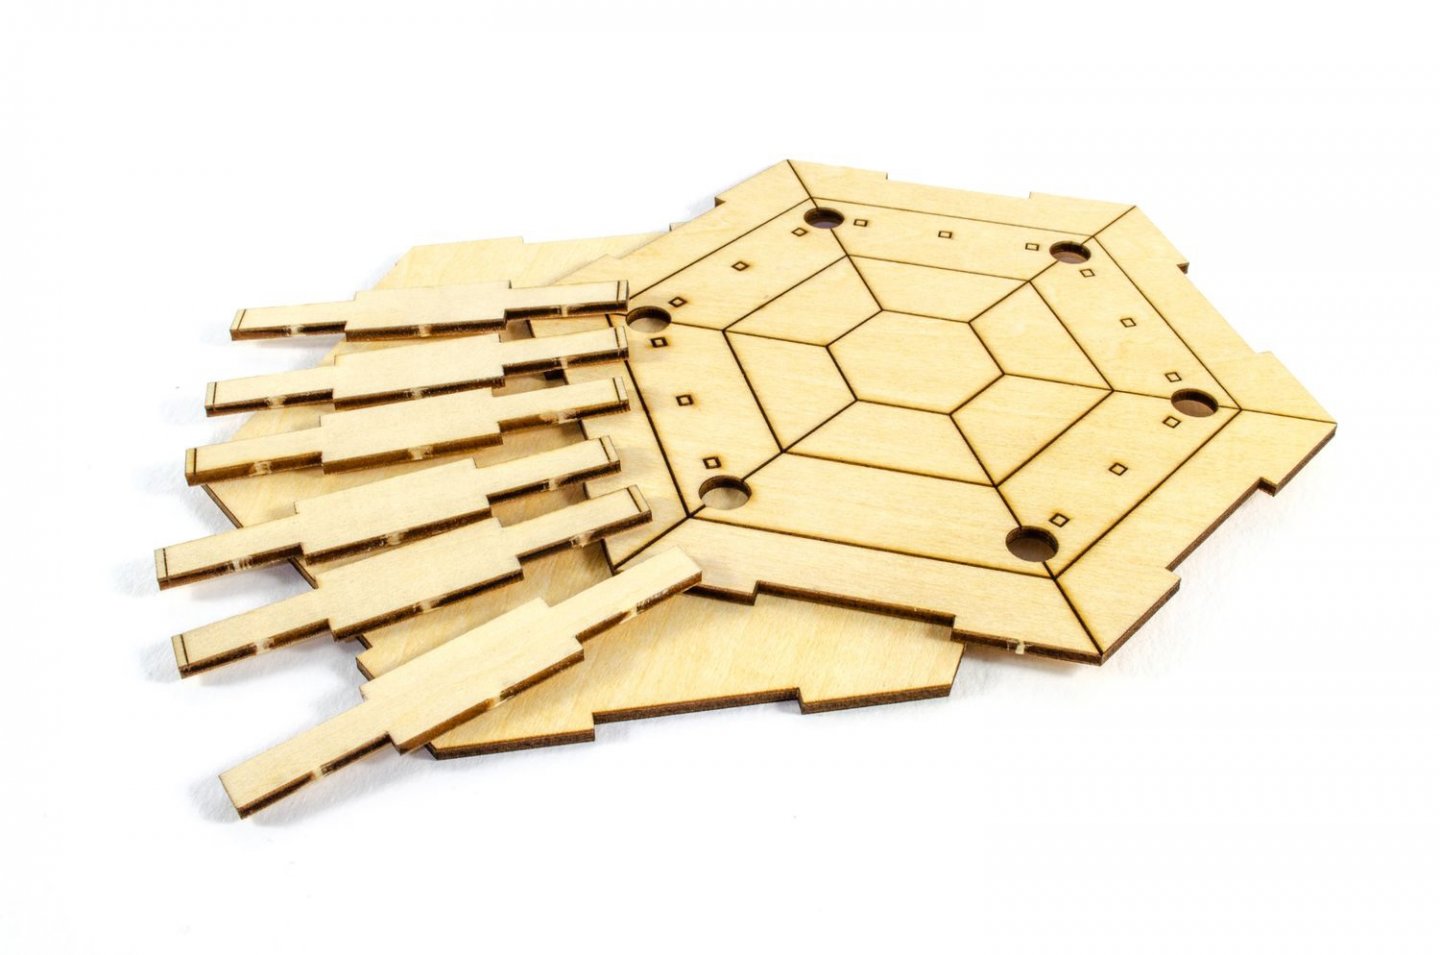
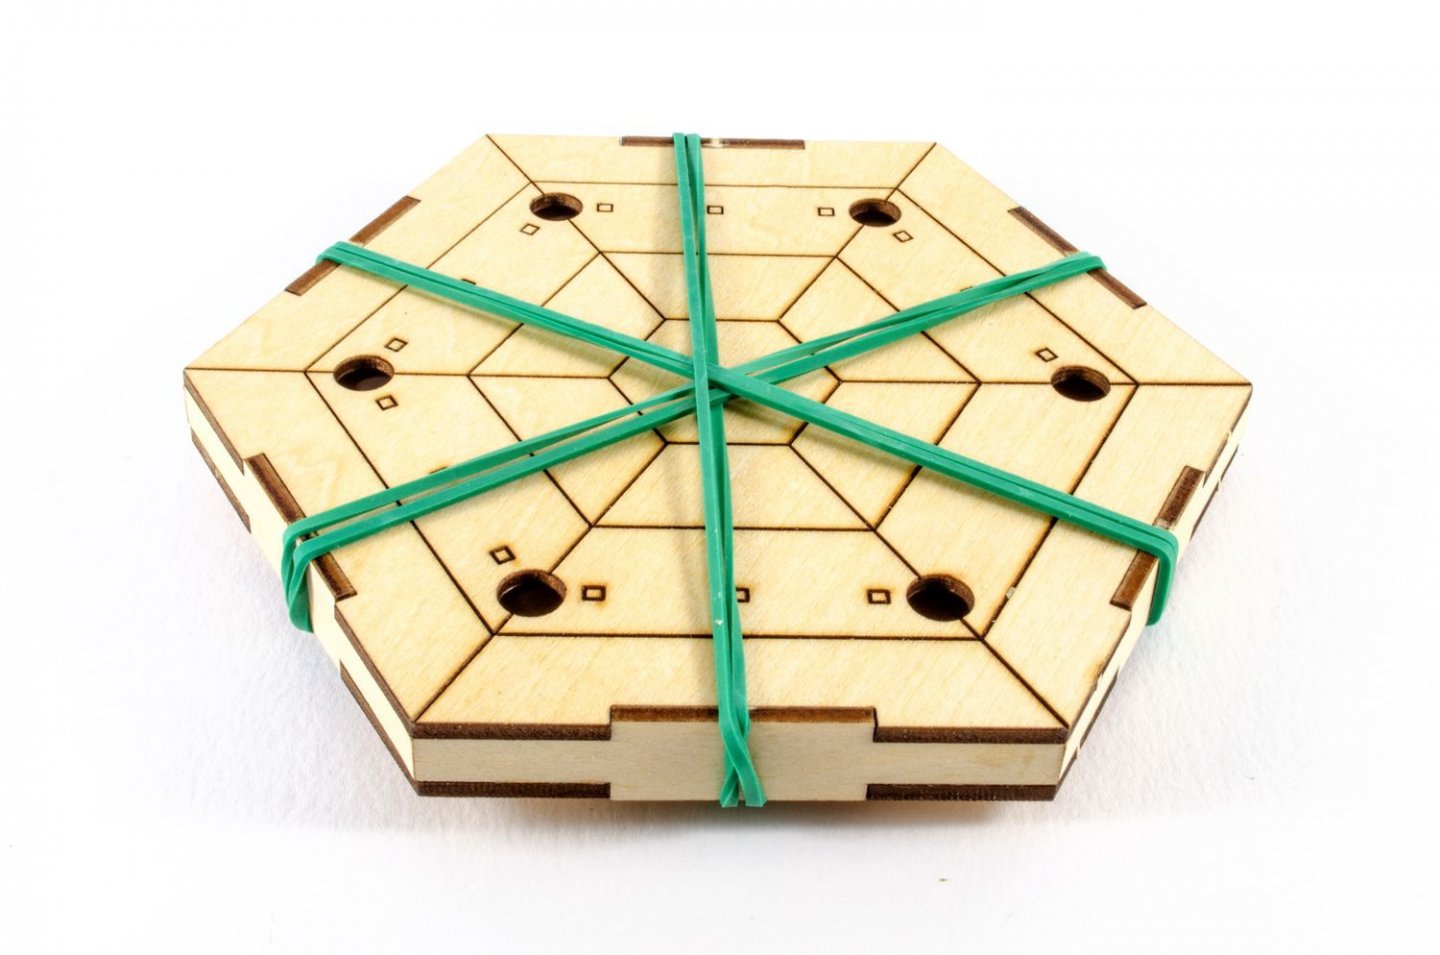
As I'm currently in ship-building hiatus (not for long), I thought I'd make a start on CAF Model's Ancient Chinese Pavilion kit, reviewed here. At the moment, I've only got the base built up, but the fit is superb. This consists of two hexagonal plates with one of these being engraved and containing the holes for the pillars. There are six side pieces which have engraved bevel marks. The material is ply, but really nice stuff with no warp. Before starting, everything is given a nice light sanding with some 320 grit paper. I found a knife the best way to evenly bevel the size piece ends. These are then glued in with Titebond and the the lid temporarily fitted whilst the sides dry. The lid of the base is then finally glued in position and elastic bands used to hold things nice and tight. Char removal is now done with a piece of 80 grit paper, followed by finer grades so there are no surface scratches. ...more as soon as I've actually done some!


-
Been a while since I saw that, but thanks for posting it here.
-
Moved to correct forum area....