


Chuck Seiler
-
Posts
1,878 -
Joined
-
Last visited
Content Type
Profiles
Forums
Gallery
Events
Everything posted by Chuck Seiler
-
 Substantially thicker? maybe so. I only look at my double edge once a week when I change them out...and I am usually half asleep. I just know the single edge that I posted works great and I keep my fingers. ...and some day I will get back to work on CardyDog.
- 175 replies
-
- 5
-

-
- hanse kogge
- shipyard
- (and 1 more)
-
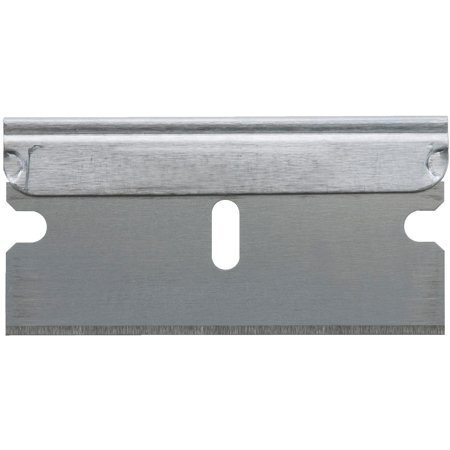
Clare, Here is what I was talking about. At first I was using a scalpel but it just wasn't cutting the mustard (so to speak). I got 5 pack of these and they work great. They ARE thicker than a normal double edged blade (which I use), but not overly so.
- 175 replies
-
- 3
-
-
- hanse kogge
- shipyard
- (and 1 more)
-
Excellent!!! Thanks. Looking forward to it.
-
I don't believe you named the model. Will it be a ship-rigged sloop LIKE the FLY, different class? ...or something else?
-
I had that same problem with the hull planks. I concluded that I didn't flatten the plank out enough as I was gluing it (them) in and the result is the plank did reach all the way to where it was supposed to be. For what it's worth, your bulwark plank nails are alot closer to being correct than mine. Looking good! Maybe we can have a cog fleet at the 2021 NRG conference.
- 175 replies
-
- 5
-
-
- hanse kogge
- shipyard
- (and 1 more)
-
I believe Thunder correctly stated that the description on the box is for the 1777 frigate ALLIANCE. It was built in Mass. by the Hackett brothers. This model is not that ALLIANCE. Thunder....keep posting.
-
600MM. What is that in real length?
-
Venture forth. We are right behind you. <Who brought a flashlight?> One theory I have heard regarding the banana shape is: The bow and stern planks are curved as they are so they can be nailed bolted (clinker style) in such a way as to provide the support one would normally get from a stem/stern post.
- 186 replies
-
- 1
-
-
- keelless
- reverse clinker
- (and 4 more)
-
I used a small square file.
-
Many thanks. How can I download/view? It requires either Facebook or gmail. I don't have a facebeak account and I USED to have gmail, but cannot recall it.
- 130 replies
-
- 2
-
-
- wütender hund
- hanseatic
- (and 2 more)
-
I have done some research but not alot, so my knowledge is sketchy. Due to Viking travel to the Med, new building techniques were incorporated into norther European shipbuilding. As distance and cargo increased, the knarr evolved. There were many different designs and due to regional terminology it is hard to say "this is a nef, that is a holk"...at least as I understand it. Much like several hundred years later we see similar looking ships being referred to as carrack, nao and caravel, even though there was also a DIFFERENT type ship being called caravel. The I have seen the infamous "White Ship" of 1120 referred to as a holk/hulk. IIRC, all these ships had a curved bow and stern on common. They were build along the same lines as a longship or knarr. It was my understanding that the advent of a straight sternpost and stern mounted rudder marked the beginning of the cog.
-
Chris, Well done! Something that has been bugging me for awhile...how does one get into the forward castle? The ladder leading up to it appears to be too far forward. I think it should rest on the rear of the castle rather than end underneath of it. I know that is how the kit is designed and that is how Roland von Bremen (replica of the Hansa Cog) had it, but.... Any thoughts?
- 179 replies
-
- 2
-
-
- shipyard
- wütender hund
- (and 1 more)
-
Is this model a cog (post 35) or pre-cog? Hulk maybe? I see the side mounted rudder. I thought even early cogs had stern mounted rudders. I am trying to get a handle on the shrouds. It appears the lower part is a hull mounted post. Could the upper part be a heart or similar?
-
Rodolfo, The model is looking great! Keep up the good work.
-
Heh heh heh heh (evil laughter and rubbing of hands). Another potential medieval ship model builder.🤪
-
Huh? Whaaa? Who woke me up? No further progress on the long boat. I have it set aside for retirement. As you may have seen, I have started at least one other (which is also on hold).
-
Why not black paint?
-
2021 NRG CONFERENCE
Chuck Seiler replied to kurtvd19's topic in NAUTICAL RESEARCH GUILD - News & Information
I can go with fresh. Both of the models I have actually completed are fresh water vessels. -
2021 NRG CONFERENCE
Chuck Seiler replied to kurtvd19's topic in NAUTICAL RESEARCH GUILD - News & Information
To those of BIG town folk Los Angeles is a real pain. Been to Ohio. Never been to Minnesota. Why not Duluth?