


Landlubber Mike
-
Posts
4,543 -
Joined
-
Last visited
Content Type
Profiles
Forums
Gallery
Events
Everything posted by Landlubber Mike
-
 Nicely done Eric - getting the pre-formed gunwales on is always a stressful part of the build, and you've done a great job with it. I have to say though, in the end, the pre-formed gunwales are much easier to do than planking the hull and cutting out gunports! I had to do that on my La Renommee build and it took forever.
 -
That's really nice detail on there, wow! You're doing a fantastic job on it. Putting aside the PE, the hull detail with the plating is really crisp and impressive. I know what you mean about taking breaks. Need to relax the eyes and hands, and sorta reset the mind. I also find I need to stretch my back and legs if I'm sitting too long hunched over with the optivisor and tweezers
-
Great job OC! I love it! Can I ask what you are using for the diorama base? Looks pretty cool.
-
Really nicely done Gary! I second the build log idea
-
This is one of the coolest dioramas I've ever seen, and incredibly impressive considering the scale. Absolutely fantastic work!
- 189 replies
-
- 10
-

-

-
Chris, it's really amazing what you can do with card. Really impressive!
-
Thanks Jack and Derek. Sorry to keep asking questions on the honing guides, but what do you get with the Kell guide that you don't get with the Veritas guide? I'm still not exactly sure of the difference, but likely because I haven't used honing guides very much. For what it's worth, I'm only looking for something for smaller/miniature chisels as I don't expect to get into using larger ones (famous last words). I do want to get back to my wooden ship builds now that I have these cool toys.
-
Jack, since you have both honing guides, would you say it’s worth getting the Kell guide if you have the Veritas one?
-
Really nice job Scott! Love all the details!
-
Looking great Glen! Moment of truth coming soon! Good luck!
- 71 replies
-
- 2
-
-
- Charles W Morgan
- bottle
- (and 1 more)
-
Thanks for the review. I think I pretty much ordered the same items minus the block plane which I already had. I'm still waiting on a few things. I'm glad they came out with the miniature honing guide for the mini chisels. I have had them for a few years but couldn't find a solution that worked. Enjoy the tools!
-
Great stuff there Edward! Nice job! 👍
-
Catching up here too - wow! Great diorama! I used to paint fantasy miniatures as a teen and can attest to how hard it is to make them look lifelike - you make it look really easy though, fantastic job!
-
Well done! Looks great amongst the other treasures on the shelf of glory!
-
Great job Popeye! The painting was really well done, first rate for sure. To echo an earlier comment, what an eye catcher for the display shelf!
-
Just caught up with your log OC. Very nicely done! The figure really brings the model to life!
-
Just caught up on your log Eric, really nice job so far! And thank you for sharing your adventures with woodworking tools. Very interesting! The Perry looks like a really nice subject to model, and the BJ kit looks pretty nice, especially with that helpful CD. Personally, I don't know if I would ever do a solid hull (mostly because I would want to use power tools to speed things along but would be too nervous that I would remove too much material), but you are doing a fantastic job!
-
Thanks Lou, really appreciate the kind words. On size, you're totally right. For another comparison, I was looking at the expected lengths of various models in my stash the other day, and saw that the Shimakaze was about 425 ft long. The USS Gambier Bay, an escort carrier, was 512 feet long. Not too much smaller.
-
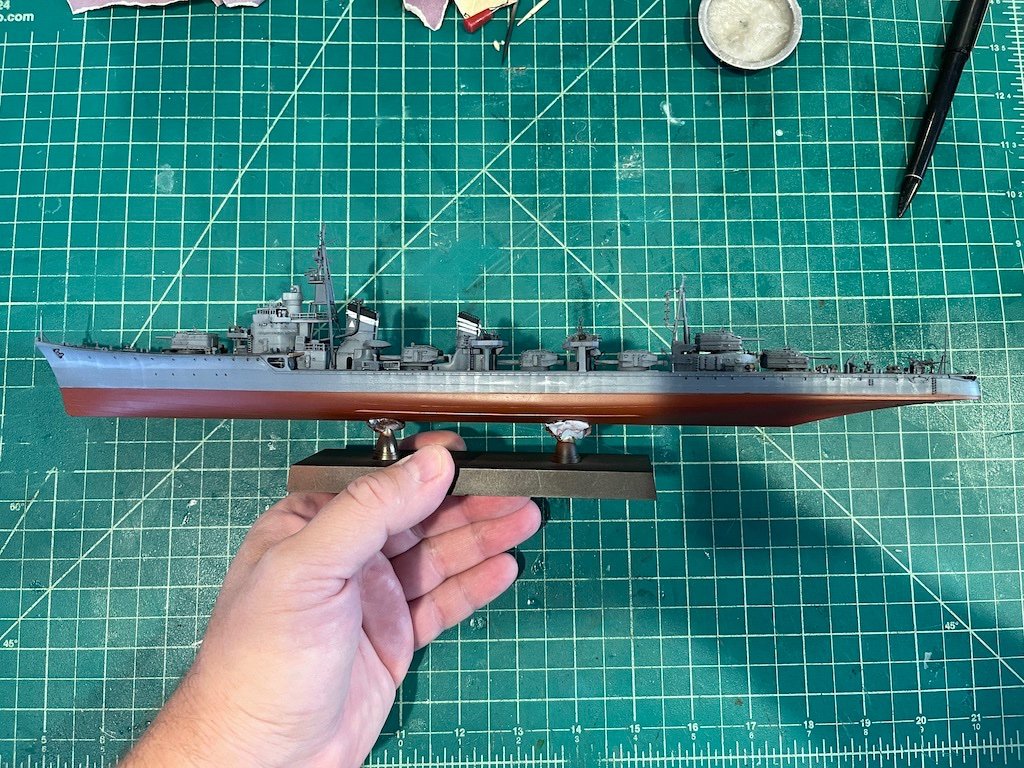
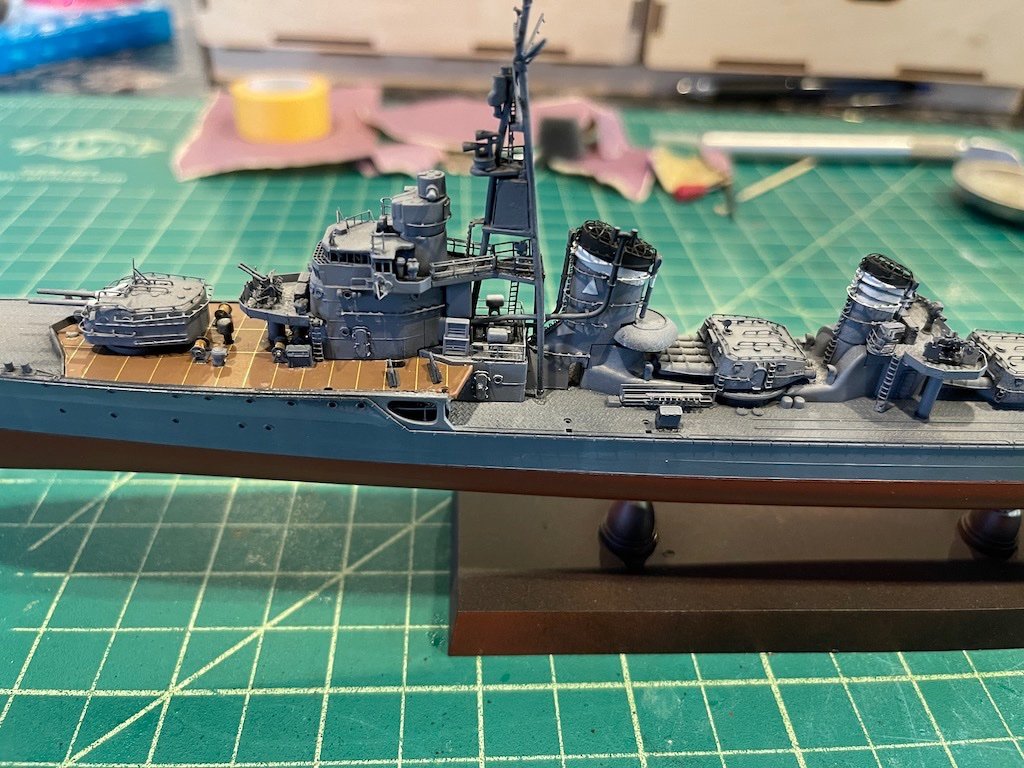
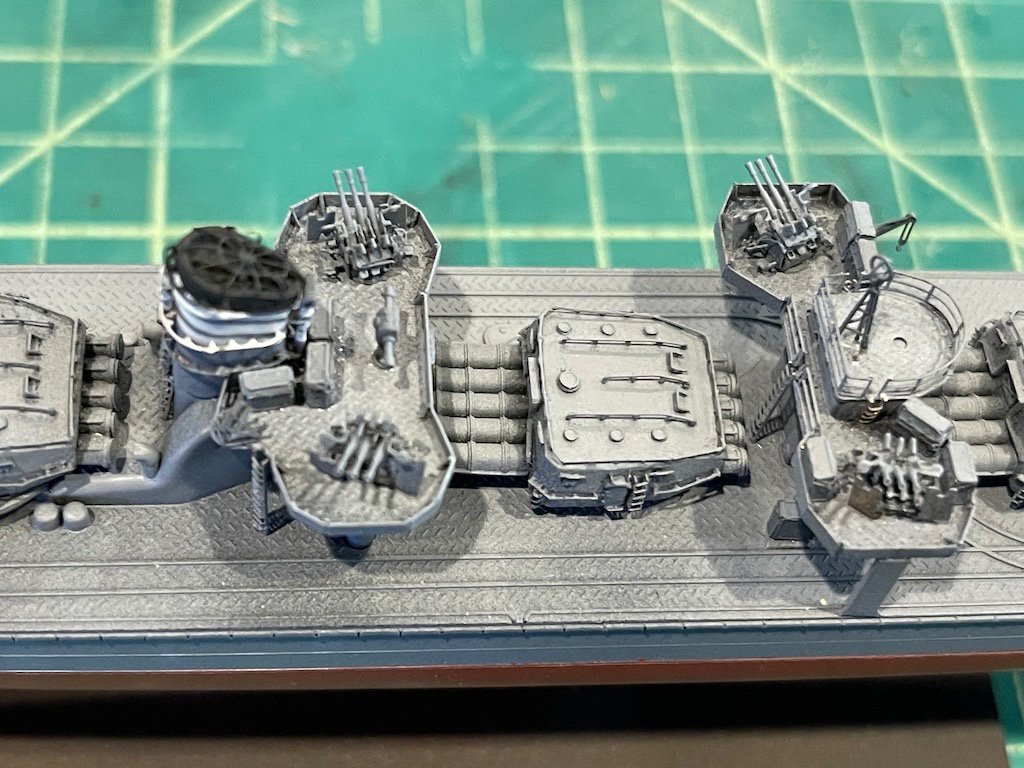
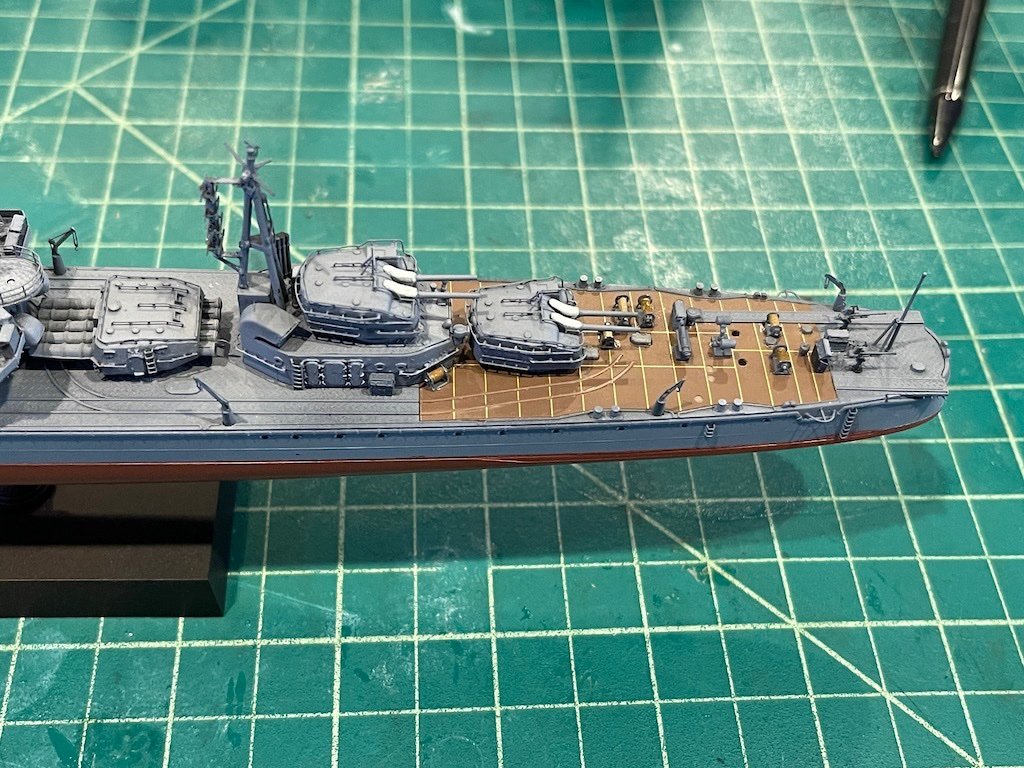
Slowly making more progress. I thought once I painted the details that it would be a day or two more of work and then I could get to clear coating and weathering. Has been a little bit more involved. I think I'm just about at the point where a few more final details and paint touchups and I can start finalizing the build. It's amazing how many details there are on destroyers. I ended up buying a hot wire foam cutter (Proxxon) to be able to cleanly cut foam to make the diorama base. I need to look into what type of foam board to buy. I think some use standard styrofoam, while you can also use stuff like expanded foam, builder foam (might be the same as expanded foam), etc. Not exactly sure what all those are, so need to educate myself. The great thing about the hot wire cutter is that you end up with clean cuts and don't have bits and pieces of foam all over the place with that nasty electrostatic cling if you use a saw or knife to cut it. Well worth the money in my opinion, as I hate trying to clean up foam particles that stick to everything but inside the garbage bin.
- 154 replies
-
- 21
-
-

-
Looks great to me Glen. Good luck getting it into the bottle - fingers and toes crossed here for you
- 71 replies
-
- 2
-
-
- Charles W Morgan
- bottle
- (and 1 more)
-
No worries Alan. My first try at clear coating by hand with Tamiya clear to seal the edges of the tape worked really well too. Nice job on your Flower Class!
- 460 replies
-
- 4
-
-
- Finished
- Flower-class
- (and 1 more)
-
They work great. When you have very small pieces, it's impossible to hold them and avoid getting glue on the tweezers - for some reason in my case, PE likes to stick to everything else - fingers, tweezers, the bench, etc. - instantaneously with CA but not to the model. I've tried holding pieces along the sizes (tweezers perpendicular to the part), but you have to be very careful about not accidentally increasing pressure or the dreaded ping happens which can lead to an hour searching for the part on the floor. Been there, done that too many times to count. 🤬 I looked into the vacuum suction devices, but I think these pencils offer a much simpler, cost-effective solution.
-
Looking forward to this one Ron, especially with the upcoming sails and diorama. For the title, I think you can go back and edit it if you go to the first post.
- 542 replies
-
- 3
-
-
- Sphinx
- Vanguard Models
- (and 3 more)
-
I just checked since I thought I remembered there were seven whale boats. See page 23 of the instructions: https://modelexpo-online.com/assets/images/documents/MS2140_Charles_W_Morgan_Instructions.pdf Five hang from davits, with three on the port side, two on the starboard side. The other two hang upside down on the amidships shelter. I can't seem to copy pictures from the MS website, but there are good photos of how their kit subject looks: https://modelexpo-online.com/Model-Shipways-CHARLES-MORGAN-WHALE-BARK-164-SCALE_p_1026.html I don't recall from the Leavitt book whether the number of whaleboats changed during the ship's history.
- 71 replies
-
- 1
-
-
- Charles W Morgan
- bottle
- (and 1 more)