Landlubber Mike
-
Posts
4,543 -
Joined
-
Last visited
Content Type
Profiles
Forums
Gallery
Events
Everything posted by Landlubber Mike
-
 Looks great Craig. White is not an easy color to lay down in big swaths like that. Well done!
 -
I'm in for this one too! Though, I might have one eye closed. I started with plastic ships and told me that was the end of plastic for me. Then I started on planes, and said no way will I buy car kits. Well after a bunch of car kits in the stash, I have been saying no armor kits! With your skills, I'll be sorely tempted to break yet another vow!
-
Good news! Fingers crossed that it works! Not sure if this would be helpful, but there are those wax sticky pencils that have just enough tack to lift a part and put it in position, and just enough to release the part when it's time to glue.
-
I've used the Mr. Hobby spray on primers and really like them. They spray great from the can without any need for decanting. Great coverage, and the primed surface is very hard and scratch resistant (unlike Vallejo). The number on the can is the "filler" capacity of the primer (higher the number, the less filler it is). Don't expect huge clumps coming out of the can, but it does fill slight scratches, etc. and levels perfectly. Unlike Vallejo, you can sand this without pitting or other issues. Only issue is the smell which is pretty terrible like most lacquers/acrylic-lacquers (I forget what exactly this is). I like Vallejo for the ease and use it a lot for smaller detail parts, but for larger sections like car bodies and planes where you might need to use a little filler and want a very smooth finish, this is hard to beat. I've put Tamiya and Vallejo on top of it without issues. I've used gray on my other models, but they also have black (and white and possibly some other colors). I've been using Vallejo Metal Colors for engines and on the aluminum bare metal finish of my F3Fs. There I used Vallejo Gloss Black primer as recommended, and the effect was very nice. I discovered, however, that the Vallejo primers can use a bit of thinning as they come out a bit thicker and tend to gum up the airbrush.

-
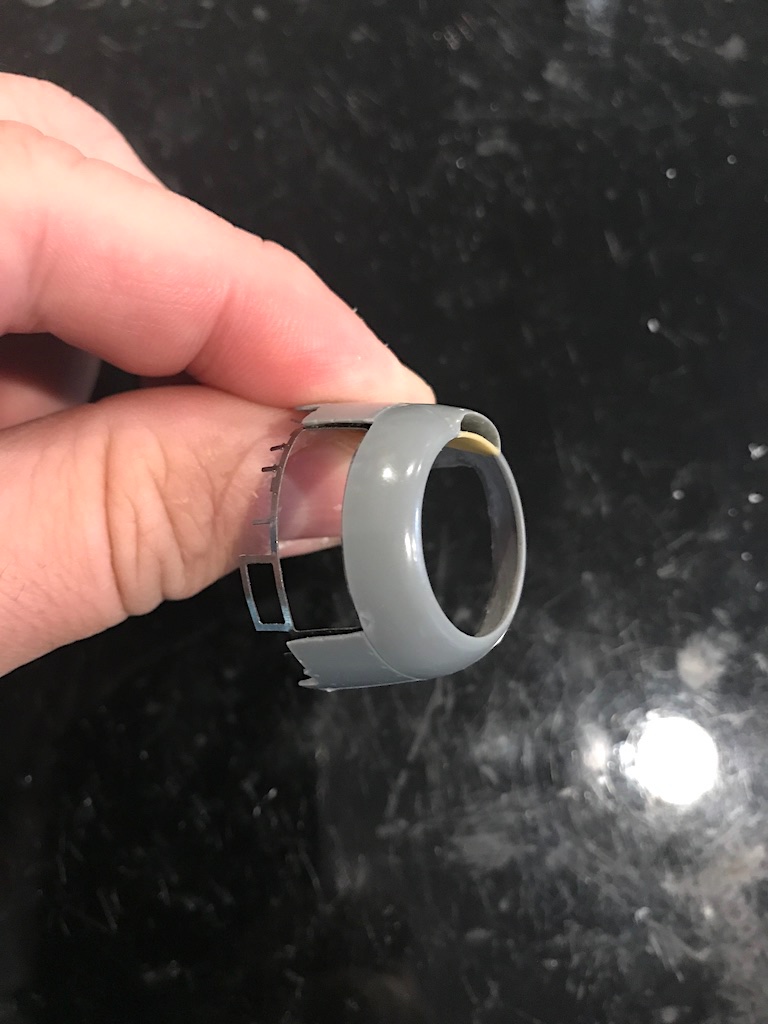
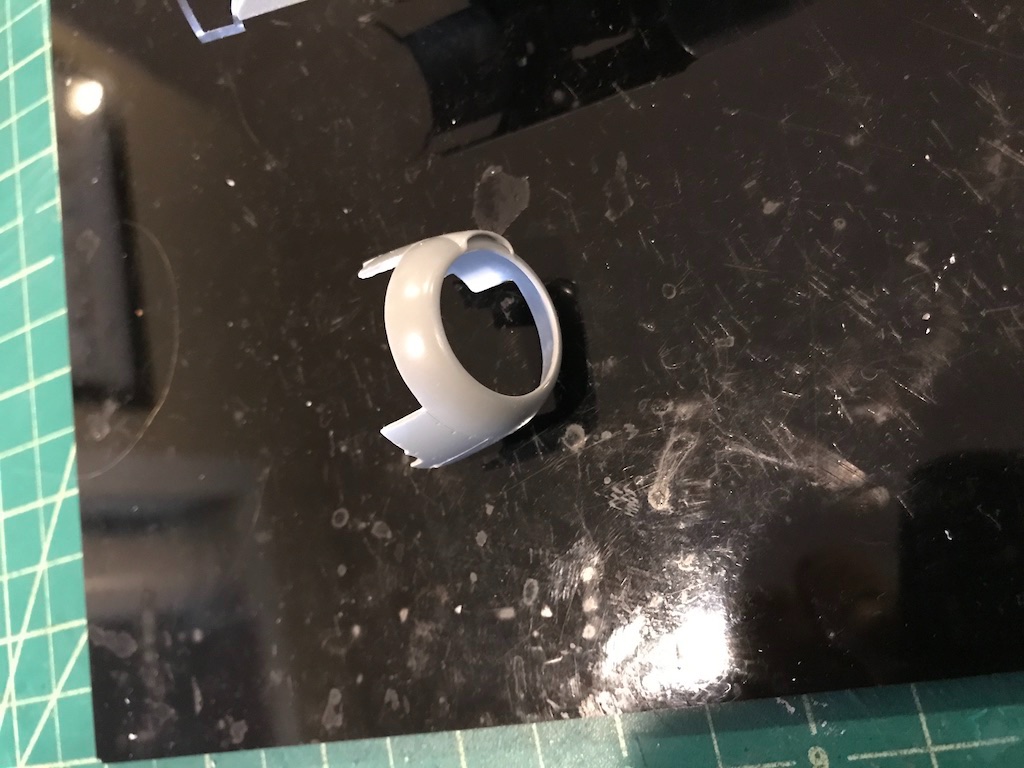
I made a little more progress on the cowl last night. Managed to get one of the PE framing pieces installed. Also included the top air intake. The kit's intake was molded into the cowl, but the Aires resin part provides a little more depth as it runs along the full length of the top of the cowl. Add this piece has been a royal pain. Just gluing this on took over an hour. 🤬 It's been hard to glue and use clamps, and like I mentioned earlier, the CA seems to take considerably longer to set the PE against the plastic (in part I think because the PE likes to spring to it's original position). I thinned the cowl sections, but the shape doesn't seem to perfectly line up with the shape of the cowl. So, I think I'm going to have to cut a little off the bottom plastic so the PE frame is the same width is exposed across, which will mean re-riveting the plastic part (sorry that probably isn't very clear). Fingers crossed that the other side goes a little better. After including the other side, there are two separate intakes that run along the cowl from front to back and ending into that small rectangular section, and then the cowl flaps.
-
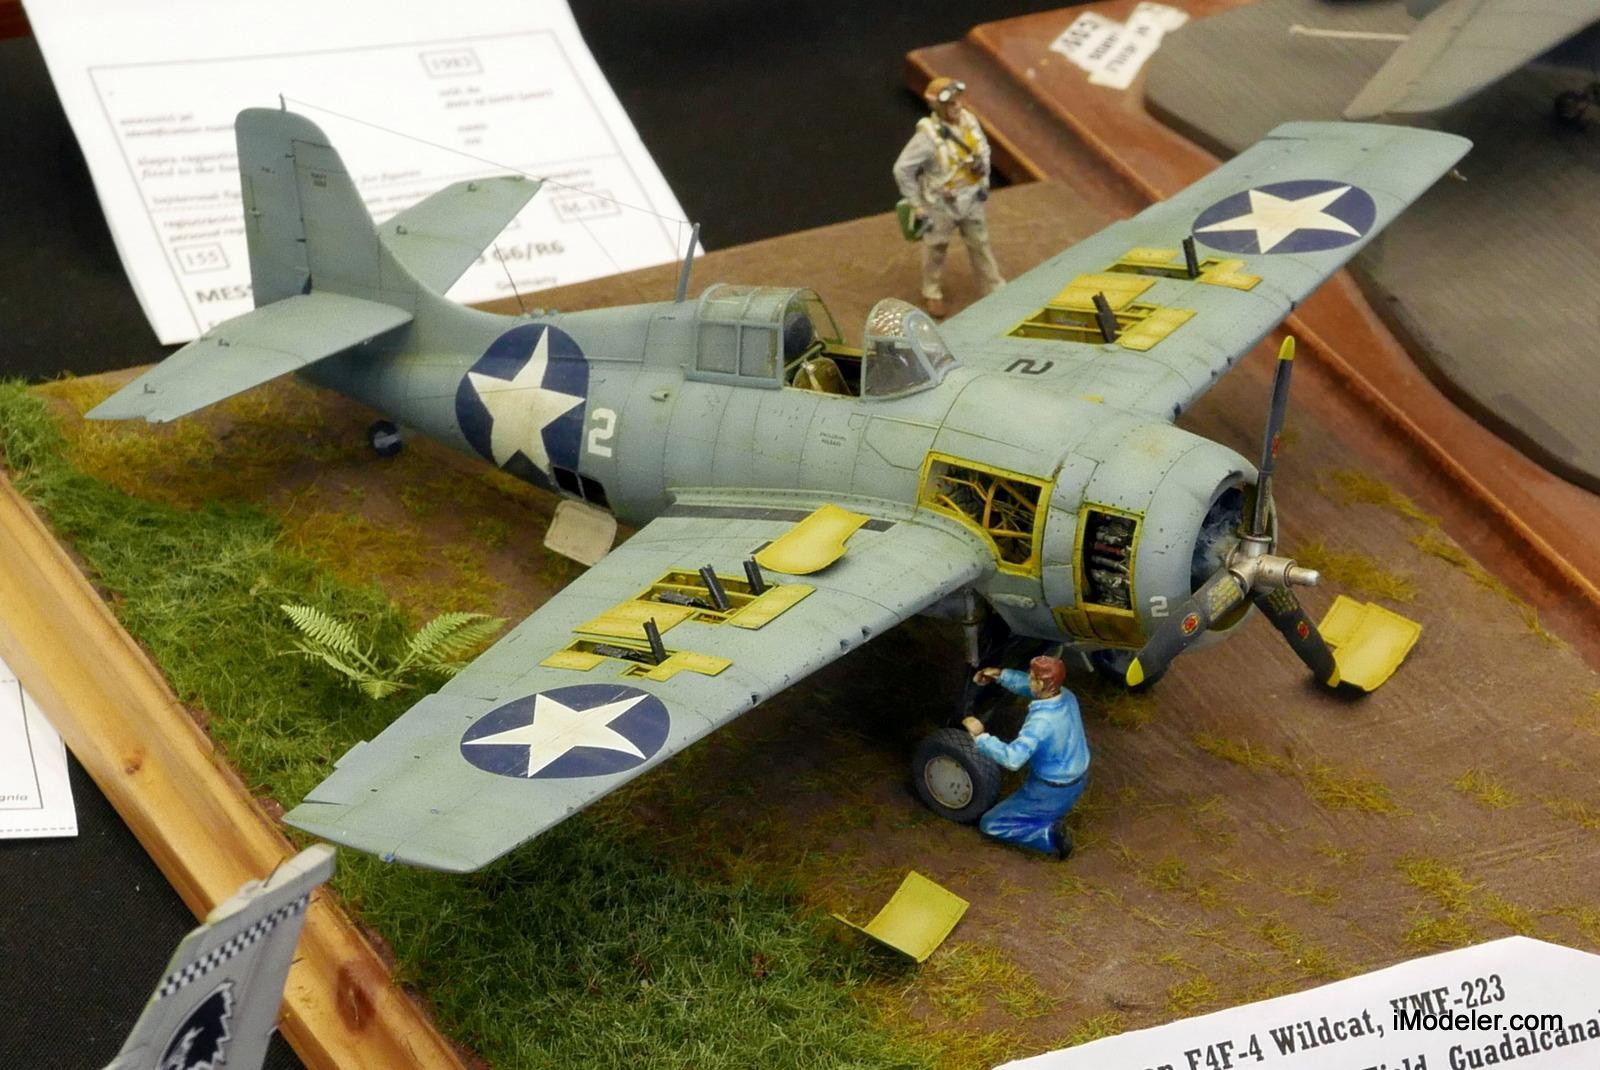
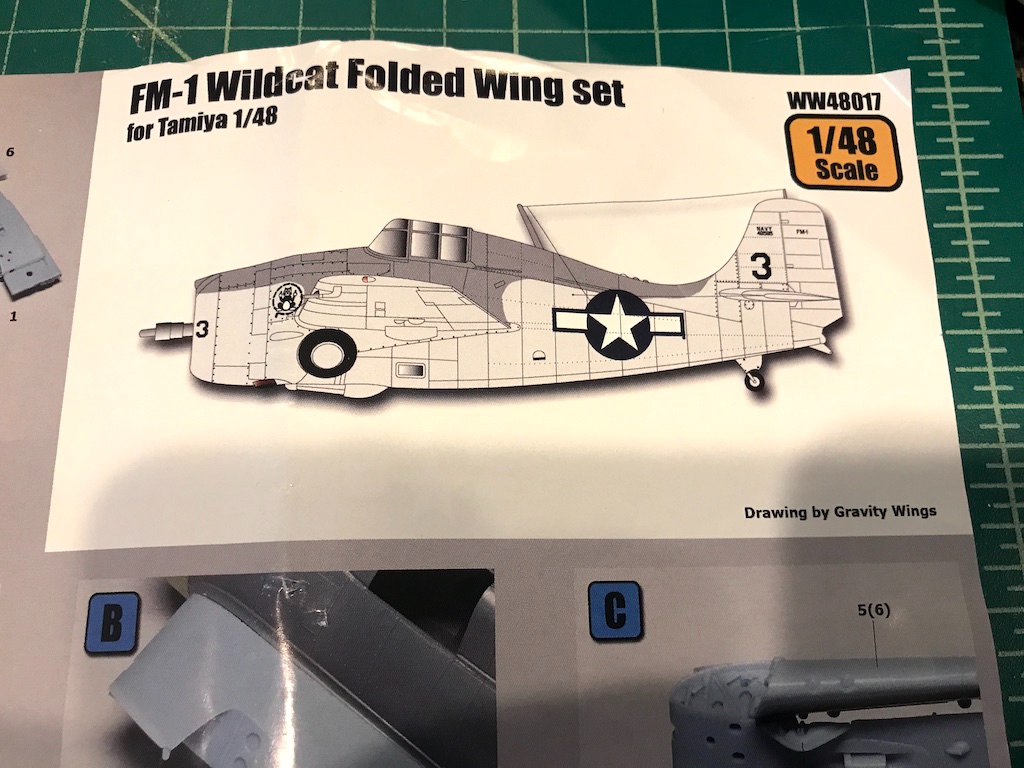
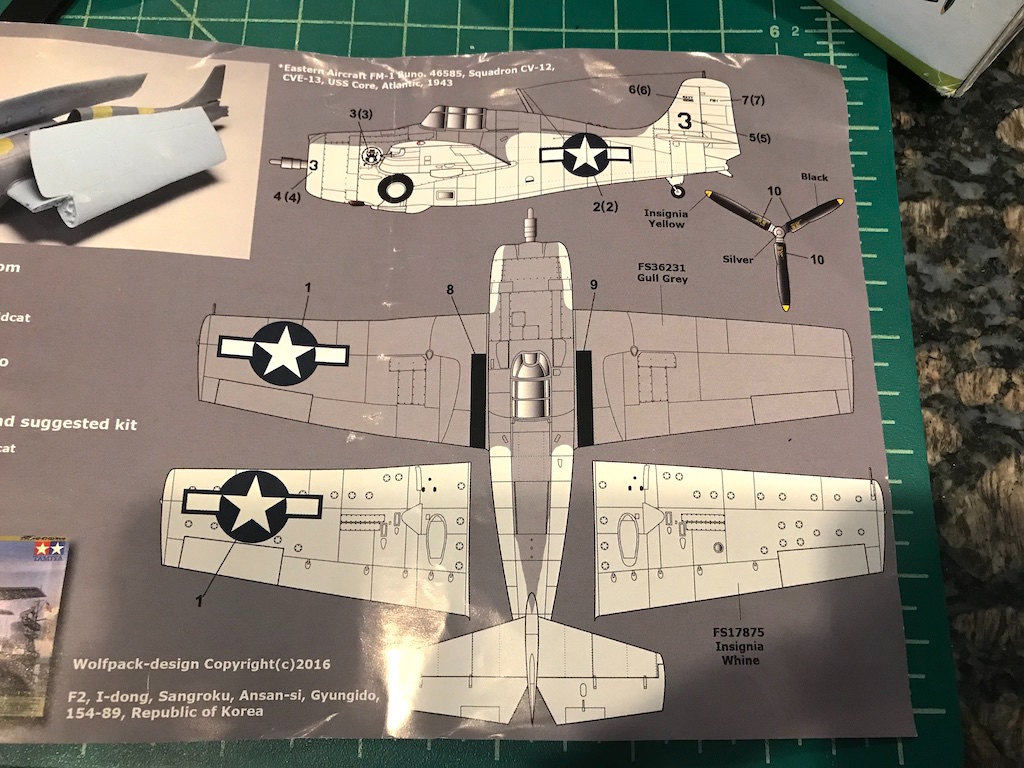
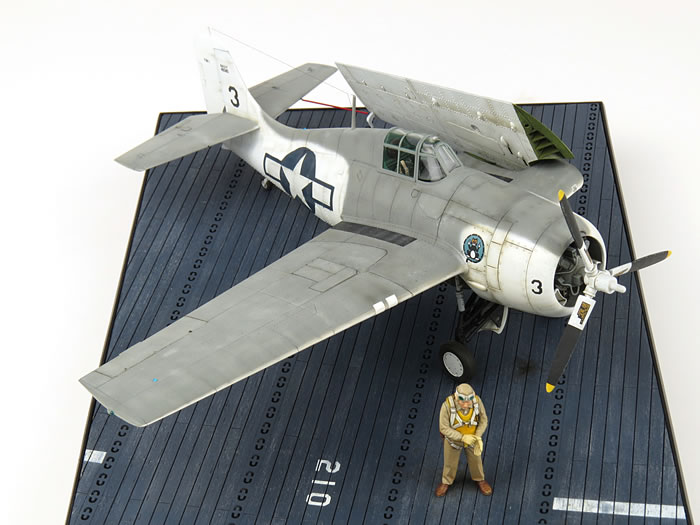
Roger, I know that F4F Wildcats were in both the Atlantic and the Pacific theaters. What I'm not sure about is whether FM-1s were in the Pacific. I've done some searching but haven't come across anything definitive. A number of sources note that the FM-1s were included on escort carriers in the Atlantic, so that's pretty clear. There weren't too many FM-1s made by GM/Eastern (1,150), and 311 were sent to Britain where they were designated as the Martlet V (and later as the Wildcat V). In any event, the Wolfpack FM-1 wing fold conversion set has markings for an FM-1 aboard the USS Core (CVE 13) in 1943. Colors are "Gull Gray" on top and "Insignia White" on bottom. Here's a picture I found online of someone that used the Wolfpack set to build an FM-1. Forgot I had found this. Good example of the color scheme. I have to say that the one wing up/one wing down is growing on me. The builder here kept the original kit wing on the right, and used the Wolfpack on the left. Decisions decisions. I might see if I can find the base this guy used which was the Skunkmodels SW-48015 WWII USN Wooden Deck Display Base. Looks pretty cool. Speaking of color schemes, has anyone tried blackbasing (where you use black primer as the base and then work colors up from there)? I was thinking of trying it out, but am thinking that the black might be too dark a base for the Insignia White areas. I like what this guy did where the panel lines in the white areas are more a brownish gray.
-
This PE is from the Aires set. My guess is that it is stainless, reminds me of the Eduard stainless. The slight bends are easy. The issue is when the part doesn’t touch the part to be glued too. The PE wants to spring back so I’ve found you need longer holding/clamping time or the CA just doesn’t grab. And of course sometimes you can’t use a clamp so you’re down to fingers, and any slight movement doesn’t let the CA set.
-
Sorry to hear OC. Sometimes you have to wonder if the kit designer actually tried putting the kit together. Seems a bit ridiculous to make things harder than they need be.
-
Thanks for the kind words guys and all the tips and suggestions, I really appreciate it. I may have mentioned this before, but one thing I've really enjoyed with these models is learning all the history and technology that goes along with these planes. It's been very fun learning and sharing with you all.
-
Thanks for the pointing out the cowl flaps. The way Aires has the PE, it looks like these are supposed to be partially open as you surmised. Found another diorama where it looks like the builder used the Aires detail set I'm using for an F4F-4. The modeler has the cowl flaps slightly open and the gun bays open. Looks pretty cool (though, again, wings are down)! I still might pass on the gun bays on this kit though. I have a few other kits where I have the option to open the gun bays so might try it there. Also, I think the color scheme and decals for the FM-1 Wolfpack are for an Atlantic-based plane, and these FM-1s generally were used on escort carriers. I'd love to make a diorama scene like the above, so will probably have to wait until I get to a different model where I can model terrain (and not have to figure out whether gun bays were open on folded wings or not).

-
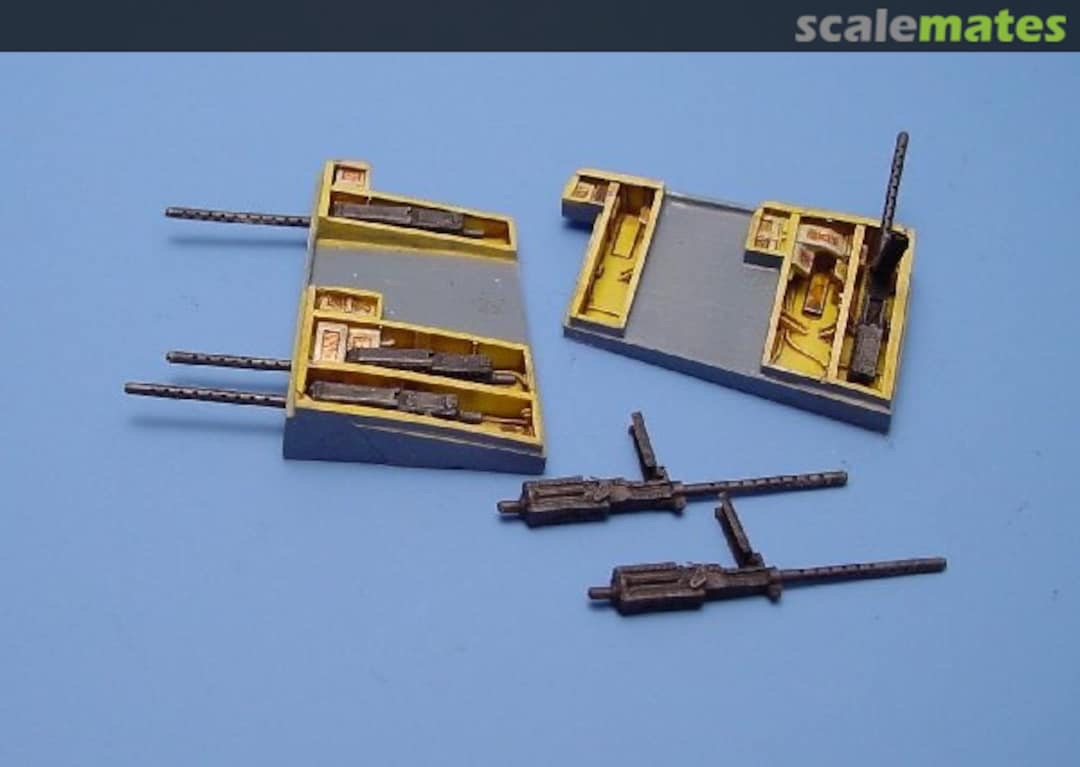
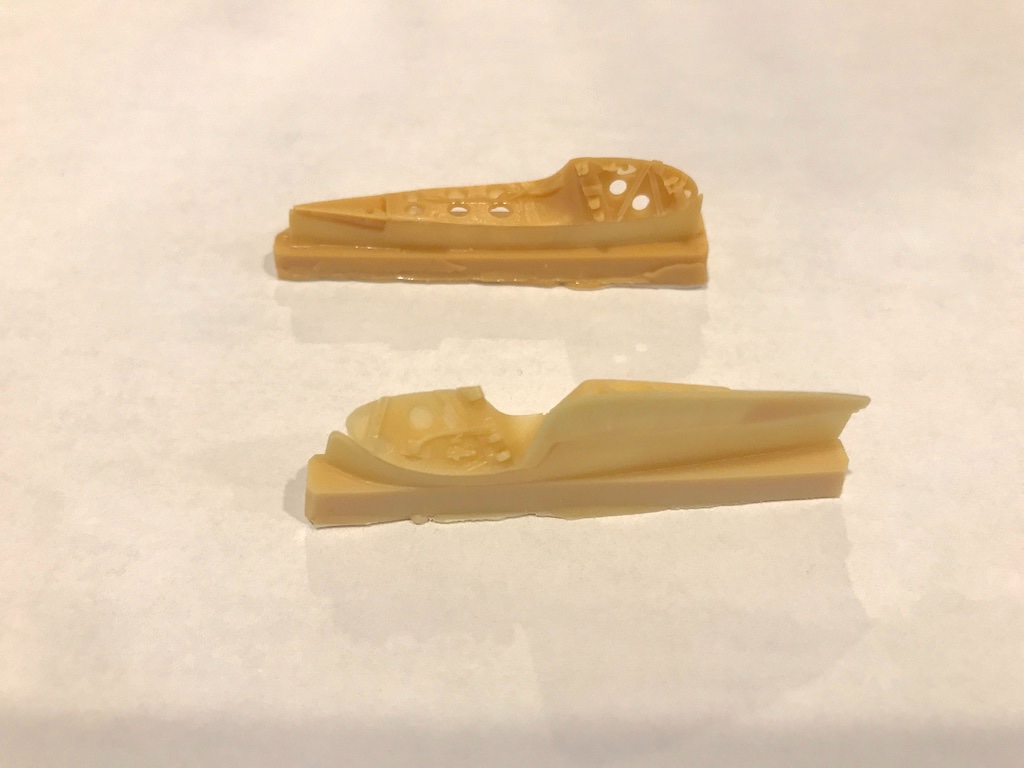
I found a picture online of the Aires gun bay. Doesn't look too bad, but doesn't excite me all that much either.
- 241 replies
-
- 10
-

-
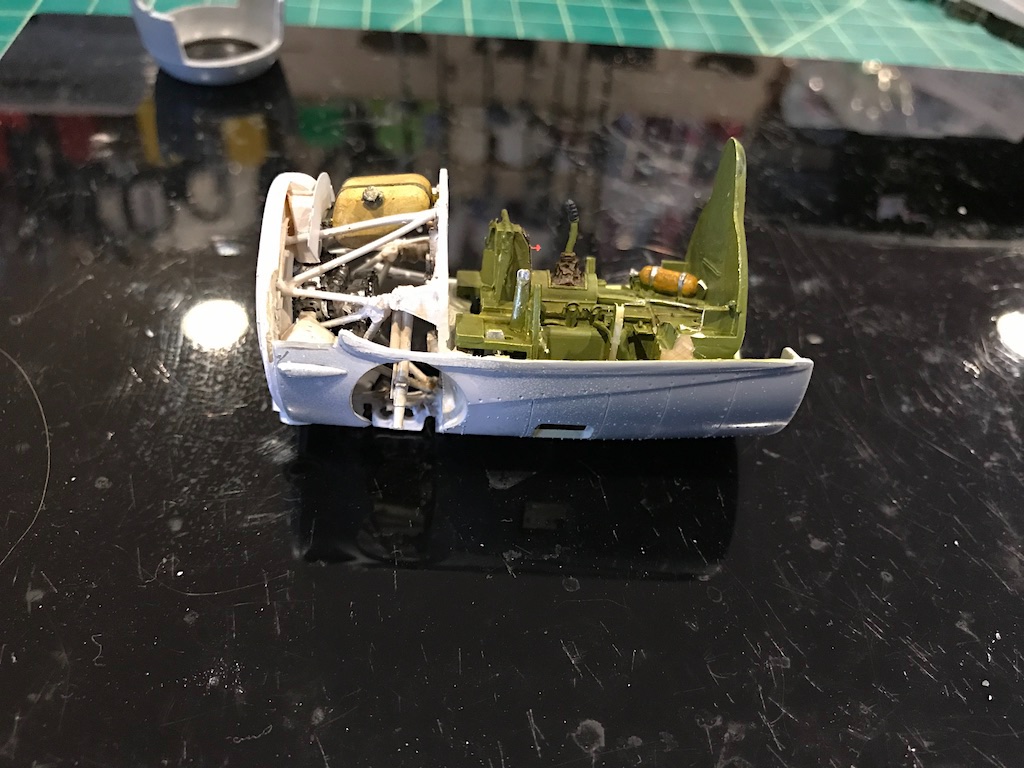
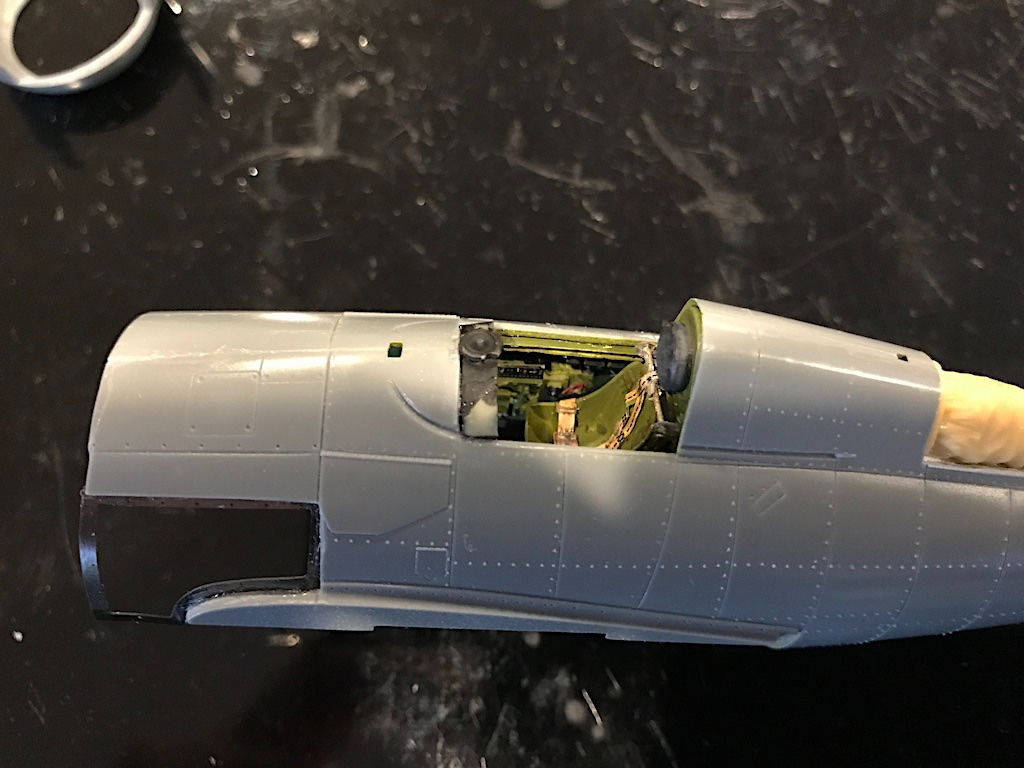
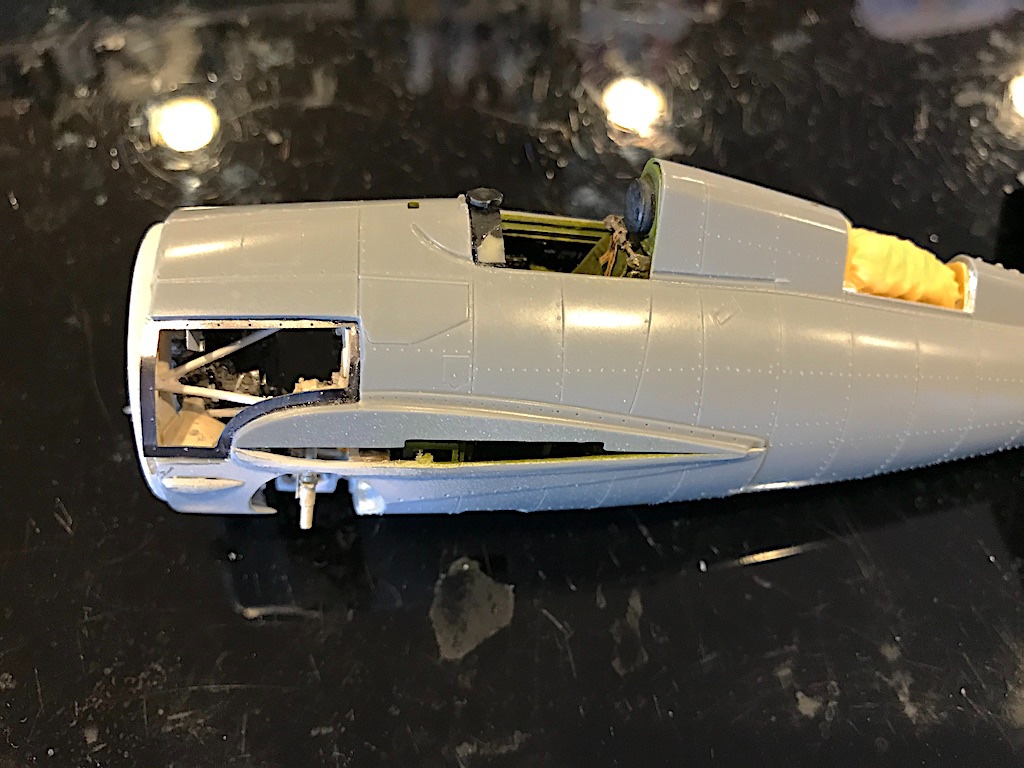
I've been spending a lot of time on the model, but making excruciatingly slow progress. More than a few times I just wanted to put it back on the shelf and work on something else, but figured I should press on and try to get over this stage of the build. It's not that the Aires set is bad - I think it's quite good aside from the serious fit issues of the cockpit side panels and dash - it's just that there is a ton of work needed to modify the kit parts to accept the various detail parts. I'm still fairly new to this plastic stuff, so maybe I should have started with something a little simpler or at least a well-designed kit that I didn't have a lot of aftermarket for -- I keep saying that on all these plastic builds 🥴 But, all complaining aside, I'm learning a lot and so far I'm pleased with how things are looking. So here is where I am. Managed to get the bottom tub completed. As I mentioned earlier, the Aires cockpit fits together really well outside of the fuselage, but there are serious fit issues when you try to install it. So, rather than drop the fully assembled cockpit into the bottom tub which is inserted as a unit into the main fuselage, I only included the cockpit tub into the bottom tub, and inserted the seat back, dash, and cockpit side panels into the main fuselage. Took some surgery to make it all fit, but eventually got there (you can see some of the cuts, etc. in the picture below which won't be visible once glued into the main fuselage). I also put together the section of the engine compartment between the air dam and firewall. That wasn't too bad, but there was a lot of test fitting and sanding/cutting back to get the framing rods fit in place correctly. Need to dirty it up a bit more, but I think it's looking good. The next part which has taken me more hours than I care to admit was cutting out the front quarter panels and installing the cutaway frames. I was really afraid of cutting too much away so it was endless dry fitting, cutting and sanding a bit, dry fitting, cutting and sanding a bit, etc. Finally got the panels on last night though, hooray! If you look just above the cutaway panel, there is a small square panel on the top left of the fuselage. I think that's the access panel to the oil tank, which is the dirty yellow squarish thing in the prior picture. I think I might cut that panel out for a little more visibility into the engine compartment. Saw another modeler do that and thought it might be a nice way to show off more of the compartment including the oil tank. For an idea of how things will look, here is the bottom tub dry fit into the main fuselage: Now I'm working on the cowl. Lot of surgery here to cut away most of it. There is a fairly detailed PE framing piece that goes on each side, which are covered by what I believe looks pop up panels along the edge of the cowl. Then there are three resin parts that look like air intakes that get attached to the inside of the cowl. I have a love/hate relationship with the PE in this set. I believe it's made of some kind of stainless steel or perhaps aluminum. It doesn't seem to like to glue via CA to plastic very well, but maybe I should have done some more prep in cleaning off any residue or etching it. On the plus side, it's a lot stronger than brass and holds its shape very well. My worst nightmare came to be two nights ago when I was trying to glue one of the front quarter panels and it fell onto the floor. I stepped back out of my chair to a place I was absolutely sure the part wasn't, and ended up stepping squarely on the part. 😡 Not only that, but despite the part being fairly flat, somehow my foot managed to crumple it 🤬 Using pliers, I was able to straighten the part out, so in the end, the modeling gods must have taken pity on me ☺️ Thanks as always for looking in!
- 241 replies
-
- 10
-
-
Thanks EG, really appreciate it. I'm still thinking about what to do on the wings. It's a bit hard to tell how much crisp detail the Aires resin guns and gun bay will give. The guns are made up of resin accented by PE so they might be ok, but at first glance they don't seem to be very crisp. So they might actually detract a bit, not sure. Also, if I do go one wing up one wing down, I'm wondering if I can connect the resin parts to make an unfolded wing, or if I'll have to go back and reattach the original kit wing and modify it to account for the two, rather than three, guns per wing configuration of the FM-1. I still have a little time to think about things.
-
I'm in too! Great to hear about Tamiya's customer service, how nice of them!
-
Nice work! Awesome little subject congrats!
-
Excellent! Looks perfect in the new display case 👍
-
Despite the kit's error, you put together a fantastic model. Well done!
-
Wow, not sure how I missed this one, but you're doing an amazing job. Fantastic work!
- 211 replies
-
- 4
-
-
- prince of wales
- tamiya
- (and 2 more)
-
Wow, that looks really amazing, nice paint job!
-
That looks beautiful Denis! Did you paint the propeller or is it a wood one? Looks very realistic! I know what you mean about wire/metal cables. In some respects they are easier, but others, not so much. If there is a slight bend or wave, it's almost impossible to correct. I had that issue with the PE rigging on the biplanes I recently built. One time in removing a part from the PE fret, somehow a twist got into the full fret which carried forward to the rigging. Wasn't really much I could do unfortunately.
-
Wow very cool, many thanks for sharing! Hmm, might have to give this a little thought. So appears the ammo is loaded from under the wing while it’s folded, and then gun bays open when wings are horizontal. Seems there might be a bit of artistic license then in some of the dioramas out there. I guess it doesn’t bother me too much if not technically accurate if your goal is to show off the innards.
-
Wow, those are great pictures, thanks! I see what you mean. Hmm, I have a little time to think about it. Do you guys know, with the panels off so you can see the engine, access the lift raft, etc., would the wings be folded or not? Now I'm wondering if I'm going to do a diorama with the engine panels off and the panels off the life raft, maybe folded is not the way to go. I paid for the Wolfpack set, so I'll probably go with the wings folded. Maybe instead of a diorama, I just build the Wildcat as a model showing off some of the interior details, sorta like how some people build the models with clear or open exterior parts.
-
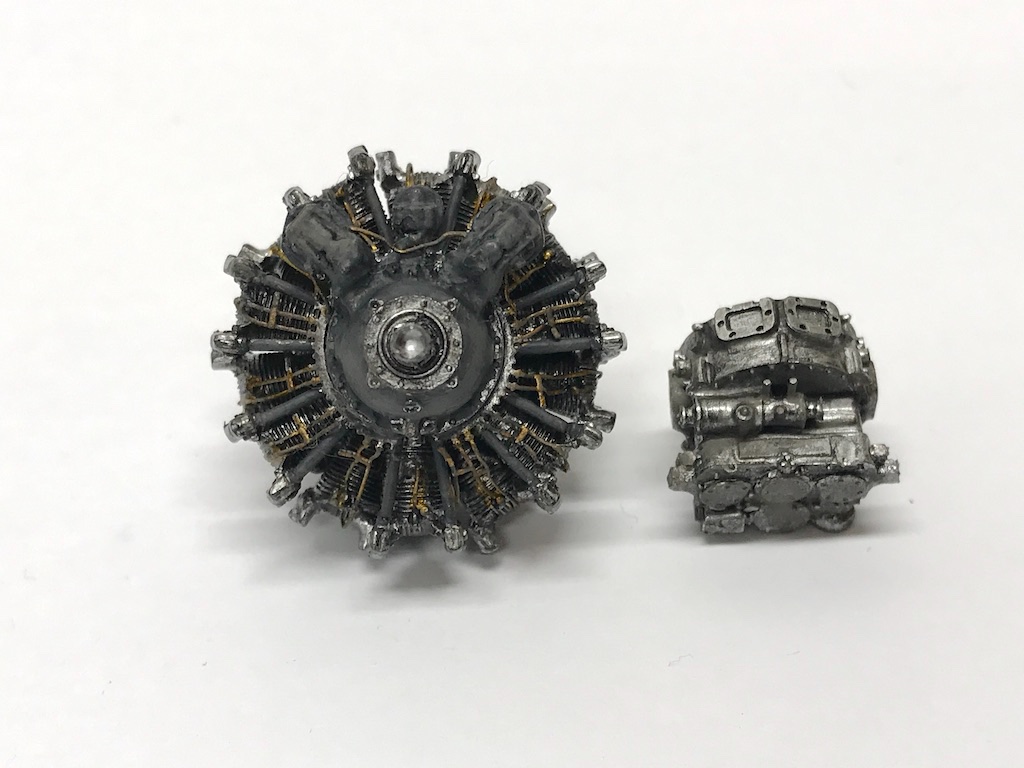
Thanks guys! I’m pretty happy with the way the engine came out. A little bit of dark wash followed by the engine grease and oil washes really goes a long way. One reason I stayed away from plastic models all these years is that I didn’t think the solid blocks of color looked very realistic. With the various washes you can use for panel lines, filters, etc., I’m slowly learning you can come up with more subtle and complex colorings that make things look more realistic. I’m still way low on the learning curve though. The wings are actually the same size (just measured them). My guess is that Wolfpack cast the Tamiya wings and modified them for the two gun per wing arrangement. I took the picture from an angle to avoid glare from the overhead lights so it’s probably just the perspective coming into play. Lou you masochist you!! In some respects I was hoping to keep this with both wings up to take up less room. But, I’ve thought about doing one wing down (and gun bay open) and one up (and gun bay closed). If I can find a picture of a real plane in that configuration maybe I’ll try that. Depending on how this one is looking, I might put it in a diorama as I picked up a few pilot and mechanic figures that might make for an interesting display.
-
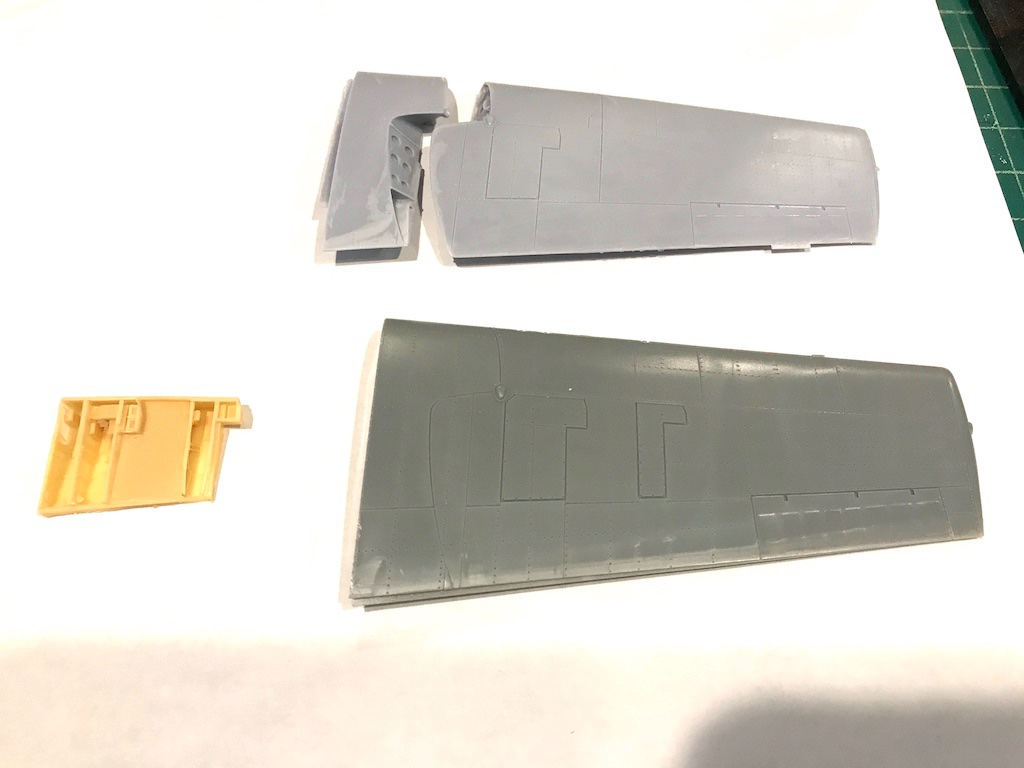
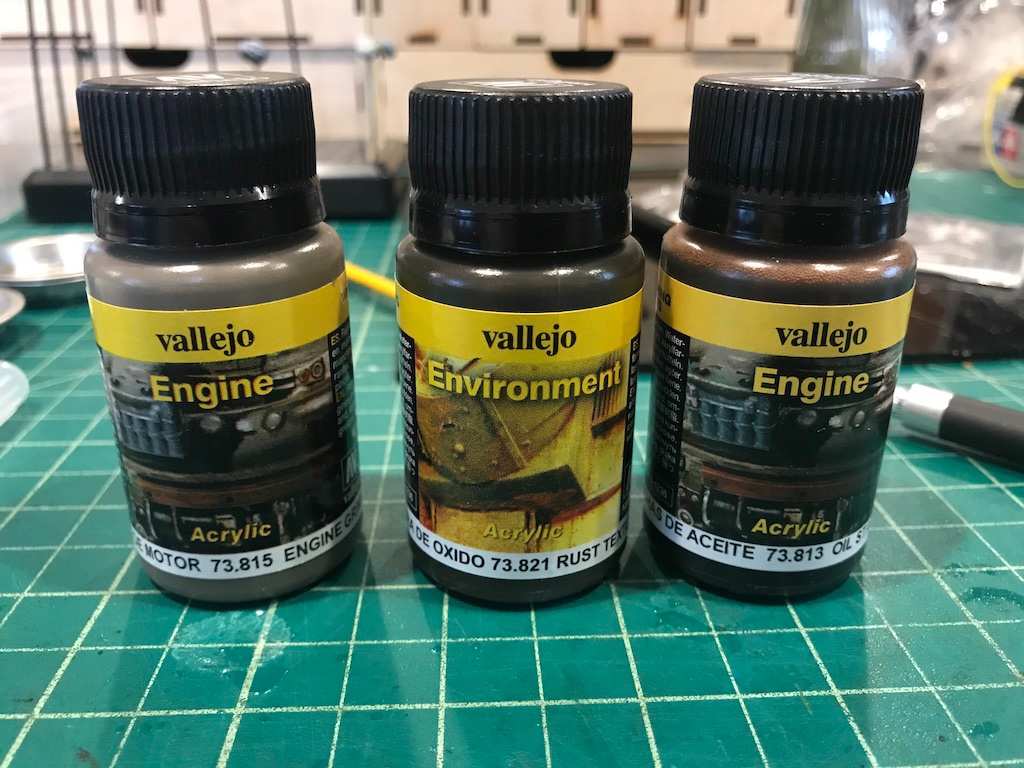
You can see how the wings on the F4F and FM-1 differ in the picture below. The top is the wing from the Wolfpack FM-1 wing fold conversion set, the bottom the kit wing. Lou, you're correct that the extra gun per wing was located further out (see the smaller second upside down "L" shape panel). To the left in yellow, is the Aires gun bay. If I wanted to open the gun bays on the FM-1, I'd have to essentially cut off the right half of the Aires resin part. You can see how the Wolfpack wings are nicely detailed. The Aires detail set also includes parts for a wing fold version. Instead of giving replacement wings, the Aires set has you cut up the wings and insert these resin parts into the open section between the top and bottom halves of the wing. The parts look fairly nice. I went with the Wolfpack set as I thought I would do the FM-1 version, and thought it was going to be a little easier using the replacement wings as opposed to cutting up the kit wings. I think I'm just about done with the engine. Lot of detail in the Aires resin for sure. These were all done with Vallejo products. Vallejo Metal "Duralinum" for the base, a mixture to get to the bluish-gray engine cover, dark rubber for the control rods, brass for the ignition wires. Then I used Vallejo black wash for the recesses, and dirtied them up a bit using these Vallejo washes (first time using them, but really like them):
-
Glad to see you back CDW! Love the subject you're working on - cars from that period are amongst my favorite. Sad looking out into the road and seeing cars completely stripped of all that cool style from back then. Nice score on the display cabinet - that looks absolutely perfect! I've been thinking about what I could get or build to store my upcoming models (assuming I get around to building them) and that one you showed couldn't be better.